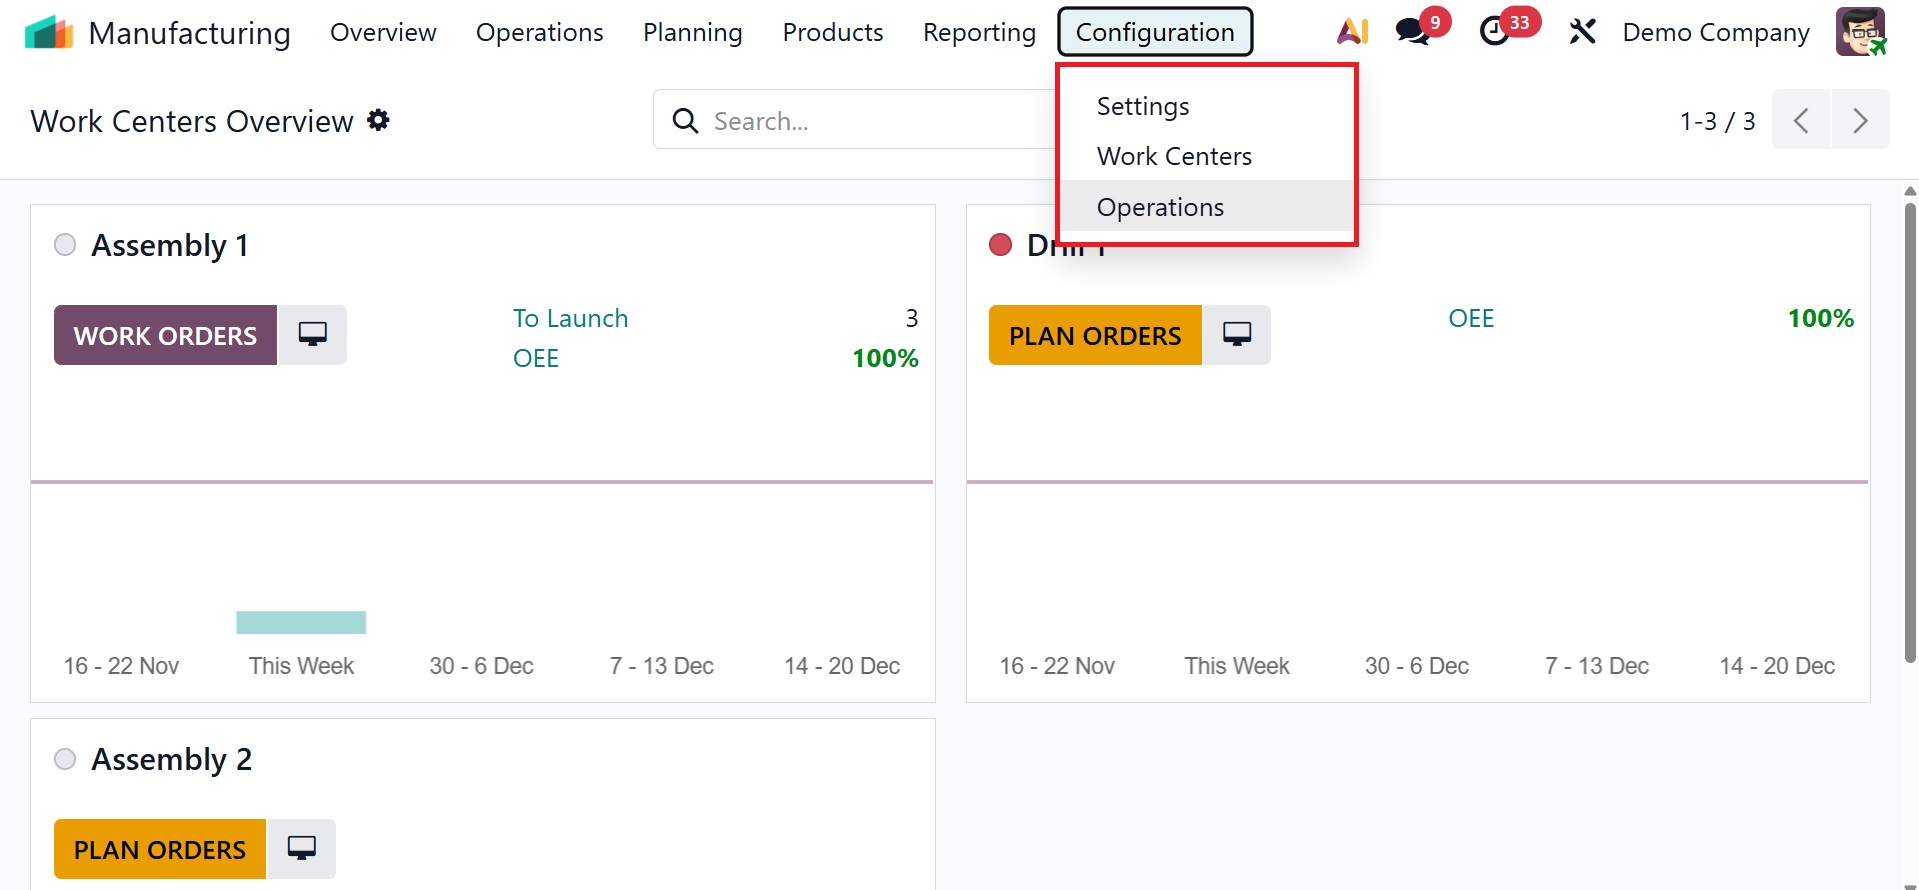
Configuration
Under the configuration, you have the options like, settings, work centers, and operations, respectively.
1.1 Settings
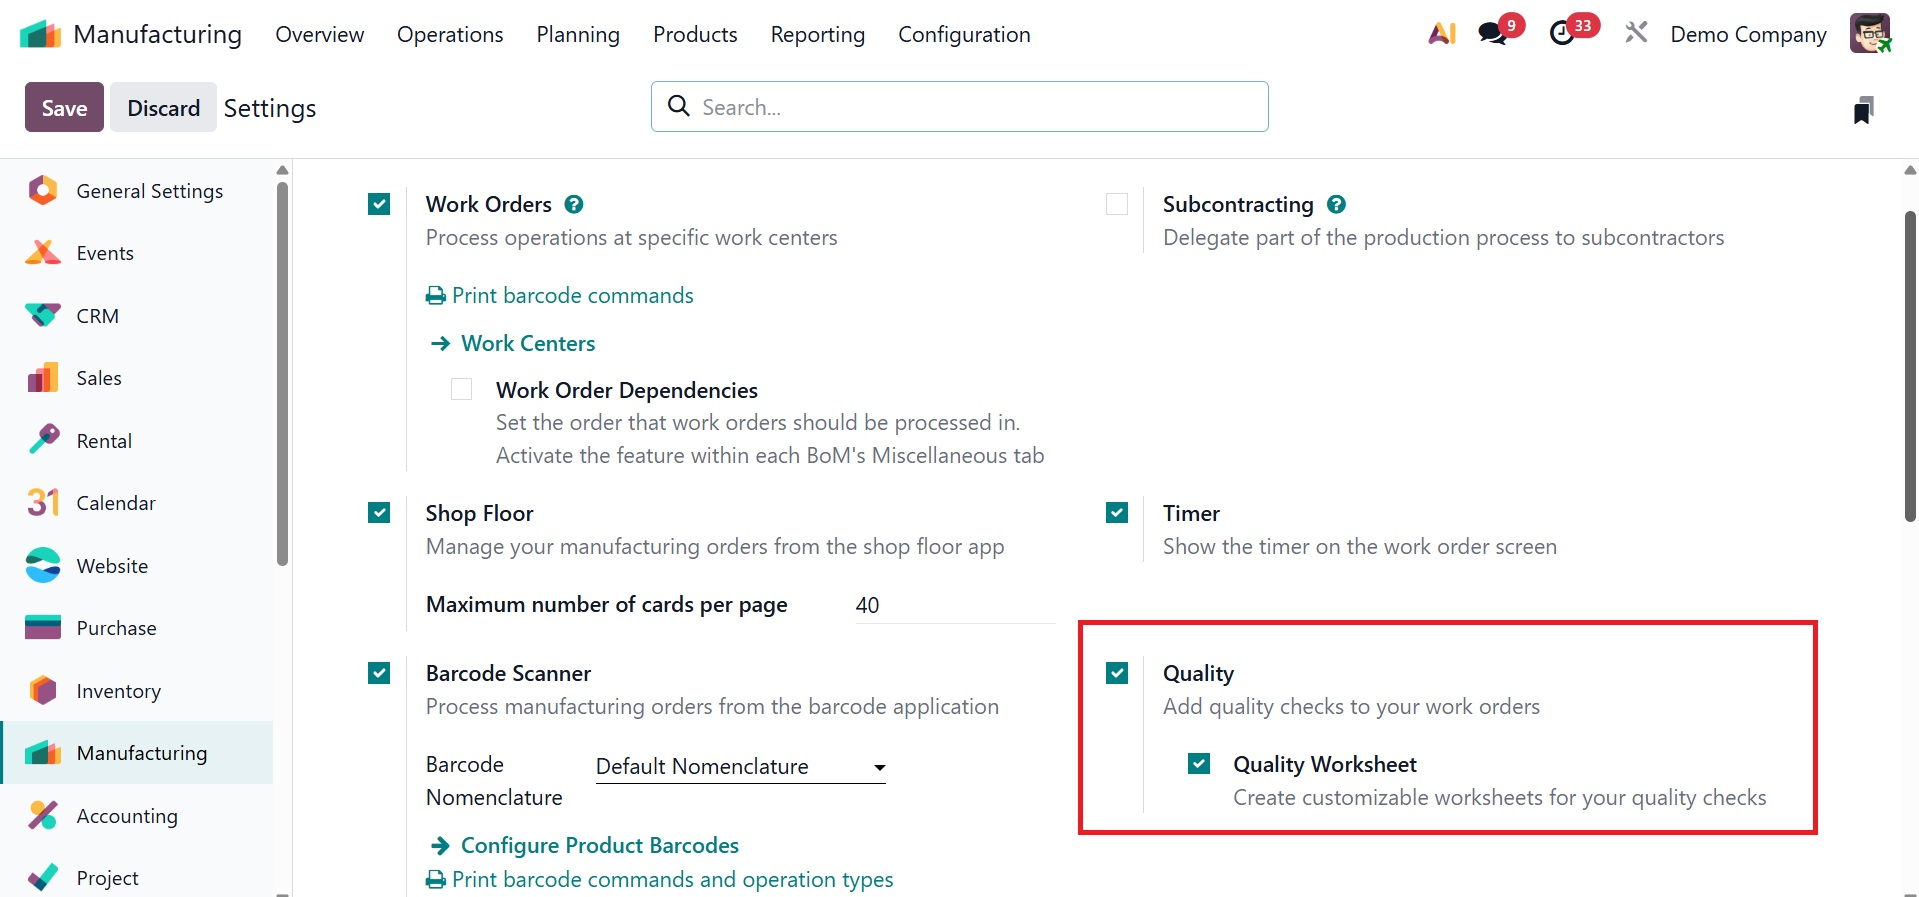
You can adjust the system to fit your production processes by selecting the Settings option from the production module's Configuration menu. Important decisions include utilizing the Master Production Schedule (MPS) for planning, enabling Work Orders for comprehensive task management, and monitoring By-Products in bills of materials. It is possible to set up Subcontracting, manage product variations, and build up Work Centers with efficiency parameters. Additional features like Quality Management, Manufacturing Order Management, Allocation Reports for manufacturing orders, and Timer options can be set up as needed to increase overall production efficiency.
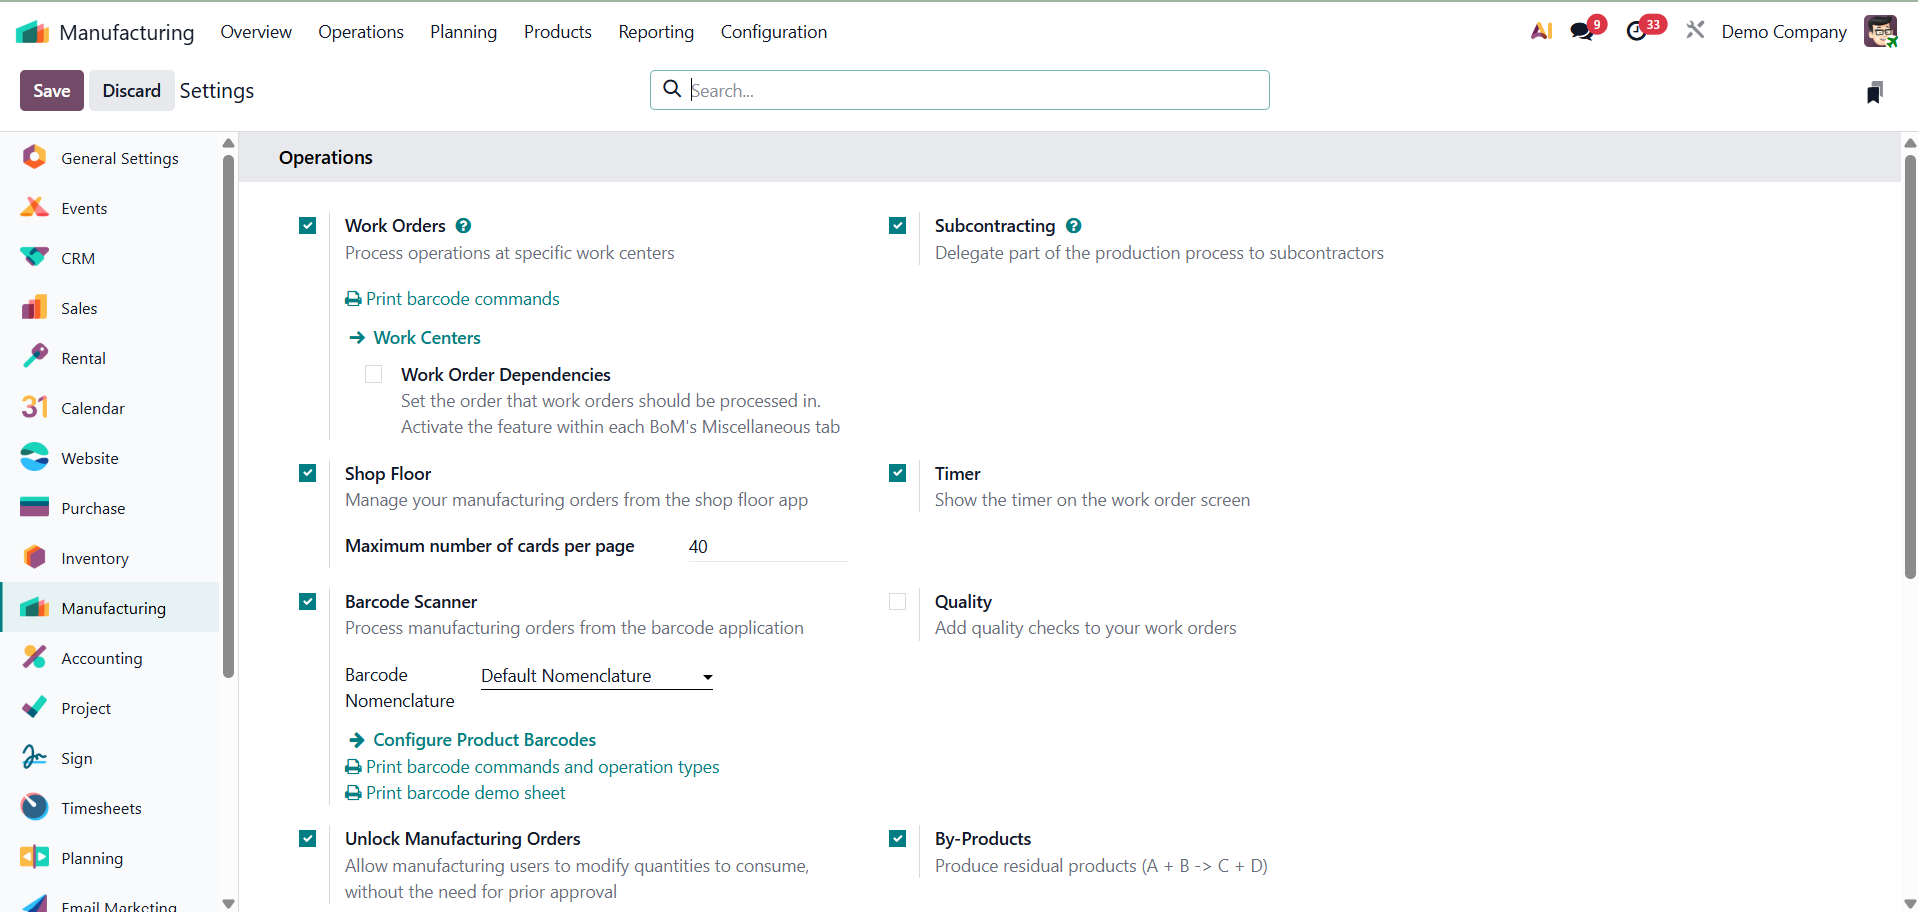
- Work Orders: By enabling Work Orders, you may divide the production process into precise, doable tasks that are assigned to designated work centers. This functionality facilitates improved shop floor operations scheduling, tracking, and execution.
- Work Order Dependencies: This feature lets you specify the order in which a manufacturing process's work orders should be carried out.
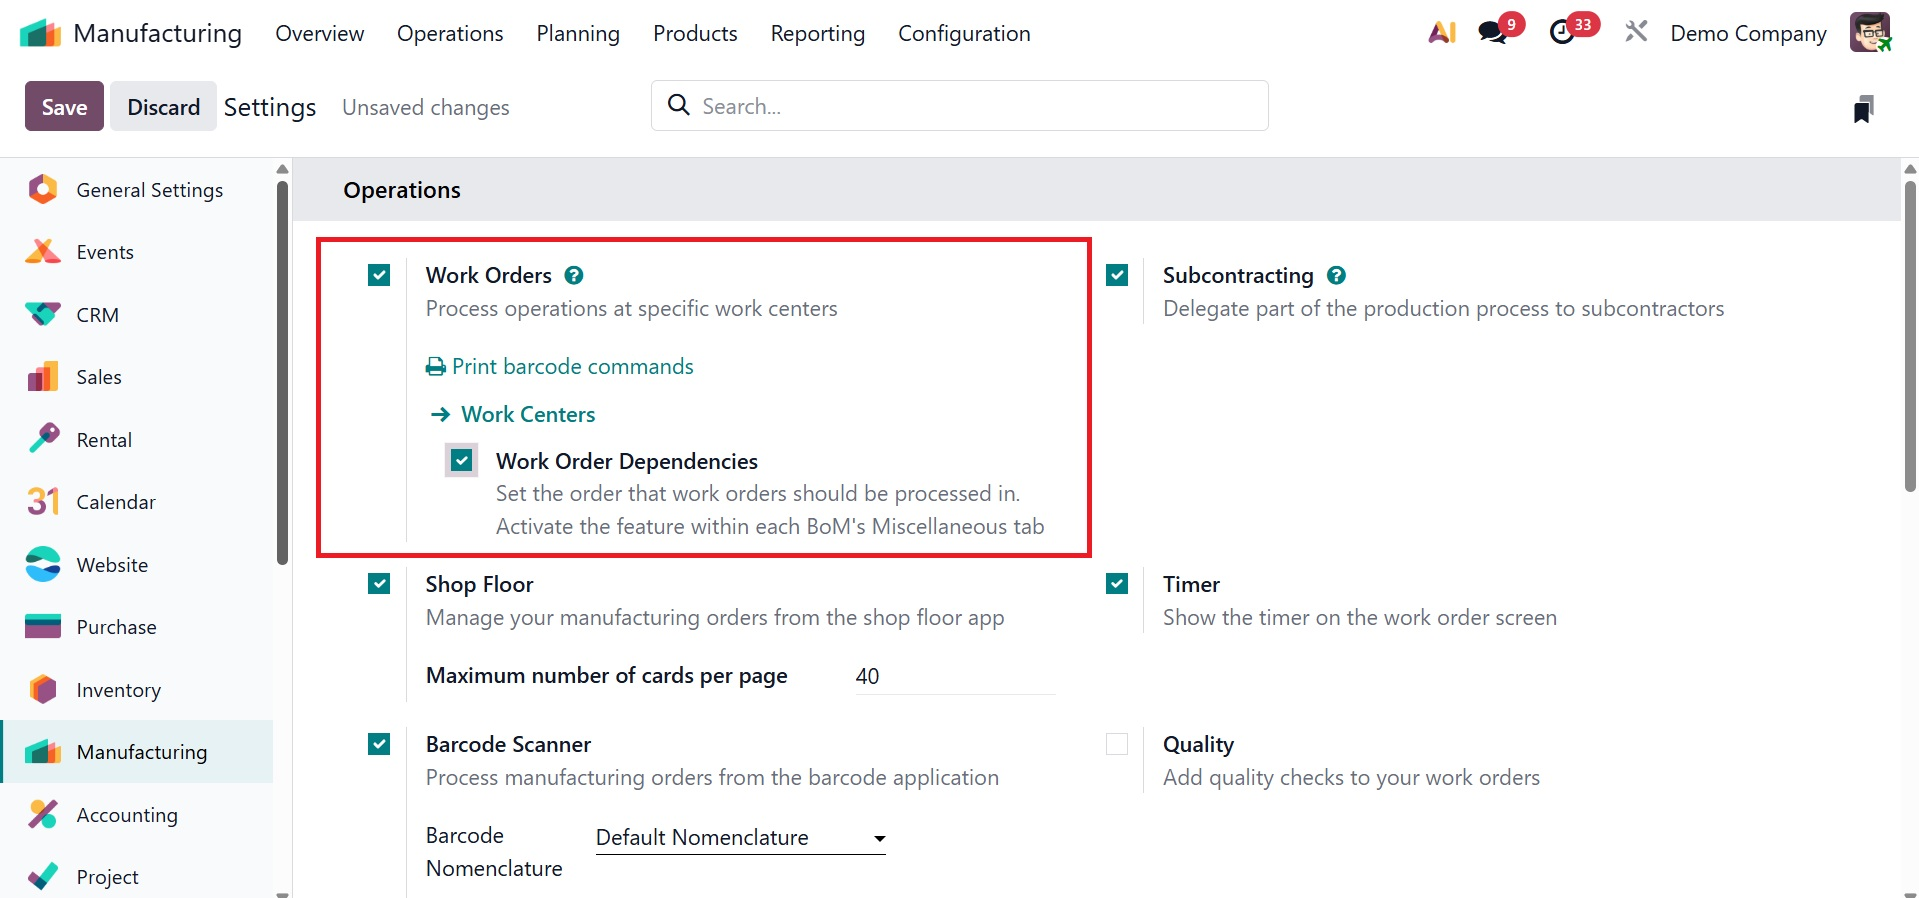
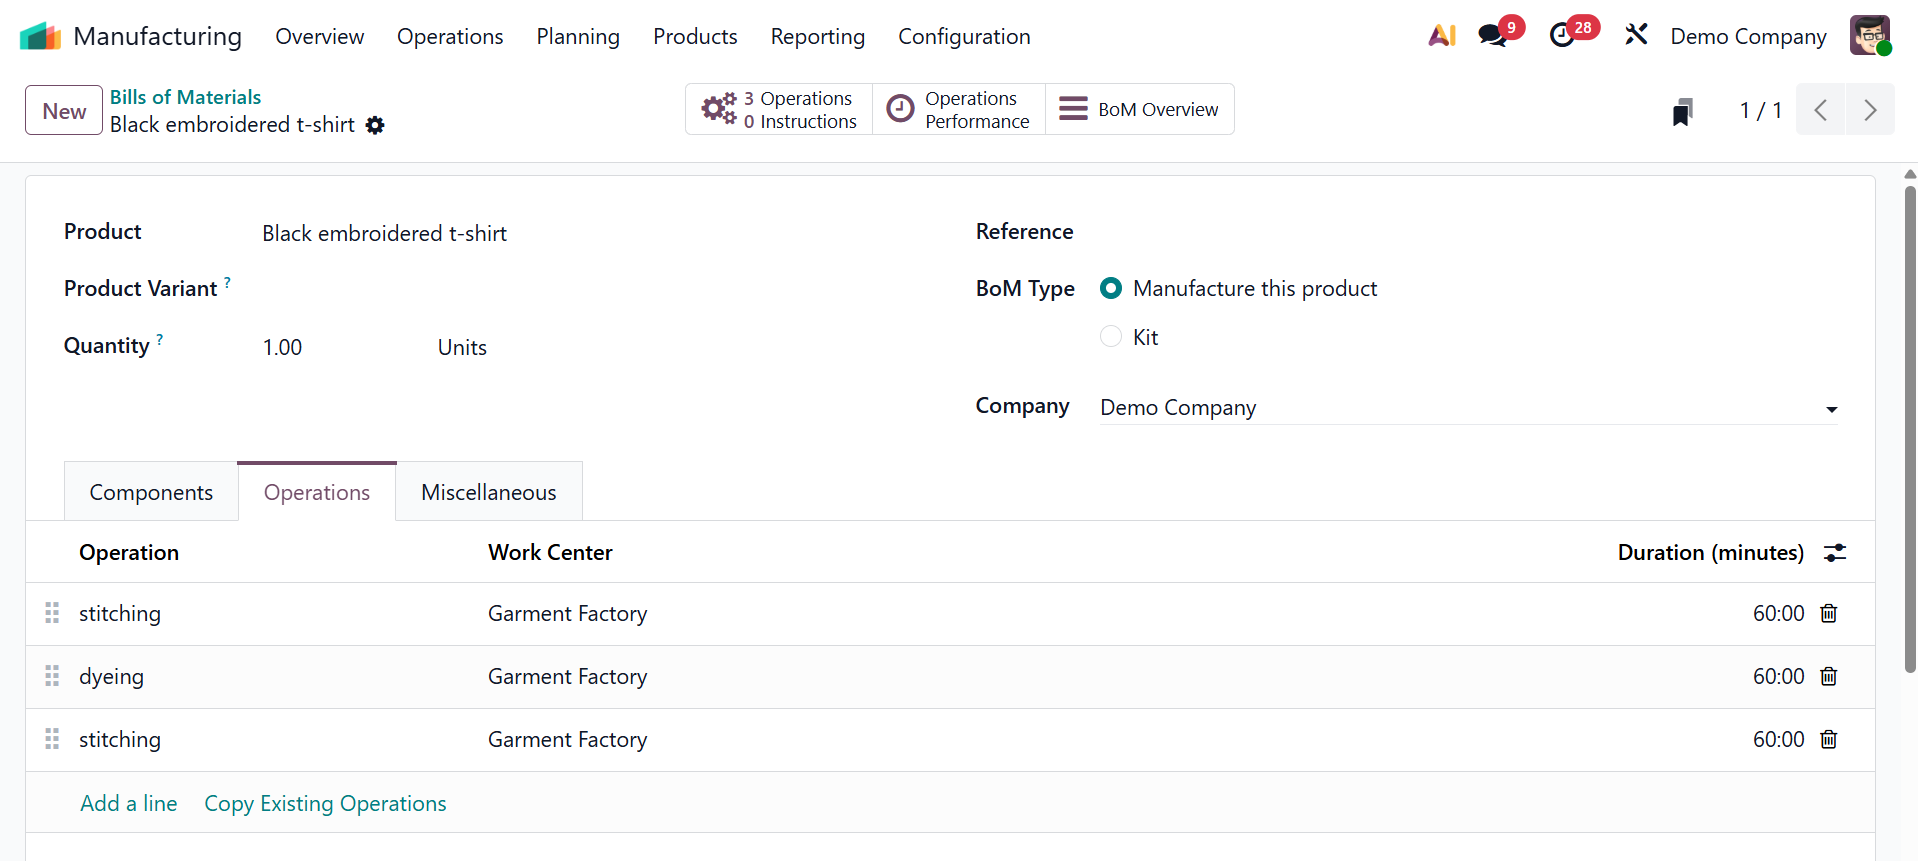
As shown in the screenshot below, enable it by selecting the "Operation Dependencies" option under the Miscellaneous tab of each Bill of Materials (BoM). On activating the option, you will get the option to enable operation dependencies under Miscellaneous tab of bill of materials option, as shown below.

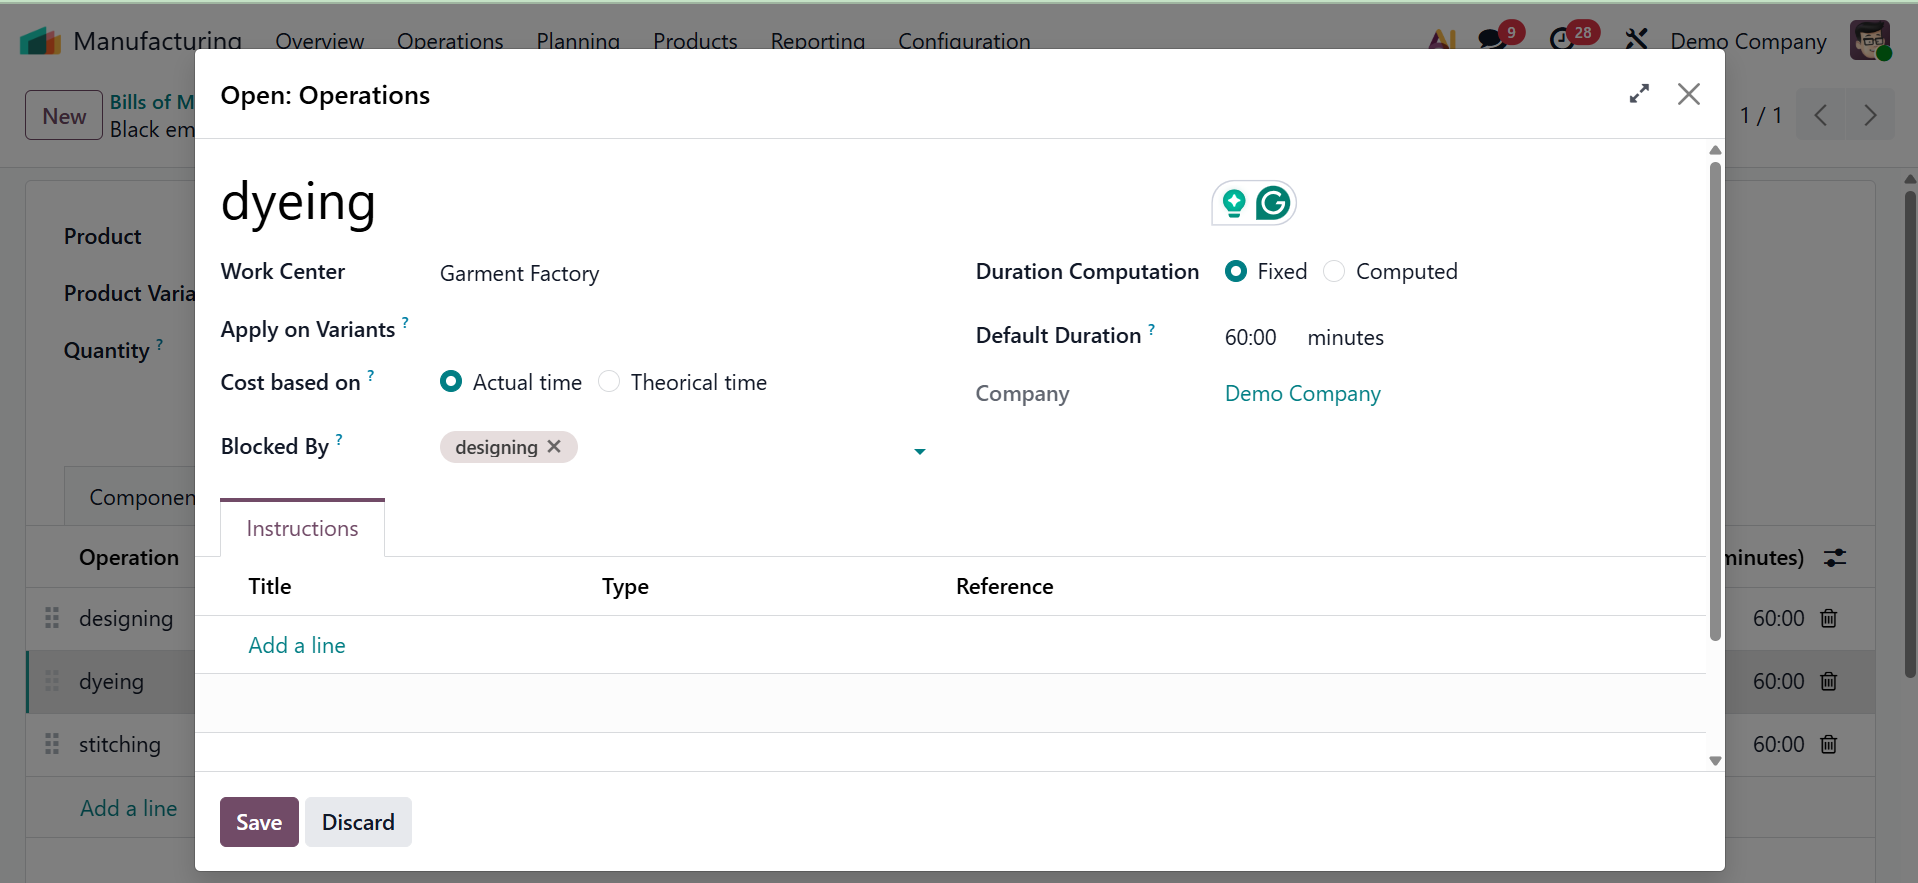
Then the Operation tab will gain a new field named "Blocked By." If Operation B is blocked by Operation A, then the Operation B can only perform after completing the Operation A.
Designing is the initial activity made in this case. The first step must be completed before dyeing may begin. Stitching will start after the designing and dying procedures are complete.
Open the second operation after that. Add the first operation, "Designing," to the Blocked By option. Next, save the process.
Add the second operation, Dying, to the Blocked By section after opening the third operation. save it.
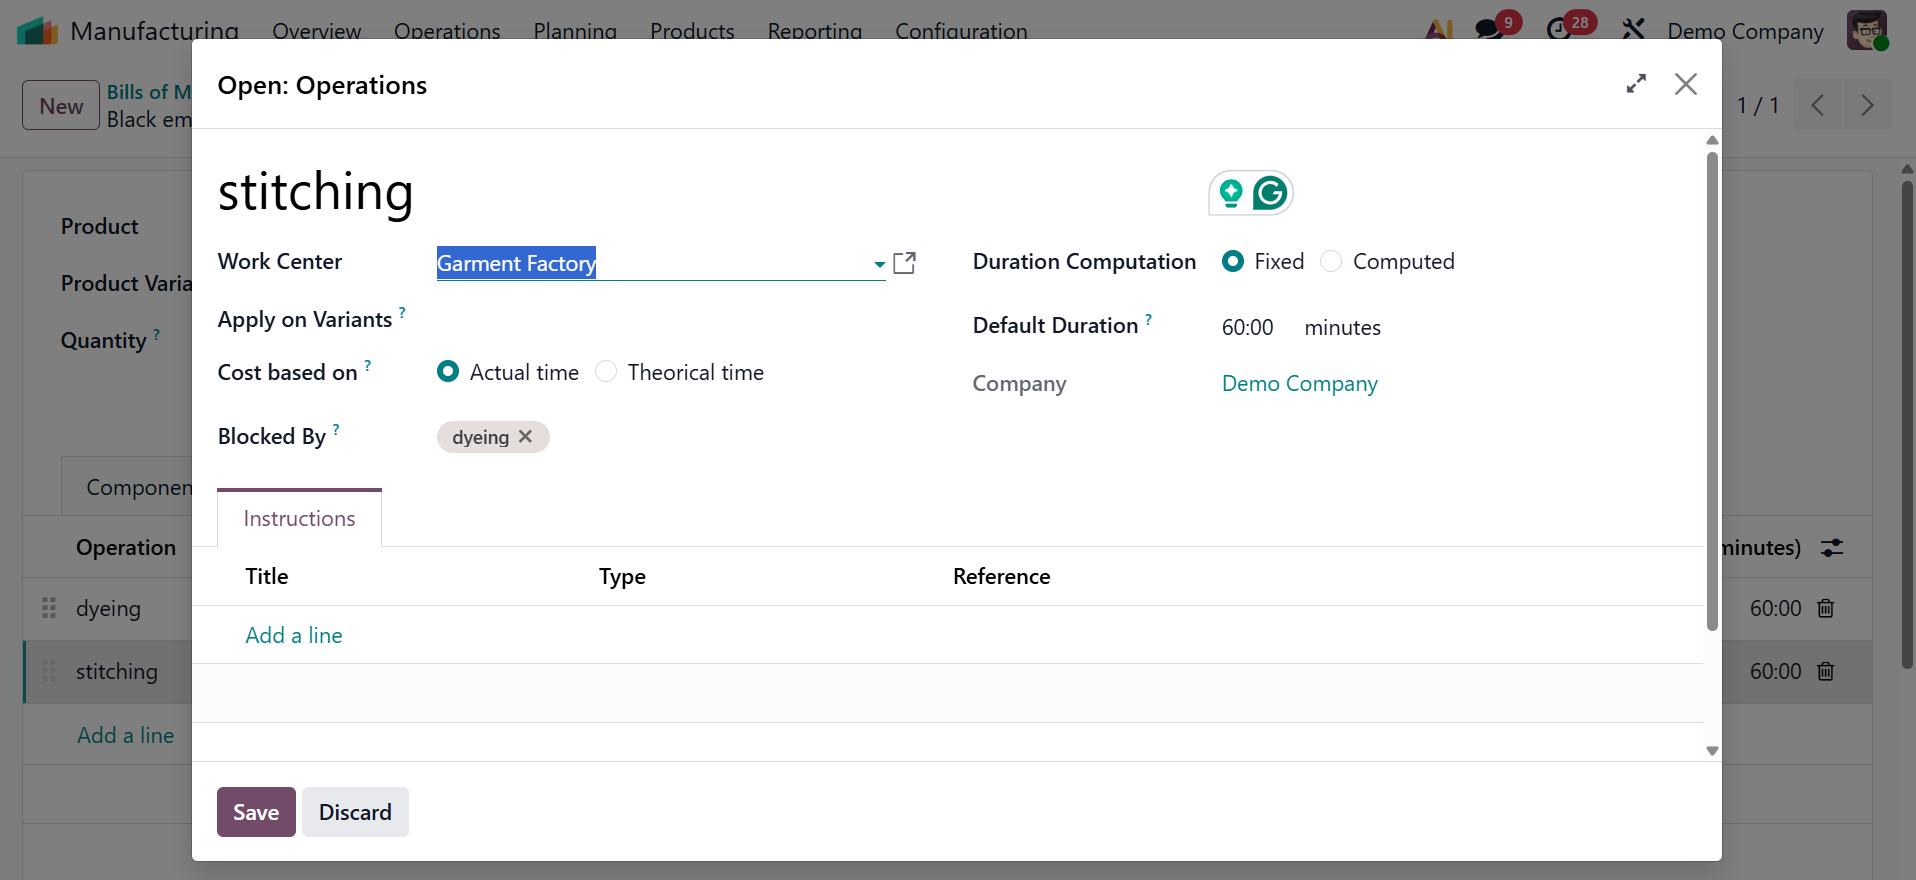
Dyeing is only done after designing is complete, according to the Operations tab. And Stitching will function once Dyeing is finished.
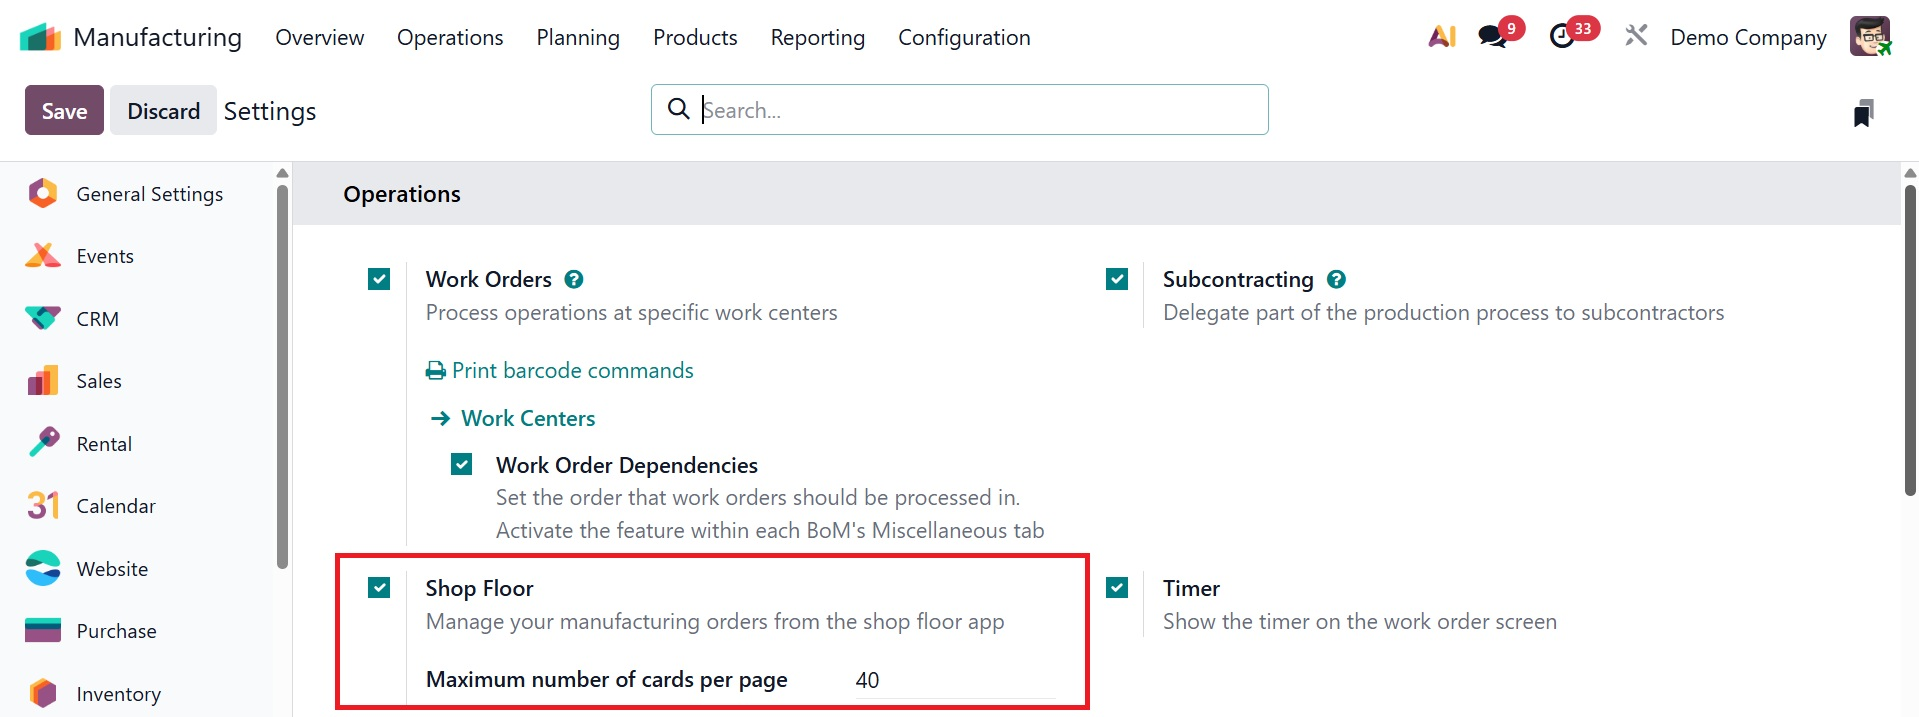
- Shop Floor: Using the special Shop Floor app, you may manage and carry out production orders. It provides a user-friendly interface tailored for tablets and touchscreens, enabling operators to monitor given jobs, monitor progress, and finish work orders instantly, increasing productivity and visibility on the floor. Here, there is an option, named "Maximum number of cards per page" setting in the Odoo Manufacturing module's Shop Floor configuration defines the limit on how many work orders or manufacturing orders (represented as cards in the user interface) are displayed simultaneously on a single screen.
The "Shop Floor" smart button on a manufacturing order configuration form or the "Open Shop Floor" button on a Work Order configuration form are two ways to access the shop floor. As shown in the screenshot below, you can use the "Install App" button to install the shop floor app while selecting a work center for the station.
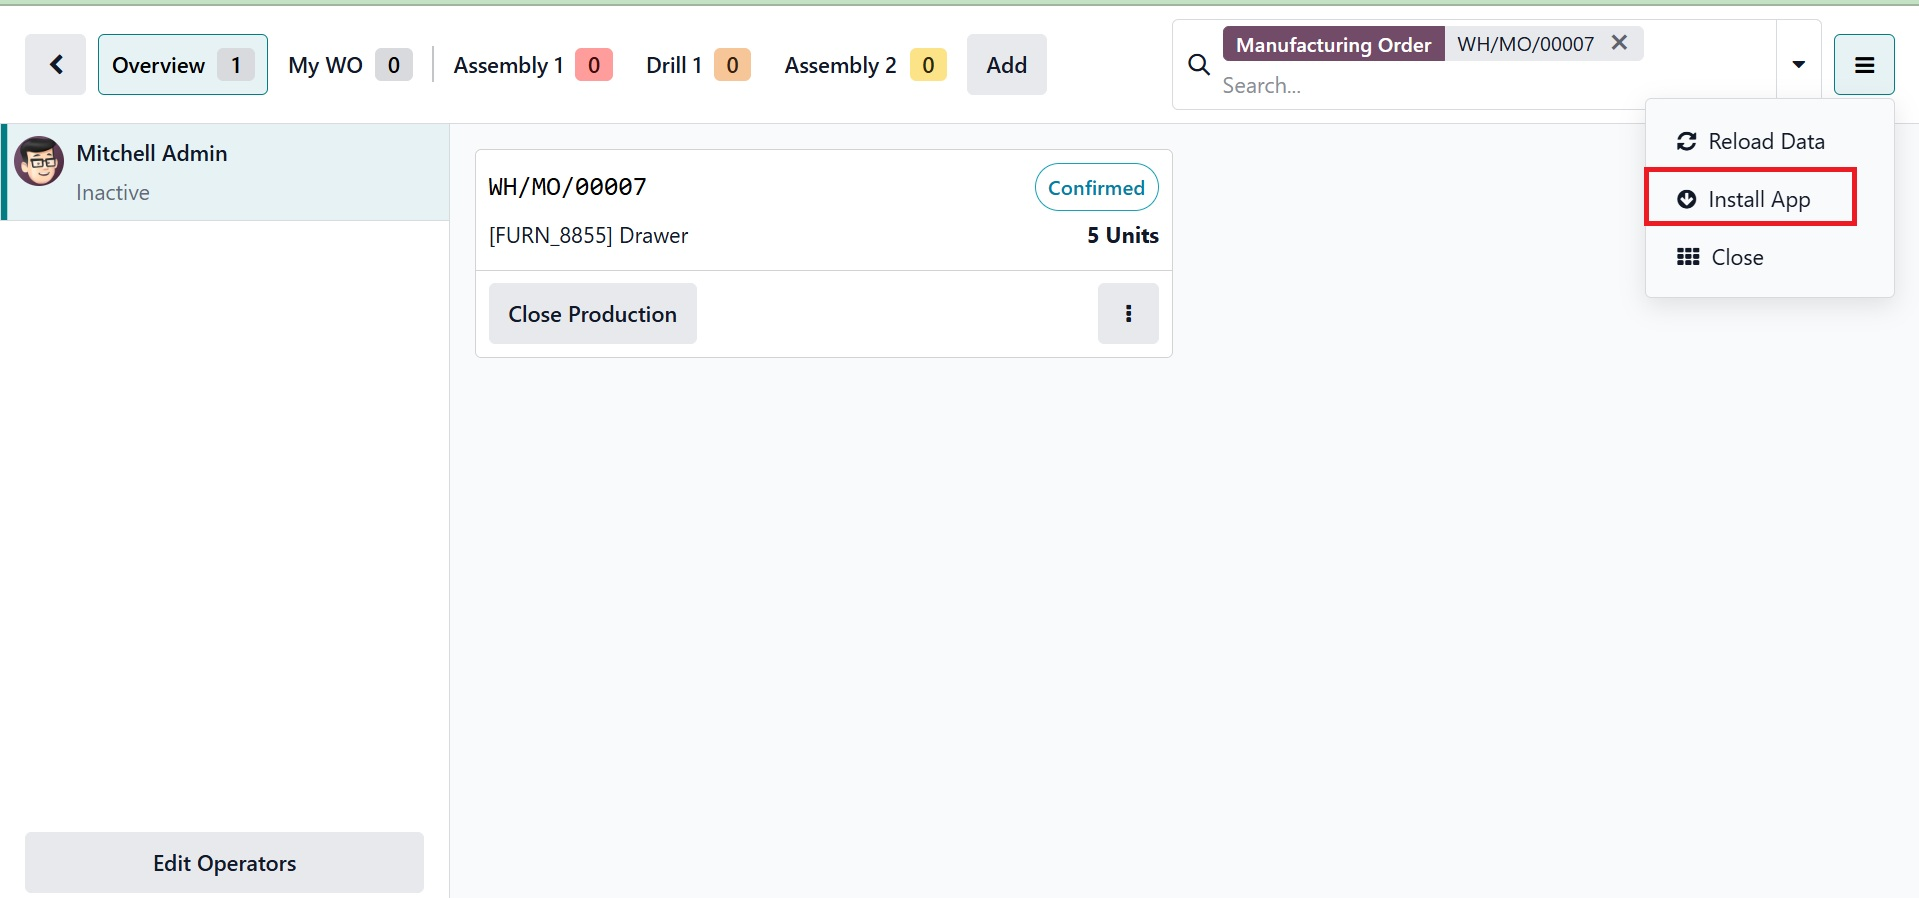
Once the installation is complete, select a work center and use the Shop Floor interface to manage work orders and other tasks.
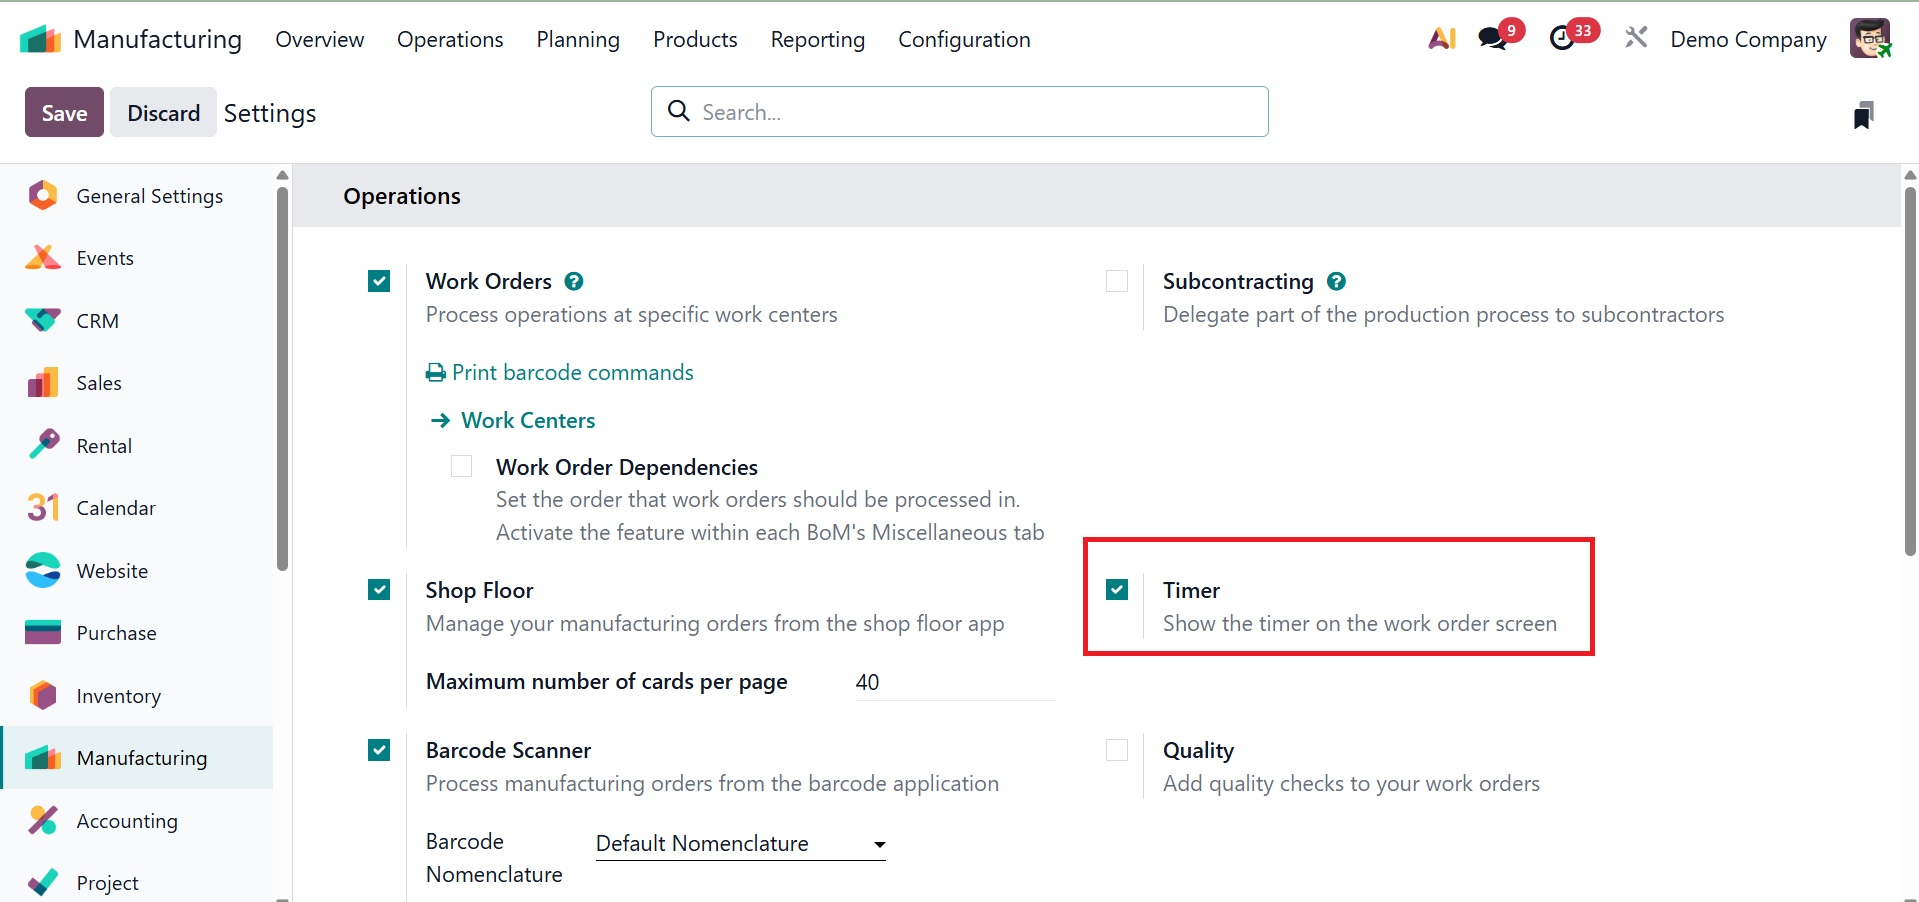
- Timer: A timer appears on the work order screen when the Timer is activated. This facilitates performance monitoring, time-based analysis, and more accurate production time reporting by assisting operators in keeping track of the amount of time spent on each work order.
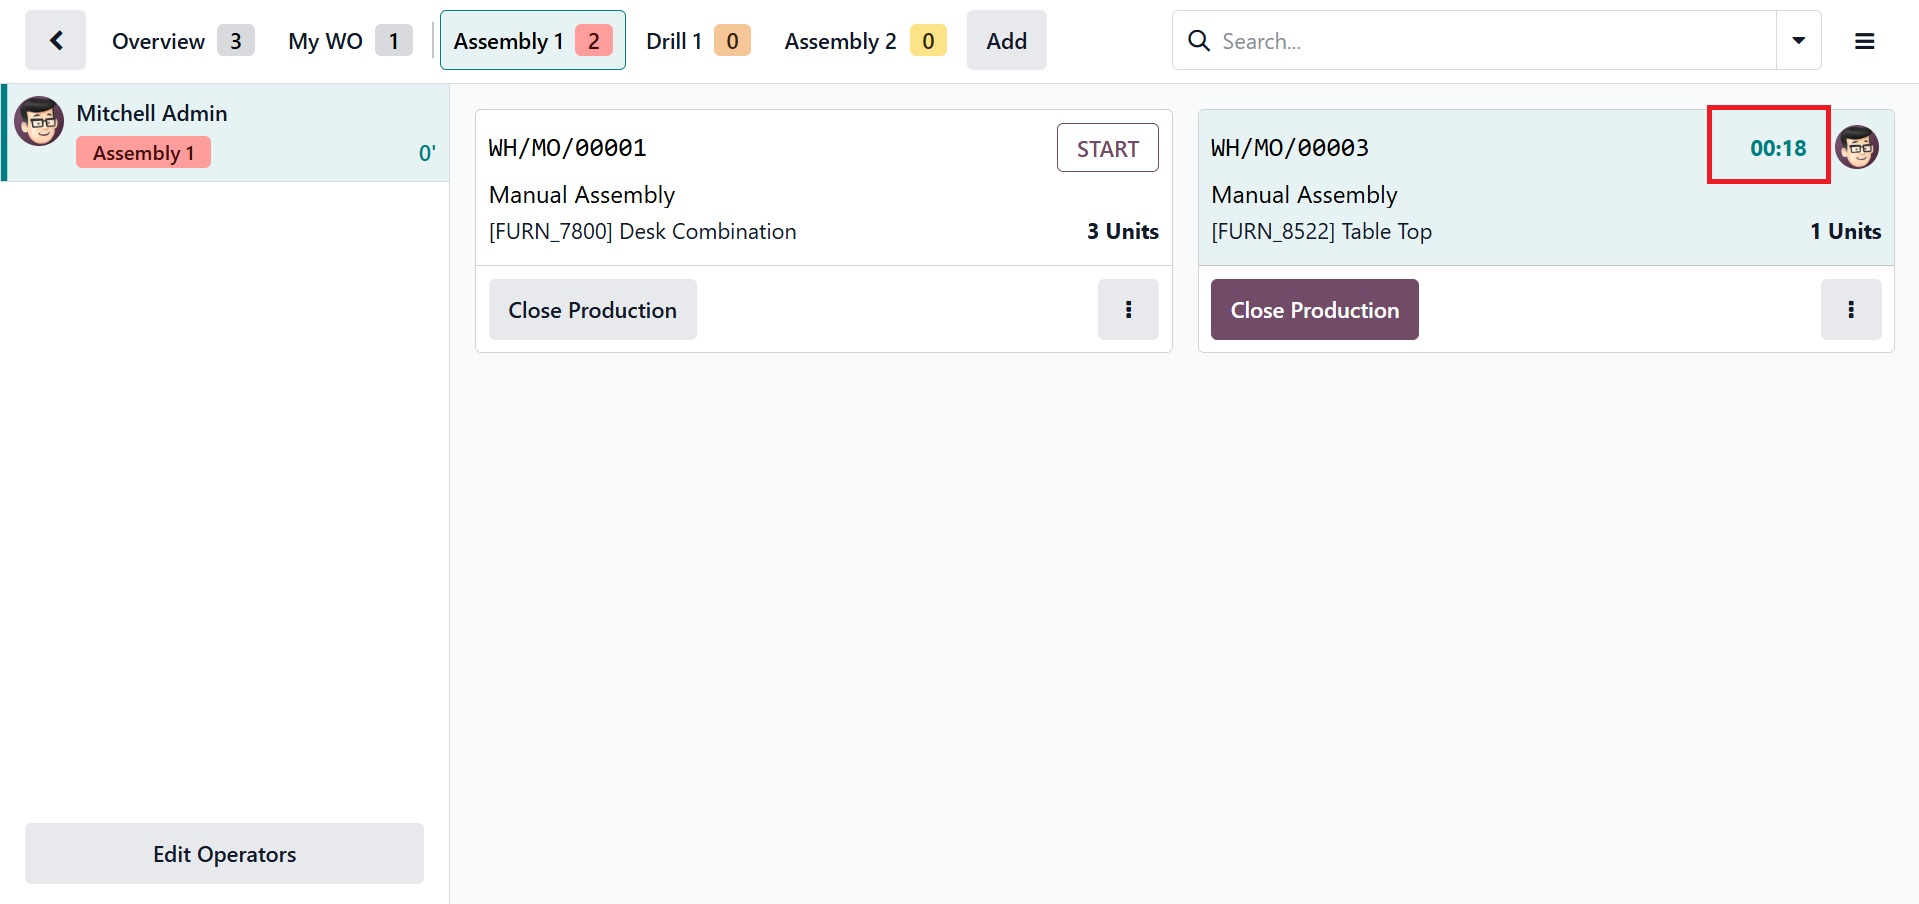
Click the "Open Shop Floor" button on a work order form to test the feature. The screenshot below shows the timer operating under a work order.
- Barcode Scanner: This configuration specifies how the system interprets barcodes. For various documents such as production orders, operations, and products, it establishes the format (nomenclature) of scanned barcodes. You can set up custom barcode rules to make sure they fit with your workflows.

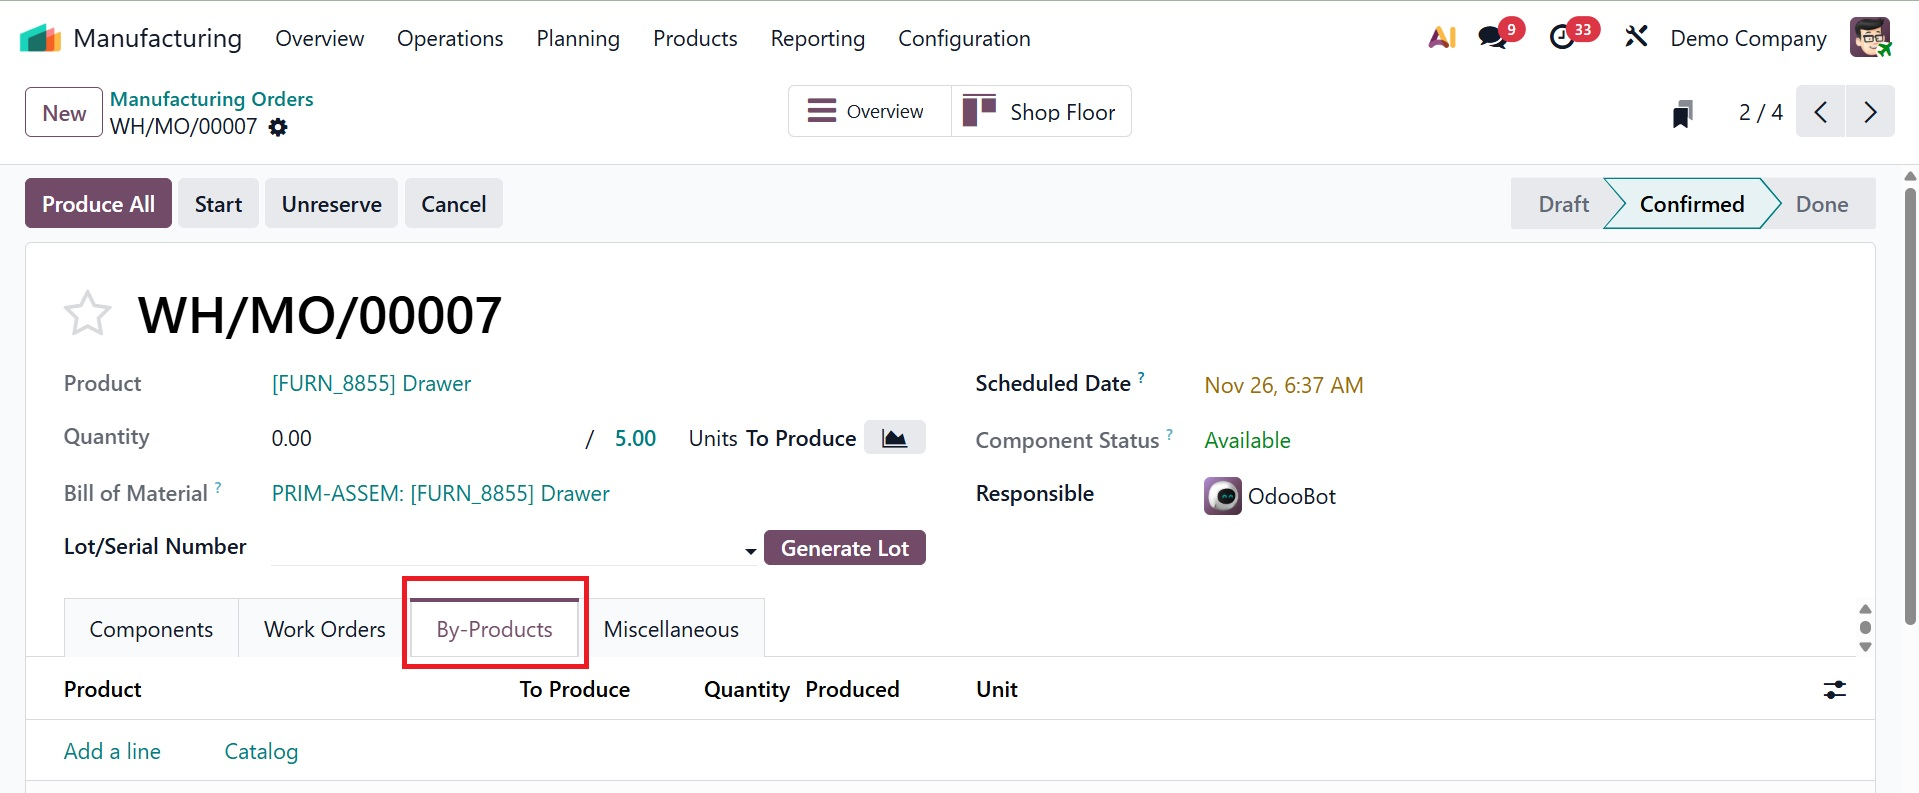
- By-Products: Turning on Secondary goods produced during a manufacturing process can be defined in the Bill of Materials (BoM) using By-goods.
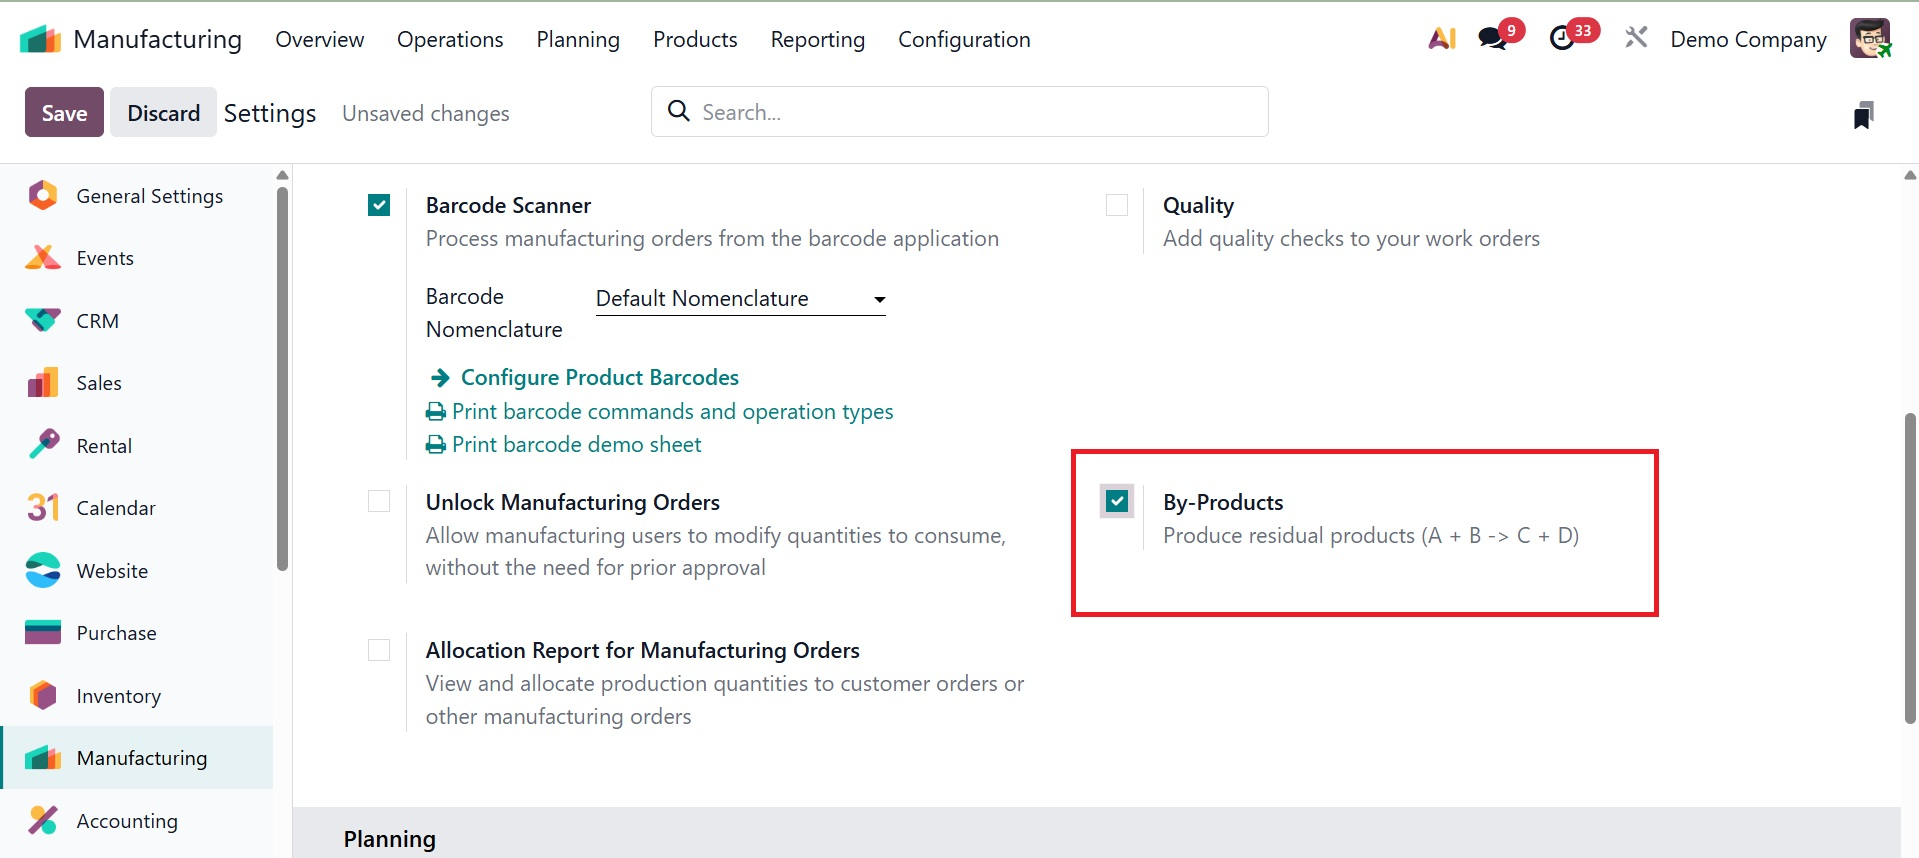
As seen in the screenshot below, this is helpful for companies where trash or reused materials are produced as part of the primary manufacturing.
- Quality: You can specify quality control points, inspection procedures, and alarm systems by turning on the Quality option, which enables connection with the Quality module. Throughout the production process, this guarantees consistency and conformity.
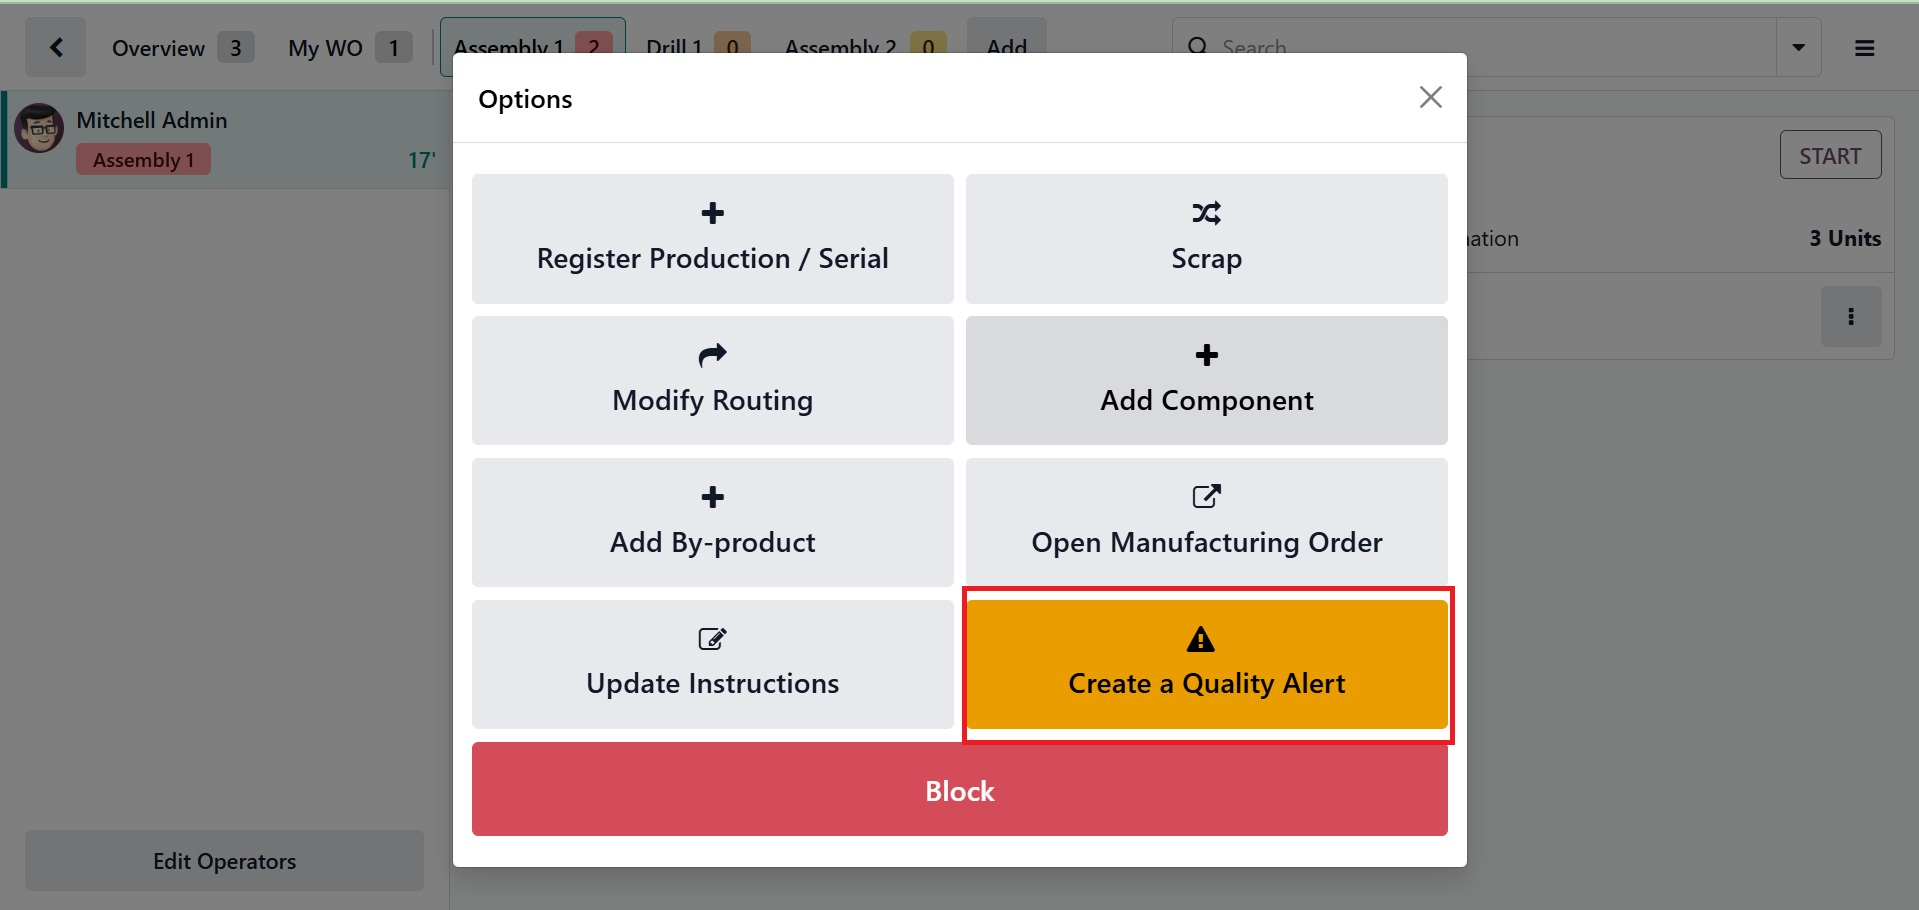
Open a Shop Floor and select the little settings icon from the specific Work Order station to test the feature. When a product quality issue arises, you can make any quality alerts by selecting the "Create a Quality Alert" option from the menu list that opens.
The quality issue Title, Product, Product Variant, Lot, Work Center, Picking, Team, Priority, Root Cause, etc. can then be used to send the quality alerts, as shown below.
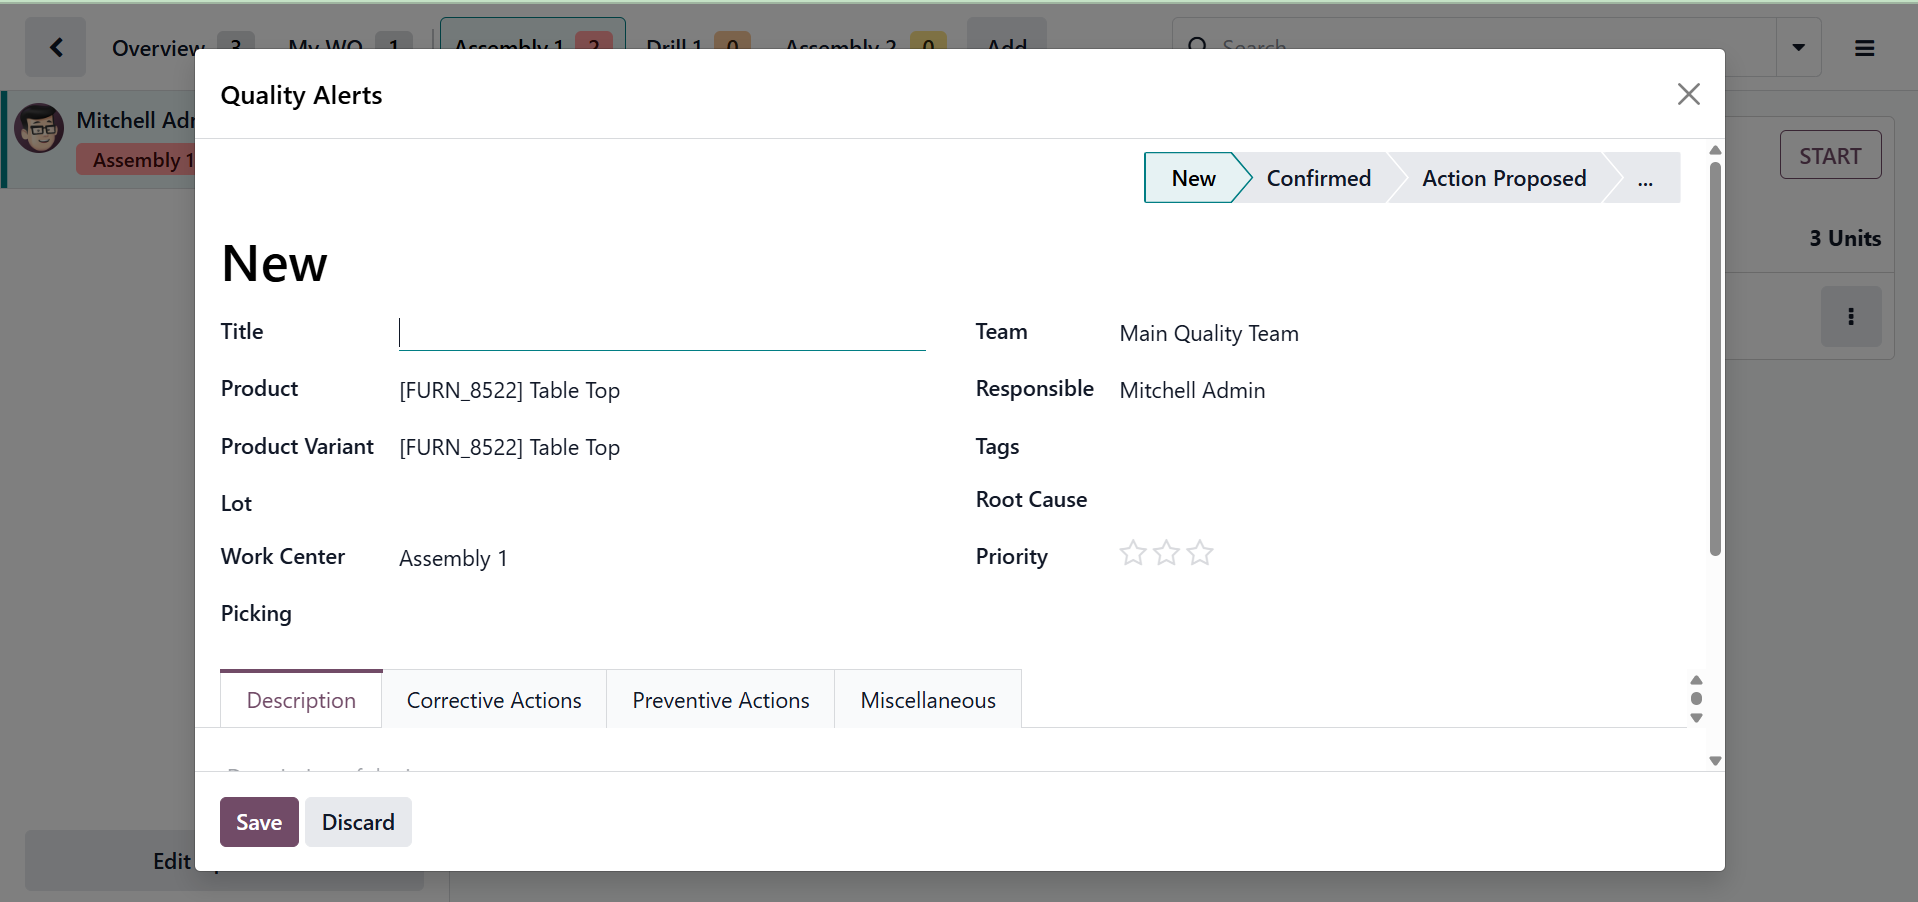
As you can see from the screenshot above, you may then provide any description of the quality issue in the "Description" page, any Corrective Actions, Preventive Actions, and any other Miscellaneous facts about the Vendor, Date Assigned, etc. in the appropriate tab sections.
-
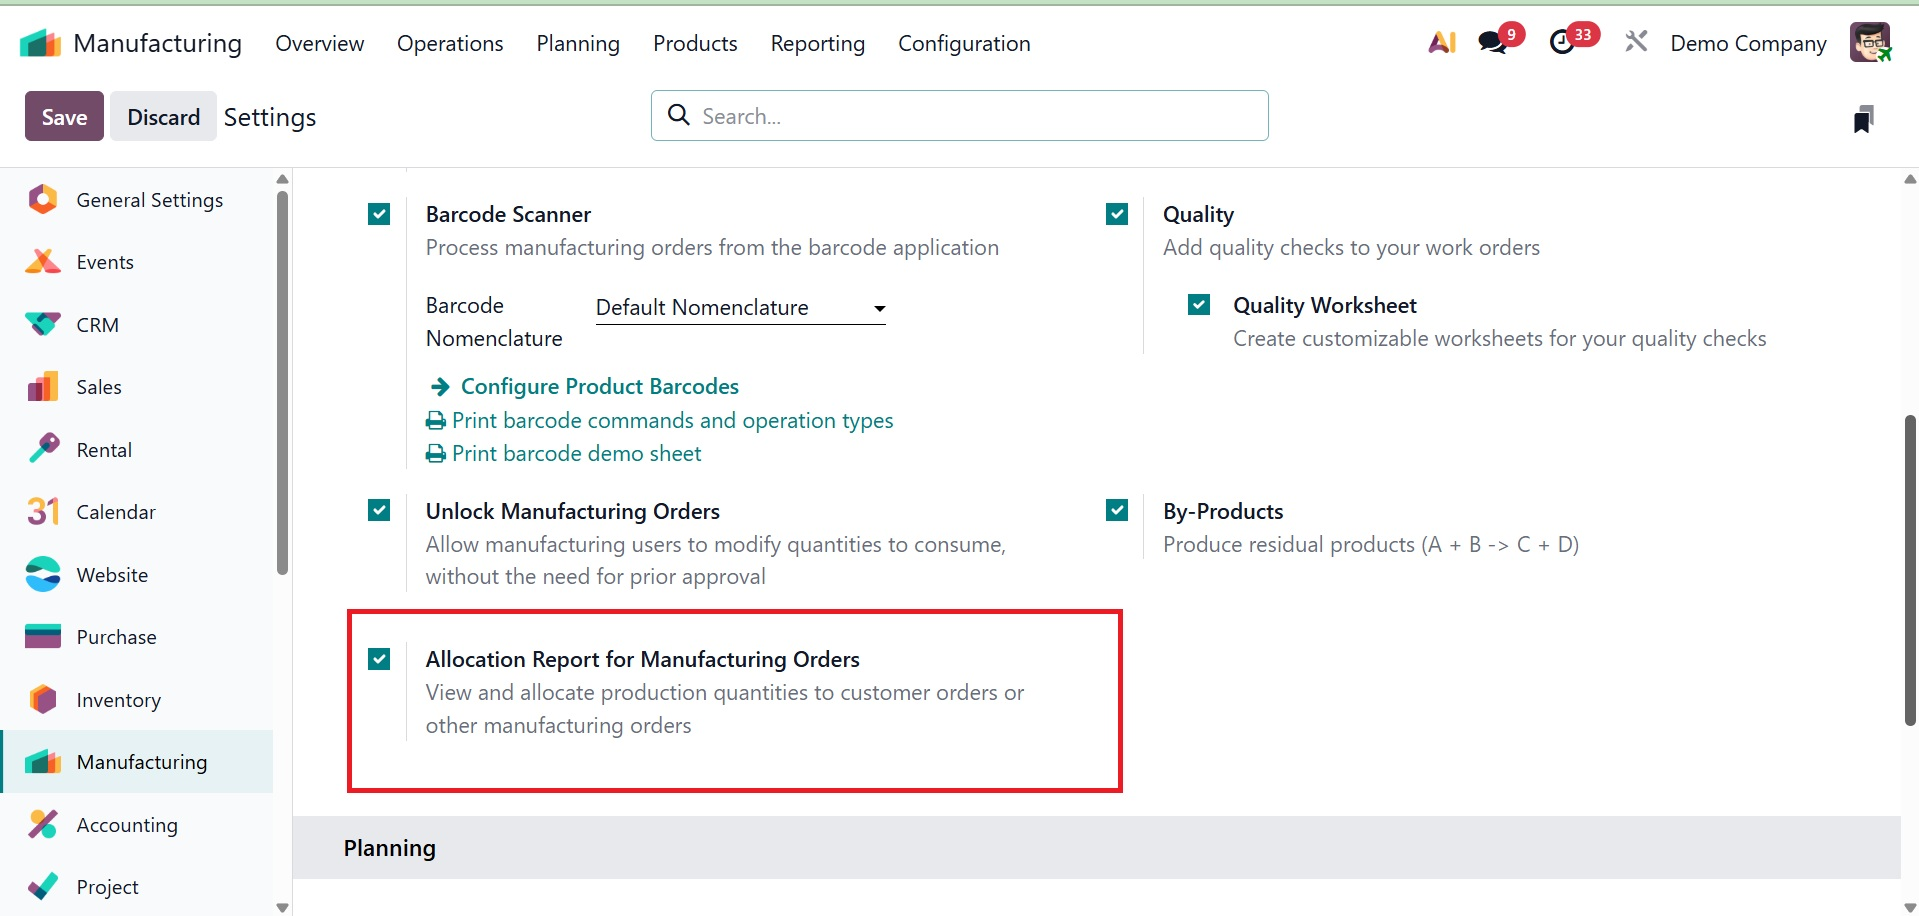
Unlock Manufacturing Order Management: This feature offers ways to automate and simplify the generation, monitoring, and processing of Manufacturing Orders (MOs), guaranteeing control and visibility across the whole production process.
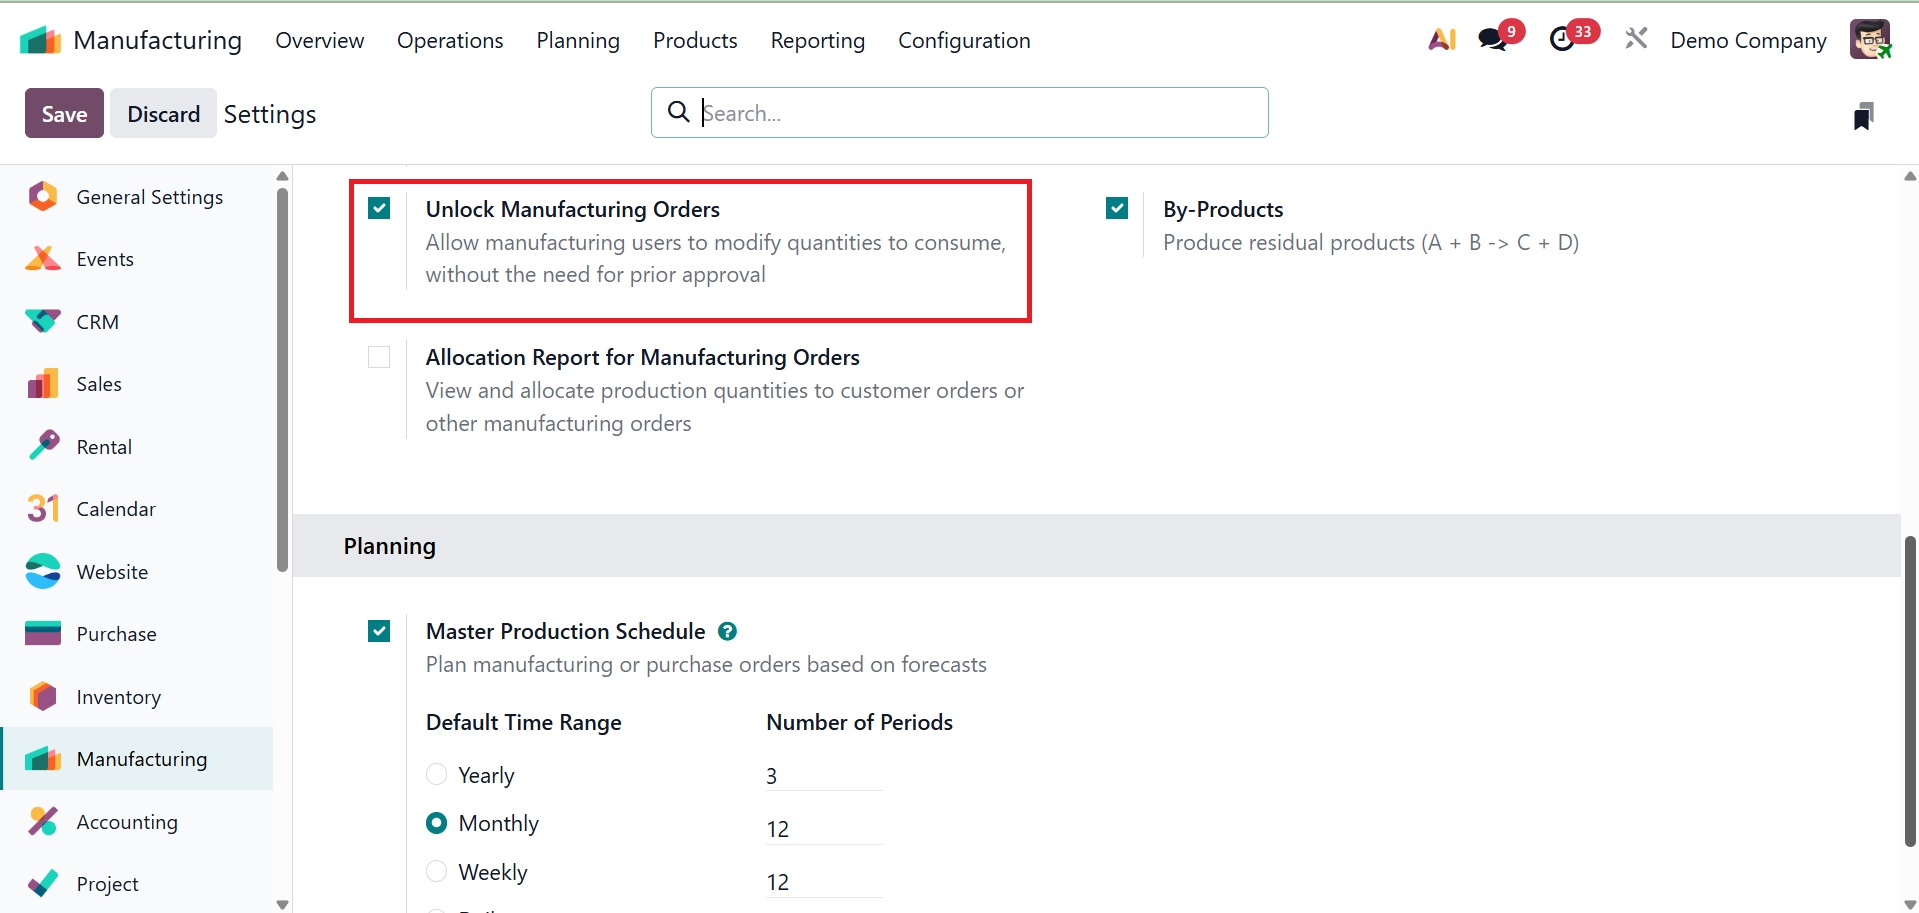
- Allocation Report for Manufacturing Order: The allocation of materials to various production orders is visible through Allocation Reports for production Orders. This enhances inventory planning and aids in recognizing surpluses or shortages.
In order to allow for unforeseen delays, Security Lead Time adds buffer time to manufacturing operations. This guarantees that even in the event of delays, production deadlines are fulfilled.
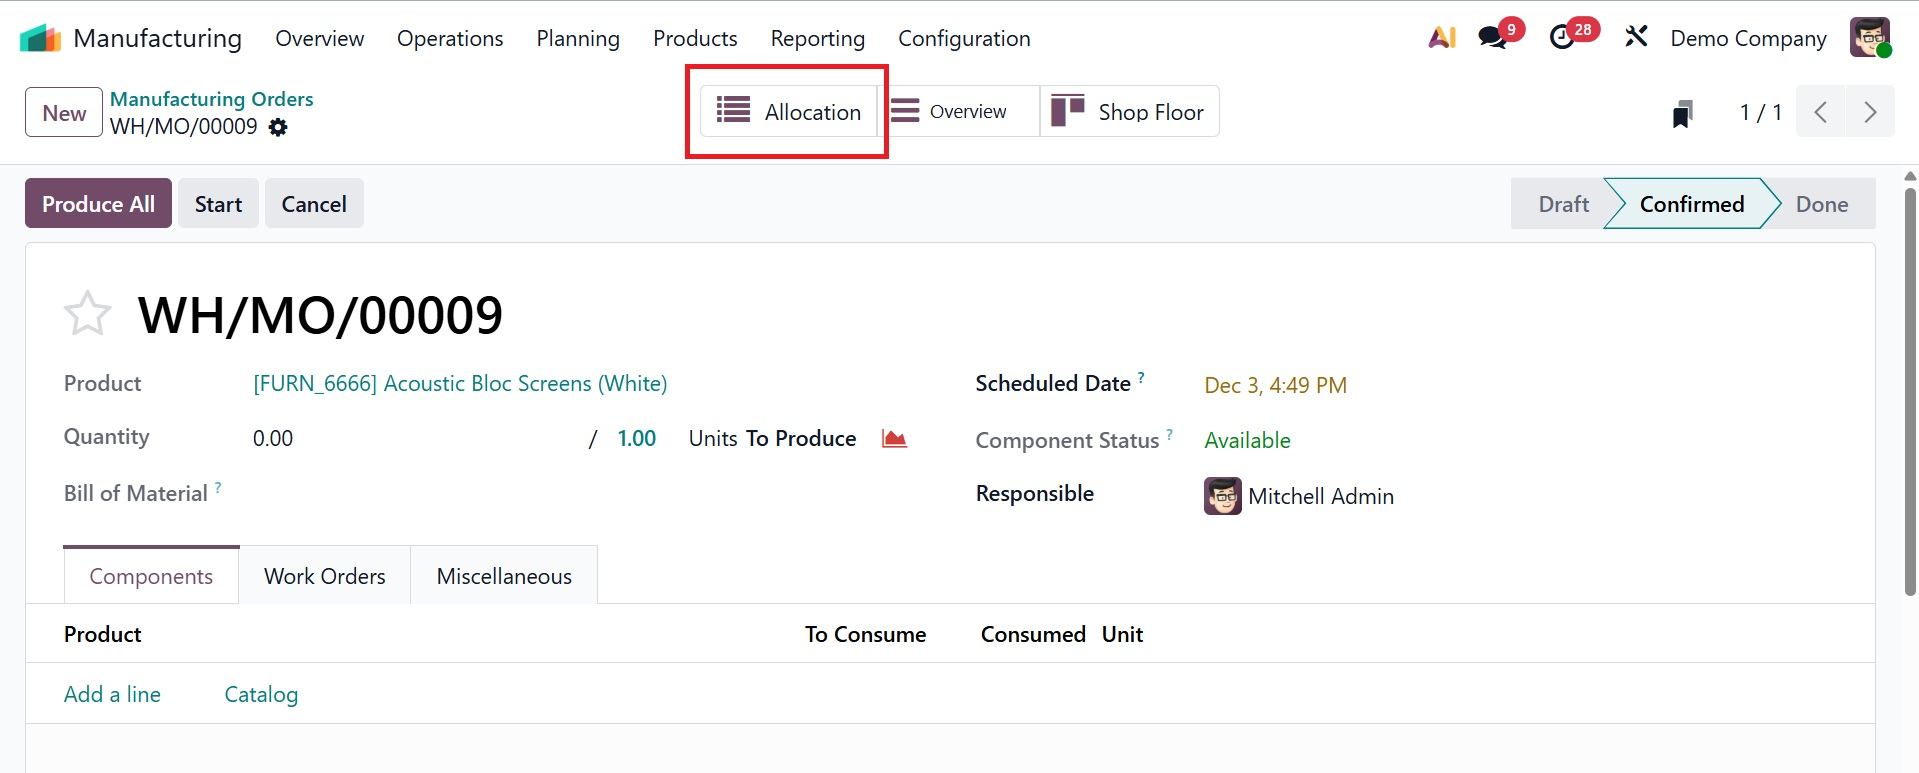
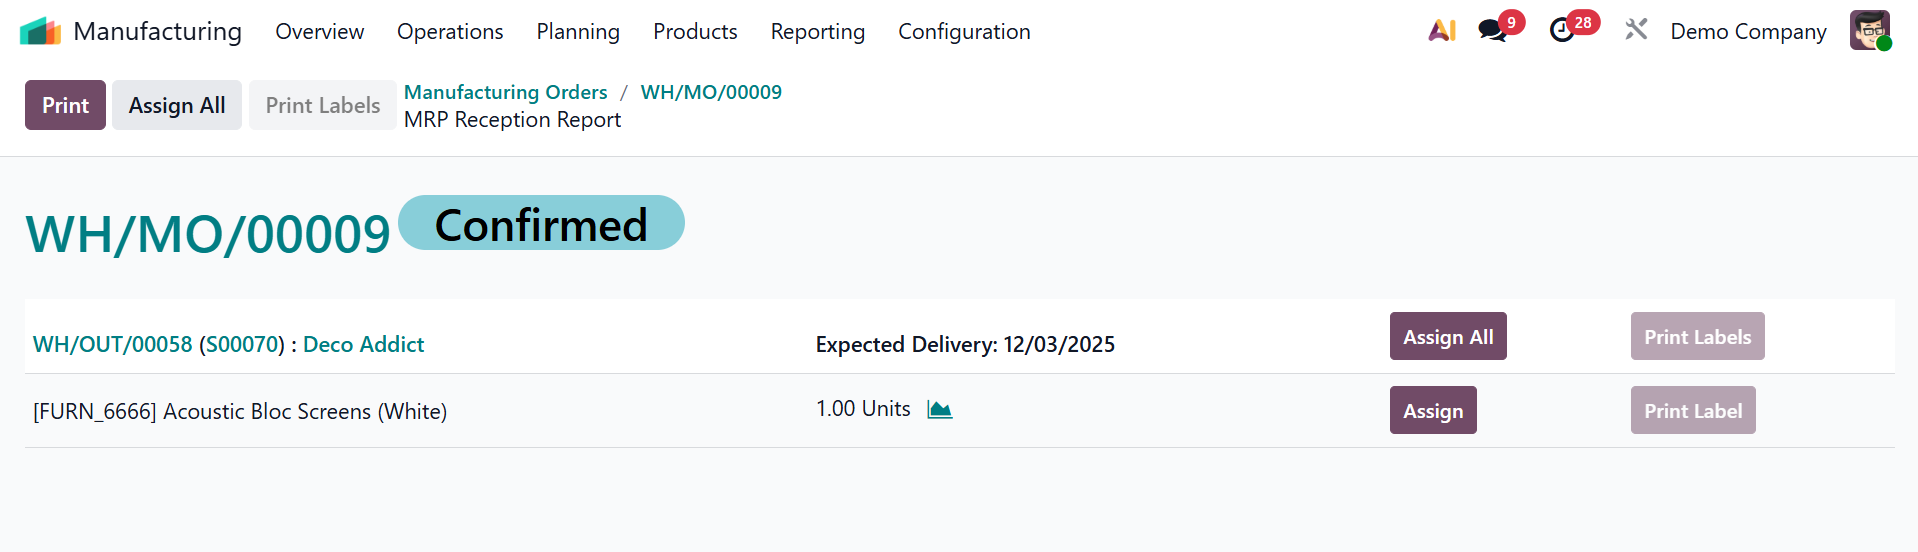
Here, you can see the smart button of allocation for the manufacturing order, as shown below.
On opening the button, you will get the created sale order for the product.
-
Master Production Schedule (MPS): By enabling you to estimate demand and plan manufacturing quantities over a given time horizon, the MPS aids in production planning. In order to predict production requirements and match them with resource availability, this tool offers a visual, time-based grid.
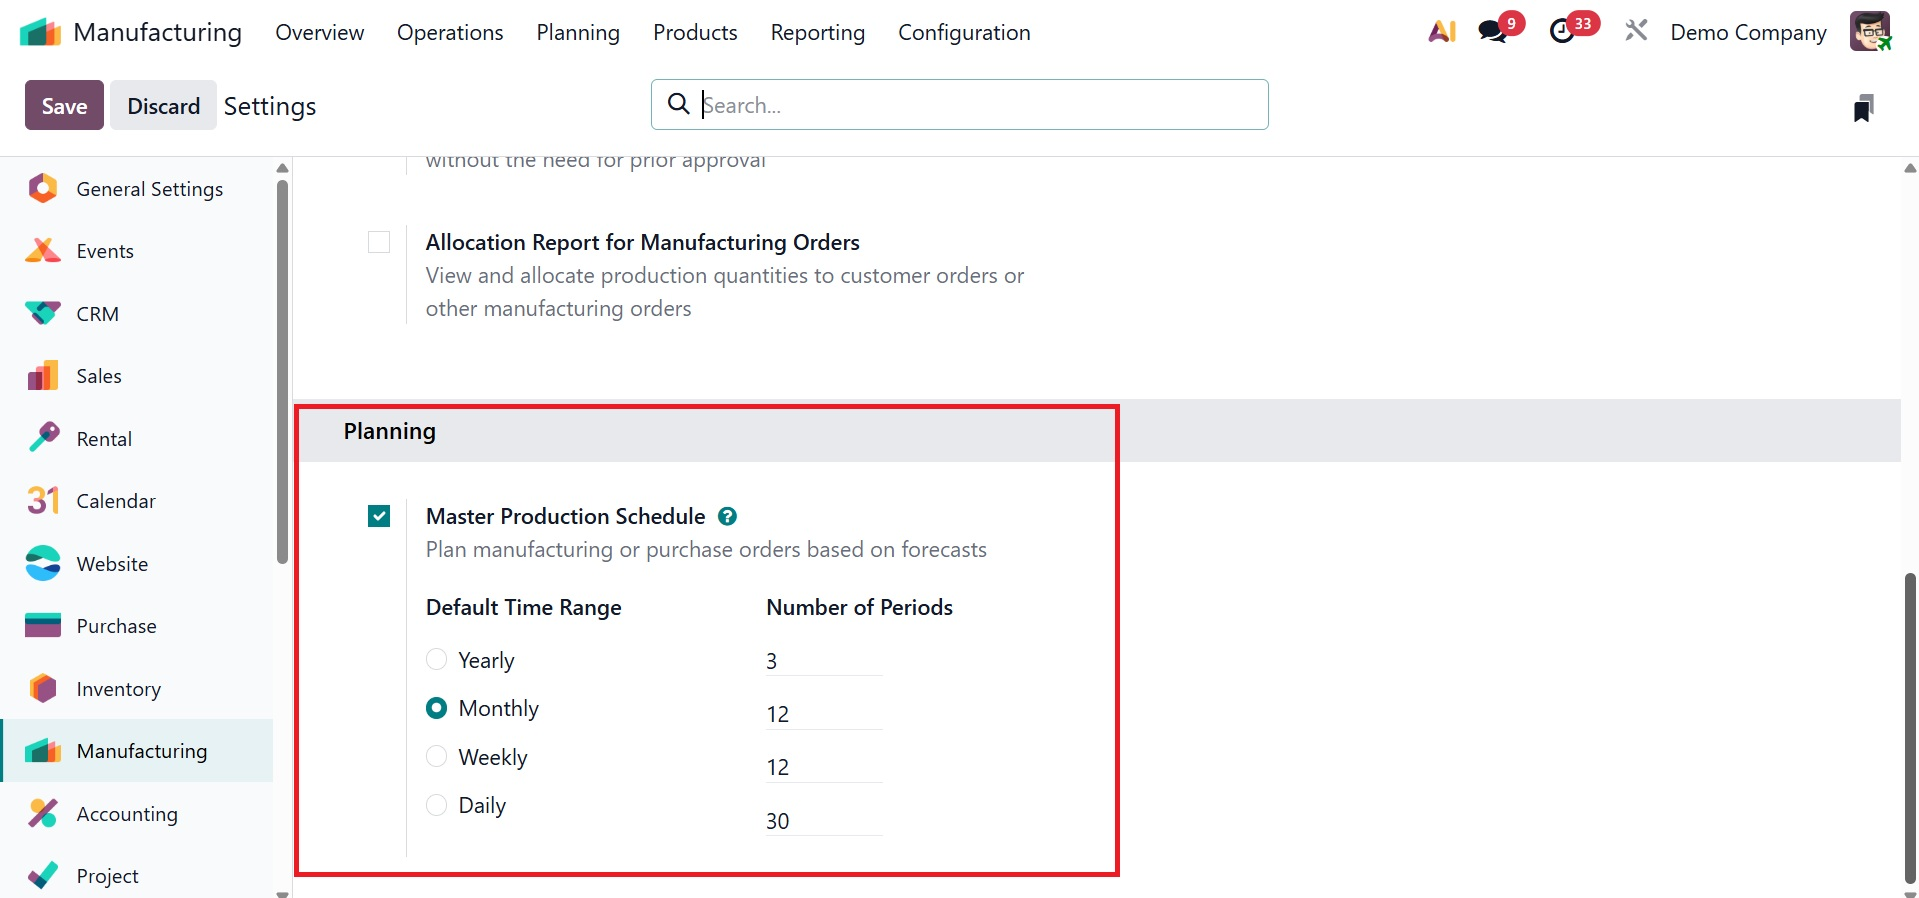
Odoo may easily adjust to your manufacturing operations by enabling or configuring each of these parameters in accordance with your unique operational requirements.
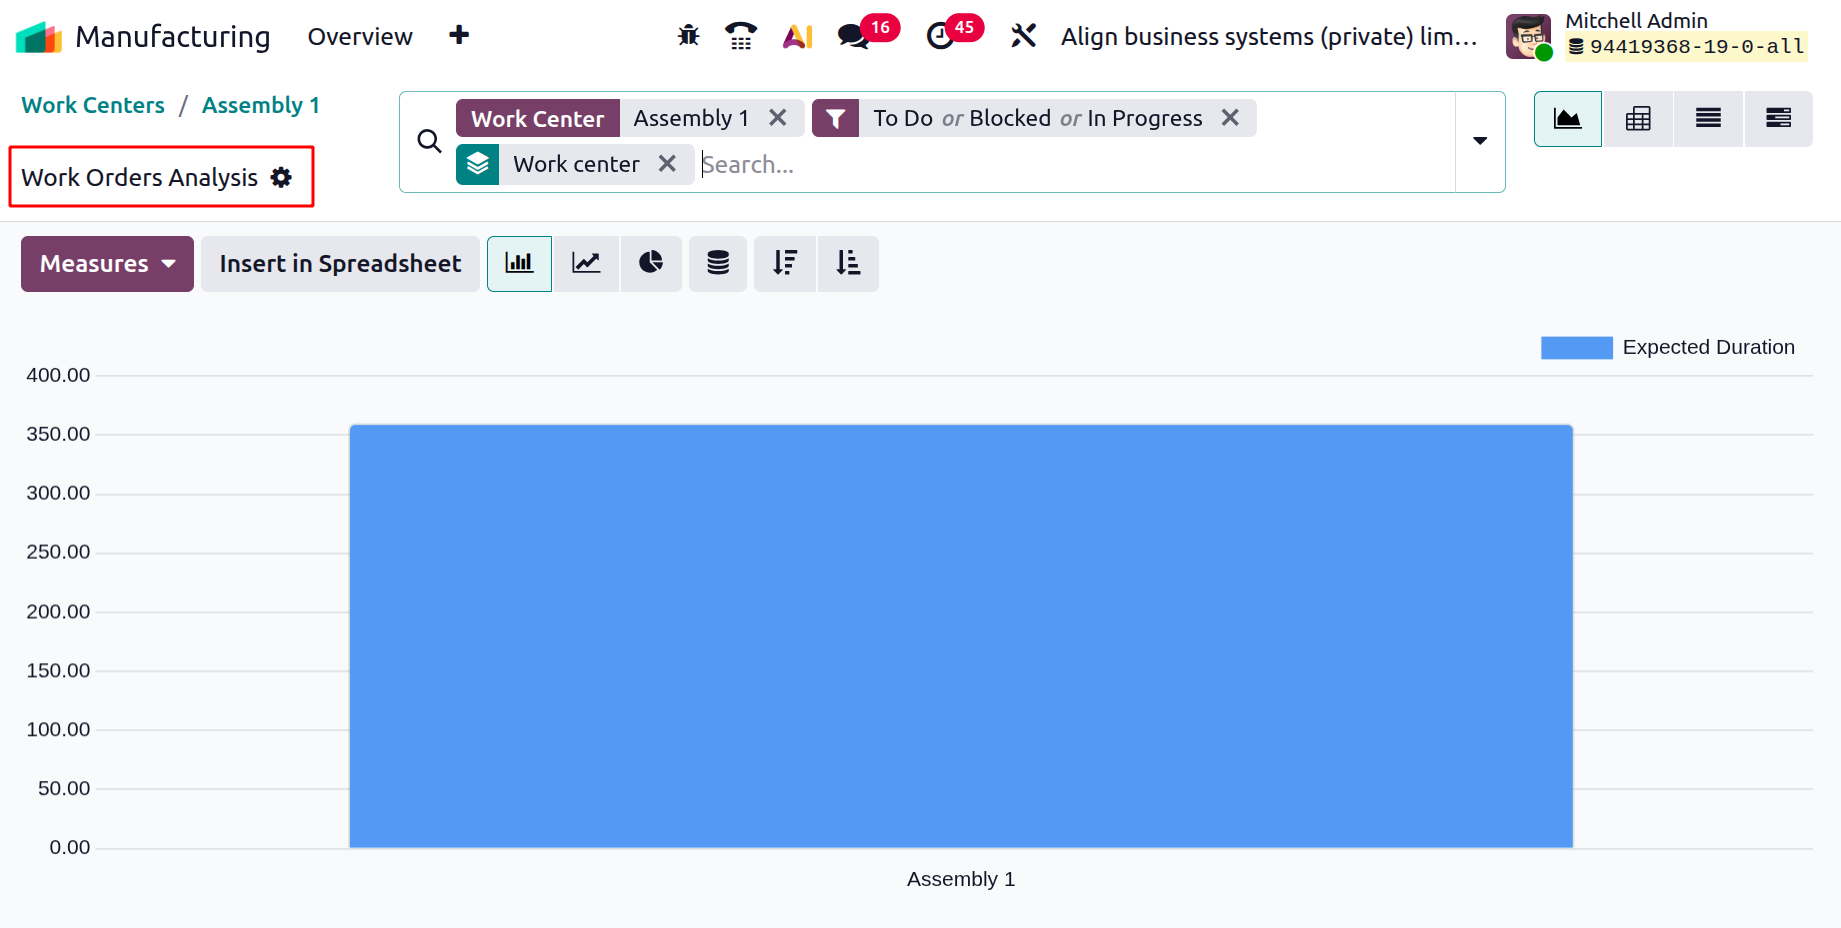
1.2 Work Centre
Work centers, which are specialized areas or units where manufacturing processes take place, are the center of production activities. By enabling users to establish and oversee numerous work centers, the Odoo 19 Manufacturing module makes sure that each production activity has a suitable location.
This function aids in maintaining quality throughout the entire production process. Go to the settings window and select the Work Orders option to create a new work center. The work center setup link, which shows current work centers and their configurations, is accessible after activation.
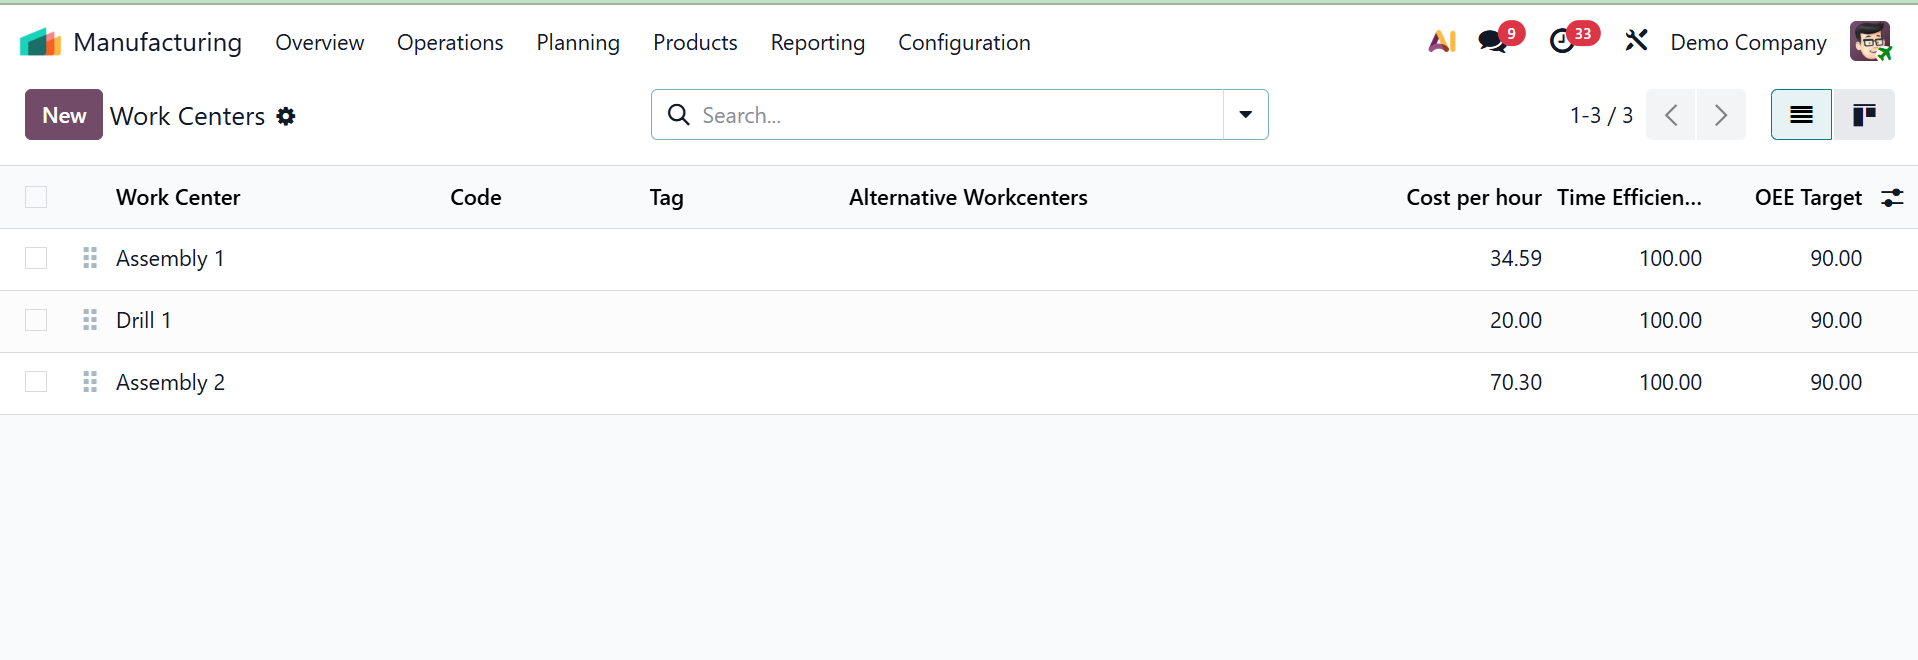
The dashboard of all the accessible work centers, including their Name, Code, Tag, Alternative Work Centers, Cost per hour, Capacity, and other details, is visible in the "Work Centers" window of the "Configuration," as shown in the screenshot above.
Click the "New" button and provide the necessary information, including the special "Work Center Name," to create a new work center for your business. The "Tags" help organize and categorize work centers for easier filtering. If the primary center is not available, you can select a backup center in the "Alternative Work Center" area to continue operations.
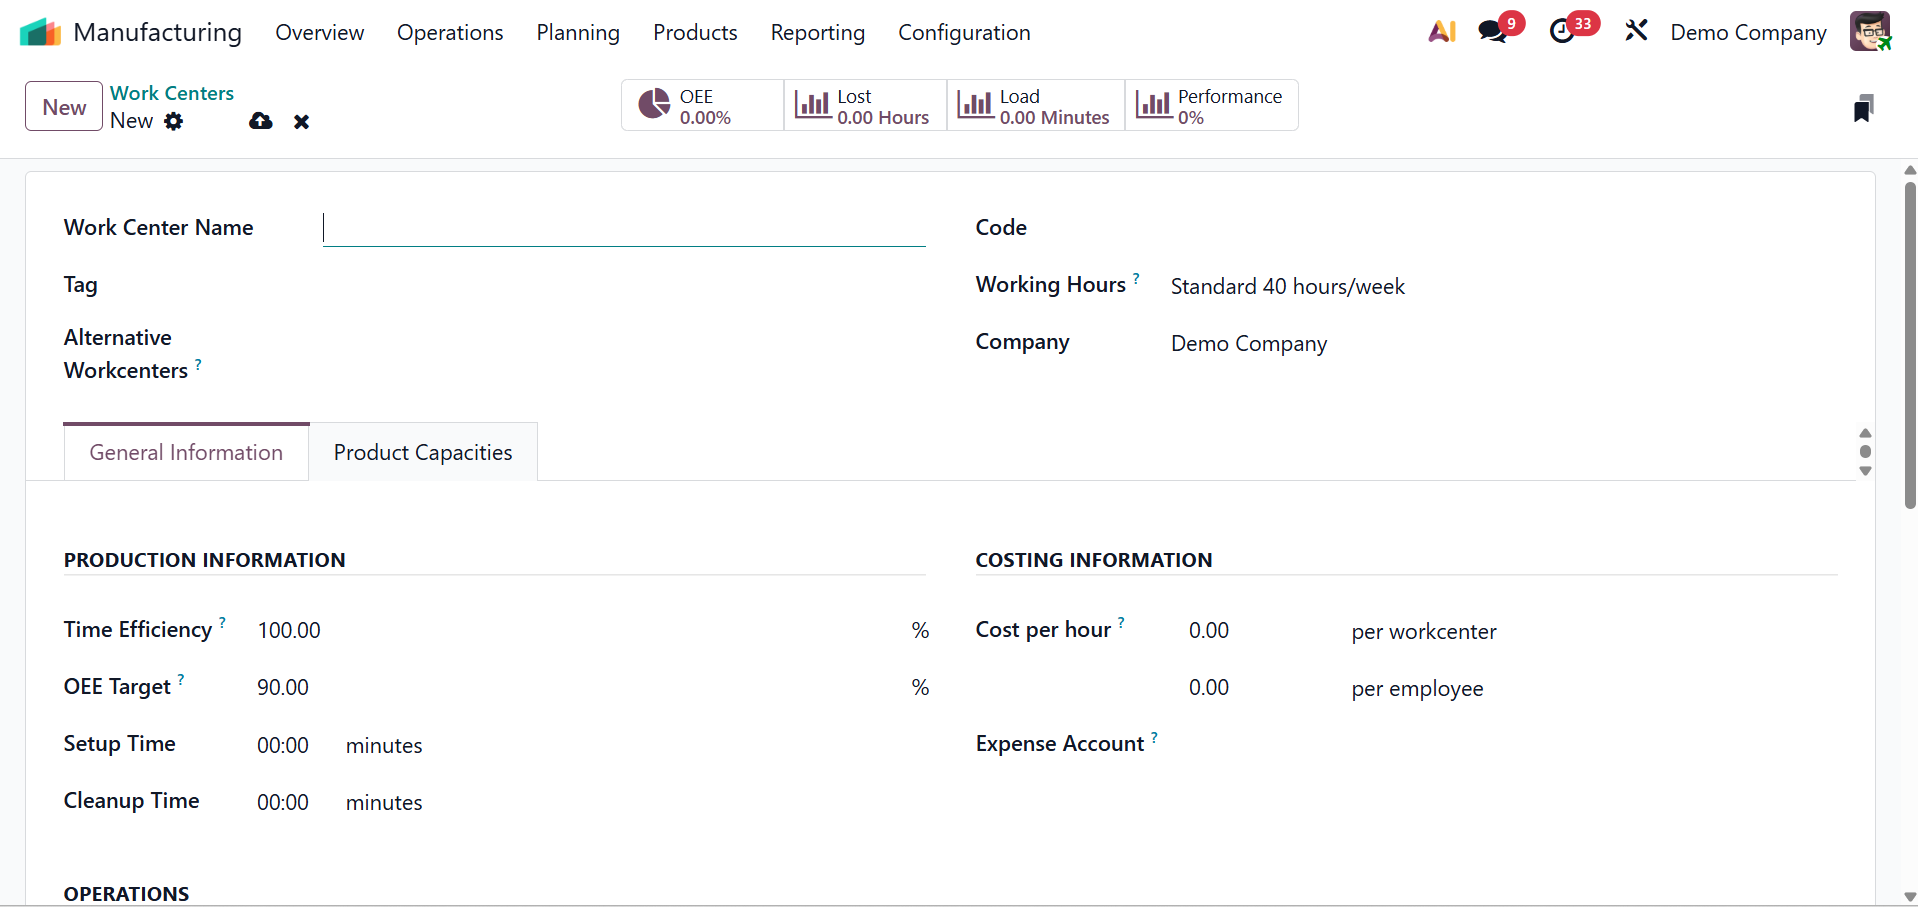
Provide the Work Center Name, Tag, and Alternative Workcenters. Each work center also has a unique "Code" and specified "Working Hours" to indicate its availability. Provide the name of the Company.
Under the PRODUCTION INFORMATION, add the Time efficiency. To accurately estimate production costs and set up "OEE Targets" (Overall Equipment Effectiveness targets) to track efficiency. You may also enter Cost per Hour, Setup Time, and Cleanup Time.
- Time Efficiency shows the work center's anticipated performance speed and how quickly it functions in relation to the typical production time (e.g., 100% signifies regular speed, above 100% means faster).
- OEE Target: The work center's targeted Overall Equipment Effectiveness percentage is defined by the OEE Target in order to gauge performance and production.
- Setup Time: The amount of time needed to set up the work center before beginning a production process, such as tool configuration or machine adjustment, is known as setup time.
- Cleanup Timeis the amount of time required to reset or clean the work center in order to get it ready for the next task once a manufacturing process is over.
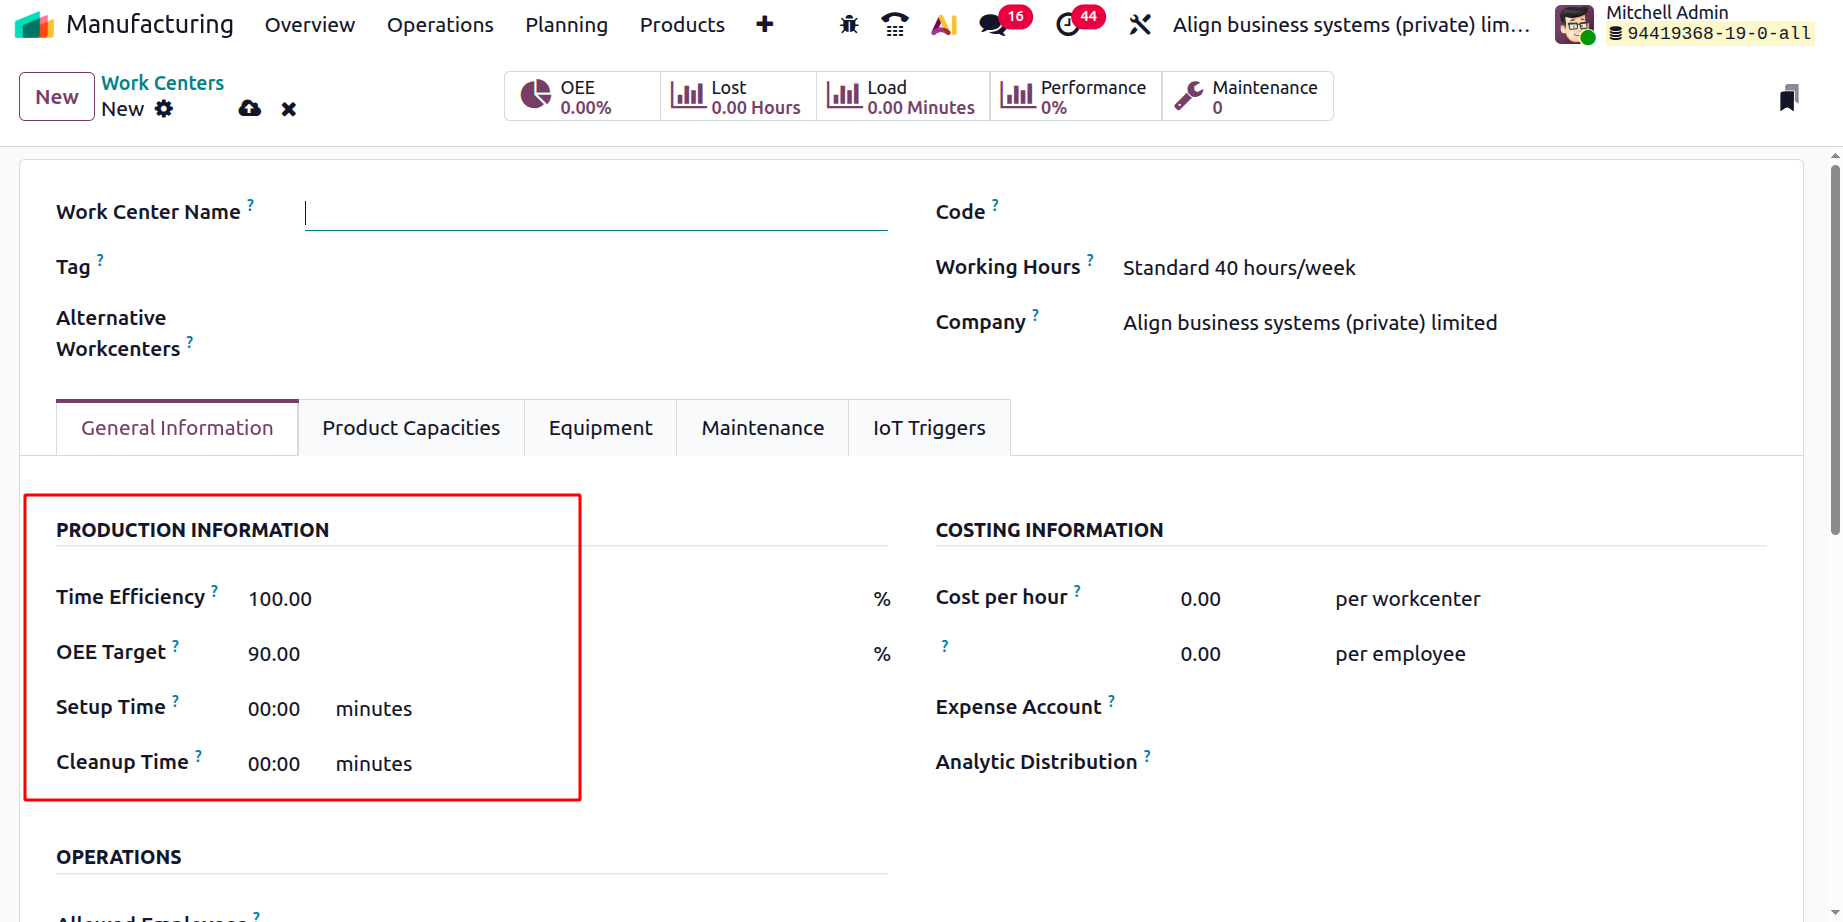
An "Expense Account" may be assigned to each work center using Odoo 19's Manufacturing module, guaranteeing precise tracking of expenses, including labor, machine usage, setup, and maintenance.
Cost per Hour, which is used to determine manufacturing costs and profitability based on production time, is the hourly operational cost of operating a work center.
- Analytic Distribution: For precise financial tracking and cost allocation in manufacturing, Analytic Distribution establishes how the work center's expenses are distributed among one or more analytic accounts.
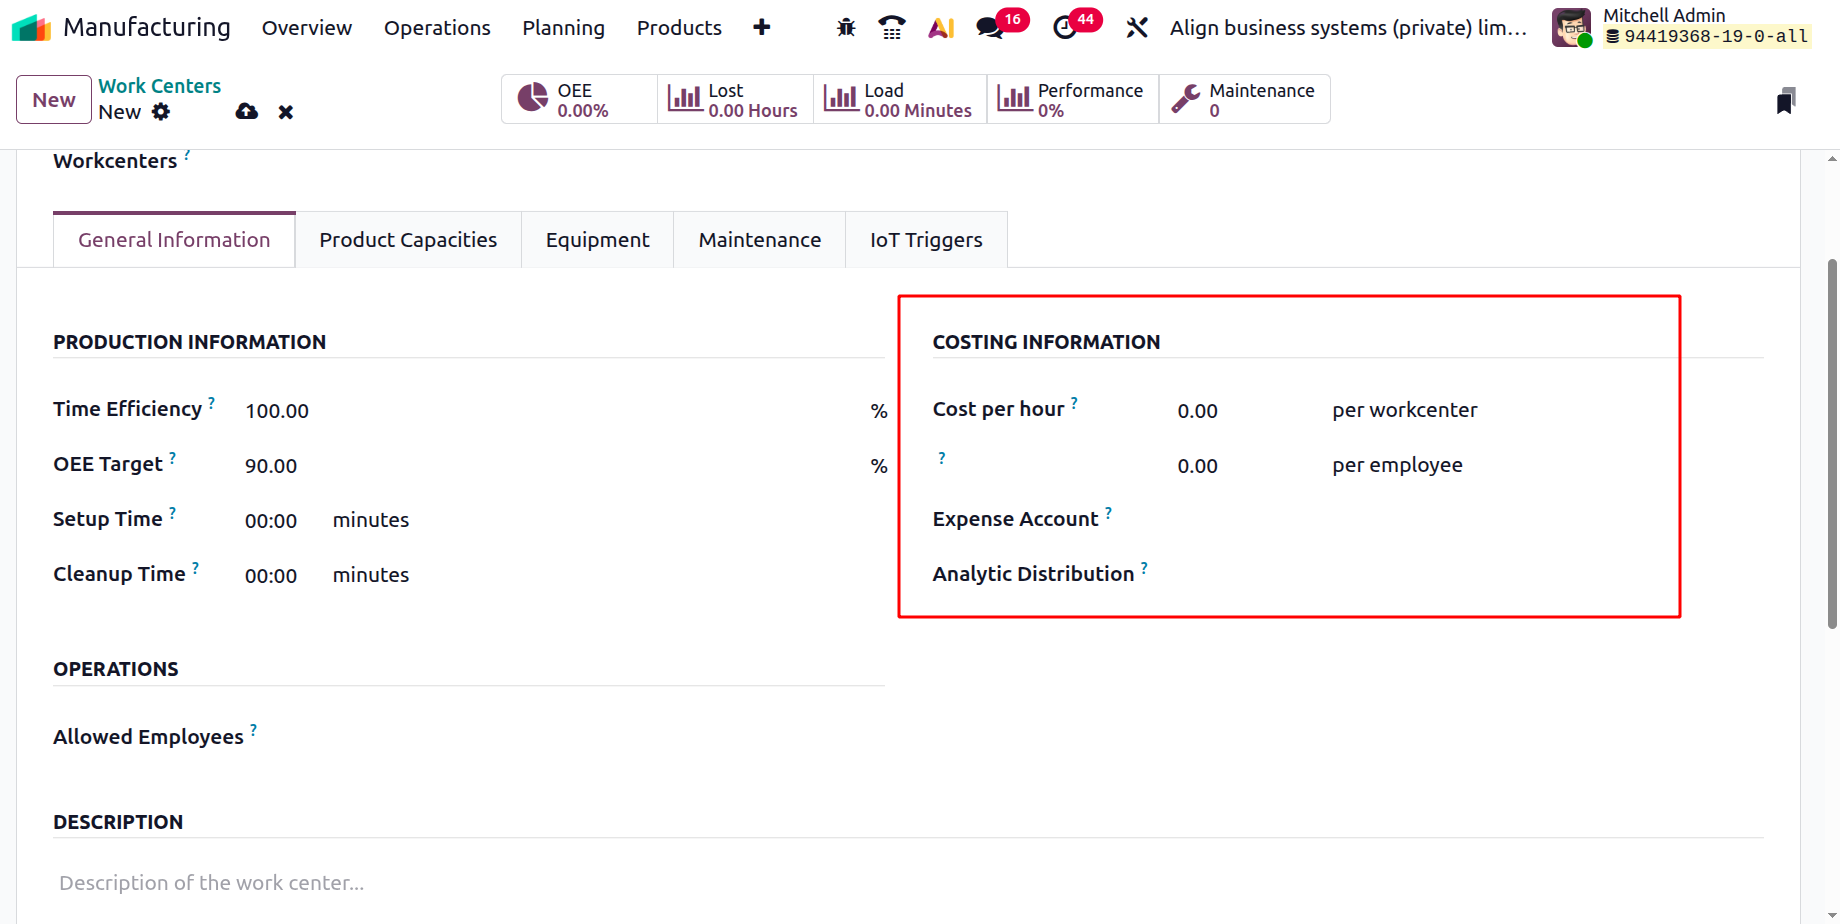
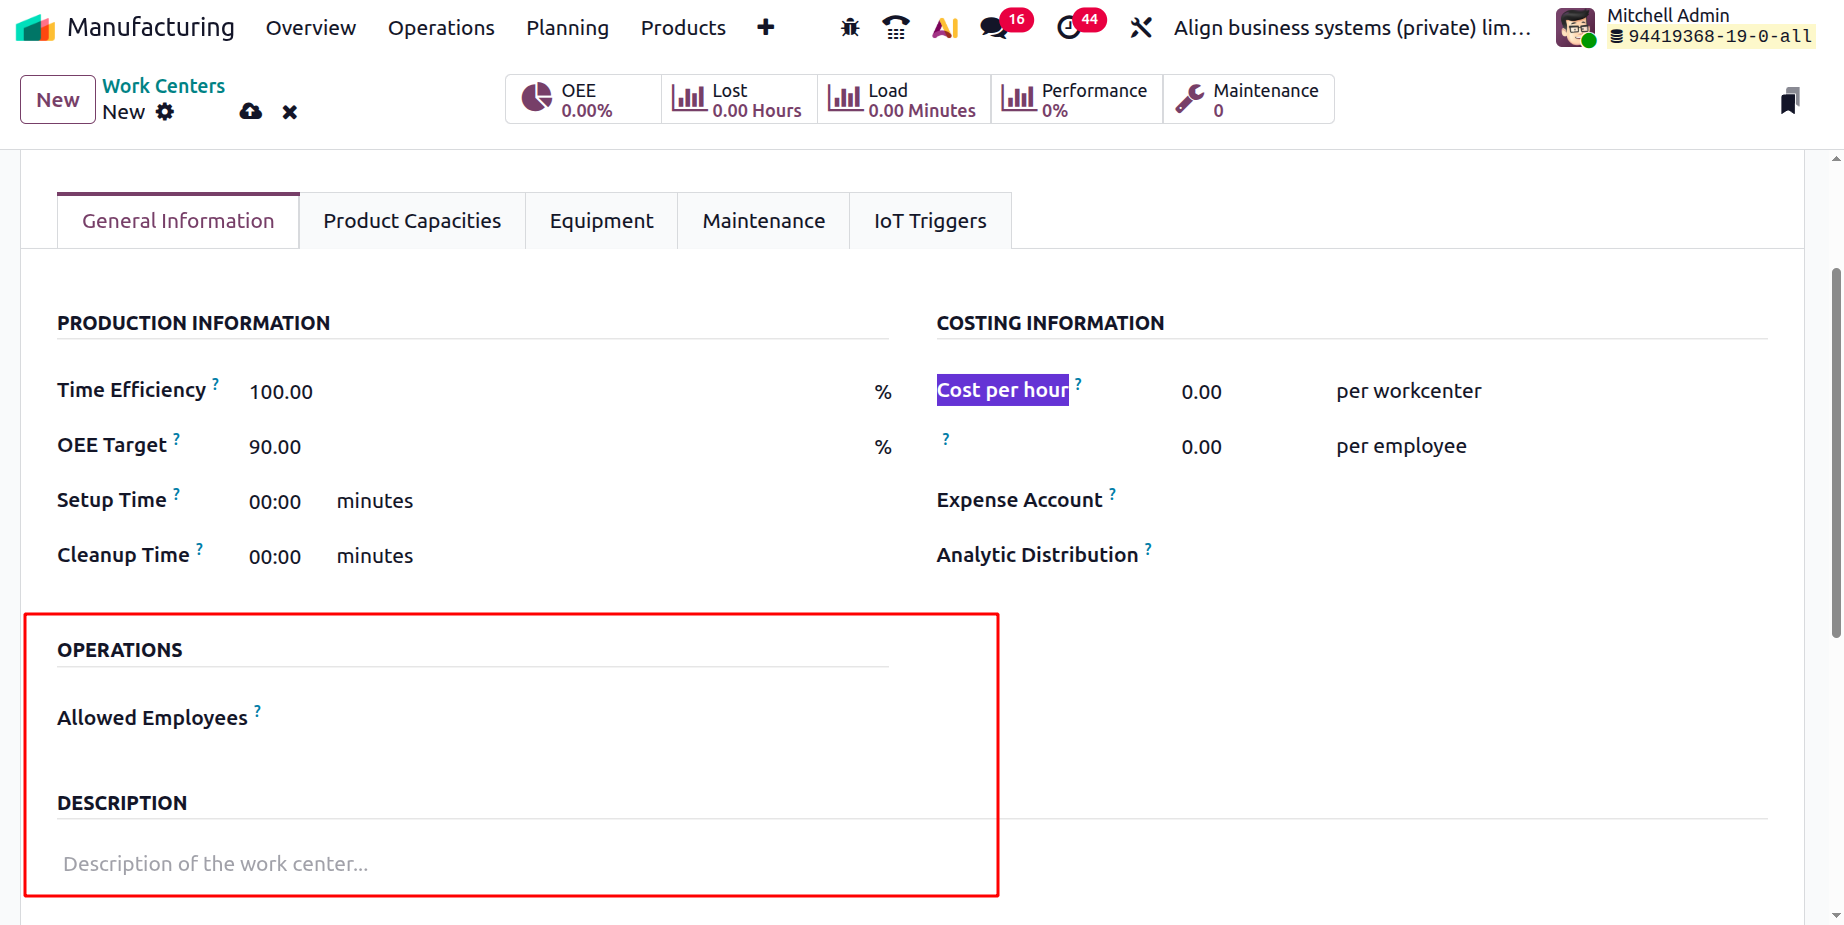
In the "Allowed Employees" section, you can list the employees who are in charge of or allowed access to a specific work center. In the "Description" box, you can also provide any pertinent details or observations regarding the work center.
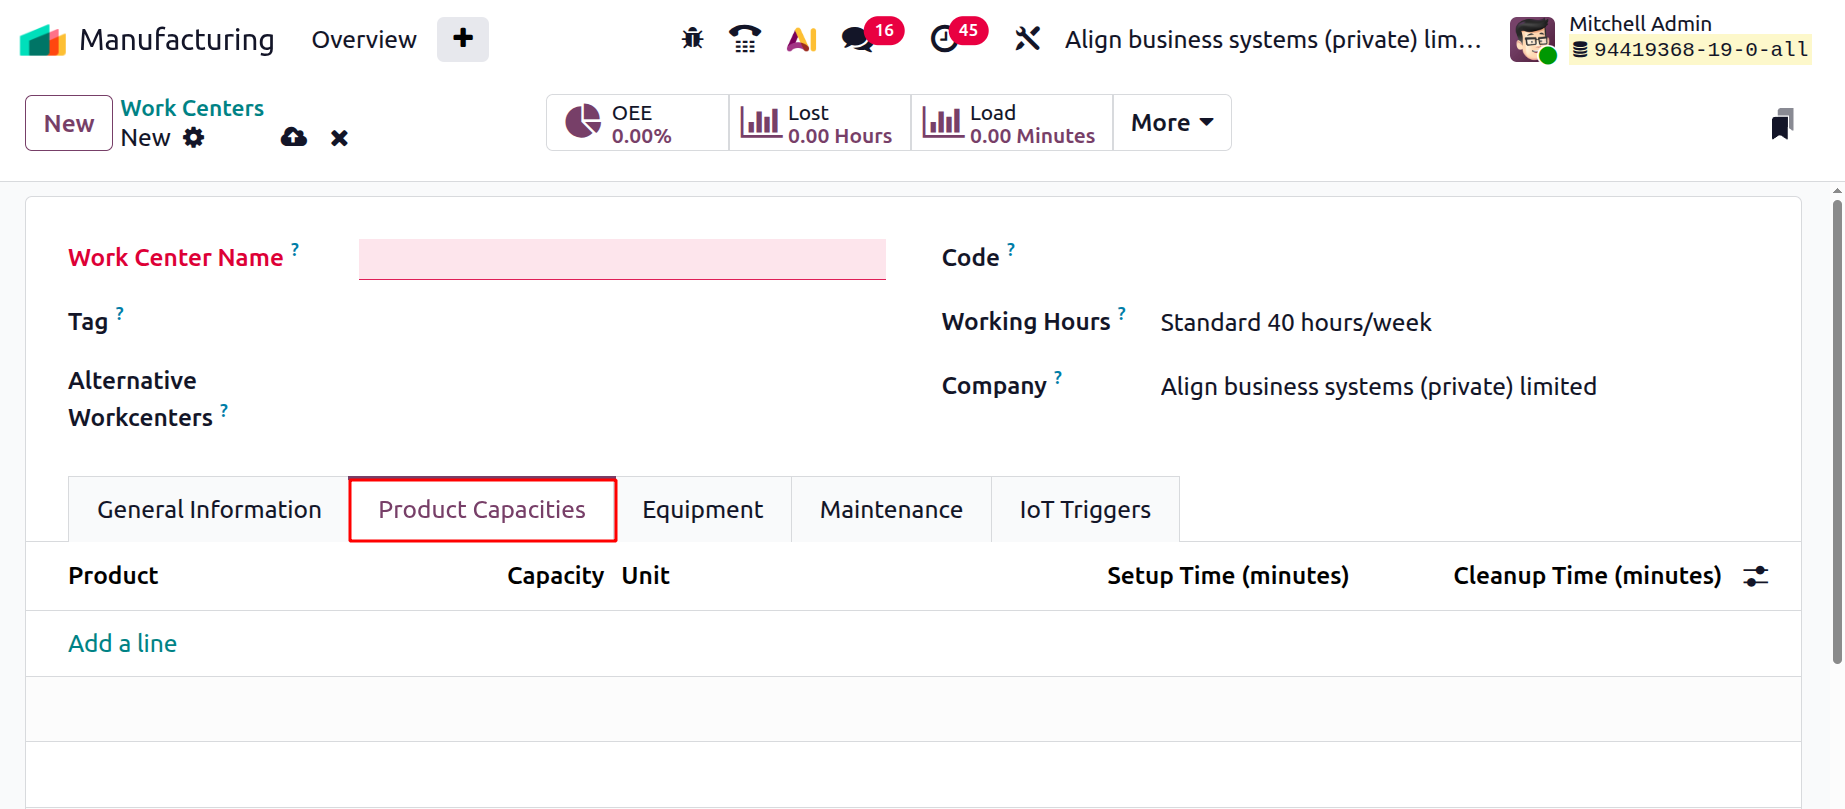
A work center's Product Capacity setting establishes the maximum number of units that can be produced concurrently in a single production cycle. This figure acts as a broad standard for the work center's output capacity. However, you can modify this by going to the Specific capacity tab if a work center can handle varying production capacity based on the product.
By using the "Add a line" button, as shown in the screenshot below, you may change capacity numbers for individual goods, enabling more precise planning and resource allocation based on the particular production requirements of each item under the Product Capacities.
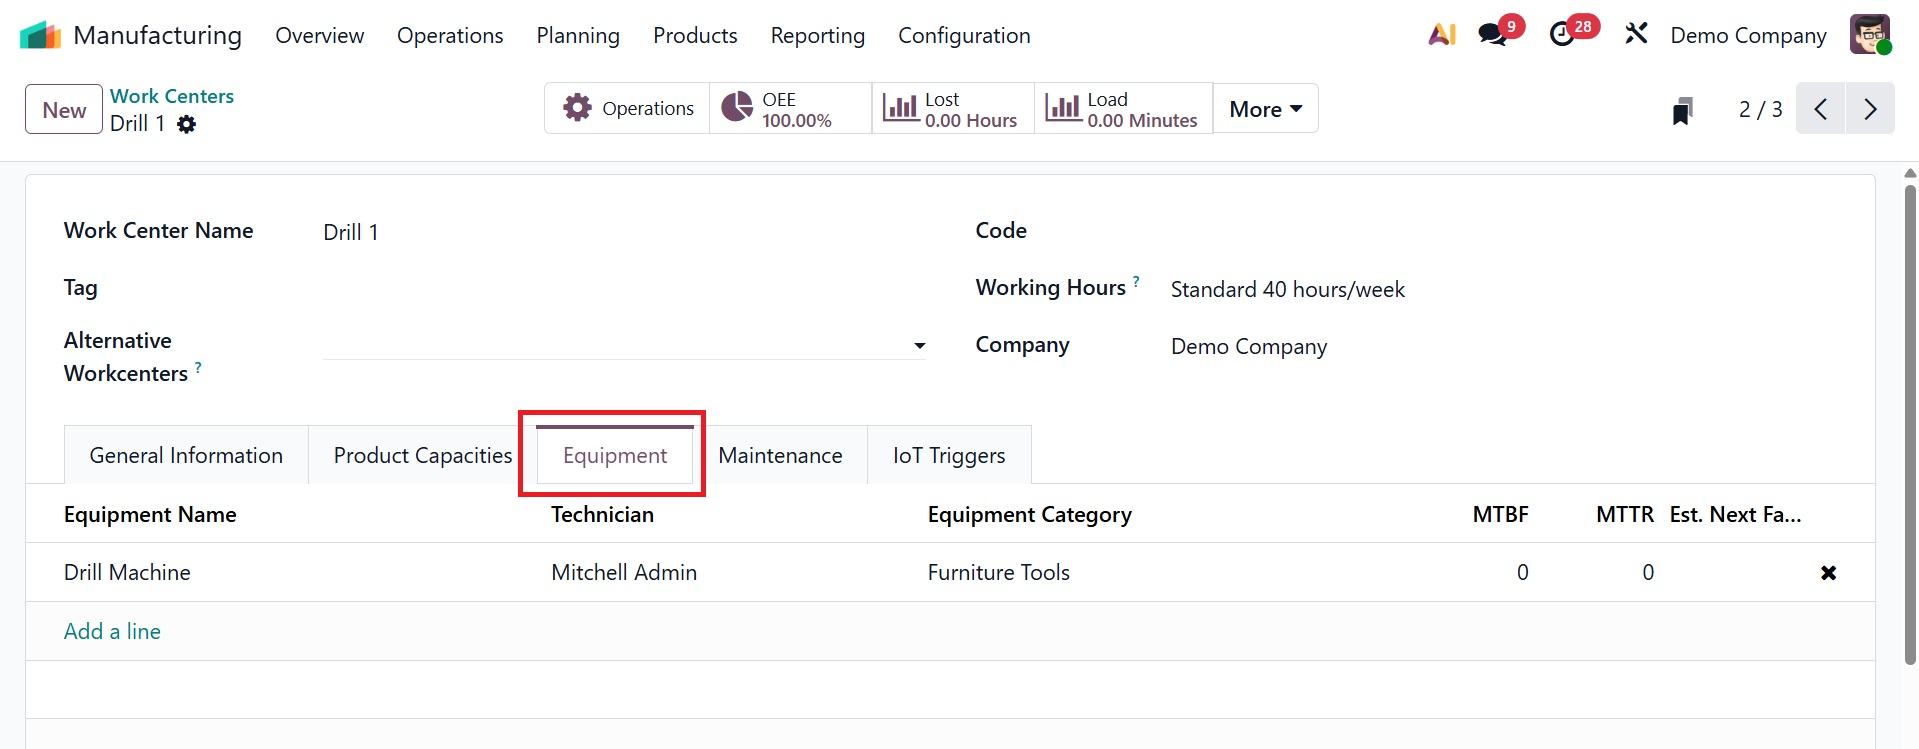
Under the Equipment tab, you can add the details regarding the equipment name, technician, equipment category, MTBF( mean time between failure), MTTR( mean time to repair), and estimated time before next failure, as shown below.
Next tab is Maintenance, as shown below. Here, you have the options, like effective date, maintenance team, technician, expected mean time between failure, mean time between failure, estimated next failure, latest failure, and mean time to repair, respectively.
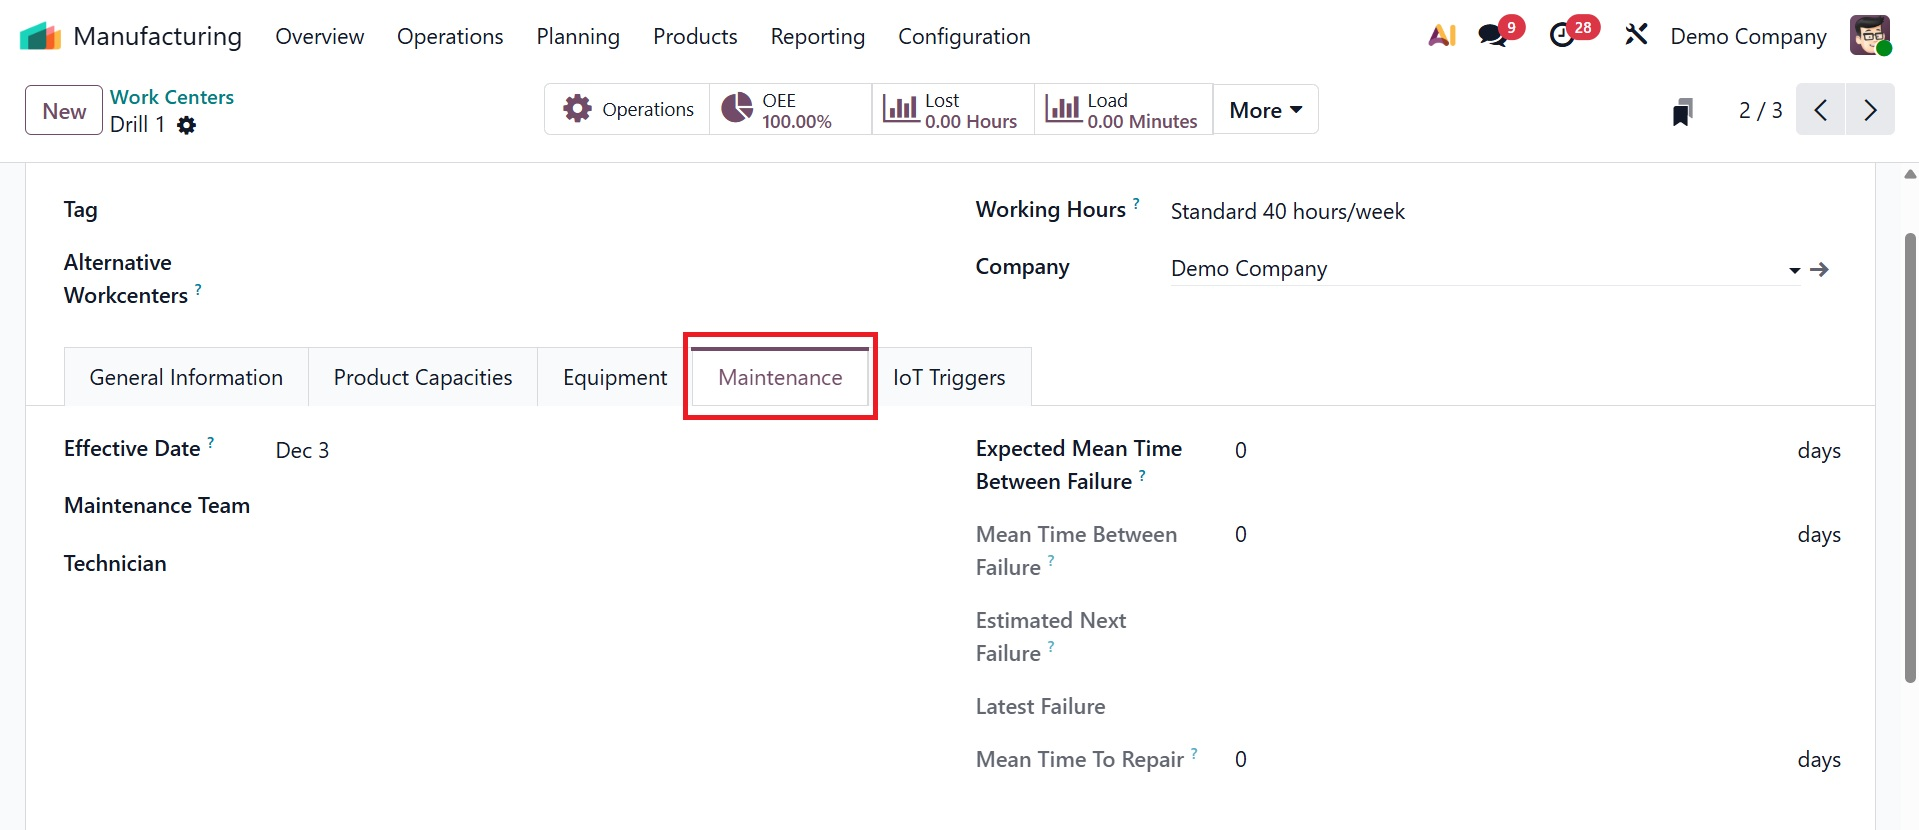
- Effective Date – The date from which Odoo begins calculating maintenance metrics such as MTBF, MTTR, and failures for the work center.
- Maintenance Team – The team responsible for handling all maintenance activities related to the work center.
- Technician – The primary maintenance person assigned to perform repairs or interventions on the work center.
- Expected Mean Time Between Failure (Expected MTBF) – The estimated duration the work center is expected to run before experiencing a failure.
- Mean Time Between Failure (MTBF) – The average operating time between actual recorded failures of the work center.
- Estimated Next Failure – The predicted date or time when the next work center failure is expected to occur based on MTBF.
- Latest Failure – The most recent date on which the work center experienced a failure.
- Mean Time To Repair (MTTR) – The average amount of time required to repair the work center after a failure.
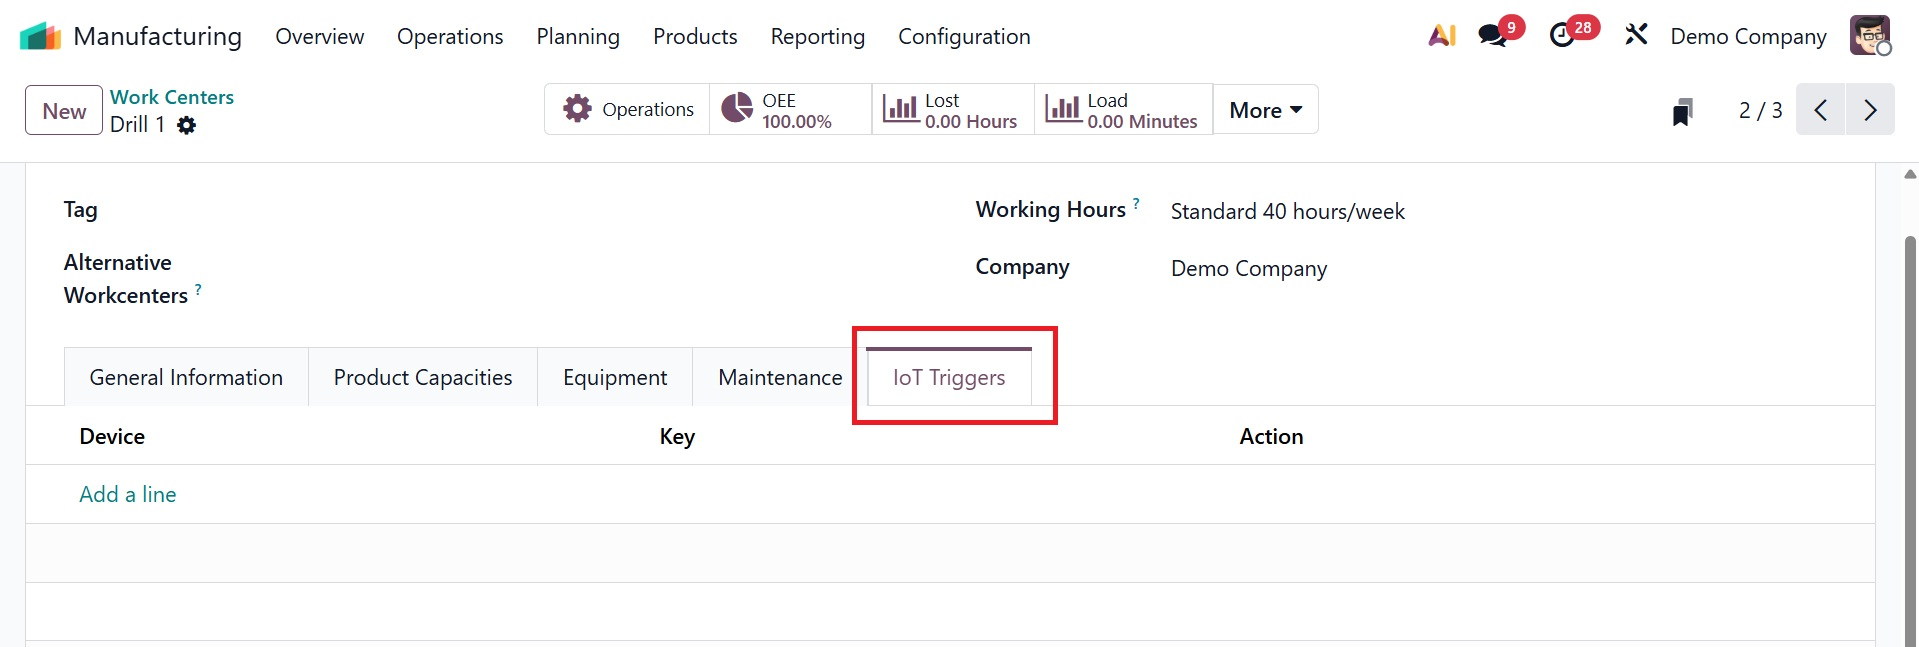
The last tab is IoT Triggers, as in the image below. Here, you can add the details, such as device, key, and action, respectively.
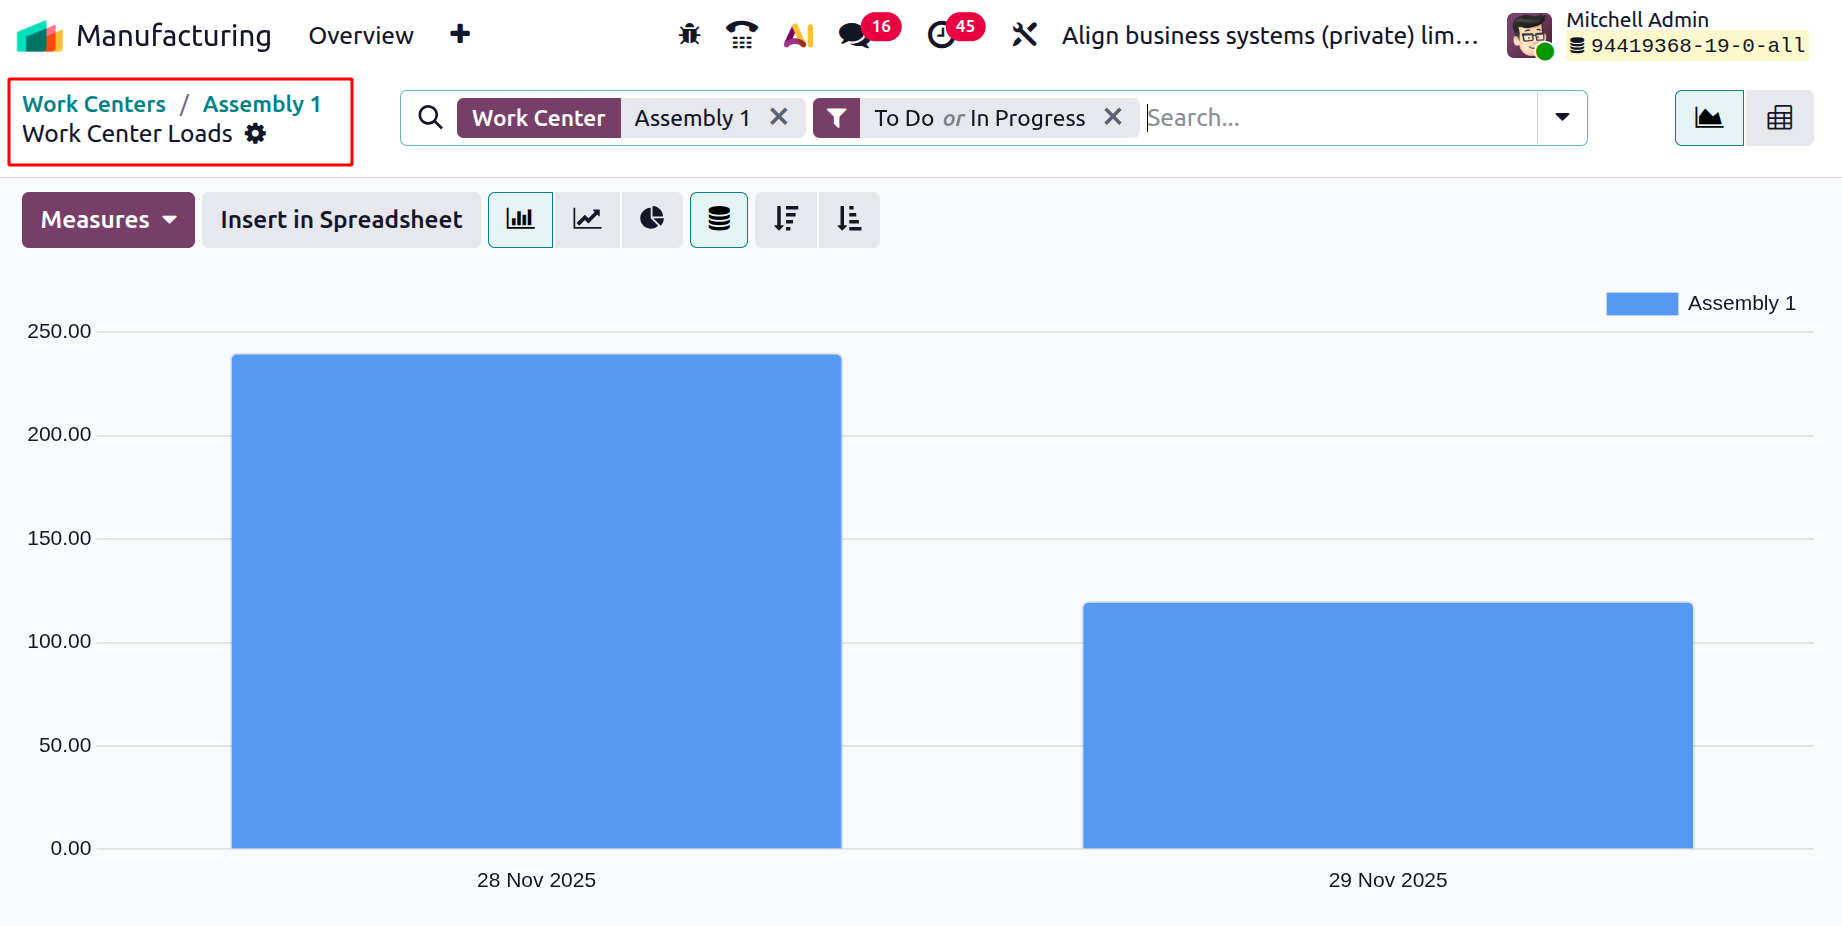
Key operational information, such as scheduled operations, Overall Equipment Effectiveness (OEE), productivity losses, work center load, and work order performance, are then easily accessible through the smart buttons on the work center form.
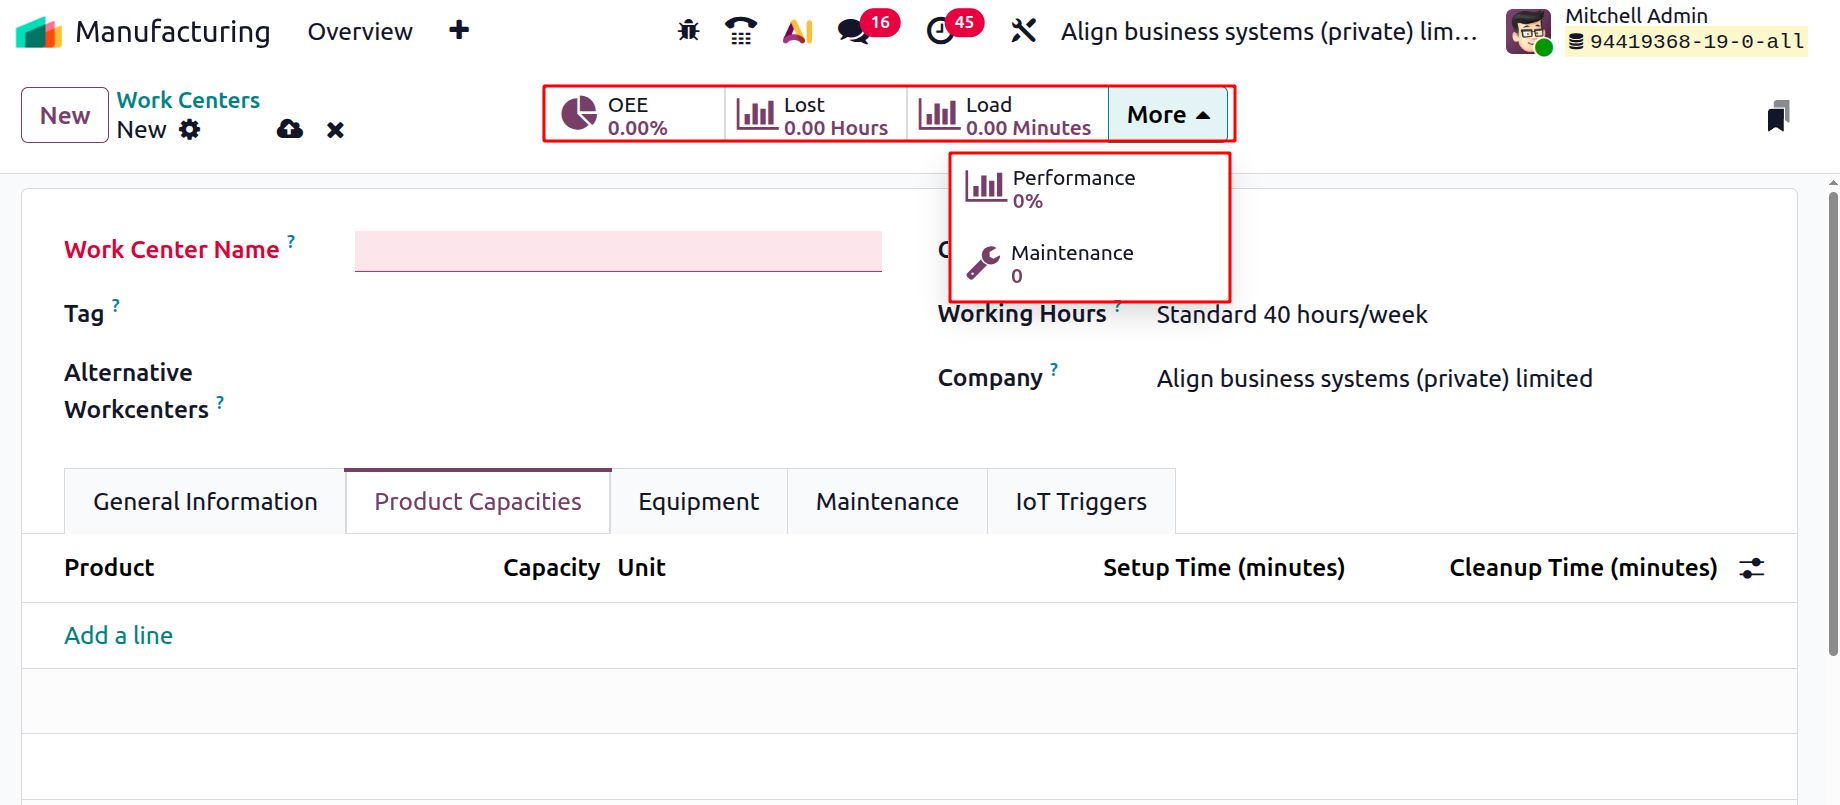
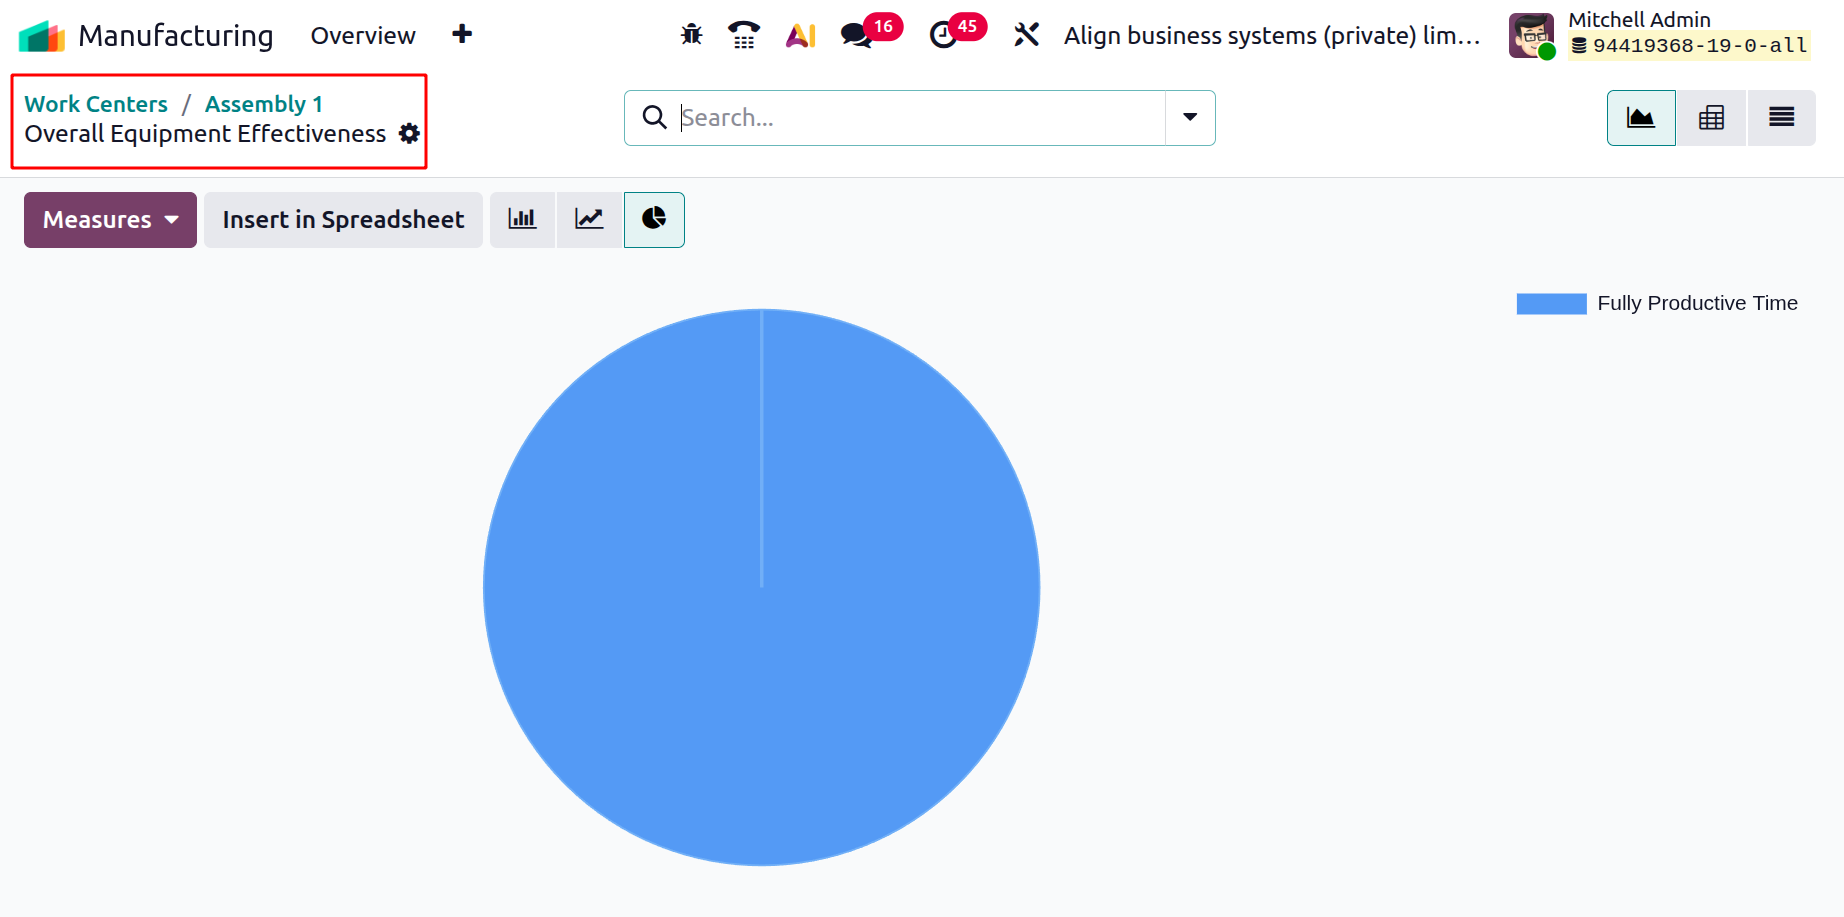
You can create a performance analysis report that assesses employee expenses, work duration, user performance, and loss caused by selecting the Overall Equipment Effectiveness button.
Reports on the effects of issues like equipment failure or decreased speed on production are shown by the production Lost button.
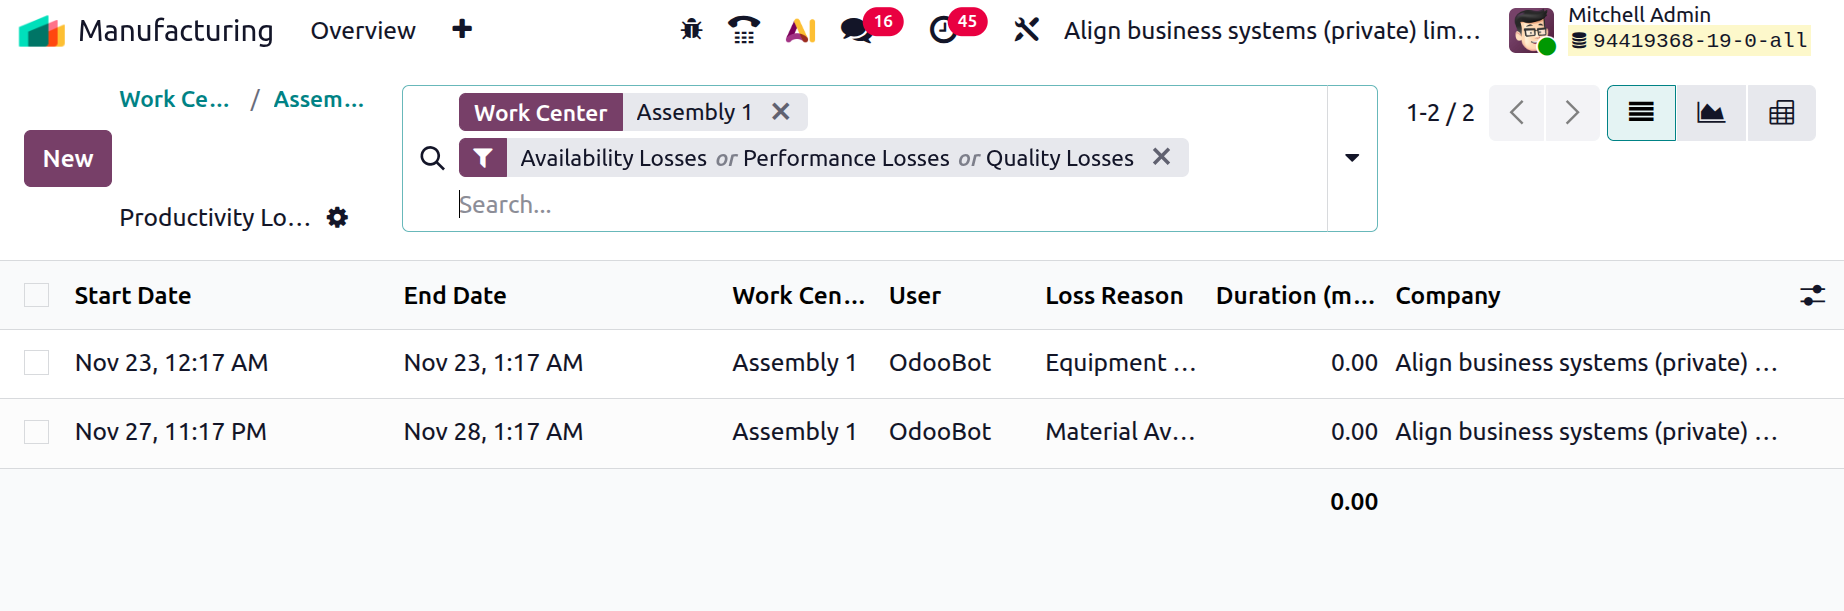
The Loads button provides information about work center capacity by comparing actual work order completion times with projected deadlines.
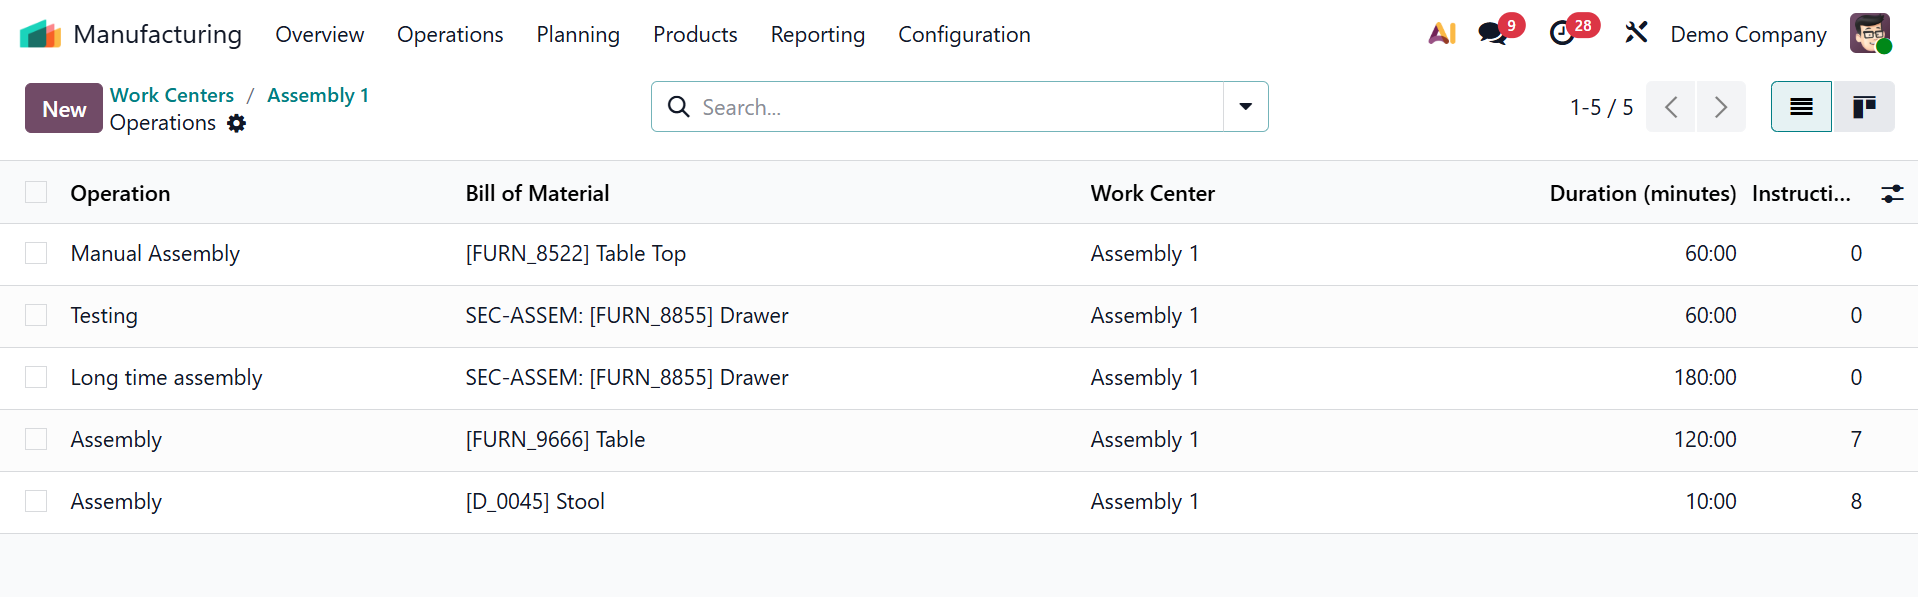
You can also view the Operations smart tab with the list of operations created, as shown below.
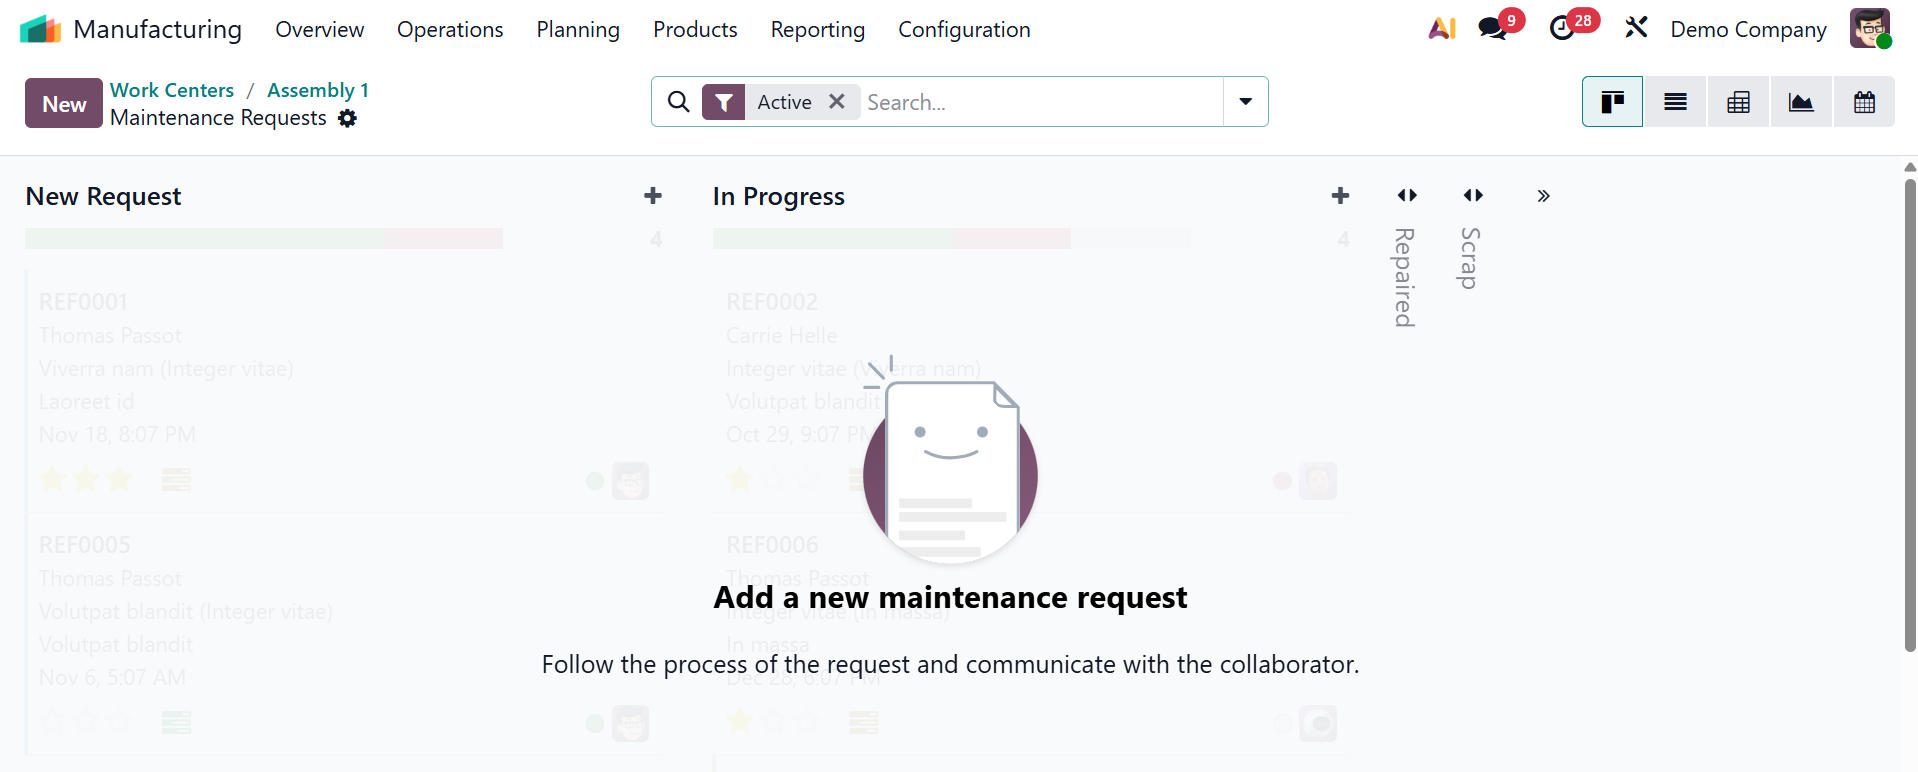
Then, there is also a smart tab named maintenance, as shown below. Here, the created maintenance requests will be visible. If any Maintenance request created for the work center will be shown there. The users can create a new Maintenance Request from here, by clicking on the New button.
Finally, you may view the performance analysis report for work orders allocated to the particular work center by clicking the Performance button.
1.3 Operations
The production processes defined by the Odoo software are referred to as "Operations." Efficient production of high-quality products for customers is ensured by the efficient coordination of these operations across several work locations.
The Configuration menu or the settings menu can be used to set up and manage operations in the manufacturing module.
The dashboard of all the possible operations, along with their corresponding Name, Bill of Material, Work Center, Duration Computation, Duration in Minutes, and Instructions, is displayed whenever you activate the "Operations" menu.
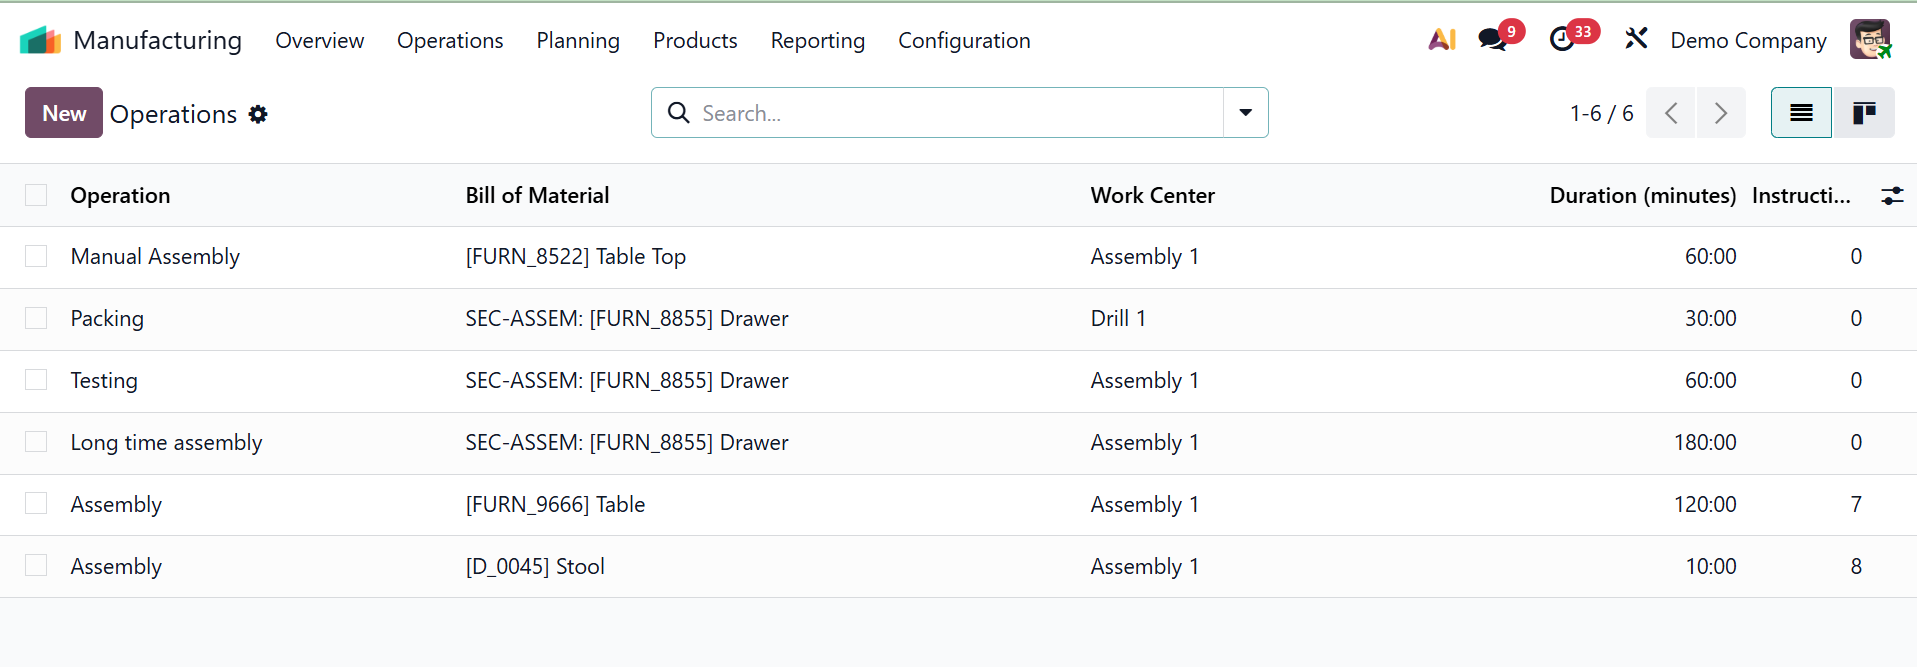
A detailed view of the operations in a form view can be obtained by opening an entry by clicking on an operation column. Filters, Group By, and Favorites tools are available to help you explore and modify the display according to your preferences.
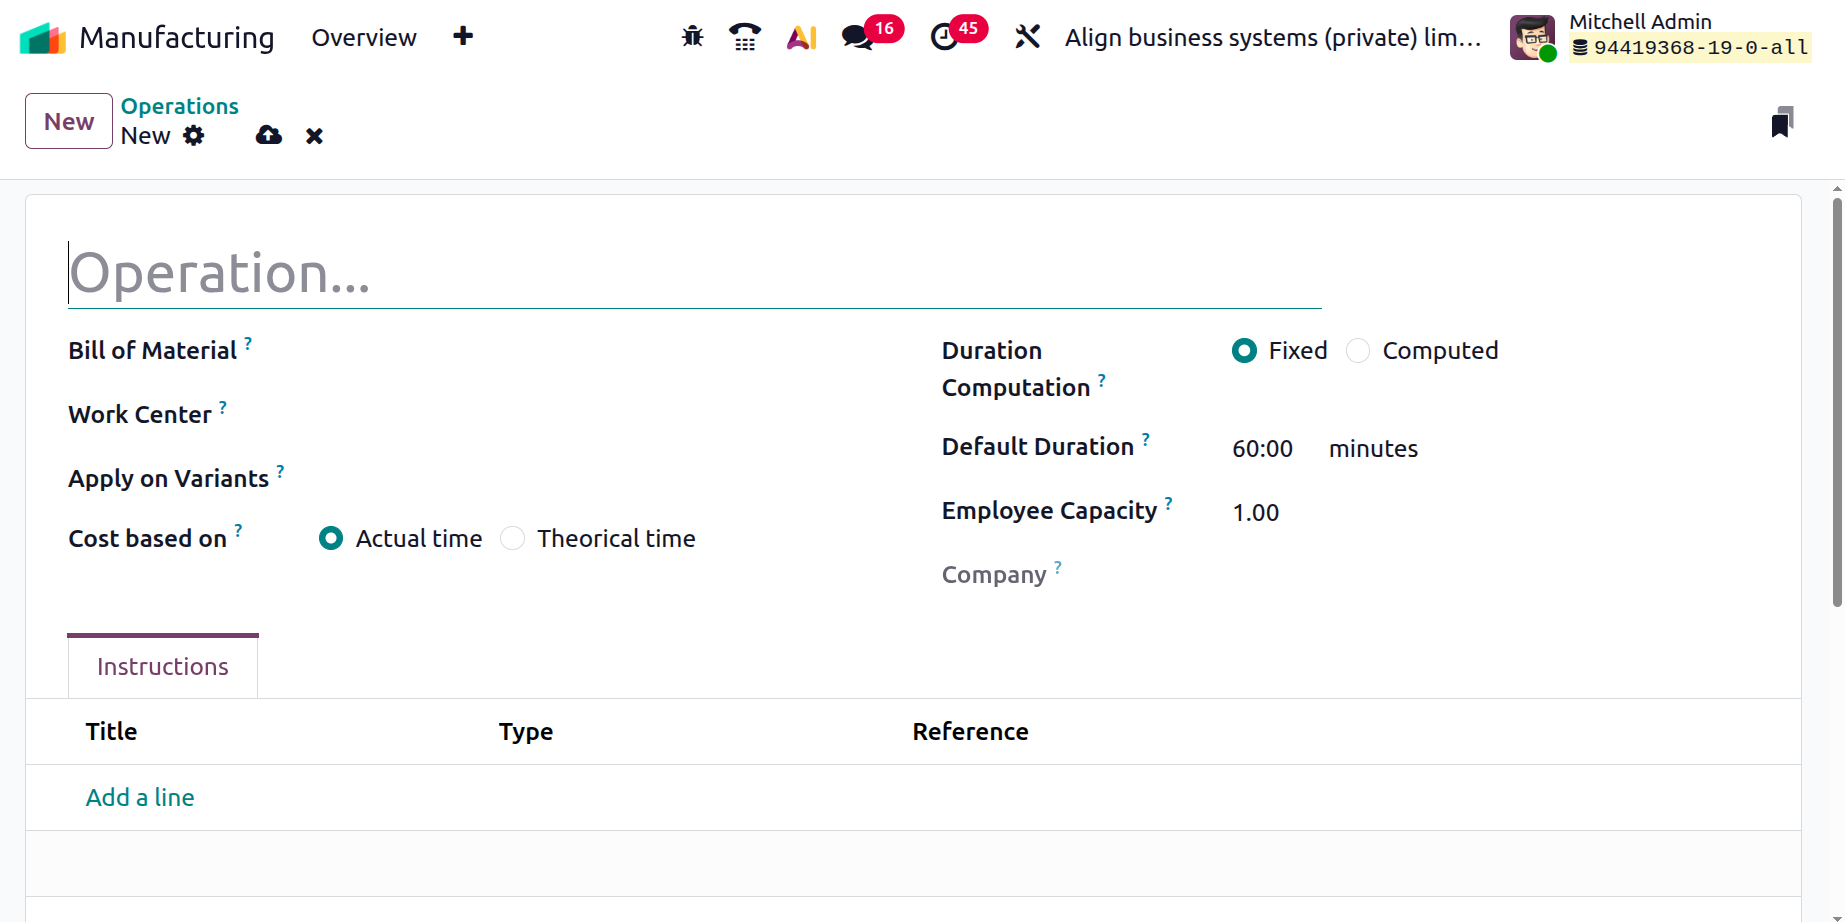
Let’s now explain how to develop a comparable function in the Odoo ERP's manufacturing module. You must provide important details such as the Operation Name, Bill of Materials, and Work Center after creating a new Operation creation form. These specifics are then connected to various Duration Computations, which can be computed automatically using tracked time or explicitly set.
As seen in the example below, the term of the production phase that outlines the particular task to be carried out during manufacturing is called the Operation name. In order for the system to understand which parts and procedures are relevant to a certain product, the Bill of Material connects the operation to a particular BoM.
- Work Center: The physical or logical workstation where the operation will be carried out is called the work center.
- Cost Based On: specifies whether the operation's cost is determined by the work center's cost per hour and duration or by its fixed cost.
- Duration Computation: Duration Computation establishes whether the operation time is computed automatically, manually, or using tracked previous data.
- Employee Capacity: The number of workers who can work on the operation at once to increase output is known as employee capacity. You can then input any Product Variants that should automatically go through this procedure in the Apply on Variants box and set the Default Duration for the operation in the designated field. Under the Instruction tab, you can add the instructions for the operation using the Add a Line option.
When finished, add the newly created operation to the list of already-existing operations by clicking the save button. This is how the manufacturing module's operations are typically created.