Managing multiple meeting rooms efficiently can often become challenging for organizations, especially when employees schedule client meetings or when unexpected visitors arrive. Without a proper system, this can lead to overlapping bookings or unavailable spaces.
The Meeting Room module in Odoo 19 Enterprise offers an effective solution to streamline the scheduling and management of meeting spaces. It allows users to easily create, reserve, and monitor meeting rooms, ensuring smooth coordination and optimal use of office facilities.
You can install the Meeting Room module directly from the App Store to get started.
1. Bookings
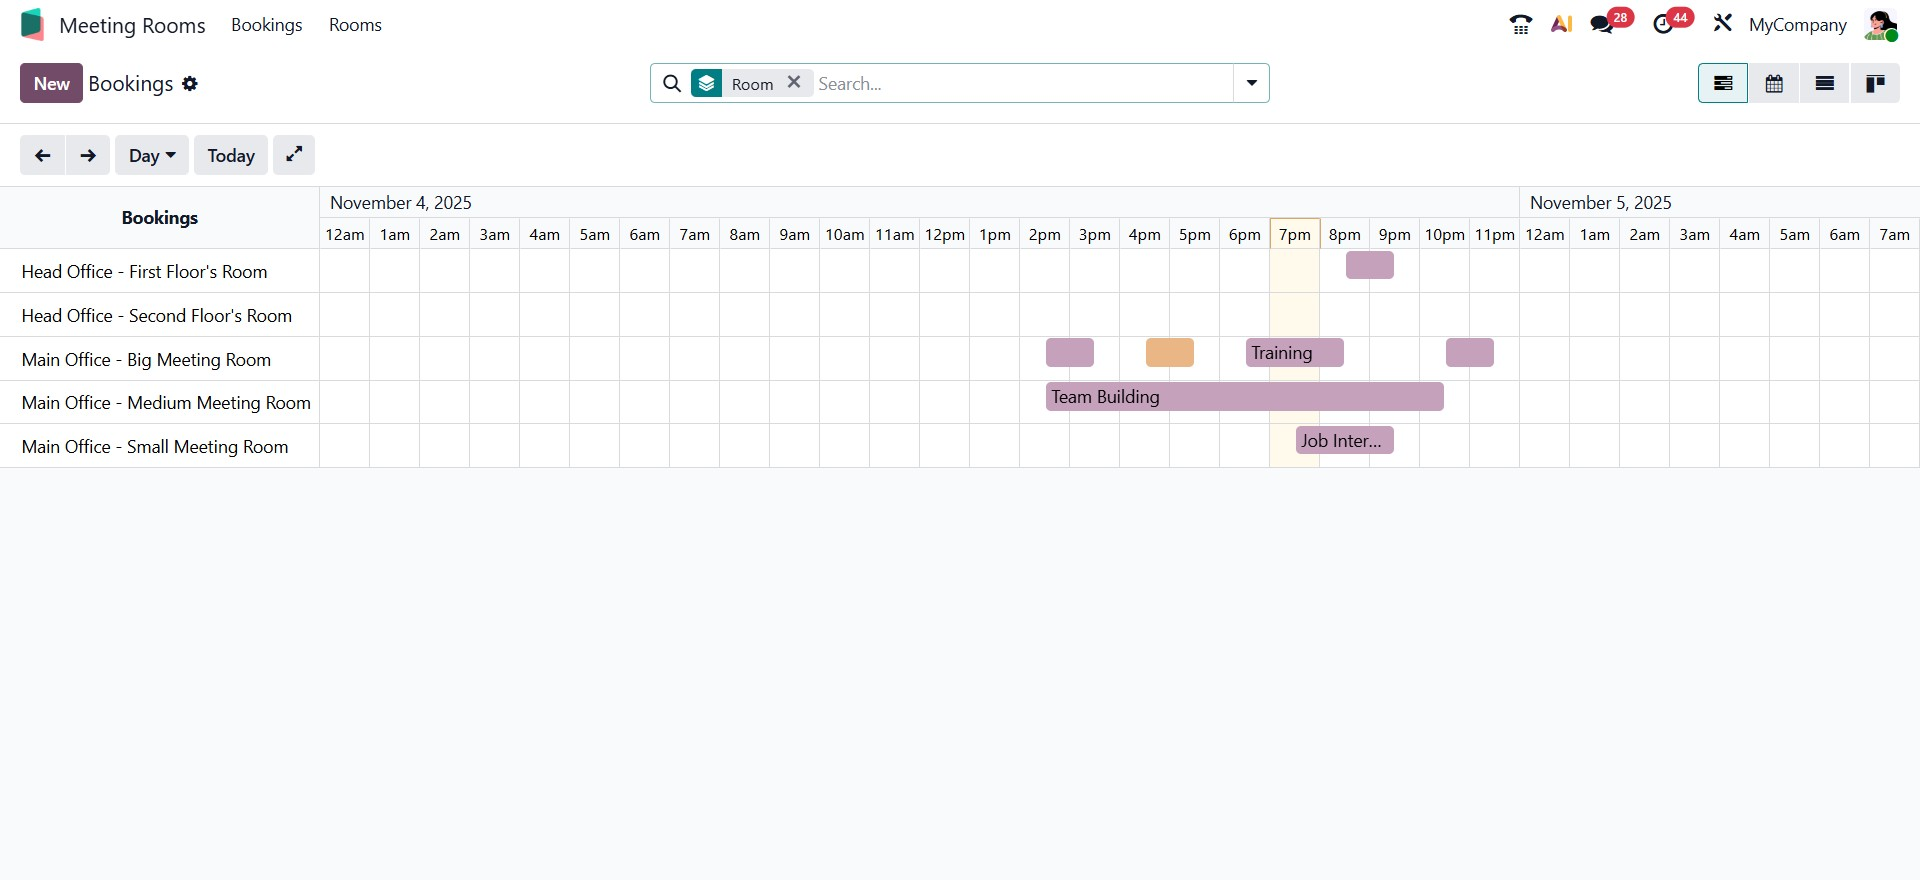
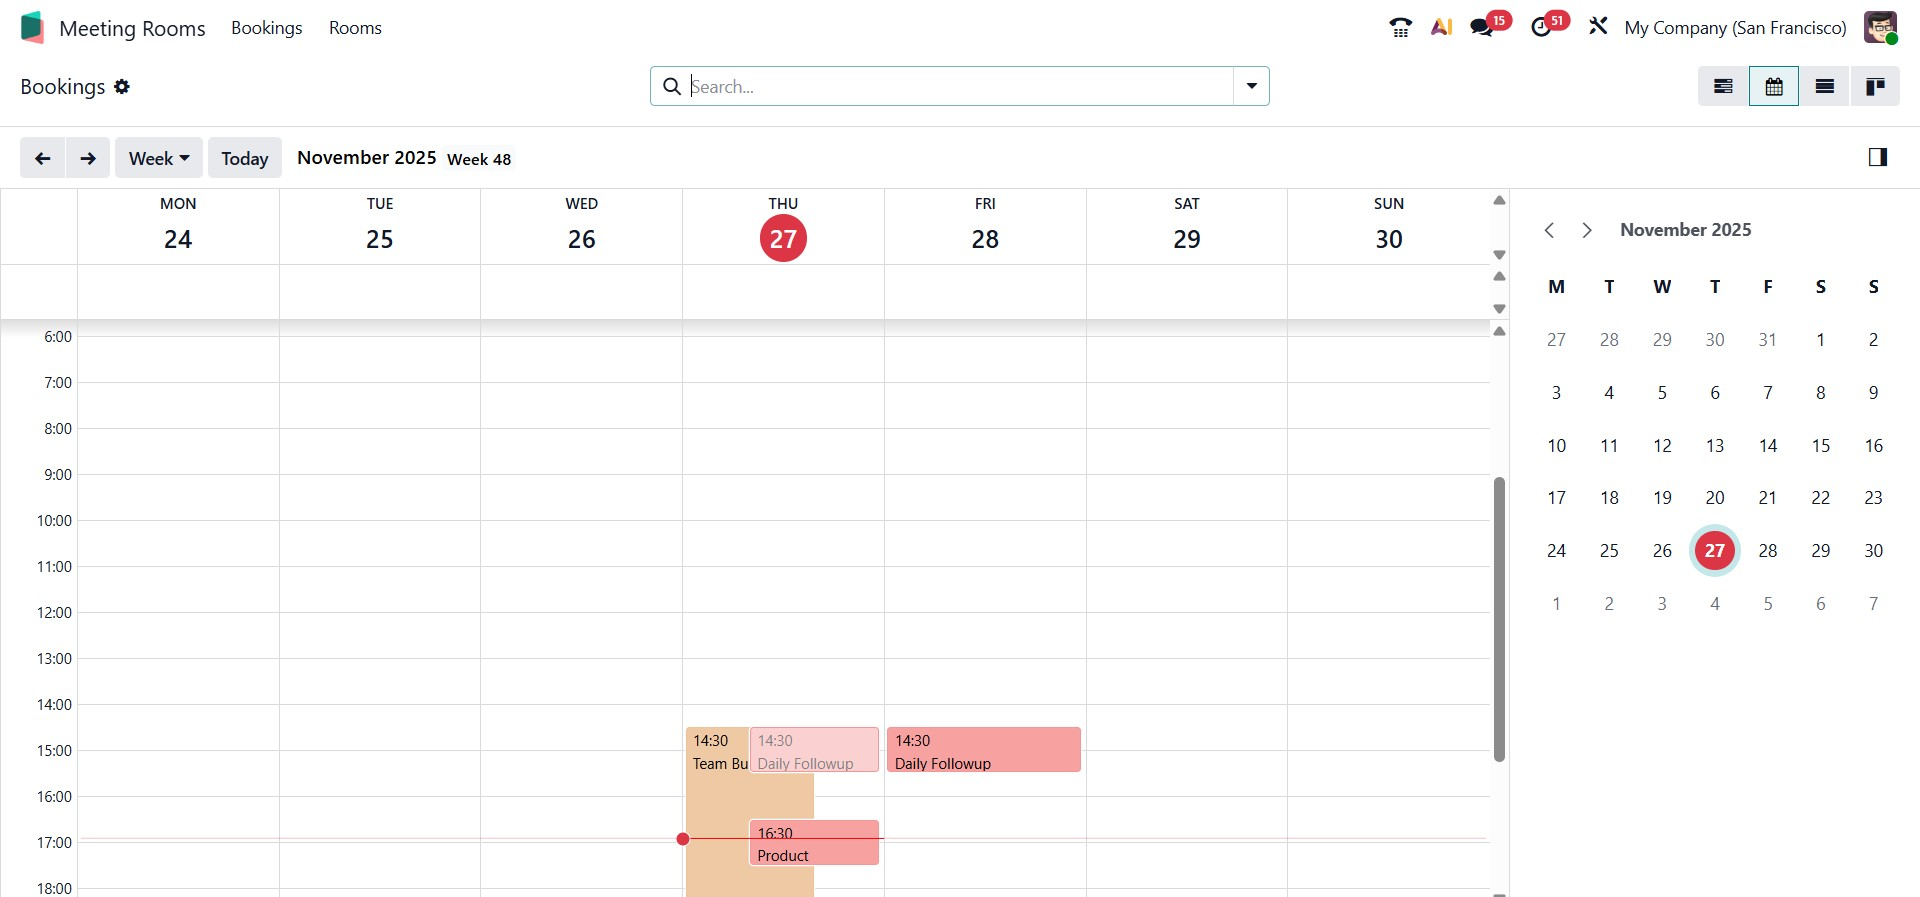
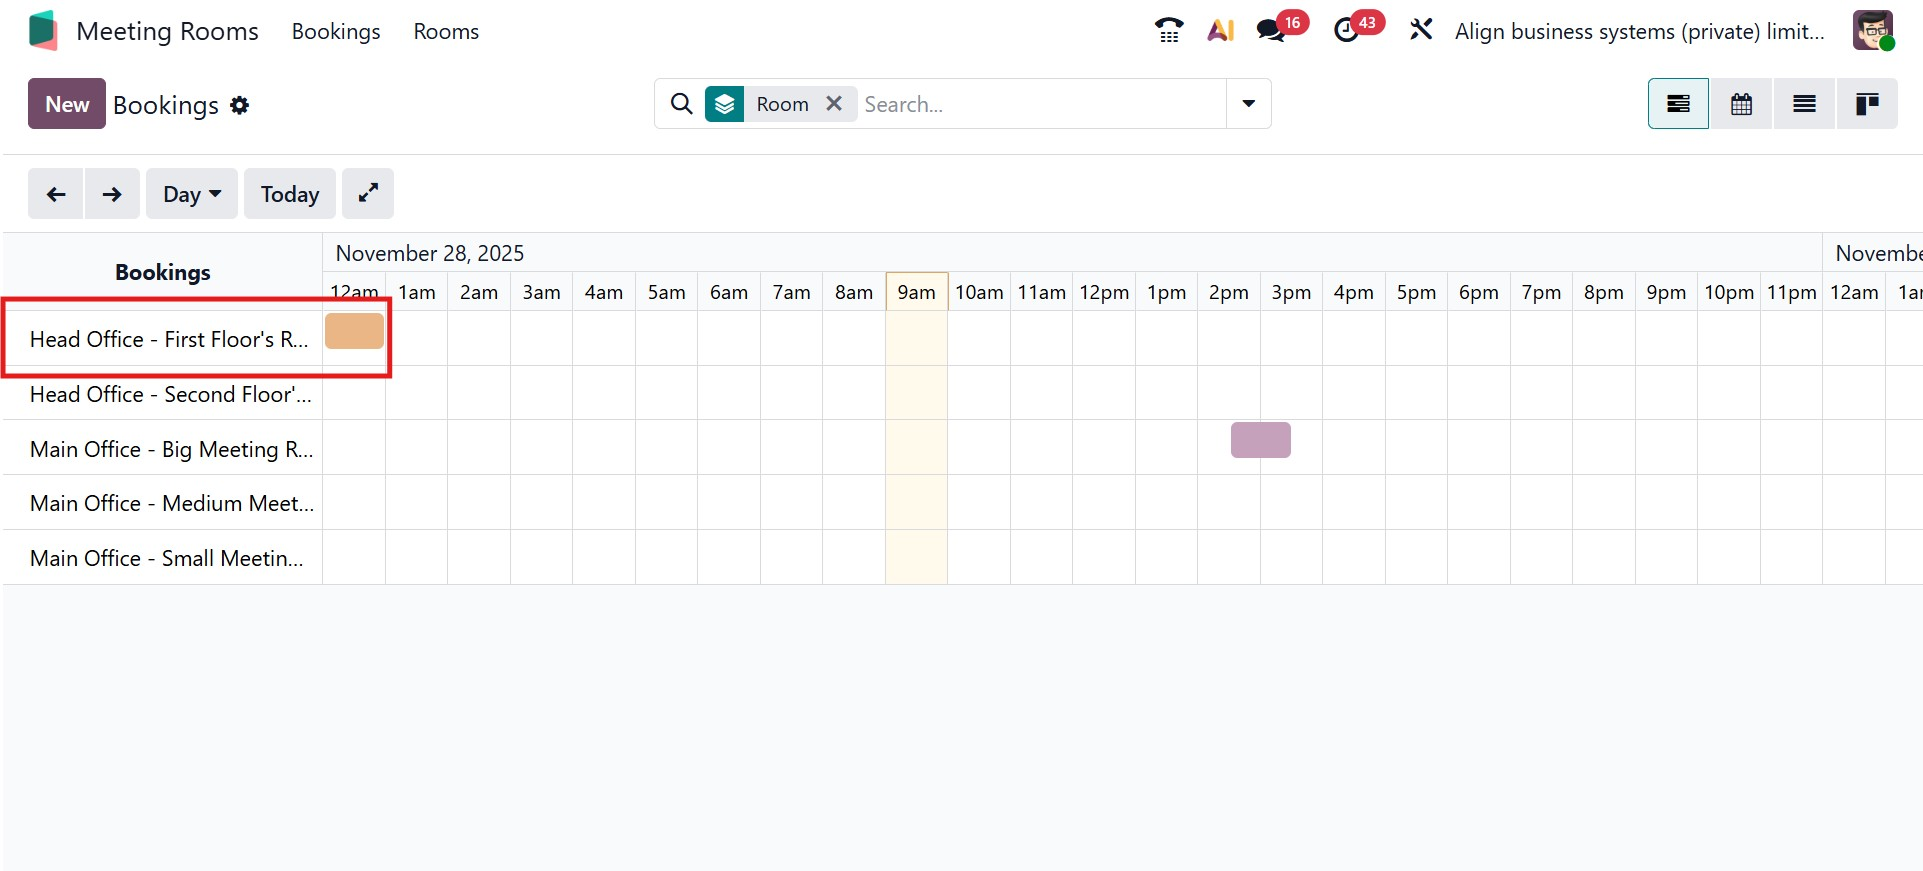
When you open the Meeting Room module in Odoo 19 Enterprise, the dashboard provides a comprehensive view of all scheduled bookings and room reservations. It offers a clean and intuitive interface that helps users easily track upcoming meetings and check room availability. The dashboard allows users to switch between different timeframes, such as daily, weekly, monthly, or yearly views, ensuring a clear overview of the organization’s meeting schedule.
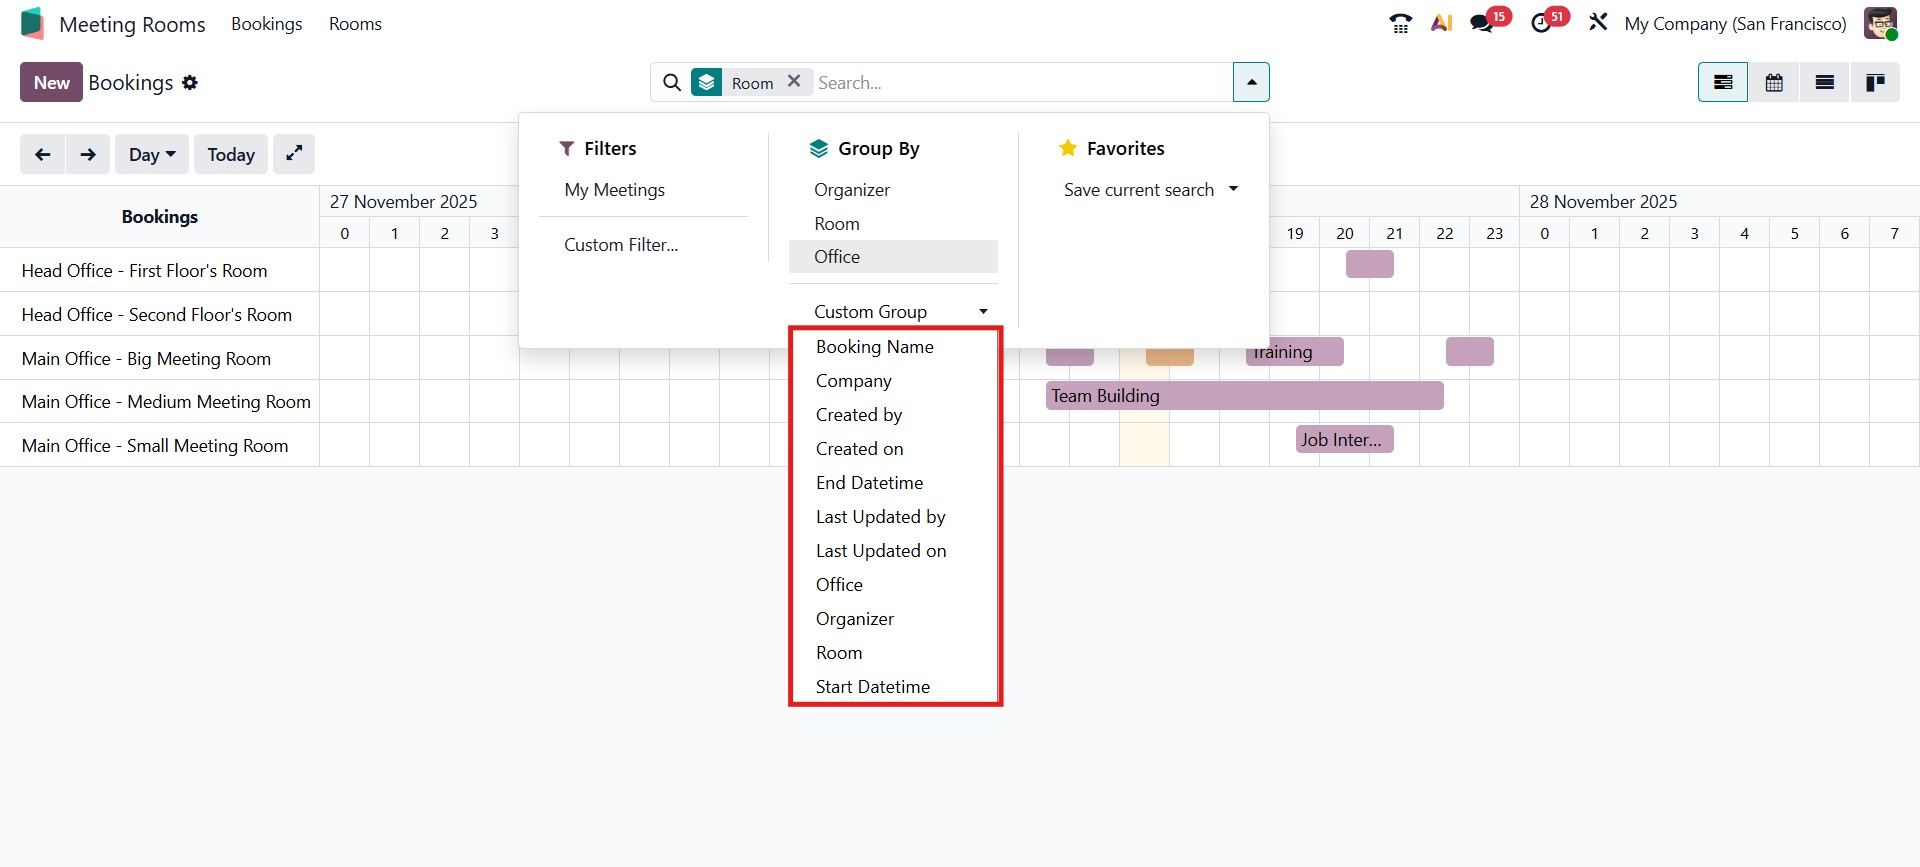
At the top of the dashboard, users can access a powerful search bar that includes Filters, Group By, and Favorites options. These tools help narrow down meeting records based on specific criteria. The My Meetings filter, for example, instantly displays meetings associated with the logged-in user. Users can also group bookings according to the meeting organizer, room, or office location, making it easier to manage reservations in large organizations.
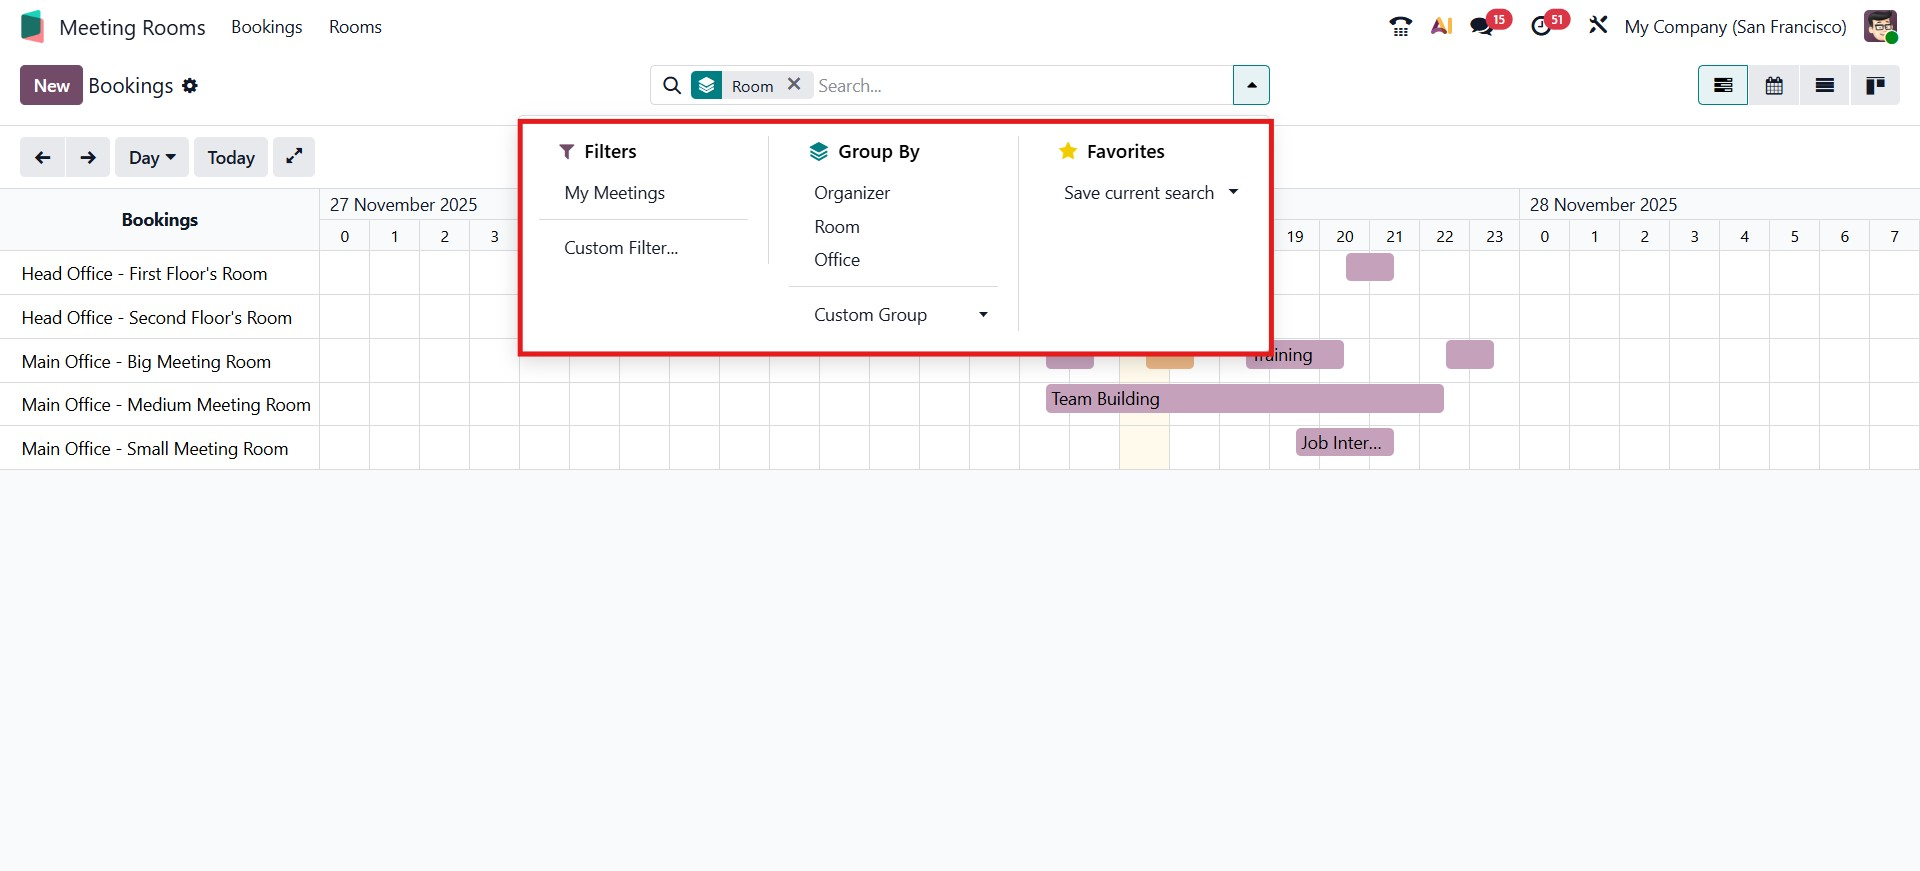
To refine results even further, Odoo provides support for Custom Filters and Custom Group options.
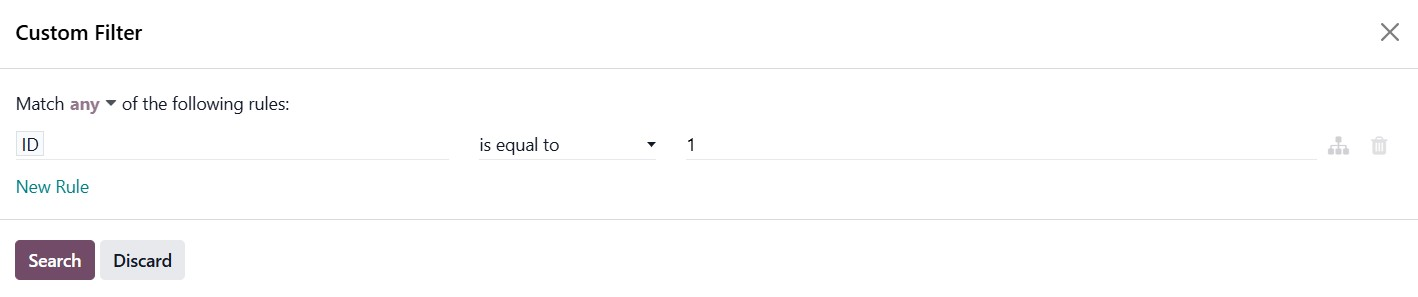
These features provide users with the flexibility to tailor their view according to their unique business requirements.
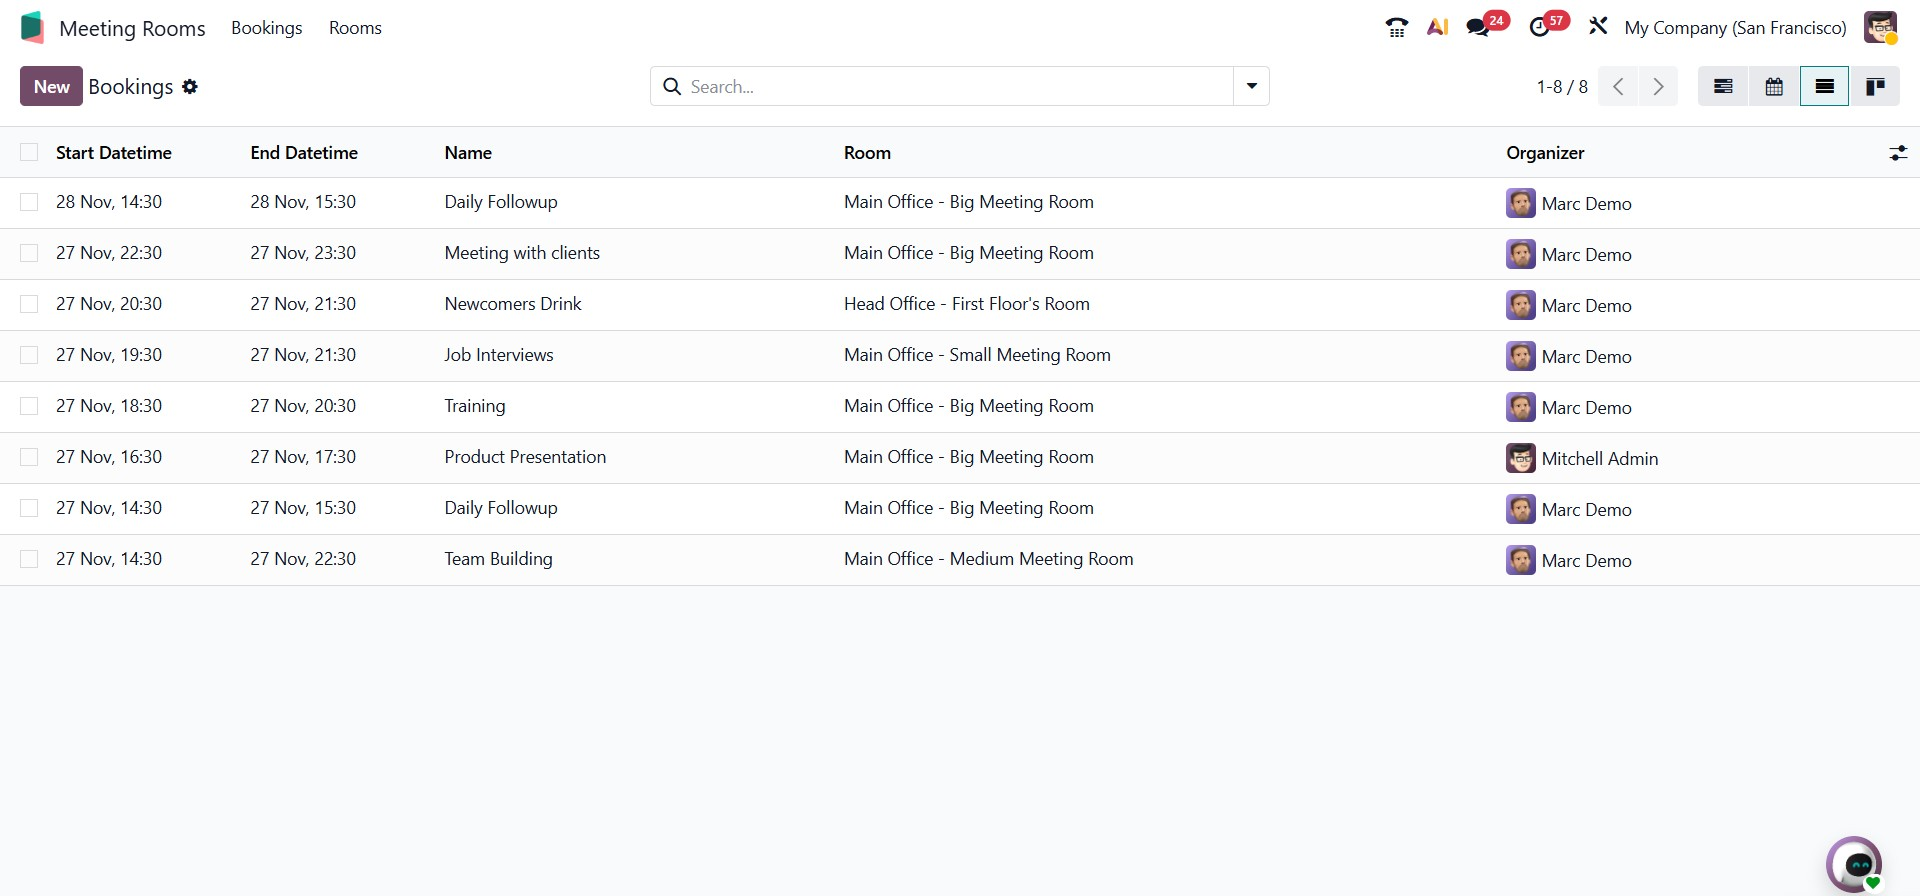
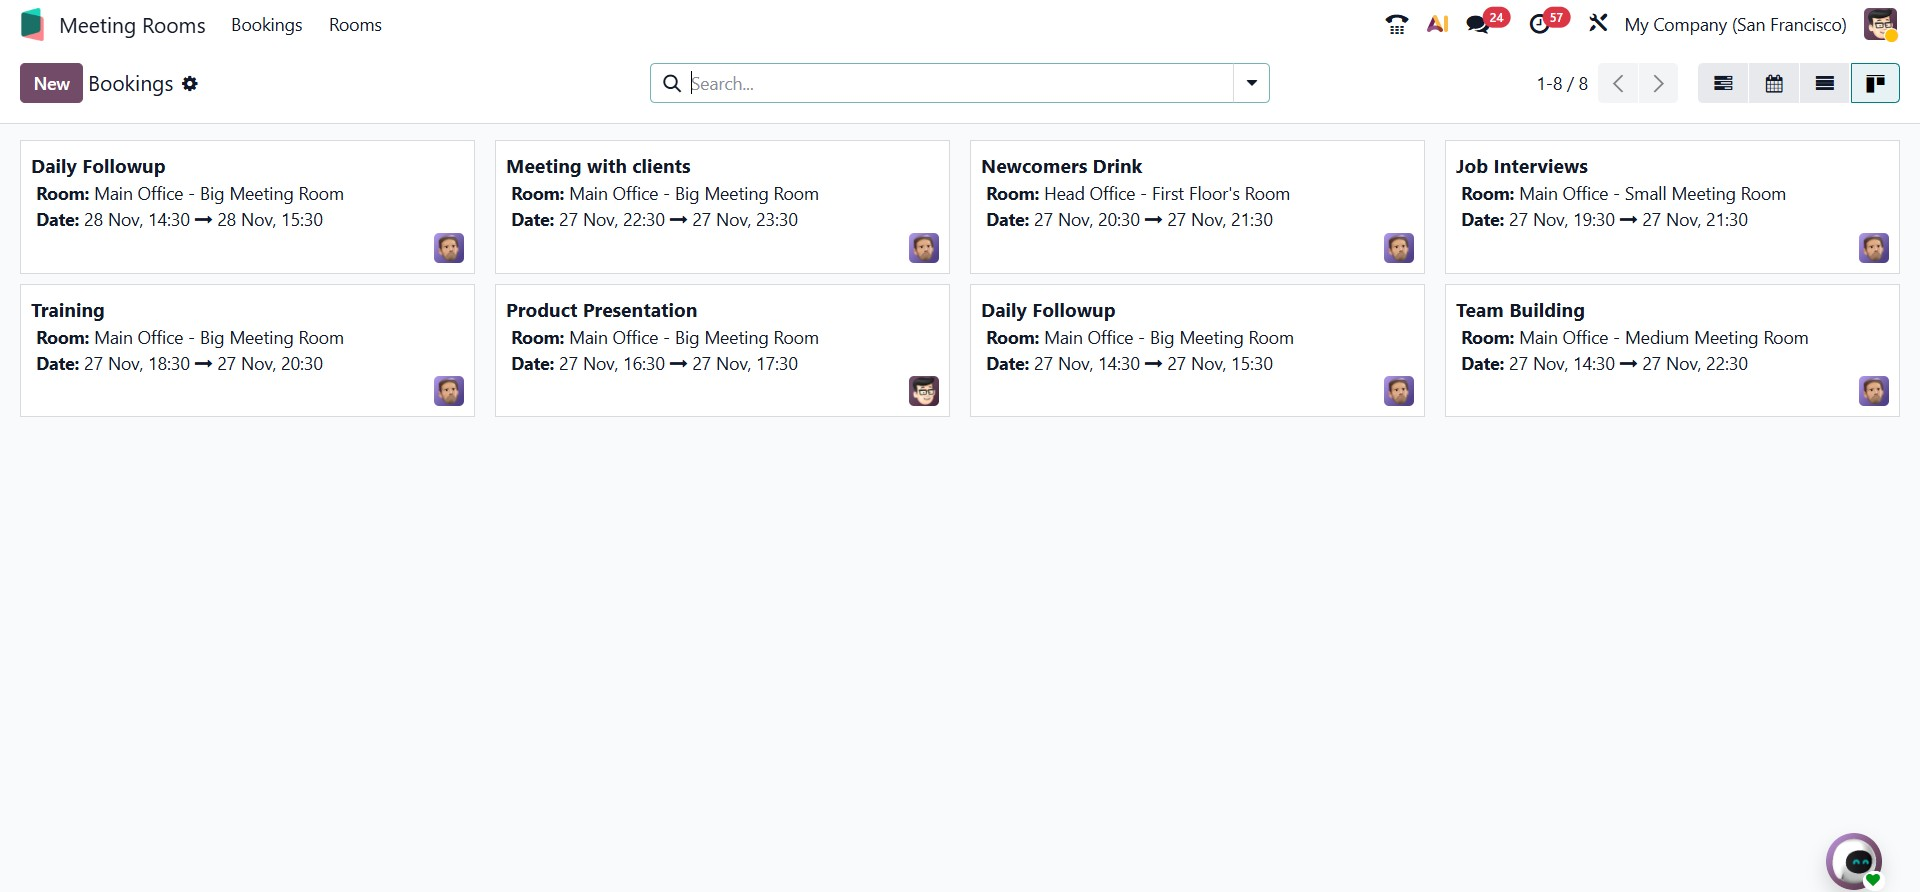
The Meeting Room module also supports multiple view modes for visualizing bookings. Other views, including the Calendar, List, and Kanban views, replace the Gantt chart. The Calendar view presents all meetings in a timeline format, which is particularly useful for managing daily or weekly schedules.
The List view displays bookings in a structured table, allowing quick comparison and easy editing of multiple records.
Meanwhile, the Kanban view offers a visual layout where meetings are organized into cards, providing a clear and dynamic overview of room usage and meeting status.
To create a new booking, simply click the New button on the dashboard. This opens a booking form where you can enter all necessary details, such as the meeting title, room, organizer, and the start and end times. Once the information is filled in, clicking Save & Close will confirm the booking and add it to the dashboard.
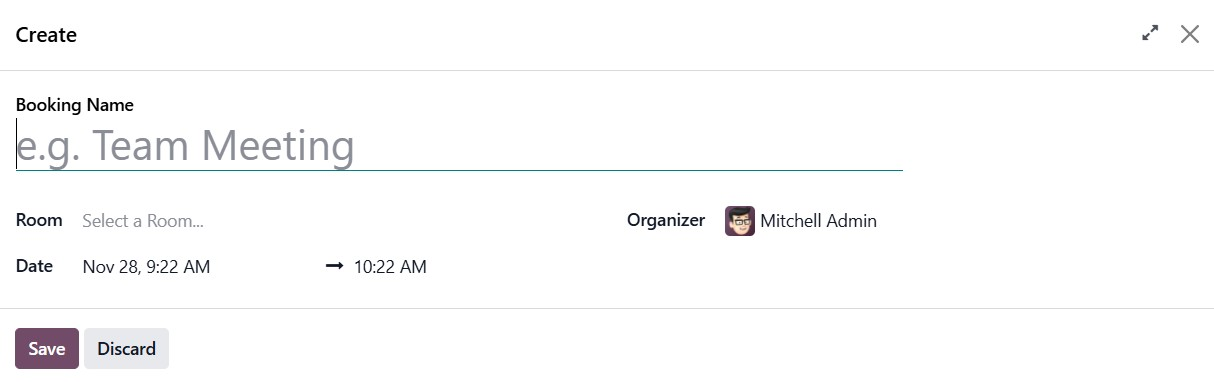
The newly created meeting then appears instantly in the selected view, ensuring that everyone in the organization can see the updated schedule and room availability.
2. Rooms
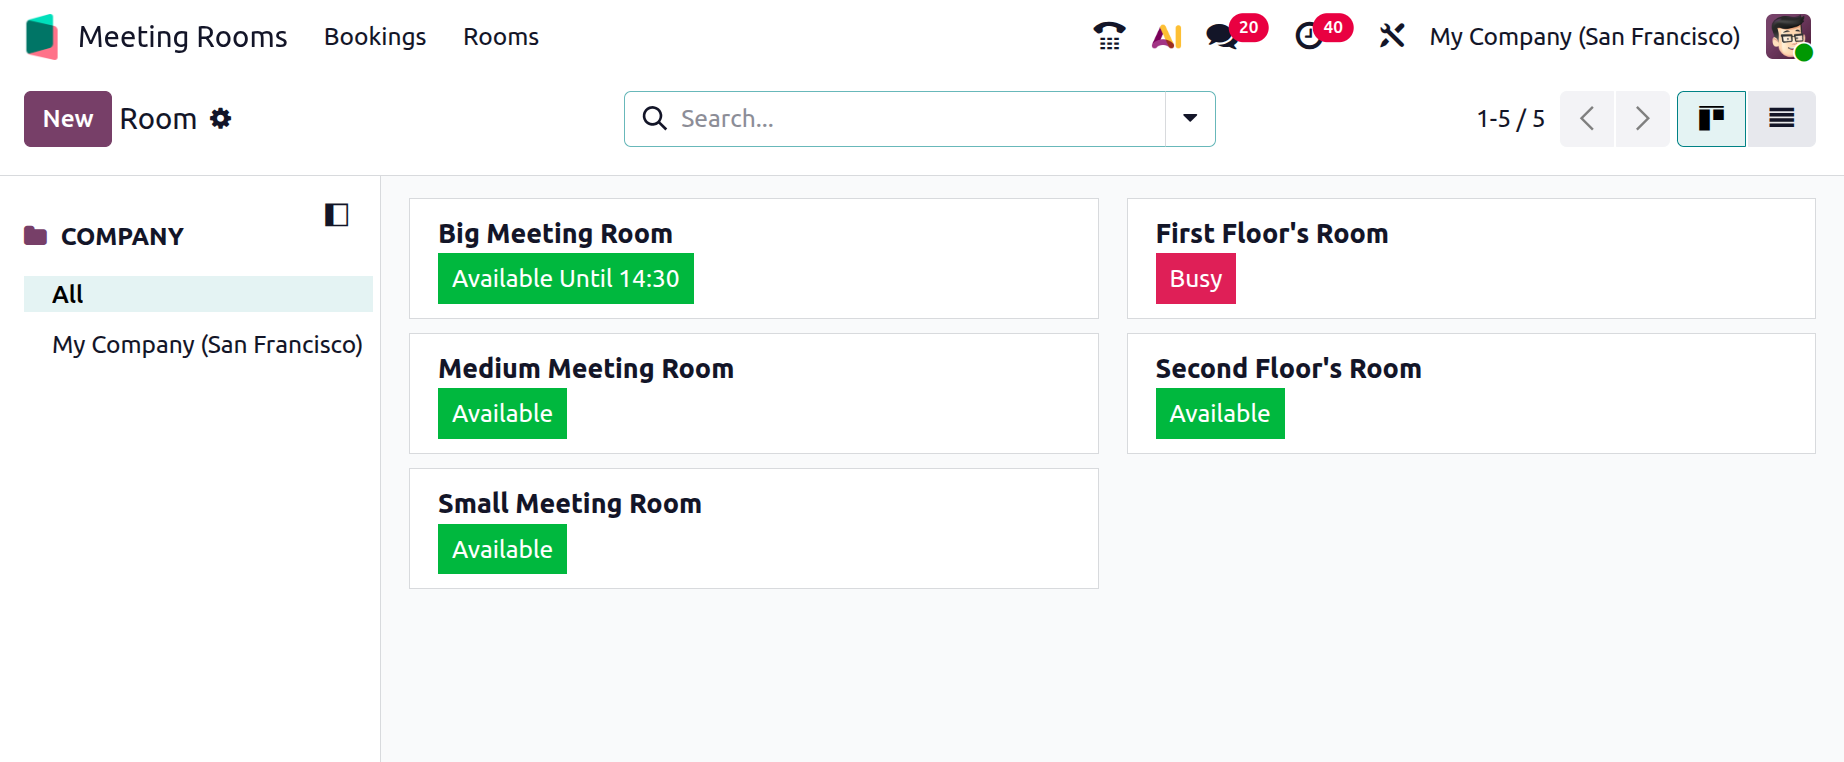
By selecting the Rooms option in the Meeting Rooms module, you can view all the meeting rooms available within the company. The rooms are displayed on the right side of the screen, each color-coded to indicate its current status.
A green highlight means the room is available until the indicated time, while red signifies that the room is currently in use or booked. On the left-hand side, several filters are provided to help refine your view. You can choose to display all rooms or filter them by company, which is useful for multi-company environments.
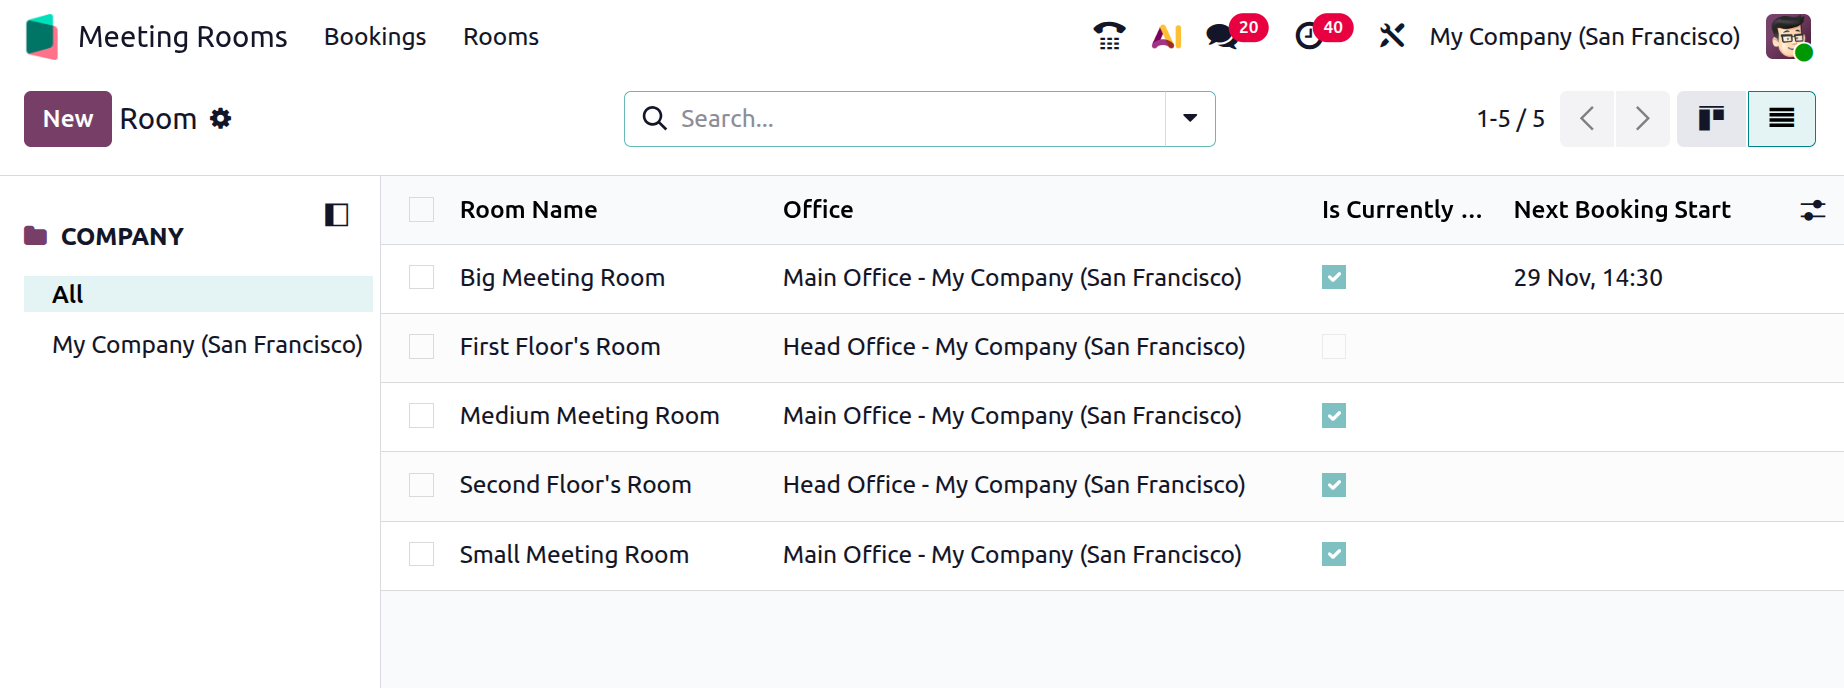
The information can also be viewed in List view, offering a structured table format that makes it easier to sort, compare, and review room details.
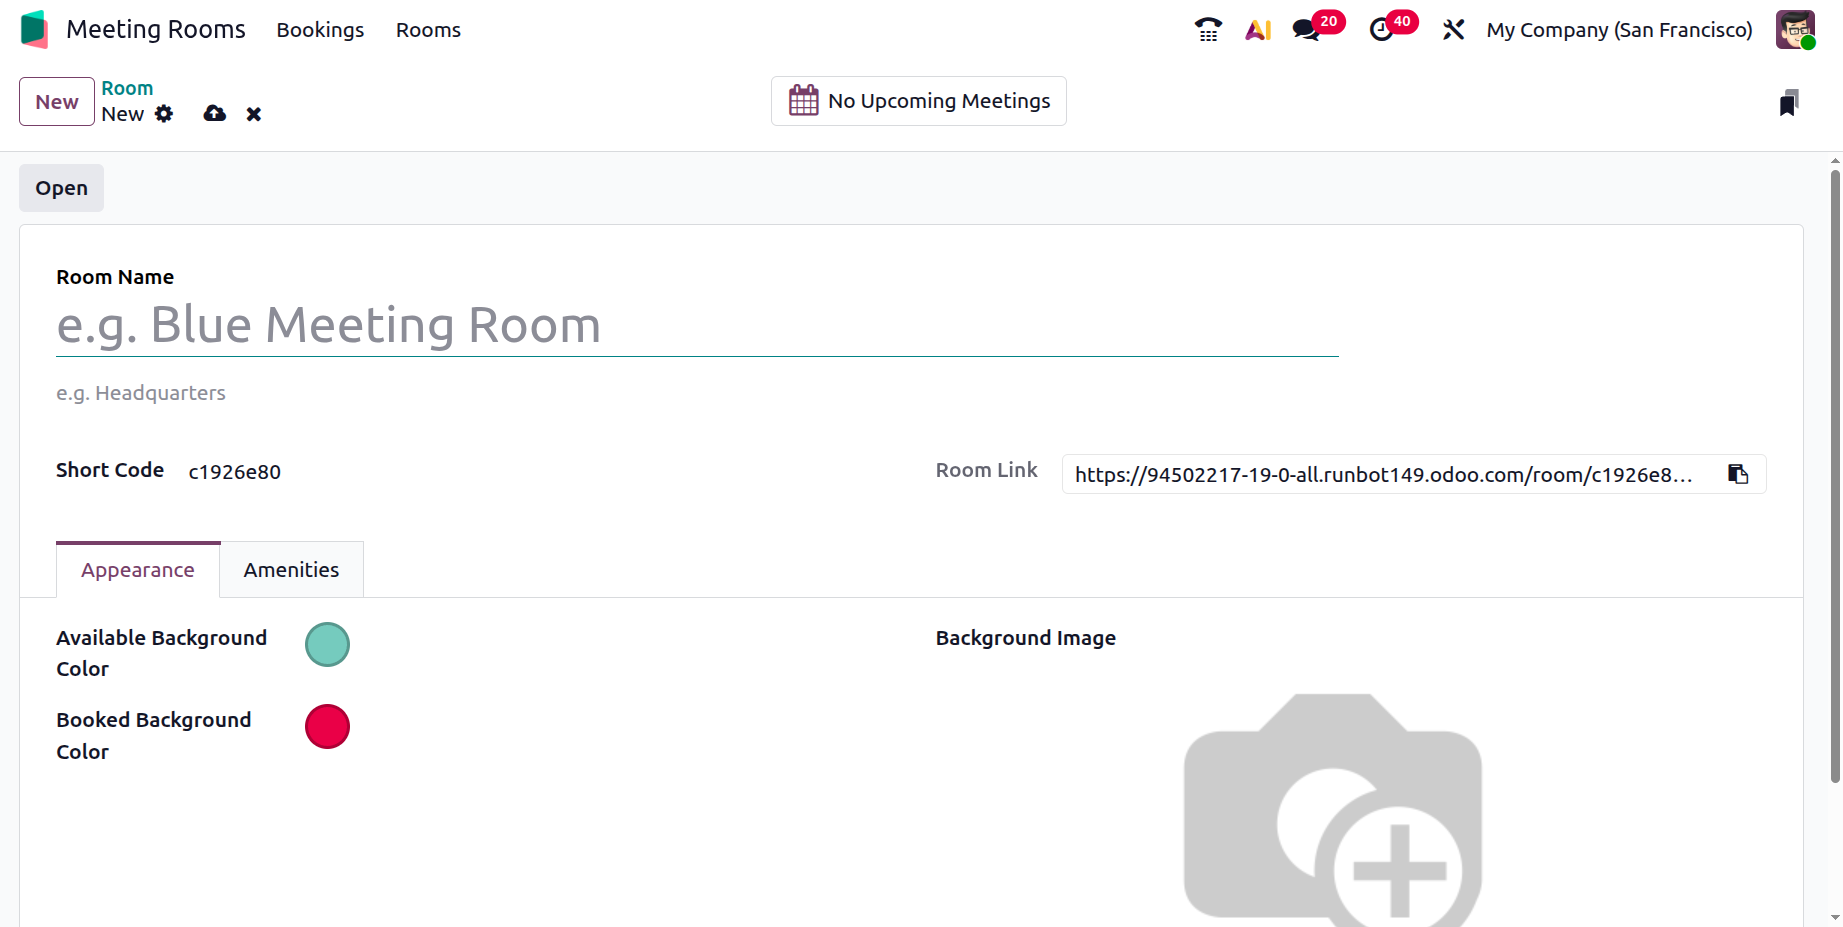
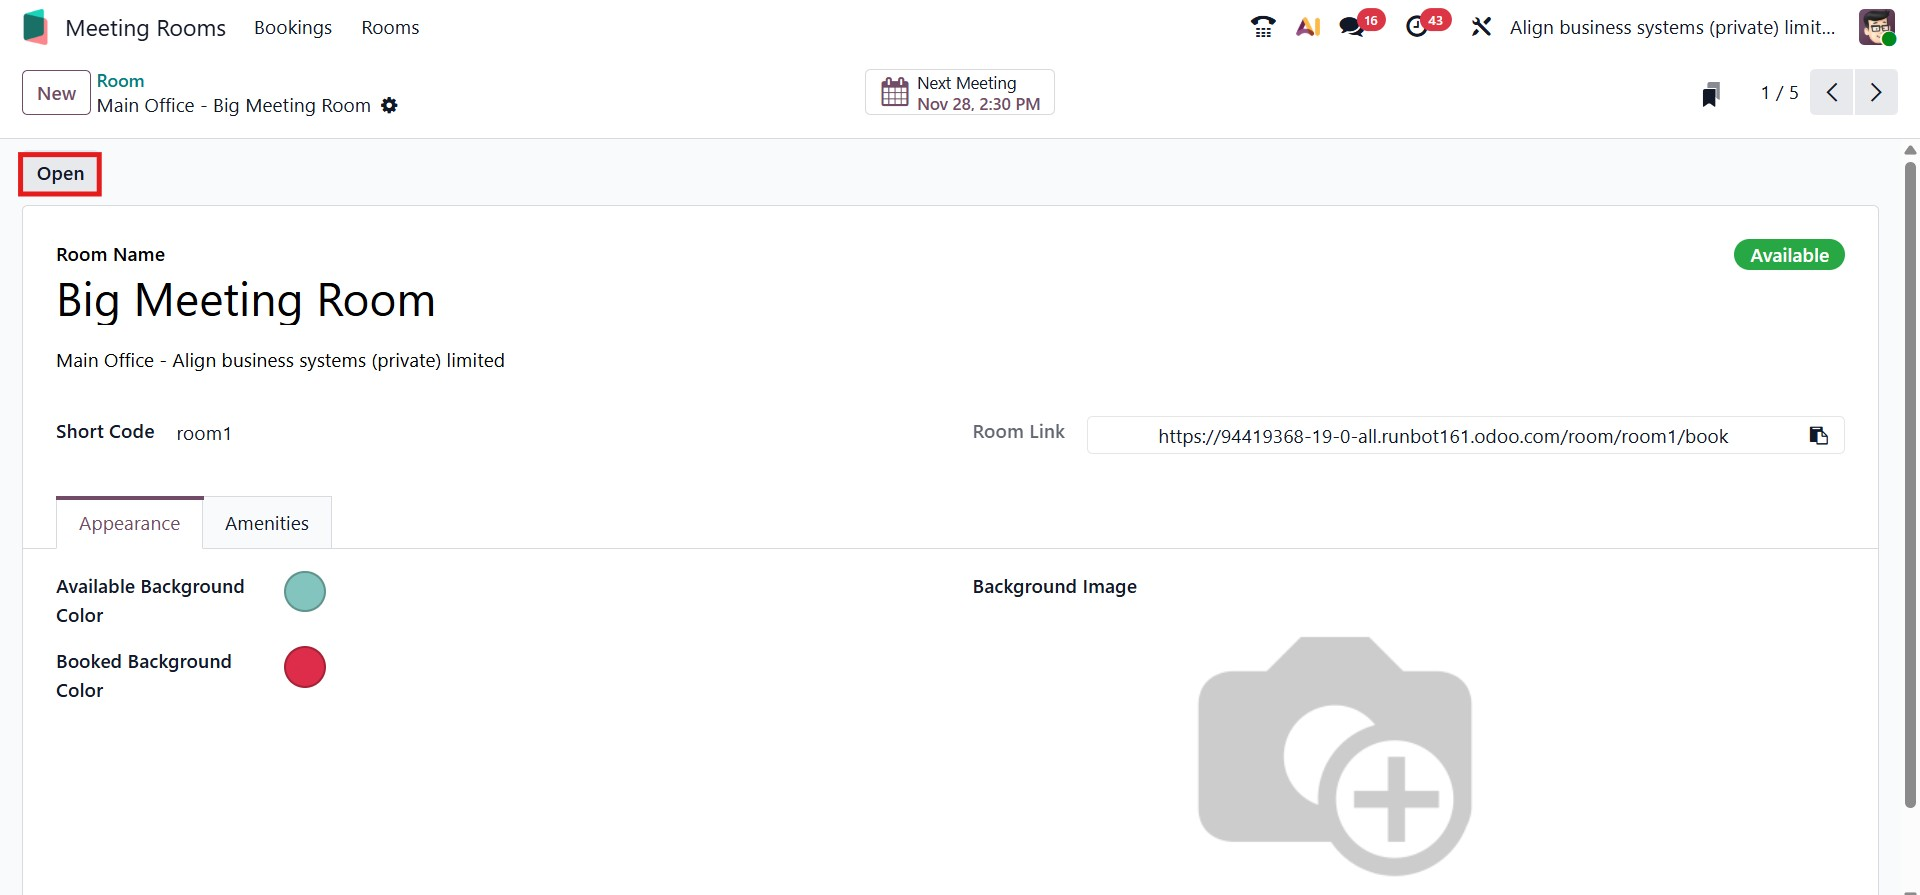
To create a new meeting room, click the New button. In the form view that opens, enter the room’s Name and Short Code. Using the Appearance section, you can define different background colors for the room when it is Available or Booked, allowing for quick visual identification. You may then upload a Room Image, after which the Room Booking Form URL will appear automatically. Any additional notes or details about the room can be added under the Amenities tab. Once completed, save the new room.
After saving, an Open button becomes visible. Clicking this button lets users create a meeting booking directly within that room. All scheduled bookings for the room can also be accessed through the Bookings smart tab.
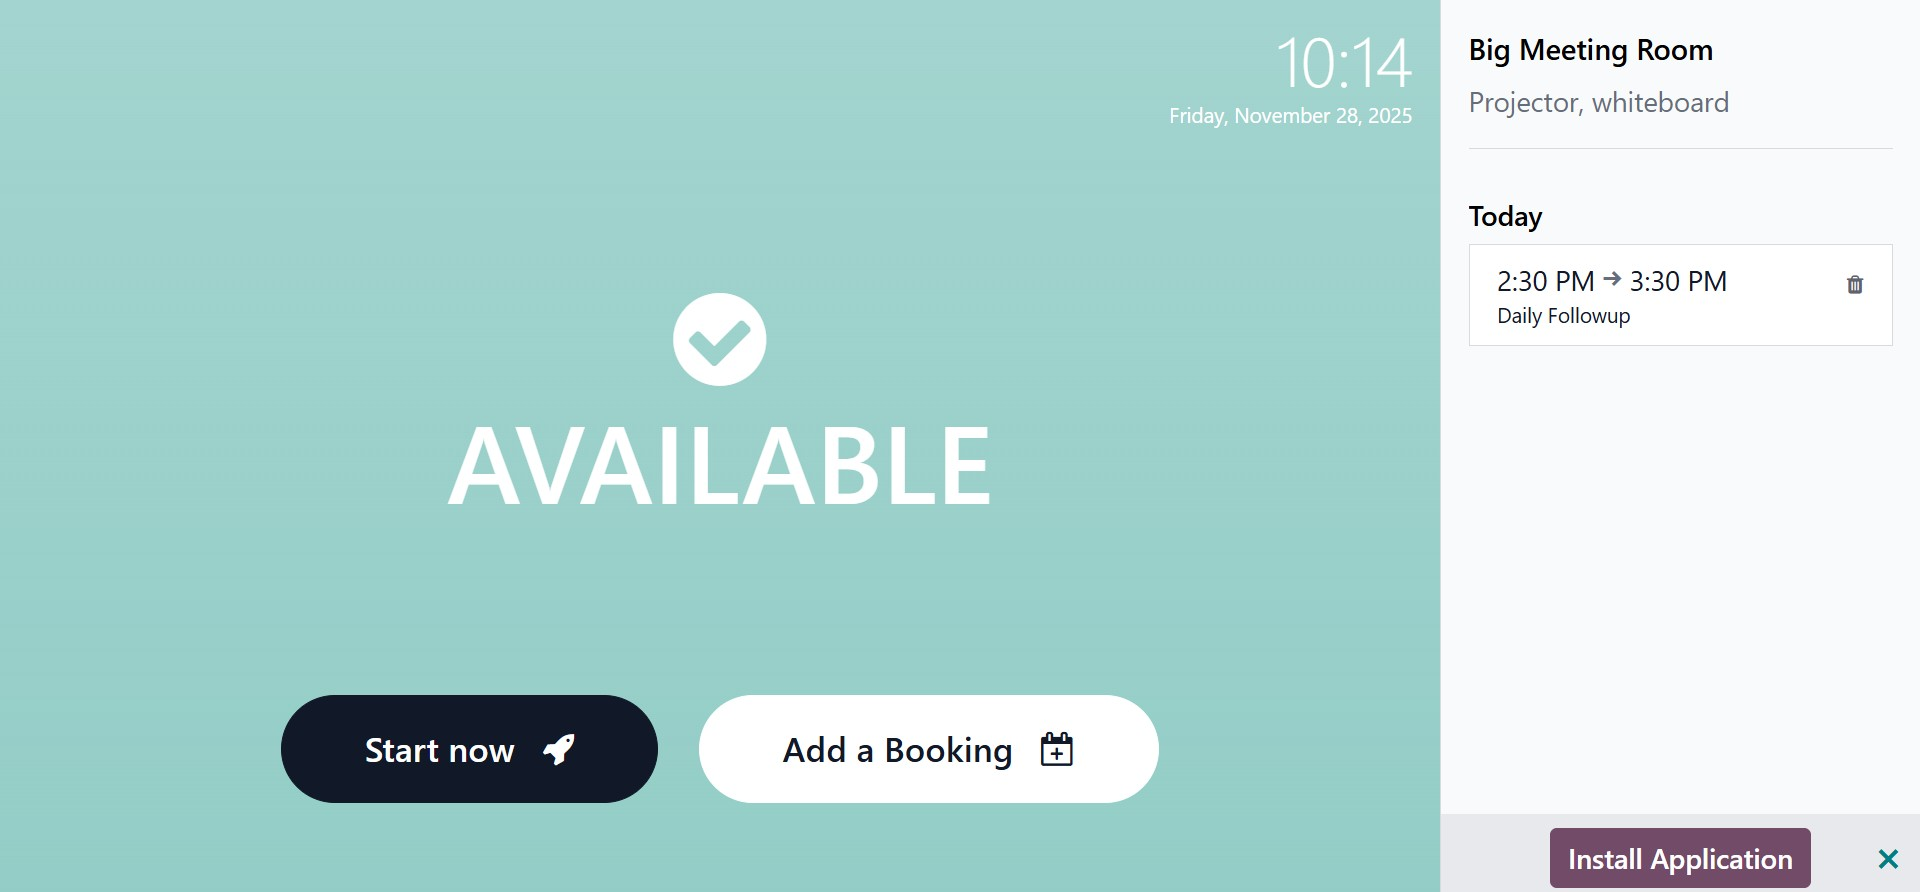
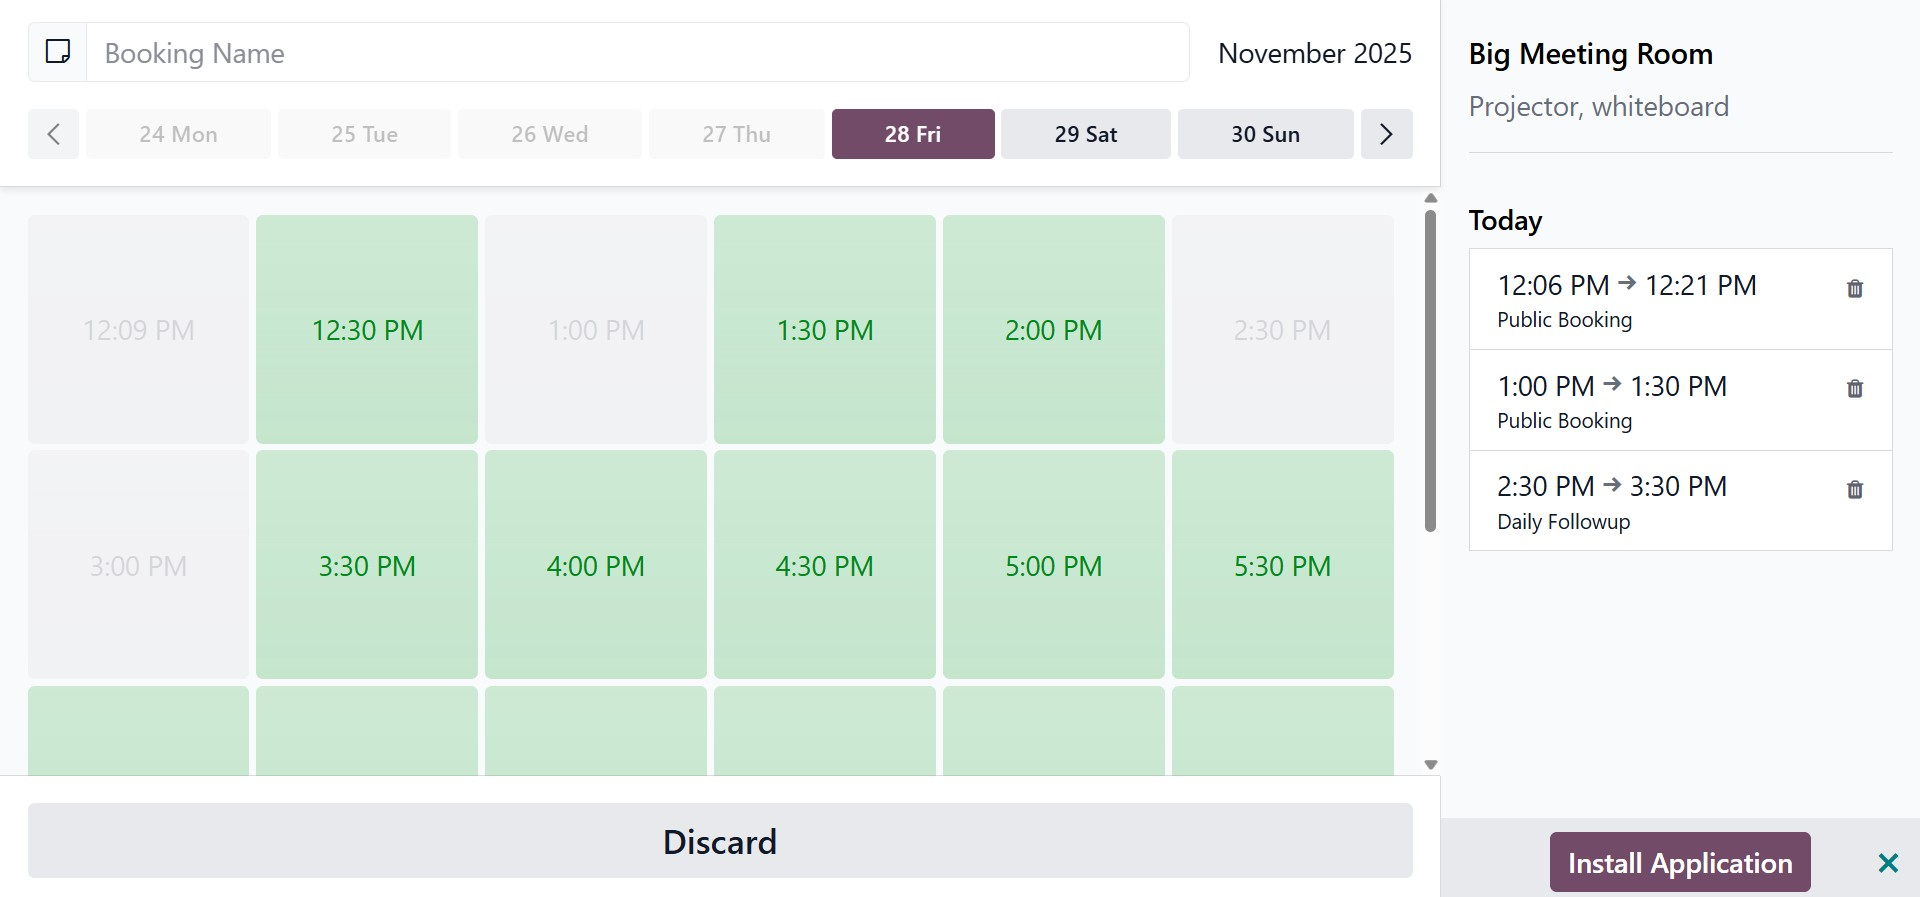
When you click the Open button, the system displays the room’s booking interface. The background color reflects the color selected in the Appearance settings; for instance, blue if that was configured. This page includes options such as Start Now and Add a Booking.
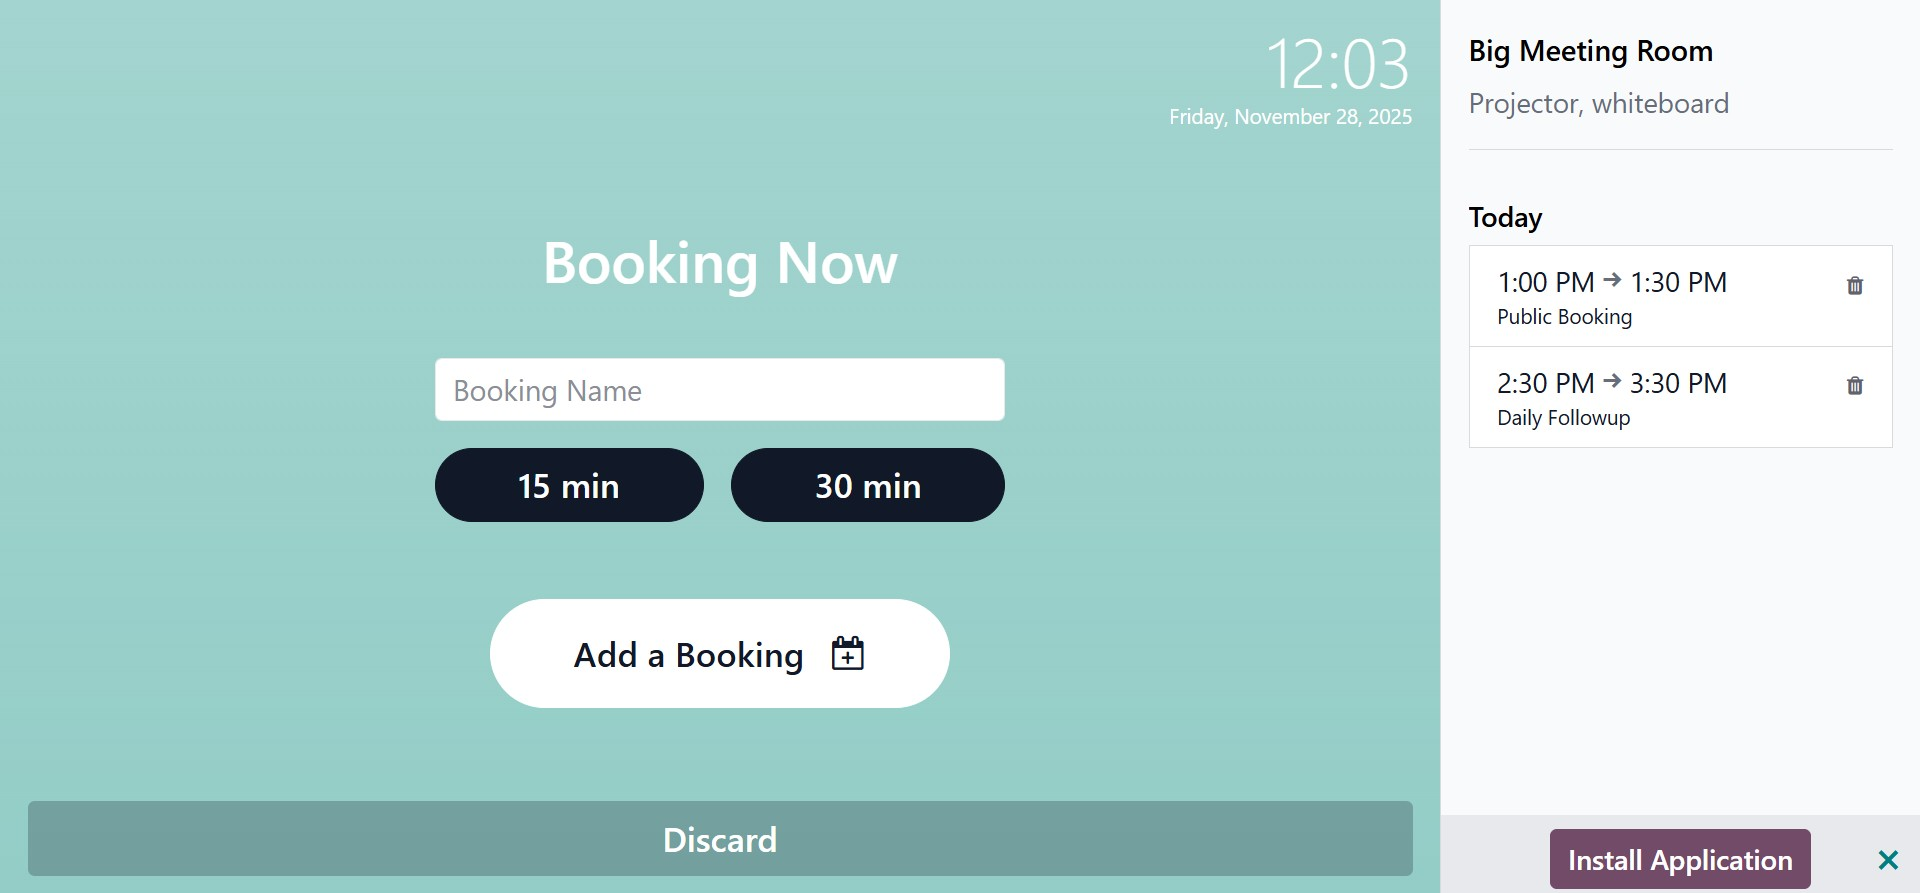
Once a booking is created, another page opens where you can select the meeting time and enter the meeting name.
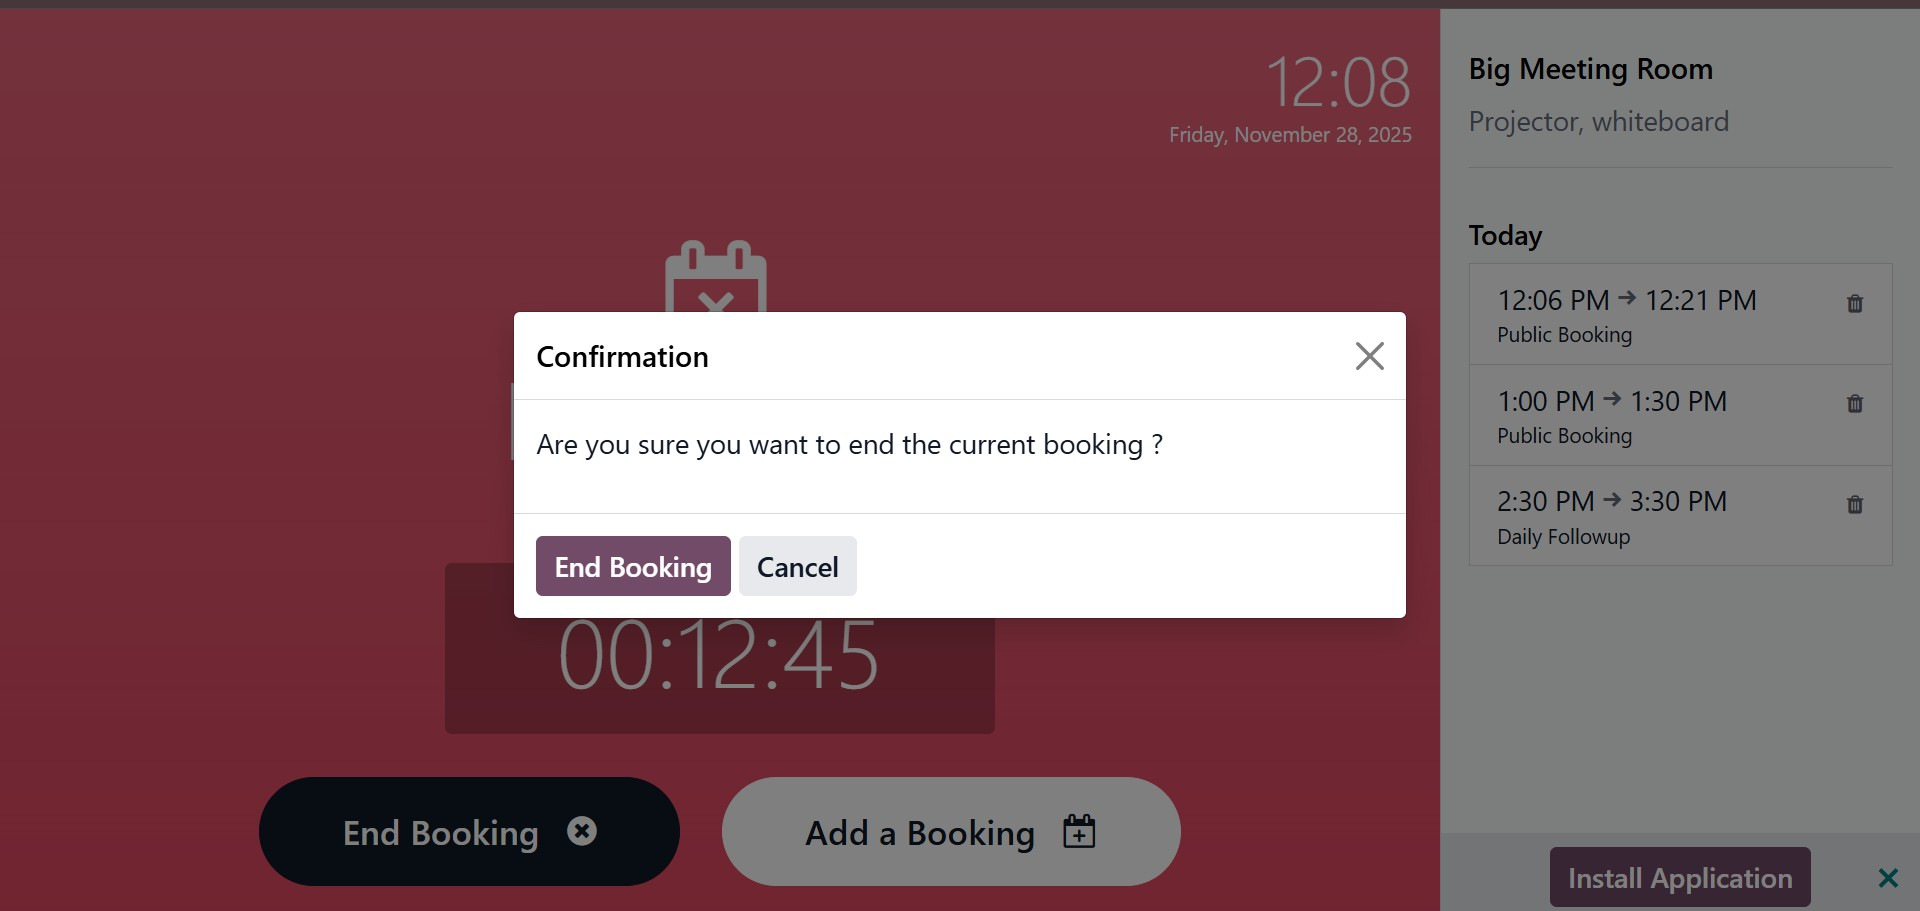
After confirming, the meeting is officially scheduled. A timer indicates the remaining duration if the meeting has a fixed length, such as thirty minutes, and the ongoing time is also displayed on the left side.
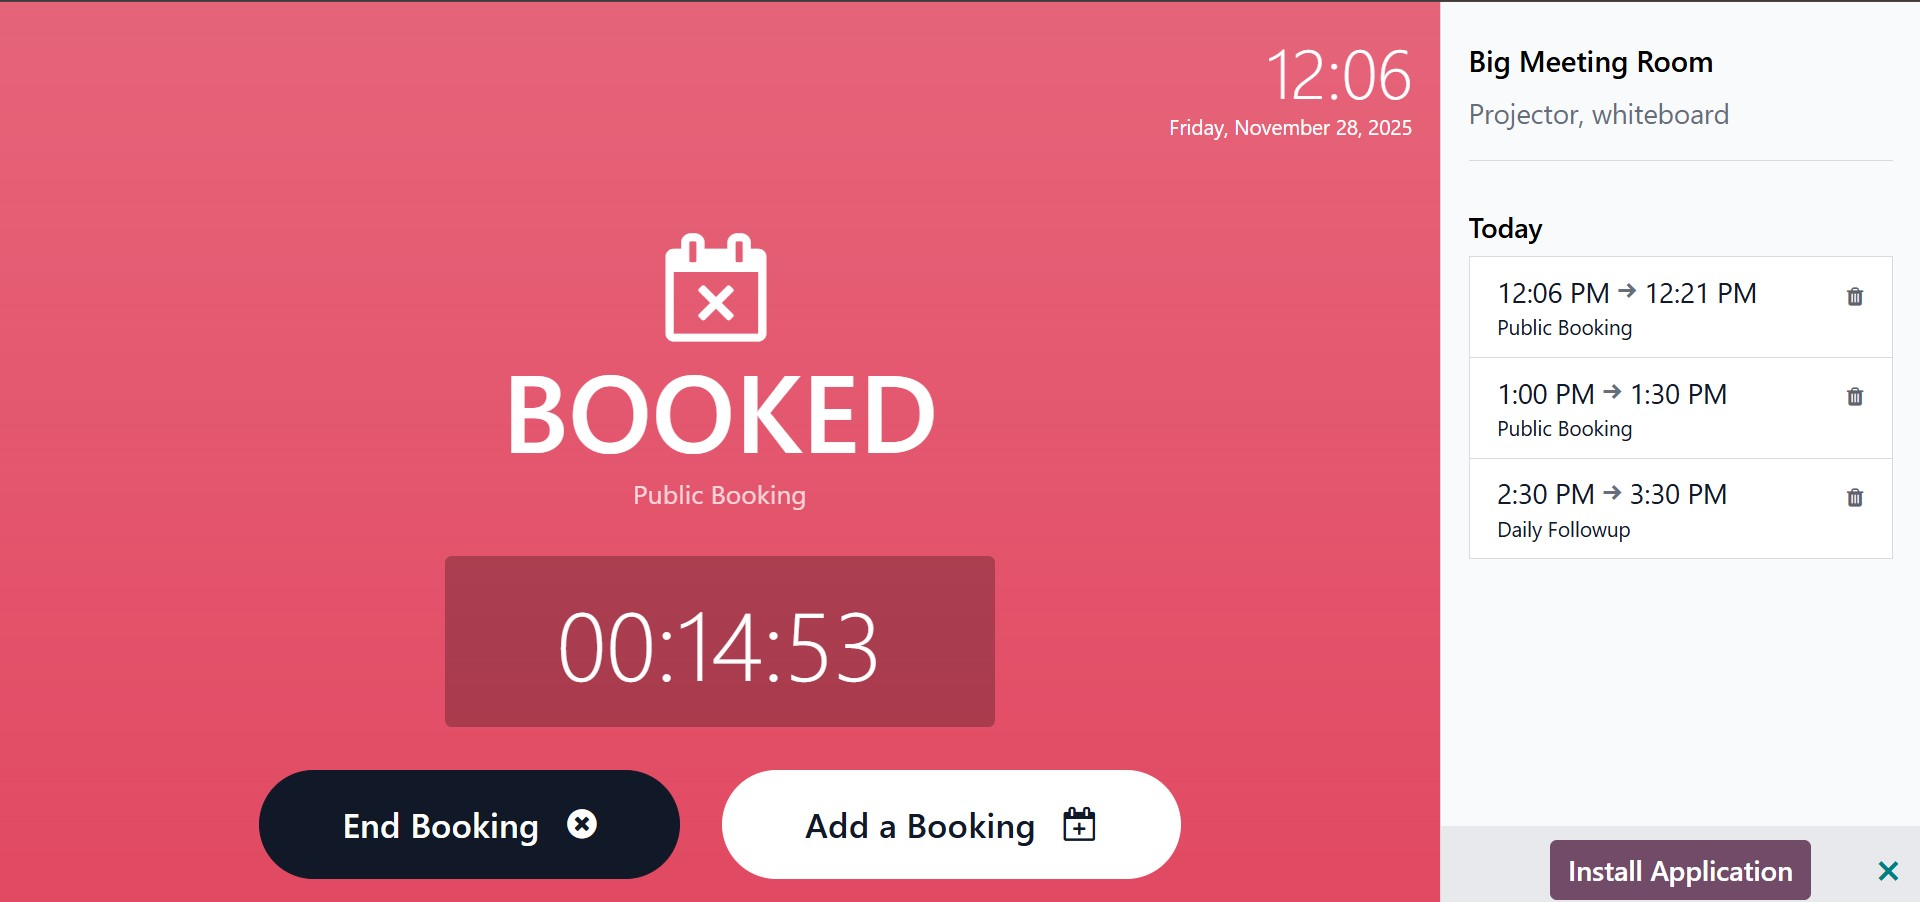
To end an active booking, simply click End Booking. A confirmation prompt will appear, ensuring you do not end the reservation accidentally.
When you select "Add a Booking," the system opens a scheduling window where you can choose the meeting’s date and time. After saving, the booking is added to the room’s schedule.
In all, the Meeting Rooms module in Odoo 19 Enterprise streamlines the entire process of managing room resources. Through its modern interface, color-coded availability indicators, and multiple scheduling views, including List, Calendar, Kanban, and Gantt, Odoo 19 enhances the efficiency of room allocation, supporting a more organized and collaborative workplace environment. Its seamless integration with other Odoo applications ensures improved productivity and better meeting management throughout the organization.