Odoo 19 PLM (Product Lifecycle Management) is an effective tool for optimizing product development processes from idea to manufacturing. It improves collaboration and version control by combining engineering, manufacturing, and quality activities on a single platform. Engineers can easily connect technical documents to product records, manage BoMs, and monitor changes with approvals. The system facilitates automated workflows and organized reviews by supporting ECOs (Engineering Change Orders). Odoo 19 PLM’s real-time communication, document management, and seamless integration with other Odoo modules enable businesses to enhance product quality, reduce errors, and promote innovation effectively.
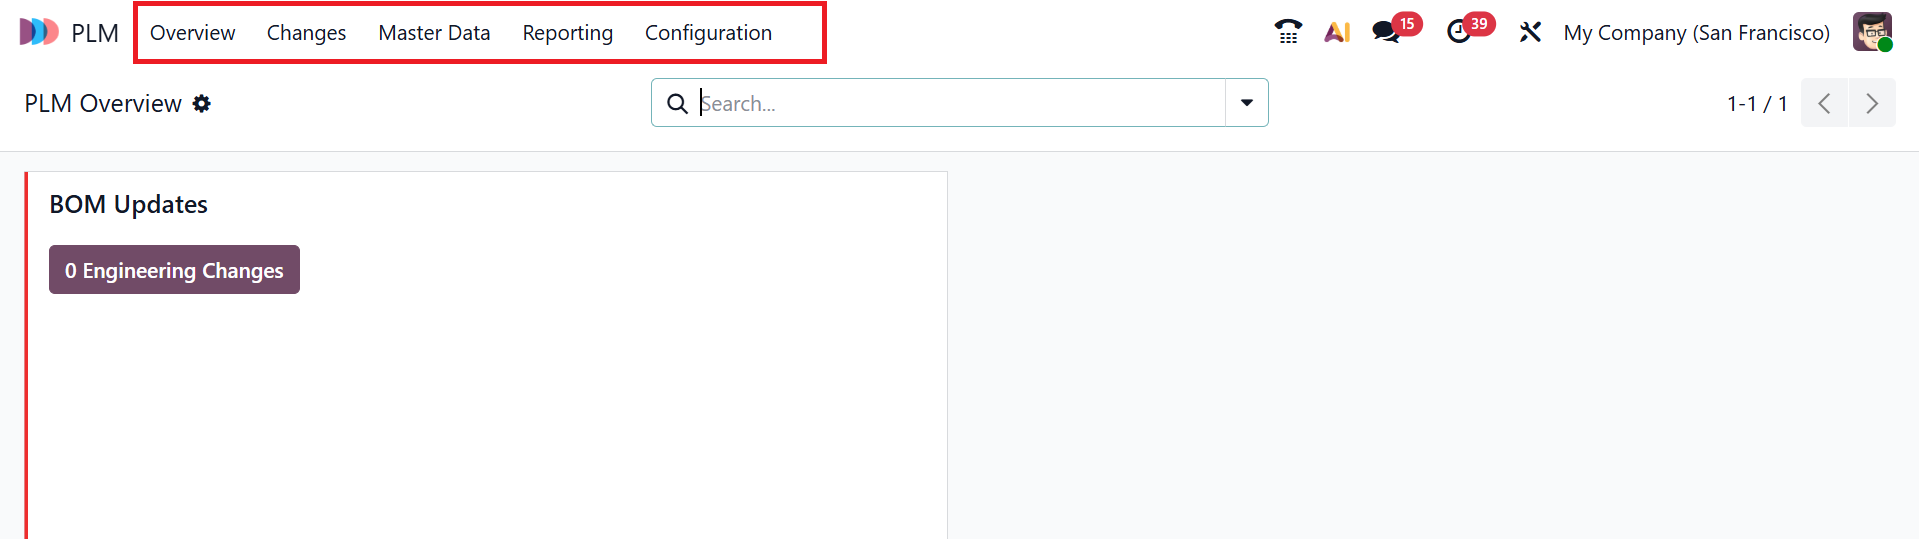
You can view five menus in the PLM module: Overview, Changes, Master Data, Reporting, and Configuration.
1. Overview:
By default, the Overview menu displays the PLM module's main dashboard. The details of the engineering change orders can be viewed here. Each order is organized into cards by ECO type to facilitate easy tracking of engineering modifications. Click on the three-dotted vertical line in the upper-right corner of the card to add a color to the specific card. The Configuration option allows you to view the selected ECO type form.
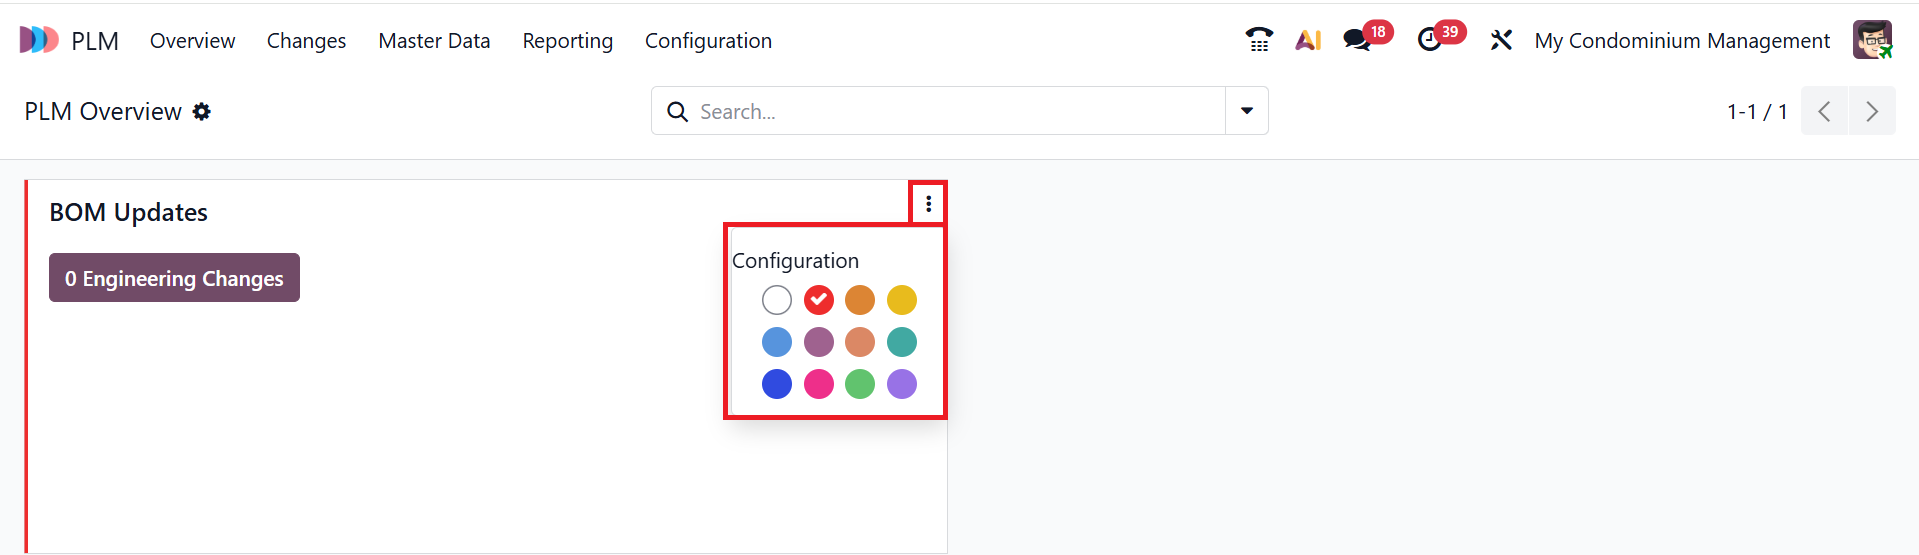
Click on the Configuration option, where you can edit the selected ECO type as shown below:

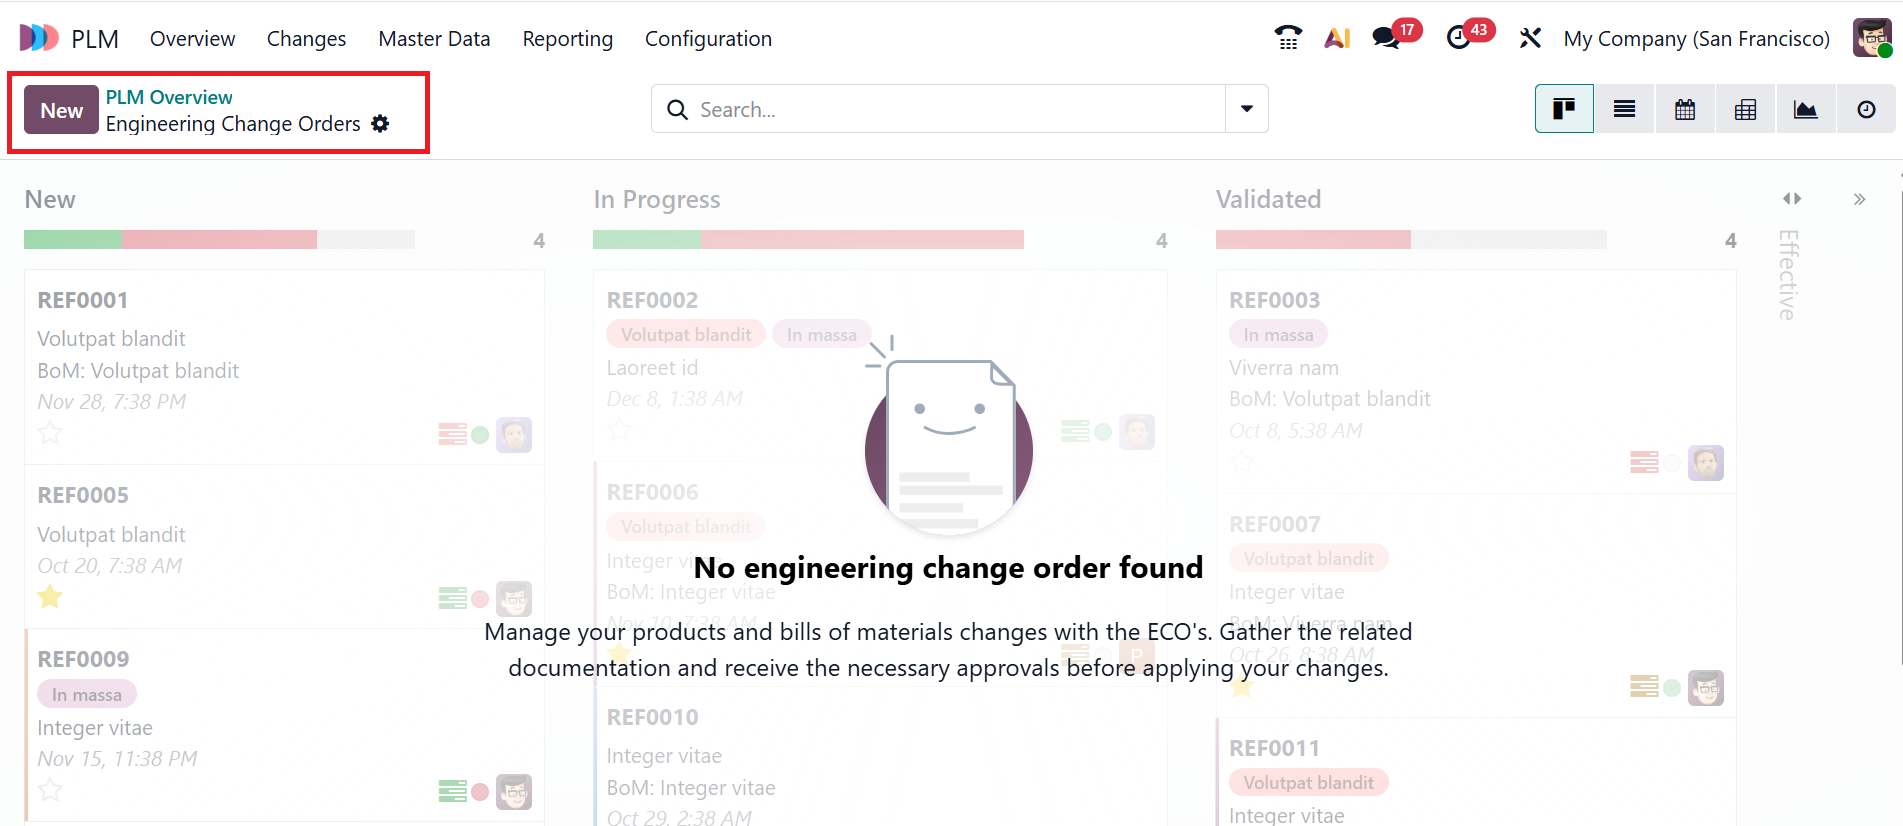
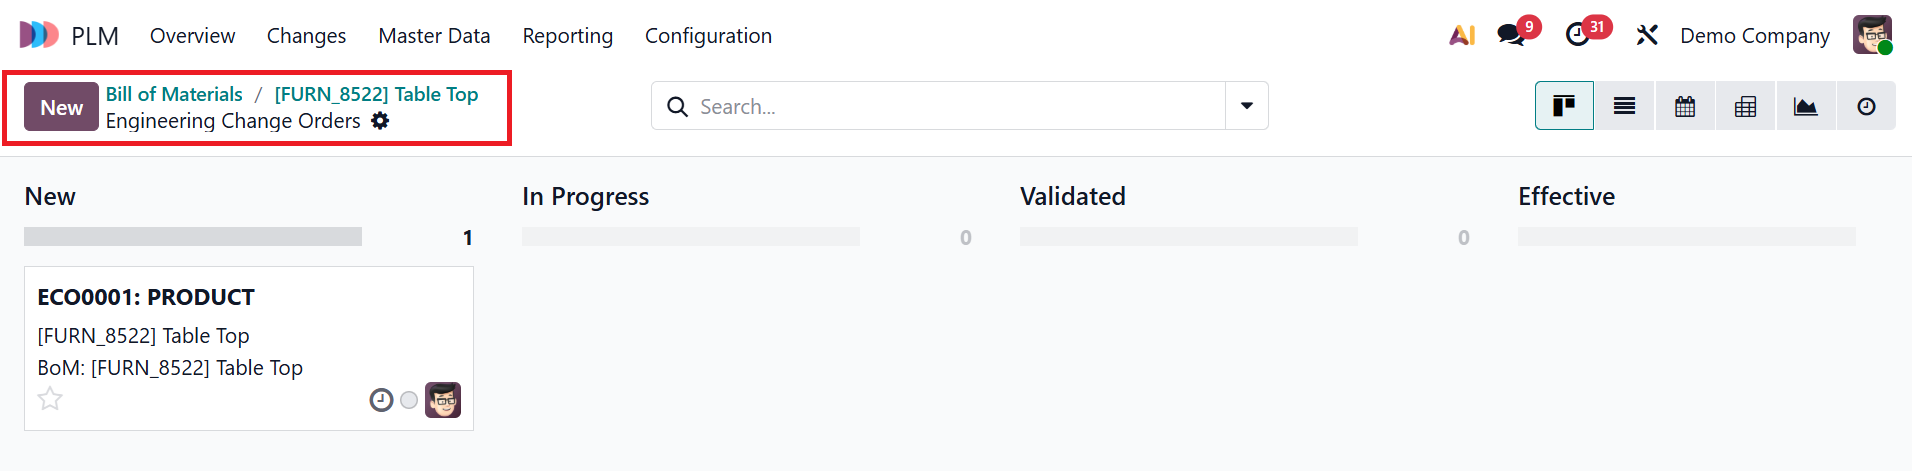
Click on the specific ECO type to view more details about the associated changes. In the screenshot below, you can see that there are no Engineering Change orders to manage products or their bill of materials.
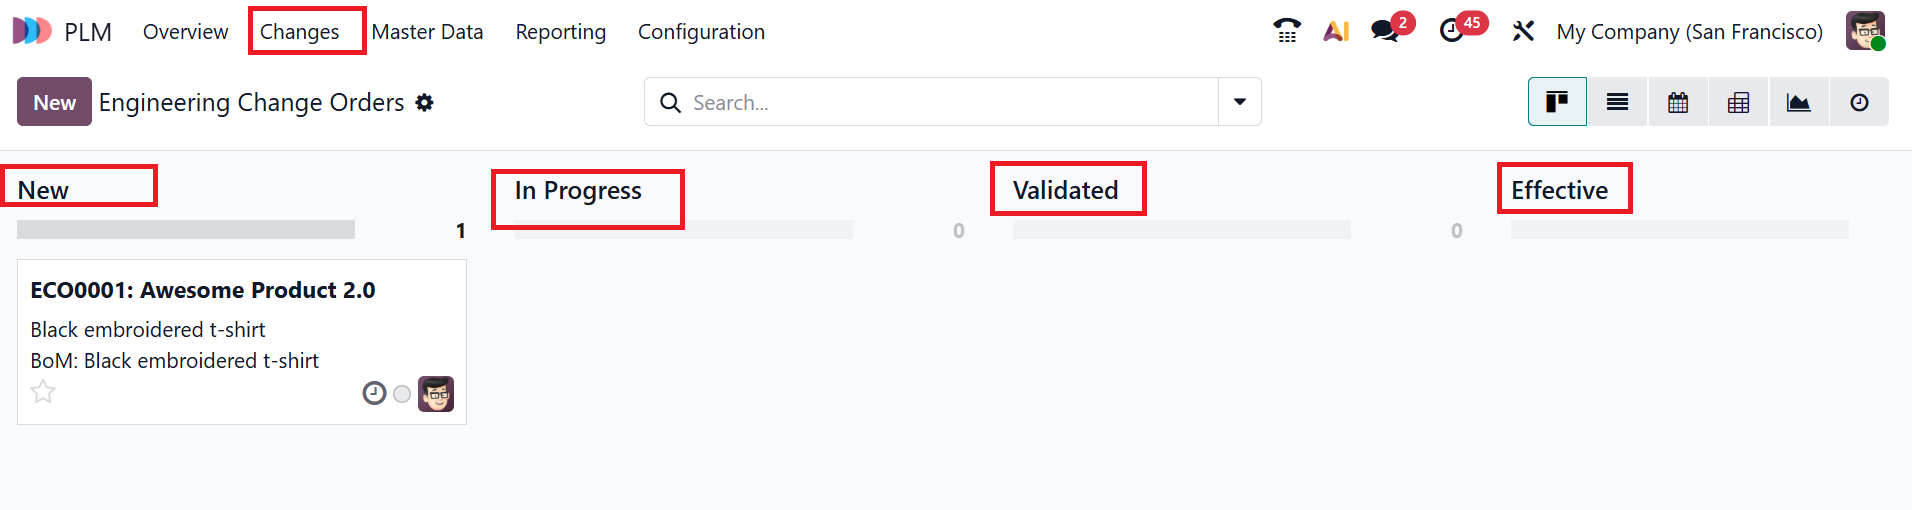
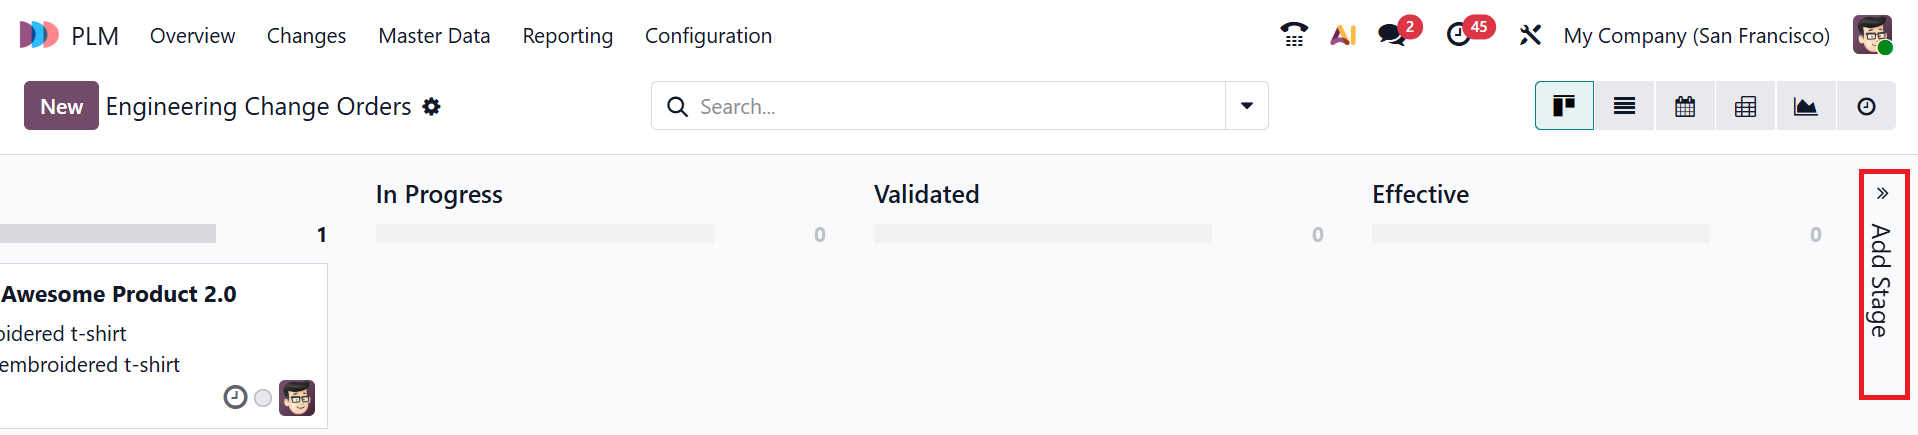
2. Changes:
n the Odoo 19 PLM module, the Changes menu allows you to manage engineering change orders by tracking product modifications, approvals, and revision history. Each changes are arranged as a stage, as shown below:
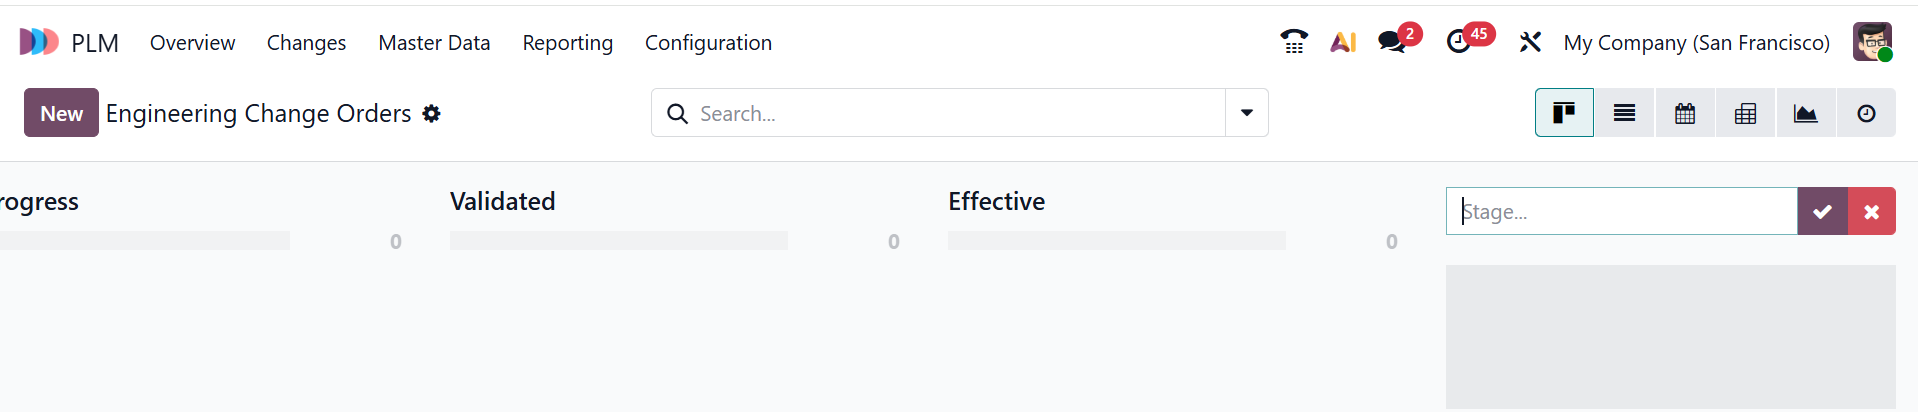
Click on the >> Add Stage button to add a new stage to the dashboard.
Here, you can add the name for your new stage and save it by clicking the tick button.
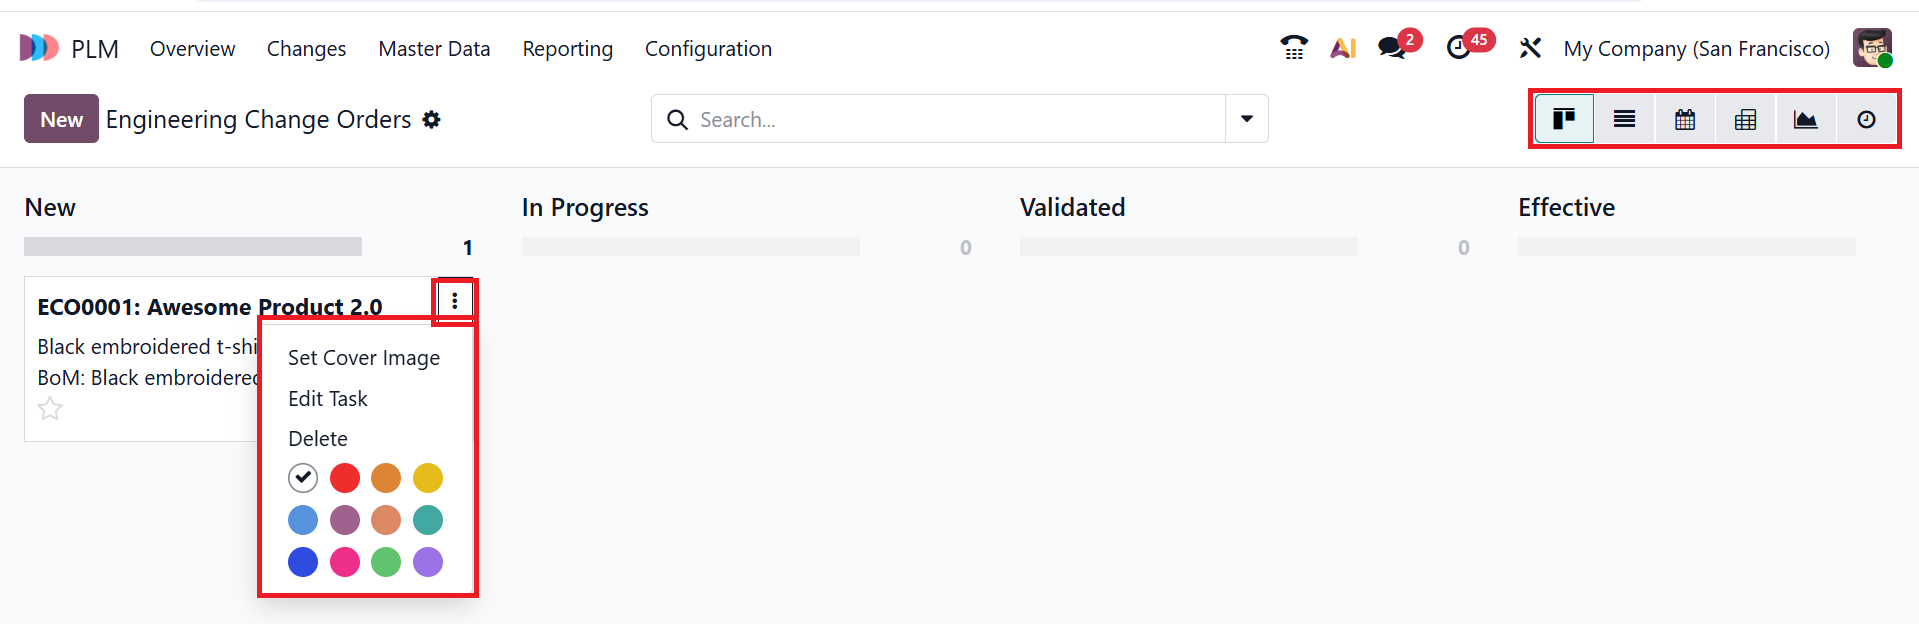
By default, the change menu is displayed in Kanban format. You can also change the view to List, Calendar, Pivot, Graph, and Activity. When you click on the three-dotted vertical line in the upper-right corner of each card, you can view options such as Set Cover Image, Edit Task, and Delete. You can also use color icons to highlight the card.
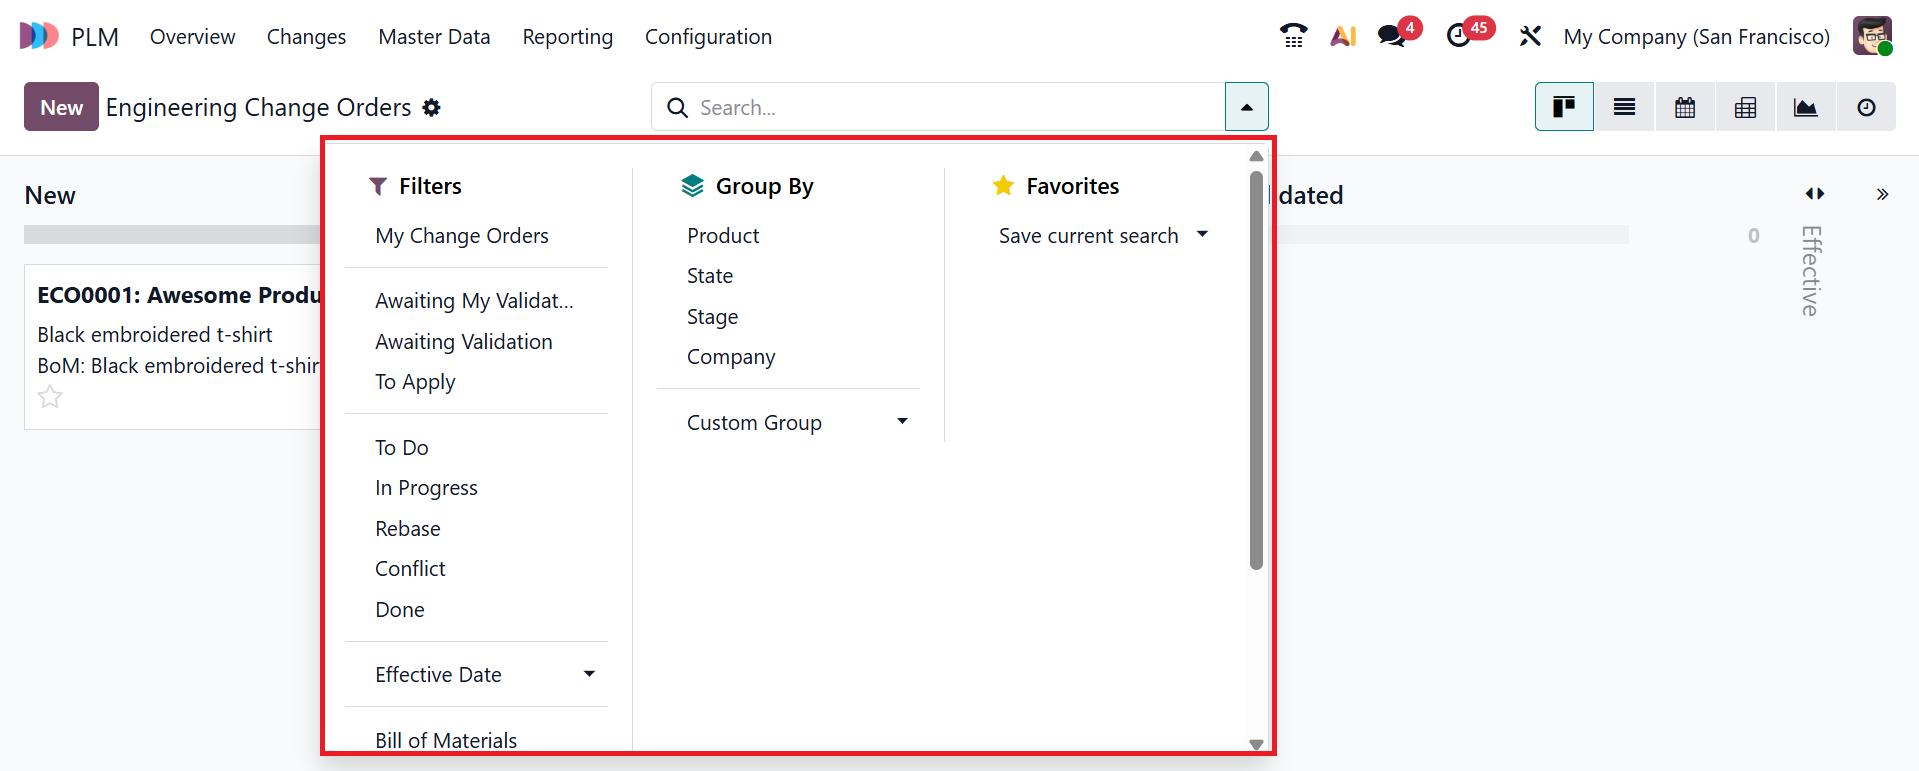
When you click on the drop-down menu in the search bar, you can view the options such as Filters, Group By, and Favorites. You can use the Filters option to sort the data based on My Change Orders, Awaiting My Validation, Awaiting Validation, To Apply, To Do, In Progress, Rebase, Conflict, Done, Effective Date, Bill of Materials, and Archived. You can also use custom filters and AI options. Under the Group By option, you can group the data by Product, State, Stage, Company, or use a custom group option. The Favorites option allows you to save searches for future use.
To create a new Engineering Change Order, click the New button. Under the Description field, add a short note of the change. You can add a specific ECO type project in the Type field. In the Apply On field, select either the Bill of Materials or Product Only option. Then, add the Product and change the BoM accordingly. In the Company field, you can add a specific company or leave it blank, depending on the product changes. You can assign a Responsible person for the ECO process. In the Effective field, select either As soon as possible or At Date option to specify when to apply the change. You can also add appropriate Tags to organize the ECO. If unchecked, the version of the product/BOM will remain unchanged once the ECO is applied. Here, you can see two tabs: Notes and Approval. The Notes tab allows you to add a note explaining the change and the reason for it.
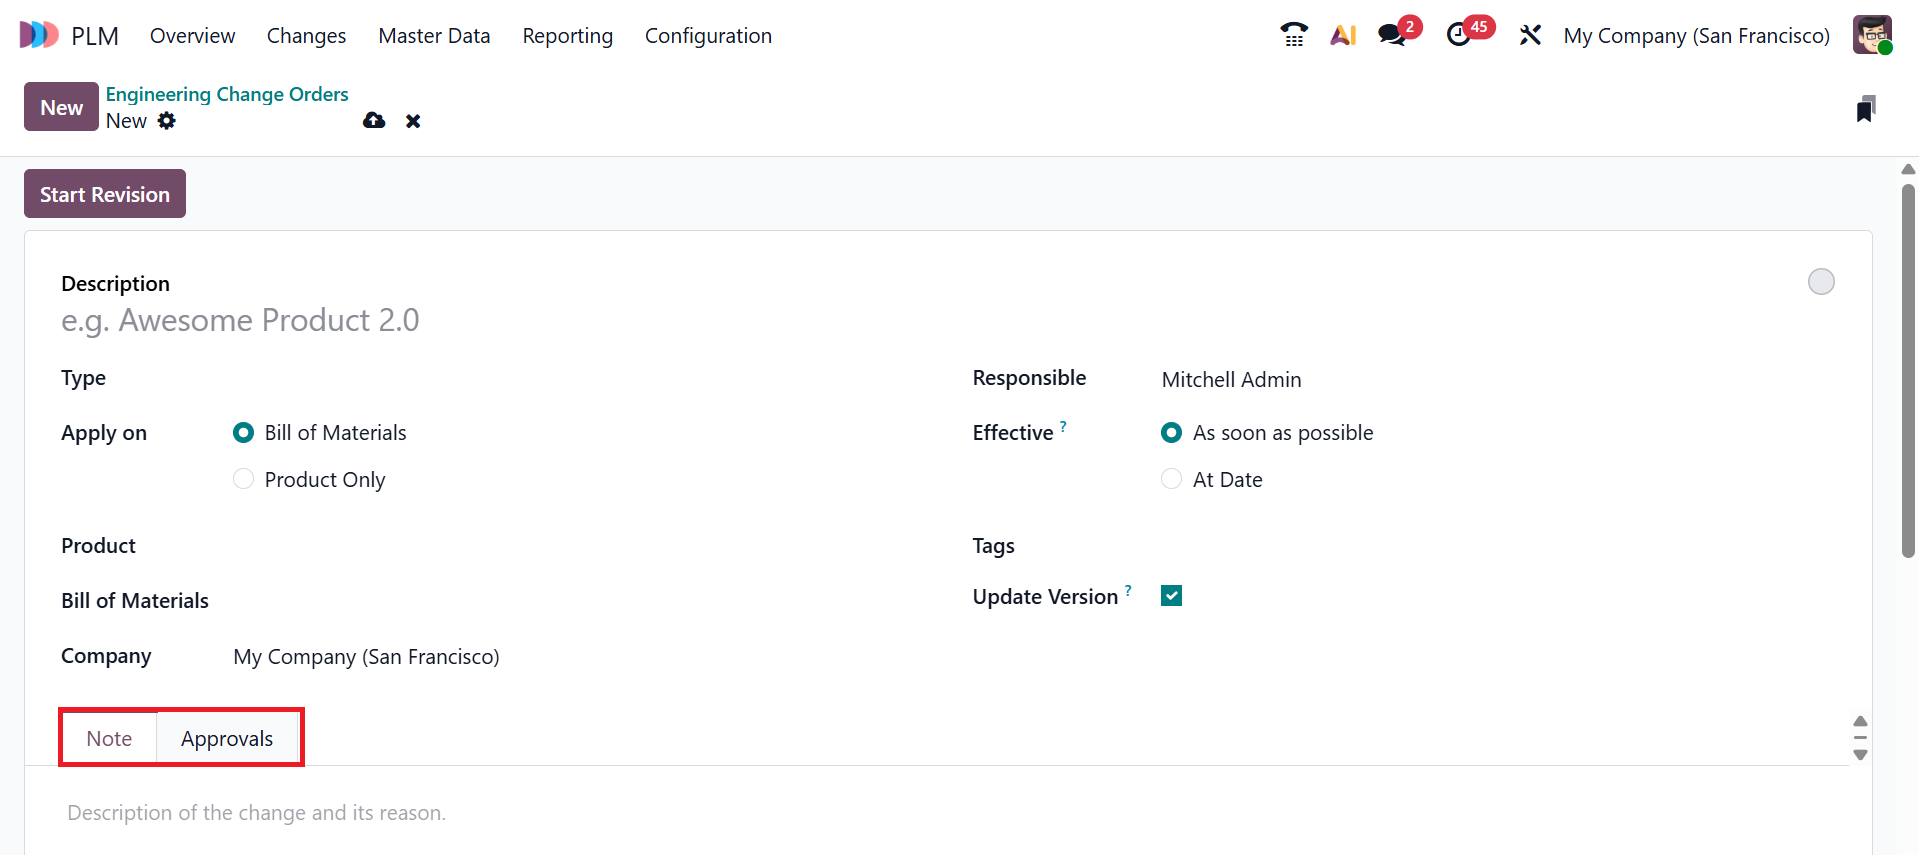
Under the Approval tab, you can add the details of the responsible users or team who approve the ECO. Then, click the Start Revision button to begin the revision process.
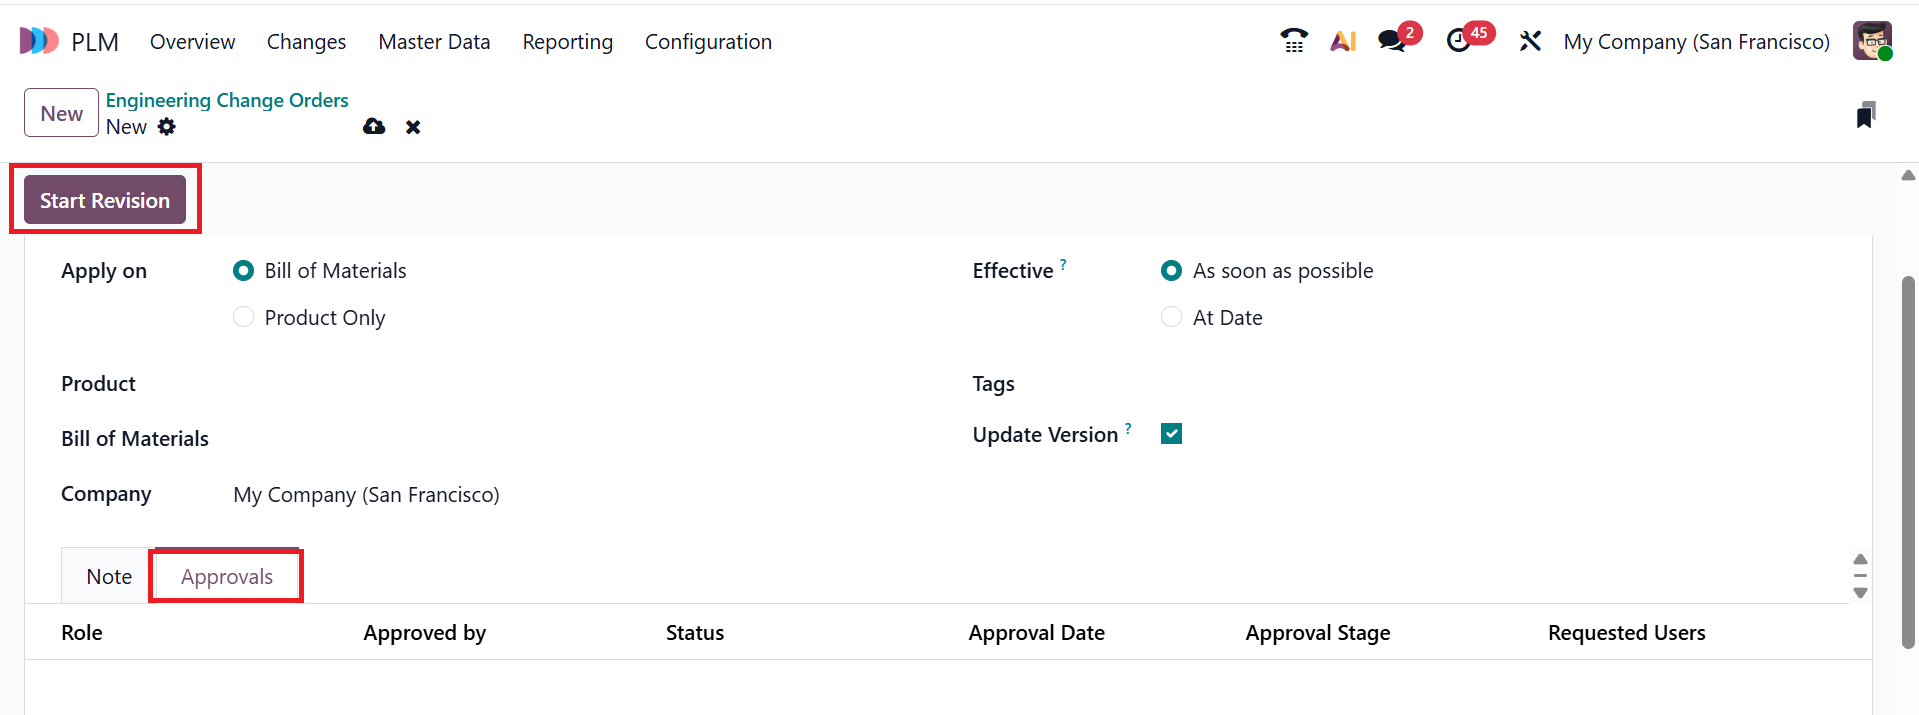
Then, you can see two smart tabs: Document and Revision. The Document smart tab displays the stored files for the BoM, and the Revision smart tab shows a copy of the production BoM and tracks all BoM versions.
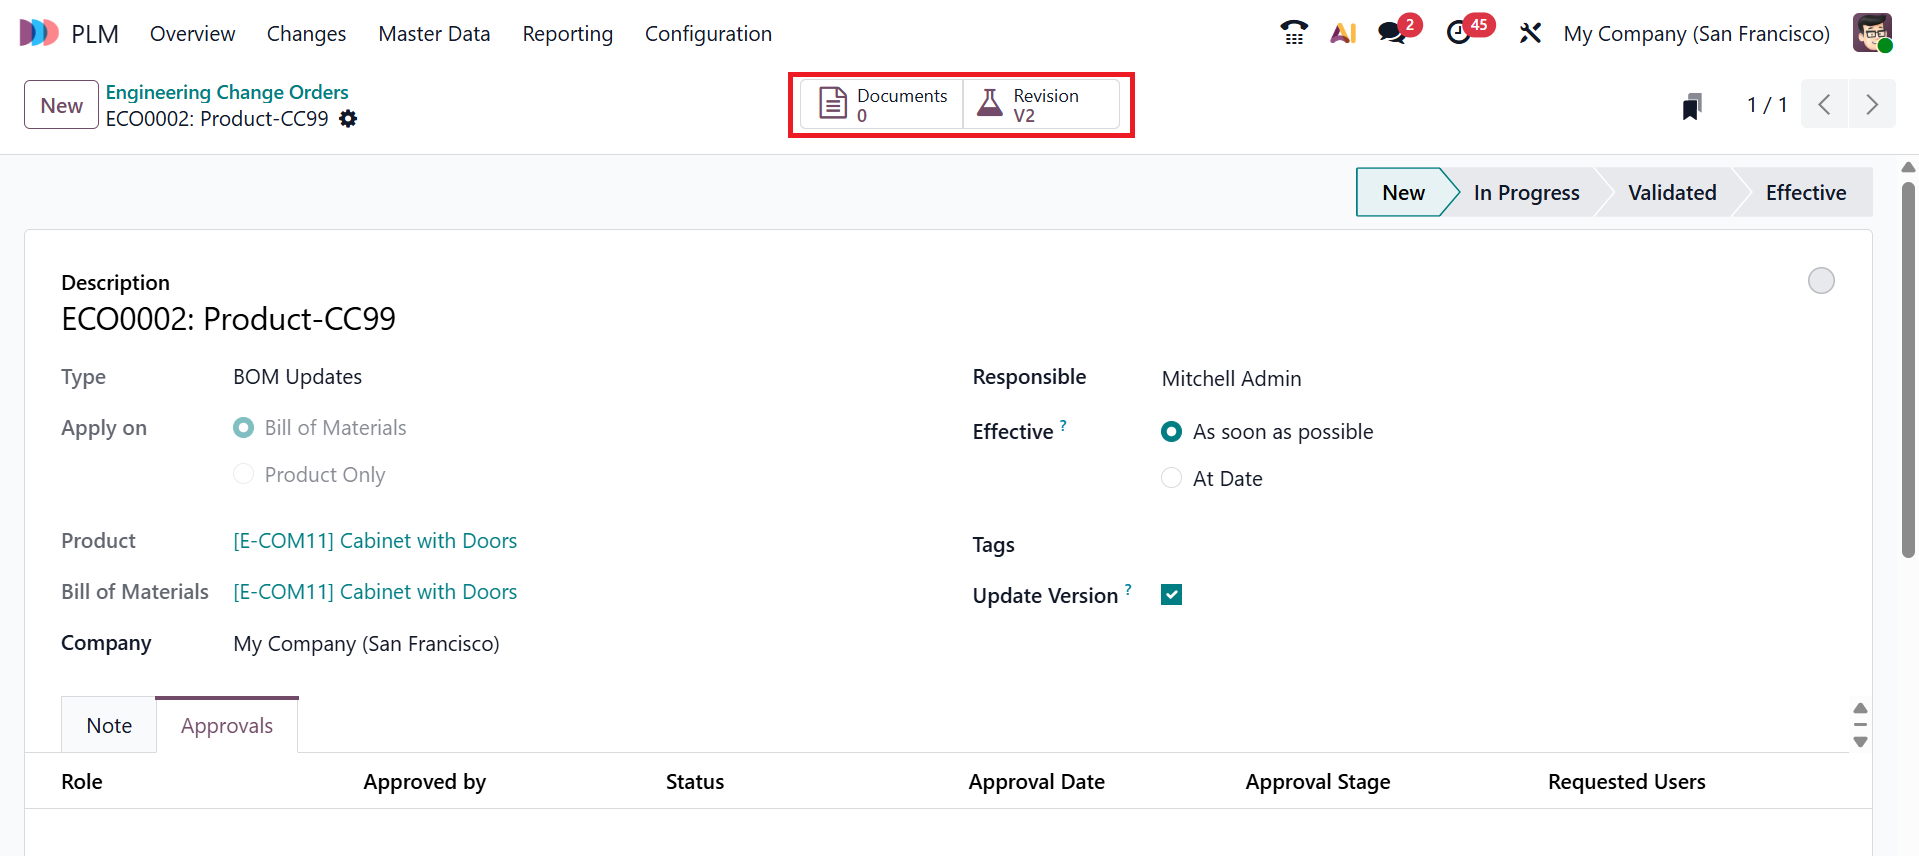
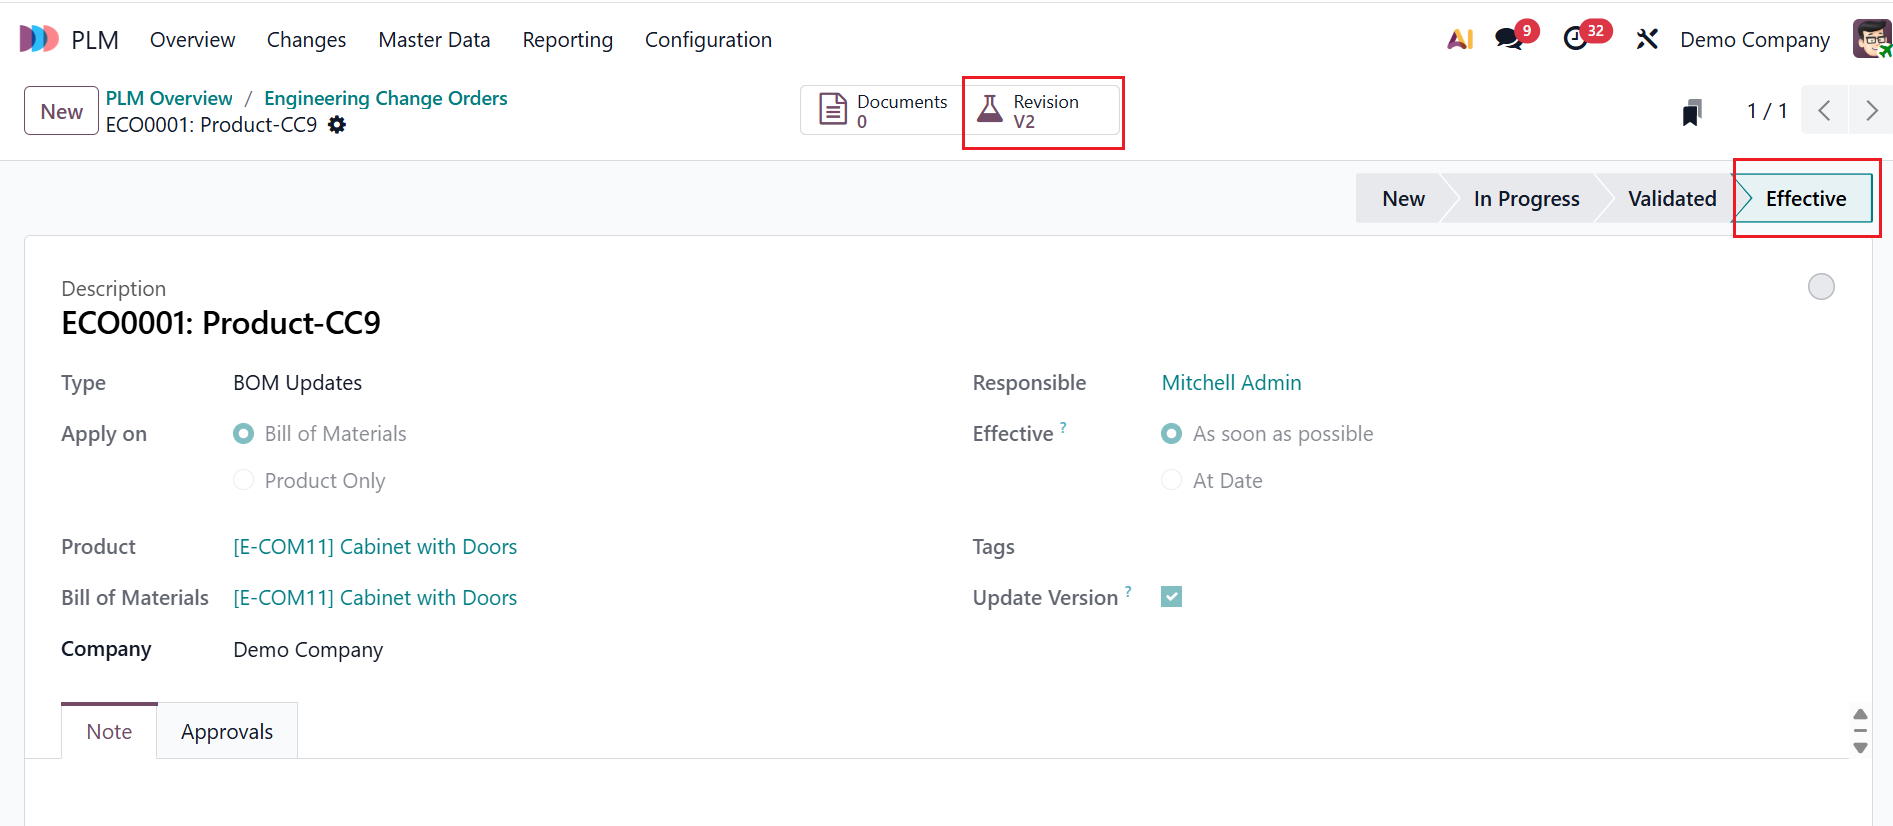
The new ECO will move from the New stage to In Progress, Validated, and Effective stages.
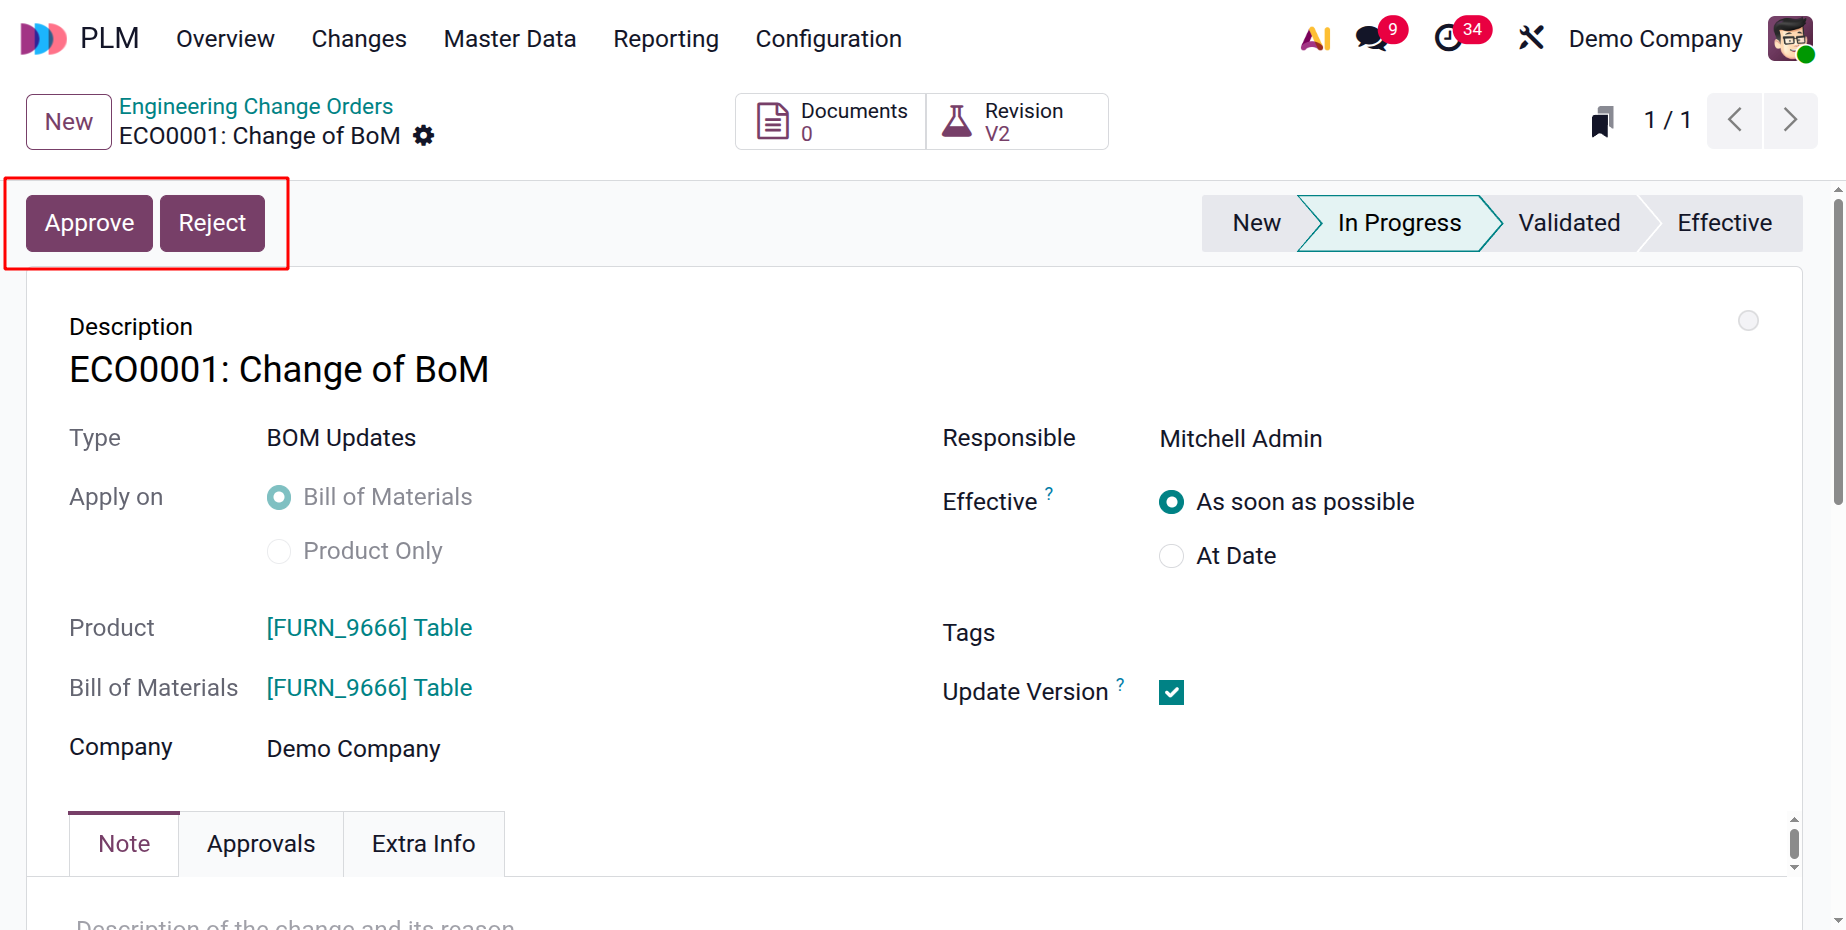
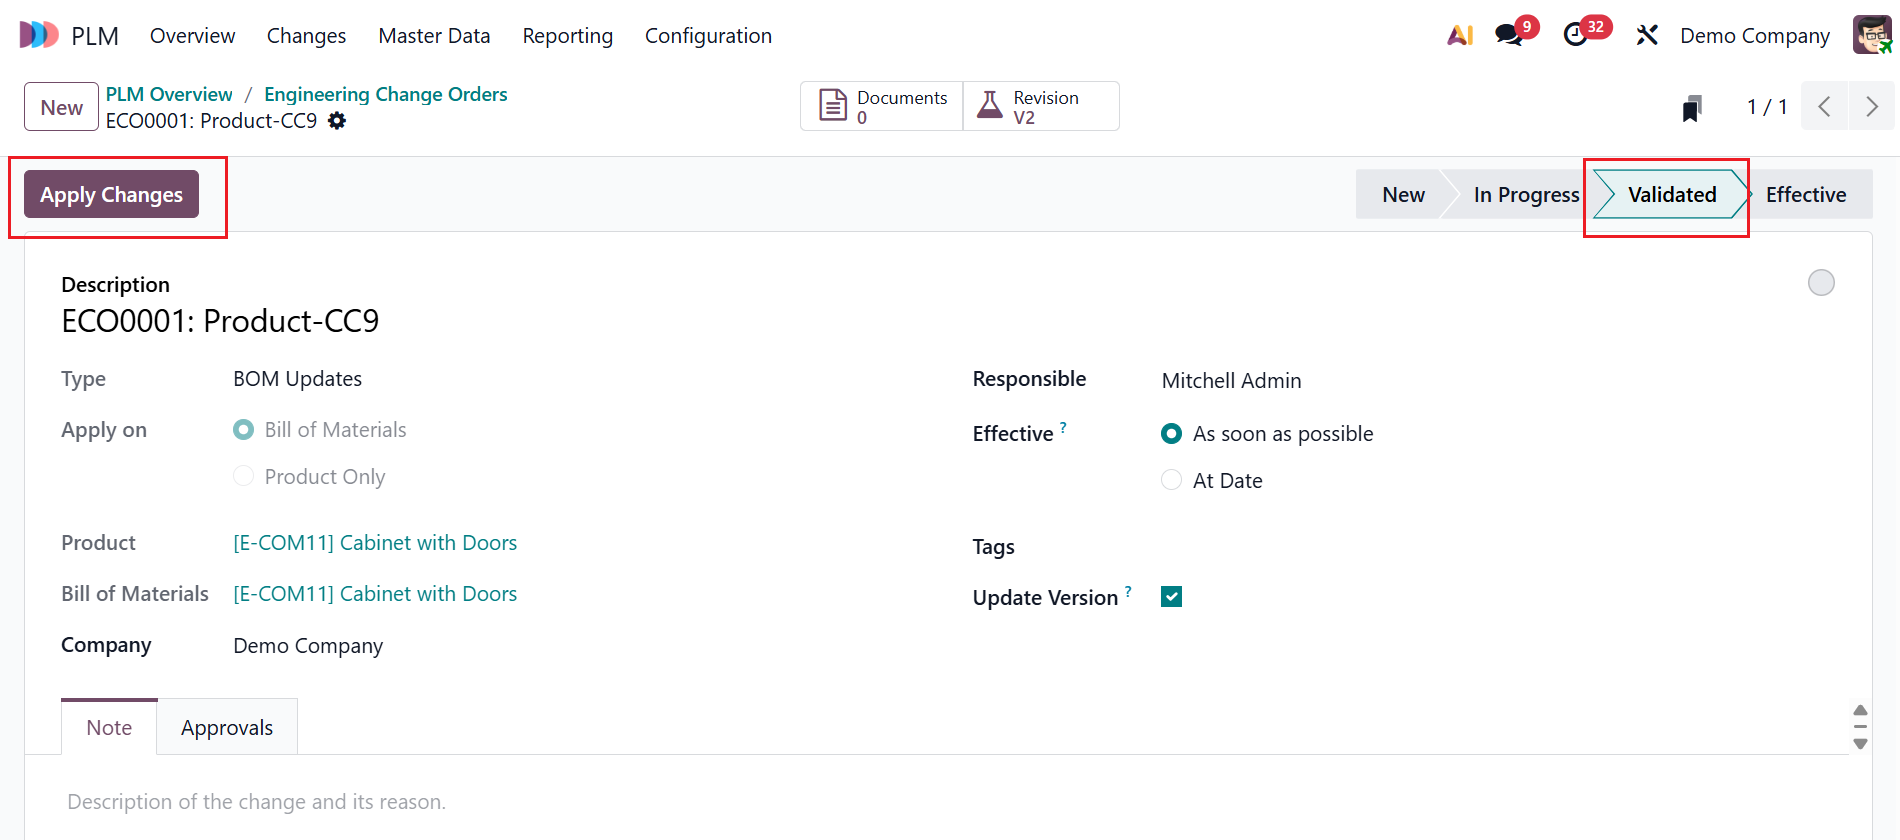
The Approve button confirms the ECO after review. When you click the Approve button, you accept the proposed changes to the Bill of Materials (BoM) or the product, allowing the ECO to move from the In Progress stage to the Validated stage.
The Reject button declines the ECO when the proposed changes are incorrect, incomplete, or not acceptable.
When the ECO moves to the Validated stage, a new option named Apply Changes will appear, as shown below.
Then, it moves to the Effective stage. Click on the Revision smart tab to view all the details of the BoM as shown below:
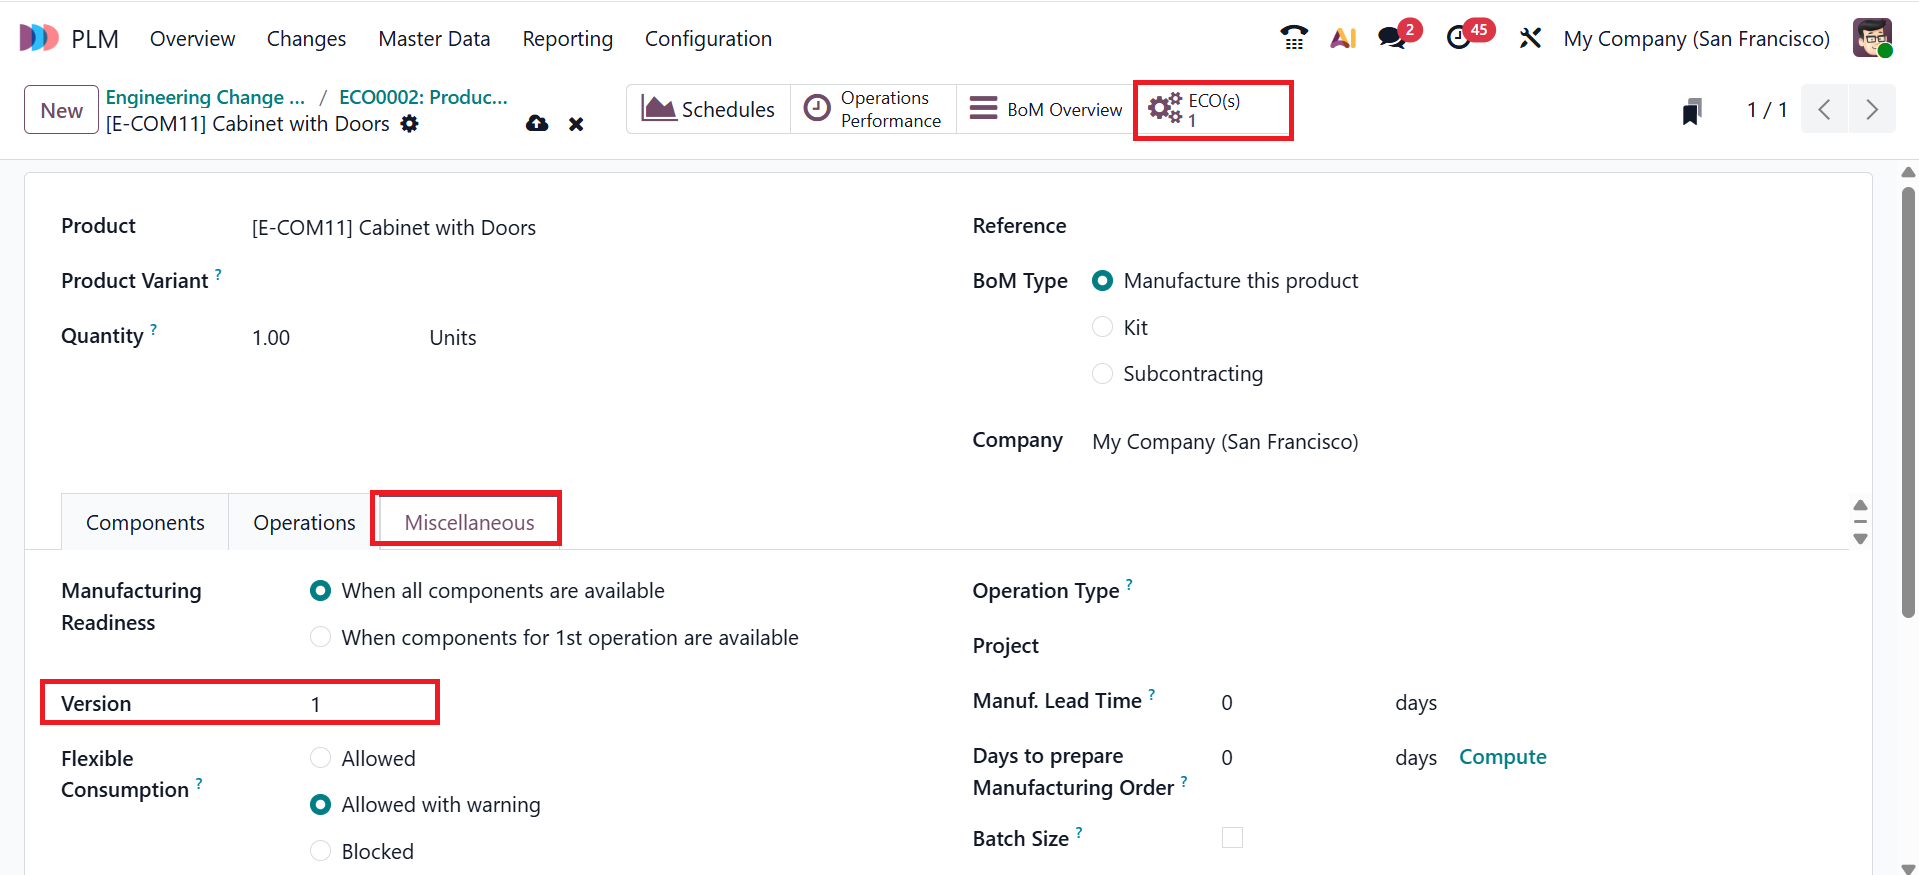
Here, add the required details or modifications for the ECO, then move to the Miscellaneous tab to view the BoM Version.
2.1 Creating ECO Orders for an Existing BOM:
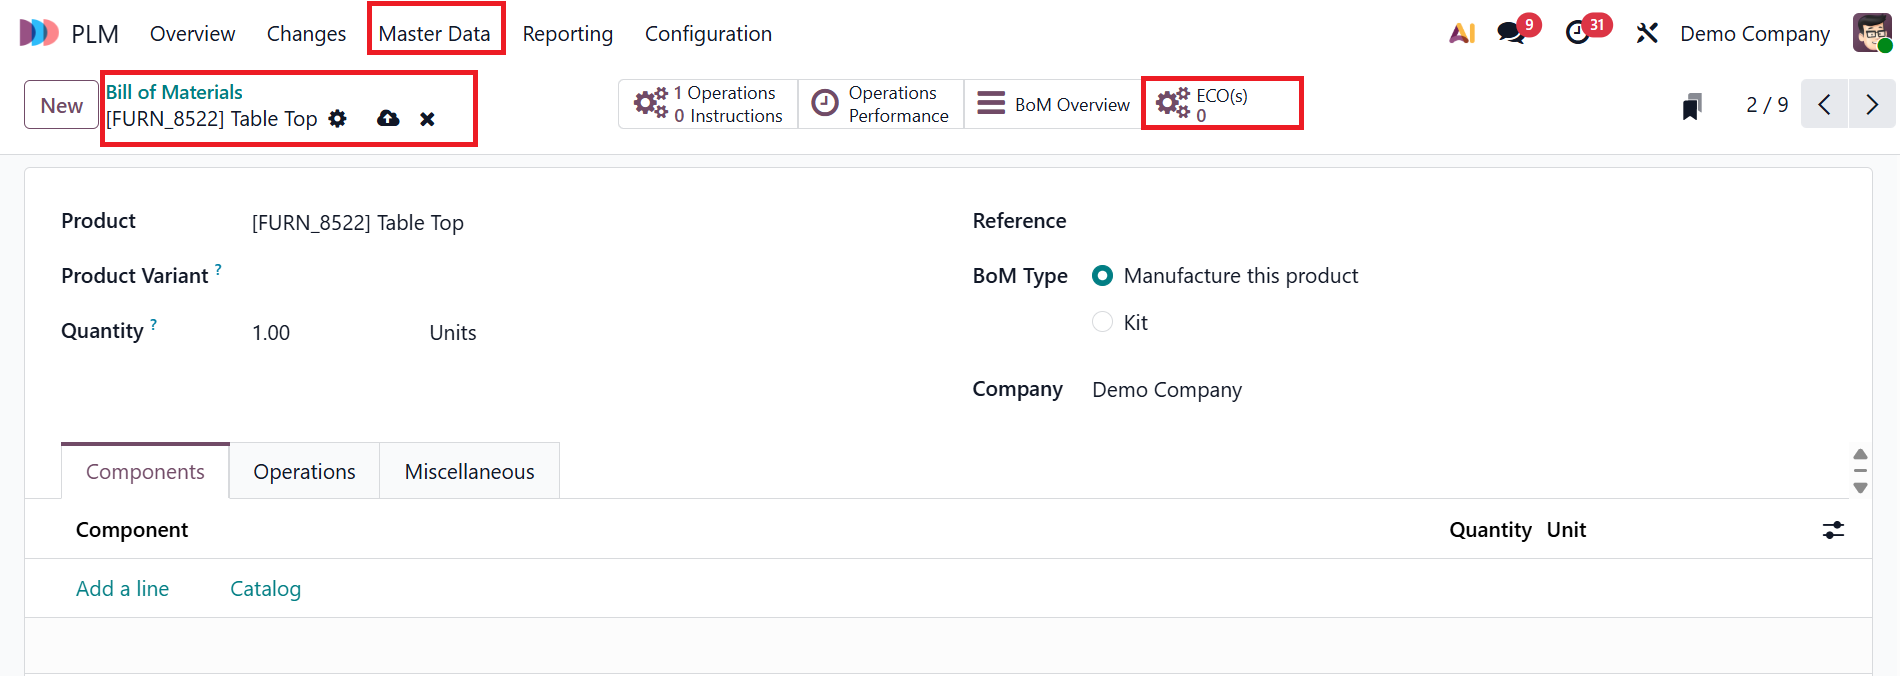
To create an ECO for an existing BoM, navigate to the Masters Data > Bill of Materials in the PLM module.
Then, select a product from the Bill of Materials list. To initiate an ECO for the selected BoM, click on the ECO(s) smart button as shown below:
In the screenshot below, you can see the previous ECOs of the selected product. To create a new ECO, click the New button, as described above.
2.2 Generating ECOs from the Manufacturing Module:
You can also create an ECO from the Manufacturing module. In the Shop Floor module, click on the advanced menu bar in the work order that was previously configured in the Manufacturing module. Then, select the Update Instructions option as shown below:
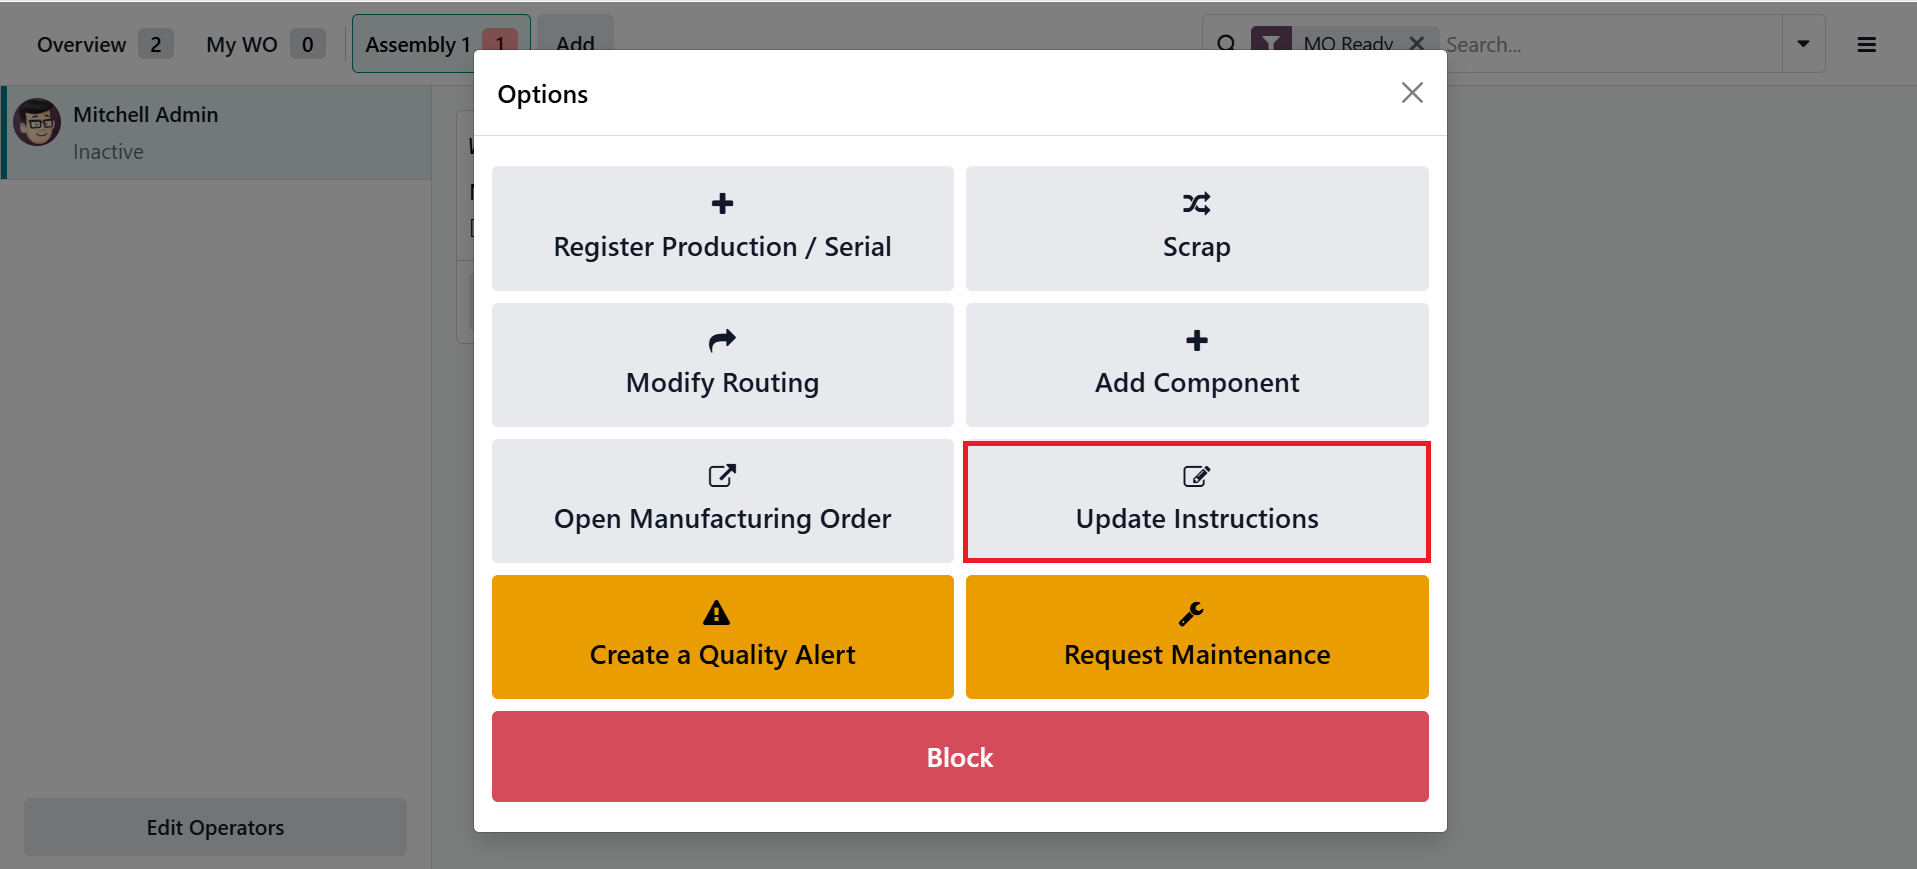
A pop-up window will appear; select the Improvement Suggestion button to proceed.

To introduce new workflow steps to the users, click on the Add a Step button as shown below:
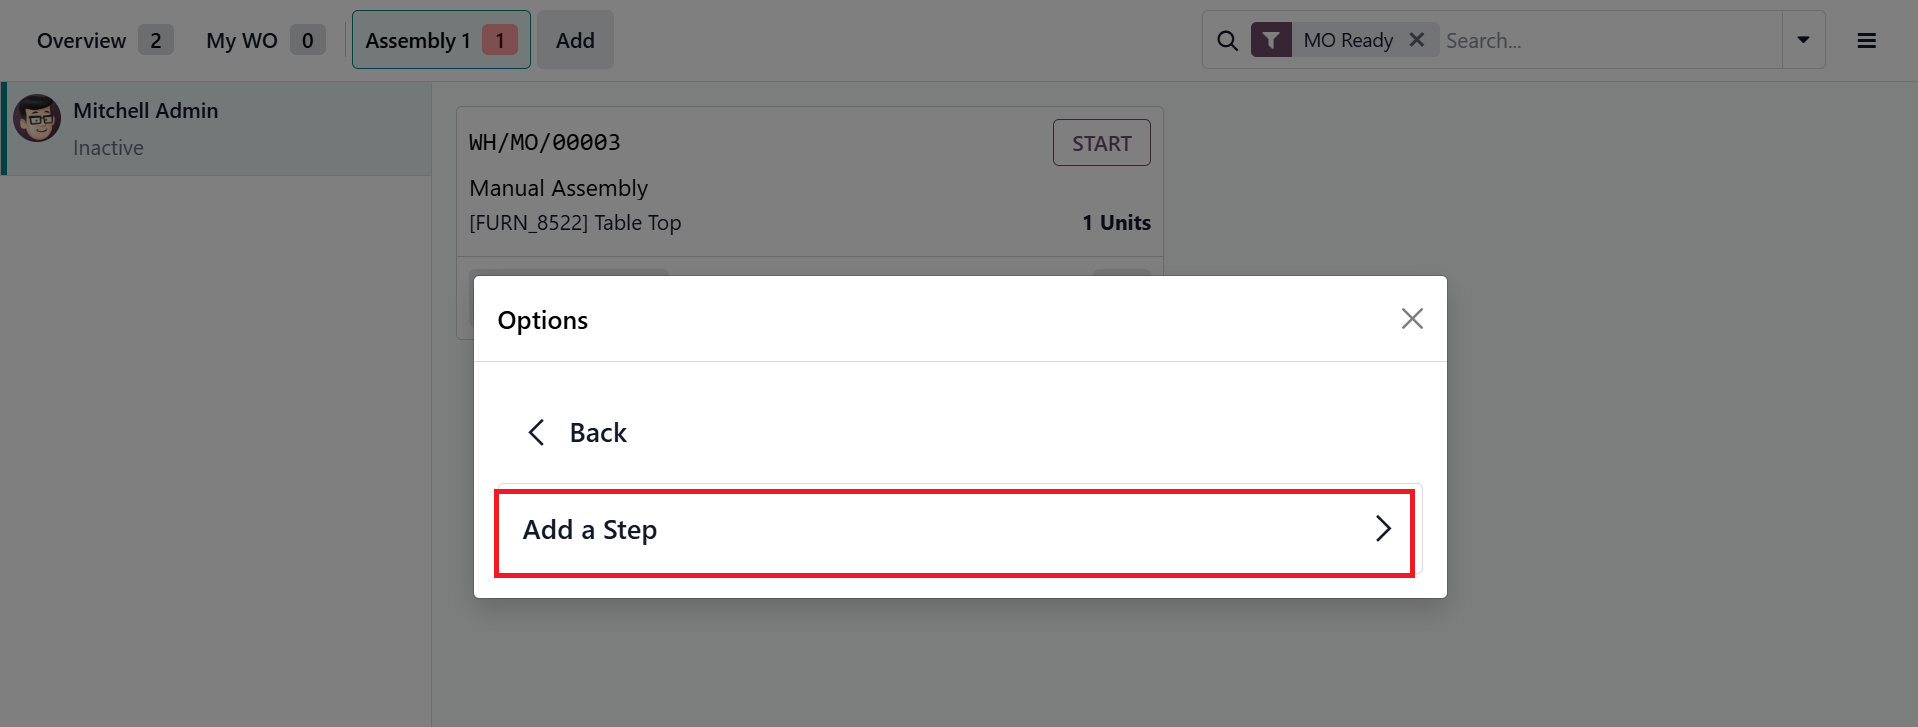
Then, specify the Test Type, Title, Instruction, and Document where you can upload your file. Then, click on the Propose Change button.

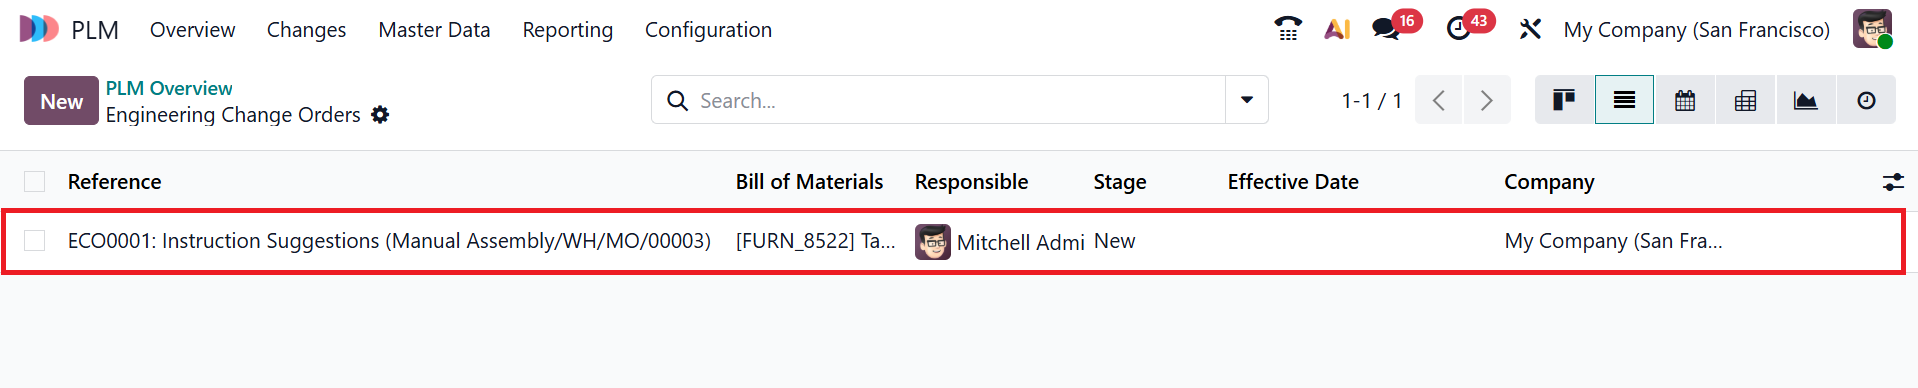
Thus, the PLM module automatically creates a new ECO.
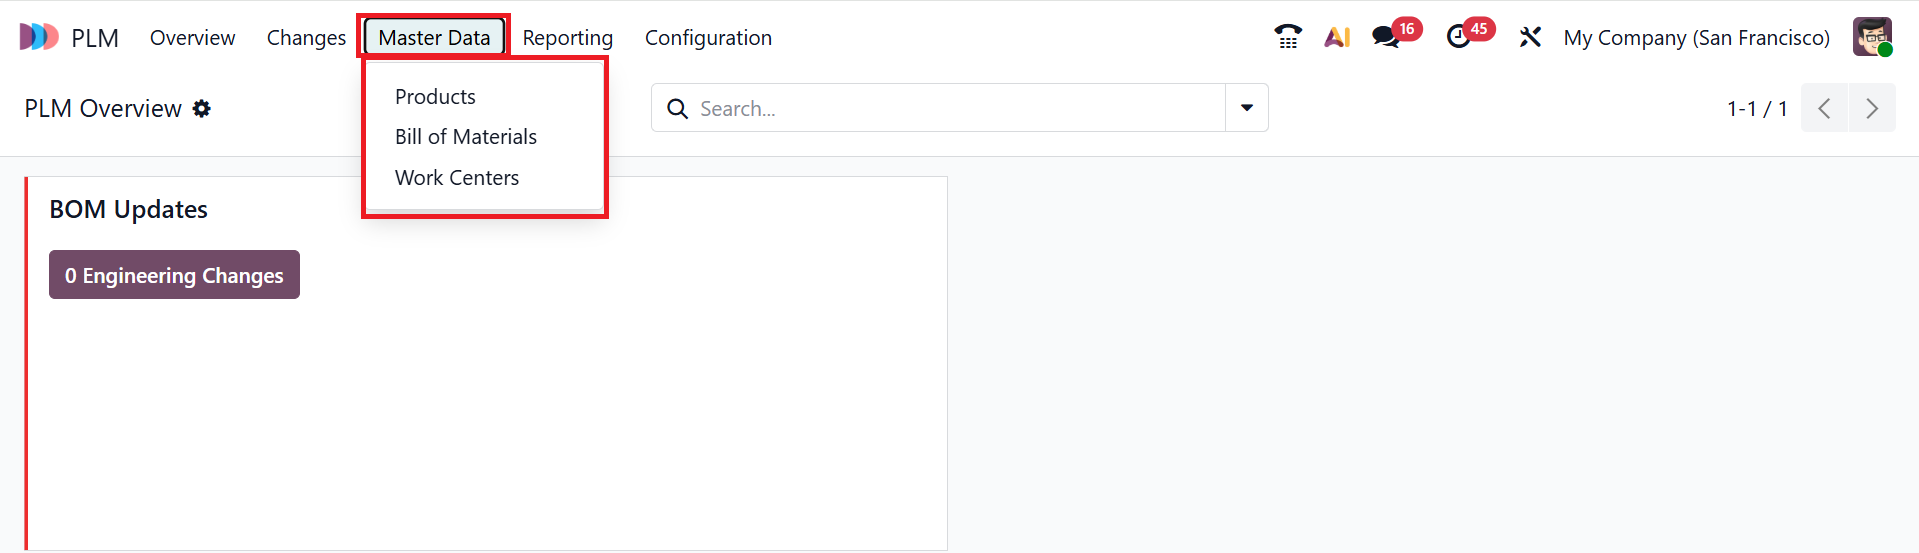
3. Master Data:
The Master Data menu in Odoo 19 PLM module serves as the core hub where the engineering team manages structured data to ensure accurate product definitions throughout production. It includes three options: Products, Bill of Materials, and Work Centers.
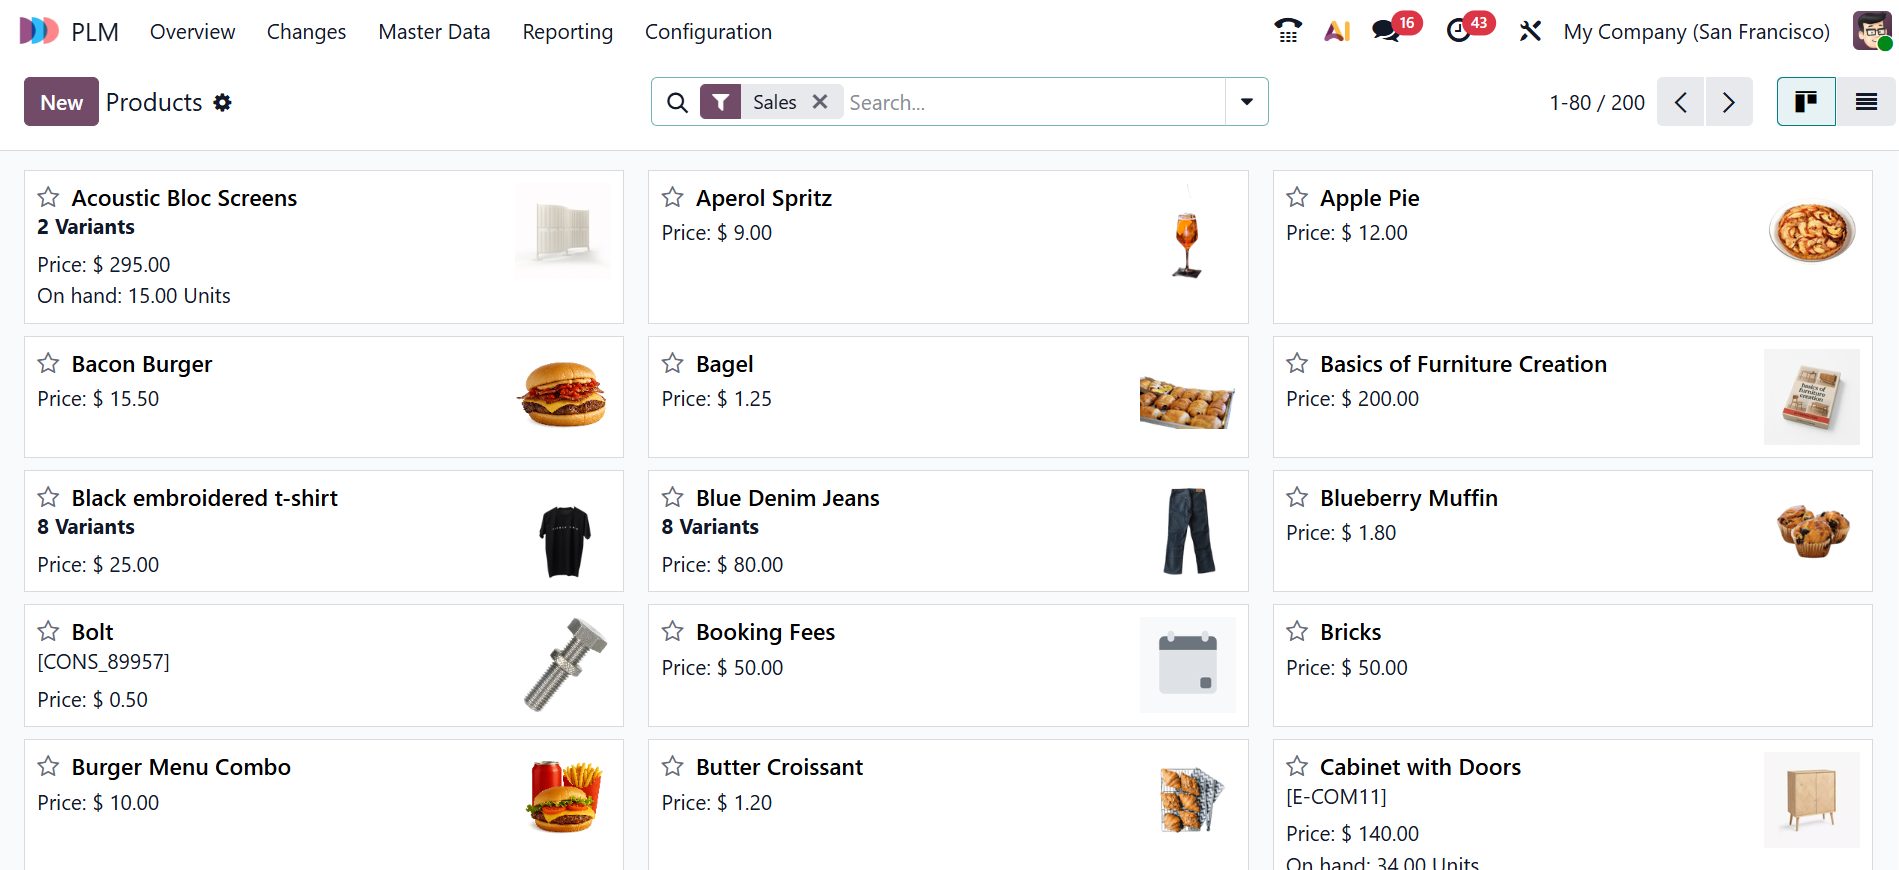
3.1 Products:
The Products option in the Master Data menu of the Odoo 19 PLM module stores all product details linked to engineering and manufacturing. It helps teams manage product variants, BoMs, and related engineering documents. You can view the Products option in either Kanban or List views.
Click the New button to create a new product. Then, you can add details of the product as illustrated below:
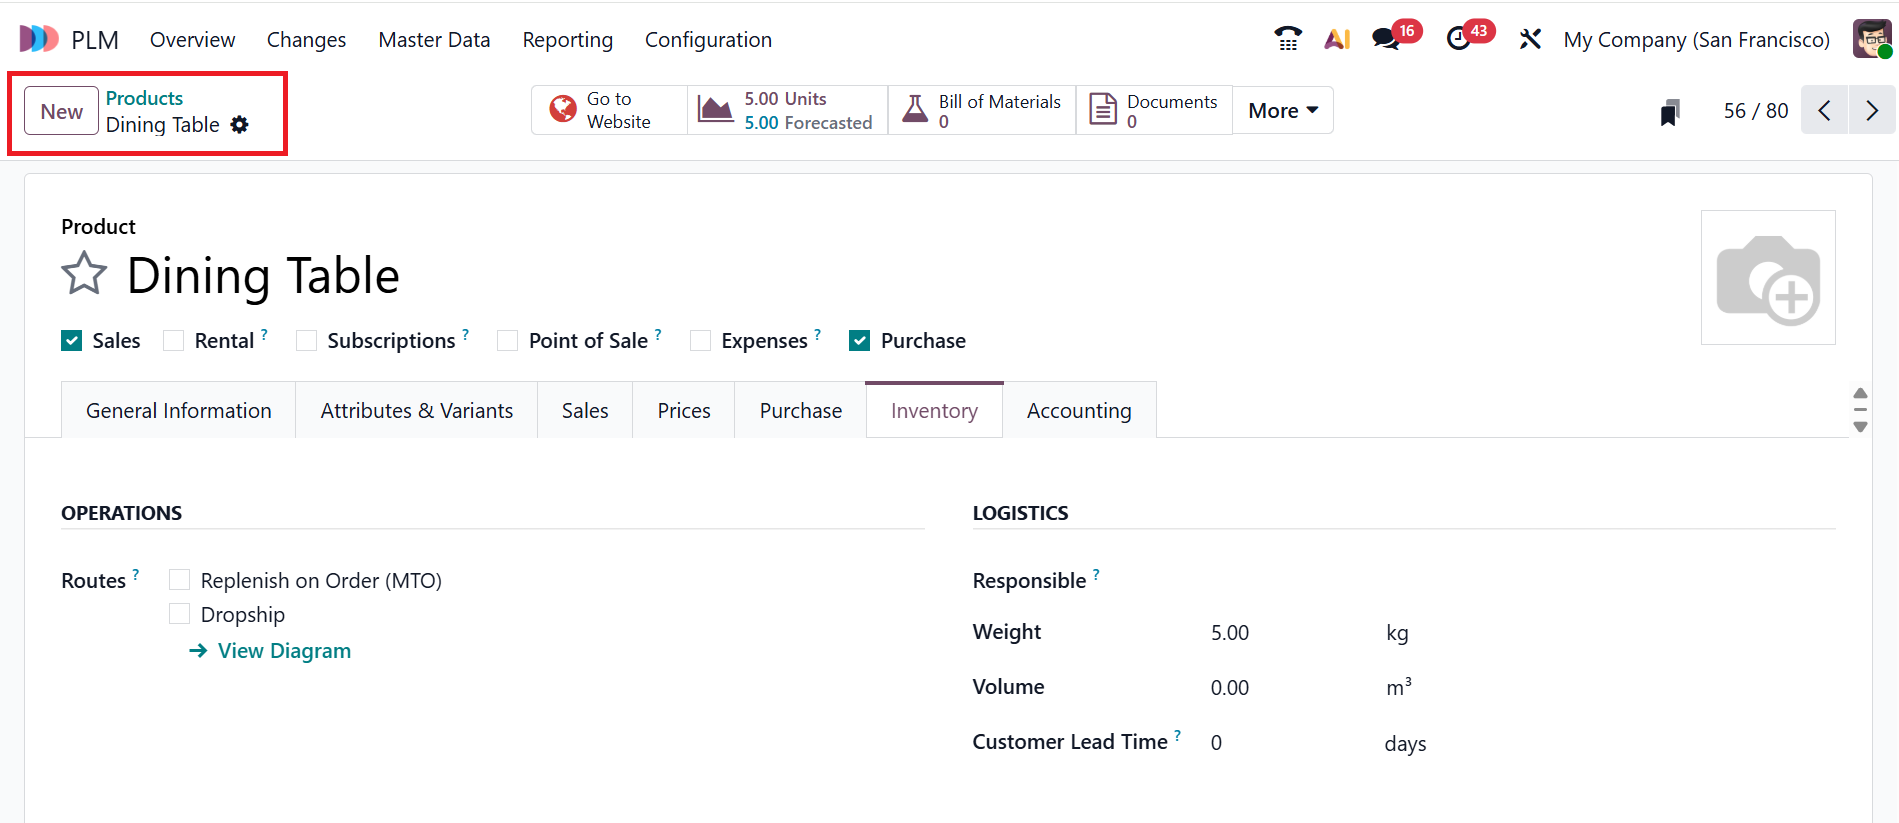
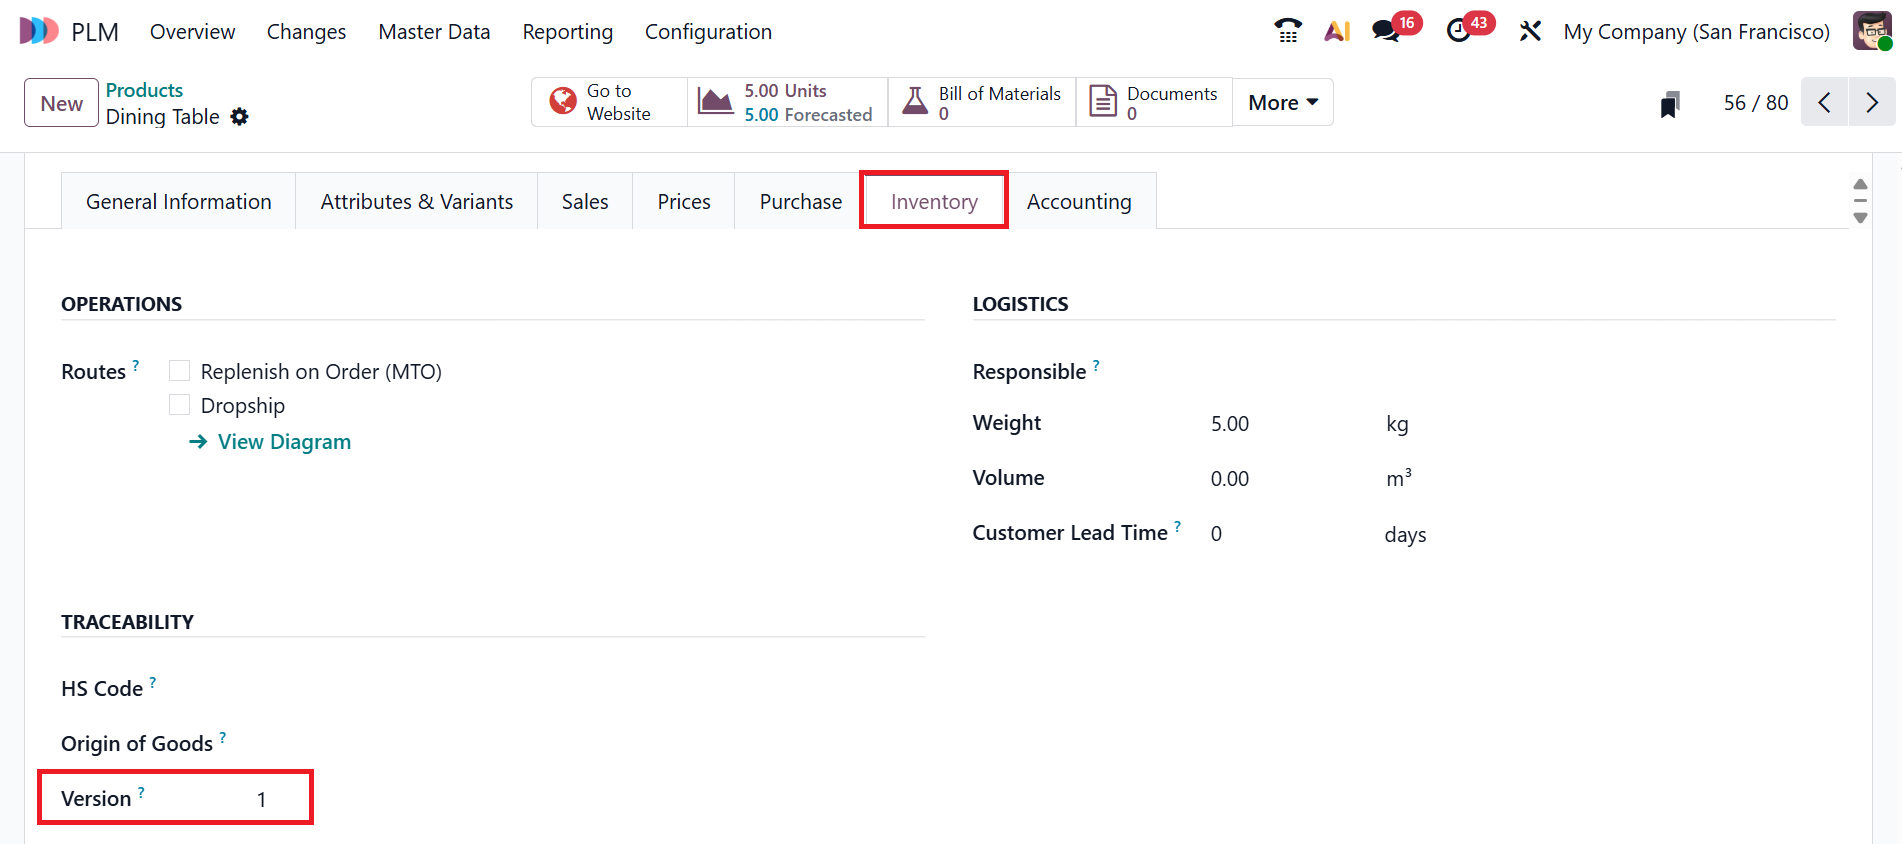
Under the Inventory tab, you can view the product version in the Versions field. When a new ECO is created for a product, Odoo automatically updates the product version. Here, you can see the product version as 1, as the particular product does not have any ECO products.
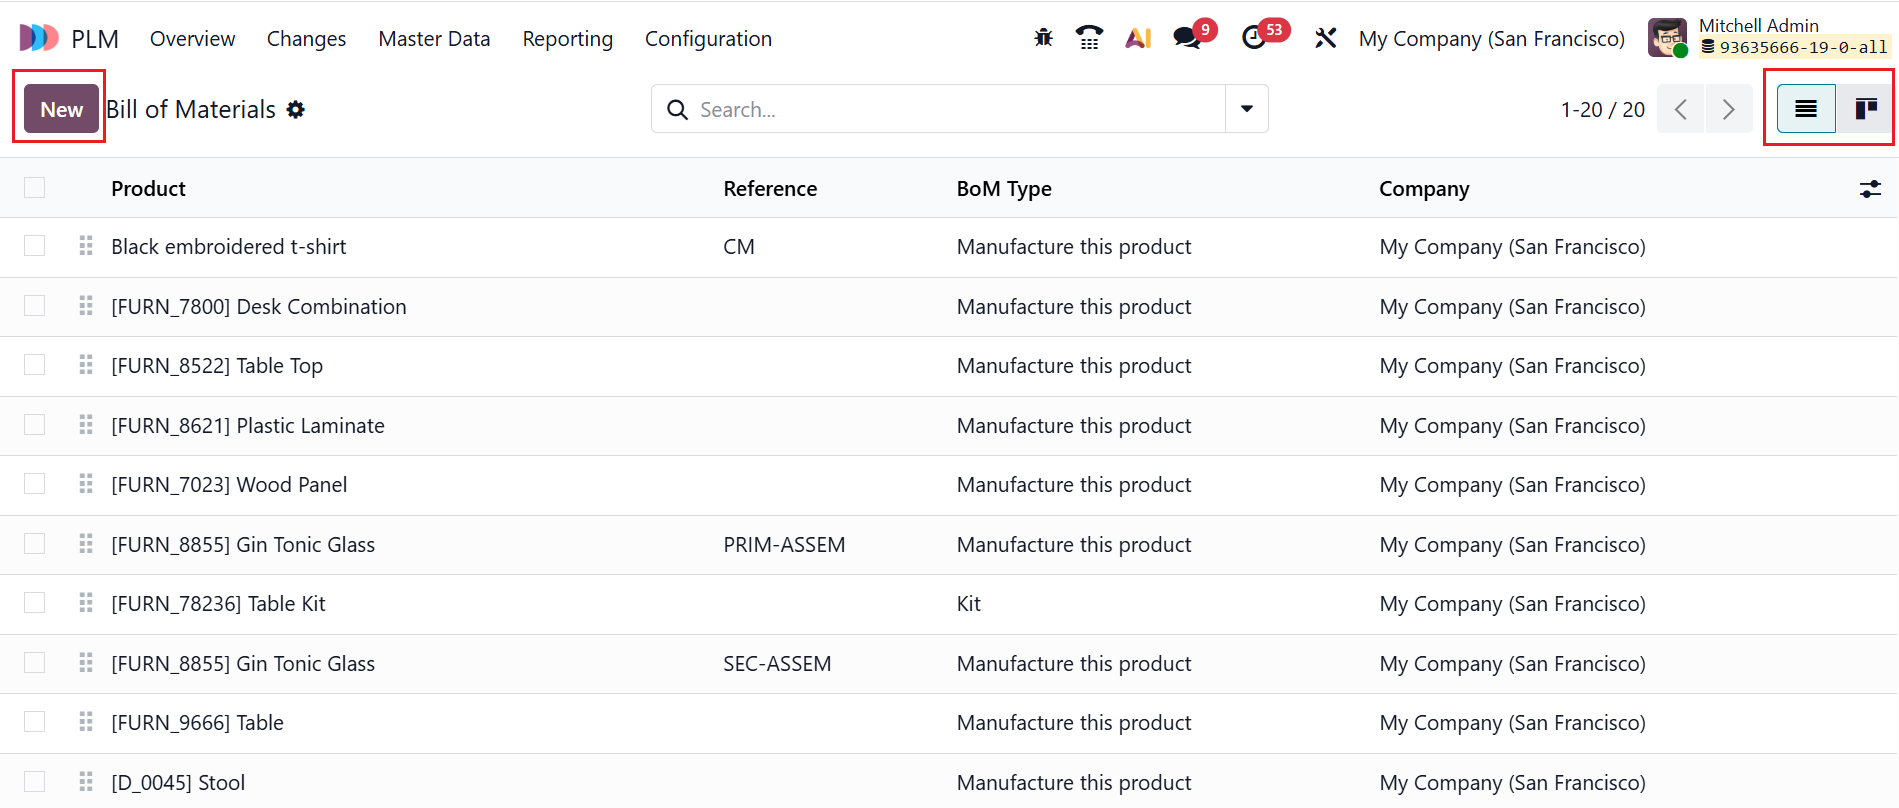
3.2 Bill of Materials:
In Odoo 19 PLM, the Bill of Materials (BoM) outlines all the products, materials, and operations required to manufacture a product. It can be viewed in both Kanban and List views. Here, you can view the details of the BoM as Product, Reference, BoM Type, and Company.
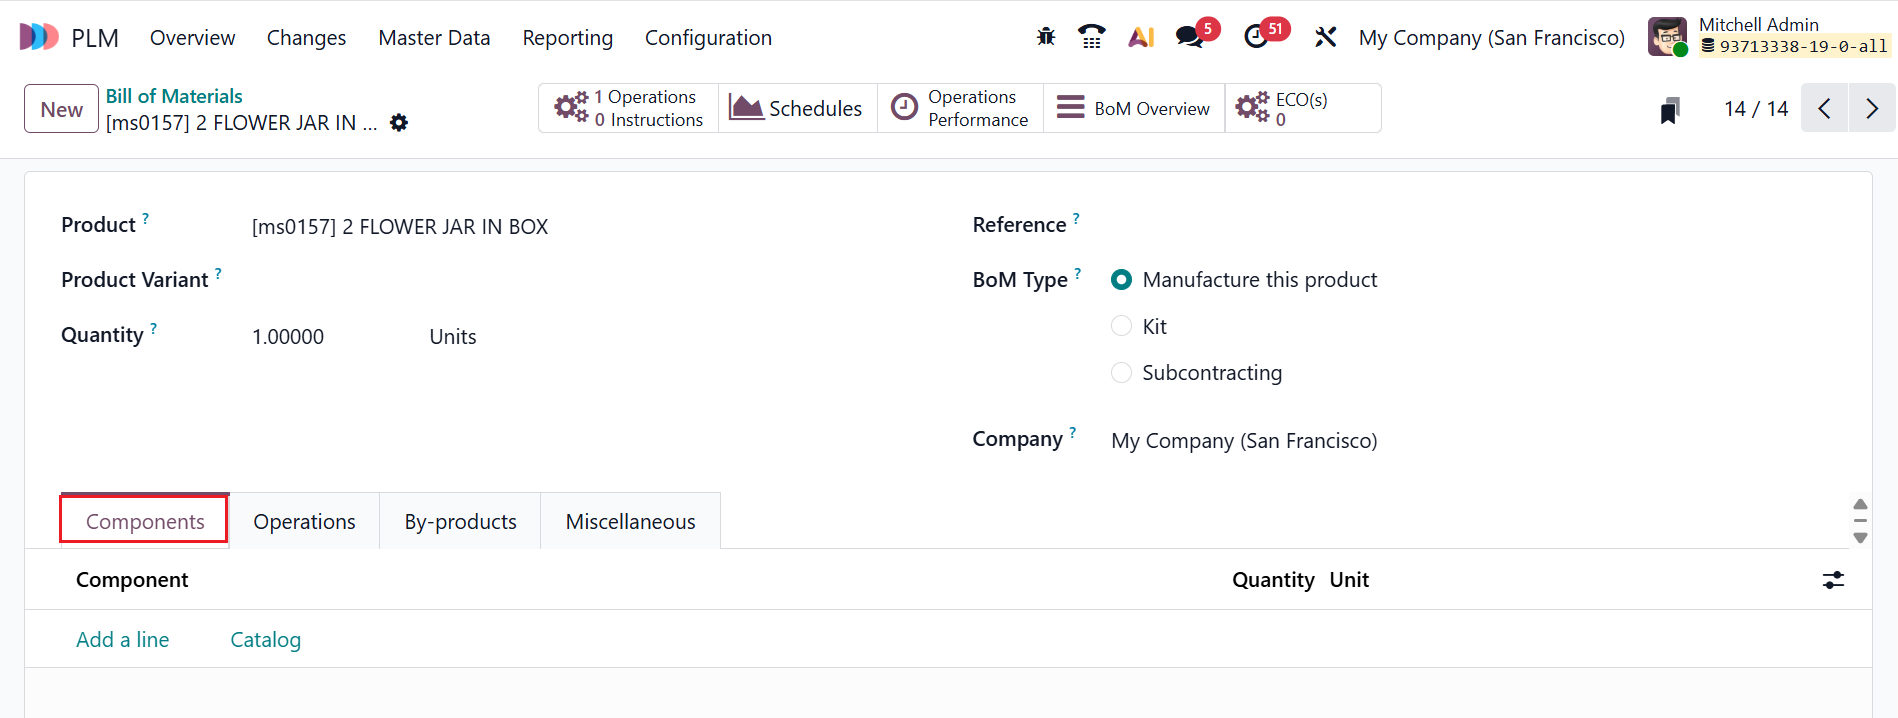
Click the New button to create a new BoM. Then add the BoM details, including Product, Product Variant, Quantity, Reference, and Company. In this section, you can choose the BoM Type: Manufacture the product, Kit, or Subcontracting.
- Manufacture the Product: The item is created in-house through internal production processes.
- Kit: The product is sold to customers in unassembled groups.
- Subcontracting: An external vendor performs the manufacturing of the product.
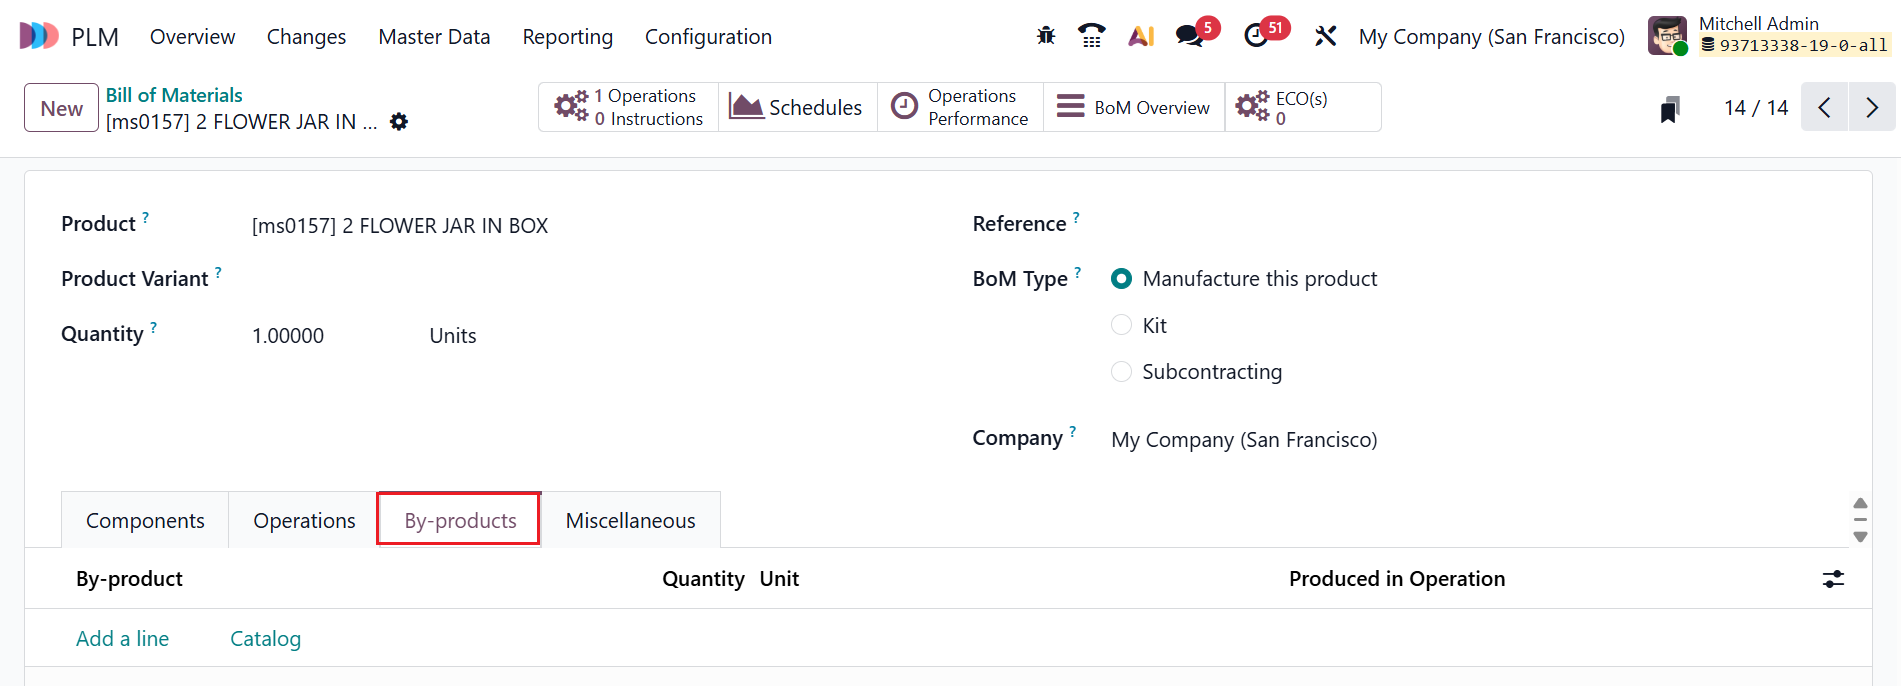
The BoM contains four tabs: Components, Operations, By-products, and Miscellaneous.
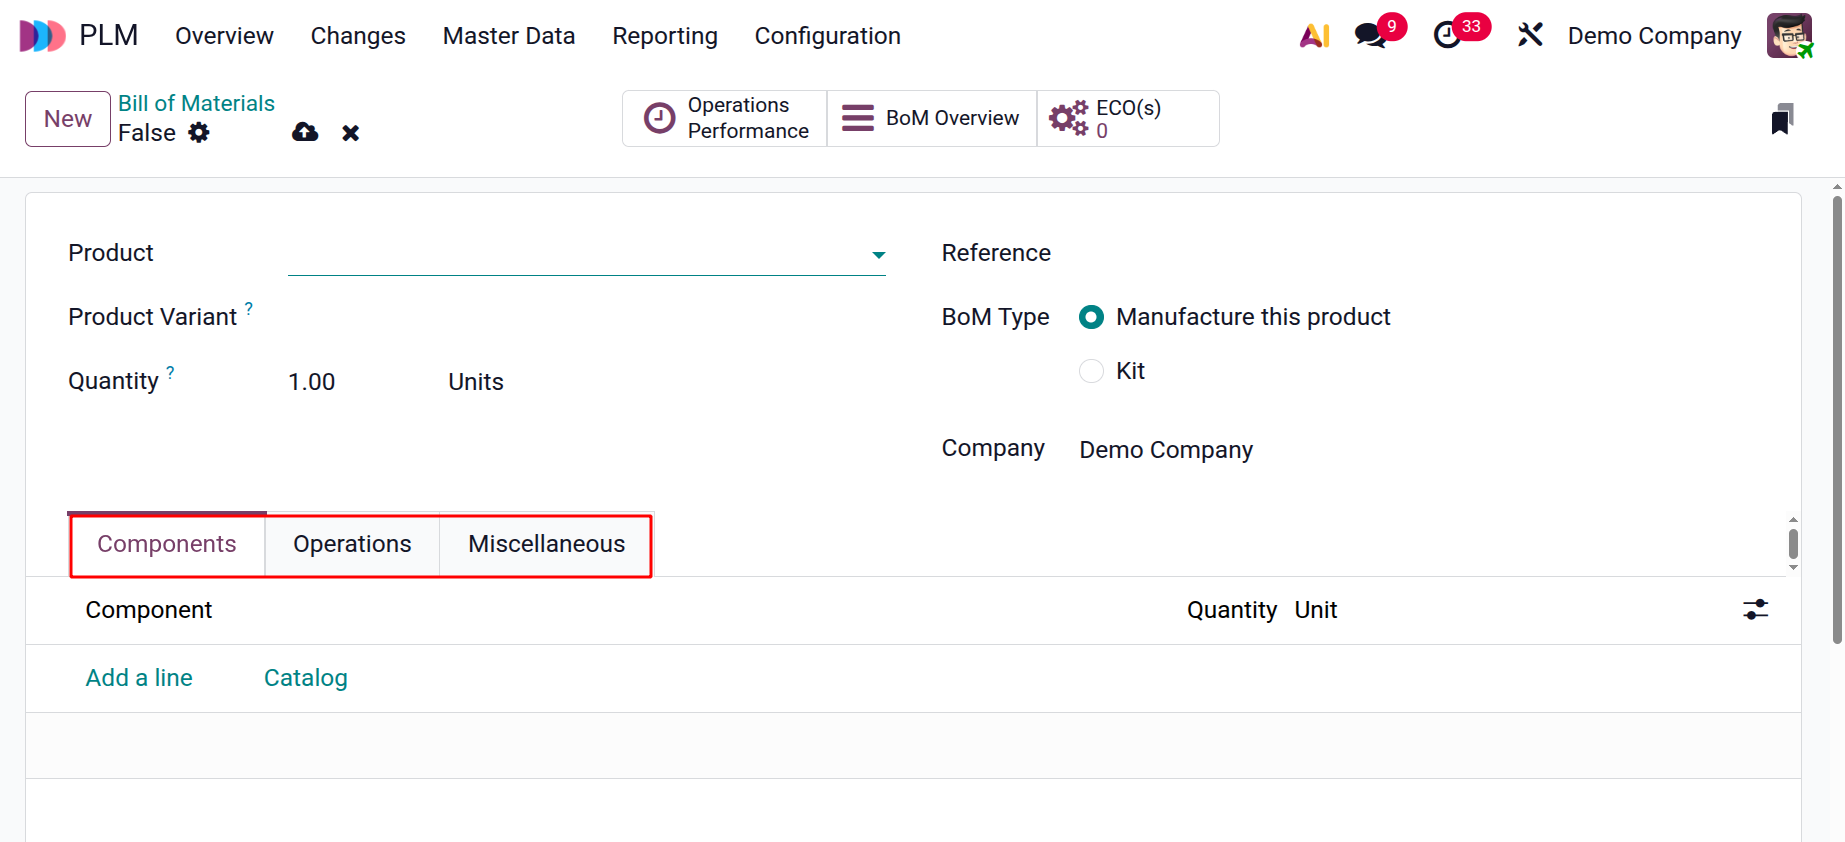
To add a component required for manufacturing the product, go to the Components tab and click Add a line. You can also click on the Catalog button to select a component.
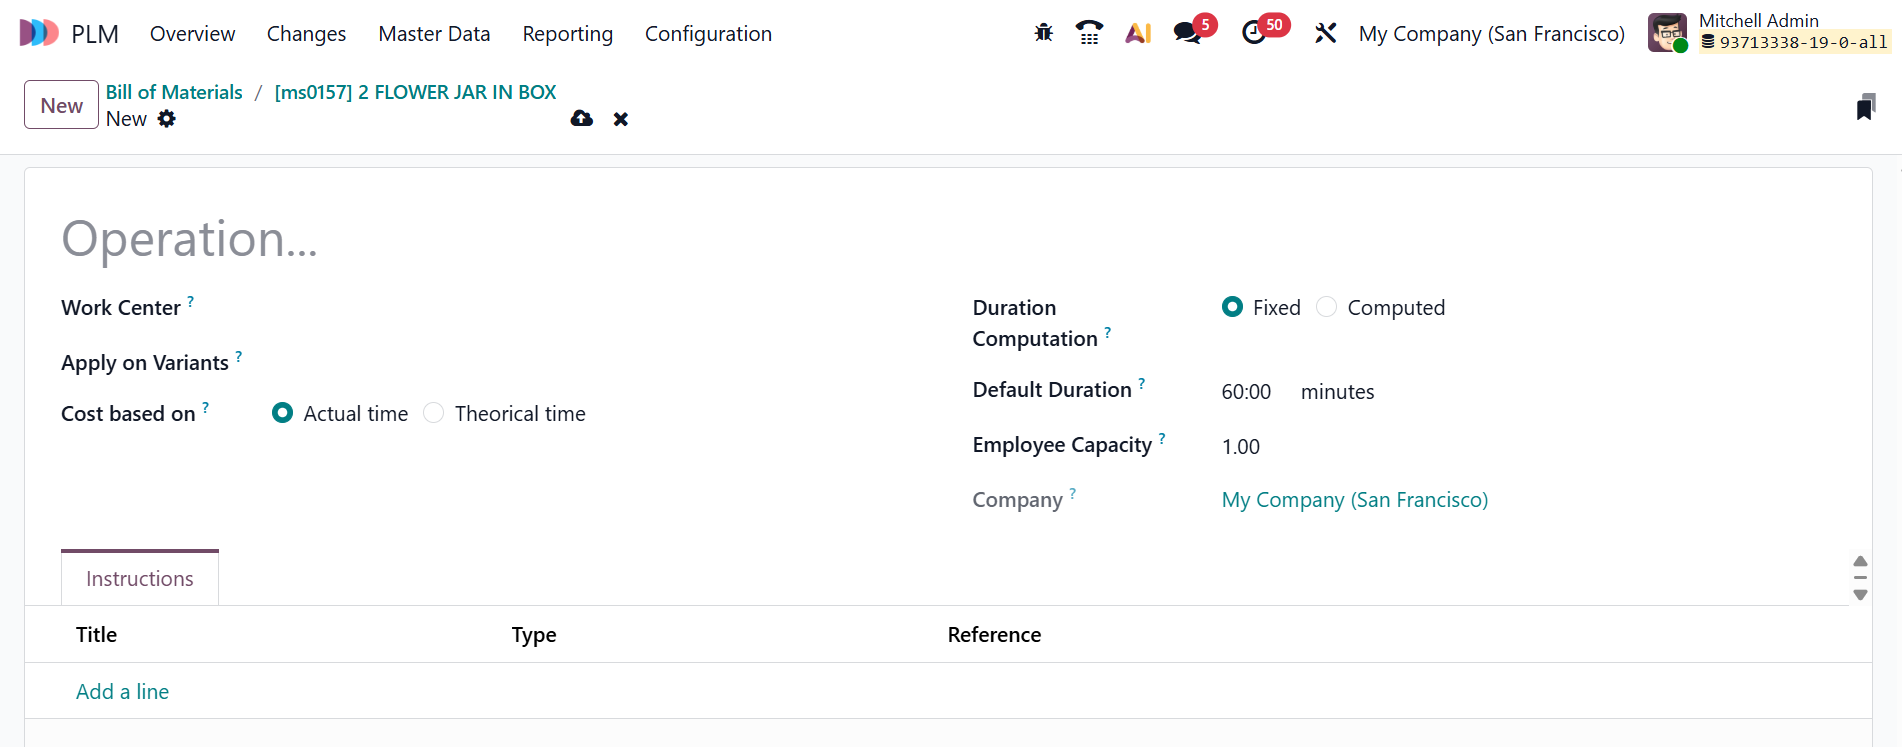
Click on the Add Operation button under the Operations tab. A new pop-up window will appear, as illustrated below. There, you can add a name for the Operation and select a Work Centre from the list. In the Apply on Variants field, add the BoM product variant if needed. Select the Cost based on field as either Actual Time (cost calculated based on tracked time and real employee time) or Theoretical Time (cost calculated based on estimated time and cost). Select the Duration Computation field as either Fixed manually or Computed by Odoo. The Default Duration is automatically displayed. The Employee Capacity field specifies the number of employees required for the operation. Select the Company where the BoM is available.
When you click on the Add a line button under the Instructions tab, a new pop-up window appears as shown below. There, add the details such as Title, Company, Type, and Team. Under the Instructions tab, you can describe the quality check to do. Under the Worksheet tab, you can upload the file. Under the Notes tab, add a short note to describe the reason for the quality check.

Under the By-Product tab, click on the Add a line button to add a residual product created during production, as shown below:
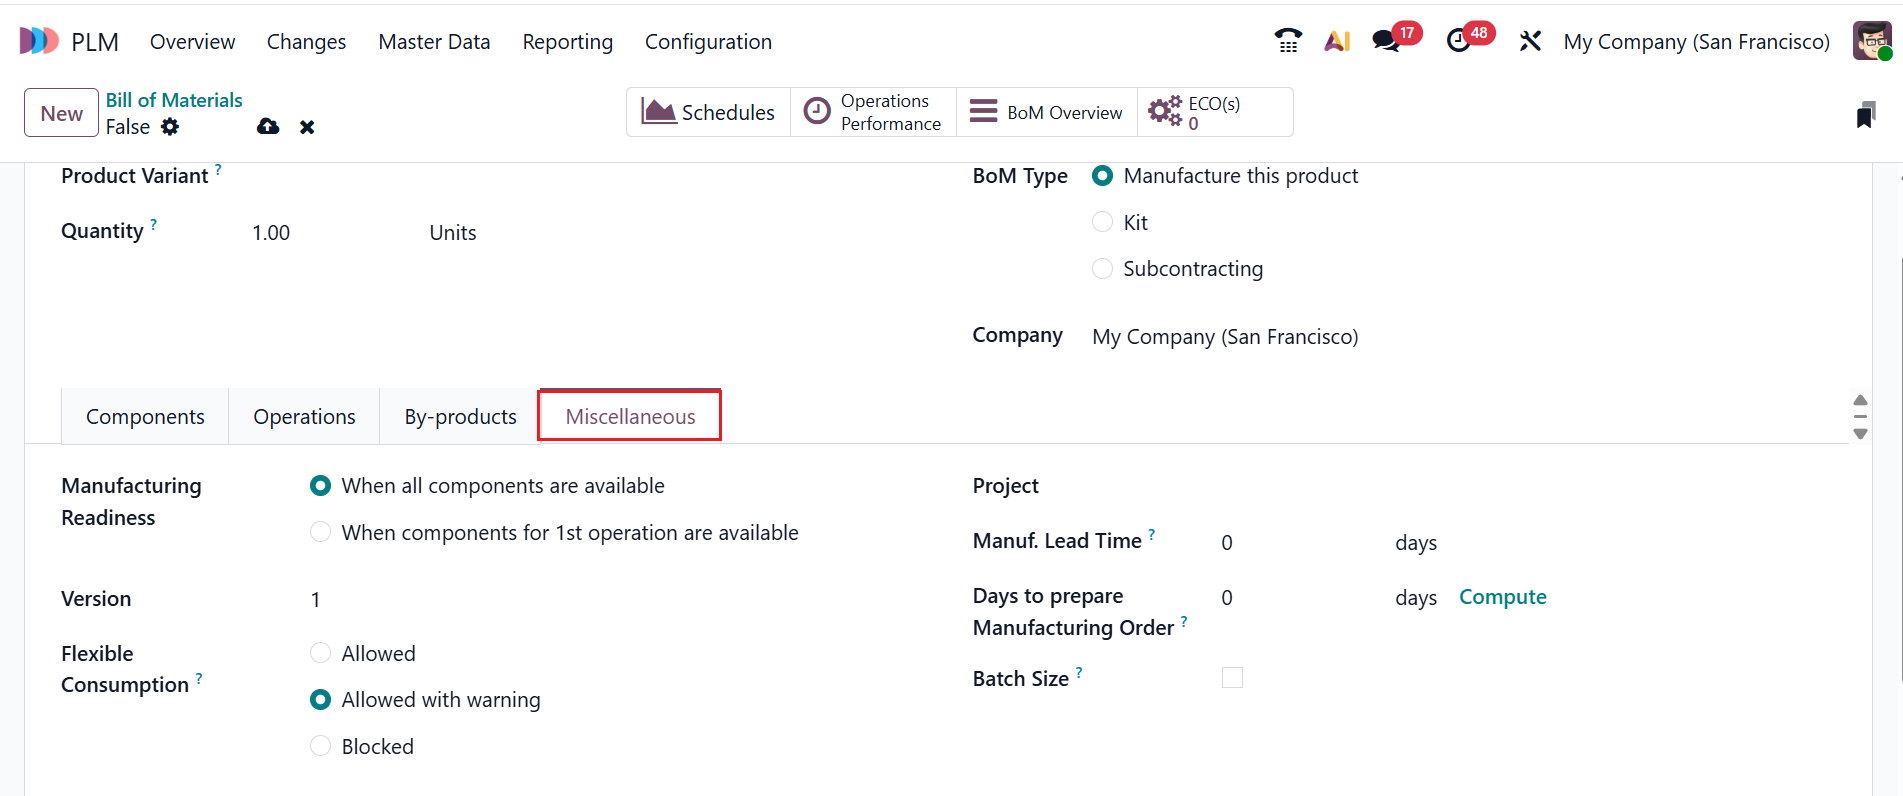
Under the Miscellaneous tab, you can customize the procurement, calculate costs, and define how components are consumed in the BoM. In the Manufacturing Readiness field, select either When all components are available (production started when all components are ready) or When components for 1st operation are available (started production when the first operation components are in stock). The Version field shows the current BoM version for managing changes. Select the Flexible Consumption field as either Allowed (allowed for all manufacturing users), Allowed with Warning (allowed to all manufacturing users with a summary of consumption difference when closing an order), or Blocked (only the manager can close the order) to use more or less components than the quantity defined on the BoM.
In the Project field, you can add a manufacturing operation type for the products you produce. In the Manufacturing Lead Time field, you can add the number of days to manufacture the product. The Days to prepare Manufacturing Order field allows you to specify how many days in advance the manufacturing order should be created and processed. Enable the Batch Size field to add the quantity produced per manufacturing batch for the BoM.
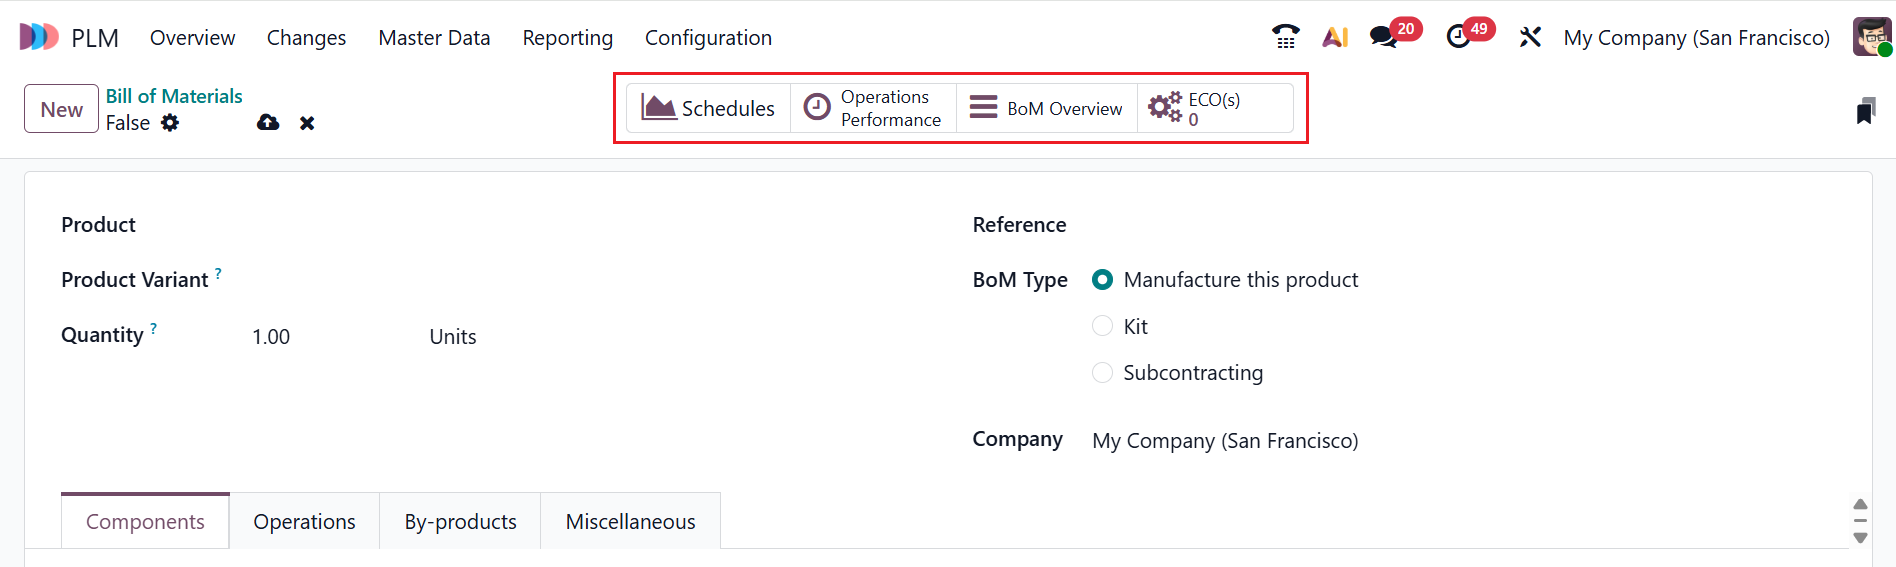
Here, you can view four smart tabs: Schedules, Operation Performance, BoM Overview, and ECO(s). The Schedules smart tab displays scheduling details for the product. The Operation Performance smart tab shows performance metrics of production operations. The BoM Overview smart tab displays a complete structural view of the BoM. The ECO(s) smart tab displays the Engineering Change Orders associated with the product.
3.3 Work Centers:
In the Odoo 19 PLM module, Work Centers represent the machines or production areas where engineering-related manufacturing operations take place.
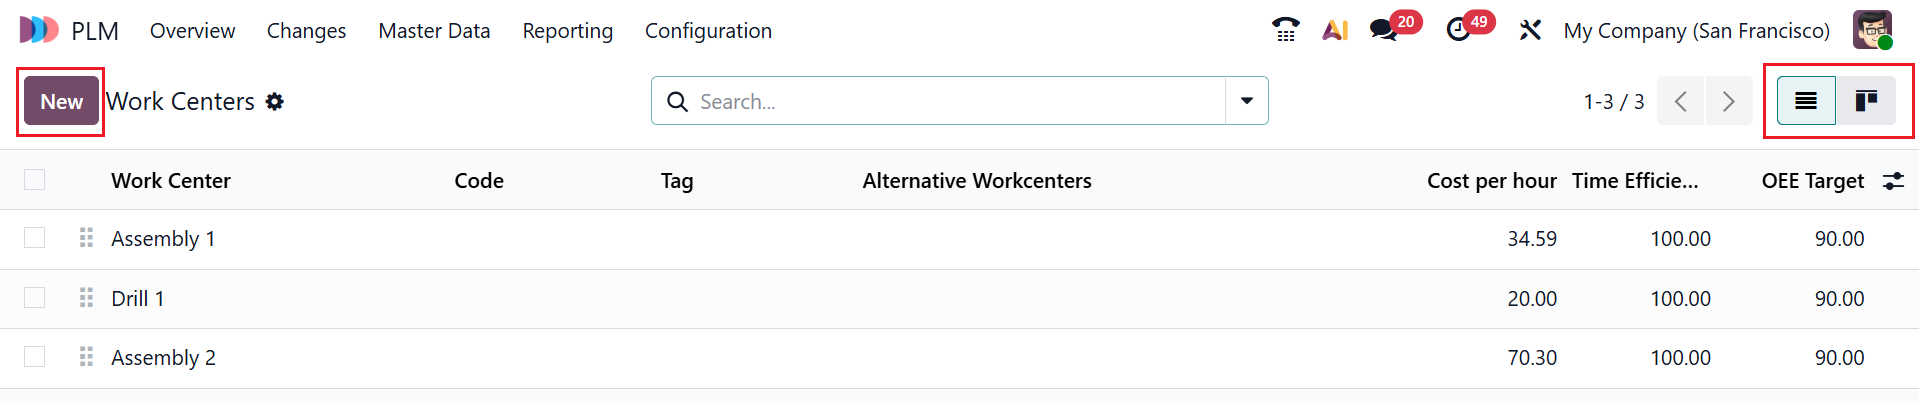
Here, you can view the work center details, including Work Center, Code, Tag, Alternative Workcenters, Cost per hour, Time Efficiency, and OEE Target. You can also view the work centers in Kanban and List views. Click the New button to create a new work center.
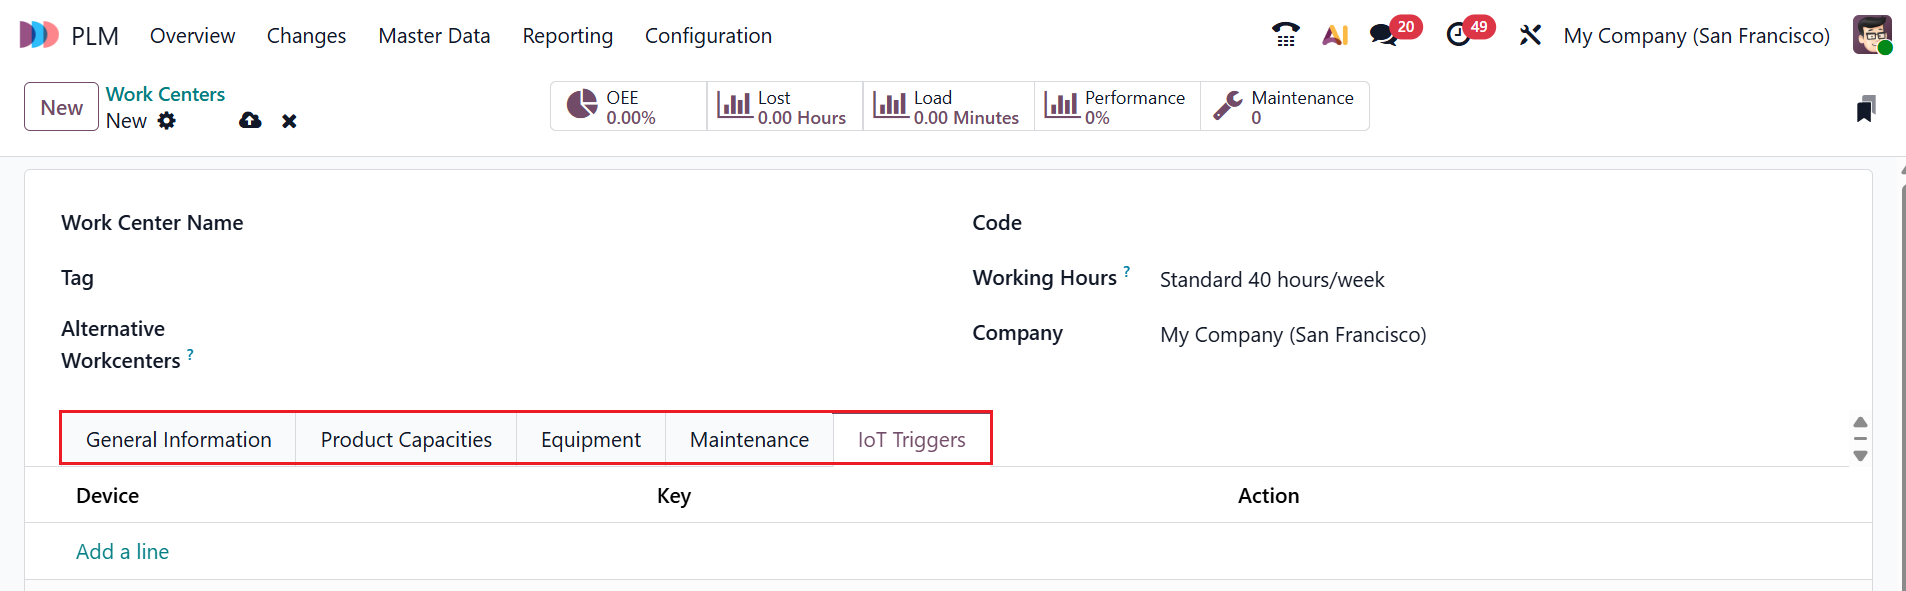
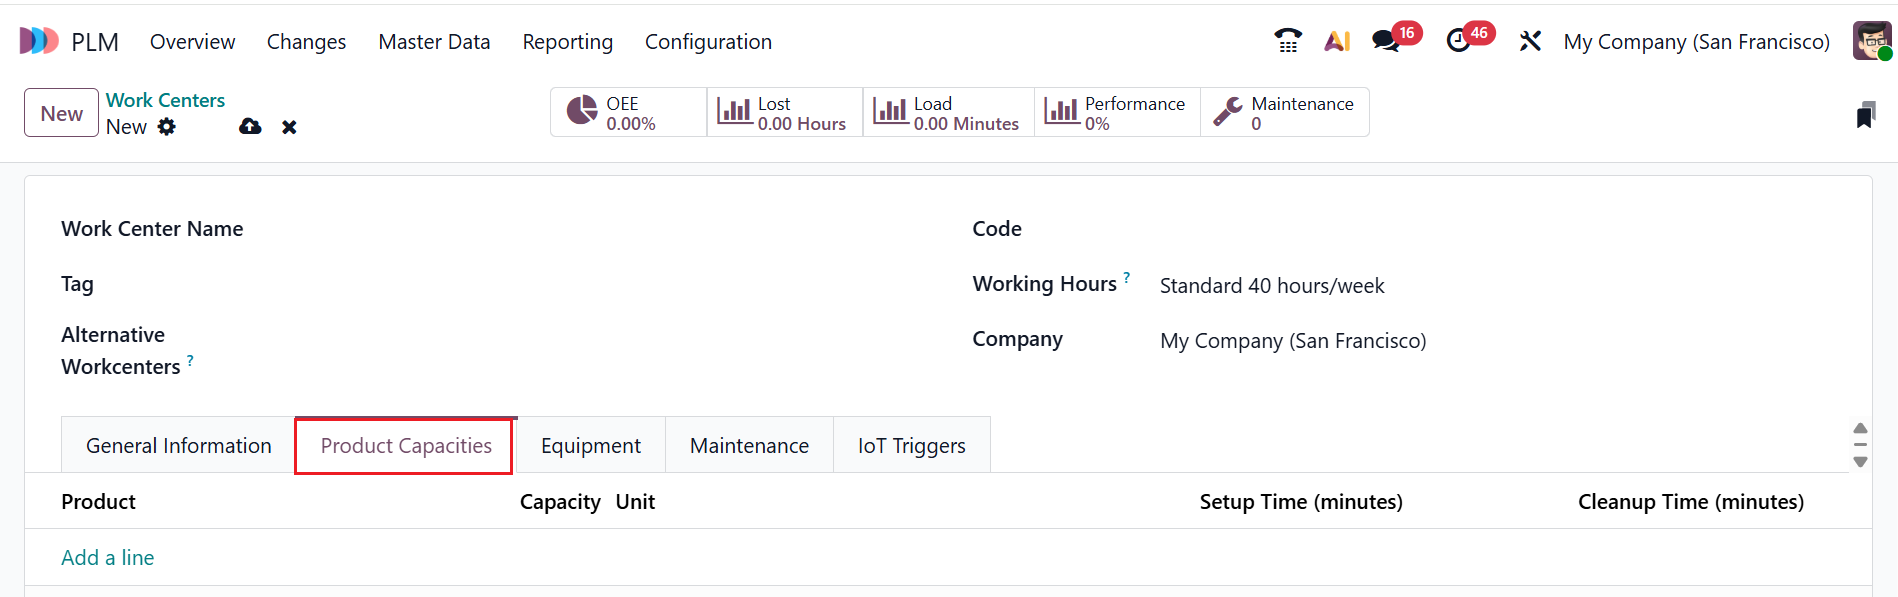
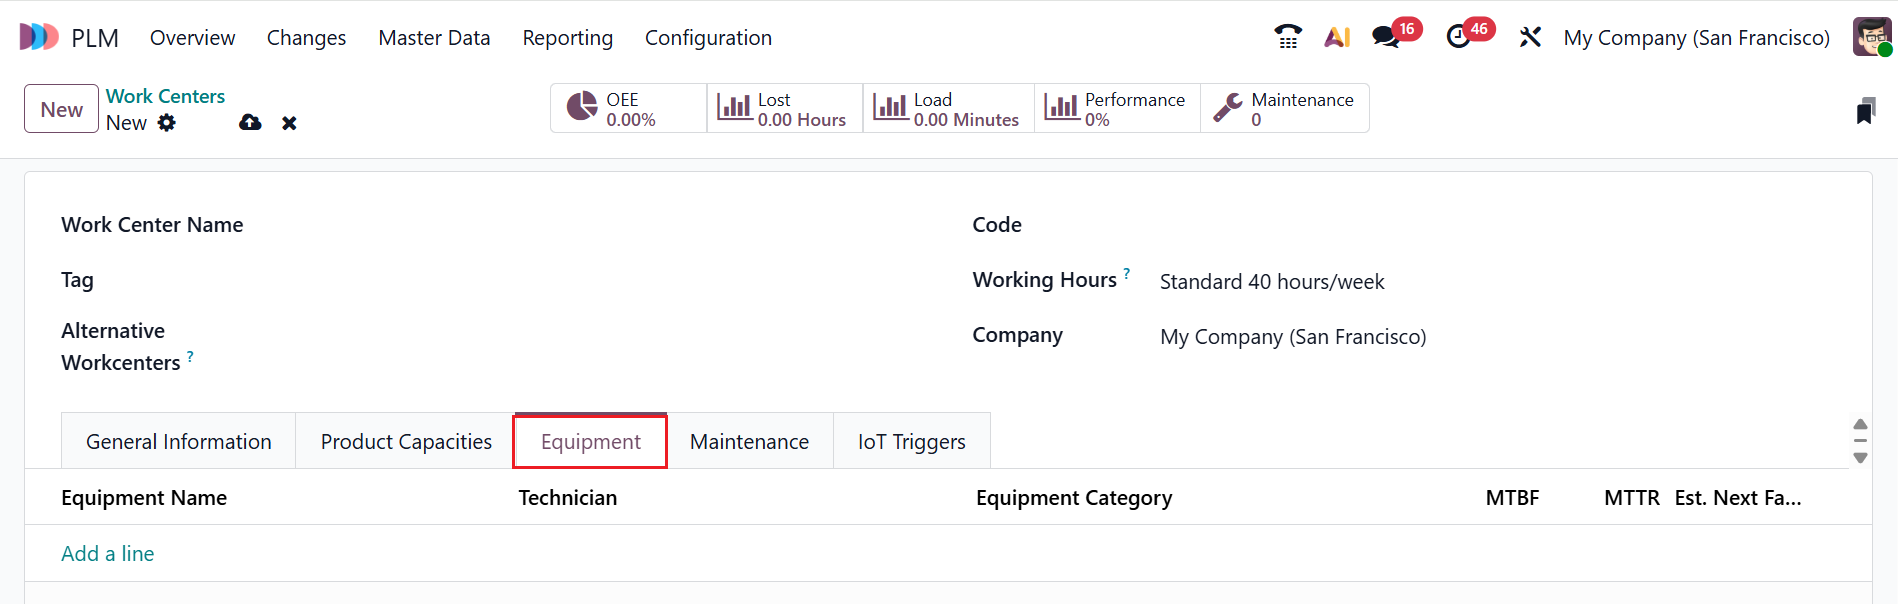
Here, you can add details such as Work Center Name, Tag, Alternative Workcenters, Code, Working Hours, and Company. For a thorough configuration, the form has five tabs: General Information, Product Capacities, Equipment, Maintenance, and IoT Triggers.
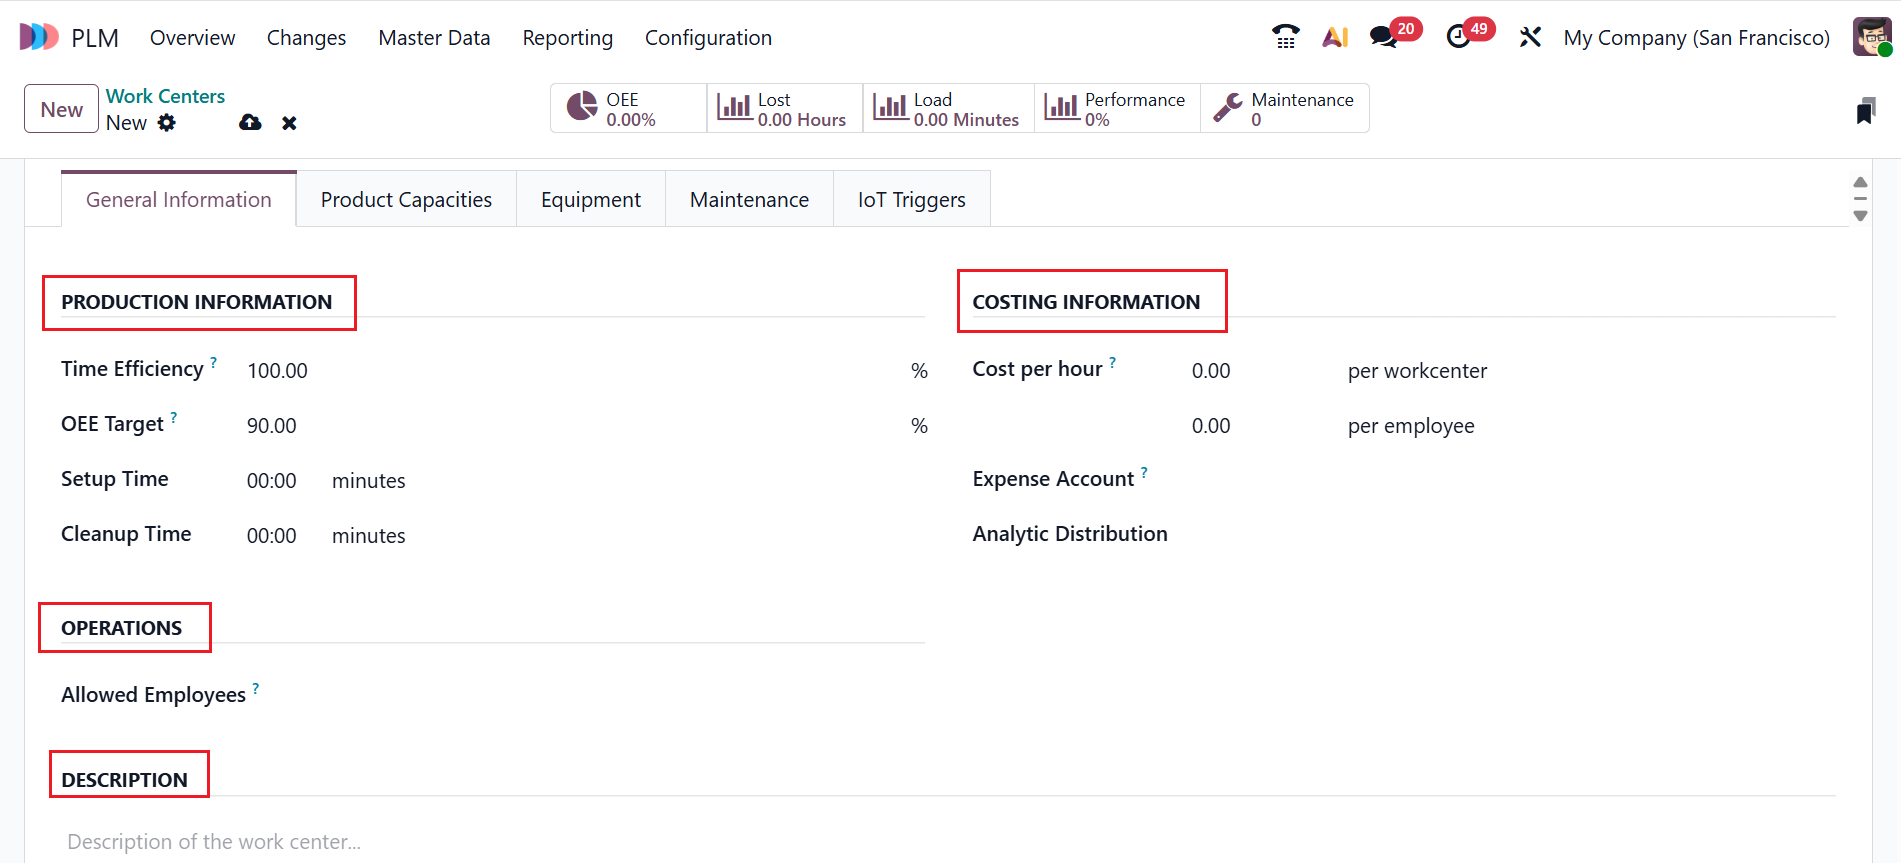
Under the General Information tab, you can view four options: Production Information, Costing Information, Operations, and Descriptions. You can add Time Efficiency, OEE Target, Setup Time, and Cleanup Time of a work order at this work center under the Product Information option. You can add Cost per hour, Expense Account, and Analytic Distribution under the Costing Information option. In the Operations option, add the employees who can log in to the workcenter in the Allowed Employees field. Under the Description option, add a description of the work center.
Under the Product Capacities tab, click on the Add a line button to add a work center capacity for each product, which is used to add new equipment.
Under the Equipment tab, click on the Add a line button to add equipment and track maintenance.
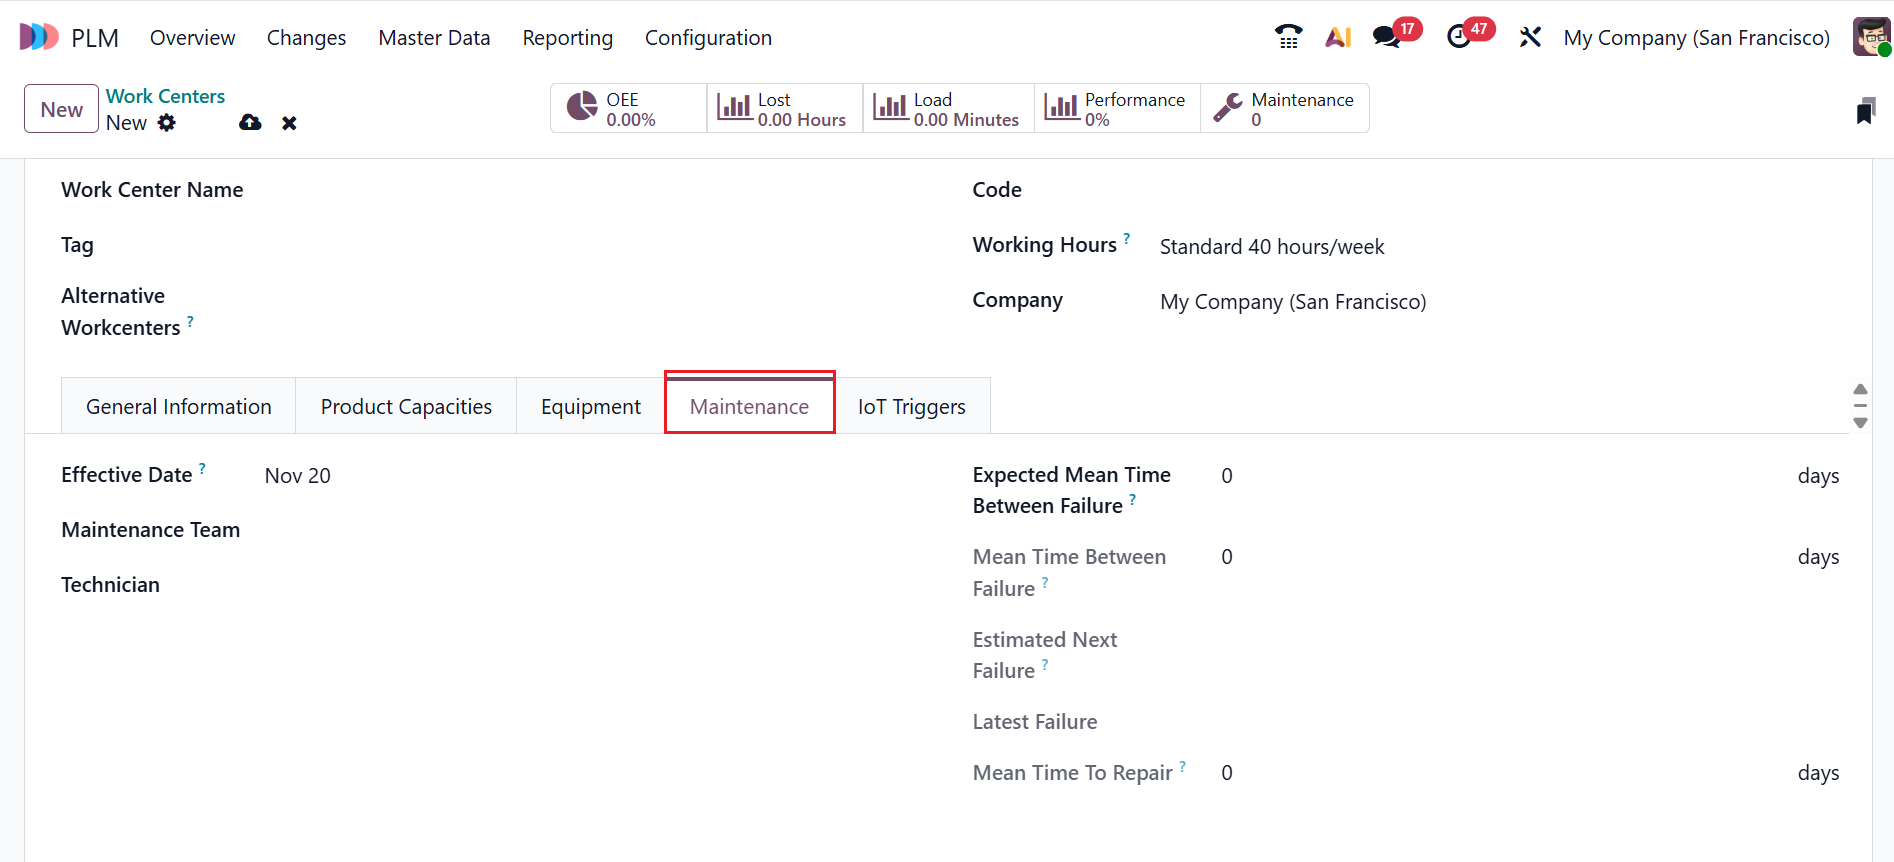
The Maintenance Tab allows you to determine the maintenance team and technician details.
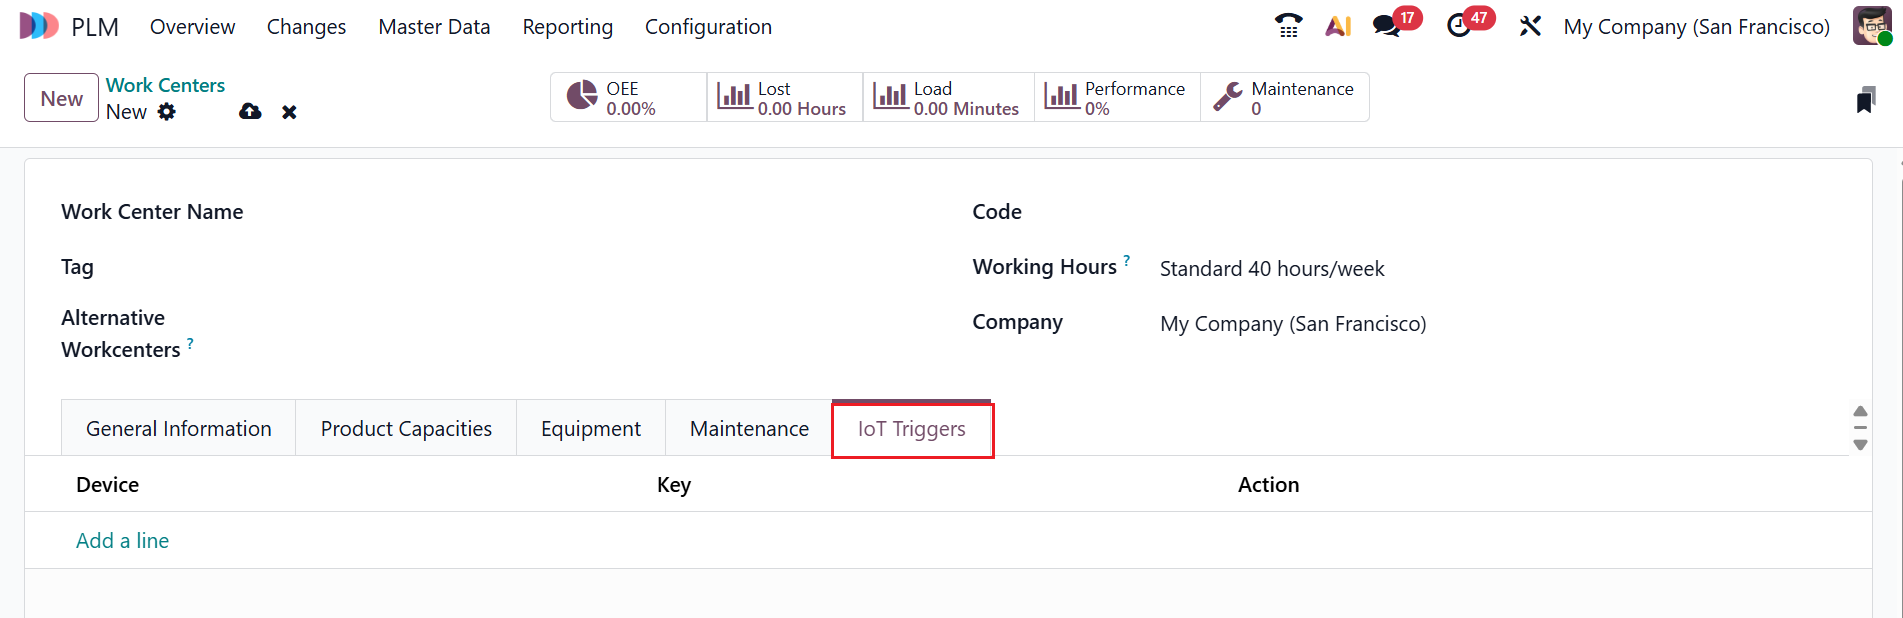
Under the IoT Triggers tab, you can change IoT settings, including Device, Key, and Action.
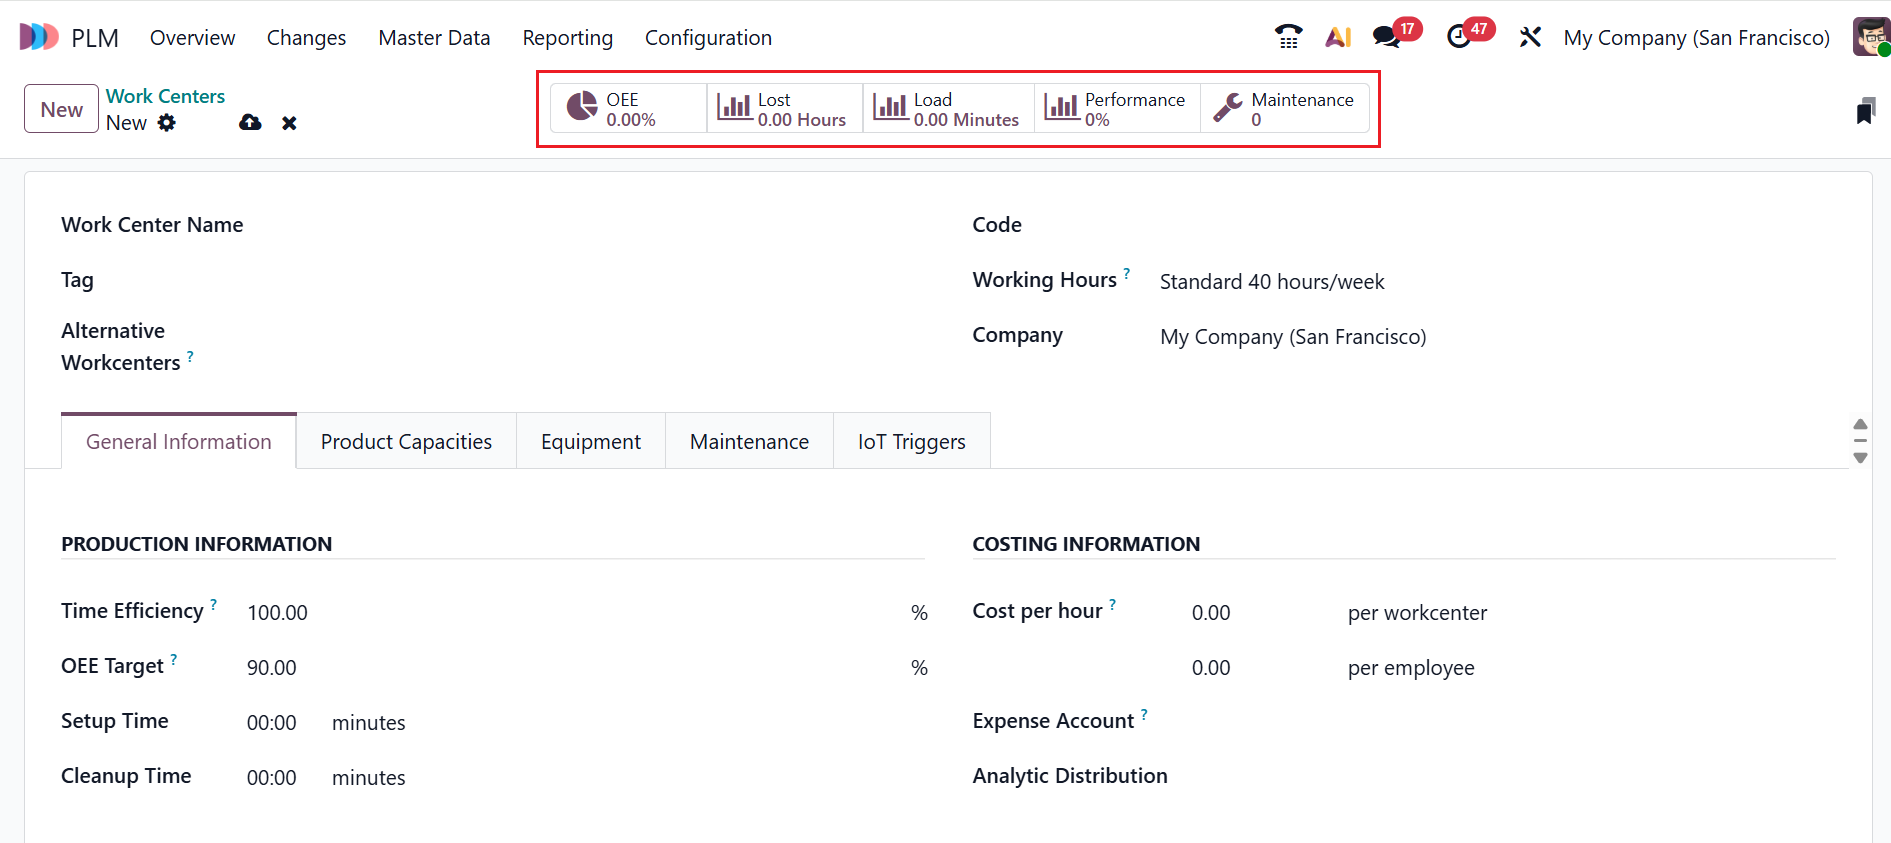
You will find five smart tabs here: OEE, Loss, Load, Performance, and Maintenance. The OEE smart tab shows how efficiently a work center is running. The Lost smart tab shows the time lost due to breakdowns or other production interruptions. The Load smart tab indicates the total workload or capacity assigned to a work center. The Performance smart tab reflects how fast and effectively the work center completes operations. The Maintenance smart tab tracks maintenance activities required or performed to keep the work center operational.
After saving all the work center details, you can utilize them for both future PLM and manufacturing operations.
4. Configuration:
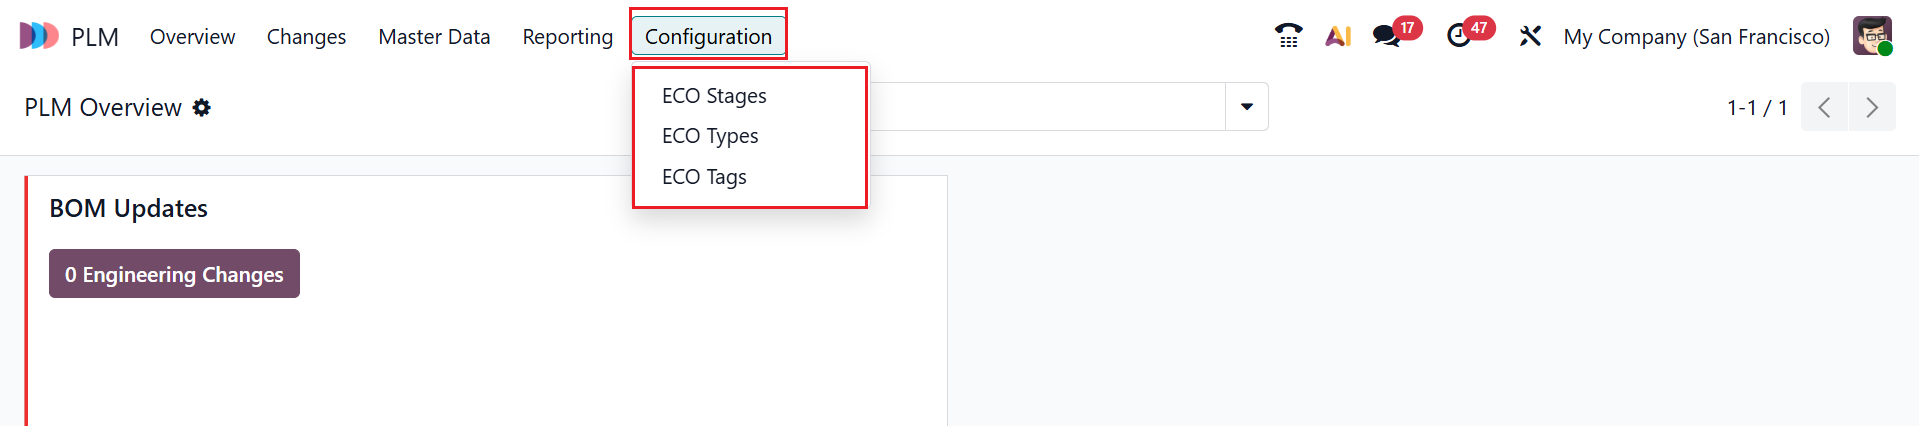
The Configuration menu in the Odoo 19 PLM module helps to customize and control how engineering changes, product documents, and production processes are managed across the system. Under the Configuration menu, you can see three options: ECO Stages, ECO Types, and ECO Tags.
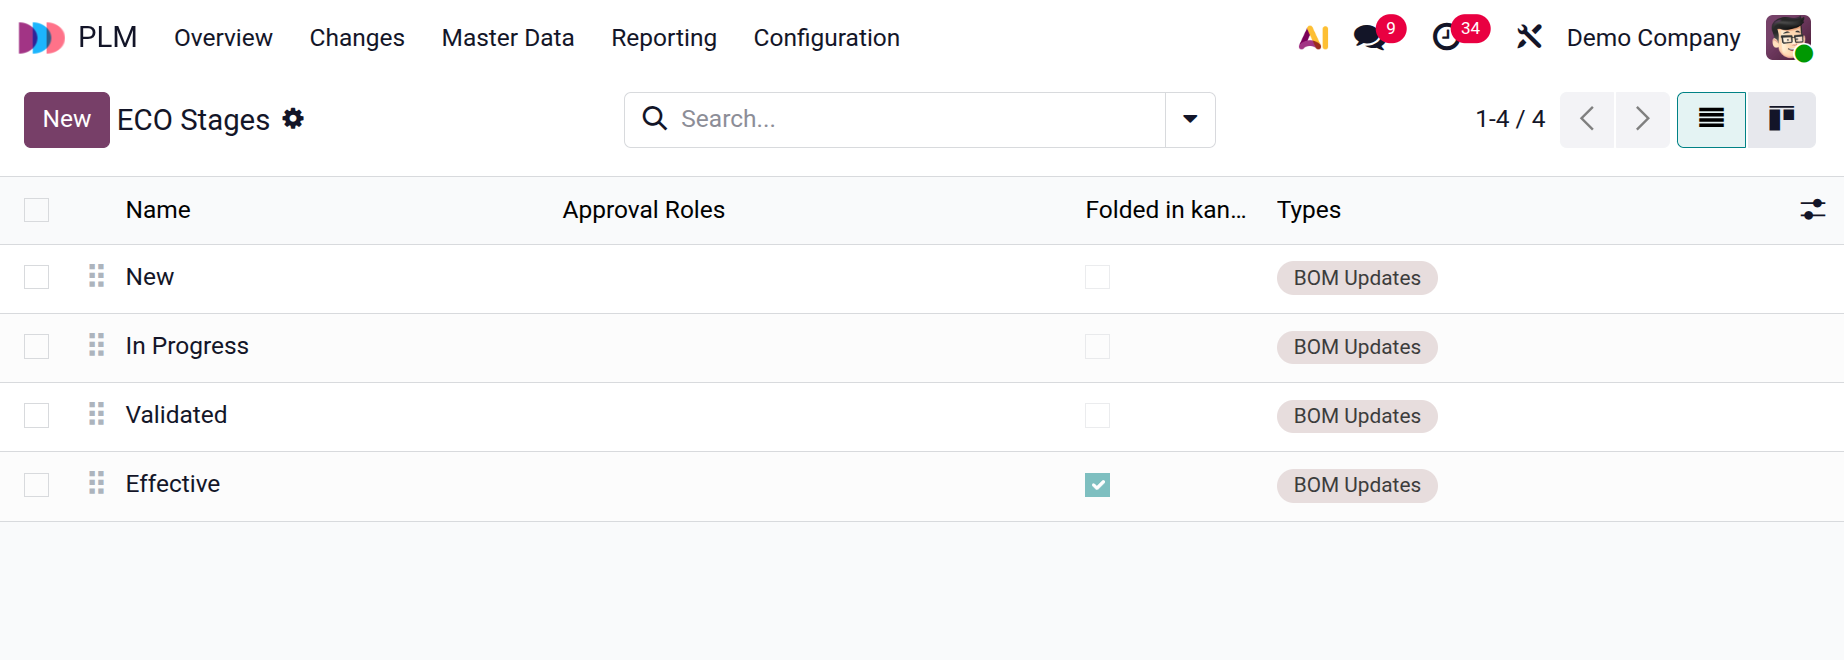
4.1 ECO Stages:
The ECO stages are the phases that an Engineering Change Order goes through. Here, you can view details of the ECO stages, including Name, Approval Roles, Folded in kanban, and Types. You can also view the ECO Stages as either List or Kanban views. To create a new ECO Stage, click on the New button as shown below:
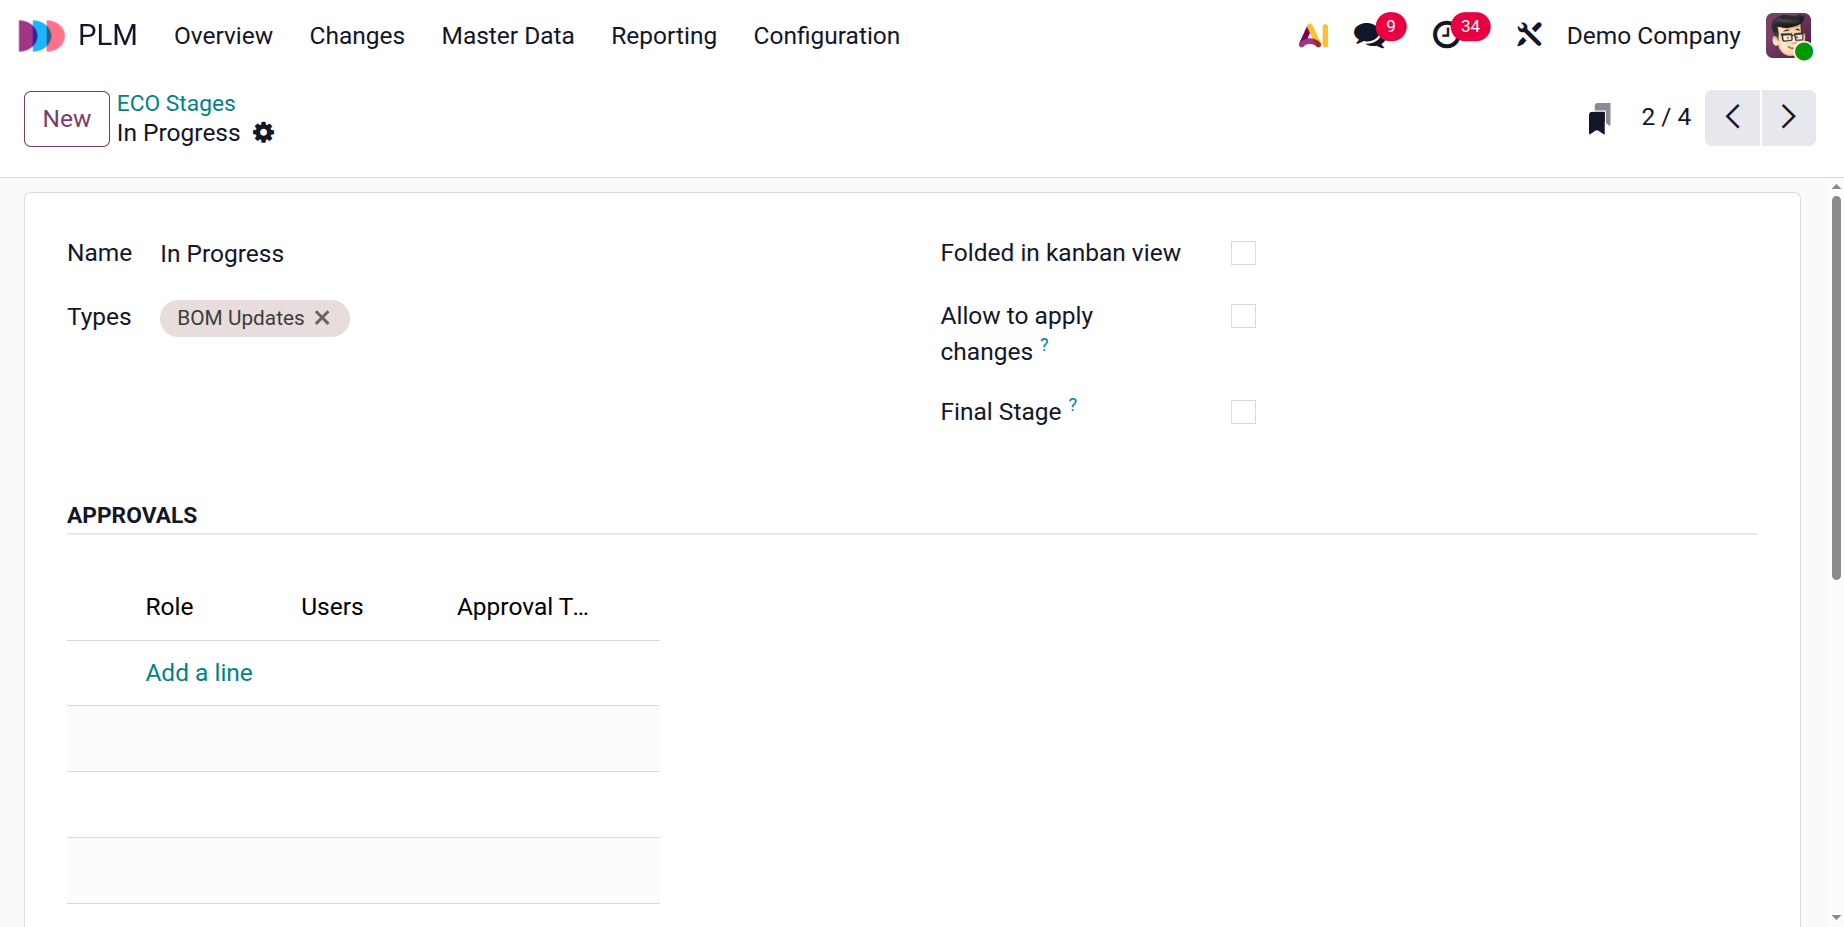
Firstly, add a name for your new ECO Stage. In the Types field, select an appropriate ECO type. Enable the Folded in kanban views option to hide the stage’s visibility in the Kanban view. Enable the Allow to apply changes field to apply changes from this stage. If this stage represents the final step in the engineering change order process, enable the Final Stage field.
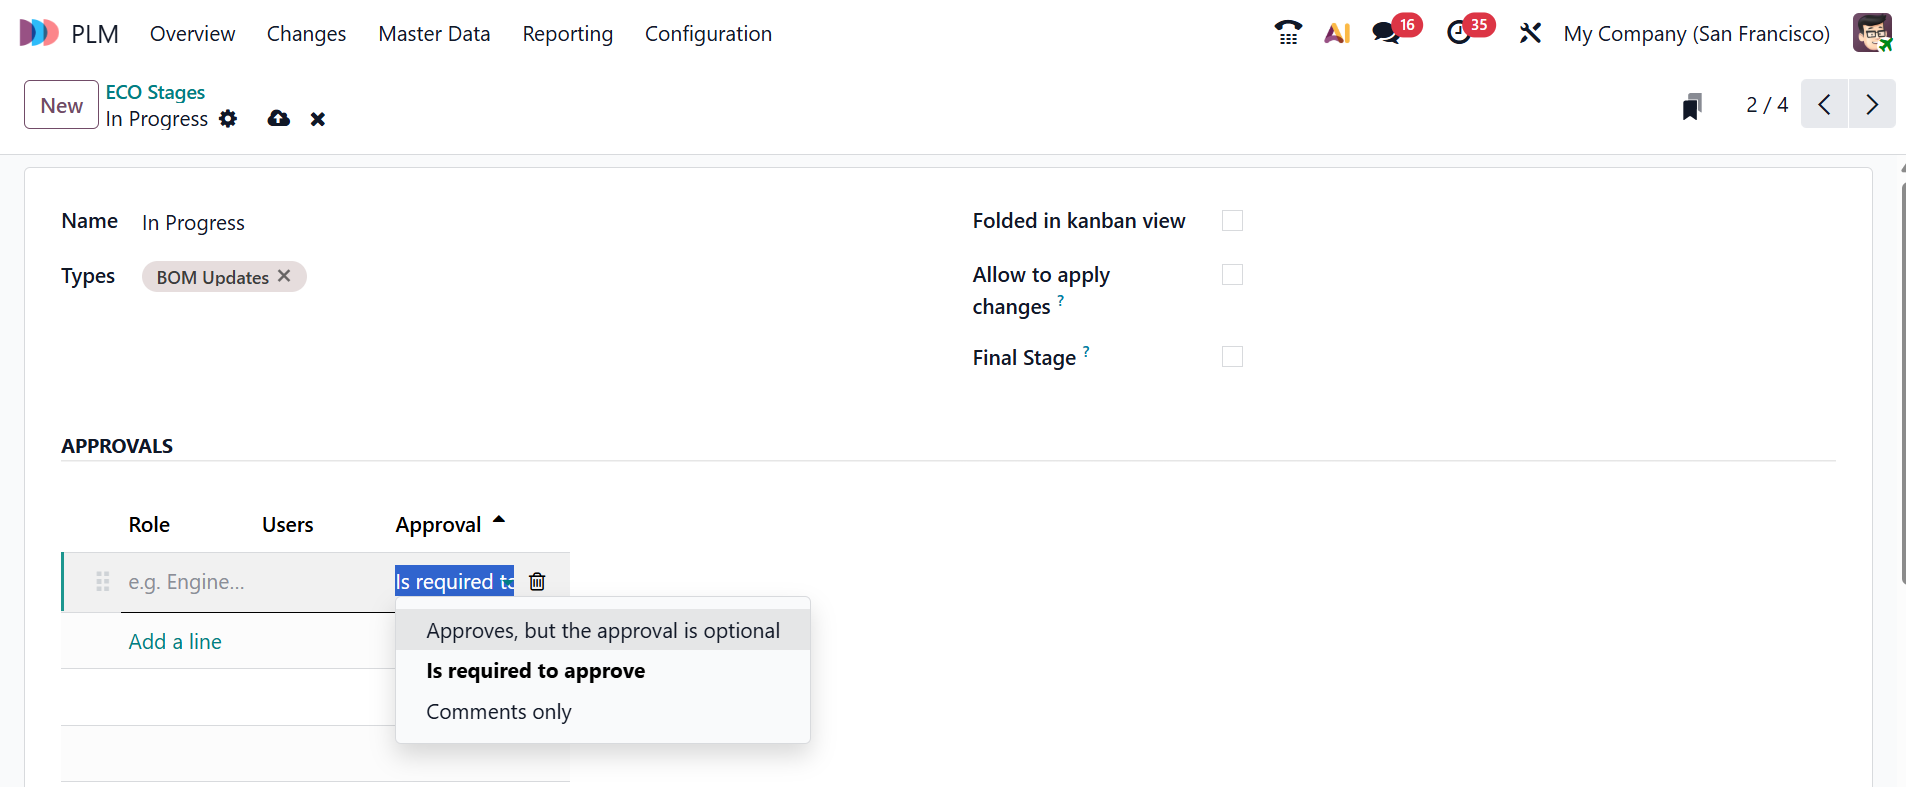
Under the Approvals tab, click the Add a line button to specify a position for the approver under the Roles option, then select a user from the list under the User field.
Under the Approval Types field, you can select
- Approves, but the approval is optional: Approvers can review and approve the ECO, but the process can continue even if they do not approve it.
- Is required to approve: The ECO cannot move to the next stage unless the assigned approver gives formal approval.
- Comments only: Approvers can add feedback or suggestions, but their approval does not affect the ECO workflow.
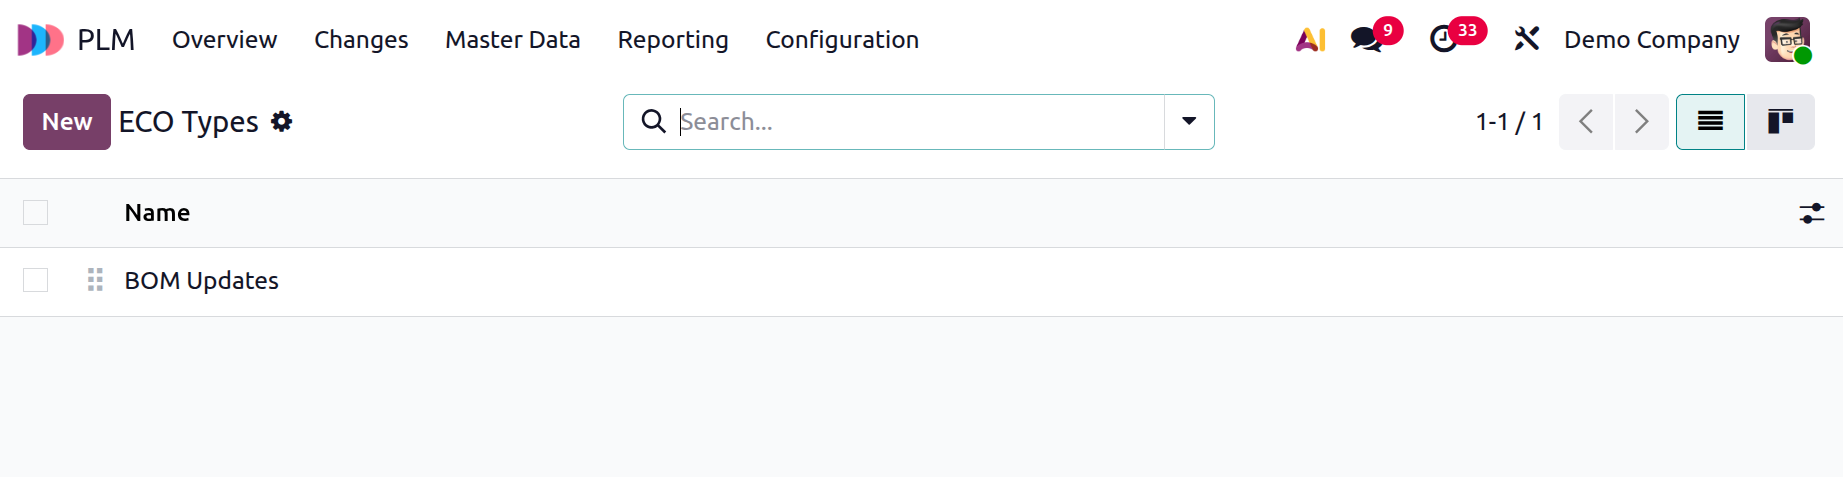
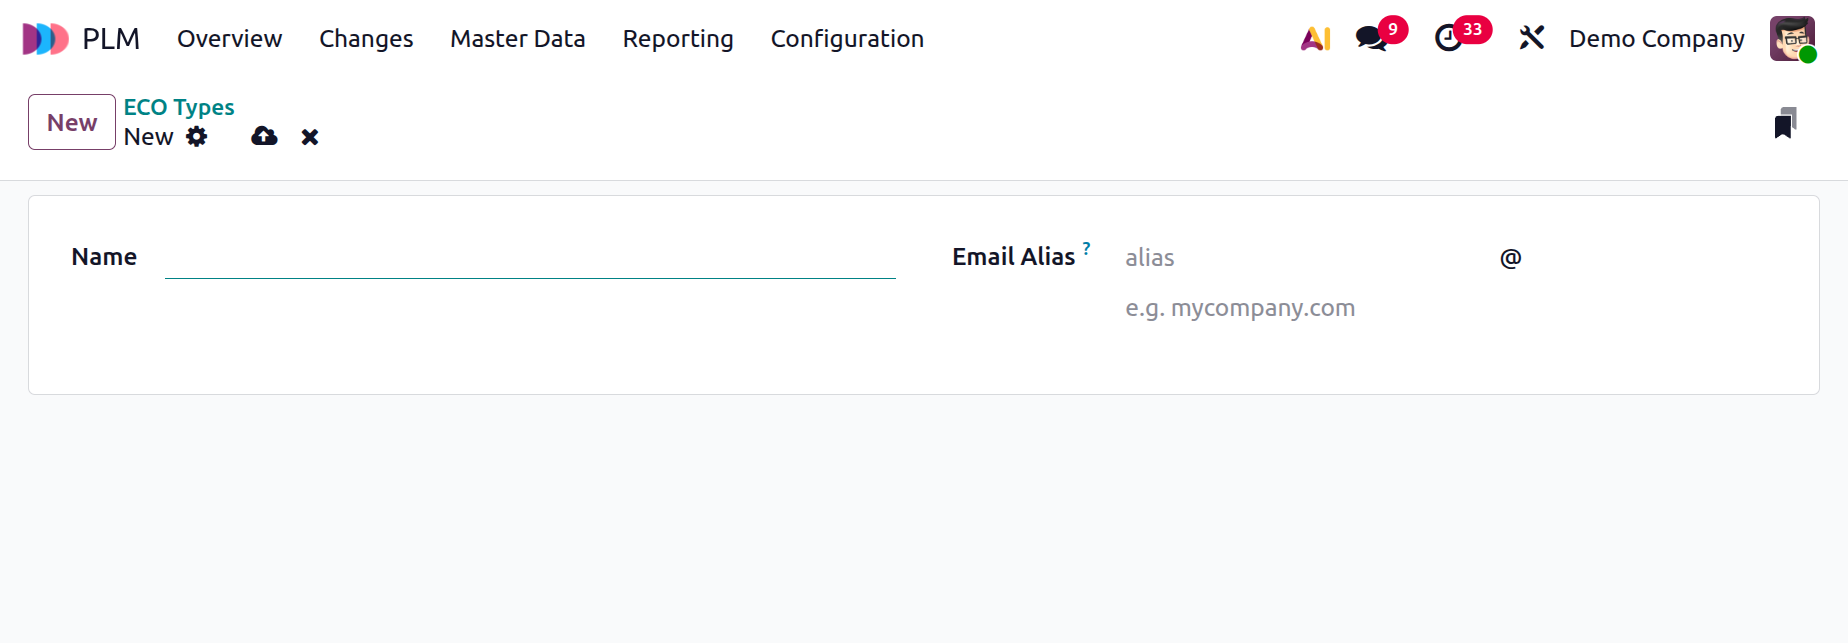
4.2 ECO Types:
ECO Types are categories used to group different kinds of engineering change orders. Here, you can see the existing ECO Types, and to create a new ECO Type, click on the New button as shown below:
You can add an appropriate name for your ECO type in the Name field and add an Email Alias to automatically generate the ECOs from emails.
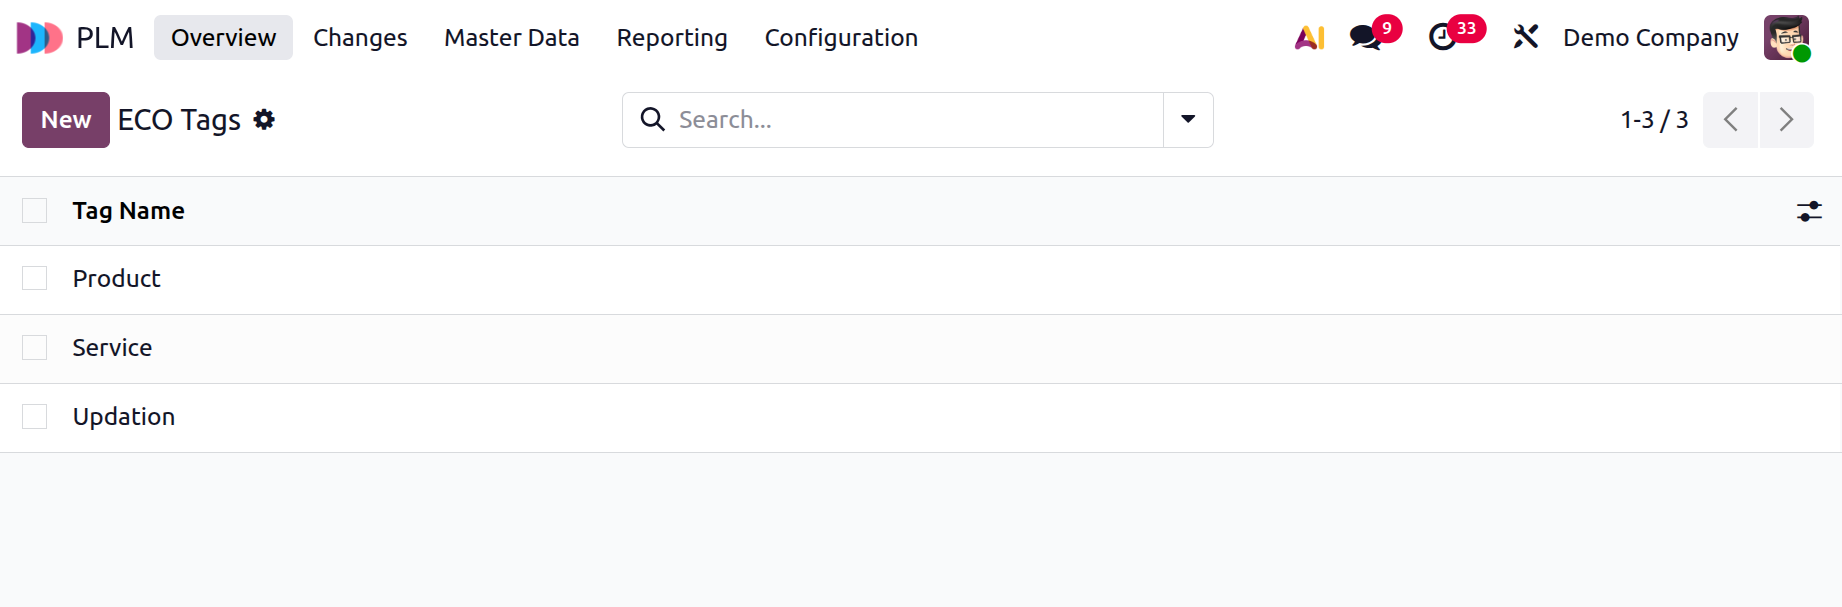
4.3 ECO Tags:
ECO Tags are labels you can add to ECOs to quickly identify or filter them. To create an ECO Tag, click on the New button and add a Tag Name and save it.
5. Reporting:
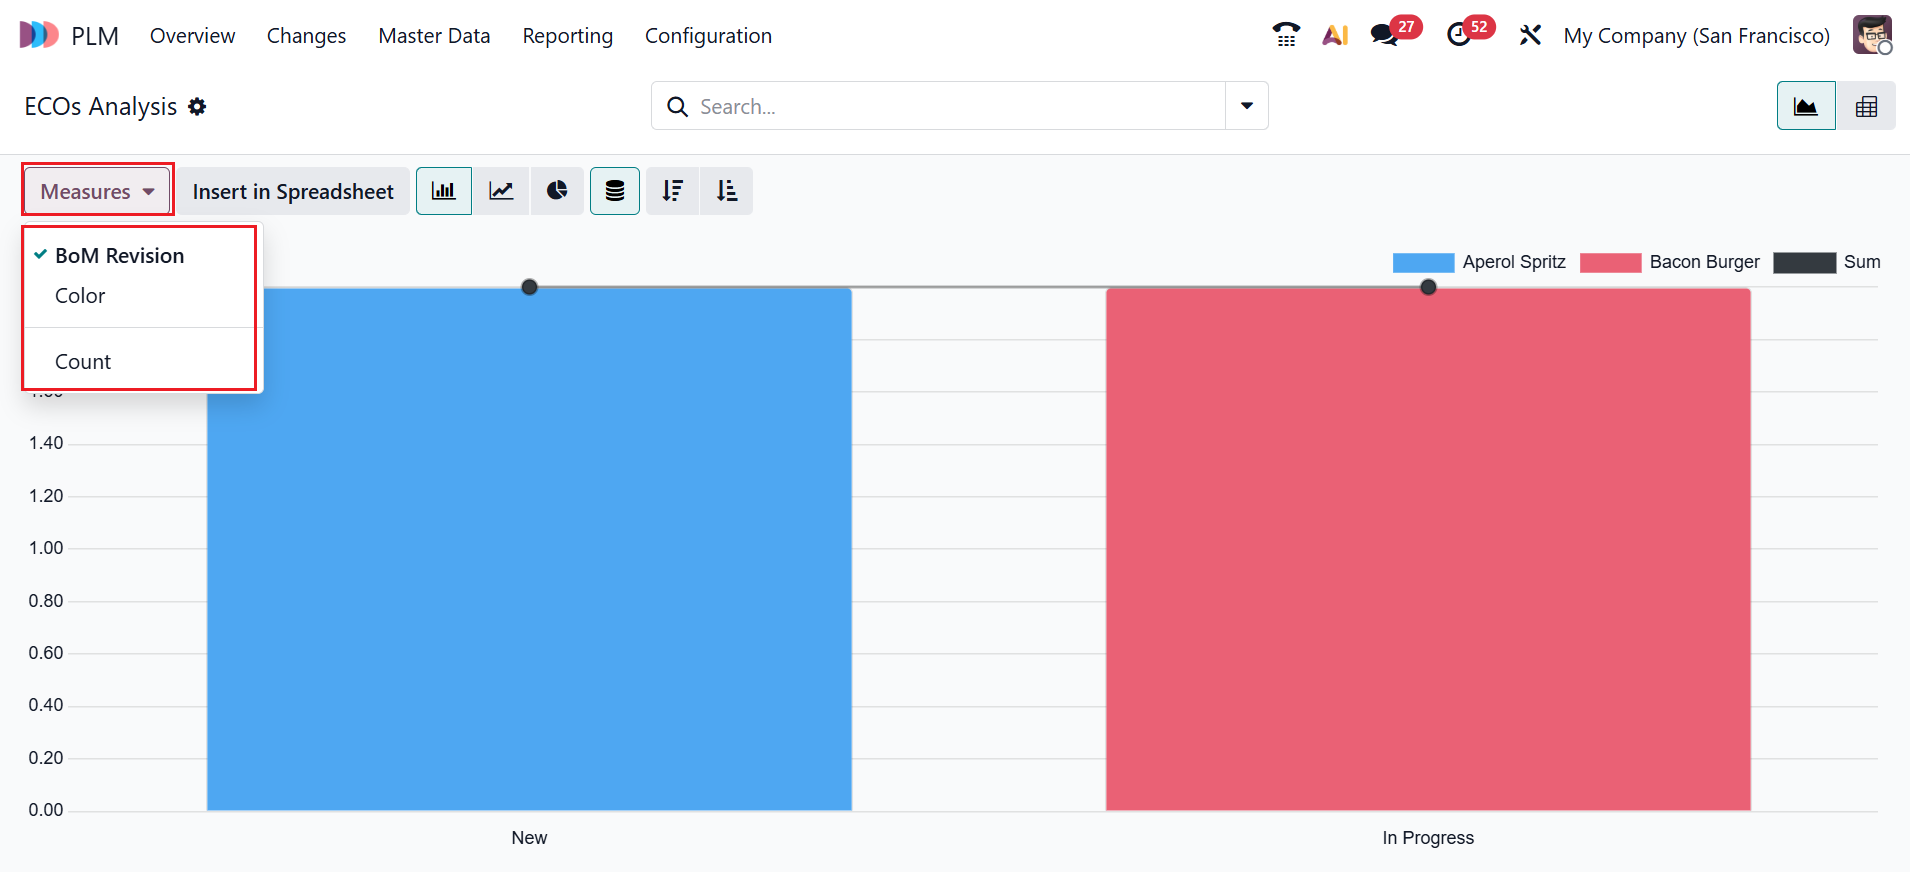
Reporting in Odoo 19 PLM gives you visual reports and dashboards that help you track and measure your engineering change processes. Navigate to the Reporting menu and select ECOs as shown below:

In the ECOs Analysis, the X-axis shows the ECO stage, and the Y-axis shows the count of the ECOs. The Measures option includes BoM Revision, Color, and Count, which can be used to customize the reporting interface. You can change the report formats to Pie chart, Line chart, Ascending and Descending order, and Stacked. You can view the ECOs Analysis as a Graph and a Pivot.
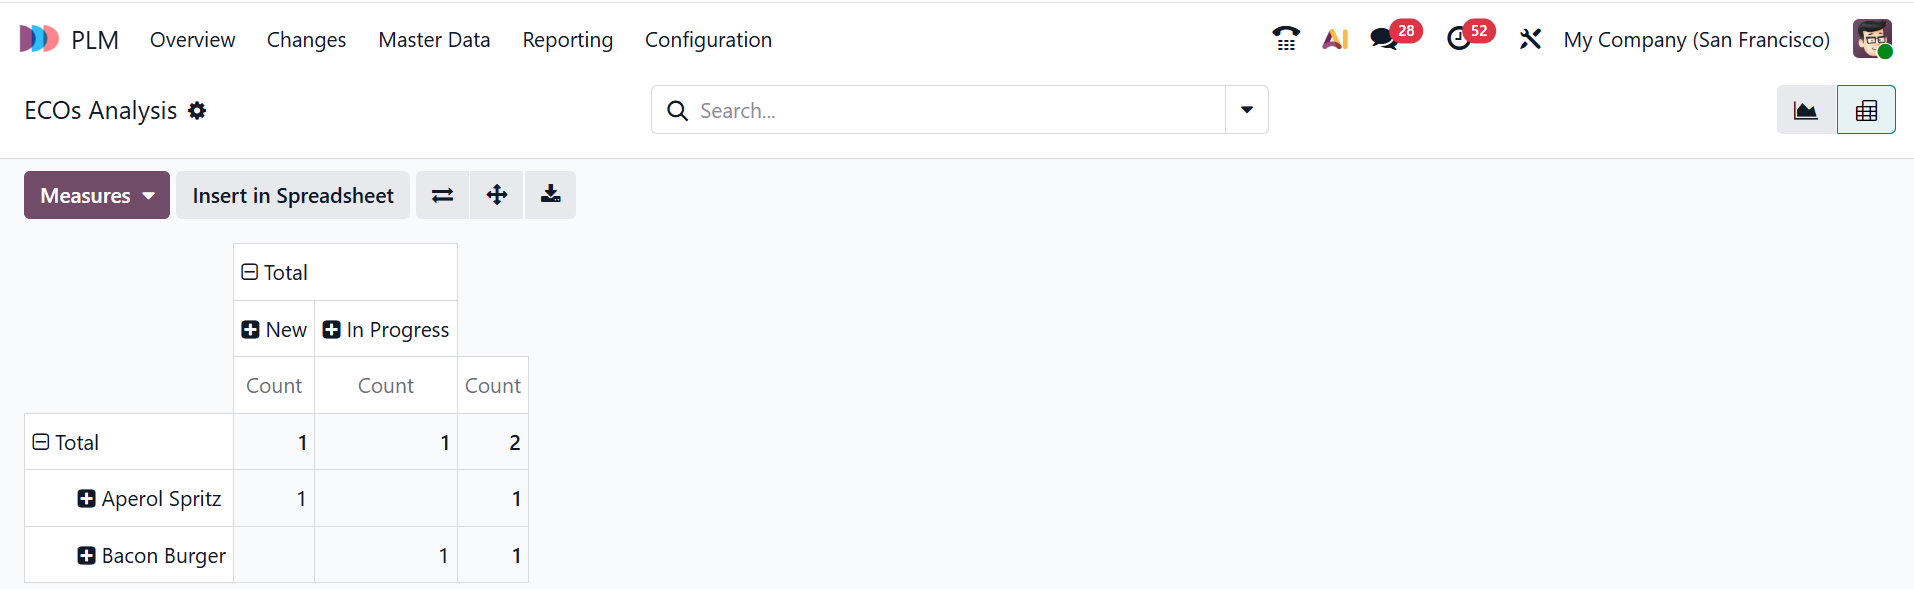
In the Pivot view of ECOs Analysis, you can analyze data in a summary table to easily compare and group it.
By integrating engineering, manufacturing, and documentation into a single environment, Odoo 19's PLM module simplifies product development. It uses organised Engineering Change Orders (ECOs) with transparent review and approval procedures to manage product versions, BoM updates, and drawing revisions. Teams can work together in real time, monitor revision histories, and directly attach files to operations and products. From concept to manufacturing, the module helps businesses maintain well-organised design data, accelerate innovation cycles, and ensure consistent product quality.