Within a fully integrated ERP environment, the Odoo 19 Enterprise Repairs module simplifies product maintenance and after-sales service. By keeping track of products, serial numbers, warranties, parts, labour, and expenses in one location, businesses can manage repair orders from intake to delivery. To ensure complete traceability, users can create repair orders directly from sales, deliveries, or customer requests. Accurate stock movements, automated invoicing, and transparent customer communication are made possible by integration with Inventory, Accounting, Sales, and Helpdesk. The Repairs module facilitates effective operations and higher customer satisfaction through configurable workflows, reporting, and enterprise-grade performance.
1. Orders:
By default, when you open the Repairs module, you can see a list of repair orders in the dashboard. Here, you can view the details of the repair orders, including Repair Reference, Scheduled Date, Product to Repair, Component Status, Customer, Sales Order, Company, and Status.
You can change the dashboard views to Kanban, Graph, Pivot, and Activity. The star icon in the dashboard helps to mark the priority of the repair order. The dashboard allows managers to easily prioritize tasks, track pending repairs, and ensure the timely completion of repair operations.
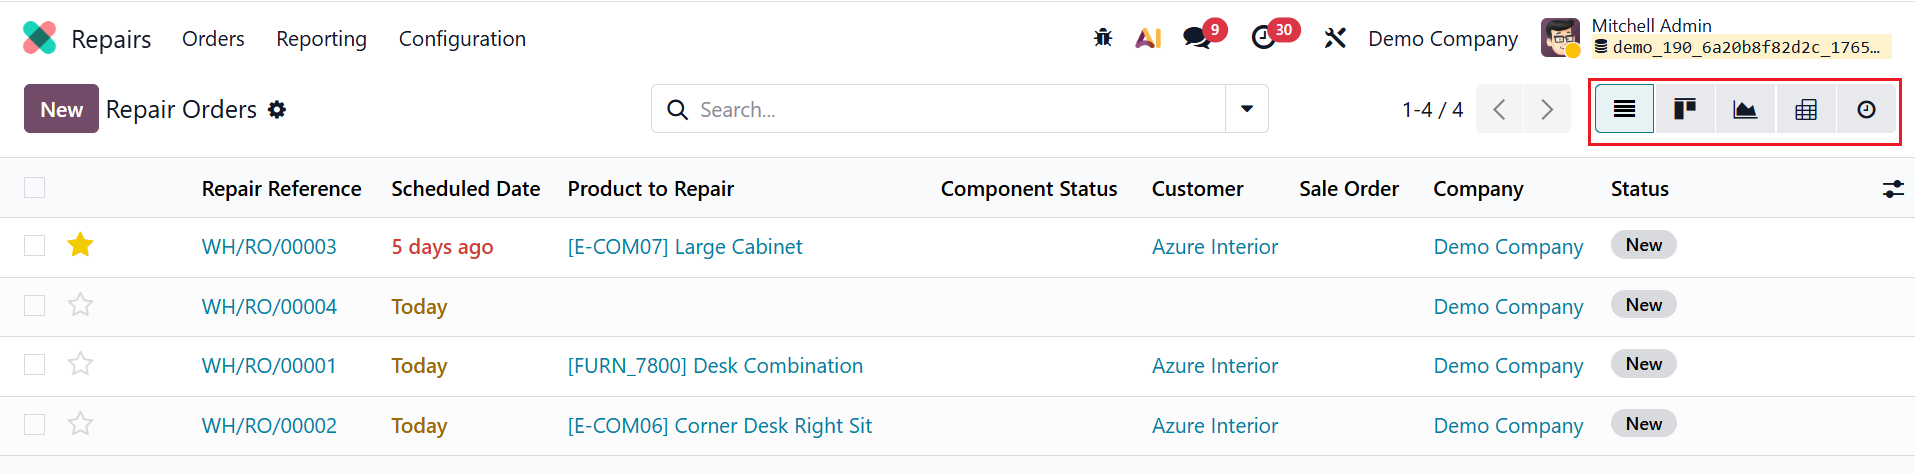
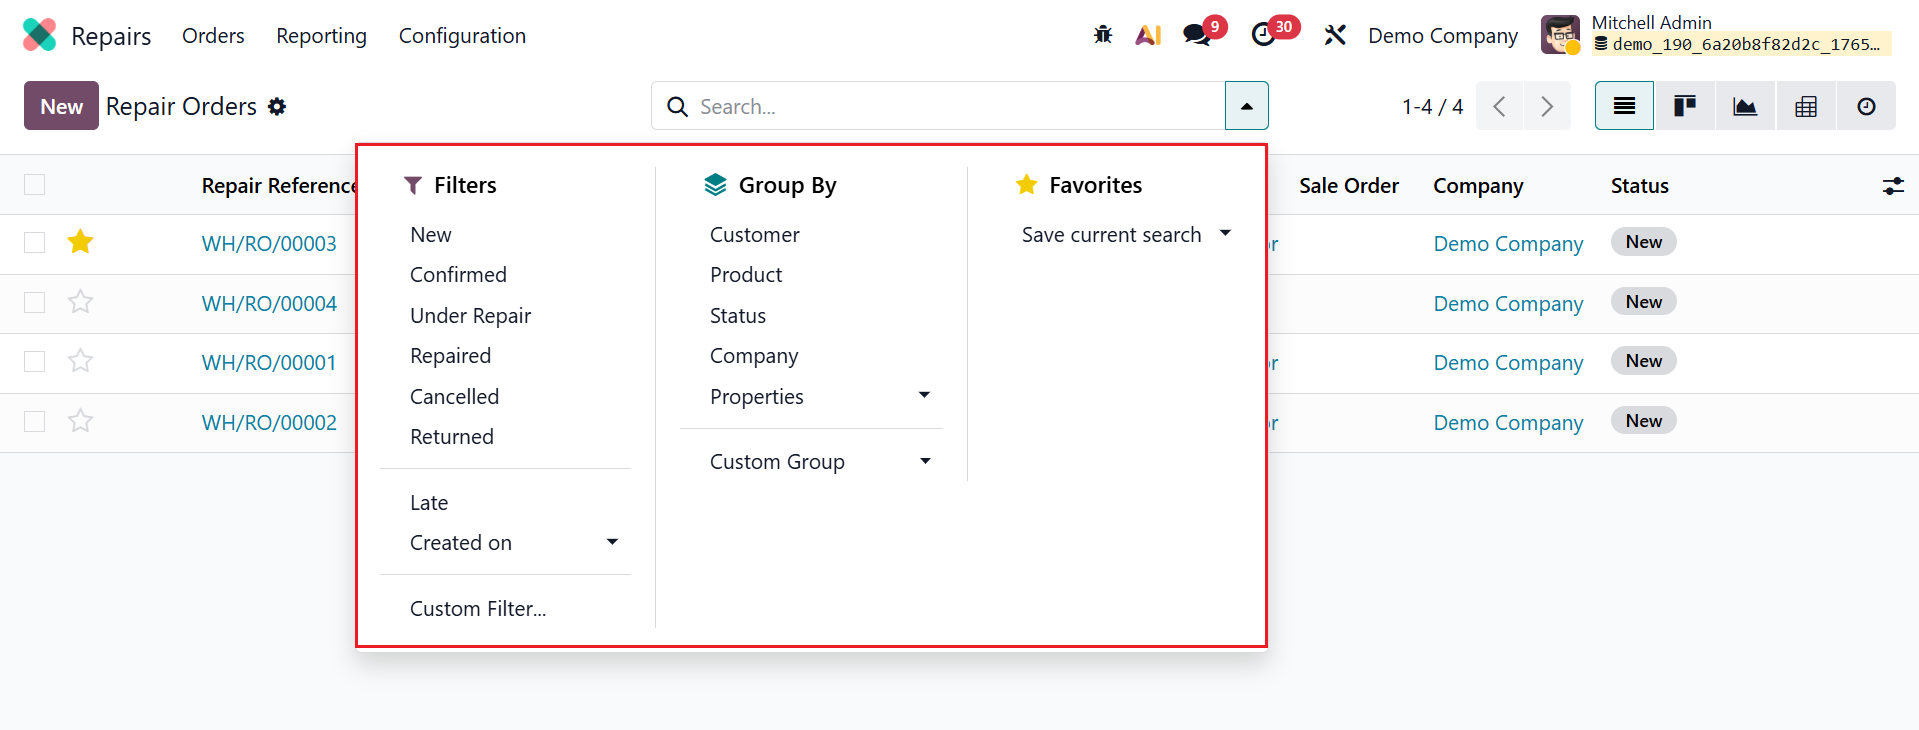
Click the drop-down menu in the search bar to see the available options: Filters, Group By, and Favorites. Under Filters, you can select options such as New, Confirmed, Under Repair, Repaired, Cancelled, Returned, Late, Created On, and Custom Filter. Under Group By, you can organize results by Customer, Product, Status, Company, Properties, or create a Custom Group. Under Favorites, you can save your search for future use.
To create a new repair request, simply click the New button. Here, the Repair Reference field will be automatically filled. Select the customer in the Customer field for whom the order has been invoiced and delivered. Then, in the Product to Repair field, choose the product you want to repair from the list. In the Product Quantity field, mention the number of items to repair. If the Under Warranty field is enabled, the repair cost will be zero. The Scheduled Date field automatically updates to the current date and time. In the Responsible field, assign a person for the repair. Add Tags and select the Company as needed.
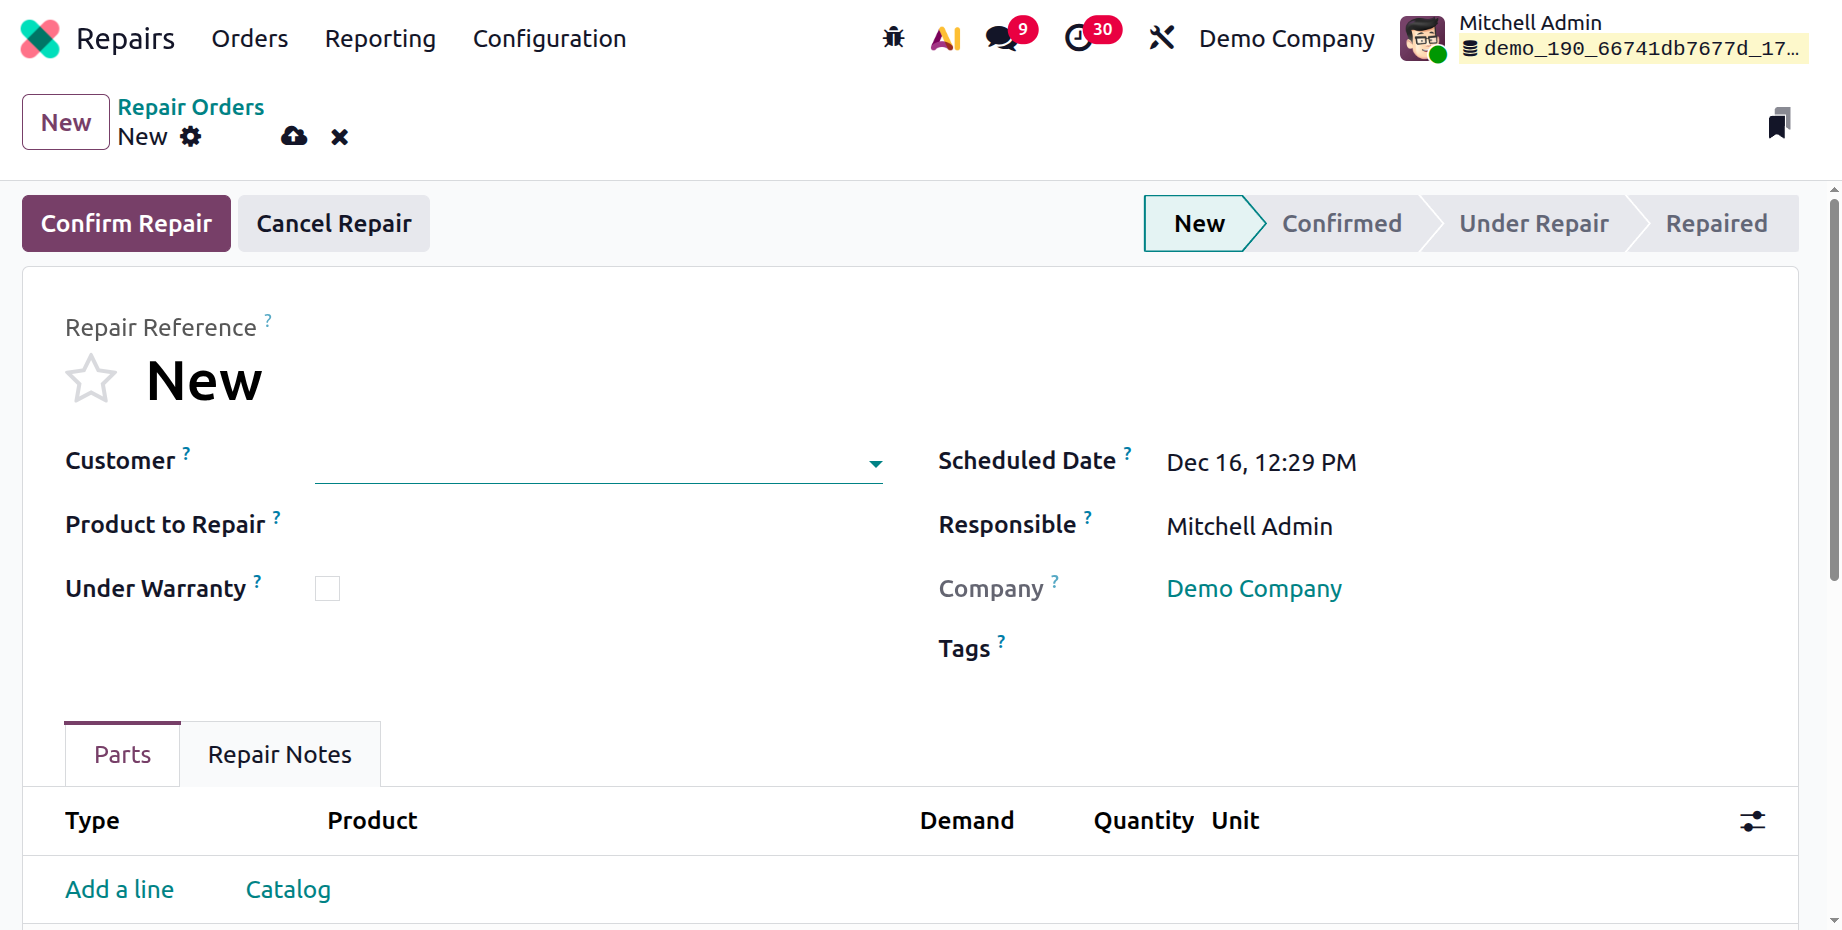
Based on the priority of the order, mark the star under the Repair Reference field. Here, you can see two tabs: Parts and Repair Notes.

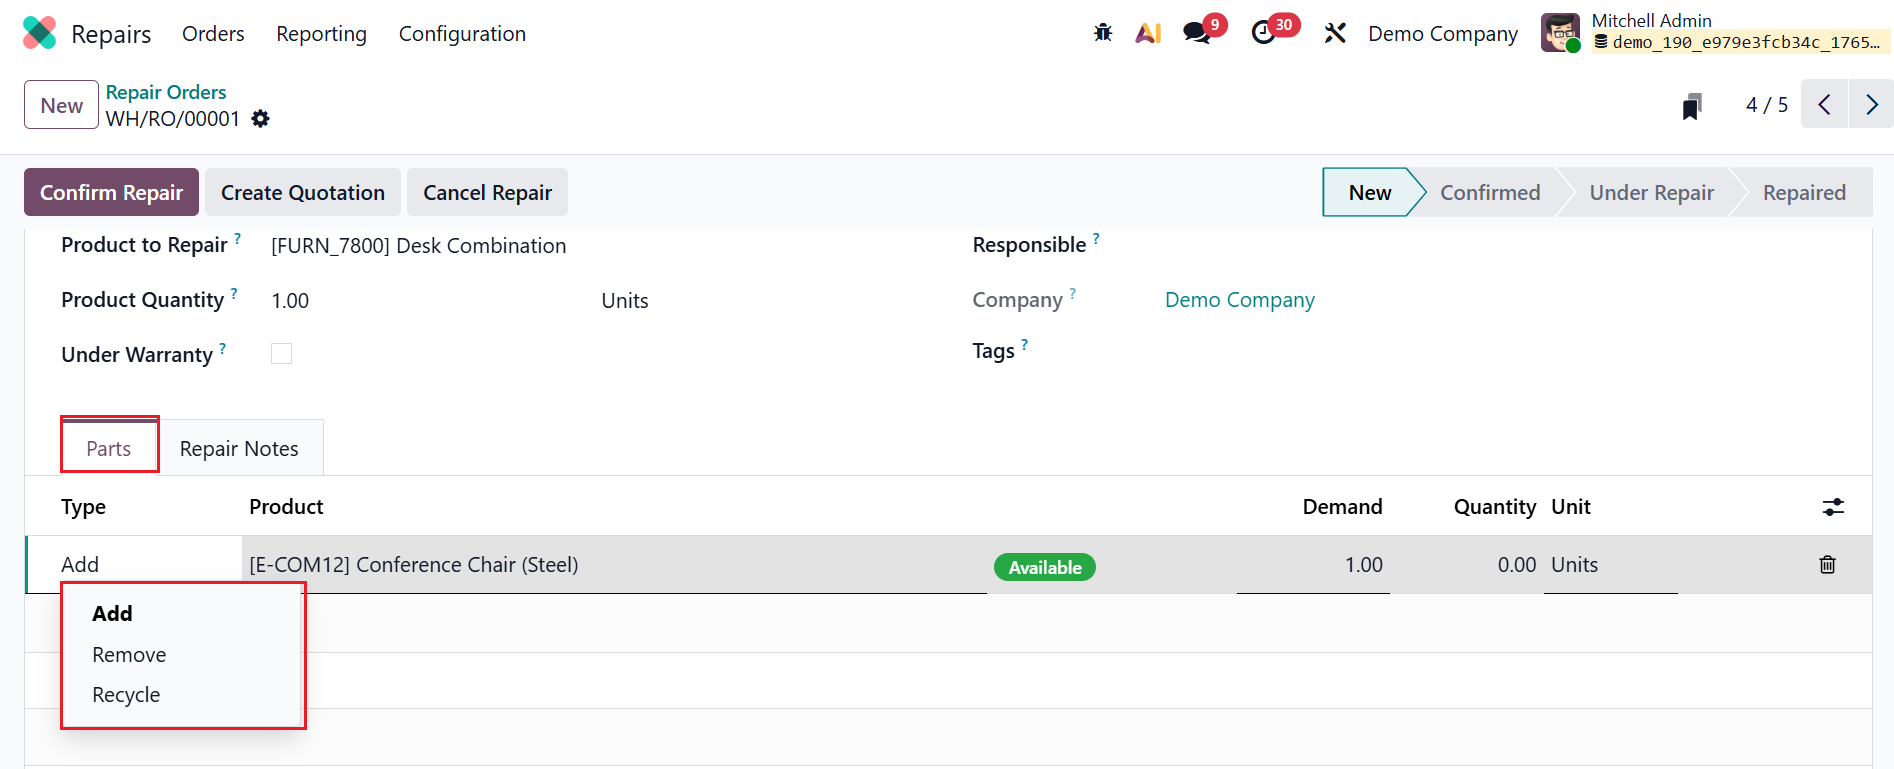
Under the Parts tab, click on the Add a line button to add specific components involved in the repair process. Under the Type section, you can see three options:
- Add:This type is used to add the parts to the repair order (RO). Either the parts can be used in the process and recorded as used, or they can be saved for another use.
- Remove: This type is used to remove the parts from the RO. During the repair process, the selected part should be removed from the product and marked as repaired.
- Recycle: This type is used to recycle the selected part from the RO. The component is mentioned as recycled and will be stored for future use or repurposed at the warehouse.
Then add the details such as Product, Demand, Quantity, and Unit.
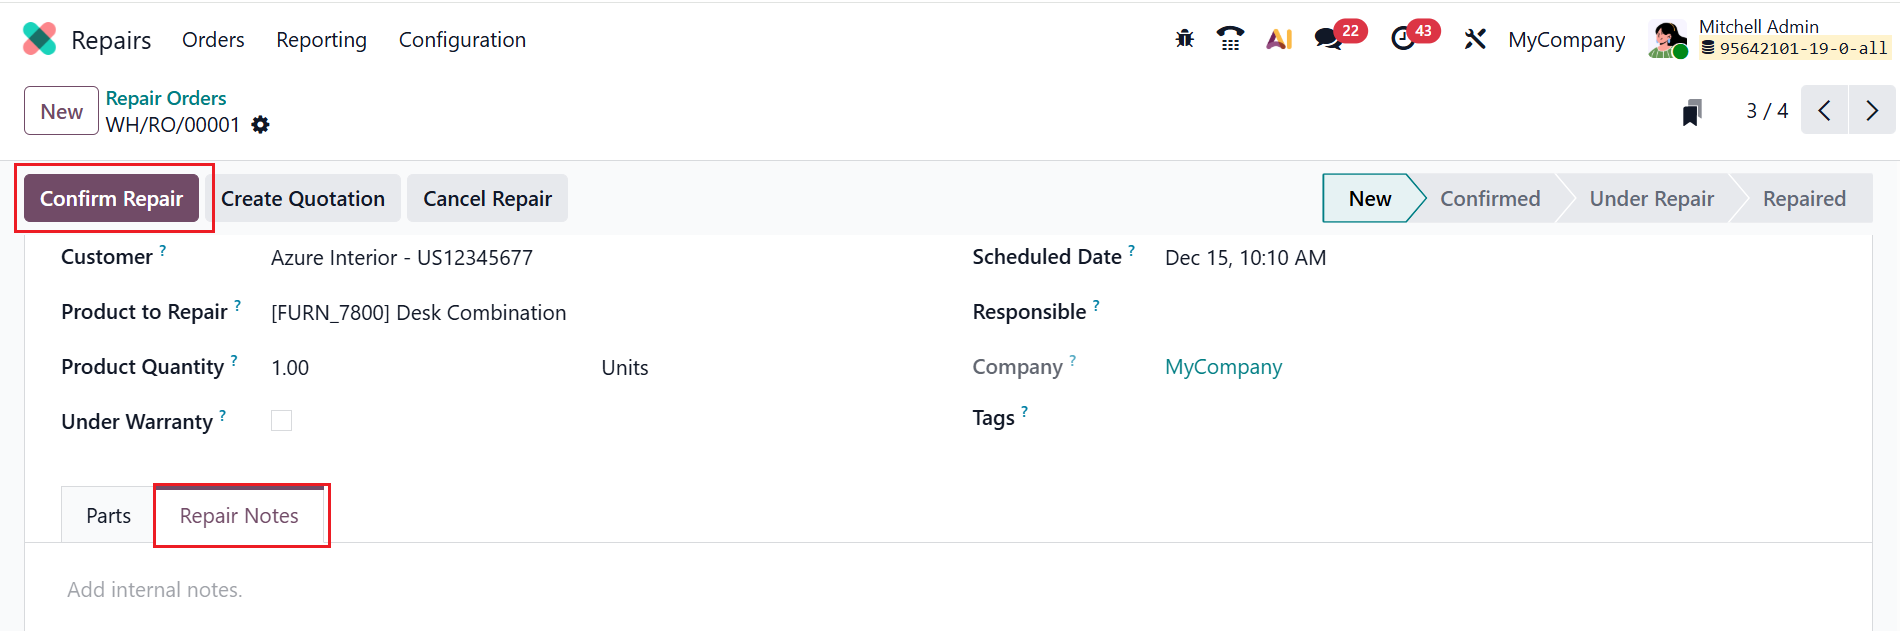
Under the Repair Notes tab, add internal notes about the RO. Then click the Confirm Repair button to confirm the repair order; it moves to the Confirmed stage.
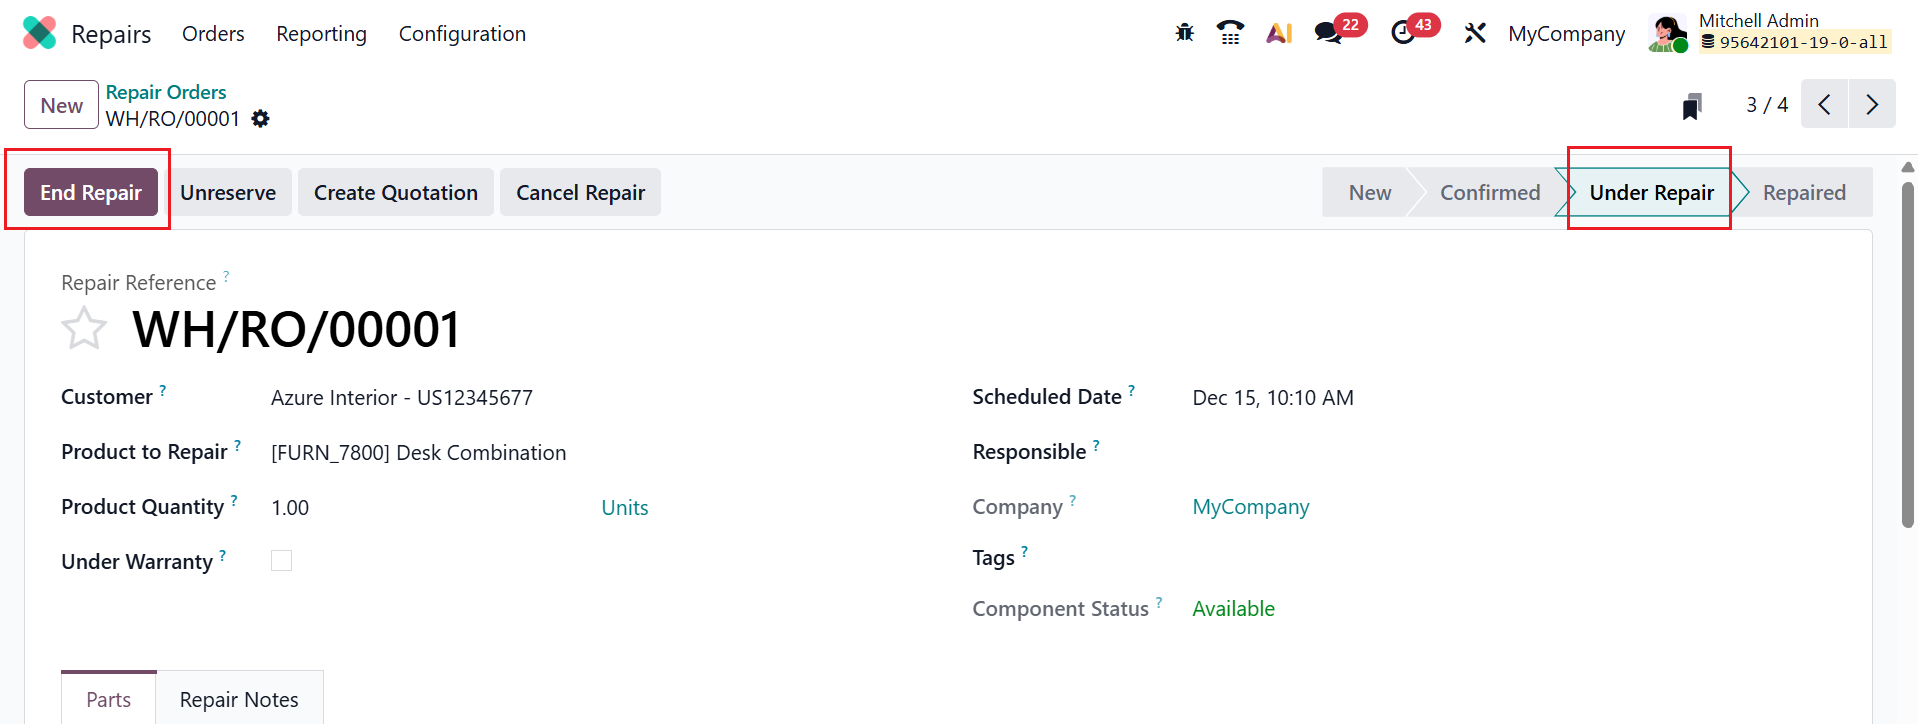
After adding all the details, the repair order is ready for the process. To initiate the repair process, click the Start Repair button. The Unreserve button helps remove previously repaired parts and returns them to available stock. Select the Create Quotation button to generate a repair order quotation. The Cancel Repair button stops the repair process before completing it.

To begin the repair process, click the Start Repair button. While the repair is ongoing, the repair order is in the Under Repair stage. Once the process is complete, click the End Repair button to close the repair.

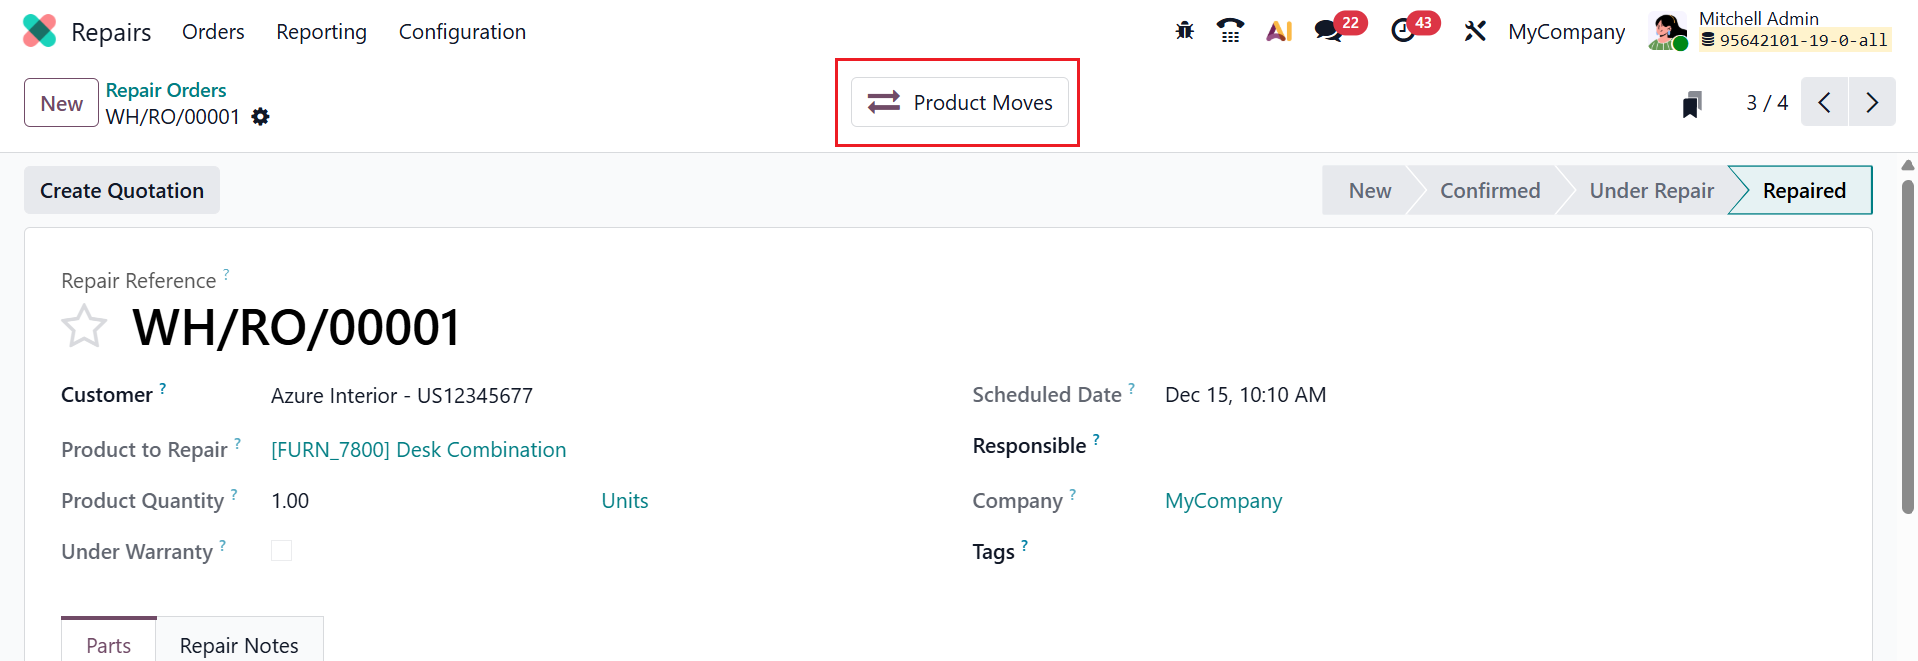
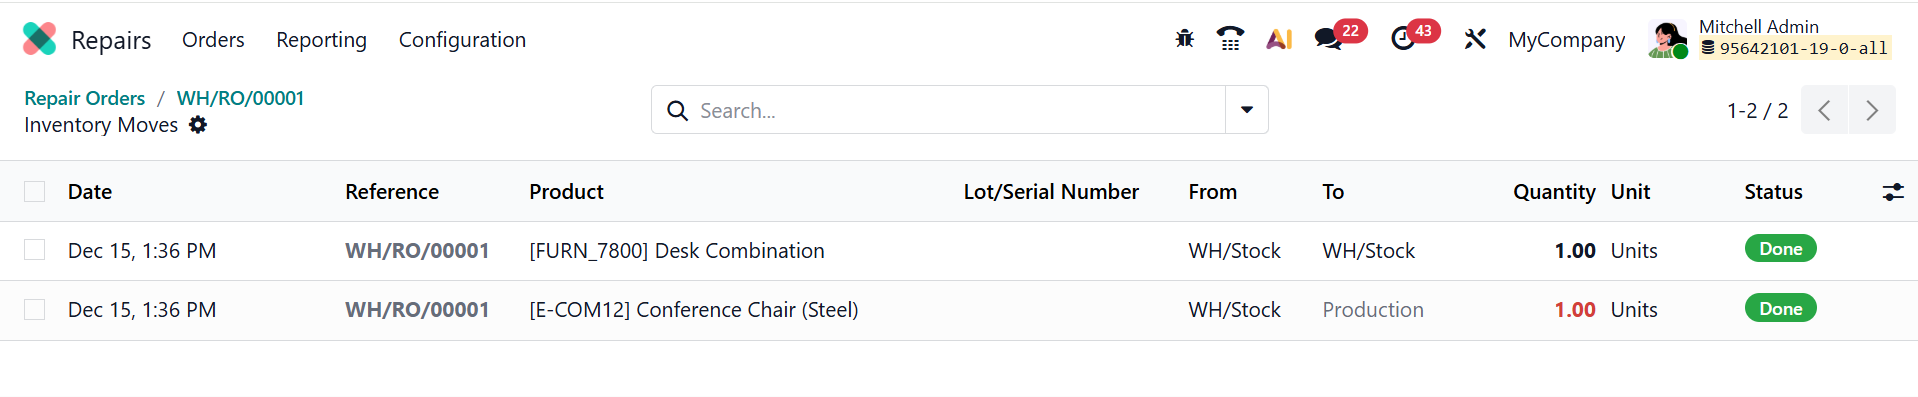
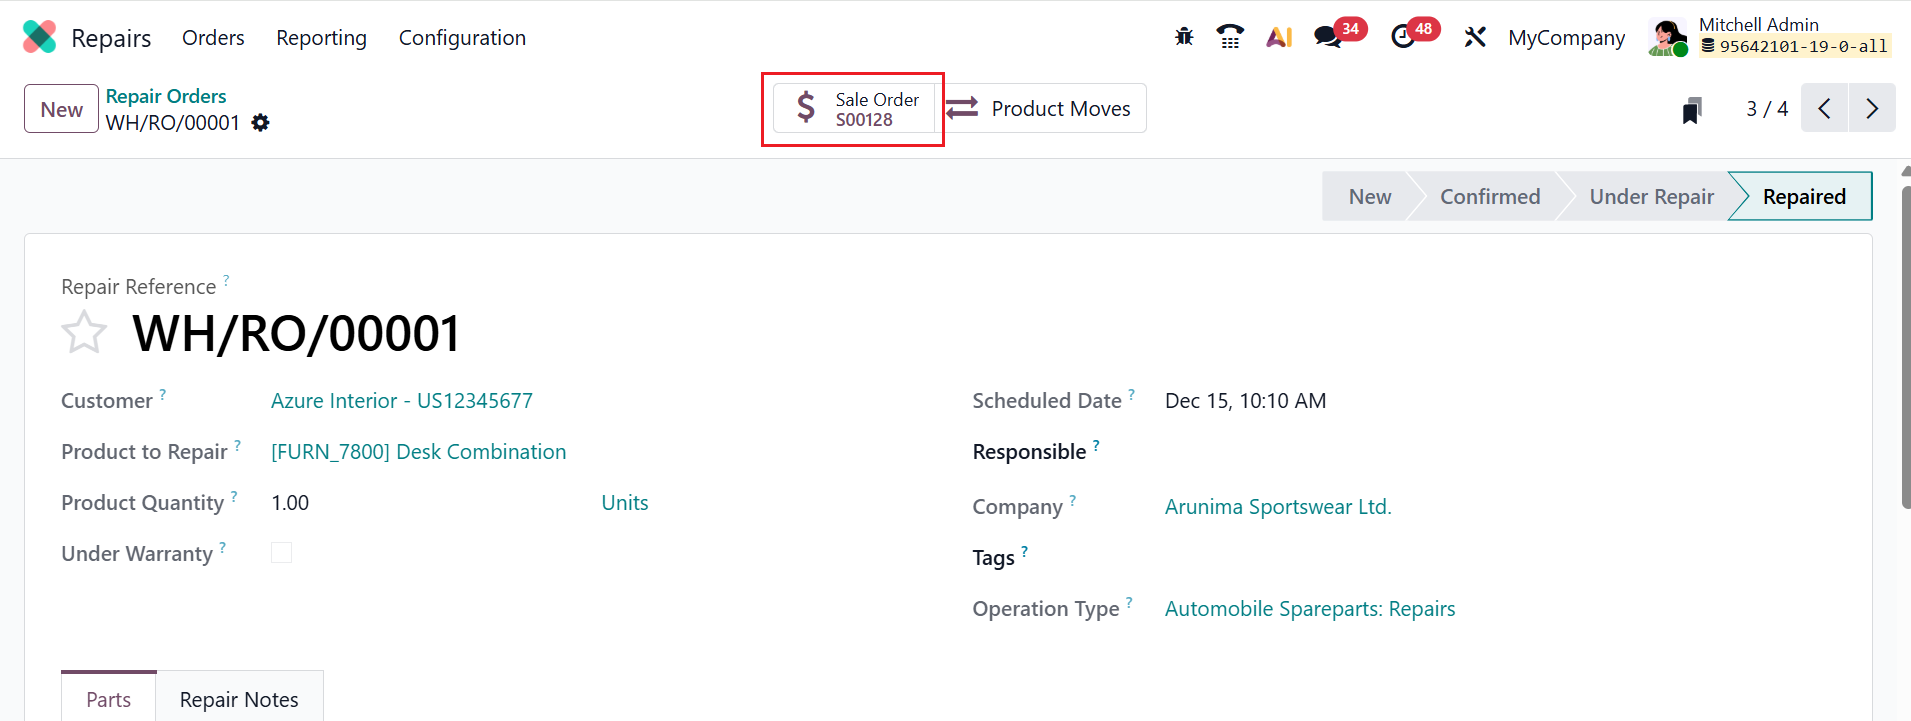
Here, you can see the repair order is in the Repaired stage. The Product Moves smart tab shows product movements after the repair order is placed.
The Product Moves smart tab shows a complete record of the product moves after repairs. This section displays details such as Date, Reference, Product, Lot/Serial Number, From, To, Quantity, Unit, and Status.
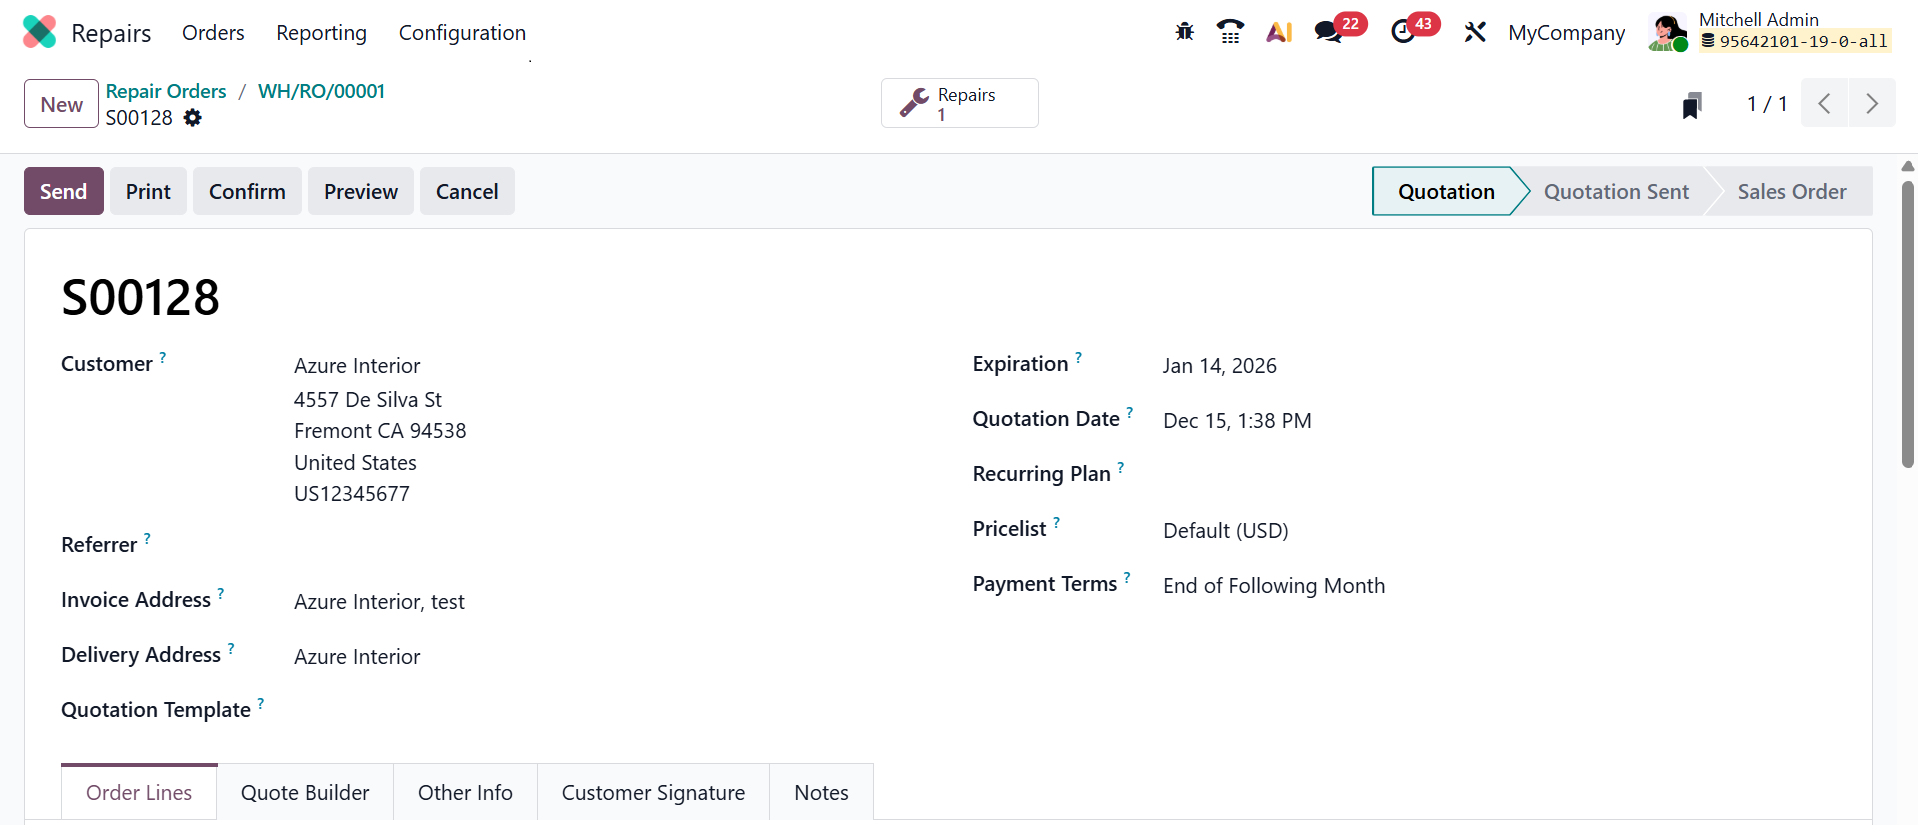
When you click on the Create Quotation button after completing the repair, the repair order will directly convert into a new quotation, as shown below:
Then, confirm the quotation and generate an invoice for the order. After creating an invoice, a Sales Order smart button will appear in the repair order dashboard as shown below:
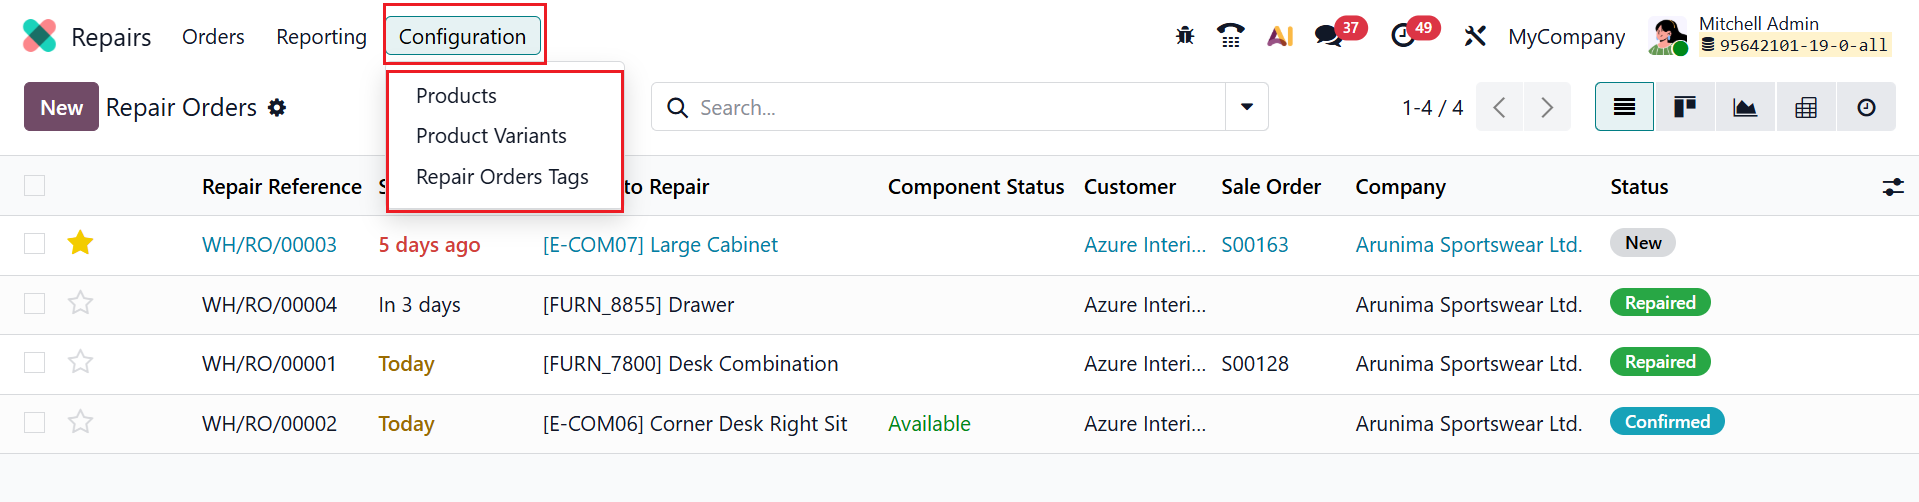
2. Configuration:
Under the Configuration menu, you can see three options: Products, Product Variants, and Repair Orders Tags.
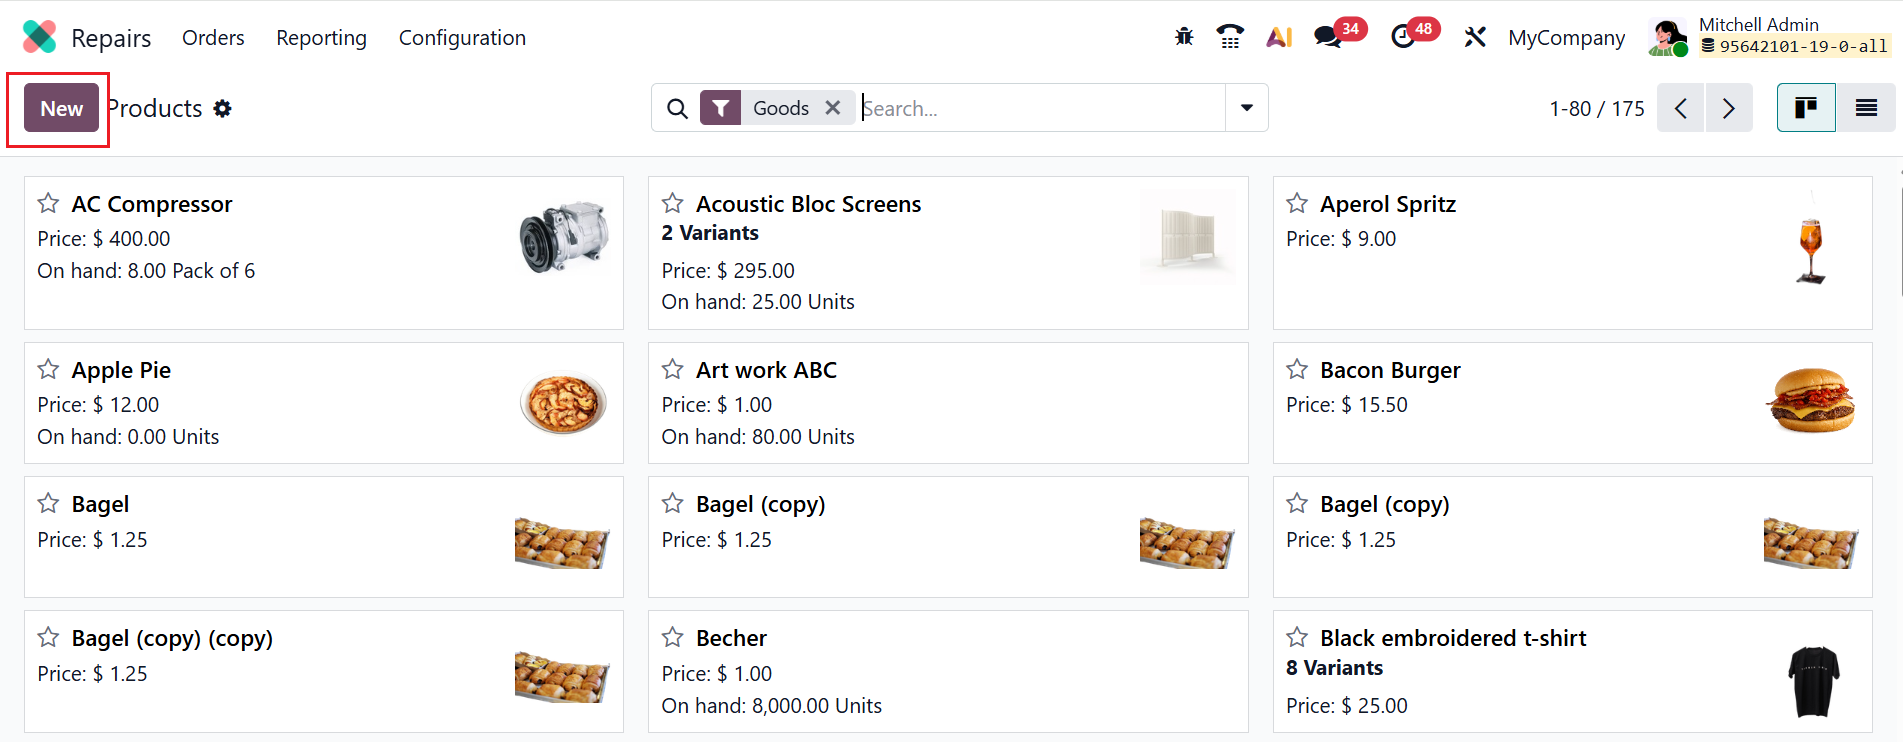
2.1 Products:
The Products option under the Configuration menu helps to define and manage the parts and services that can be added to a repair order. In a kanban dashboard view, you can see a detailed product catalog, including the product name, price, and quantity, as shown below. To add a product, click the New button or choose an existing product from the list.
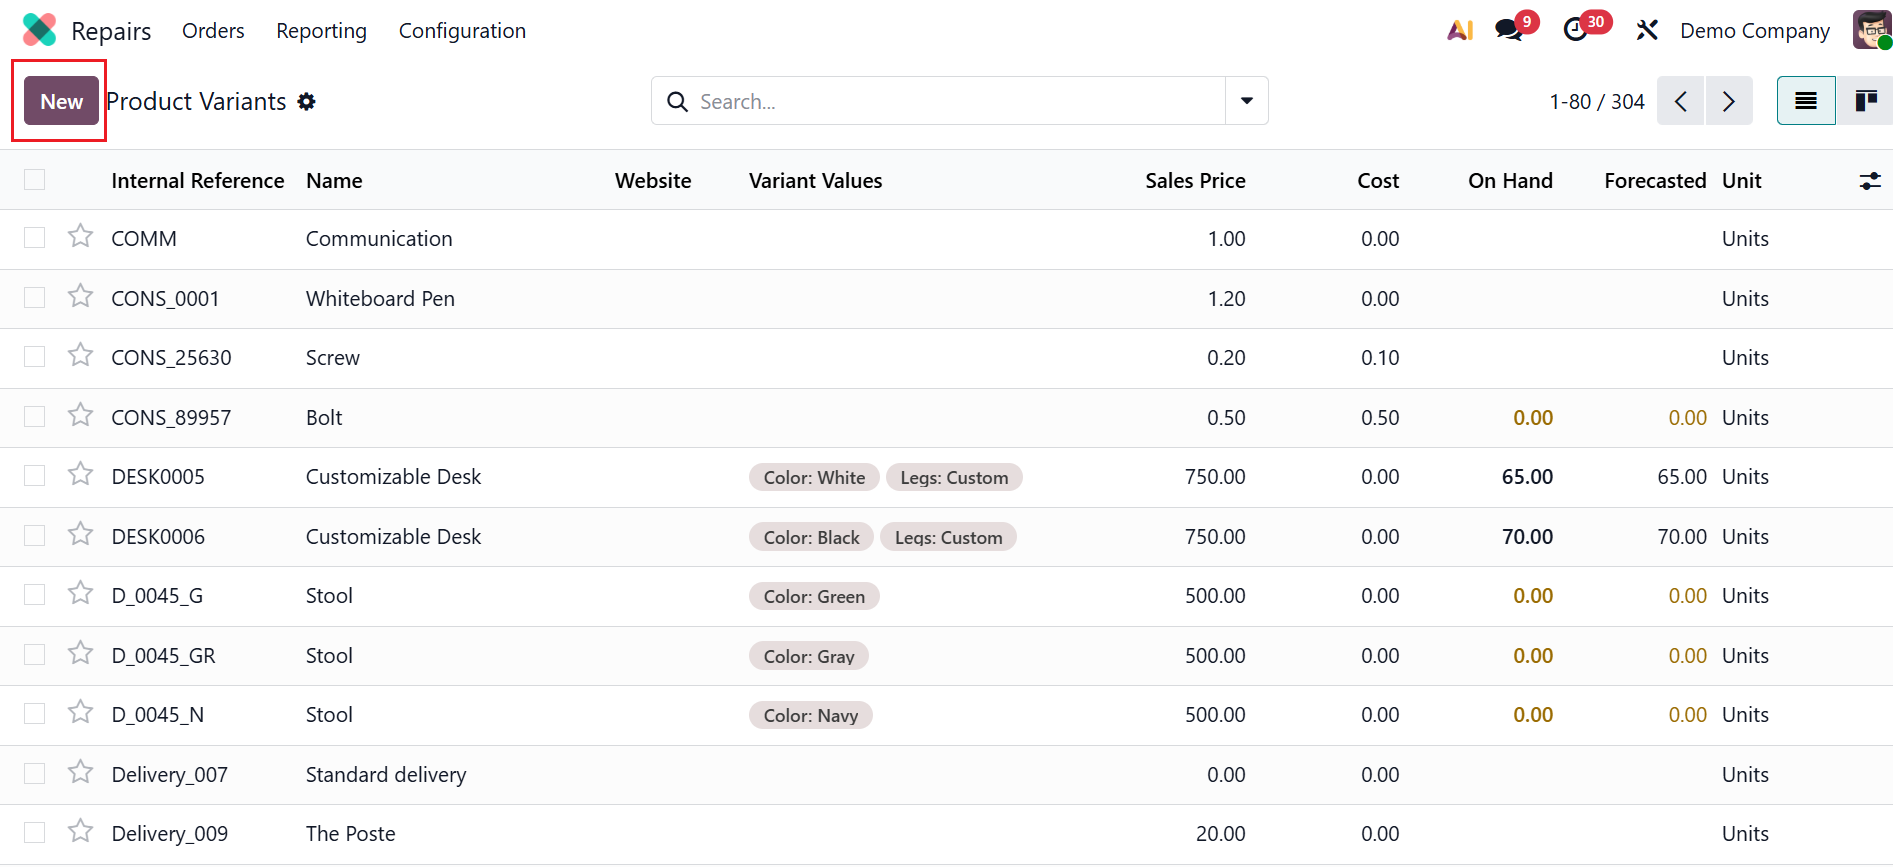
2.2 Product Variants:
The Product variants option allows you to manage variants of the same product within a single product template. These variants help you select the exact part or item needed for a repair. Click on the New button to create a new product variant or select an existing one from the list as shown below:
2.3 Repair Orders Tags:
Repair Order Tags are labels used to categorize and organize repair orders. Click the New button to create a new tag. Enter the Tag Name and Color Index in the line that appears, and then save

3. Reporting:
The Reporting menu provides analytical views of repair orders. This helps managers monitor repair performance and make well-informed decisions. The graphical representation of Repair Order Analysis can be changed into List, Pivot, and Kanban views. To view metrics such as Product Quantity and Count, click the Measures button. You can also change the bar chart of repair orders into a line chart, a pie chart, a stacked chart, an ascending order, or a descending-order chart.
The Odoo 19 Enterprise Repairs module demonstrates how Odoo accurately and efficiently streamlines repair processes. It shows how companies can track parts, manage repair orders, keep costs under control, and guarantee smooth coordination between customer service, accounting, and inventory. Odoo 19 minimises errors and manual labour by integrating repairs with stock movements and invoicing. The module's real-time reporting and visibility facilitate improved decision-making. In conclusion, Odoo 19 Enterprise's Repairs feature enables businesses to deliver faster, more reliable repair services while preserving profitability and client satisfaction.