Configuration
1.1 Sales Team
An efficient team of individuals is essential for managing all sales-related activities within a company. With the help of the Odoo 19 Sales module, you can create many productive teams of accountable individuals to manage your sales initiatives and, consequently, boost sales. There are setting choices for the sales team in the CRM module as well. A similar method is used by the CRM and Sales modules to configure sales teams.
By choosing the Sales Teams option from the Configuration menu of the Sales module, you can access the platform shown below for creating and managing sales teams.
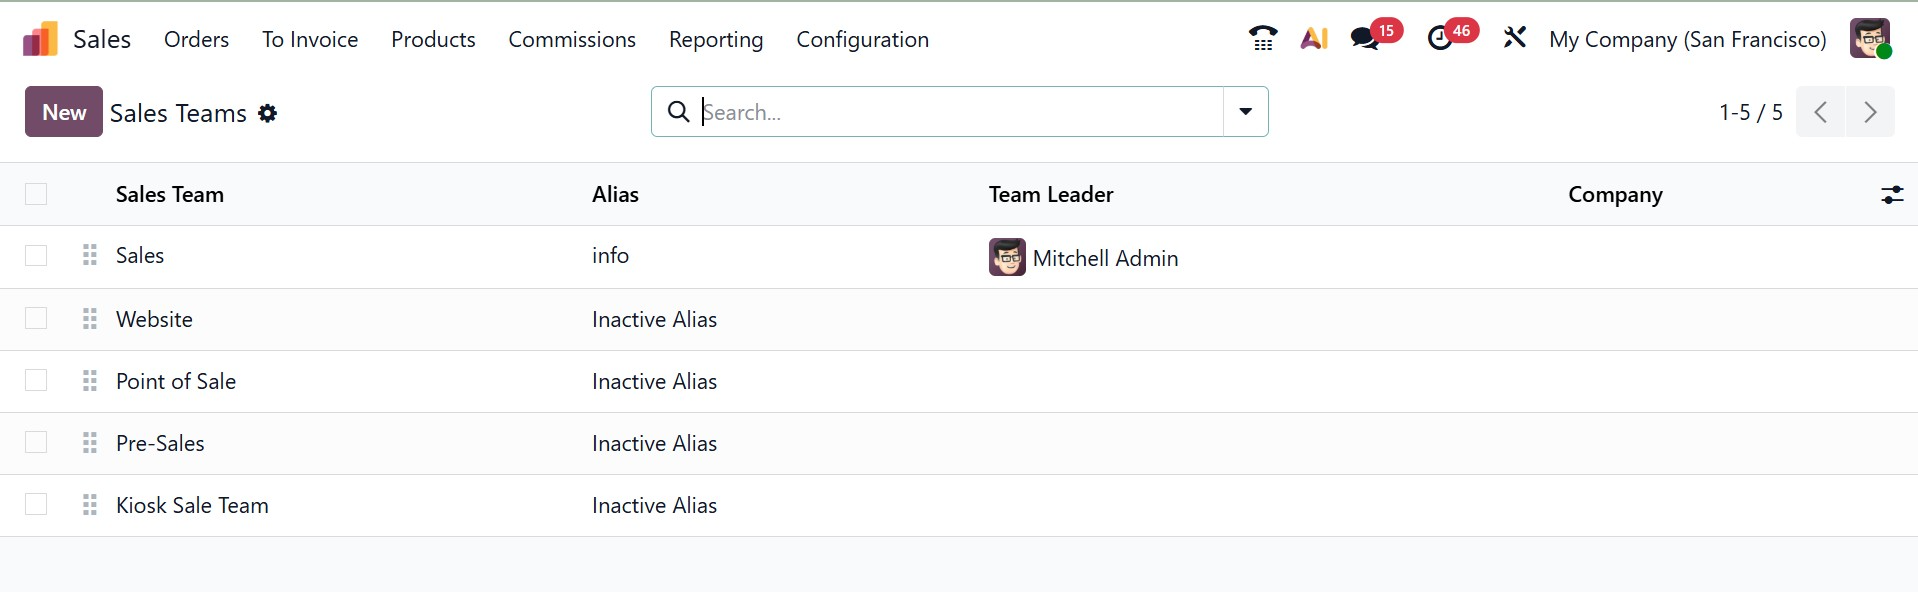
You may see the sales teams that are already set up on this platform, together with details like the team's name, alias, team leader, and company. Using the New button, you can quickly create a new team to manage your sales activities.
The new sales team setup window's Sales Team section allows you to enter a suitable team name. By ticking the Quotations option, you can provide your customers with quotes instead of instantly confirming sales orders. Check the Pipeline box to manage a pre-sales process with opportunities. Before being converted into opportunities and sent to a salesperson, incoming queries can be filtered and qualified as leads by clicking the Leads box.
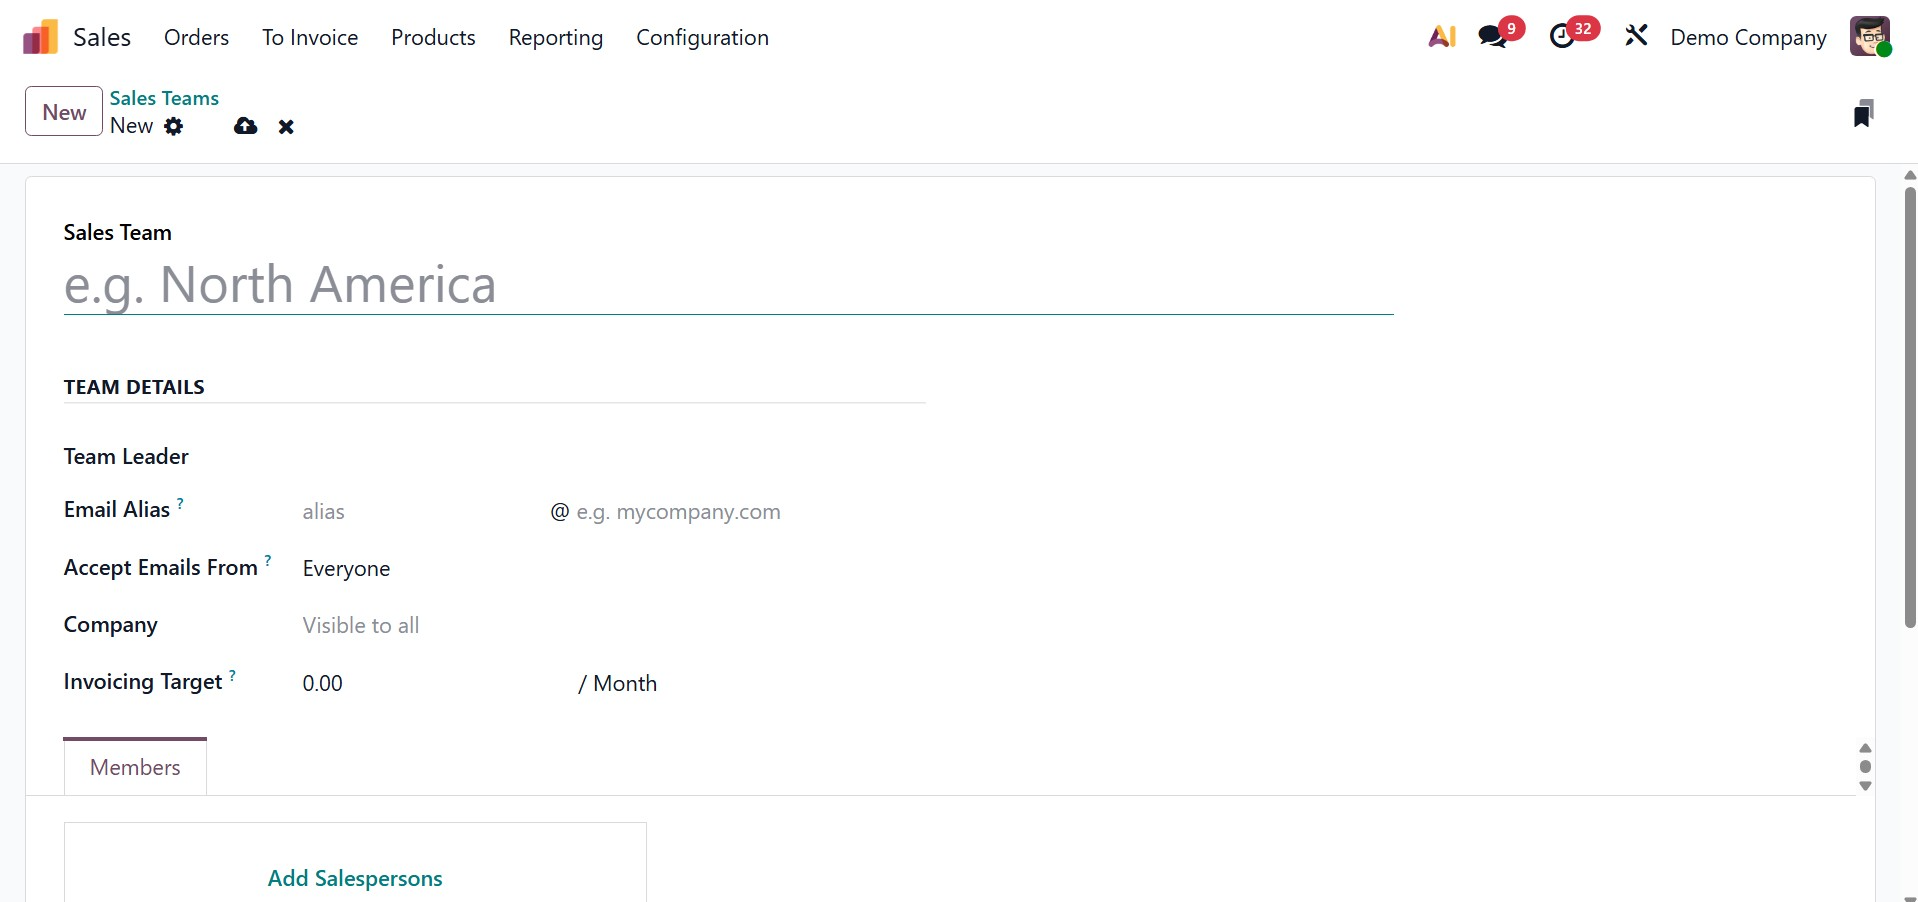
You can assign a worker to the role of Team Leader under "Team Details." Next, set up a custom domain to use as your email alias in the designated field. This sales team can accept emails from Authenticated Employees, Followers only, Authenticated Partners, or Everyone, depending on the option you select in the Accept Emails From section. The company linked to the sales team can be specified in the relevant area. In the invoicing target box, you can select the monthly income goal.
Clicking the Add button beneath the Members tab will allow you to add team members. A new wizard will show up as soon as you click the Add button, as shown in the picture below.
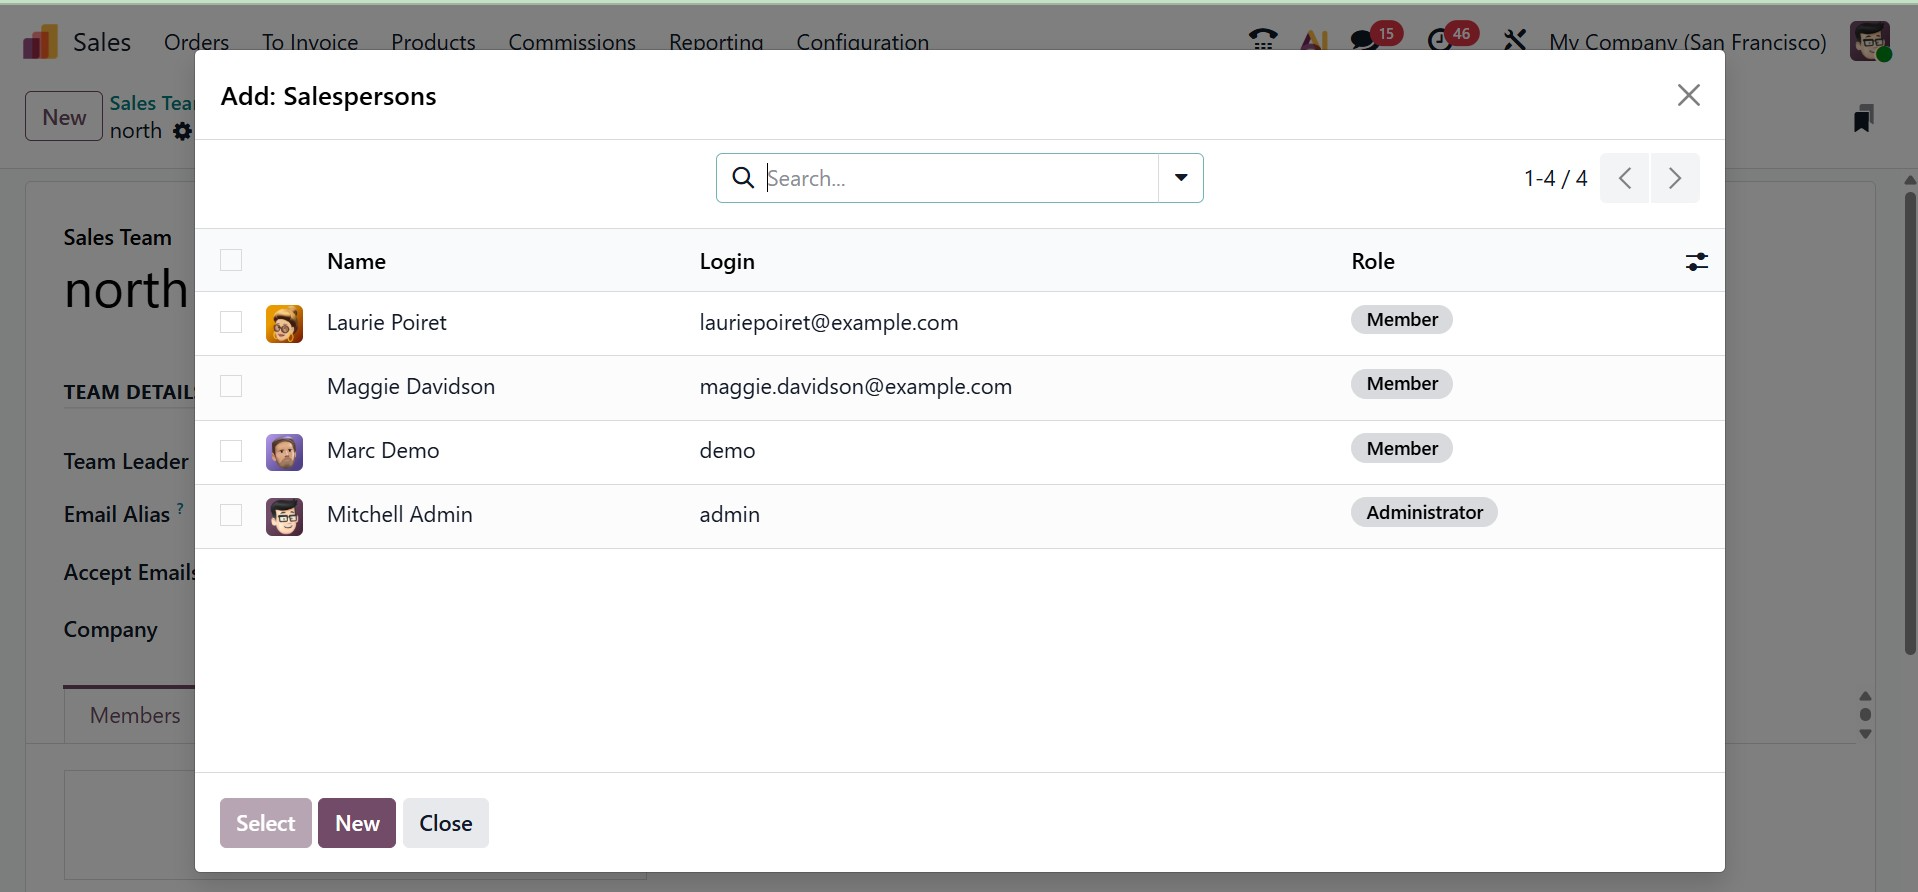
You can select team members from this window. After further members are joined, the new sales team will be stored in your system.
1.2 Quotation Template
In the Odoo 19 Sales module, you can provide a standard format for the sales quotes you create. When creating new quotations, you may quickly utilize these templates that you can create using Odoo 19. It's easy to create quotation templates with the Odoo 19 Sales module.
To use the platform for creating quotation templates, you must enable the Quotation Templates option from the Sales module's Settings menu.
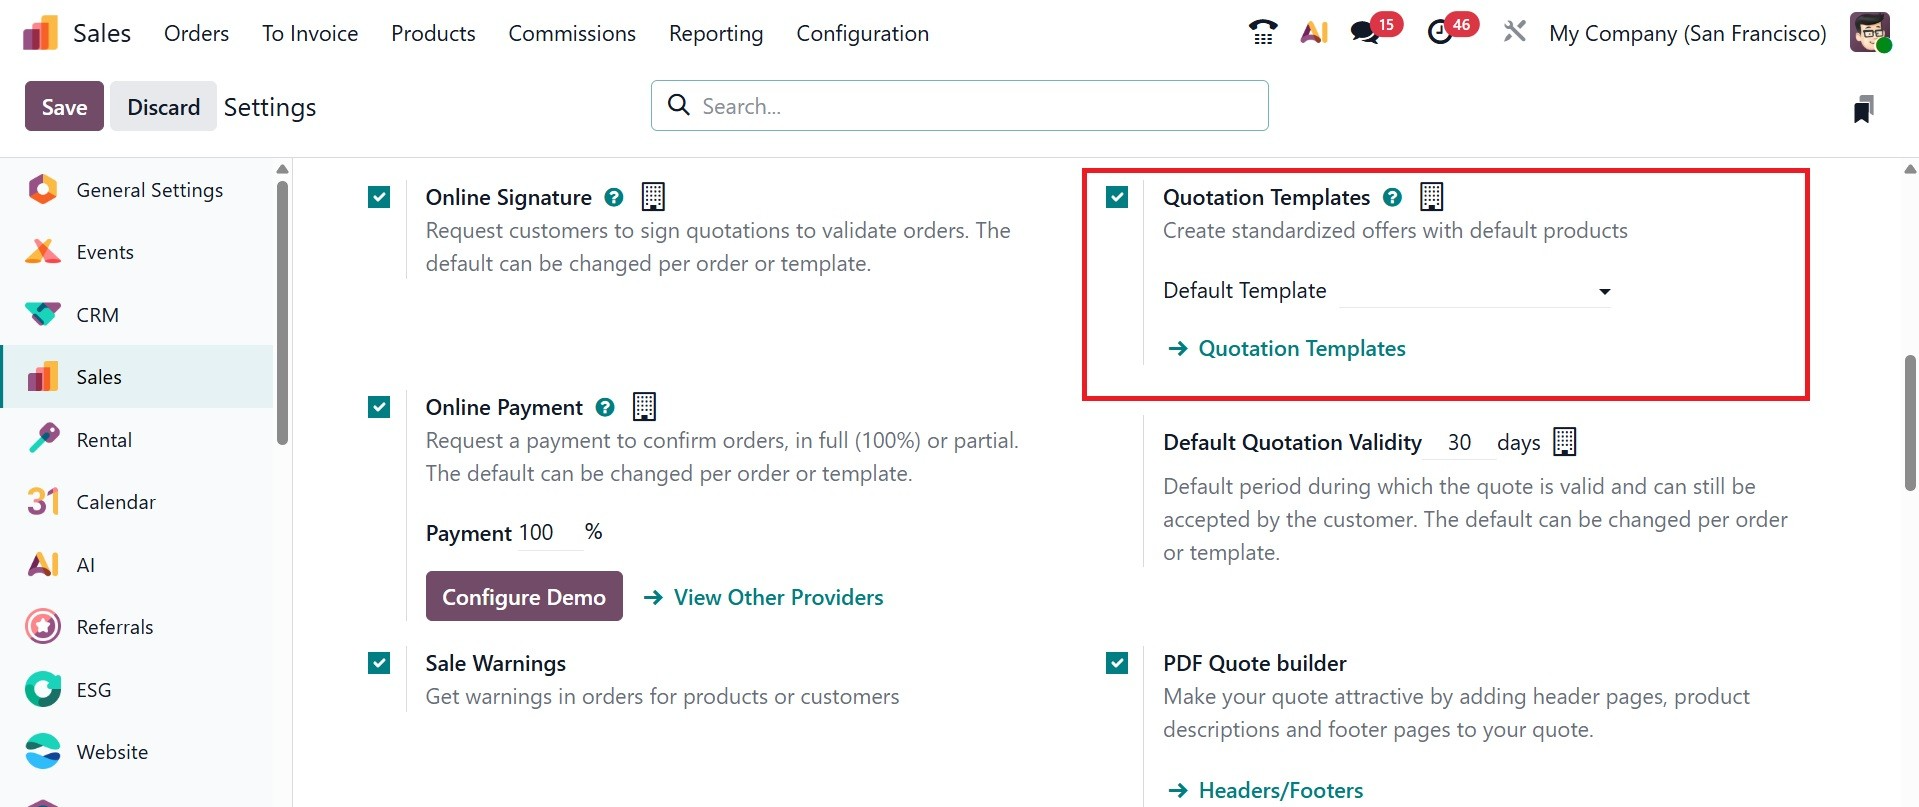
In order to swiftly generate your quotation templates utilizing the advanced building blocks offered by the Odoo 19 website, you are permitted to enable the Quotation Builder option in addition to this one.
New Quotation Templates can be configured via the Configuration menu of the module.
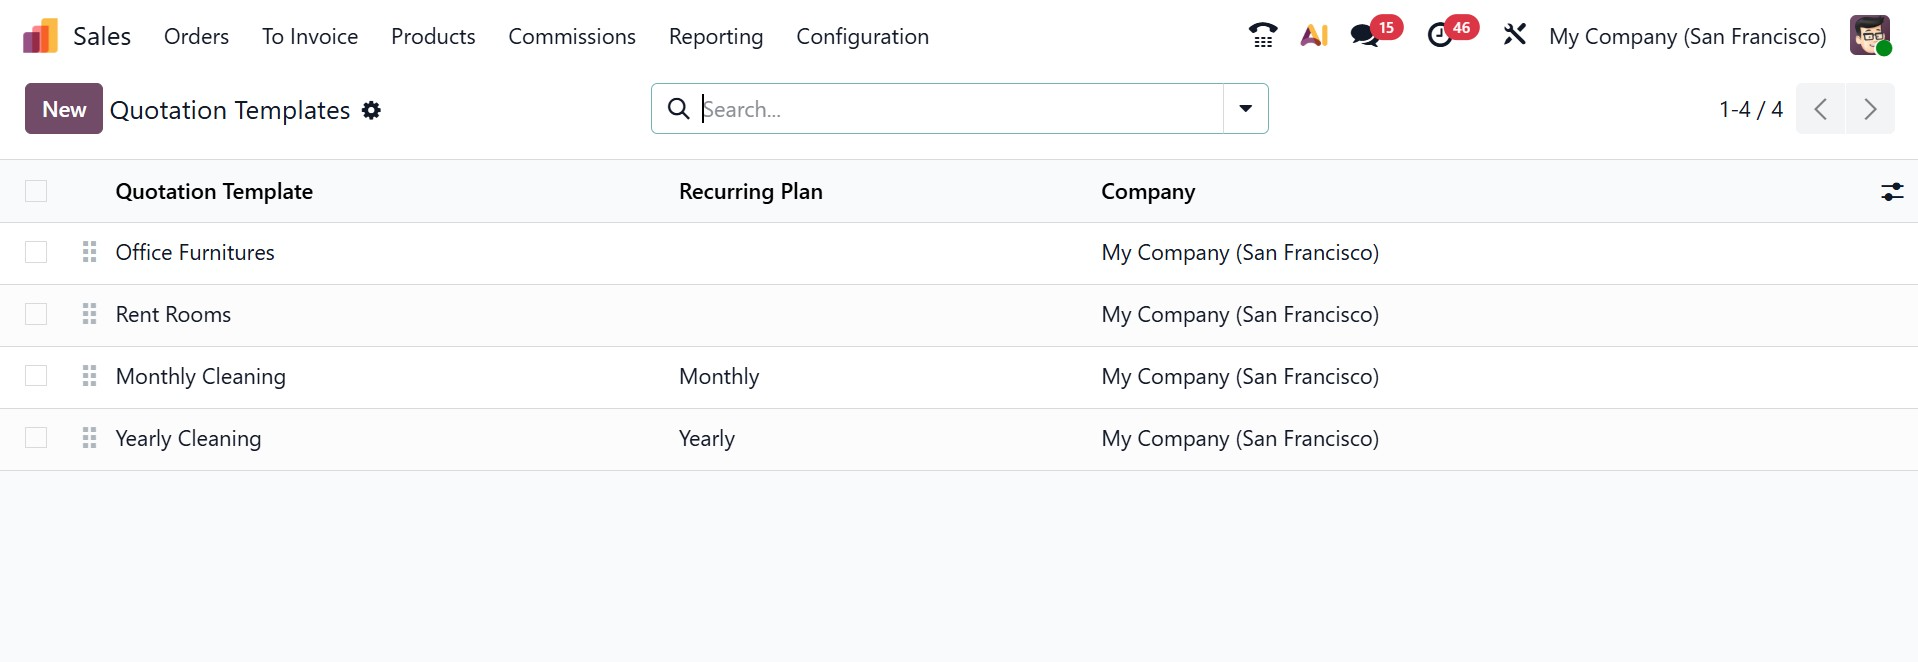
You will be able to access pre-configured templates on this platform that contain the title and business details. Click the NEW option to create a new quotation template. A new window for creating quotation templates will appear on your screen.
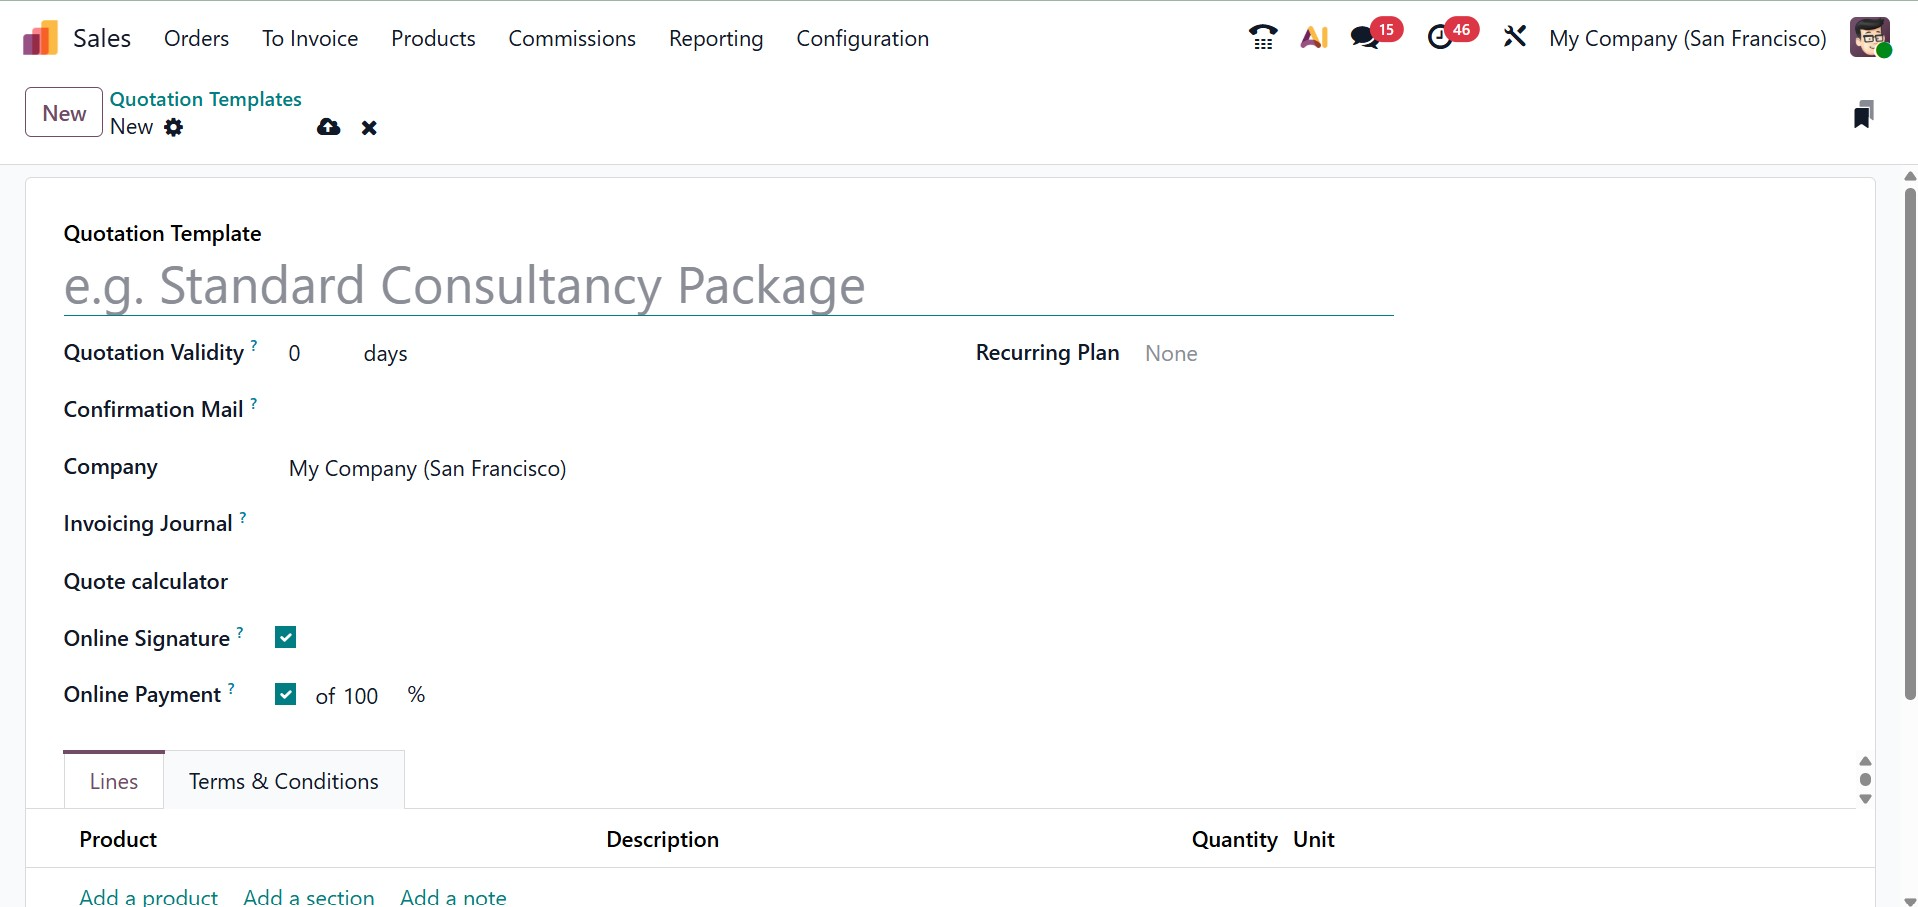
You can enter the Quotation Template's name in the designated field. In the section marked "Quotation Validity," you can enter the number of days to be used in determining the quotation's validity date. You can add the Company, Confirmation email, an Invoicing journal, and Quote calculator options as well.
- Company: To indicate which company this quotation template applies to in a multi-company setting, utilize the Company field.
- Confirmation email: Choose a preset email template to be sent to clients upon order confirmation by clicking the blank drop-down box in the Confirmation Mail field.
- Invoicing journal: All sales orders using this template will invoice in the designated journal if a journal is defined in the Invoicing Journal box. The sales journal with the lowest sequence is utilized if this field is left empty.
- QuoteCalculator: The "quote calculator" tool automatically calculates and displays exact pricing based on established rules, product configurations, quantities, and other dynamic parameters using Odoo's spreadsheet application.
By activating the Online Signature feature in the online confirmation box, you can request the customer's online signature to instantly validate the sales order. By turning on the Online Payment field, the consumer can use online payment alternatives to pay for their orders.
By simplifying the automated creation of periodic quotations, Recurring plans in Odoo 19 quotation templates make it easier to manage subscription-based services or goods with recurrent billing.
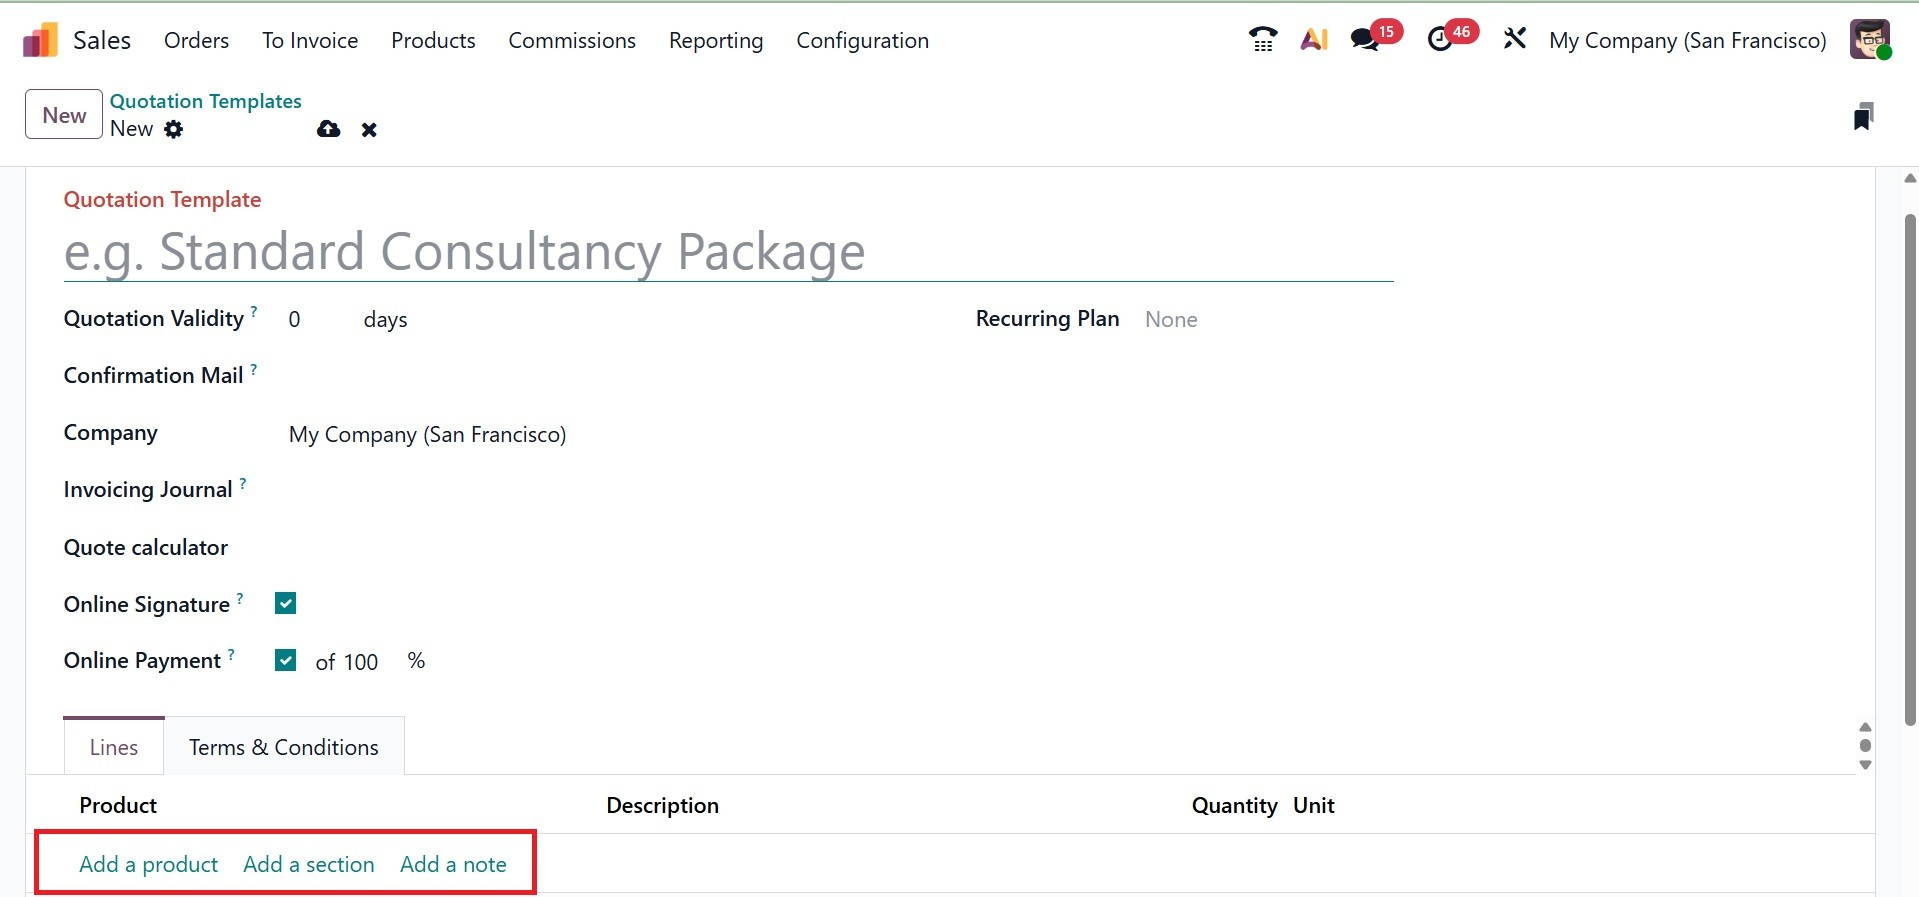
As we indicated in the Sales Quotation setting, you will be able to locate the tab to add the list of products in this window. Under the Lines tab, you may add products, sections, and notes by using the Add a Product, Add a Section, and Add a Note buttons, respectively.
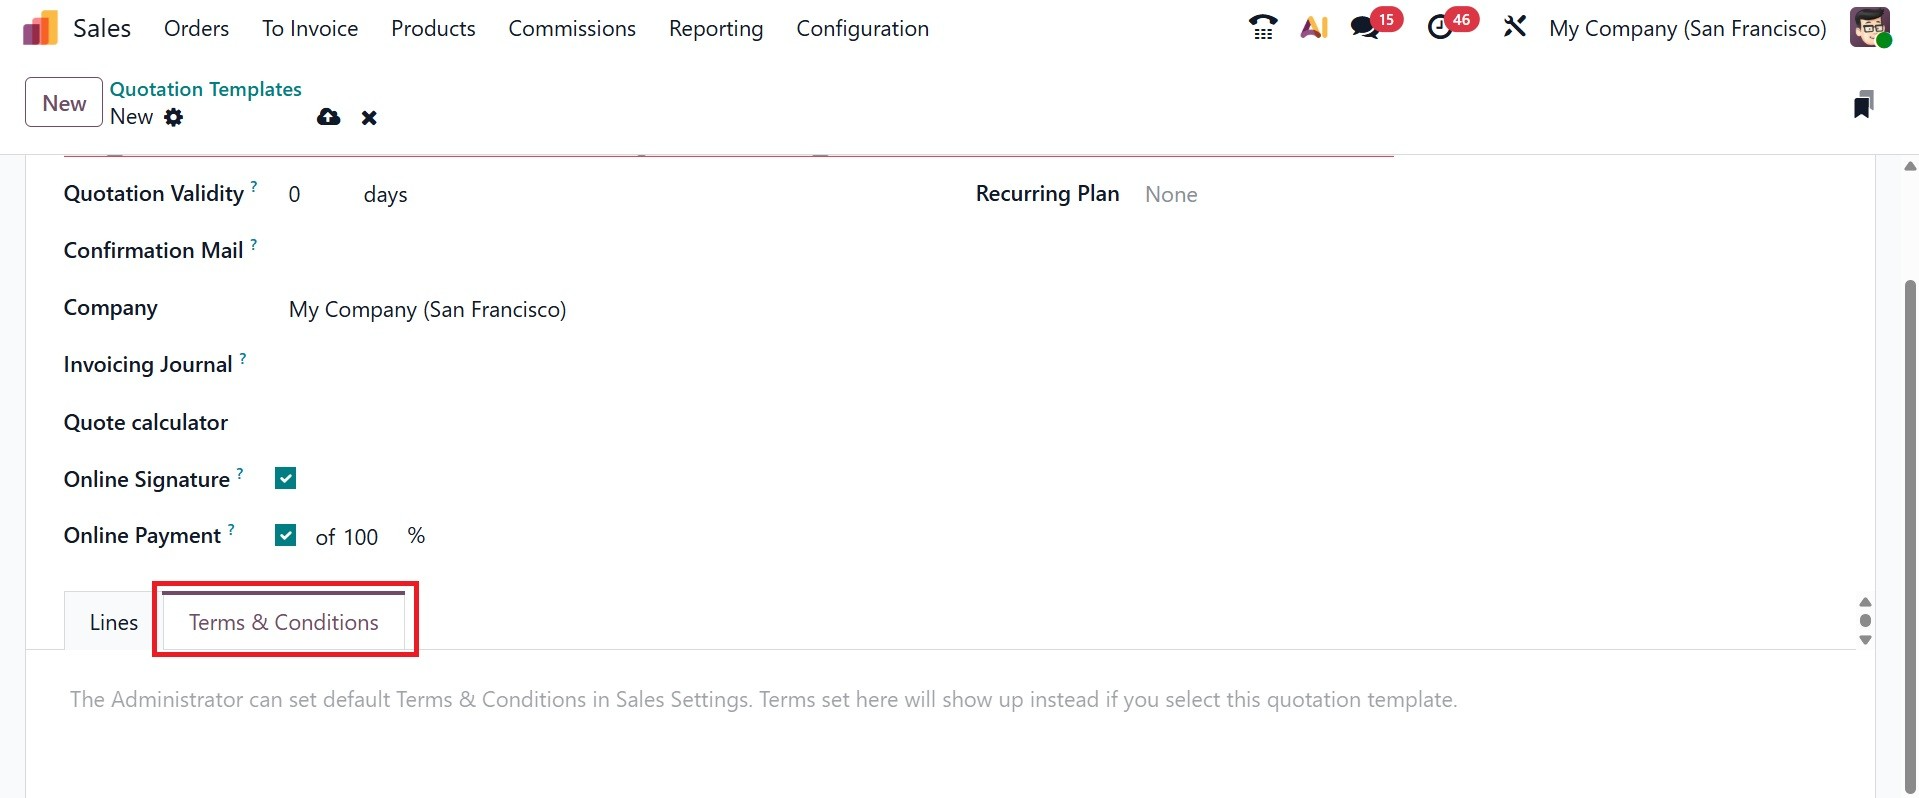
The Terms & Conditions tab allows you to specify the terms and conditions that apply to this quotation template.
Once all required fields have been completed, the new quotation template will be immediately added to your system.
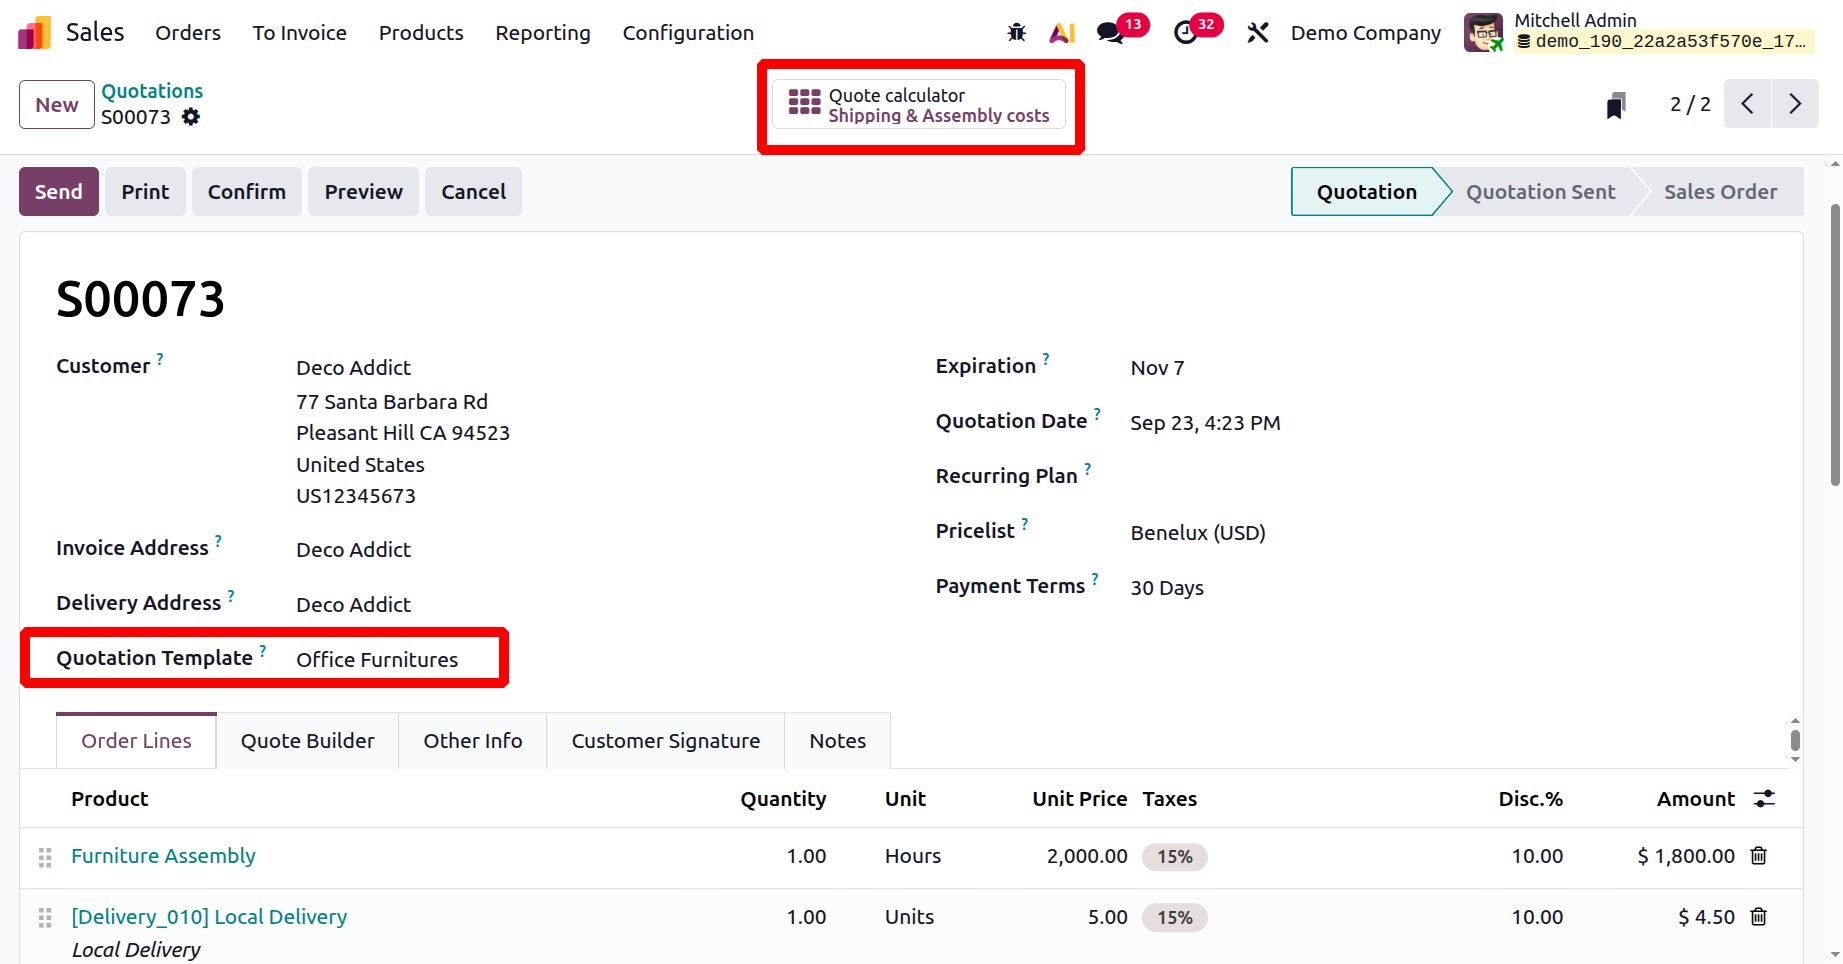
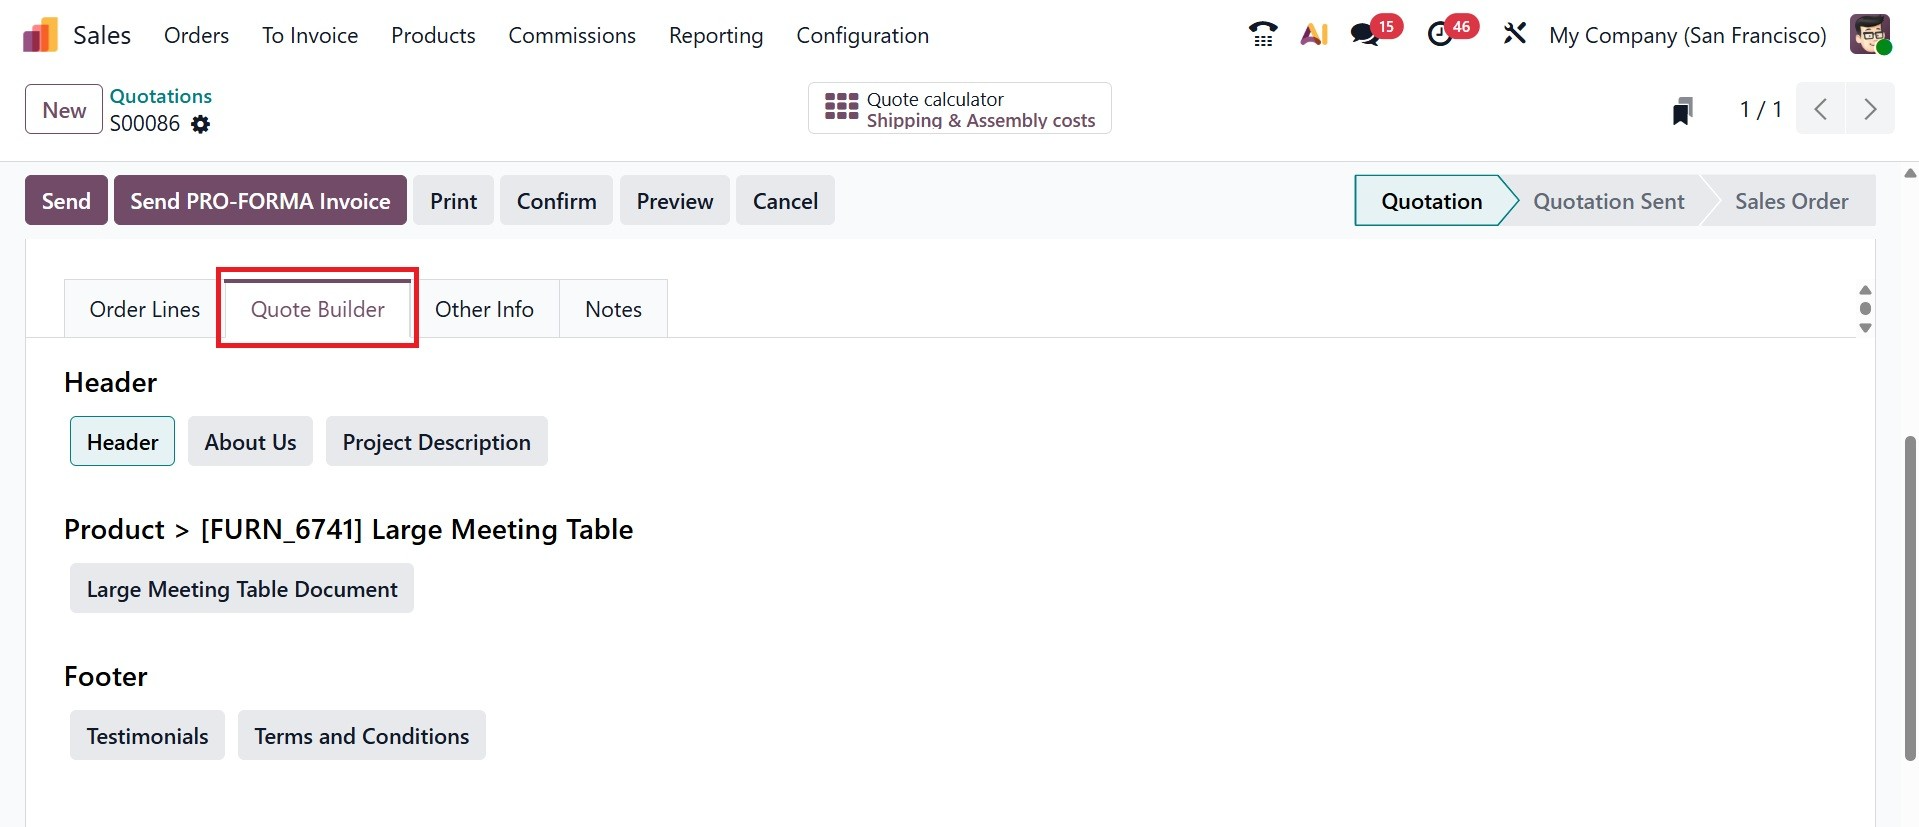
The Quotation Template can be used inside the Quotation, and the Qute calculator will shown as a smart tab as shown below.
1.3 Headers/Footers
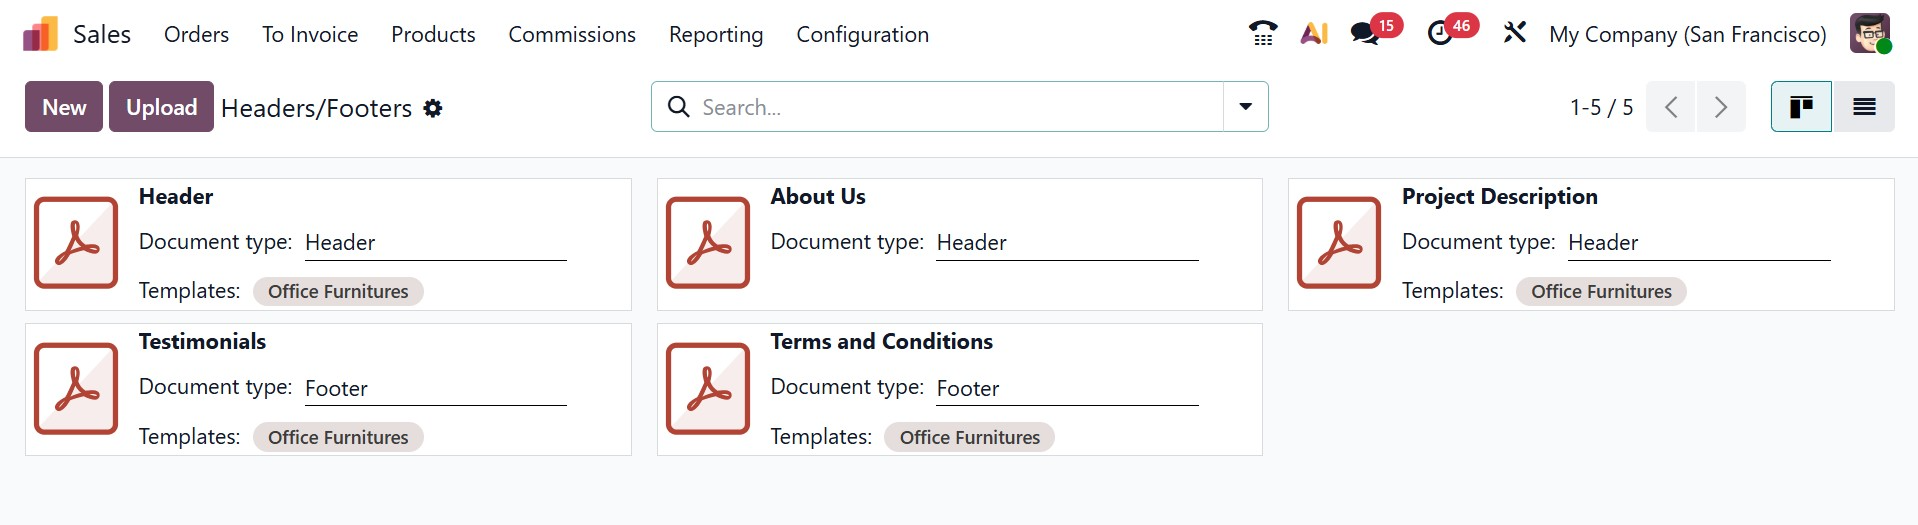
The Headers/Footers option in Odoo Sales' Configuration menu allows you to alter the company's branding and legal information that is automatically displayed on sales-related documents such as invoices, sales orders, and quotations. You can specify the standard header (such as the company name, logo, slogan, and address) and footer (such as the legal terms, registration information, disclaimers, or signature lines) that will be used uniformly in all printed or PDF reports produced by the Sales module using this parameter. The page provides the headers/footers, as in the screenshot below.
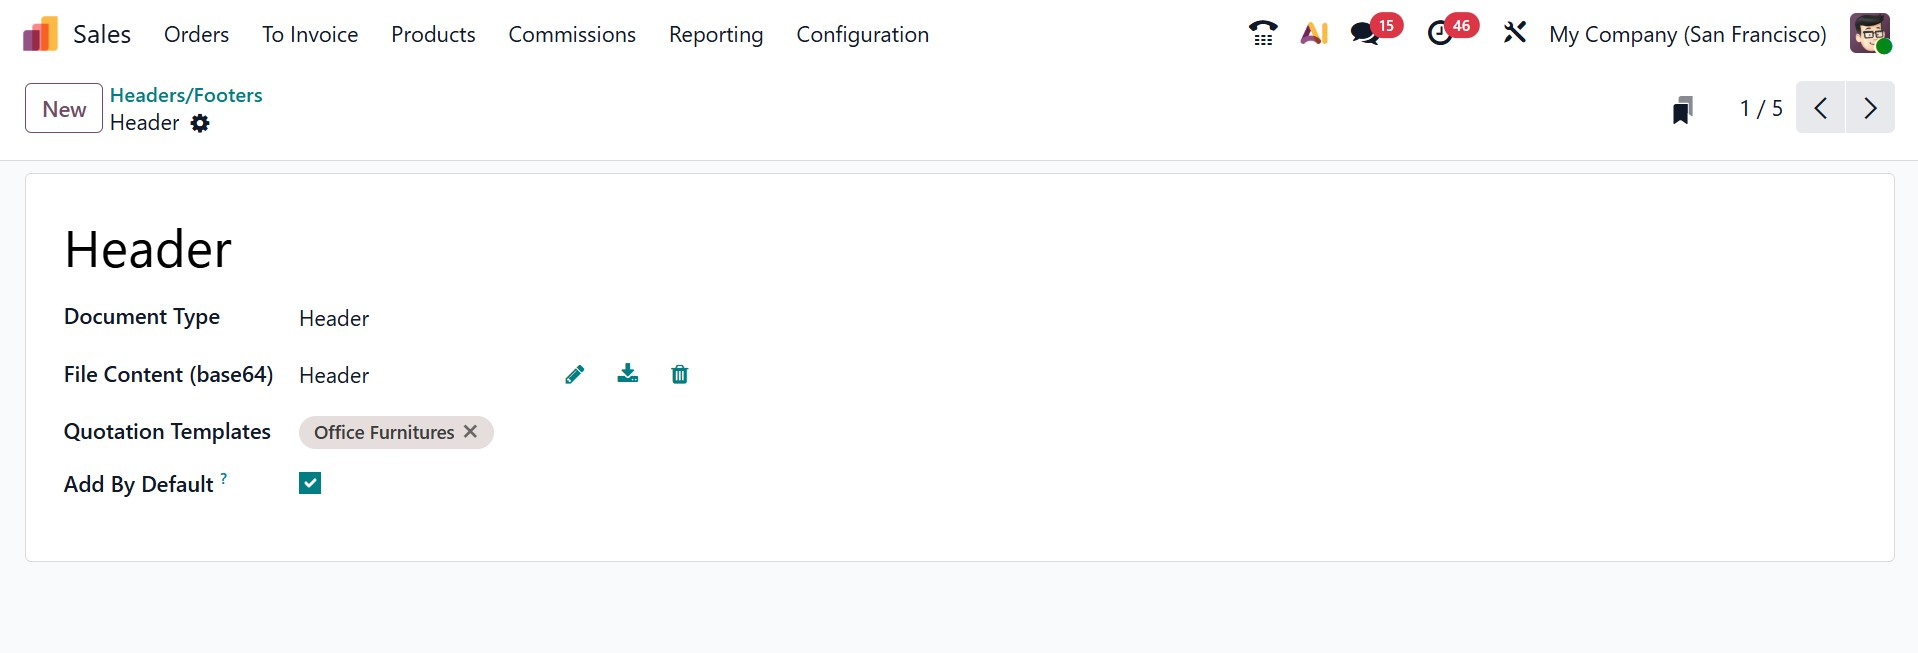
Here, on selecting a particular one, you can add the headers and footers by default, as in the image below.
Now, create a new quotation from the order’s menu, and provide a quotation template in the allotted space.
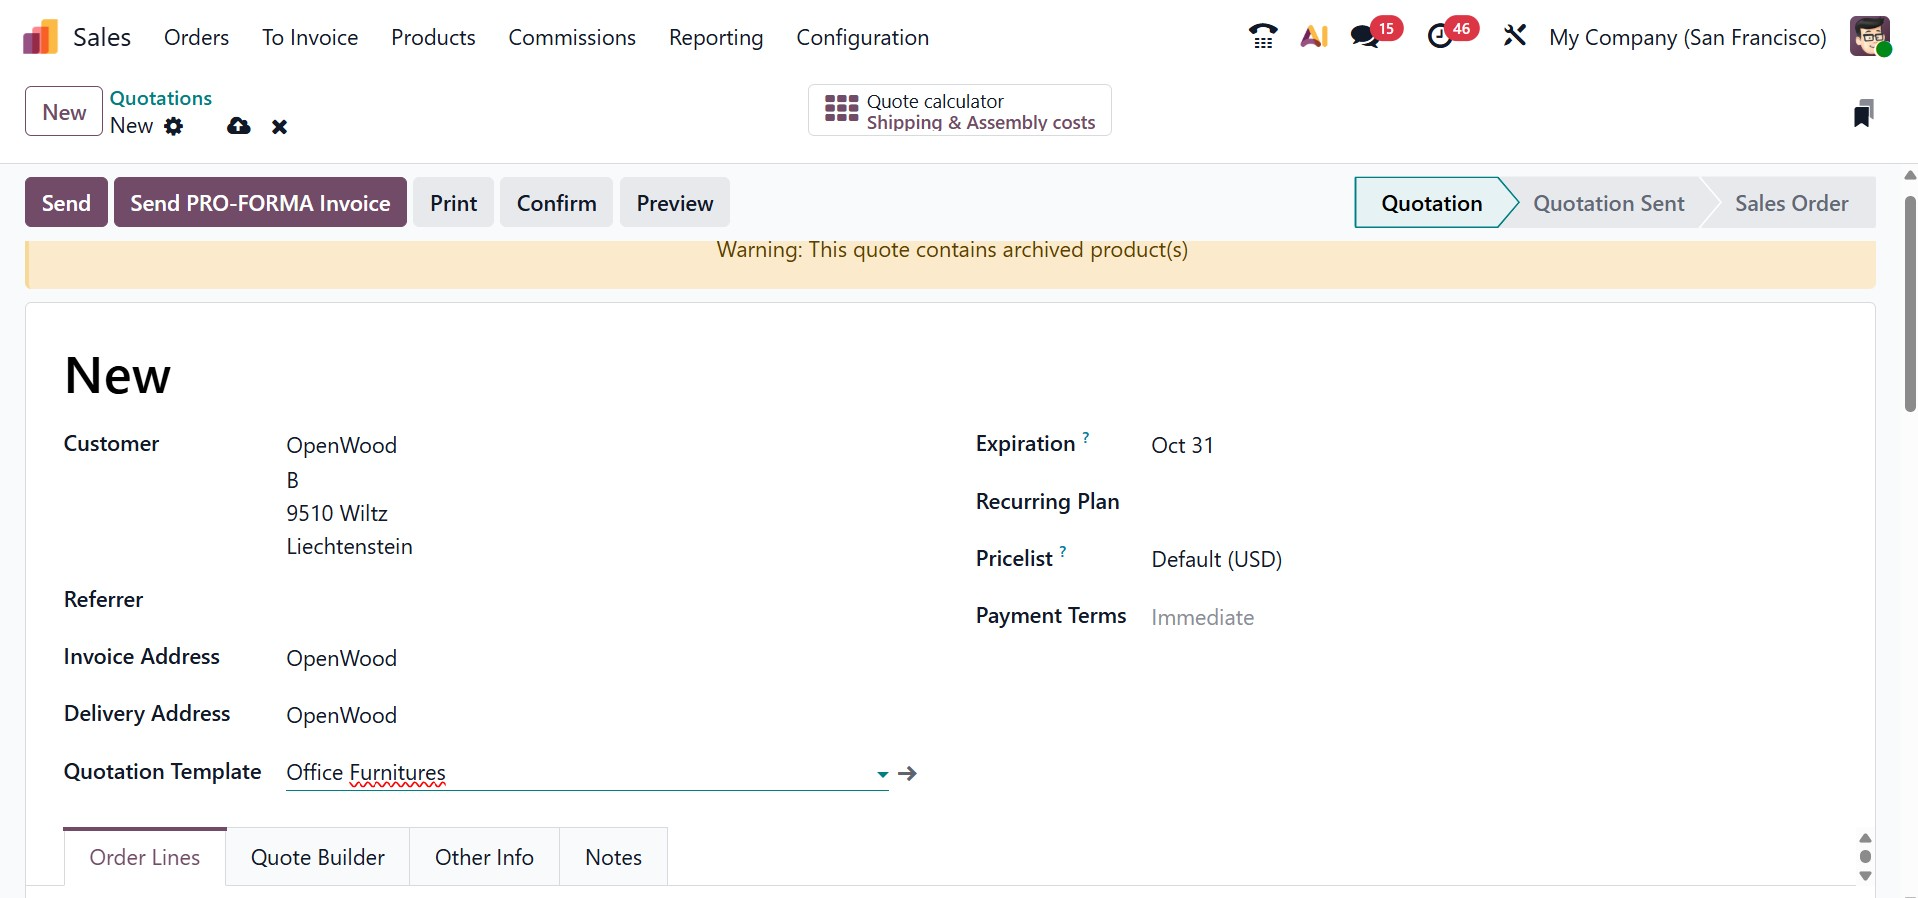
There, then move to the Quote Builder tab, which provides the header and footer added by default, as in the image below.
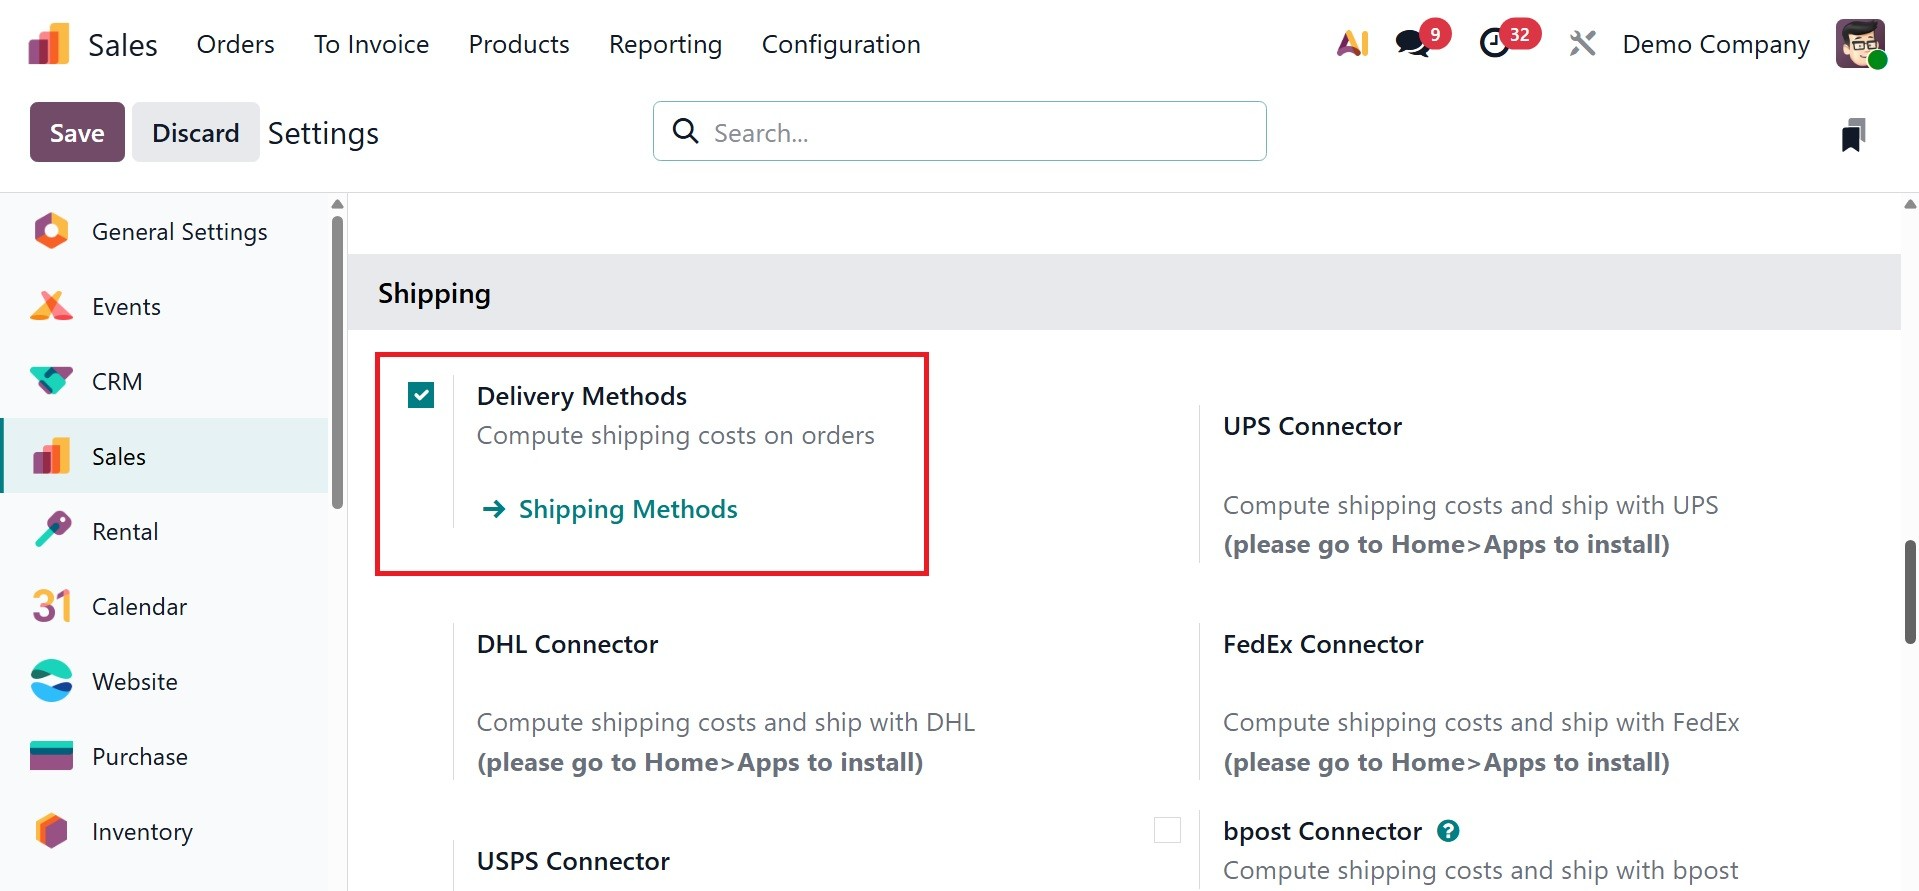
1.4 Delivery Method
When enabled in Odoo settings, the Delivery Methods feature gives you the ability to figure out how much shipping will cost for sales orders and online shopping carts. The option will be available once you activate it from the settings, as shown in the screenshot below.
Shipping costs are determined using the carrier's pricing and packing details when a third-party carrier is integrated.
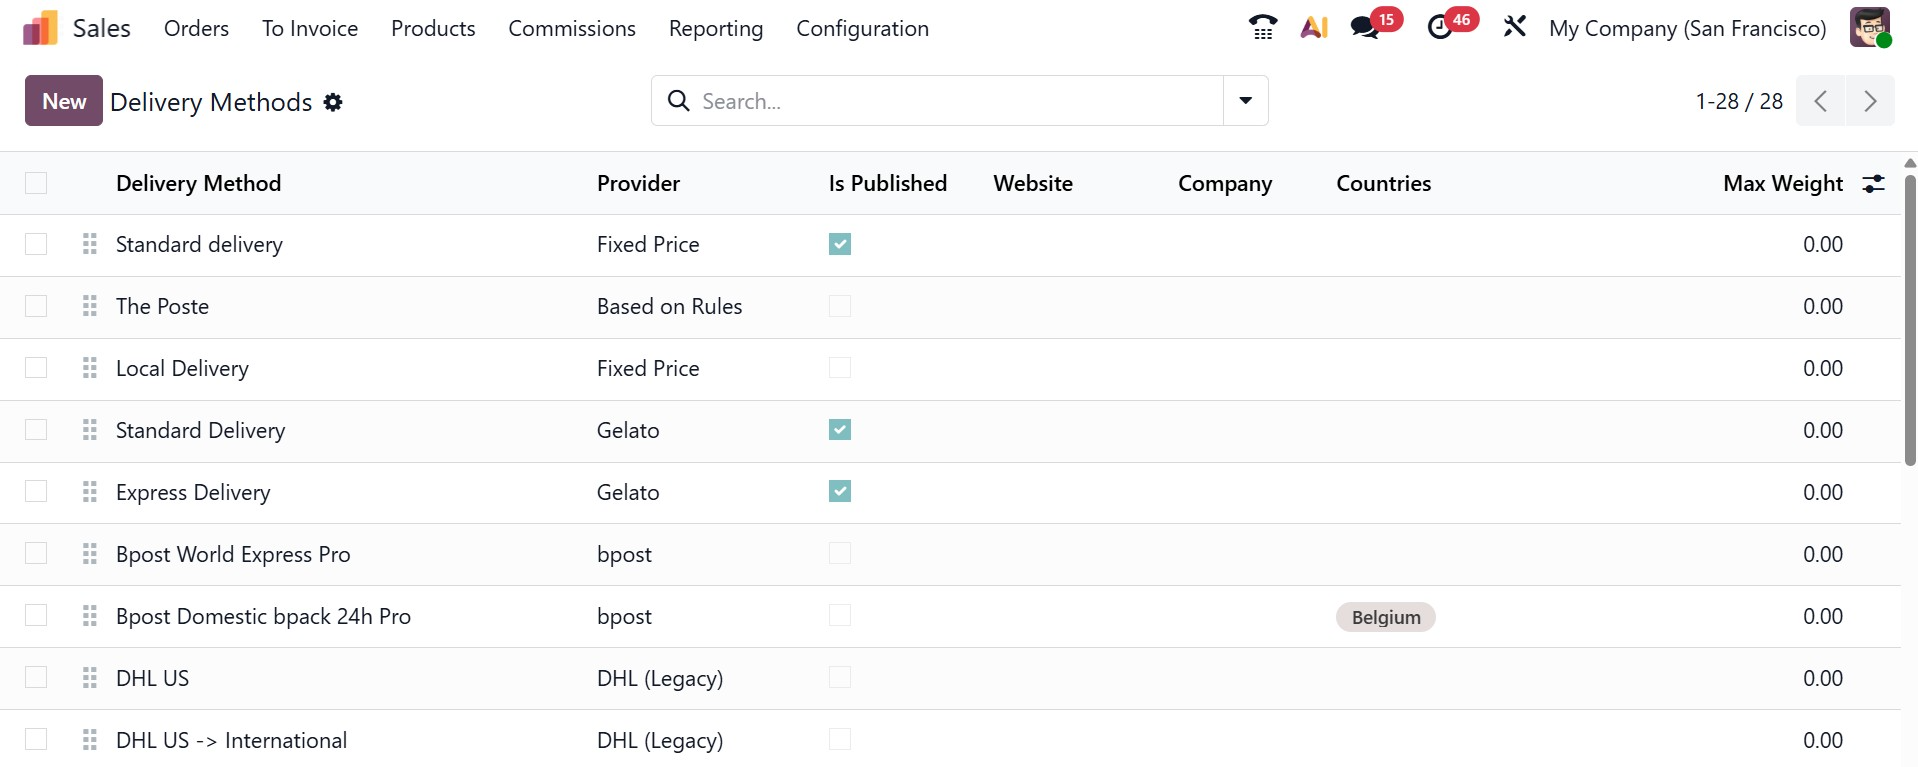
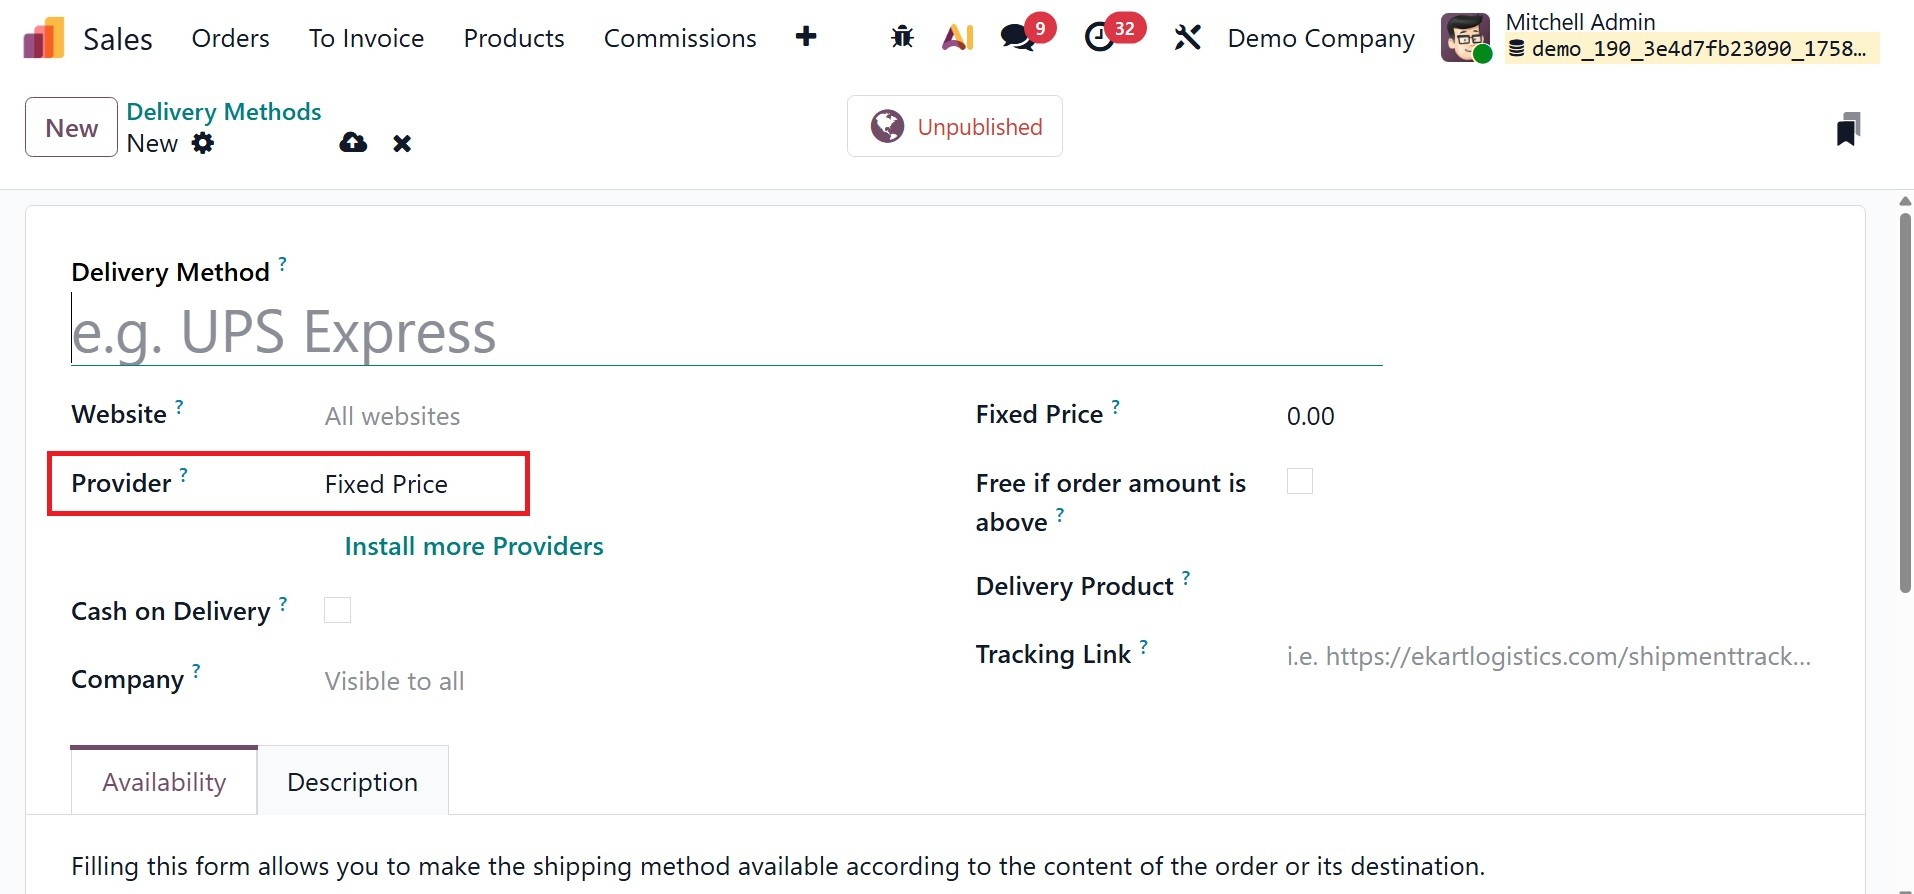
Click New to add a method to the Delivery Methods page. By doing this, a form requesting information about the delivery supplier is opened, containing:
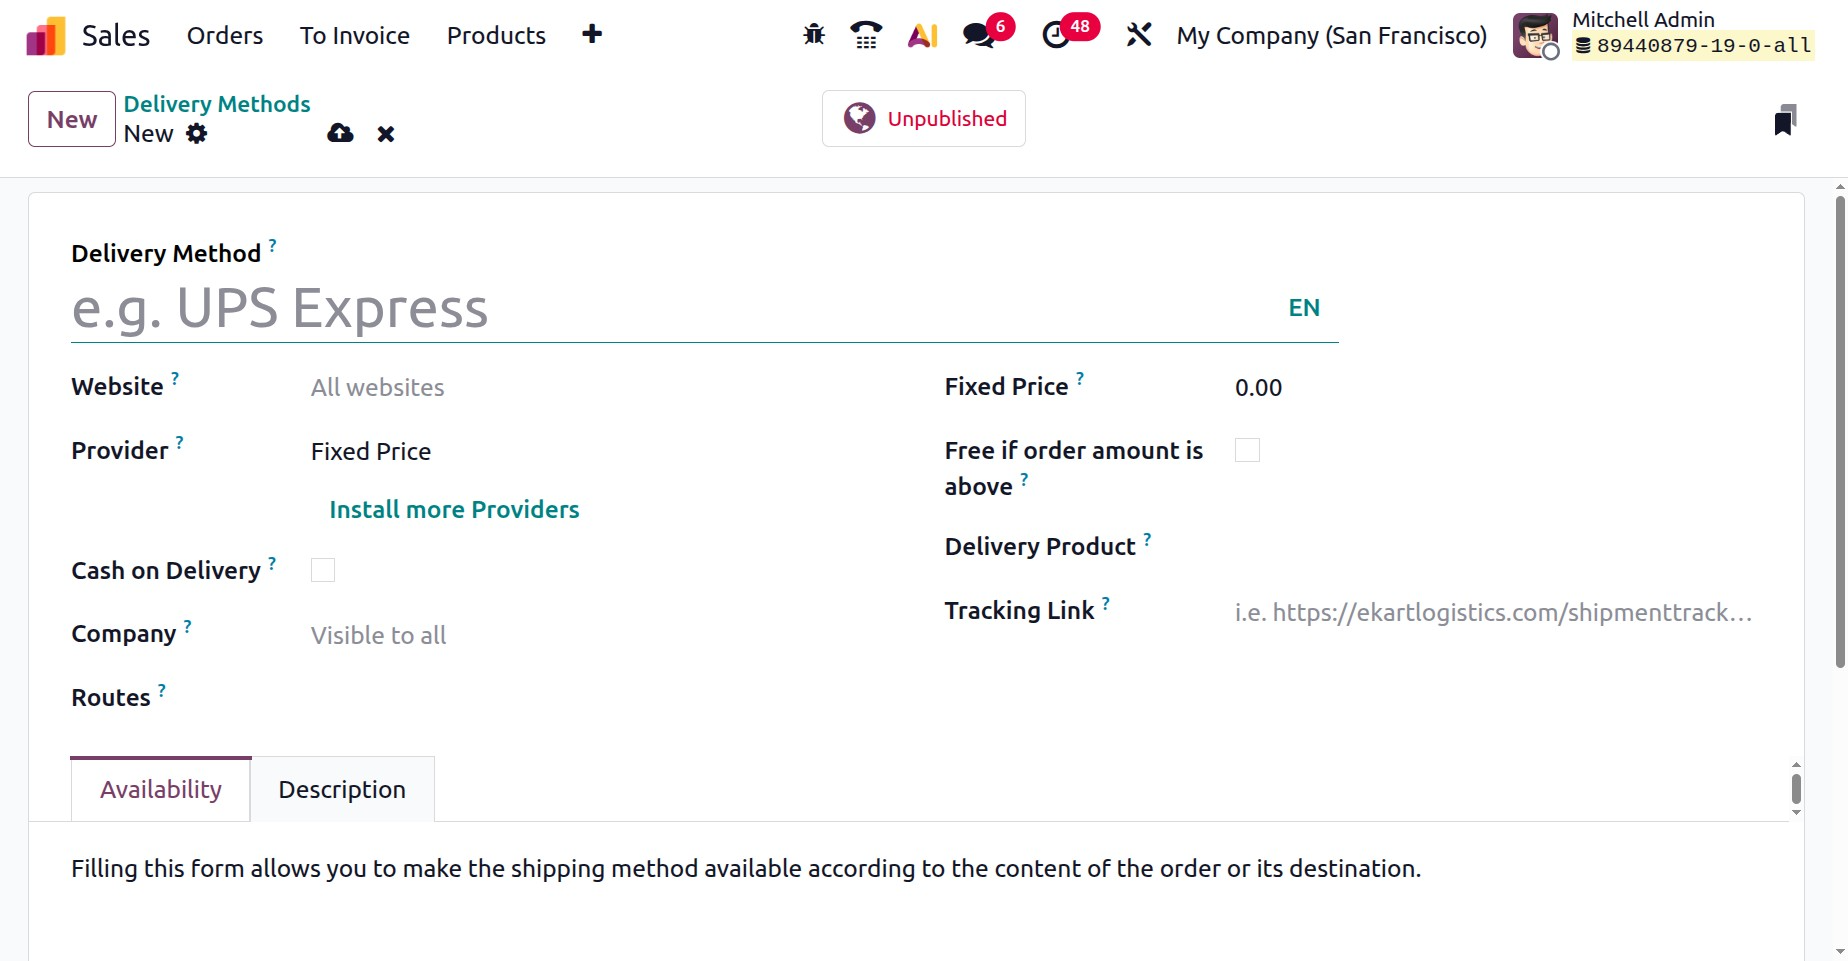
- Delivery Method:(Required field): the delivery method's name (e.g., same-day delivery, flat-rate shipping, etc.).
- Provider: (Required field): if using a third-party carrier, select the delivery service, such as FedEx. Make sure the shipping carrier integration is implemented correctly, then choose the provider from the drop-down option. See the corresponding sections below for further information on setting up bespoke delivery alternatives, such as fixed price or based on rules.
By choosing this option, the Fixed Price field, where the fixed rate shipping amount is specified, becomes accessible.
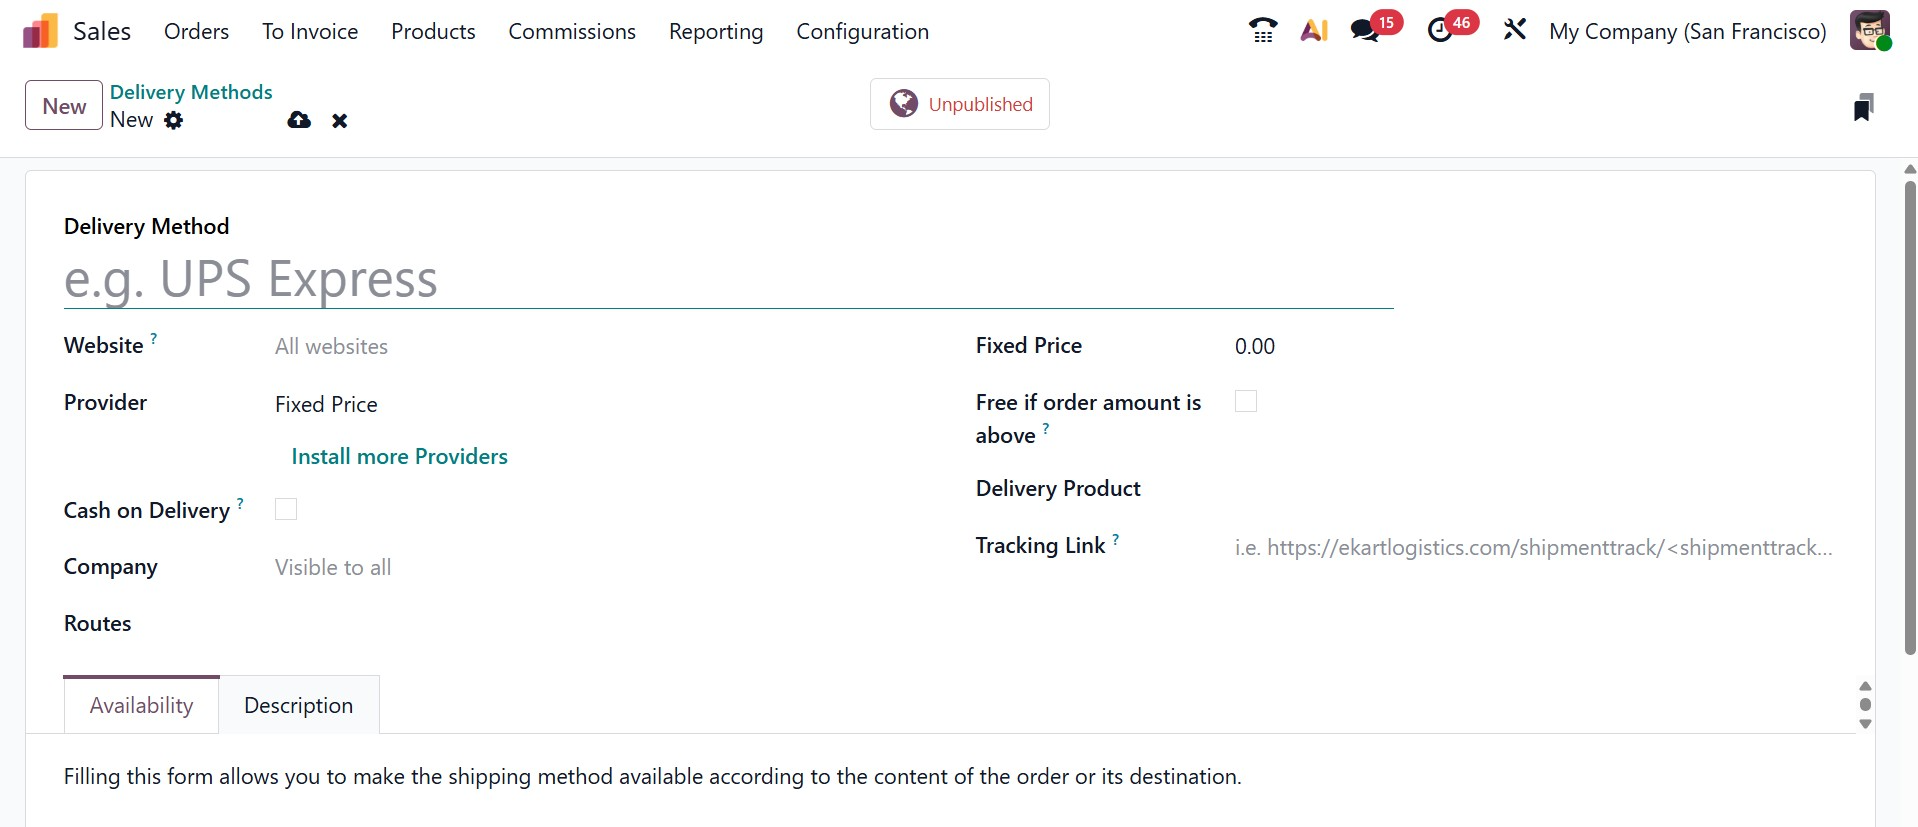
- Website:Set up an e-commerce page's shipping options. Use the drop-down menu to choose the relevant website, or leave it empty to use the method on all websites.
- Company: Choose from the drop-down menu if a certain company should be covered by the shipping method. To apply the approach to all companies, leave the field empty.
- Delivery Product(Required field): the item that is charged for delivery on the sales order line.
- Free if order amount is above: If the buyer checks this box, free delivery will be provided if their purchase exceeds the designated amount.
- Cash on Delivery (COD): Let customers pay for their order at the time of delivery instead of upfront.
- Route: Specifies the logistics path the delivery will take, such as dropshipping or warehouse delivery.
- Fixed Price: Applies a flat delivery charge to all orders using that delivery method.
- Tracking Link: Provides customers with a shipment tracking URL from the carrier.
Provide all the details and save the data.
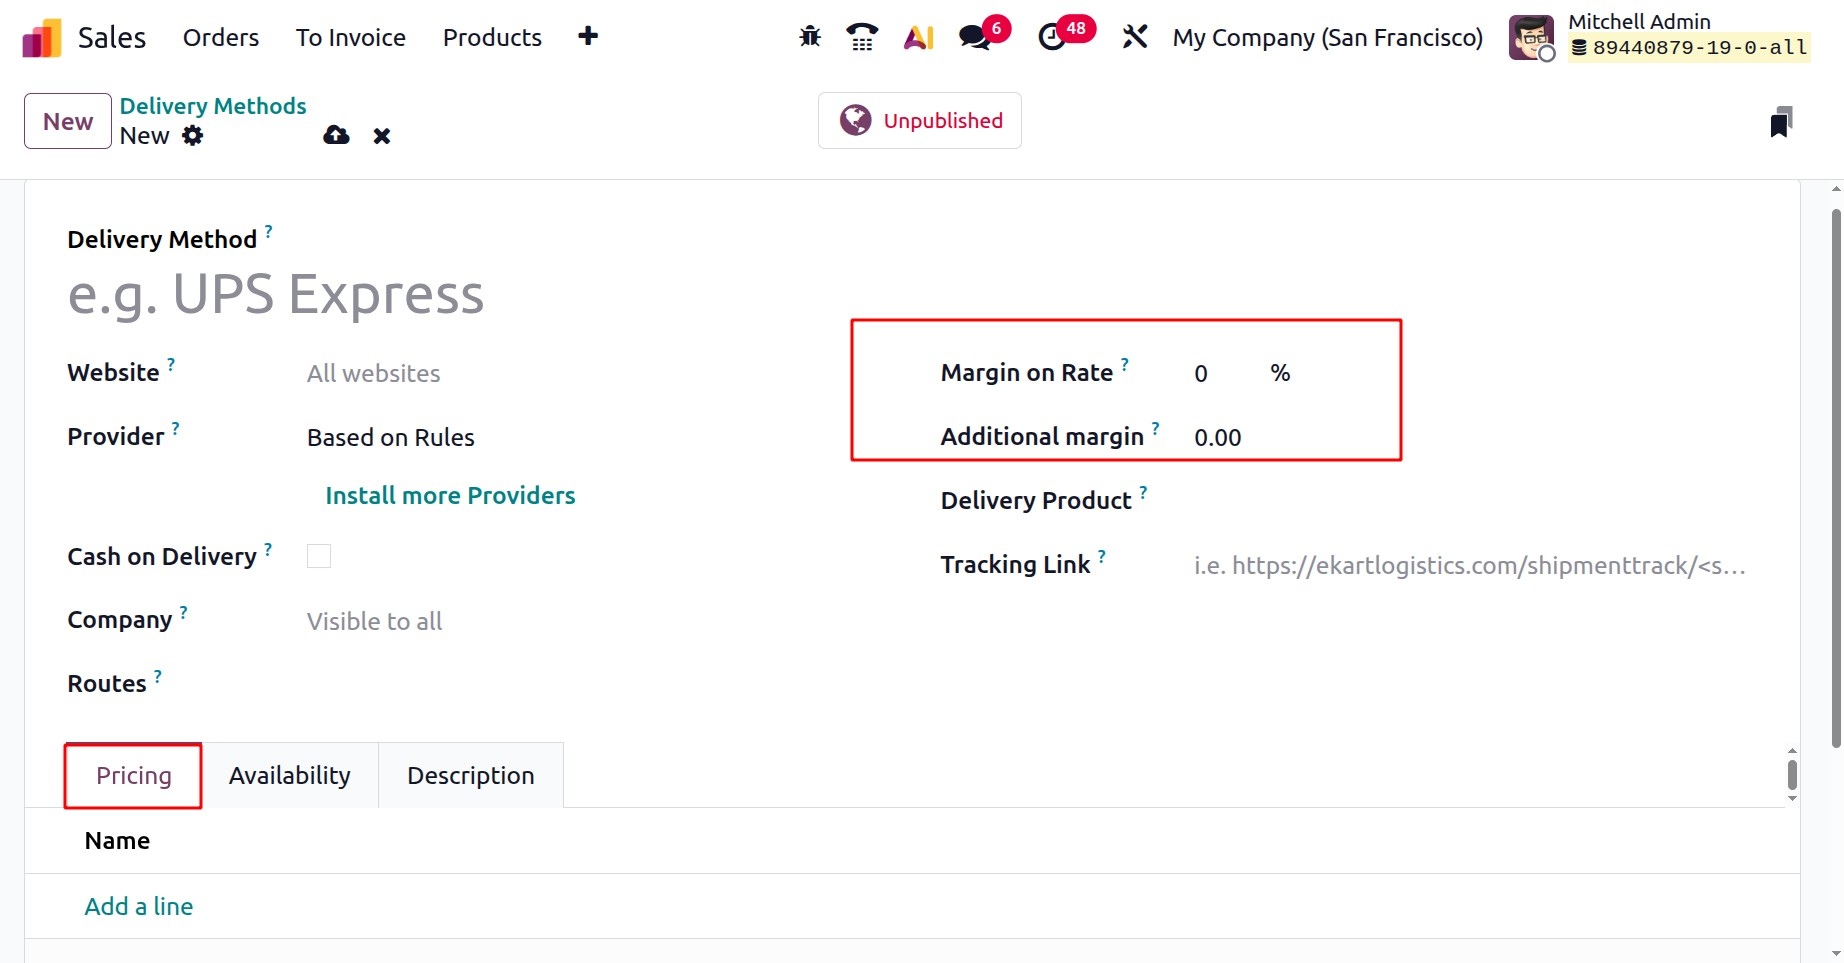
If the provider is set as based on rules, then, you can determine the delivery cost using pricing rules. You can choose to include additional shipping expenses by adjusting the Margin on Rate and Additional Margin, as in the screenshot below.

You can choose to include additional shipping expenses by adjusting the Margin on Rate and Additional Margin, as in the screenshot below.
- Margin on Rate: This allows you to apply a percentage markup to the shipping fee that the carrier charges.
- Additional Margin:This raises the carrier's rate by a predetermined amount.
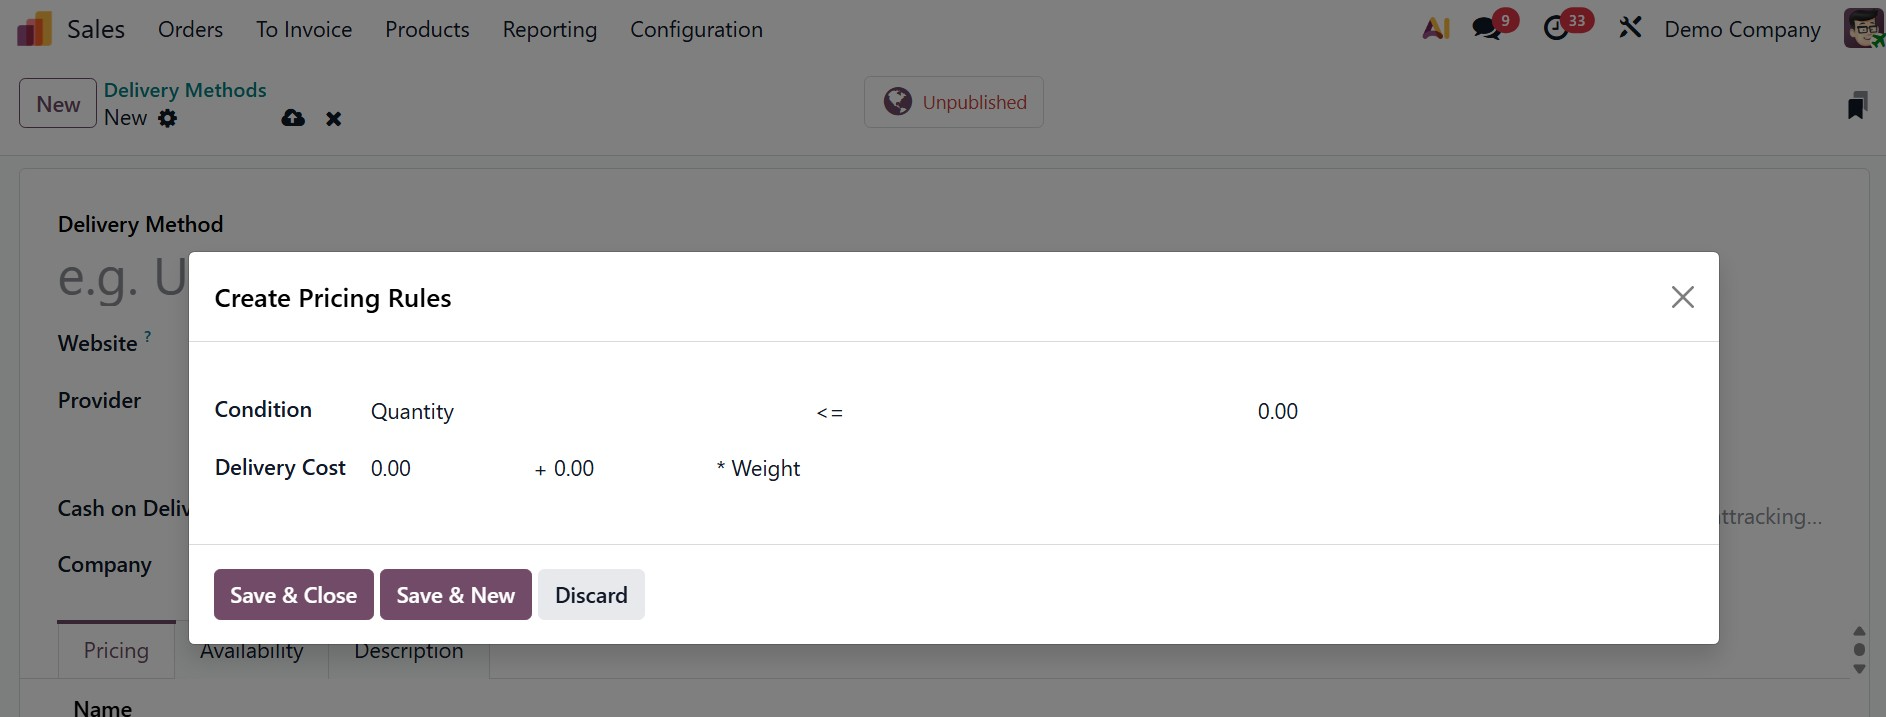
On the Pricing tab, select "Add a line." By doing this, the Create Pricing Rules window is opened, where the Delivery Cost is determined by comparing the Condition pertaining to the product's weight, volume, price, or quantity to a predetermined amount, as shown below.
When you're done, select Save & Close or Save & New to add another rule.
The next tab is Availability, as shown below.
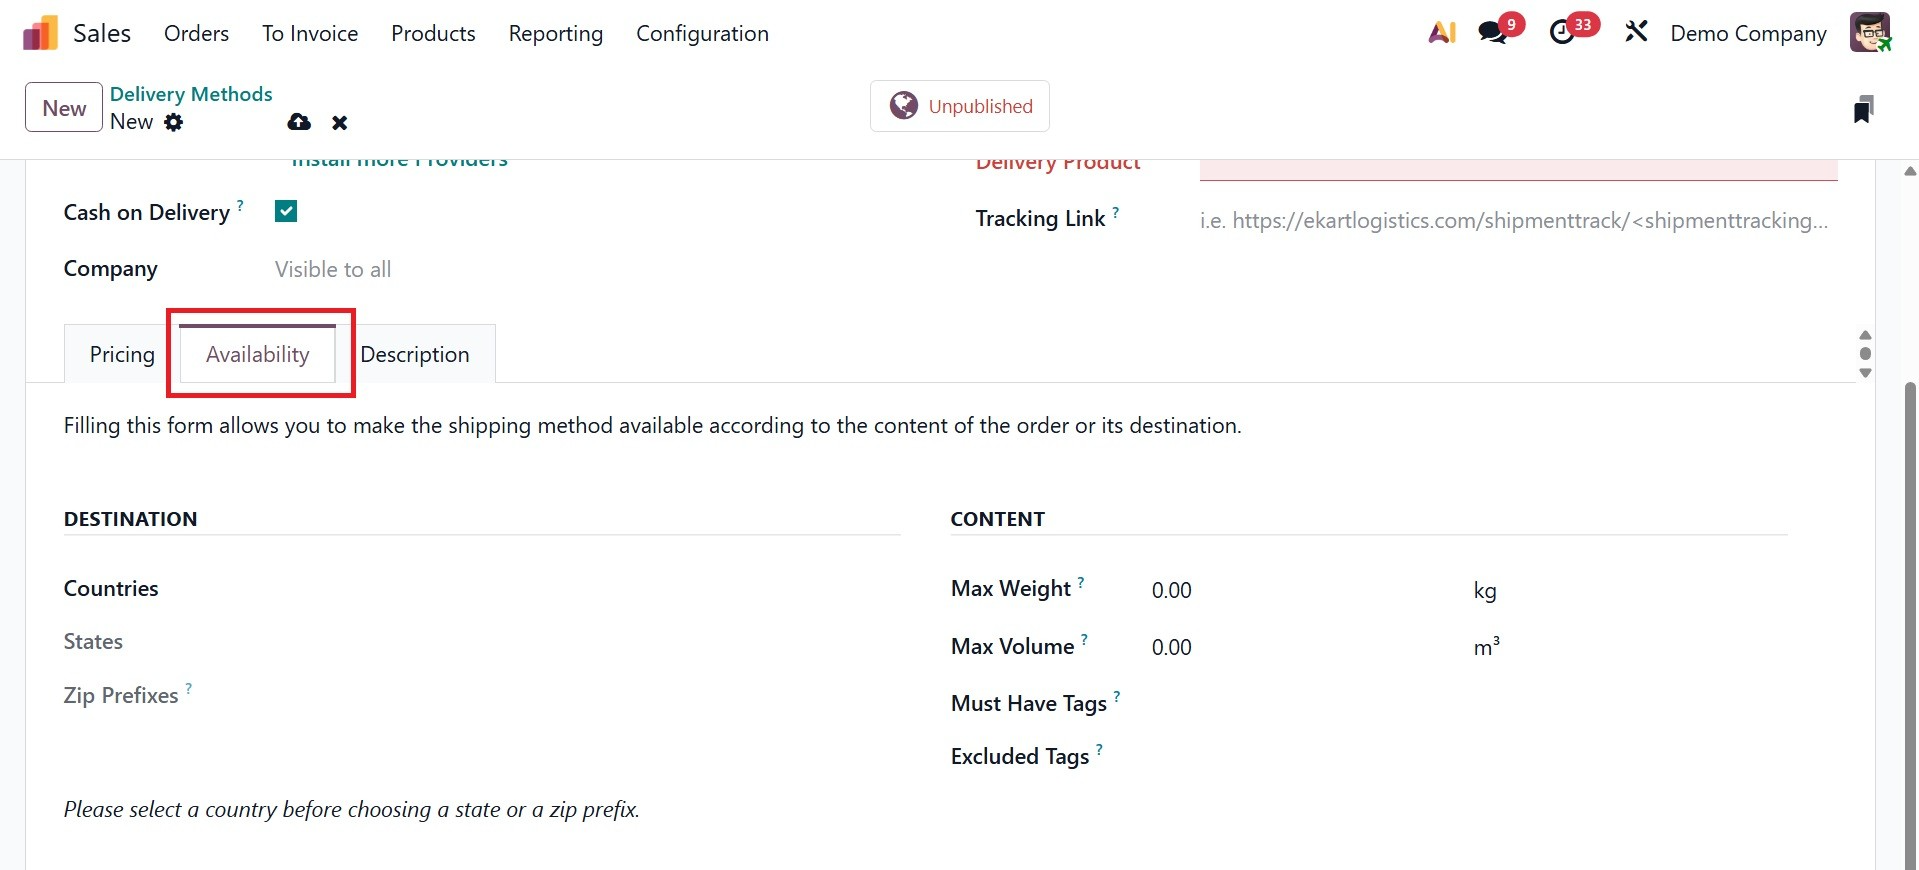
In the delivery method form, select the Availability tab and specify the Countries, States, and Zip Prefixes to limit shipping to particular destinations. And can add the max weight, max volume, must have tags, and excluded tags options under contents section. If every place is applicable, leave these entries blank.
- Max Weight: The highest order weight that this delivery method is capable of supporting. This shipping option won't be available for bigger orders
- Max Volume: The maximum amount of volume of the products using this delivery method. The method won't work if the order volume is higher than this.
- Must have Tags: Only items or orders with these particular tags (such as "Fragile," "Express Eligible") will be eligible for the delivery option.
- Excluded Tags: Products or orders with these tags will not be eligible for the delivery option.
- Excluded Tags: Products or orders with these tags will not be eligible for the delivery option.
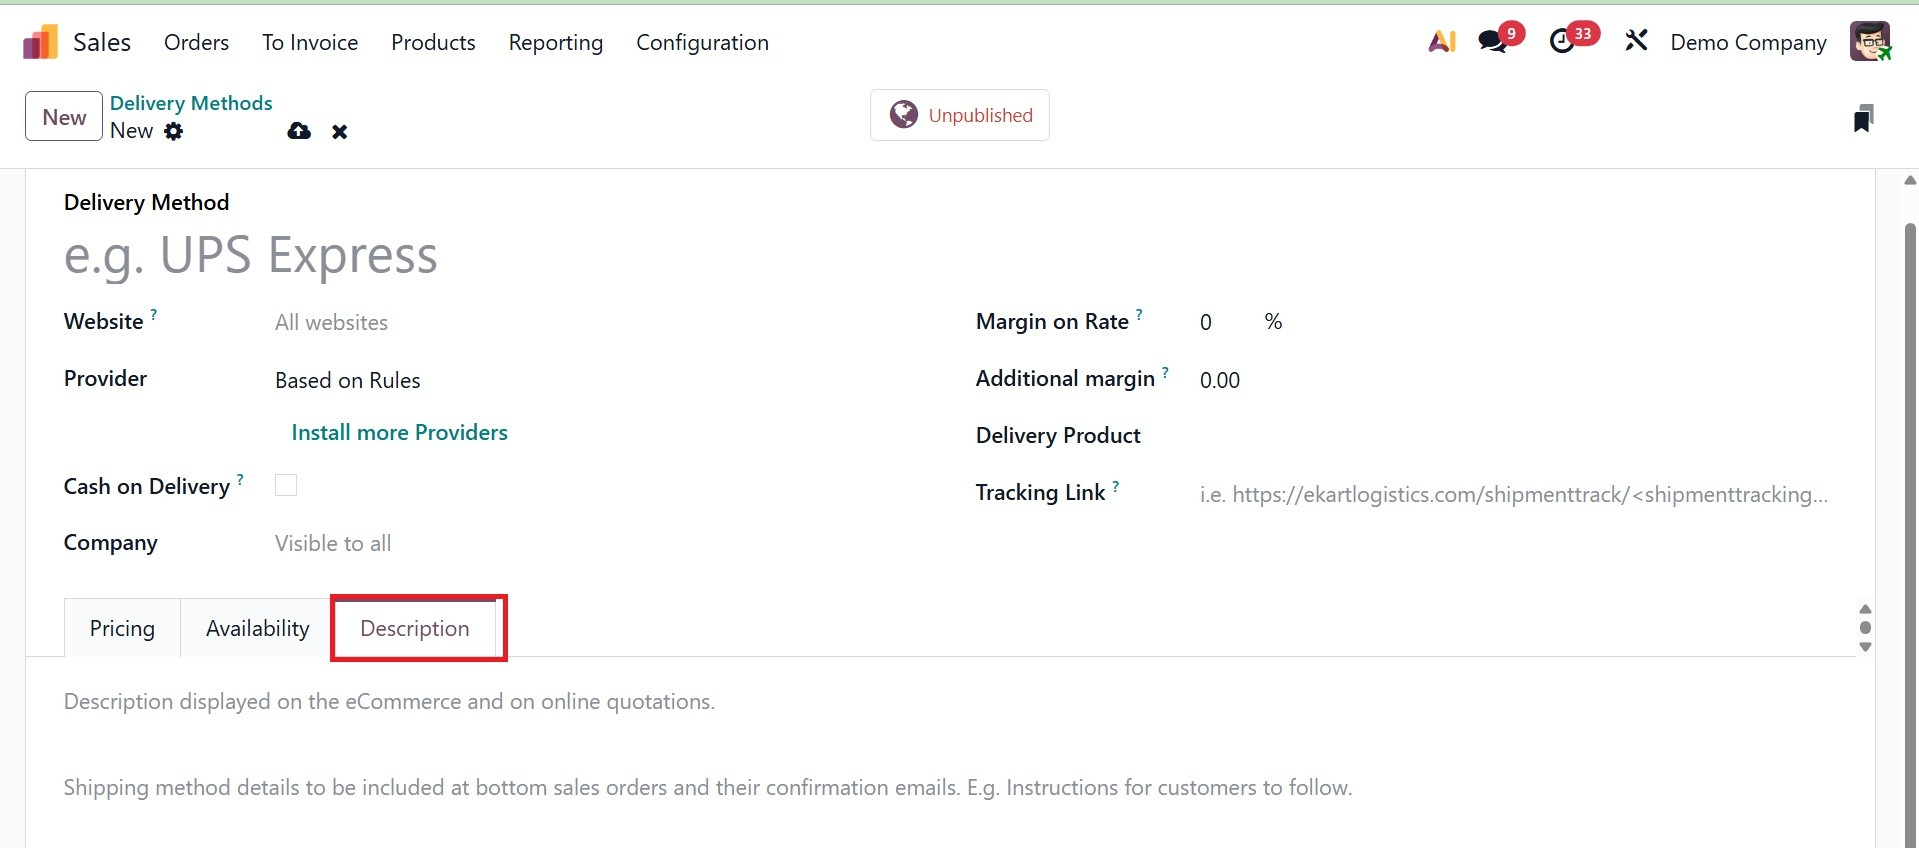
Under the Description tab, you can add the description regarding the shipping method.
Finally, save the data that is added.
1.5 Tags
Adding tags to actions when saving them to your database will always help you get the data more quickly when you need it. Odoo 19 allows you to filter the preset operations by applying tags to them. The Configuration menu in the Odoo 19 Sales module makes it simple to set up these sales tags for the sales operations.
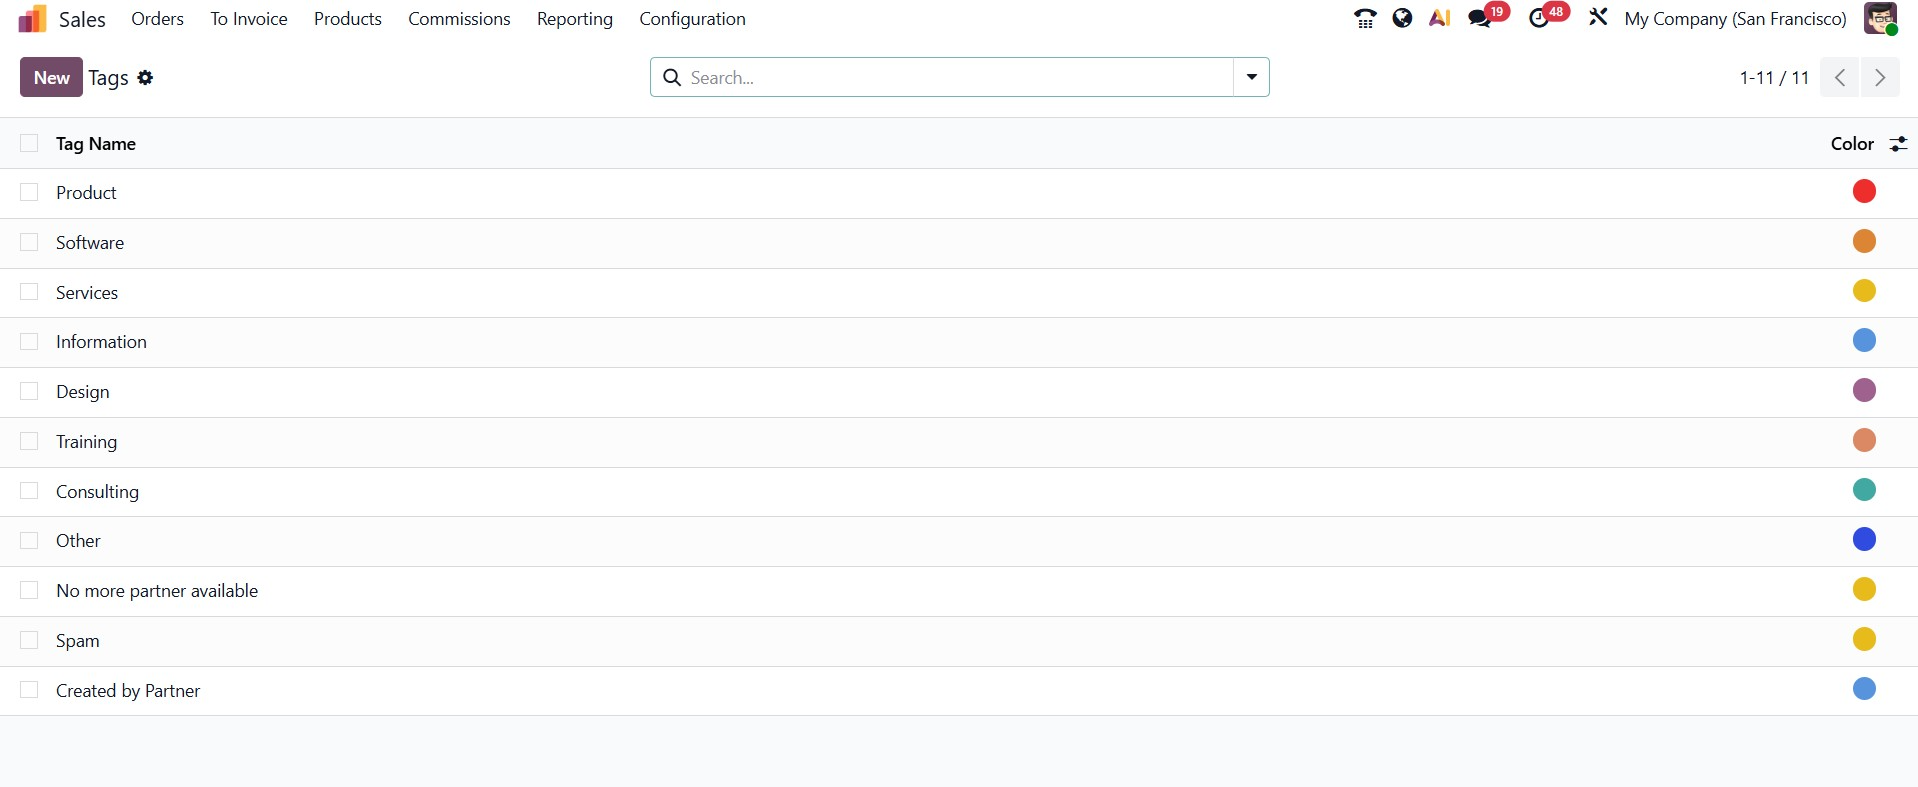
As seen in the figure above, you may use the Configuration menu to access the Sales Tags platform. A list of the pre-configured tags will appear on your screen, along with details on the Tag Name and Color.
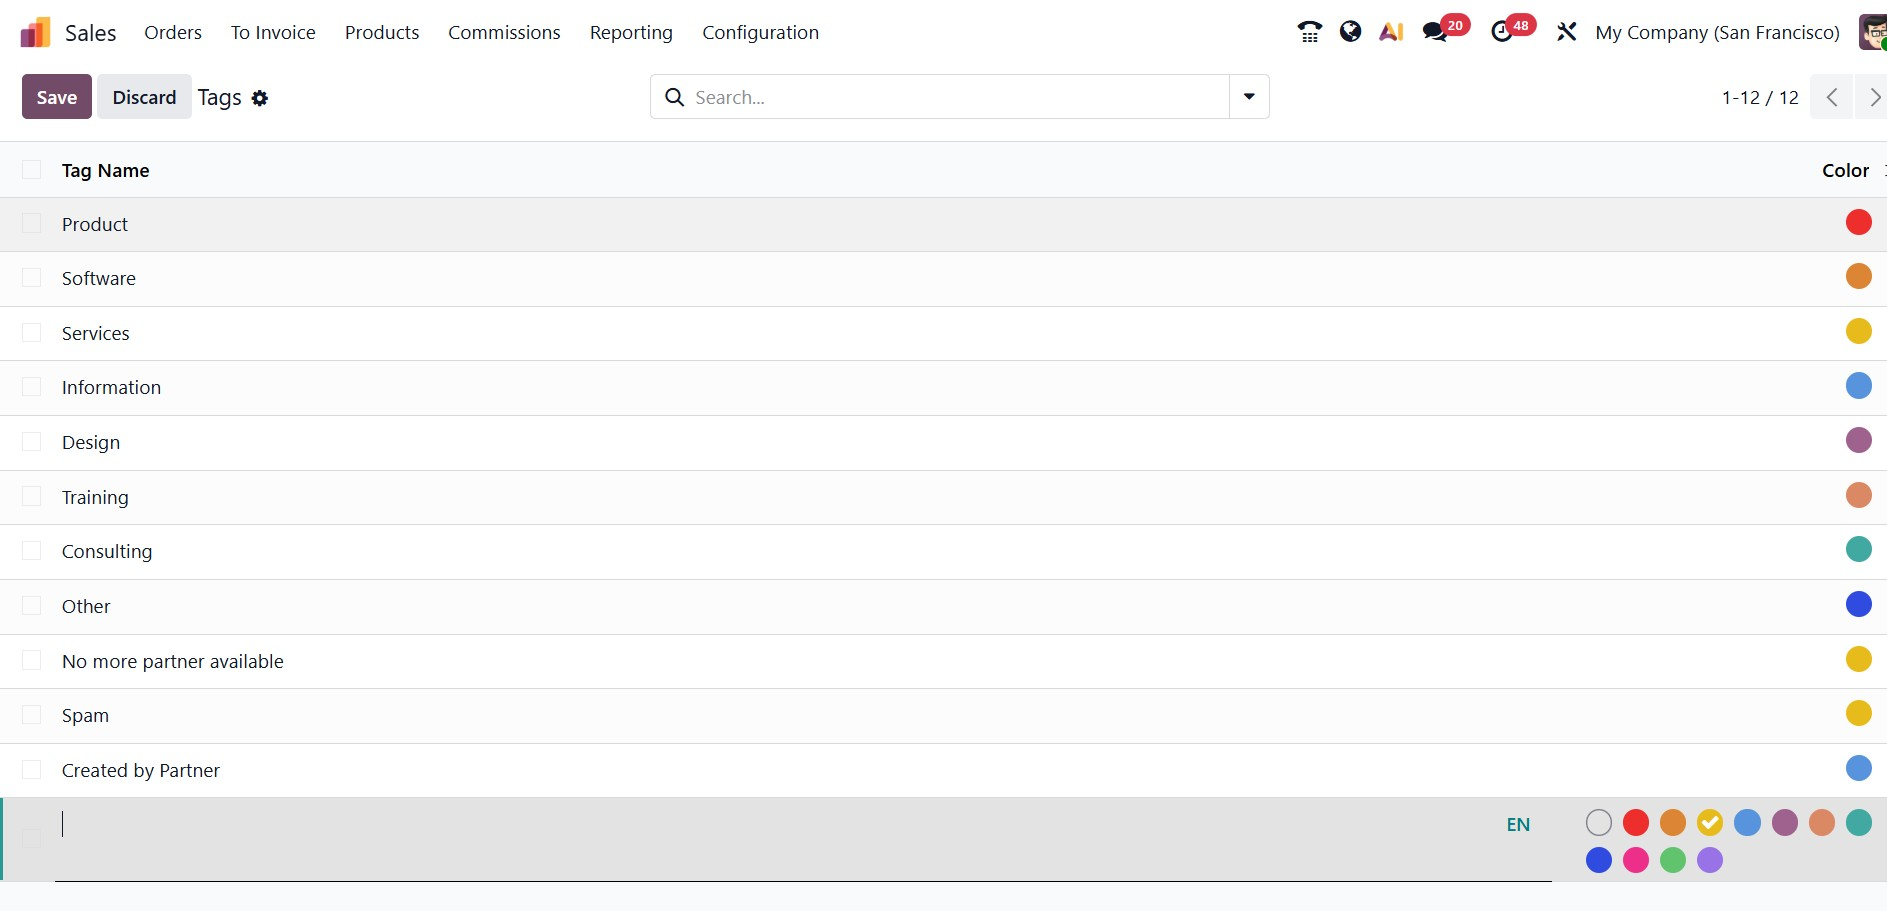
You can enter the name of your new sales tag and select a suitable color for it by selecting the New option, which will create a new line beneath the existing list of tags. Click the Save button to add the new tag to the list.
The Odoo 19 Sales module's Attributes are covered in the section that follows.
1.6 Attributes
The Odoo Sales module itself provides access to the Attributes pane. Odoo's excellent integration efficiency makes it feasible. From the Odoo Sales module's Configuration tab, you may open the Attribute window. You may see the Attributes option in the Products section when you select the Configuration tab. The Attributes window will appear as shown in the figure below.
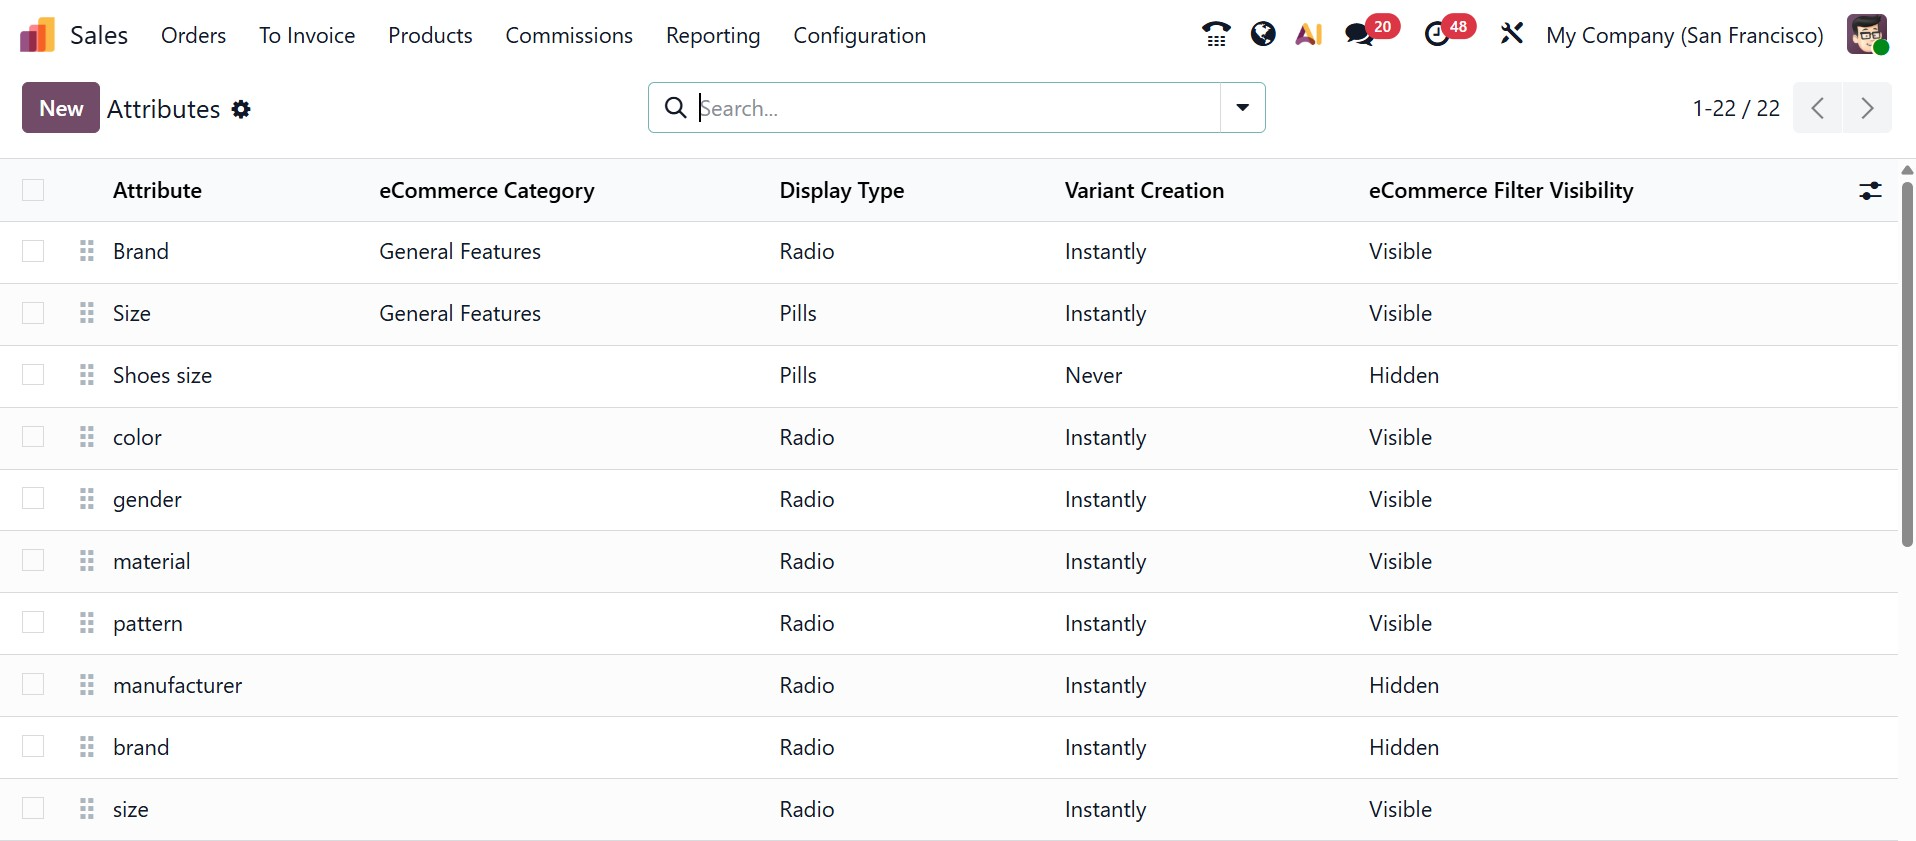
You can see every attribute that has ever been generated in the Odoo system in this window. All of the attributes will be listed in the window, along with the attribute name, eCommerce Filter Visibility, Category, Display Type, and Variants Creation Mode. If necessary, you can also add more custom fields. You can enter the Attribute creation window by clicking the New button on the upper left, as seen in the illustration below.
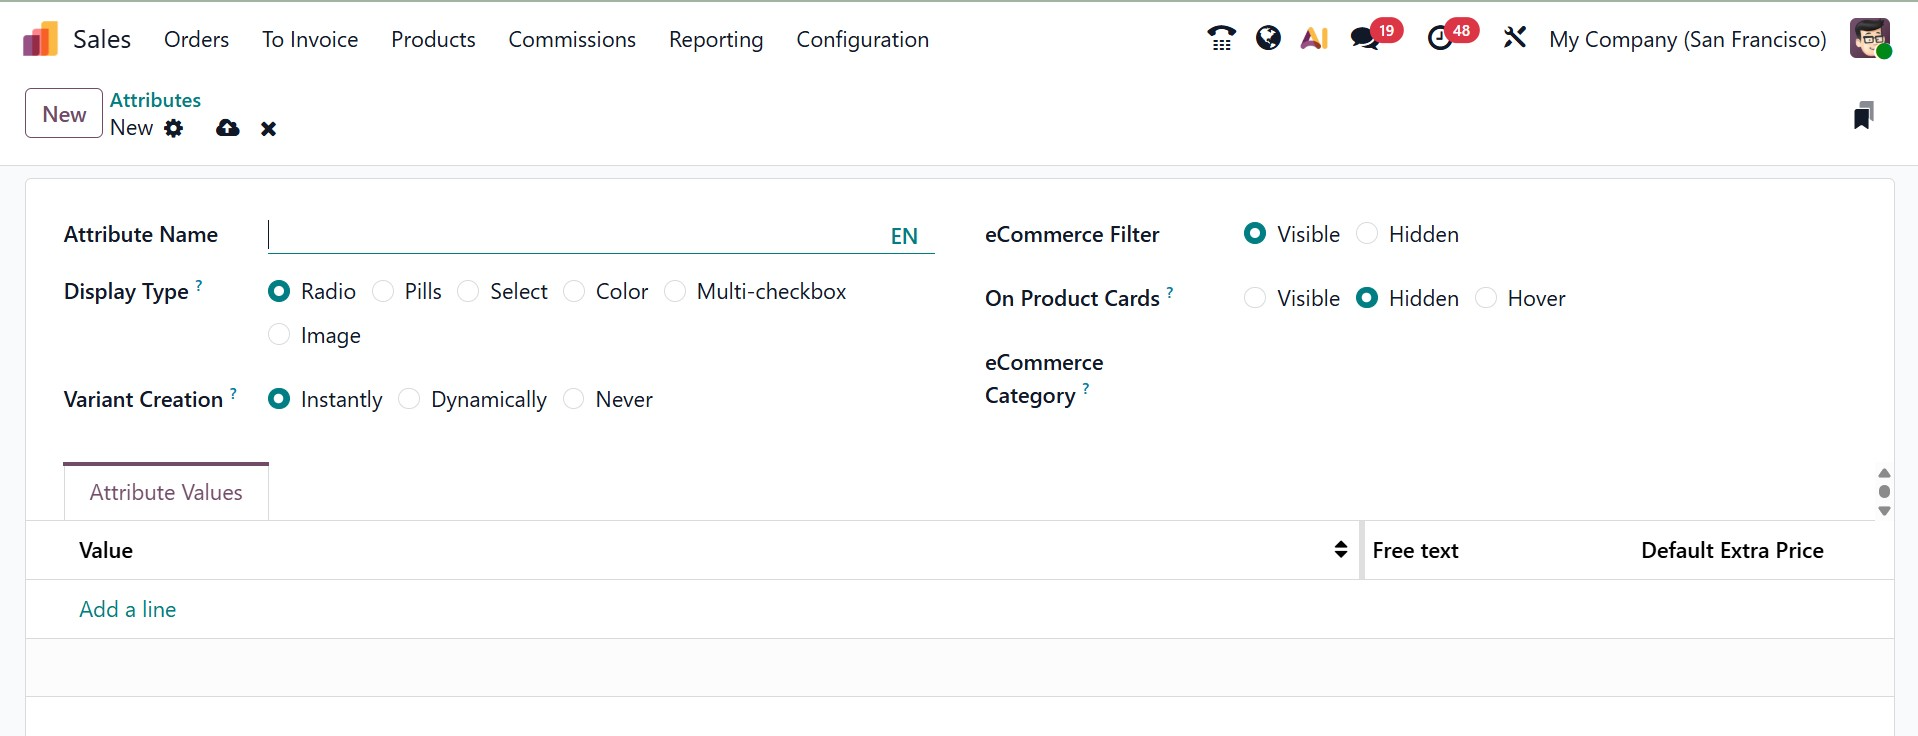
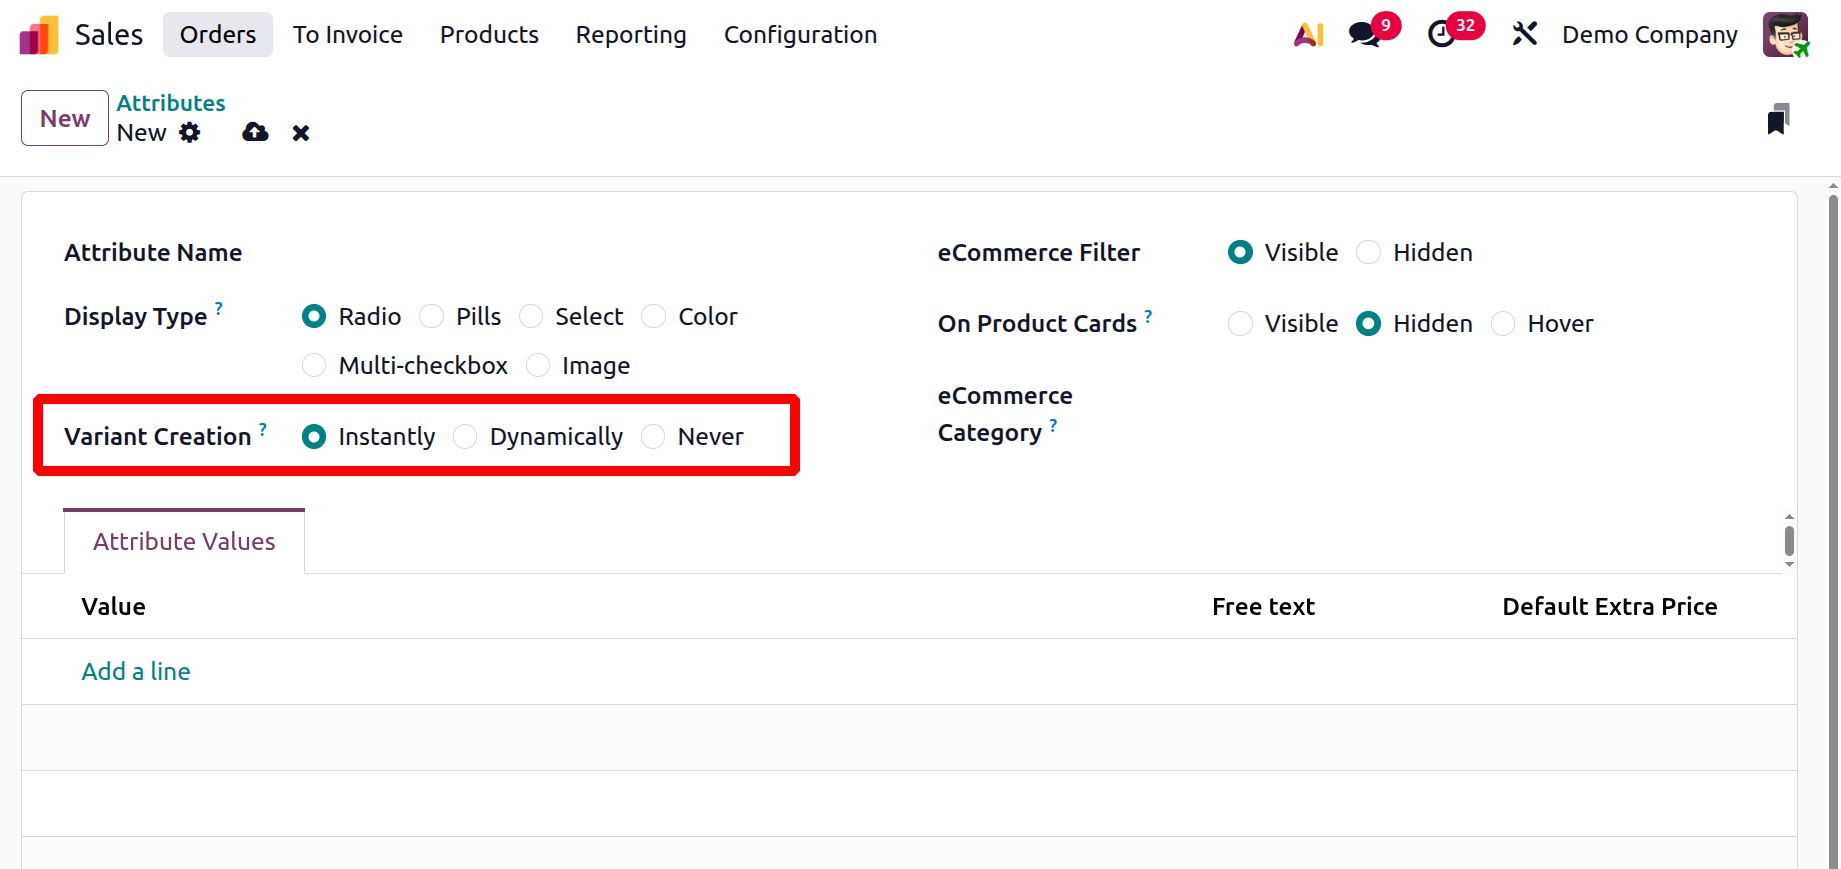
You can first enter the attribute name in the creation box, and then you can create a category to gather related attributes under the same section on the eCommerce comparison page. After that, you may select the Display Type from the list of possibilities, which includes Radio, Pills, Select, and Color. Additionally, there are three possibilities for the Variants Creation Mode: Instantly, Dynamically, and Never.
- Instantly: generates every potential variation as soon as a product template's properties and values are added.
- Never (option): never generates variants on its own.
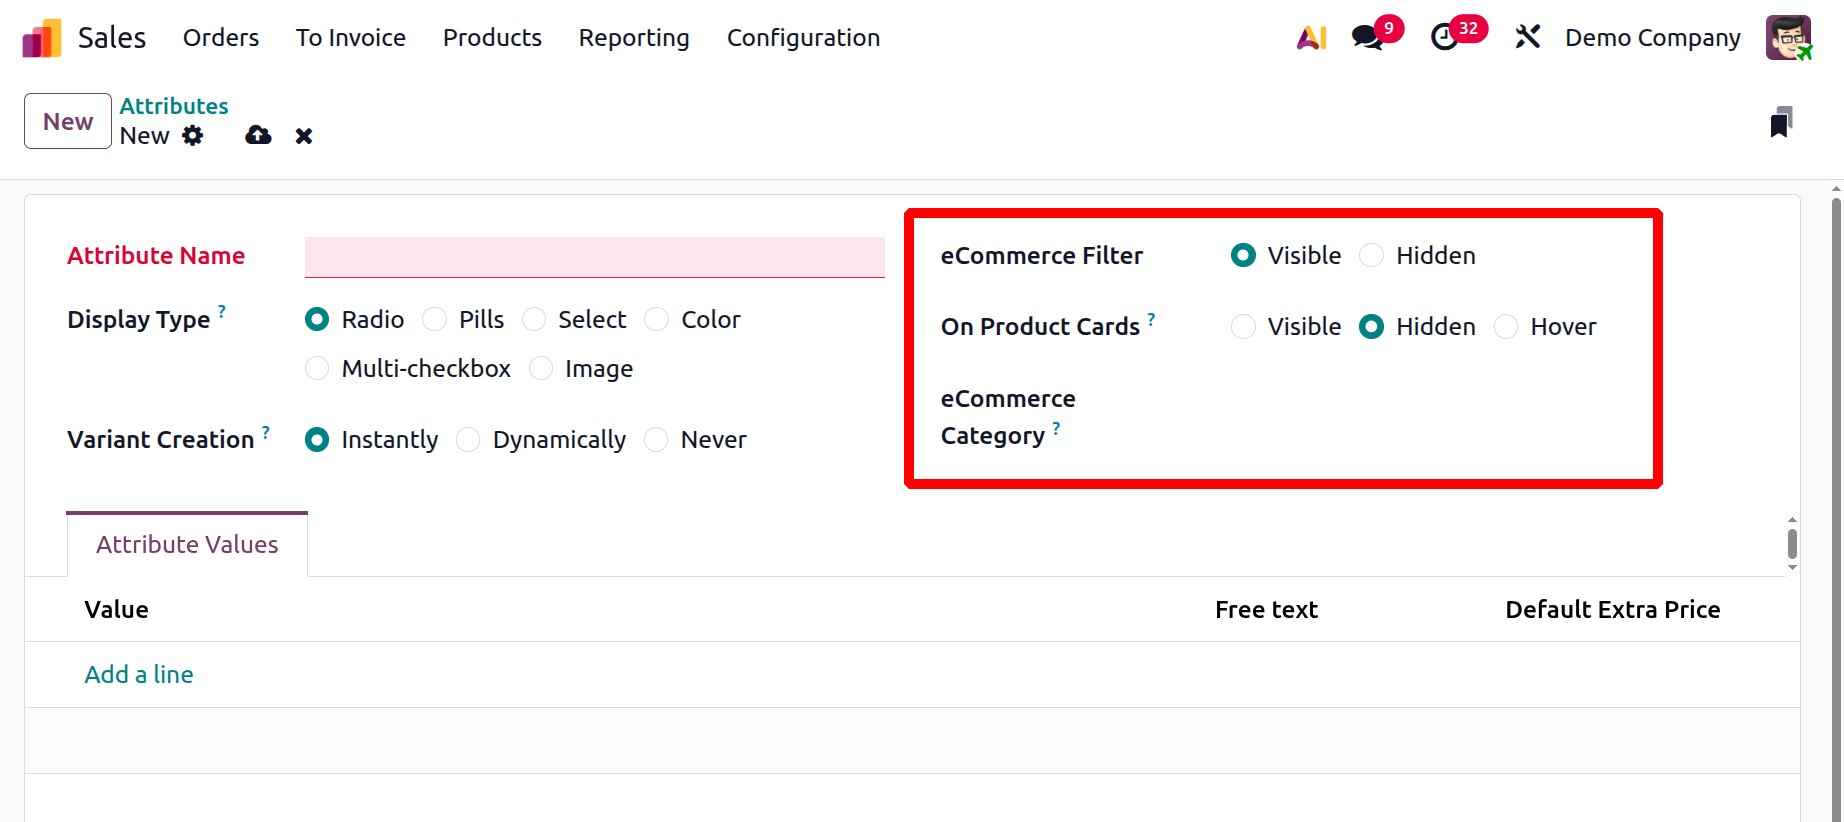
Similarly, there are two visibility settings for the eCommerce Filter: Visible and Hidden. Then, you can set the product cards as visible, hidden, or hover. The value can be allocated under the Attribute Values tab. Under the Attribute Value, you can provide the Value, Free Text, and Default Extra Price, respectively.
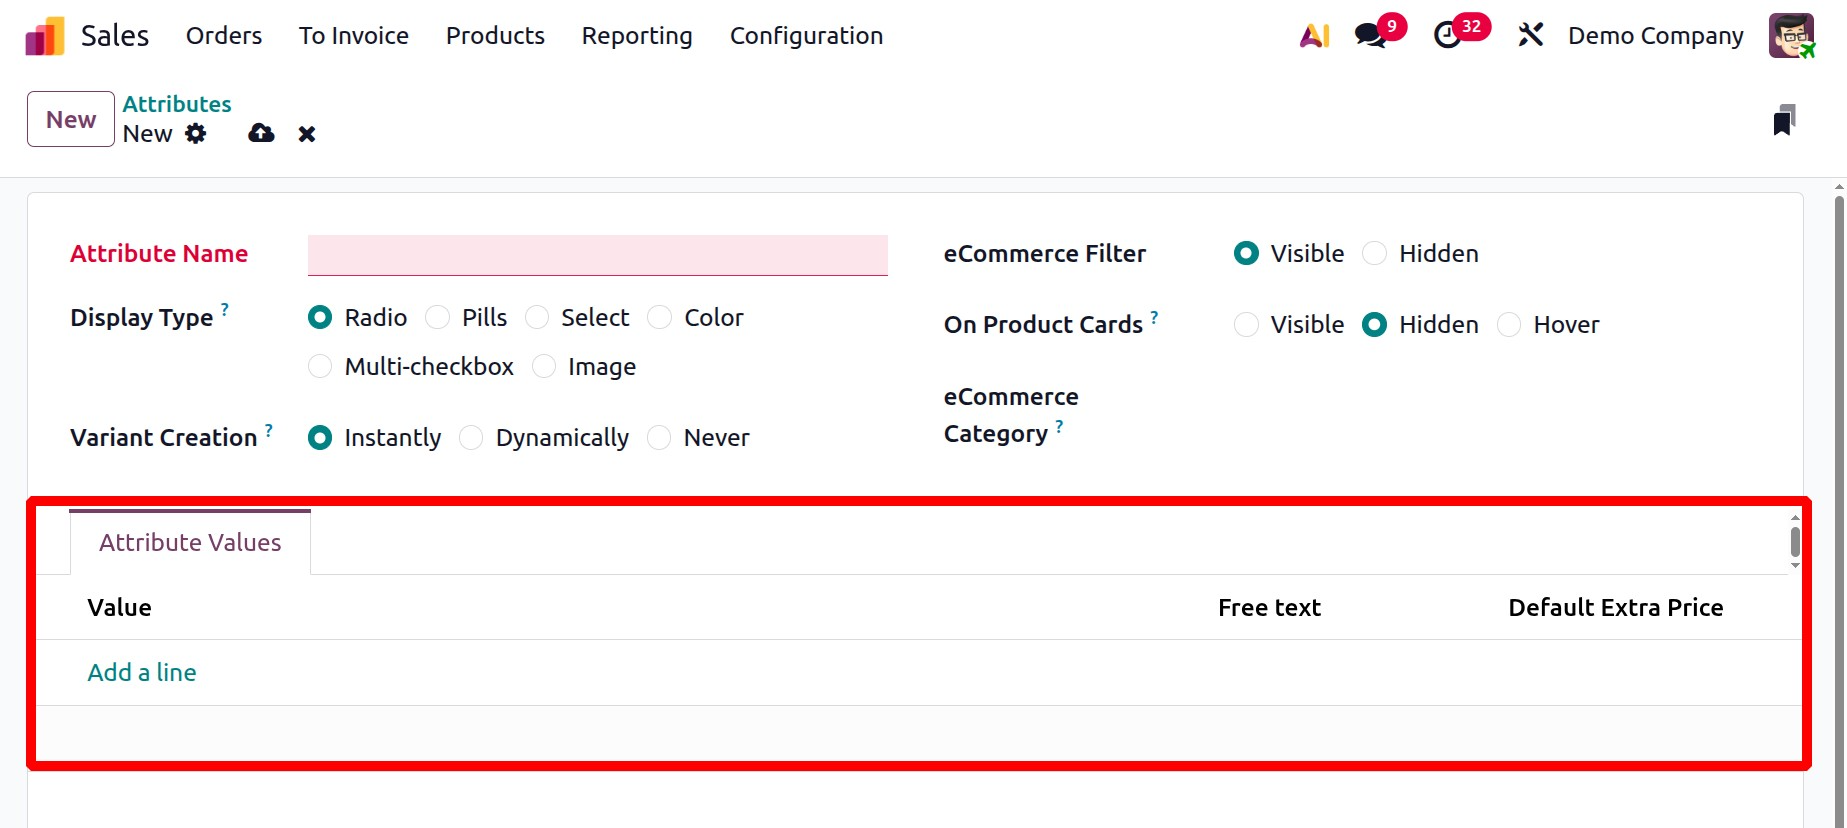
- The Value: This is the particular, preset choice for an attribute. If the attribute is "Color," for instance, the values might be "Red," "Blue," or "Green."
- Free Text: This feature, when enabled for an attribute value, lets users provide a unique, free-form text value rather than choosing from a preset list. Enabling "Free Text" allows customers to enter their desired text.
- Default Extra Price: A default price adjustment (increase or decrease) linked to a certain attribute value can be defined in this field. When that specific characteristic value is chosen, the additional cost is automatically added to the product's base price.
And by choosing the Add a line option, you can provide the details to fill out the form, you can click the SAVE option to save the information.
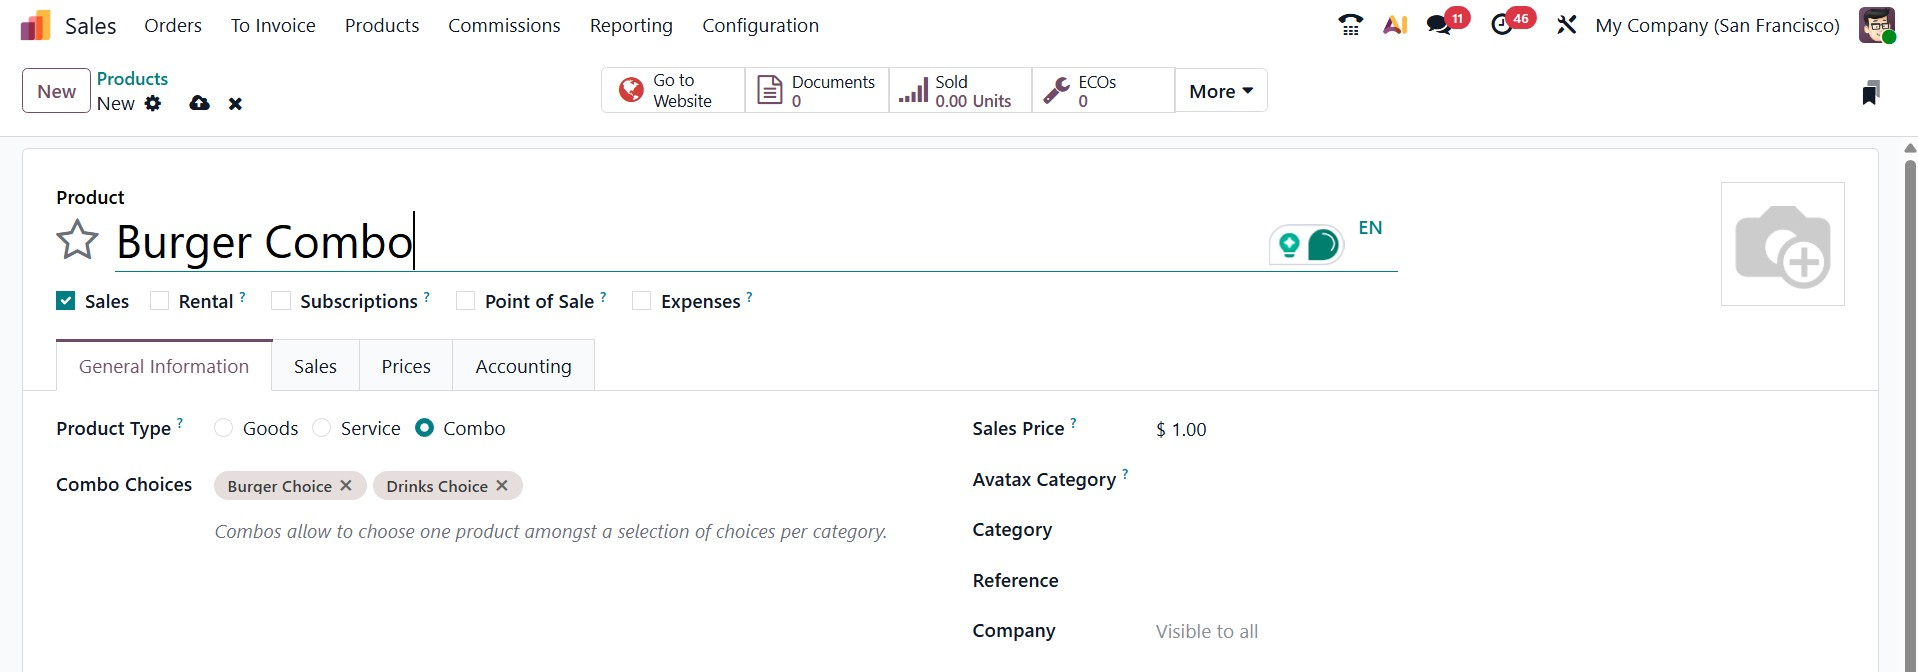
1.7 Combo Choice
Under Odoo sales, we may design the combo options. For that, navigate to Combo Choices under the Configuration menu.
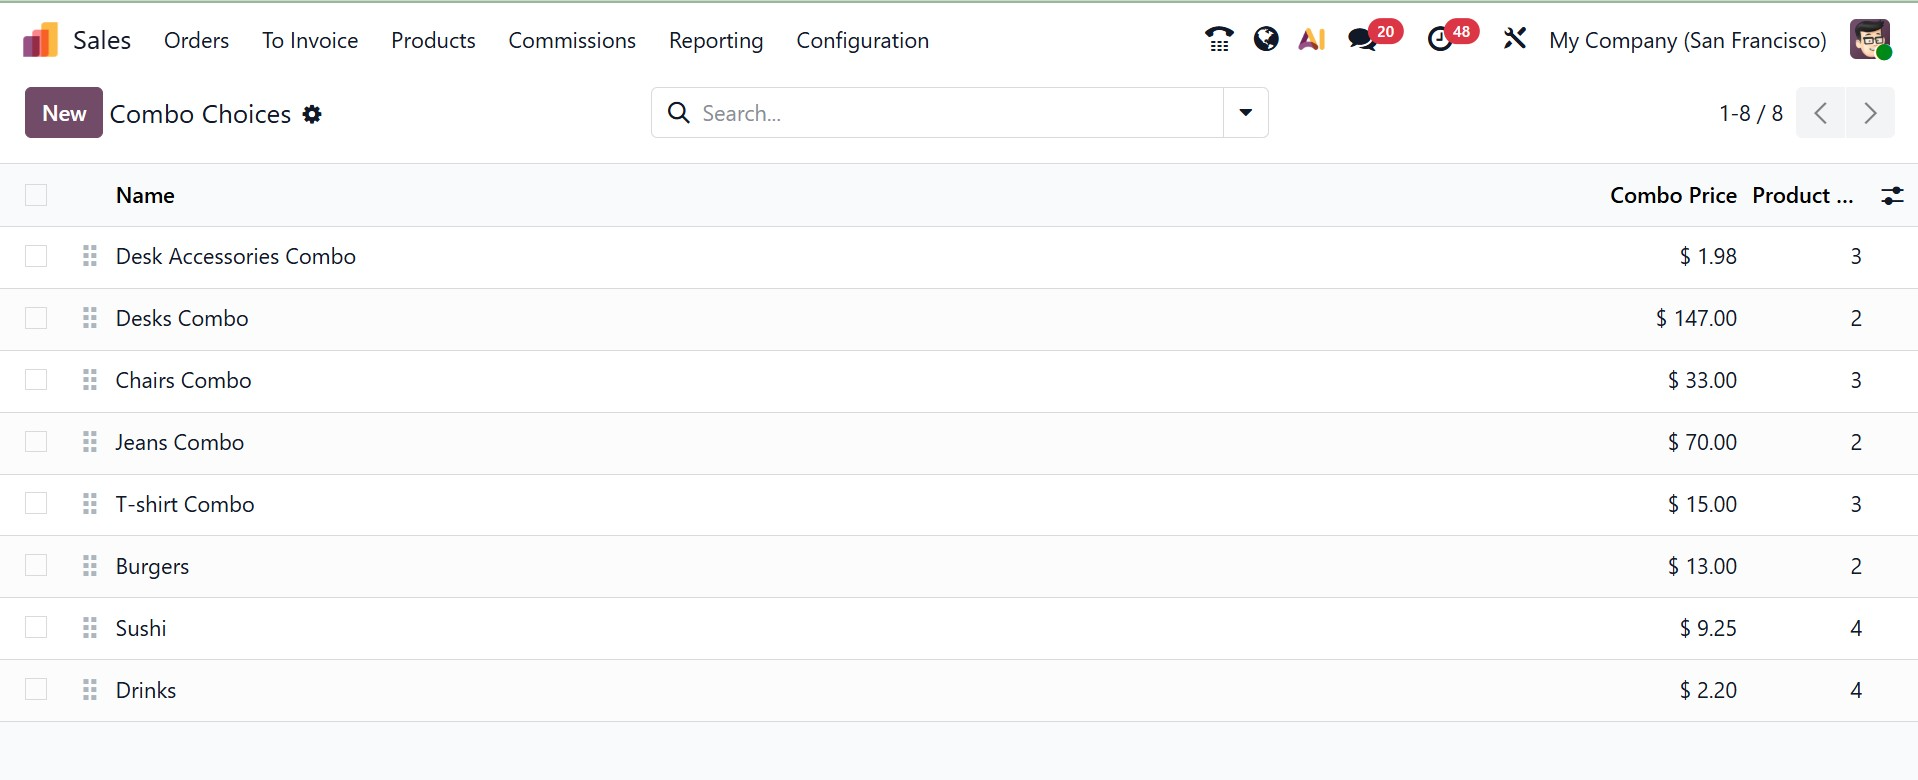
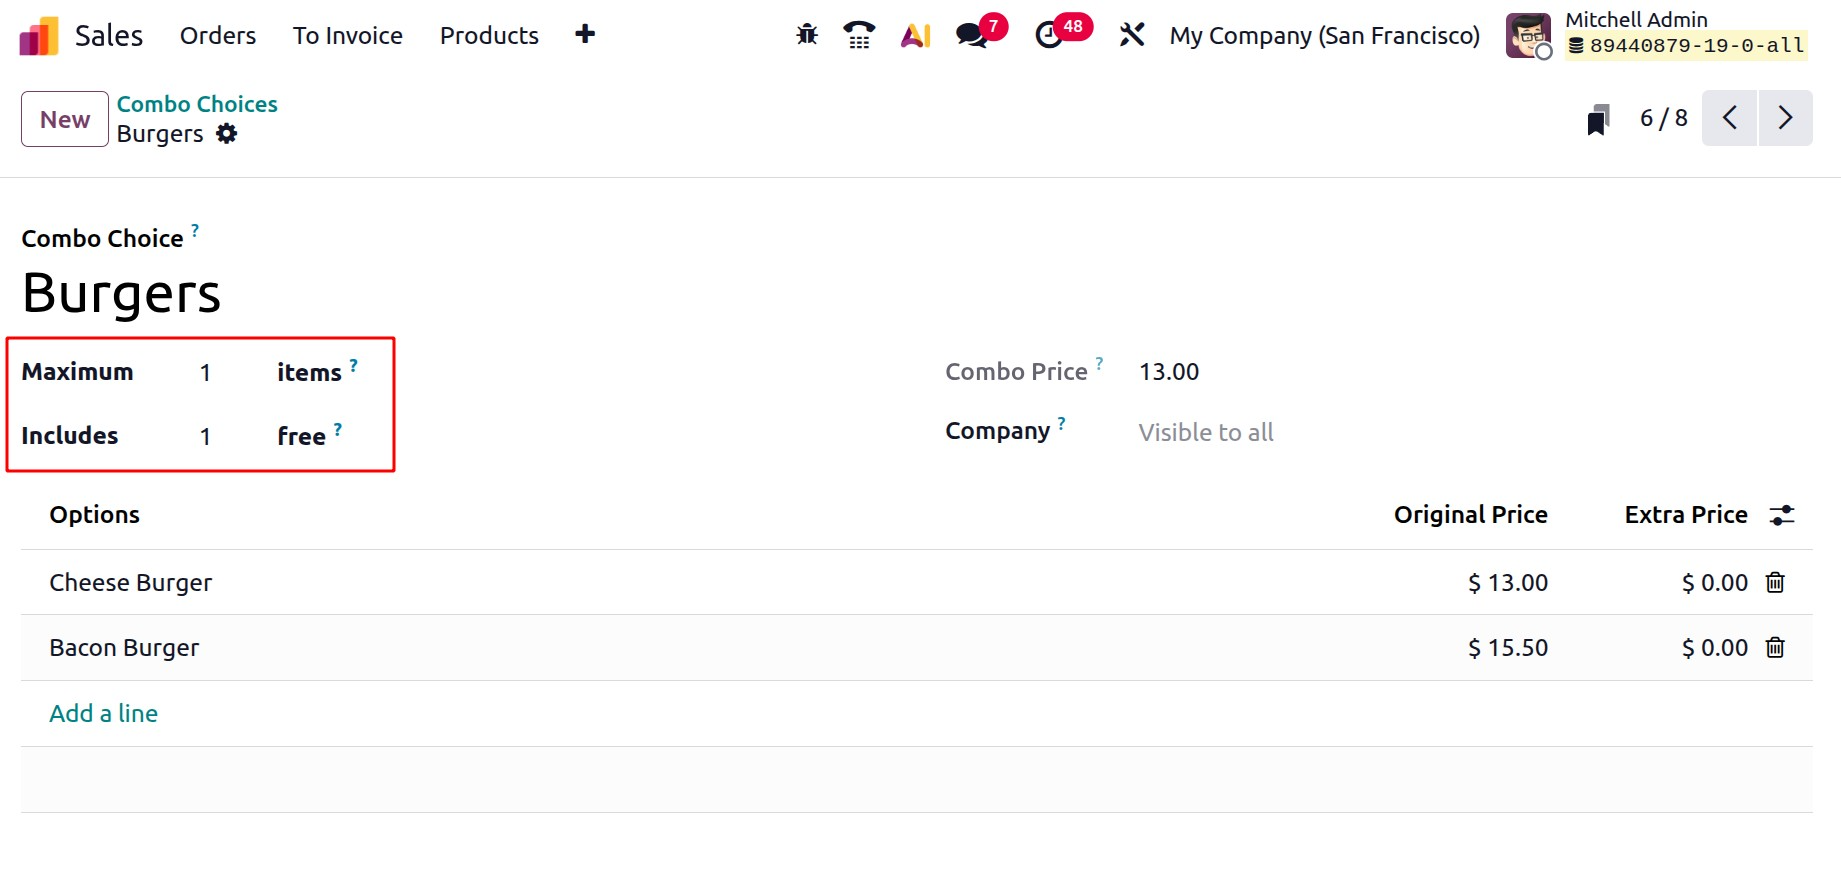
Make a new combo option. For this example, I'll make a combo option for burgers and drinks. Here, you have the options of :
- Maximum: This determines how many things a consumer may choose from a combo option. For instance, the buyer can only select two products from that combo if the maximum is two.
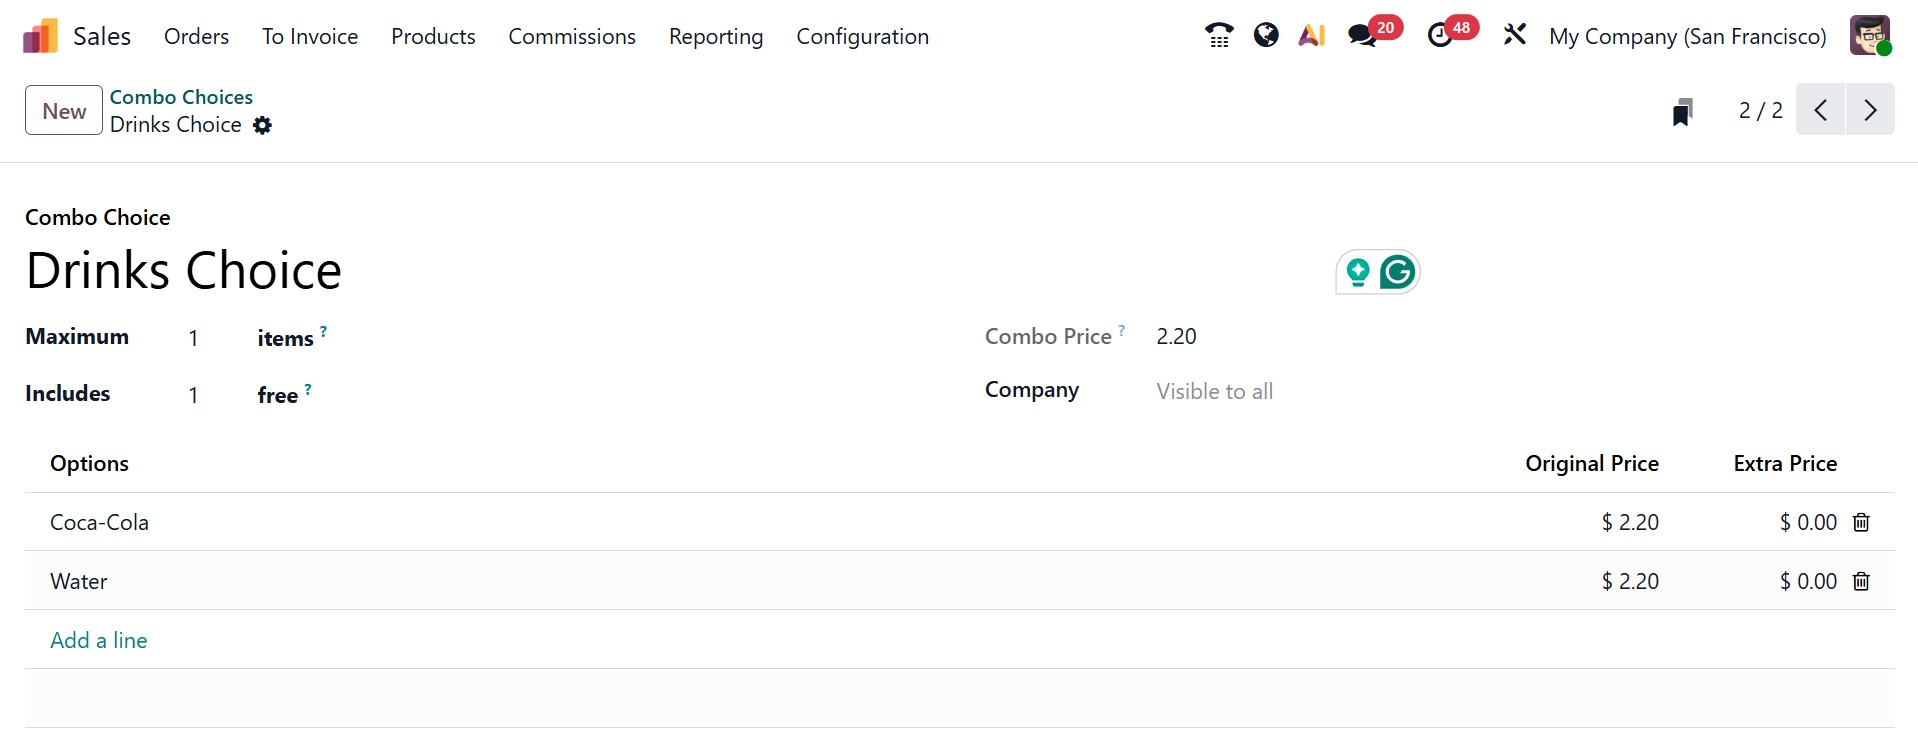
- Include: This specifies which items in the combination choice must be present by default. These will be preselected when the customer sees the combo. Below that, you can add the product for combo choice.
Now create a choice for drinks.
Now, go to the Products menu, and select the product type as Combo.
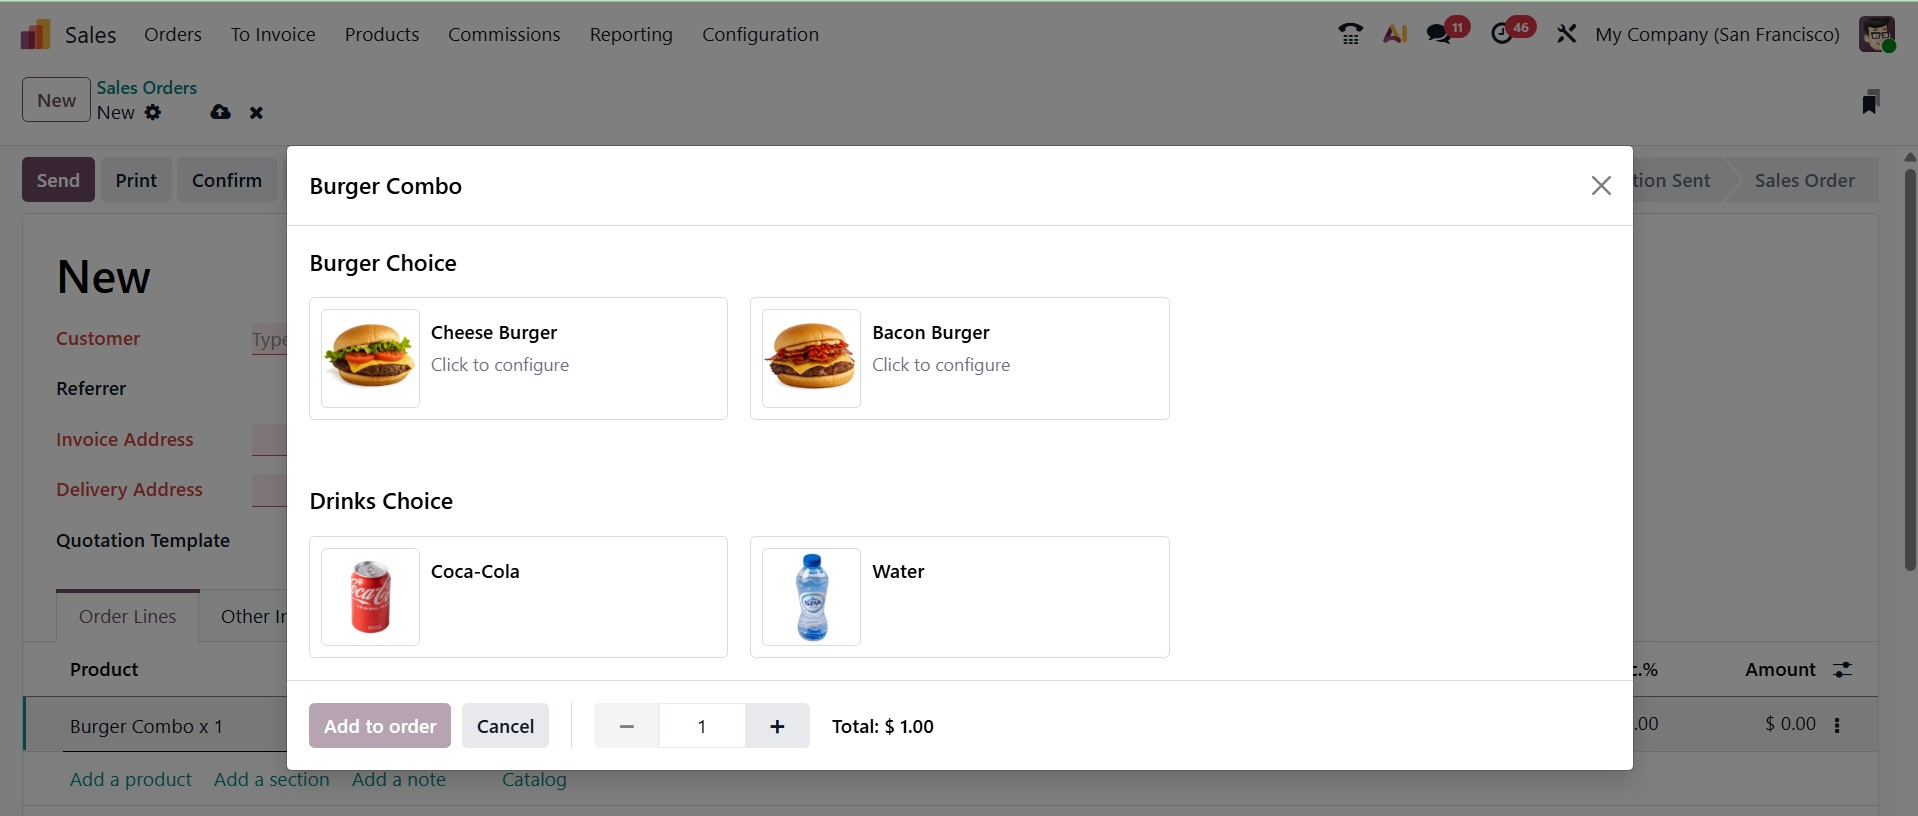
Afterward, a pop-up window allowing the user to select from the available products appears when a combo product is chosen on the sale order line.
6.9 Categories
The Odoo In Sales module's Categories functionality allows you to group your products into several categories. Product categories must be defined in Odoo in order to carry out different types of product actions. Because Odoo lets you filter by product categories, it will make it easy to find the products. As seen below, the Configuration menu of the Sales module will provide the user with access to the Categories window.
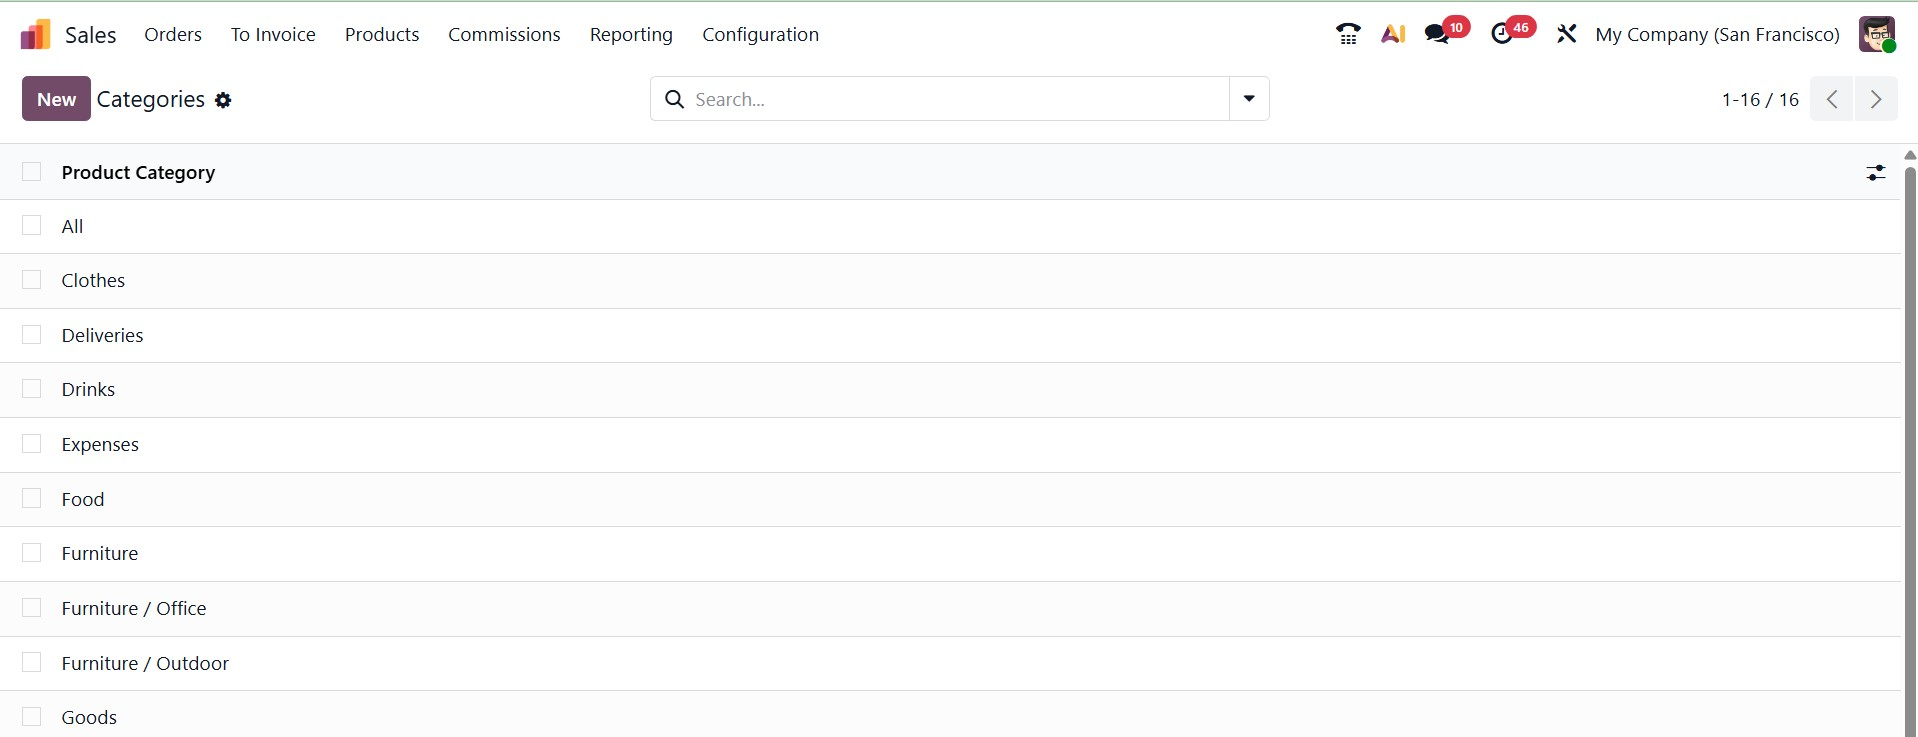
This window offers a number of pre-configured categories, including All, Consumable, Deliveries, Rental, Saleable, Internal, External, and many more. Let's use the New button to create a new category. To set up a new category, Odoo will take you to a new window, as seen in the screenshot below.
Along with the information about its Parent Category and Avatax Category, the new category's name can be entered in the designated space.
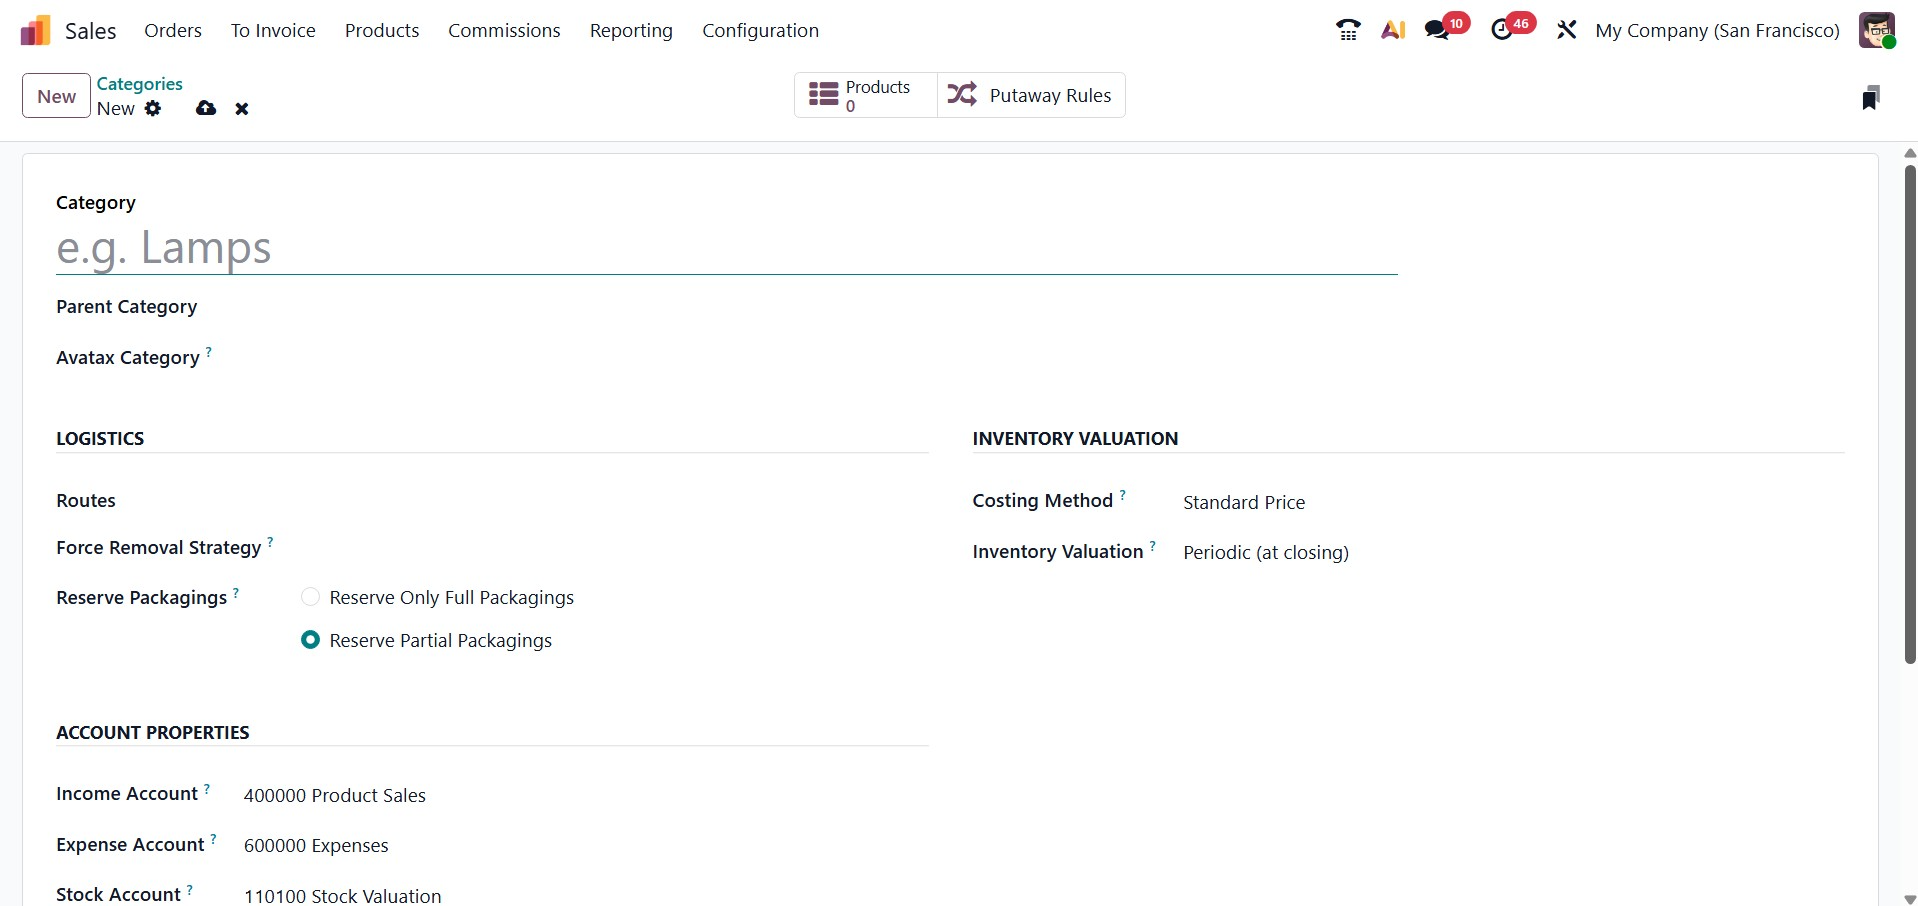
You can specify the routes of operation for this product category under the Logistics tab. You can provide a removal method in the Force Removal Strategy box that will be used regardless of where this product's source is located. Reserve Partial Packaging or Reserve Only Full Packaging are two options for the Reserve Packaging.
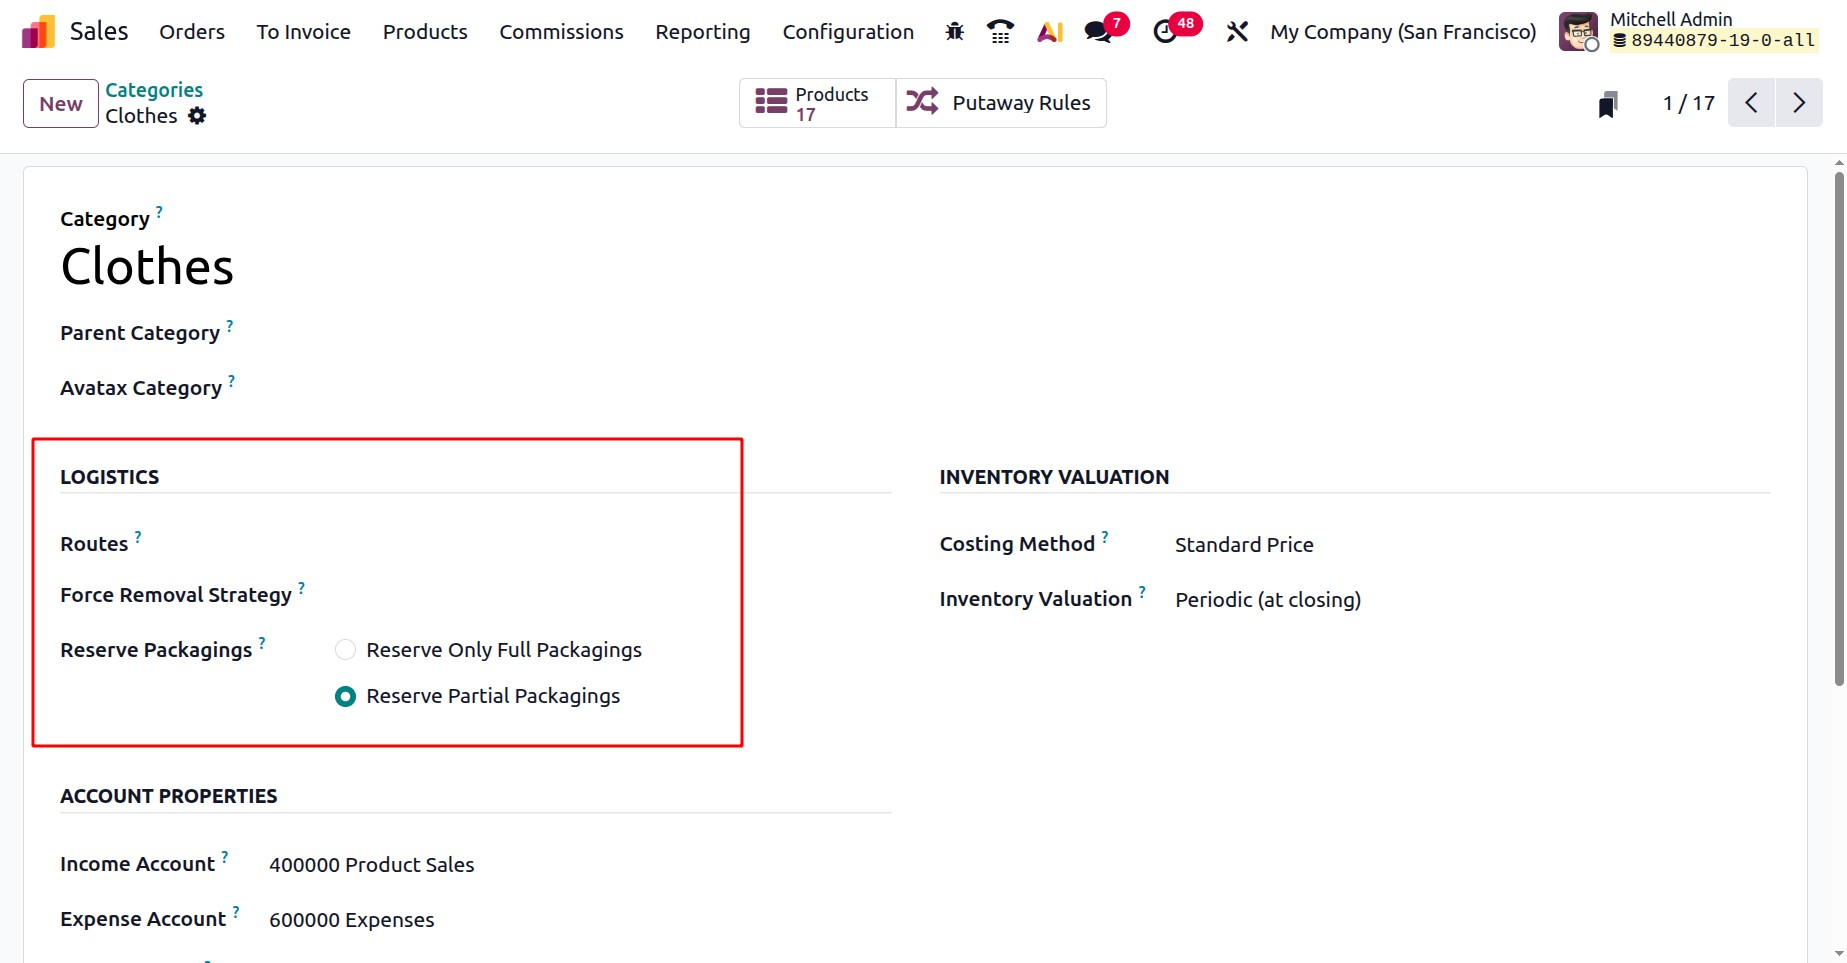
- Reserve Only Full Packaging: This feature enables you to reserve only whole packaging. Only 1000 units will be reserved if a customer requests two pallets of 1000 units each and you only have 1600 in stock.
- Reserve Partial Packaging: Partial packing can be reserved thanks to this feature. 1600 will be set aside if a customer wants two pallets of 1000 units each and you only have 1600 in stock.
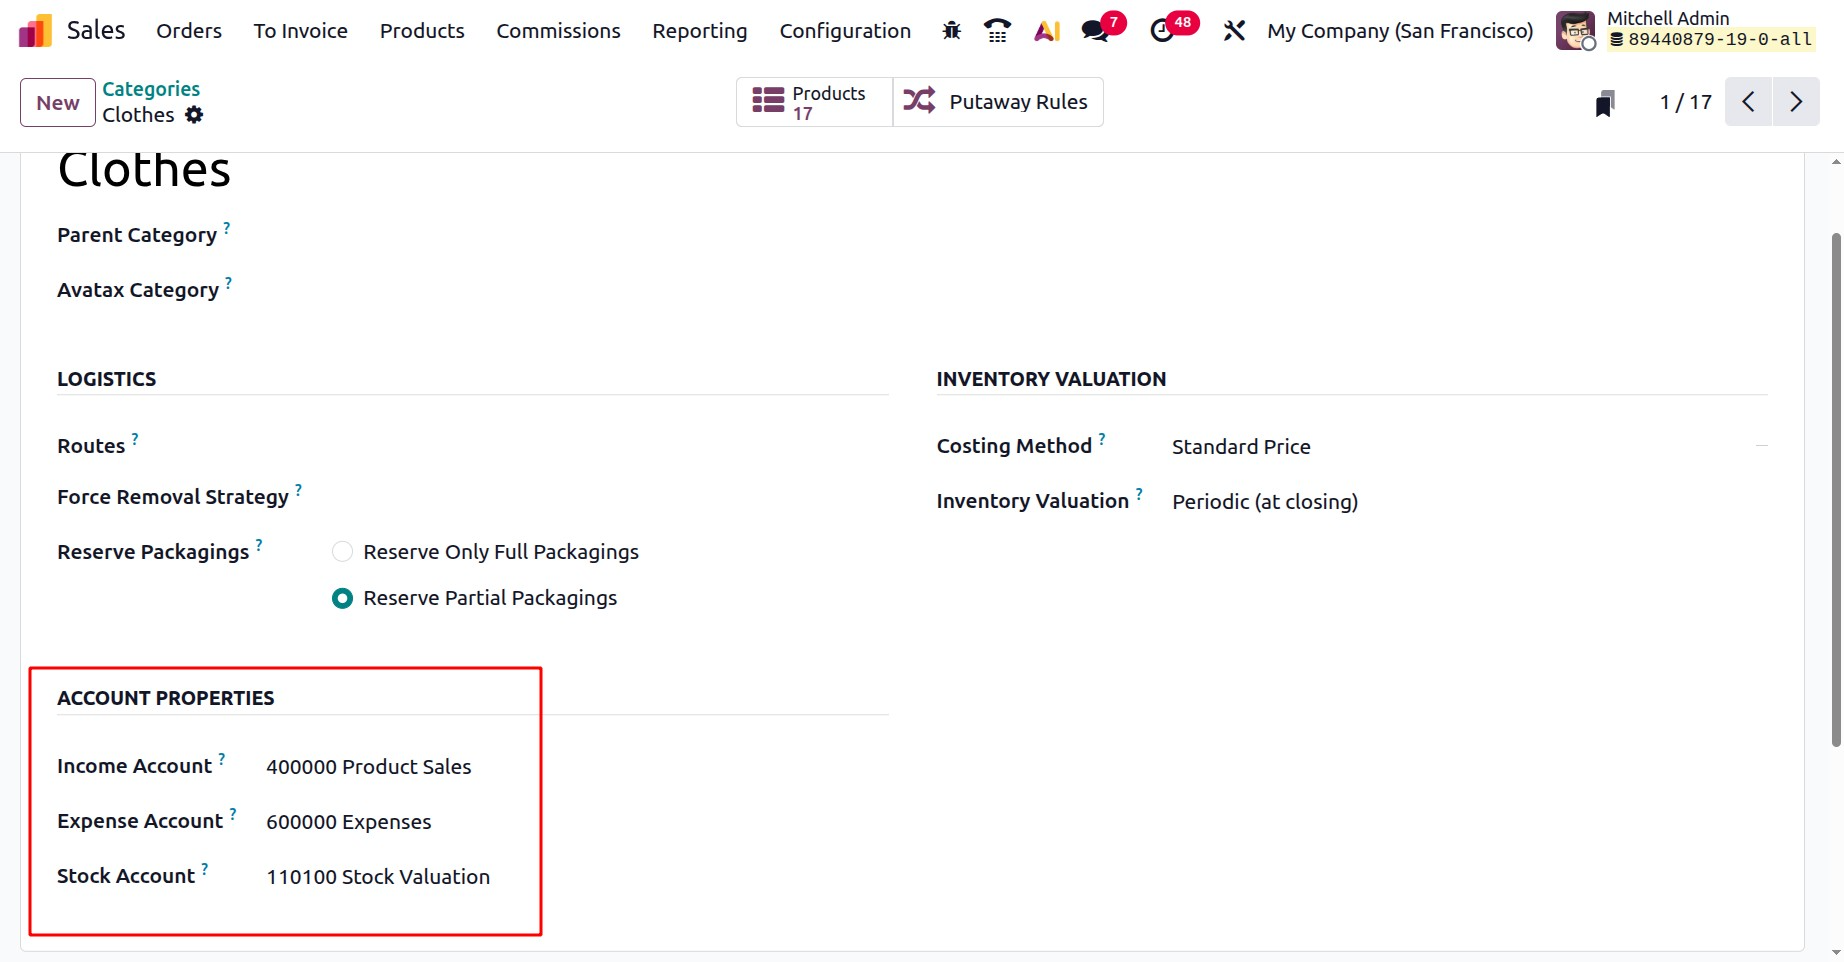
You can designate the Income Account and Expense Account in the corresponding fields on the Accounting Properties tab. Moreover, the Stock Account details can also be added below that. When a customer invoice is validated, the income account will be used, and when a vendor bill is validated, the expense account will be recorded.
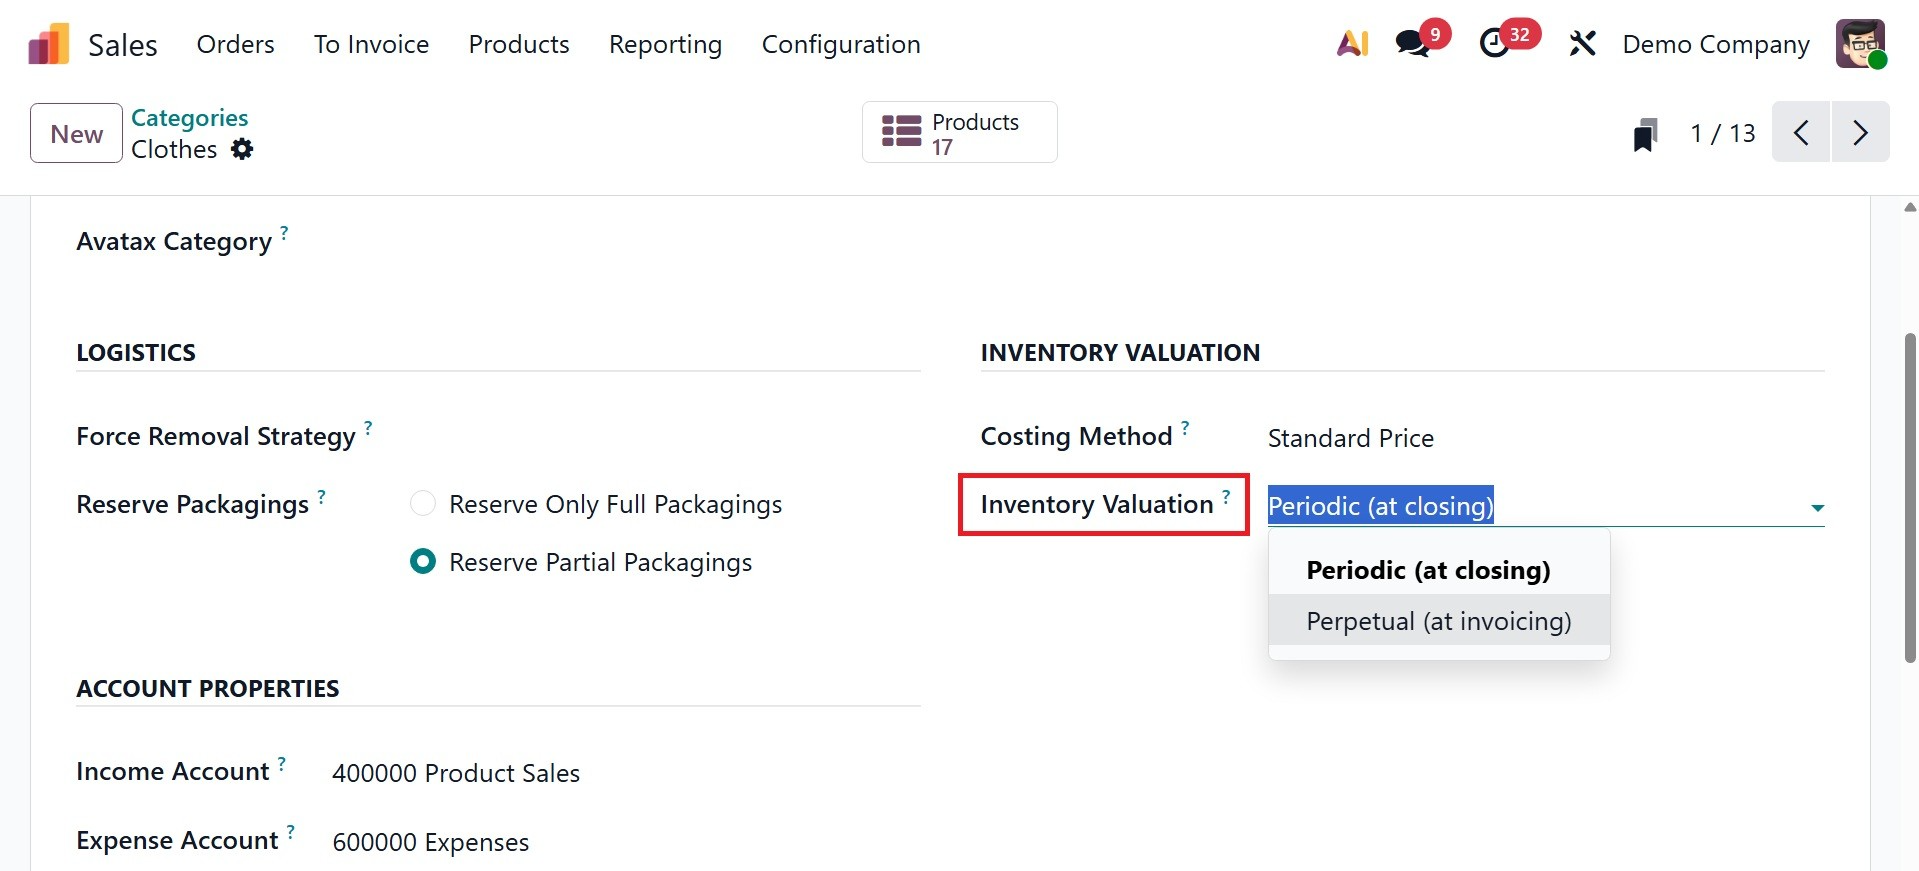
You can choose the Costing Method for this product category under the Inventory Valuation tab. The costing techniques that Odoo offers are:

- Standard Price: Each product's standard cost is used to determine its worth.
- Average Cost (AVCO): The Weighted average cost is used to determine the products' worth.
- First In First Out (FIFO): Products are priced according to the principle that those that enter the business first will also depart first (first in, first out, or FIFO).
Depending on your needs, you can choose to have the product category's inventory valuation done periodically or perpetual, as in the screenshot below.
1.8 Product Tag
Product tags are essential for classifying and arranging goods for easier accessibility and management. Product tags can help you handle your product catalog more efficiently by streamlining searches and producing filtered views.
To set up Product Tags, go to the Sales module's Configuration menu and choose the Product Tags option.
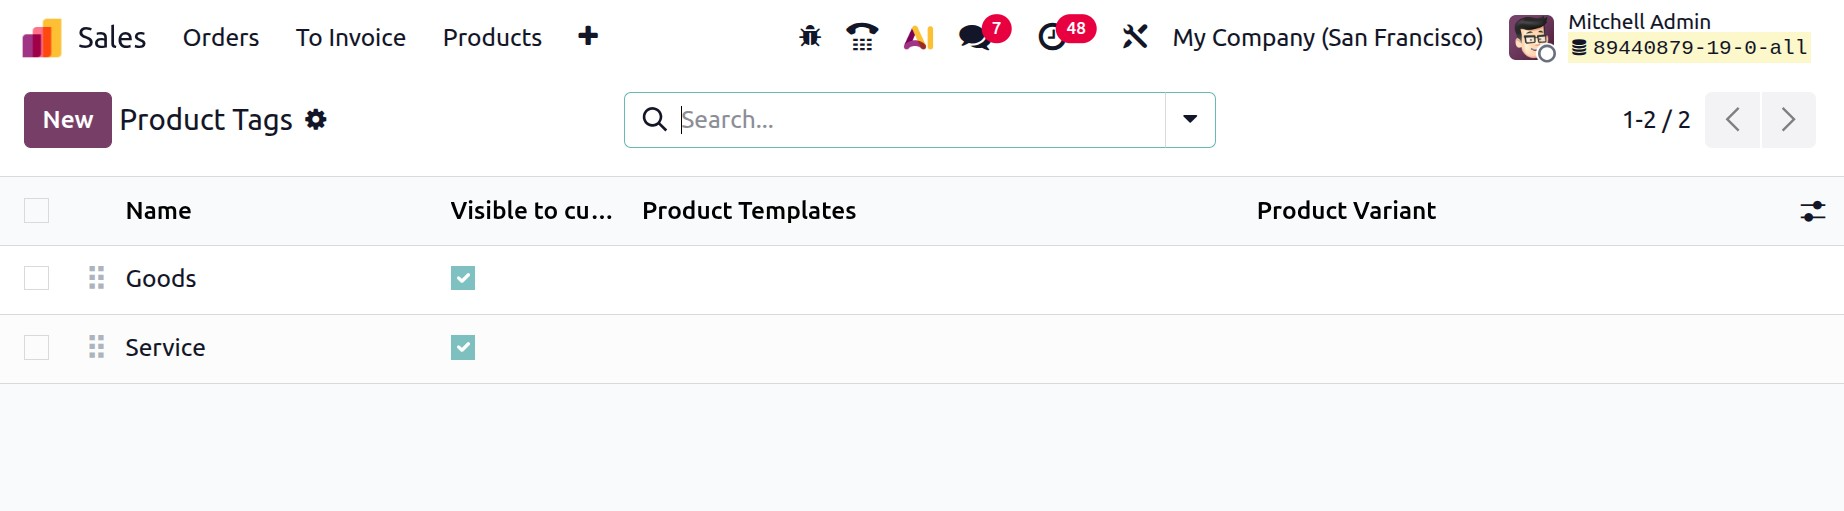
A list of current tags will be shown; these can be changed or removed as needed. Click the New button to create a new tag. You can give the tag a name, designate a color for convenient identification, and store the tag for later use in the creation window.
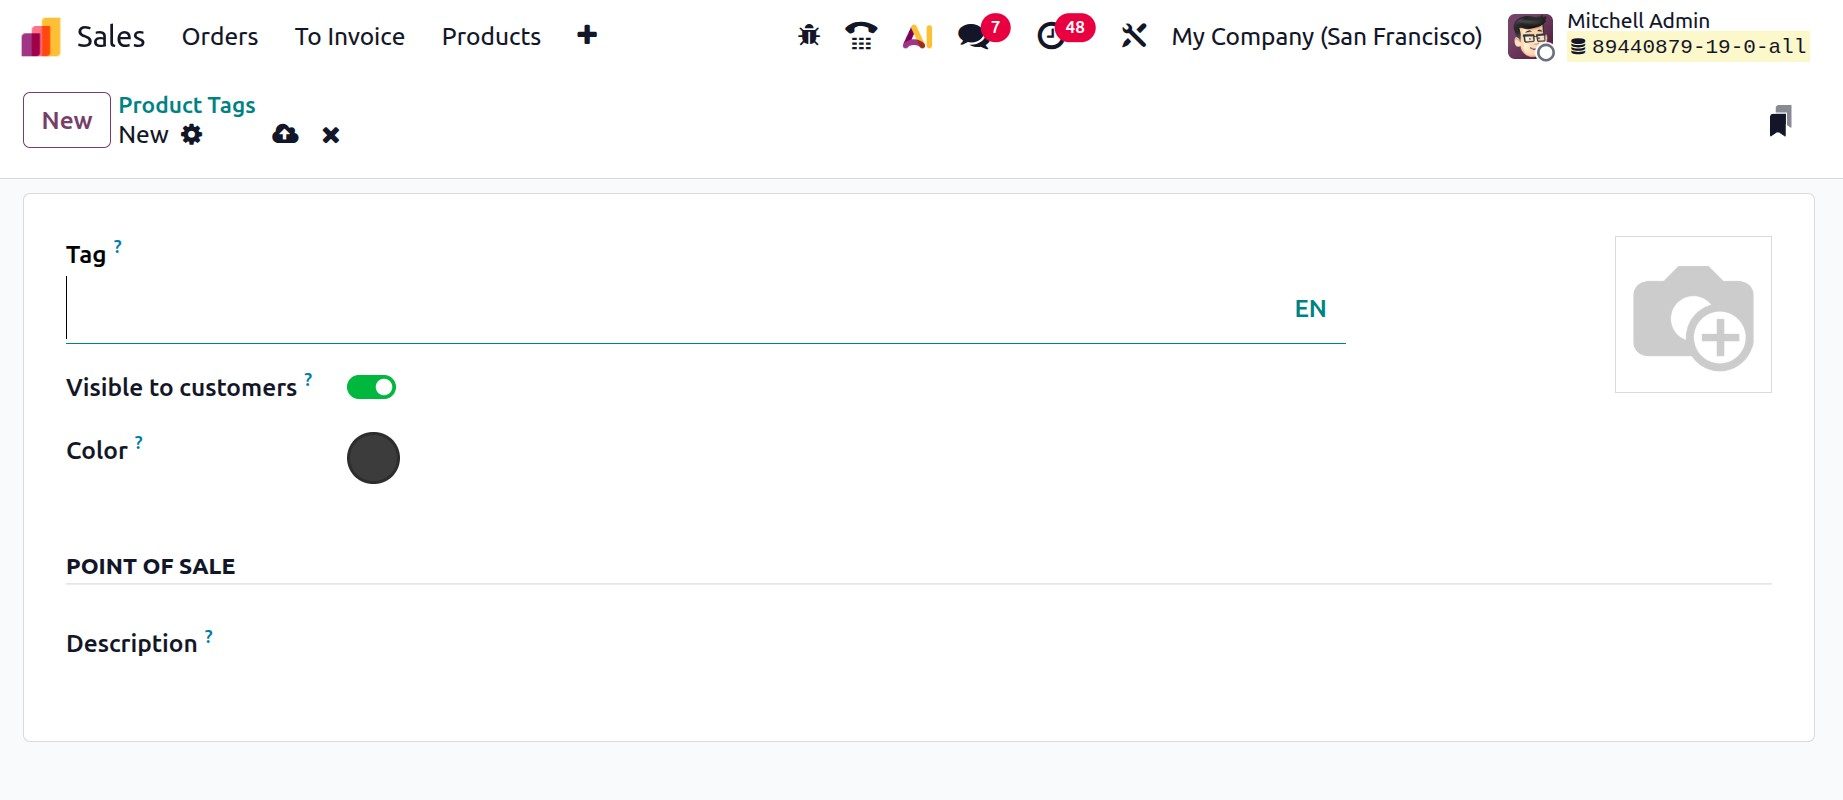
If you wish to make the product tag visible to customers, mention its name and turn on the Visible to Customer option. In the appropriate fields, enter an image and pick a suitable color. And can add description in the allotted space as well.
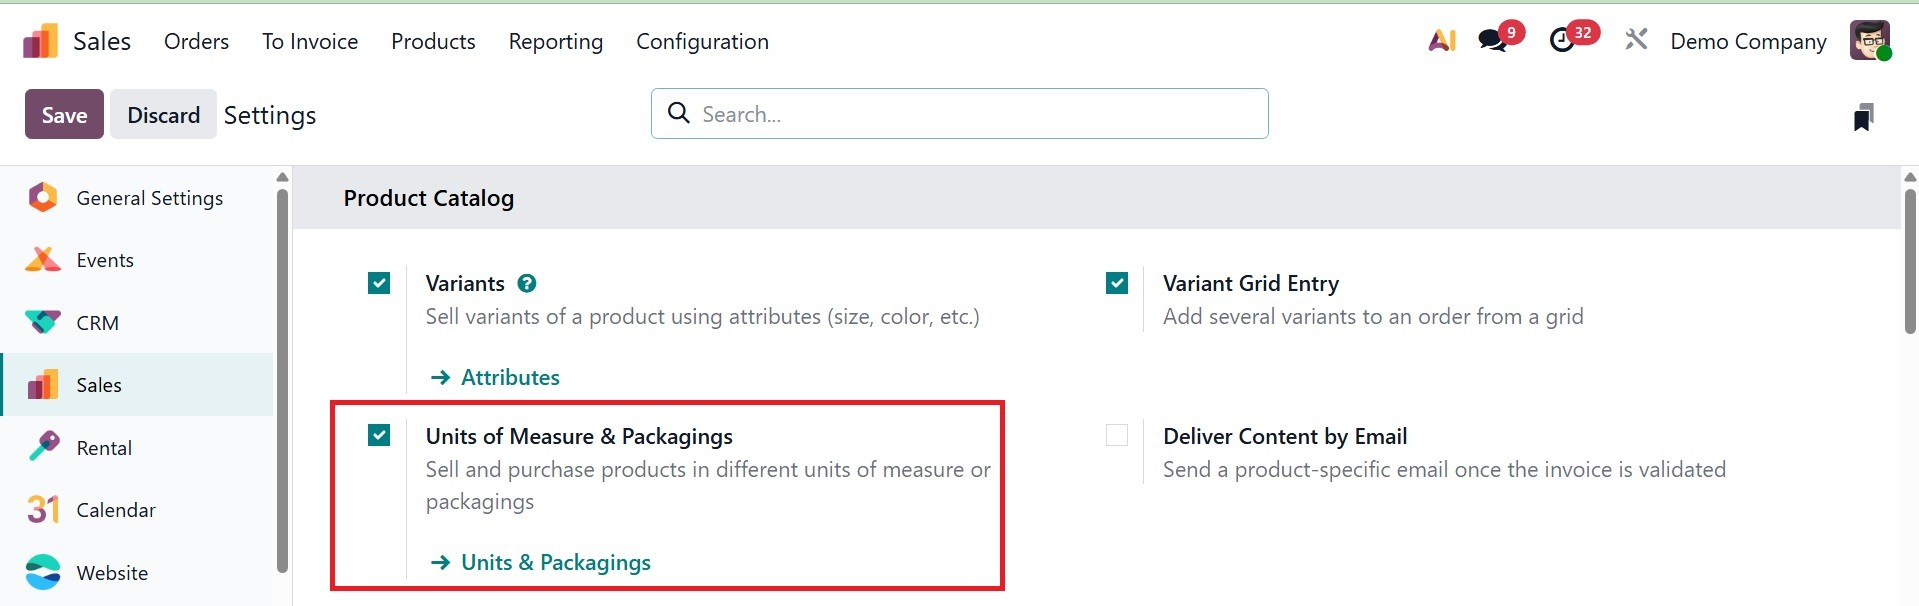
1.9 Units and Packagings
Businesses can specify how goods are sold, bought, or delivered with the aid of the Units of Measure (UoM) and packaging options:
- Units of Measure (UoM): This feature lets you set up and designate numerous units (such as pieces, boxes, kilograms, or liters) for your goods so that they can be purchased, sold, or kept in a variety of measurement units while maintaining constant stock levels.
- Packaging: By allowing you to establish product packaging guidelines (such as a box of 10 or a pallet of 100), this feature facilitates more effective management of bulk sales, delivery planning, and shipping logistics.
All of these capabilities work together to give Odoo Sales the flexibility to manage product handling for both small and large sales by handling transactions in a variety of amounts and packaging forms. In order to have this option, you have to activate this from the settings, as in the screenshot below.
On selecting the option, you will get the page, as in the screenshot below.
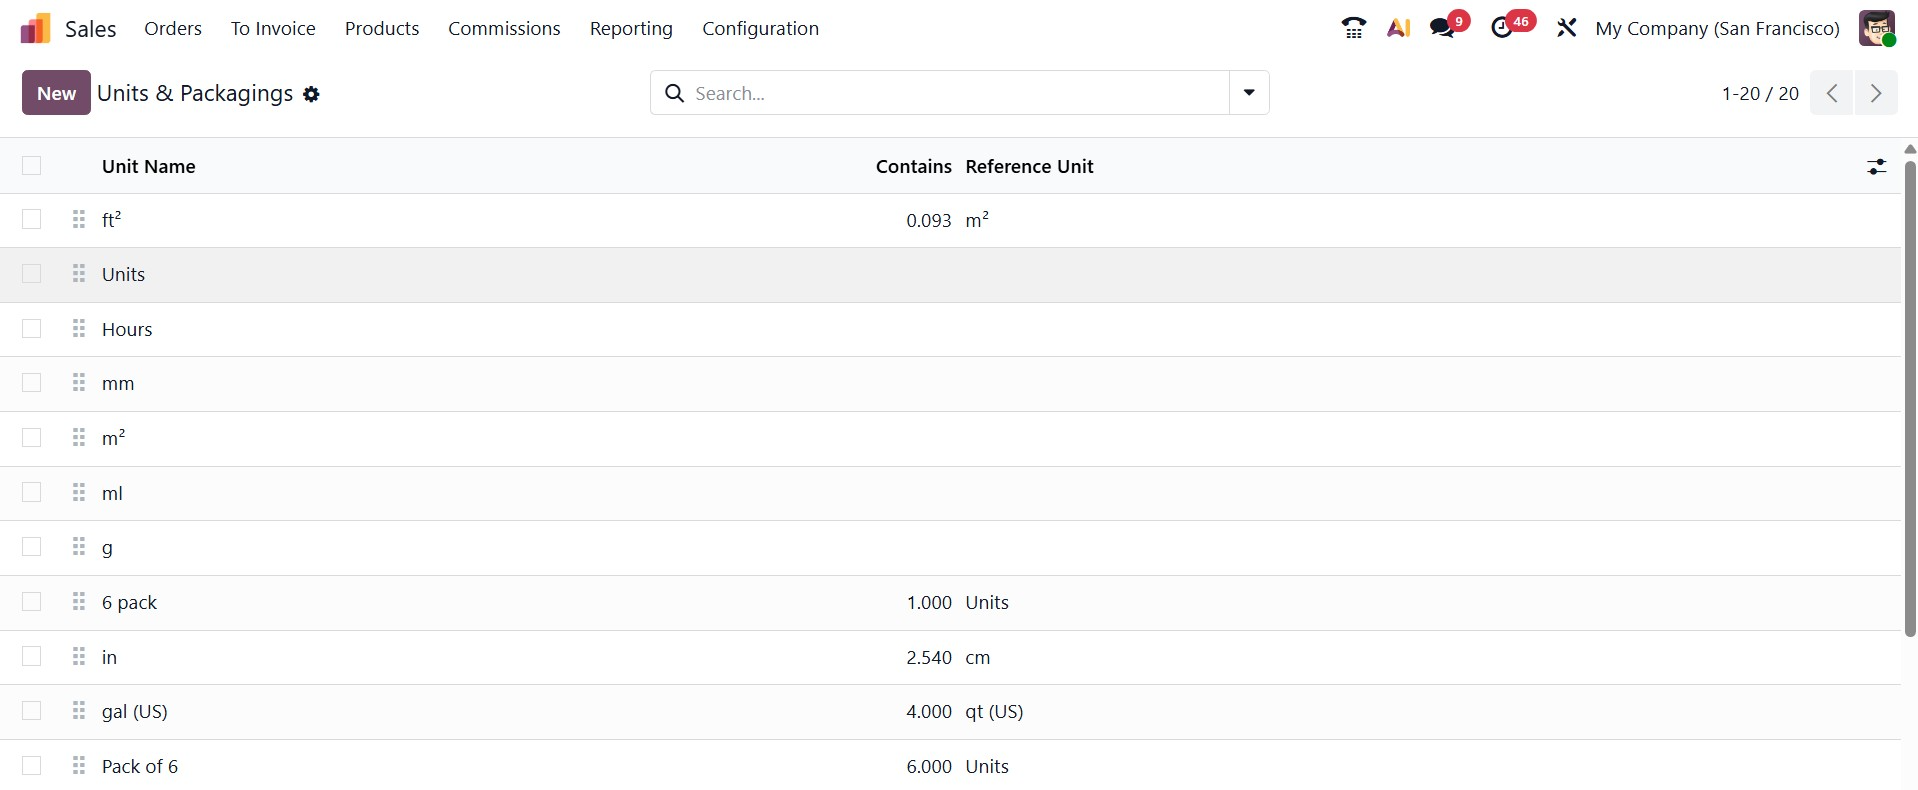
In Odoo 19, both units of measure and packaging come under a single option, where in the creation page, you can add the details like Unit name, Quantity, and UNPSC categories, respectively, as in the screenshot below.

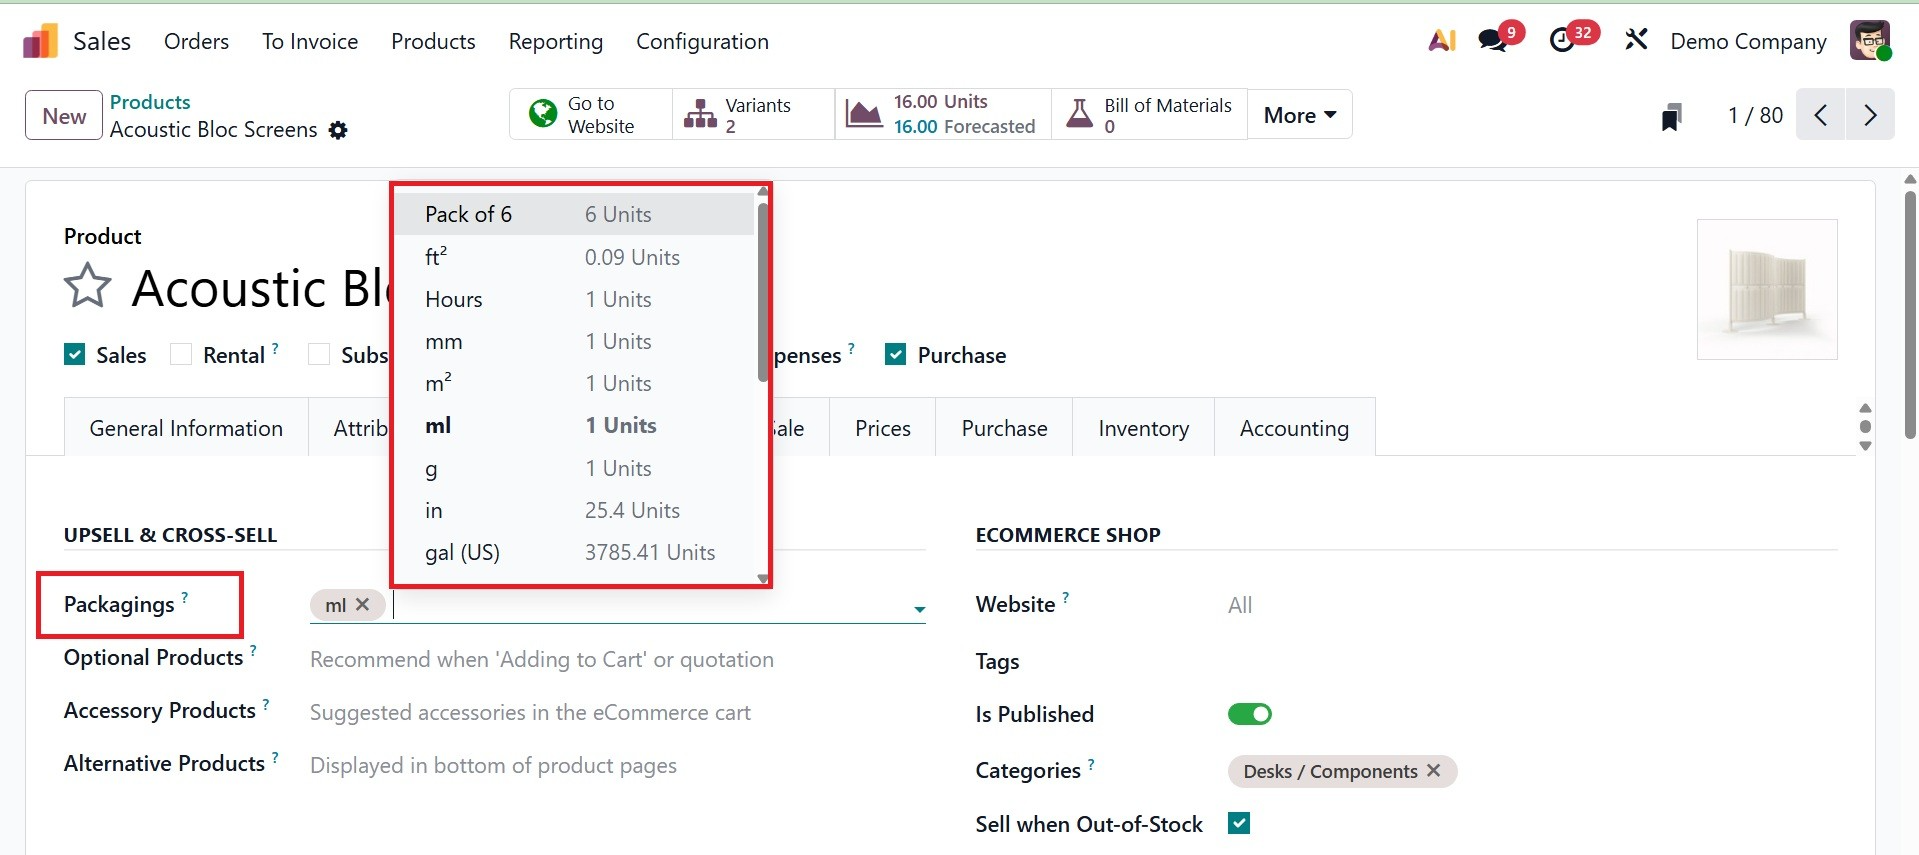
The options can be viewed under the Sales tab of Products Menu, where both units of measure and Packaging details comes together.
1.10 Accounts
Go to the Sales app ‣ Configuration ‣ Settings ‣ Connectors section, turn on the Amazon Sync option, and then click Save to link an Amazon Seller account in Odoo 19, as in the screenshot below.
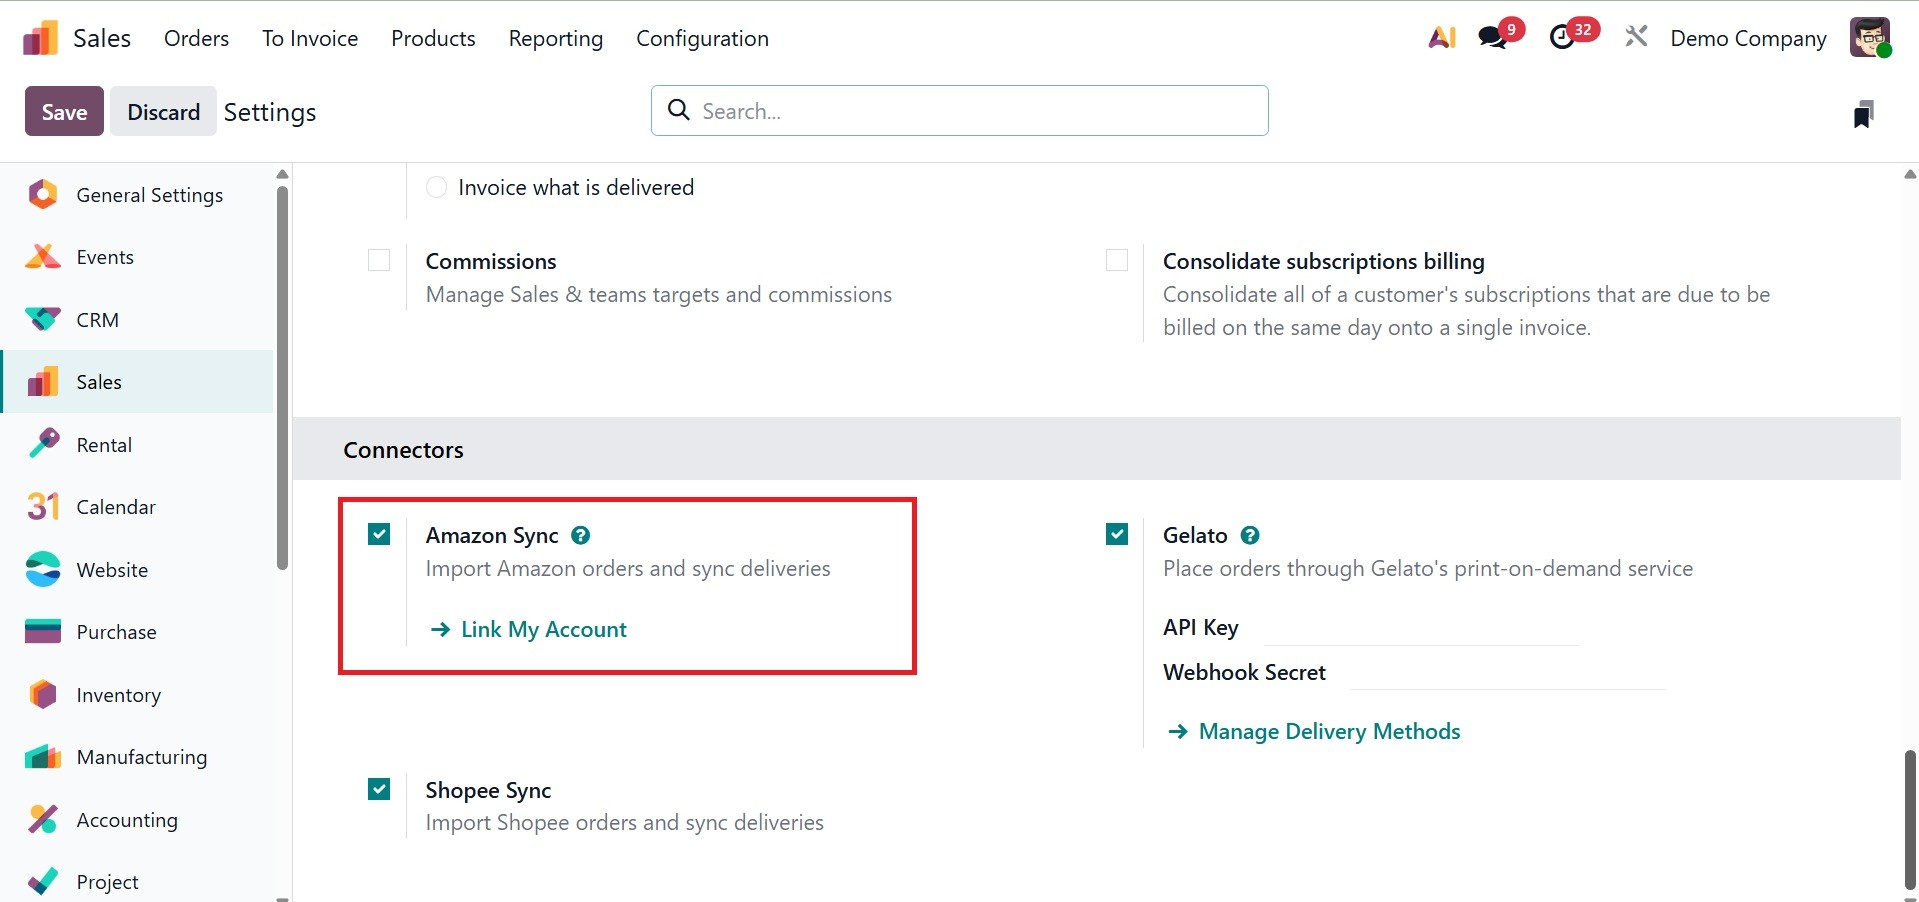
Amazon Seller Central accounts are linked to Amazon accounts. To begin integrating your orders into Odoo, you can register.
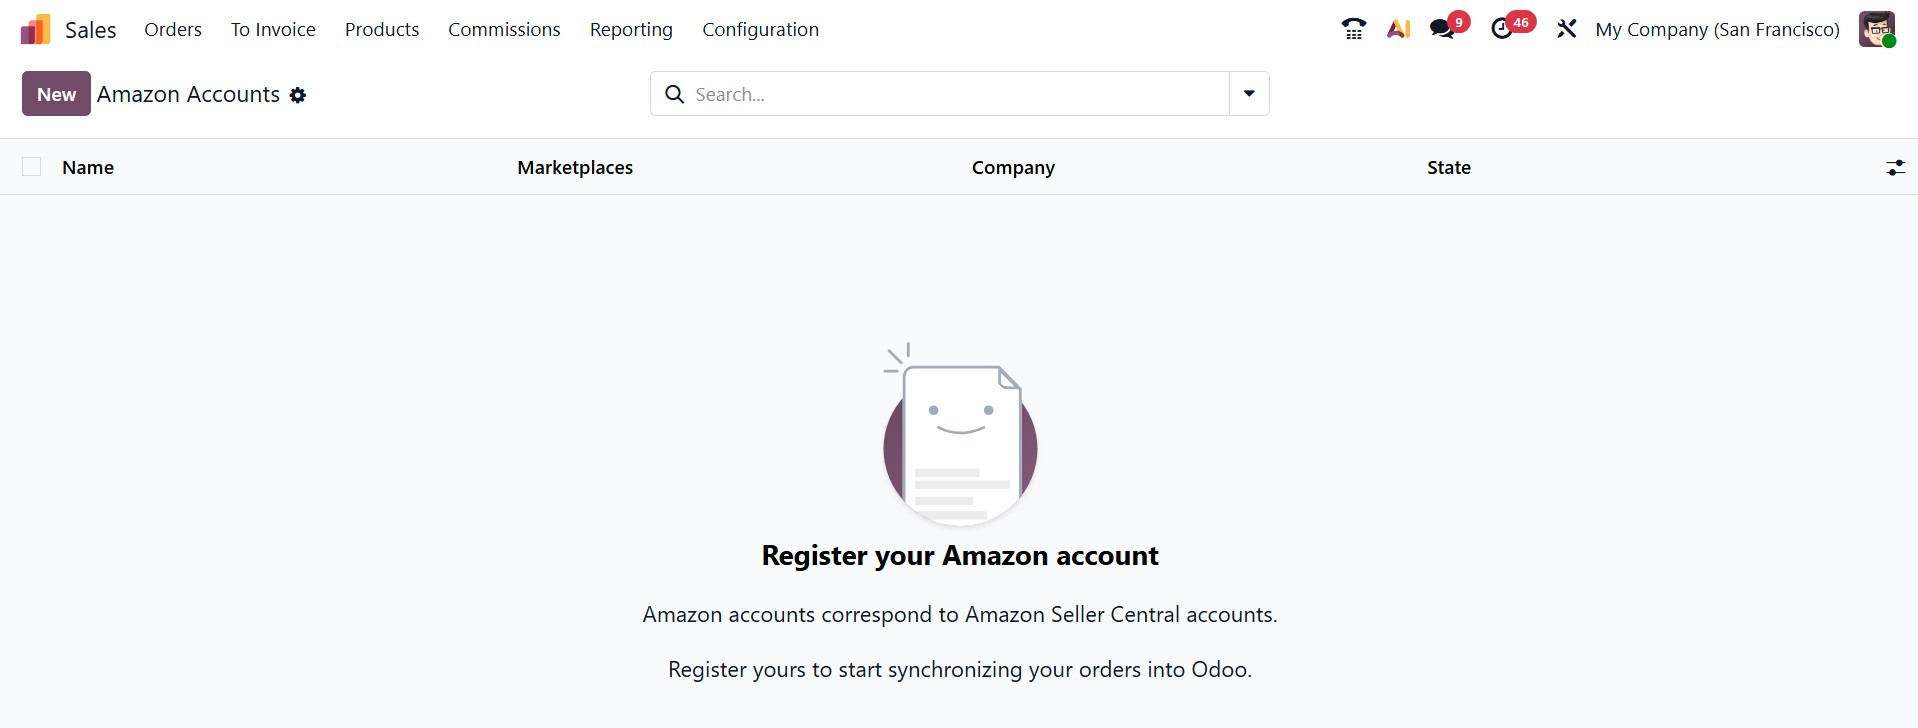
To create a new account, go for the New icon, and it provides a pop-up, as in the image below.

Here, you can provide the Home Marketplace to select the Amazon Marketplace to log in from. And then, go for the Connect icon, which helps you to create one.
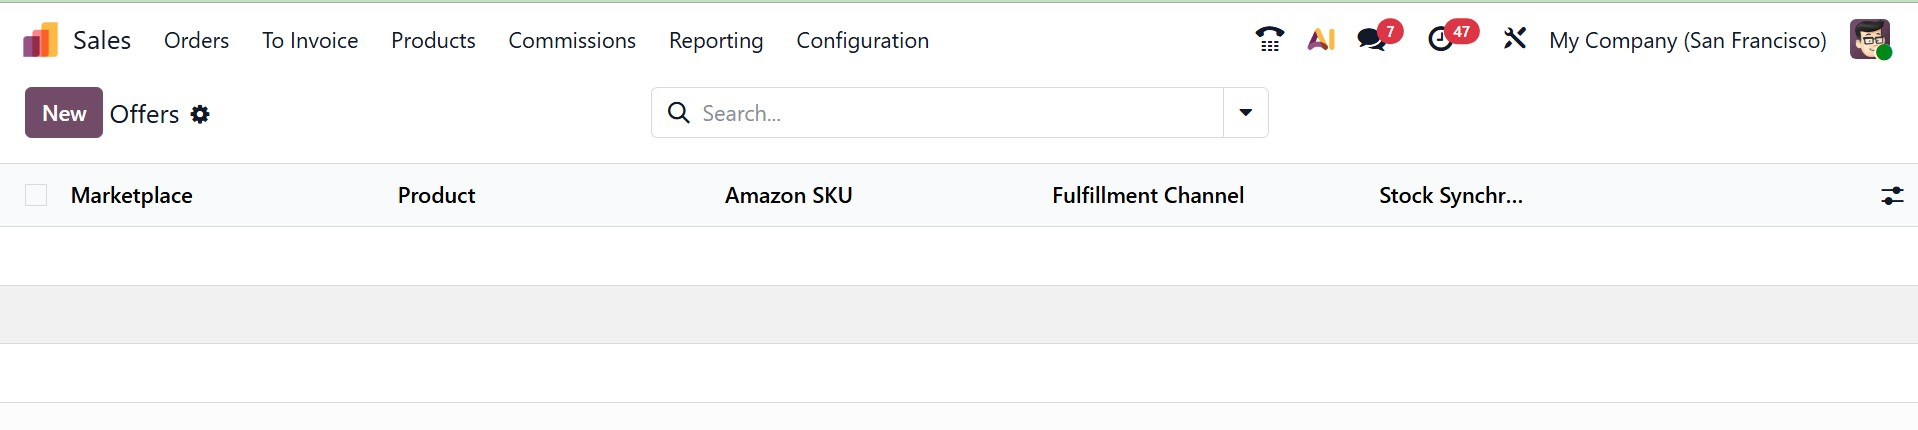
1.11 Offers
You may control how your products and prices are synchronized with your Amazon seller account by using the Offers option under the Amazon Connector setup.
Deals: This option manages the prices, stock levels, and availability of the product listings (deals) you post on Amazon. It guarantees that your Amazon marketplace offerings automatically reflect any modifications you make in Odoo, such as adjustments to the number or pricing.
To put it briefly, the Offers option in the Amazon setup of Odoo 19 Sales is used to maintain uniformity in product availability and pricing between Odoo and Amazon.
1.12 Accounts
You connect and manage your Shopee seller accounts under the Accounts option in the Shopee Connector setup.
Accounts (Shopee): Entering the necessary information (such as shop ID, API keys, and authorization tokens) enables you to connect one or more Shopee stores with Odoo. Once set up, it allows Odoo to Accounts (Shopee):seamlessly sync prices, stock levels, orders, and goods with your Shopee account.
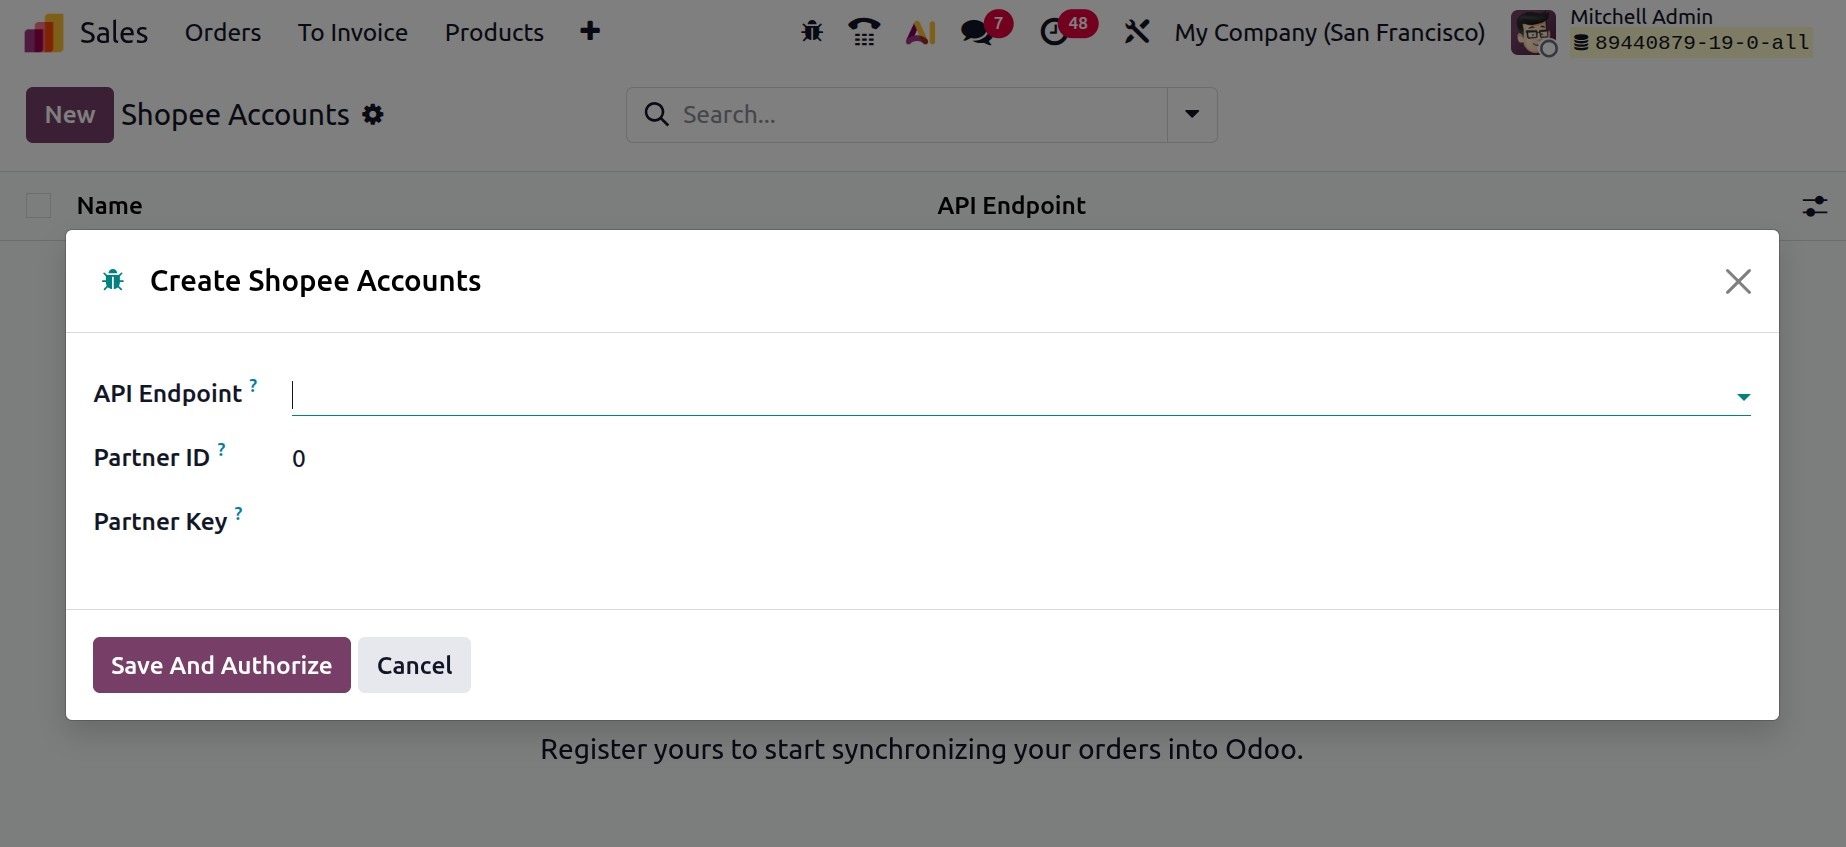
Integrating your Shopee marketplace stores with Odoo is made feasible by the Accounts option in the Shopee settings, which guarantees unified inventory and sales administration.
1.13 Shoppe Items
Items (Shopee): This option enables you to manage and synchronize product information between Shopee and Odoo. You may export Odoo products to Shopee, import items that are already listed on Shopee into Odoo, and maintain product details like names, descriptions, pricing, stock levels, and variations current on both platforms.
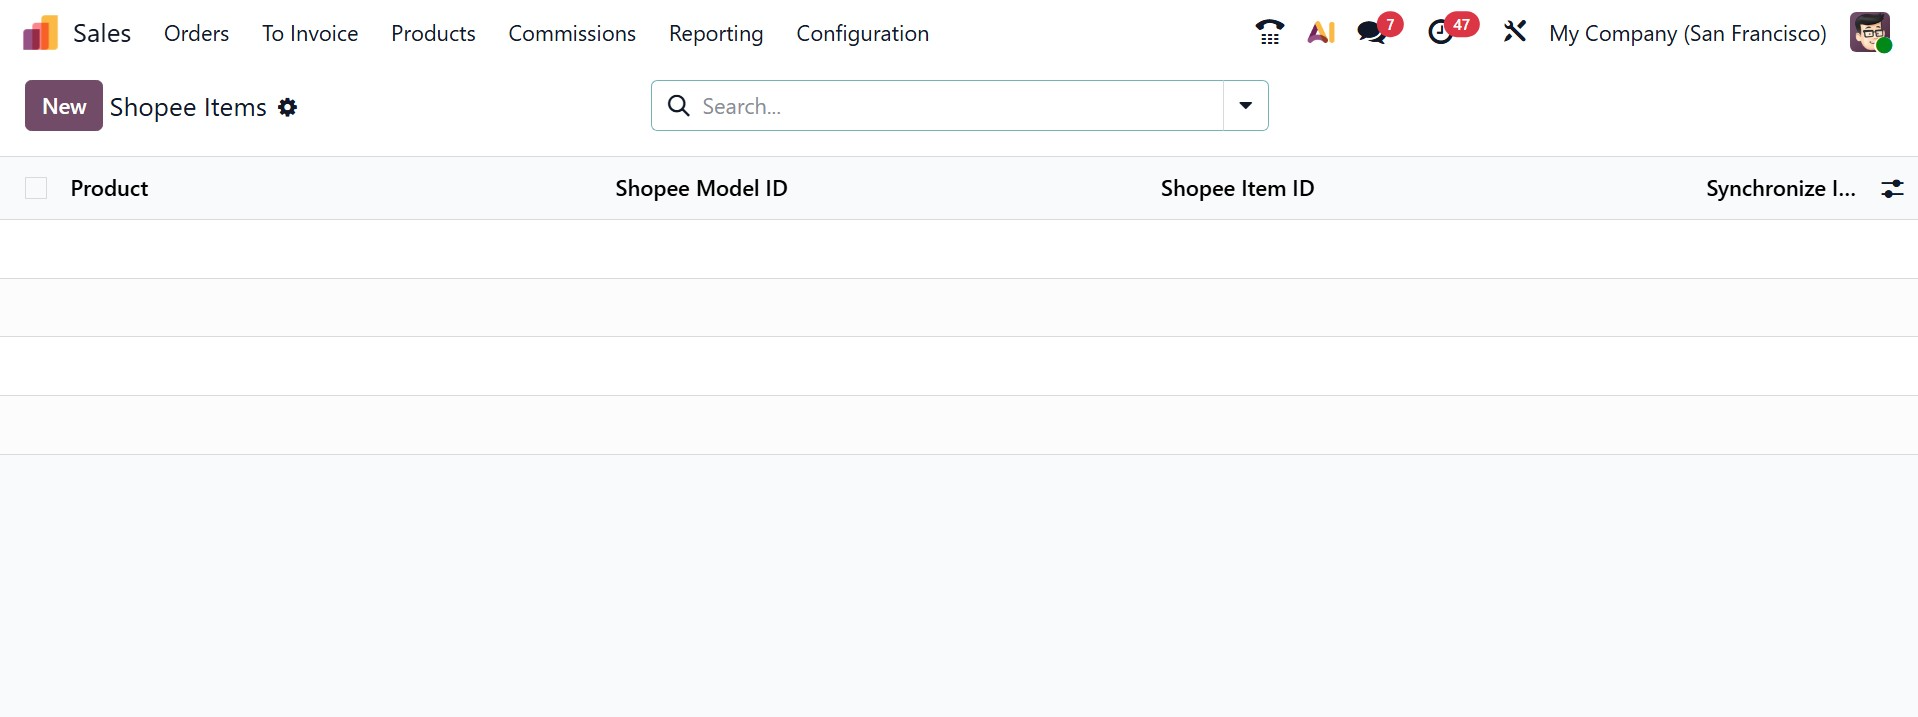
For smooth selling and inventory management, the Items option makes sure that your Shopee product catalog and your Odoo database remain in sync.
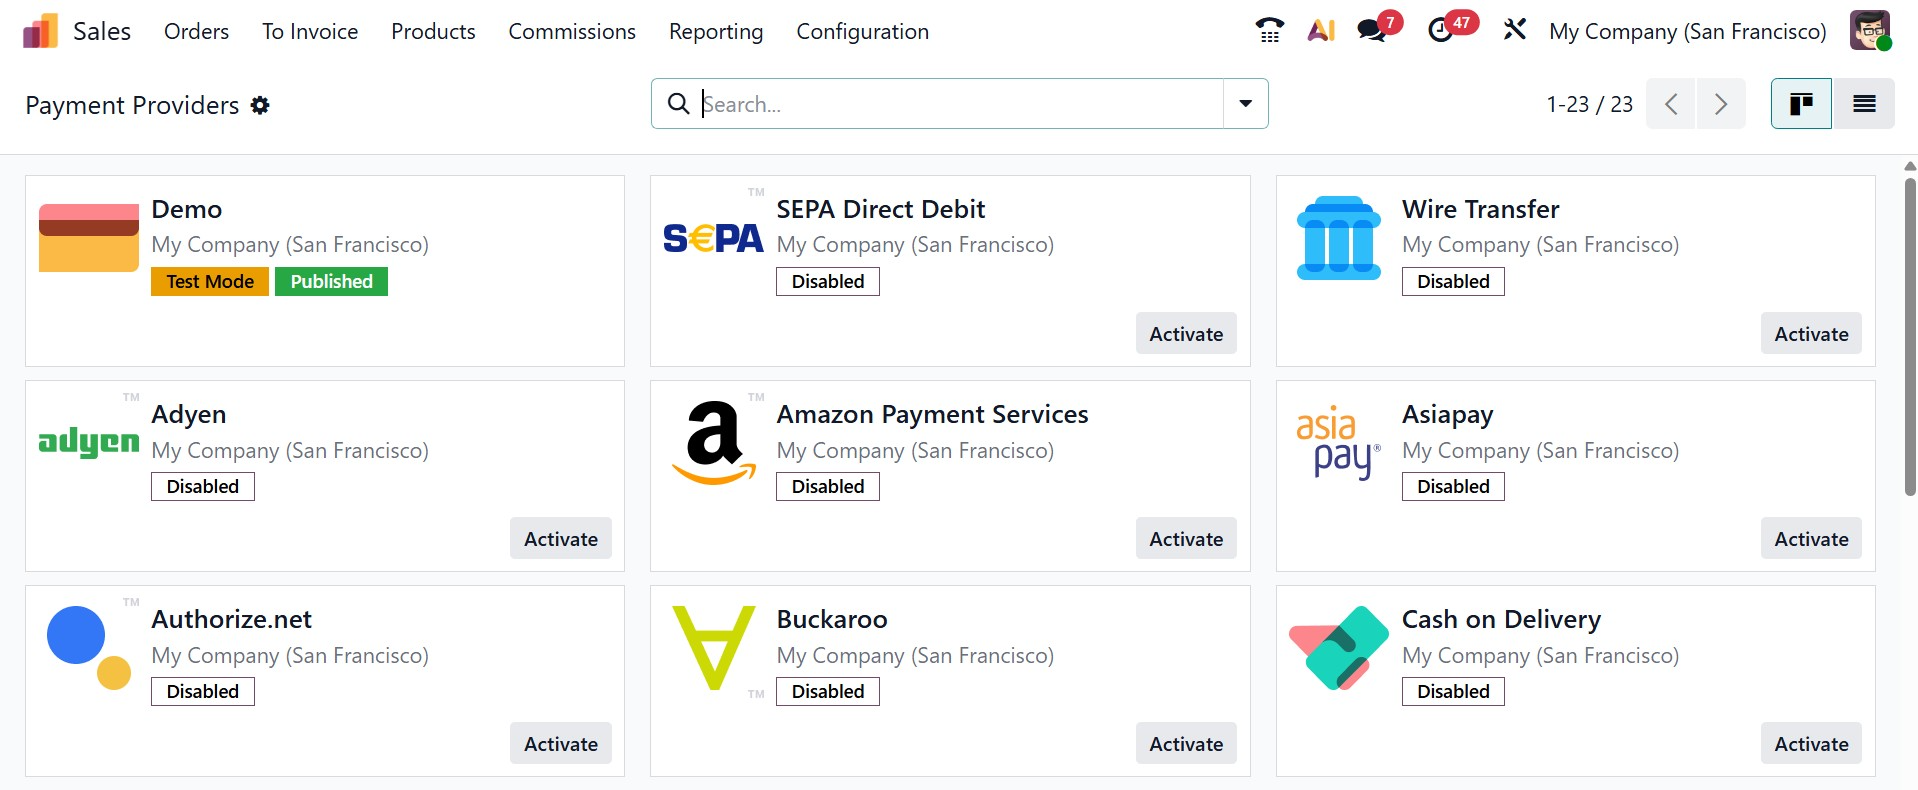
1.14 Payment Providers
Several payment providers are integrated with Odoo, enabling your clients to make payments via your eCommerce website, their customer portals, or online. They can use their preferred payment methods, including credit cards, to settle sales orders, invoices, or subscriptions with recurring payments.
A list of accepted payment methods that you can (de)activate according to your needs is connected to each payment provider.
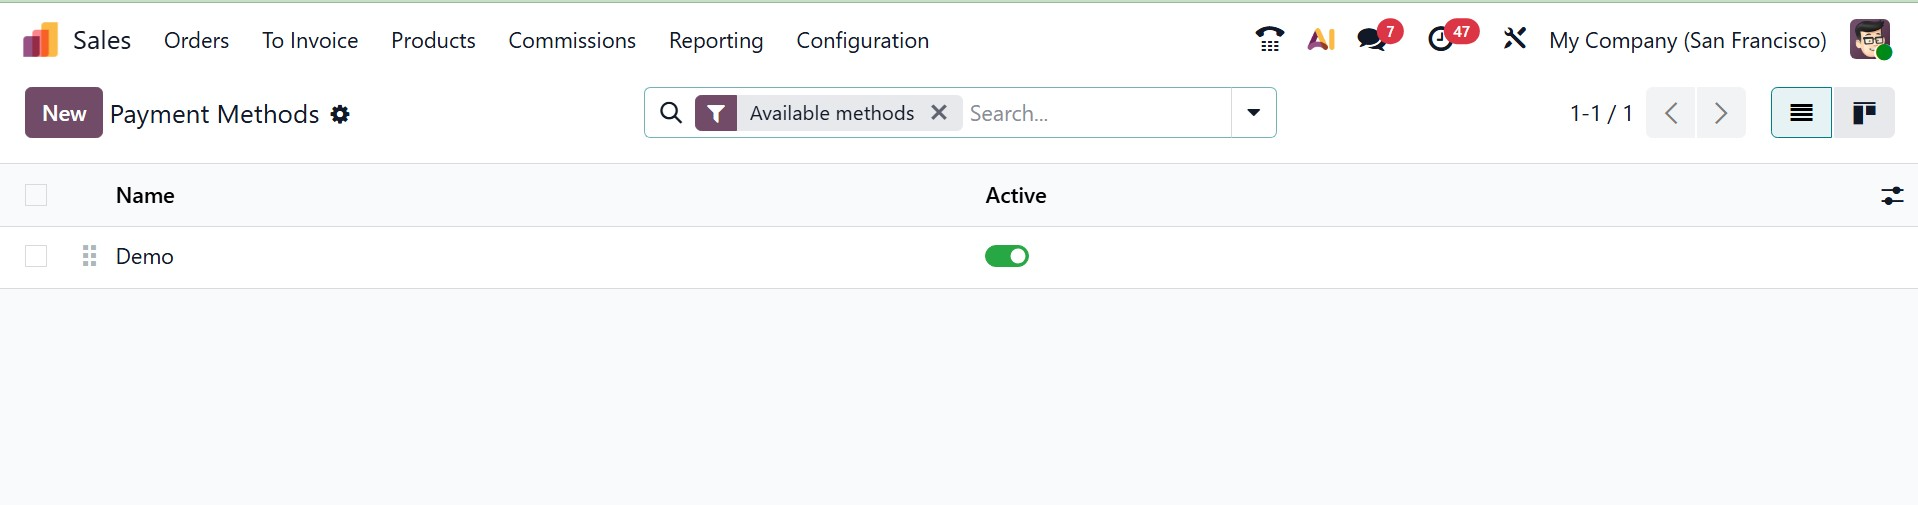
1.15 Payment Methods
Several payment providers are integrated with Odoo, enabling your clients to make payments via your eCommerce website, their customer portals, or online. They can use their preferred payment methods, including credit cards, to settle sales orders, invoices, or subscriptions with recurring payments.
A list of accepted payment methods that you can (de)activate according to your needs is connected to each payment provider.
On selecting the New option, you can easily create a new one, as in the image below.
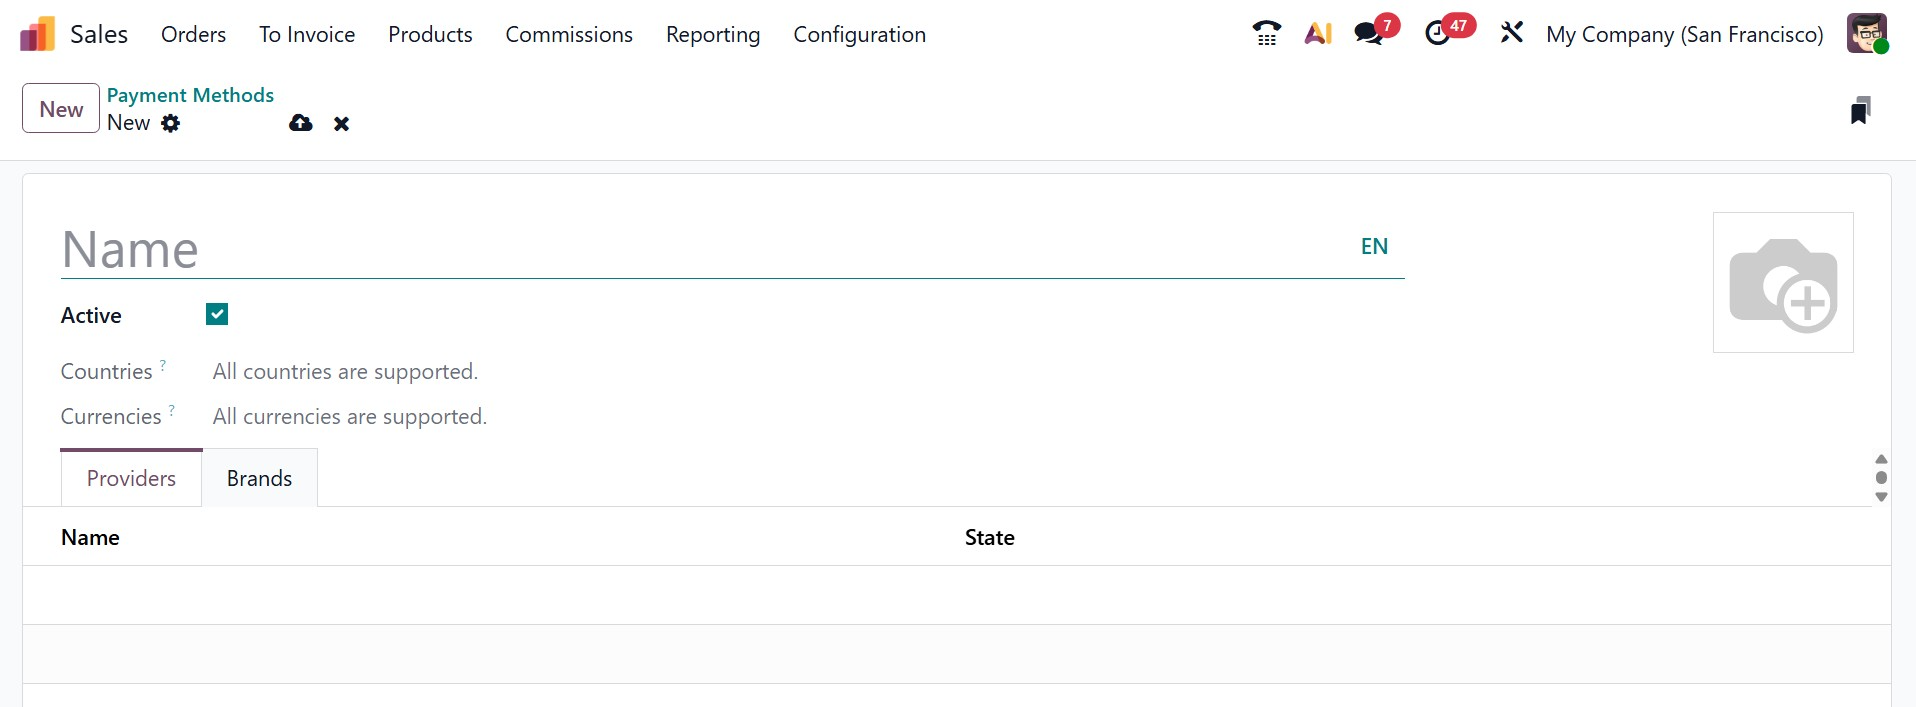
Here, you can provide the name for the payment method, enabling the Active option. Then, add the providers and brands for the payment method.
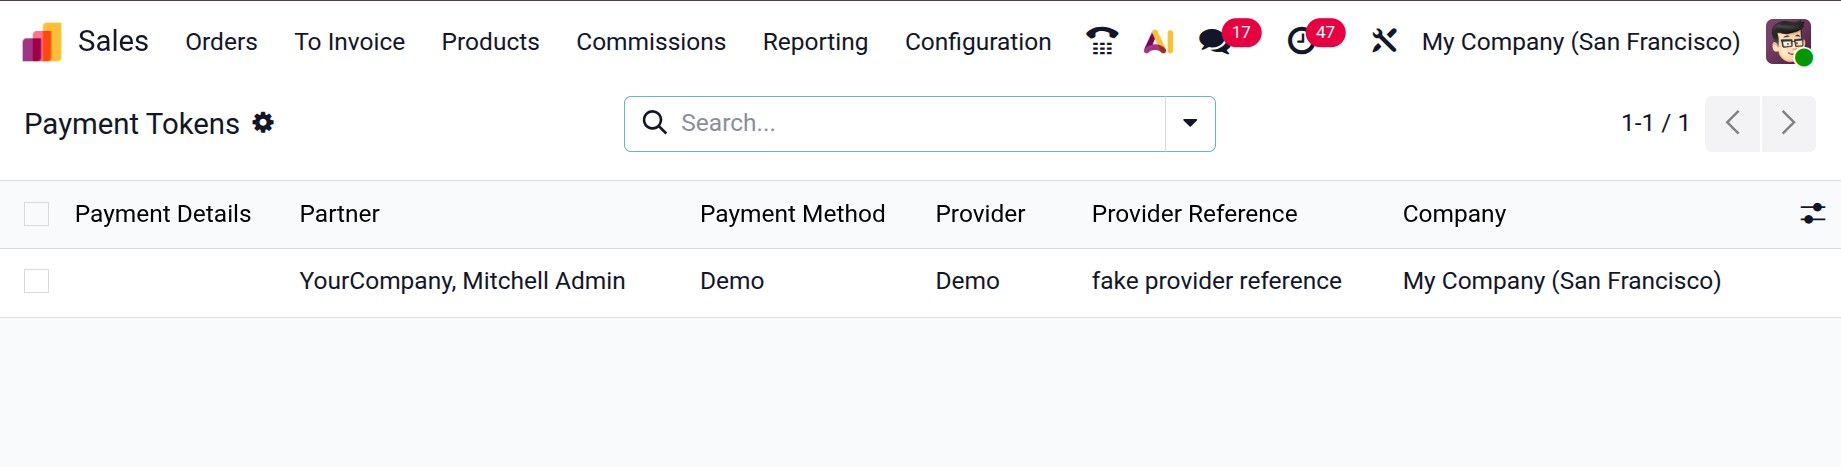
1.16 Payment Tokens
To avoid requiring the customer to submit their payment method information again, a payment token is created in Odoo and may be used as a payment method for future payments. This is especially helpful for subscriptions that require recurring payments and the eCommerce conversion rate. On selecting the option, you will get the page, as in the screenshot below.
1.17 Payment Transaction
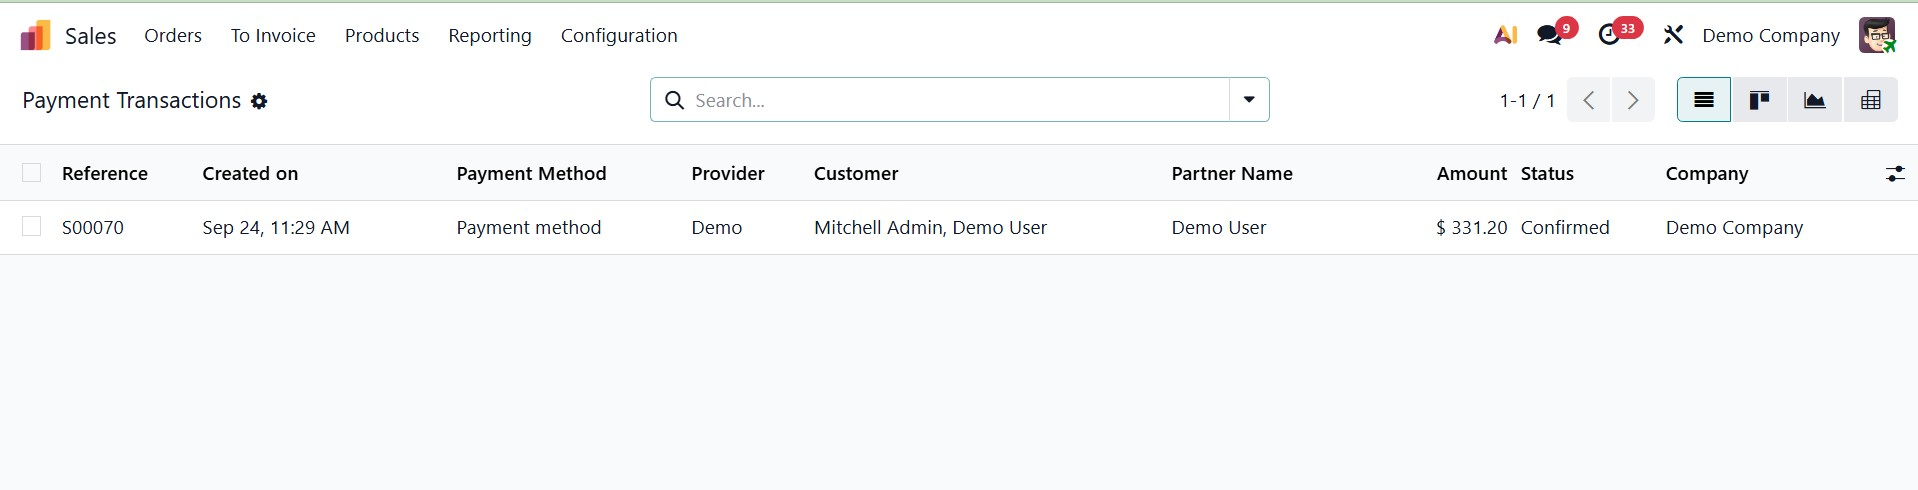
When a consumer pays for a sale, the process is referred to as a "payment transaction." This includes registering the payment and comparing it with the relevant sales order or invoice. In order to settle the amount owed on an invoice, generate customer credits for later use, or handle down payments, Odoo maintains these transactions, which may include manual payments or online payments made through payment gateways. The page of payment transactions will be, as in the image below.
1.18 Activity Type
By scheduling and planning different actions, the Schedule Activity feature in Odoo 19 Sales enables businesses to maintain a relationship with their consumers. Regular interaction and smooth client follow-up are made possible by this functionality, which is accessible across customer management and sales-related modules. You can effectively plan calls, meetings, reminders, and document uploads with this function, guaranteeing that every client interaction is timely and well-structured. On selecting the Activity type option, you will get the pre configured activity types.
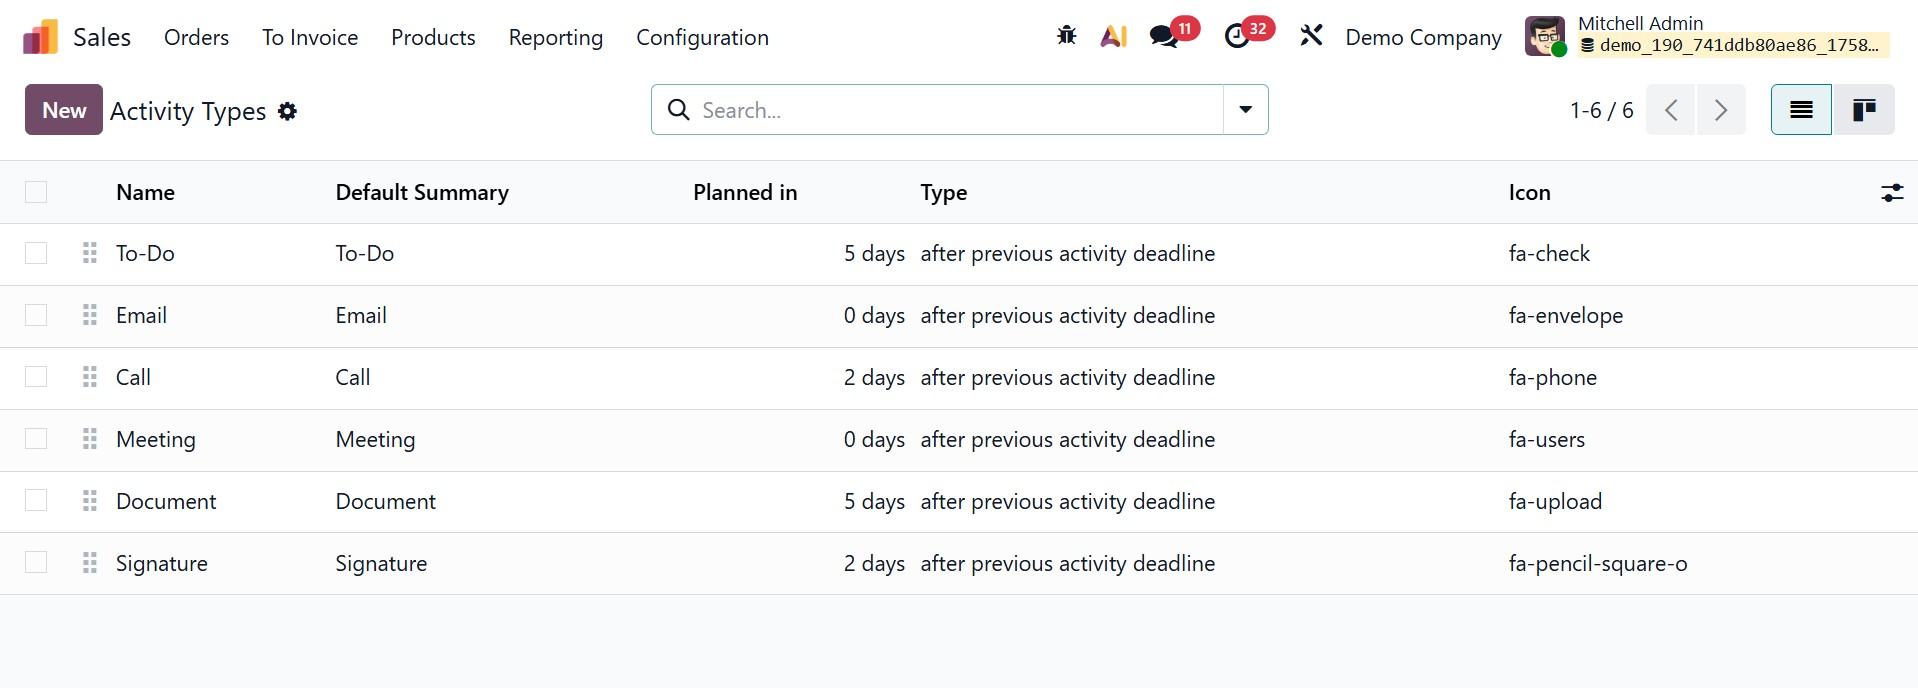
Go to the Configuration menu and choose the Activity Types option to set up activity types. Along with information like the activity name, default summary, scheduled duration, type, model, and related icons, this menu offers a range of pre-configured activity kinds. Clicking the New button will allow you to create a new activity type. Enter the activity's name in the designated field at the beginning of the creation window.
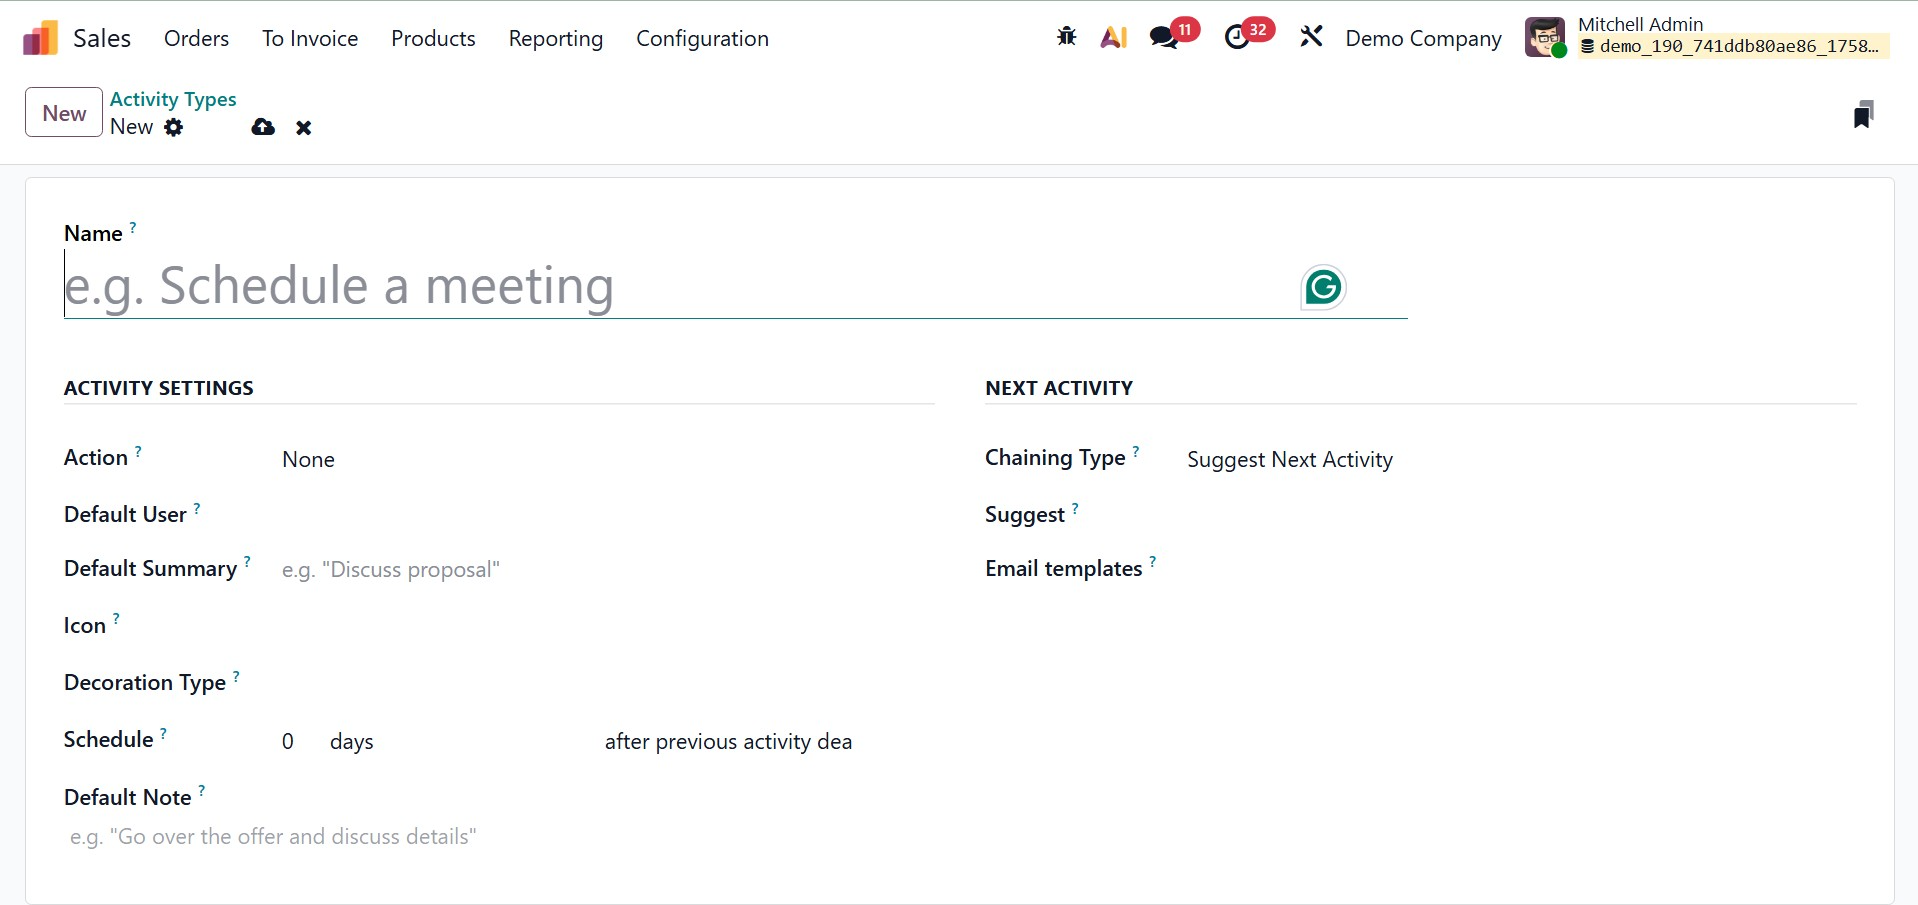
Once the activity has been named, you can select the appropriate Action from the list of possibilities, which includes Upload Document, Call, Meeting, or None. Certain actions, including launching a calendar view or immediately marking an activity as completed when a document is uploaded, are determined by the specified action. To limit its use to a certain model, you can also designate the Default User in charge of this action and link them to that model. Give a brief explanation of the activity that will serve as its default summary in the Default Summary section. You can also add a Default Note, Decoration Type, Schedule and Icon to personalize the activity.
For smooth chaining, Odoo additionally offers the ability to specify the subsequent action. You can set the Chaining Type to either Trigger Next Activity or Suggest Next Activity under the Next Activity tab. When you choose Suggest Next Activity, Odoo will suggest a certain follow-up task after the current one is marked as completed. As an alternative, selecting Trigger Next action will cause the subsequent action to be scheduled automatically after the current one is finished. When the activity is planned, you can additionally designate an Email Template to be used for emailing clients. Additionally, by indicating how many days, weeks, or months before the activity should occur, you may establish the action deadline in the Schedule box.
1.19 Activity Plans
An organized approach to customer contacts is made possible by Odoo Sales' Activity Plans, which let you develop and oversee several activities under a single plan. Businesses that need a set of follow-ups or workflows for managing leads, opportunities, or customers may find this functionality very helpful.
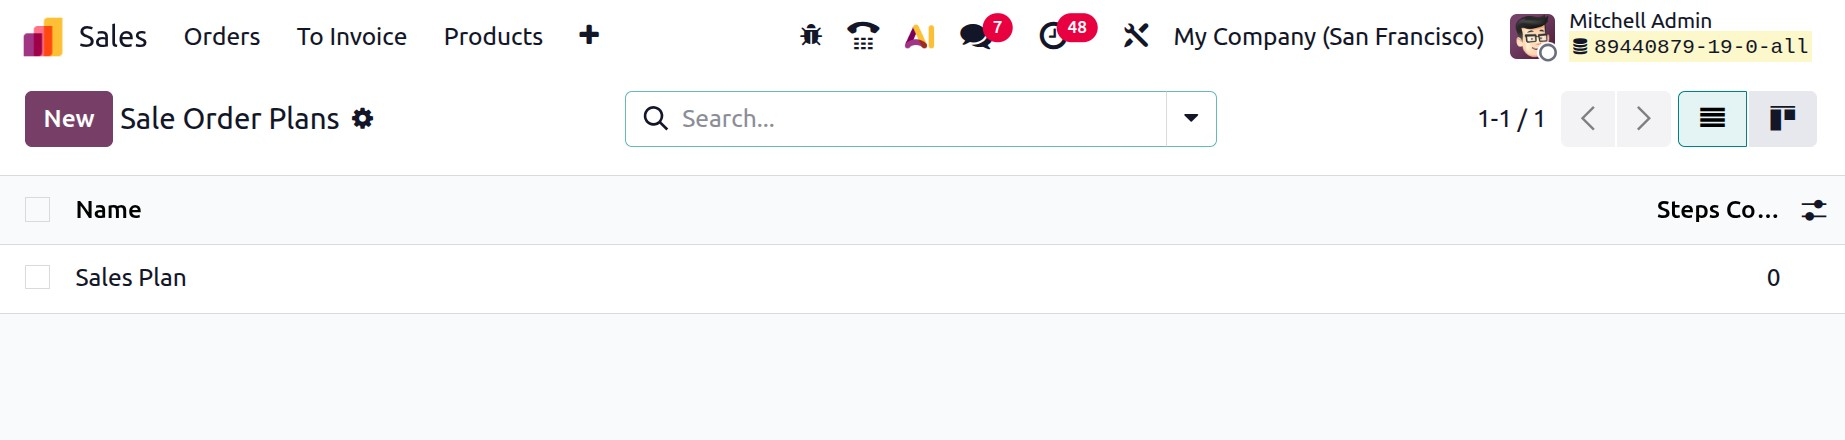
Choose the Activity Plans option under Configuration. You can use Activity Plans to create a series of actions that are customized to your sales operations, like calls, meetings, emails, and document uploads. Click the New button to make a new one.
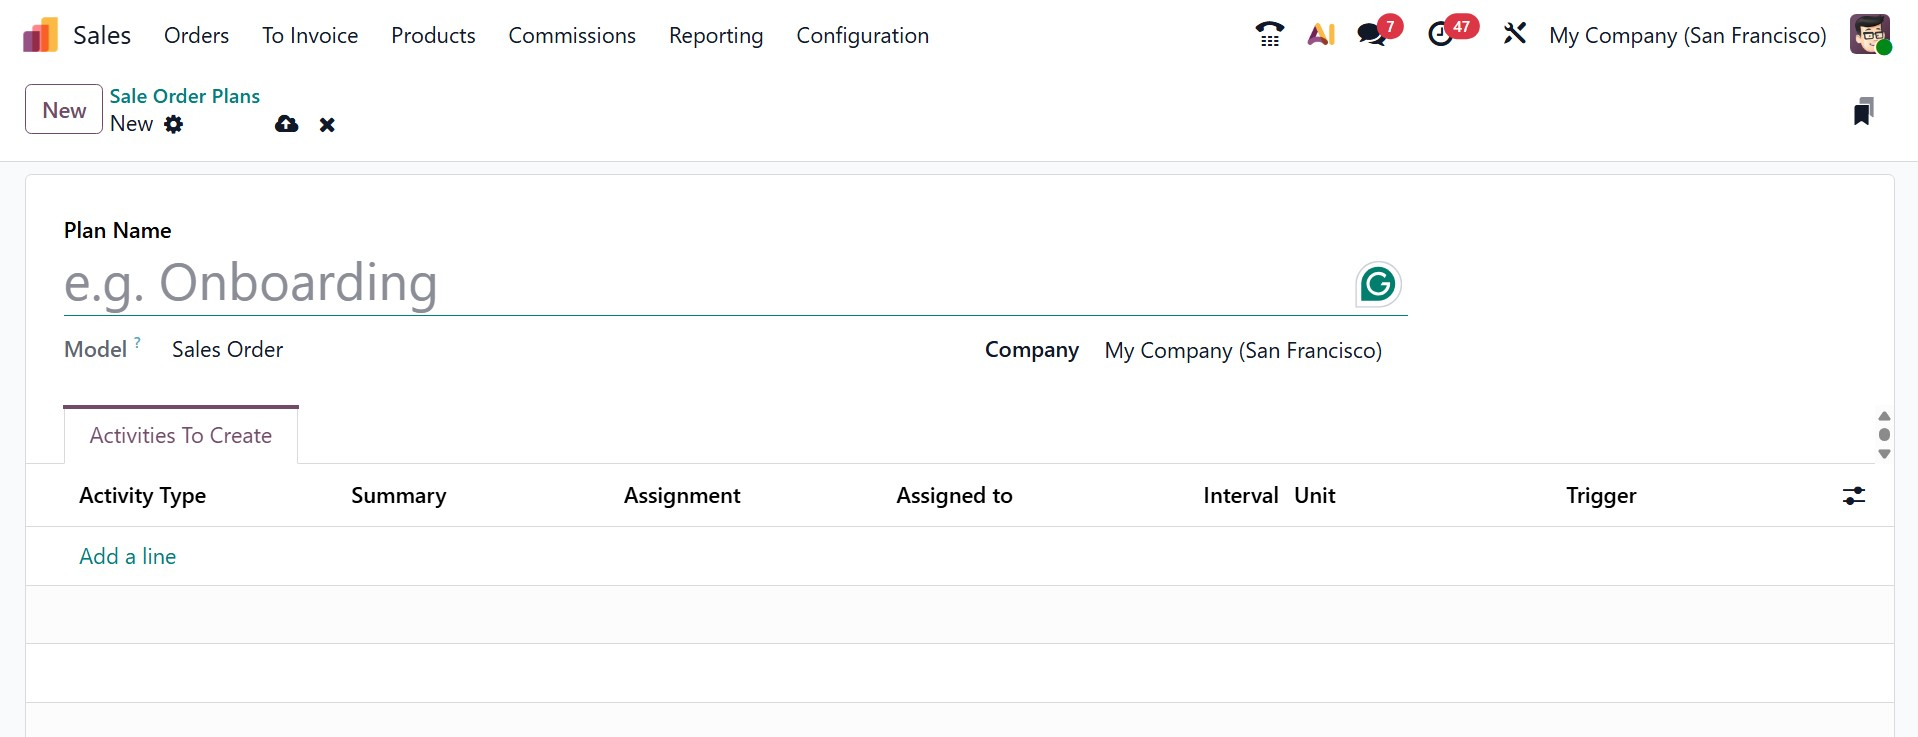
In the appropriate areas, choose Model and Company and mention the Plan Name. The Add a Line button allows you to add activities one at a time under the Activities to Create tab. There can be a type, summary, assignment, interval, unit, trigger, and assigned to for every activity in the plan.
All of the actions listed in an activity plan are automatically scheduled in order when it is applied to a lead or opportunity.