Orders
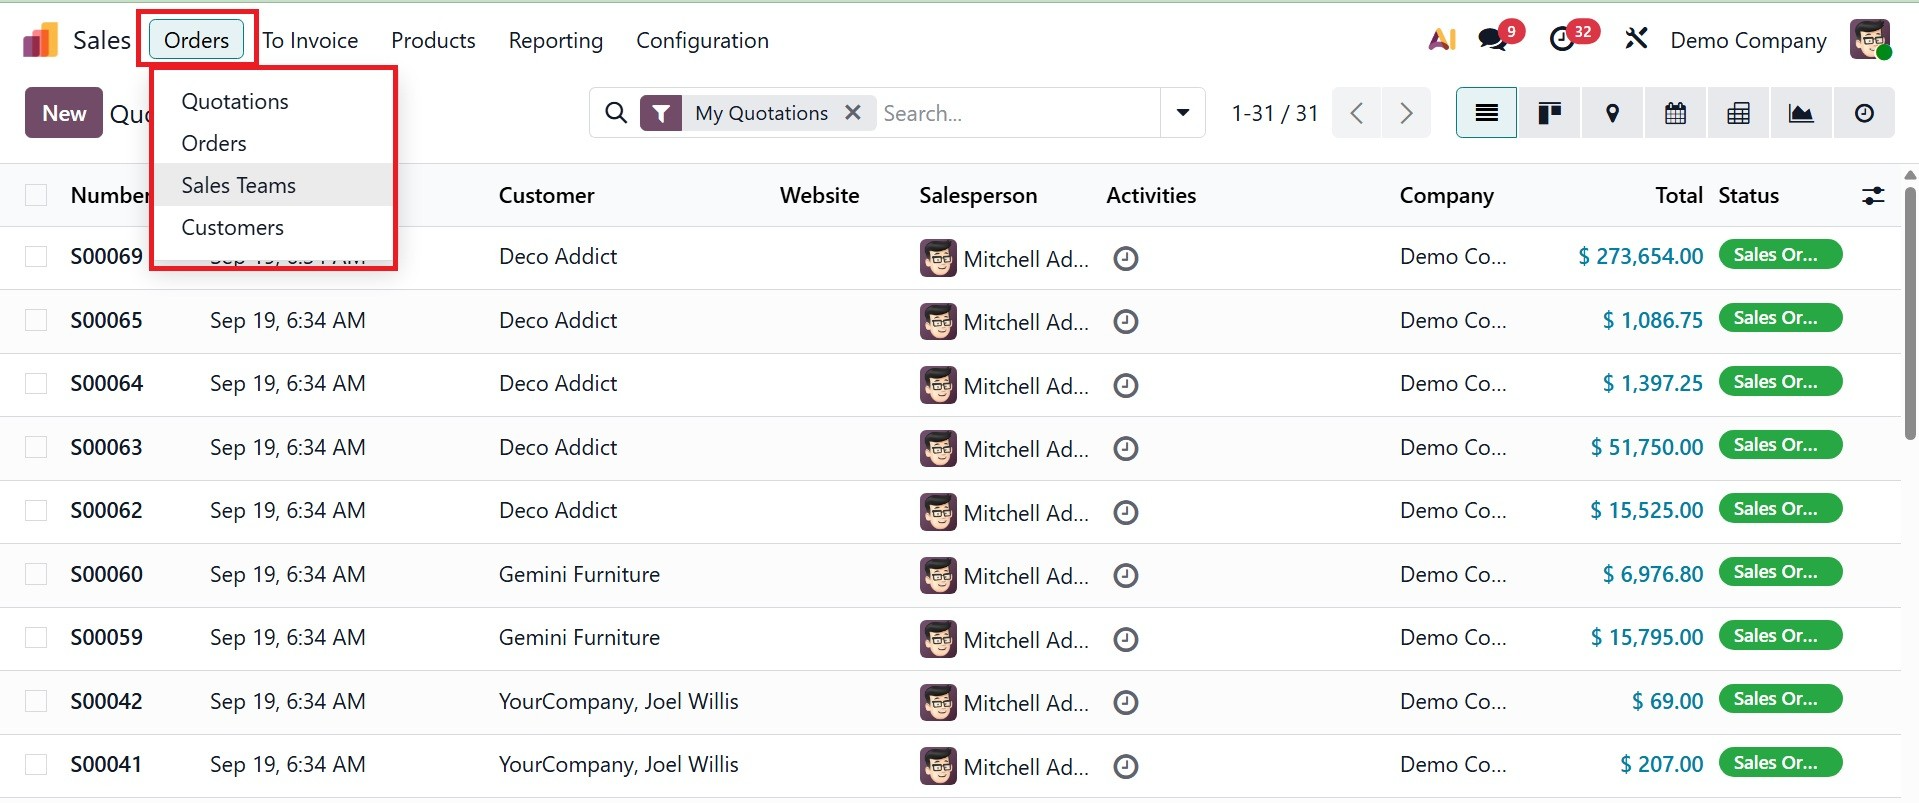
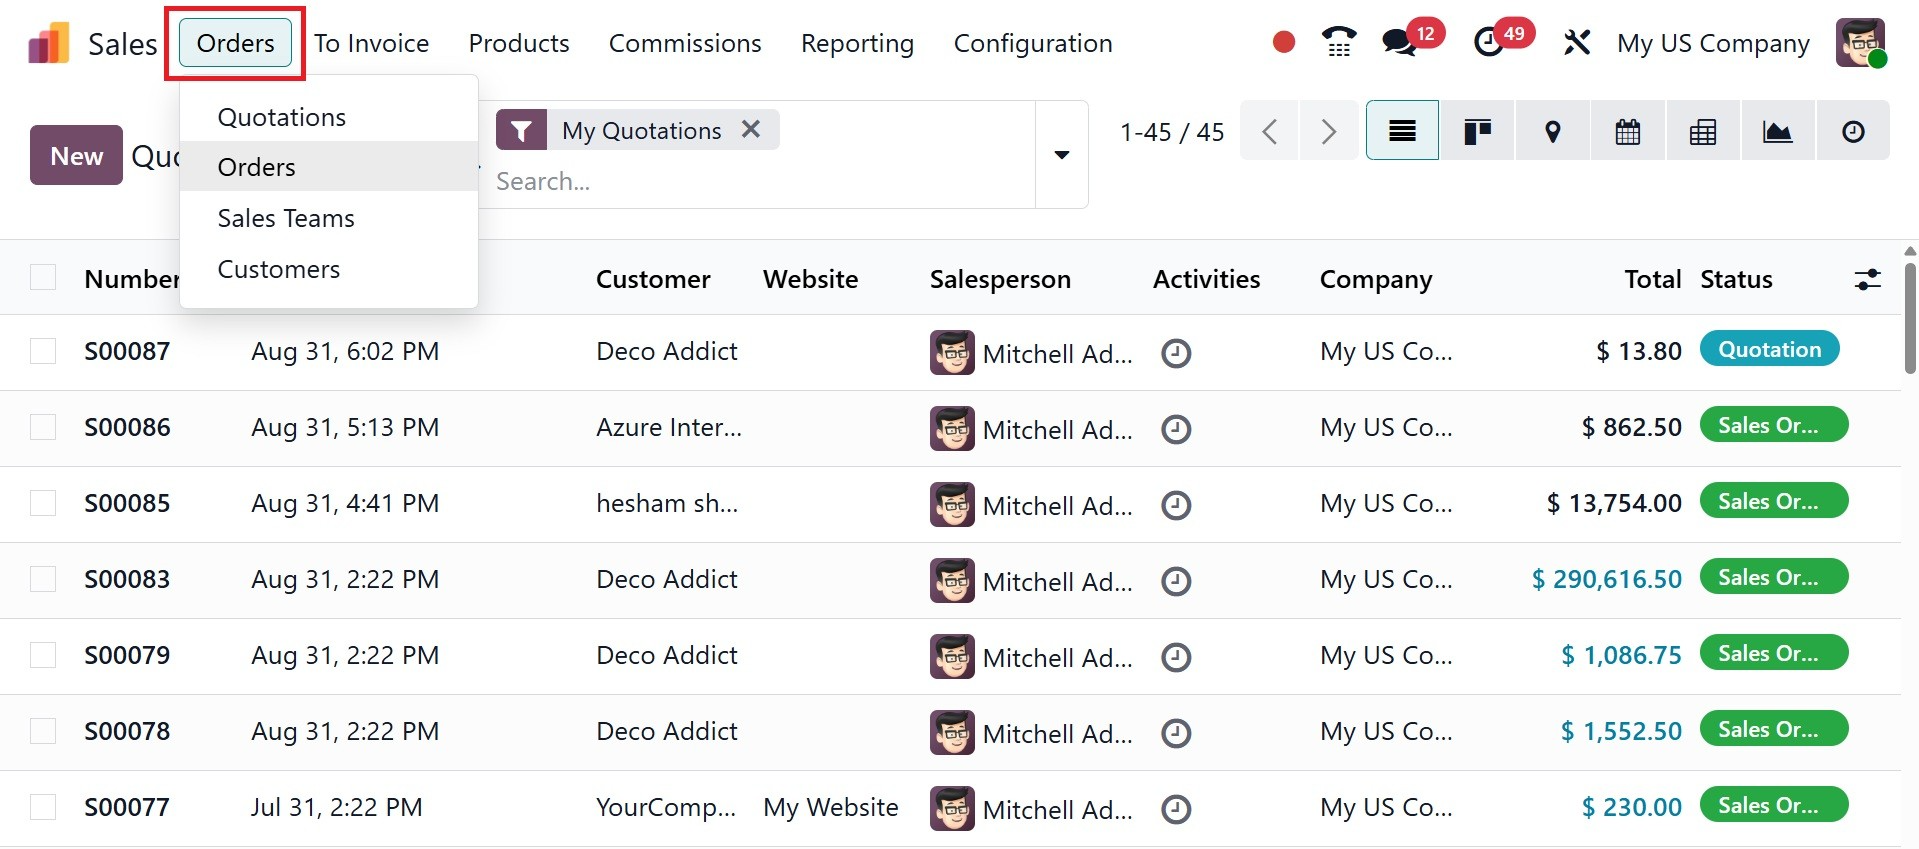
Under the Orders, you have options like Quotations, Orders, Sales Teams, and Customers, as in the image below.
1.1 Quotations
Sales quotations are the first step in a company's sales order creation process. A sales quotation will contain all relevant information to give the customer a realistic impression of the products. A sales quotation can be thought of as the agreement between the buyer and the seller. It will clarify the price of the products included in the sales operation for both parties. You can rapidly create and submit a quote to a customer using the Odoo 19 ERP system, giving them the opportunity to see the exact cost of the products and services you offer before signing any contracts.
The sales quotation may eventually become a successful sales order if the customer is satisfied with what your business has to offer.
You might be able to create and manage quotations in the Sales module under the Orders menu. By choosing this option, as shown in the image below, you can view the list of sales quotations that have already been configured.
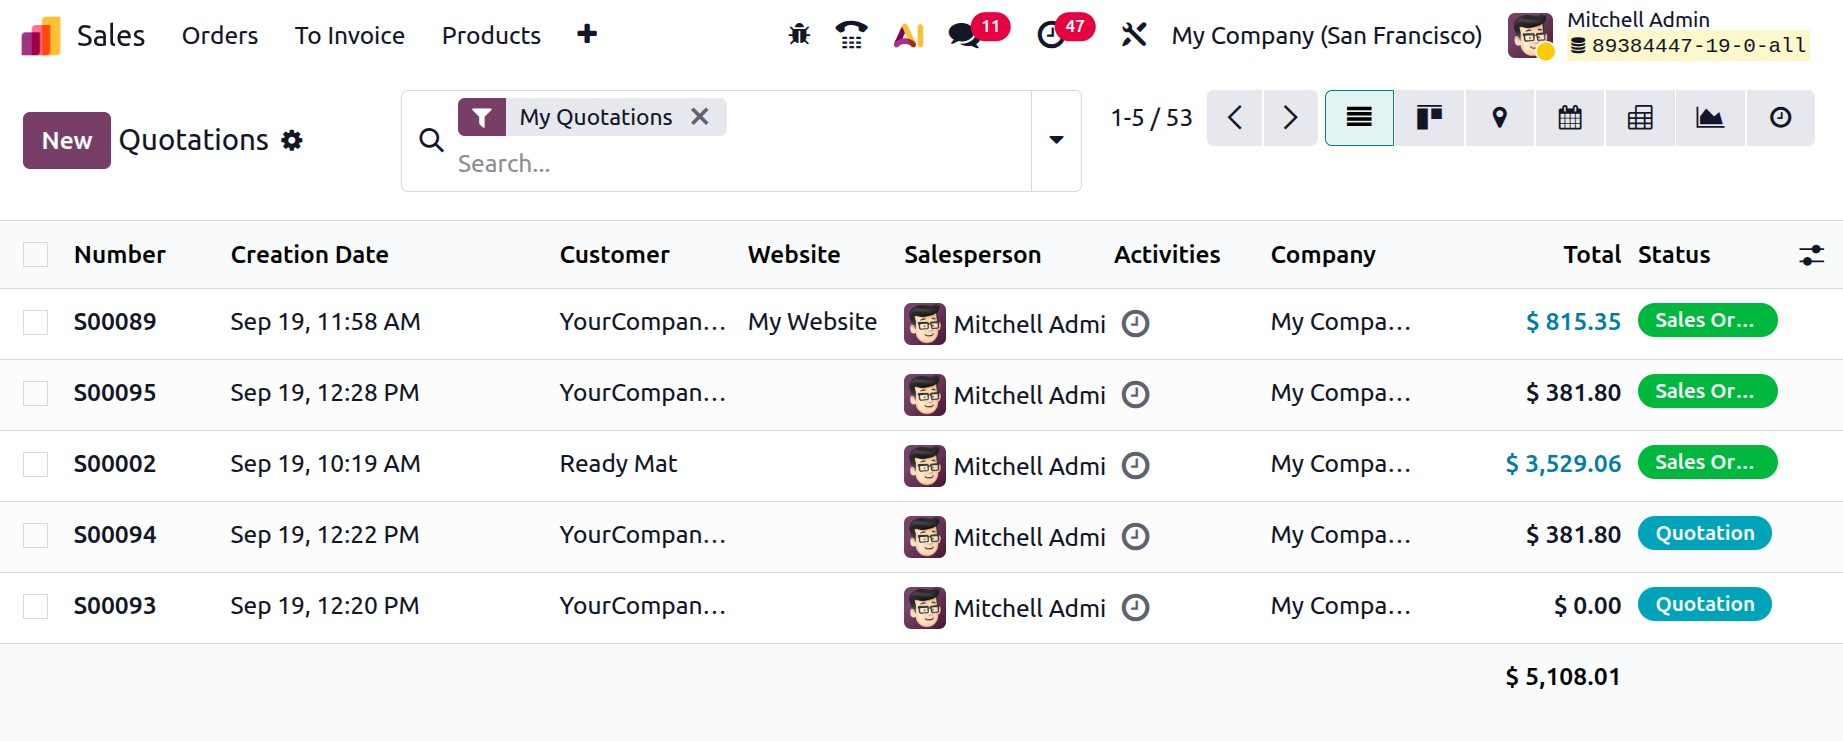
The Number, Creation Date, Customer, Salesperson, Activity, Company, Total, and Status details are all included in the preview of each quotation. Using the small clock icon on the Activities field, you can schedule several activities with the appropriate customers.
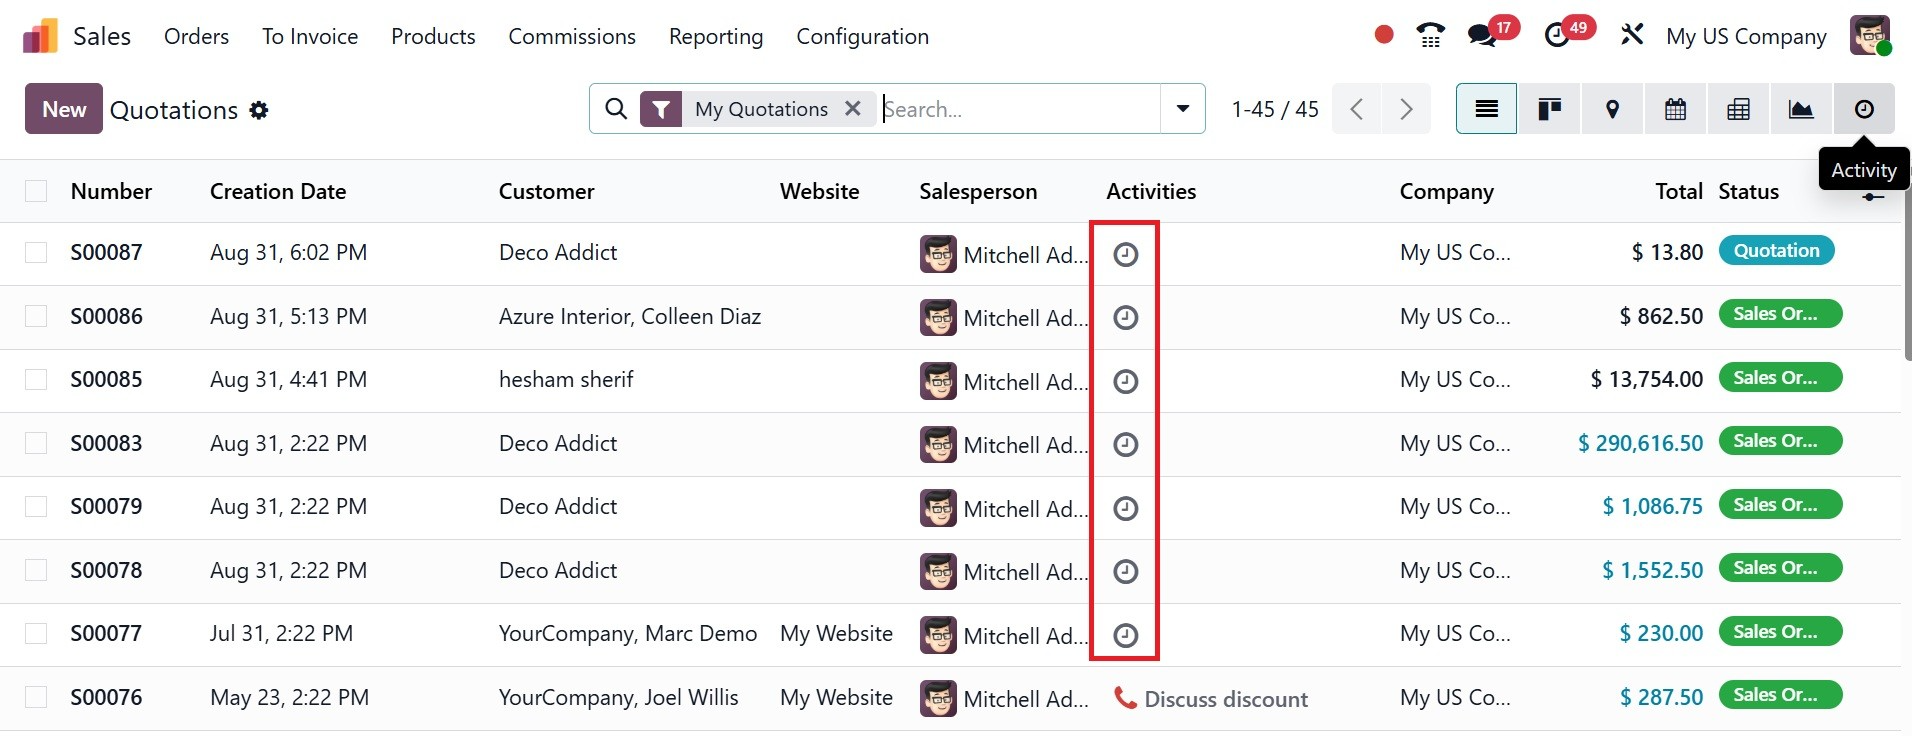
In addition to the list view, Odoo 19 provides Kanban, Map, Calendar, Pivot, Graph, and Activity views for this platform.

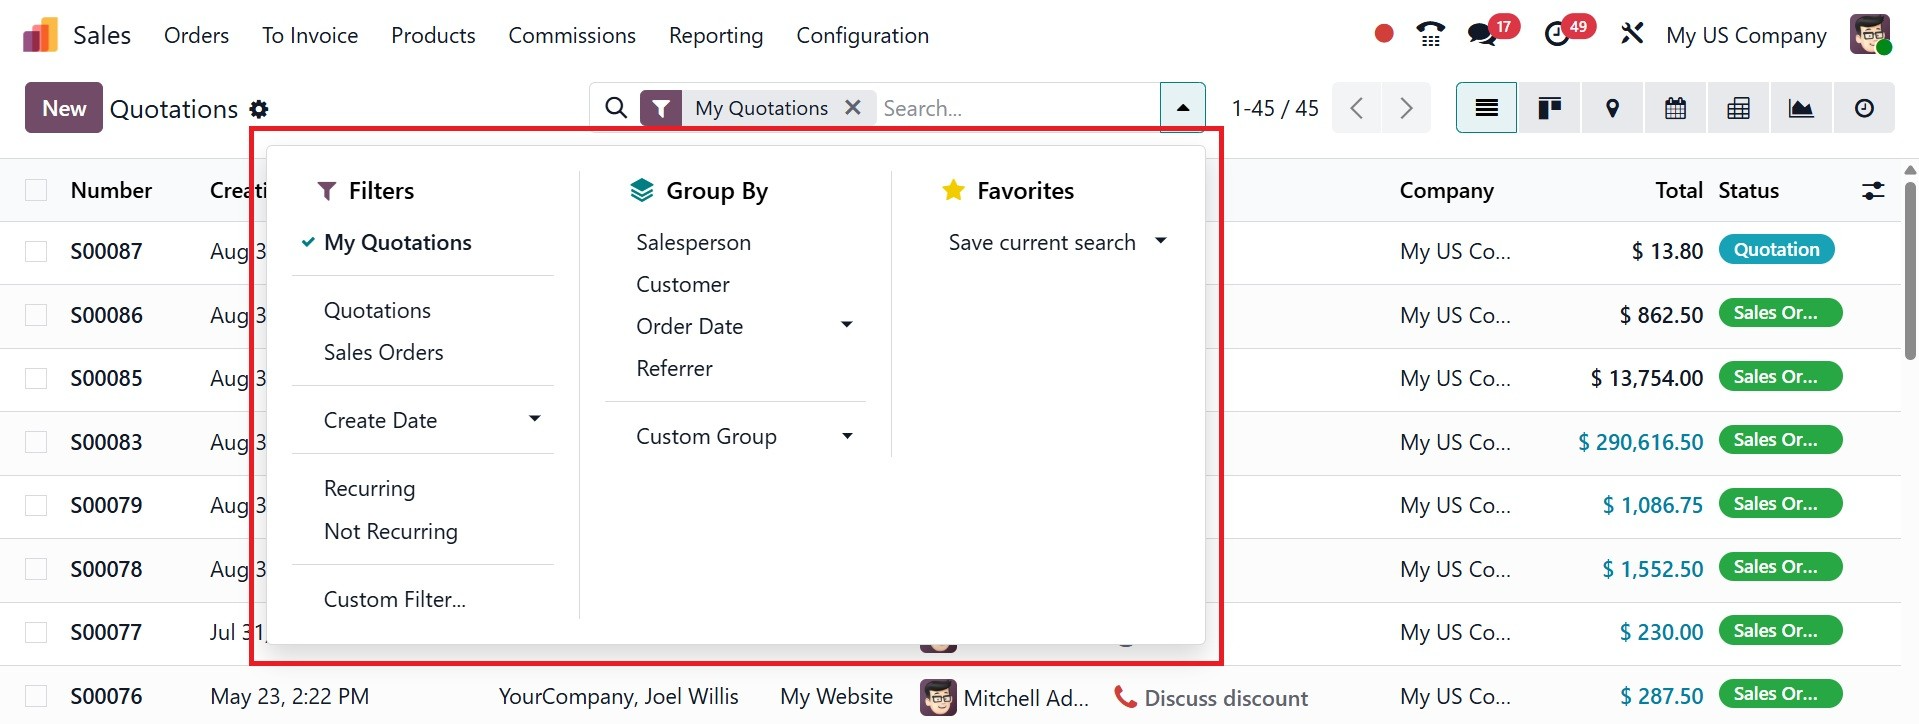
Using the default and customized filter options, you may arrange and filter the quotations to suit your preferences.
Let's have a look at how to draft a new sales quote. You can accomplish this by clicking the New button, which will open a new quotation creation window as seen below.
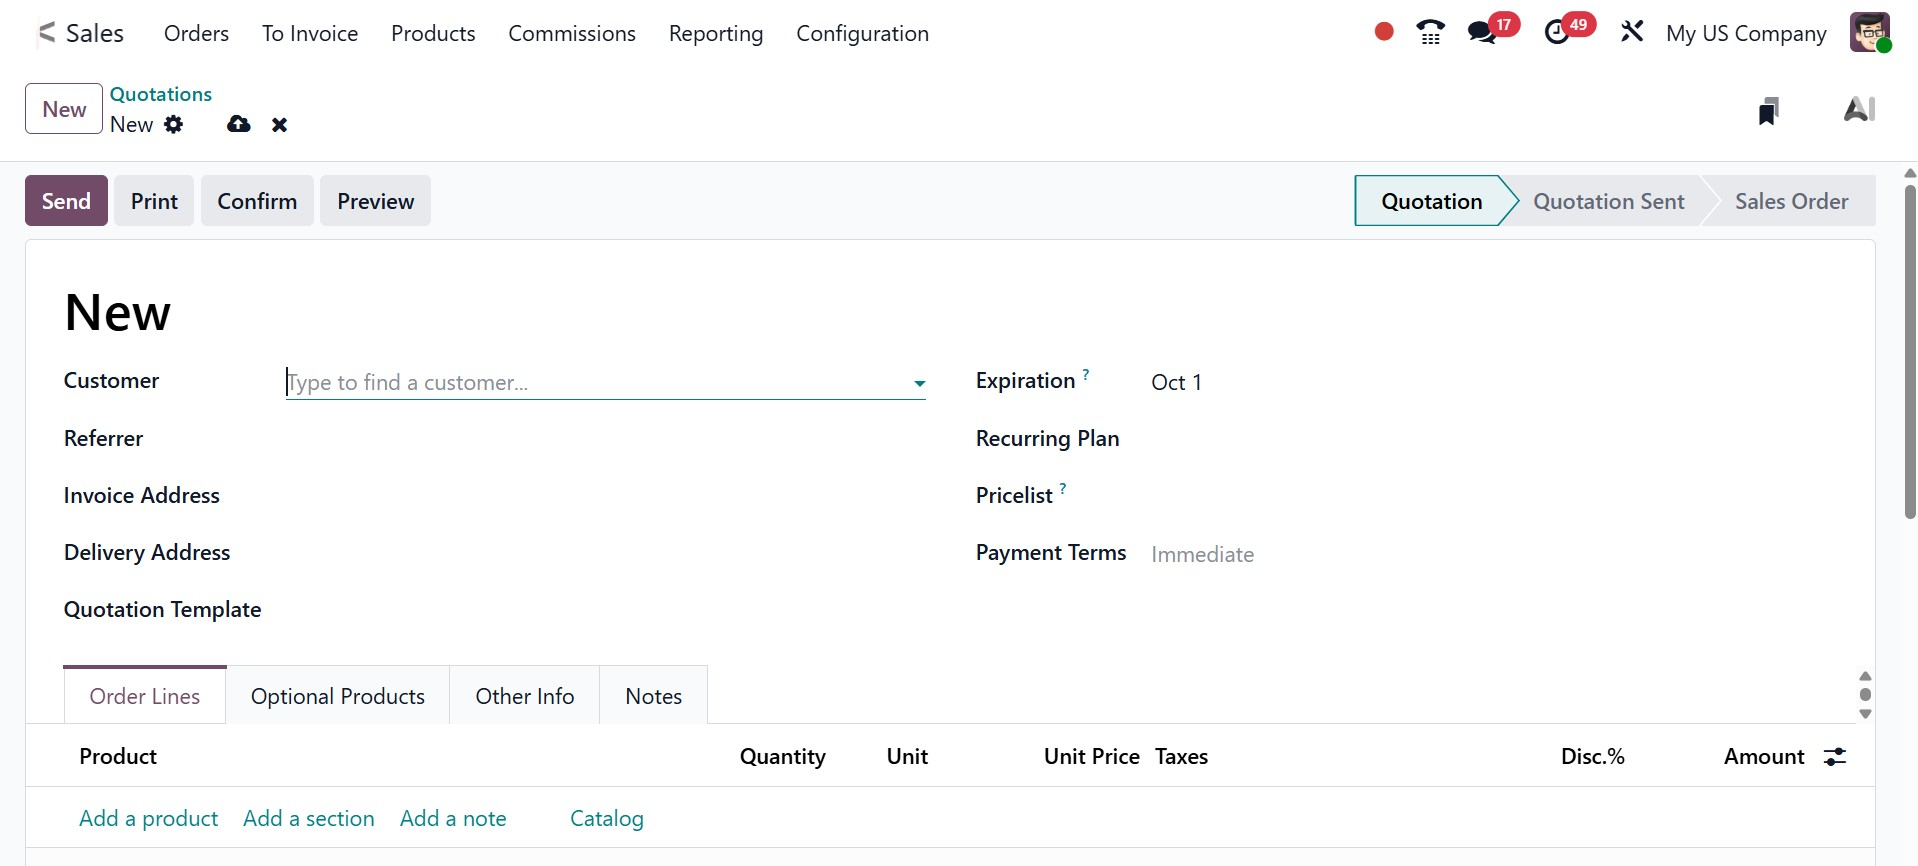
In the Customer field at the top of the form, start by typing the customer's name. This field is necessary. Based on the information from that customer's contact record (available in the Contacts application), the Invoice Address and Delivery Address fields automatically fill in with the recorded information for those fields if the customer's information is already in the database.
- Delivery Address: The address listed as the Delivery Address on the sales order is used for delivery orders and the delivery slip reports that accompany them. In order to reassure the customer that the delivery is being made to the right place, invoice reports by default provide both the shipping address and the invoice address.
- Invoice Address: The invoice is sent to the email of the address listed as the Invoice Address on the sales order, however the quotation and sales order are sent to the main contact's email as normal.
In the Referrer field, put the name of the customer if they were referred by another customer or contact.
Selecting a Referrer opens a new field called Commission Plan, where a commission can be chosen from a drop-down menu. A commission plan is a set of rules that automatically calculates and tracks payments for salespeople or partners based on their performance.
The contact chosen in the Referrer form receives this commission, as in the image below.

- Invoice Address – The address of the customer where the invoice will be sent; it may differ from the delivery location.
- Delivery Address – The address where the products or services will be delivered.
- Quotation Template – A ready-made template with predefined products, terms, or conditions that helps speed up quotation creation.
- Quotation Date – The date on which the quotation is generated in Odoo.
- Expiration – The validity date of the quotation after which the offer is no longer applicable.
- Recurring Plan – An option to set up repeating sales orders or subscriptions at regular intervals.
- Pricelist – The price rule list applied to the quotation, which can include discounts, currency, or region-based pricing.
- Payment Terms – The conditions defined for customer payment, such as due date, installment rules, or immediate payment.
You can add products in the Order Line part of the quotation generation window based on the needs of the customer.

You can add products and their quantities to the quotation by selecting them in this tab.
From this tab, you may add products to the quotation in two different ways.
Click Add a product, pick the item you want from the Product drop-down menu, and then, if needed, change how much of that product you have chosen.
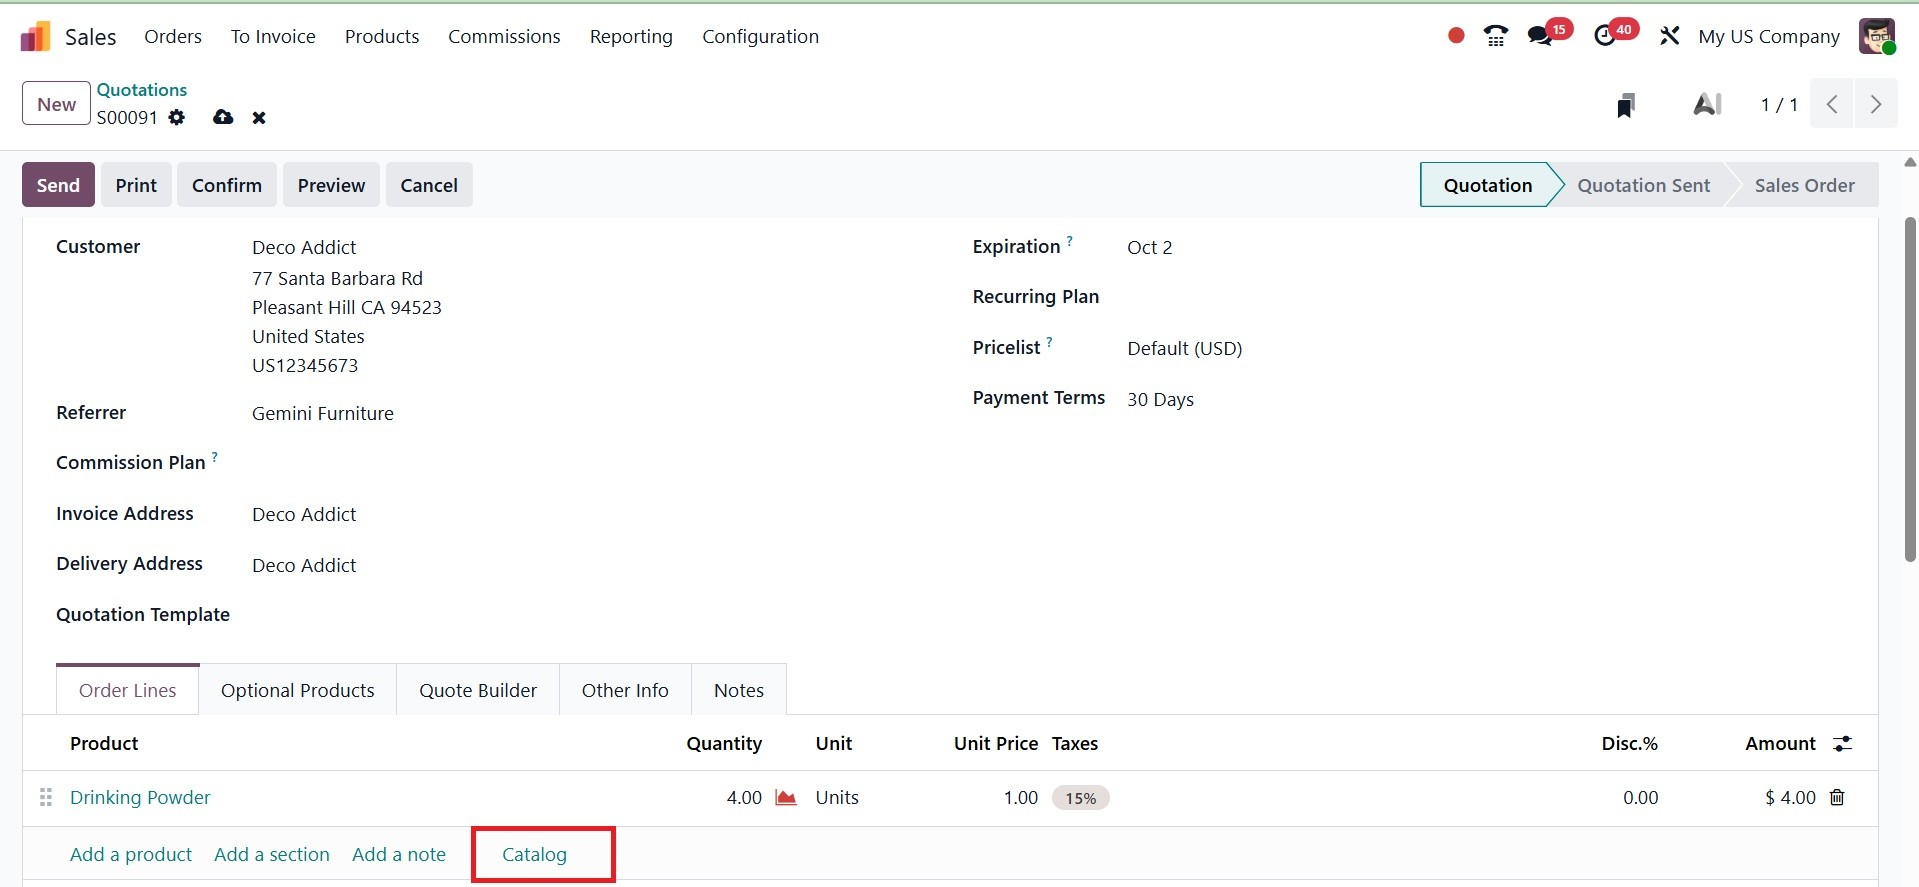
Alternatively, select Catalog to open a new page that displays each item (and all possible product variations) in a well-organized catalog display, with items arranged according to Product Category and Attributes, as shown below.
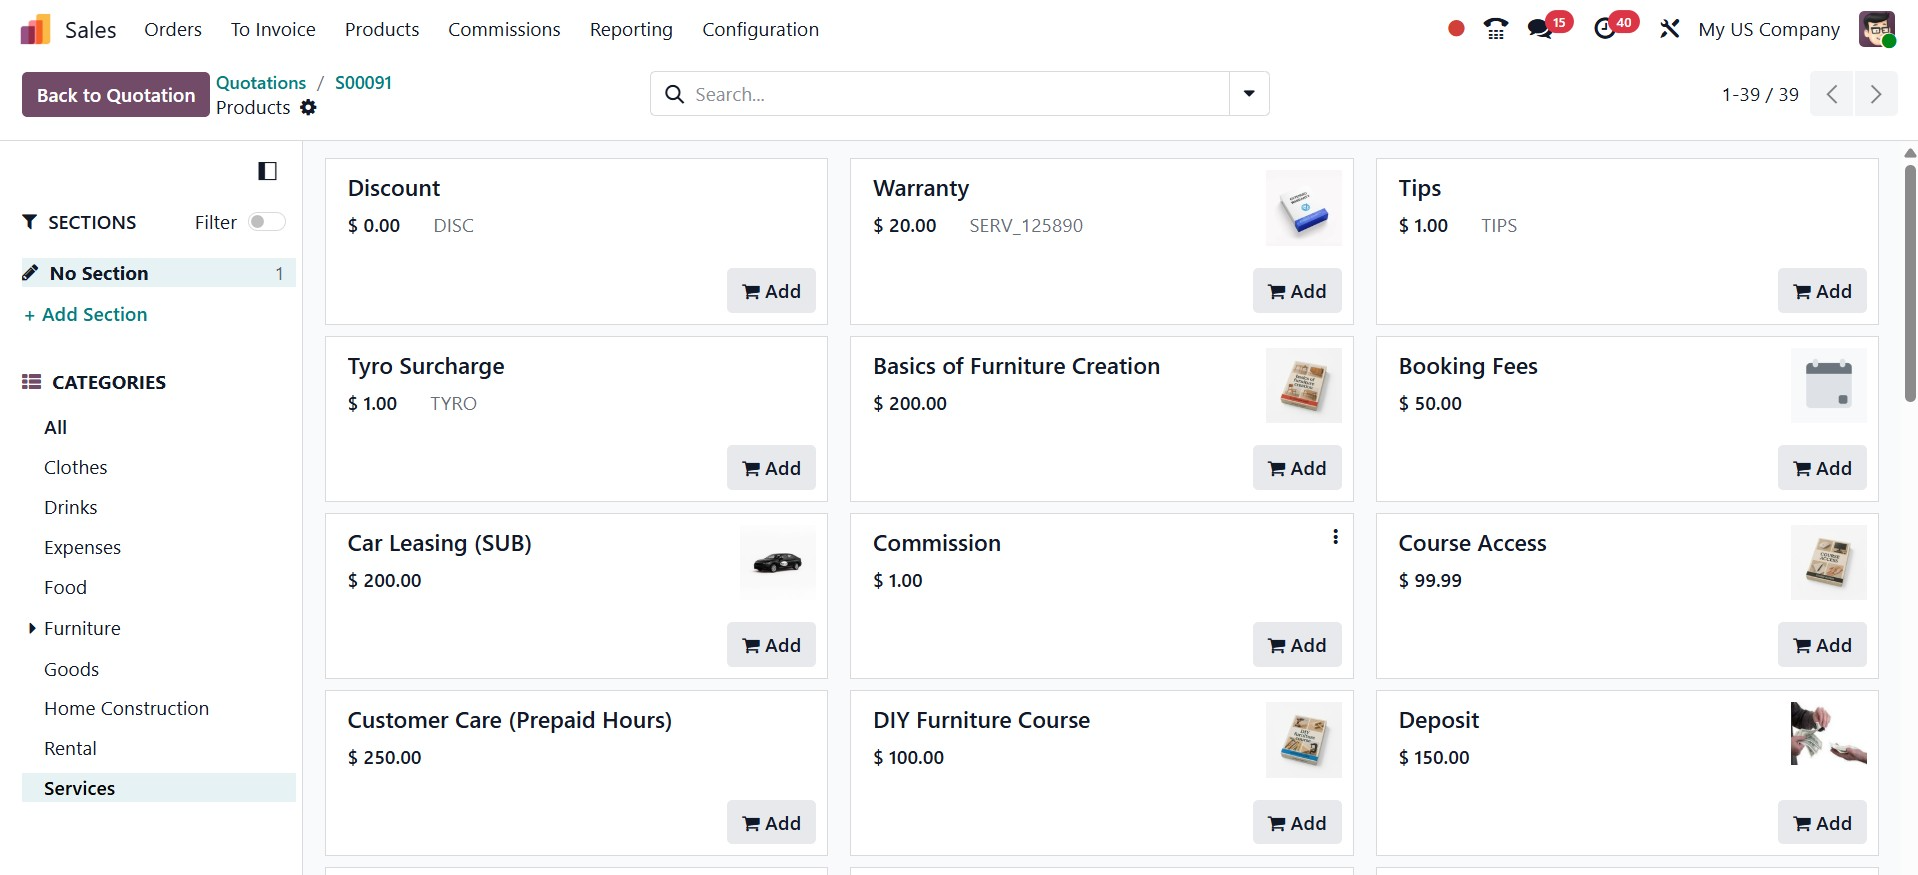
Simply find the things you want, click the Add button on the product card, and change the amount if necessary. Once finished, return to the quotation by clicking the Back to Quotation button in the top-left corner. The Order Lines tab contains the newly selected catalog items.
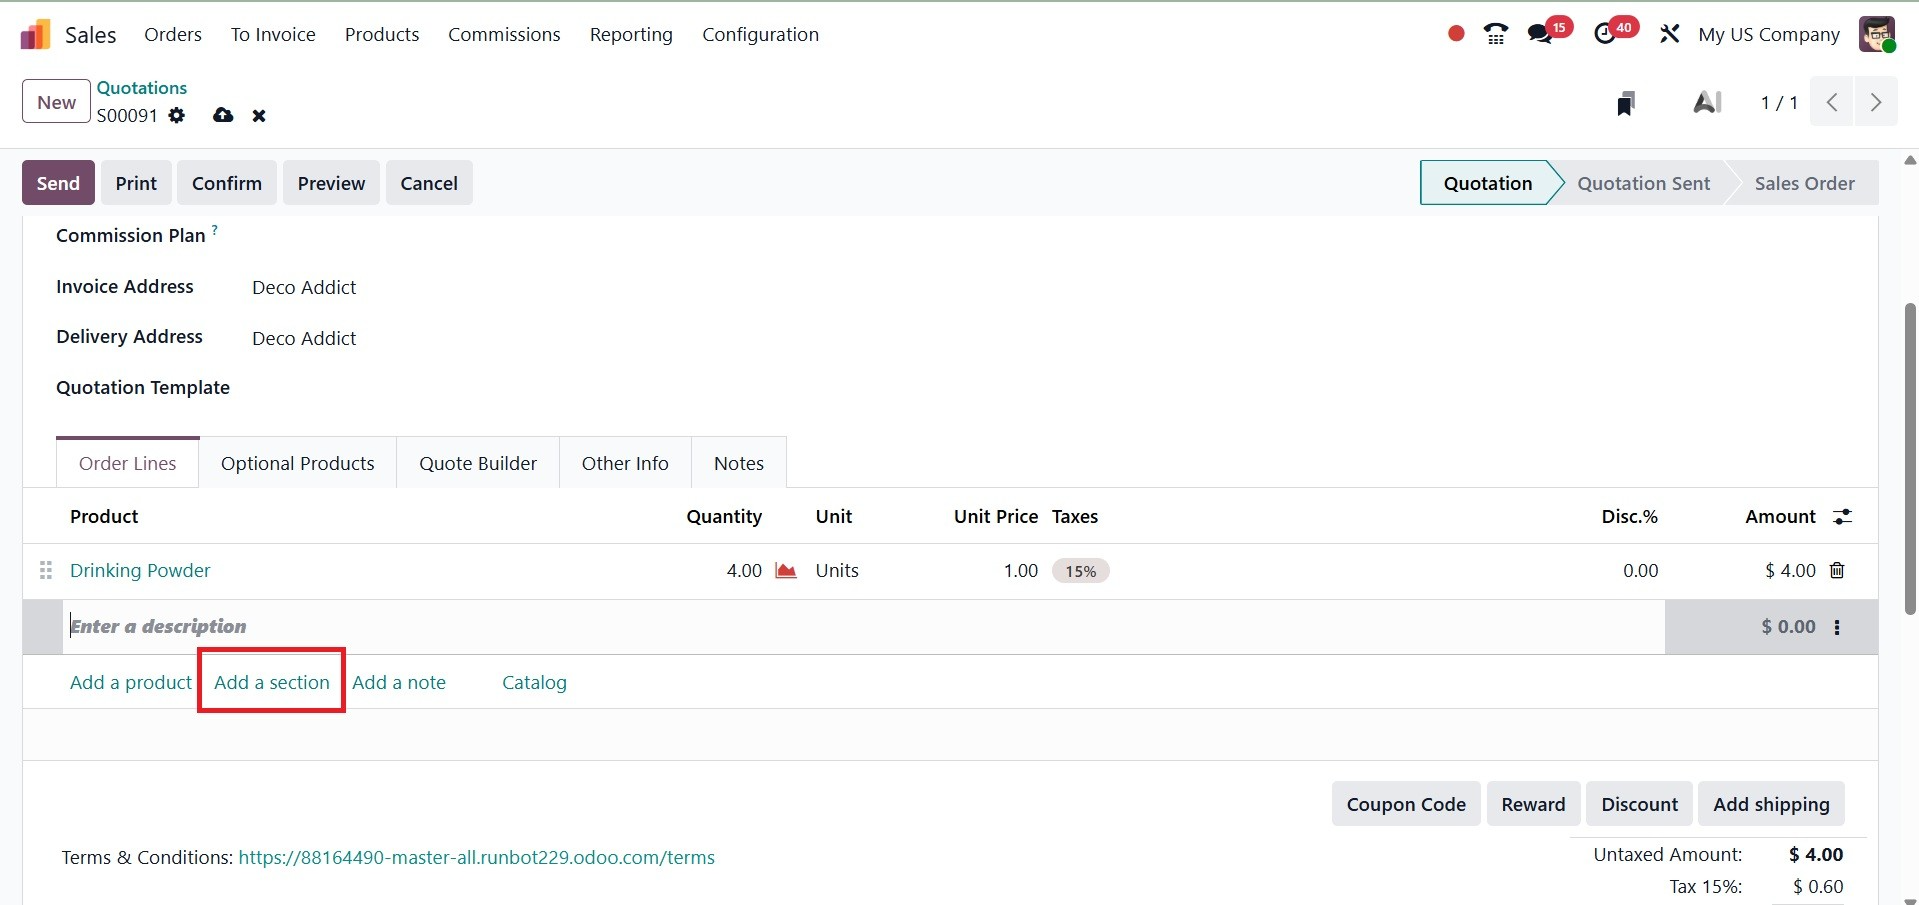
Click Add a section, give the section a name, and then drag and drop the section heading among the items in the Order Lines tab if you want to present several items on the quotation in a more structured manner. The heading of the section is bolded, as in the image below.
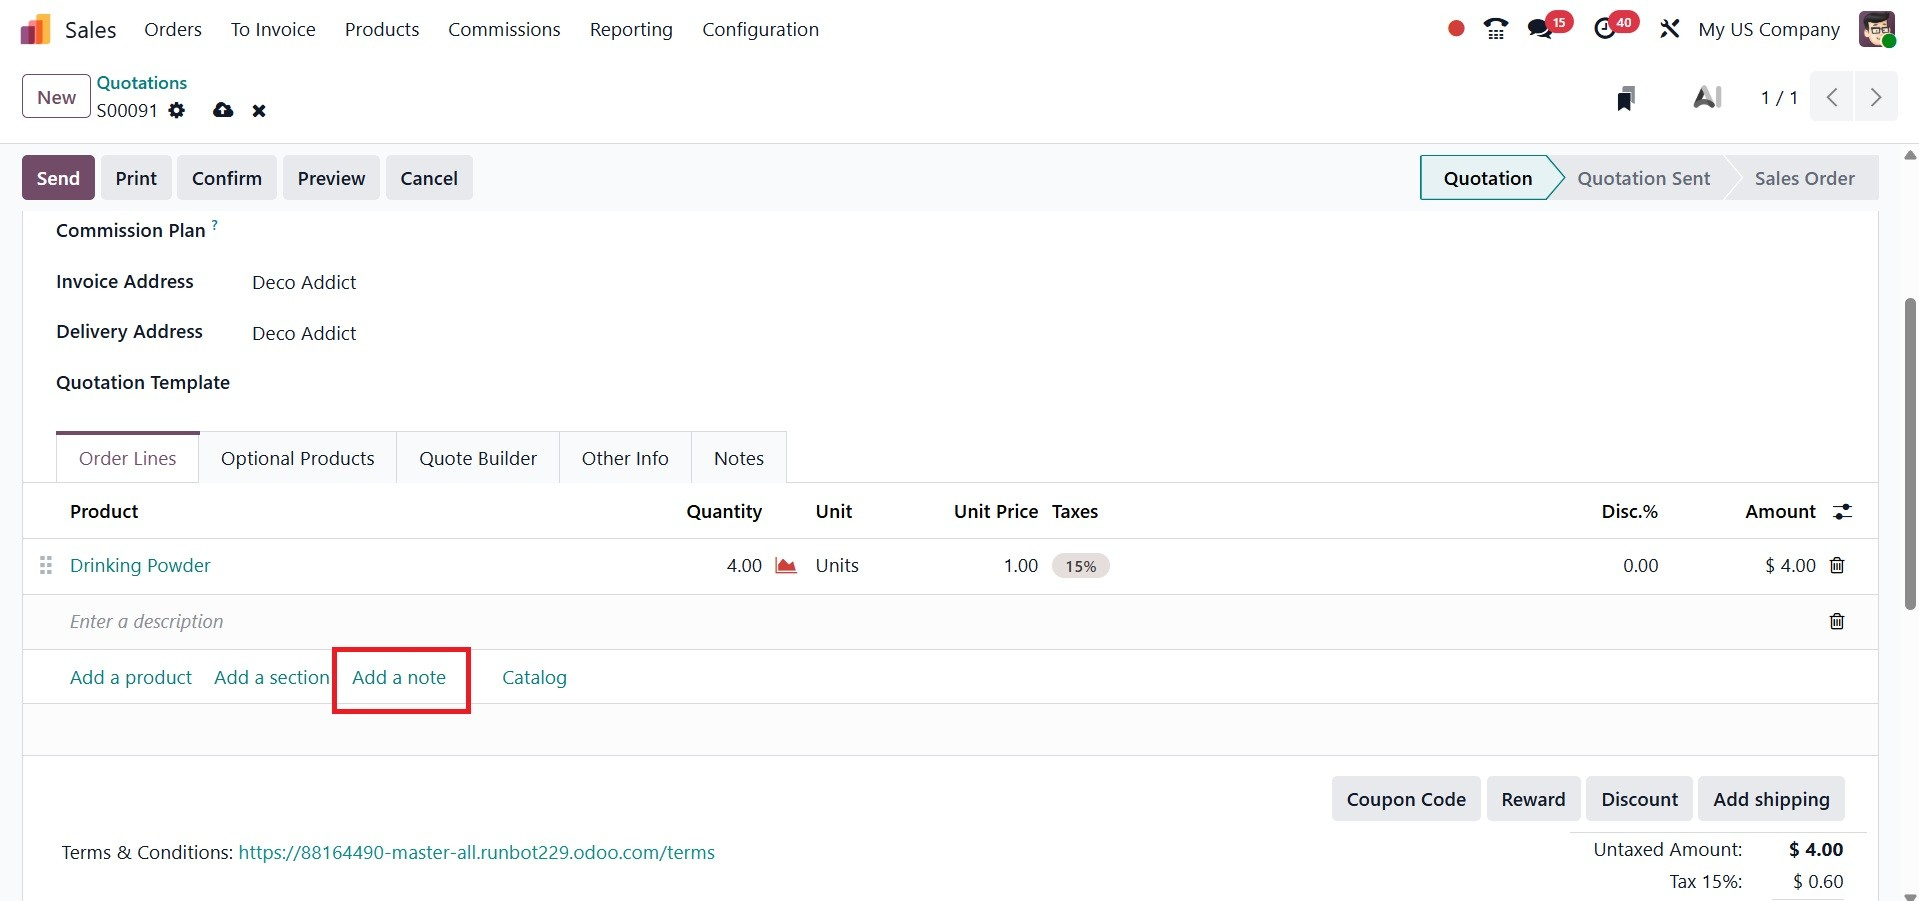
To add a personalized note about a particular product, click Add a note under that product line if necessary. The note is italicized. The note can then be dragged and dropped beneath the desired product line if necessary, as in the screenshot below.
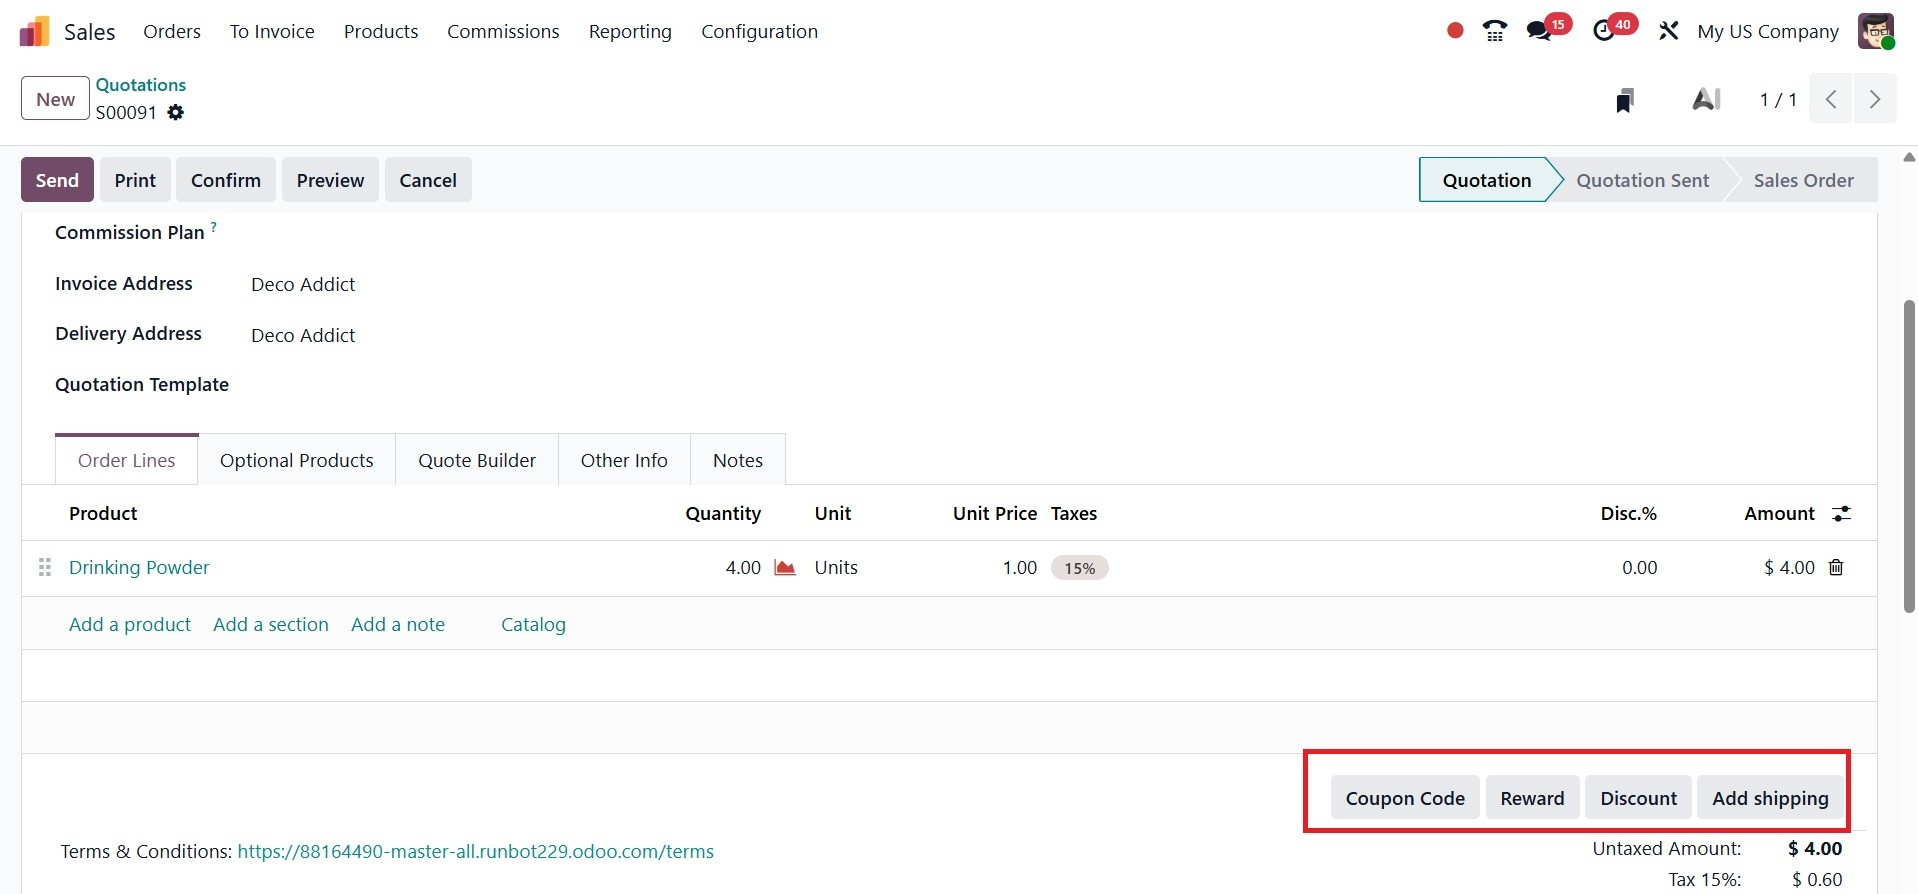
You can apply any of the following by clicking on the buttons beneath the product lines: Coupon Code, Promotions, Discount, and/or Add Shipping.
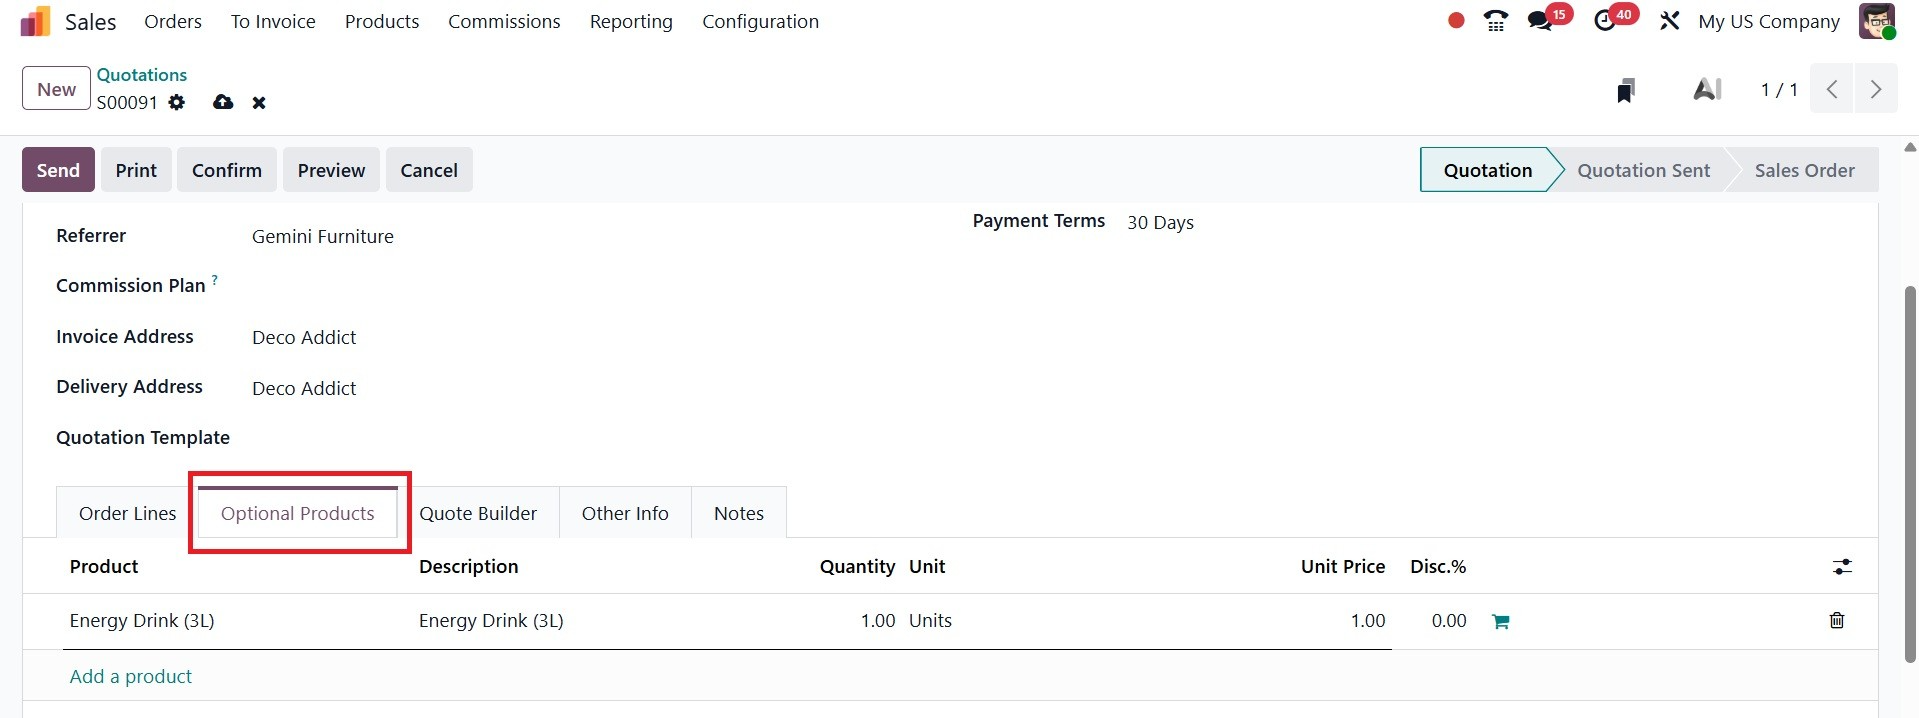
To choose related products that can be shown to the consumer and potentially improve sales, use the Optional Products option, as in the screenshot below.
You can add header pages, thorough product descriptions, and footer pages to your quotation using the PDF Quote Builder to improve its visual appeal. This tool allows you to alter the quote's arrangement to make it more polished and consistent with your brand, as in the image below.

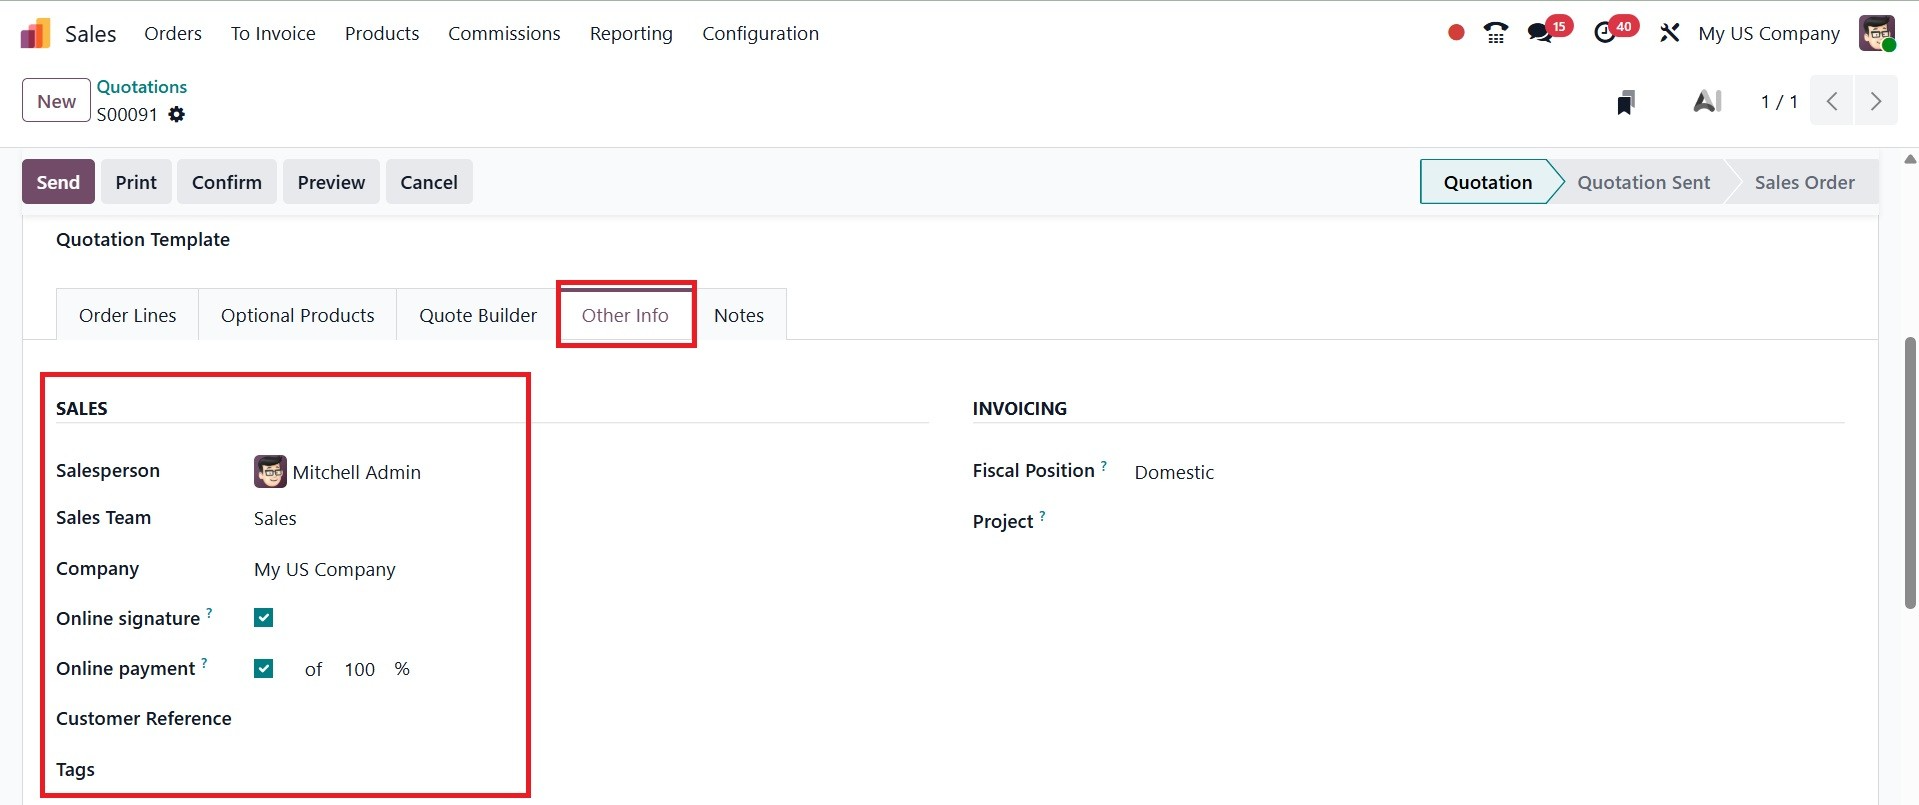
The Other Info page contains four distinct sections: Sales, Delivery, Invoicing, and Tracking, each of which contains different options connected to quotations, as shown below.
Configurable sales-specific fields can be found in the Other Info tab's Sales section.
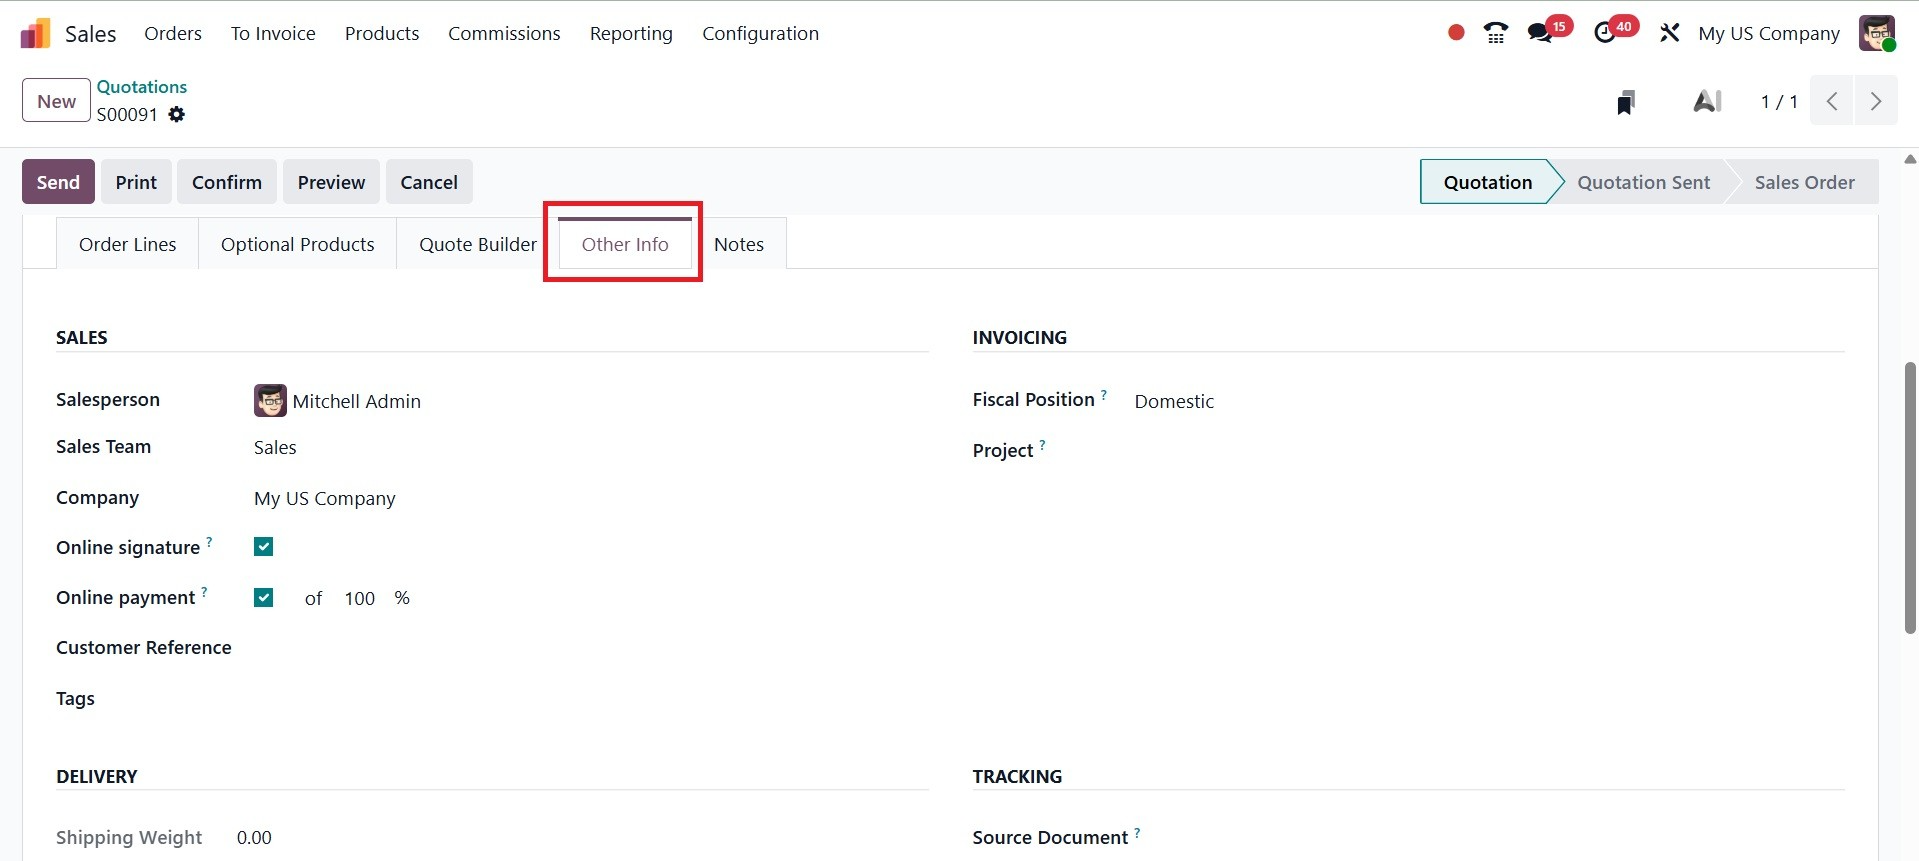
- Salesperson: Choose a salesperson to go with this quotation from the drop-down menu. By default, the user who authored the quotation is the one who is selected in this area.
- Sales Team: Assign this quotation to a particular sales team. The field is automatically filled up with the sales team if the chosen salesperson is a part of it.
- Company: Choose the business with whom this quotation should be connected using the drop-down option. Only while working in a multi-company setting does this field show up.
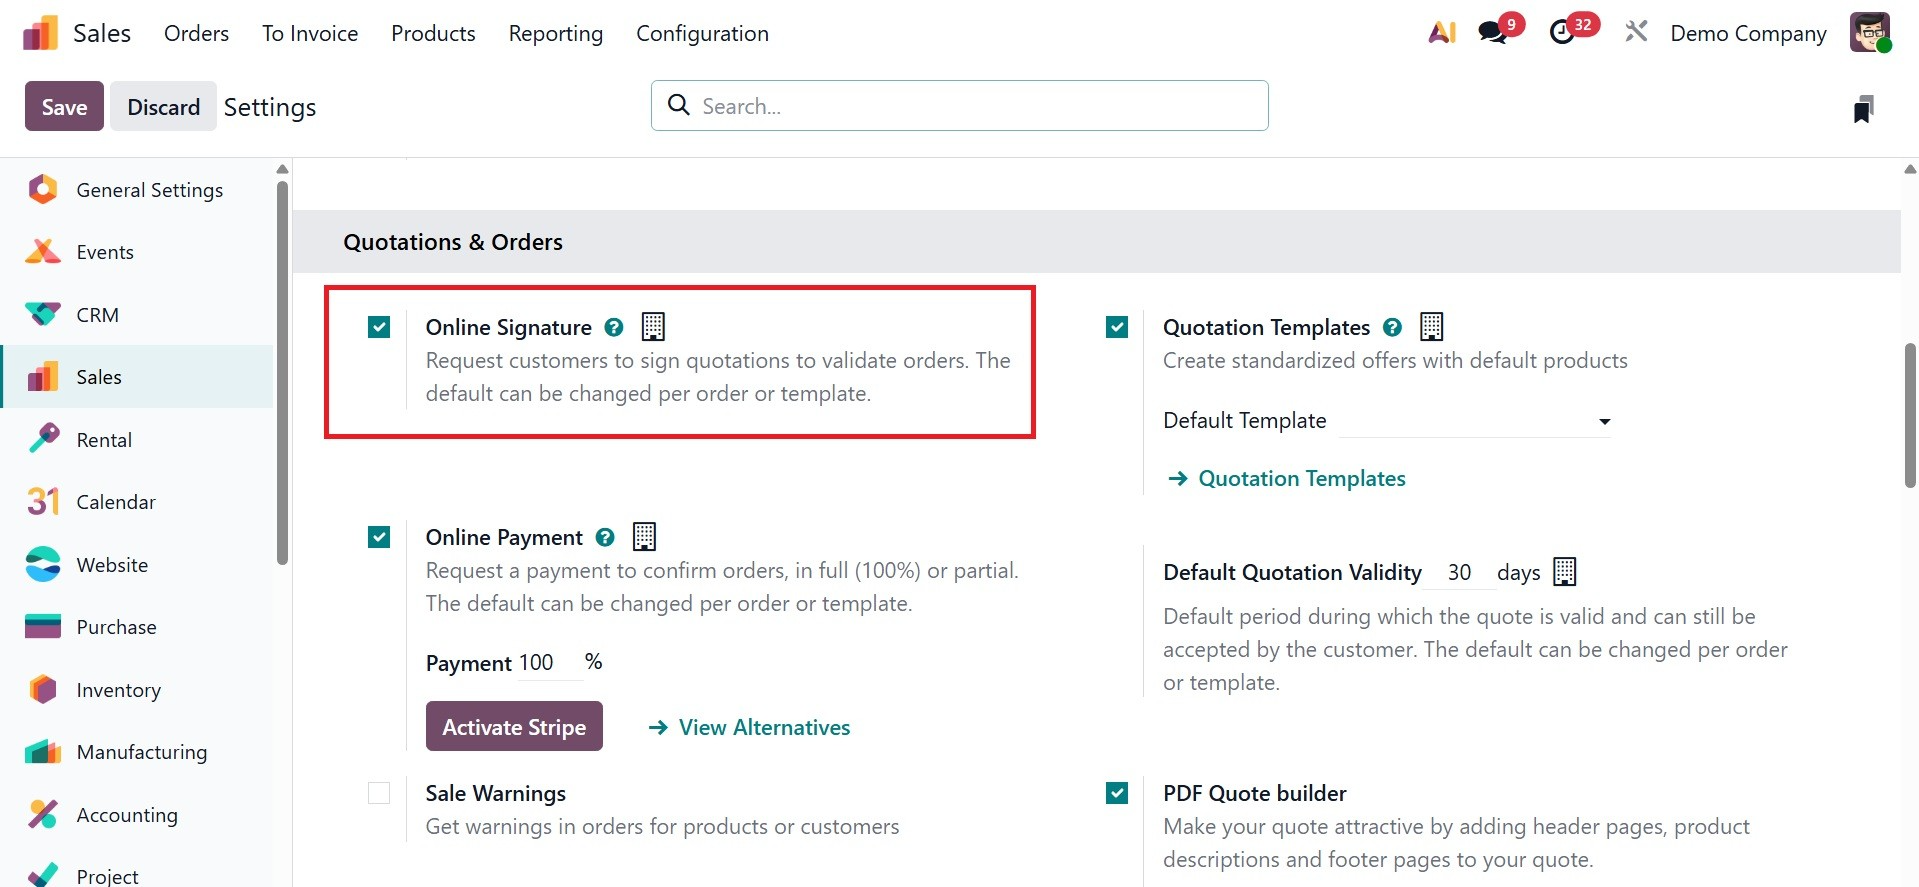
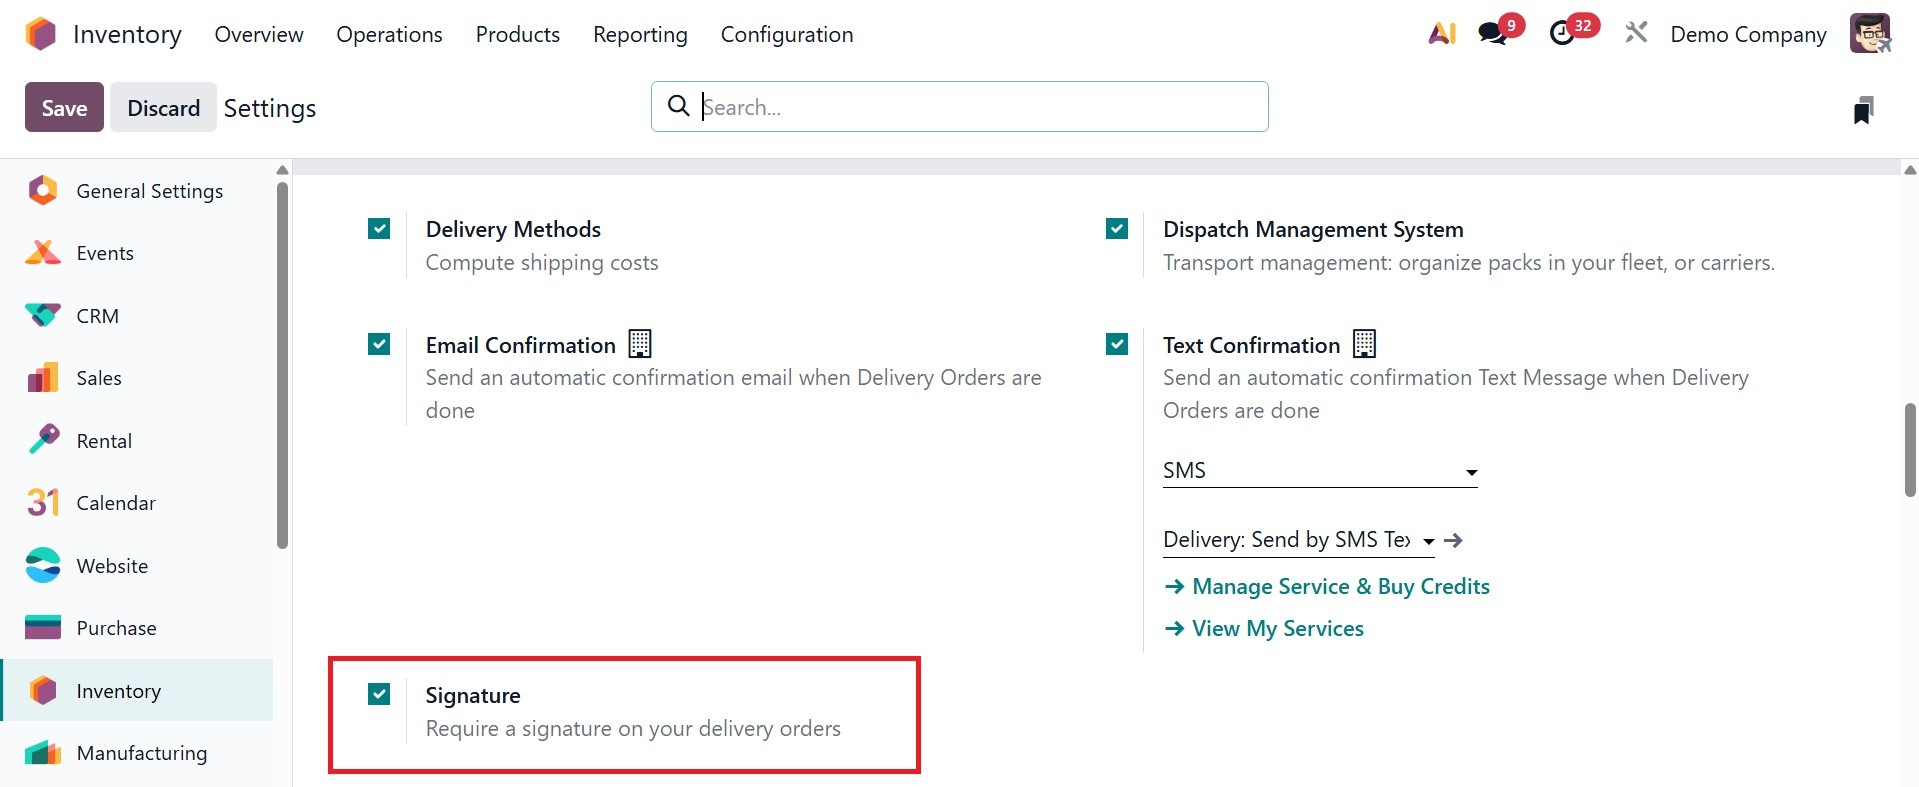
- Online signature: To get a customer's online signature to validate the order, click this box. Only when the Online Signature setting is enabled does this field show up. In order to get this option, you have to enable the option of Online Signature, as in the image below.
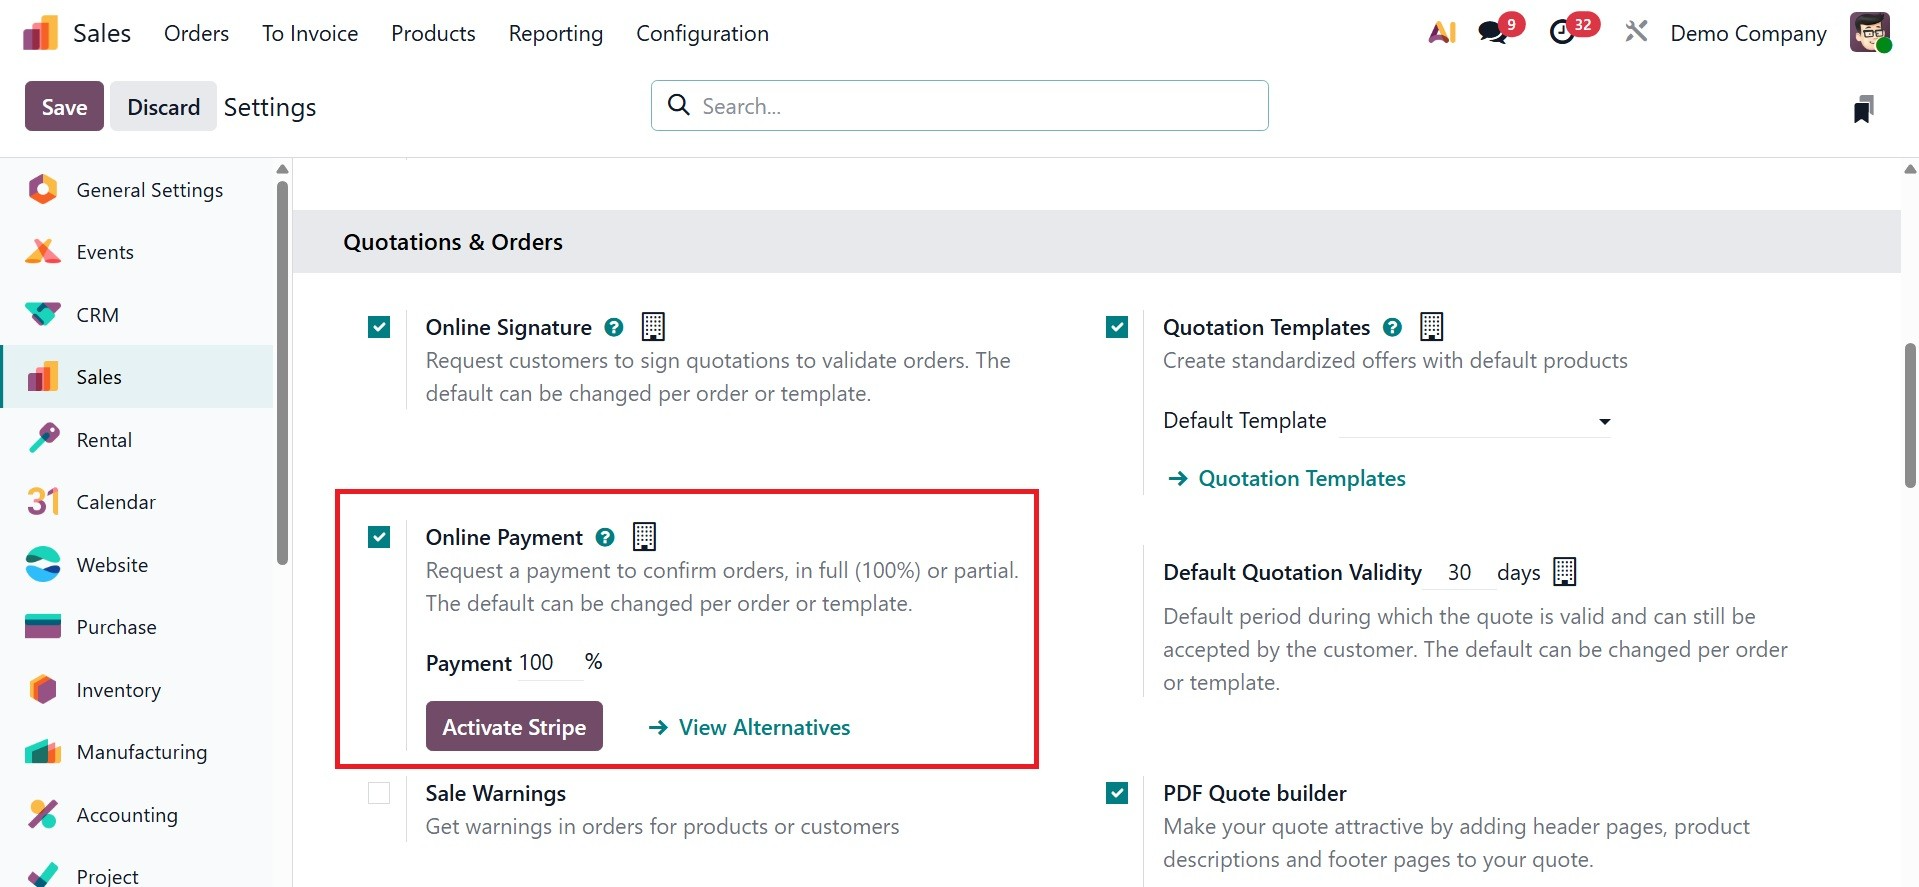
- Online payment: To require an online payment from the customer (for that specified percentage of the total price) in order to confirm the purchase, check this box and enter the desired percentage in the adjacent field. Only when the Online Payment option is activated does this field show up, as in the screenshot below.
- Customer Reference: Provide this customer's unique reference ID. Letters, digits, or a combination of both may be used in the reference ID that has been entered.
Tags: To improve organization and searchability in the Odoo Sales application, add appropriate tags to the quotation. If required, more than one tag can be inserted.
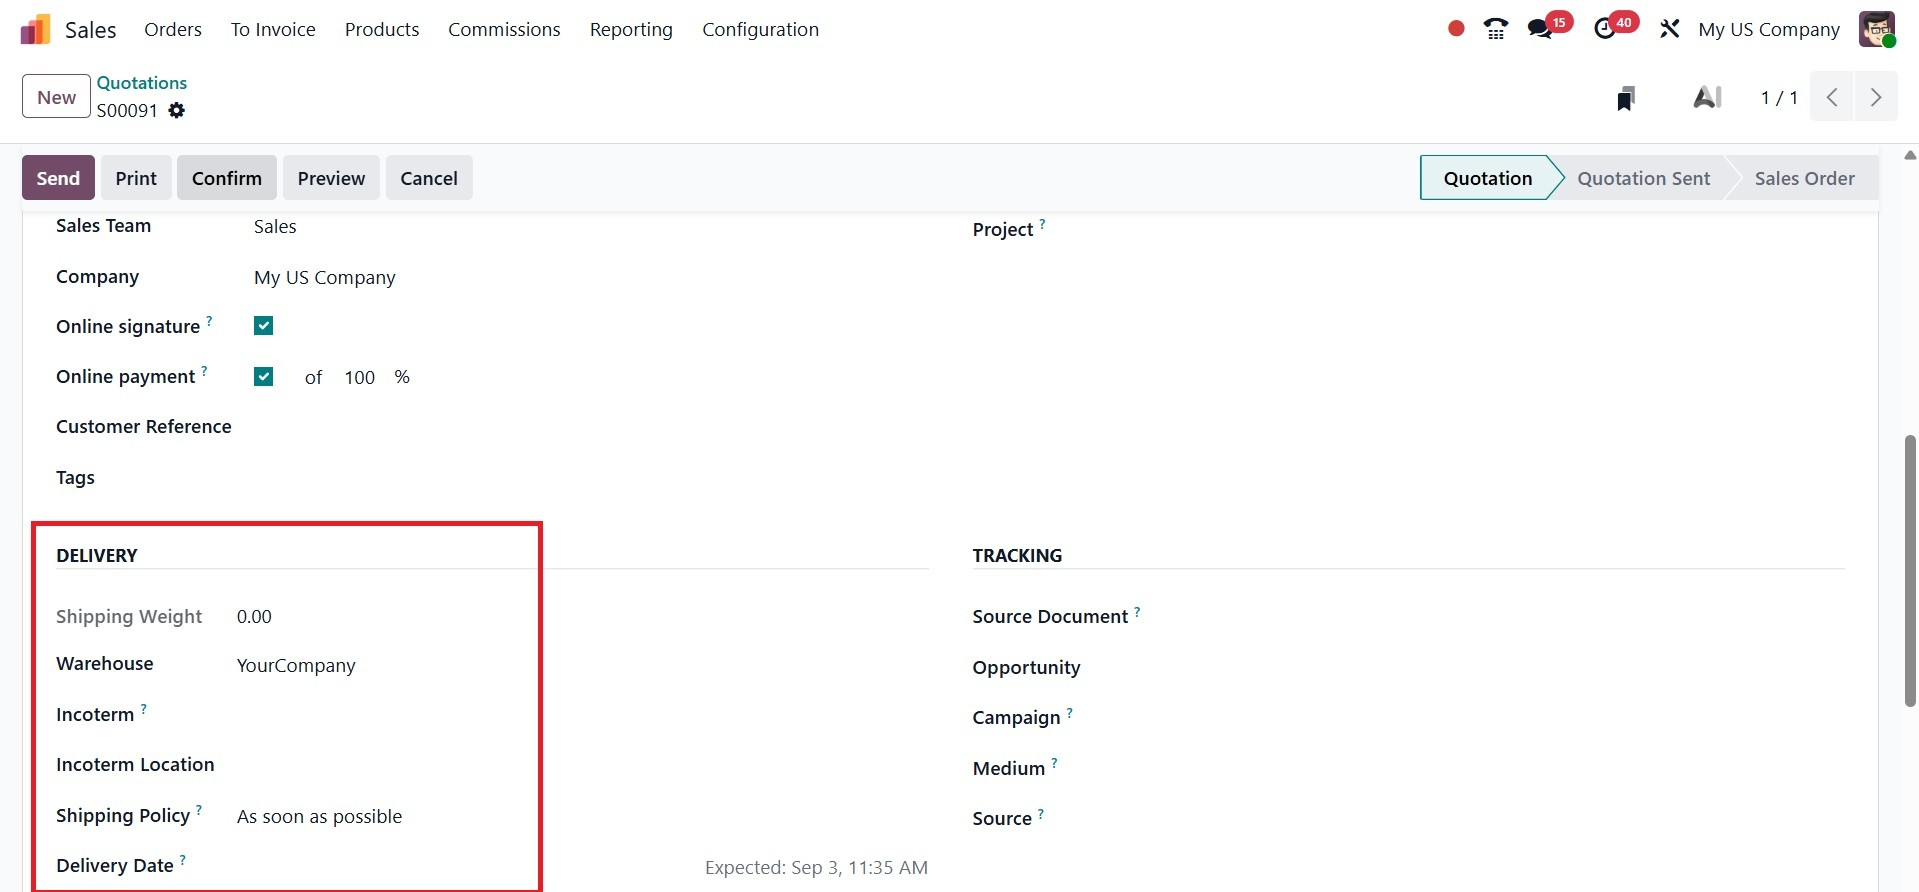
Configurable delivery-specific fields are located in the Other Info tab's Delivery section.
- Shipping Weight: Indicates how much the things being shipped weigh. There is no way to change this field. Each product form has its own configuration for product weight.
- Warehouse: A warehouse can be a physical location, such as a distribution center, storage facility, or actual store, where goods are kept. Every database has a warehouse that is already set up with the address of the business.
- Incoterm: To utilize as predetermined commercial words for international transactions, choose an Incoterm (International Commercial Term).
- Incoterm Location: Provide the international location in this field if an Incoterm is being used.
- Shipping Policy: From the drop-down menu, choose the preferred shipping policy. The delivery order is arranged based on the longest product lead time if all products are supplied at once. Otherwise, the least lead time is used. When all products are ready or as soon as possible the alternatives are offered.
- Delivery Date: Select a customer delivery date by clicking into the blank field, which will display a calendar popover. Use the expected date that appears to the right of that field if a custom date is not needed.
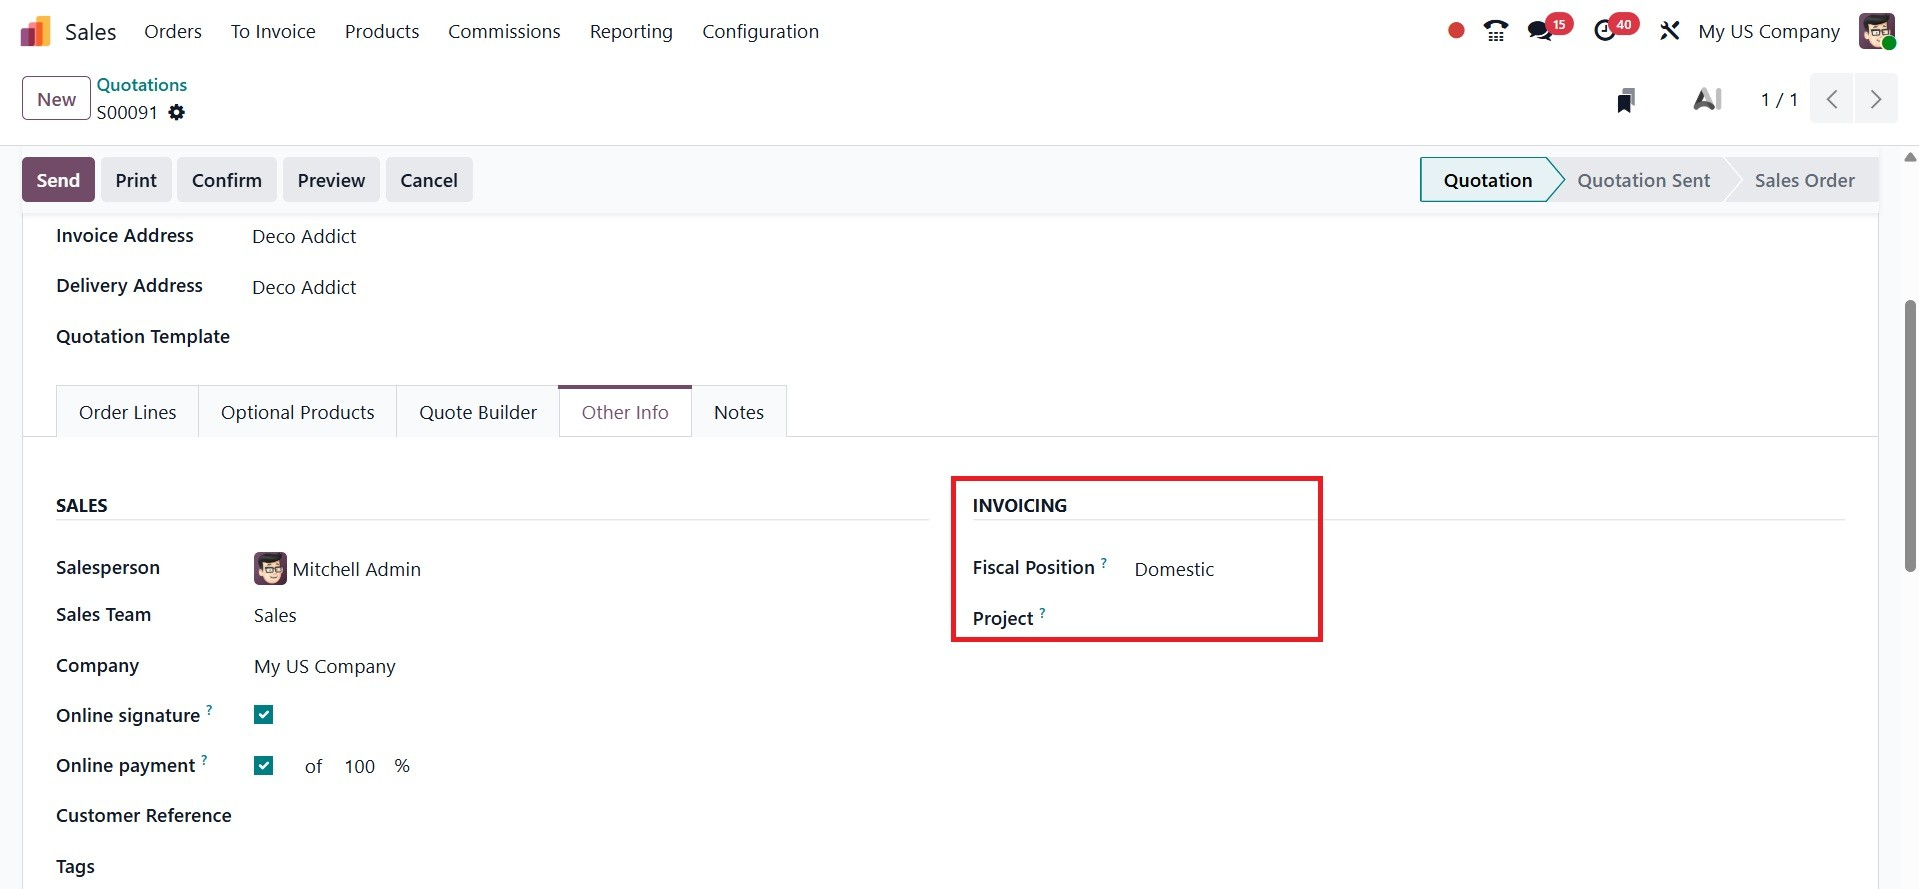
Configurable invoicing-specific fields can be found in the Other Info tab's Invoicing section. The options include:
- Fiscal Position:Choose a fiscal position that will be used to modify accounts and taxes for specific clients or sales orders/invoices. The consumer provides the default value. An icon and clickable link for updating taxes appear if this field is selected. Clicking it updates the taxes for this specific customer and quote. Additionally, a confirmation window opens.
- Project: under this option, you can select the required project from the drop-down menu.
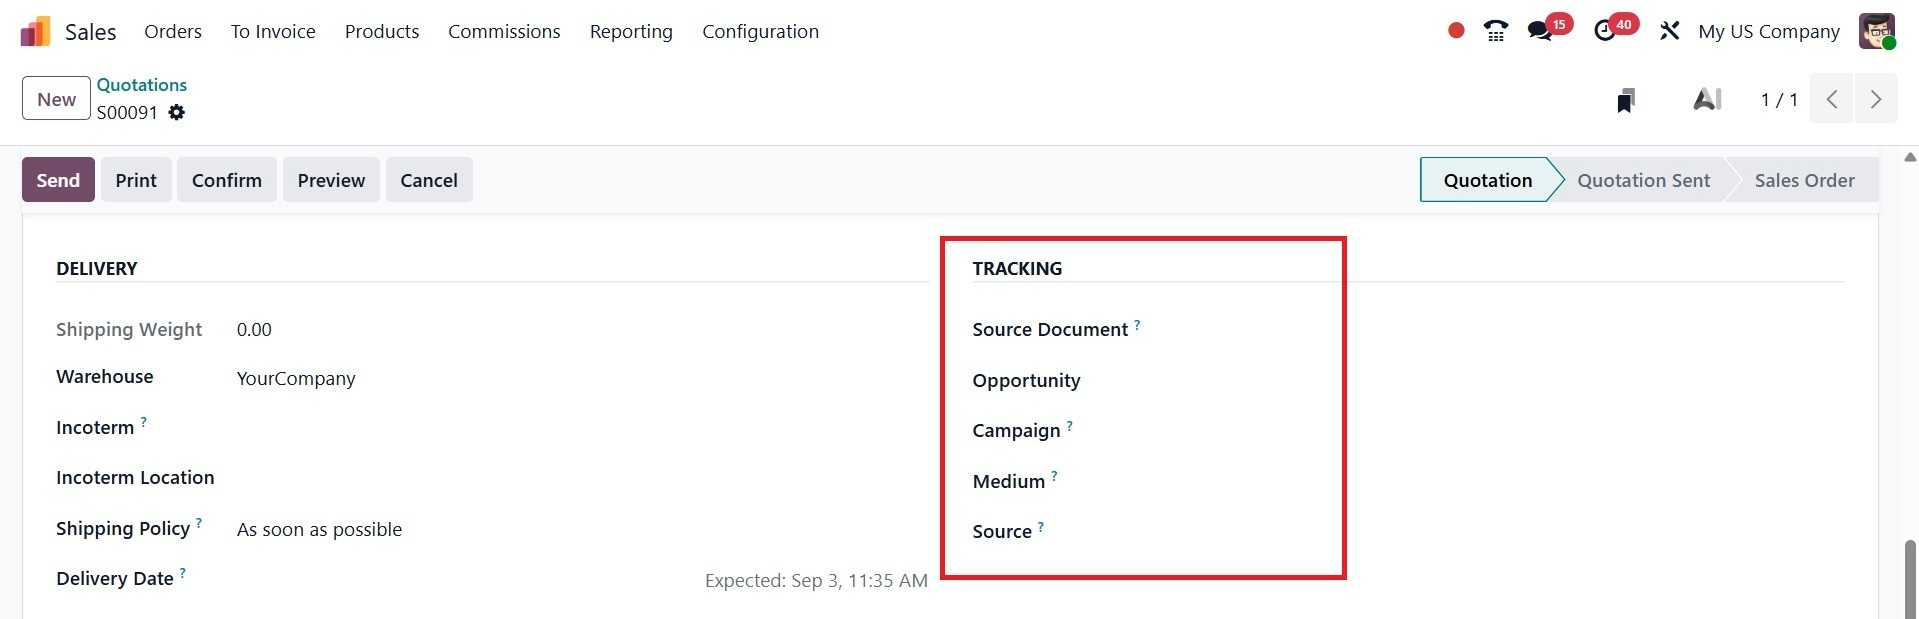
Configurable tracking-specific fields are located in the Other Info tab's Tracking section. The options coming under include:
- Source Document:If relevant, enter the reference to the document that produced the sales order or quotation.
- Opportunity:If appropriate, choose the particular opportunity associated with this quotation (from the CRM software).
- Campaign: If applicable, choose the marketing initiative associated with this quote.
- Medium: If appropriate, choose the channel (such as email) from which this quotation was obtained.
- Source: If relevant, choose the URL that produced this quotation (such as Facebook).
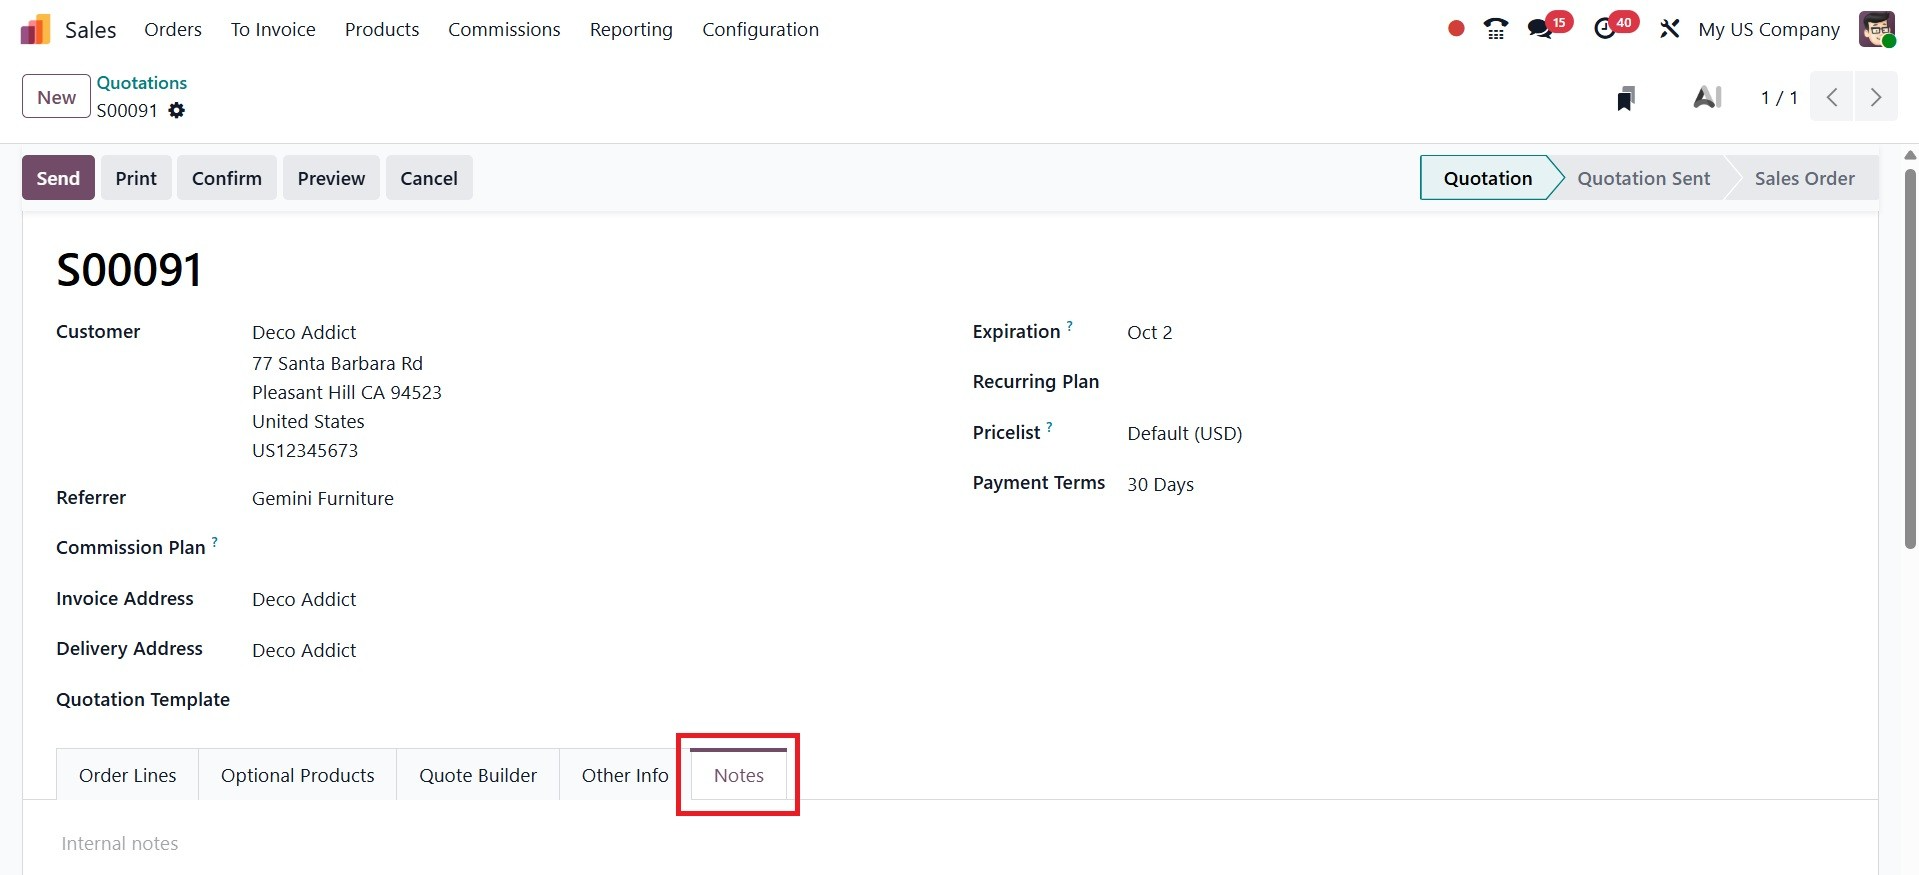
Finally, if you would like, include any particular internal notes on the quotation and/or customer in the Notes tab of the quotation form.
It's time to send the quotation to the client for approval after all required fields and tabs have been set up. The quotation becomes a formal sales order after it is confirmed. The form has a number of buttons at the top:
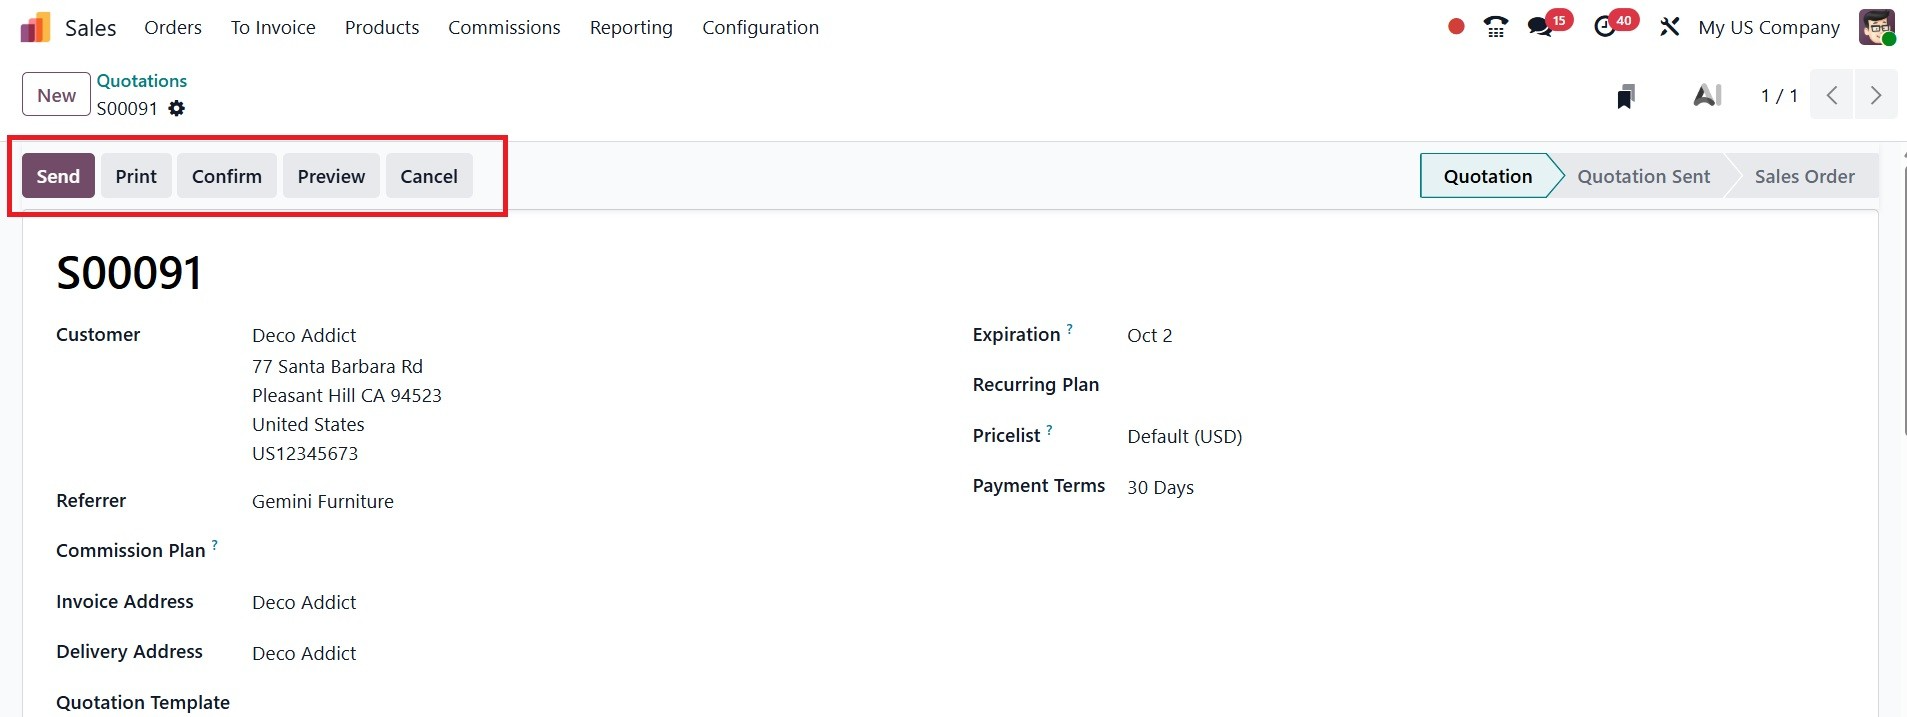
- Print:the option allows you to have a printout of the quotation.
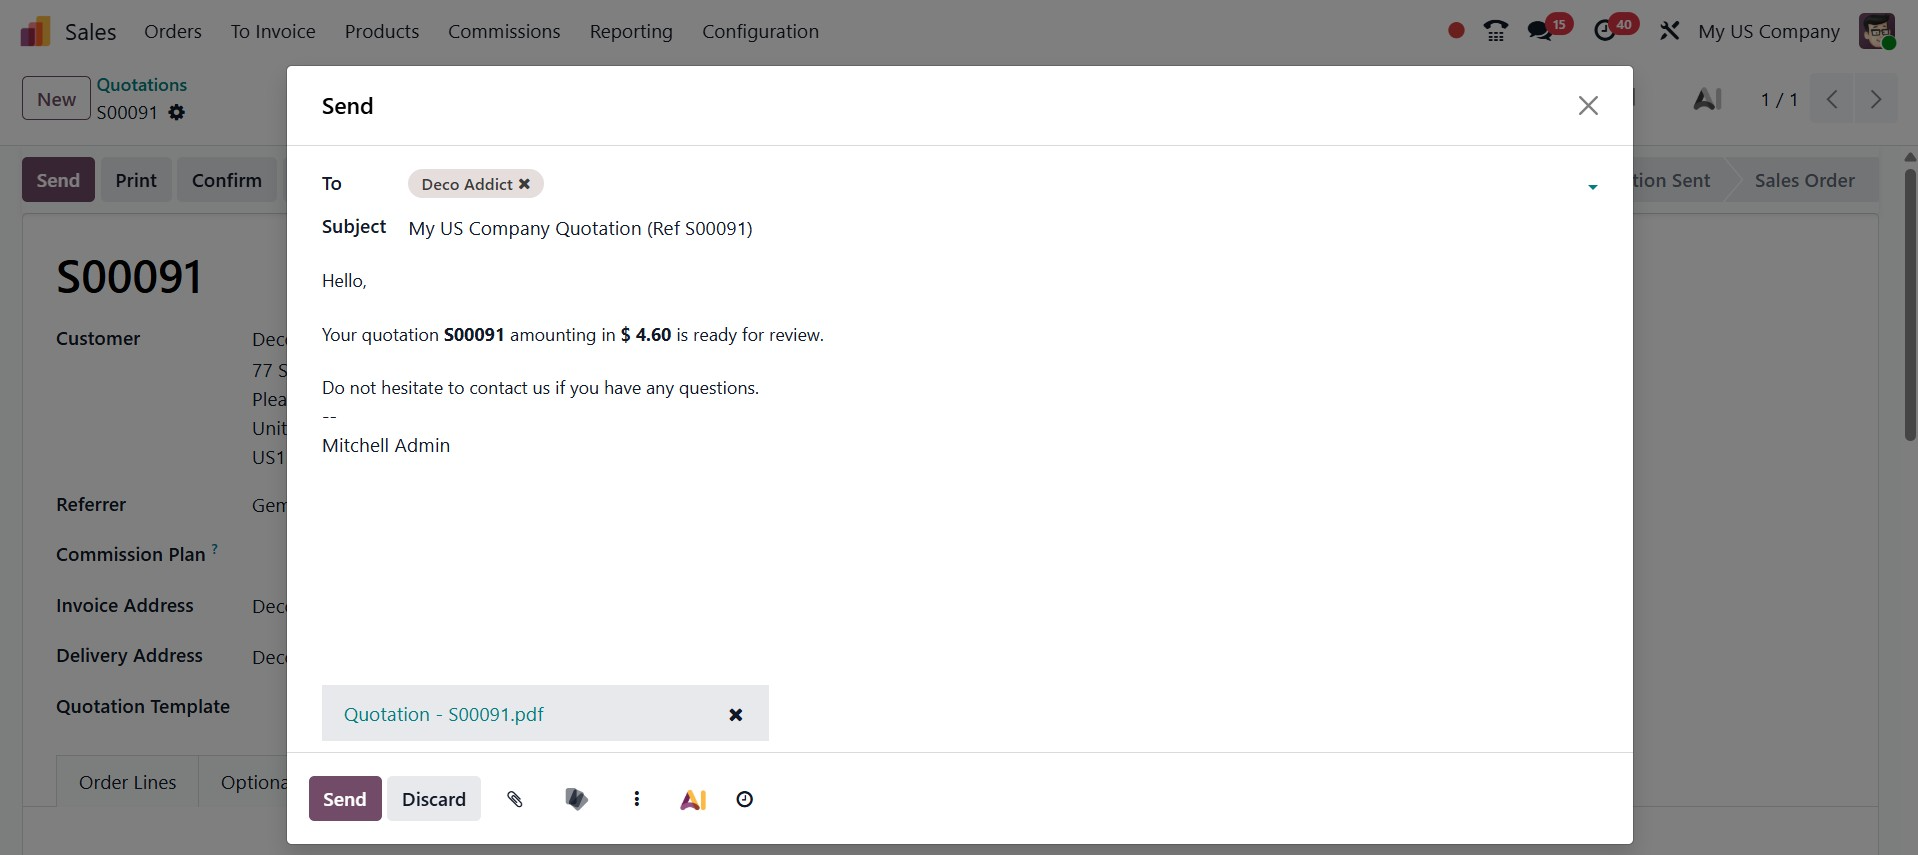
- Send: Clicking this button opens a pop-up window with the quotation (and reference ID) in the Subject area, the customer's name and email address in the Recipients field, and a short default message in the body of the email that can be changed if necessary.
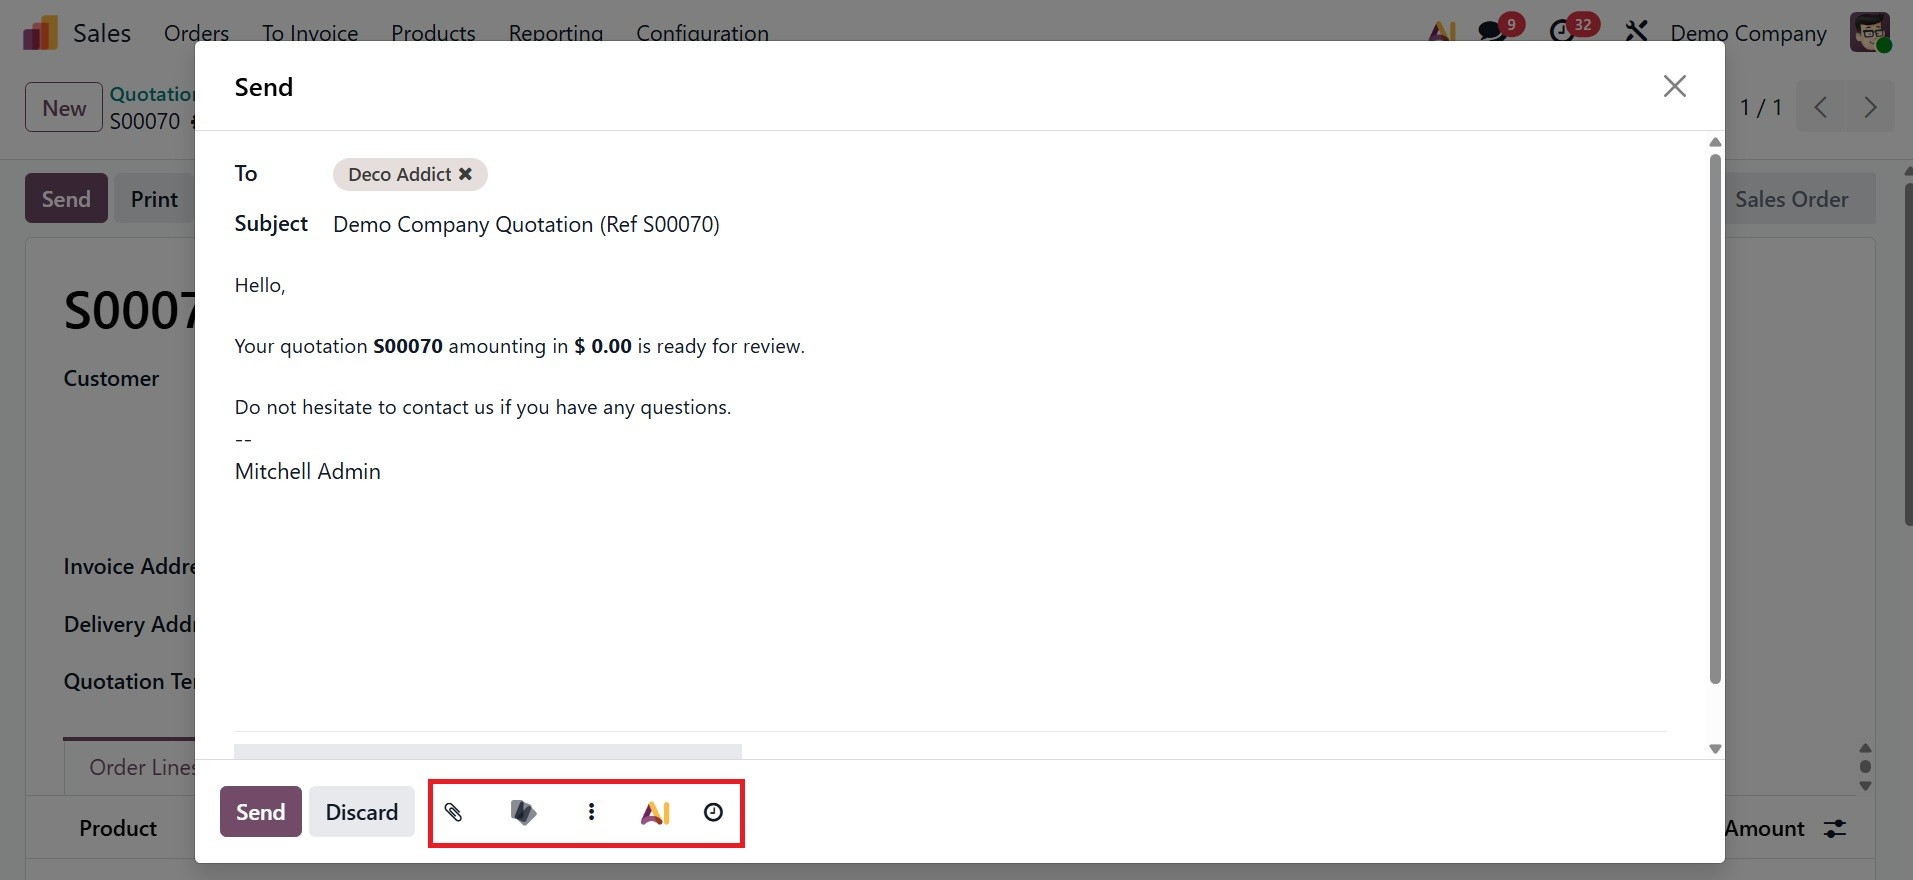
Near to the Send and Discard icons, you have got some options, such as Add Attachment, Add from Documents, Templates, Ask AI, and Send Later options, respectively.
- Add Attachment:This feature enables you to attach files (such as PDFs, photos, or contracts) straight to the sales order or quotation.
- Add from Documents:This feature lets you retrieve and attach files that are already saved in the Odoo Documents app.
- Templates:Offers pre-made email or quotation formats that you can use again to save time.
- Ask AI:This feature uses Odoo's AI assistant to generate or suggest content, such as emails or product descriptions.
- Send Later: This feature lets you mark the quotation or email to be sent later rather than right away.
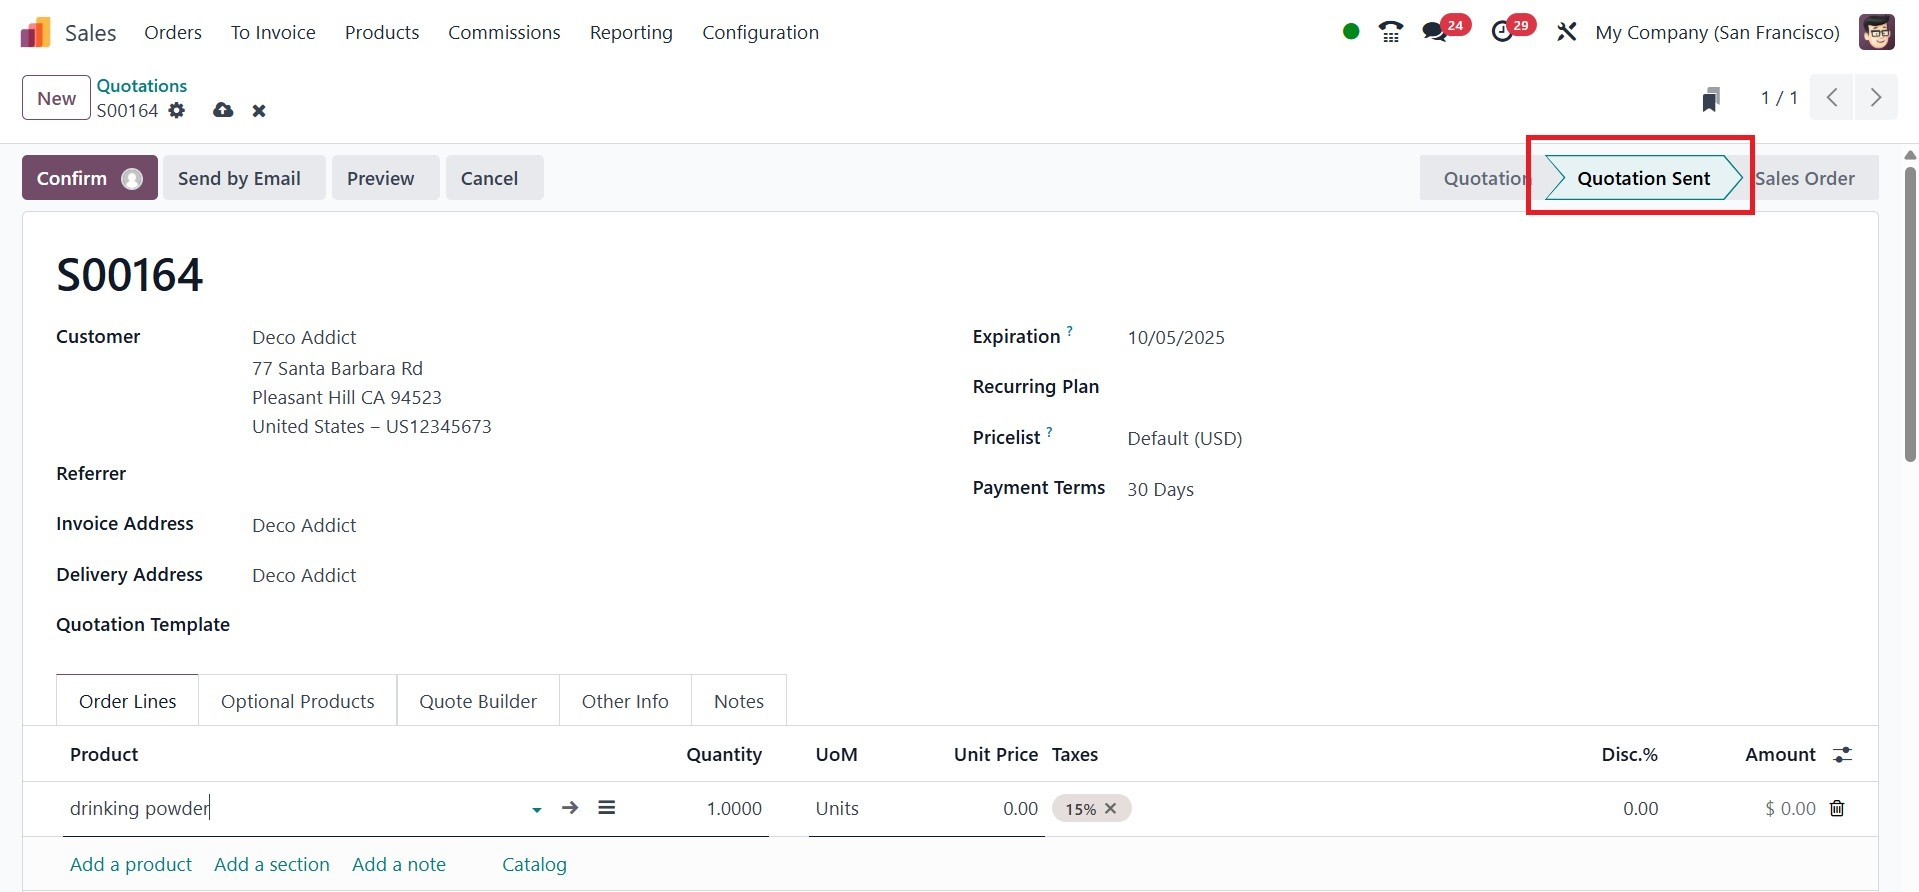
A PDF copy of the quotation is included below that. When the quotation is ready, click the Send option to the customer for evaluation and confirmation.
The quotation information will be attached to the email, and after it has been sent, the quotation's status will change to Quotation Sent.
- Preview: When a customer logs into their customer portal, Odoo displays a preview of the quotation they saw. To go back to the quotation form, click the Back to edit mode link on the blue banner at the top of the preview page. You may see what your consumers will see when they receive your quotation by selecting Customer preview. Following that, your clients can either sign and pay the quote, provide feedback, or reject the quote, as shown below.
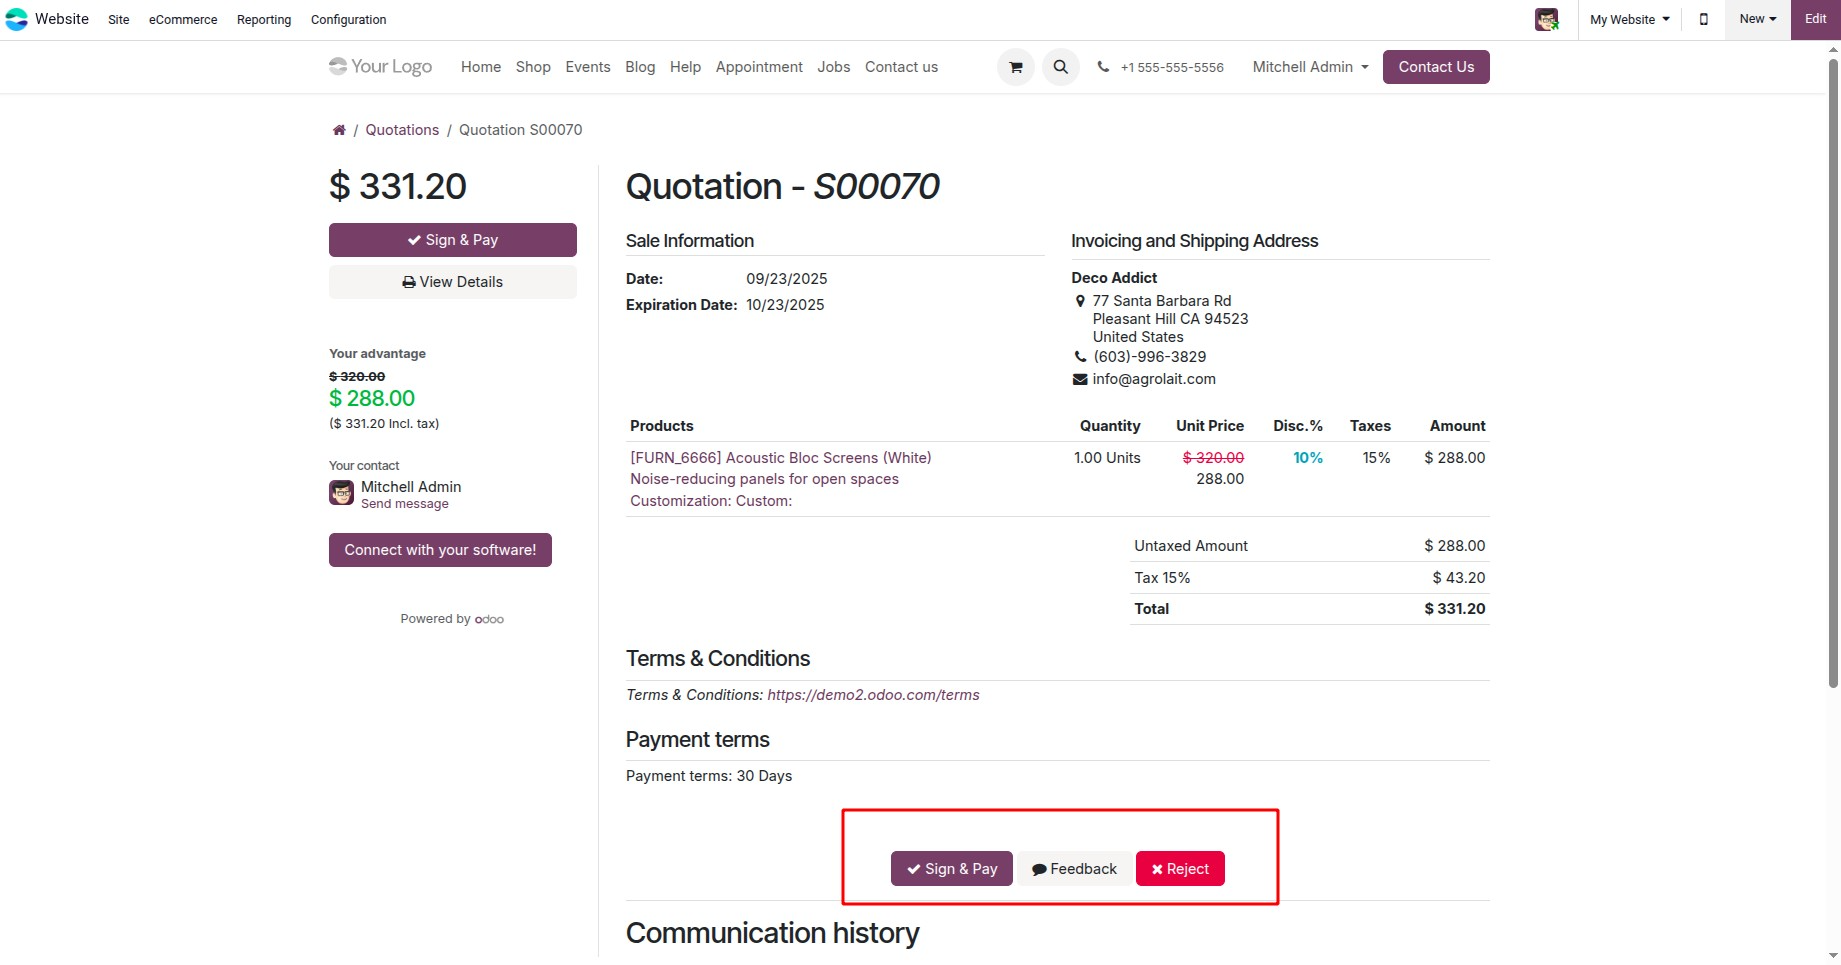
- Sign & Pay:This option allows the customer to digitally sign the quotation (using Odoo Sign) and make an online payment in one step. It’s often used for e-commerce or service contracts where confirmation and payment need to happen together.
- Feedback: This option lets the customer send comments or suggestions about the quotation without confirming or rejecting it. It’s useful when the client wants modifications, negotiation, or clarification before acceptance.
- Reject:If the customer decides they do not want to move further with the order, they can formally decline the quotation. When the quote is clicked, Odoo marks it as "Lost," allowing the sales team to note the reason or get in touch with the customer again.
- Cancel: This option allows the customer to decline the quotation, marking it as rejected. The sales team will see it as canceled and can follow up if needed.
- Confirm: Clicking this button results in the quotation being verified and the status changing to Sales Order. Once the Quotation is converted into the Sale Order, you can deliver the product and create an invoice.
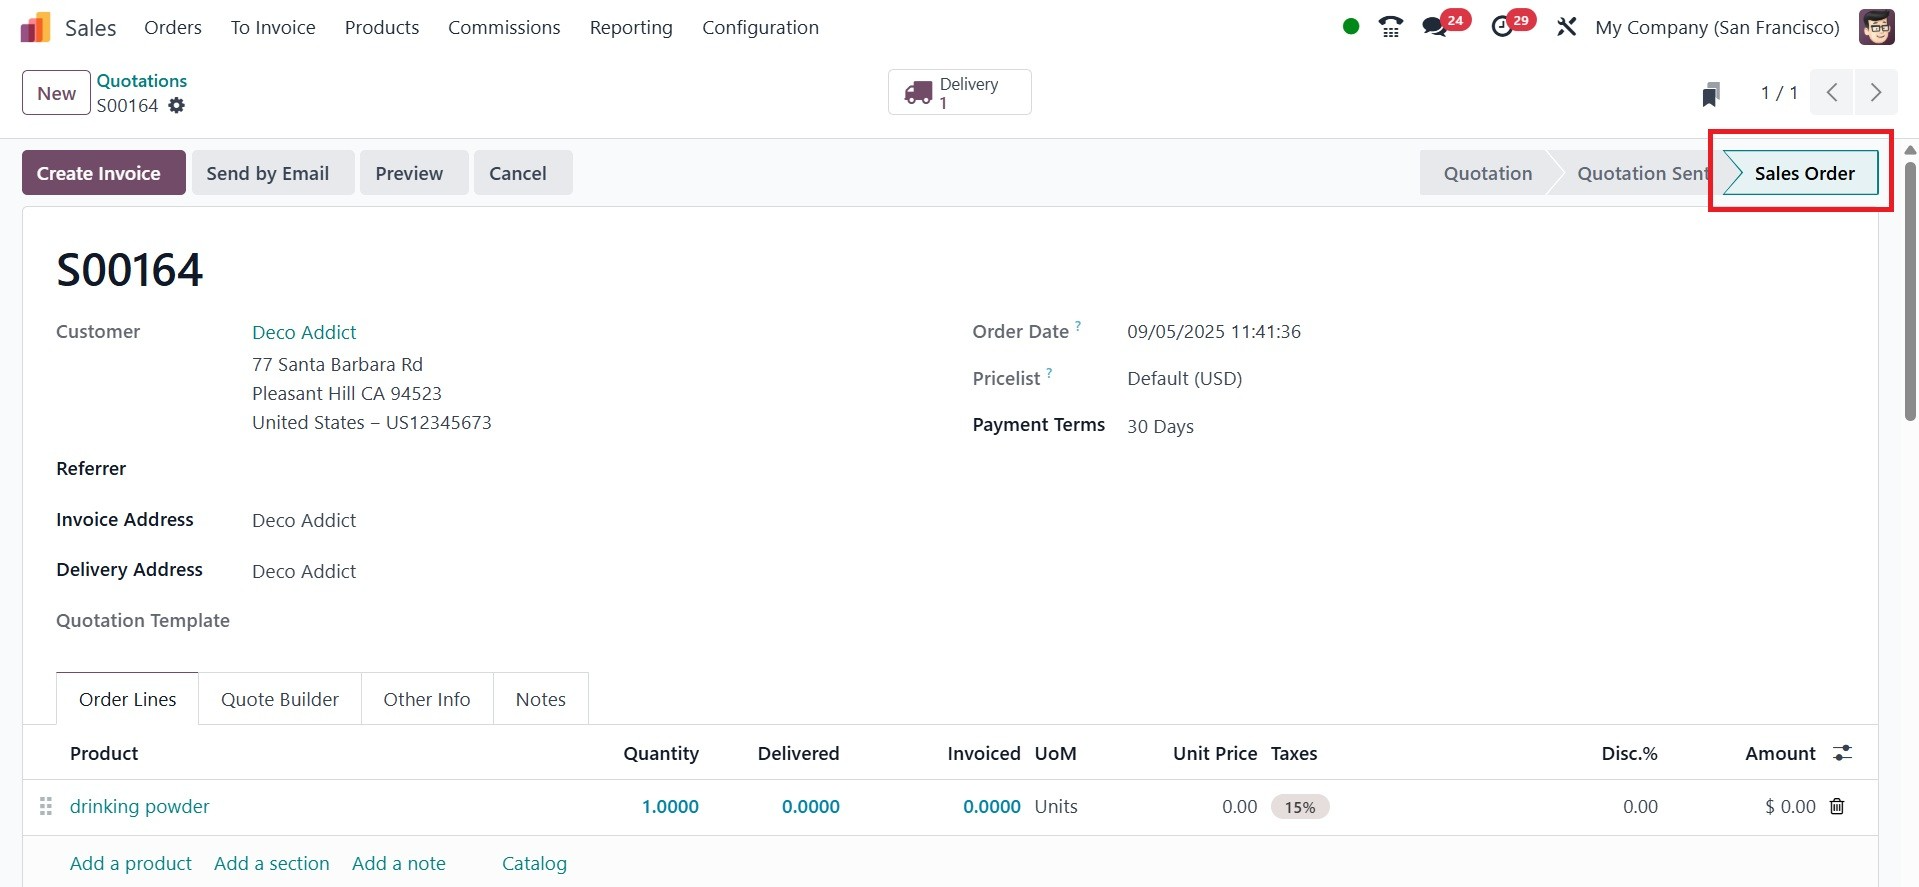
The quotation has now been verified, converted into a sales order, and is prepared for billing and payment. They can also sign in and pay using the website's customer portal if it is enabled.
1.2 Orders
With details like the order number, order date, website, customer, salesperson, activities, company, total amount, invoice status, and order status, the Sales Orders area of the Sales module provides a thorough list of all confirmed sales orders. Similar to the Quotation Section, you can examine these sales orders in a variety of layouts, such as Kanban, Pivot, Graph, Calendar, and Activities views.
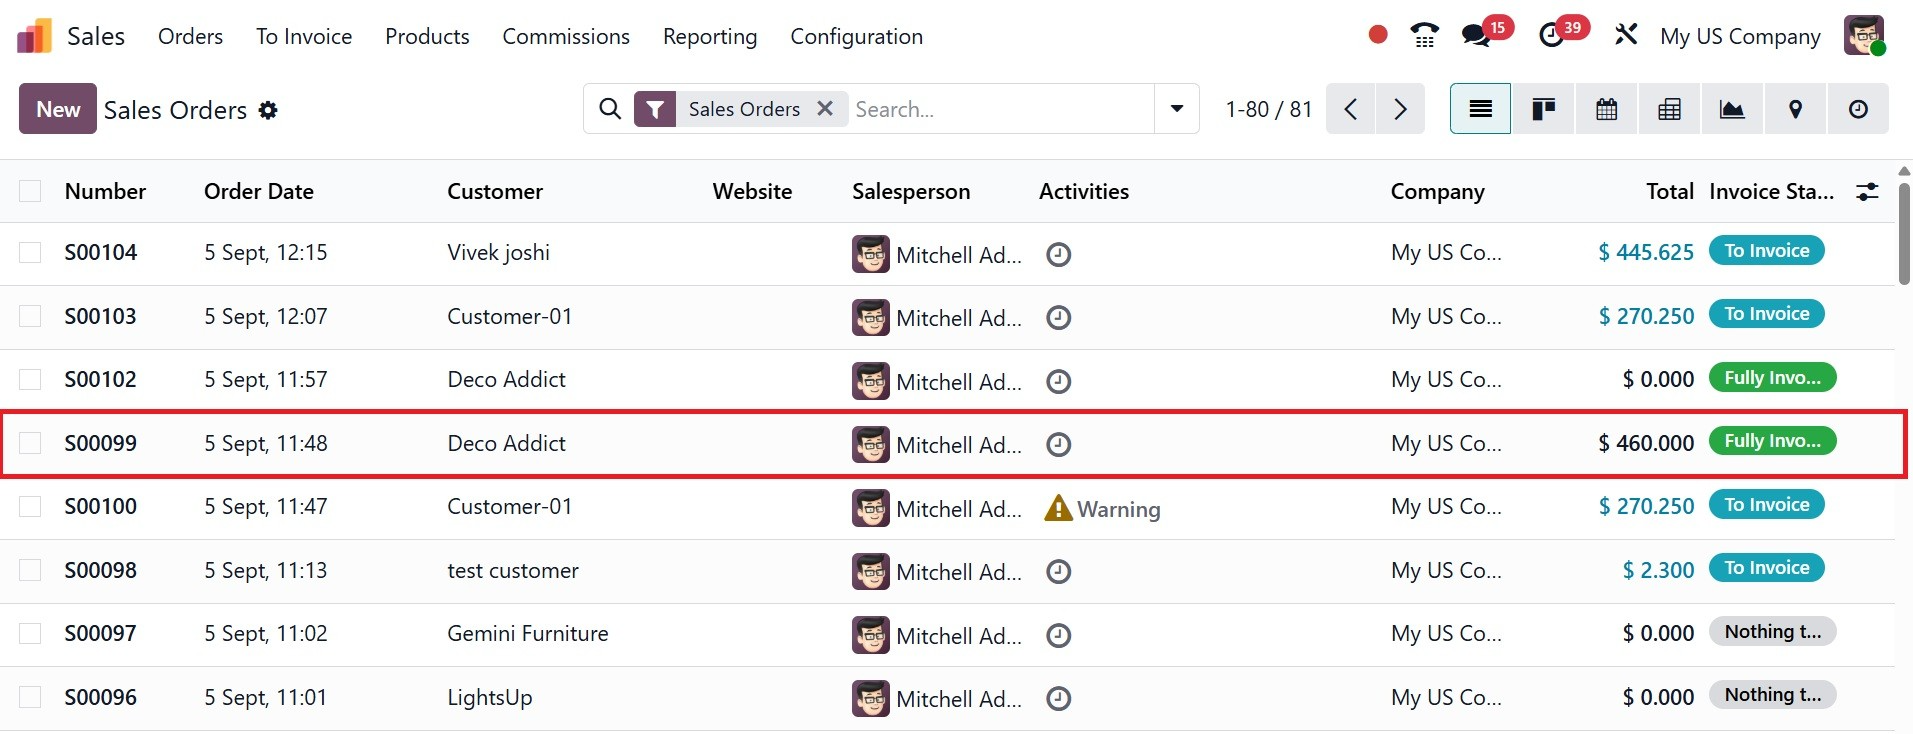
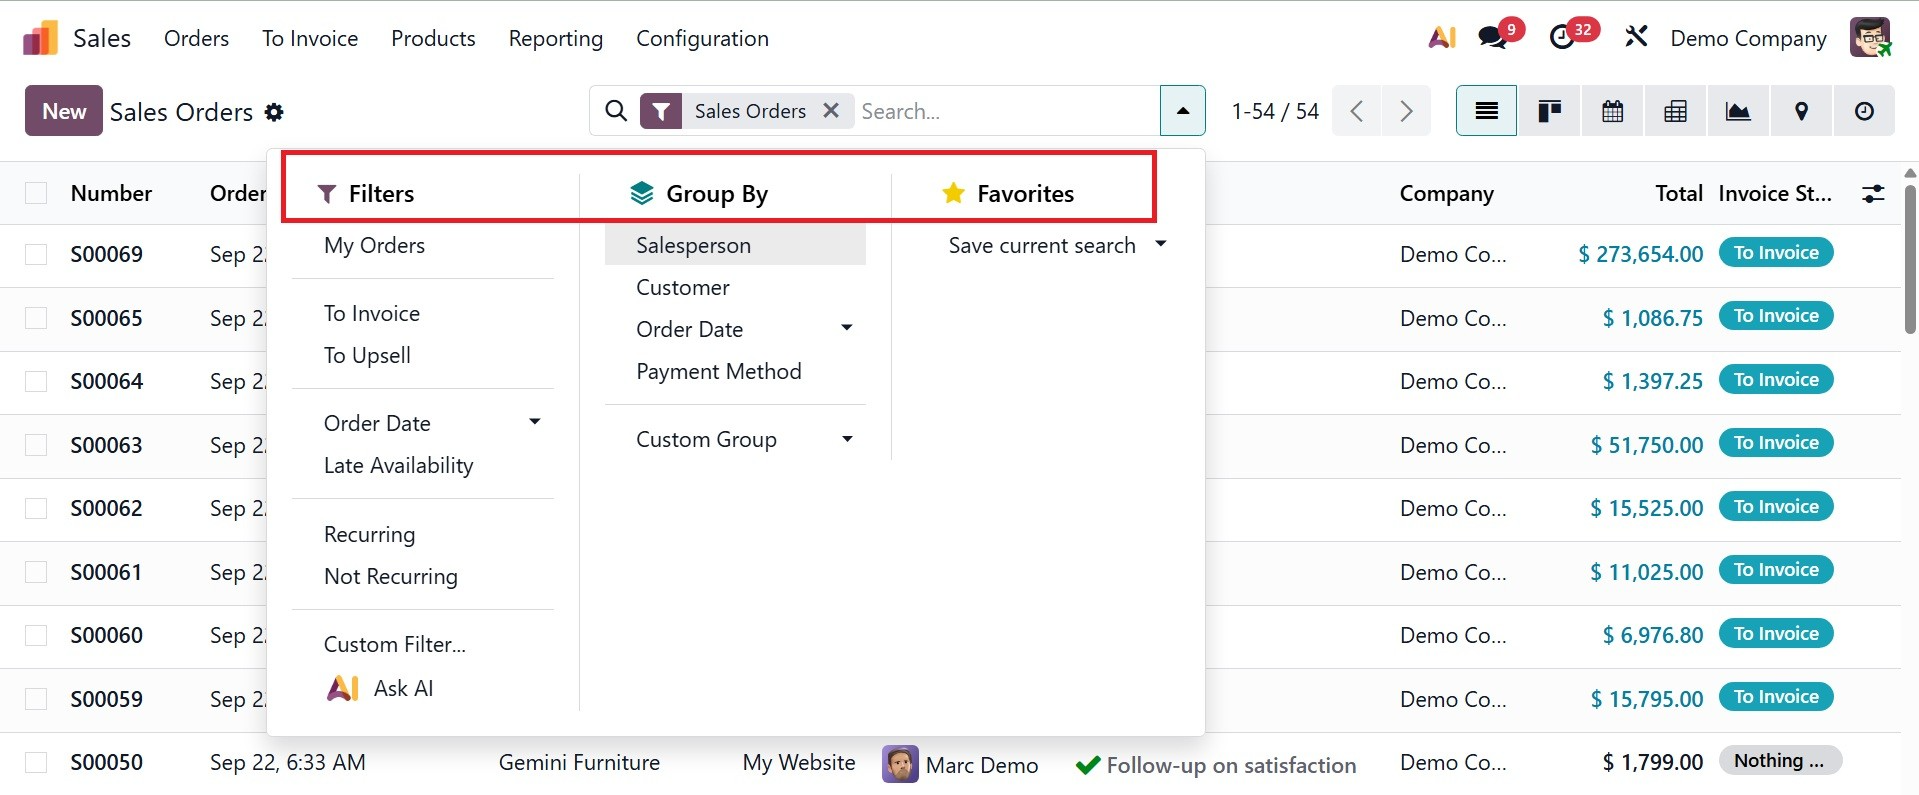
The marked invoice is that of the above-mentioned quotation. Here, you have different filters available, such as My Orders, To invoice, To upsell, order date, late availability, Recurring, Not recurring, custom filter, and Ask AI, as in the screenshot below. You can also make use of the Group By and Favourites options accordingly.
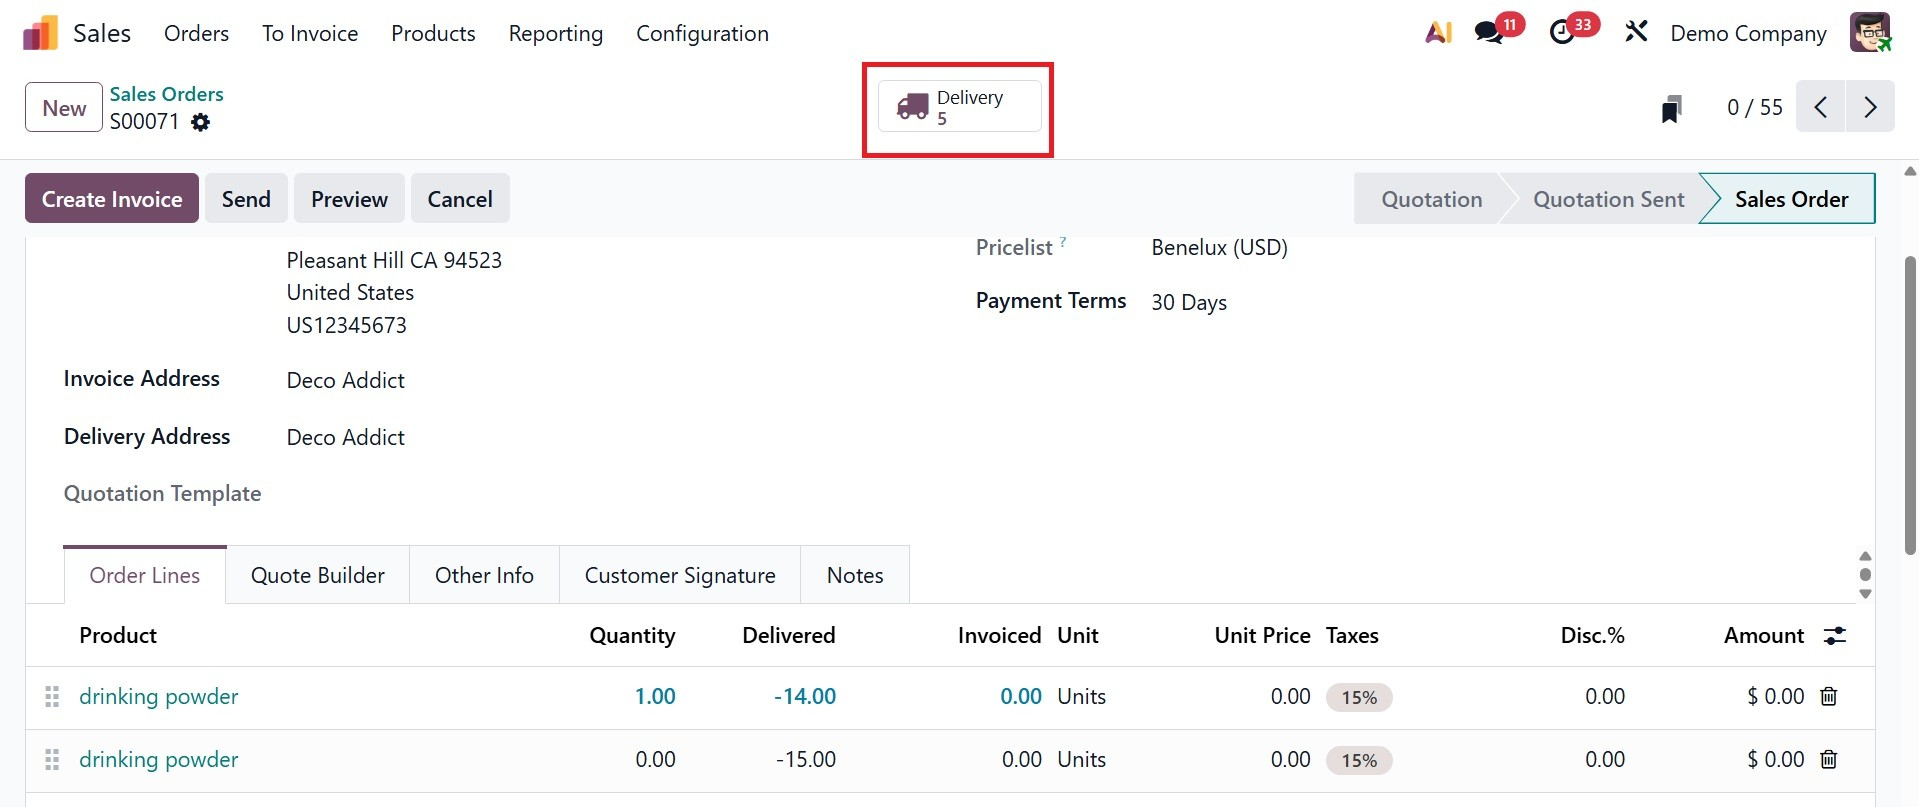
Now, either you can create a new one using the New option, or select the created sale order as in the screenshot below.
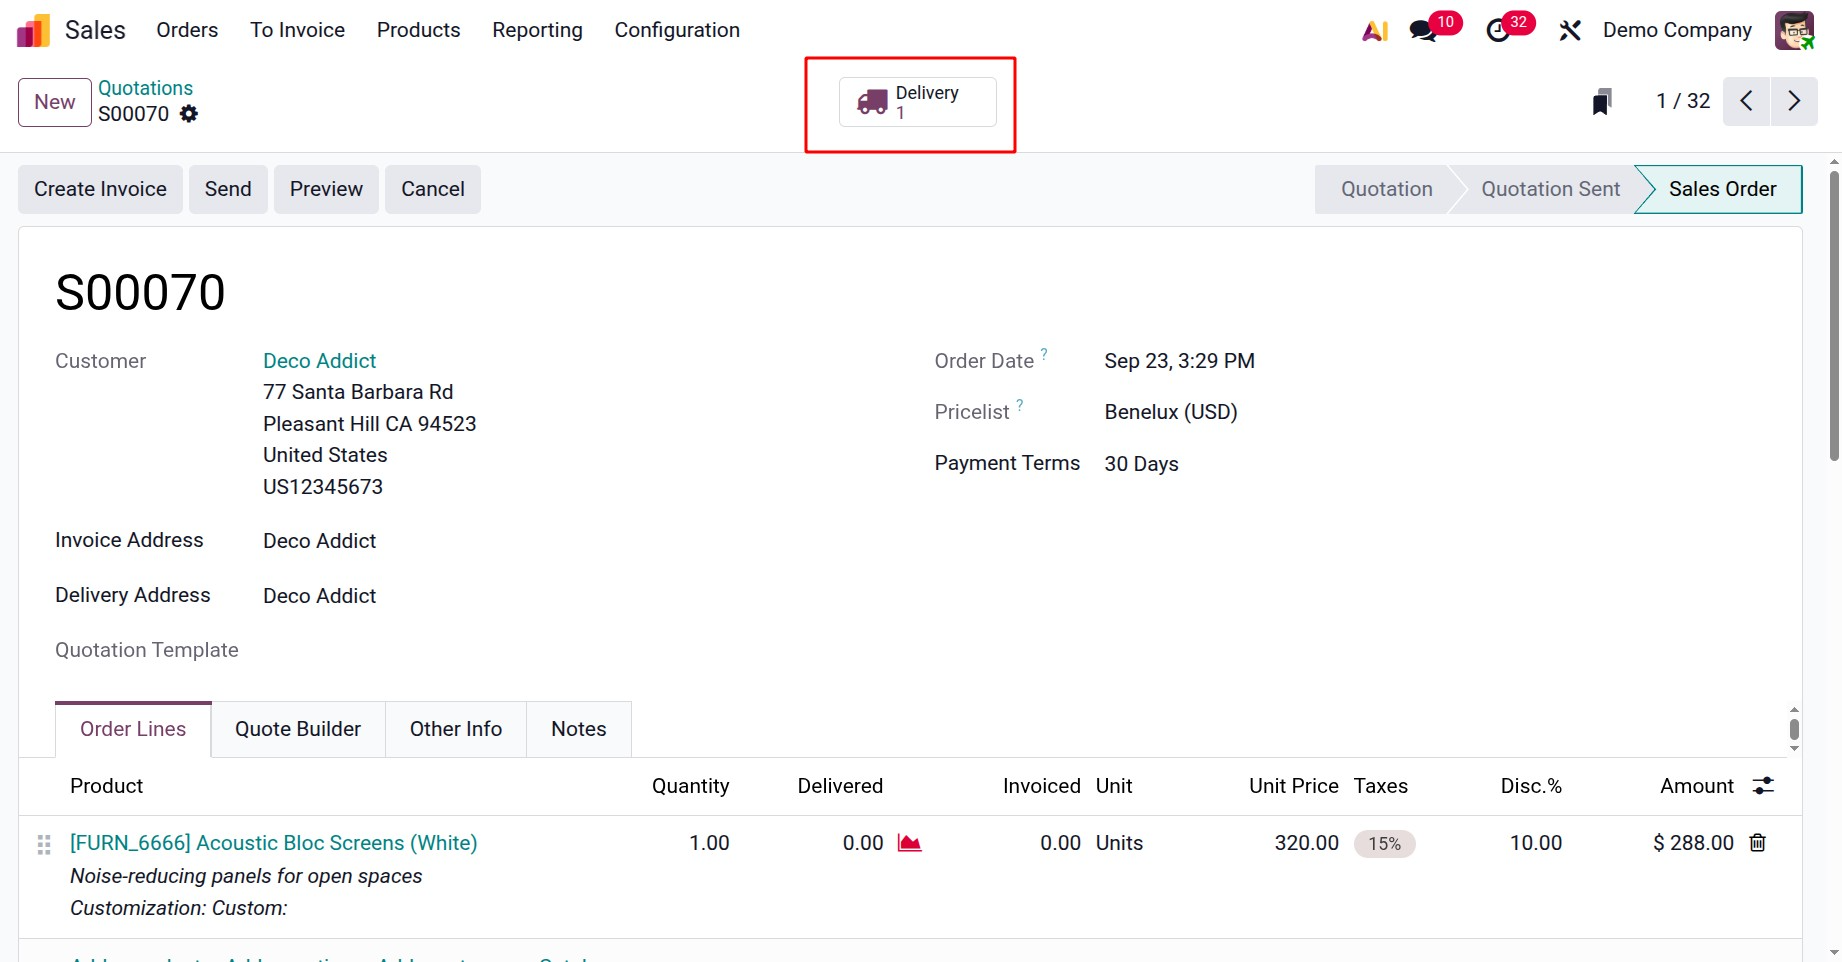
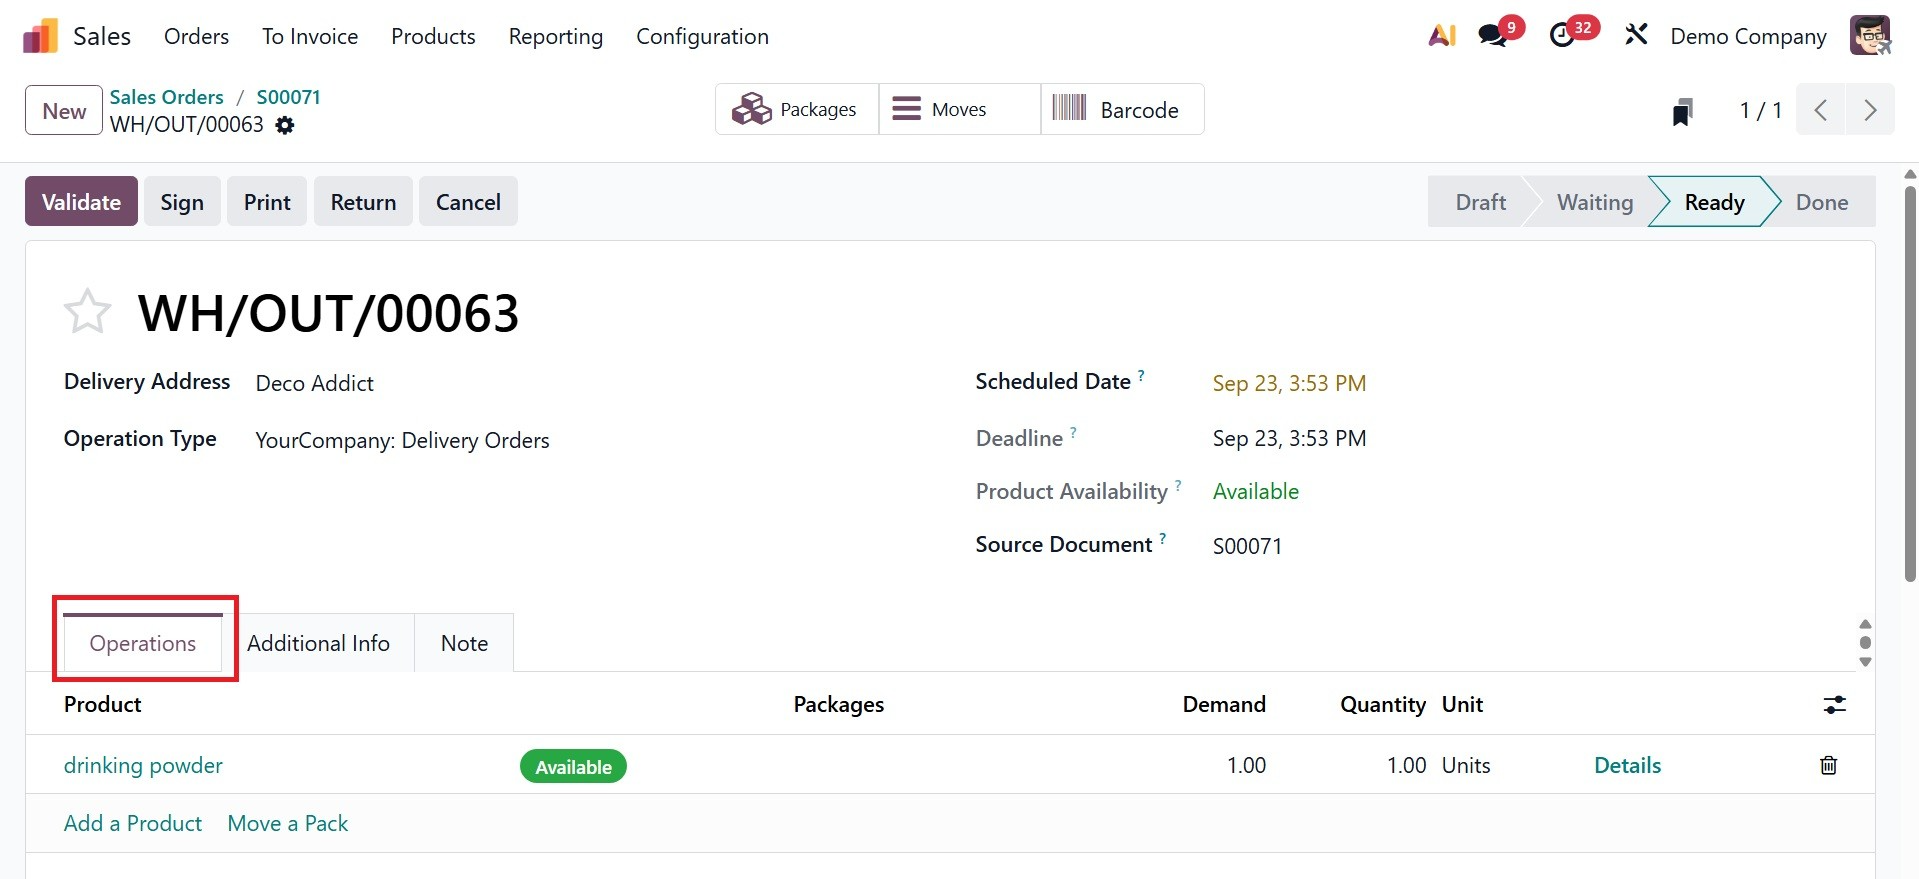
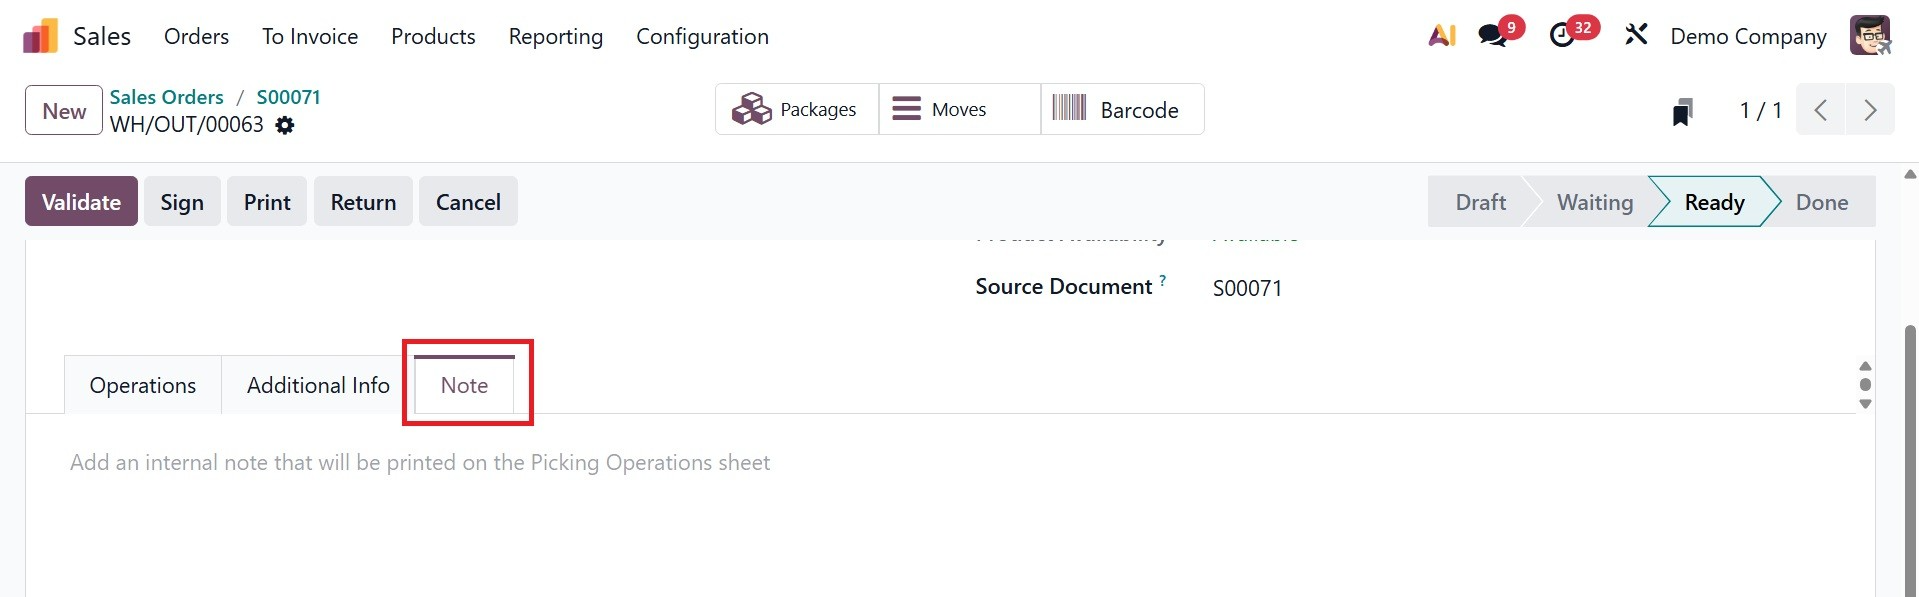
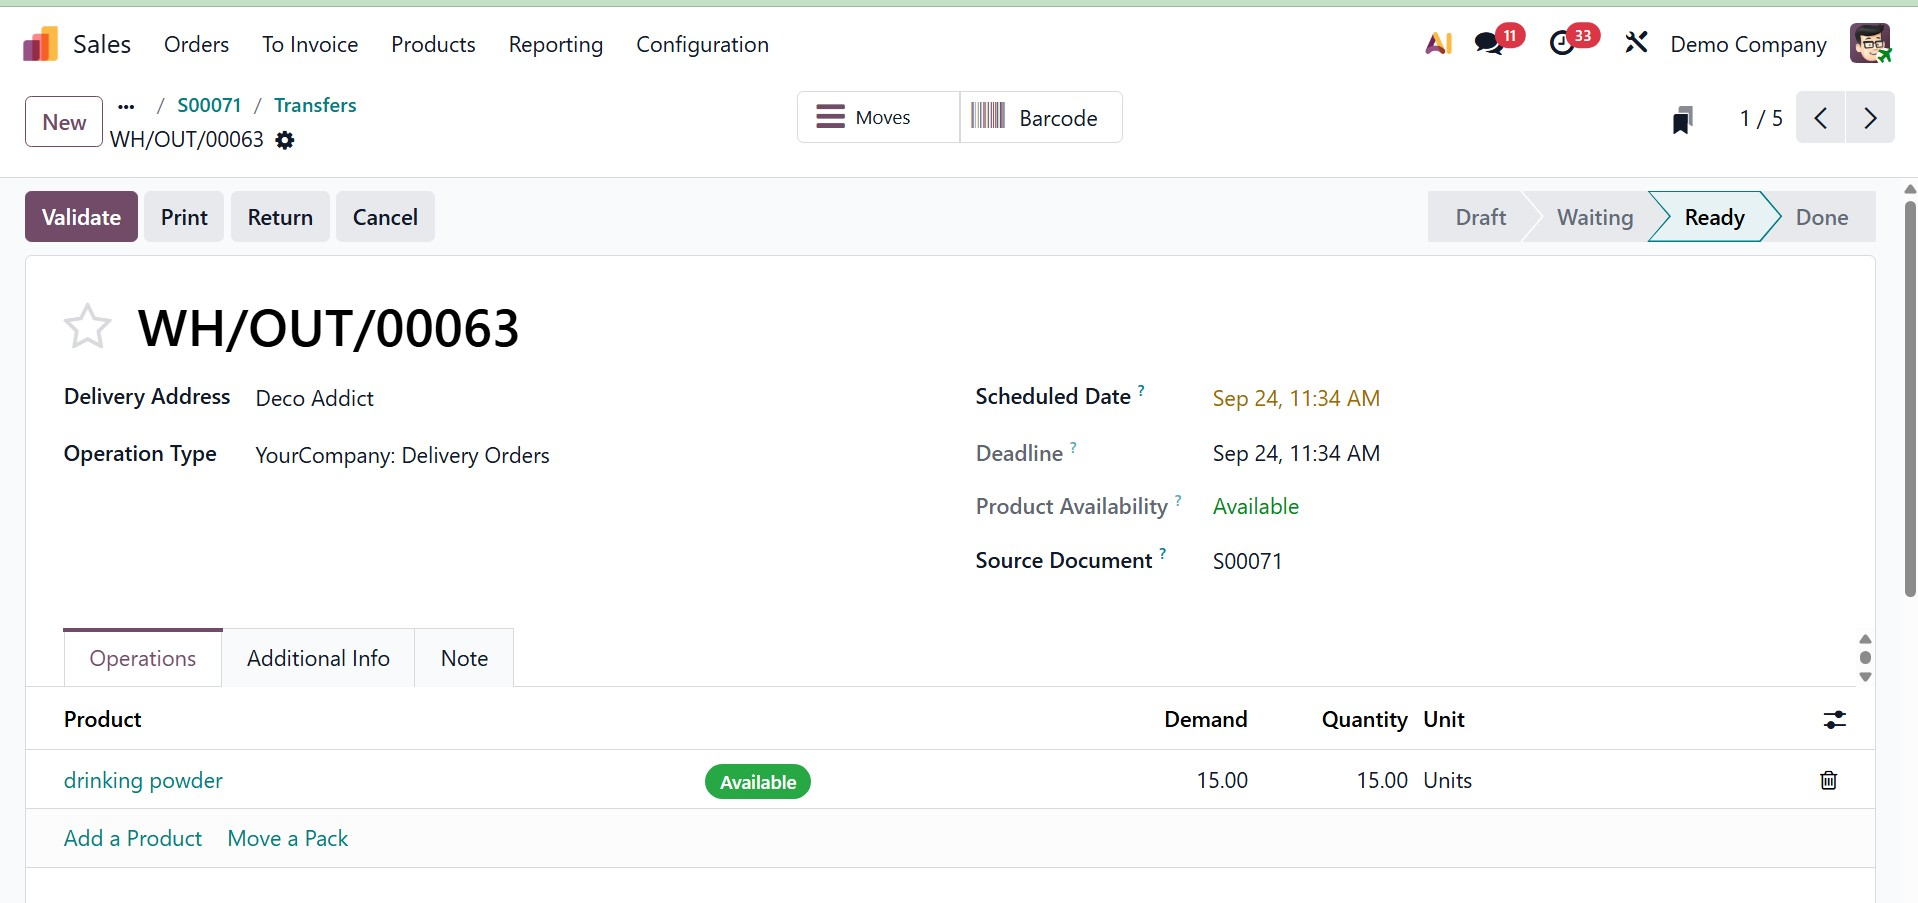
After confirmation the quotation changed to sale order. There is a smart tab named Delivery as shown above. On opening the Delivery smart tab, you will be directed to the page, as shown below. Here, you are provided with the delivery address, operation type, source location, scheduled date, and source document, respectively. Moreover, there are Operations, Additional info, and Notes tab as well.
The operations tab: displays the delivery order's specifics, such as the product list, quantities, reserved stock, and, if relevant, lot or serial numbers. Its primary purpose is to monitor the selection and delivery of goods.
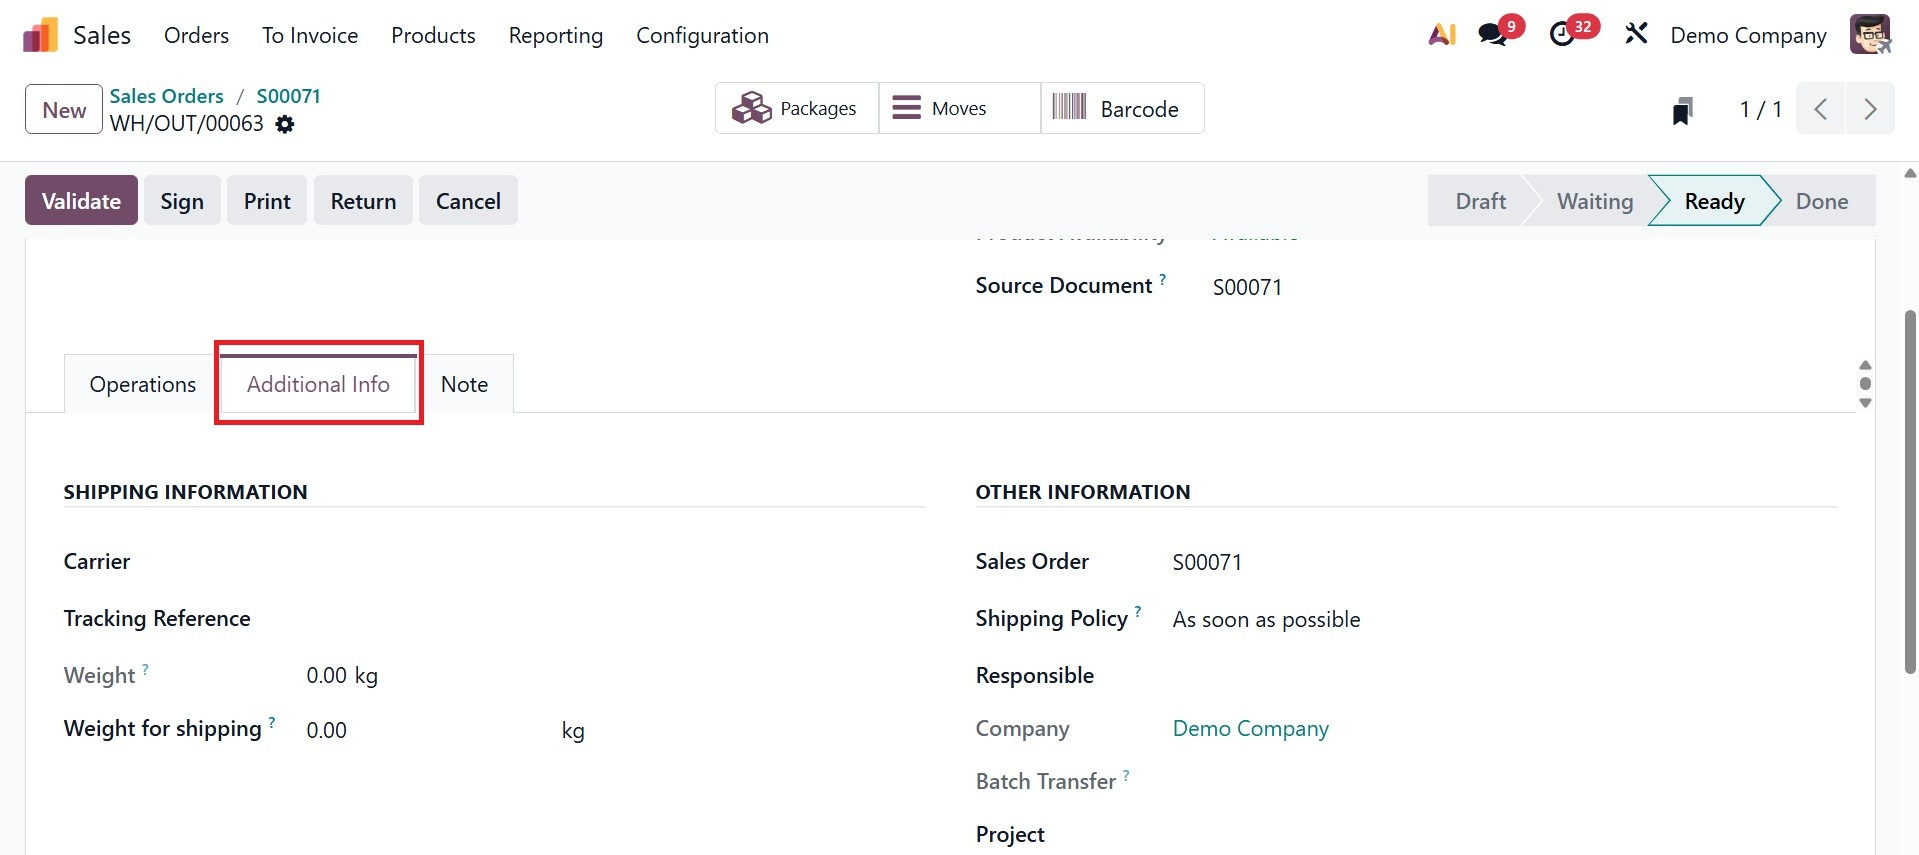
Additional Info : Carrier, Tracking reference, and weight for shipping comes under shipping information. Sales order, shipping policy, responsible, company, and project comes under the other information. Beyond simply the product lines, this aids in managing and keeping an eye on the delivery process.
Notes:The notes tab offers a place to include internal notes or additional delivery-related data that the warehouse or logistics team could find helpful. Documents that are viewed by customers may not always contain these notes.
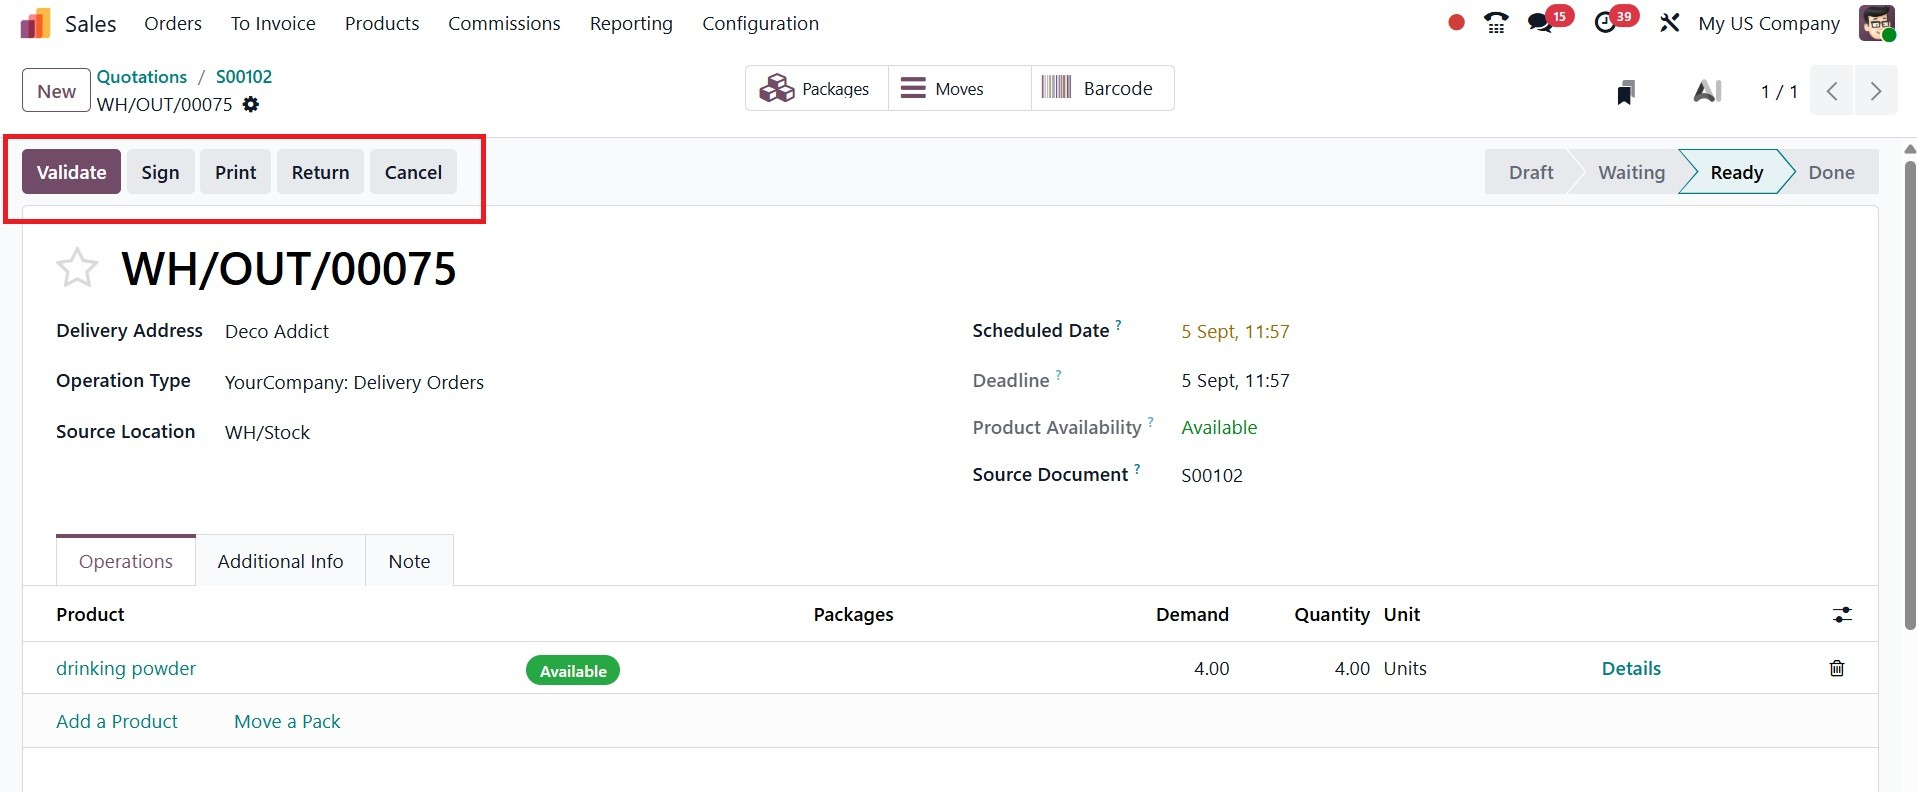
Now, on activating the Signature option in Odoo Inventory module, you will get the extra options like sign here.
Now, you are provided with some options like Validate and Sign options, as in the image below.
On selecting the Sign option, you have a field to add the signature. Here, you can have the signature auto-generated, or draw by yourself as well.
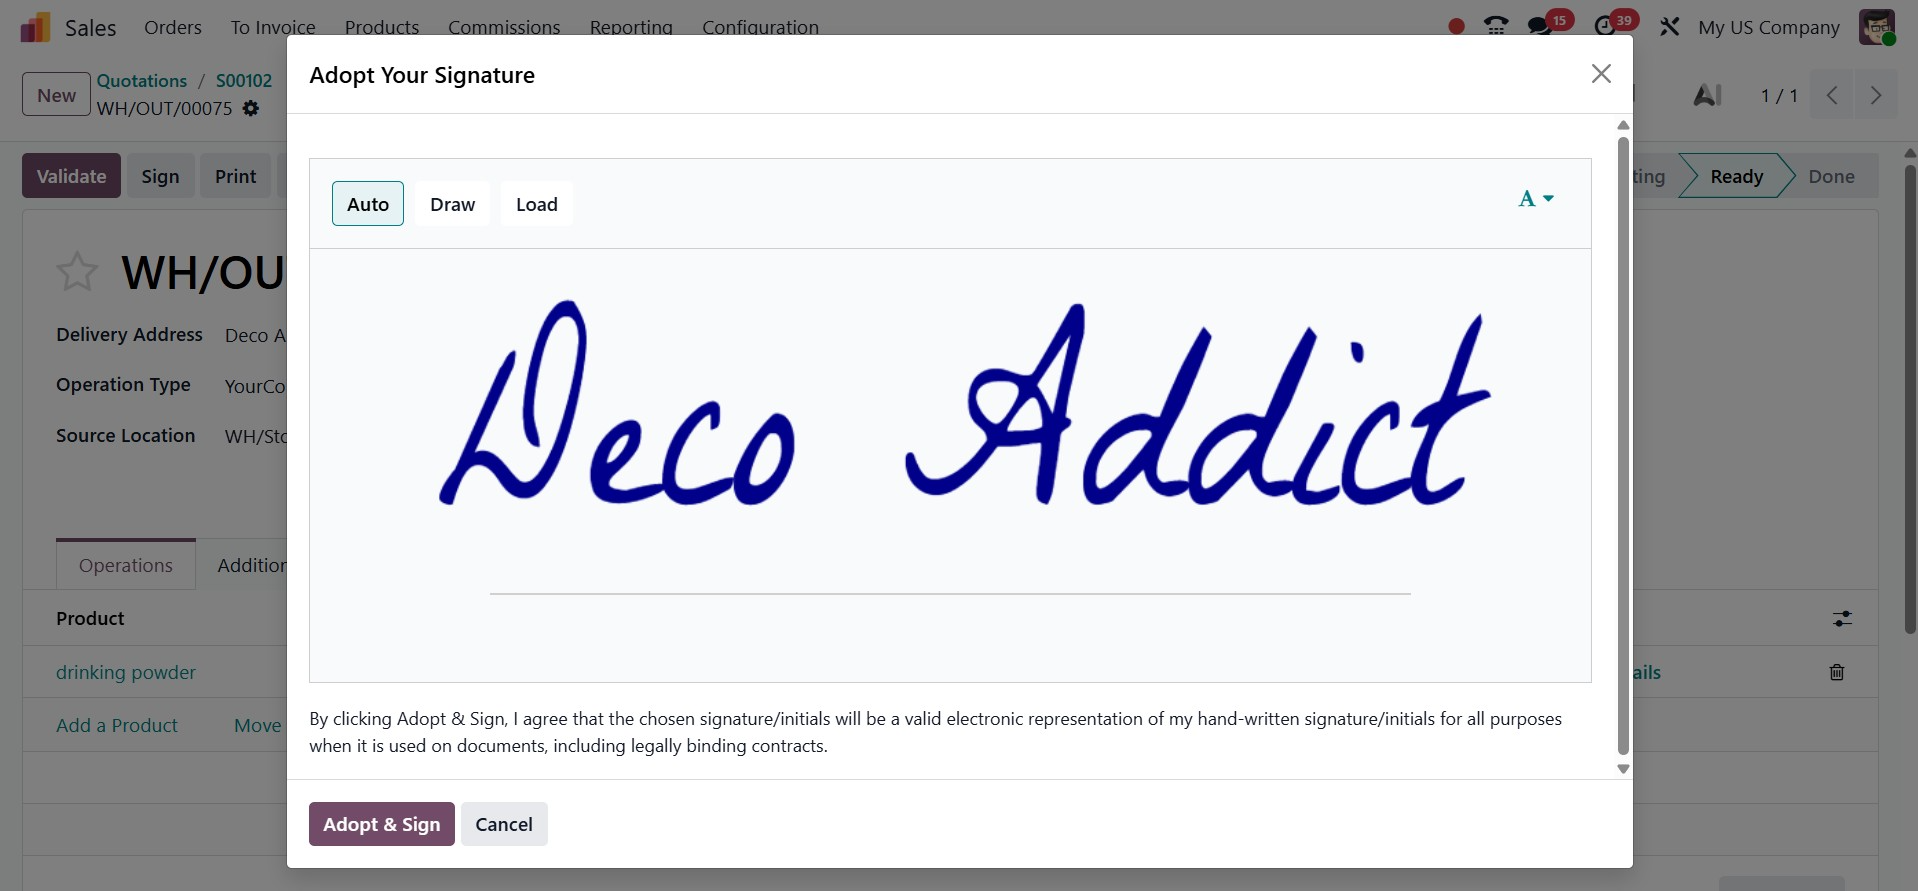
After adding their signature, the customer will be taken to the payment page, where they can make their payment in accordance with the terms that have been provided.
On selecting the Validate icon, the status moves to the Done field, as in the image below.
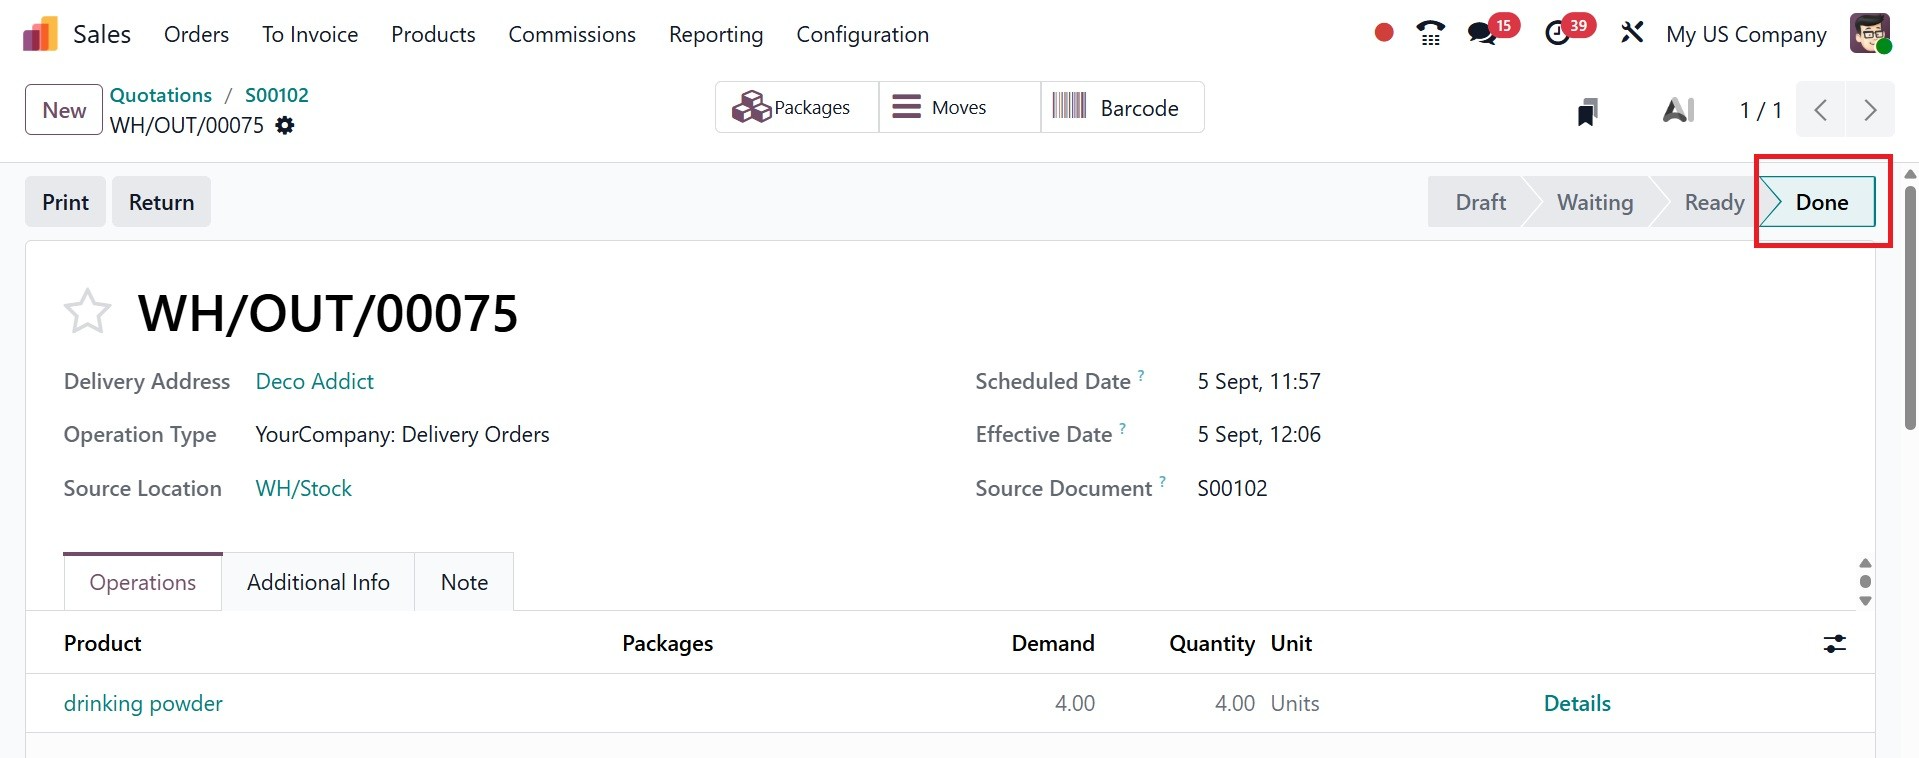
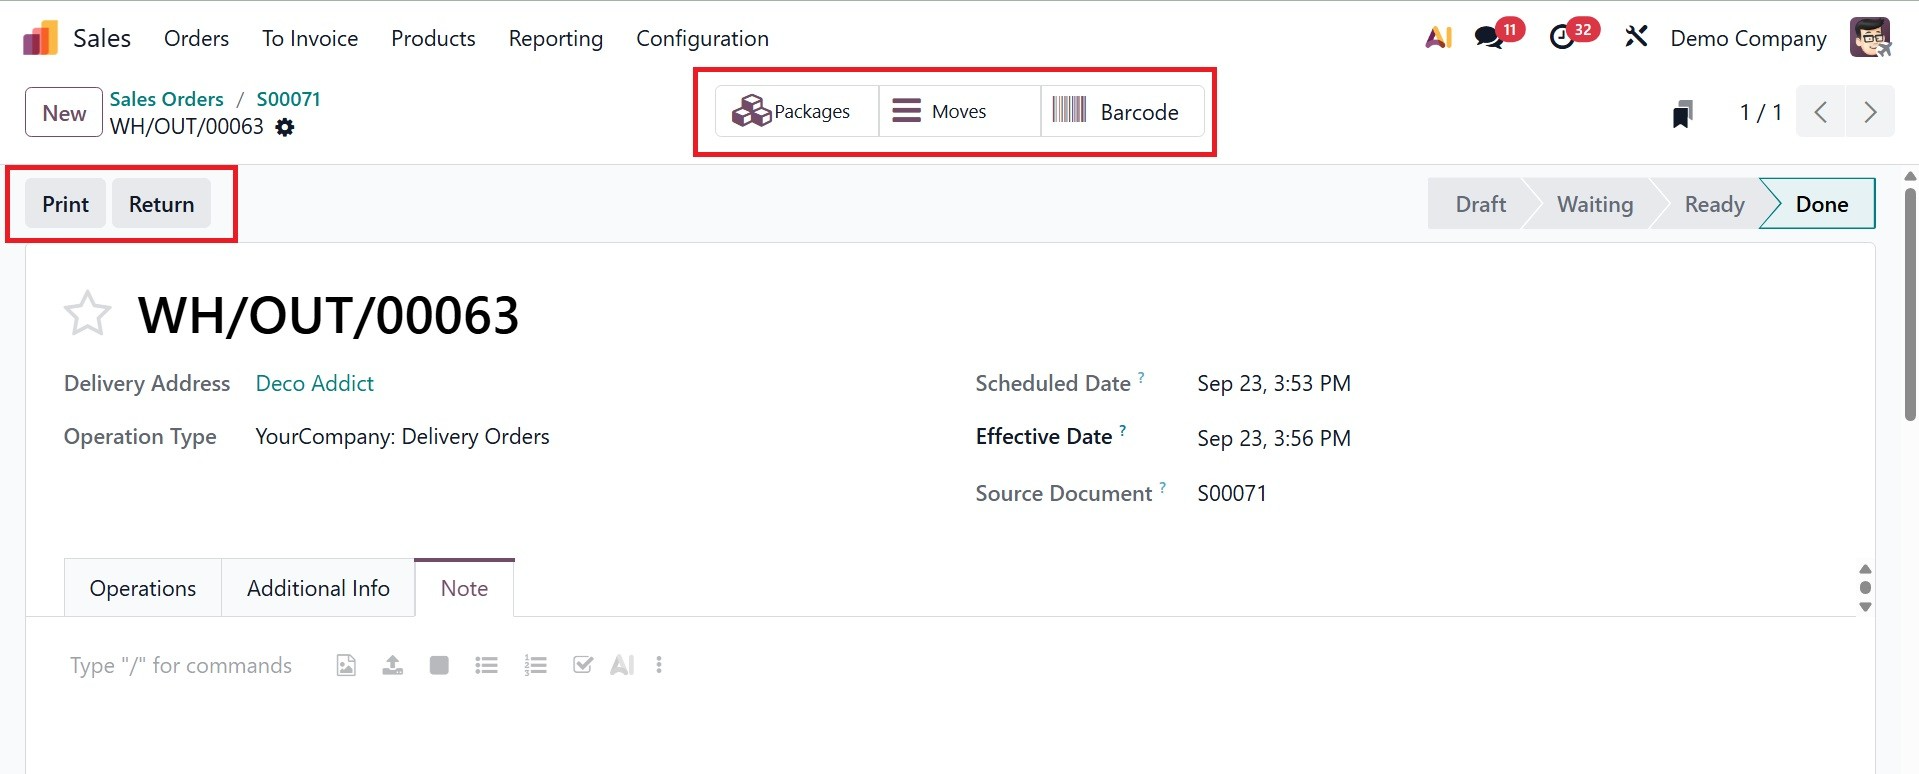
Then, you will be provided with some smart tabs, like Packages, Moves and Barcode, as in the screenshot below.
- Packages: This page displays every package made for that sales order during the shipping process. One or more products may be included in a package, which facilitates shipment organization for simpler tracking, labeling, and carrier integration.

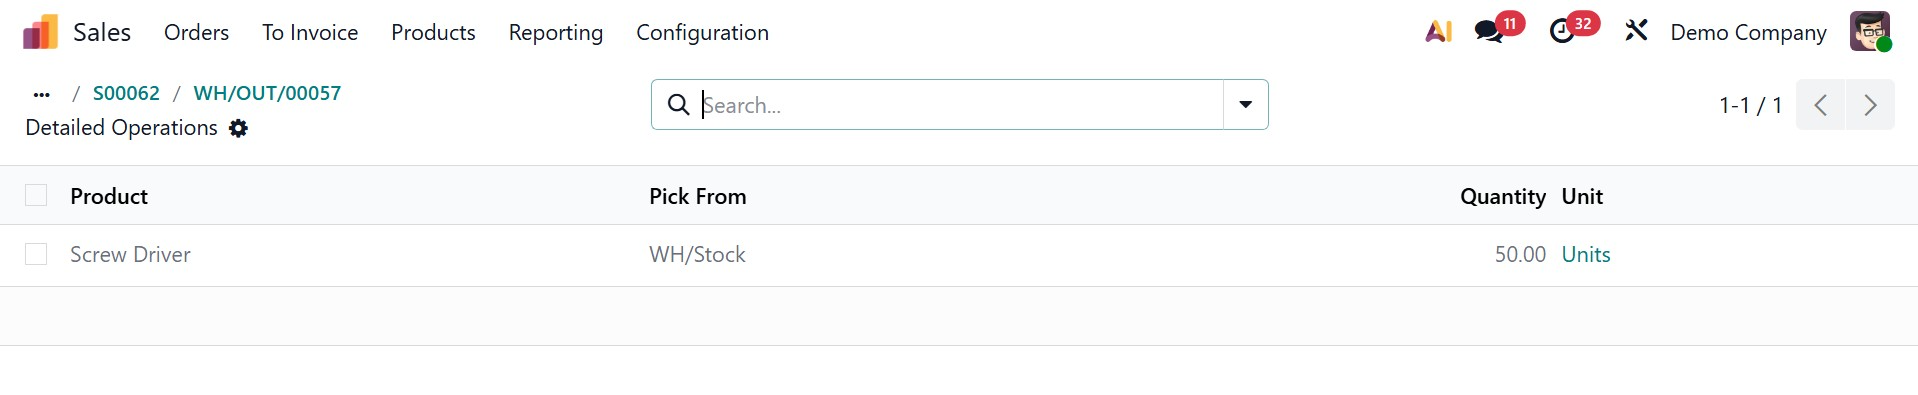
- Moves: This button displays the delivery-related stock moves. It assists you in keeping track of the number of products that have been shipped, reserved, or are awaiting delivery from the warehouse. On selecting the option, you will get the detailed analysis of the delivery related stocks.
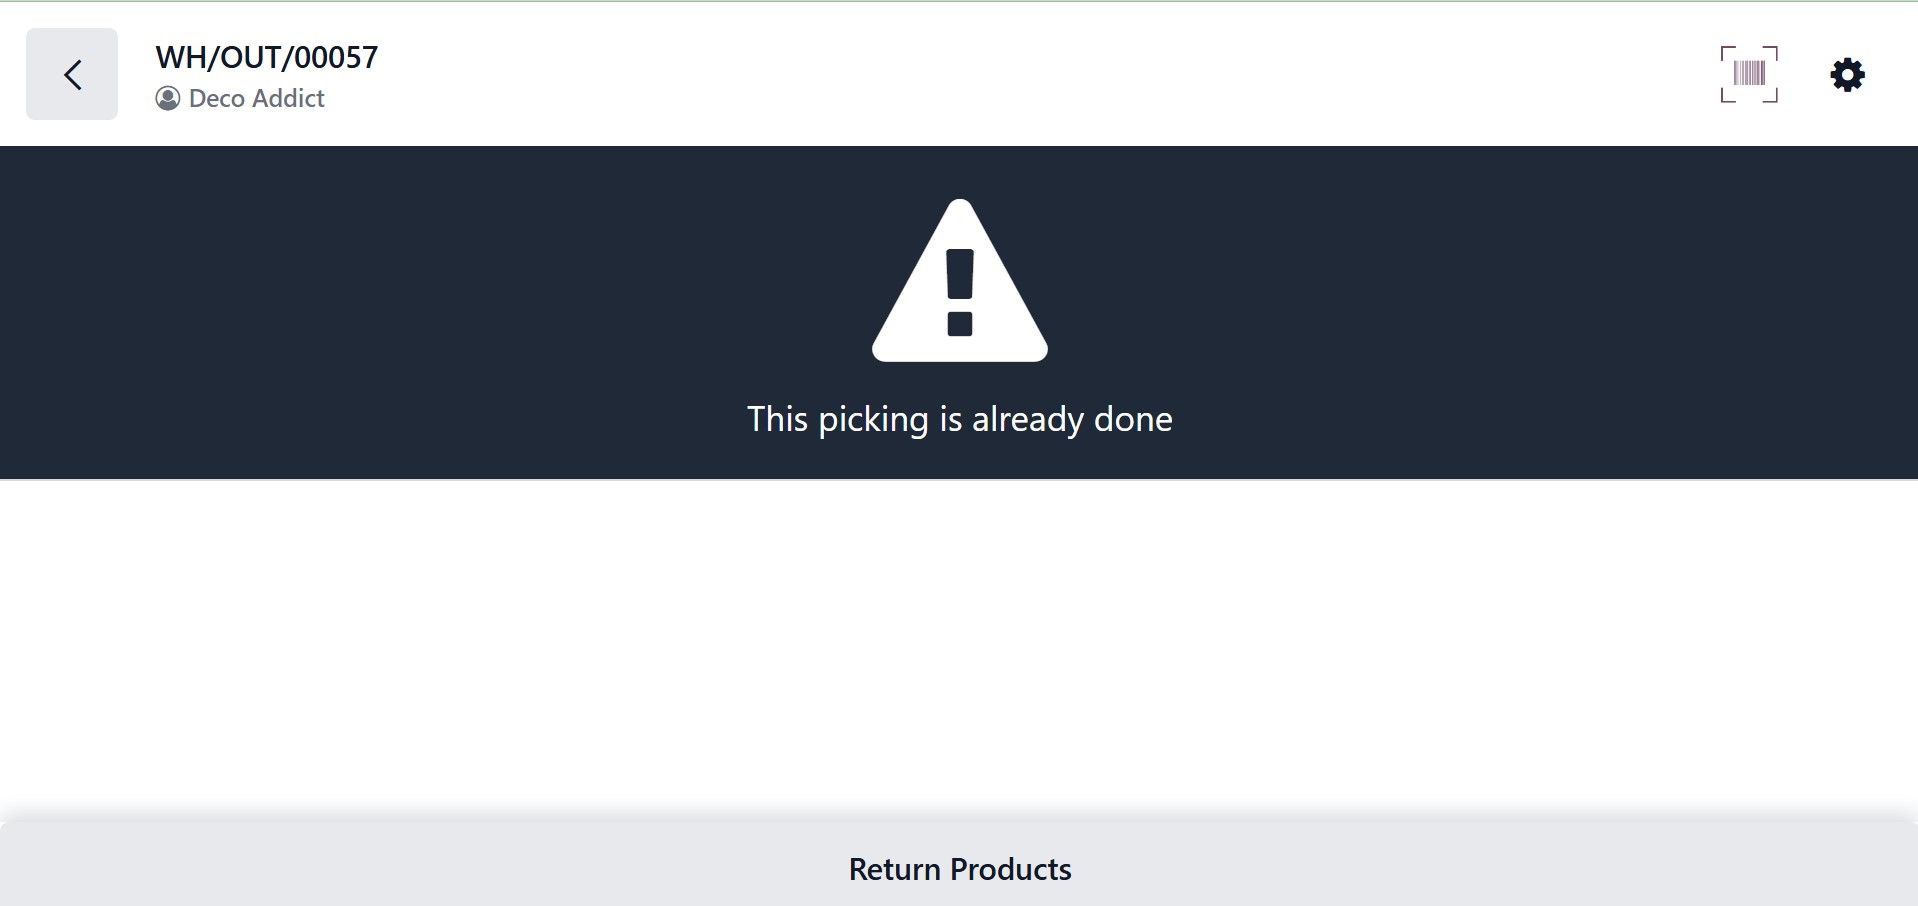
- Barcode: By using this button to launch the barcode scanning view, you can handle deliveries more rapidly by scanning product barcodes rather than manually inputting them. On selecting the smart tab, you will get the page to scan the barcode, as in the screenshot below.
Similarly, you have options like Print and Return.
- Print: This feature enables you to create and print delivery-related documents straight from the quotation's delivery tab, including delivery slips, shipping labels, and package details.
On selecting the Print option, you can have the printout of the delivery slip.
- Return: If a consumer returns things, this feature enables you to establish and manage product returns from the delivery order. On selecting the option, you have the pop up, as shown in the image below.
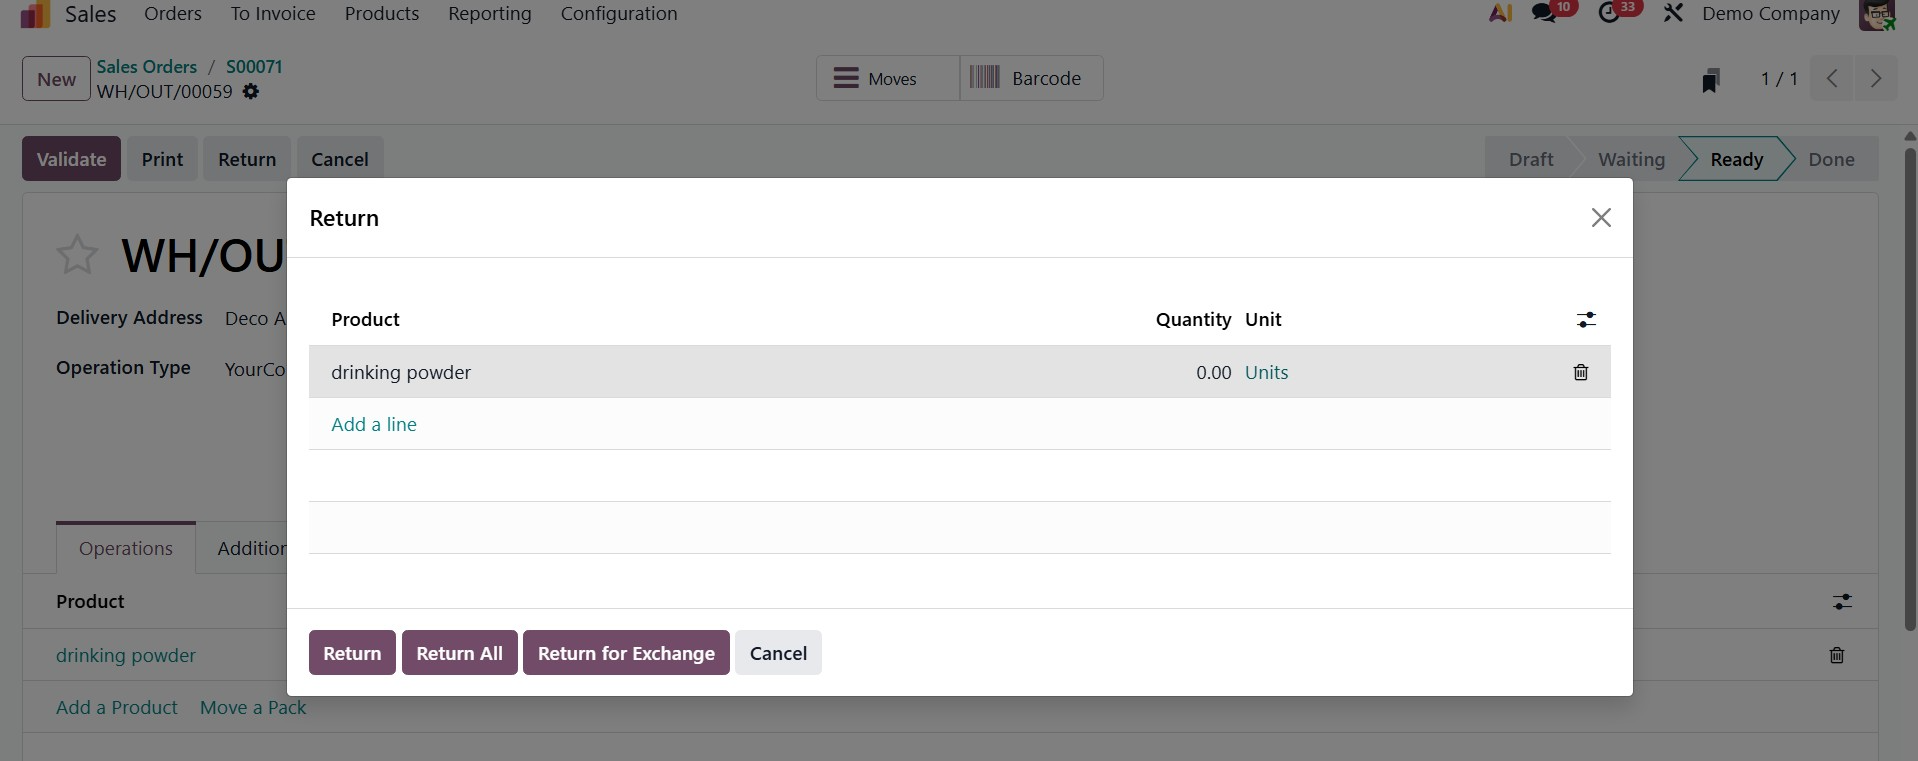
Enter the desired quantity for each product to be returned in the pop-up window. To create the warehousing operation for the returned item, click Return. Then a receipt for the mentioned quantities will be created there, as shown below.
Simply input the maximum quantity available for each applicable product in the Reverse Transfer pop-up to return a complete transaction. For that, click on Return All option.
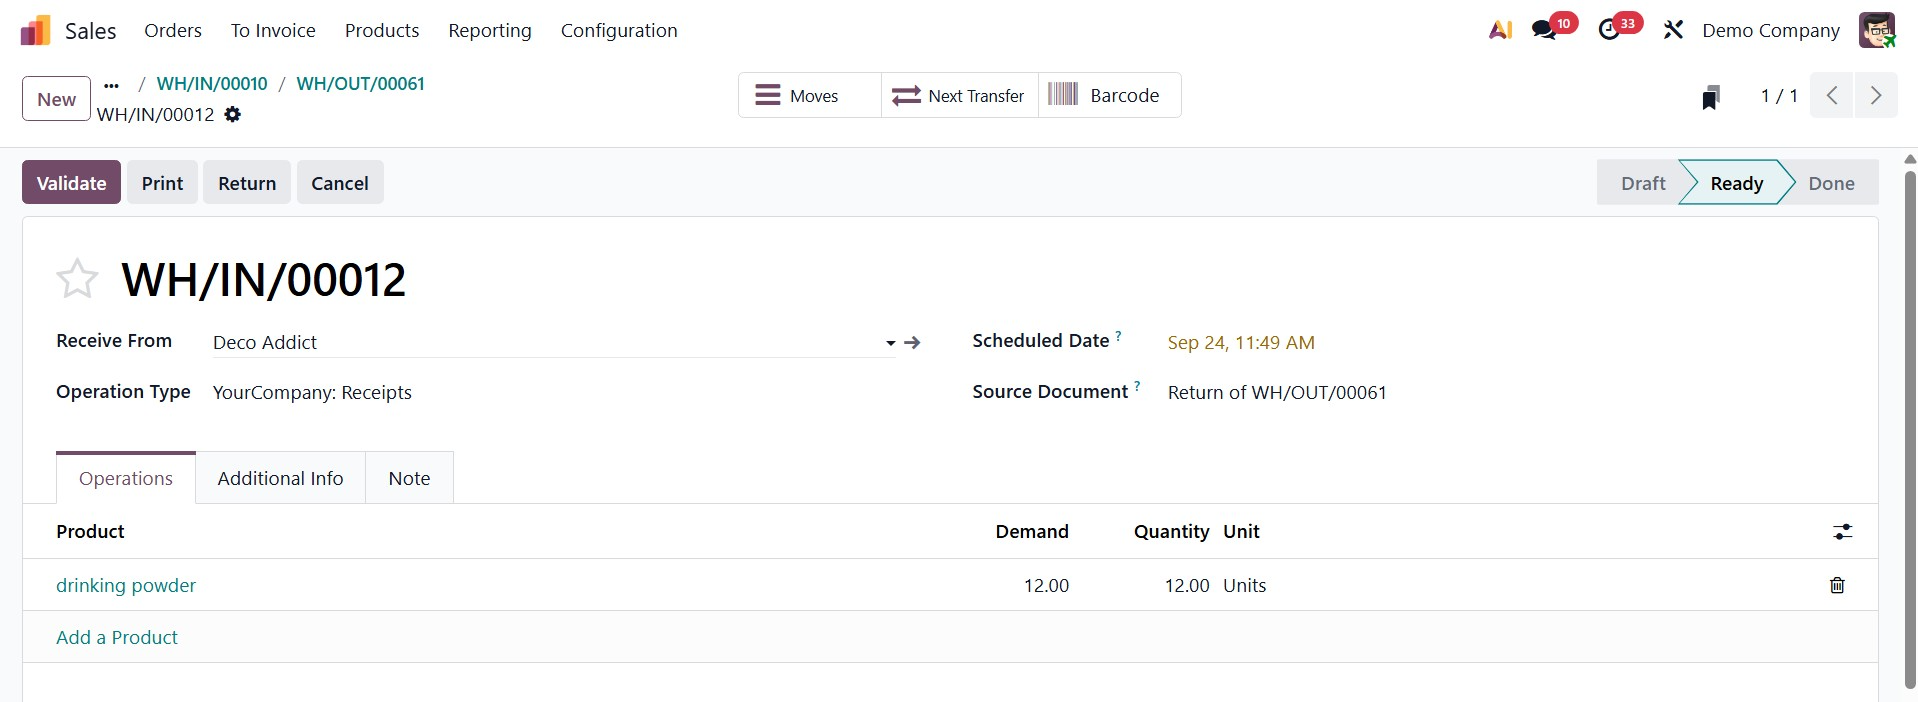
In place of a return, Odoo 19 offers a replacement option. Let's examine the replacement from the identical purchase order. Open the delivery order once more for that. Then press the Return button. The previously described window will open.
A new receipt will open, as previously stated. As a result, the company receives 15 product quantities from the customer's location. Verify the receipt.
Thus, the return has been finished. Let's take another look at the sale order. There is a smart tab named Delivery. The user can then see every transfer made on this sale order. Reopen the smart tab.
The first one is the delivery order, which is the first transfer that occurs during the sale. Which means transferring 15 quantities of drinking powder to the customer.

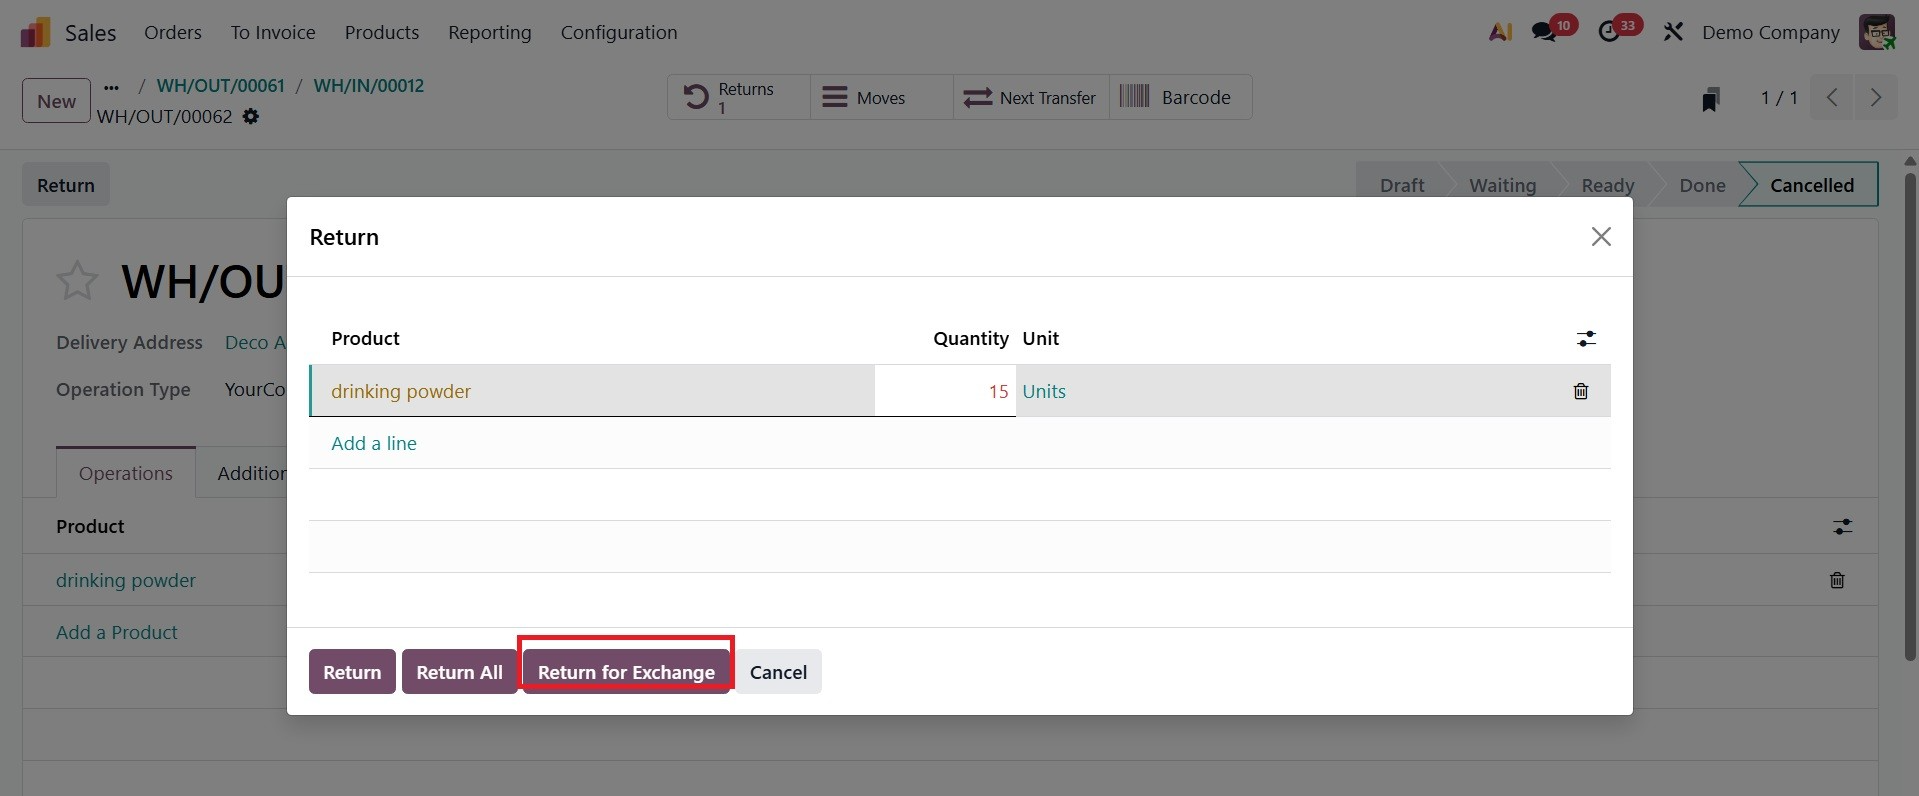
The transfer is a delivery here, as shown below. To open it, click on it. For 15 quantities, the consumer added Return for Exchange. We validated the return before.
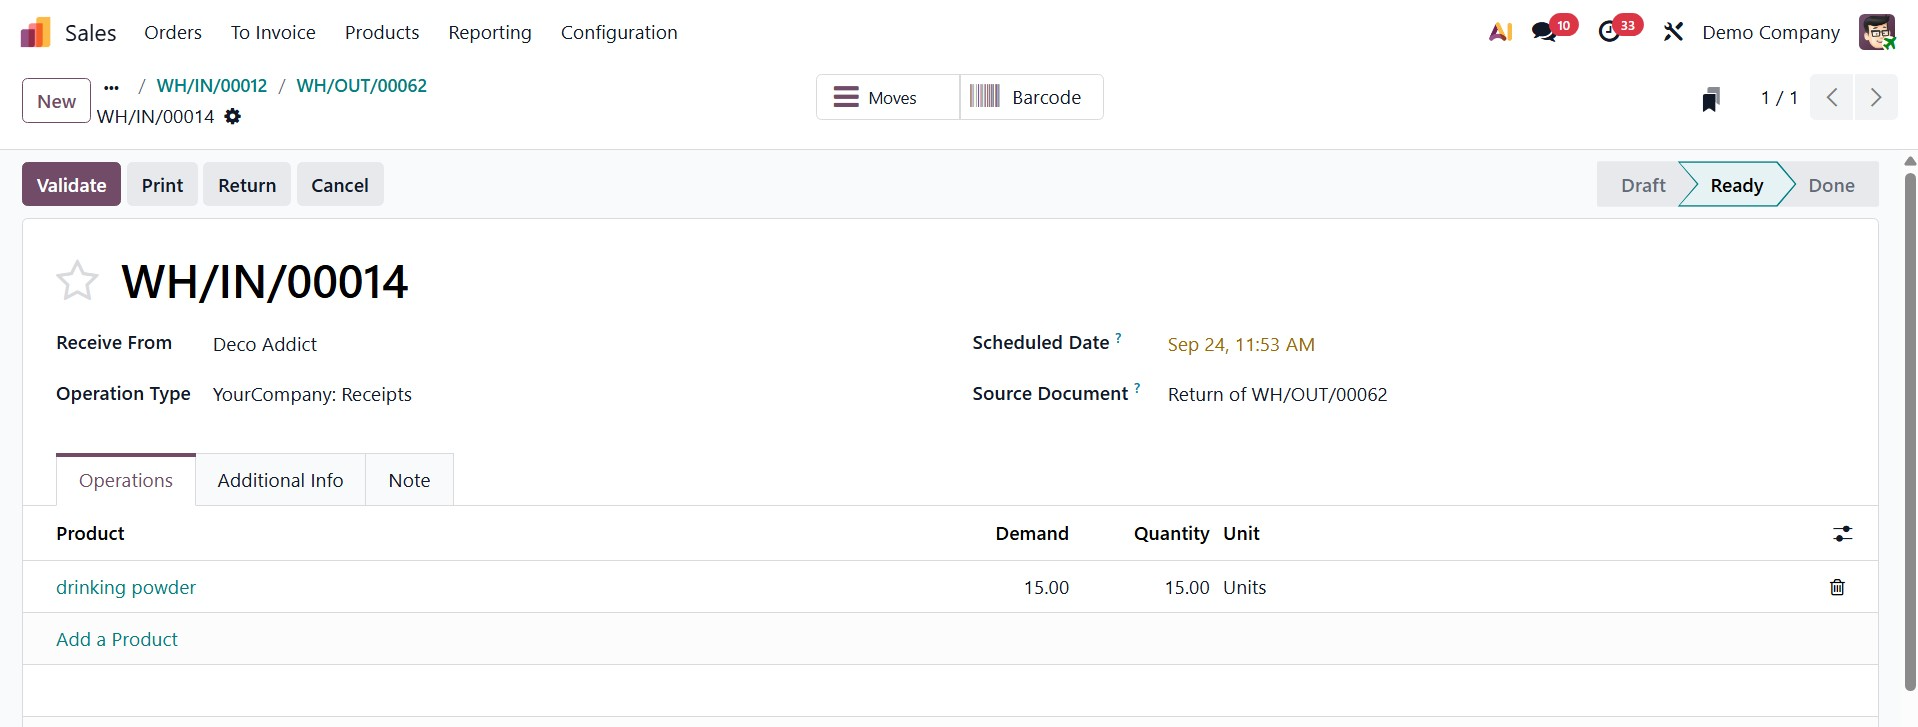
This is the exchange order or delivery that was made. To finish the transfer, click the Validate button.
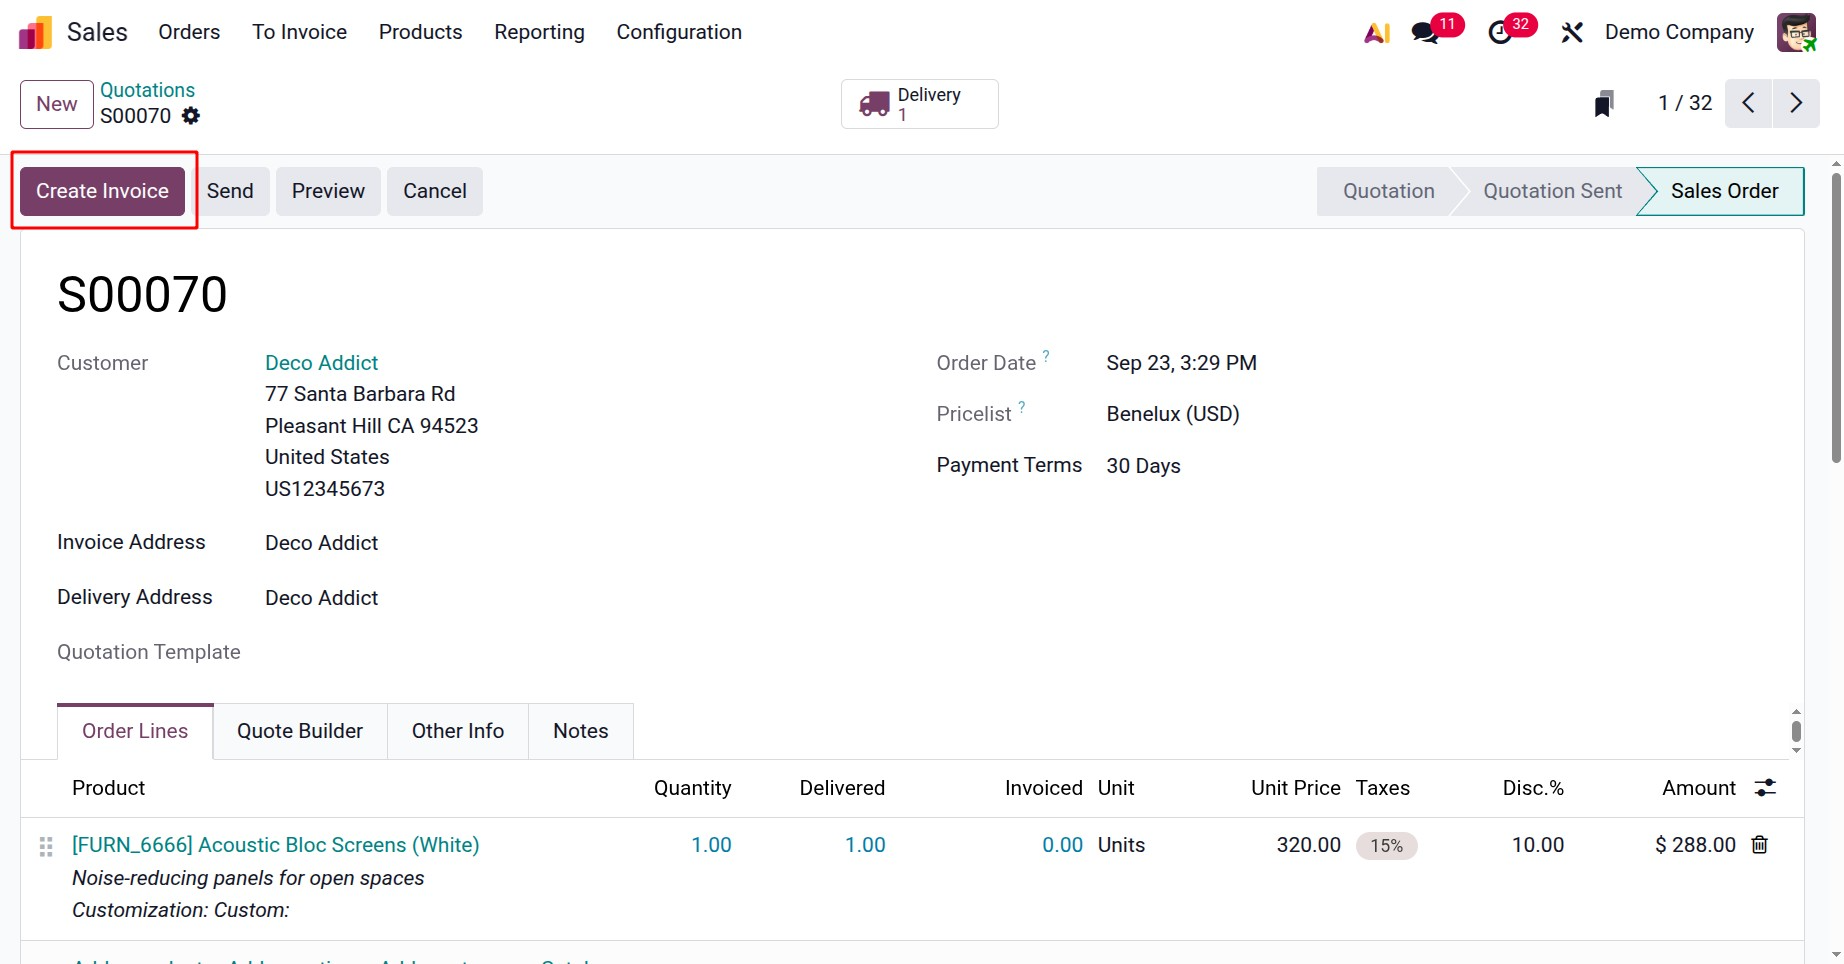
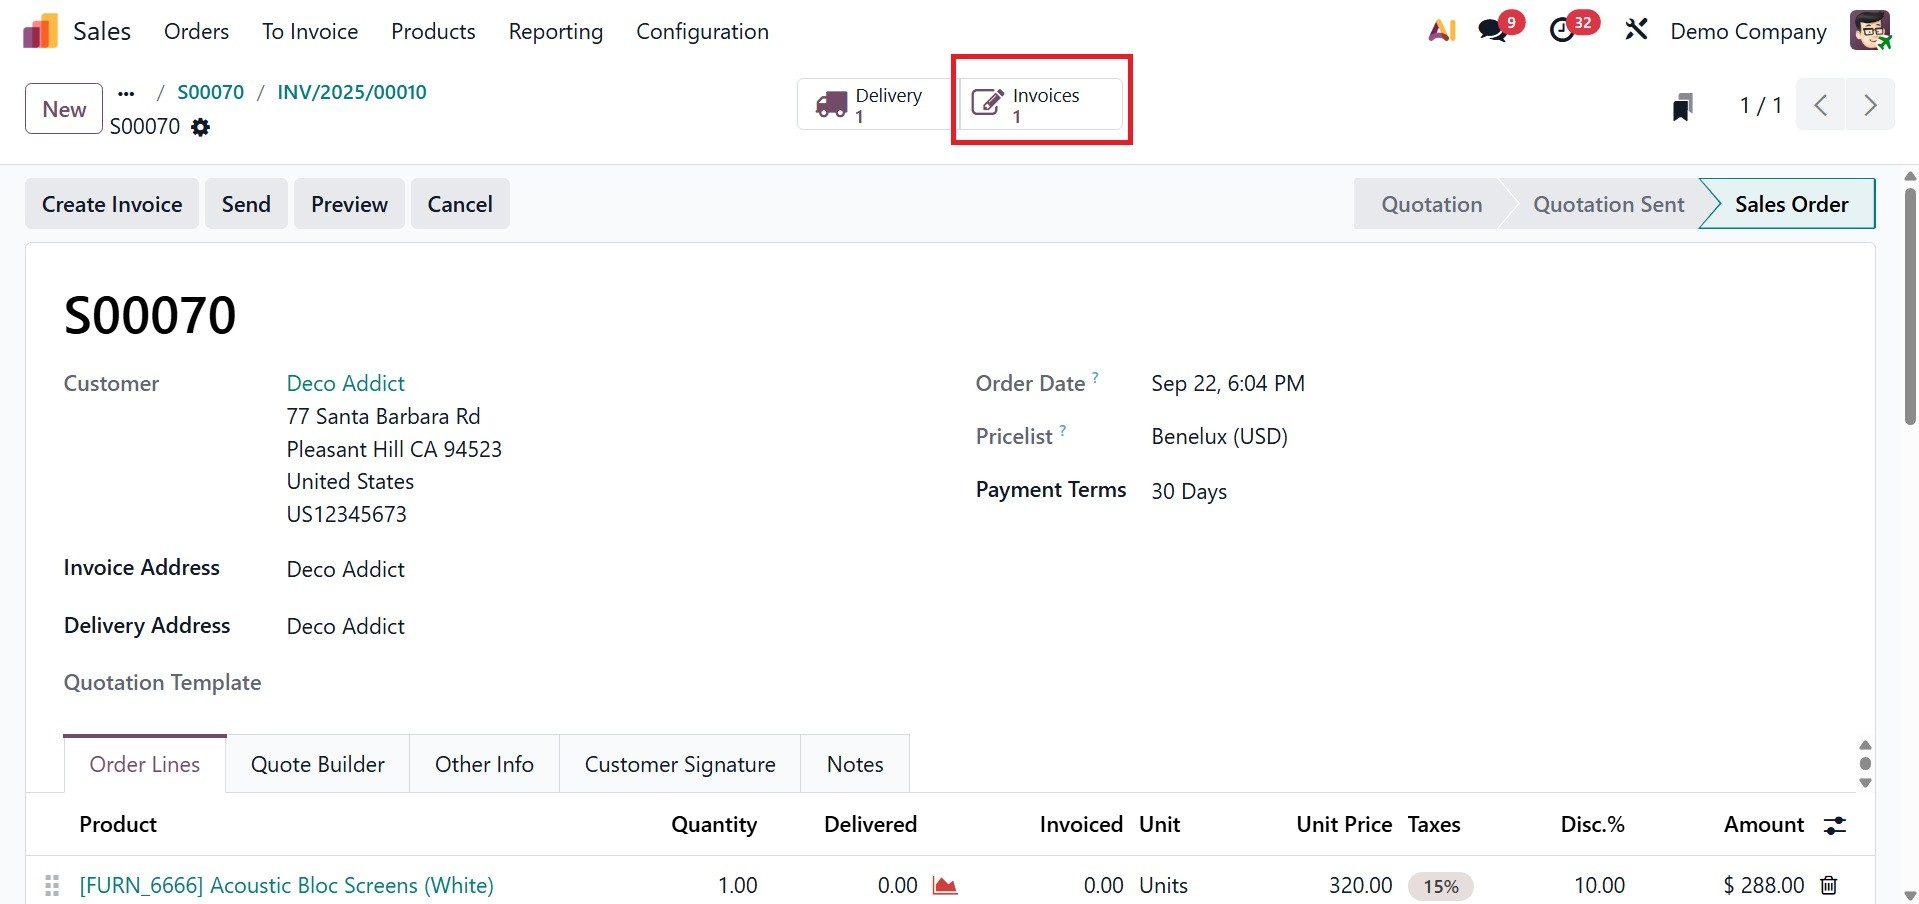
Now, go back to the created quotation page, and there, you can have the Create invoice option, as in the image below.
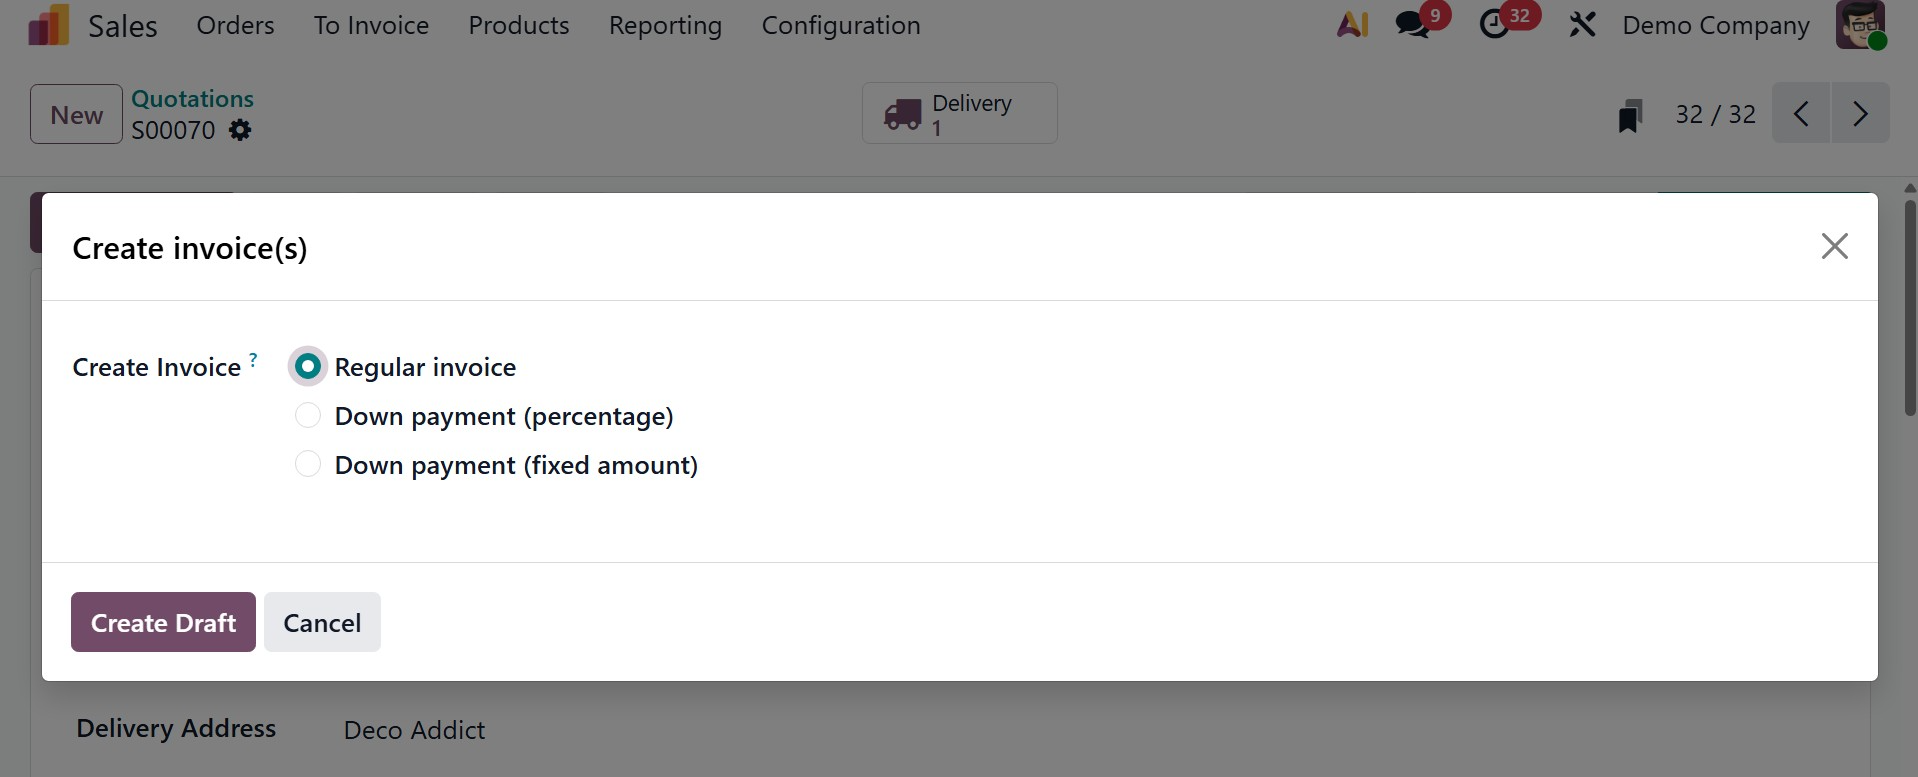
On selecting the option, you can decide the invoice as a regular invoice, down payment(percentage), or down payment(fixed amount). Then, go for the Create Draft icon, as shown below.
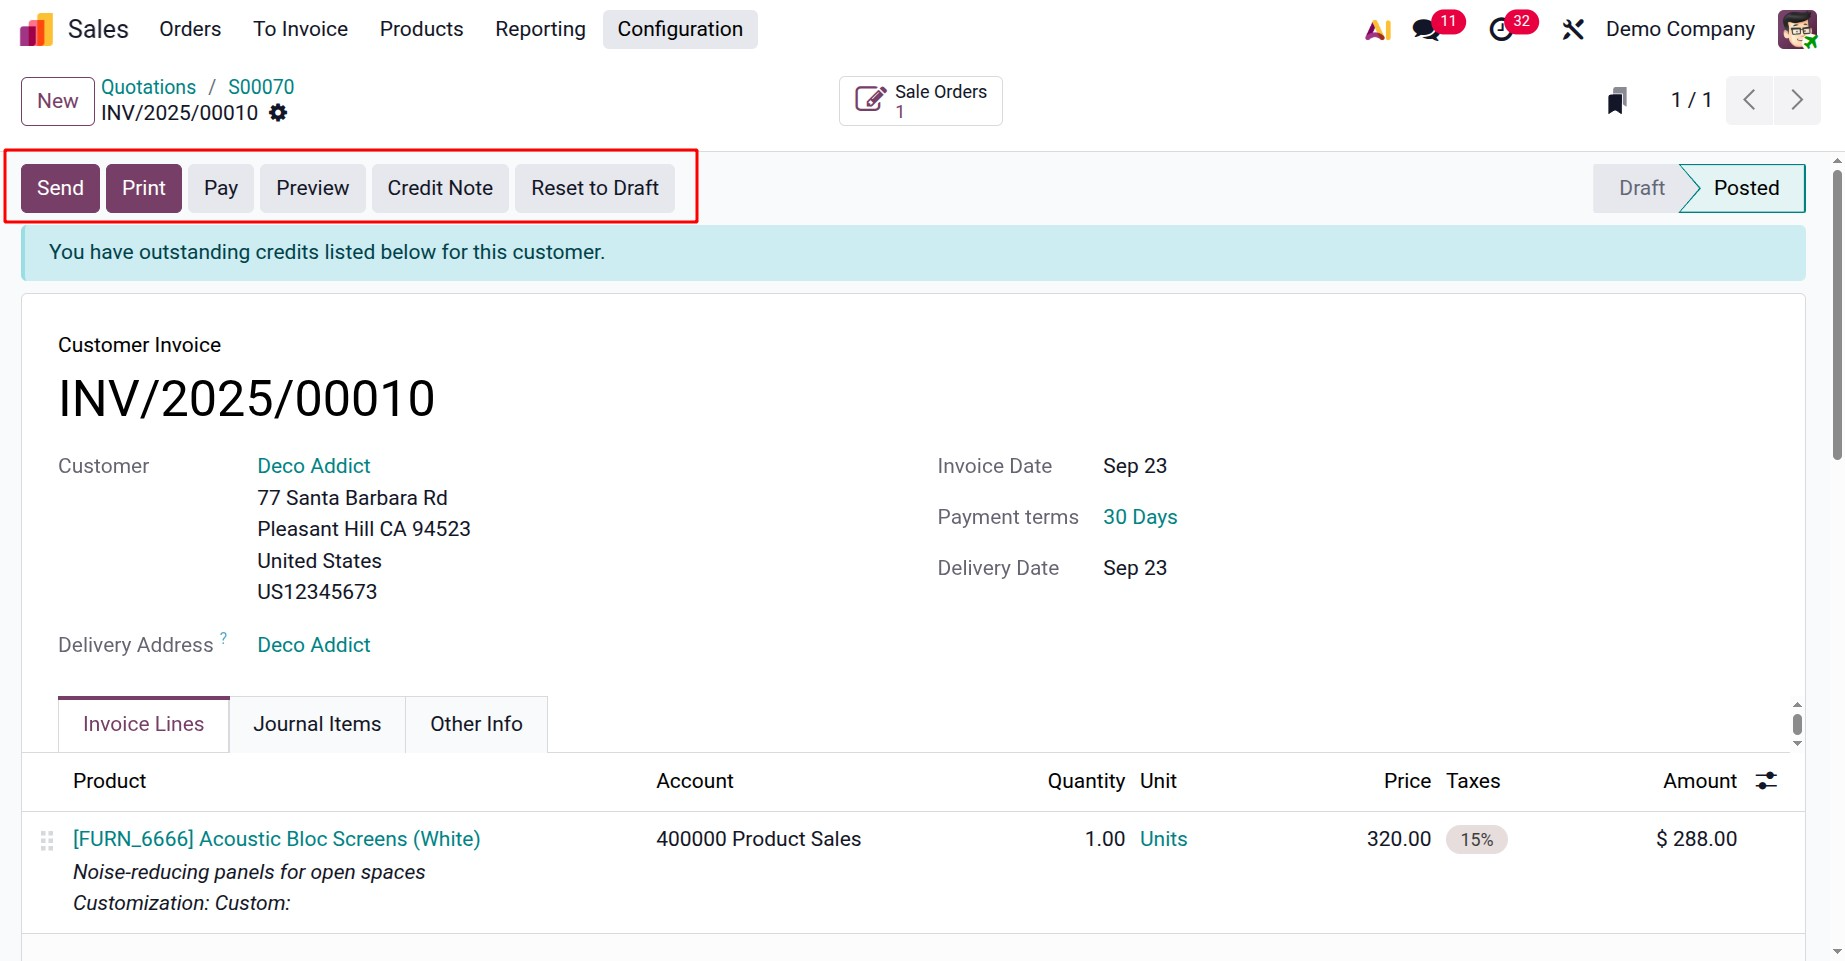
Then, you can have the page with the created sale order smart button, as shown below.
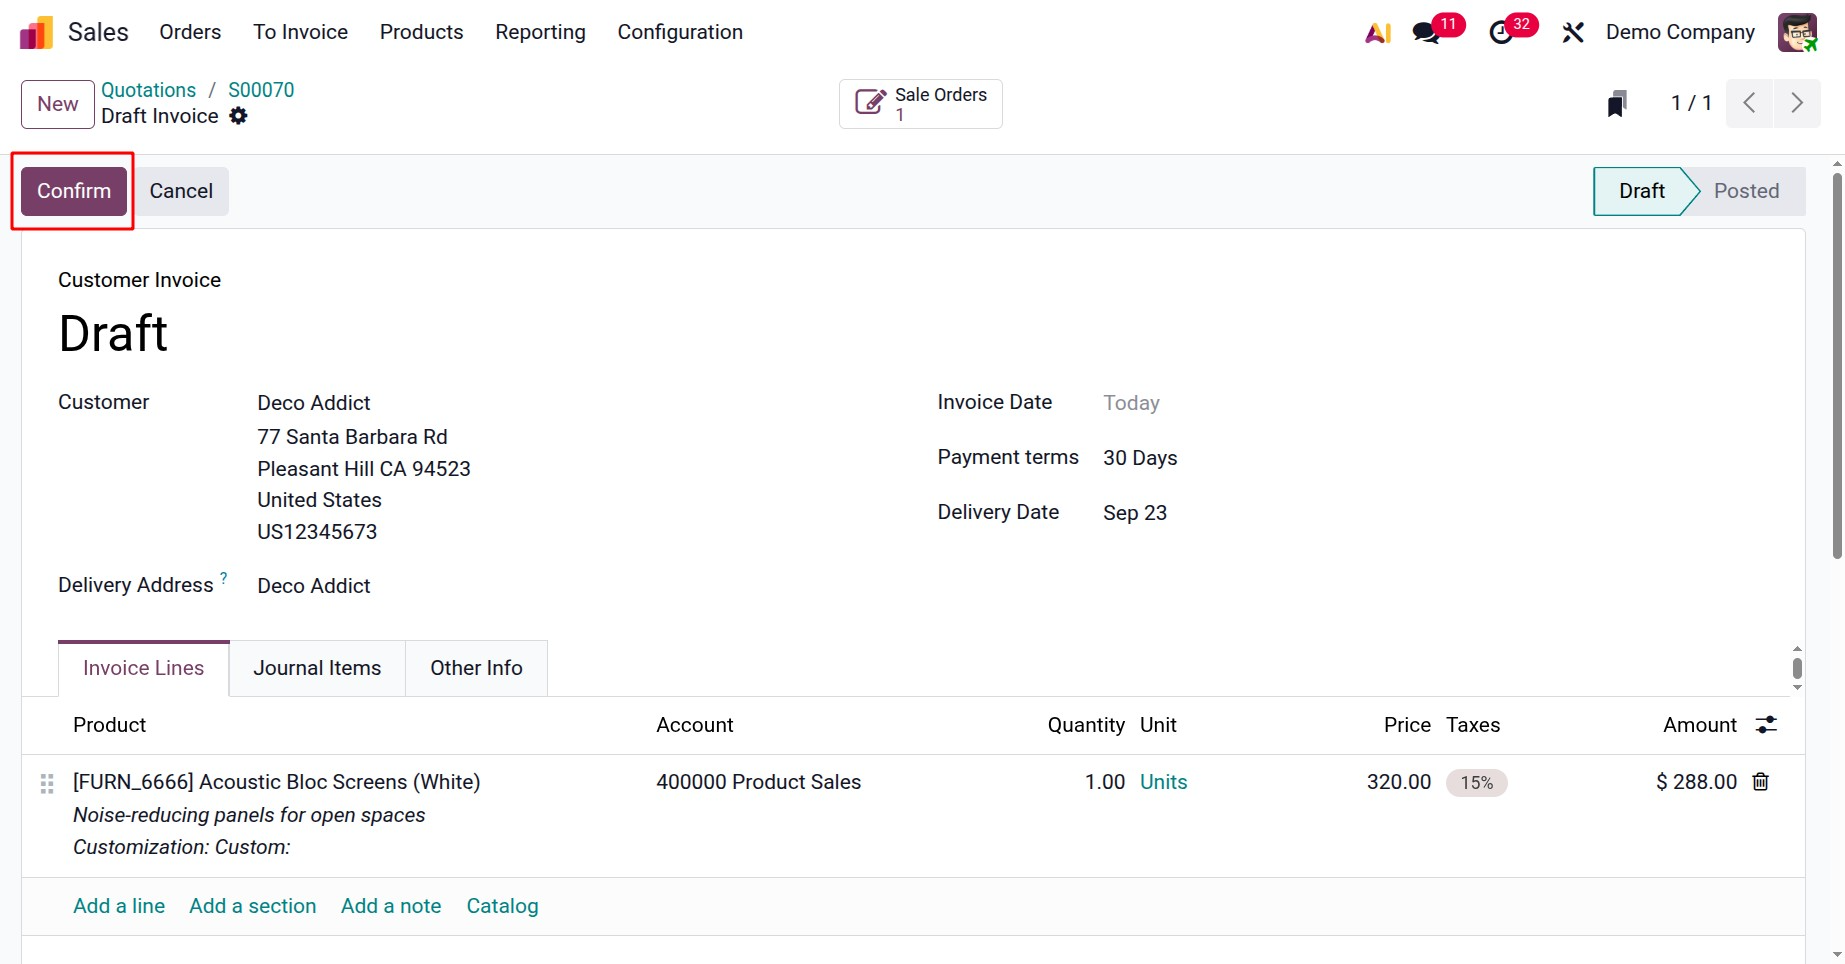
The invoice can be sent to the customer by clicking on the Send button. And can print by clicking on the Print button. Preview button shows the customer preview. To pay the invoice click on the Pay button.
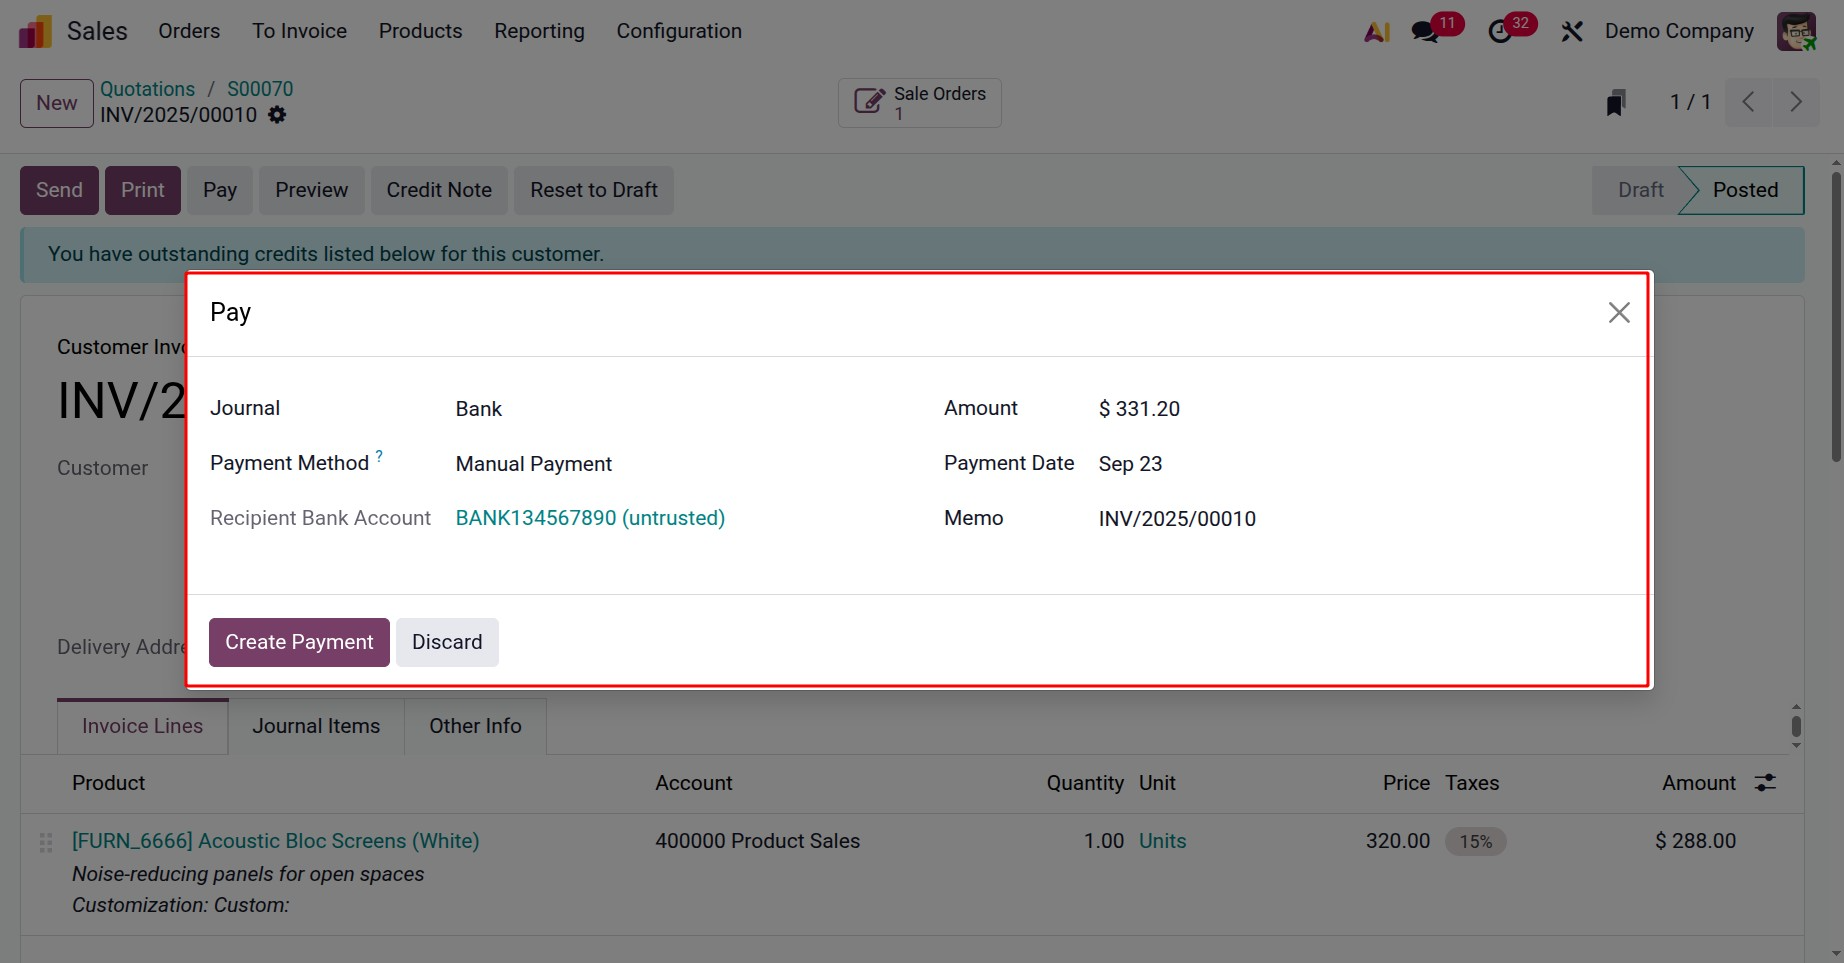
On selecting the option, you can select the payment method, as in the image below. Add the payment details like :
1. In the Pay window, select the Journal and the Payment Date.
2. If previously set, the contact’s preferred Payment Method is automatically selected by default but can be updated if necessary.
3. If using payment terms, the Amount is automatically set based on the installment amounts defined by the payment term. To pay the full amount instead, click full amount.
4. If necessary, edit the Memo.
5. Click Create Payment, as shown below.
Once the payment has been verified, the produced invoice will be automatically updated to "IN PAYMENT" and connected to the sales order, as in the screenshot below. Provide all the details, and confirm the sale order, where you will get the option to create invoice.
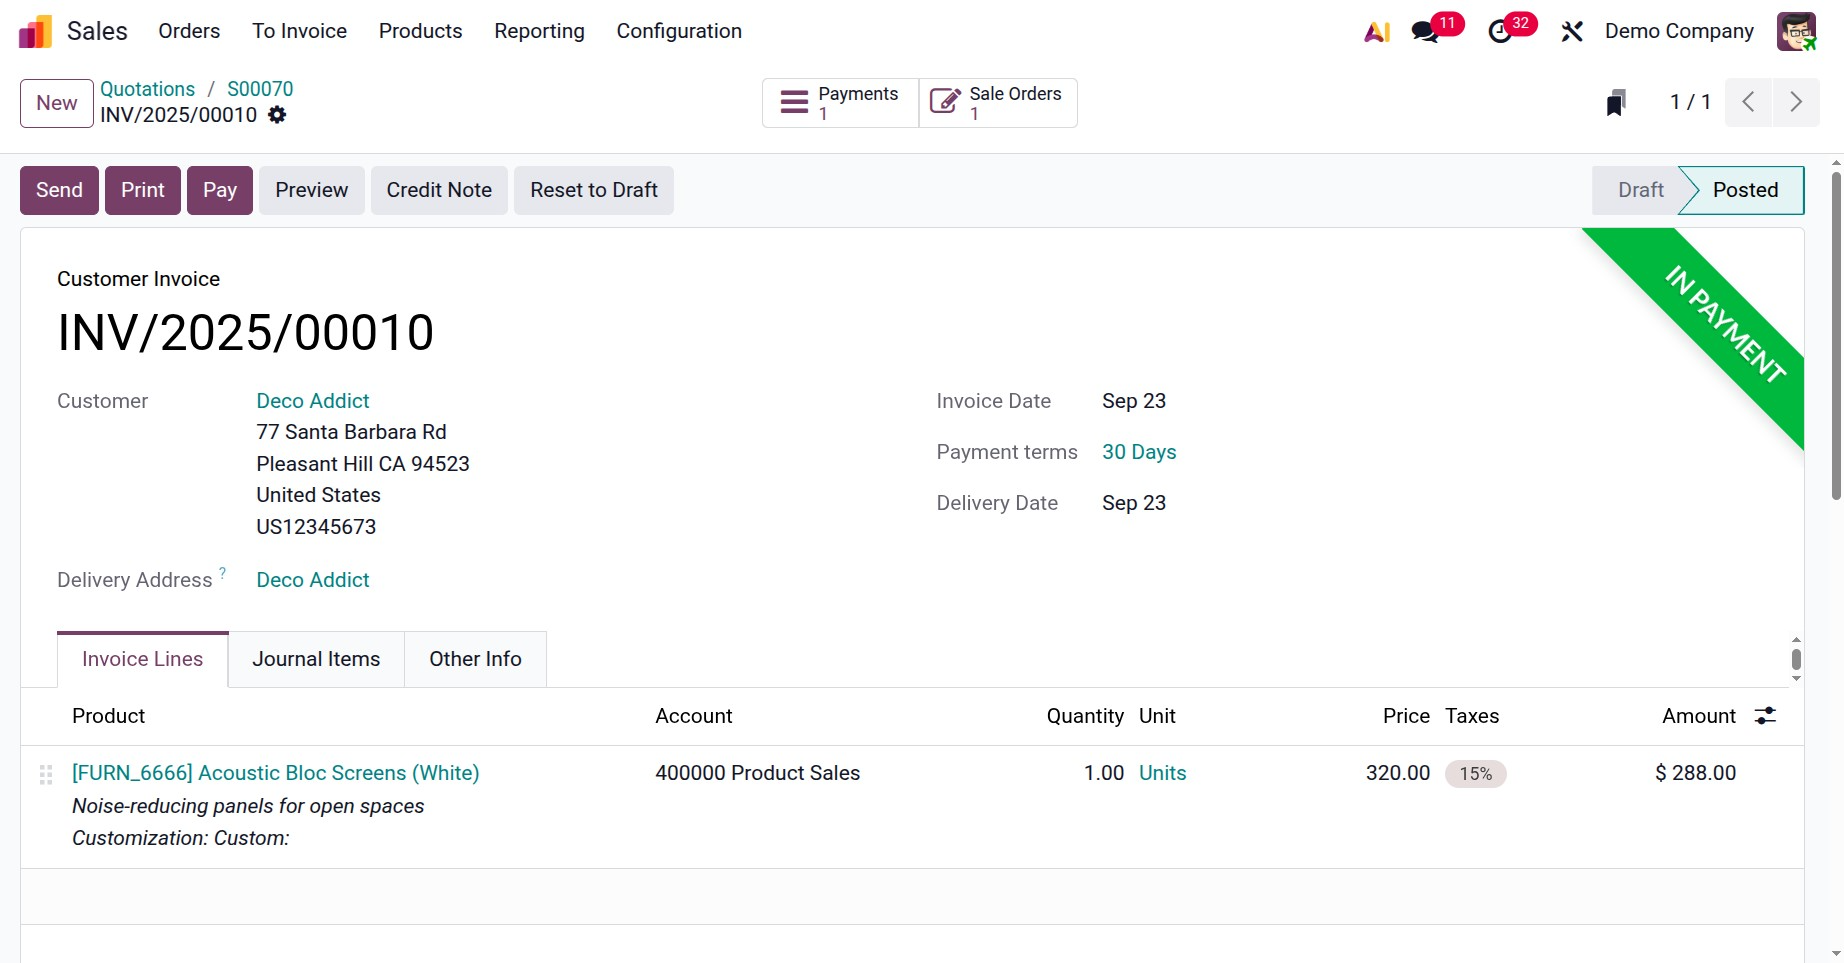
After confirmation, the invoice is created and the sale order shows the created invoice as a smart tab, as shown below.
From the customer portal through the customers can complete online payment. The review as shown below and click on the Pay Now button to make payment.
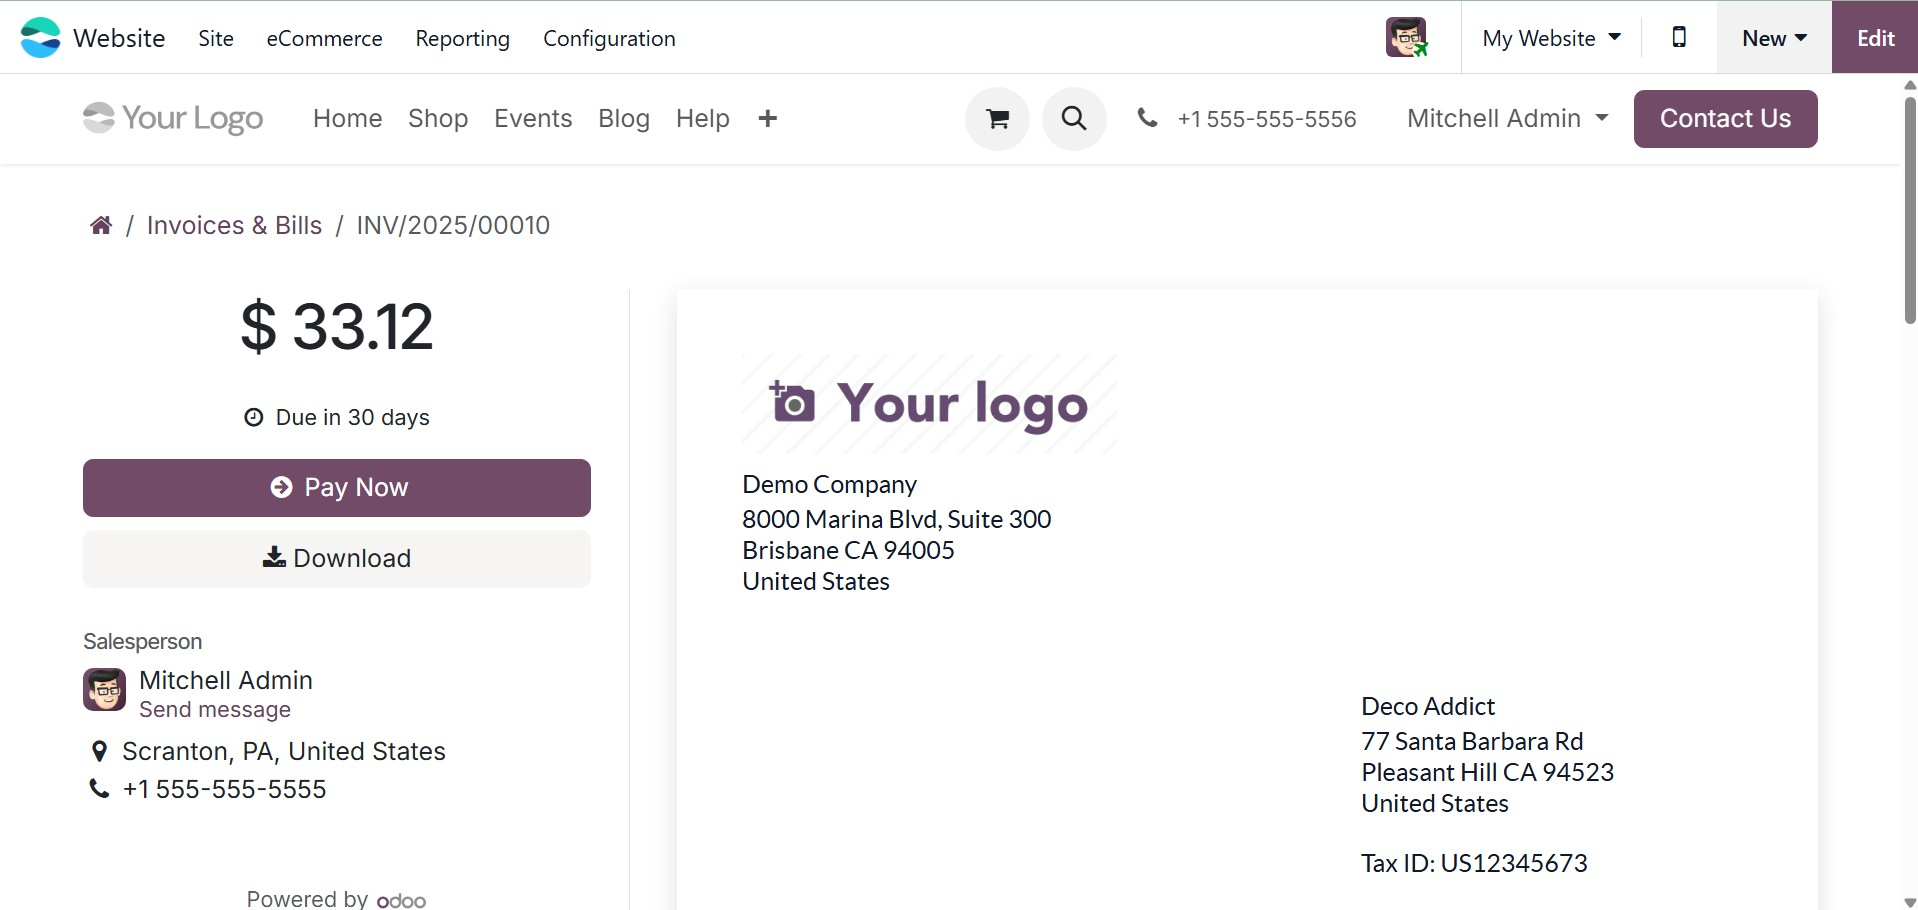
They will be taken to the payment page, where they can make a payment using the terms that have been chosen.
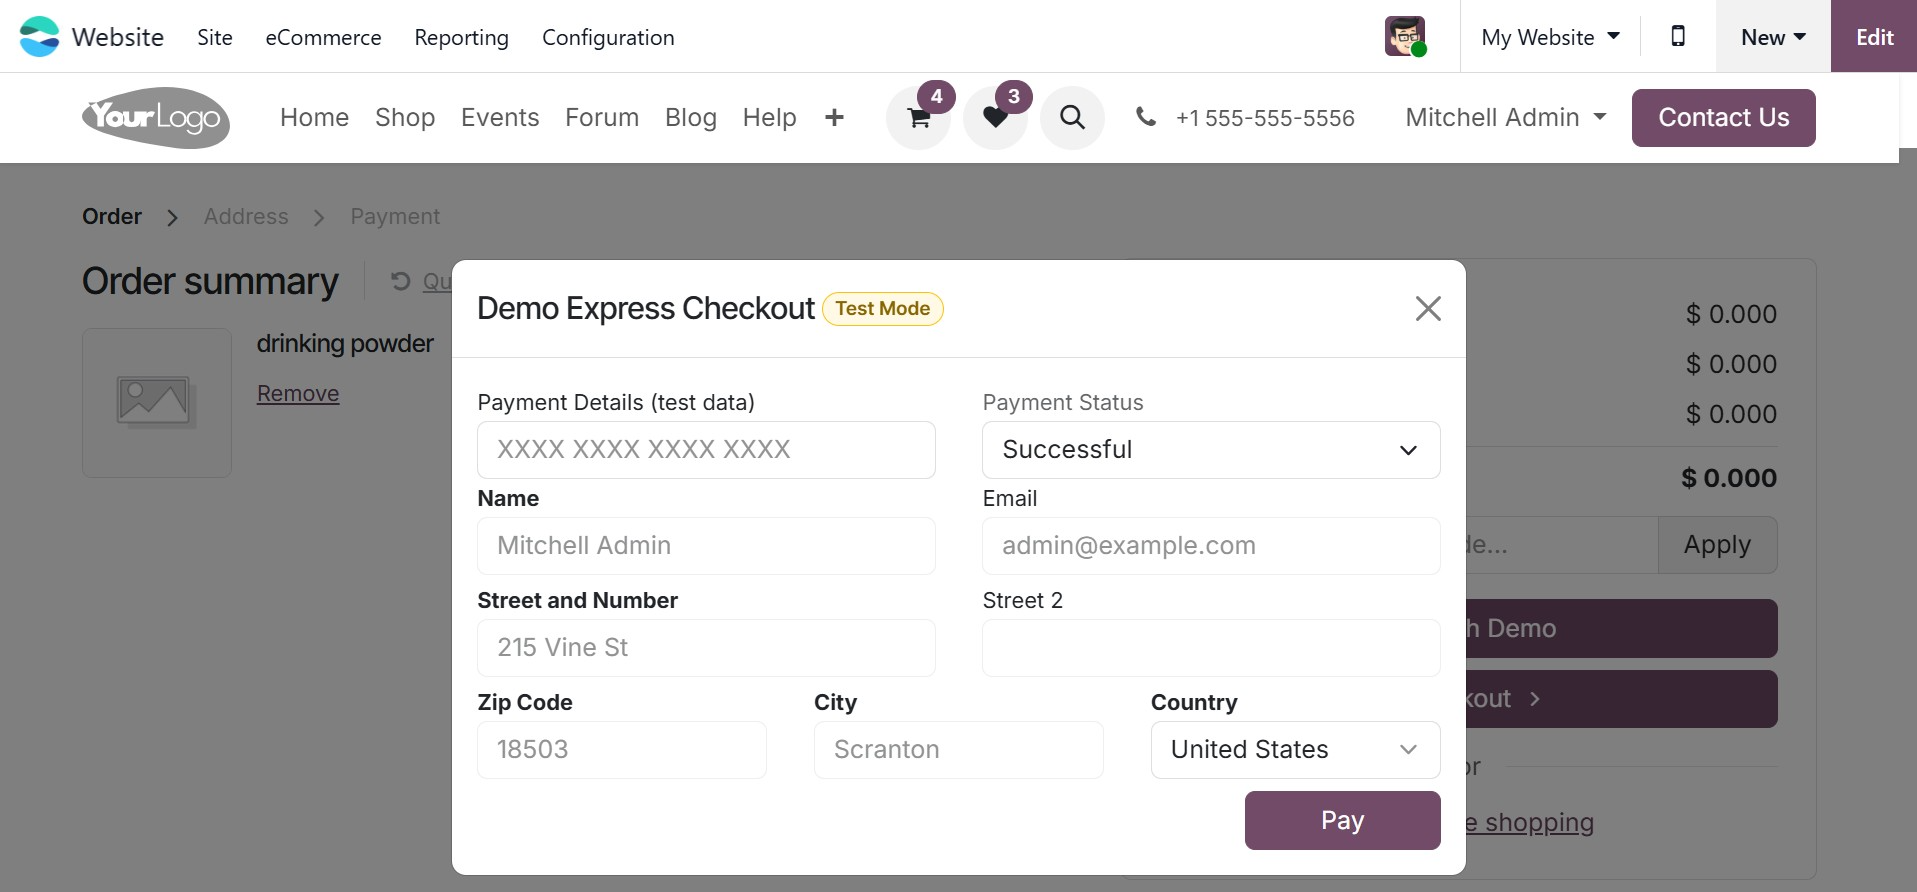
You can then complete the payment process using the Pay option.
1.3 Sales Team
A professional staff is needed to manage sales-related operations in Odoo. Businesses can create specialized sales teams, which are set up within the Odoo 19 Sales module, to efficiently manage every facet of sales. Under this option, you will get an overall analysis of the sales team here.

By choosing the Sales Teams option from the Sales module's Orders menu, you can gain access to the platform that manages all sales teams. The effective management of sales-related procedures depends on the assignment of sales teams.
By clicking on the three vertical dots in the right-hand corner of each tab, you may access additional administration options for each sales team. There are options to view, new, reporting, and configuration for that particular team, as in the screenshot below.
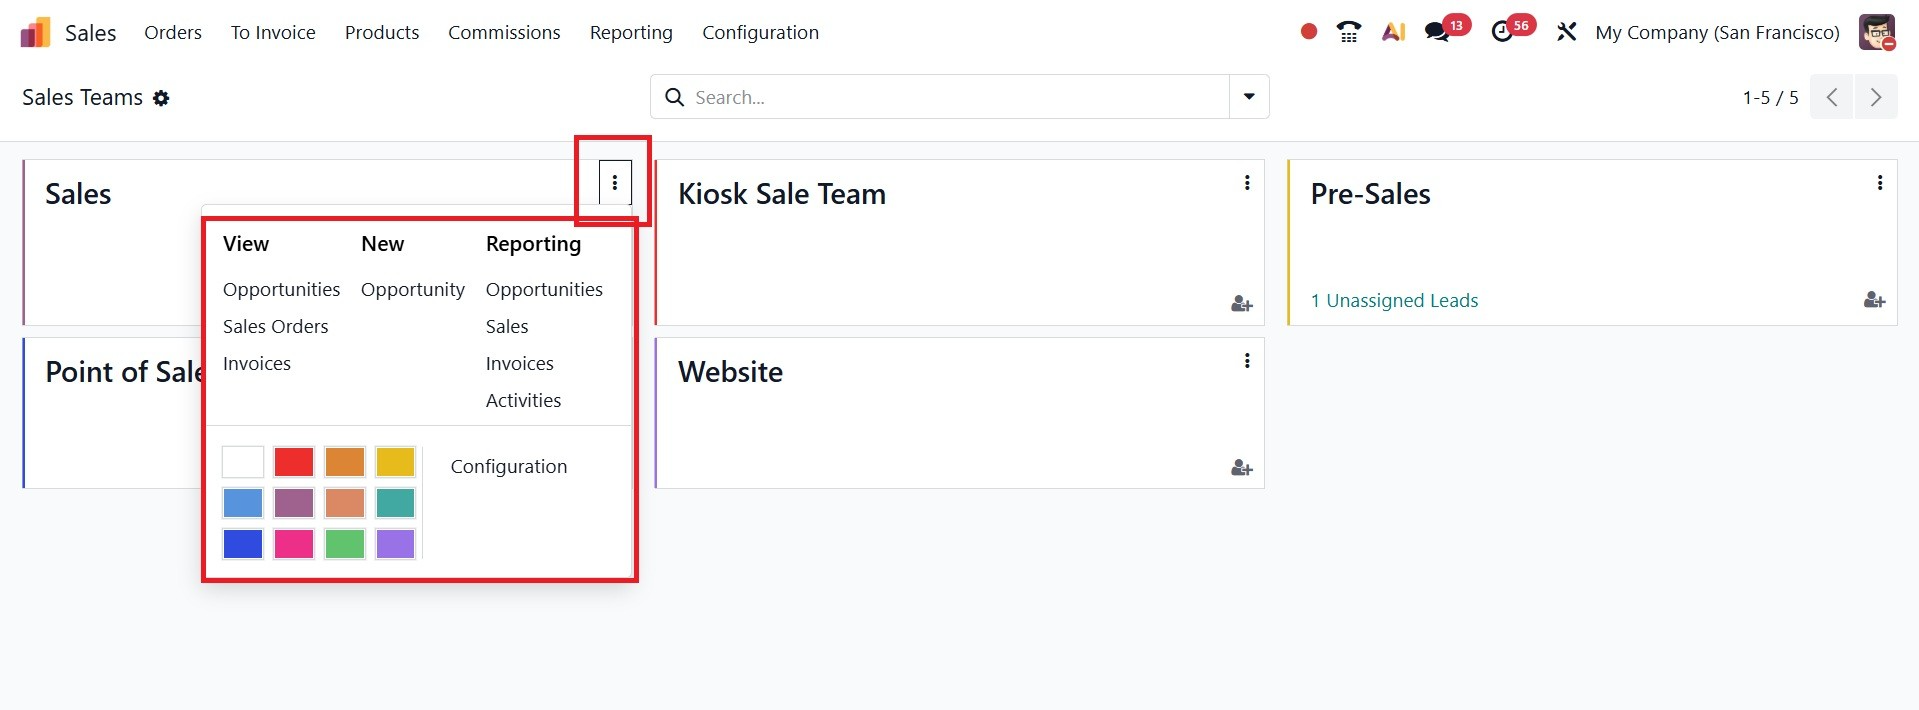
Reports on the opportunities, sales, invoices, and activities of each sales team are shown in the advanced reporting option. In addition to these options, a Configuration button will be available for you to change the appropriate sales team.
In the Odoo19 Sales module, you may establish and manage new sales teams by selecting the Sales Teams option from the Configuration menu.
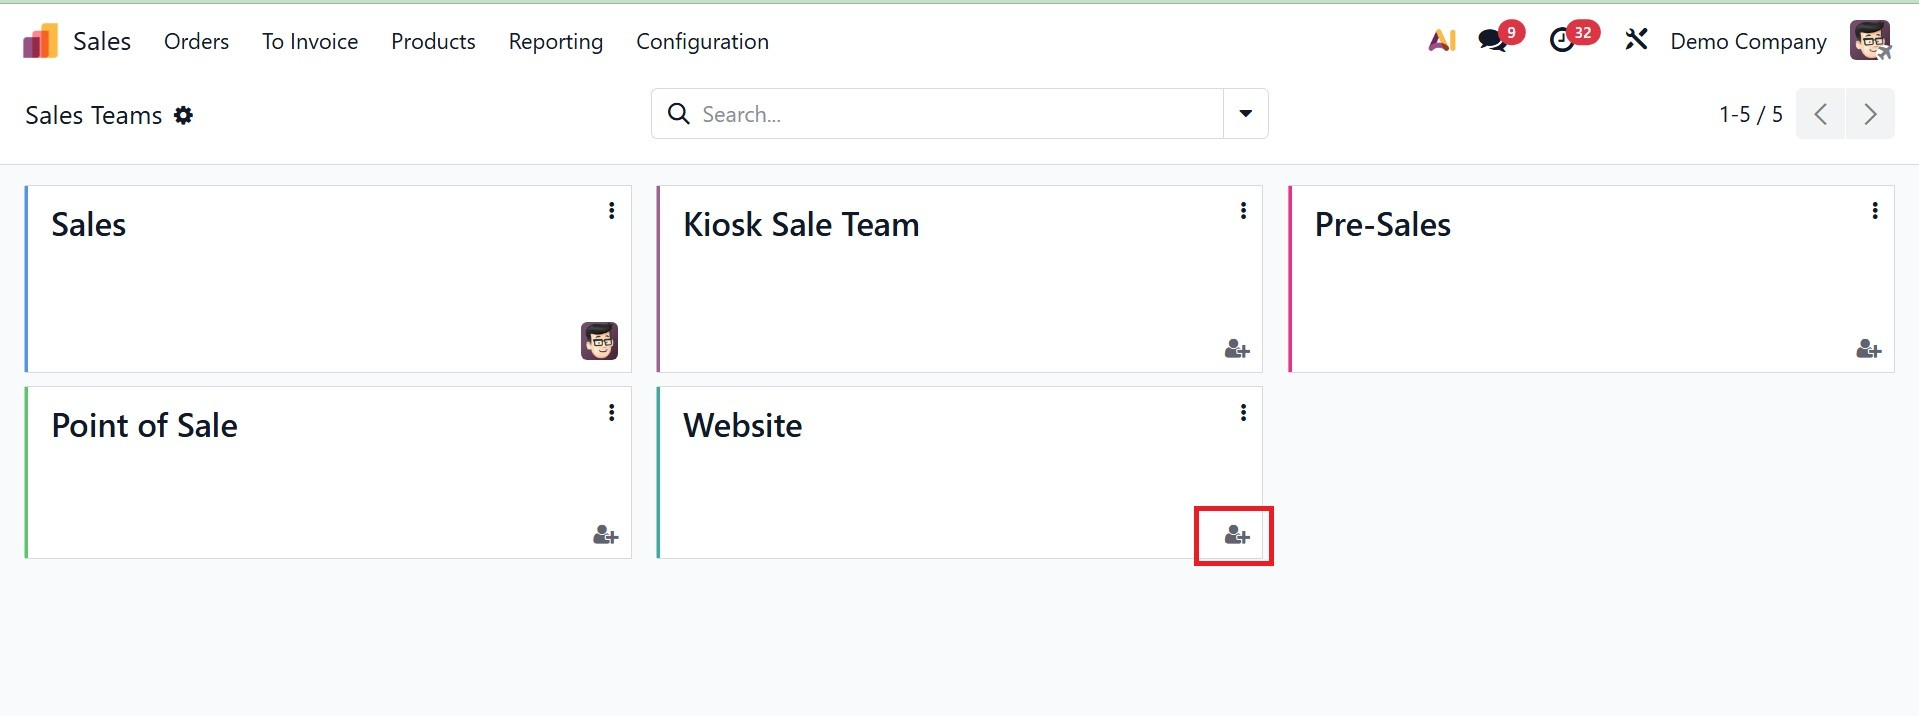
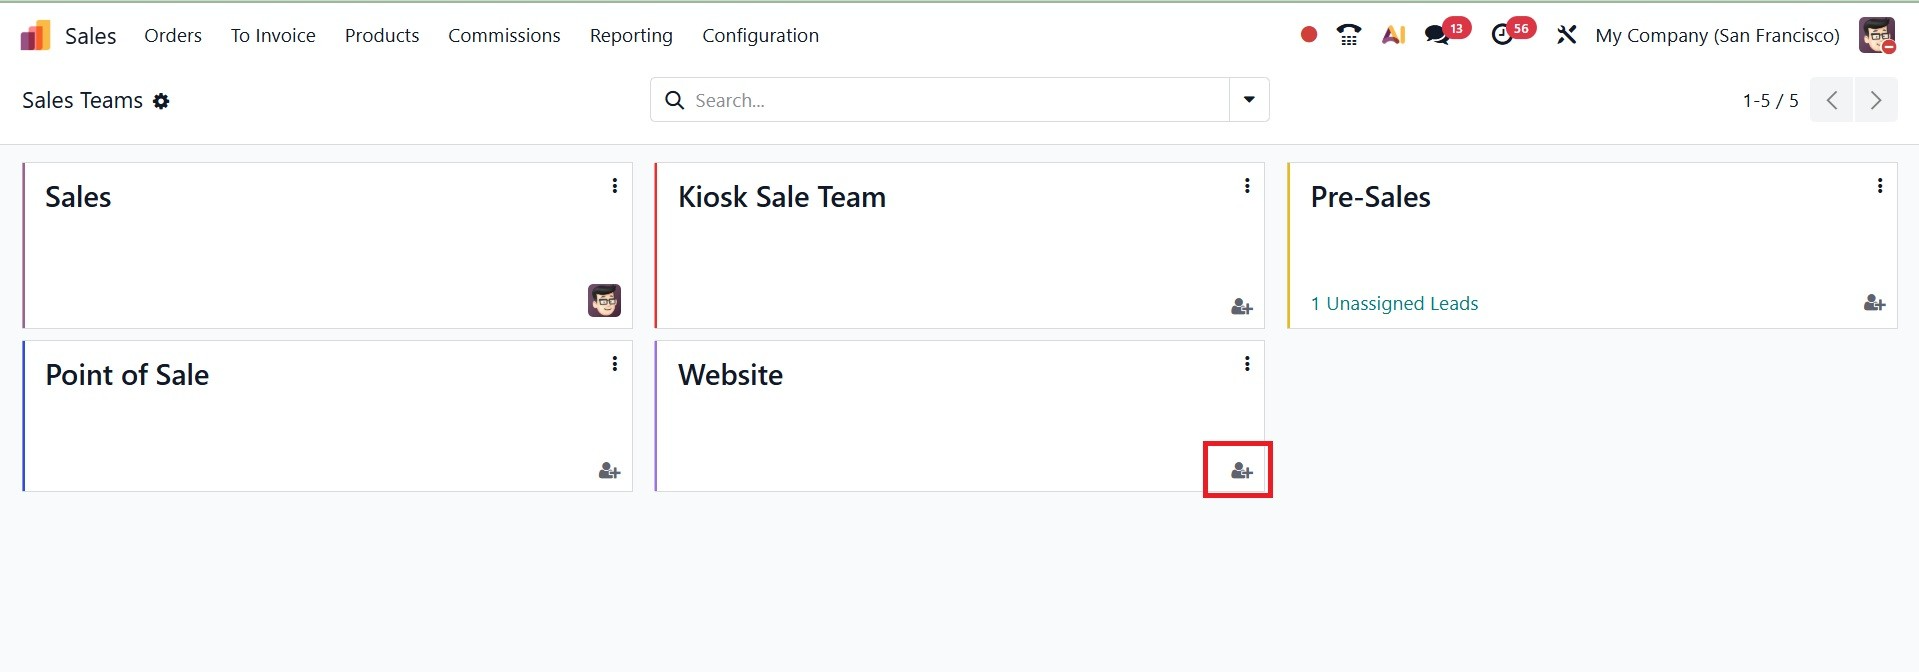
When you select the Assign icon, you can assign a particular user as team leader as in the screenshot below.
In order to create a new sales team, you have the option of a sales team under the Configuration Menu, as in the screenshot below.
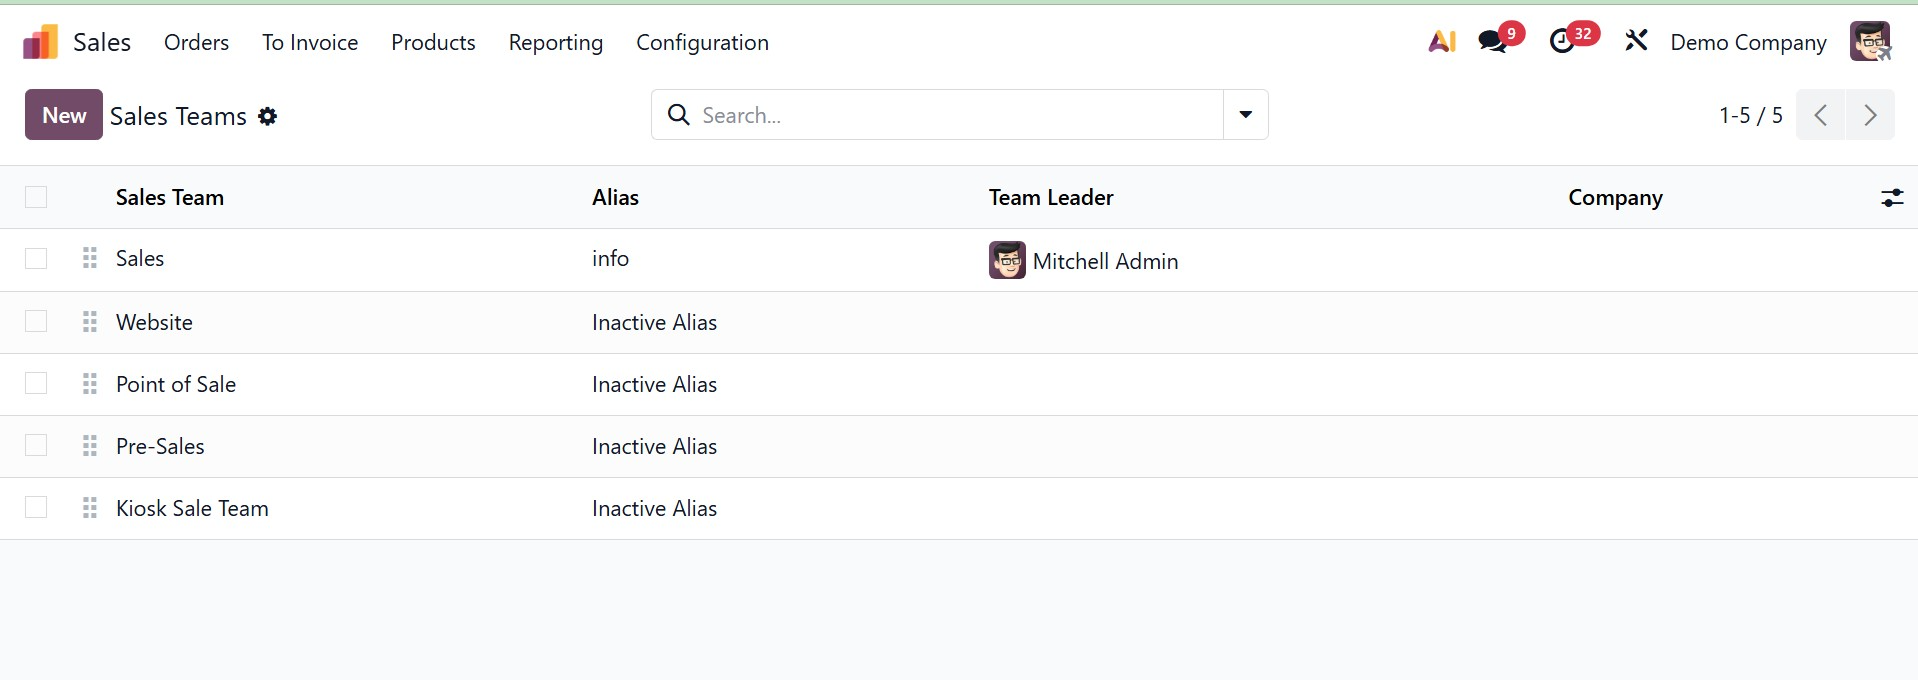
You will get the details regarding creation of the sales team under the Configuration menu .
1.4 Customers
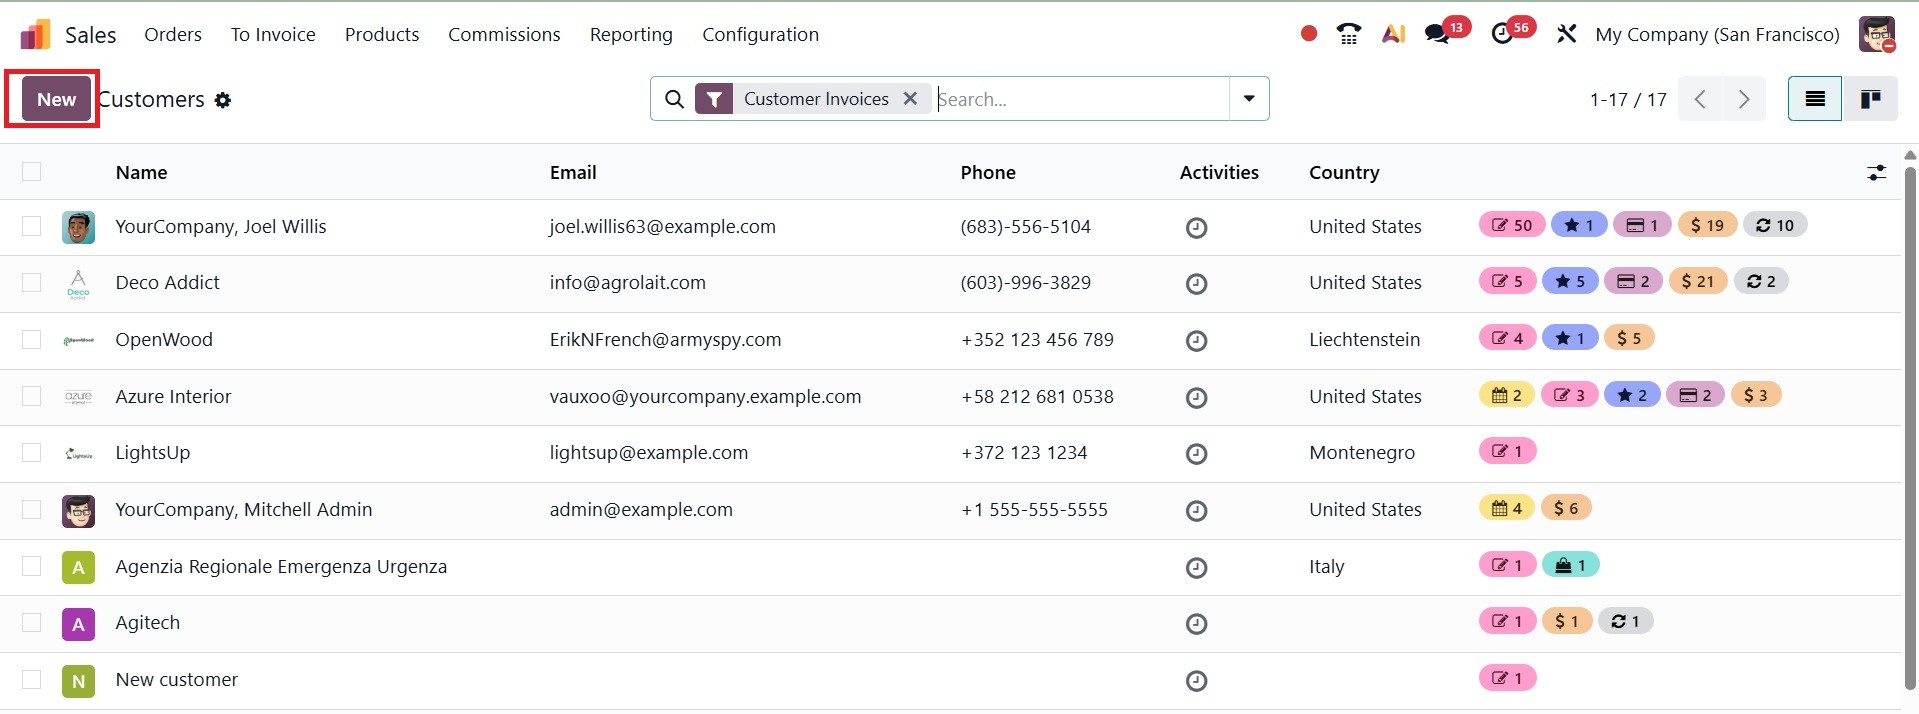
The Odoo 19 Sales module will give you a unique platform to create and maintain your company's customer records. As shown here, the Orders menu contains the Customers platform. Although the window below is shown in a Kanban format, you may quickly switch it to a list view based on your needs. With the help of the adjustable Filters and Group-by options, you can easily find the information you need from the client records stored in your database.
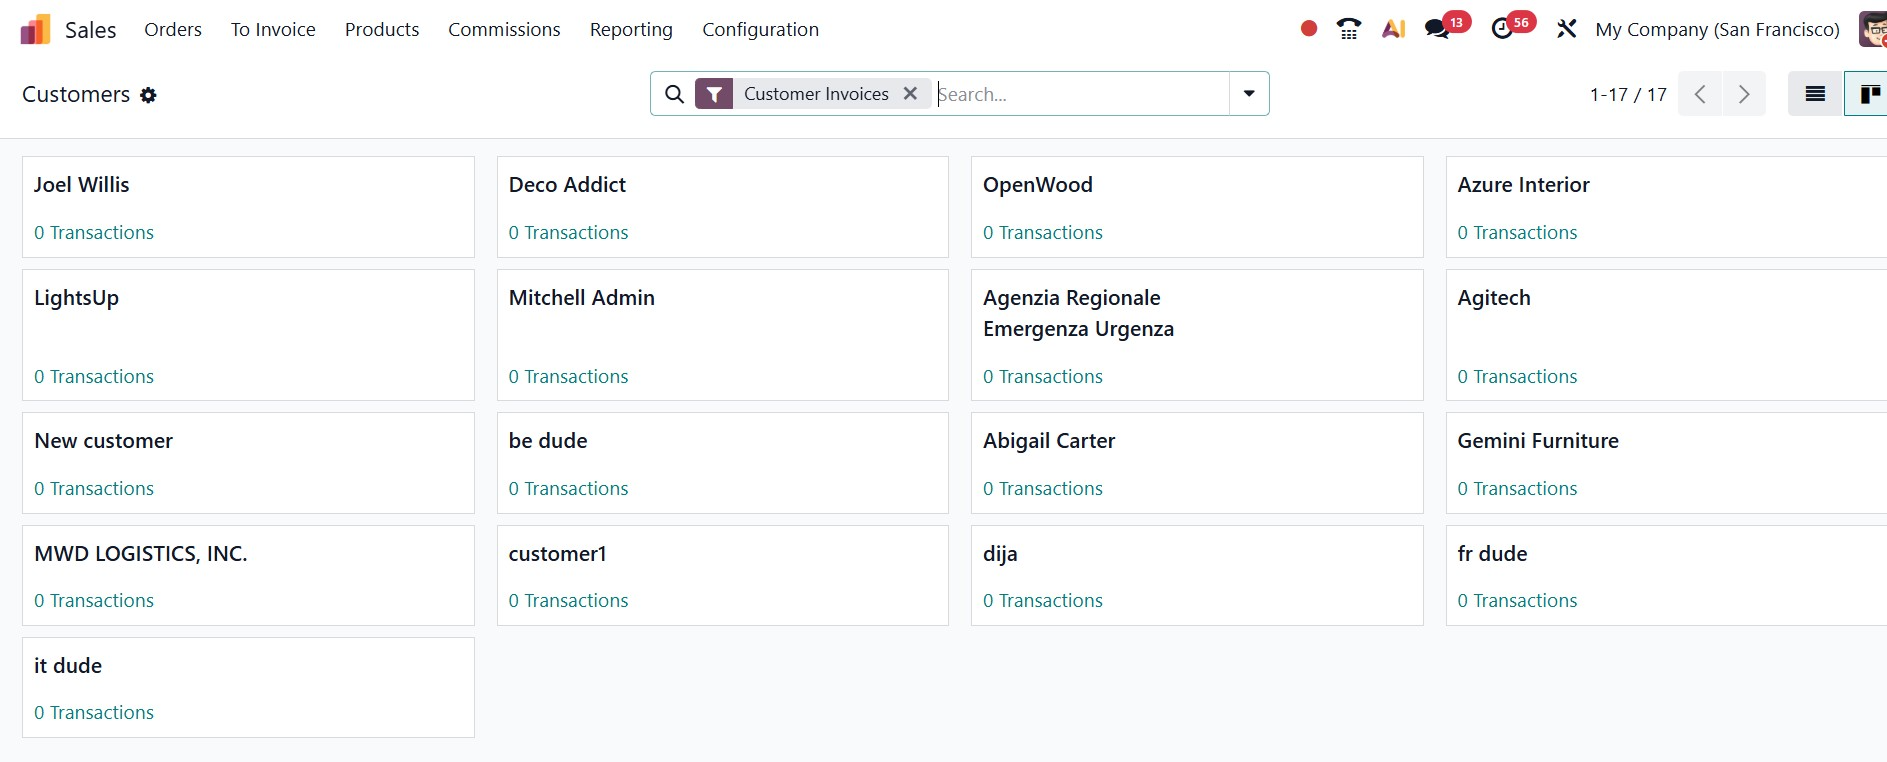
There have also been some updates made to the client window's Kanban view. Each customer's profile shows the number of transactions they have completed. You may control it by clicking the icon, which will instantly take you to the related panel.
You are provided with the New icon under the list view of the page, as in the screenshot below.
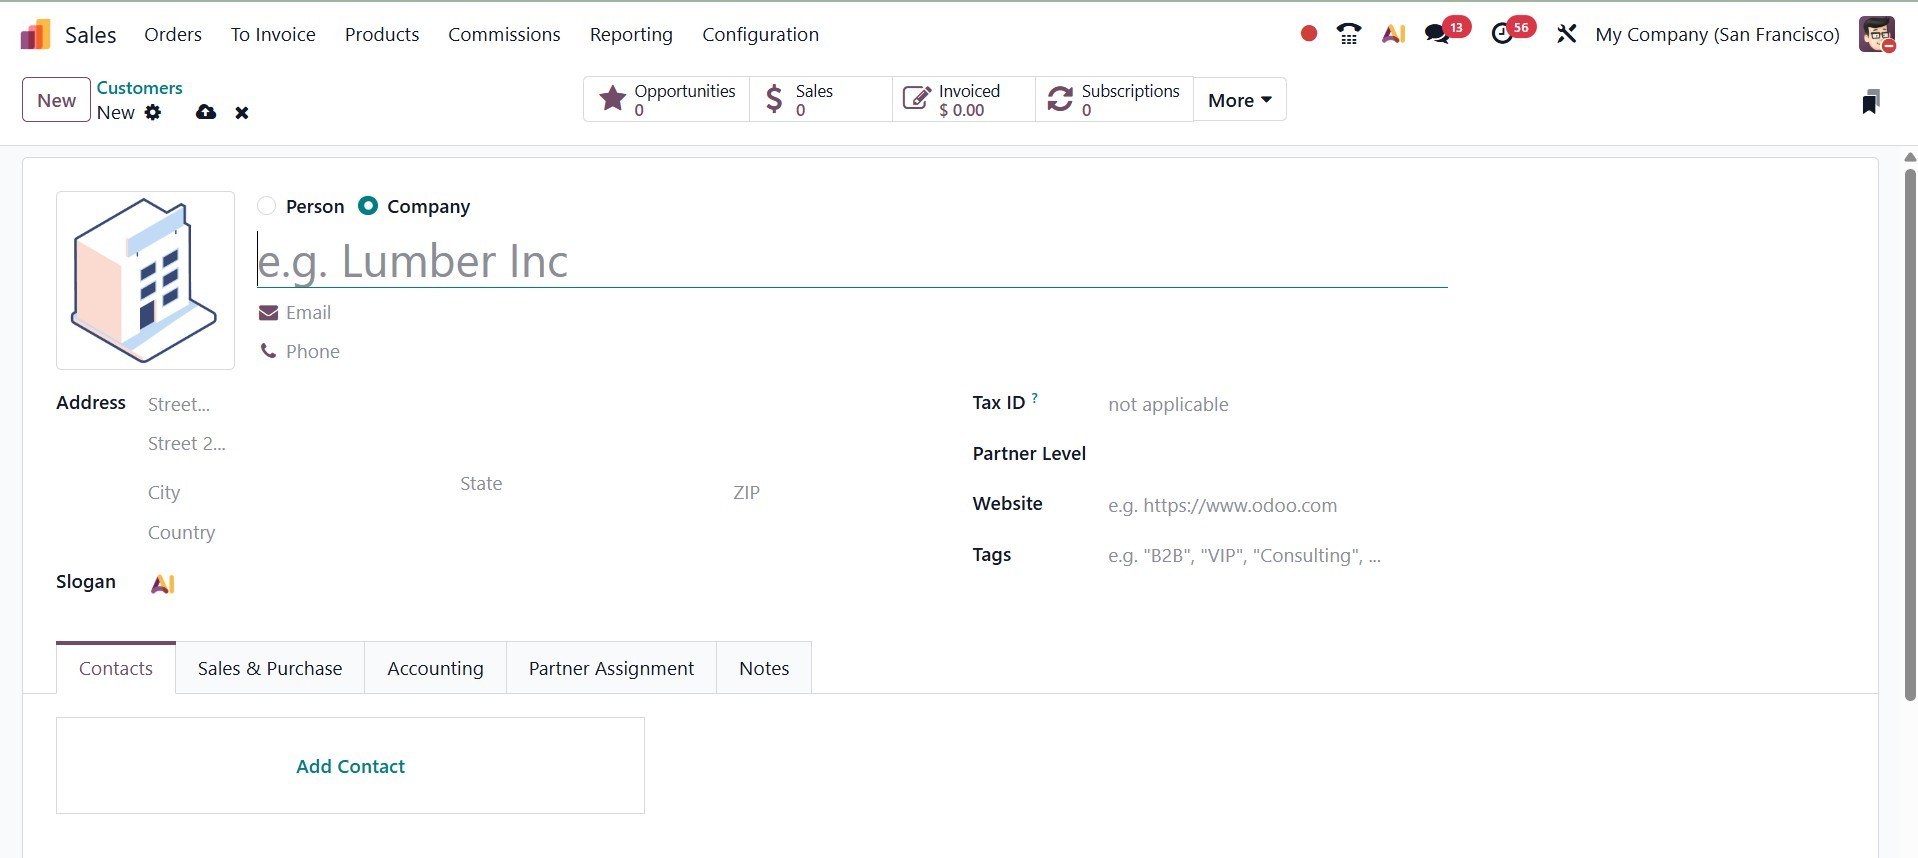
You can now configure a new customer to the sales module with the New button. The name of an individual or company can be used to create a new customer profile. In the appropriate space, the client's name might be mentioned. A client's address, slogan, tax identification number, Partner level, website, and tags can then be set up. Often used for marketing or rapid identification, the slogan option in the Odoo Sales module's client creation page is a text field where you may enter a brief tagline or description for the customer.
Clicking the Add a Contact button beneath the Contacts tab will allow you to add the customer's contact details. On selecting the option, you will get a pop-up, as in the screenshot below.
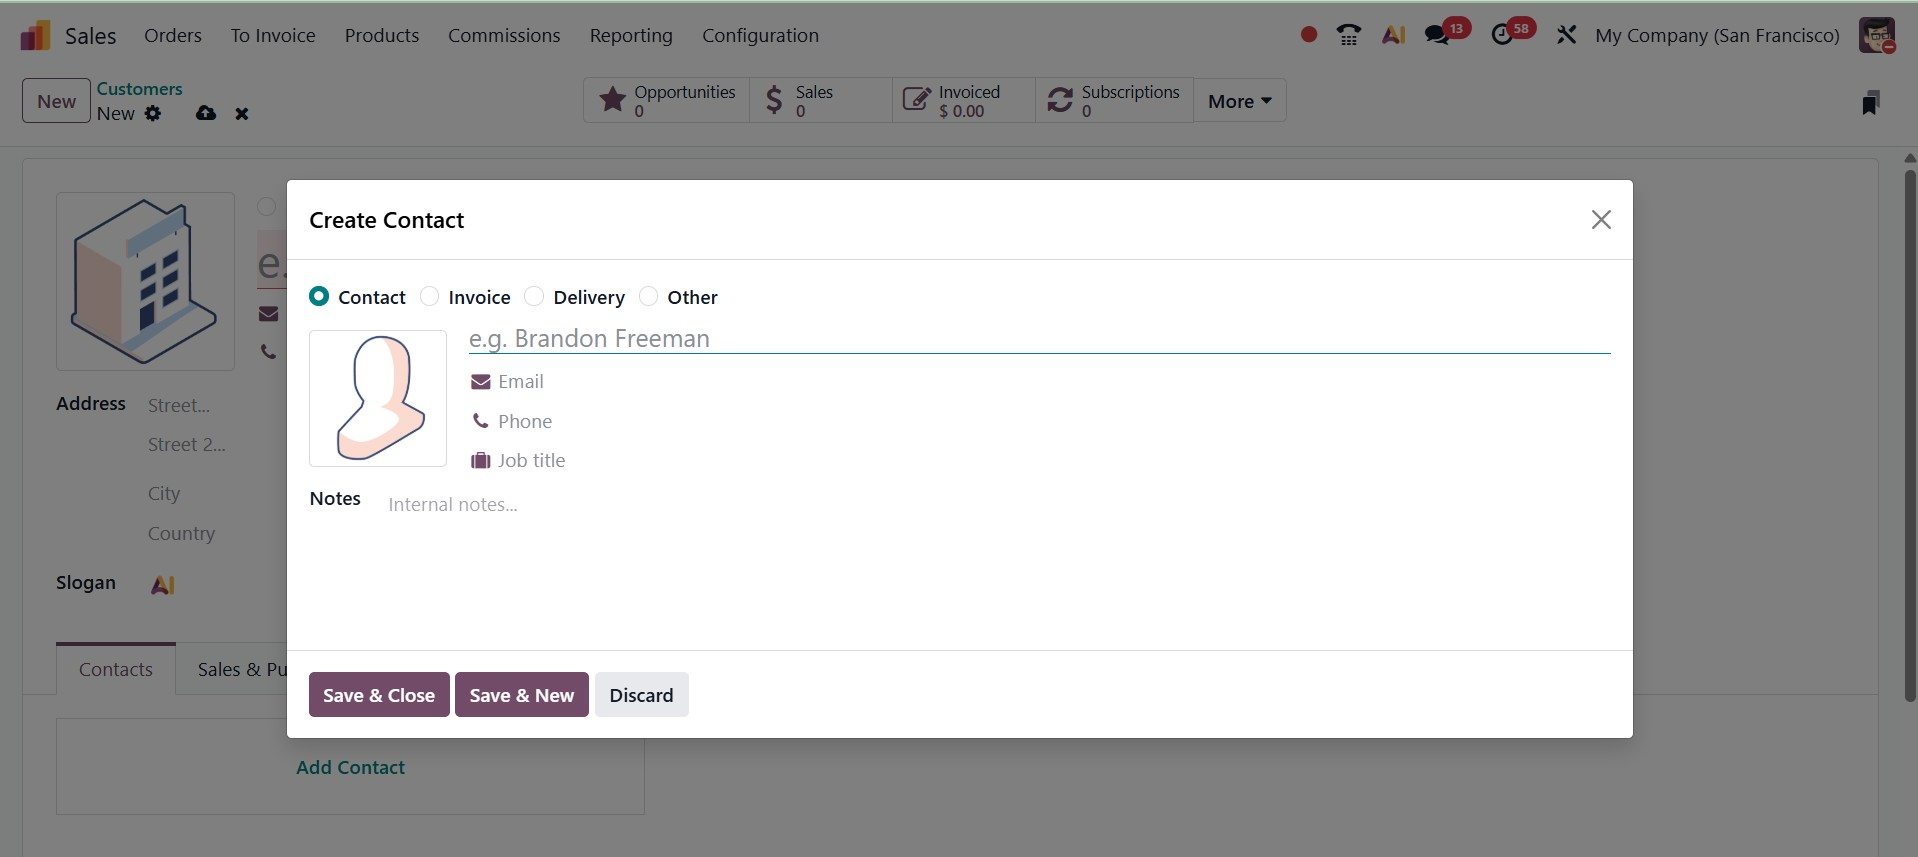
Here, you can add different addresses like Contact, Invoice, Delivery, and Other, respectively.
In Odoo, the Invoice Address is the address where invoices are sent and is typically associated with a customer or vendor for billing purposes.
The exact location to which goods or services are to be delivered is known as the Delivery Address in Odoo. For shipping purposes, it is typically linked to a client or vendor.
The "Other Address" in Odoo typically refers to a distinct location connected to a contact or company, serving as an extra contact point, temporary address, or supplemental business site.
You can add according to need. Then, next, you have the Sales and Purchase tab, as in the screenshot below.
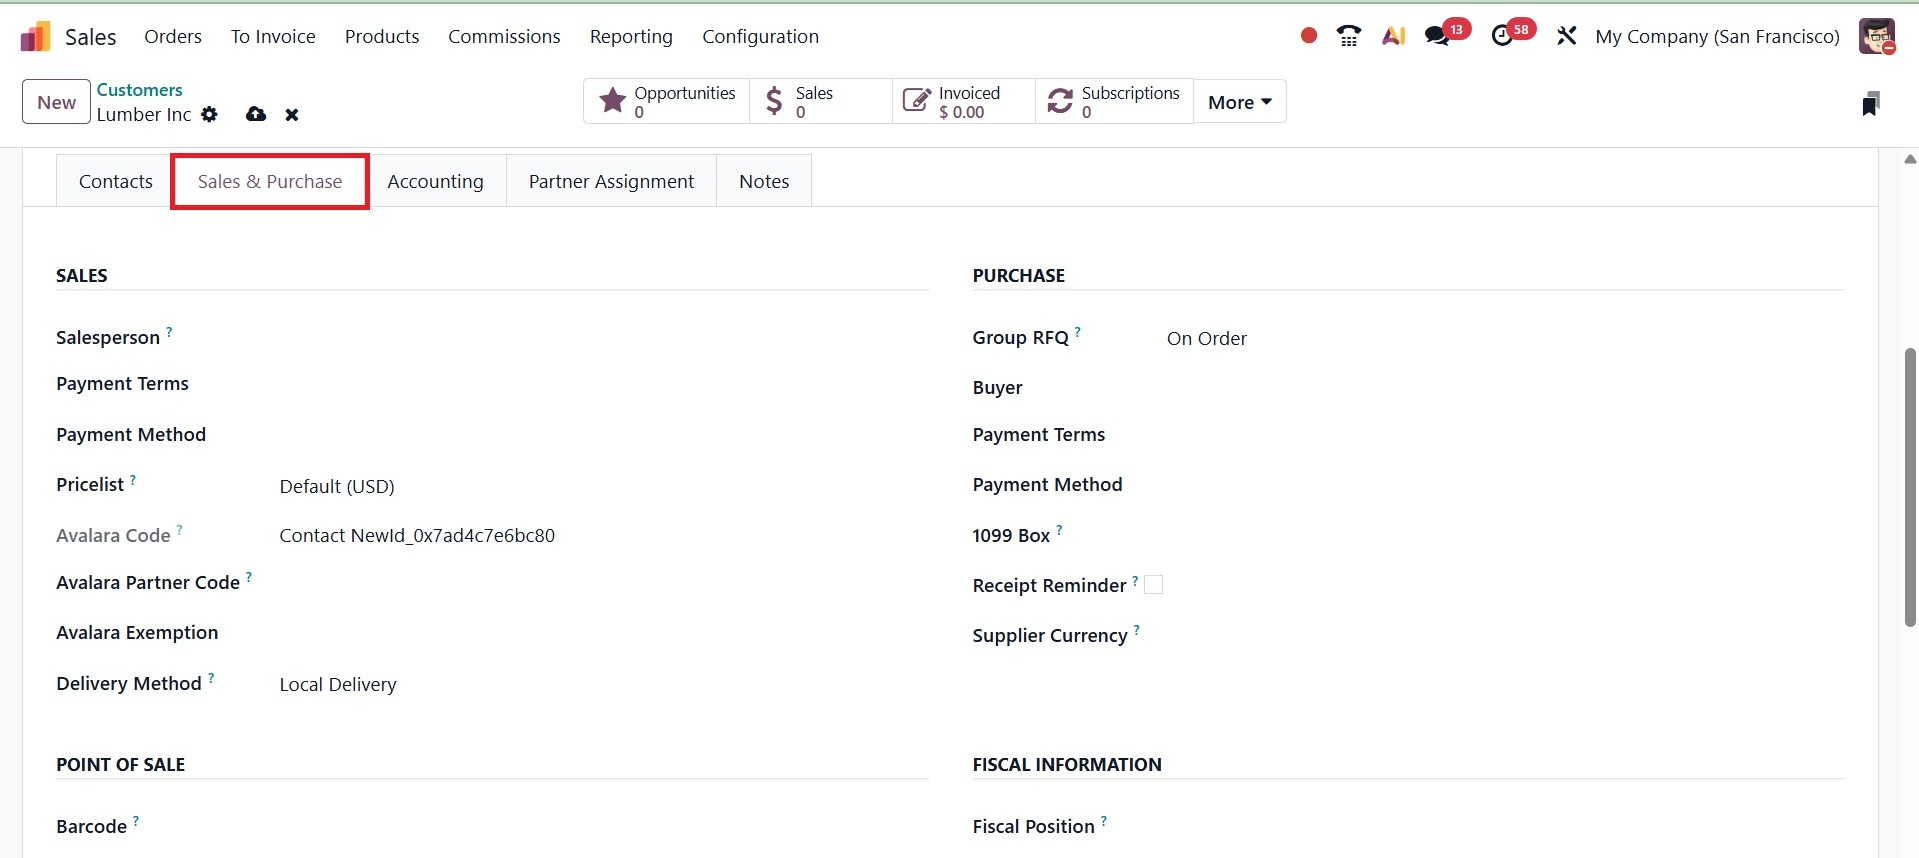
To manage the sales operations related to this customer, you can assign a Salesperson and Sales Team under the relevant areas under the Sales tab. On sales orders and customer invoices, the specified payment terms will be used instead of the usual ones. You can select the payment method in the provided space. In place of the default price list, you can specify a special one for this customer in the field that will be used for sales. The customer will receive an Avalara Partner Code that can be used for cross-referencing within the Avalara port. Mention the Avalara Partner Code and Avalara Exemption in the corresponding boxes. You can designate the default delivery method for this customer's sales orders using the Delivery Method option.
Under the Purchase tab, you have the option of Group RFQ and buyer, which can be selected accordingly. The group RFQ option lets you combine multiple purchase requests for the same vendor into a single Request for Quotation (RFQ), making purchasing more organized and efficient. There is drop down provided, such as on order, daily, weekly, and always, as shown below.
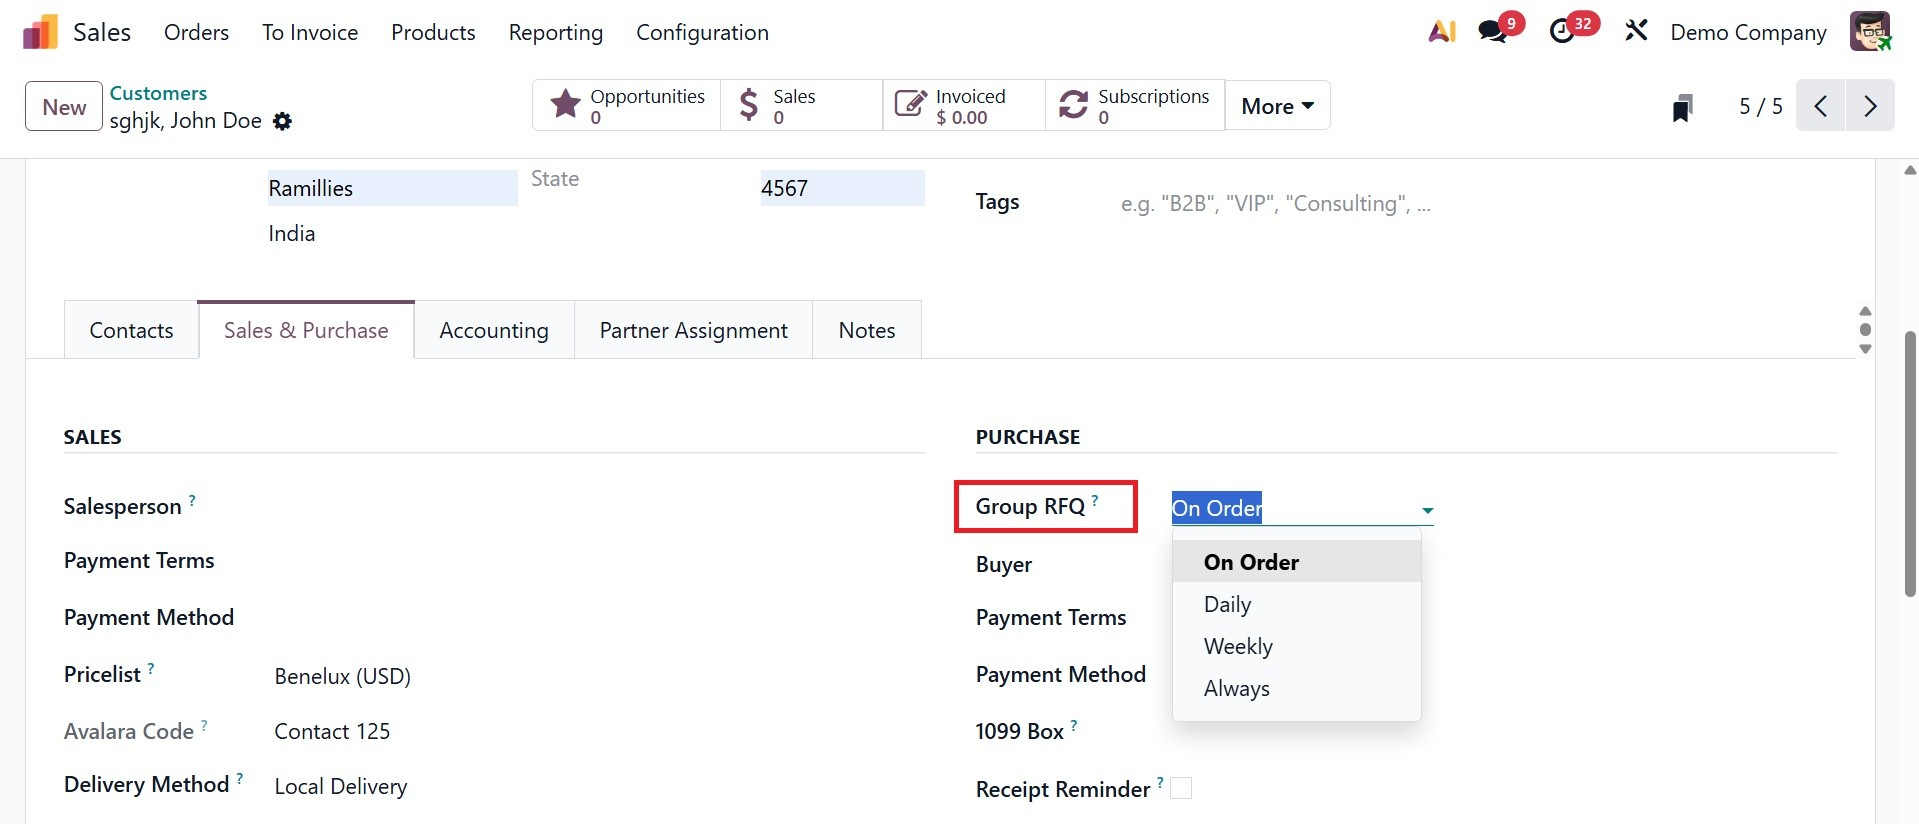
- On Order – An RFQ is created immediately whenever a purchase order is confirmed.
- Daily – All purchase requests for the vendor are grouped into one RFQ per day.
- Weekly – All requests are grouped into one RFQ per week.
- Always – Every request creates its own RFQ without grouping.
And this Group RFQ is a new feature introduced in Odoo 19.
You can select the customer's preferred payment terms, and those terms will be used instead of the default ones on vendor bills and purchase orders. And the payment method can also be selected. The vendor's journal entries will be entered into the box you selected on the 1099 report when you mention the 1099 Box.
Odoo 19 will automatically send a confirmation email to the vendor a few days before the expected receipt date, asking them to confirm the exact day if the receipt reminder is enabled. The currency listed in the Supplier Currency column will be used for purchases made from the current partner.
You can designate a barcode for the customer's identification at the point of sale. The customer's fiscal position can be entered in the Fiscal Information section. The financial status determines which taxes and accounts are used for this contact, as in the screenshot below.
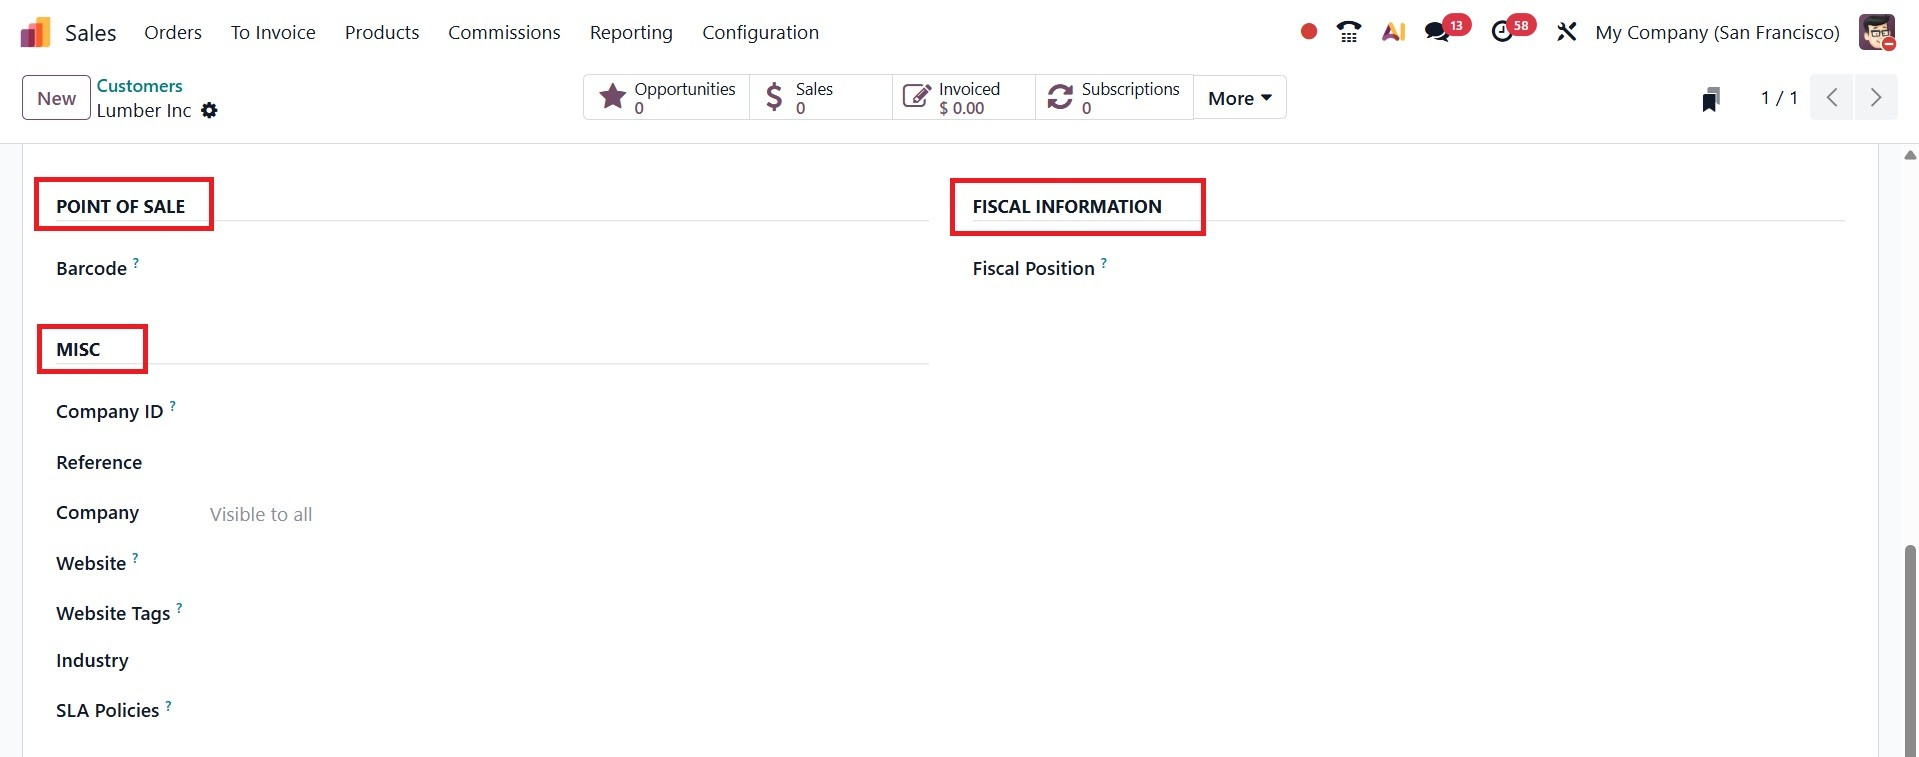
For the Company ID, Reference, Company, Website, Website Tags, Industry, and SLA Policies, you can fill in the appropriate boxes under the Miscellaneous tab. Next to that, you have the Inventory tab, as in the screenshot below.
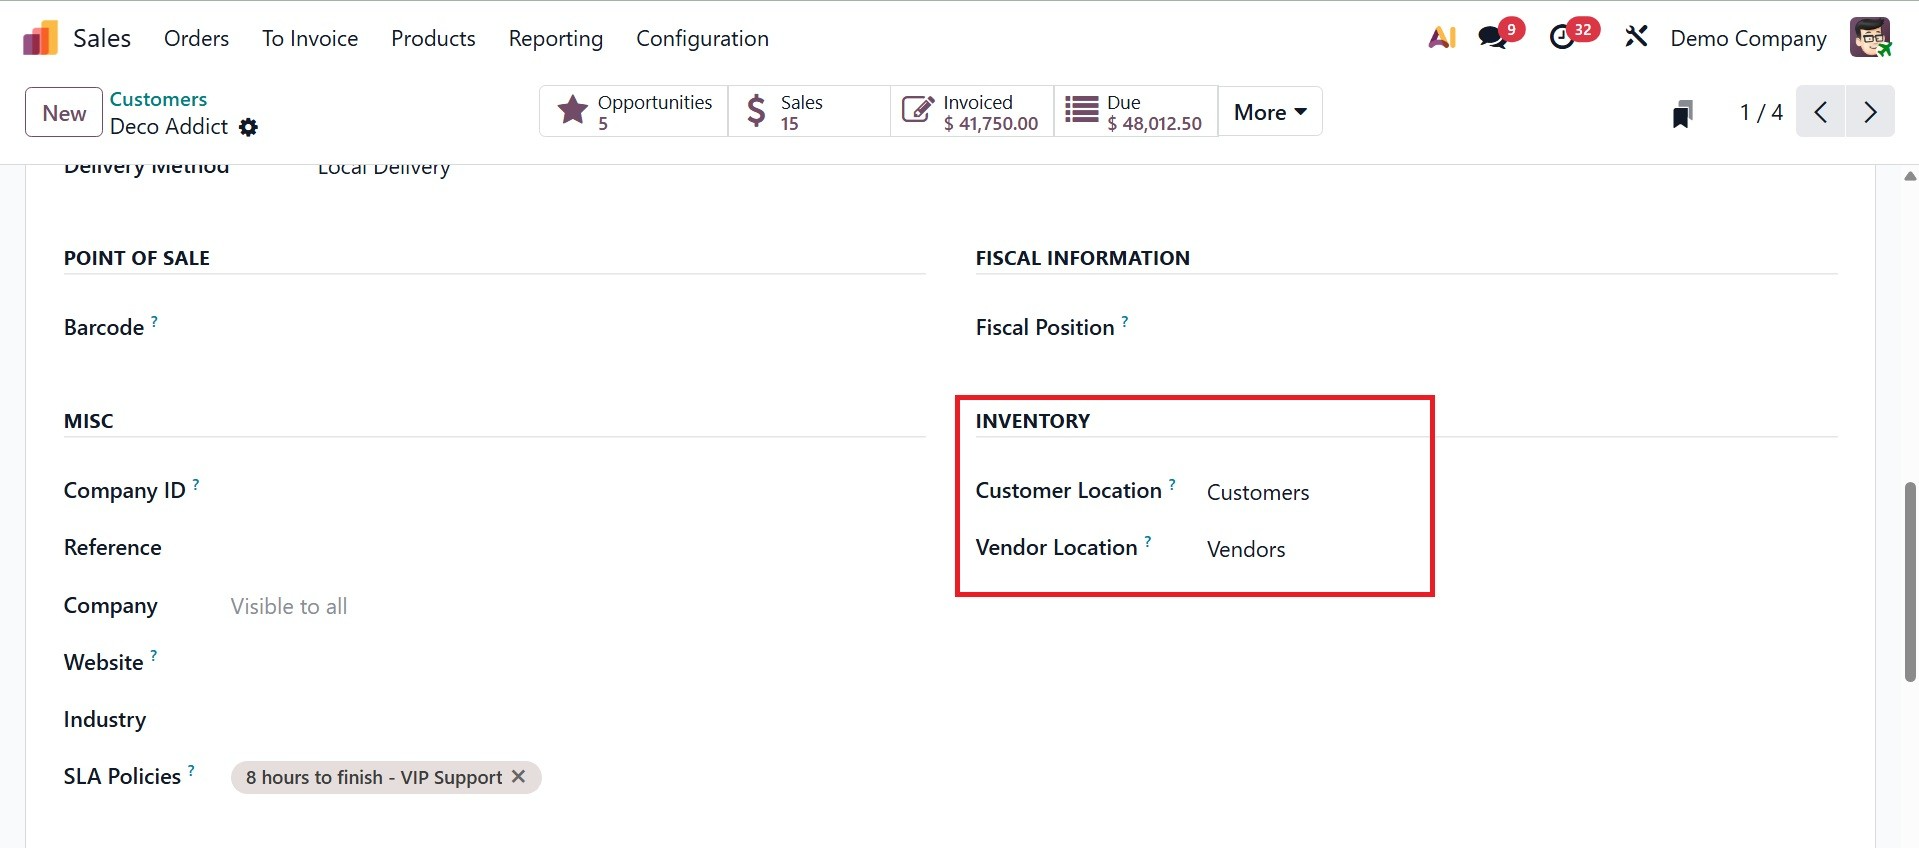
- Customer Location: When you sell to a customer, this field indicates the stock location from which the products are shipped. When a sales order is delivered, it establishes where inventory is moved out.
- Vendor Location: When you buy from this vendor (or the same contact acting as a supplier), this field indicates the stock location where products are received. When a purchase order is received, it establishes where items are transferred into inventory.
- The accounting details of the client can be specified under the Accounting tab.
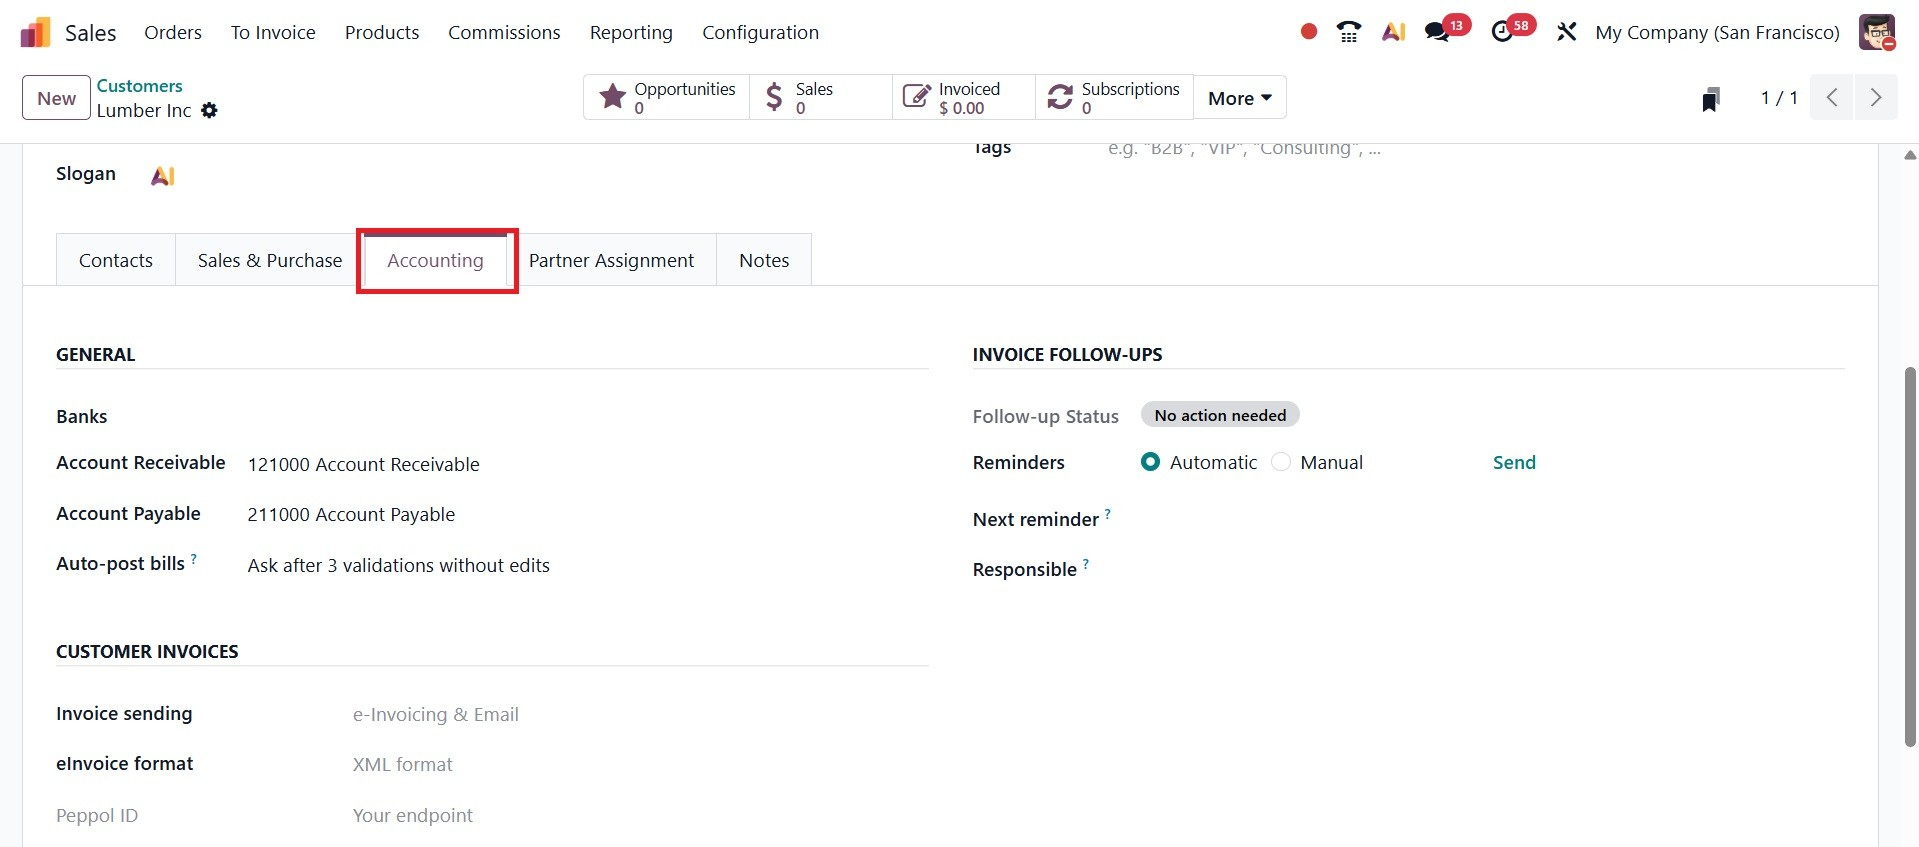
Under the GENERAL field, you have the options to provide the account number for each of the client's bank accounts, Account Payable, Account Receivable, and Auto-post bills.
- Bank Accounts –Stores the customer’s bank details for payments and transactions.
- Account Payable – The account used to track money you owe this customer (when they act as a supplier).
- Account Receivable – The account used to track money the customer owes you (when they buy from you).
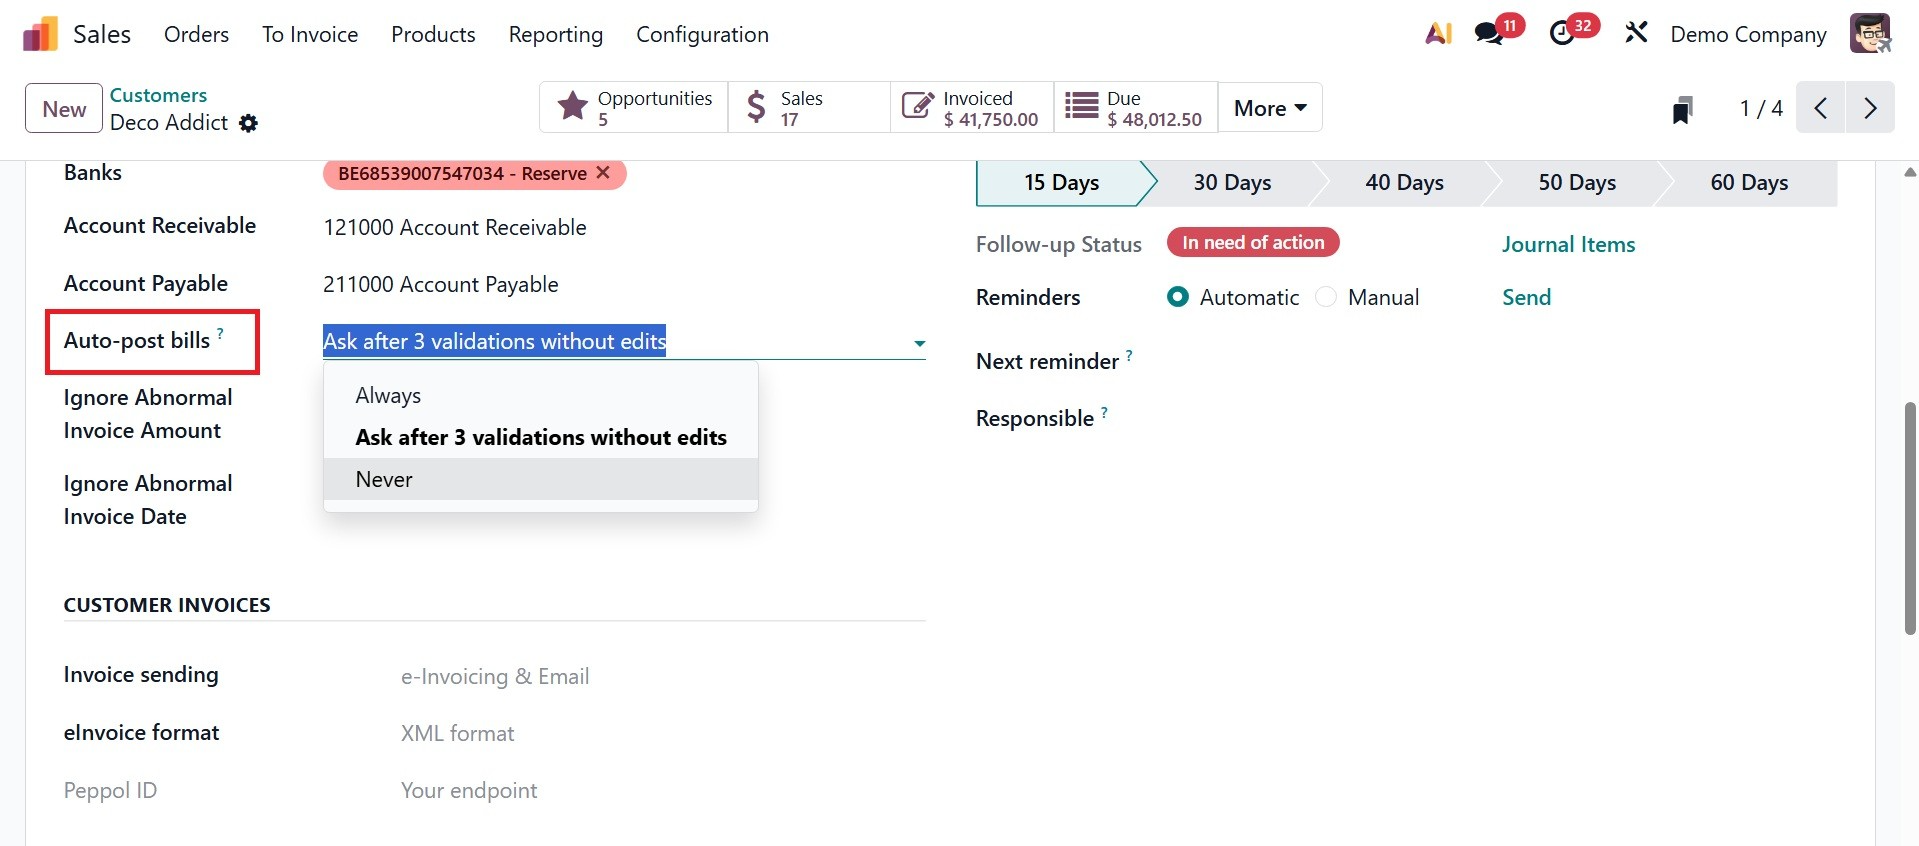
- Auto-post Bills –When enabled, bills for this customer are automatically posted without needing manual confirmation. There, you are provided with drop down, such as Always, Ask after 3 Validations without edits, and Never.
Always: Without prompting, bills are posted automatically.
After 3 validations without edits: You can choose to activate auto-validation for this vendor, ask later, or never ask again when Odoo discovers three consecutive vendor bills from this vendor that are verified without any changes.
Never: Bills need to be personally verified and submitted; they are never posted automatically.
Under the INVOICE FOLLOW-UPS, you have a follow-up status, reminders to set as automatic or manual, next reminder, and the responsible person to add.
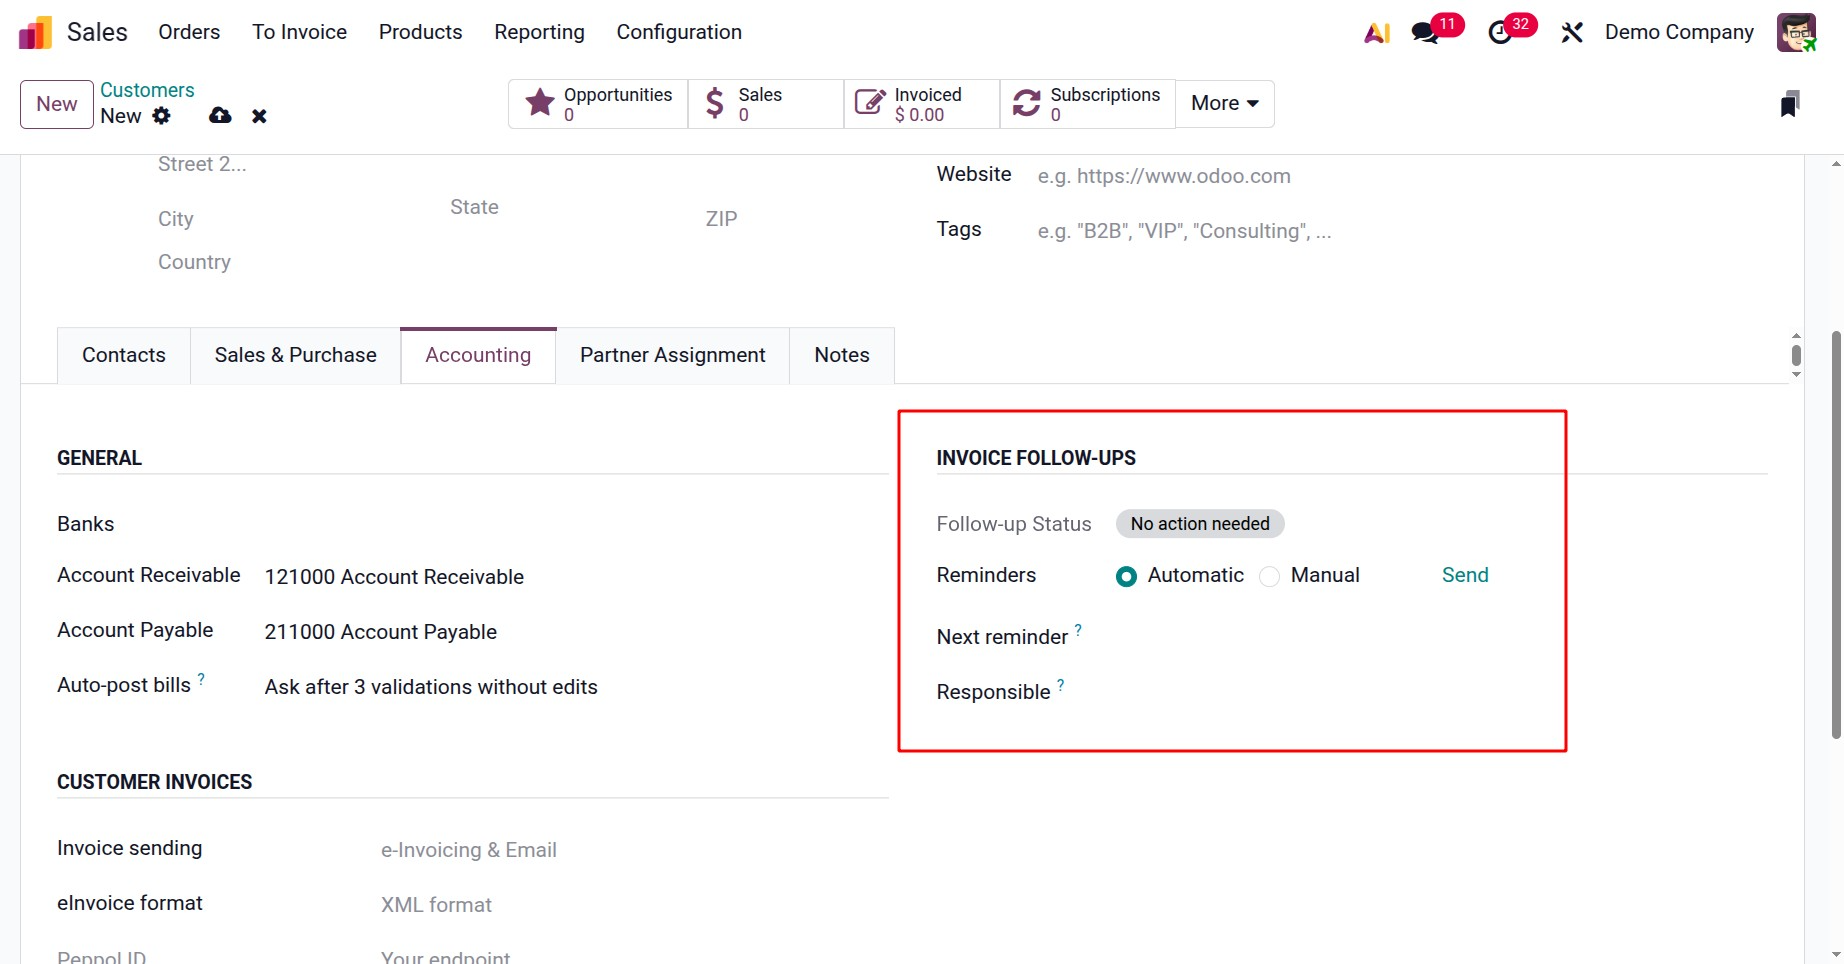
- Follow-up Status – Shows the current payment status of the customer, such as no action, in follow-up, or overdue.
- Reminders (Automatic or Manual) – Lets you choose whether payment reminders are sent automatically by the system or manually by you.
- Next Reminder –Displays the date when the next payment reminder will be sent to the customer.
- Responsible –The person in your company assigned to handle payment follow-ups with this customer.
Under the CUSTOMER INVOICES option, you have the fields like invoice sending and einvoice format options, respectively.
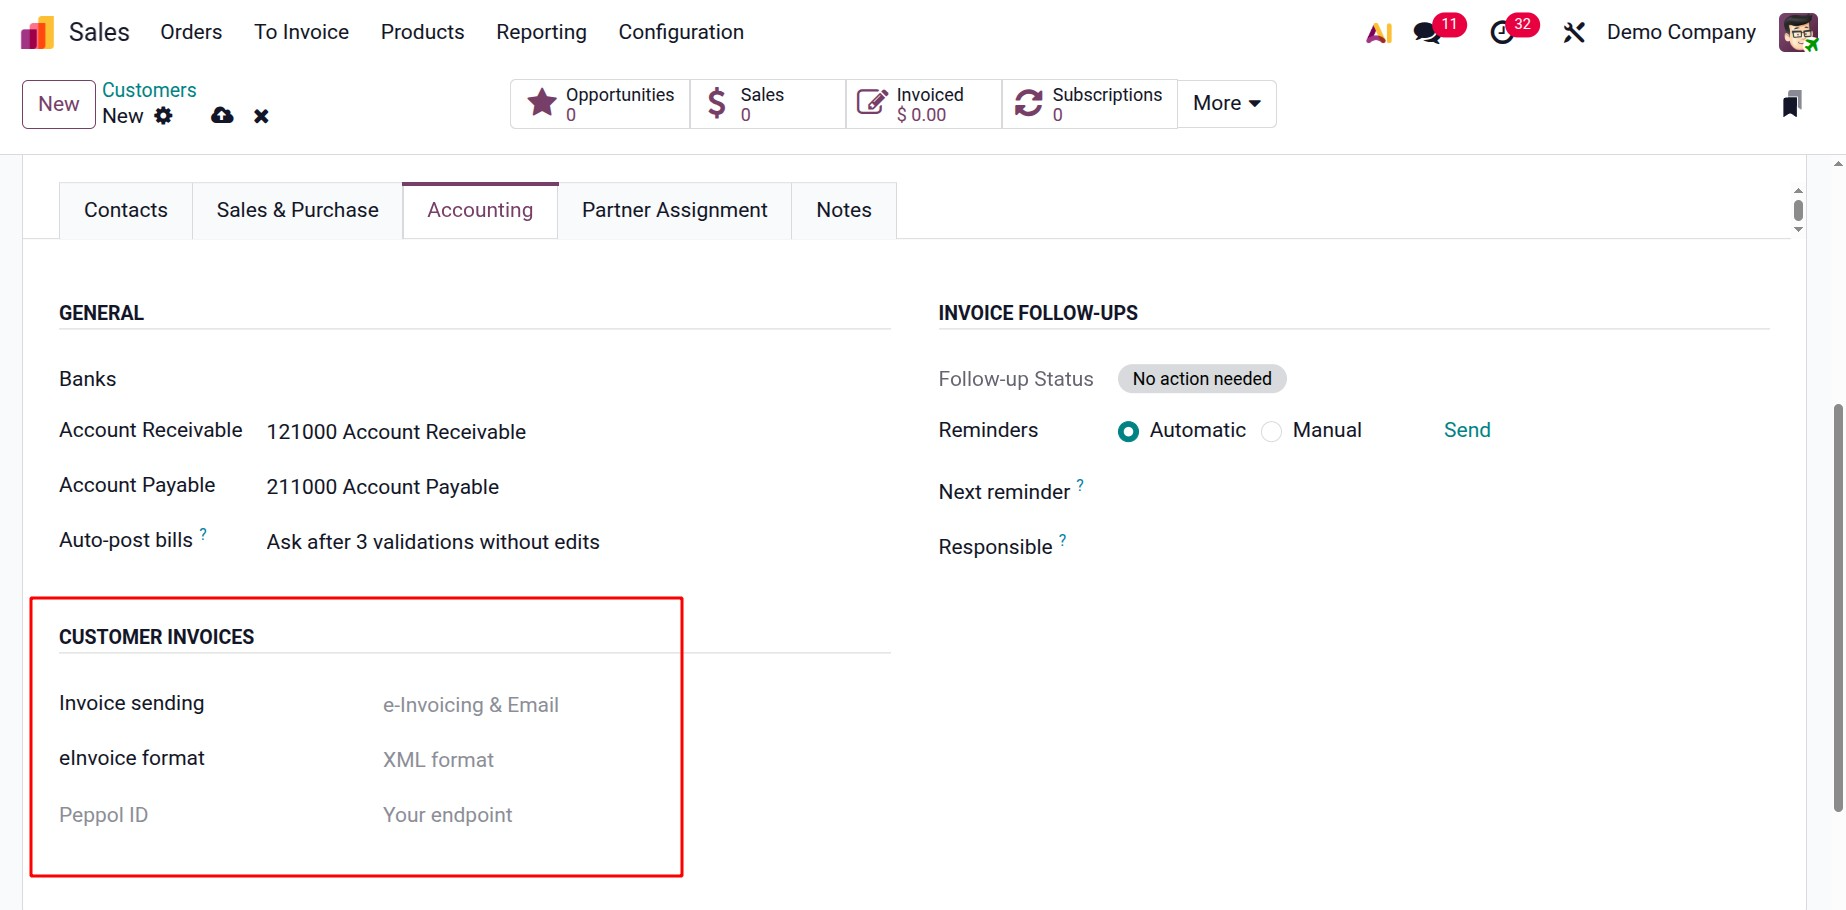
- Invoice Sending – Defines how the customer will receive their invoices, such as by email, post, or through the customer portal.
- E-Invoice Format – Specifies the electronic format used to send invoices (like XML, UBL, or other country-specific formats) to ensure compliance with legal or regional e-invoicing standards.
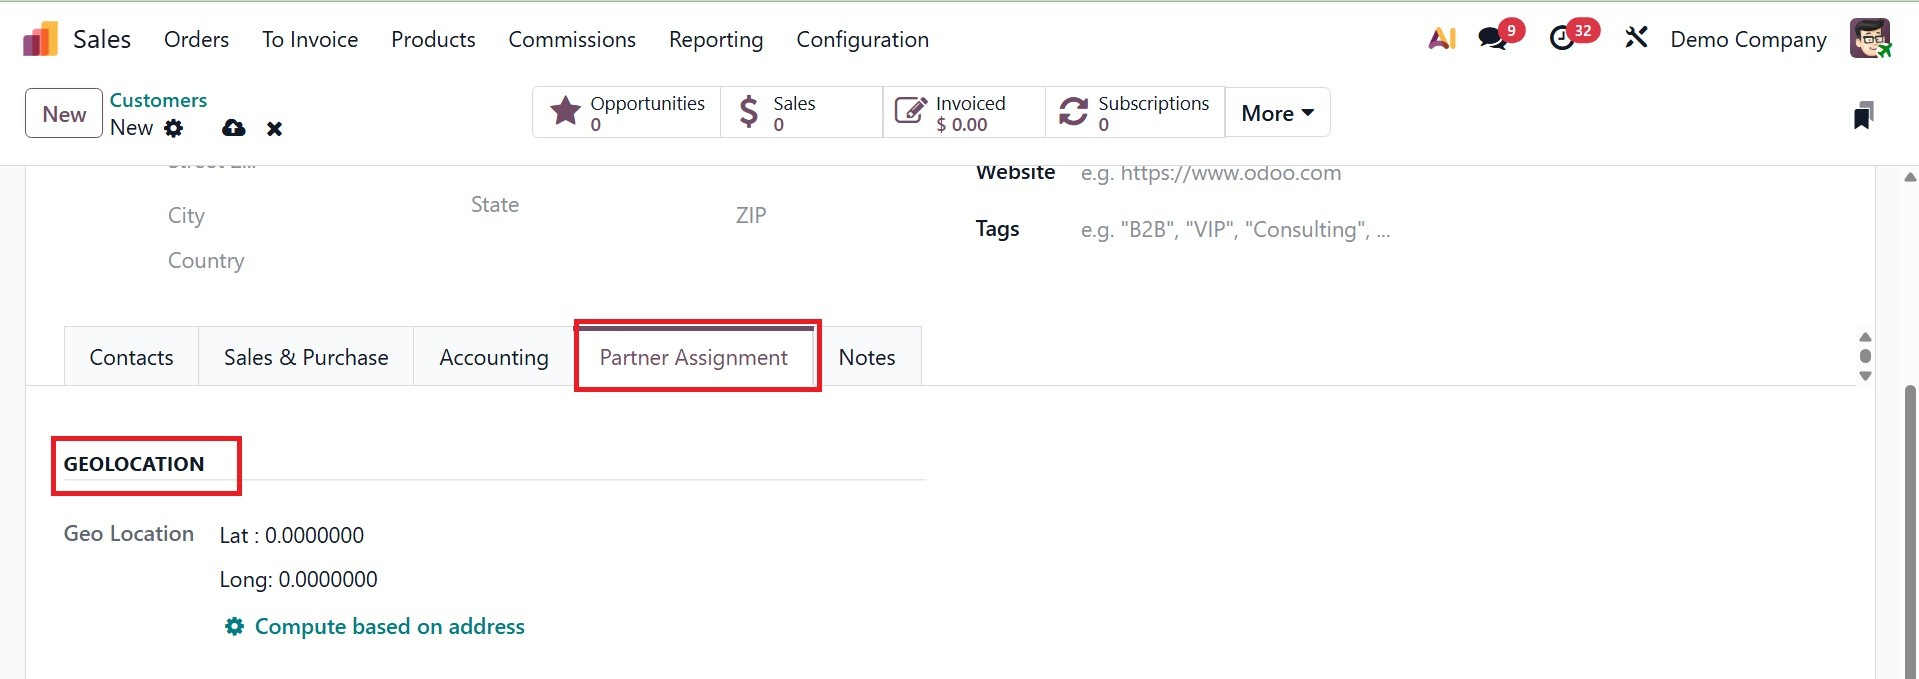
Now, the next tab is Partner Assignment, as in the screenshot below.

The Partner Assignment tab allows you to thank the Partner Activation, Partner Review, and Geolocation details. Under the Partner Assignment box, you can select the Commission Plan, Activation, and Level Weight.
The Partner Review box allows you to enter the Partnership Date, Next Partner Review, and Latest Partner Review.
The geolocation option stores the customer’s location on a map for use in sales assignments, delivery planning, or territory management. There, you can provide the Latitude (Lat) and Longitude (Long) – The exact map coordinates (numbers) that define the customer’s location, which Odoo uses to place them accurately on the map.
You can look at the Internal Notes tab in the Customer setup box. There, you can add internal notes regarding the customer.
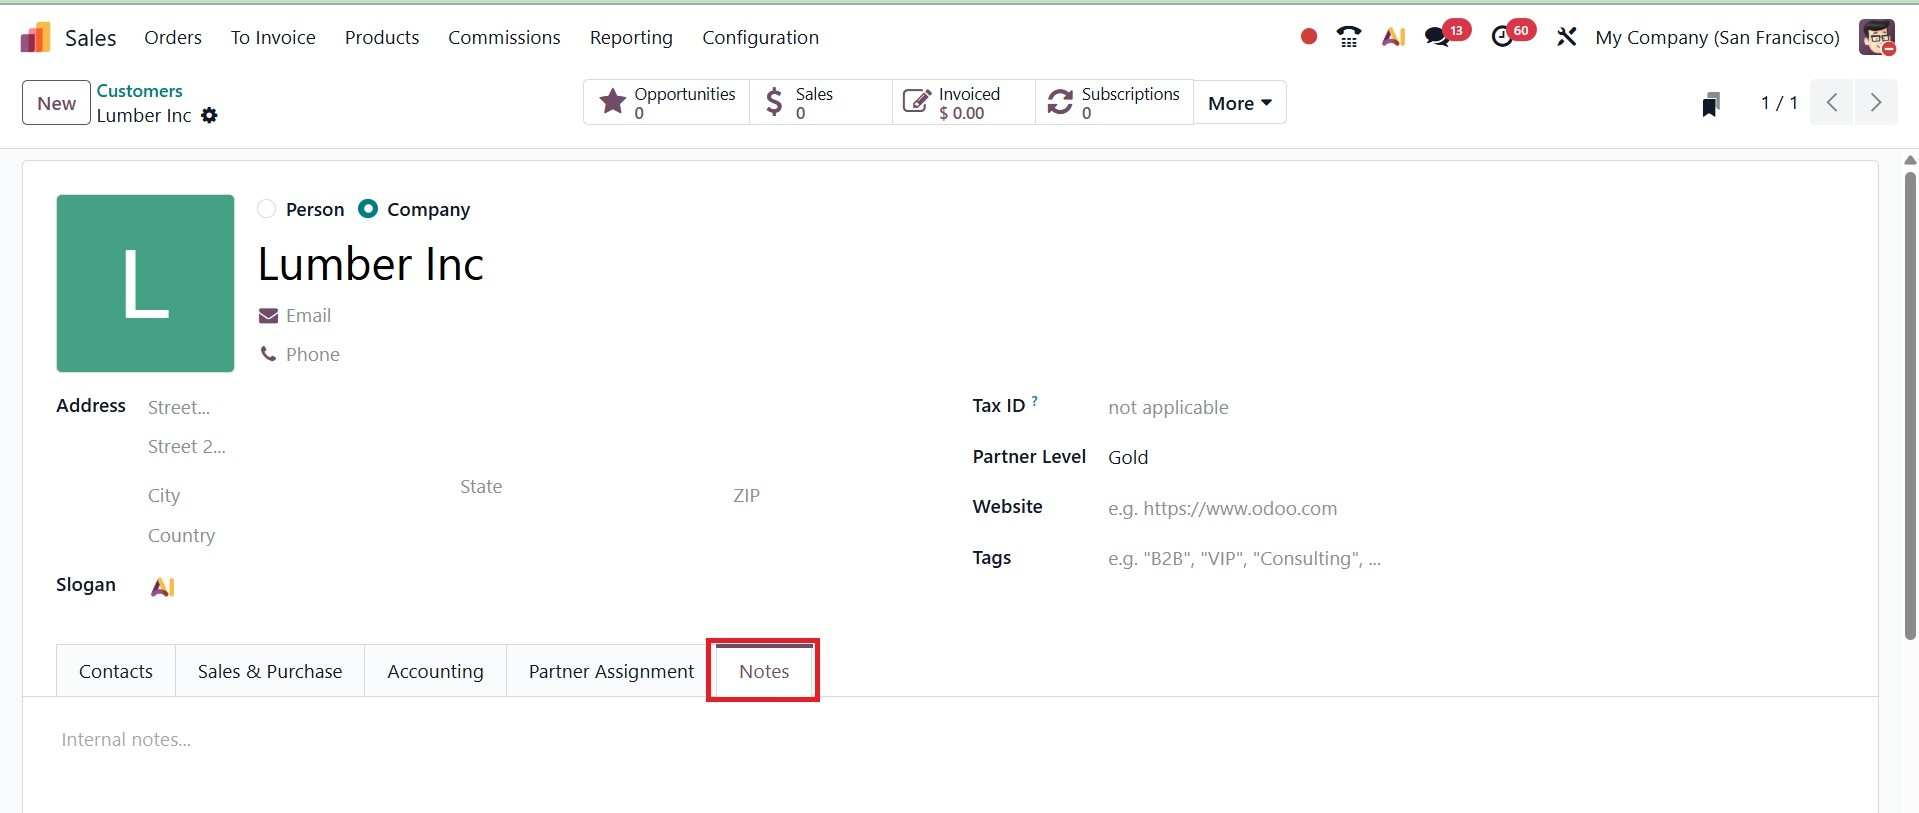
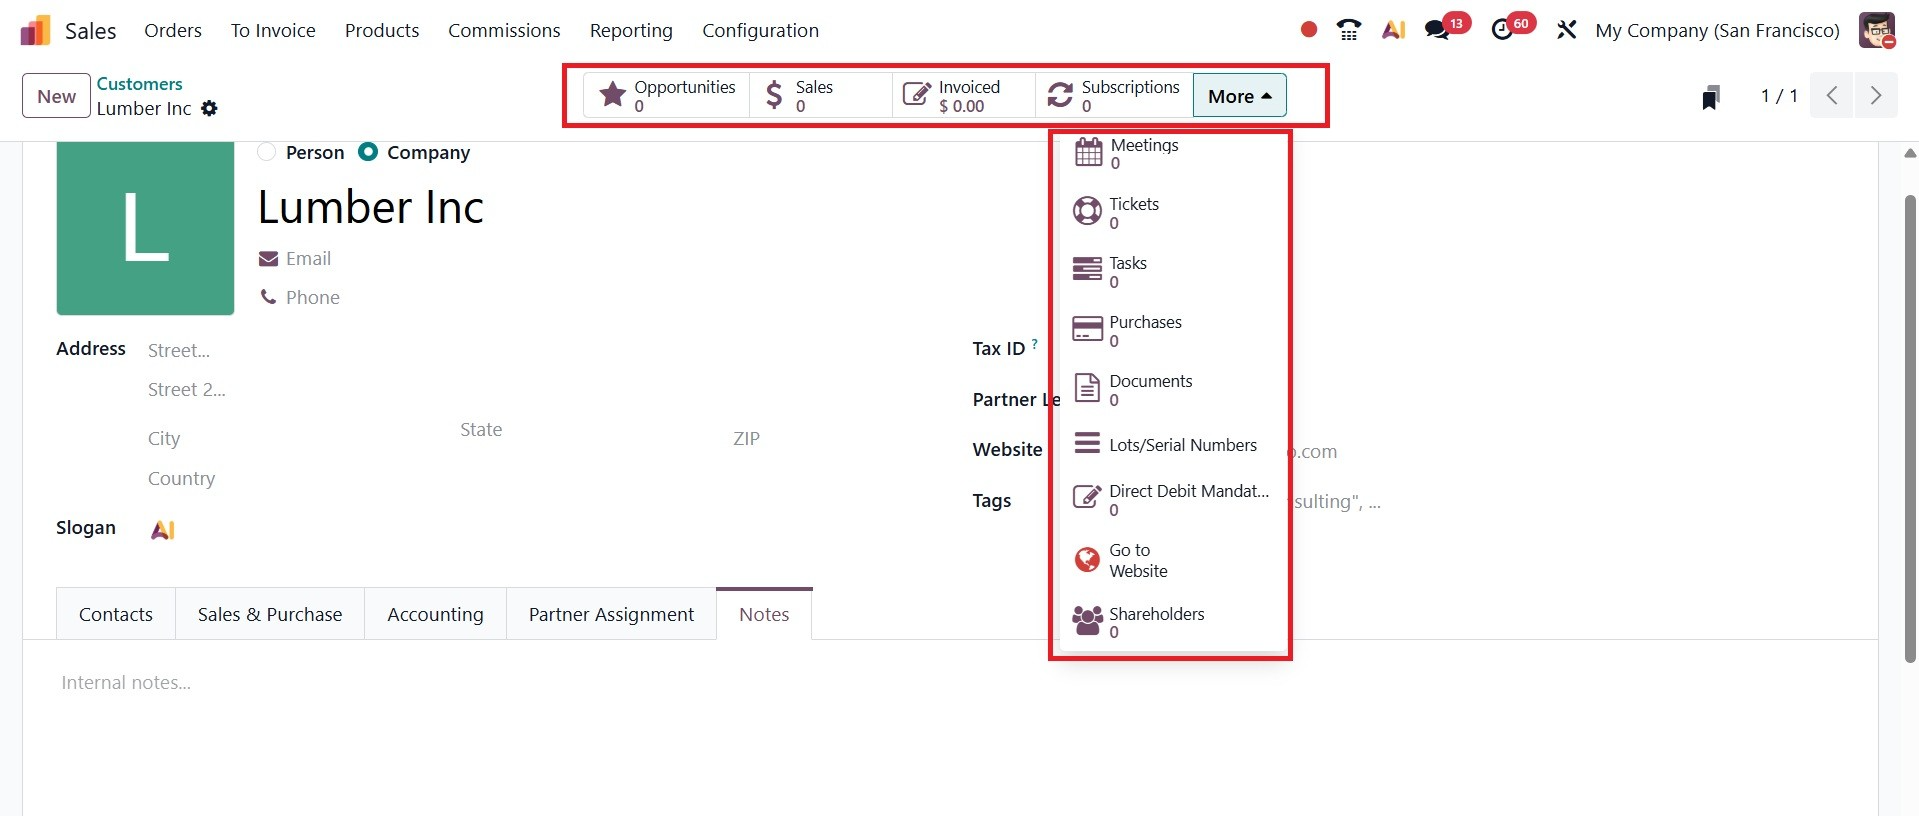
To control each of the processes performed with the consumer, you will see smart buttons on the screen. The customer Lumber Inc’s opportunities, sales, invoiced, subscriptions, meetings, ticket, tasks, purchases, document, lot/serial number, direct debit mandates, go to website, and shareholders' details are all accessible through these smart buttons.