1. Contacts Management
The Sign module in Odoo 19 Enterprise is a powerful solution designed to simplify electronic document management, approval, and signature collection. It replaces traditional paper-based workflows by allowing users to upload PDF files, add signature fields, and send them for signing in just a few clicks. With its intuitive drag-and-drop interface, users can easily insert signature blocks, date fields, or initials, ensuring a smooth and error-free signing experience.
Odoo 19 guarantees secure and legally valid electronic signatures that comply with major international standards such as the U.S. ESIGN Act, EU Regulation 910/2014, and eIDAS. By digitizing the signing process, businesses can significantly reduce costs related to printing, scanning, postage, and document storage. All signed files are securely stored online, accessible anytime and anywhere, eliminating the risks of loss or delay while improving operational efficiency.
The module also allows users to track document status in real time, whether it’s pending, signed, or completed. In addition, it provides detailed audit reports for compliance and transparency. To get started, install the Sign application from the Odoo 19 Apps menu. After installation, open the Sign icon from your main dashboard to access the module, where you’ll find a clear overview of all templates and documents ready for use.
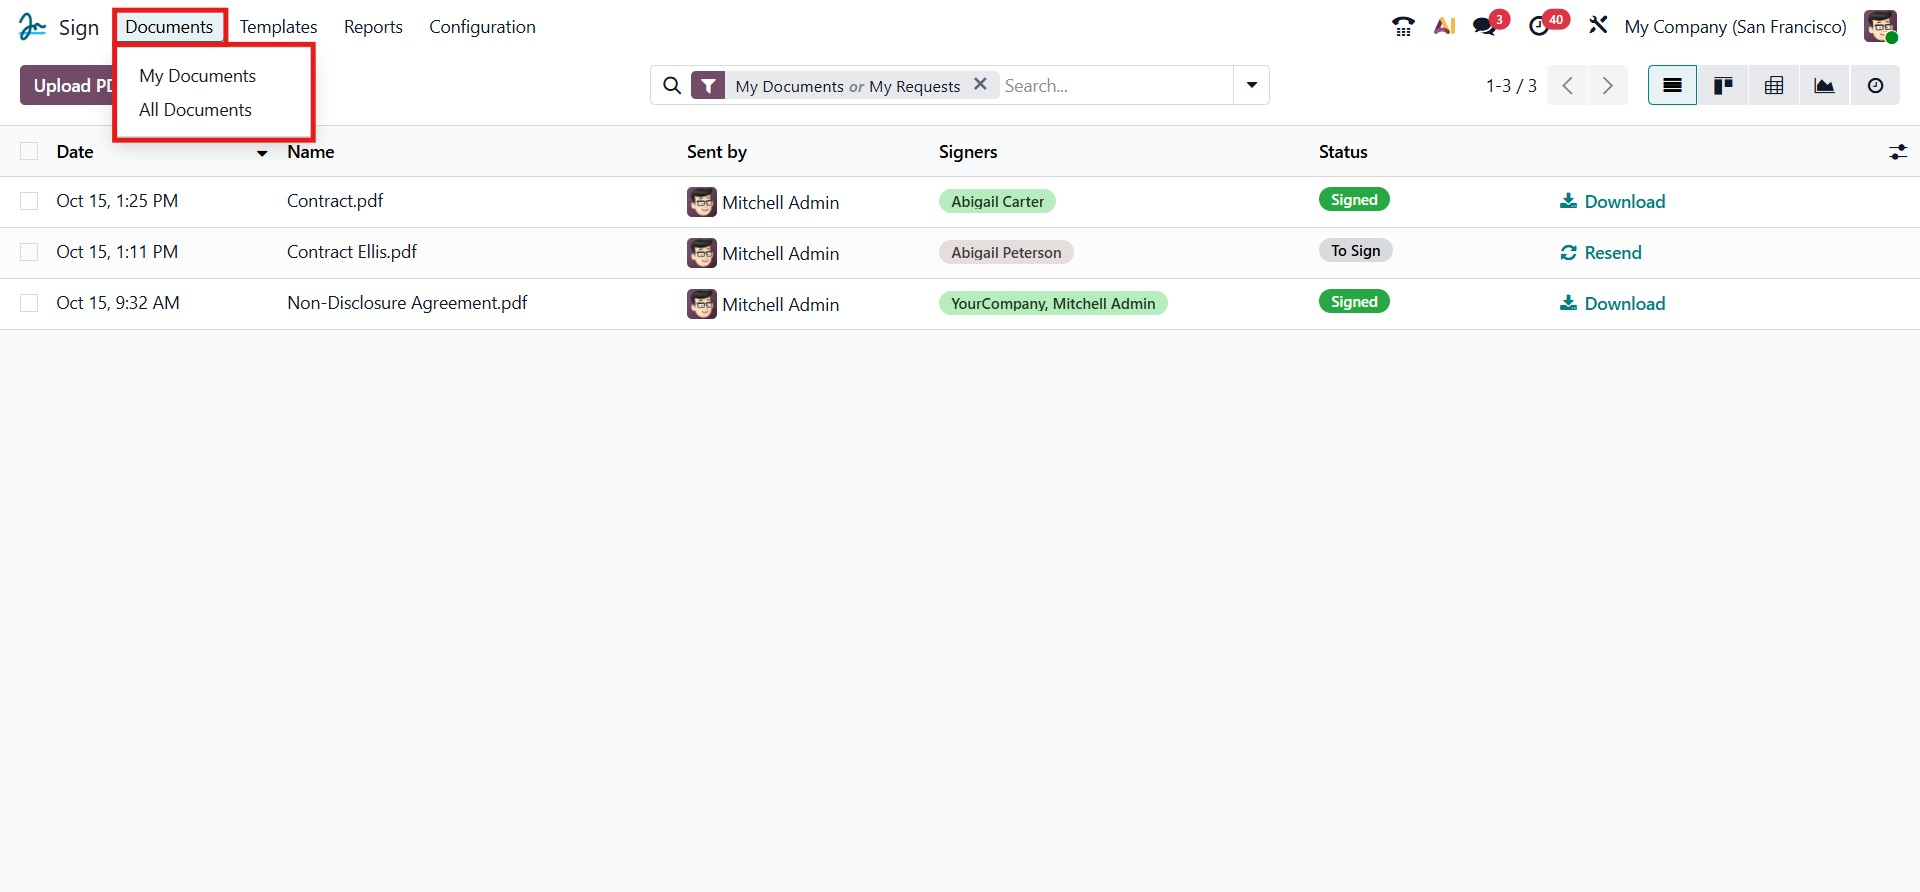
The Documents menu contains My Documents and All Documents. My Documents shows all the document assigned to the log in person and All Documents shows all the documents,
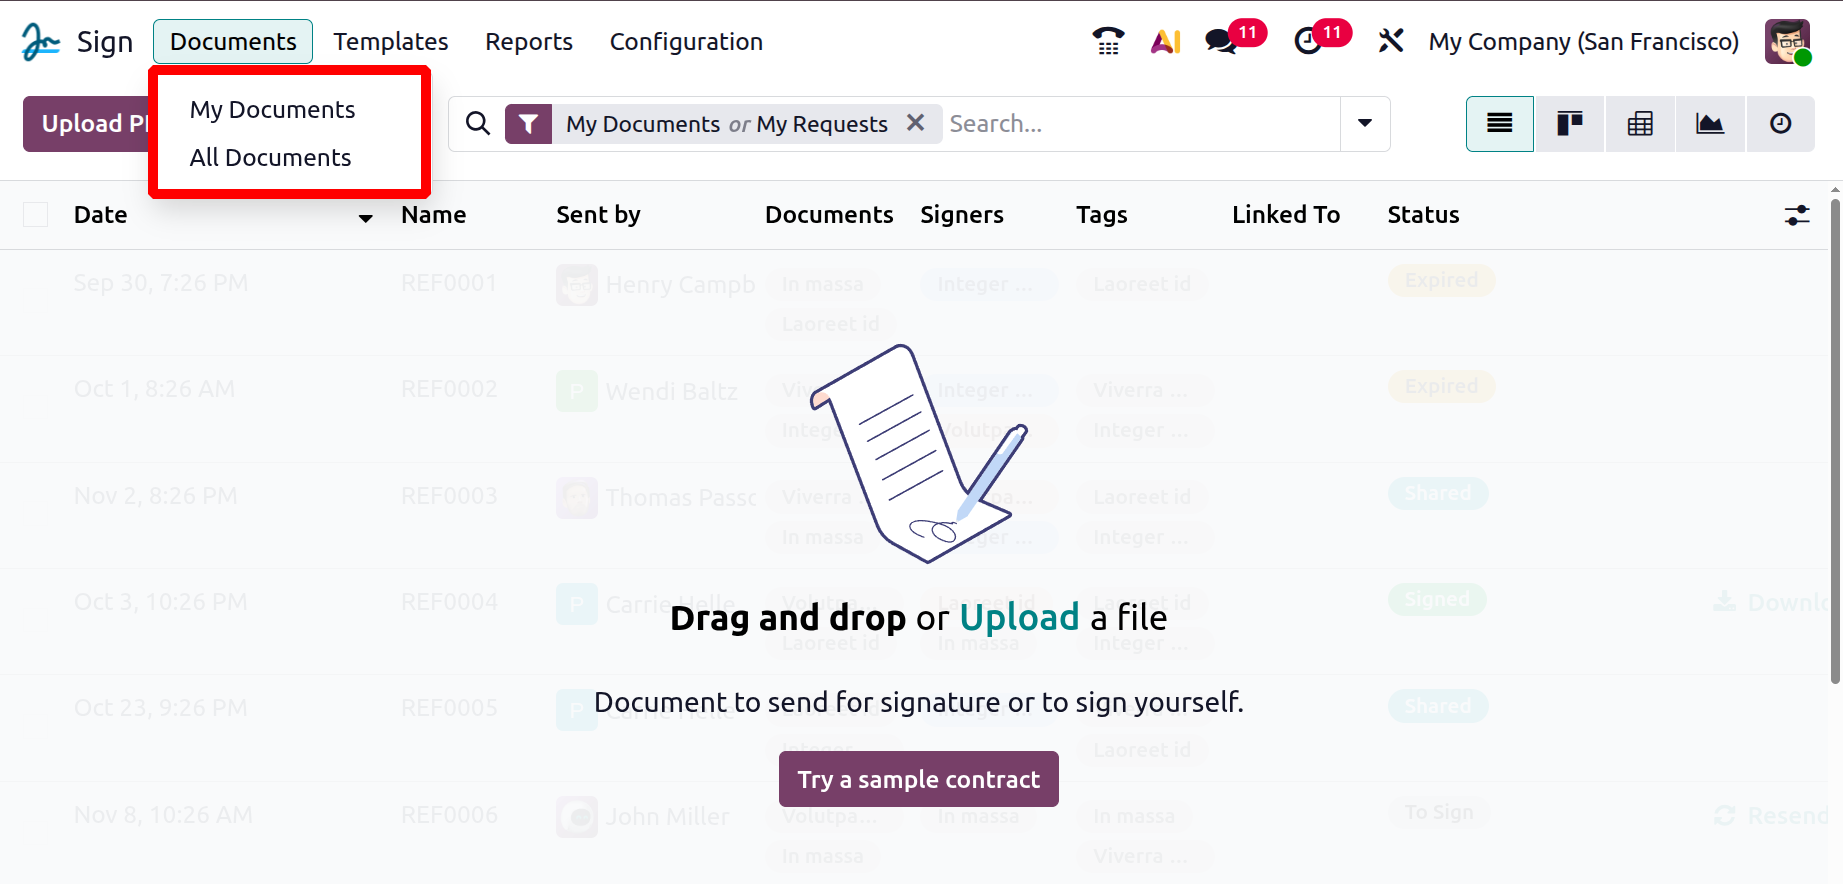
When you open the Sign module in Odoo 19 Enterprise, the system displays the Documents dashboard in List View by default. This view provides a clear and structured overview of all the documents uploaded for signing.
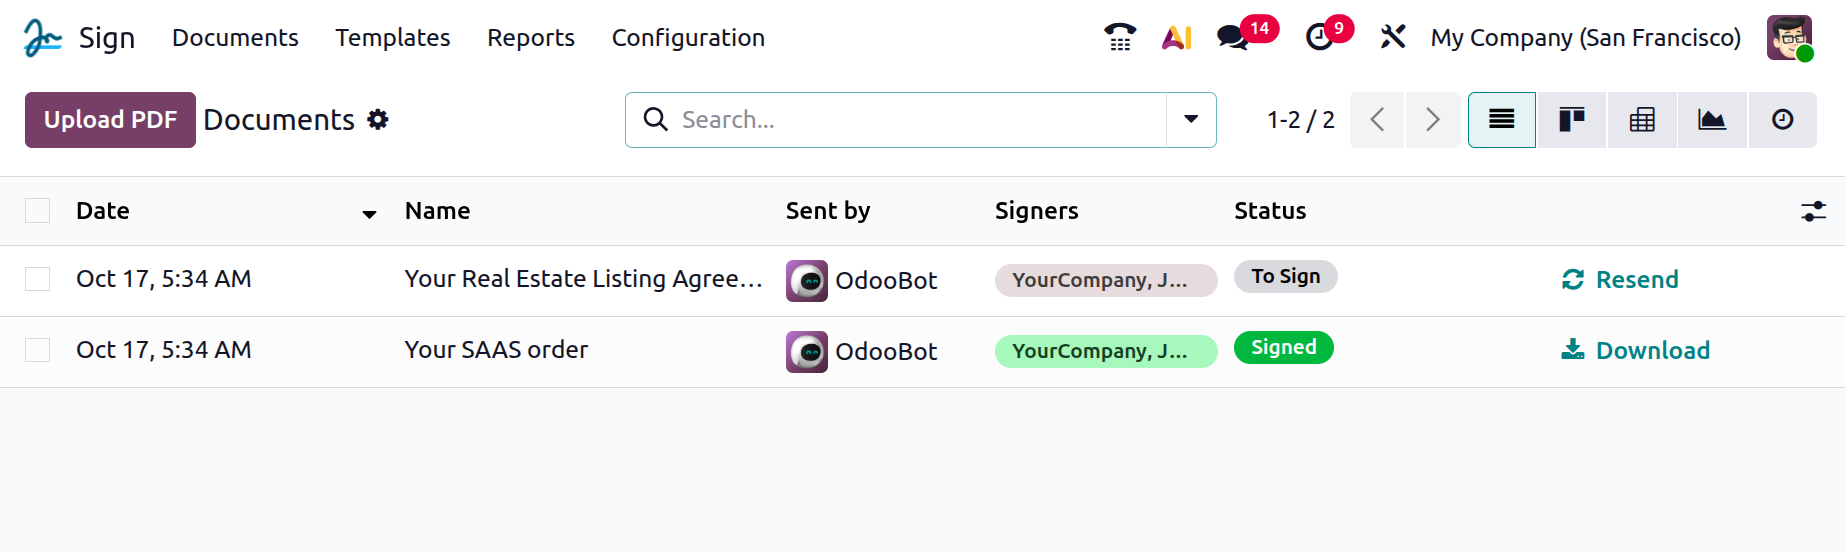
Each record is displayed in a table format with columns such as Date, Name, Sent by, Signers, and Status, allowing users to quickly review the progress of every document. There also shows a Resend and Download options.
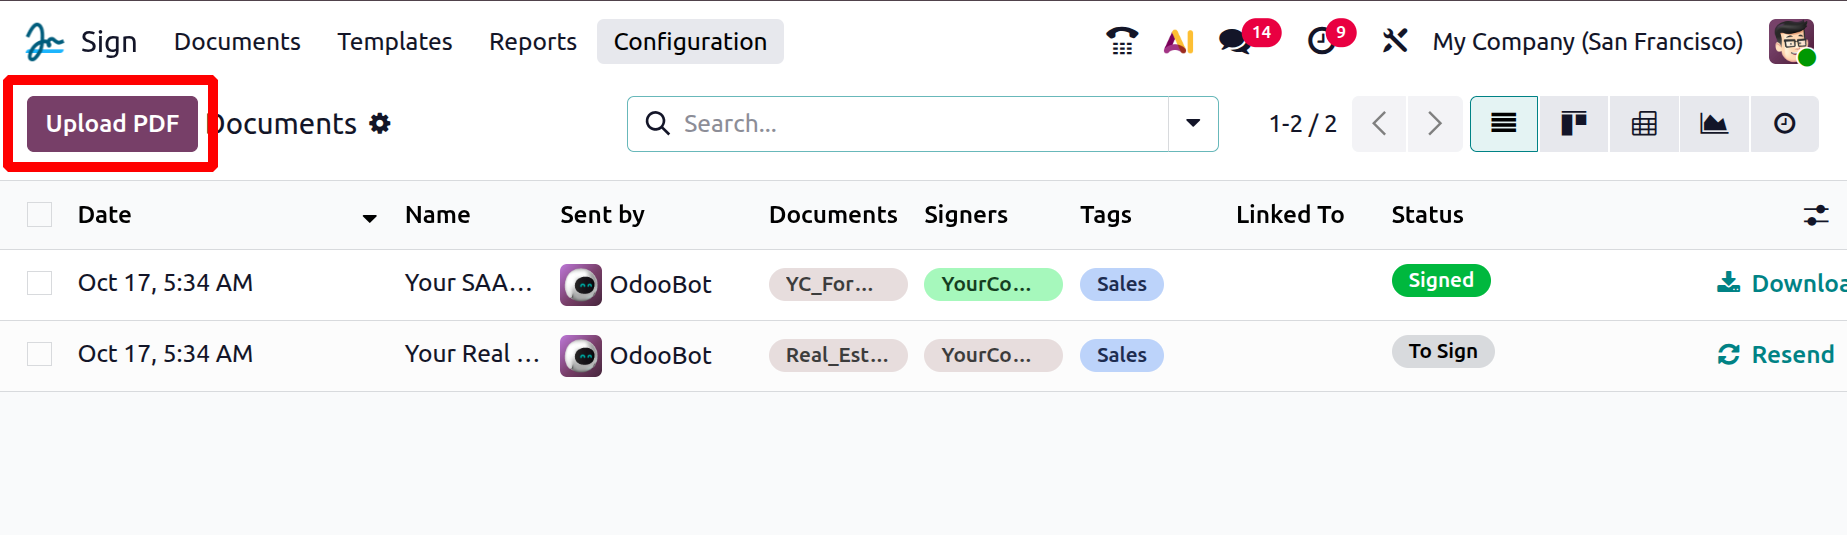
At the top of the window, you’ll find the Upload PDF button, which lets you add a new document directly from your system. Once uploaded, the document appears in the list along with relevant details, such as the sender’s name, the assigned signers, and the current signing status, for example, To Sign or Completed. A Resend option is also available, enabling users to easily resend signing requests when needed.
On the right side of the toolbar, multiple view options (List, Kanban, Graph, etc.) allow users to switch between different display modes according to their preference. In all, this interface ensures a clean, organized, and user-friendly experience for managing all document-signing activities in Odoo 19.
The Kanban View layout offers a clean and visually organized way to display all uploaded documents. Each document appears as an individual card showing essential details such as the file name, assigned signer, and upload date. This view provides a quick overview of all signing activities and helps users easily identify the status of each document.
Unlike the List View, which focuses on detailed tabular data, the Kanban view gives a compact, card-based representation of documents, ideal for users who prefer a more visual interface. Each card displays all necessary information in a simplified manner, allowing users to manage their documents at a glance without navigating through multiple pages.
The Kanban view enhances usability by making the document management process more intuitive and visually clear. It helps users stay informed about pending and completed sign requests while offering an organized workspace for tracking signature workflows efficiently within Odoo 19 Enterprise.

Each record in the Kanban view includes a dropdown menu that provides quick access to useful actions. By clicking on the three-dot icon in the top-right corner of a document card, users can perform various operations such as Details, Template, Cancel, and Archive. You can also assign color labels to your document cards, helping you categorize and identify them quickly. Using color coding is especially helpful when working with multiple contracts, agreements, or forms, as it adds a clear visual distinction between different types of documents.
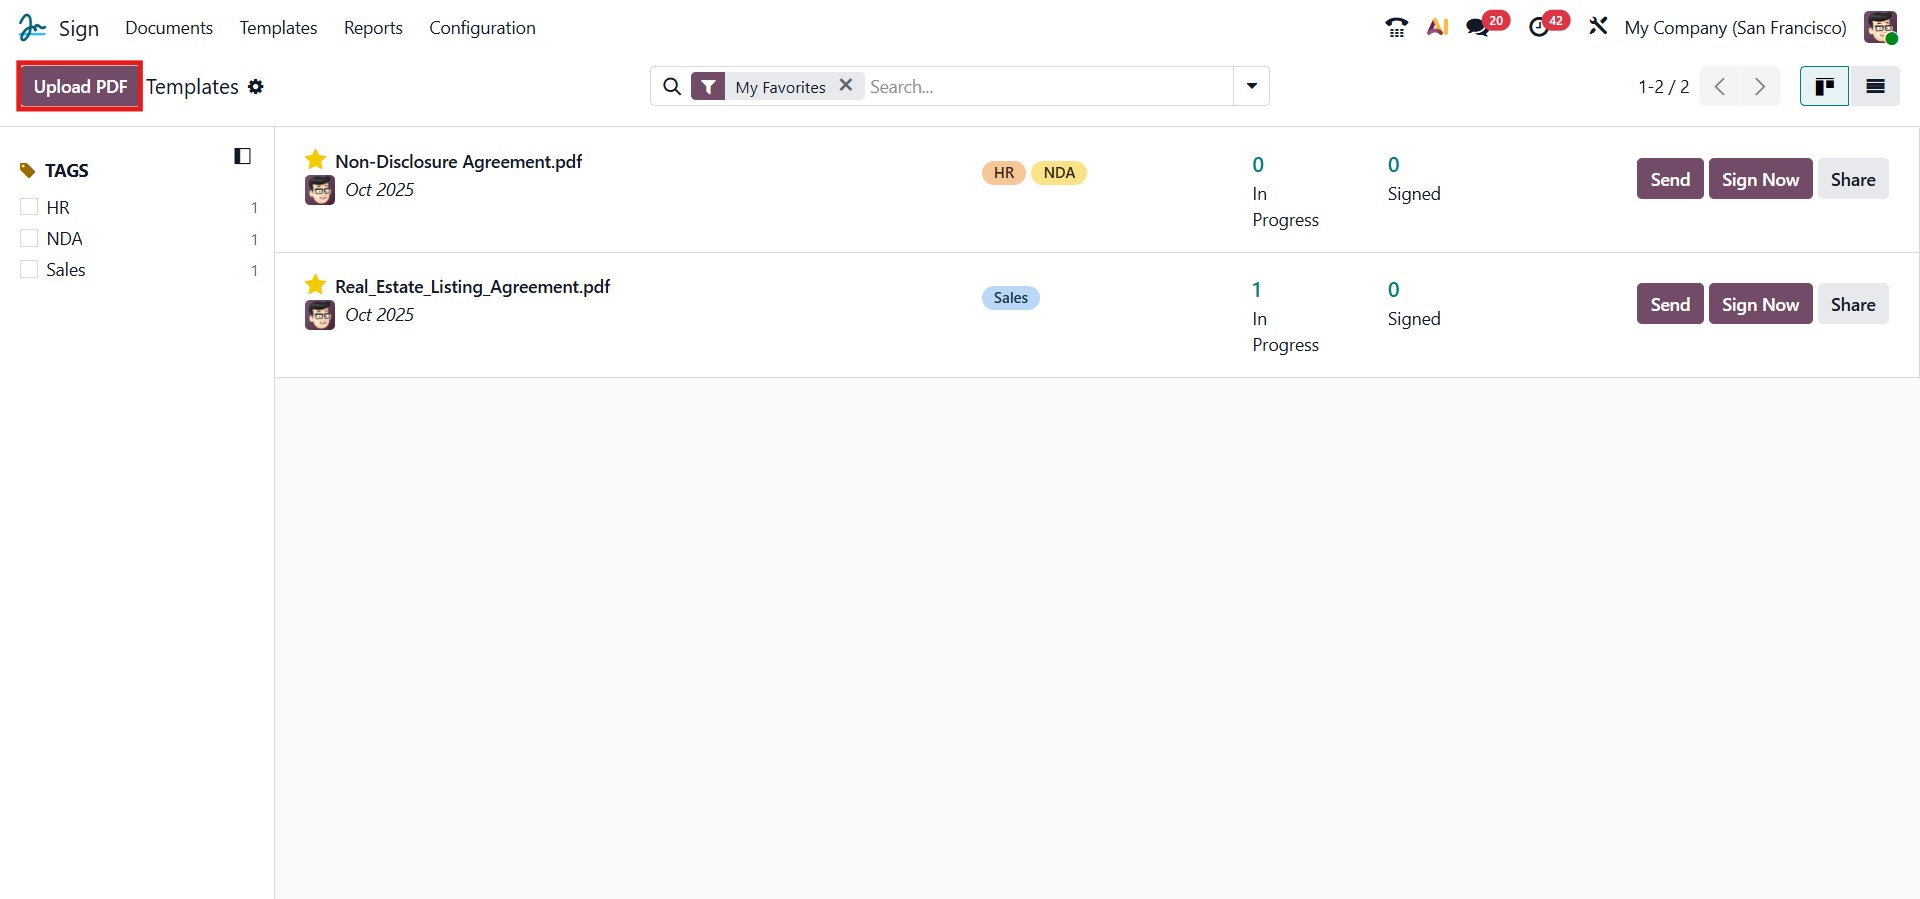
The Templates window in the Sign module offers a clean and efficient layout for managing all your document templates. The left side of the window displays a Tags panel, where templates are grouped and organized according to their assigned tags, such as HR, NDA, or Sales.
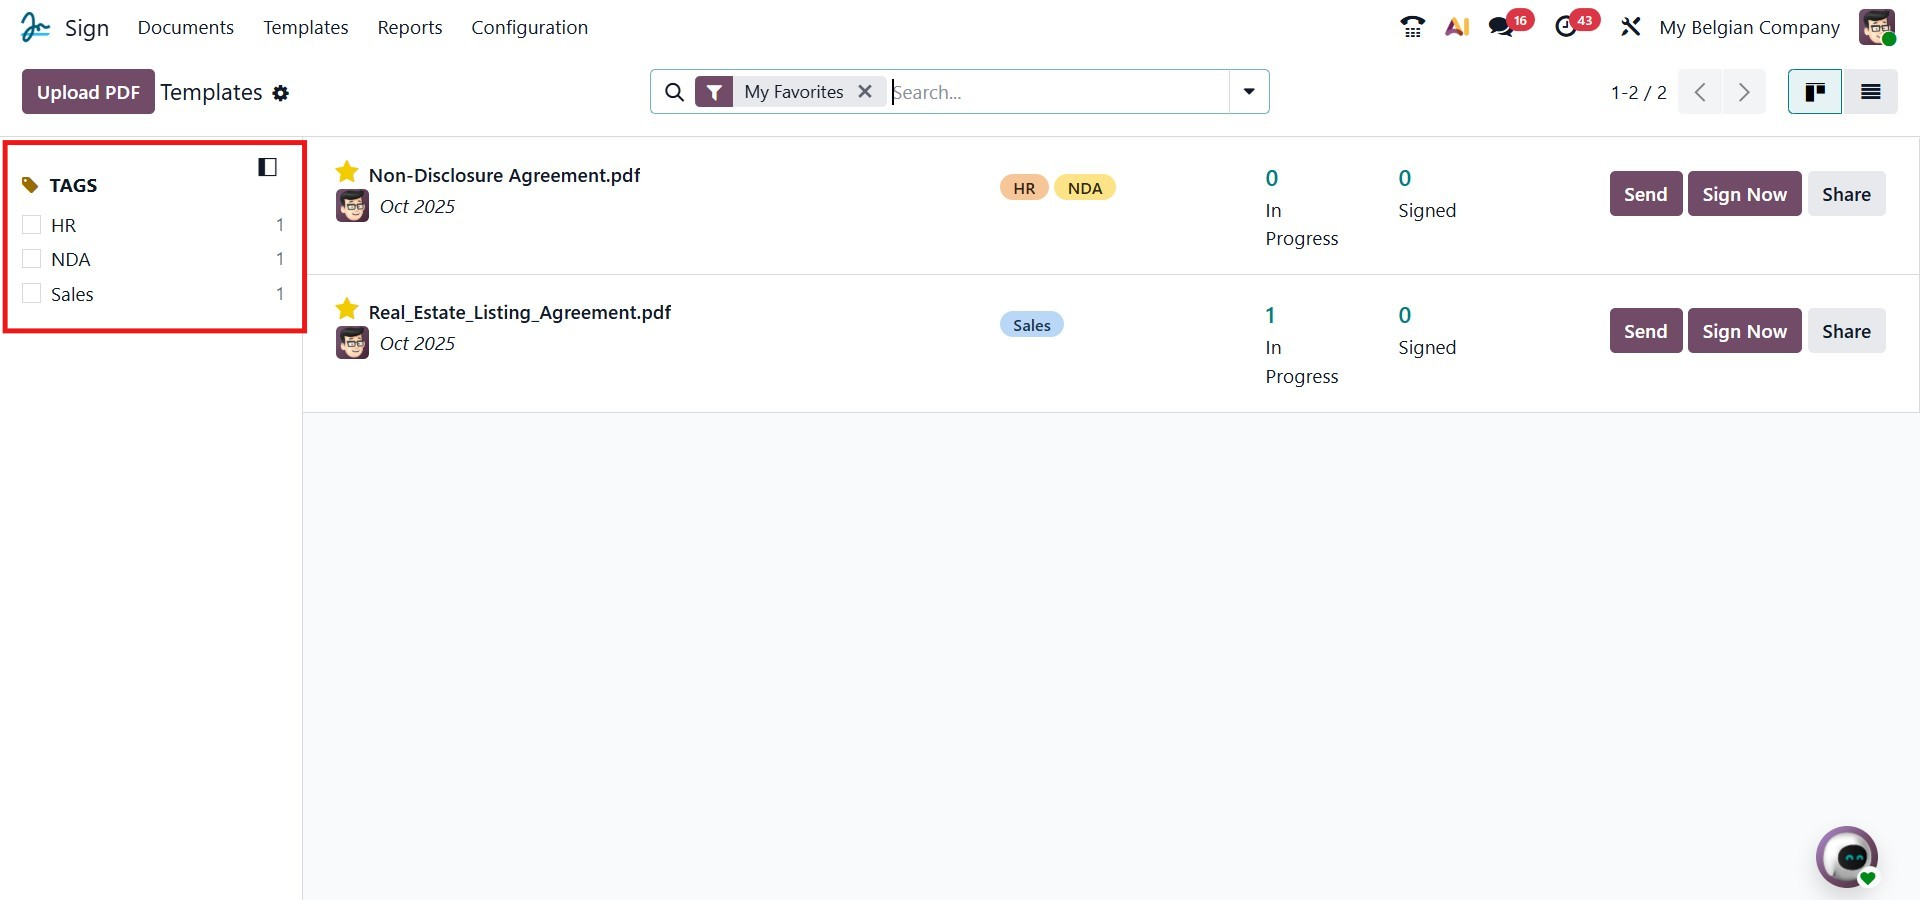
Each template is displayed on the right side of the interface in a card-style format, showing key information such as the template name, tags, creation date, and responsible user. You can also view the number of documents currently in progress and the number of documents that have been signed for each template. The interface includes quick-action buttons like Send, Sign Now, and Share, enabling users to perform common tasks directly from the dashboard without additional steps.
This organized view helps users maintain clarity and control over all document templates, ensuring that every contract, agreement, or form is properly categorized and easily accessible within the Sign module.
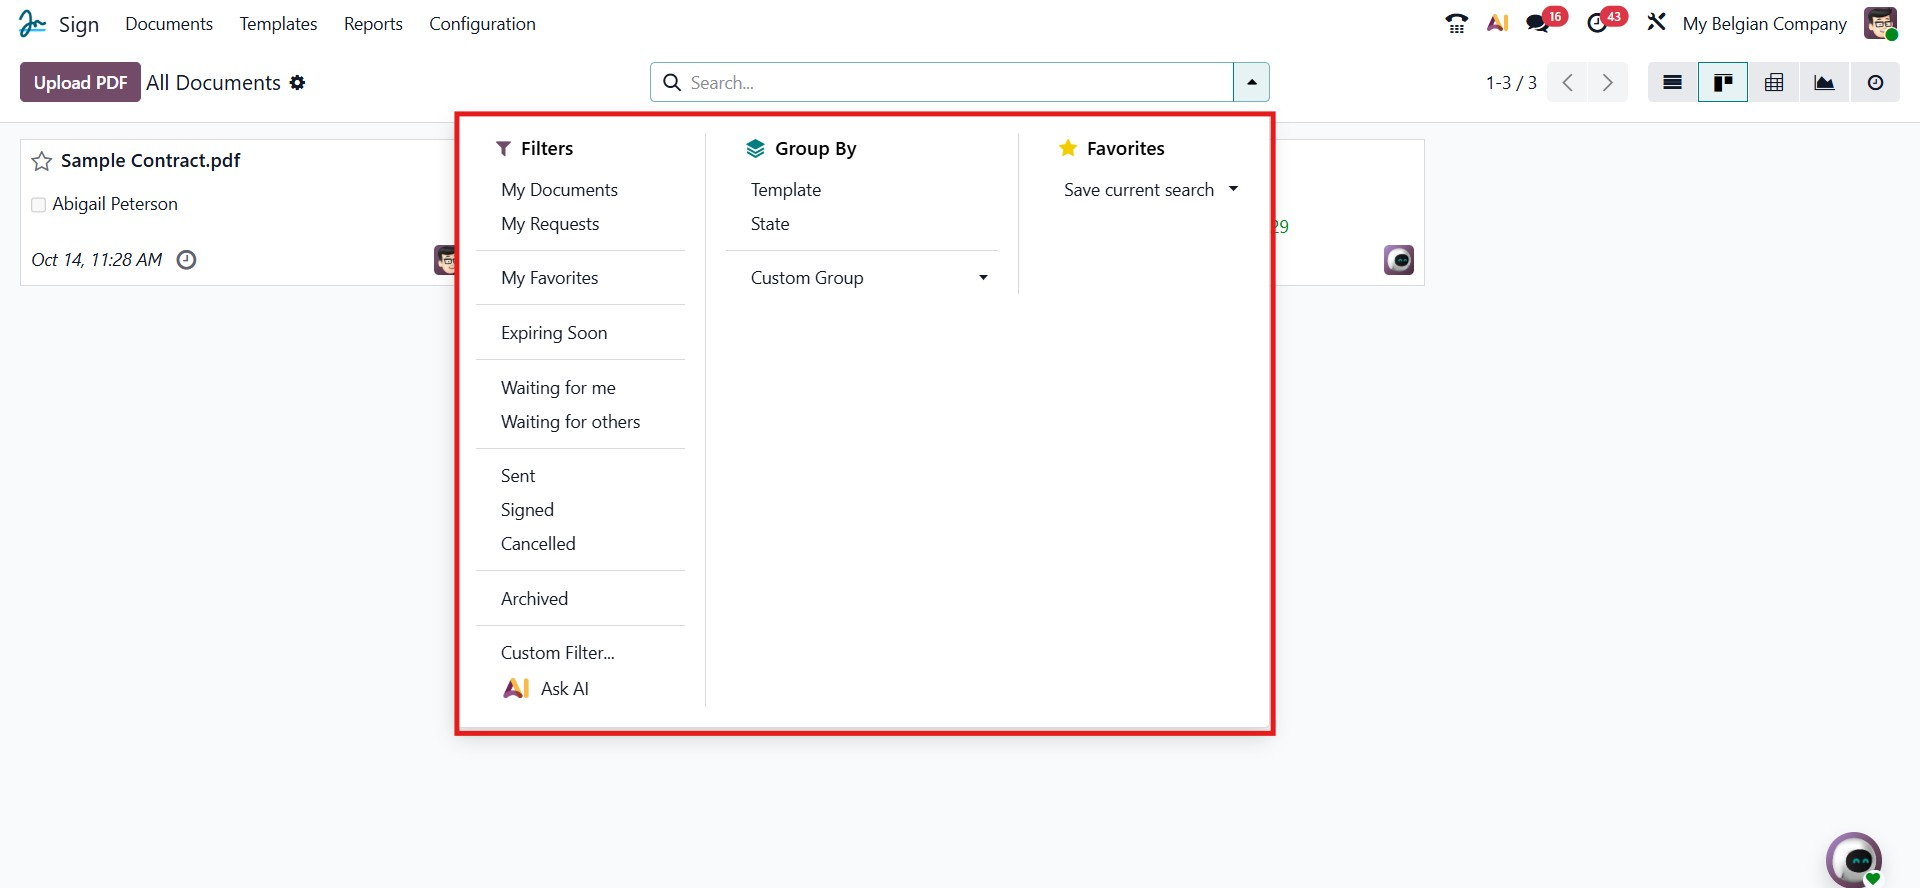
At the top of the All Documents window in the Sign module, users can find the Filters, Group By, and Favorites options, along with the Search bar. These tools help users easily sort, categorize, and locate specific sign requests or documents. Under the Filters menu, Odoo 19 now includes several predefined options such as My Documents, My Requests, My Favorites, Expiring Soon, Waiting for Me, Waiting for Others, Sent, Signed, Cancelled, and Archived. Users can also create a Custom Filter or use the new Ask AI option for intelligent search assistance. The Group By menu allows documents to be grouped by Template or State, while the Favorites menu lets users save current searches for future reuse.
You can upload a new document for signing by clicking the Upload PDF button located at the top left of the Sign dashboard. This option allows you to select and upload a PDF file directly from your computer. Once uploaded, you can review the document and add the required signature fields. To digitally sign the document, simply select the uploaded file and proceed with the signing process within Odoo.

In Odoo 19, selecting the Upload PDF button not only allows you to upload a new document but also enables you to update an existing PDF template. This feature is useful when you need to modify or replace a document template that is already in use, ensuring that the latest version is available for future signature requests.
After clicking the Upload PDF button, you can browse and select the desired PDF file from your system. Once the file is uploaded successfully to Odoo 19, a preview window of the newly added document will appear. This preview allows you to review the content before adding signature fields or sending it for signing, as illustrated in the image below.
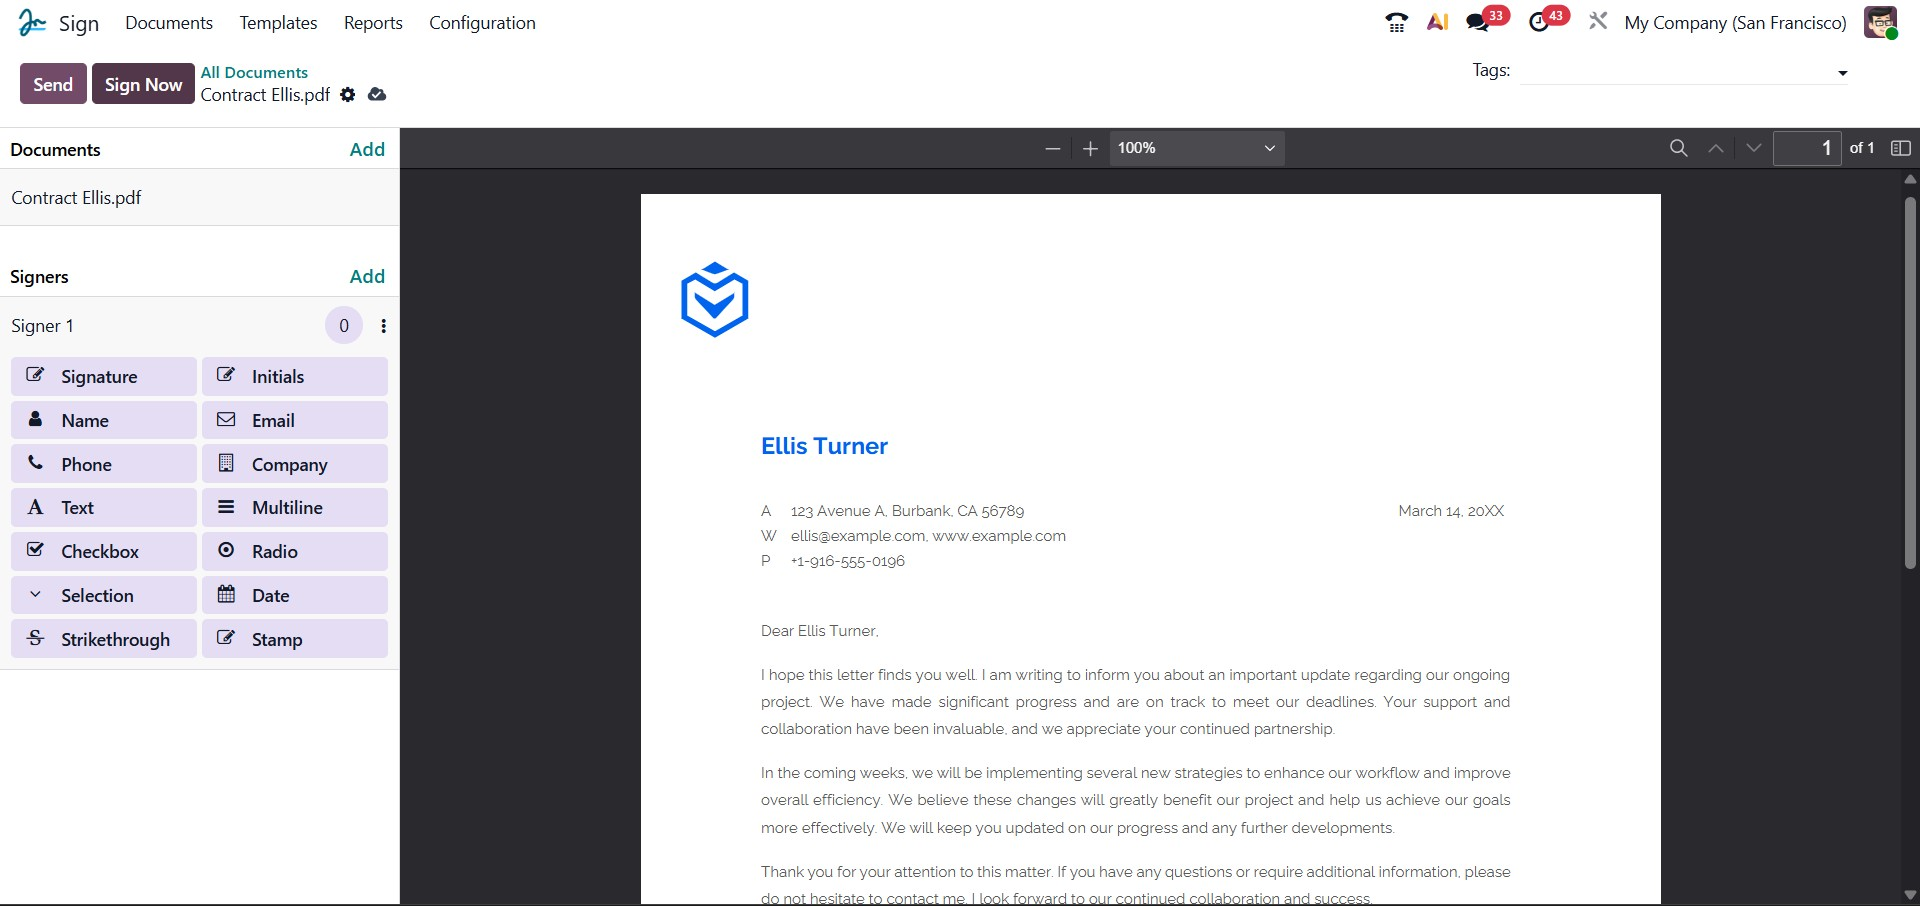
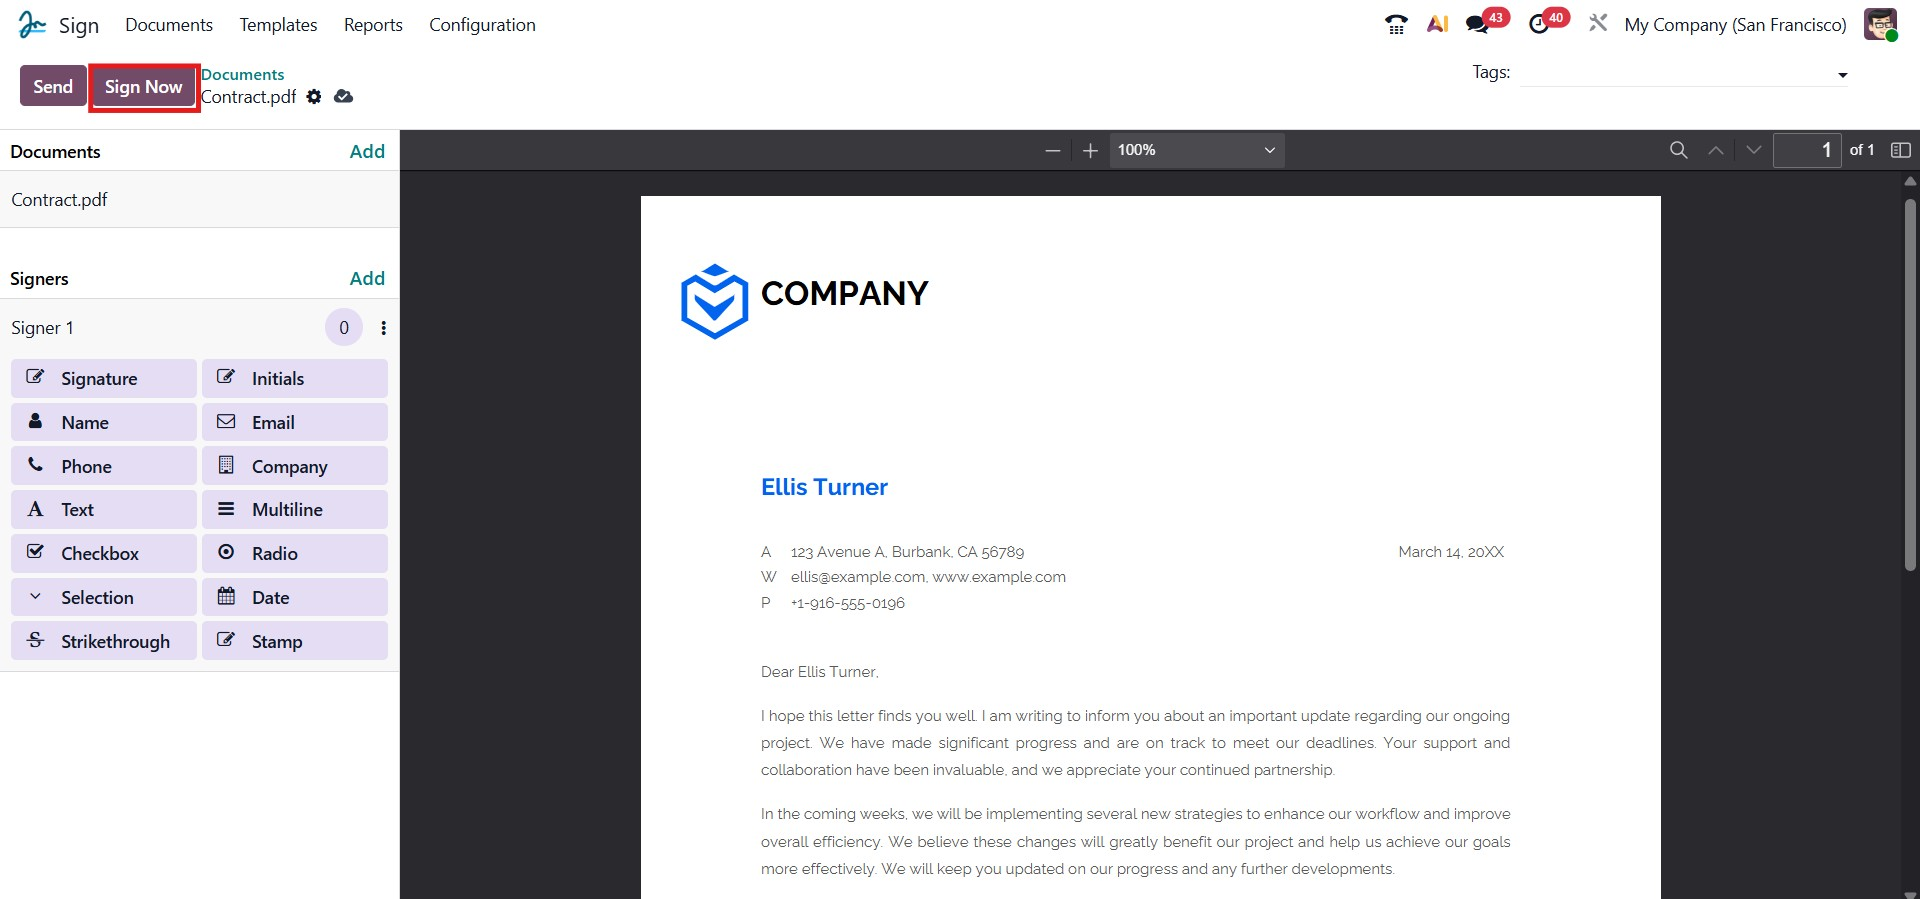
The detailed PDF preview is displayed in the following image. Within this view, you can find multiple options and tools to customize your document before sending it for signing. On the left panel of the window, various field options are available, which can be dragged and dropped onto the document as needed. These fields are highlighted in the illustration below.
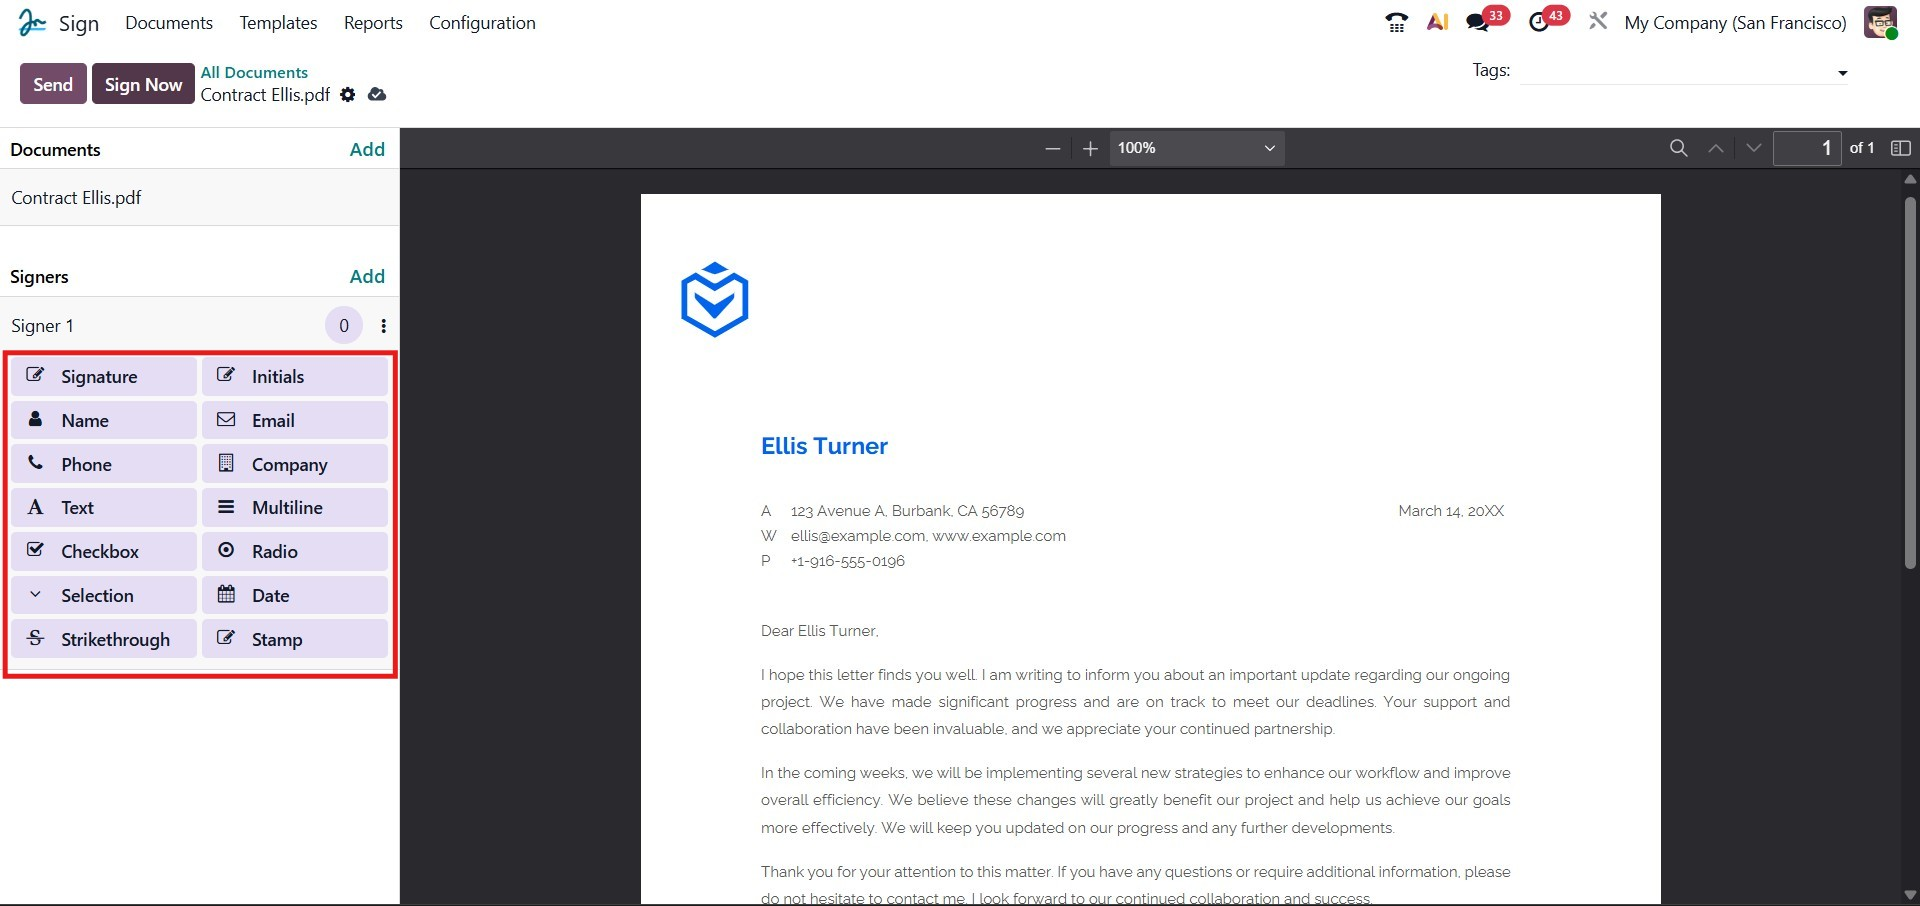
Odoo 19 introduces an enhanced collection of predefined fields that can be inserted into your document for signing and data collection. These include Signature, Initials, Name, Email, Phone, Company, Text, Multiline, Checkbox, Radio, Selection, Date, Strikethrough, and Stamp. Each of these elements can be easily dragged and dropped from the left-hand panel onto the desired area of your PDF.
To add a signature, simply drag the Signature field onto the appropriate section of the document. Likewise, you can place other fields to capture essential details or verification inputs. Once you select the Signature field on the document, a pop-up window will appear, allowing you to configure the signing field.
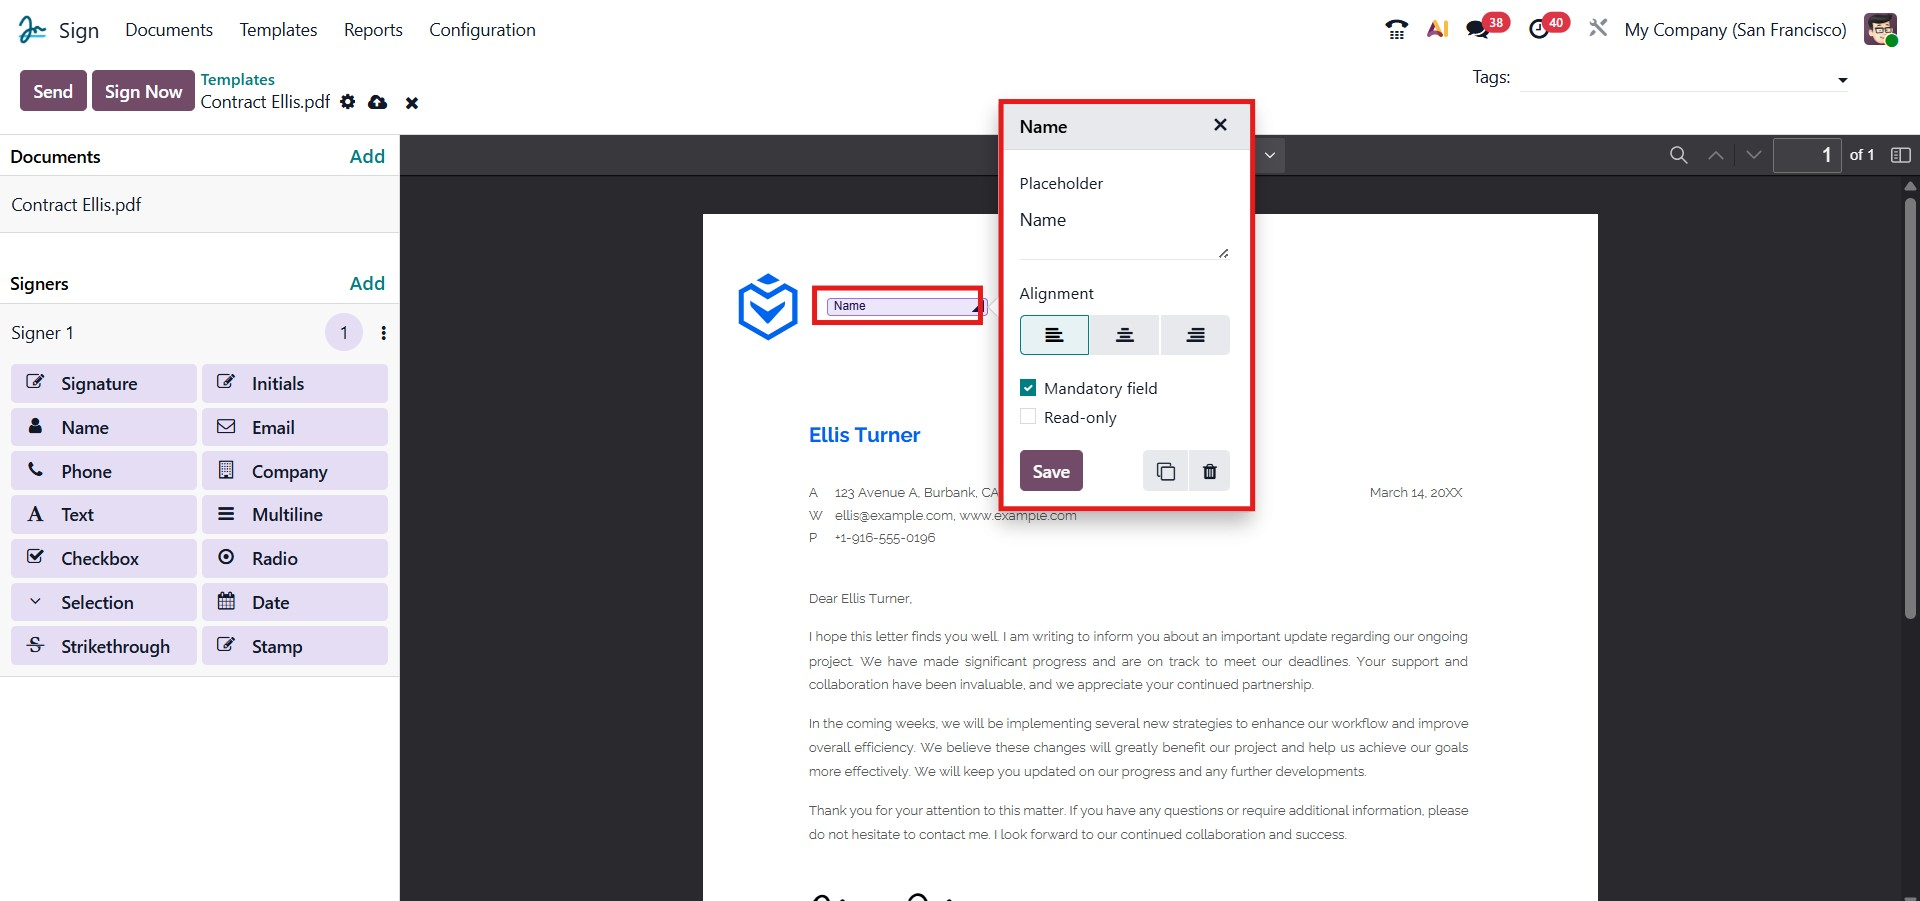
After dragging and placing a field Name onto the document, you can configure its properties directly in a pop-up window, as shown below. This pop-up allows you to set a placeholder name, choose the alignment (left, center, or right), and specify whether the field should be marked as a mandatory field or read-only. Once the configurations are complete, click the Save button to apply the changes.
The field can be freely resized or repositioned anywhere on the document to match your layout preferences. You can repeat the same process for other fields, such as Signature, Date, Company, or Email, depending on the type of information you want to collect. After filling in and adjusting all mandatory fields, click Save again to confirm the updates.
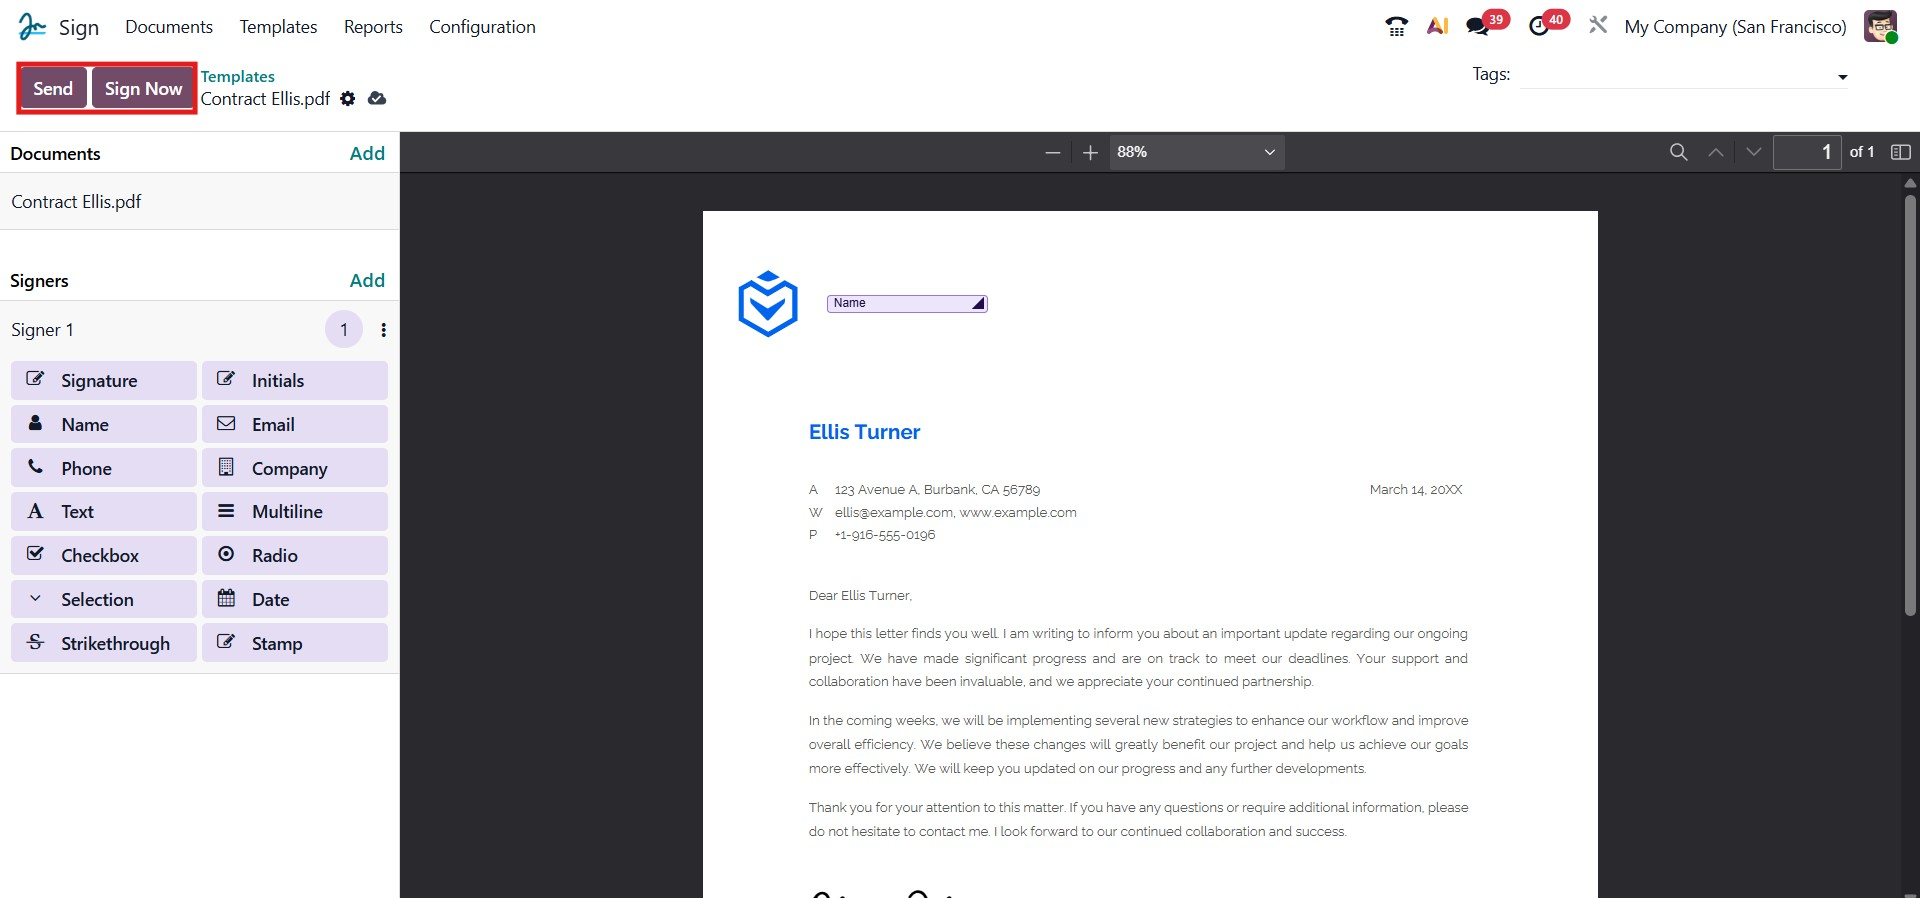
In the upper-right corner of the window, you will find two options — Send and Sign Now.
The Send button allows you to share the document with the intended recipient for their review and signature. You can specify the recipient’s email address, and Odoo will automatically send the document link for signing. This ensures a smooth and secure document-sharing process.
On the other hand, clicking the Sign Now button lets you complete the signing process immediately within the current session, without sending it to another party. This option is particularly useful when the signer is physically present or when you want to finalize the document right away.
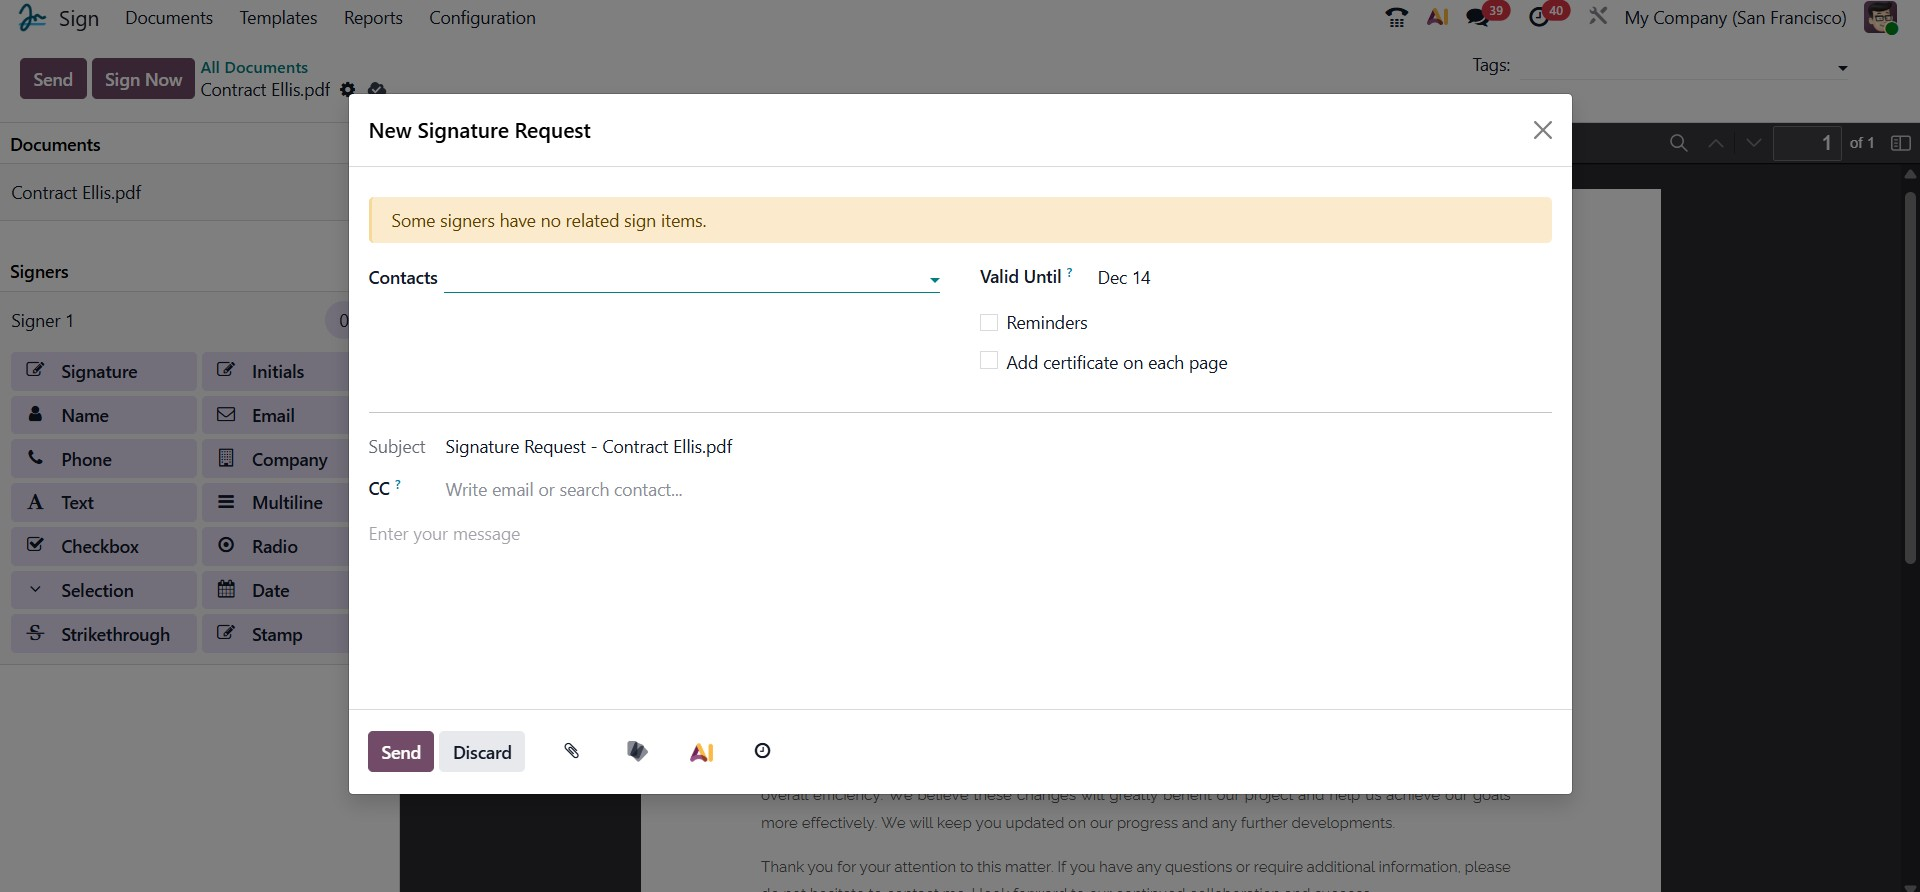
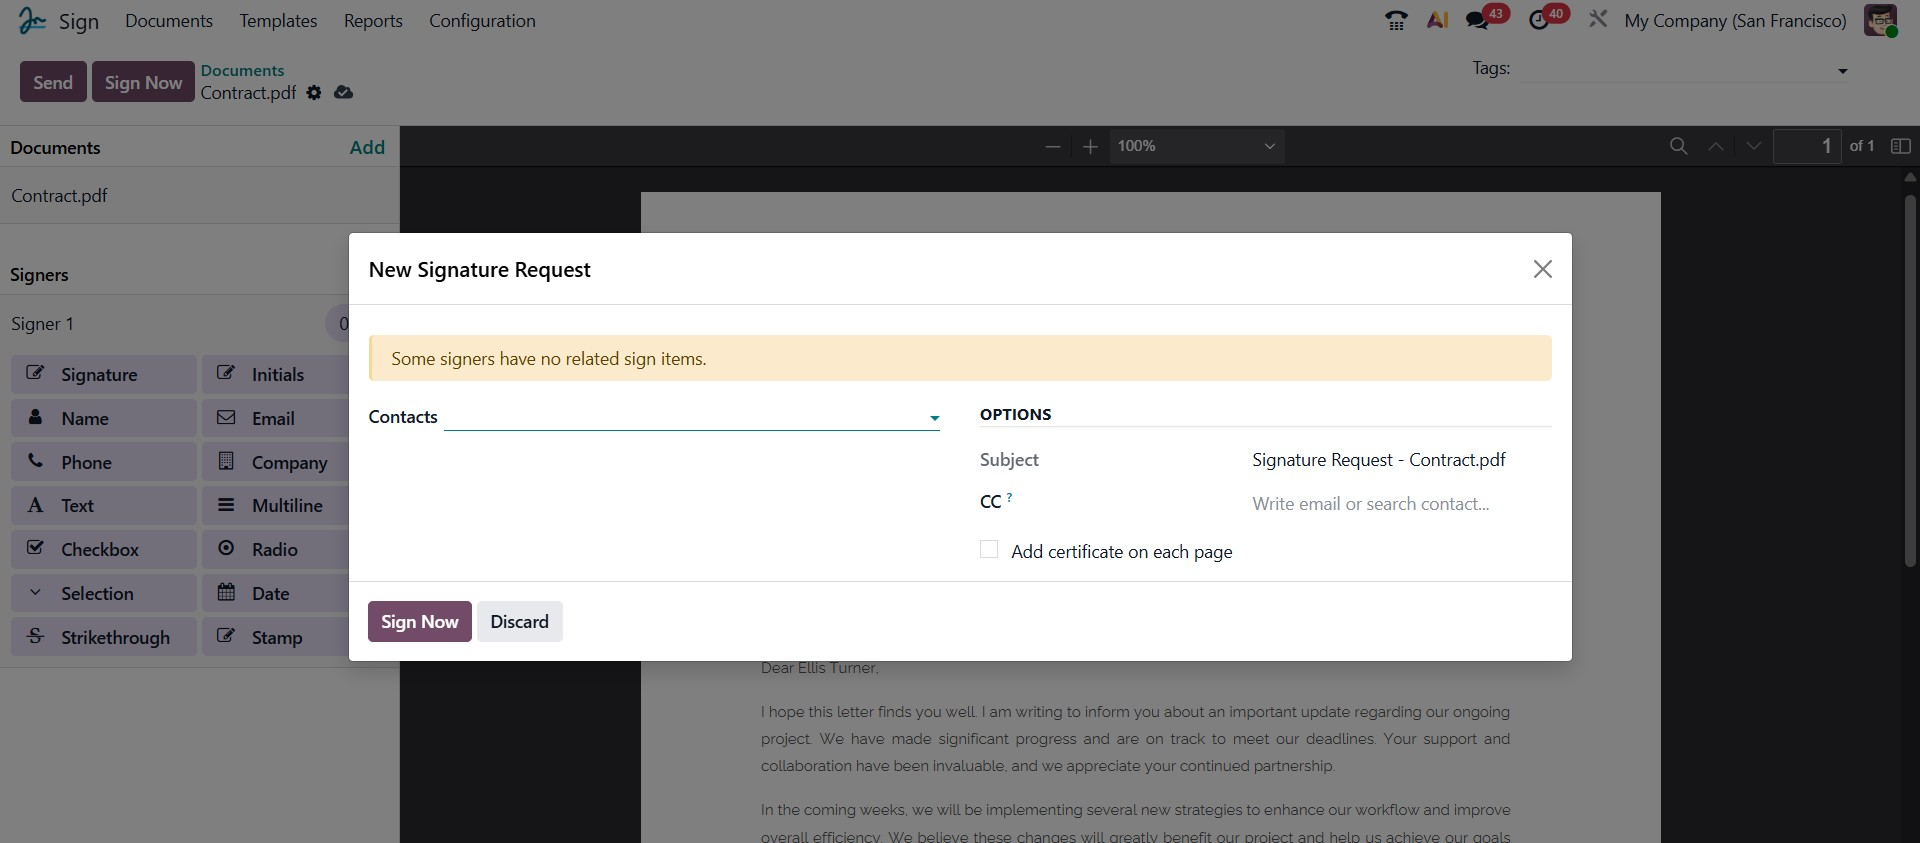
After placing all the required signature fields on the document, click on the Send button located at the top of the window. This action opens a new pop-up window titled New Signature Request, as shown in the screenshot above. This window allows you to configure and finalize the details of your signature request before sending it to the respective recipients.
In the Contacts field, you can specify or select the individuals who need to sign the document. The selected contacts will receive an email containing a secure link to access and sign the document. The Valid Until field defines the expiration date of the request, after which the document will no longer be available for signing. You can also enable the Reminders option to automatically notify recipients as the validity period nears its end. Additionally, the option Add certificate on each page can be selected if you wish to include a digital certificate on every page of the signed document for enhanced authenticity.
The Subject field is automatically populated with the name of the document being sent, while the CC field allows you to add additional recipients who will receive a copy of the document once it has been signed or declined. In the message box provided, you can include a custom note or additional instructions for the signers, which will appear in the email notification sent to them.
Once all the required information has been entered, click Send to dispatch the signature request. Alternatively, if you wish to sign the document immediately, you can use the Sign Now button. After the document is sent, Odoo will automatically notify you of the status of the signature request and inform you when the recipients have completed the signing process.
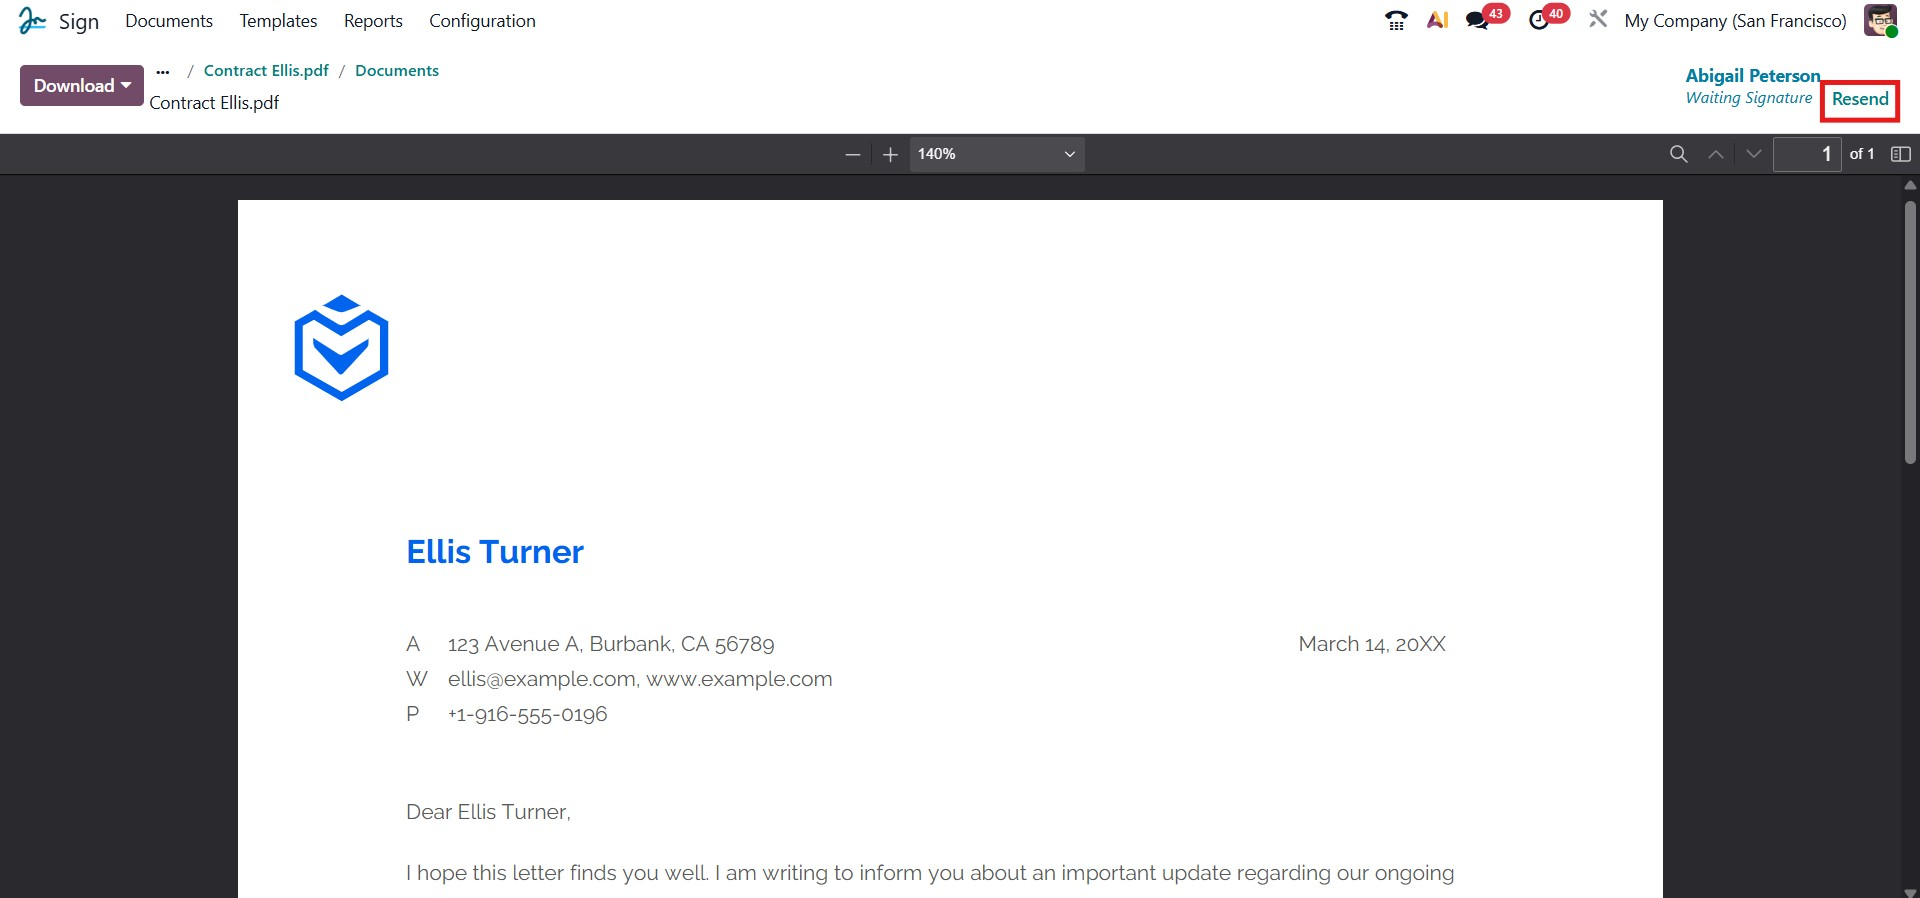
If any of the recipients fail to respond to the signature request within the specified time, Odoo allows you to resend the invitation without creating a new request. By clicking the Resend button located in the upper-right corner of the window, you can easily send the invitation again to the concerned signers. This ensures that all participants are reminded to complete their signatures promptly and helps maintain the workflow without delays.
When the Sign Now button is clicked, Odoo automatically assigns the Customer, Subject, and File Name fields according to the selected document. A pop-up window titled New Signature Request will appear, as shown in the image above. In this window, you can select the contact of the signer from the Contacts field. The Subject is automatically filled in with the document name. If needed, you can also add additional recipients under the CC field so they receive a copy of the document once the process is complete. The option Add certificate on each page can be selected if you want the system to include a digital certificate on every page of the document.
Once all details have been verified, you can proceed by clicking the Sign Now button to sign the document immediately or choose Discard to cancel the process.
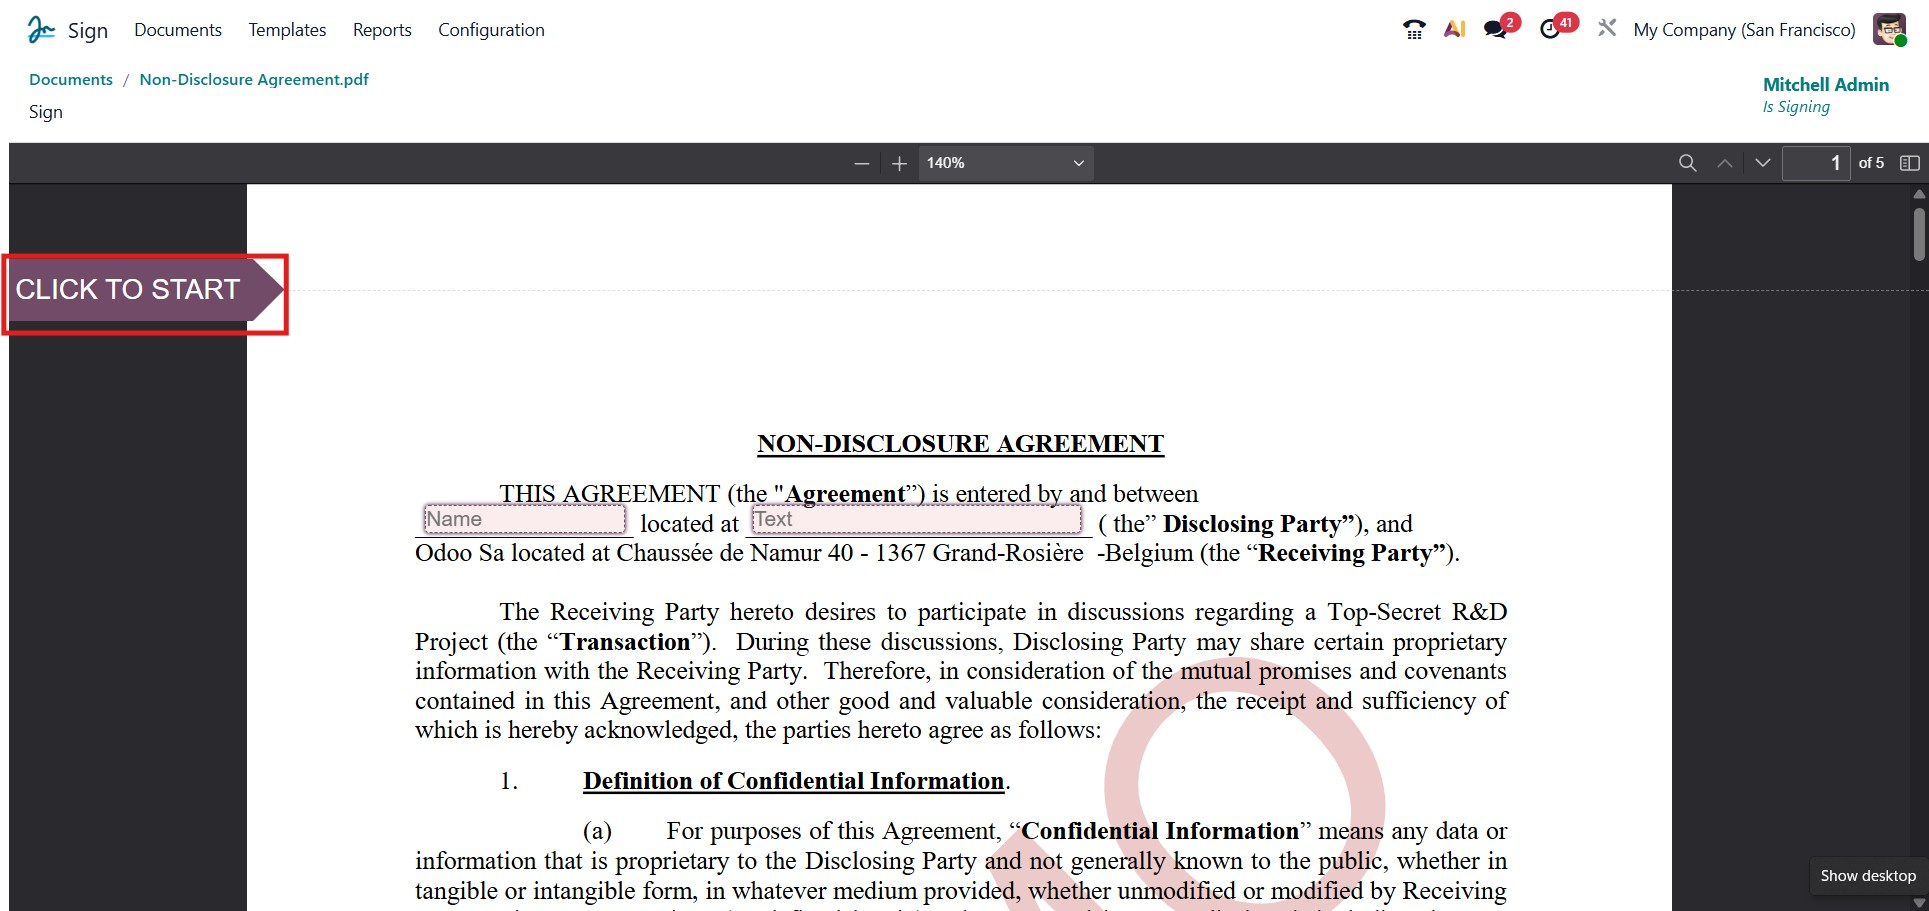
After sending or opening the document for signing, click the Click to Start button located below the document preview to begin filling in the mandatory fields. Odoo intelligently detects each required field and automatically guides you through them in sequence, ensuring that no field is overlooked during the signing process.
The system navigates you from the beginning of the document to the end in a structured, step-by-step manner. Once you complete one field, Odoo immediately highlights the next one to maintain a smooth workflow. When you reach a signature field, a dedicated pop-up window will appear, allowing you to add your digital signature directly within the document.
This guided process makes signing efficient and precise, ensuring that all required information is completed accurately before final submission. The image below shows the signature pop-up window that appears when signing a document.
You will be guided from the beginning of the document to the end in a clearly defined sequence. After completing one field, Odoo will automatically move you to the next required area, ensuring that all fields are filled without missing any step. When you reach the Signature field, a pop-up window will appear, as shown in the image below. This is where your signature will be embedded into the document.
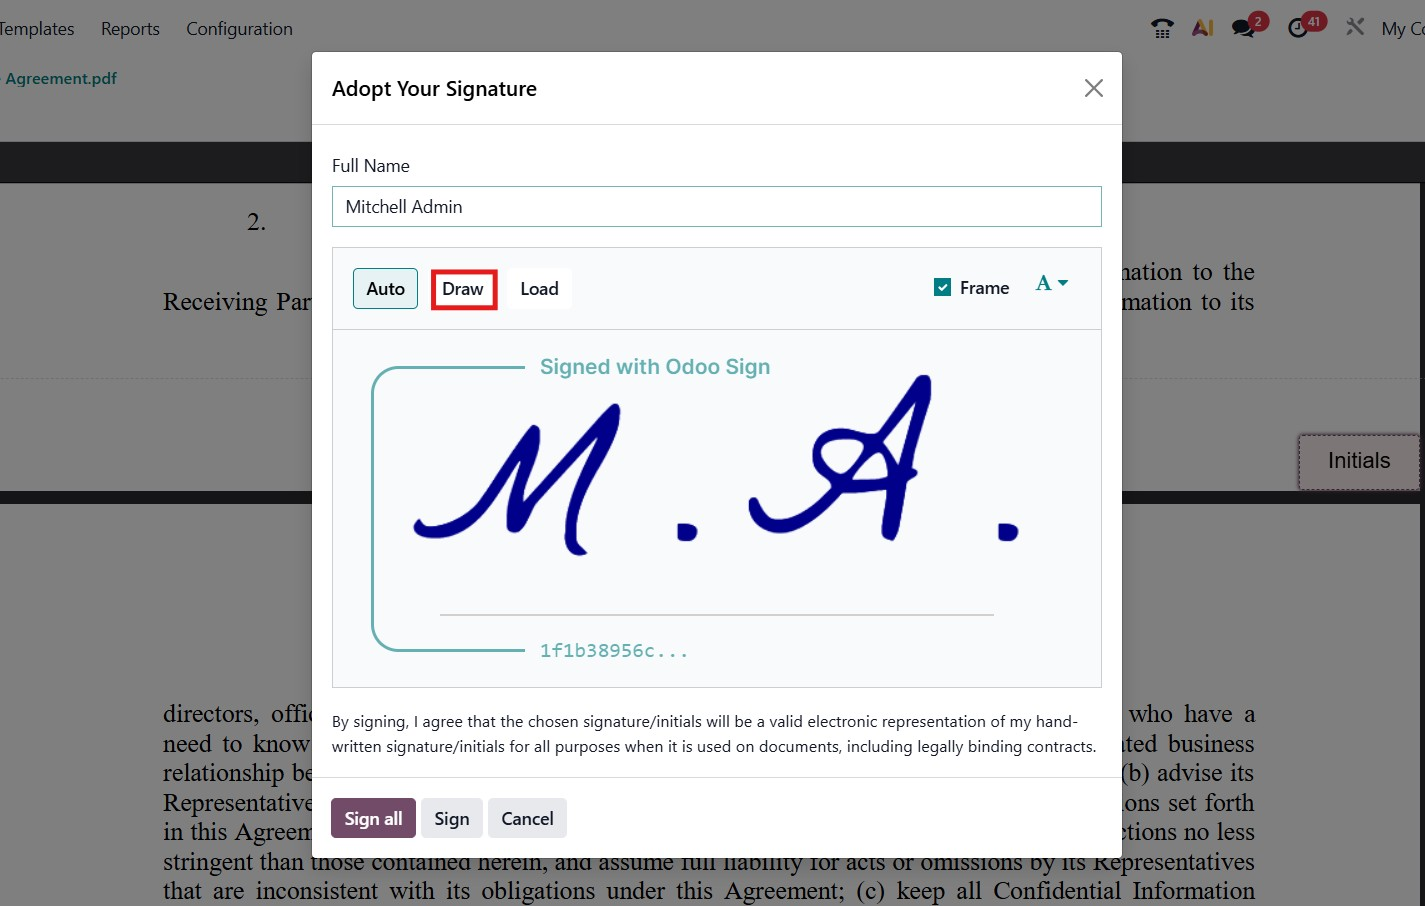
You can start by filling out the Full Name field by typing your complete name. Once entered, you can proceed to sign the document. Odoo 19 provides a variety of signature options, allowing you to personalize your signature according to your preference. By selecting the Draw option, you can manually create your signature using a mouse, digital pen, or touch input device directly within the pop-up window. This flexibility ensures that each signer can easily provide a signature in a format that feels natural and authentic.
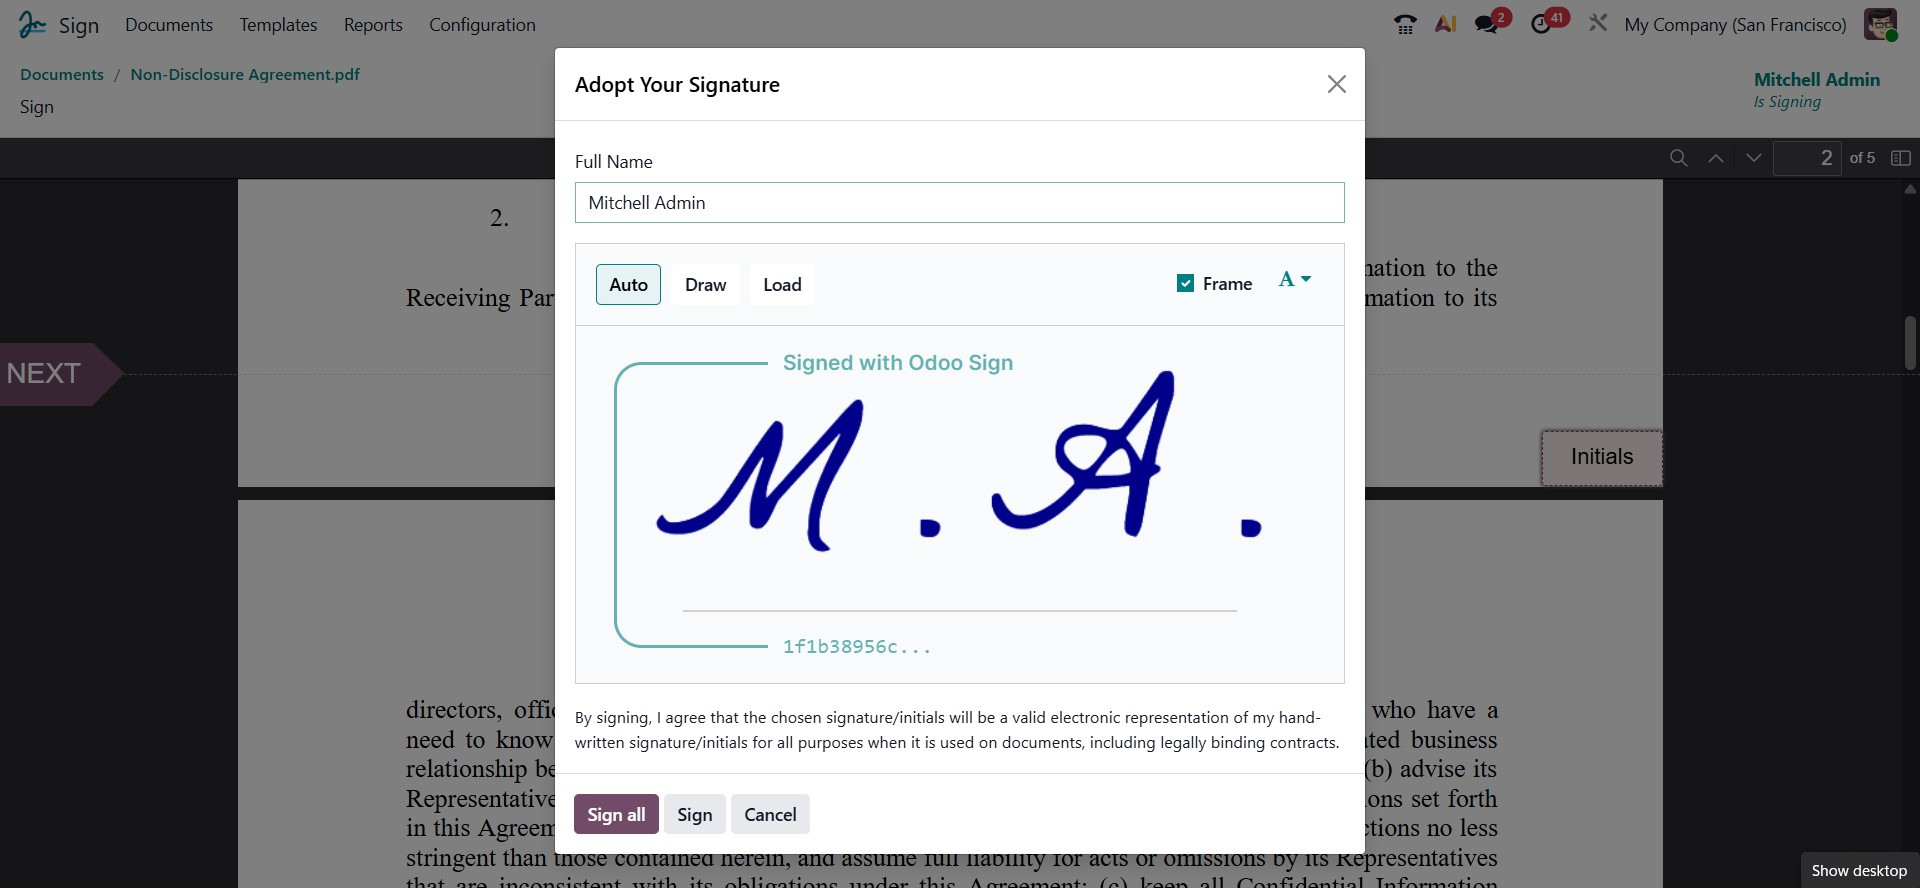
The next option available is the Auto signature mode. In this option, Odoo automatically generates a digital signature based on the signer’s full name. The system offers a variety of predefined signature styles to choose from, allowing the user to select the one that best suits their preference. This feature ensures a quick and professional signing experience without the need to draw or upload a signature manually.
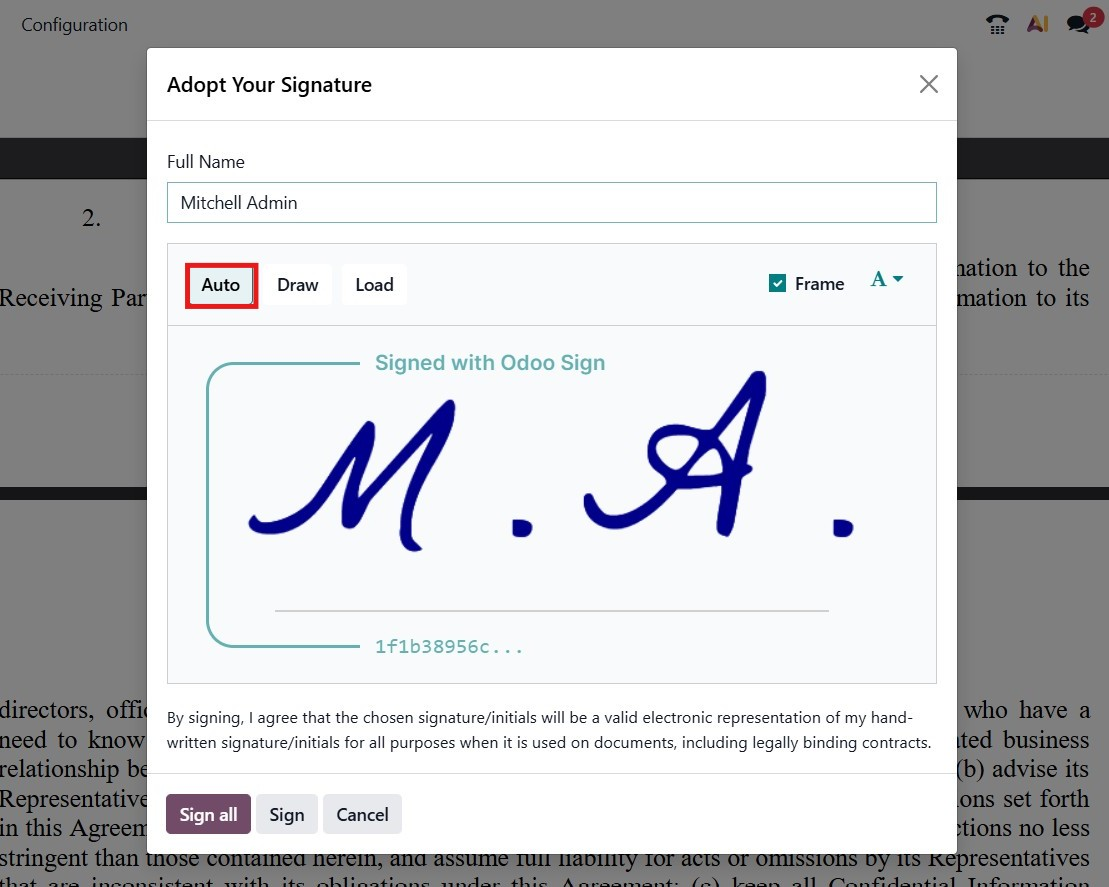
The final option is the Load feature, which allows the user to upload an existing signature directly from their system. This option is particularly useful for those who already have a predesigned or scanned signature file. By using the Load option, clients can easily import their signature into Odoo, ensuring consistency across all official documents and maintaining their preferred signing style.
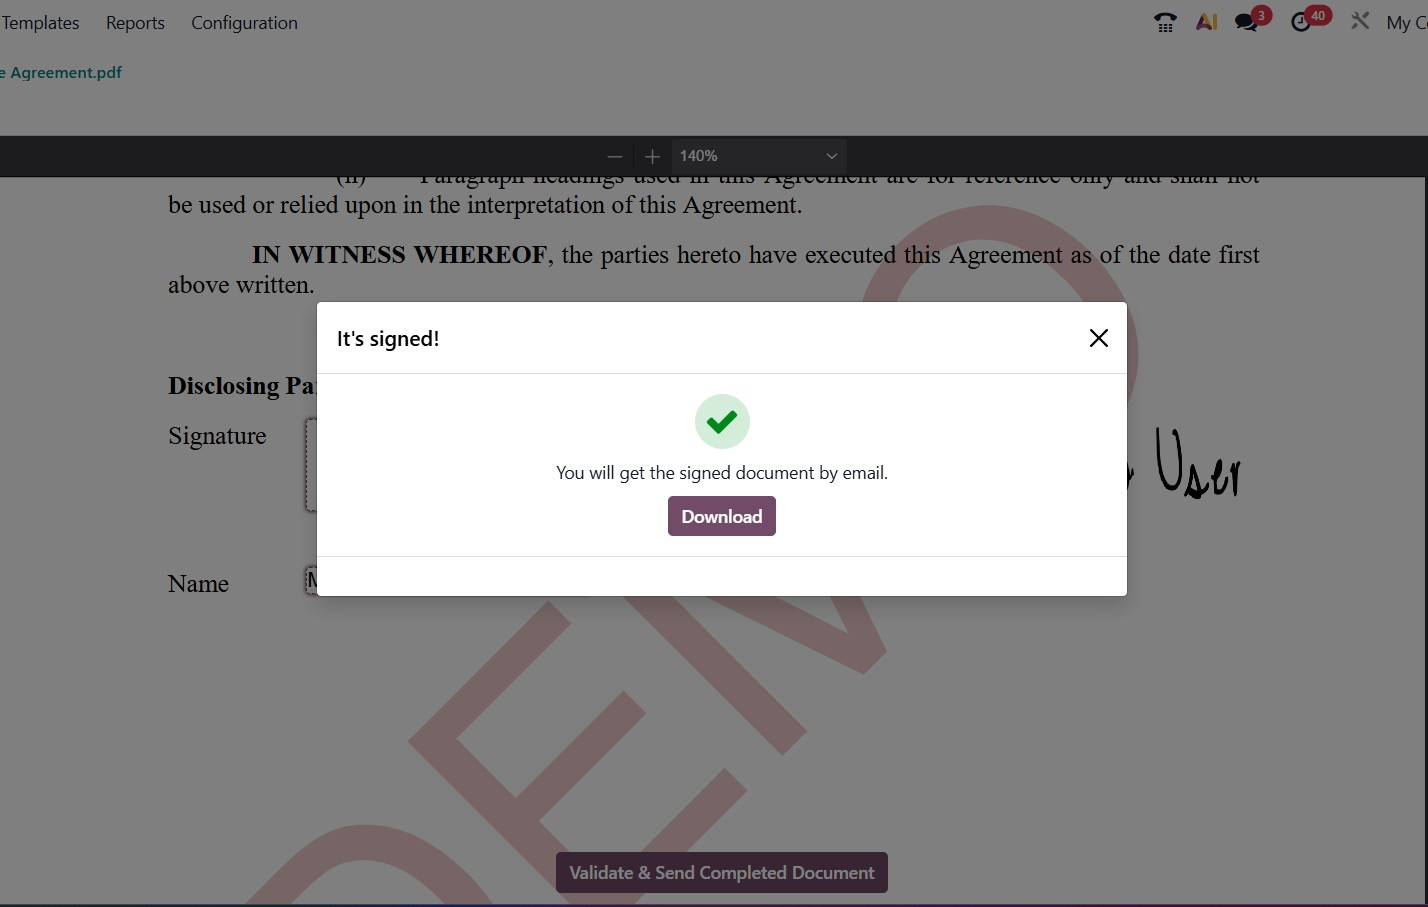
As shown in the screenshot, the system now displays a clear declaration notice before signing. The client can select their preferred signing method and then click the Sign All button. By doing so, the user acknowledges that their electronic signature is valid and legally binding, ensuring the document is recognized as an official agreement.
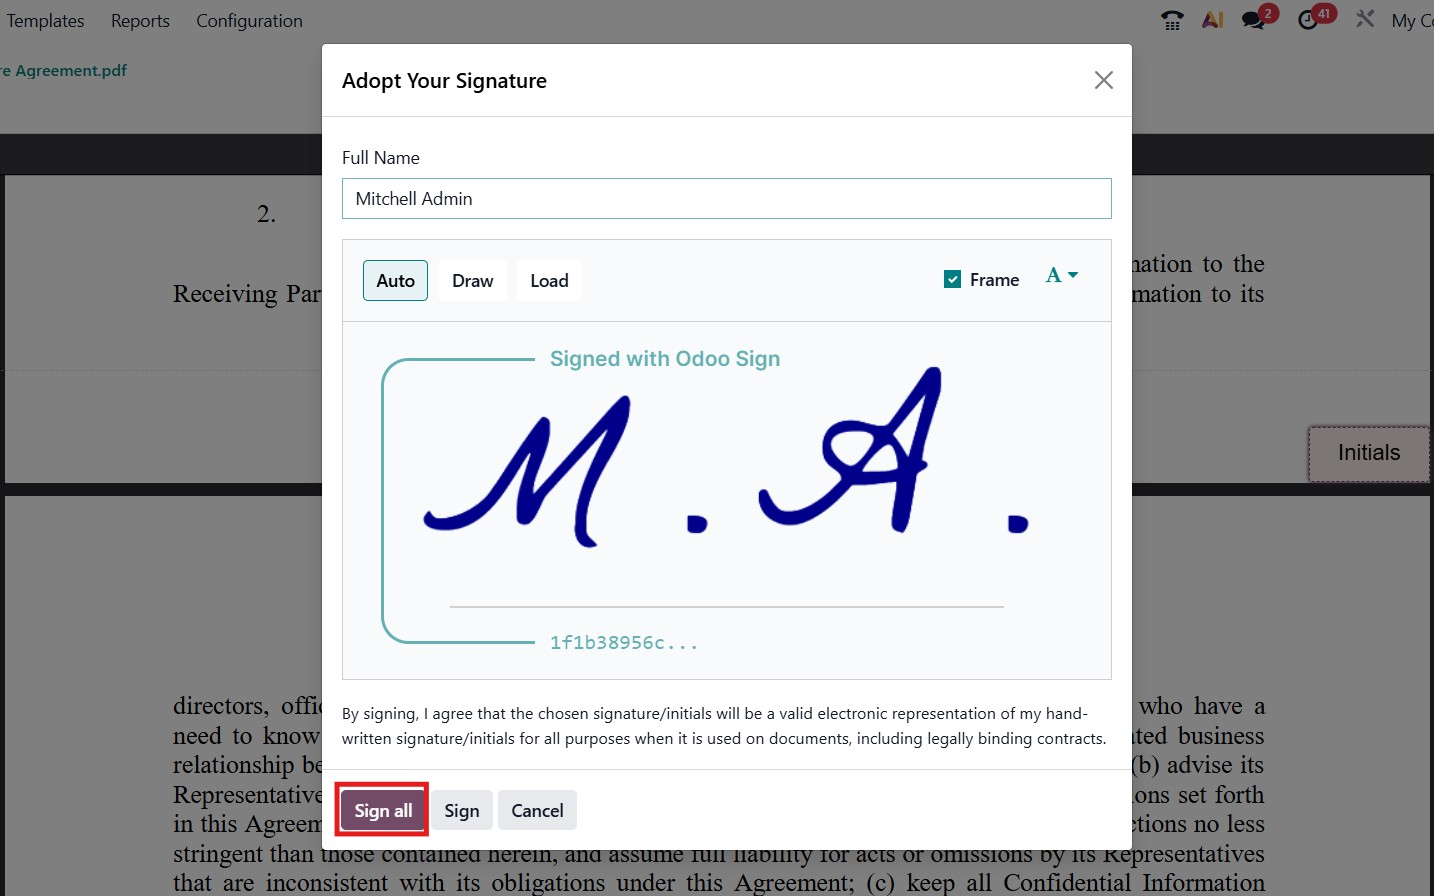
Once all fields in the document are completed, the user can click the “Validate and Send Completed Document” button located at the bottom of the page. This action finalizes the document and sends it to the intended recipients, ensuring that the signed document is officially recorded and shared.
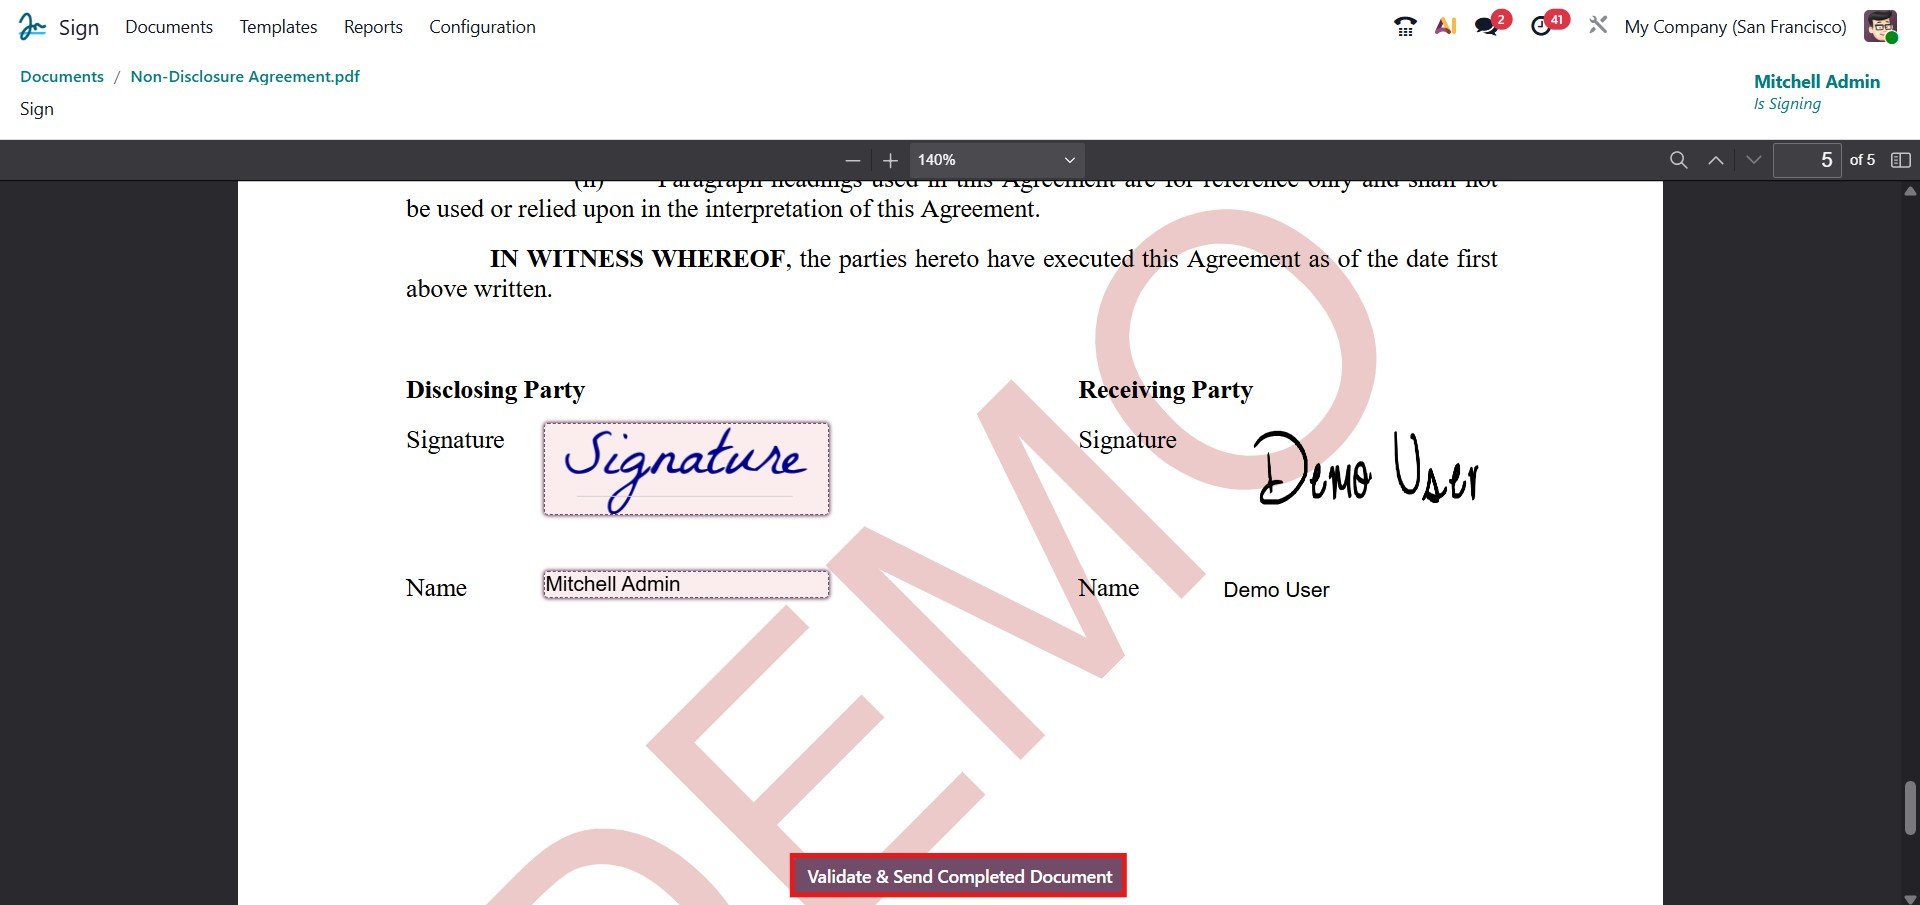
After completing the signing process, a pop-up window appears confirming that the signature has been saved. The client will also receive an email containing a copy of the signed document. If additional documents require signatures, the pop-up provides options to Sign Next Document, Download Document, or Close, along with details about the remaining documents that need attention. The signed document can be downloaded at any time by clicking the Download Document button. Additionally, it is helpful to explore the Documents tab within the Sign module. This tab provides an organized view of all signed and pending documents, making it easier to manage, track, and access documents efficiently.
1. Documents
The Documents tab in the Odoo 19 Sign module opens the main Documents window, which serves as the central hub for managing all documents sent out for signatures.
Within this tab, you can access both All Documents and My Documents, allowing users to efficiently track, organize, and manage their own documents as well as those shared across the organization.
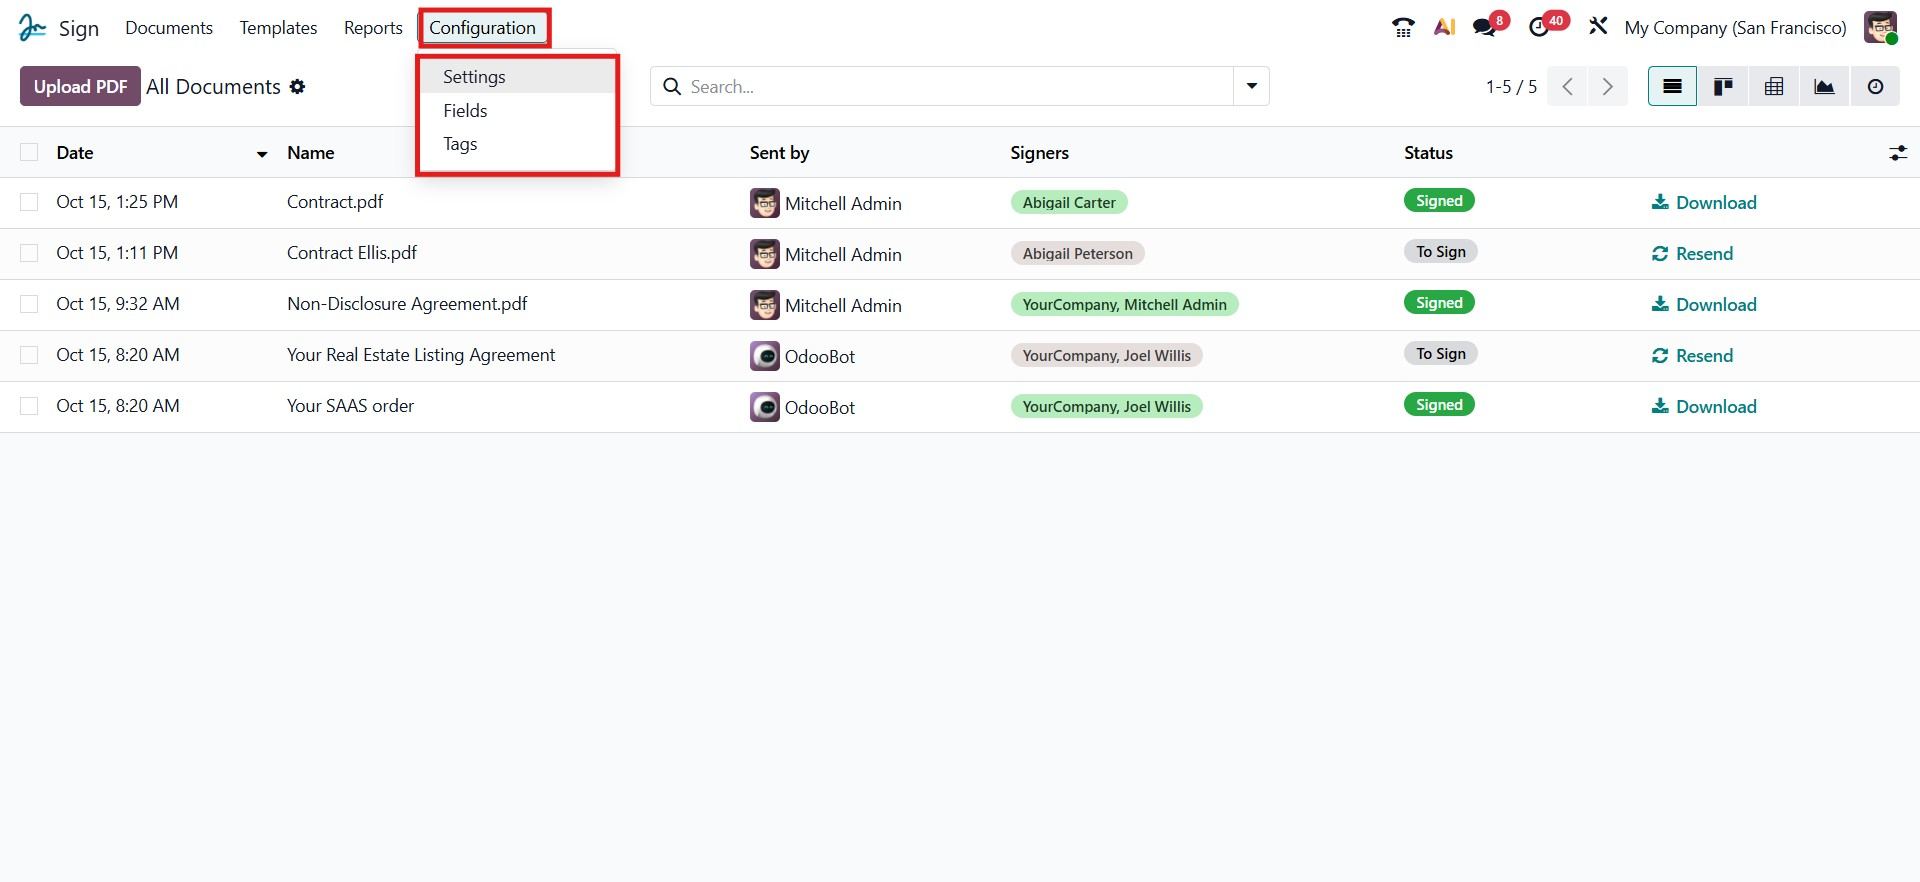
2. Configuration
The Configuration tab in the Odoo 19 Sign module provides access to several essential options that help streamline the document signing process. The Settings menu allows you to configure general preferences for the module, while Fields lets you define the types of fields that can be added to documents, such as text, date, or signature fields, and the Tags option helps organize and categorize documents for easier tracking and retrieval. Together, these configuration options make it easier to manage, structure, and automate your document signing processes efficiently.
2.1 Settings
Selecting the Settings menu in the Odoo 19 Sign module opens the Settings window. This window provides access to various configuration options that allow users to customize the behavior and preferences of the Sign module, ensuring that document workflows align with organizational requirements and streamline the signing process.
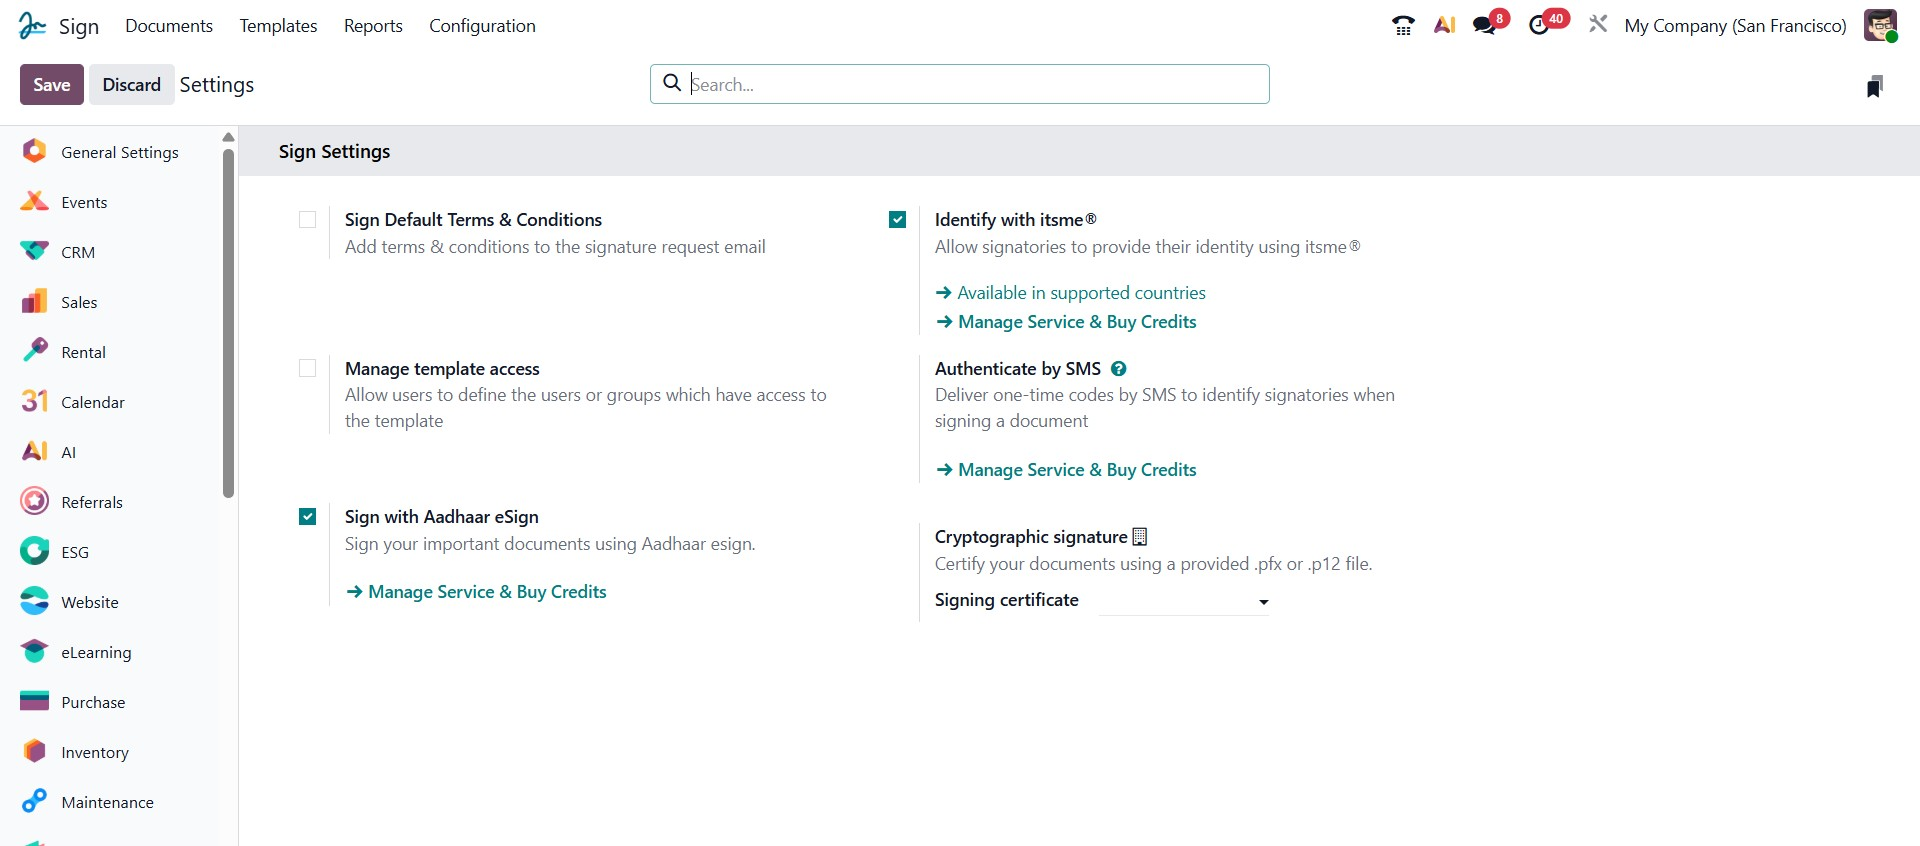
On the Settings page, you will find the option to Sign Default Terms & Conditions. Enabling this option allows you to automatically display standard terms and conditions on all signature requests.
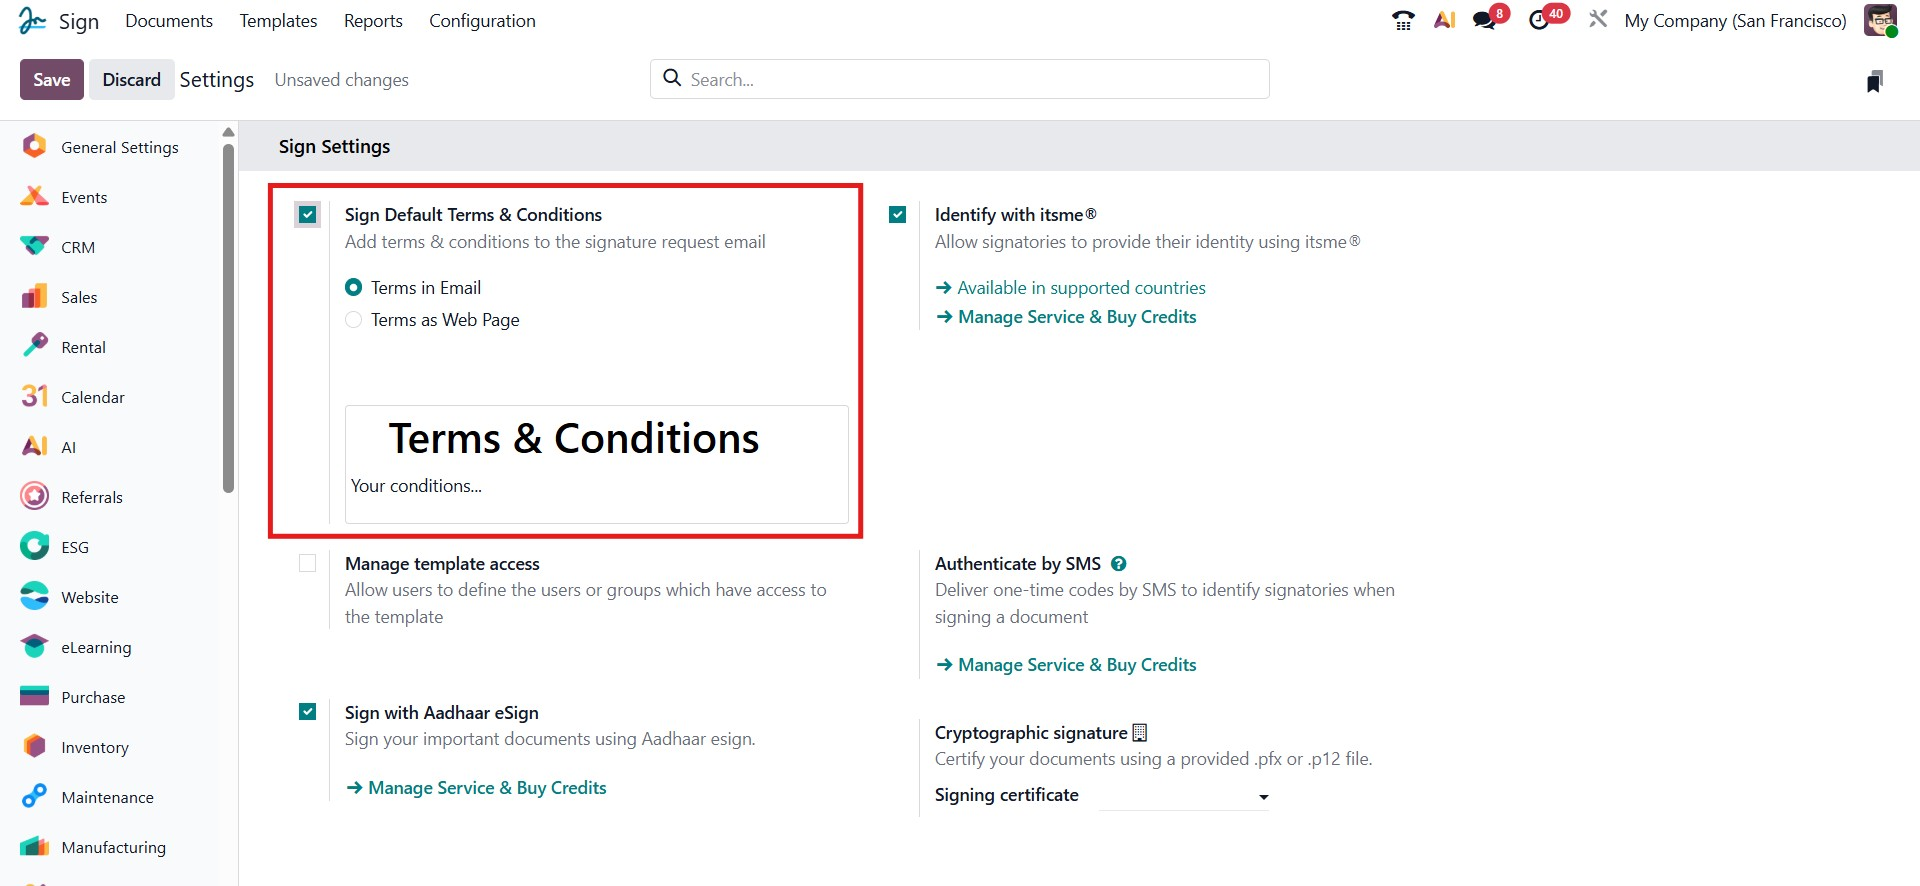
There are two definitions for the terms, including the Terms & Conditions feature, which offers two display options. Terms in Email inserts the terms directly at the bottom of every email requesting a signature, while Terms as a Web Page provides a link to the content at the bottom of these emails.
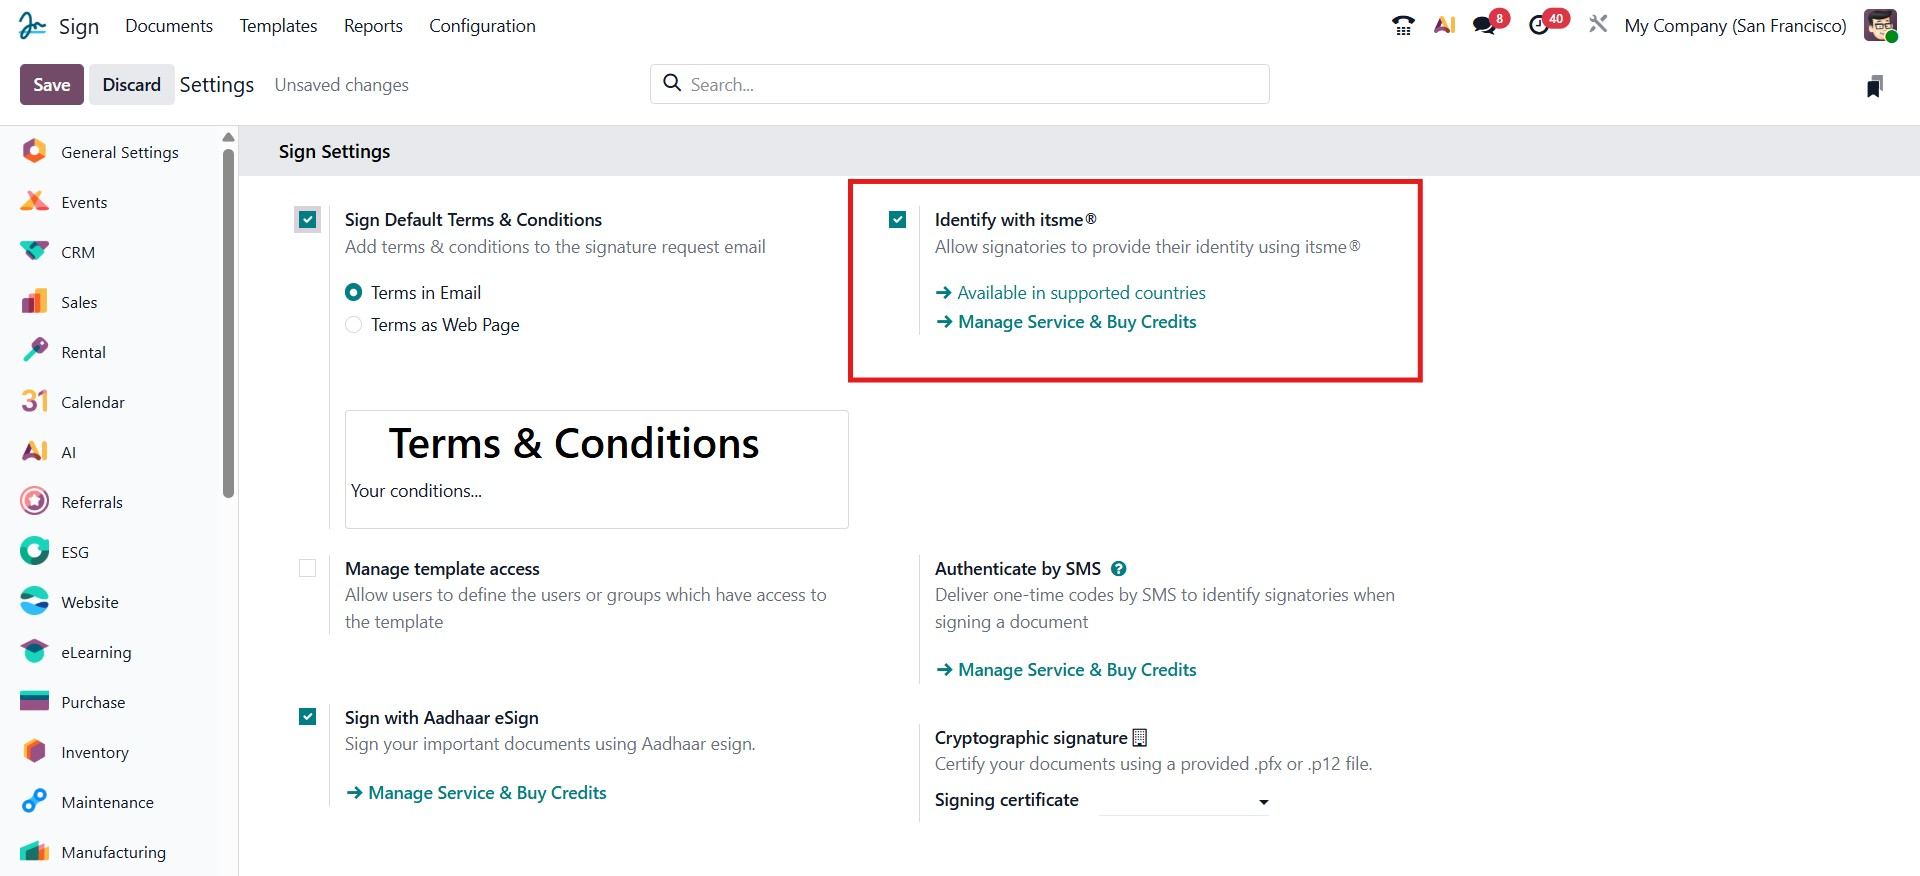
Additionally, the Identify with itsme@ option allows signatories to verify their identity securely using this method. To control the signing sequence, you can enable Signing Orders, which ensures that recipients are notified only when it is their turn to sign, creating an organized and sequential signing workflow.
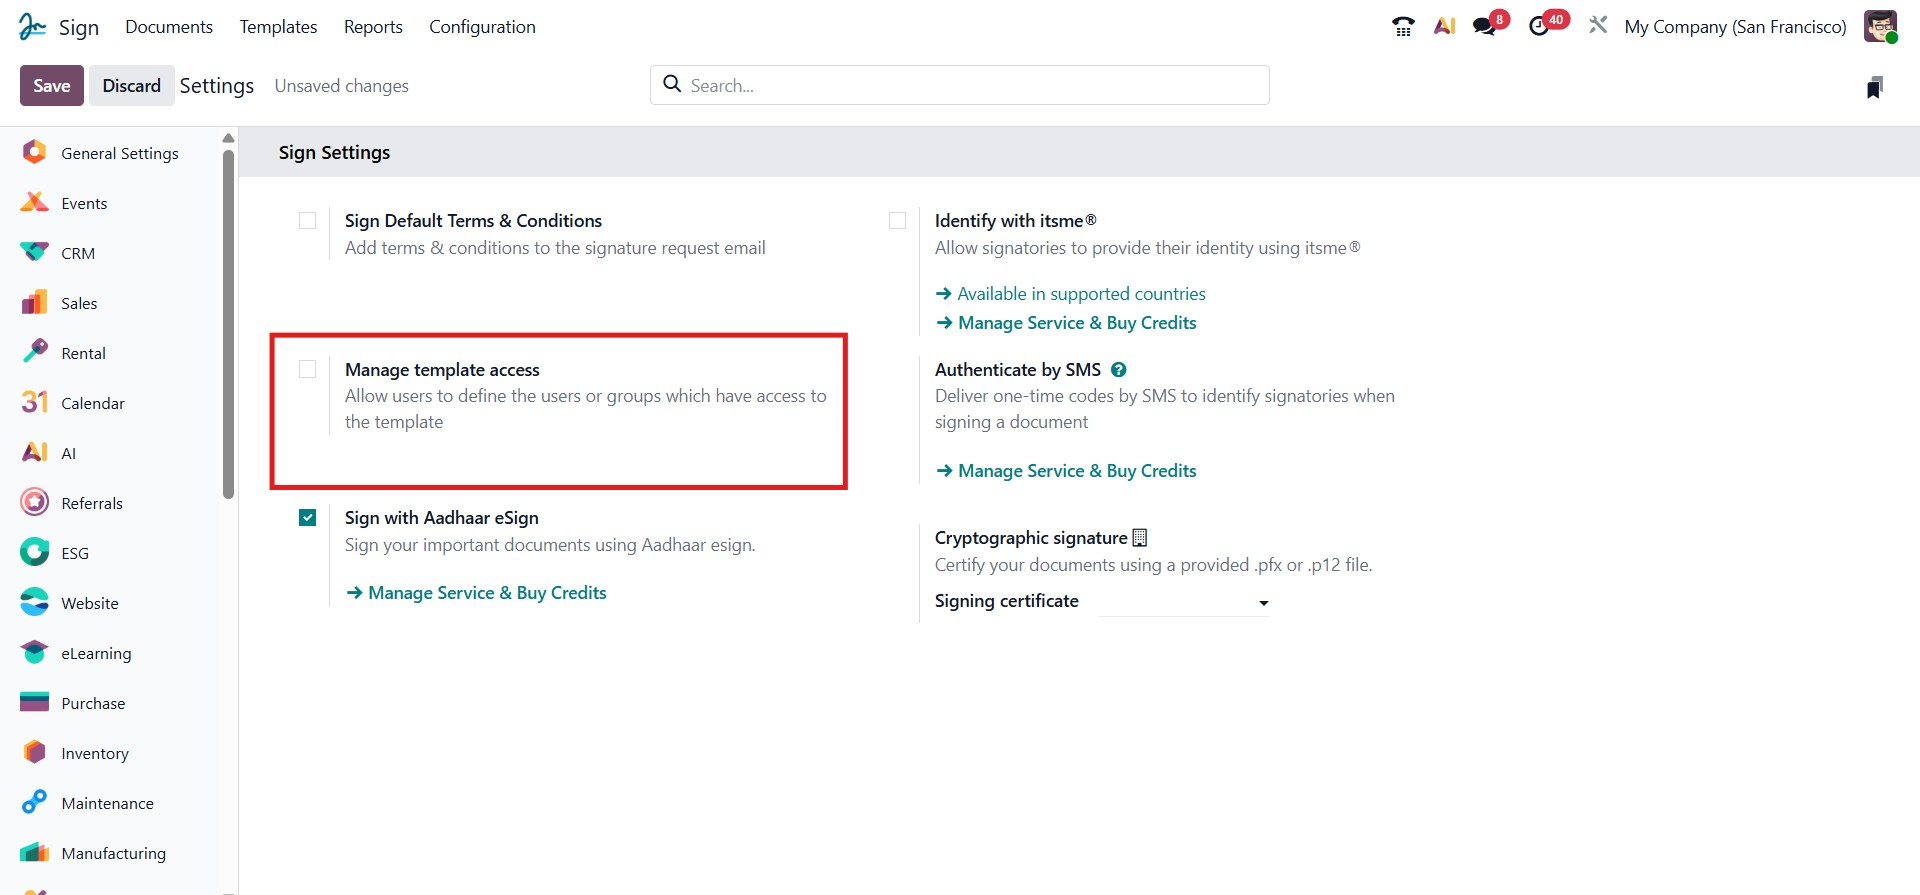
The Manage Template Access option in Odoo 19 allows you to control who can access specific document templates.
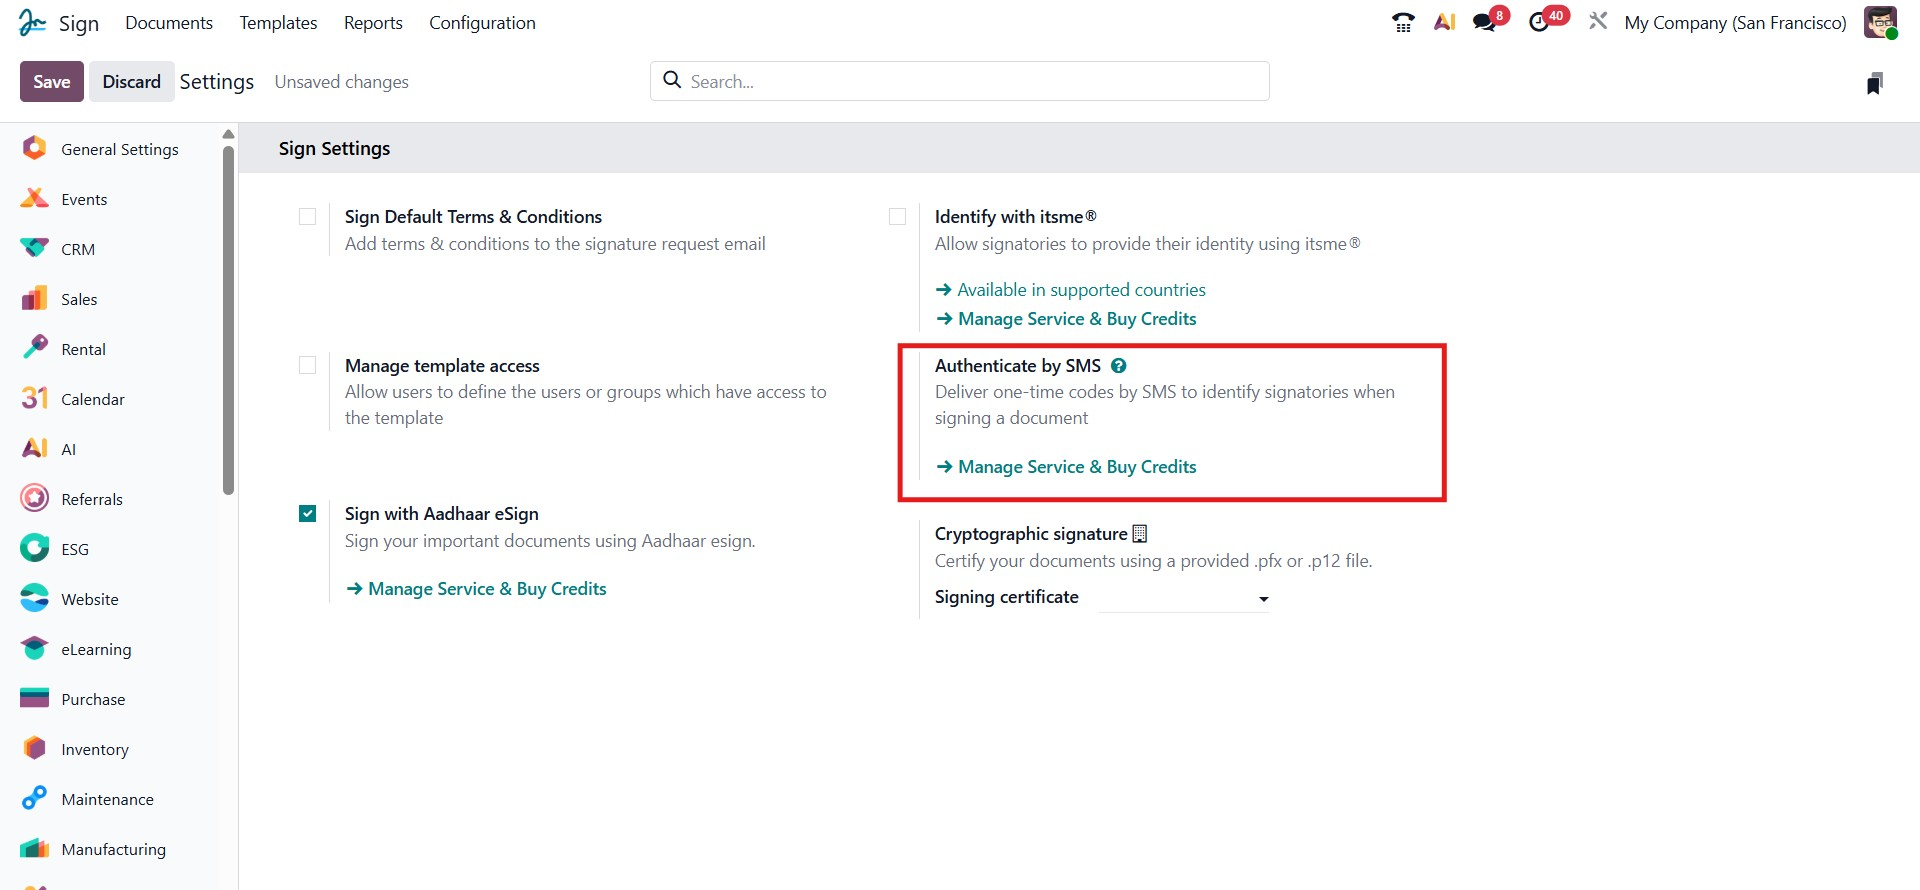
The Authenticate by SMS feature in Odoo 19 enables signatories to verify their identity when signing a document. By sending a one-time code via SMS, this method ensures that the signature is authenticated securely, adding an extra layer of verification and enhancing the overall trust and legality of the signed document.
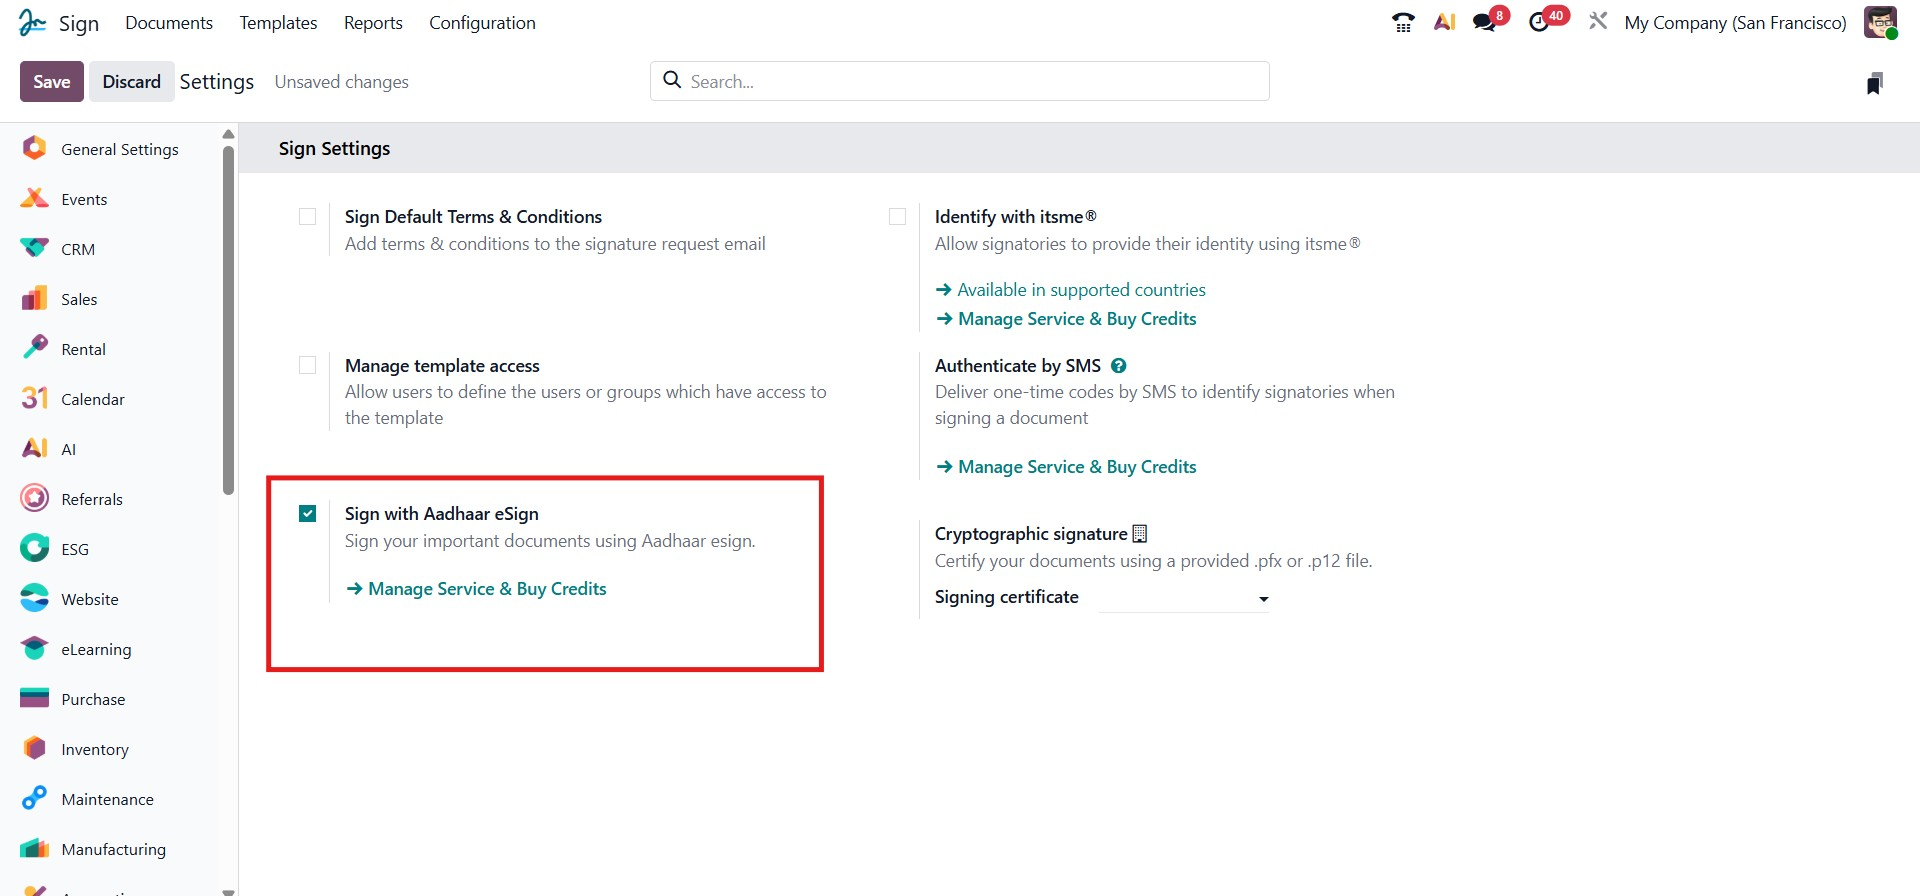
This Sign with Aadhaar eSign option enables signing official documents using Aadhaar eSign, a government-authorized digital signing method in India. When activated, Odoo integrates with the Aadhaar eSign service, allowing users to securely authenticate and sign using their Aadhaar credentials.
A link labeled “Manage Service & Buy Credits” directs you to manage your eSign service provider account and purchase necessary credits for signing.
Odoo 19 introduces enhanced support for cryptographic digital signatures, allowing organizations to certify documents using official digital certificates. This feature ensures authenticity, integrity, and legal validity for digitally signed business documents.
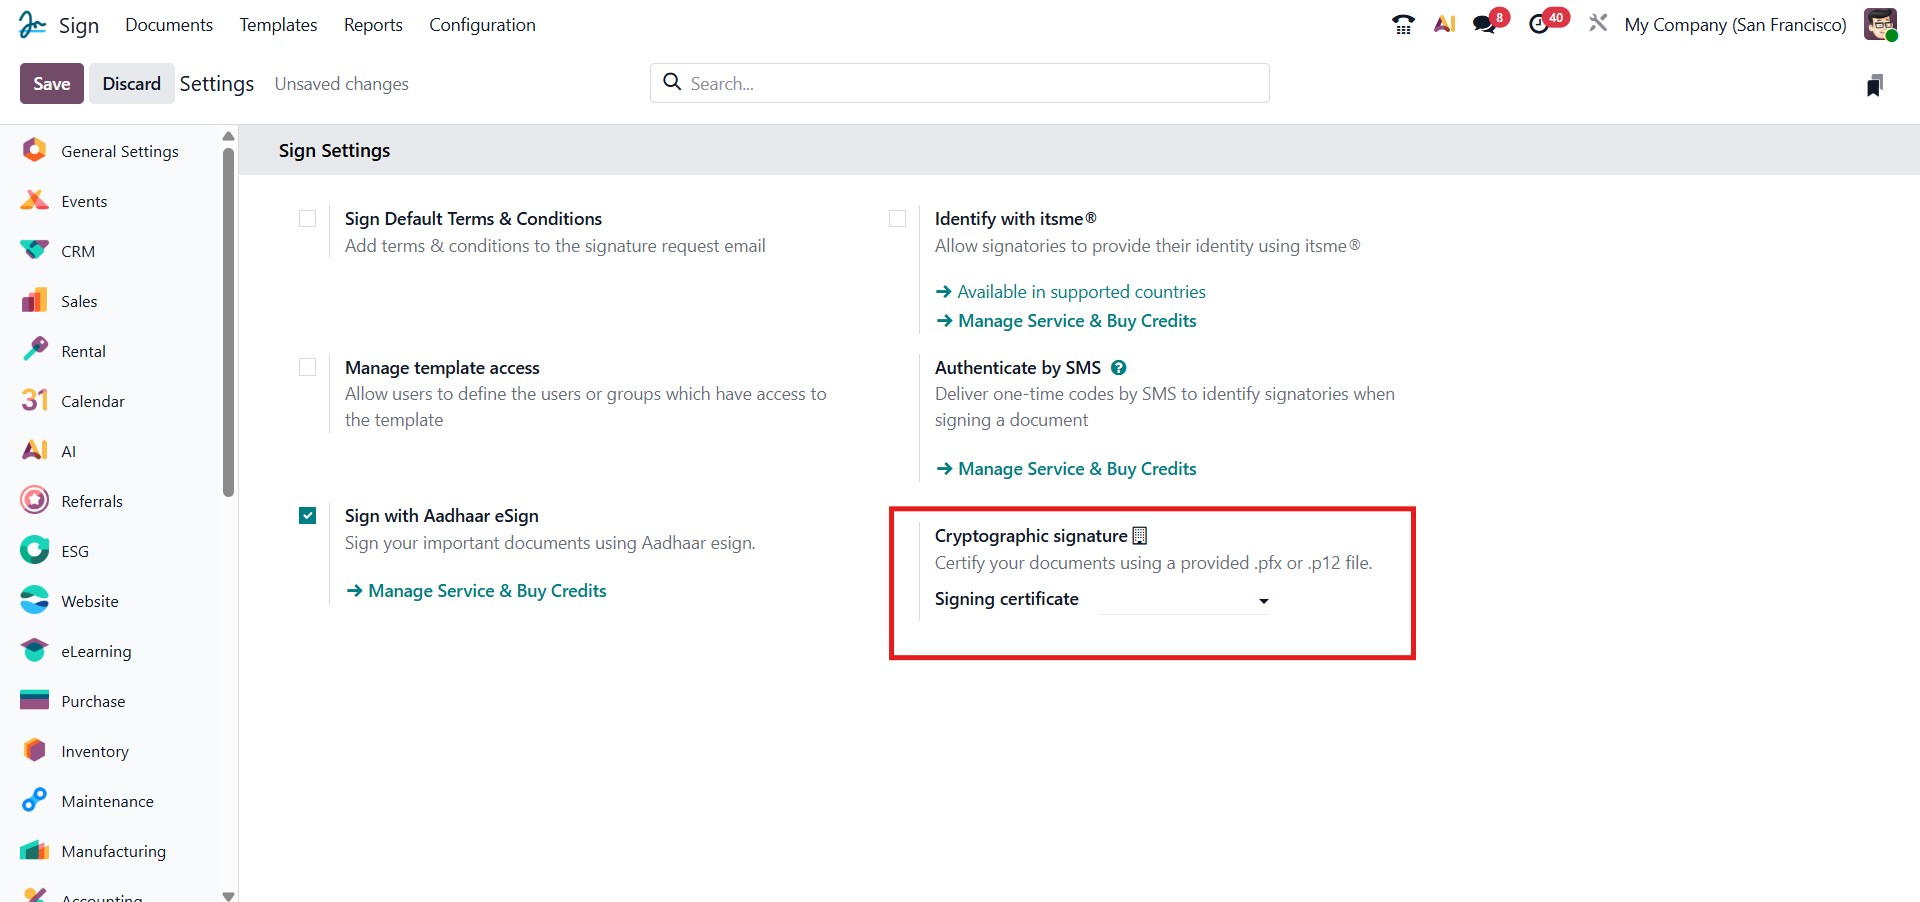
When you click the Signing Certificate dropdown and choose Create and Edit, Odoo opens a configuration window titled Create Signing Certificate.
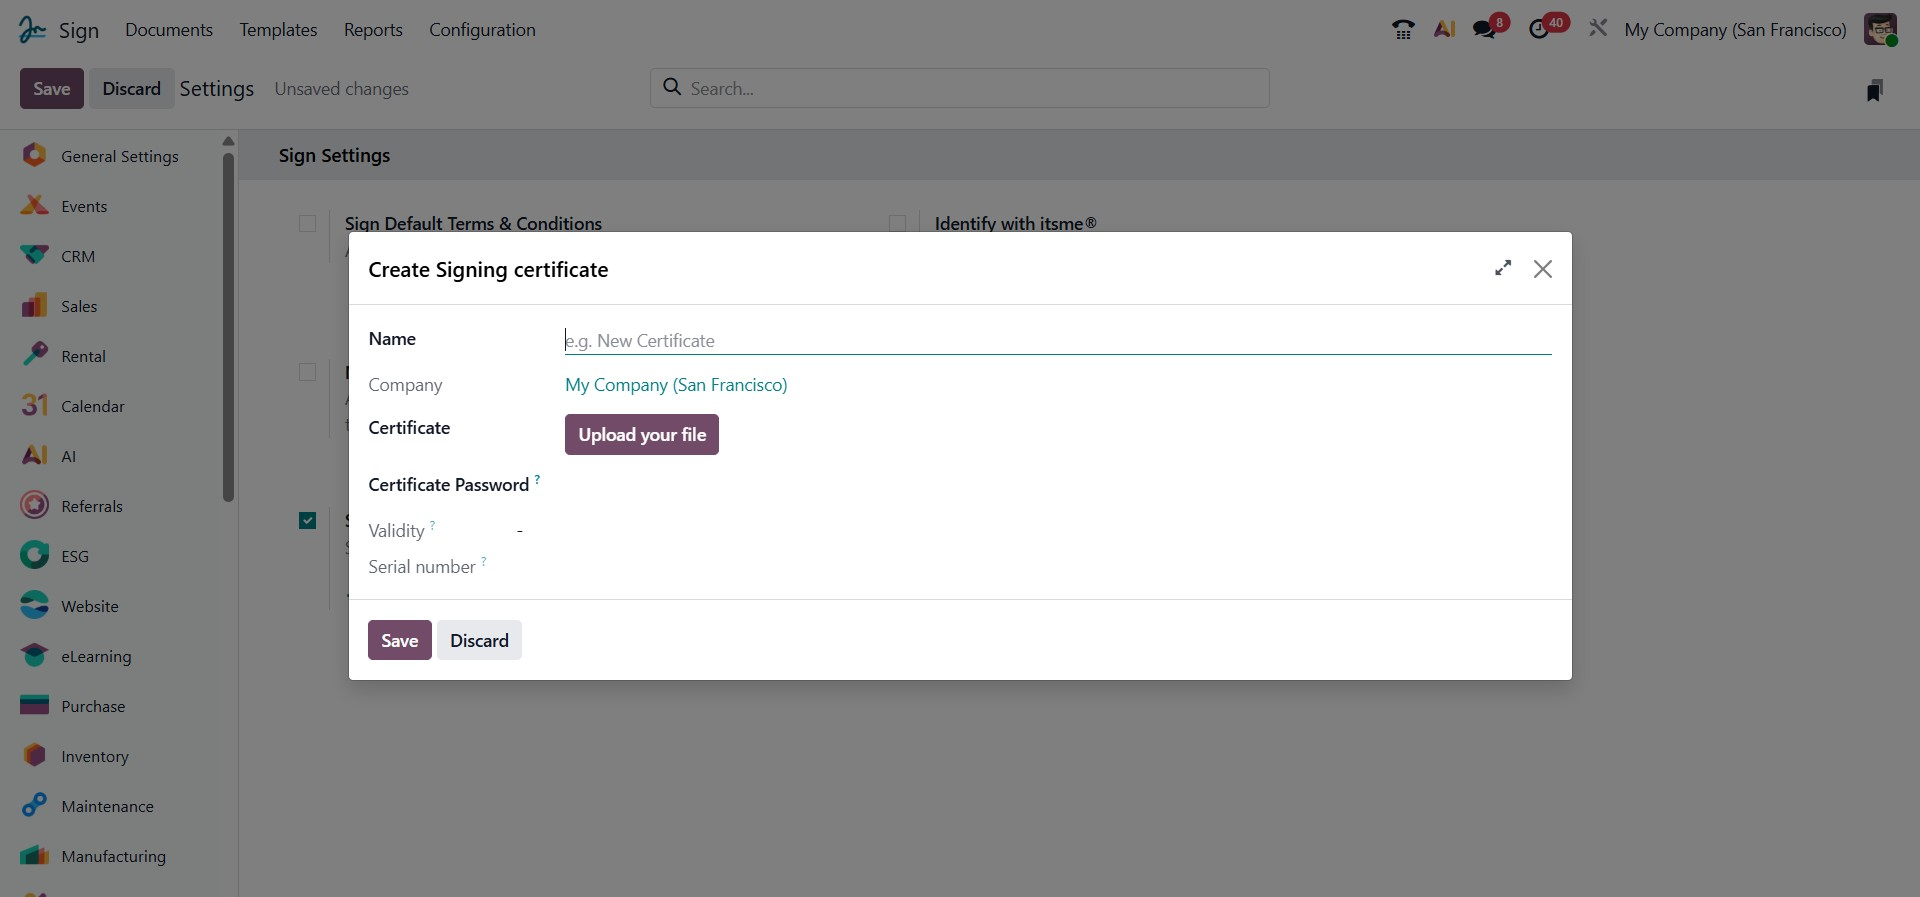
This window allows users to upload and configure a .pfx or .p12 certificate file. Below is a detailed explanation of each field available in this dialog:
The name must be specified for the certificate record, helping differentiate multiple certificates used within the organization. The company field determines which company the certificate belongs to, ensuring proper access control in multi-company setups. Next, the certificate file in .pfx or .p12 format must be uploaded using the Upload your file button. The certificate password associated with the uploaded file is then entered to decrypt the private key during the signing process. Once the file is uploaded, Odoo automatically detects and displays the validity period of the certificate, indicating its start and expiry dates, as well as the serial number, which uniquely identifies the certificate and aids in verification or audits. After all details are reviewed, clicking Save confirms and stores the certificate for use in document signing, while Discard cancels the process without saving any data.
2.2 Signature Fields
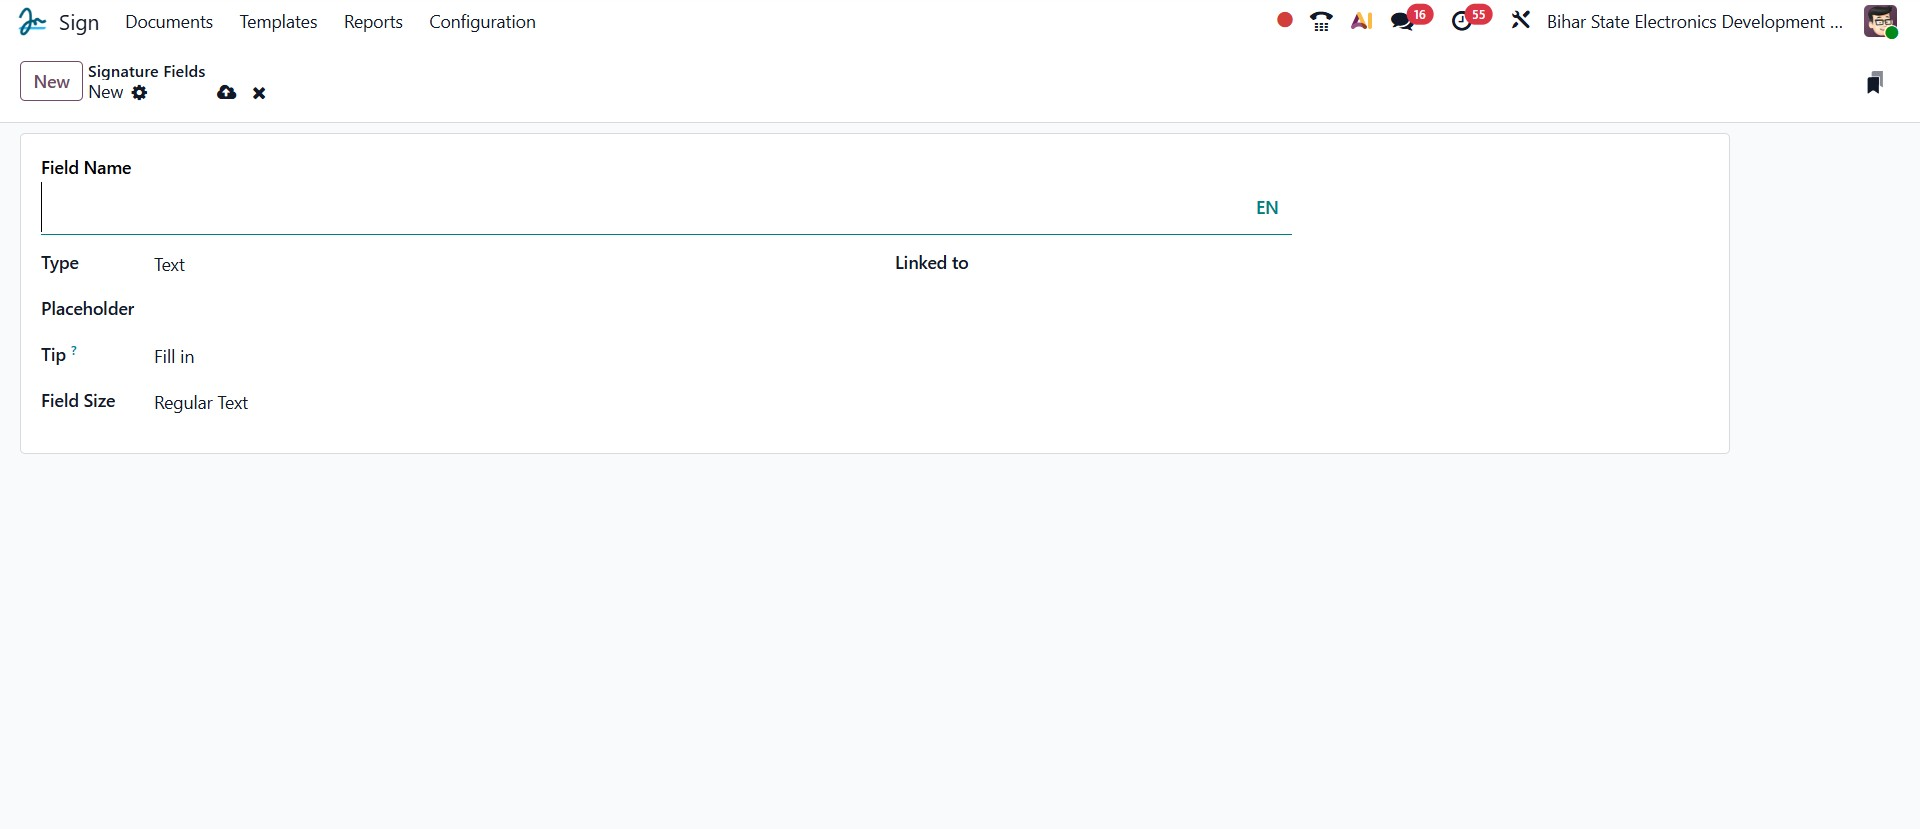
All configured signature fields can be viewed and managed under the Configuration, Signature Fields menu, as shown in the image below. From this section, users can review existing fields or create new ones by clicking the New button.
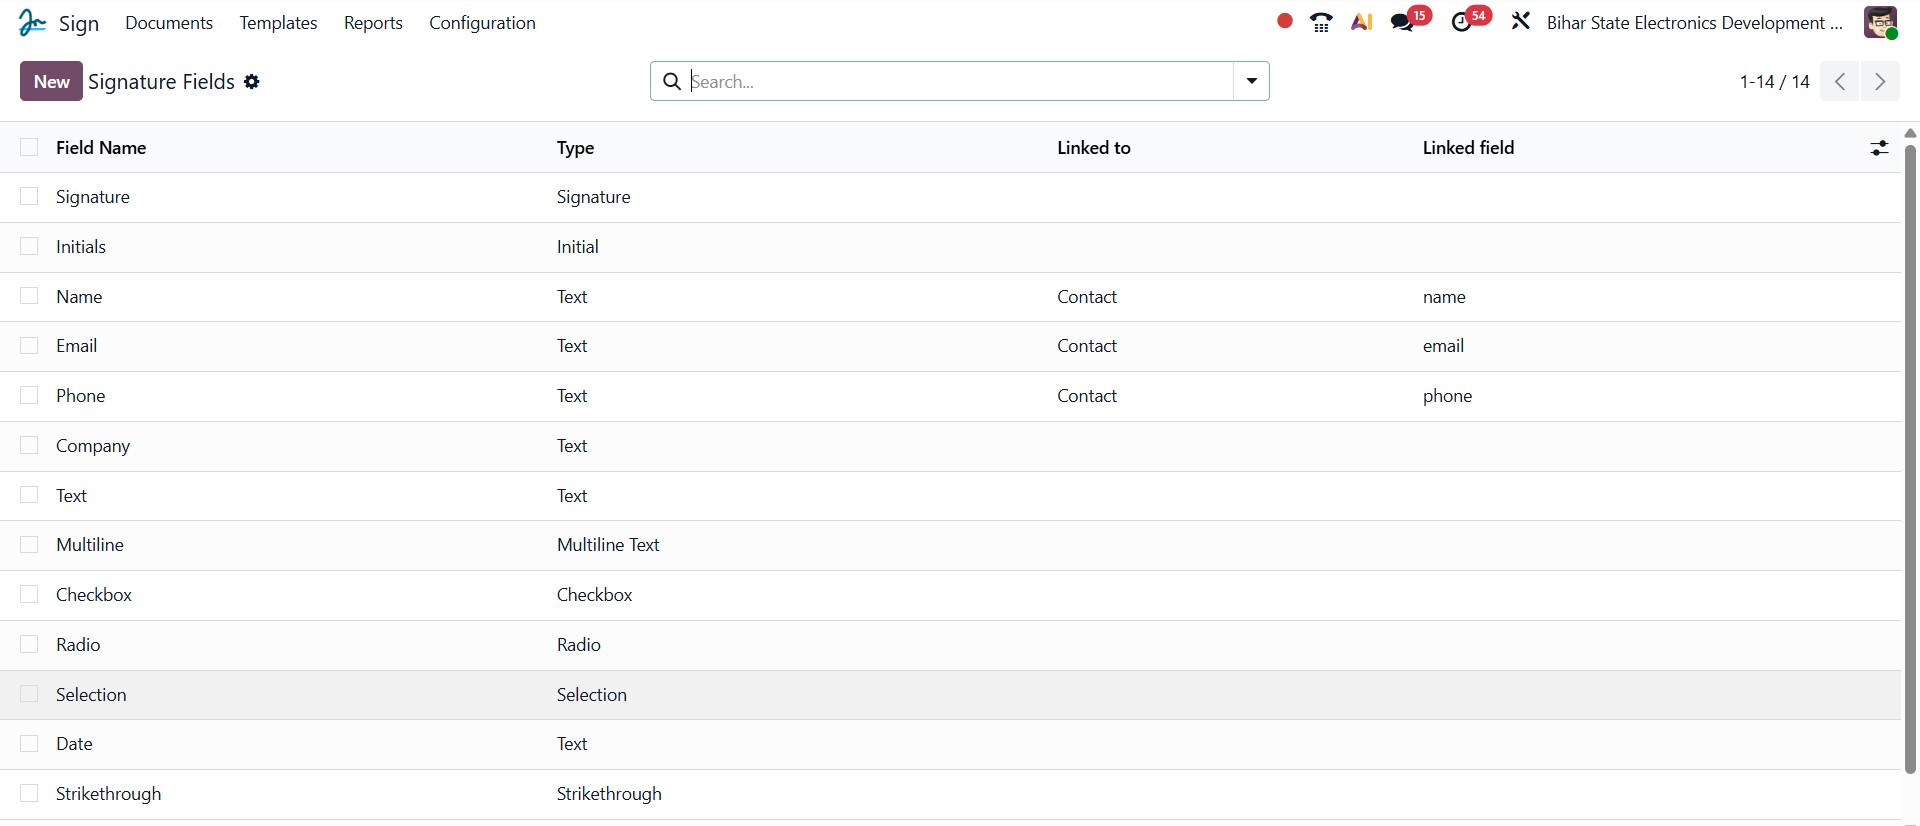
To add a new field, enter the Field Name and choose the Type from the dropdown list. The available field types include Signature, Initial, Text, Multiline Text, Checkbox, Radio, Selection, Strikethrough, and Stamp. You can also specify a Placeholder to guide users on what to enter and add a Tip for additional instructions or context. The Field Size option lets you set the preferred display size for the text field. Additionally, the Linked To field allows you to associate the signature field with specific data models, such as Account, Applicant, Appointment Type, and more. This feature enables Odoo to automatically fetch and populate relevant information when documents are signed, enhancing automation and accuracy.
2.3 Tags
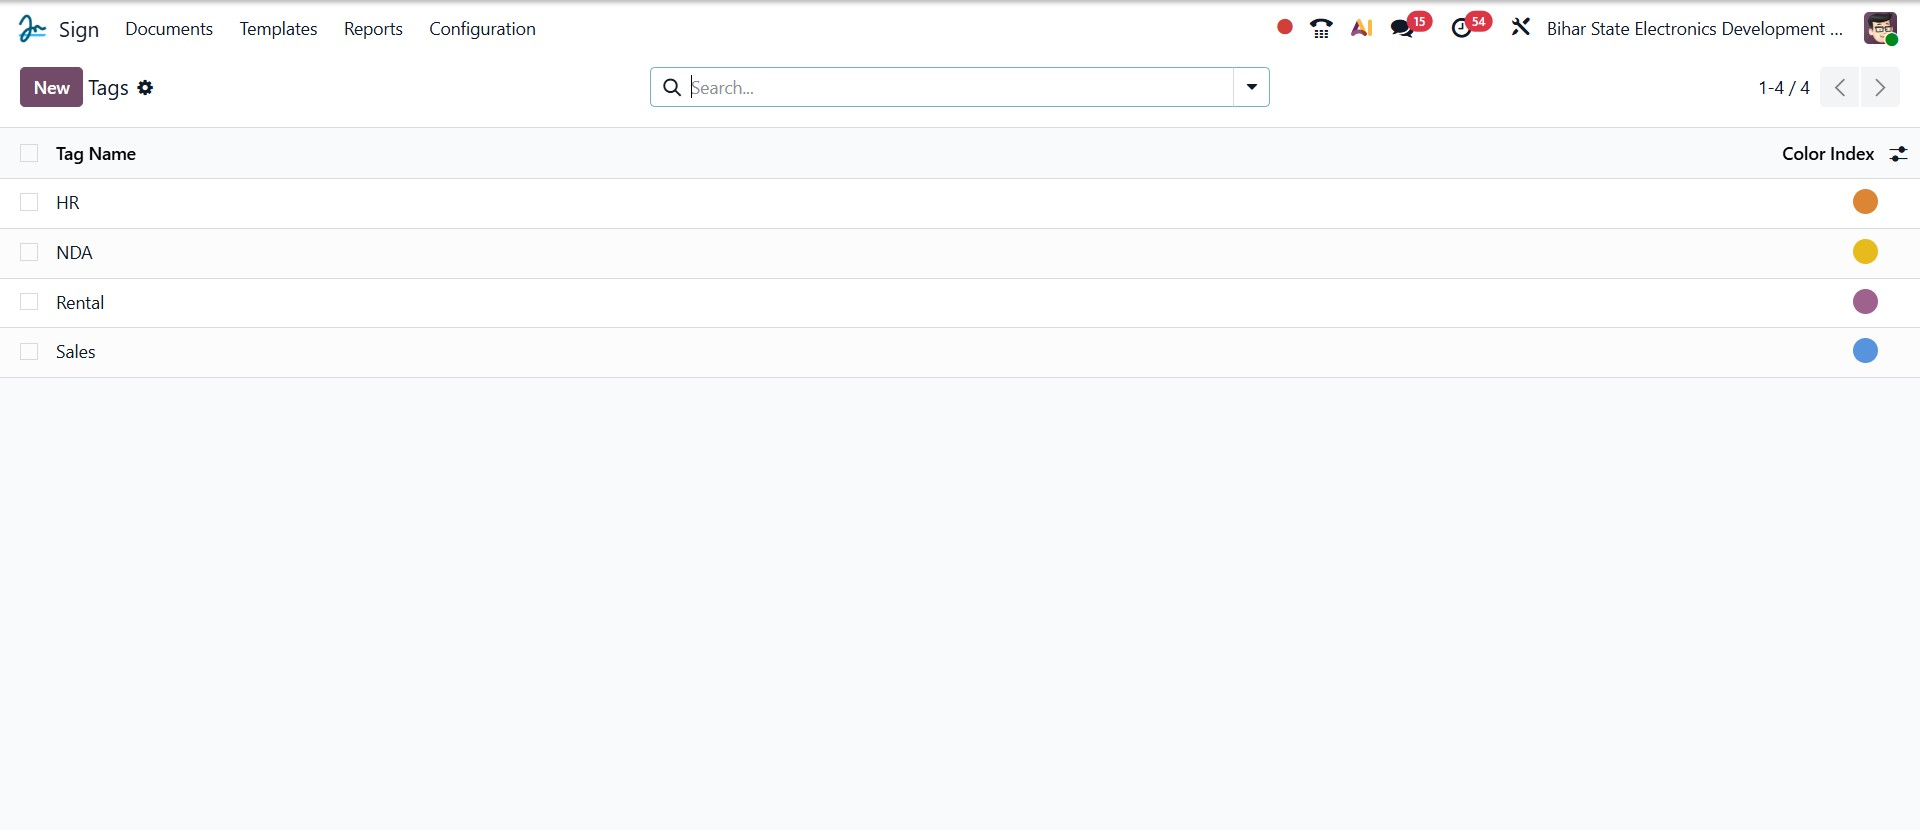
All the tags you’ve set up can be found under the Tags section within the Configuration tab, as shown in the image below.
3. Reports
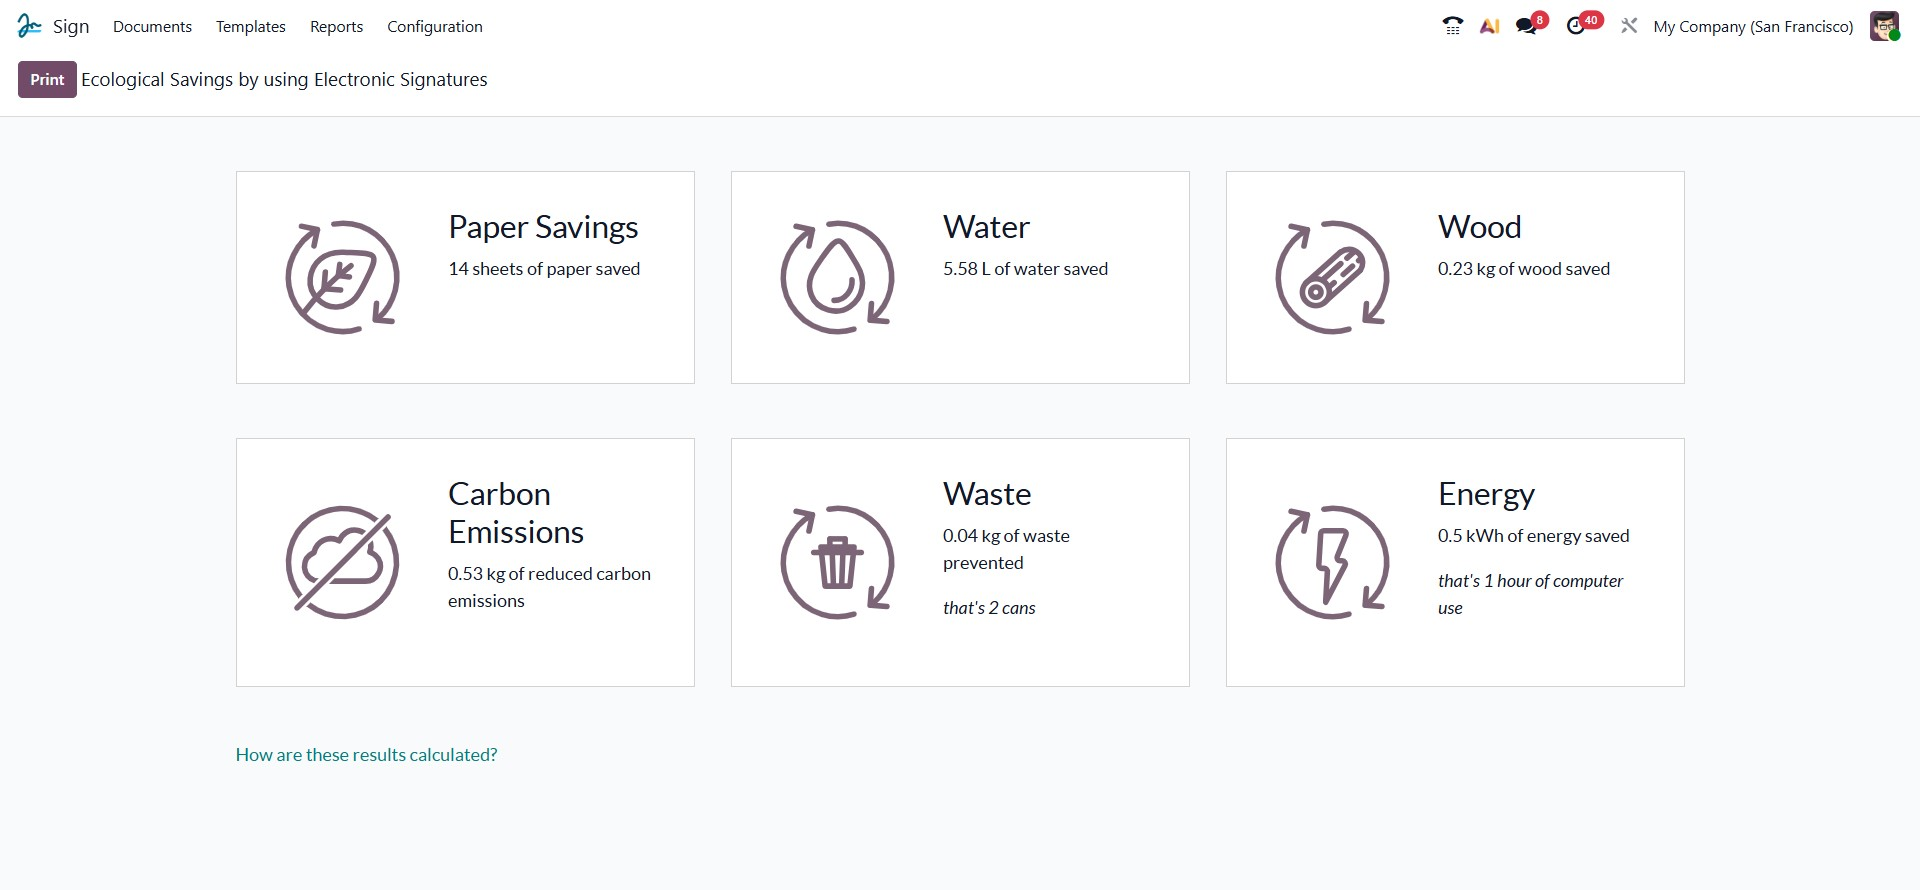
The Reports menu in Odoo 19’s Sign module displays the environmental benefits of using digital signatures. It summarizes key savings such as reduced paper, water, energy, waste, carbon footprint, and wood usage, showing how electronic signing supports sustainability. A link titled “How are these results calculated?” explains the methods and criteria behind these figures, ensuring transparency. This feature helps organizations not only streamline document signing but also track and promote their eco-friendly impact, as shown in the figure below.
The Odoo 19 Sign module is a powerful tool for digitally signing and requesting signatures on documents. It simplifies the signing process and enhances efficiency by allowing users to track the real-time status of each document, ensuring complete visibility and control over every signature request.