Configuration
1.1 Settings
Under the settings, you have the product catalog, pricing, quotation and orders, shipping, invoicing, and connectors, as explained in the Odoo Sale Module.
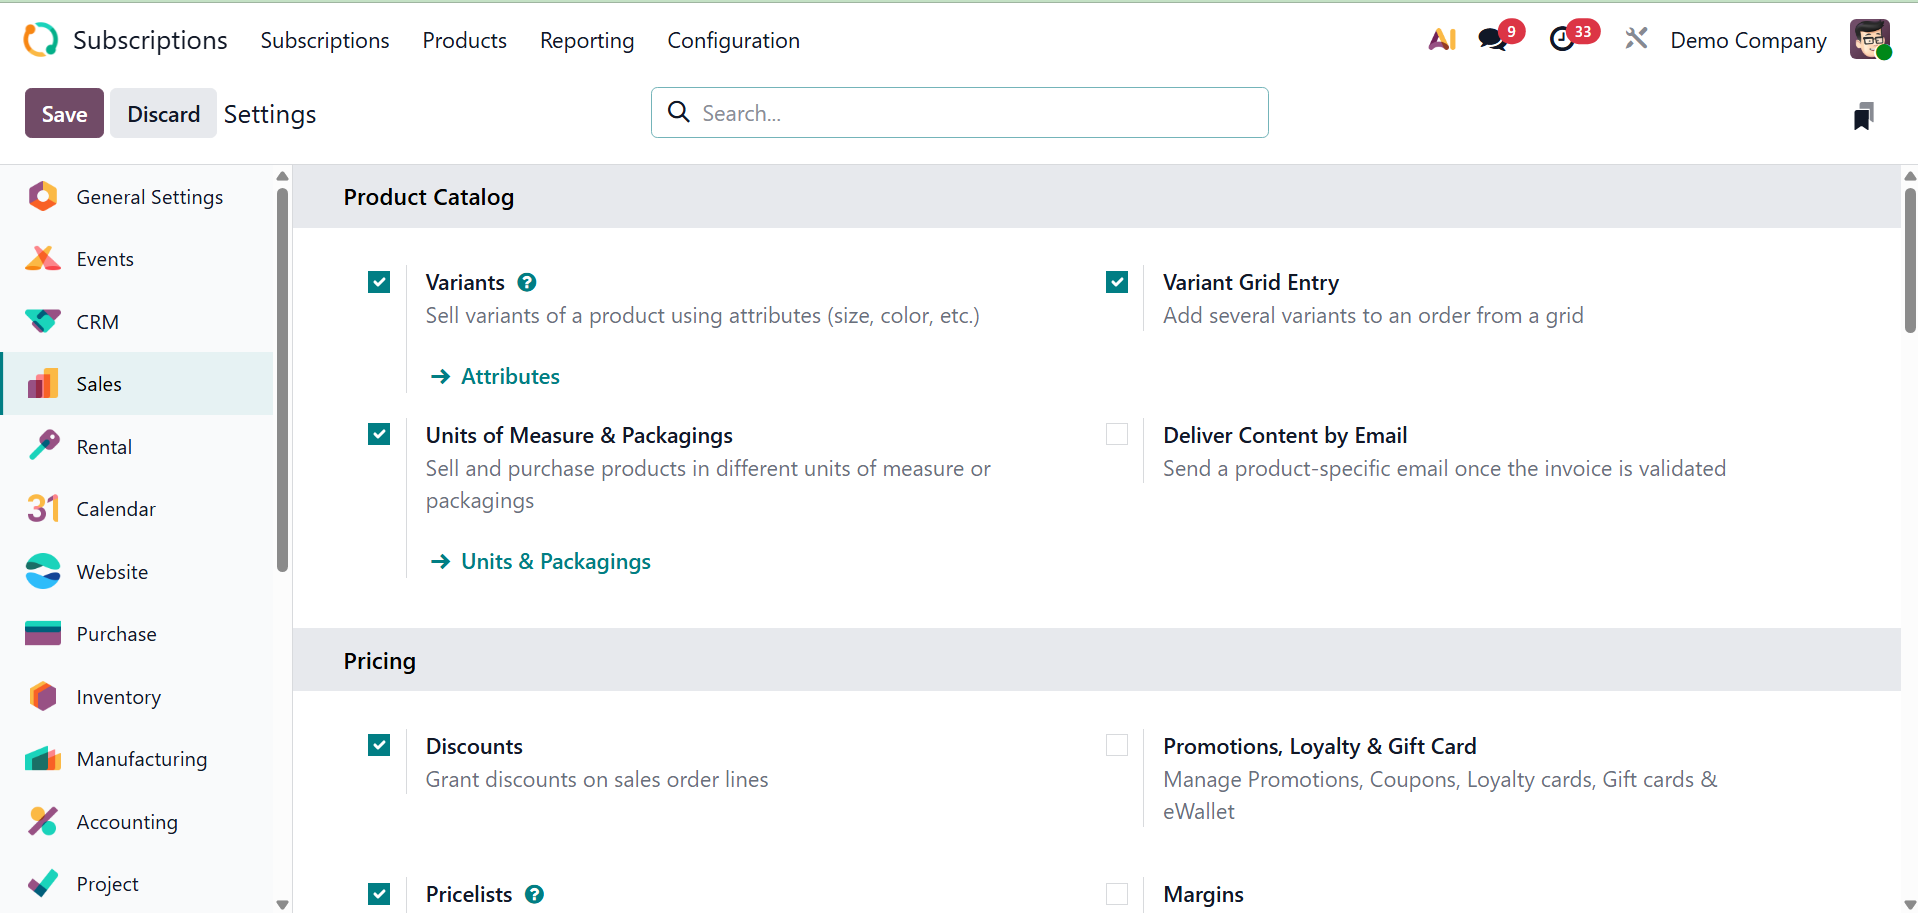
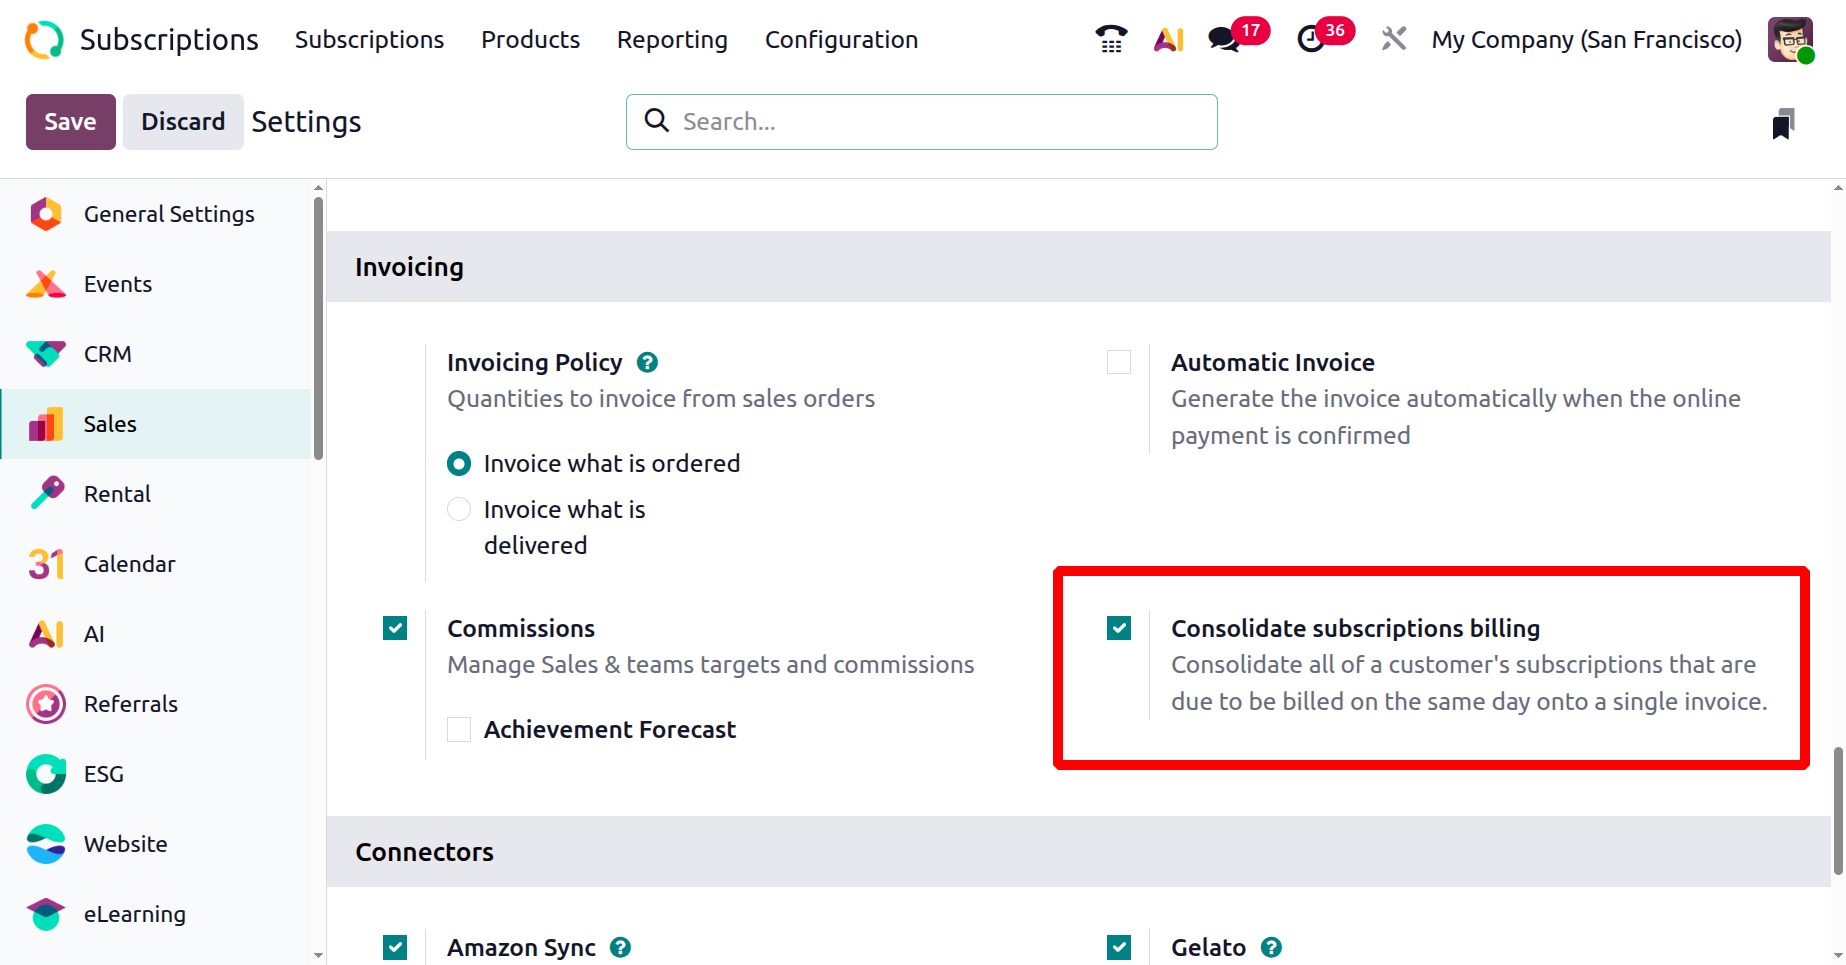
Under the Invoicing, you have the Consolidate Subscription Billing option, as shown below. Consolidated billing, which is usually produced at the conclusion of a subscription cycle, streamlines the invoicing and payment procedures for both the company and the client by combining several active subscriptions for a single customer into a single, comprehensive invoice in Odoo's subscription module. Customers will receive fewer, combined invoices rather than a separate invoice for each subscription if this option is enabled in the Sales module's settings.
Let us look at how to use the option. There are two orders for the same customer. It's possible to add a single invoice for these two orders.
We may create a single invoice for these two orders once all the form information has been filled out and the orders have been verified. For that, select the sales orders from the subscription module, and click on the Create invoice.
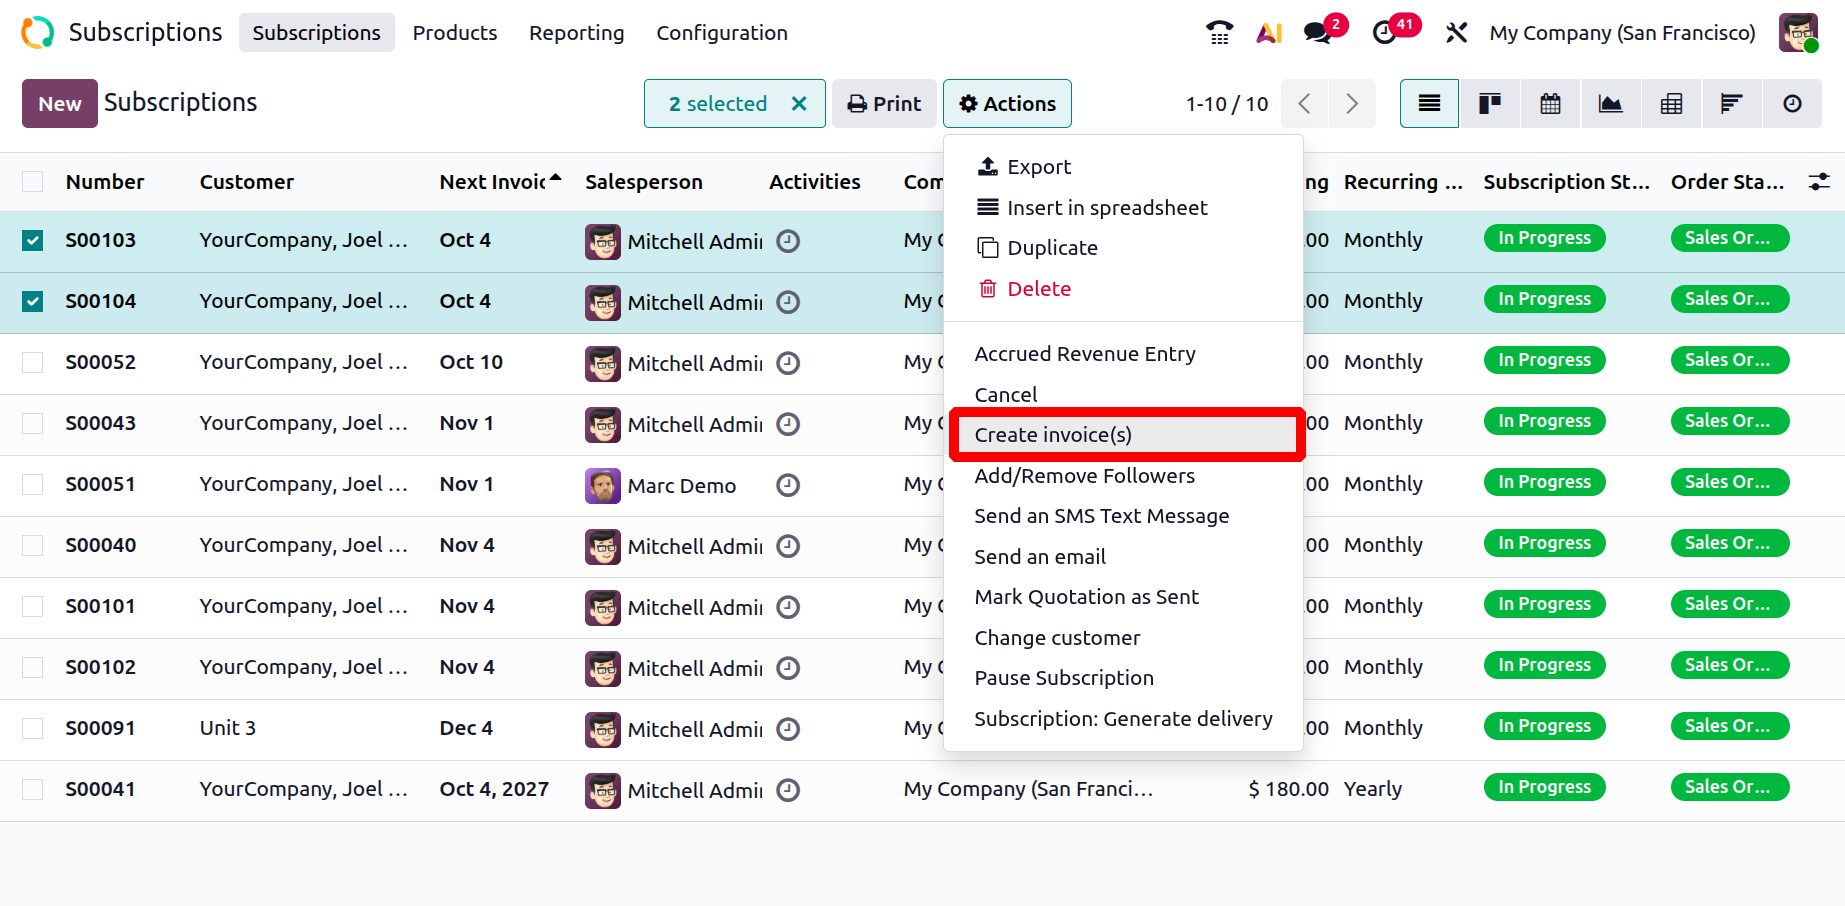
On selecting the option, you will get a pop-up, as shown below.
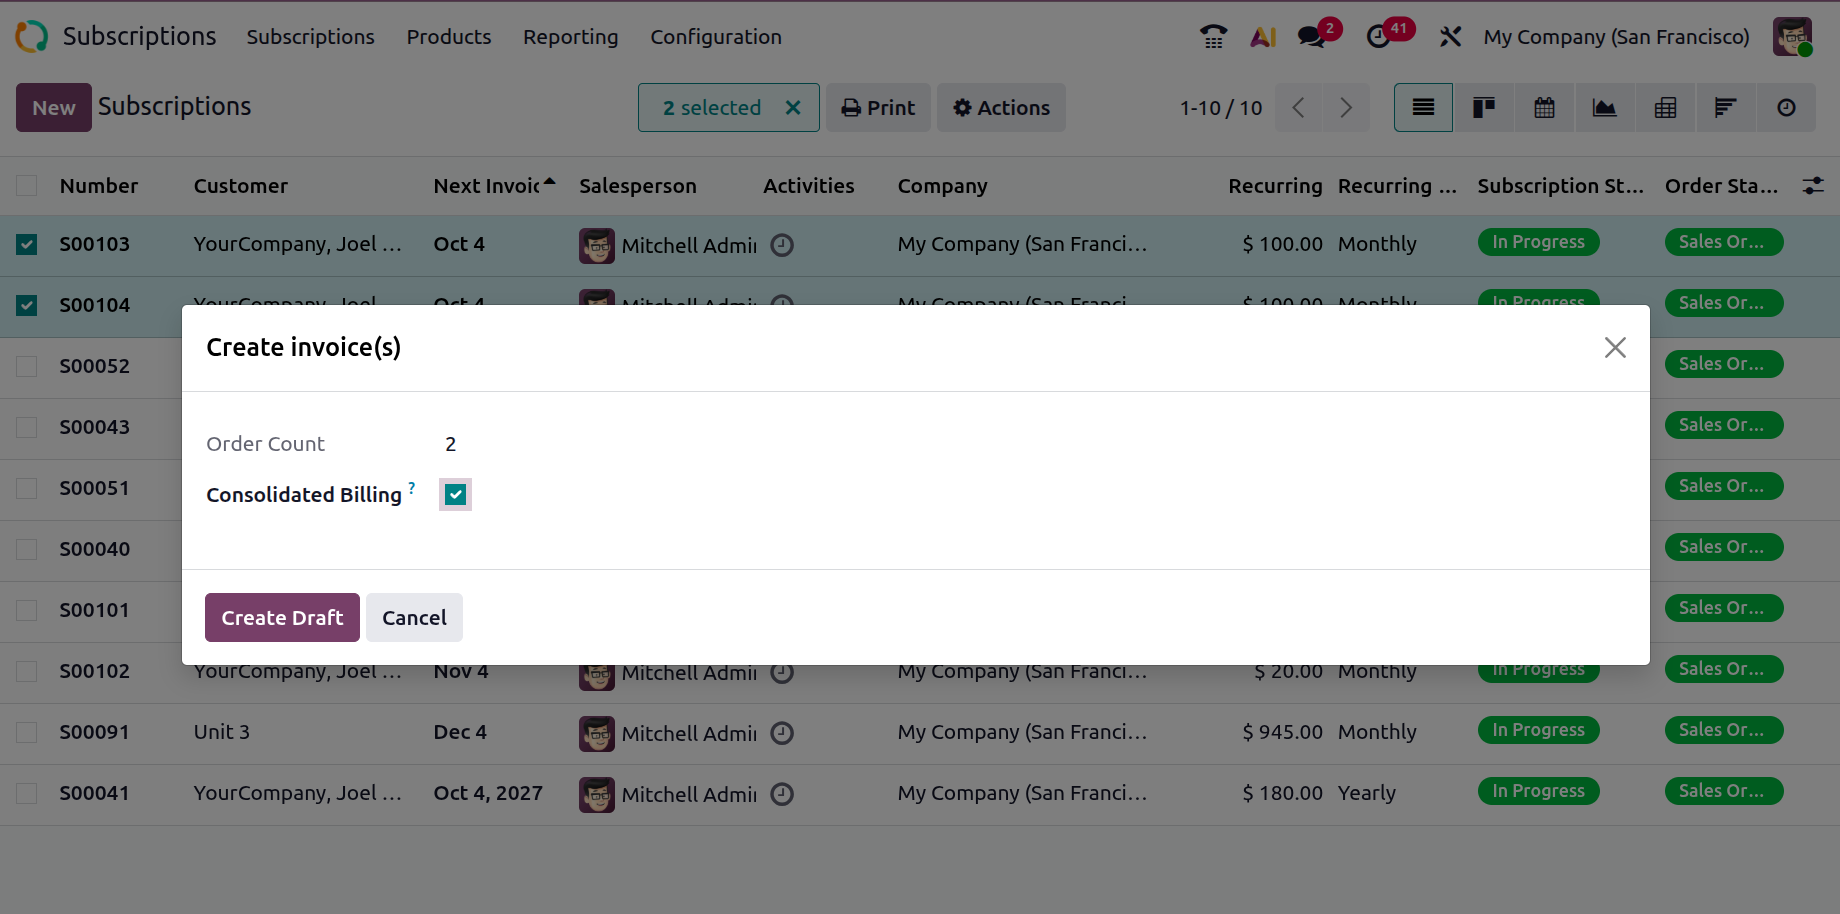
The number of orders is shown in the "Order Count" field of the window that is displayed. Press the "Create Draft Invoice" button after selecting or enabling the "Consolidated Billing" option if you wish to create combined invoices for the two orders.
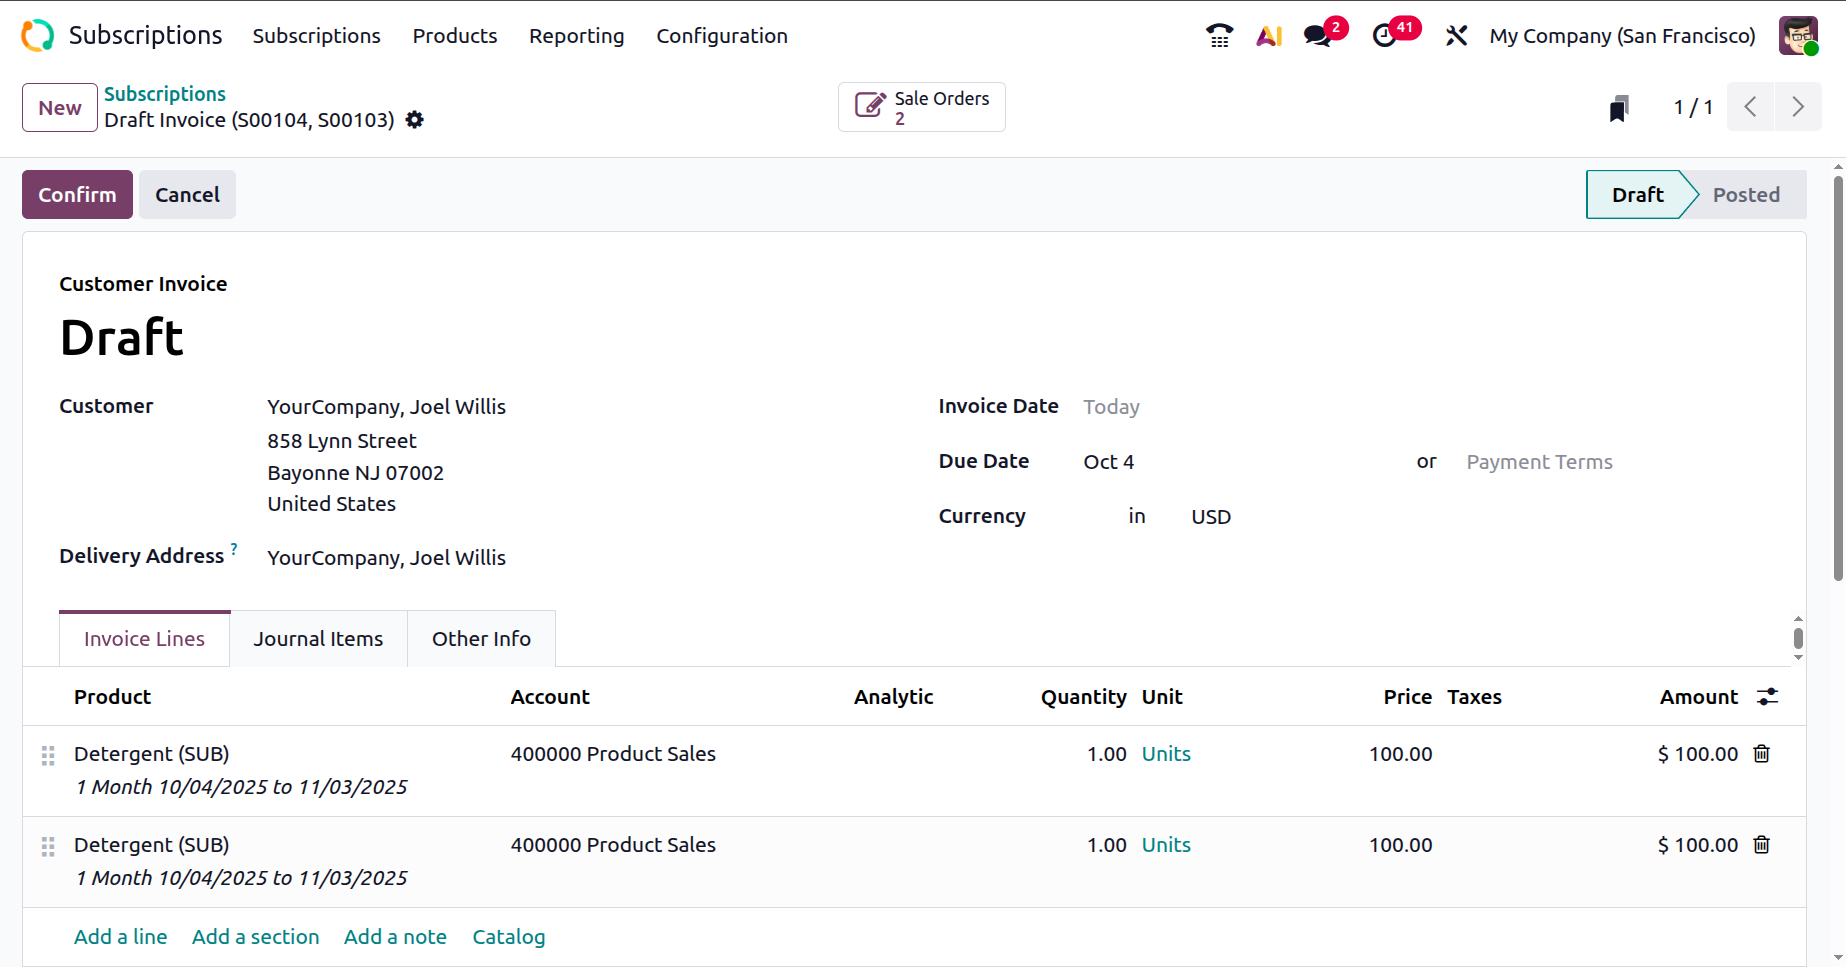
You can get the comprehensive dashboard of the generated invoices by clicking the "Sale Orders" smart button., on opening the draft invoice window. Using the action menu located within the dashboard window, you may create articles, manage invoices, and build dashboards.
This is how we handle consolidated subscription billing options.
1.2 Recurring Plans
The module's Configuration menu allows you to set up the subscription's recurring plans. When the Recurrence Periods option is selected, a pop-up window appears below.
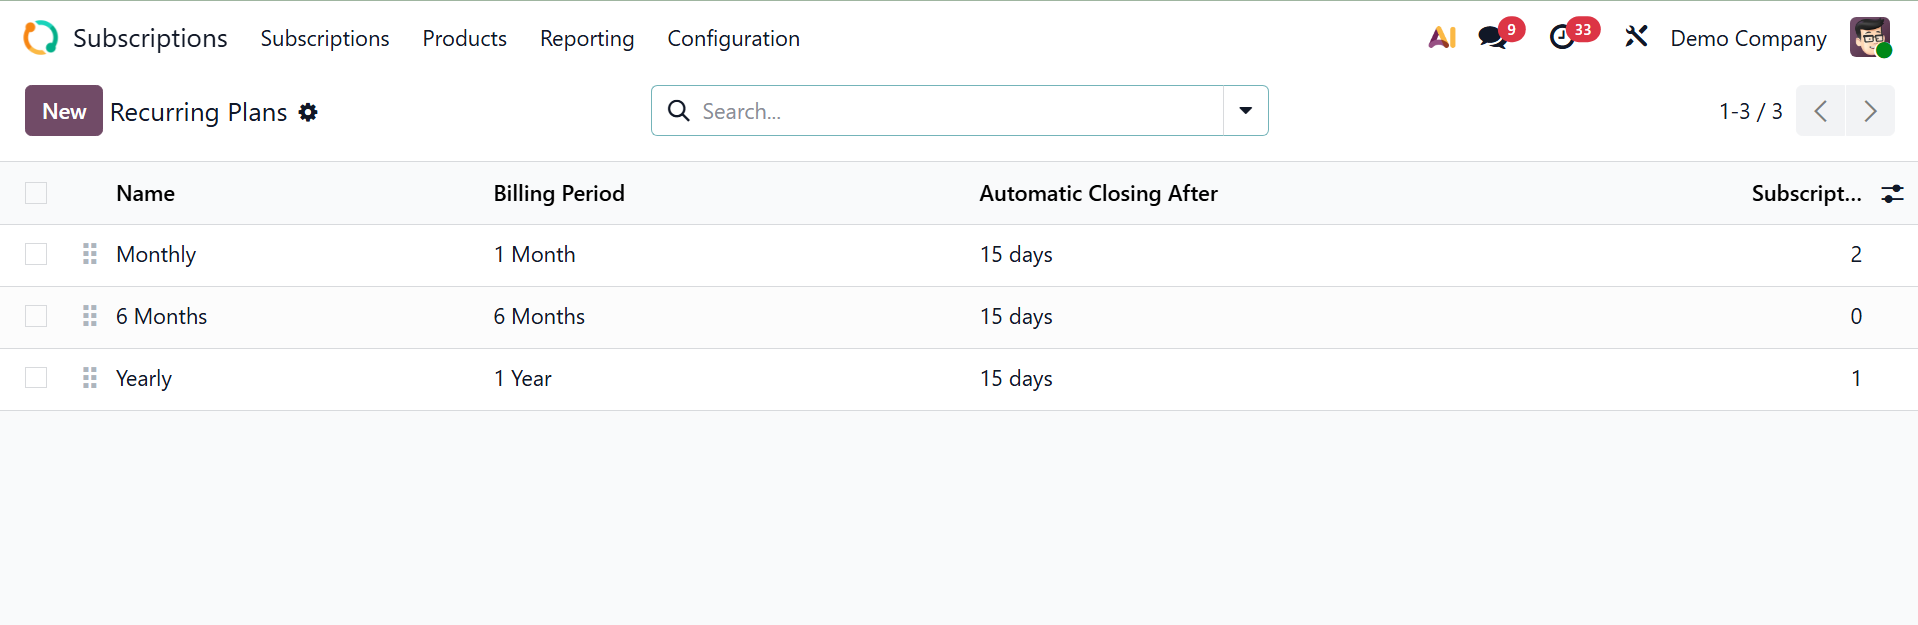
This is the database's list of available recurrence periods. Clicking the New button will create a new recurring period.
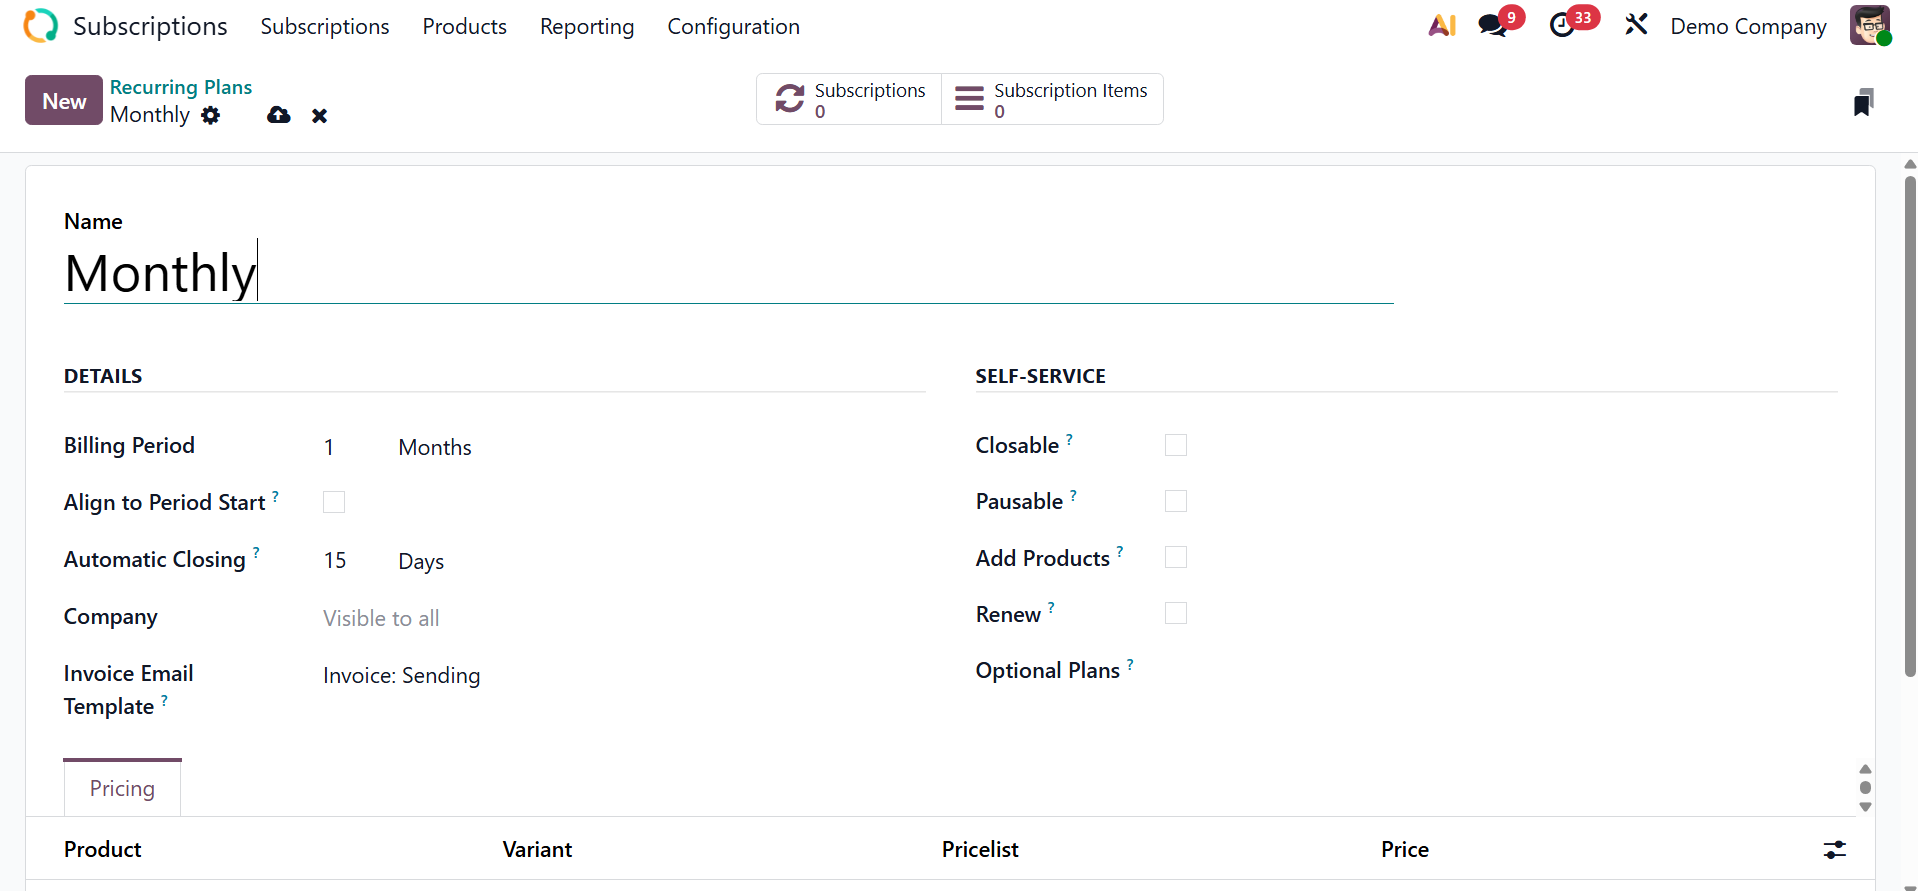
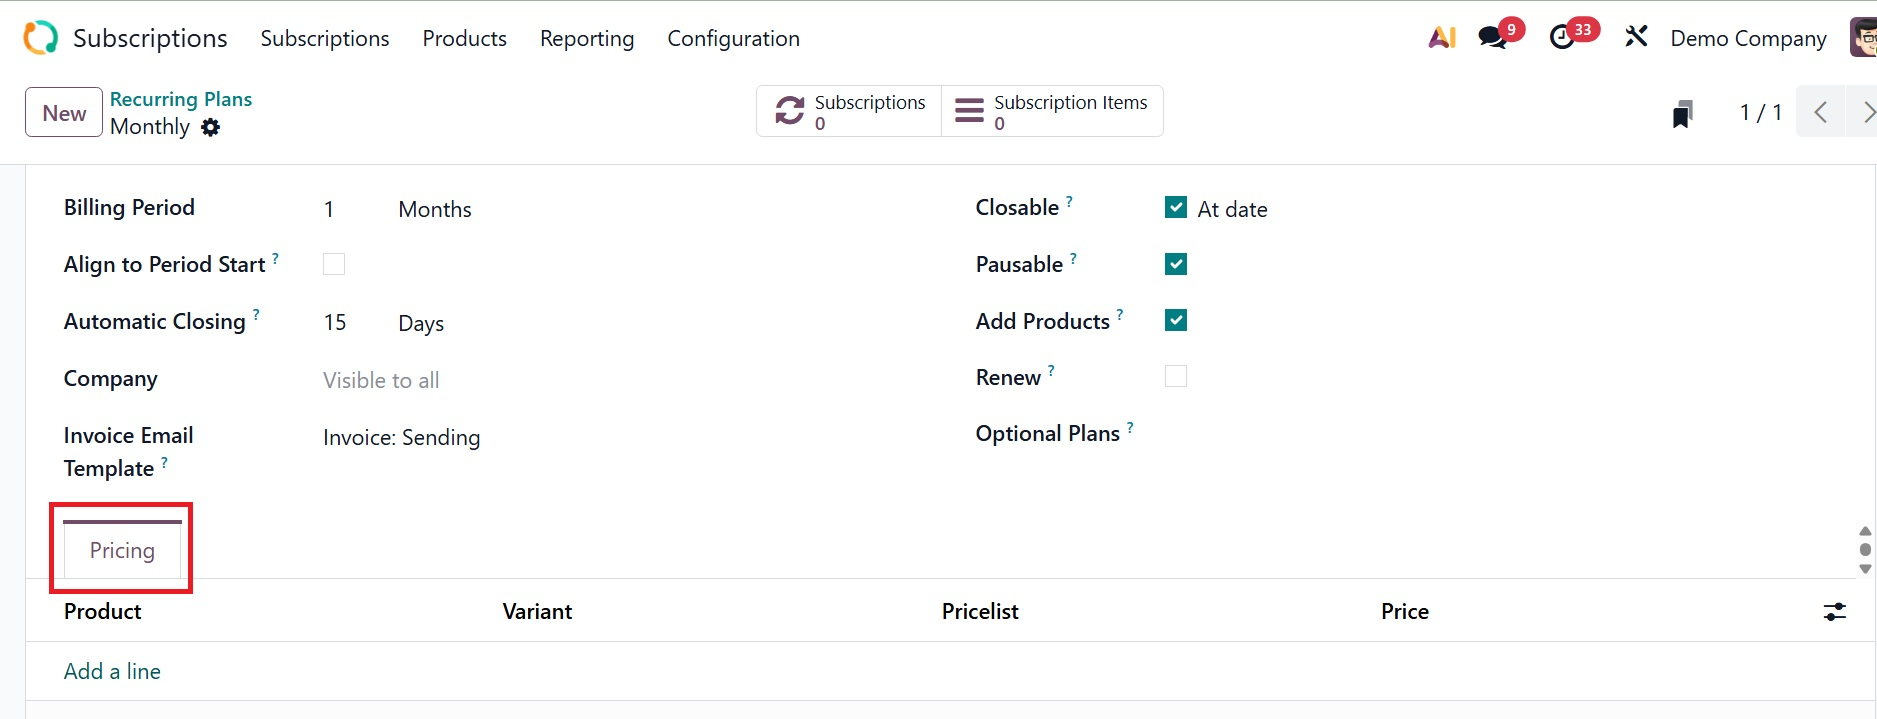
Information is shown in the appropriate section, including the Billing Period, Automatic Closing, Company, and Invoice Email Template.
The Billing Period determines the interval between periodic invoices for subscriptions with a recurring plan. The "Align to Period Start" checkbox determines whether the invoicing period should be aligned with a particular calendar period (such the first of the month) rather than beginning on the subscription date. Provide the Company in the allotted space.
You may add Automatic Closing Days to your subscription by upgrading. The subscription expiry scheduled action will automatically close any delinquent memberships that are past due by the specified number of days. The Invoice Email Template can be used to send invoice emails automatically.
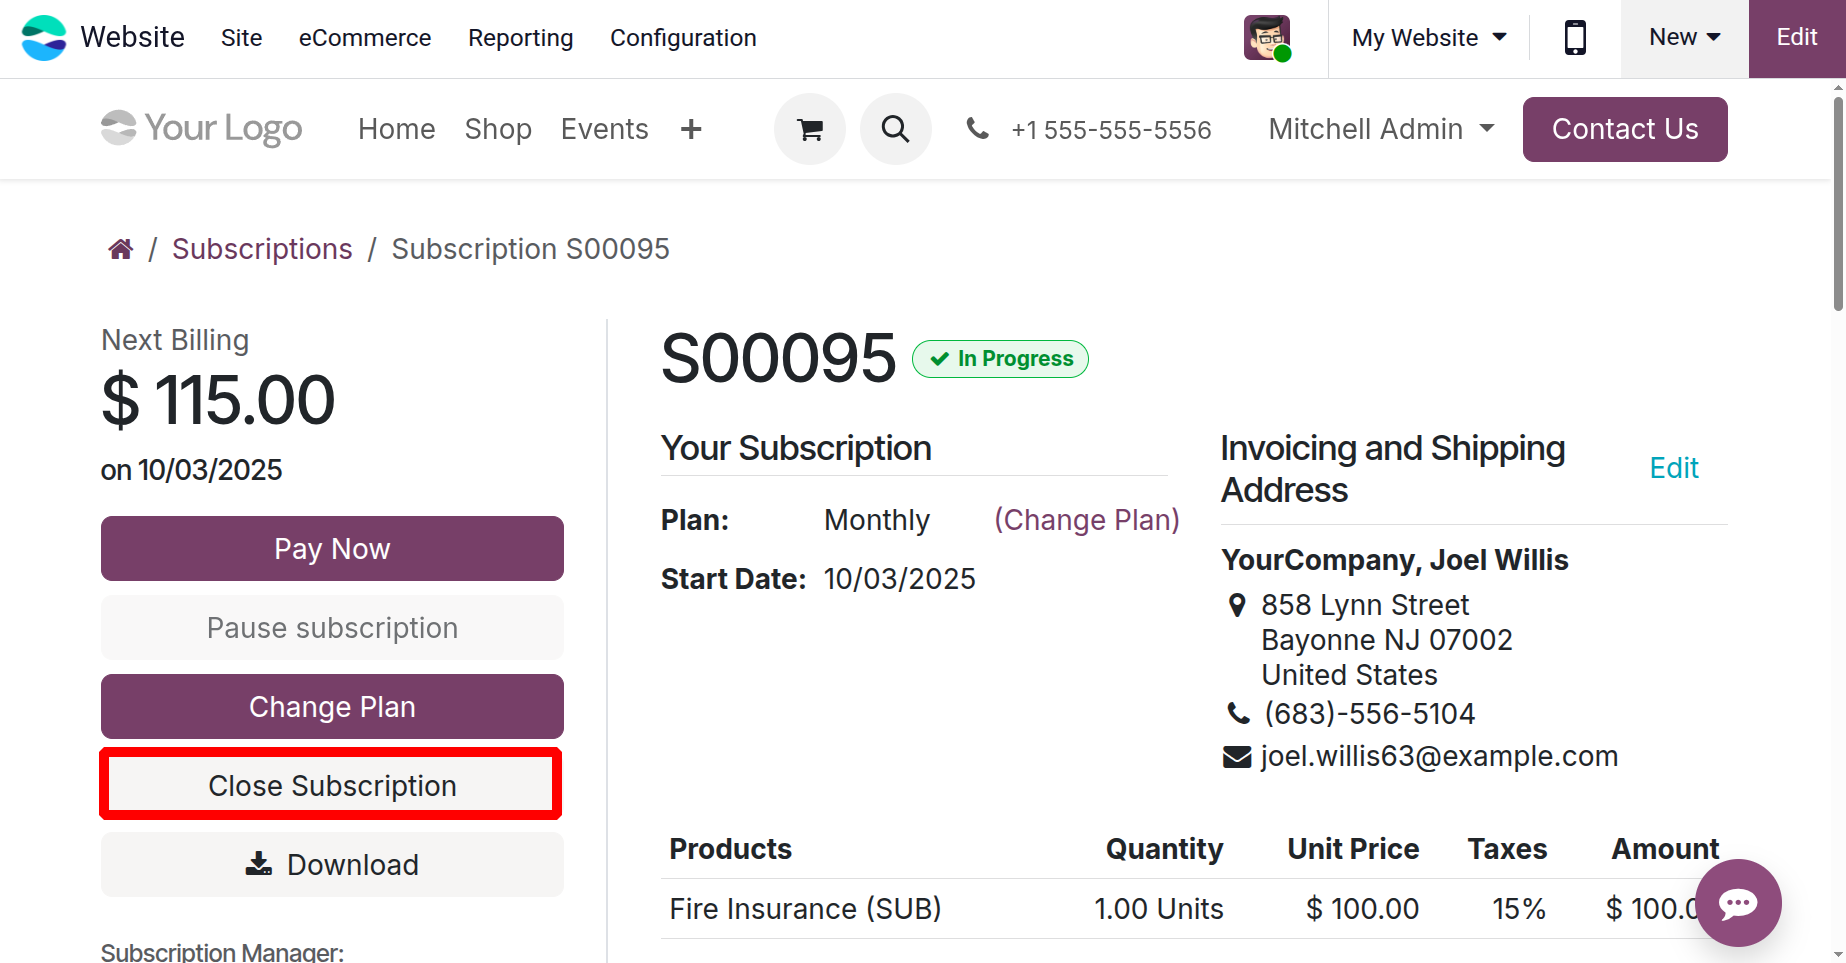
Turn on Closable if the customer wishes to cancel their membership. In other words, the "Closable" option of a recurring plan determines whether a user or customer can manually end a subscription under that plan. Via the customer portal, customers will be able to close.
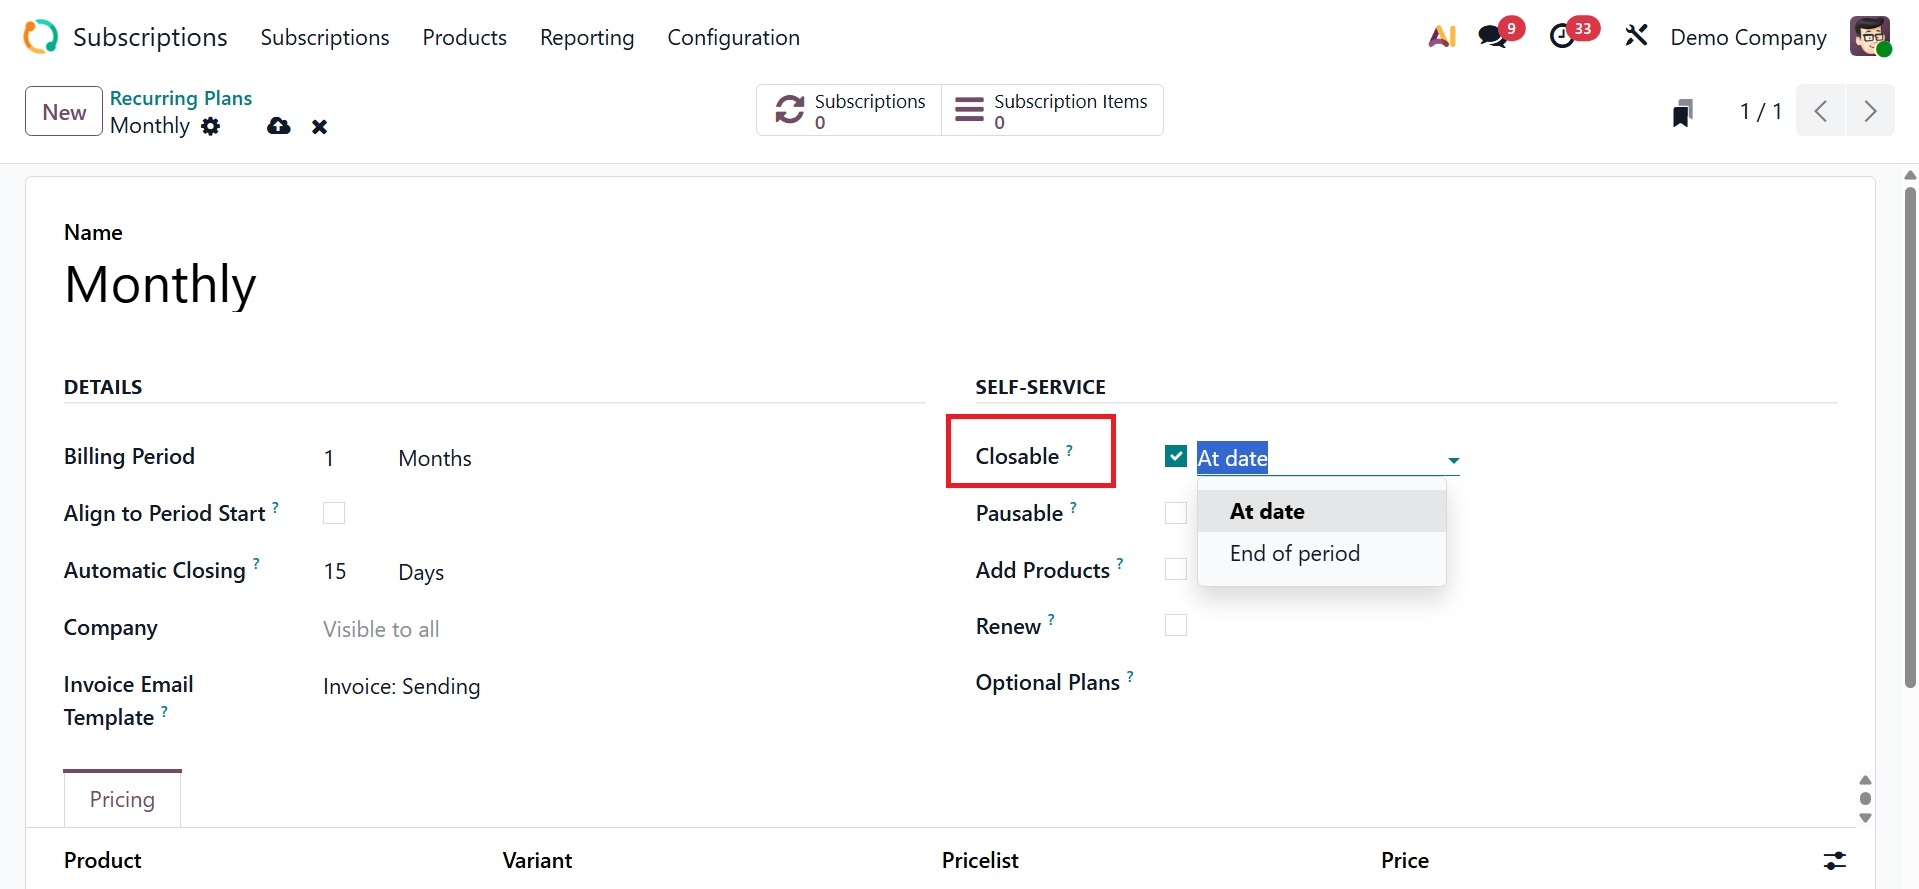
It may be closed on the designated date or, if appropriate, at the conclusion of the time.
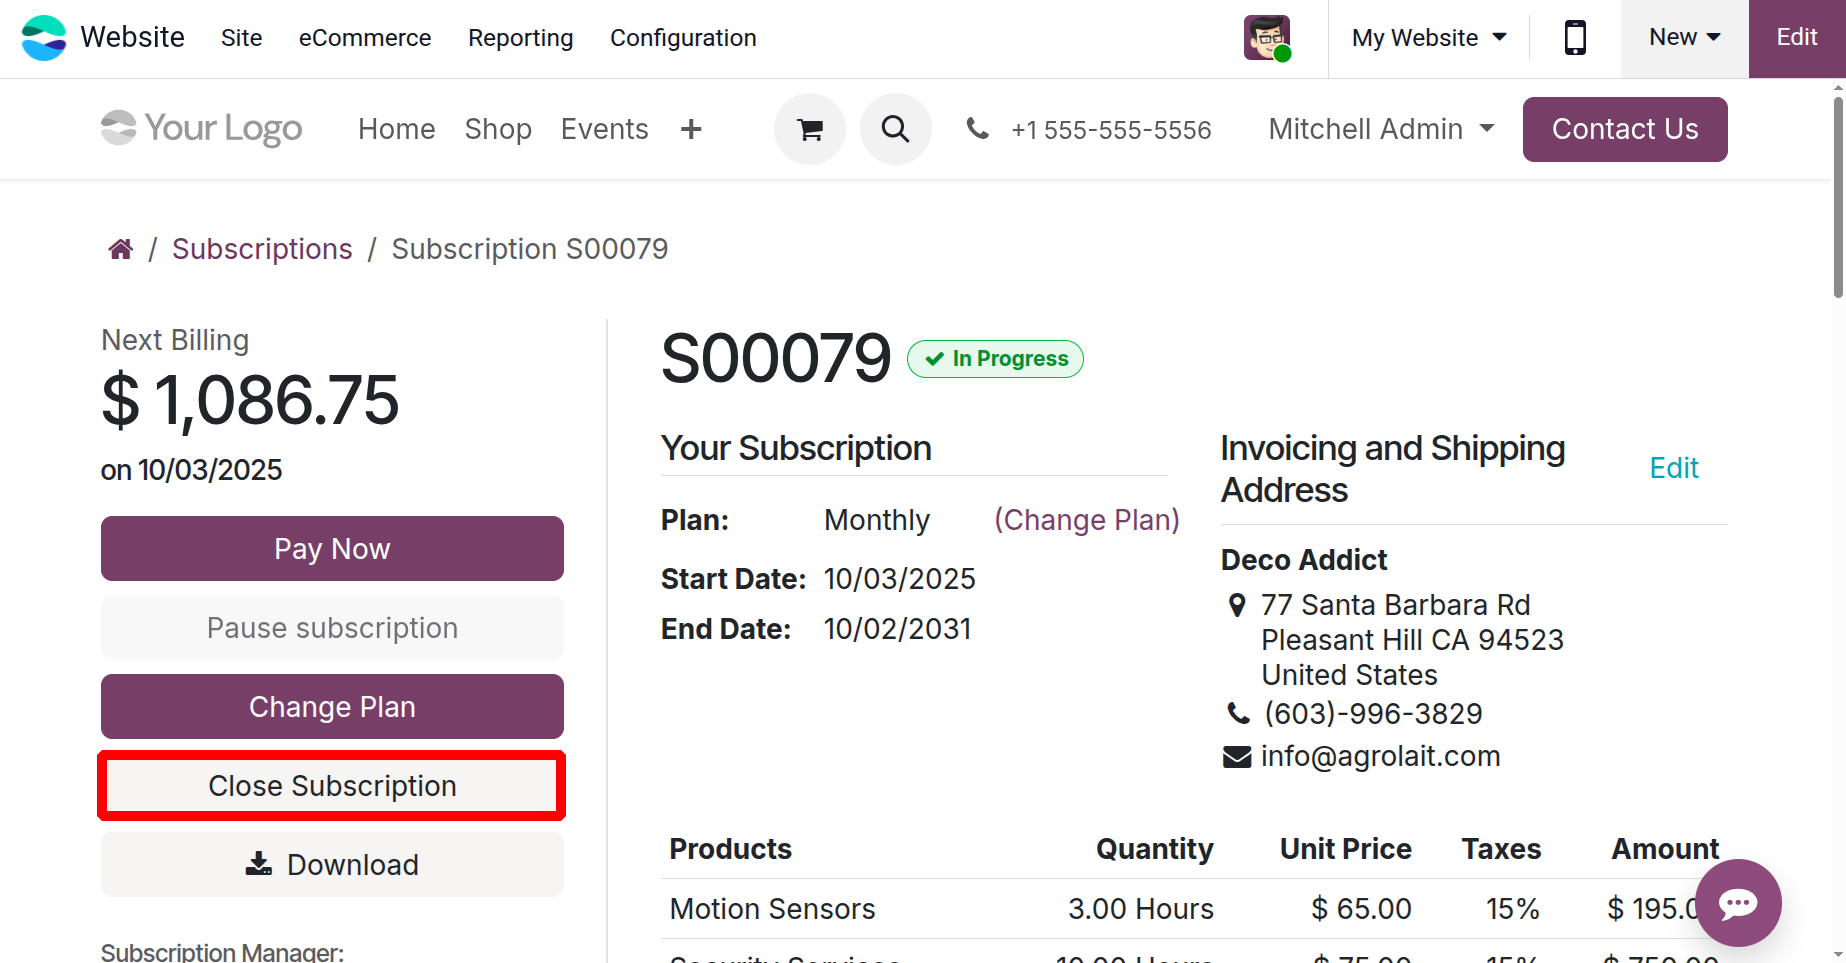
Which adds a Close Subscription button when they open from the customers portal, as shown below.
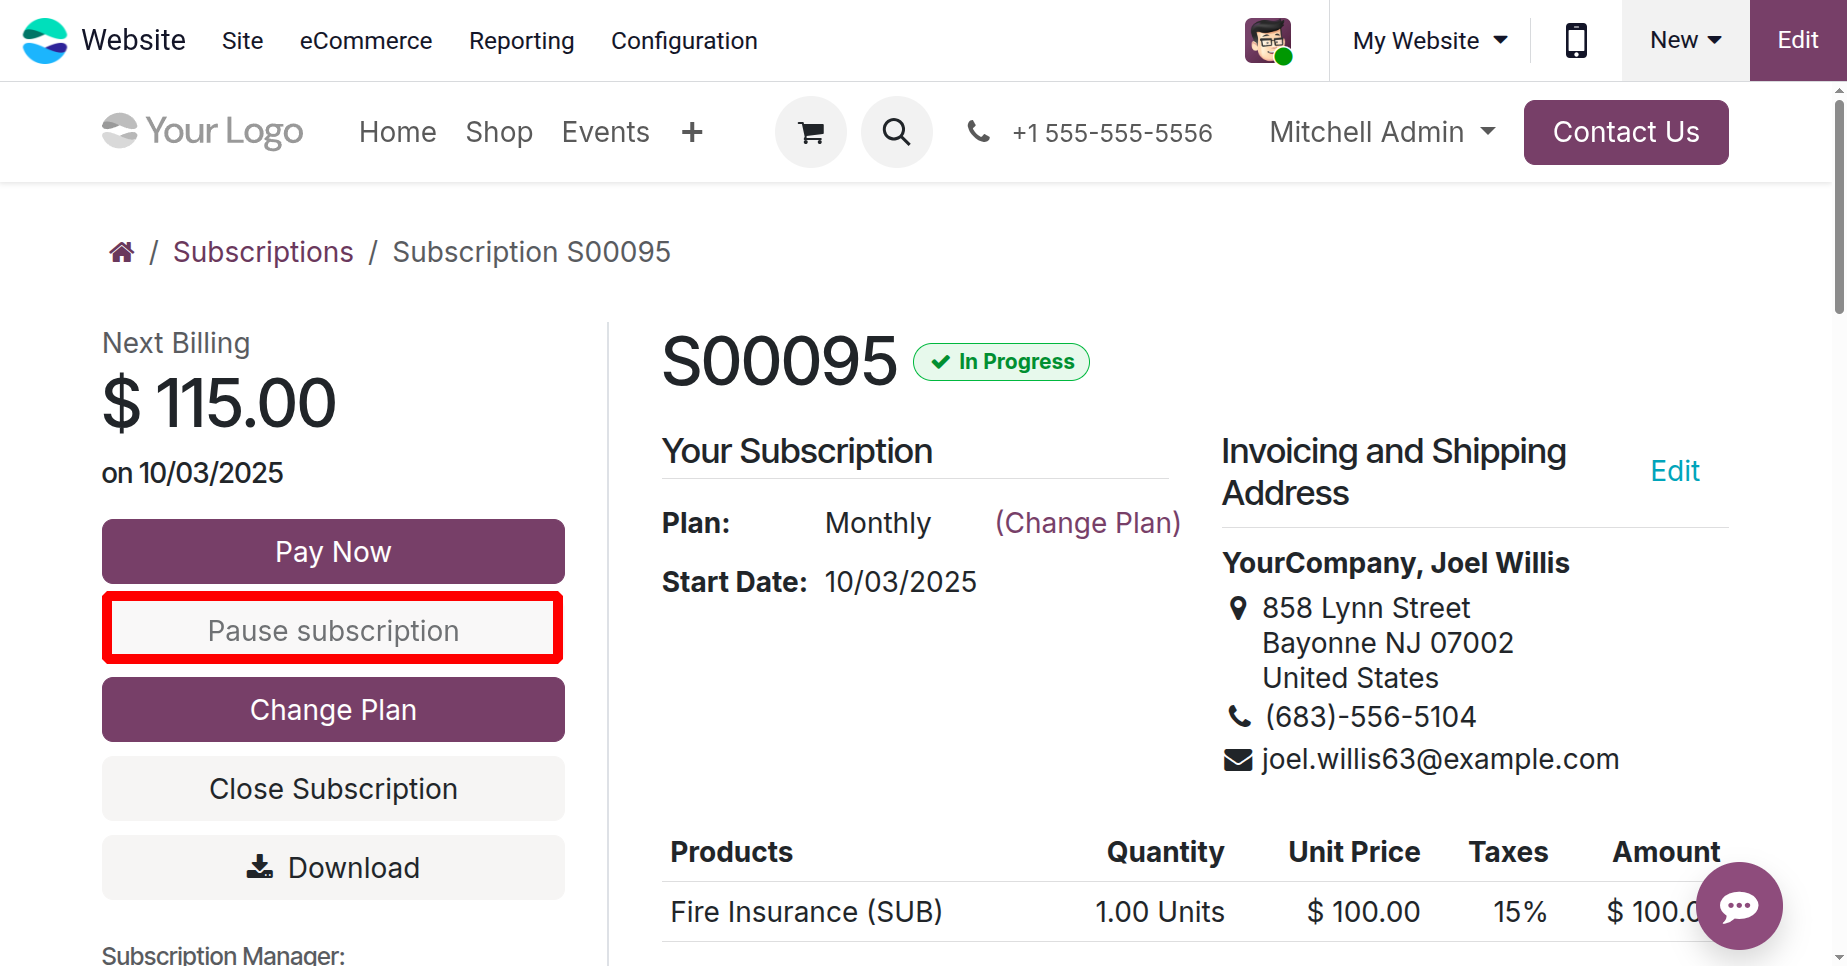
If the Pausable option is activated, customers can pause the subscription for a certain period instead of canceling it.
Customers can customize an upsell quotation using Add Products to change how many products are included in their subscription. To change the quotes, you can also use the things that are marked as optional.
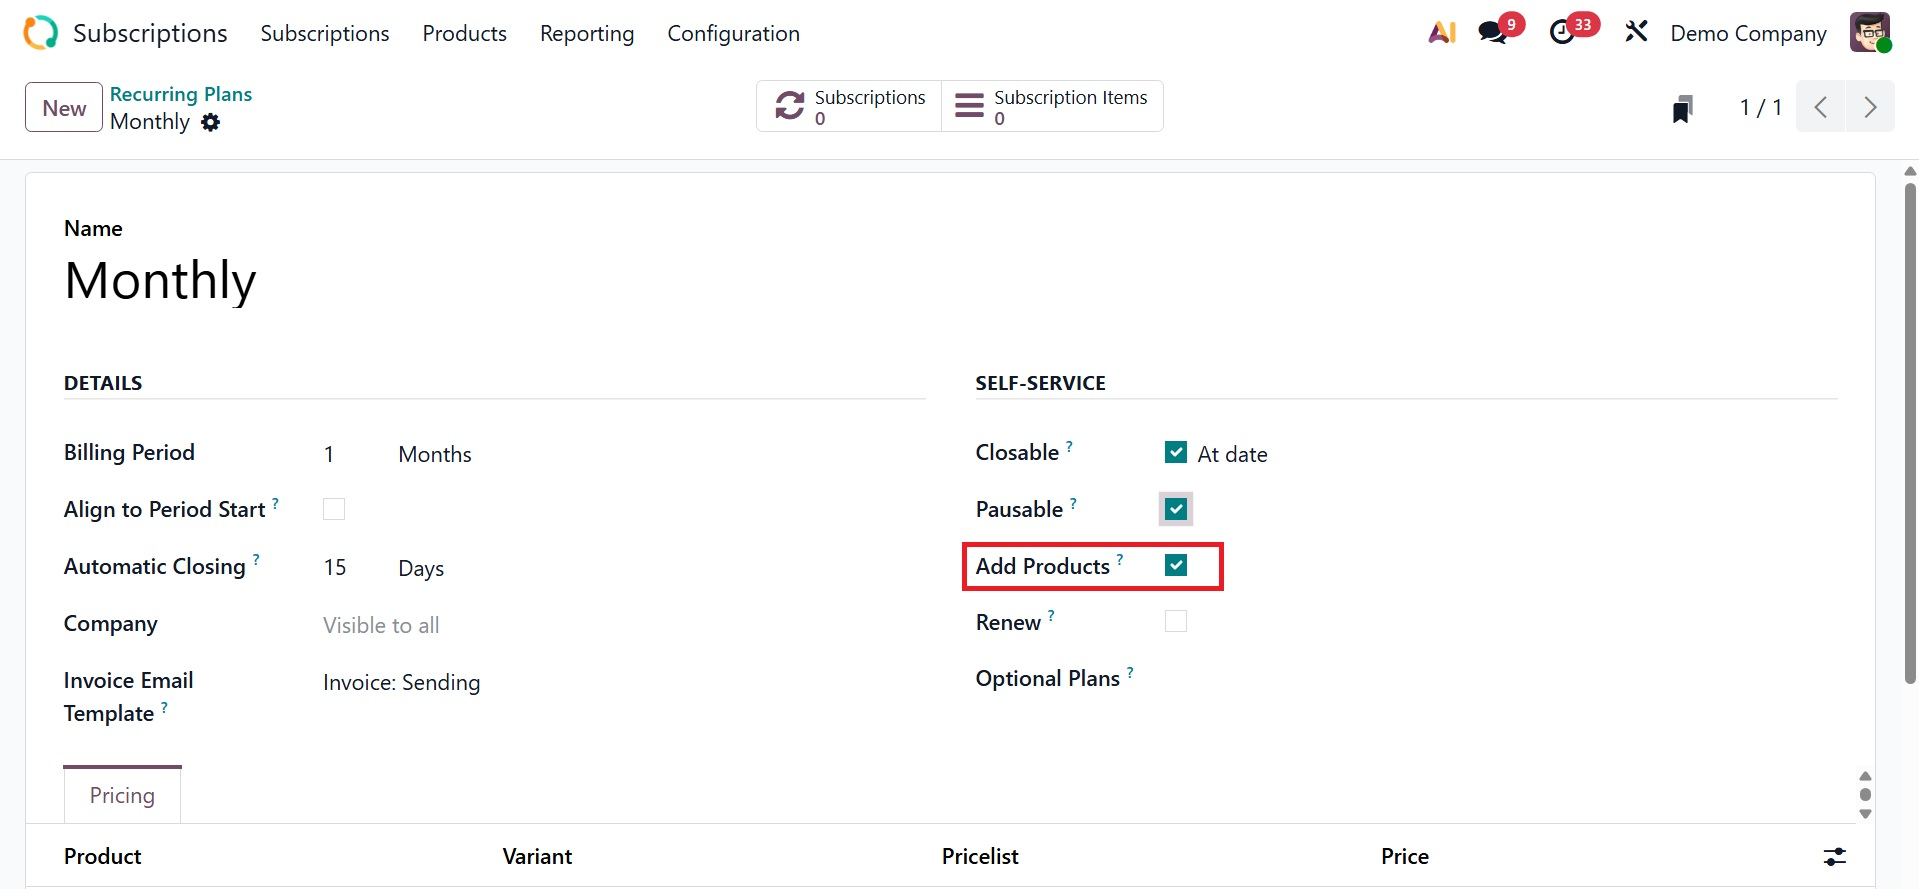
Customers can generate a renewal quote for their subscription by selecting the Renew option.
Customers can choose from a number of options when they use the Optional plan to look for a new subscription or renewal.
You can add price rules using the Price tab. The pricing tab displays the product, product variations, pricelist, and recurring prices, as shown below.
1.3 Quotation Template
You can utilize the Subscription module to generate appropriate quotation templates for your clients prior to establishing a new subscription. The Odoo 19 subscription plans serve as a template for new subscription creation. These options make it simple for customers to add new subscriptions. From the Configuration menu, choose the Quotation Template option to create subscription templates.
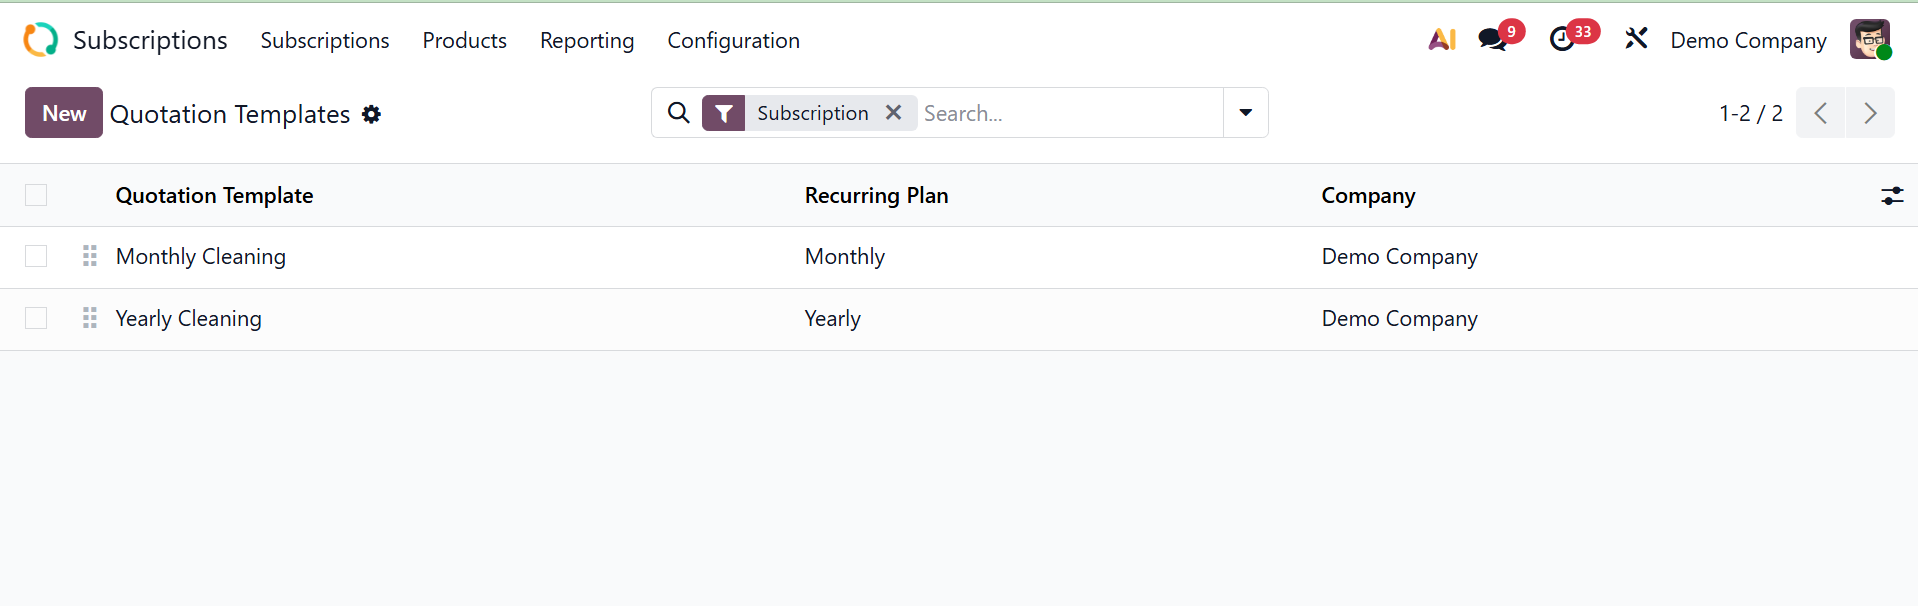
As seen below, the platform will display a few pre-made templates. The Company, Recurrence, and Quotation Template are all included in the list view. To create a new quotation template, click the New button.
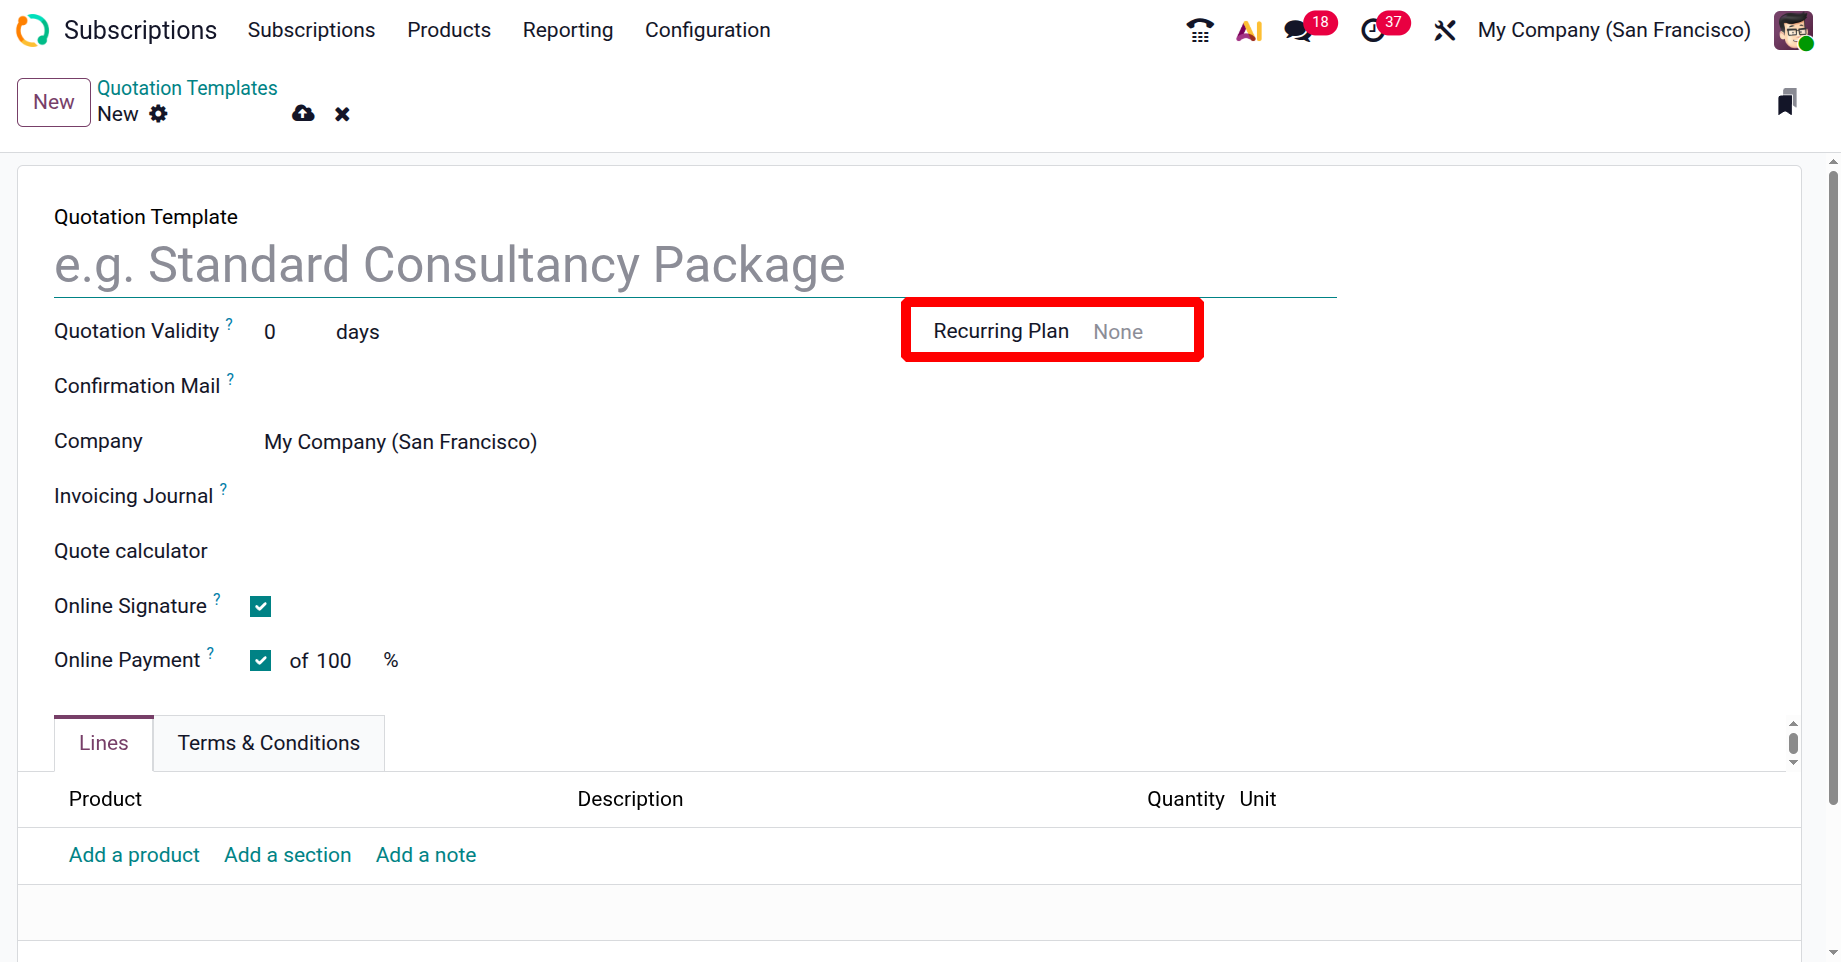
You can insert a suitable title for the Quotation Template in the designated section. In the Quotation Expires. After the section, the user can specify how many days will be utilized to calculate the Quotation's Validity date. Consequently, the quotations generated with this plan will have their expiration date automatically determined by Odoo19. Then, provide the company name in the allotted space. To indicate which journal will be used for invoicing when the quotation is converted, you can choose an invoicing journal in the template's options. When it comes to the quote calculator feature, Odoo 19 lets you incorporate spreadsheets into templates to automate and personalize charges. This allows you to sync information like pricing and quantities straight to sales orders for more precise and effective quoting.
Odoo lets you ask the buyer to sign and pay online so that the purchase is automatically validated by enabling the Signature and Payment options from the Online Signature and Online Payment field.
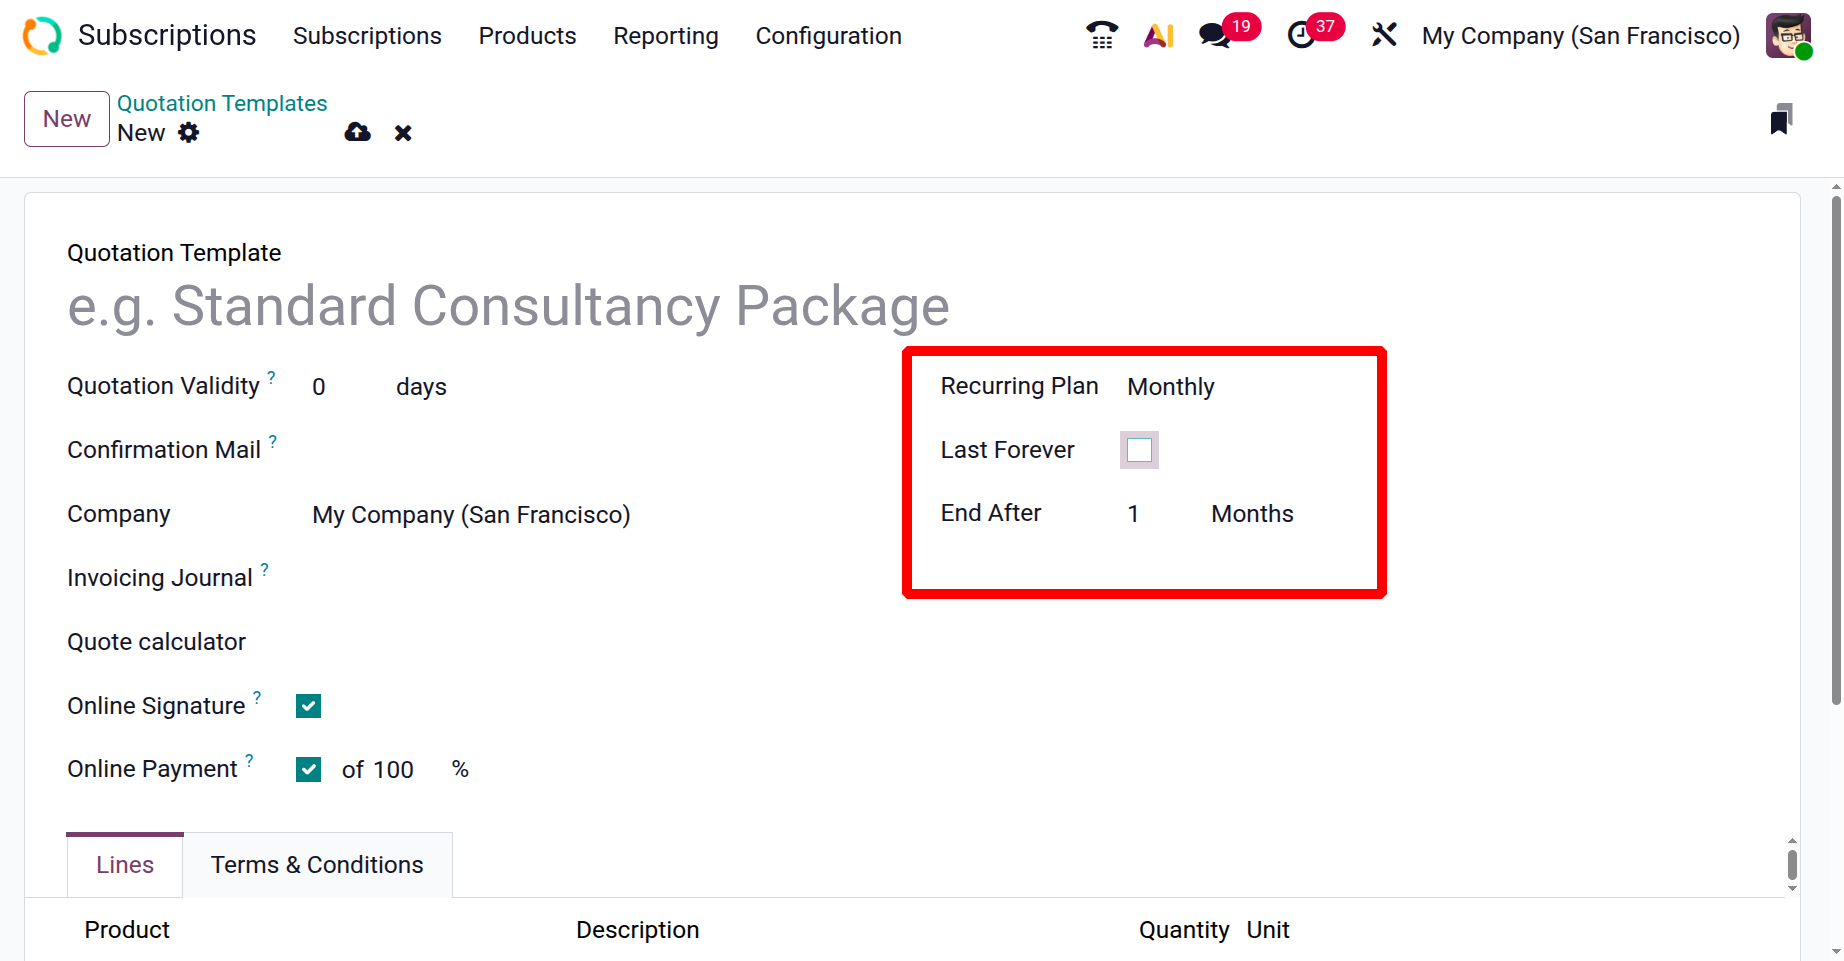
Choose wisely when it comes to recurring tactics. After selecting the Recurring Plan, more fields will be displayed to you. Since Last Forever is selected as the duration setting, the plan has no limit. A quotation template will become a subscription template if a recurring plan is added. End After regulates when a subscription made using that quotation template automatically expires. A number, such as six months, twelve months, etc., can be set. The subscription will terminate automatically without requiring manual cancellation after that many periods of use.
The Add a Product option under the Lines tab allows you to discuss each subscription product independently. When you choose this subscription plan from a quotation, these will be added to the Order Line.
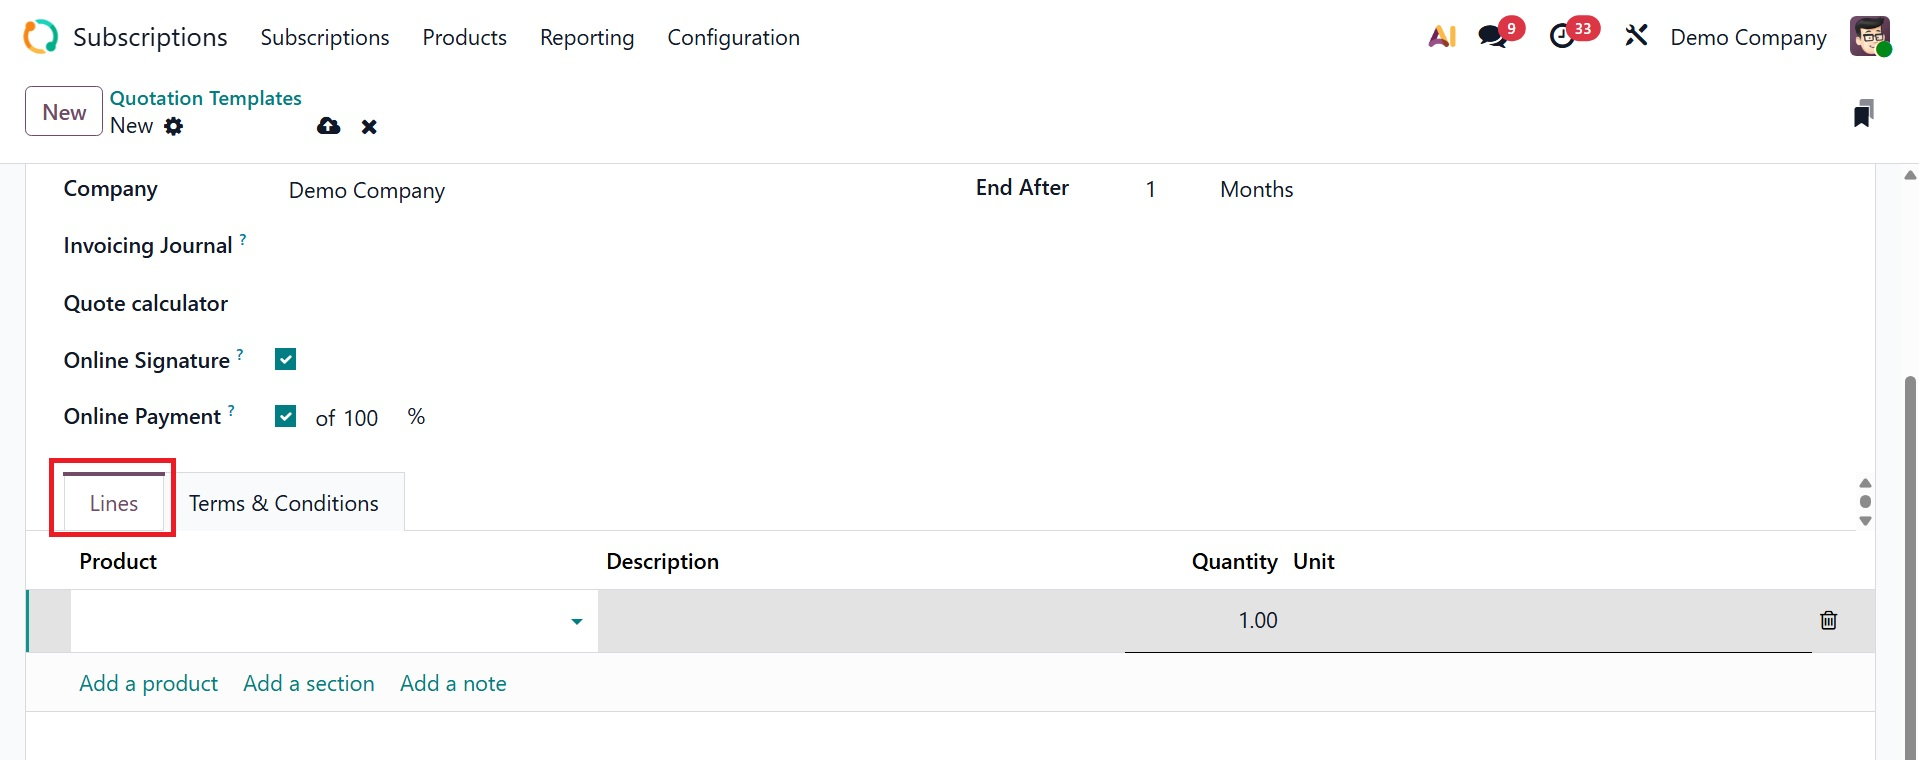
The products can be identified as distinct sections by adding a section using Add Section. You can then add further notes using the Add Notes option.
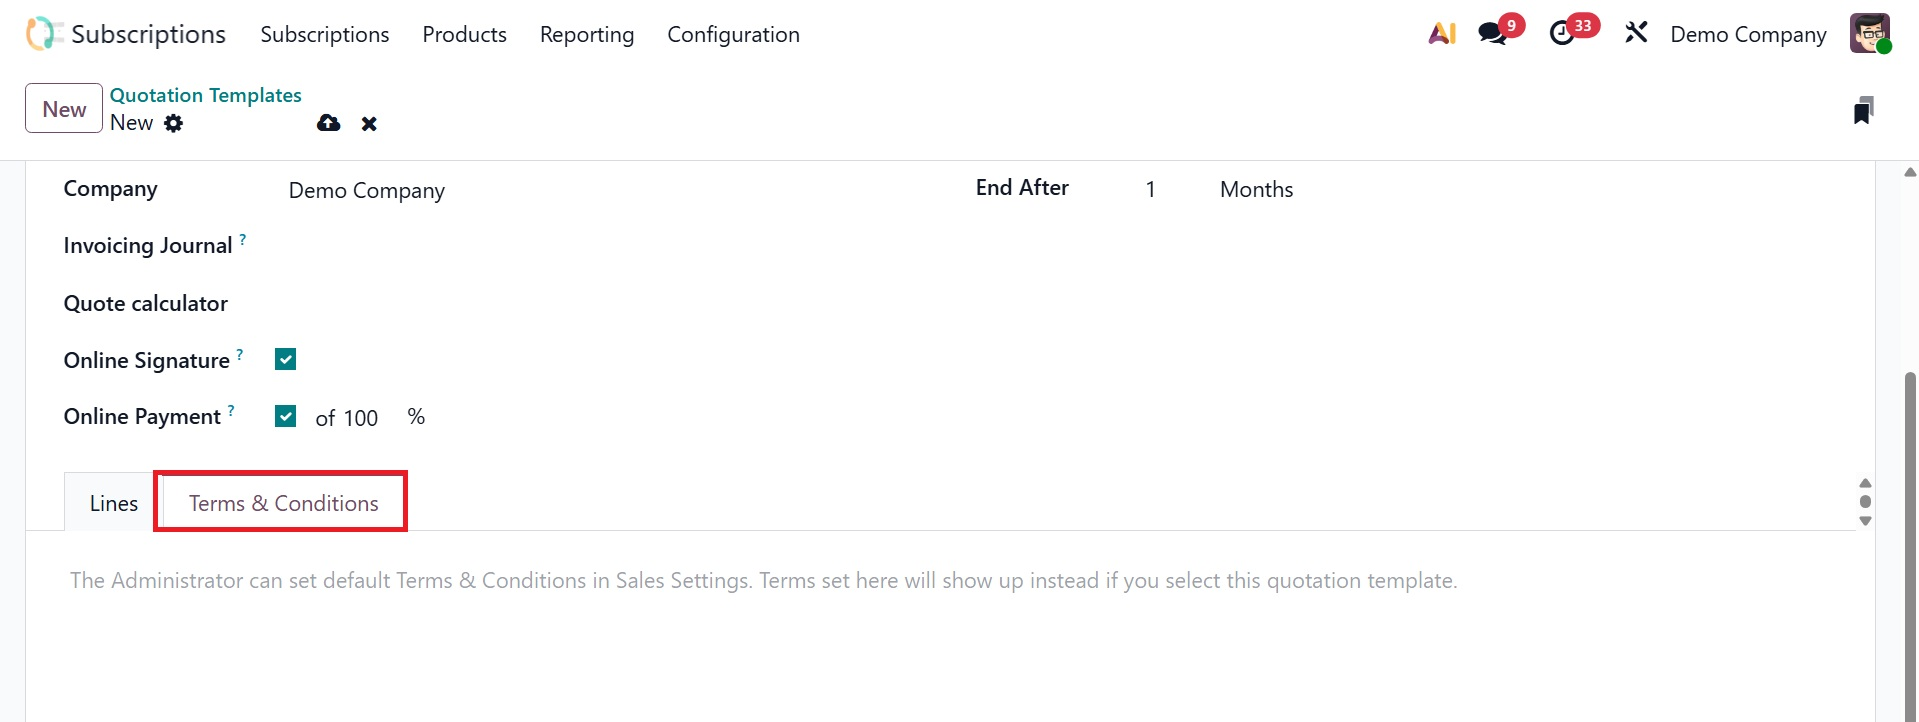
From the tab displayed in the screenshot below, you can choose the membership plan's Terms & Conditions.
1.4 Close Reasons
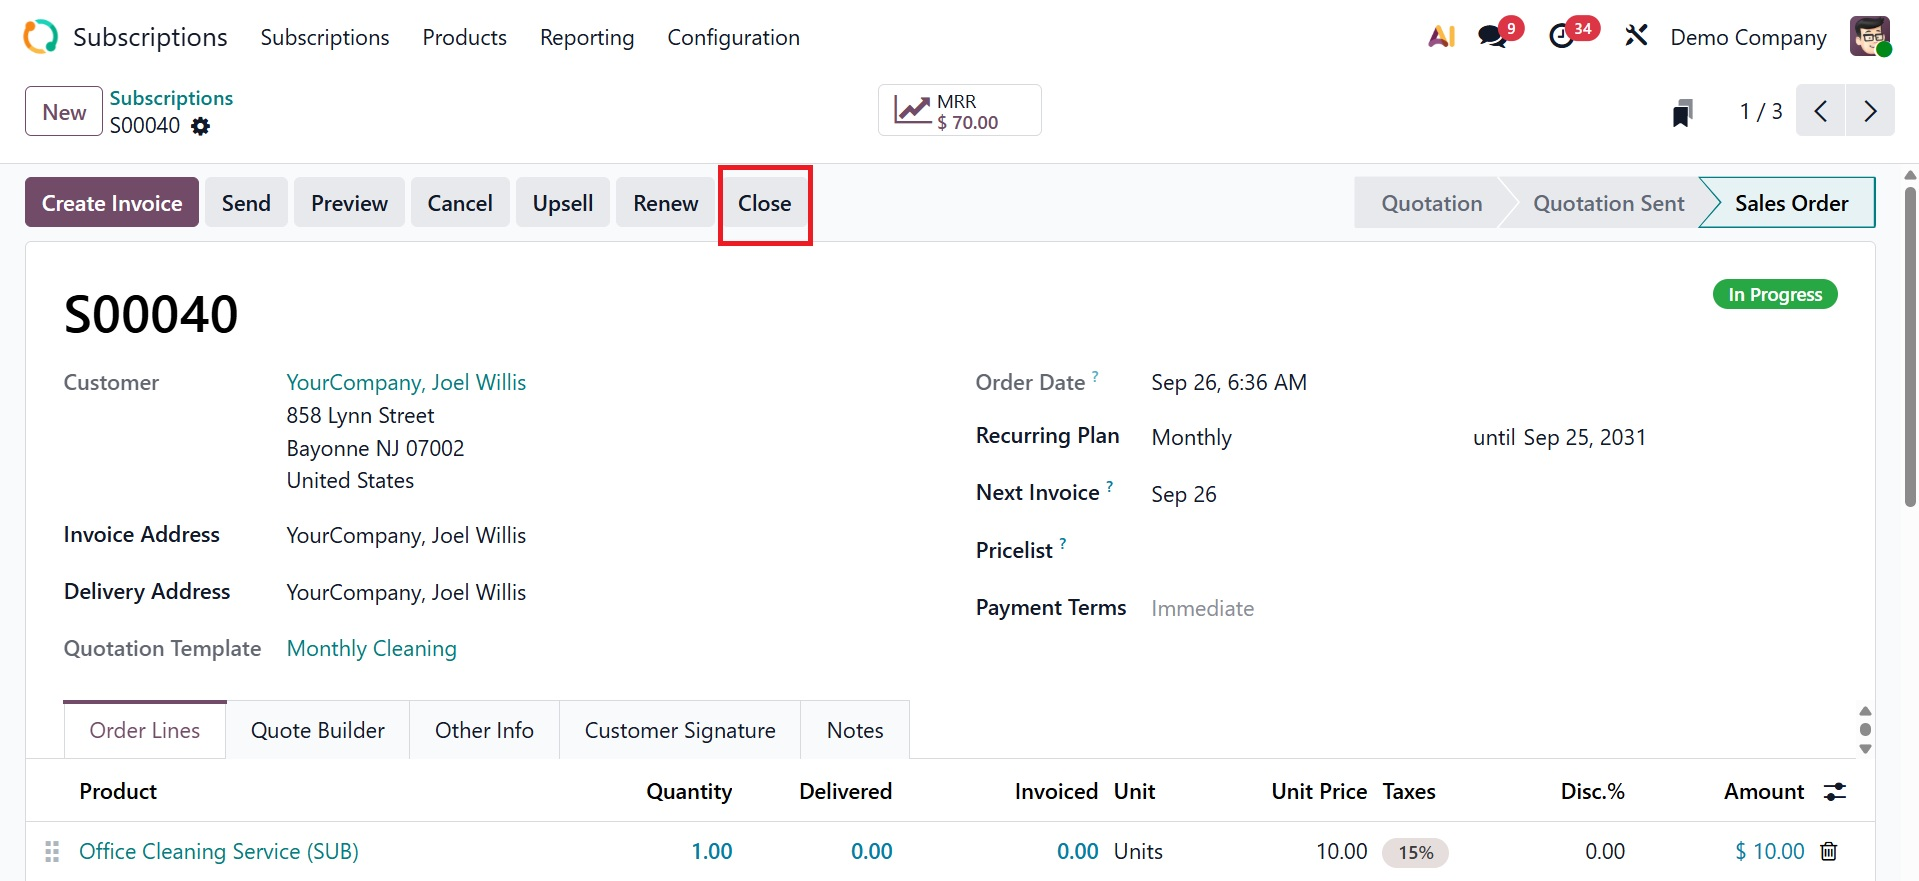
Terminating the subscription before its expiration date may be necessary in several circumstances. Before canceling the membership in these situations, it's crucial to make the situation clear. The Close button on the subscription's form view can be used to end a subscription.
For these reasons, the Odoo19 Subscription module allows you to create a list. To do this, select the Close Reasons option from the Configuration menu.
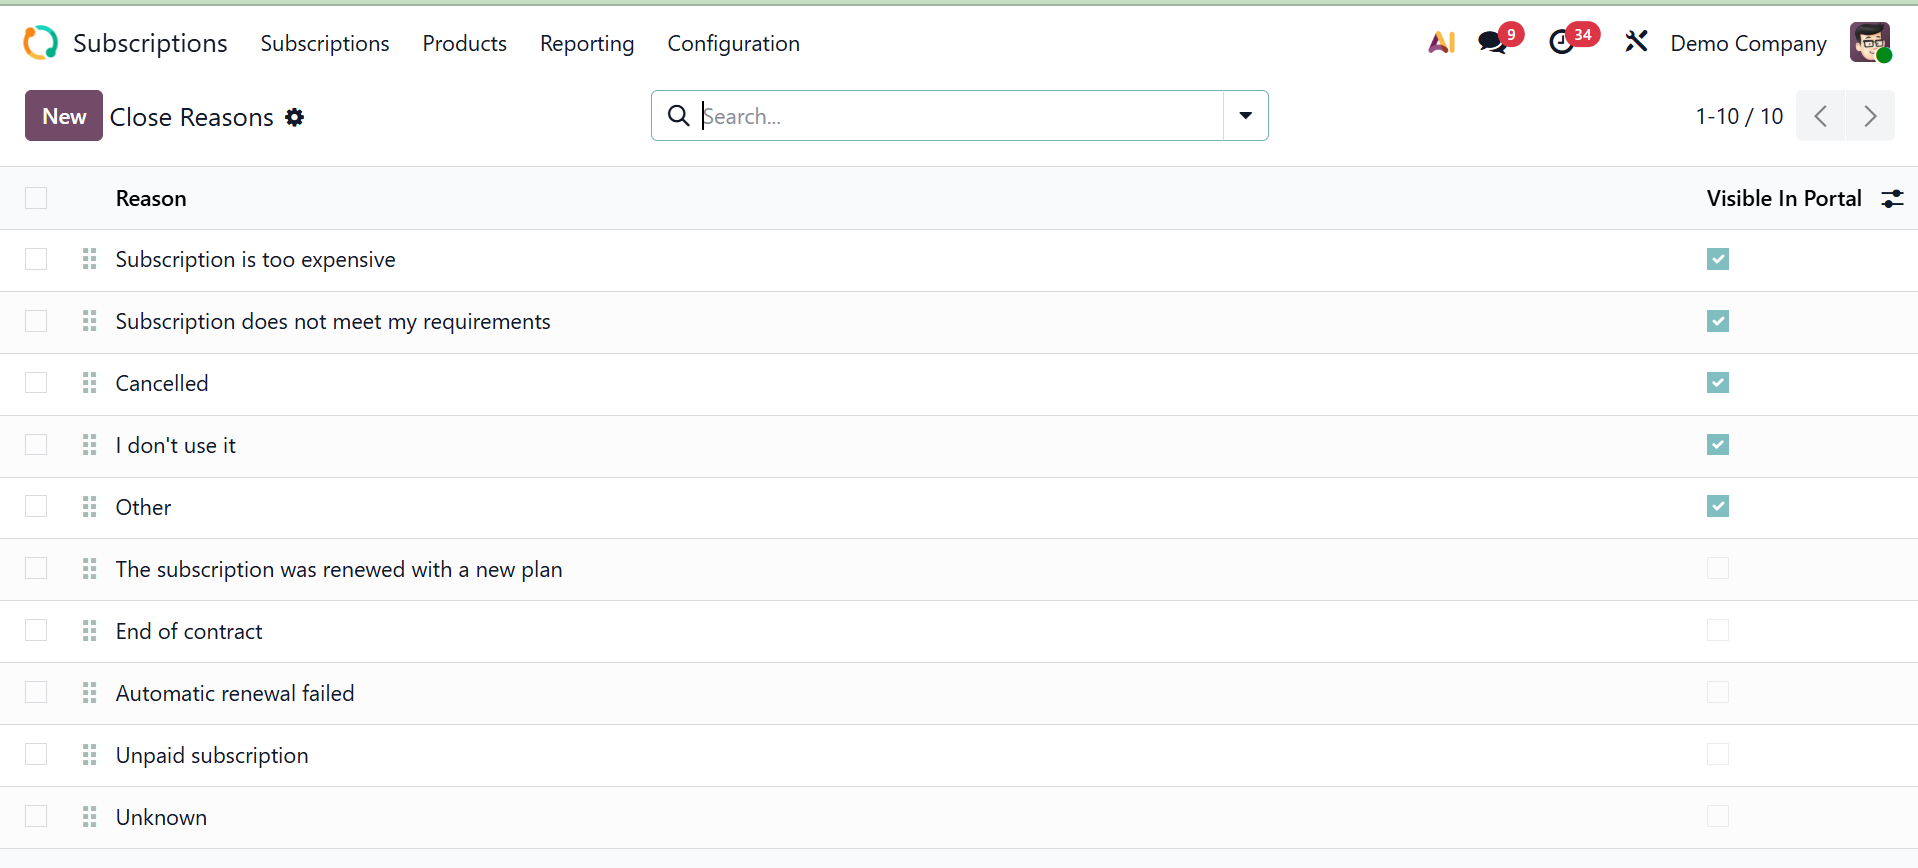
Here are the previously developed close reasons. Clicking the New button will start a new one.
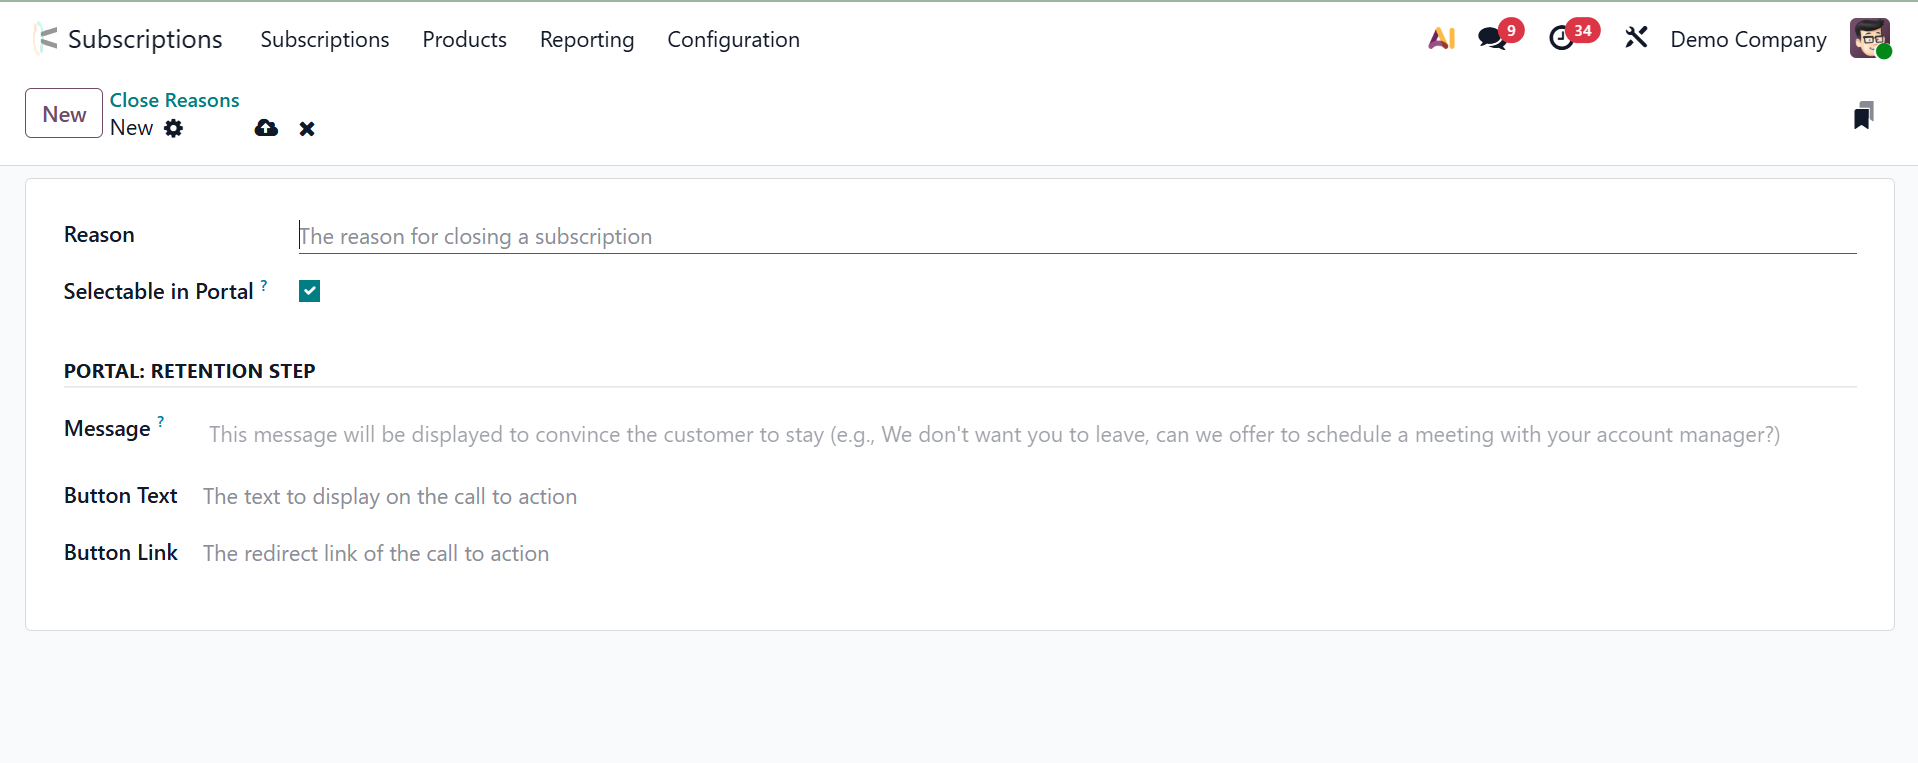
By adding a new line underneath the current list, you can include your explanation.
The "Selectable in Portal" checkbox controls whether a certain close reason is shown as an option when a customer cancels a subscription through the portal interface. To utilize this explanation, the next time you want to cancel a subscription, choose the Save option.
If the customer decides to cancel, click on the Close button.
Clicking the Close button will cause a new pop-up window to open, as seen in the screenshot below.
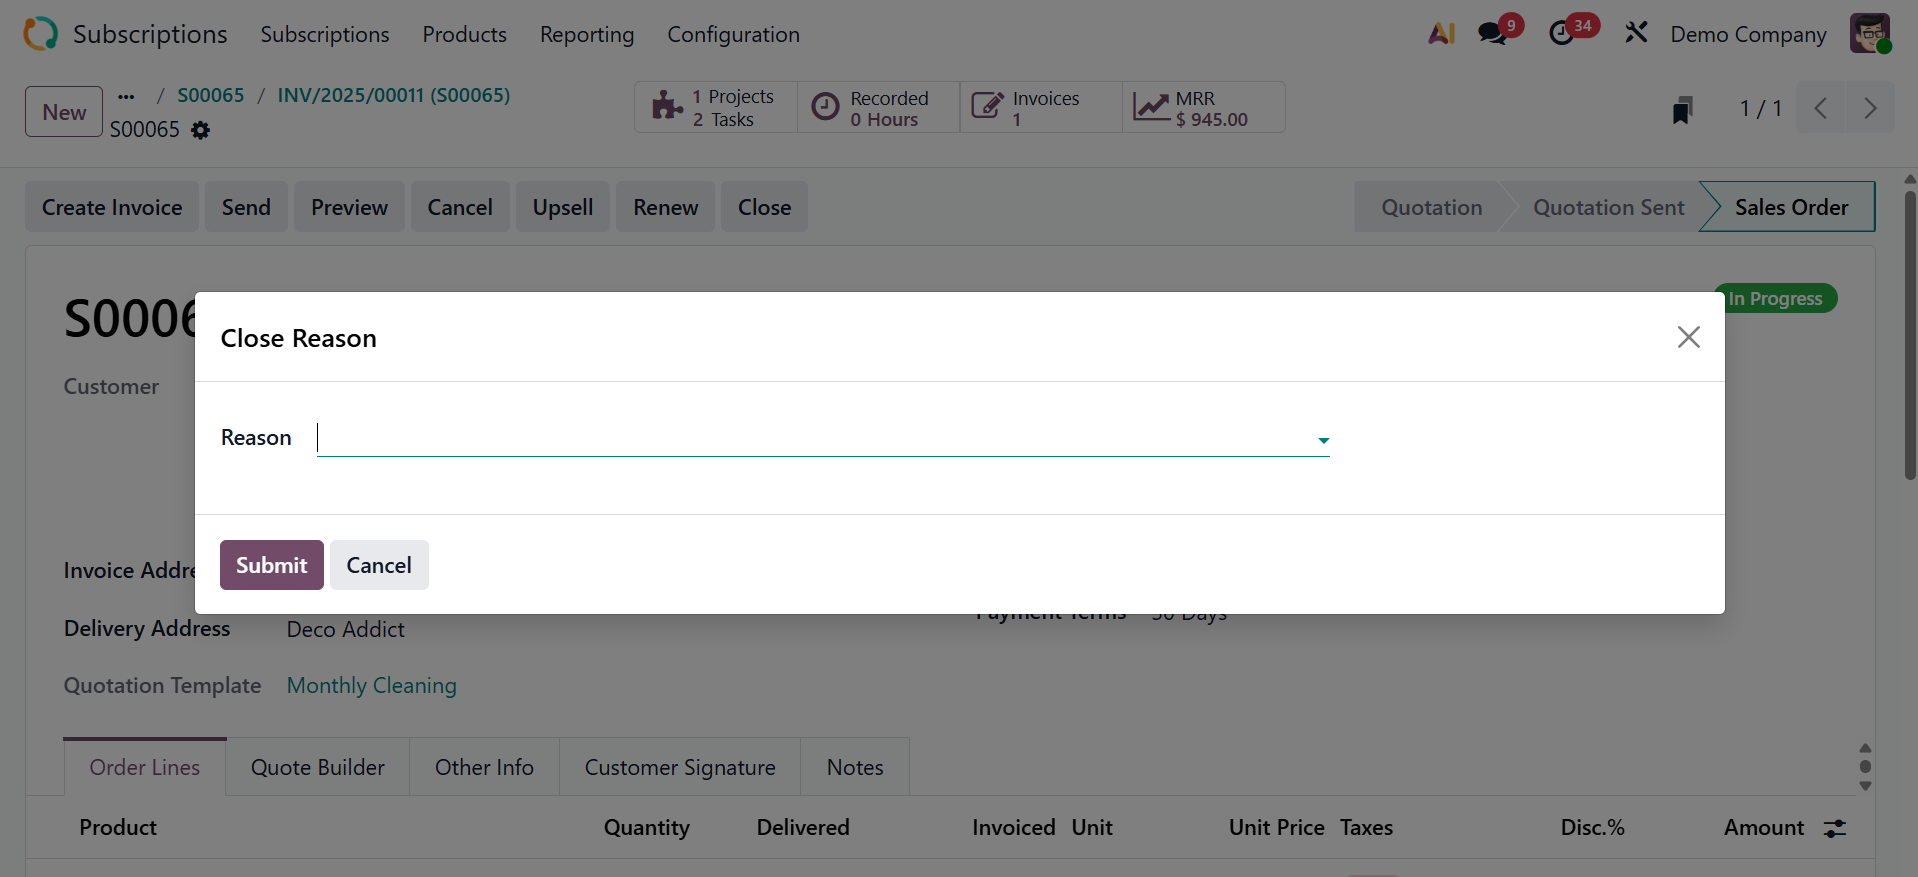
Here, you can choose the best reason to cancel your membership from the selection. After that, you can click the Submit button to end the subscription.
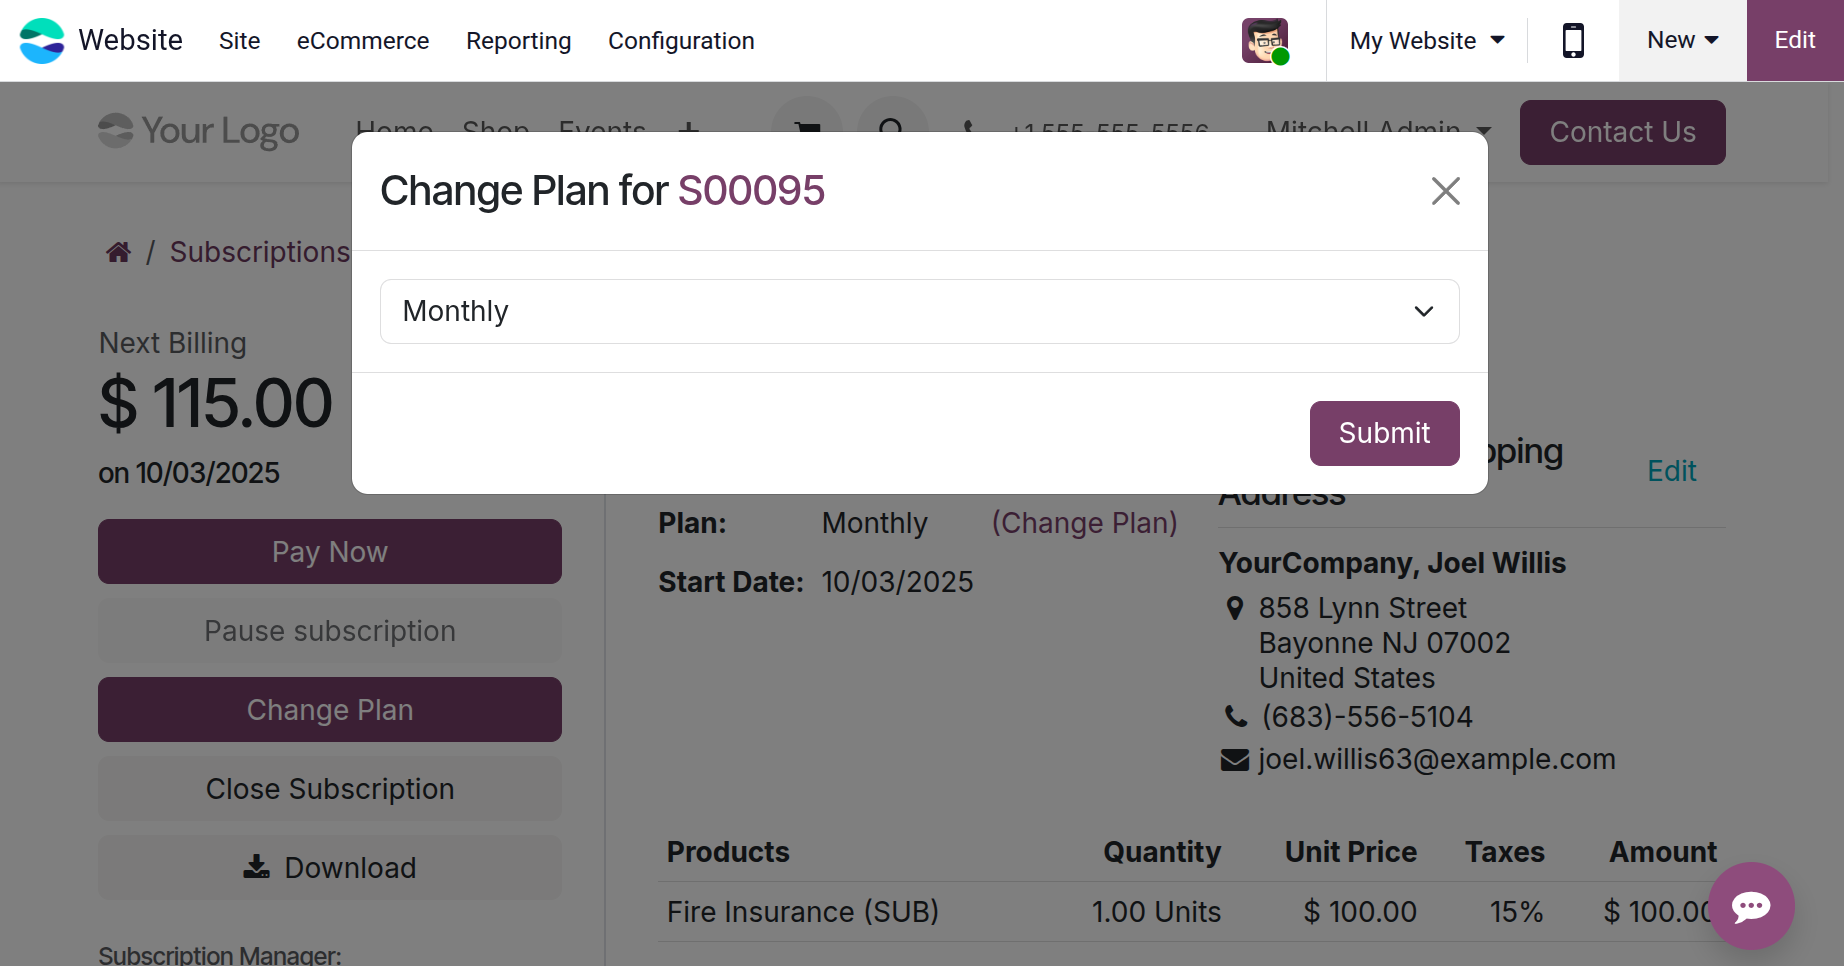
Customers can close the subscription from the portal by clicking on the Close Subscription button.
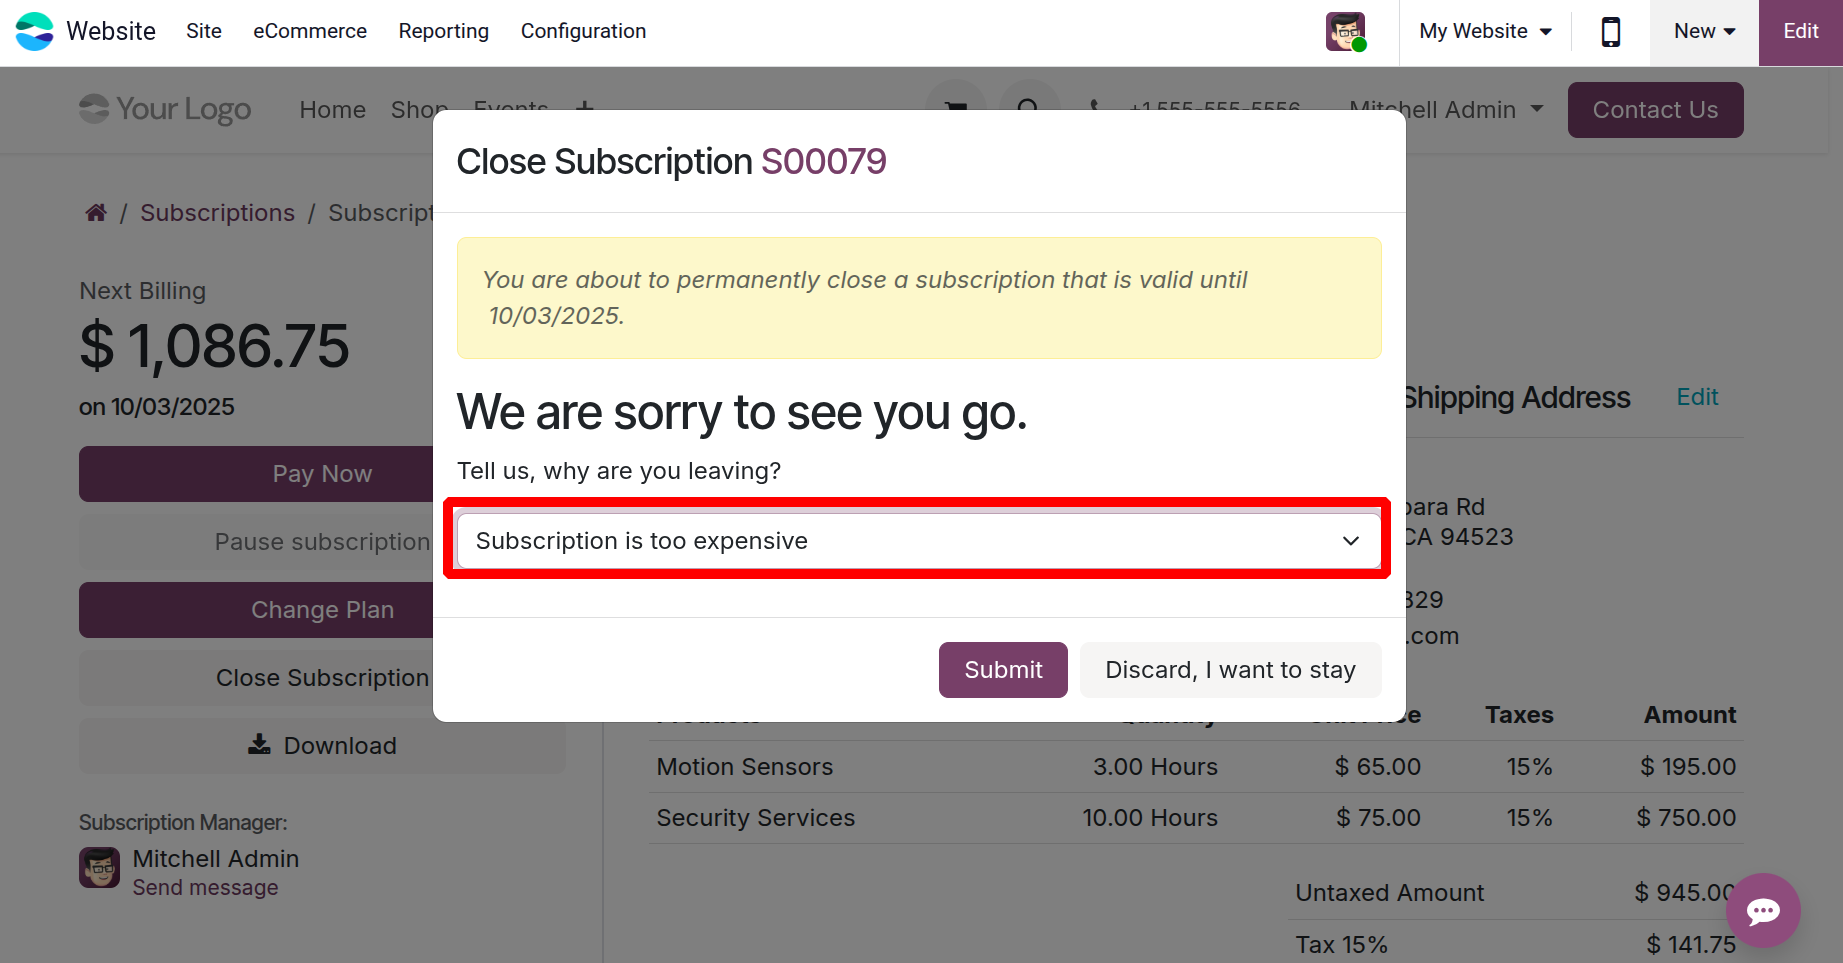
Then they can choose the Close reasons and click on the Submit button.
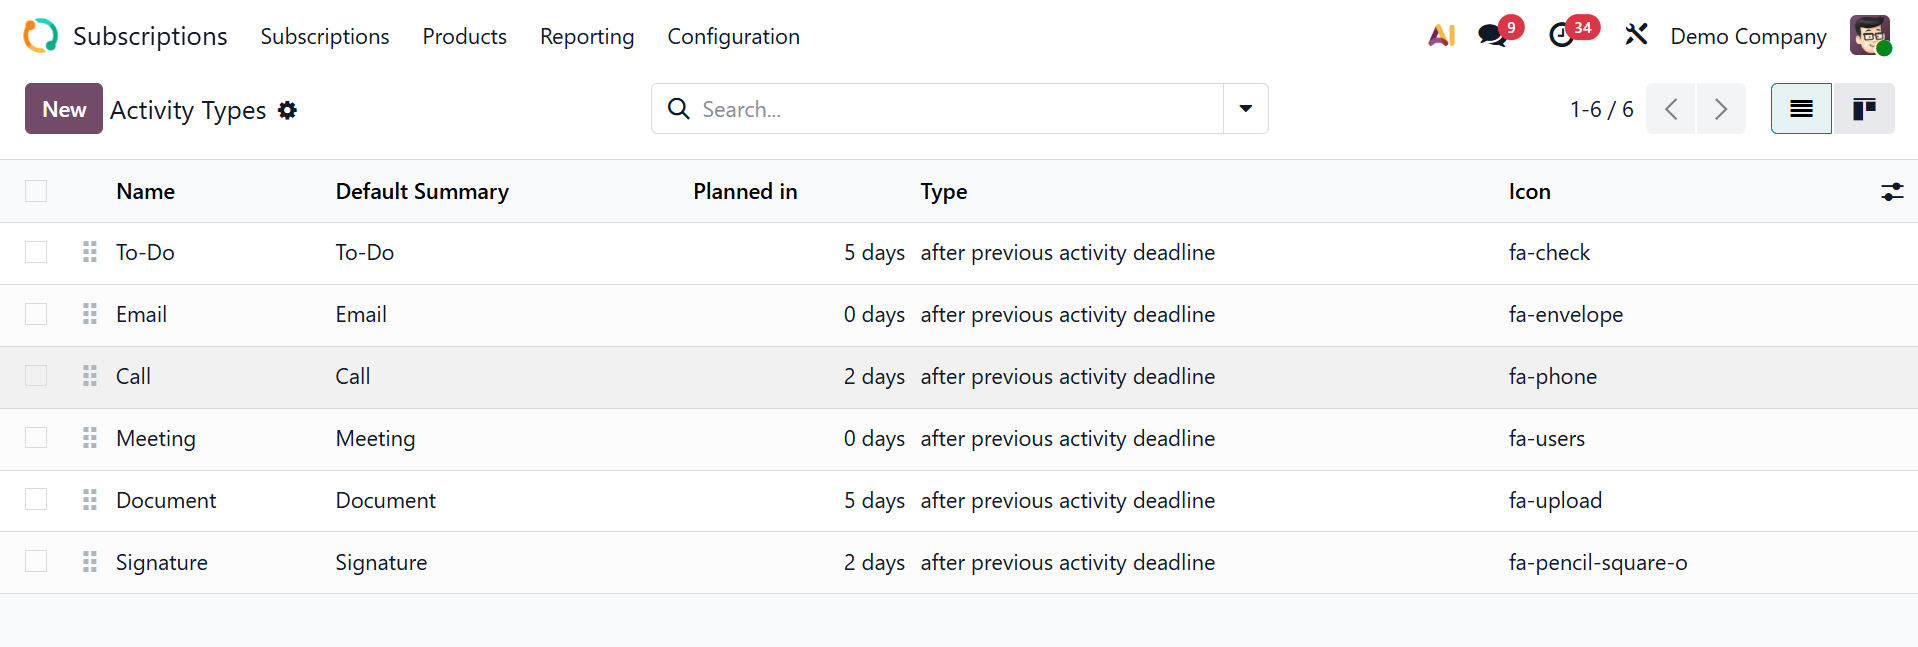
1.5 Activity type
The Odoo 19 Subscription module can accommodate more kinds of activities. To do that, select Activity Types from the Configuration menu. All of the current activity types—Name, Default Summary, Planned in, Type, Model, and Icon—as well as the information that goes with them are displayed in the list view.
To add another, click the New button. The activity type's form view will appear. In the designated field, type the name of the activity. Next, select the model and the task to be completed from the ACTIVITY SETTINGS.
Talk about the Action, Icon, Default Summary, and Default User. Has the ability to alter the backdrop color of related activities of this kind, like the Decoration type. We can schedule the action deadline using the Schedule option. If required, include any default notes.
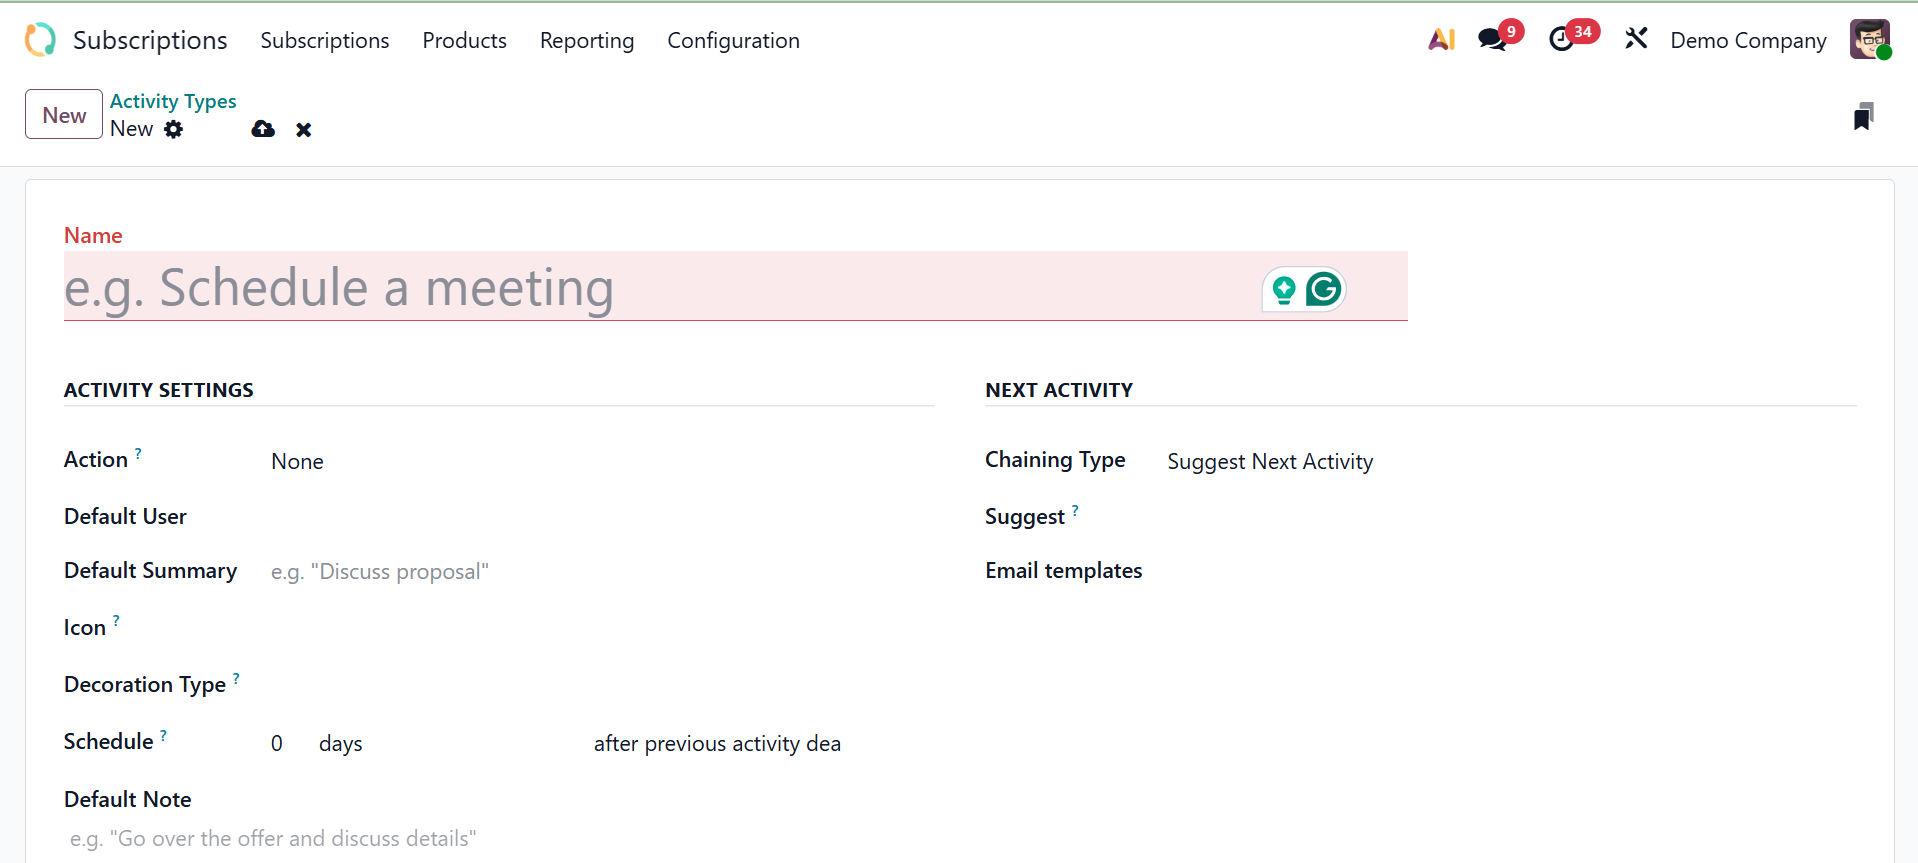
Users can add chaining kinds from the NEXT ACTIVITY section. Select the chaining type: suggest next activity or trigger next activity.
Suggest Next Activity: Odoo will recommend a follow-up task after the activity is marked as completed, but it is not required.
Trigger Next Activity: Odoo will automatically schedule the next activity you specified after the current one is finished.
Put in a template for an email under the email template option. After that, the produced Activity Type is stored. Finally, save the details added.
1. 6 Activity Plans
Activity Plan is the last choice in the Configuration menu. Choose the Activity Plan from the Configuration. Click the New button to add a new Activity Plan.
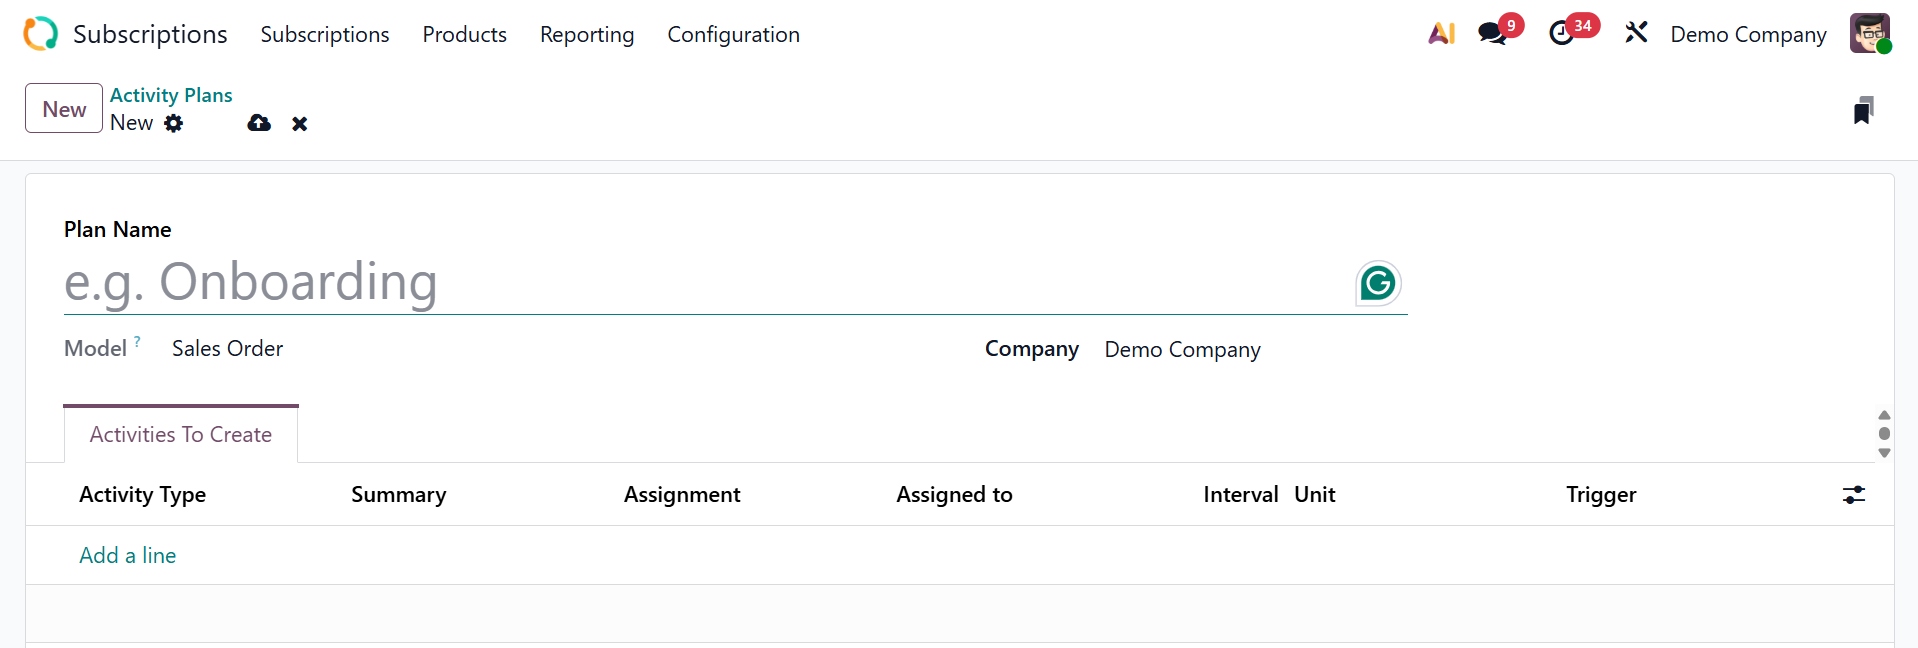
Prioritize the plan and the firm names. Next, you may use the Add a line option on the Activities To Create tab to create new Activities.