Timesheet:
The Odoo 19 ERP Timesheet system aims to optimize business operations and effectively manage employee time. The Timesheet function is a crucial tool for monitoring employee responsibilities and billing customers for billable hours. It accurately records how much time is spent on client interactions, projects, and meetings. Projects and Employees are two other HR-related modules with which the module can be combined. By monitoring and documenting staff time allocation, businesses can ensure accurate billing to clients for billable hours. An extensive summary of the capabilities offered by Odoo 19's Timesheet module is given in this section.
1.1 My Timesheet
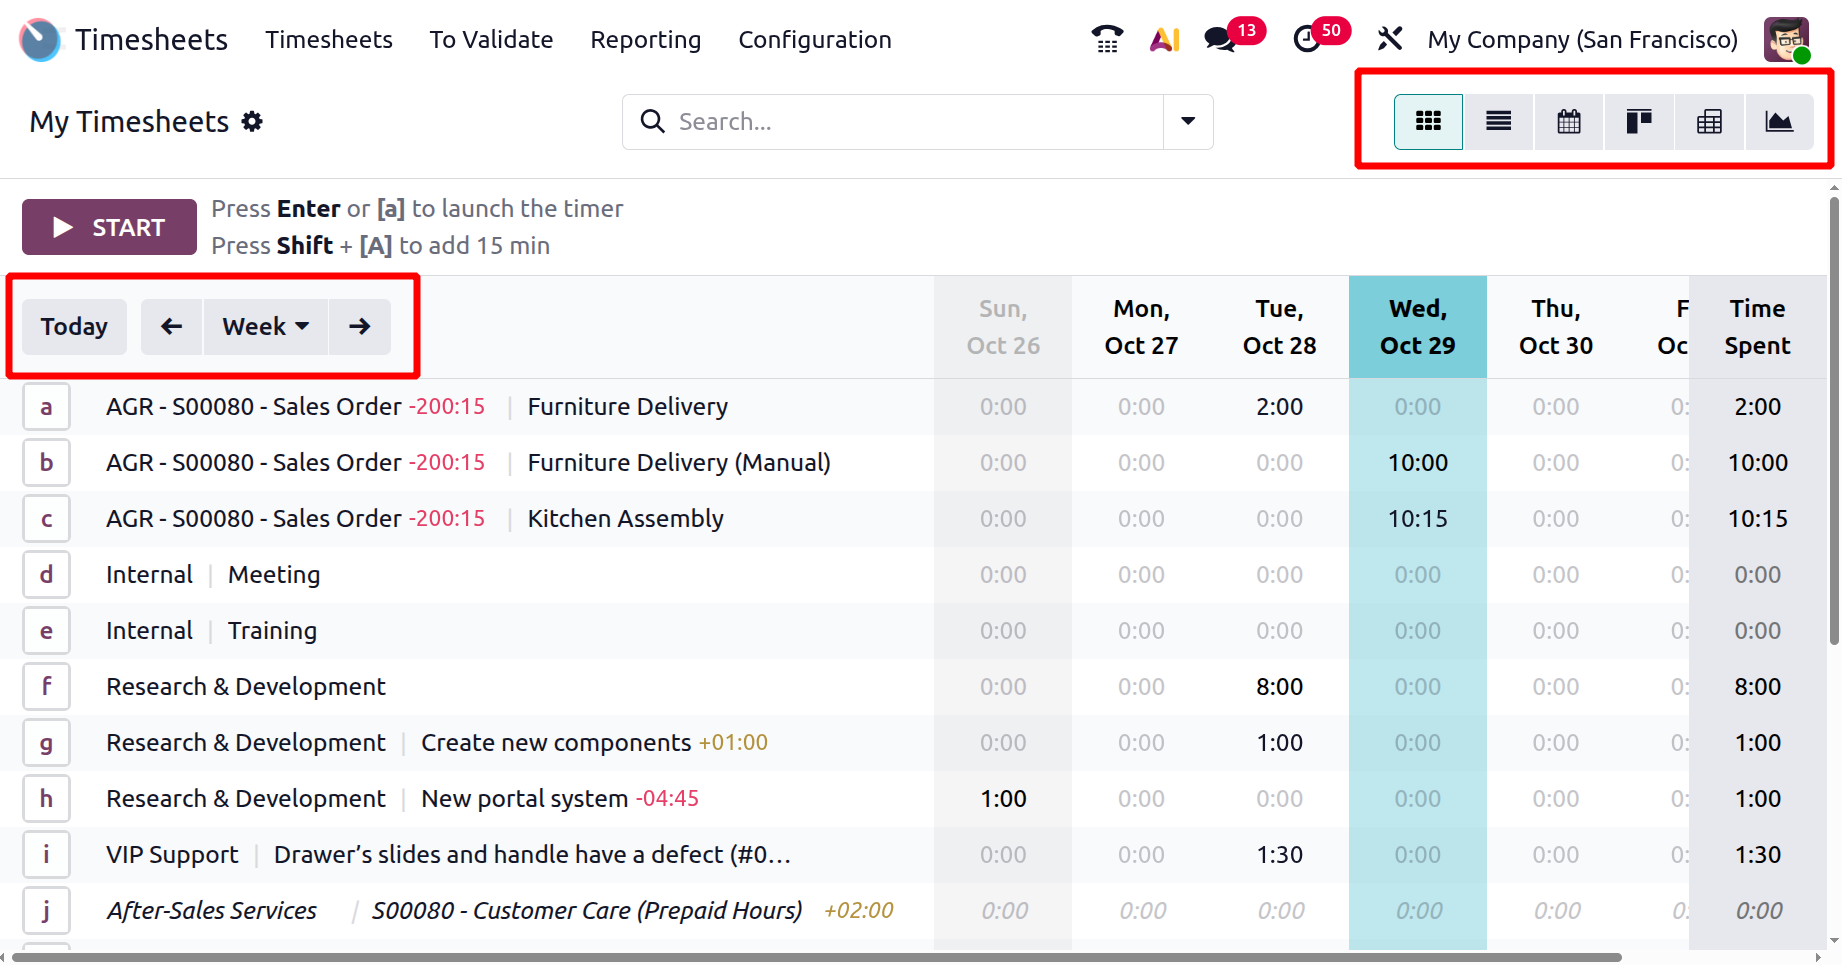
When using the Timesheet module, users are shown a grid of all recorded timesheets in the "My Timesheet" window. The titles of accomplished tasks, meetings, projects, and other activities are displayed on this interface along with the associated monitored time.
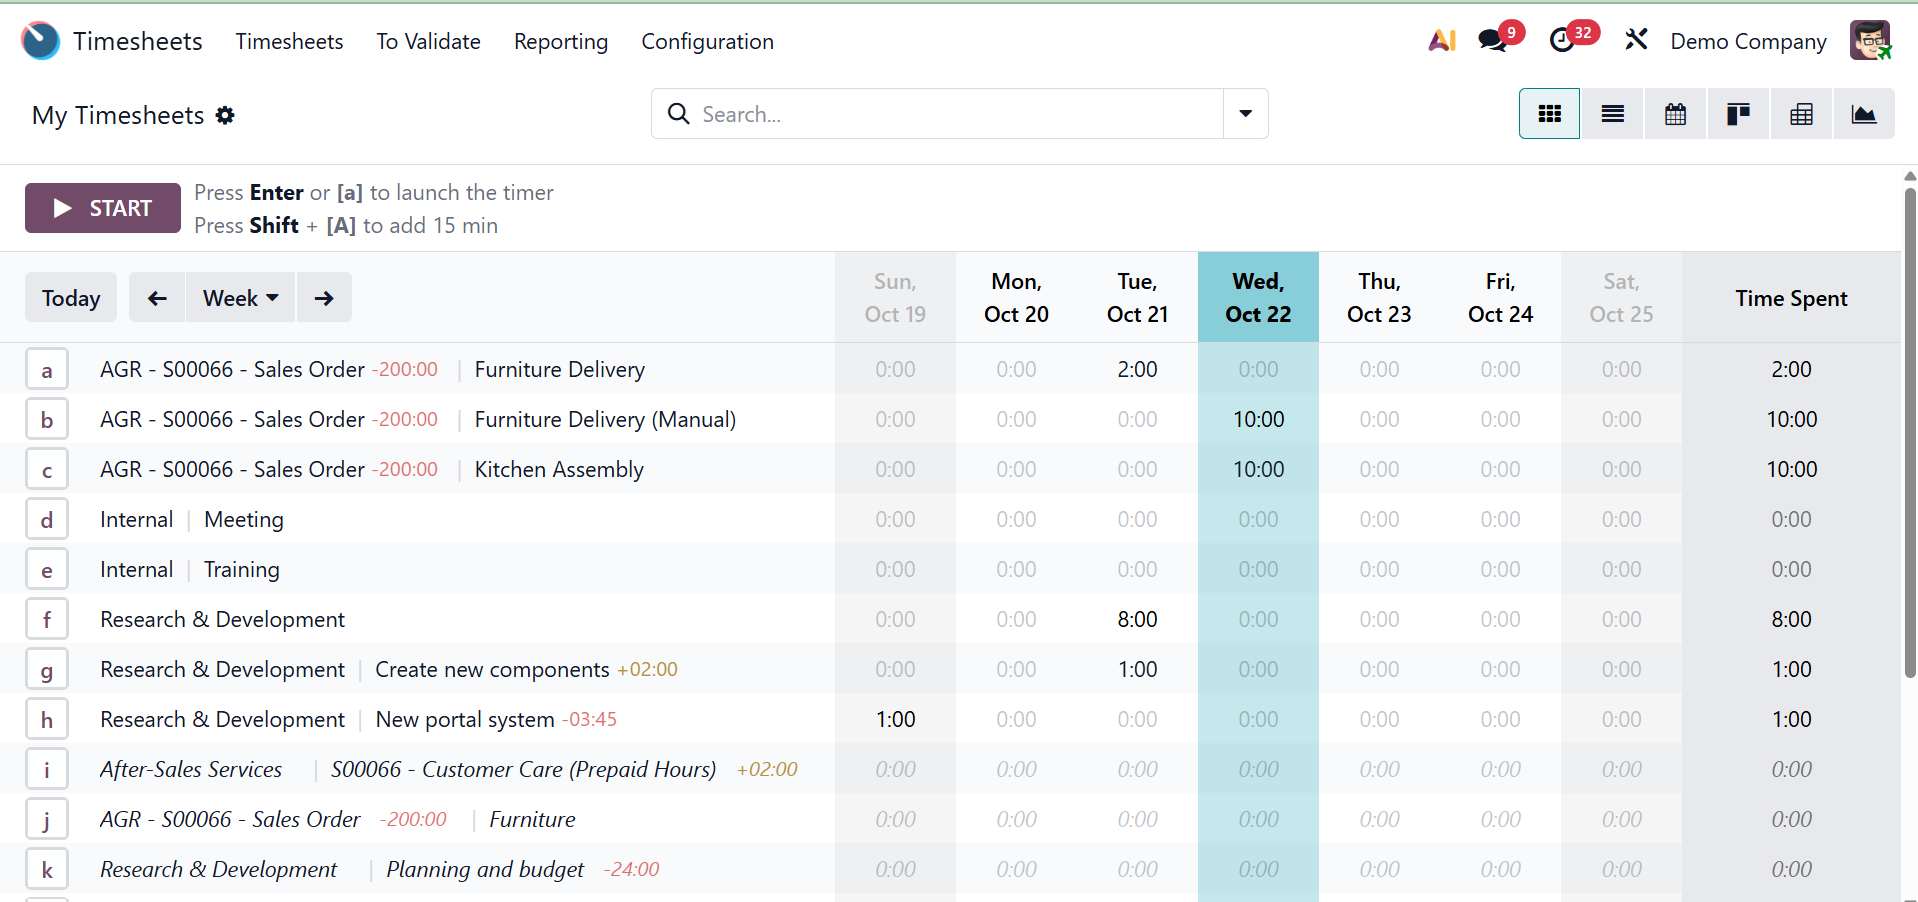
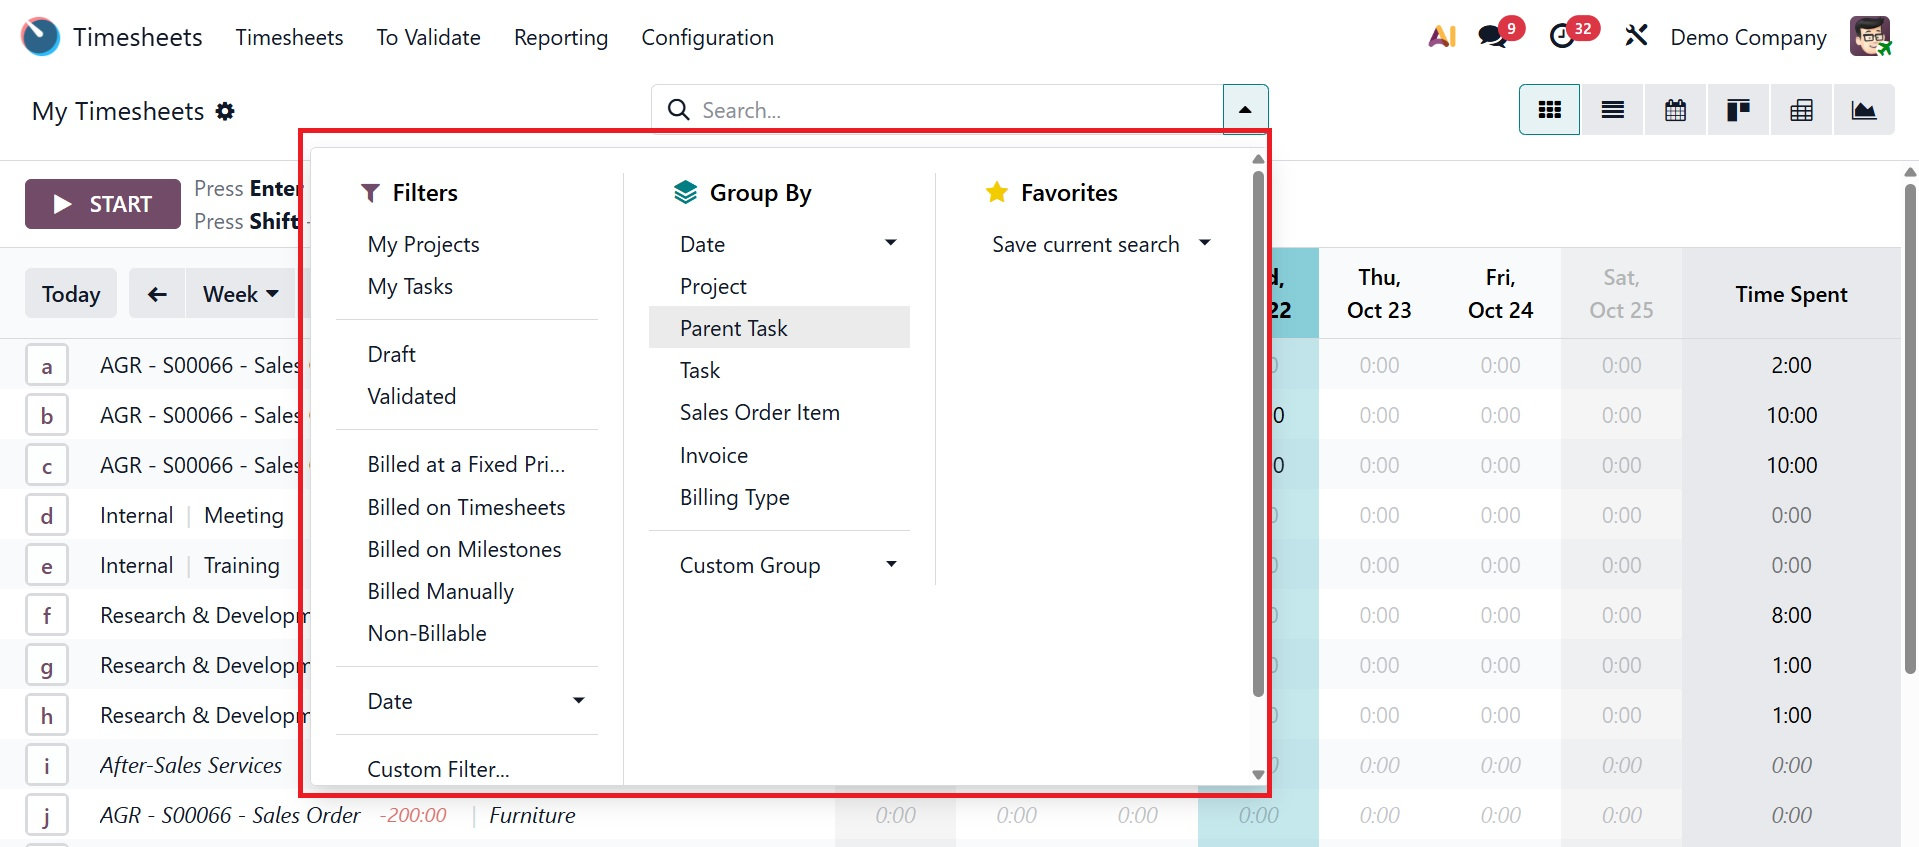
Users can choose the relevant time frame to see the amount of time spent on various organizing tasks over the course of a given week or month. The module offers a variety of view options, such as List, Graphical, Pivot, and Kanban views. Additionally, the advanced search bar area offers both standard and custom Filters and Group By options for effective data management.
Select a specific week or month to find out more about how much time was spent on each company's activities, as shown below. This window's Grid, Kanban, List, Calendar, Pivot, and Graphical views are all accessible using the marked options.
As shown below, under the Action icon, you have the options like, export, insert in spreadsheet, duplicate, delete, validate, reset to draft, and merge timesheet options, respectively.
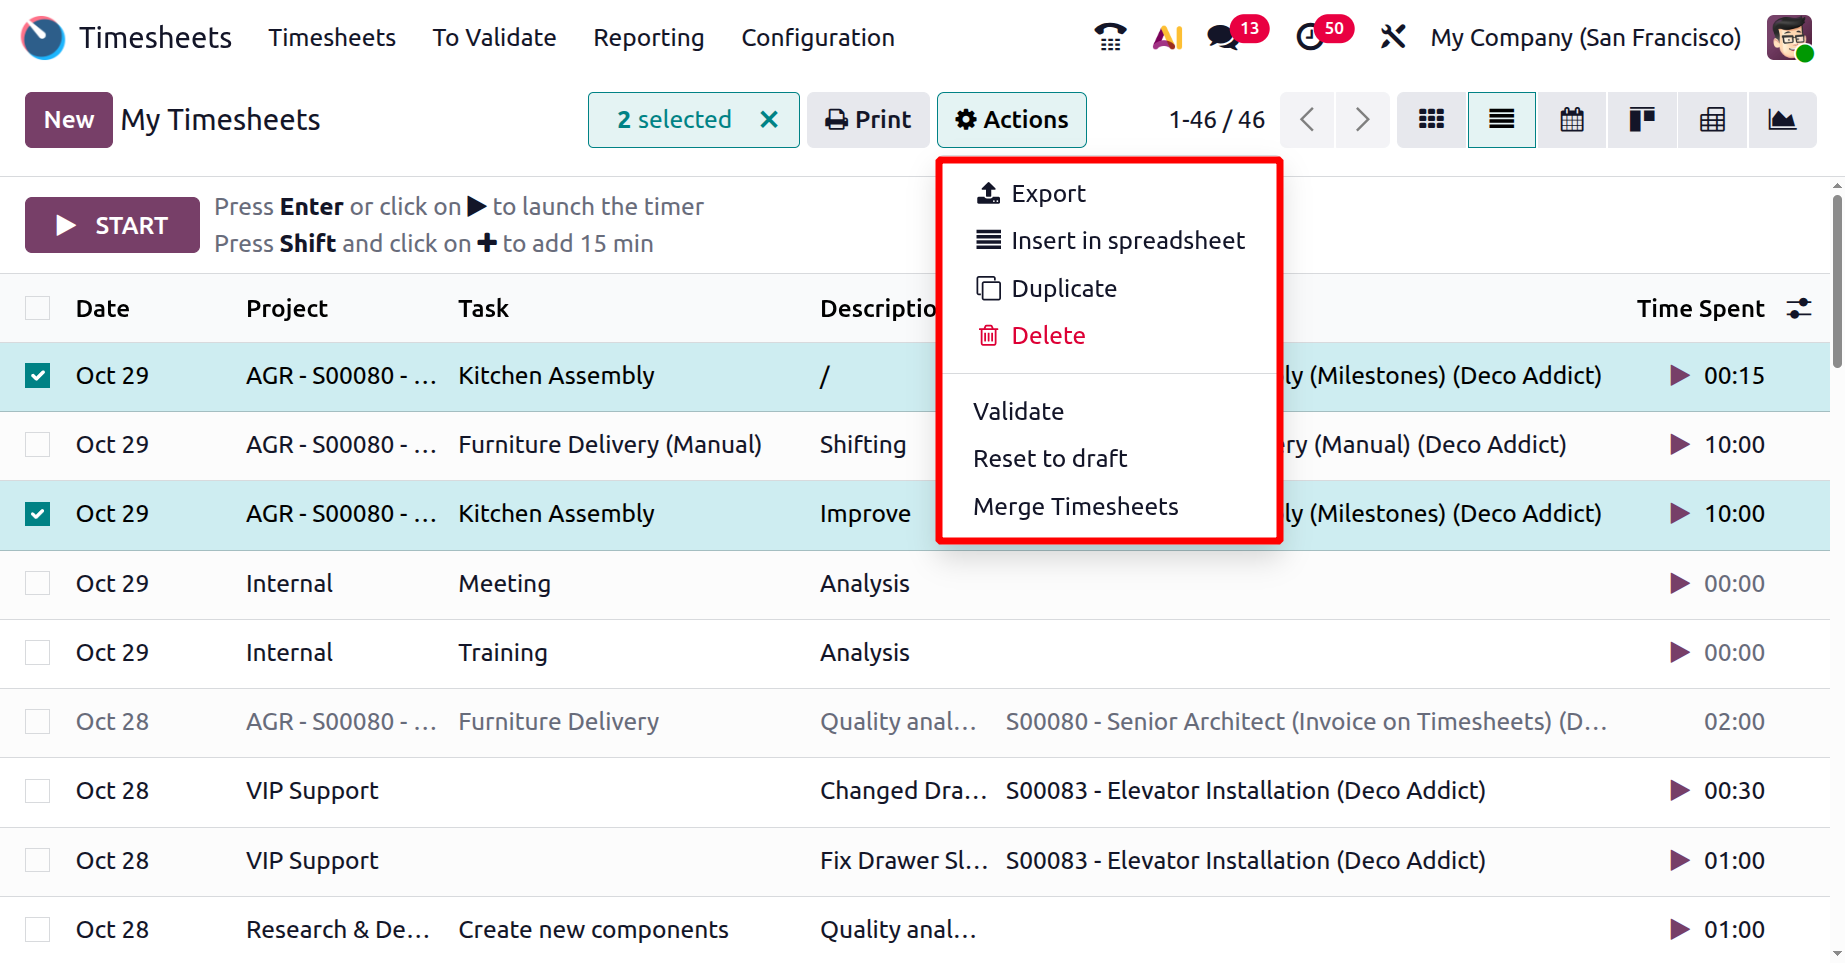
- Export – Download timesheet records into a spreadsheet file.
- Insert in Spreadsheet – Add the timesheet data directly into an Odoo spreadsheet.
- Duplicate – Make a copy of the selected timesheet entry.
- Delete – Remove the selected timesheet entry from the system.
- Validate – To approve the timesheet so it becomes official and can be used for invoicing or payroll.
- Reset to Draft – Move a validated timesheet back to draft status so it can be edited again.
- Merge Timesheet – Combine multiple timesheet entries into one for cleaner and simpler reporting.
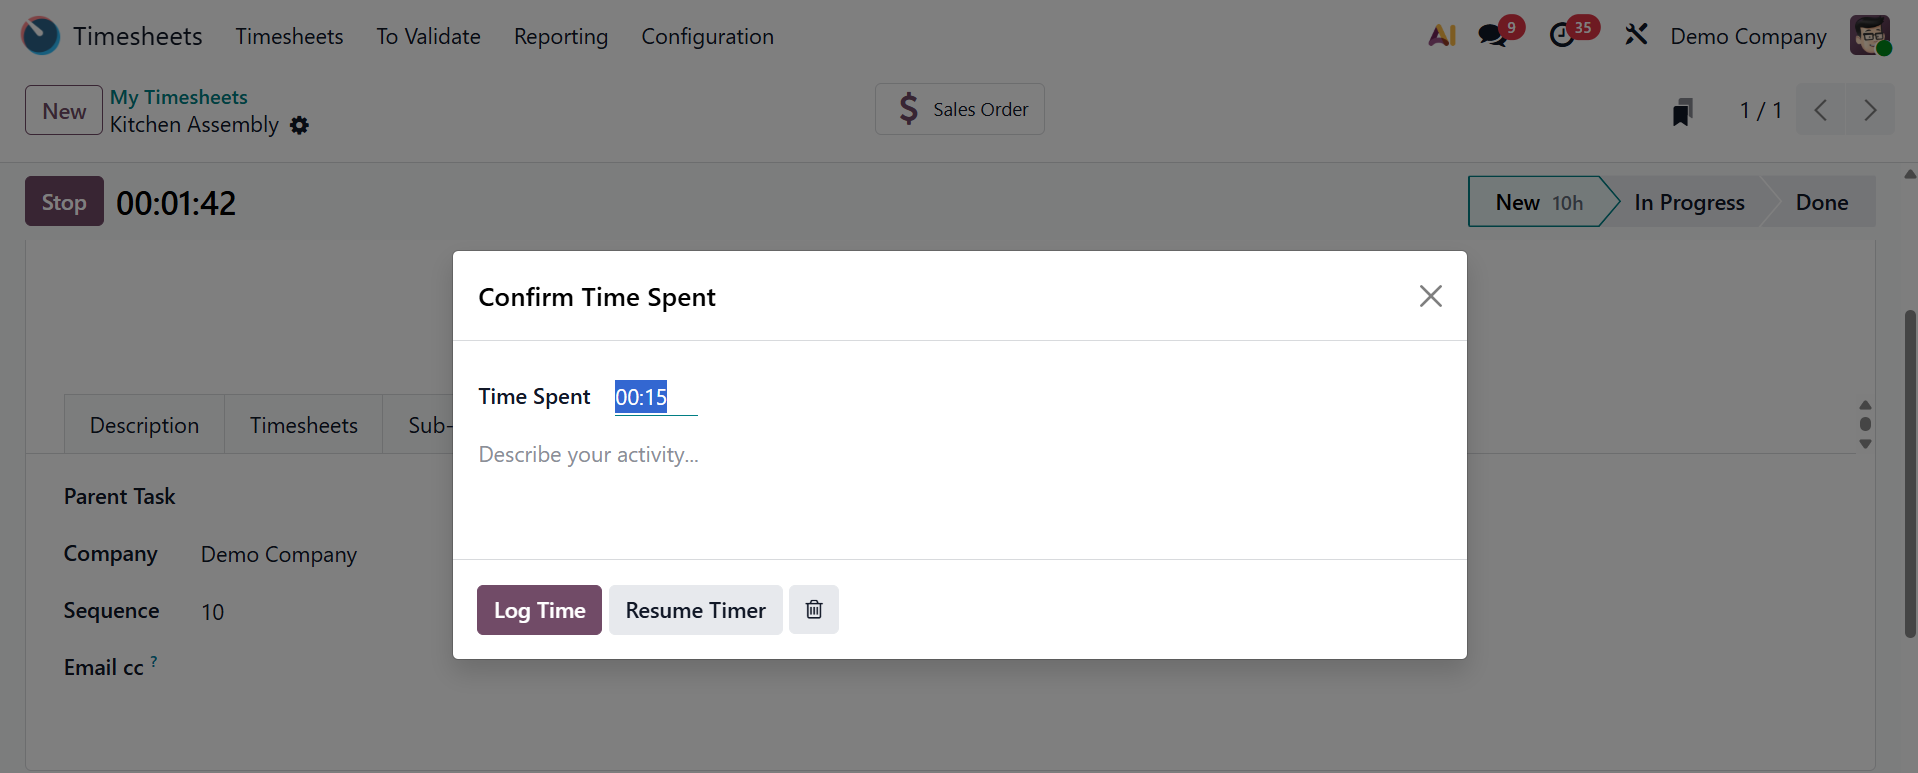
Clicking the 'Start' button starts time tracking for a particular project or task. The 'Stop' buttons allow you to pause the timer, which automatically logs the amount of time spent on the assigned work, as shown in the screenshot below.
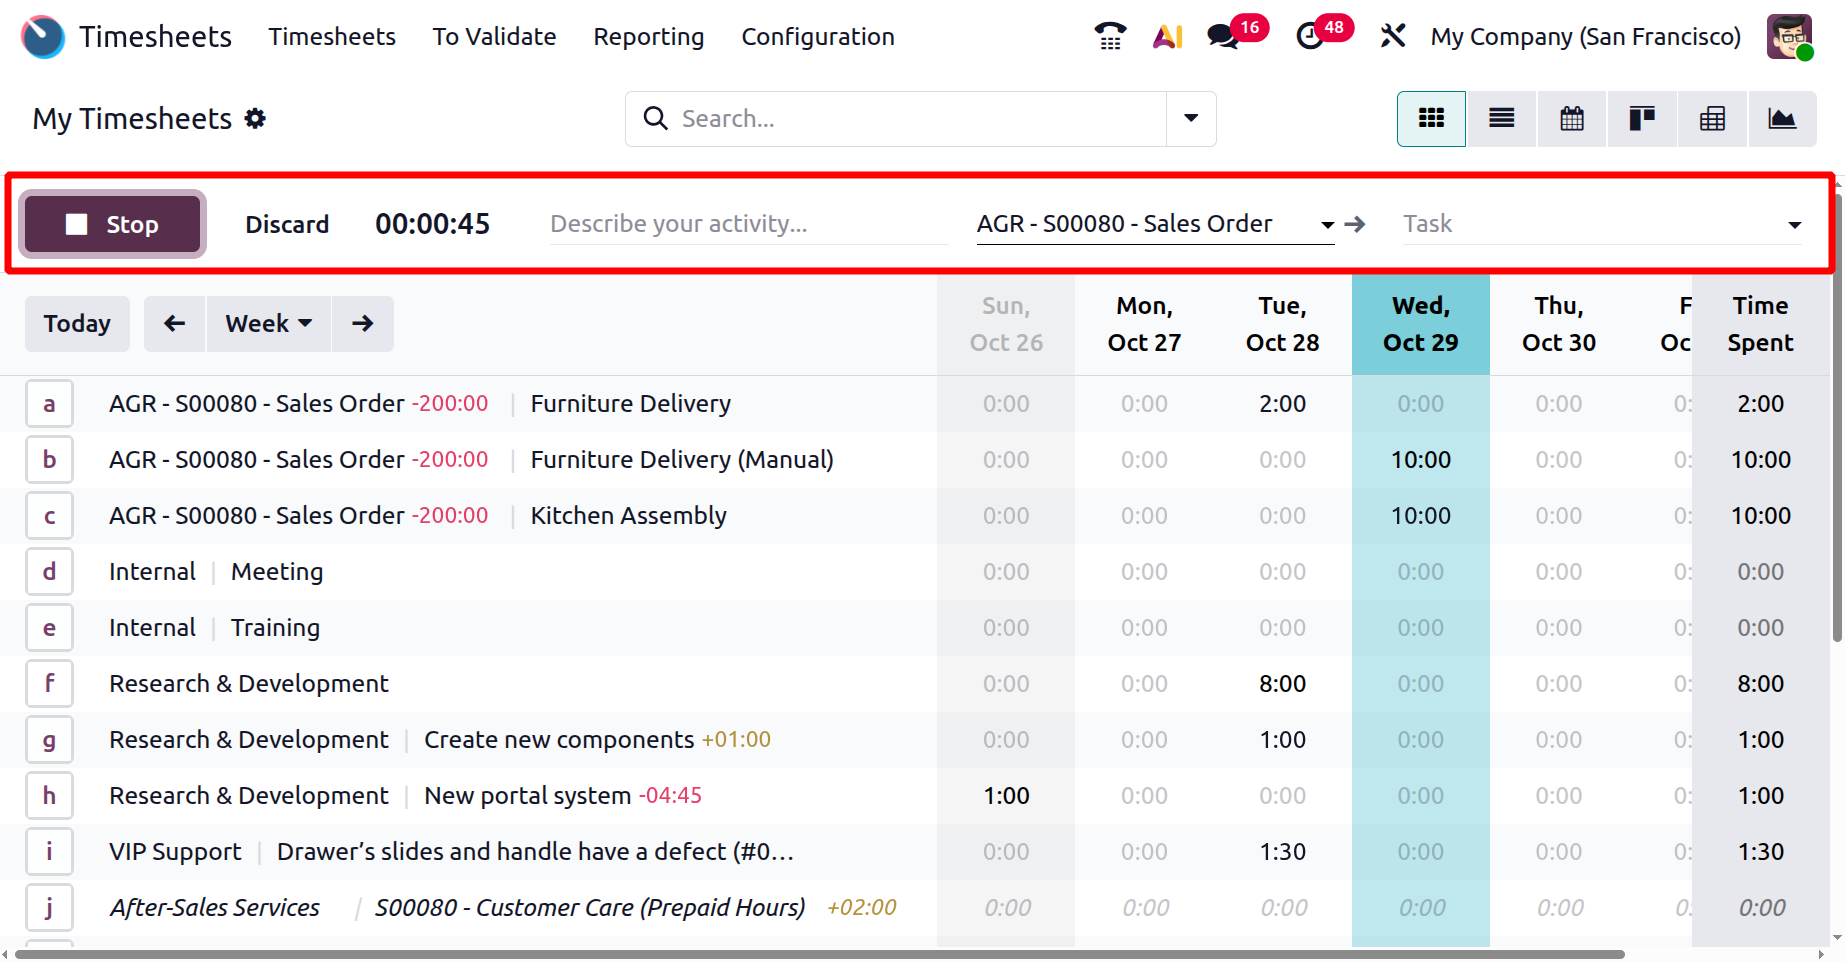
By simply clicking on the time hour item, you can also manually change how much time was spent on a specific task. A task form containing the specifics of that action will open when you click on a given timesheet data column.
Details such as Date, Project, Task, Description, and Hours Spent are shown in a separate window.
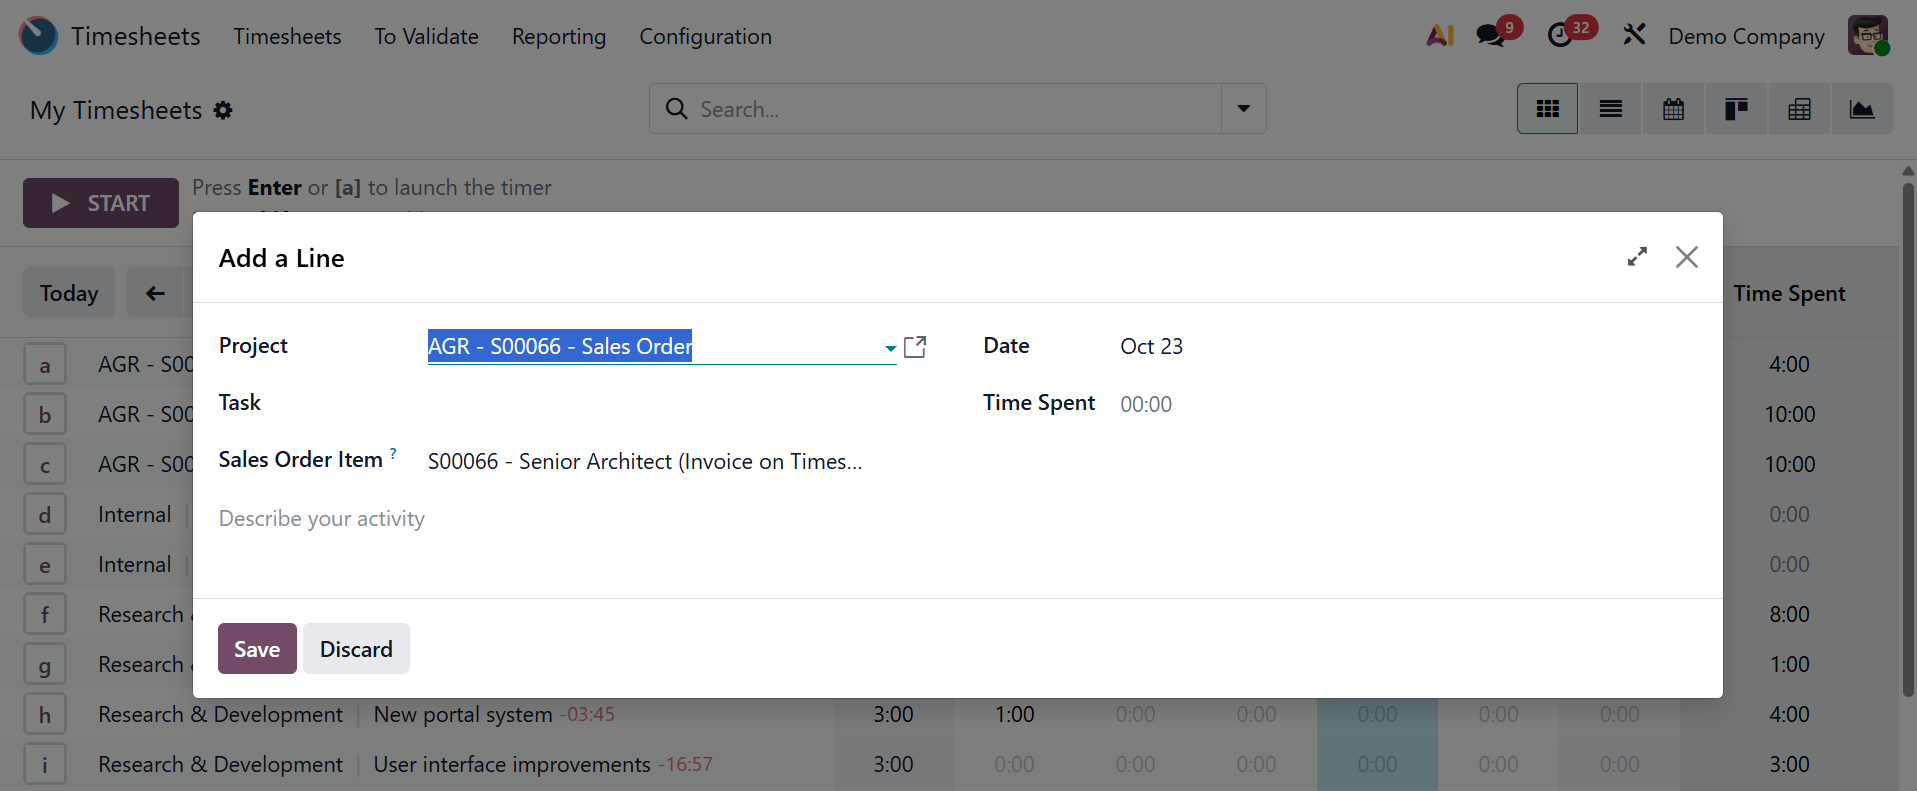
From the module's main dashboard, choose 'Add a line' to create a new timesheet.
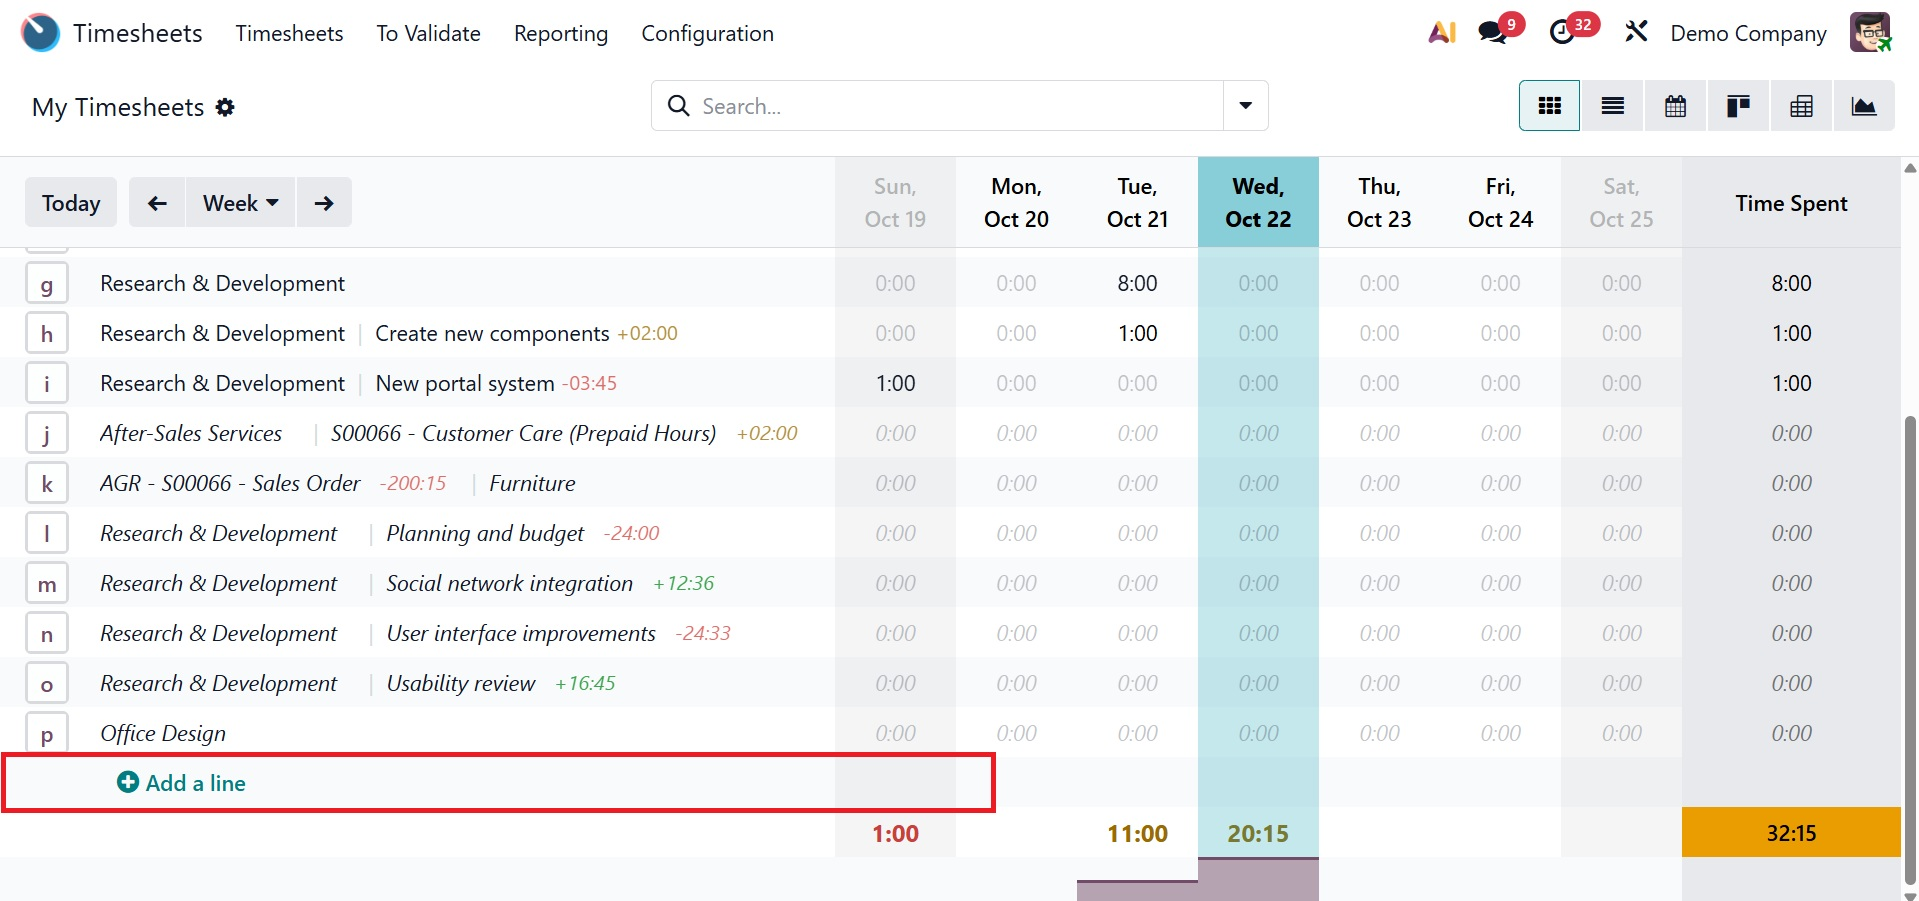
As seen in the screenshot below, clicking the "Add a line" button will cause a window to open, enabling users to enter information on the timesheet, including the related Project, Task, Sales Order Item, Date, and Time Spent. This feature makes timesheet-based billing more efficient.
As seen in the example below, you can save the data after entering the new timesheet details and then open the timesheet column to make additional edits.
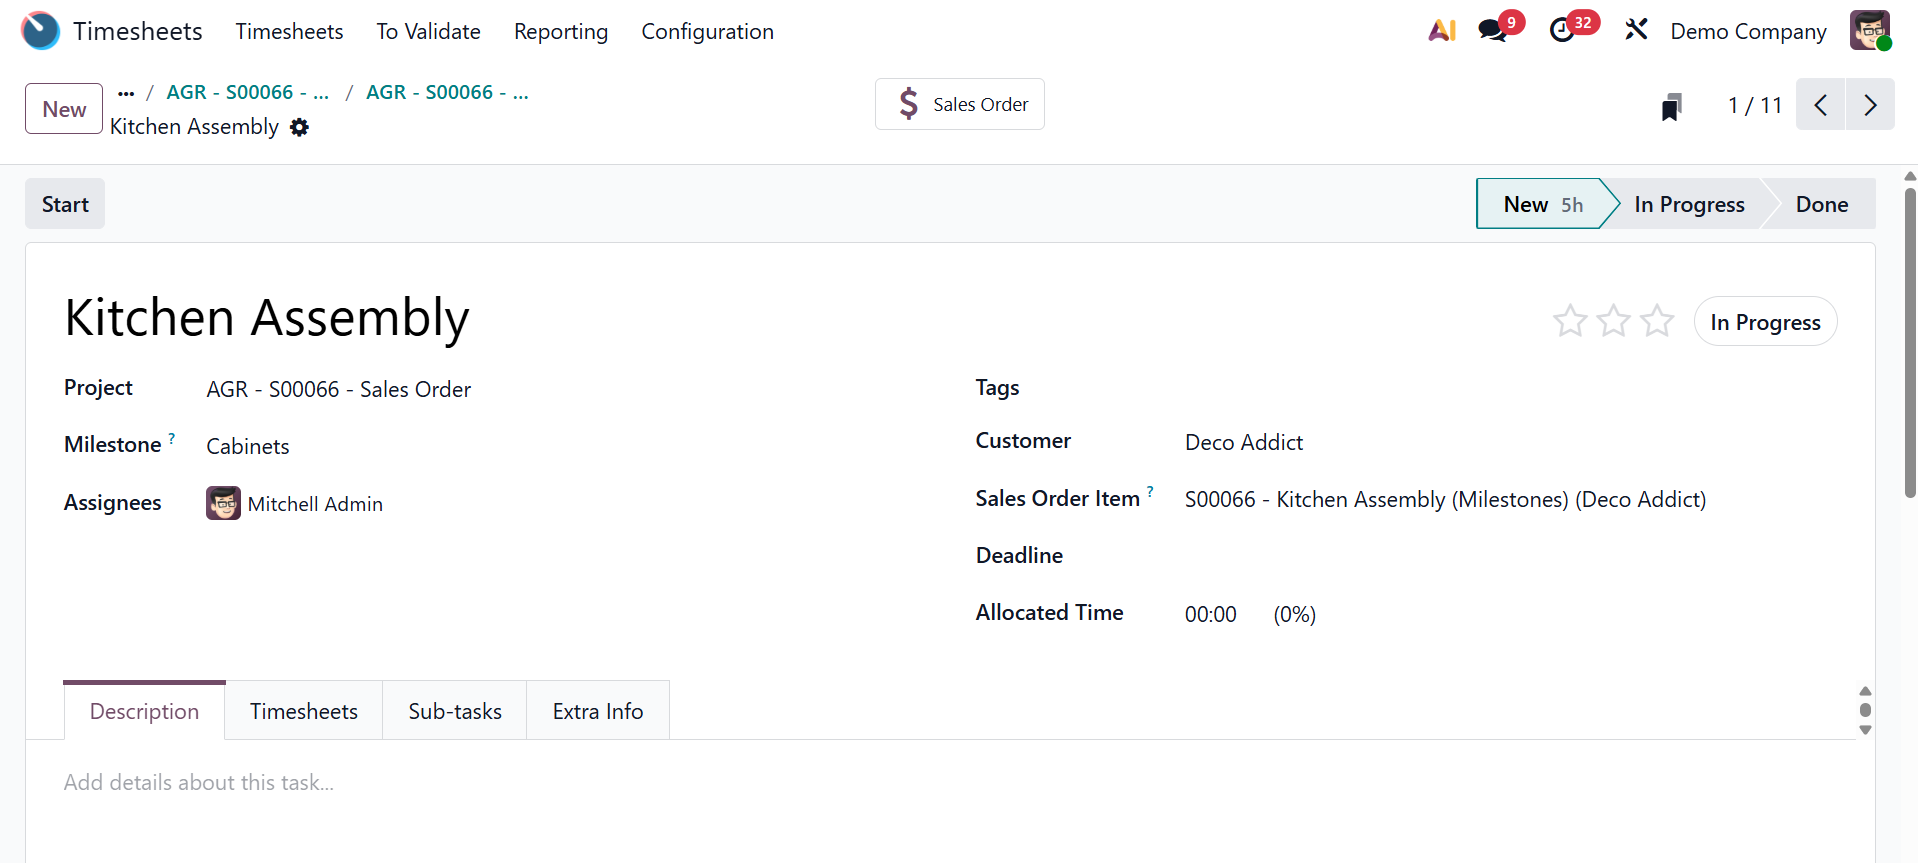
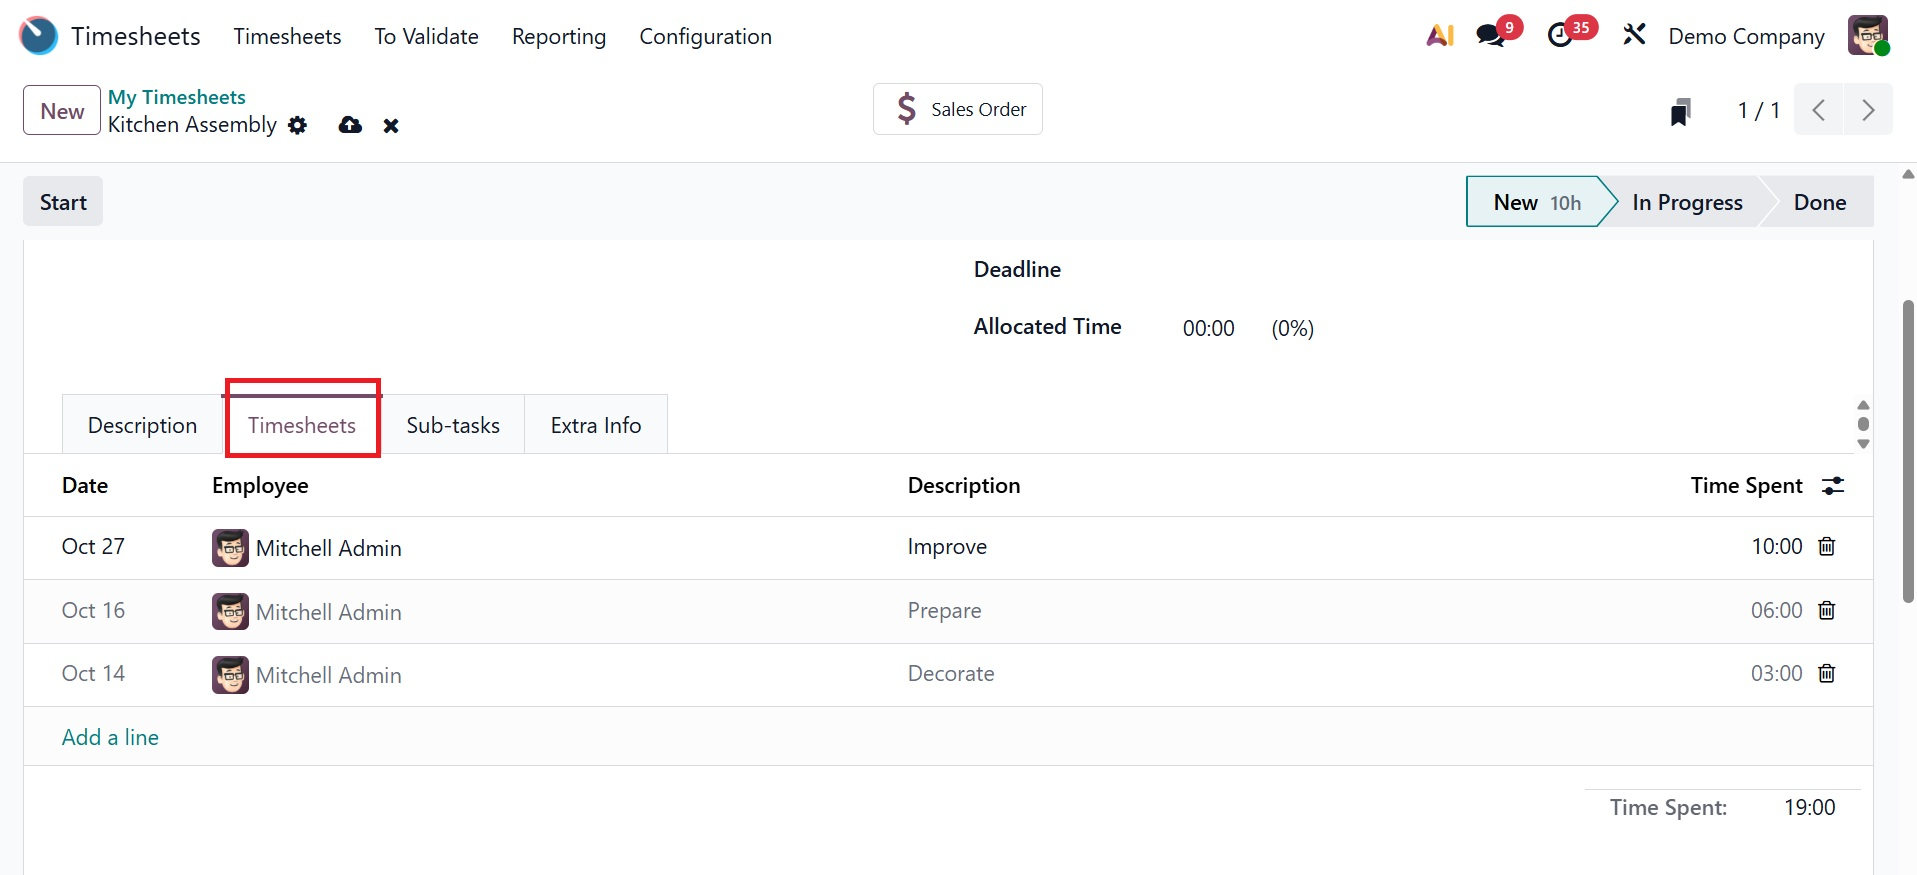
According to the timesheet activity, you can change the timesheet name, Project, Milestone, Assignees, Tags, Customer, Sales Order Item, Deadline, and Allocated Time. Edit any notes pertaining to the task or timesheet under the "Description" tab. As seen in the screenshot below, the "Add a line" button on the "Timesheets" tab allows you to change the timesheet's details, such as the Date, Employee, Description, and Time Spent.
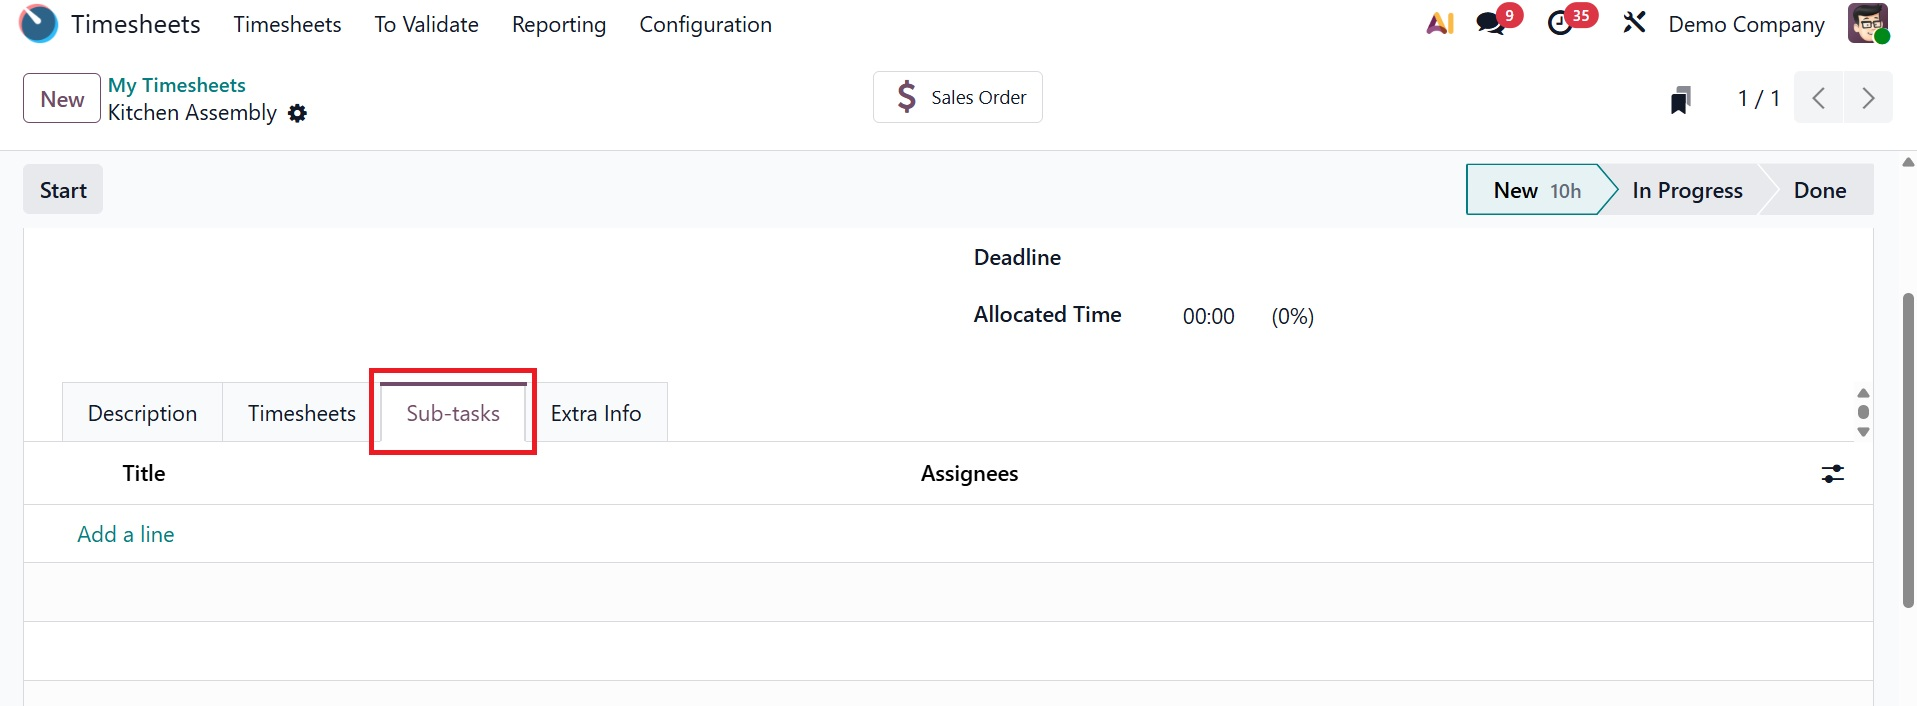
Using the "Add a line" button and the task title and assignees, as indicated below, you may add any subtask associated with the timesheet in the "Sub-tasks" tab.
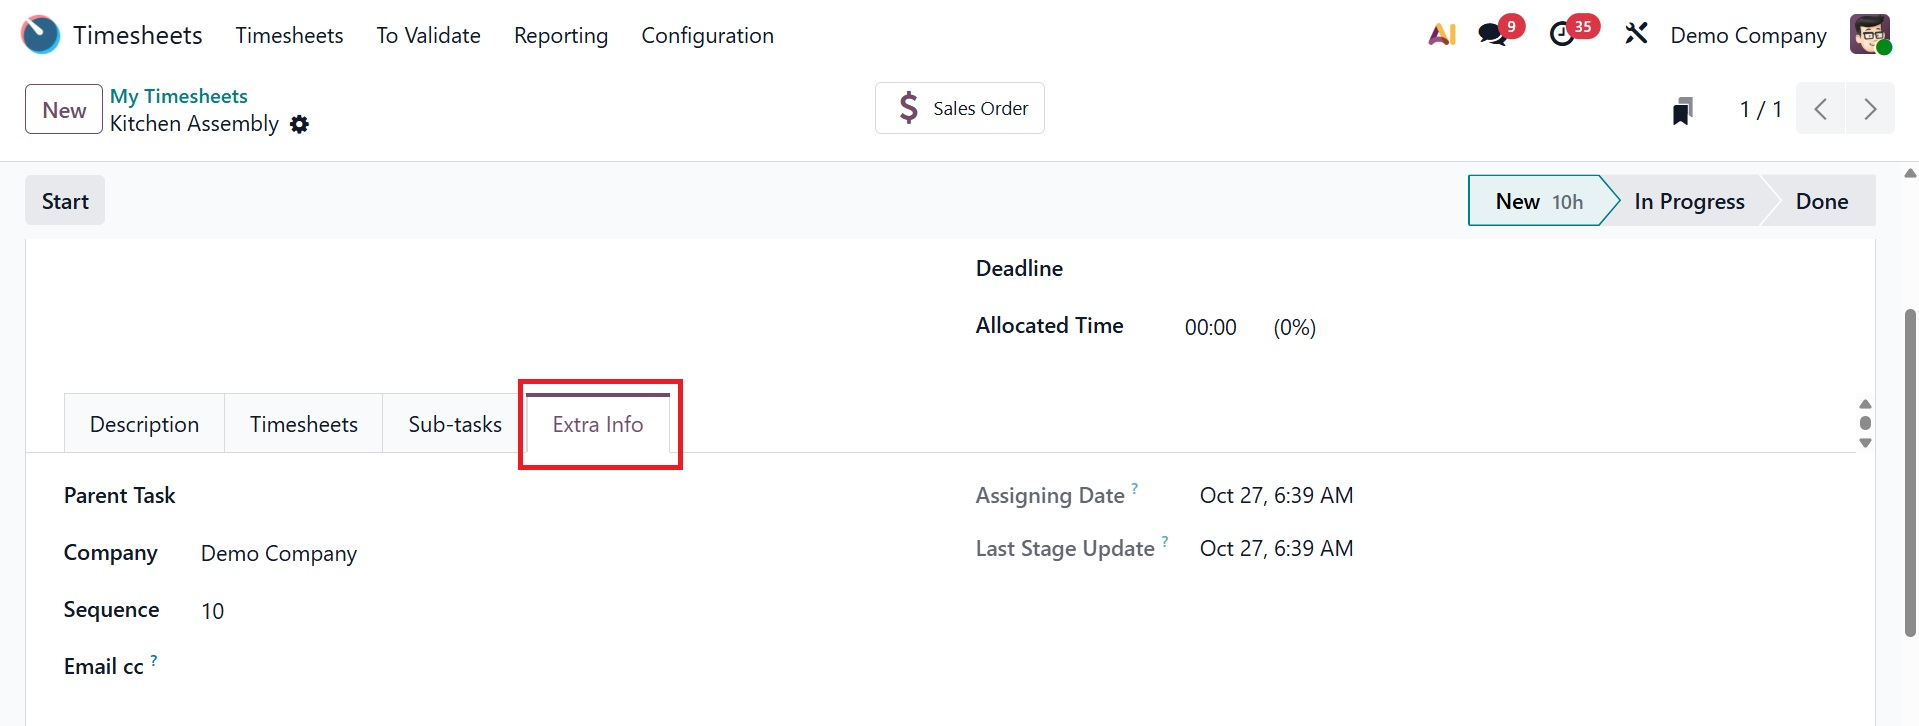
Under the Extra info tab, you have the options like, parent task, company, sequence, email cc, assigning date, and last stage update, respectively.
After entering all necessary information, save the form and click the "Start" button in the top left corner to begin. You may also manually enter how much time you spent on the task if you'd like. While working on the task, you have the option to stop or pause time tracking as needed. When you click the "Stop" button after completing the task, a pop-up box will appear, as seen in the image below, giving you the option to either record the time spent or continue the timer.
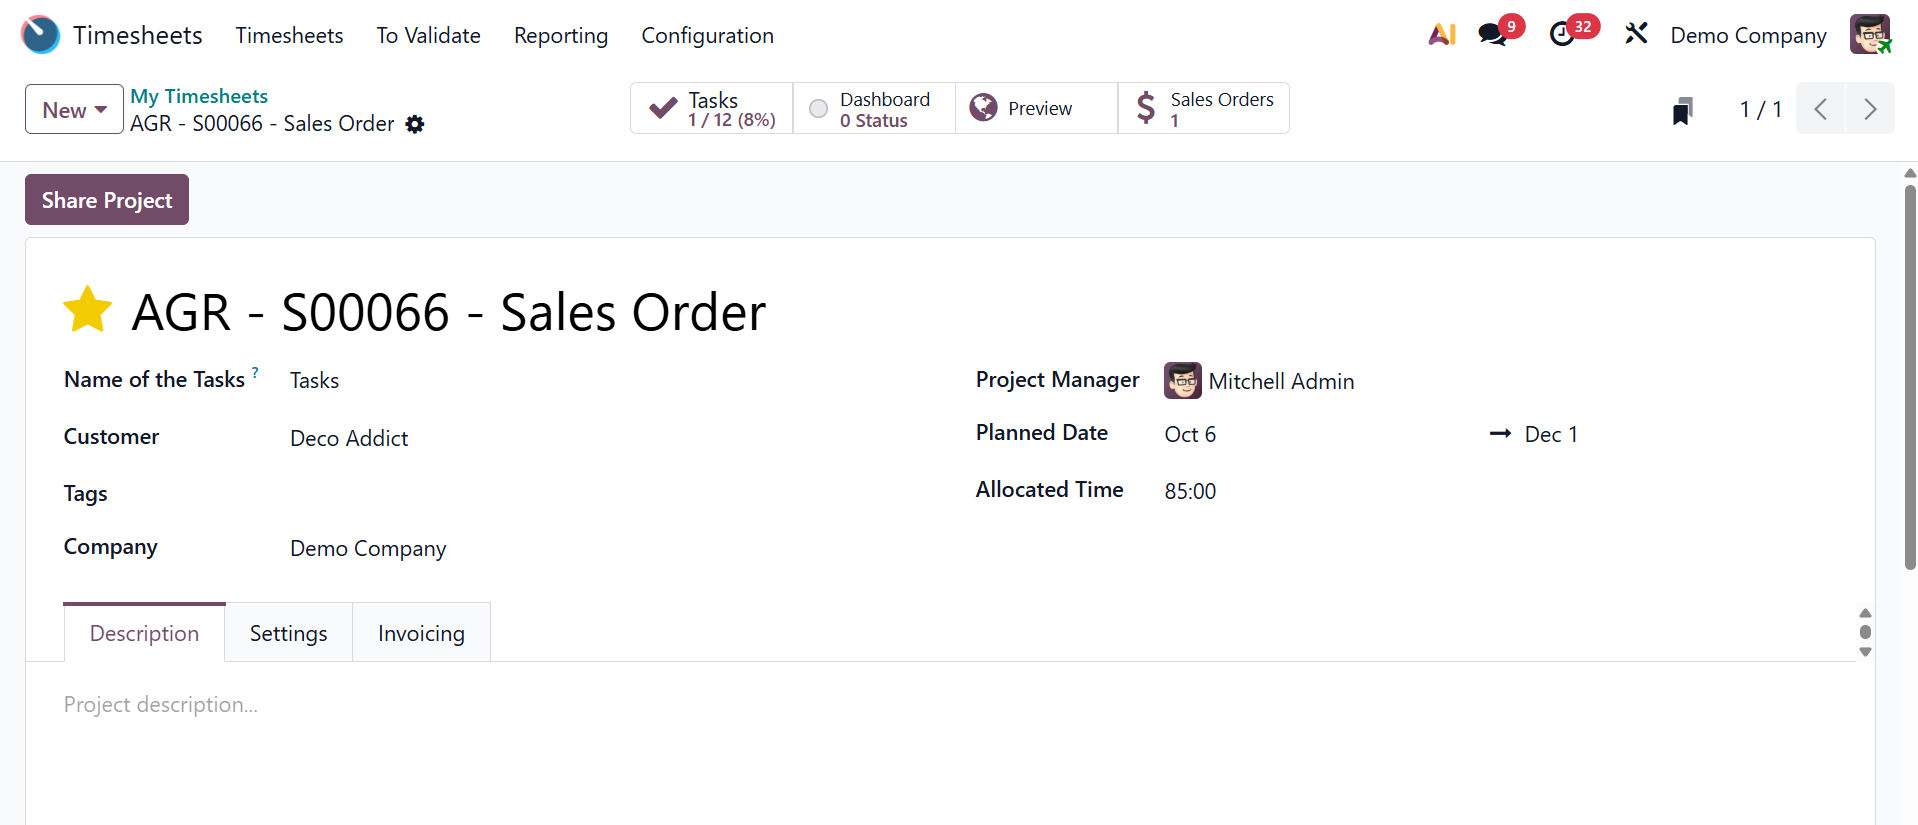
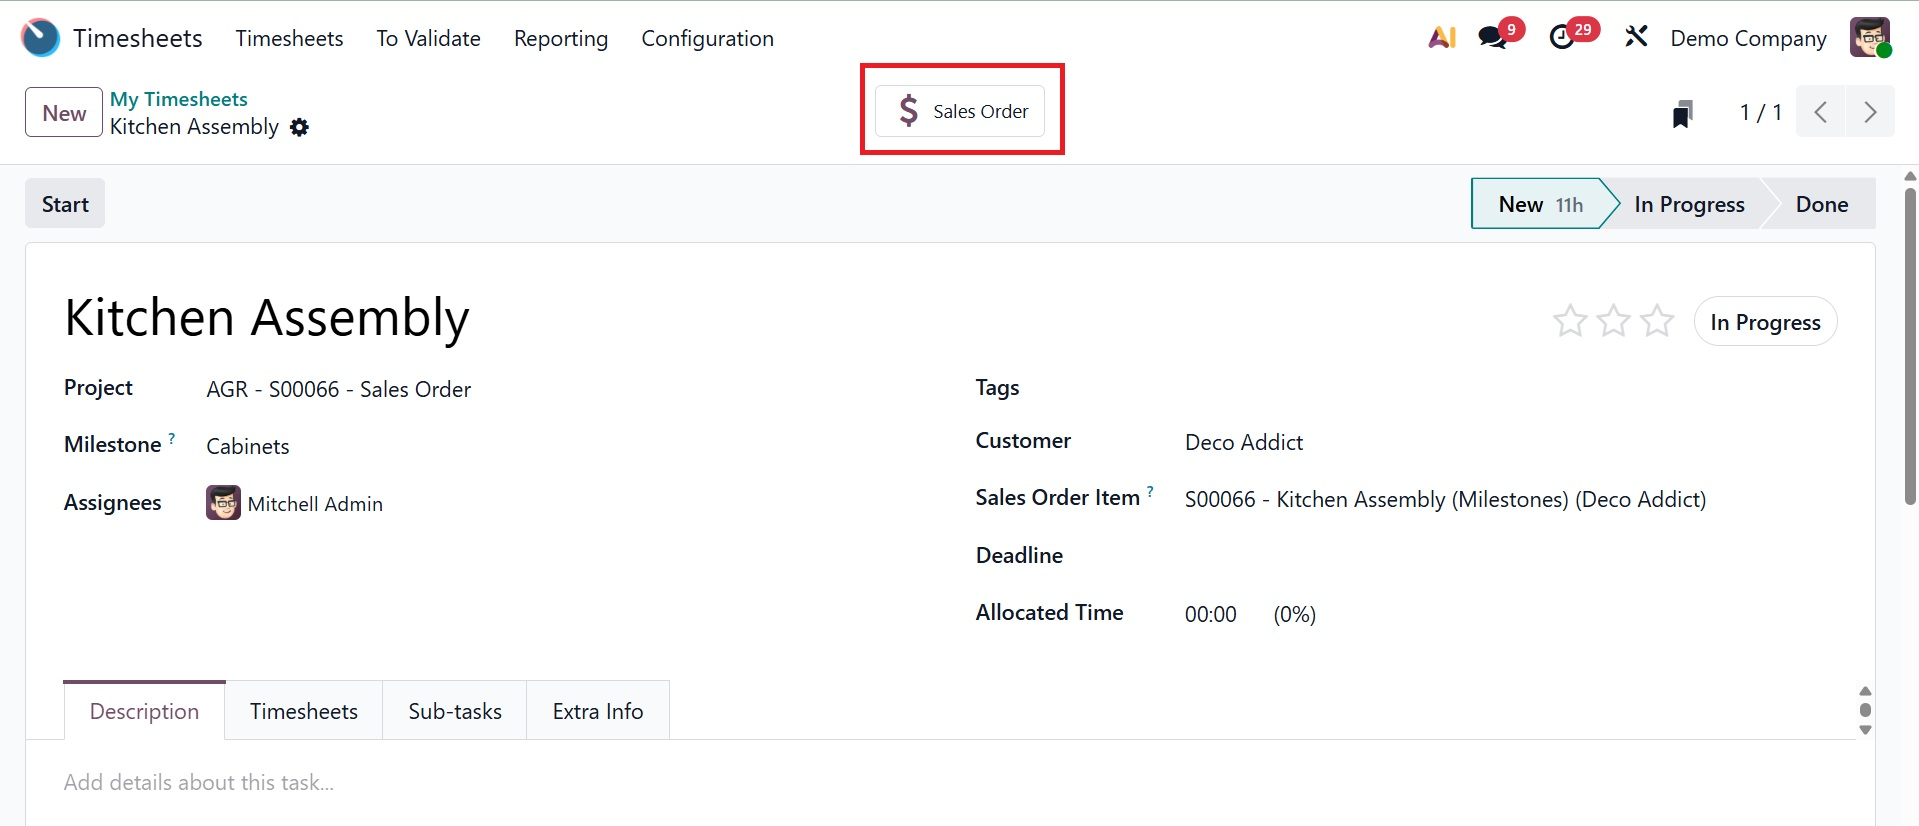
The Timesheet tab of the configuration form will display the recently submitted timesheet data. You may then see the products or services from the sales order that are linked to the timesheet for this task by selecting the "Sales Order" smart button, as shown below.
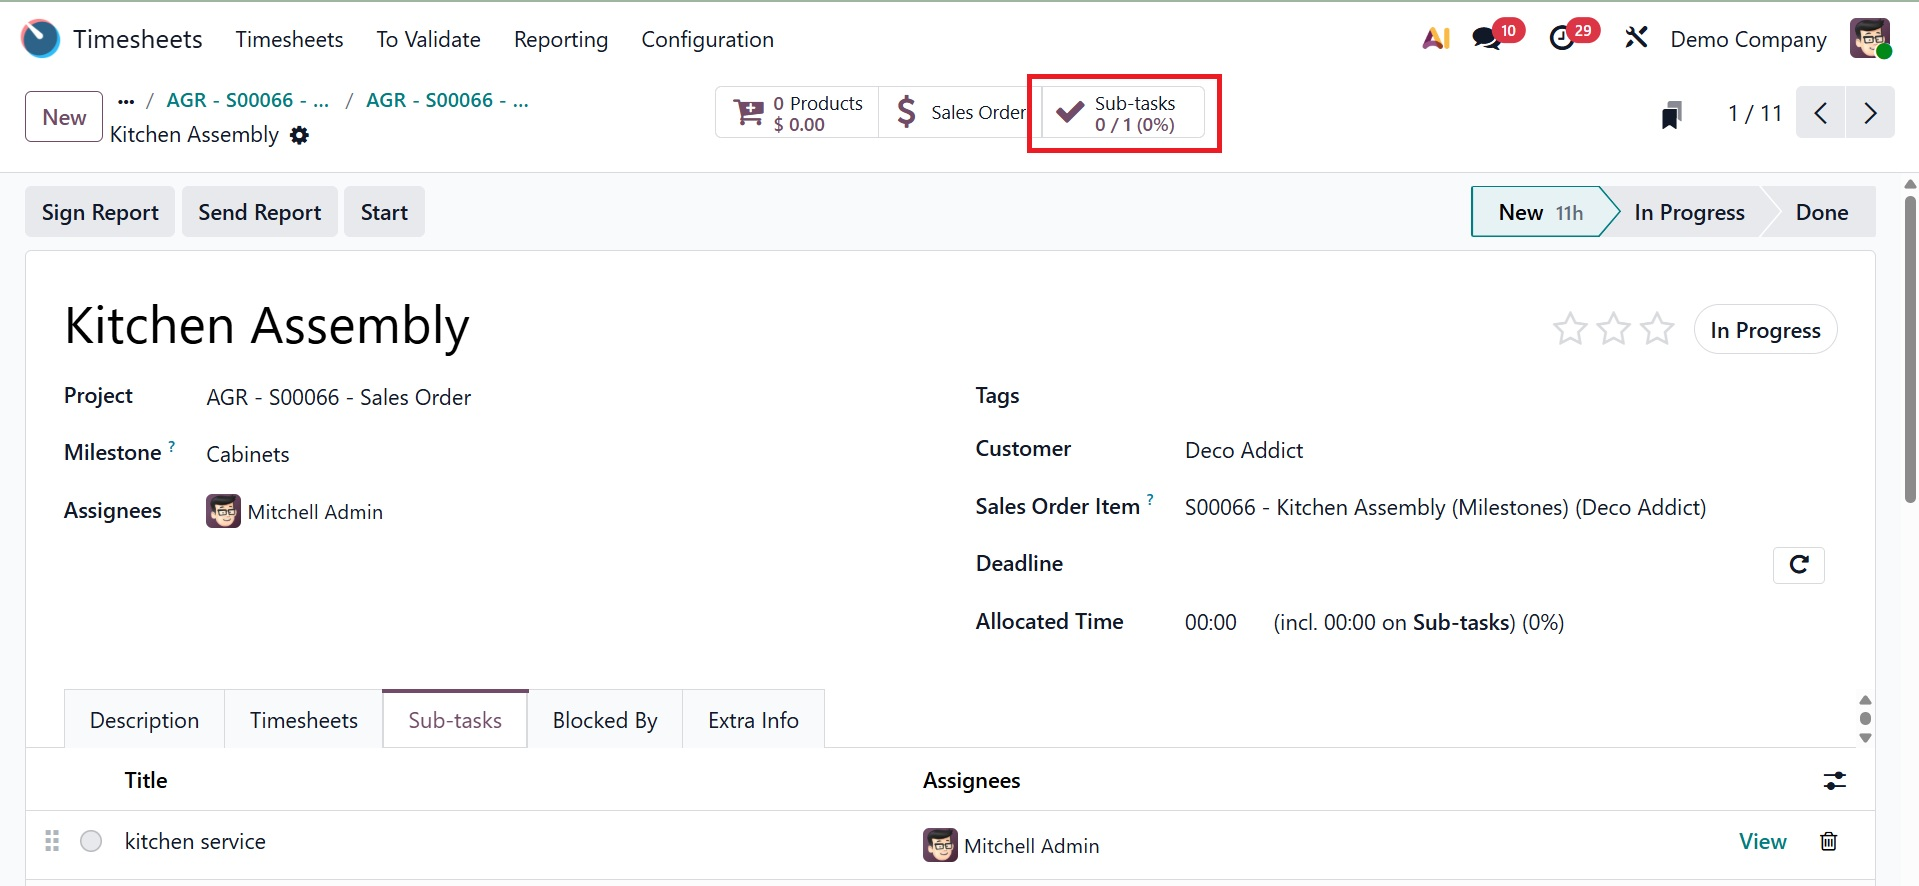
And the "Sub-tasks" smart button provides an extensive dashboard of all the timesheet's subtasks.
Using the icons indicated in the screenshot below, you can use the "Action" button on the upper left side of the form to Print, Archive, Duplicate, Delete, Share Task, Send SMS, Convert to Task/Sub-Task, Convert to Ticket, Send Report, Request Signature, Check Version History, and Add Properties to the form.

- Print:Make a hard copy of the assignment and any related documents.
- Edit property: This feature allows you to change the parameters or specifics of the chosen timesheet record. As seen below, Odoo will display a pop-up card with editing properties when you click on this specific button inside a form.

As shown in the screenshot above, you may select the Field Type, Default Value, and Display in Cards options within the property editing window, as well as enter the field name in the "Label" box.
Choose from the "Field Type" section, which has several possibilities such as Text box, Multiple Text Line, Calendar, Date, Selection, Tags, etc., based on the kind of information you wish to enter in the field. The new field will be added to the form once the data has been saved.
- Version History: This feature lets you examine or recover earlier iterations of the timesheet by displaying a history of all modifications made to it.
- Archive: Preserve the records for future use by moving the work to an archived form without removing it.
- Duplicate: It is helpful to create a copy of the current task when creating recurring or similar activities.
- Delete: Permanently remove the task from the system.
- Share Task: Make a shareable link so that other users or collaborators can access the task.
- Send SMS: Provide task updates or reminders by direct SMS to specified people or clients.
- Convert to template: Convert to Template: This creates a reusable template for later use from the current timesheet or associated task.
- Send Report: This feature lets you send or share a timesheet summary report with management or clients.
- Convert to Task/Sub-Task: You can make the current record either a main task or a sub-task, depending on how you want to organize your workflow. The "Convert to Task/Sub-Task" button at the top of any task's form view can be clicked to test this capability. As seen in the screenshot below, this will cause a pop-up window to appear and ask for the parent task.
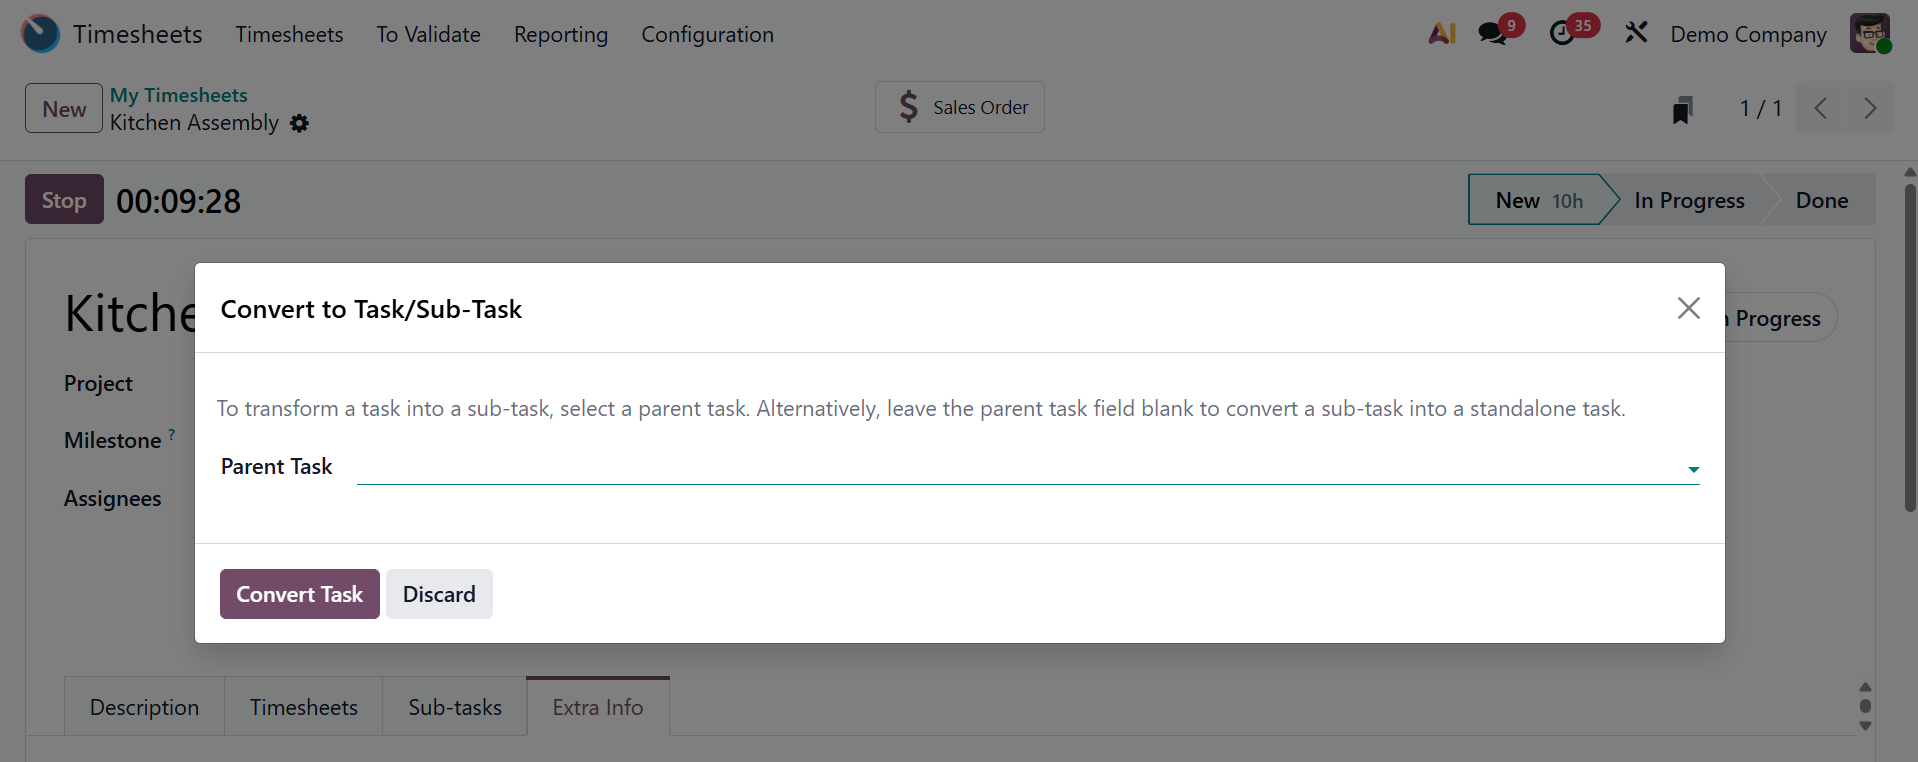
Click the "Convert Task" button to continue after selecting the parent task. In doing so, a task or subtask will be created.
- Convert to Ticket: Create a helpdesk ticket if the task calls for managing customer assistance. Click the "Convert to Ticket" button on the task form to test the feature. A new pop-up window requesting a Team and Stage will then open. As seen below, you can select any step based on the task's current status, including New, In Progress, On Hold, Solved, and Cancelled.
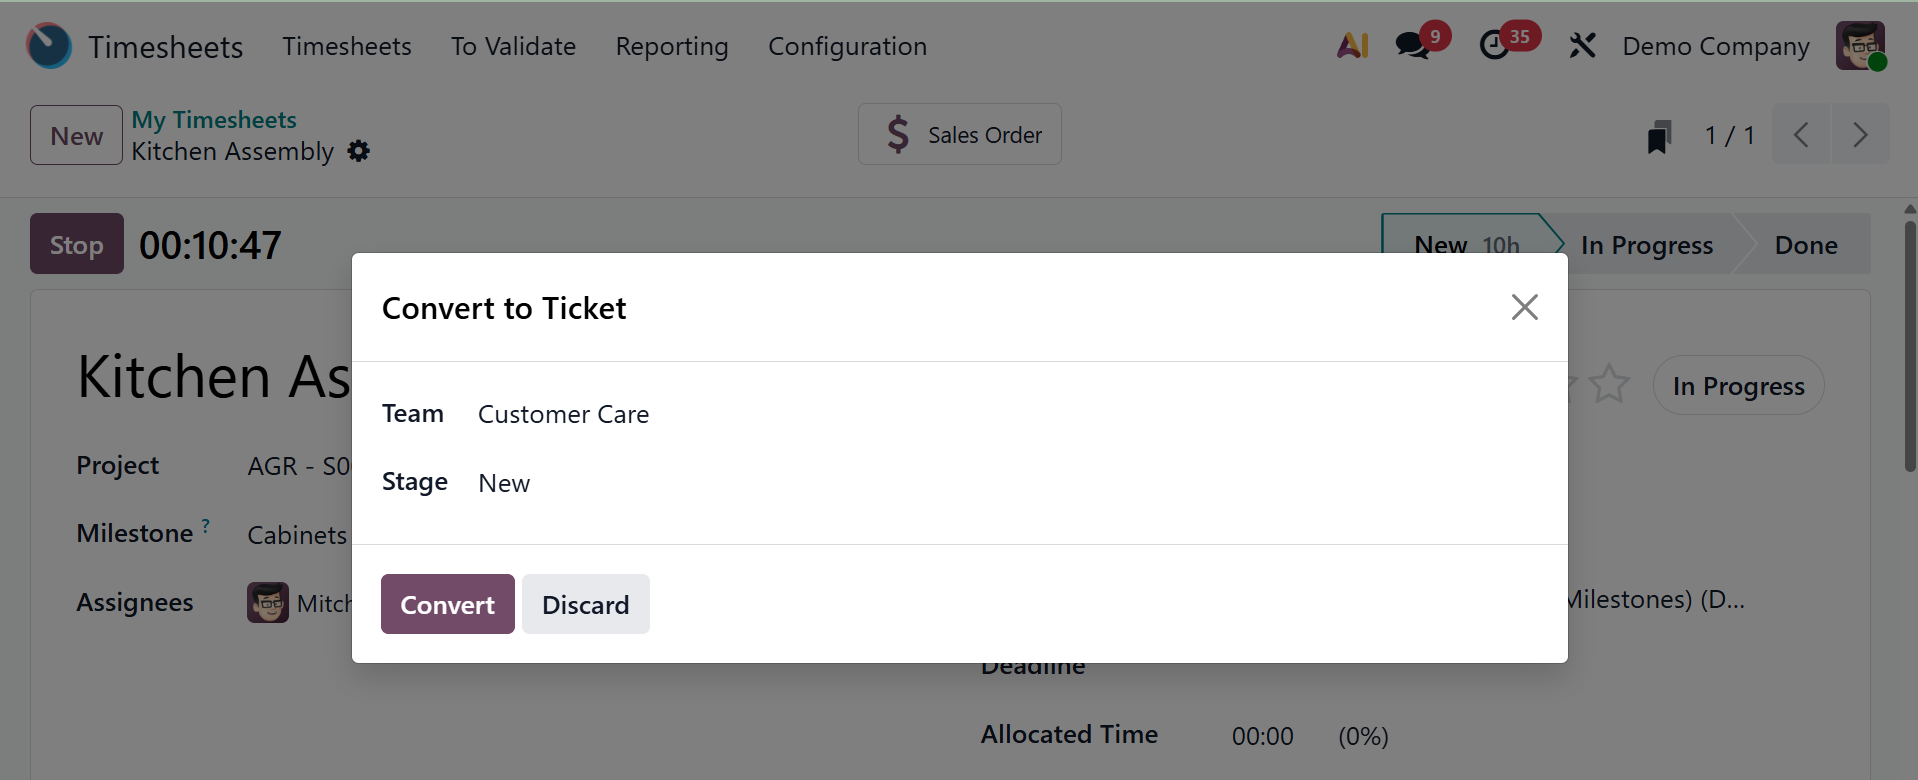
To convert the task into a ticket, click the "Convert" button. Following conversion, the "Tickets" smart button displays the open and available tickets. From the tickets dashboard, you can then manage the converted tickets. Additionally, as seen in the example below, you can use the appropriate buttons to Check Plan Intervention, Share on Forum, and turn the ticket into an opportunity.

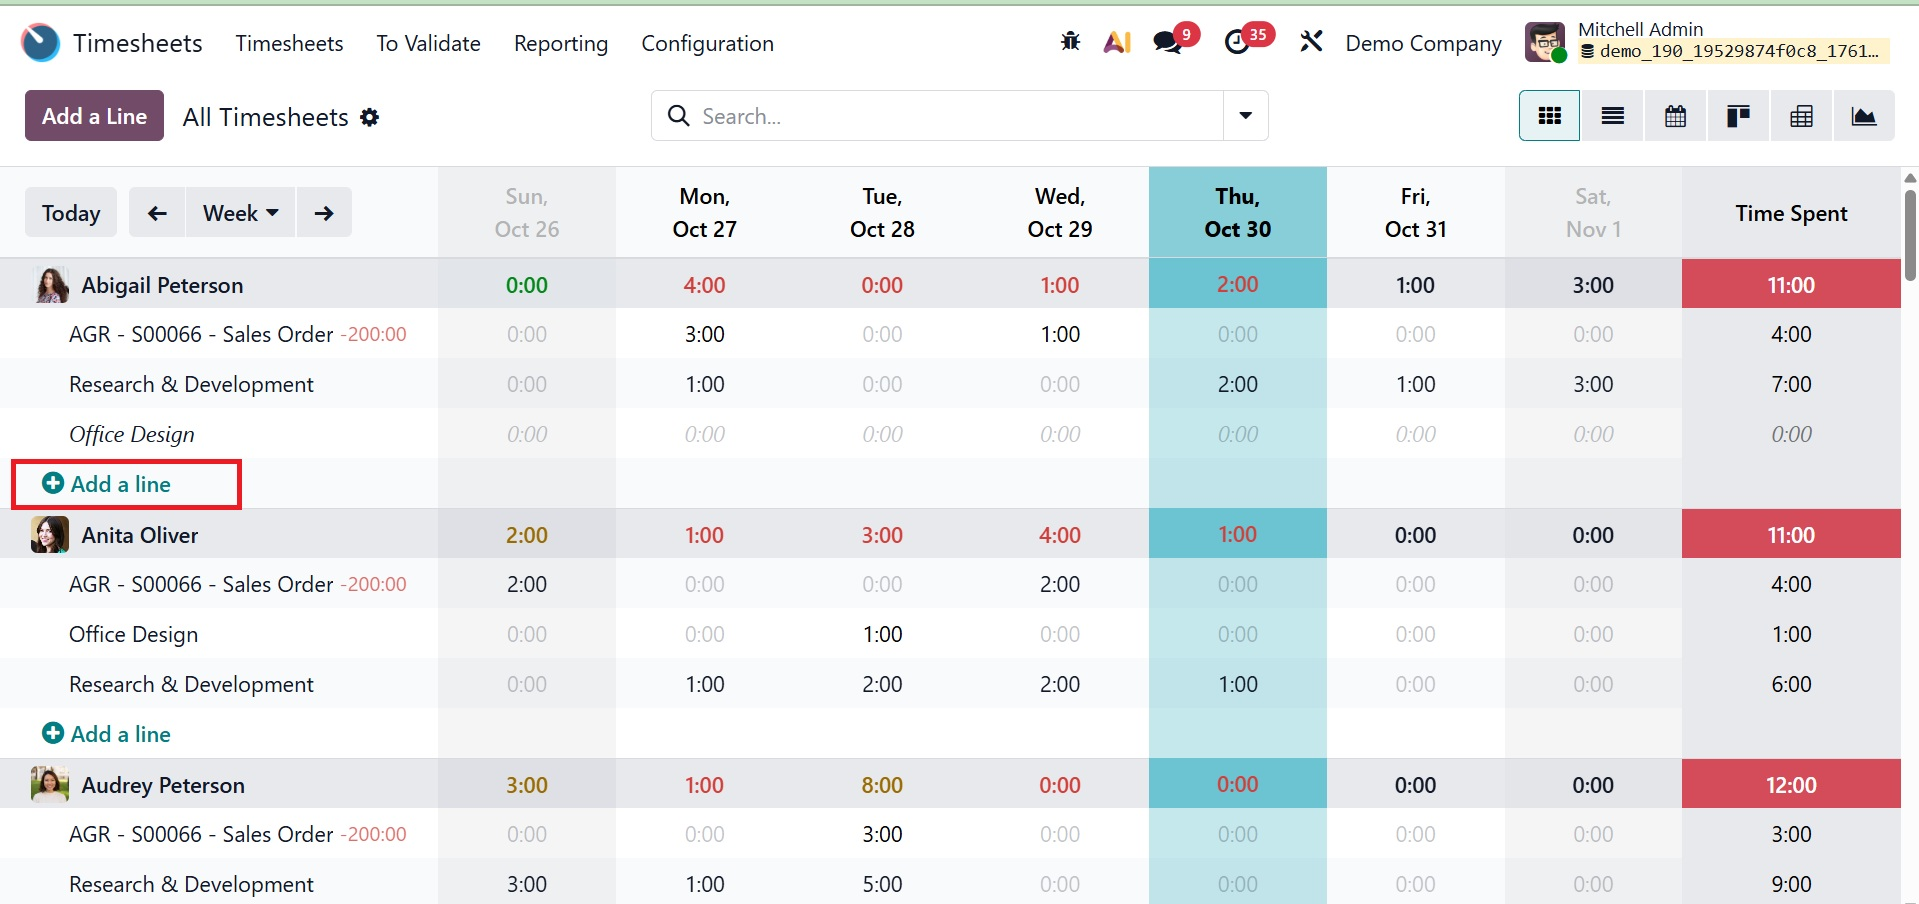
1.2 All Timesheet
The firm manager can view all timesheets logged in the module by selecting the 'All Timesheets' option. Like the "My Timesheets" box we previously mentioned, the system shows the timesheet histories of employees together with the names of the corresponding projects or tasks. You can see different colouration for the time spent.
- Red: These typically indicate insufficient or low hours (probably less than the needed daily working hours).
- Yellow: These denote additional or overtime hours (beyond regular business hours).
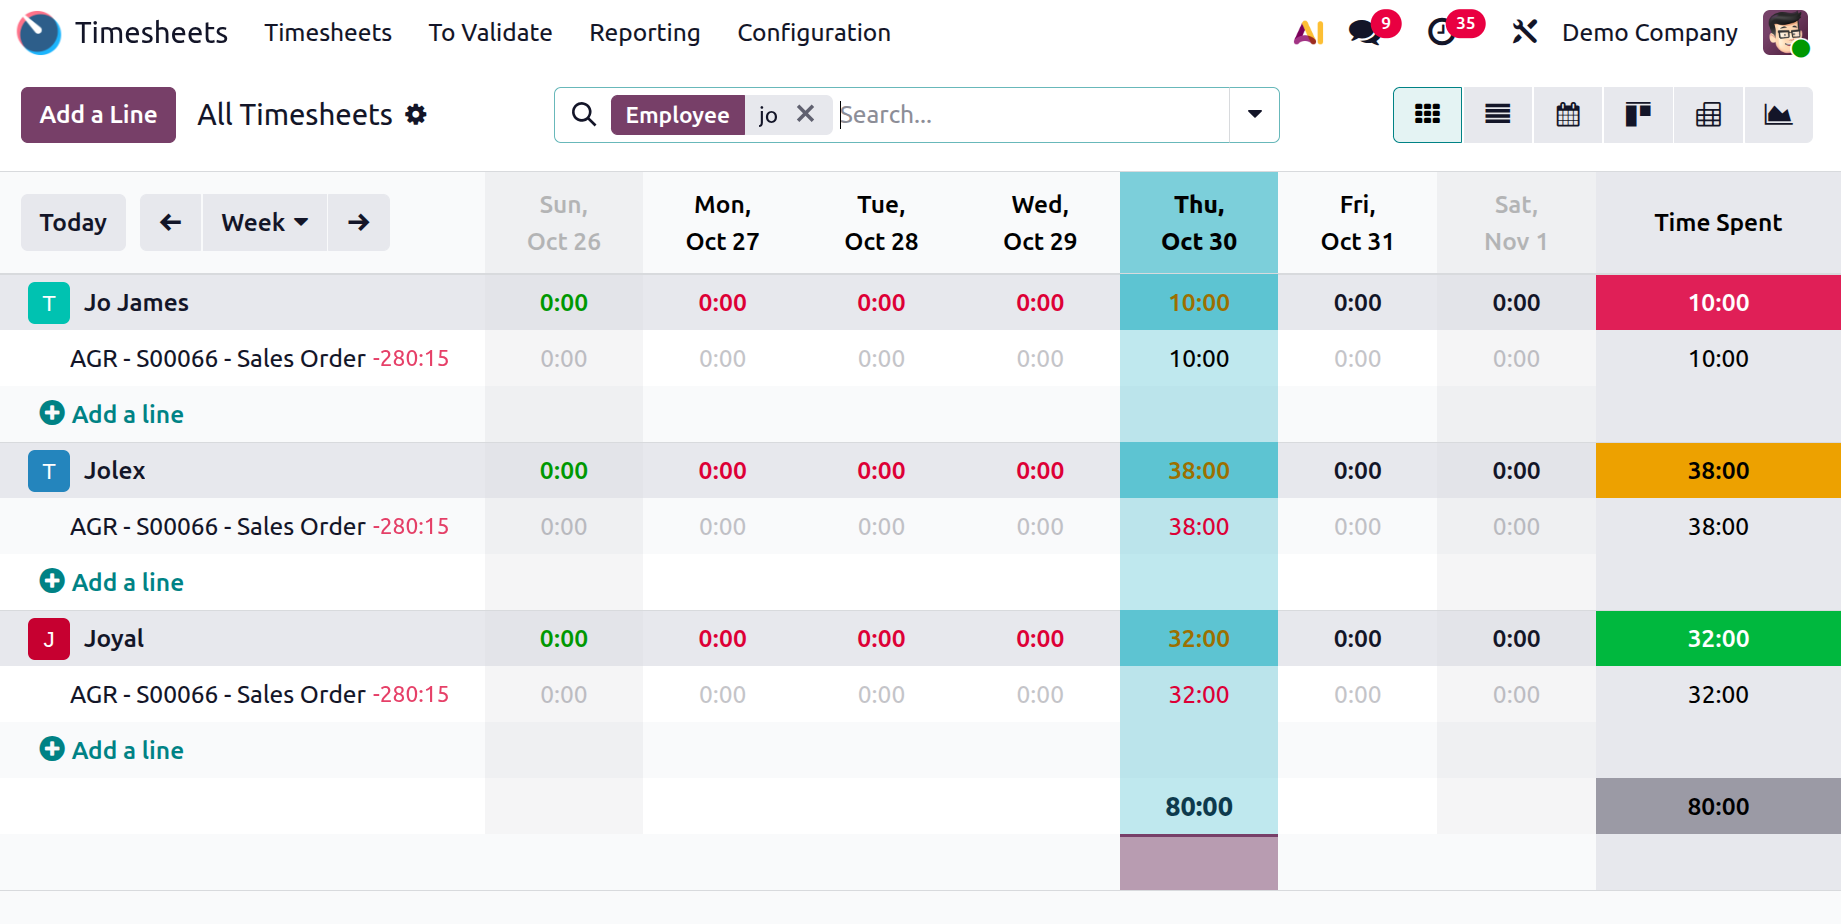
- Green: if the time spent in a particular week is equal to the required hours for a week, then, it will be marked in green color.
- Grey: These indicate summaries and totals, such as the weekly total at the bottom.
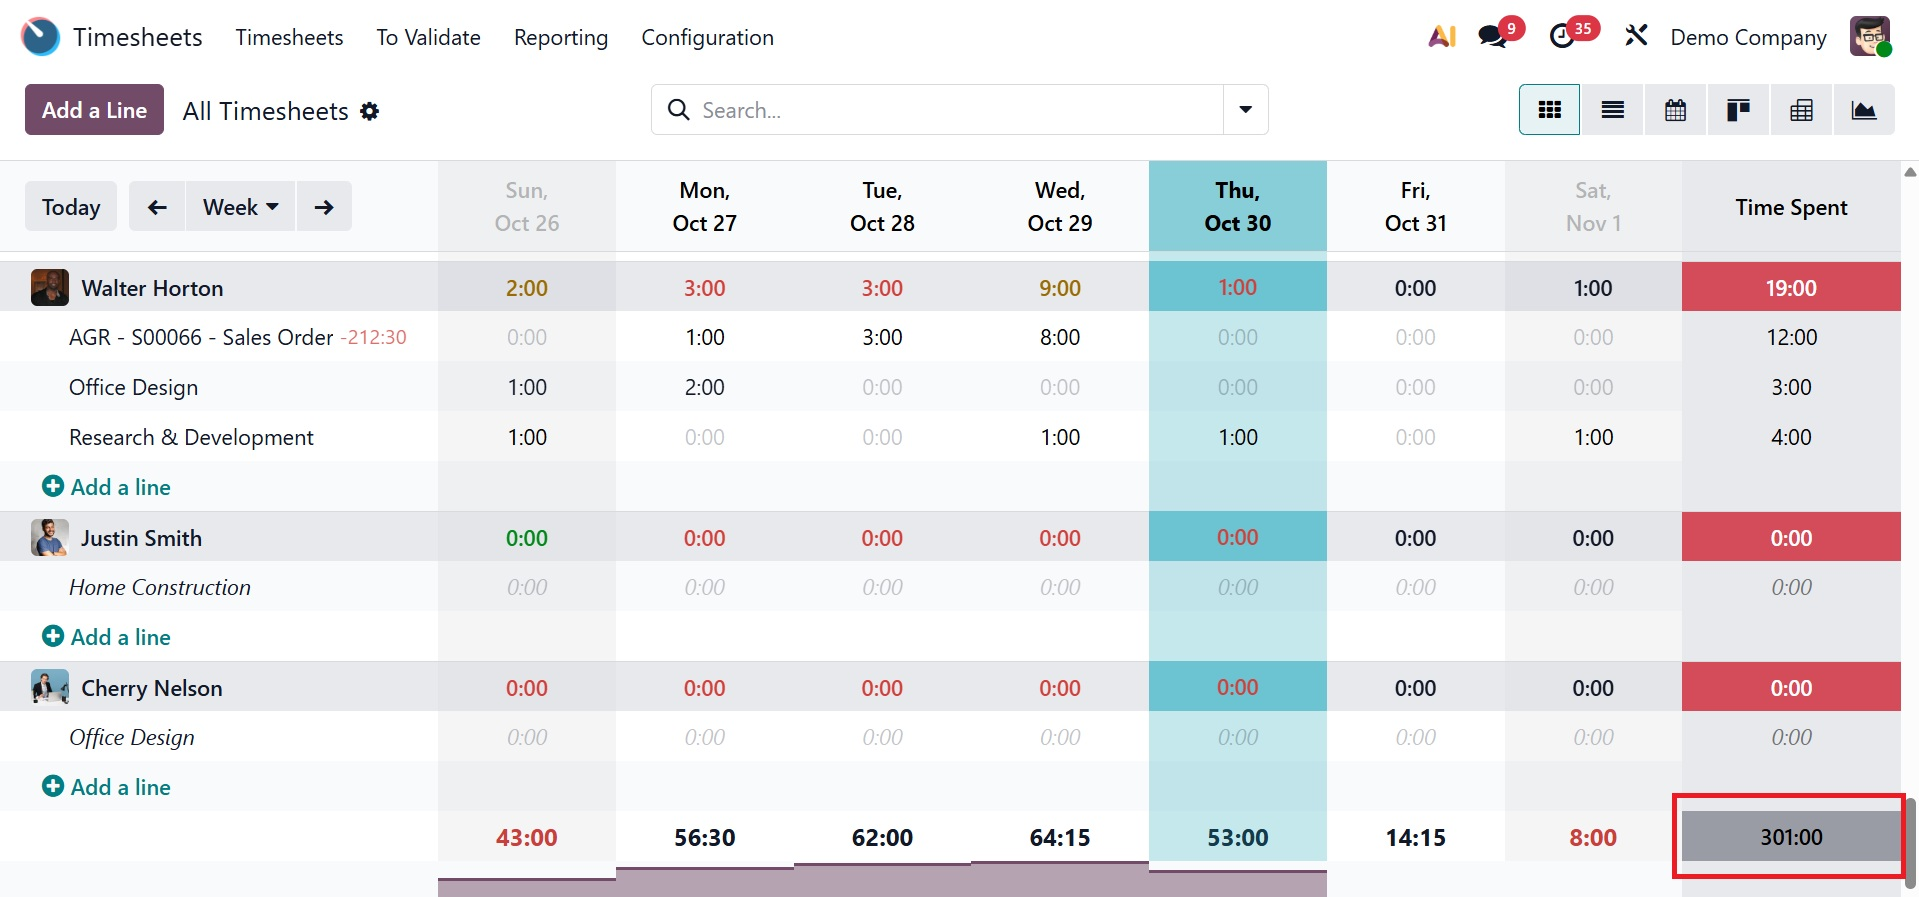
As we covered in the previous section, you can add additional timesheet entries to the current dashboard by using the "Add a Line" button, as shown below.