Configuration:
The 'Configuration' menu of the Timesheet module gives access to the 'Settings' section, where a number of parameters can be changed to improve the efficiency of the module.
1.1 Settings
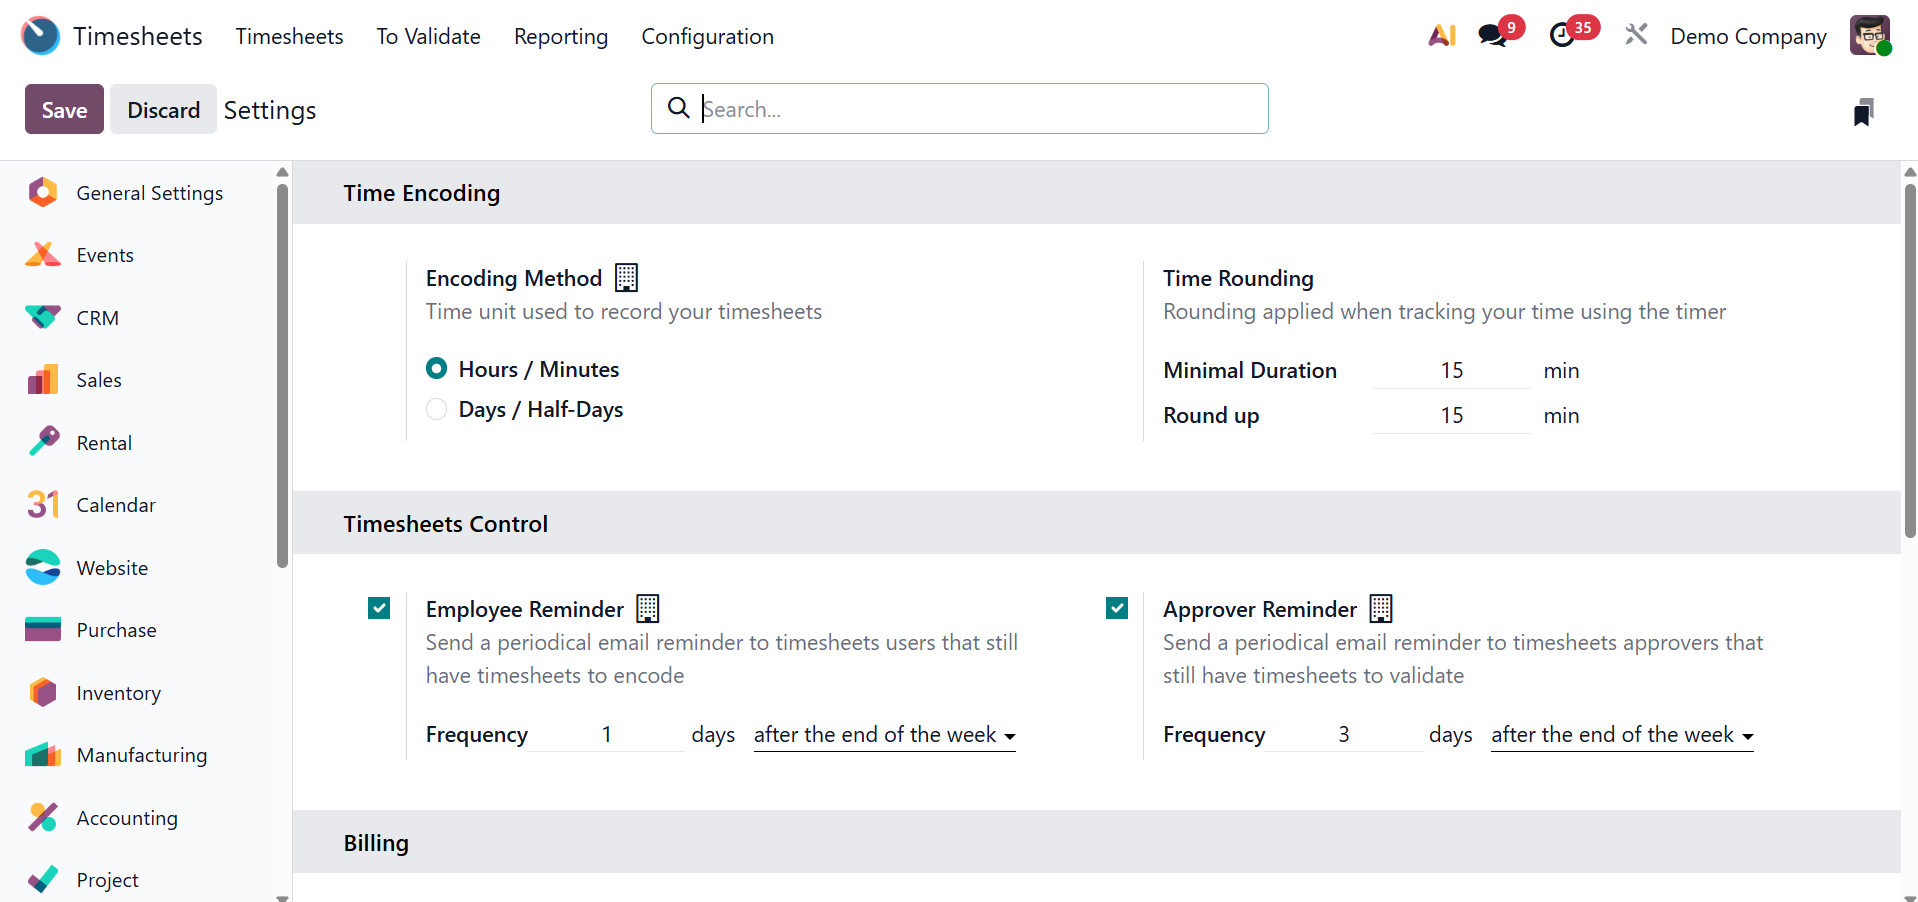
Users can specify the time unit used for timesheet recording by selecting the 'Encoding Method' option under the 'Time Encoding' tab. When utilizing the timer, the 'Time Rounding' box makes it easier to configure 'Round Up Time' and 'Minimal Duration' for rounding time entries.
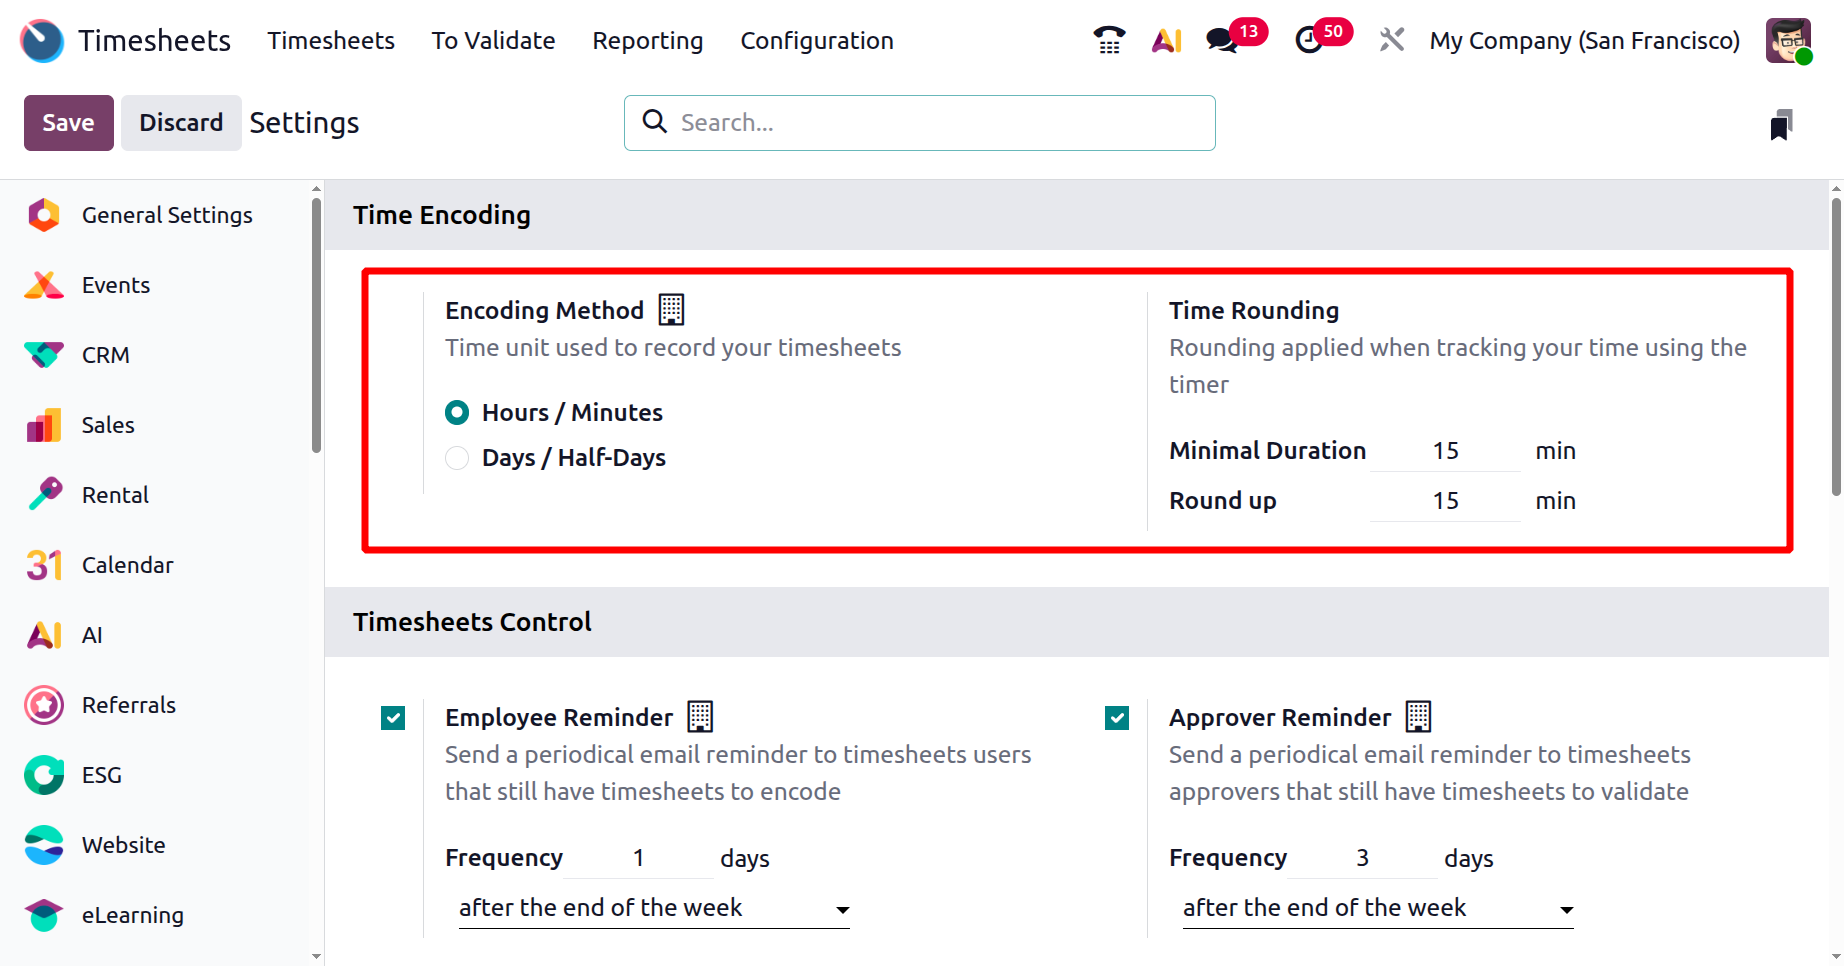
Employees can be automatically reminded to submit their timesheets on a regular basis by using the 'Employee Reminder' option found under the 'Timesheets Control' page. In a similar vein, managers can receive reminder emails at predetermined intervals with the 'Approver Reminder' option.
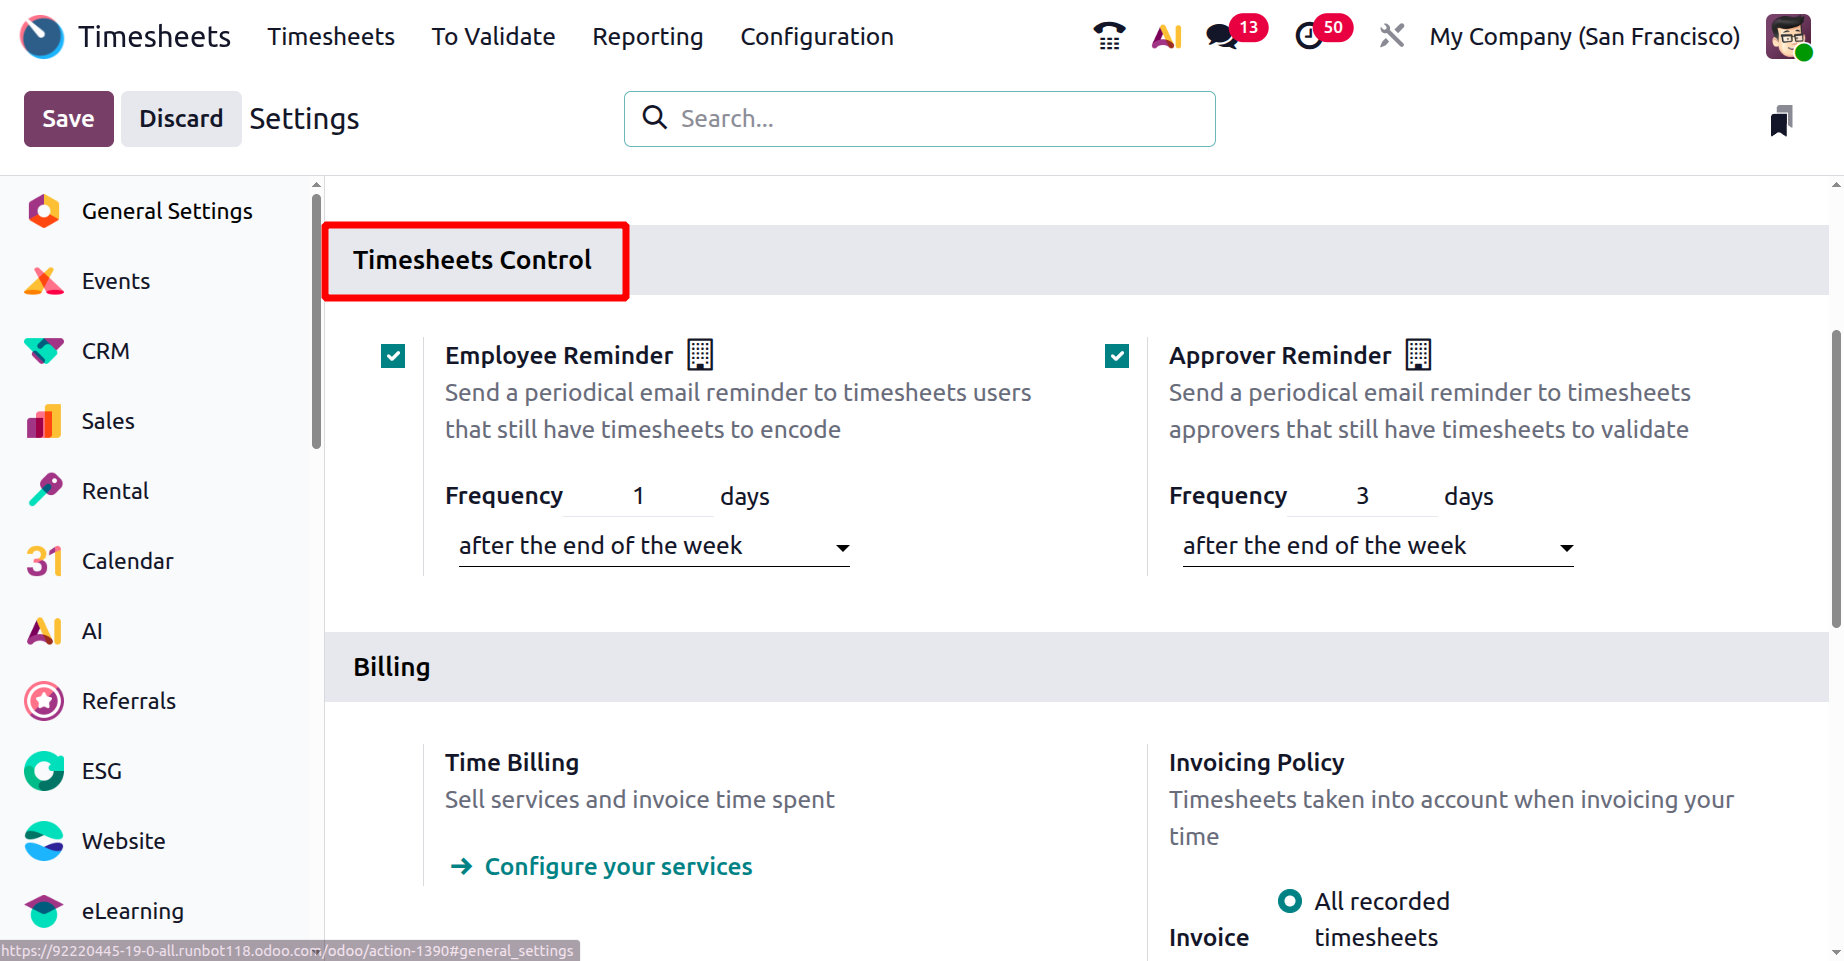
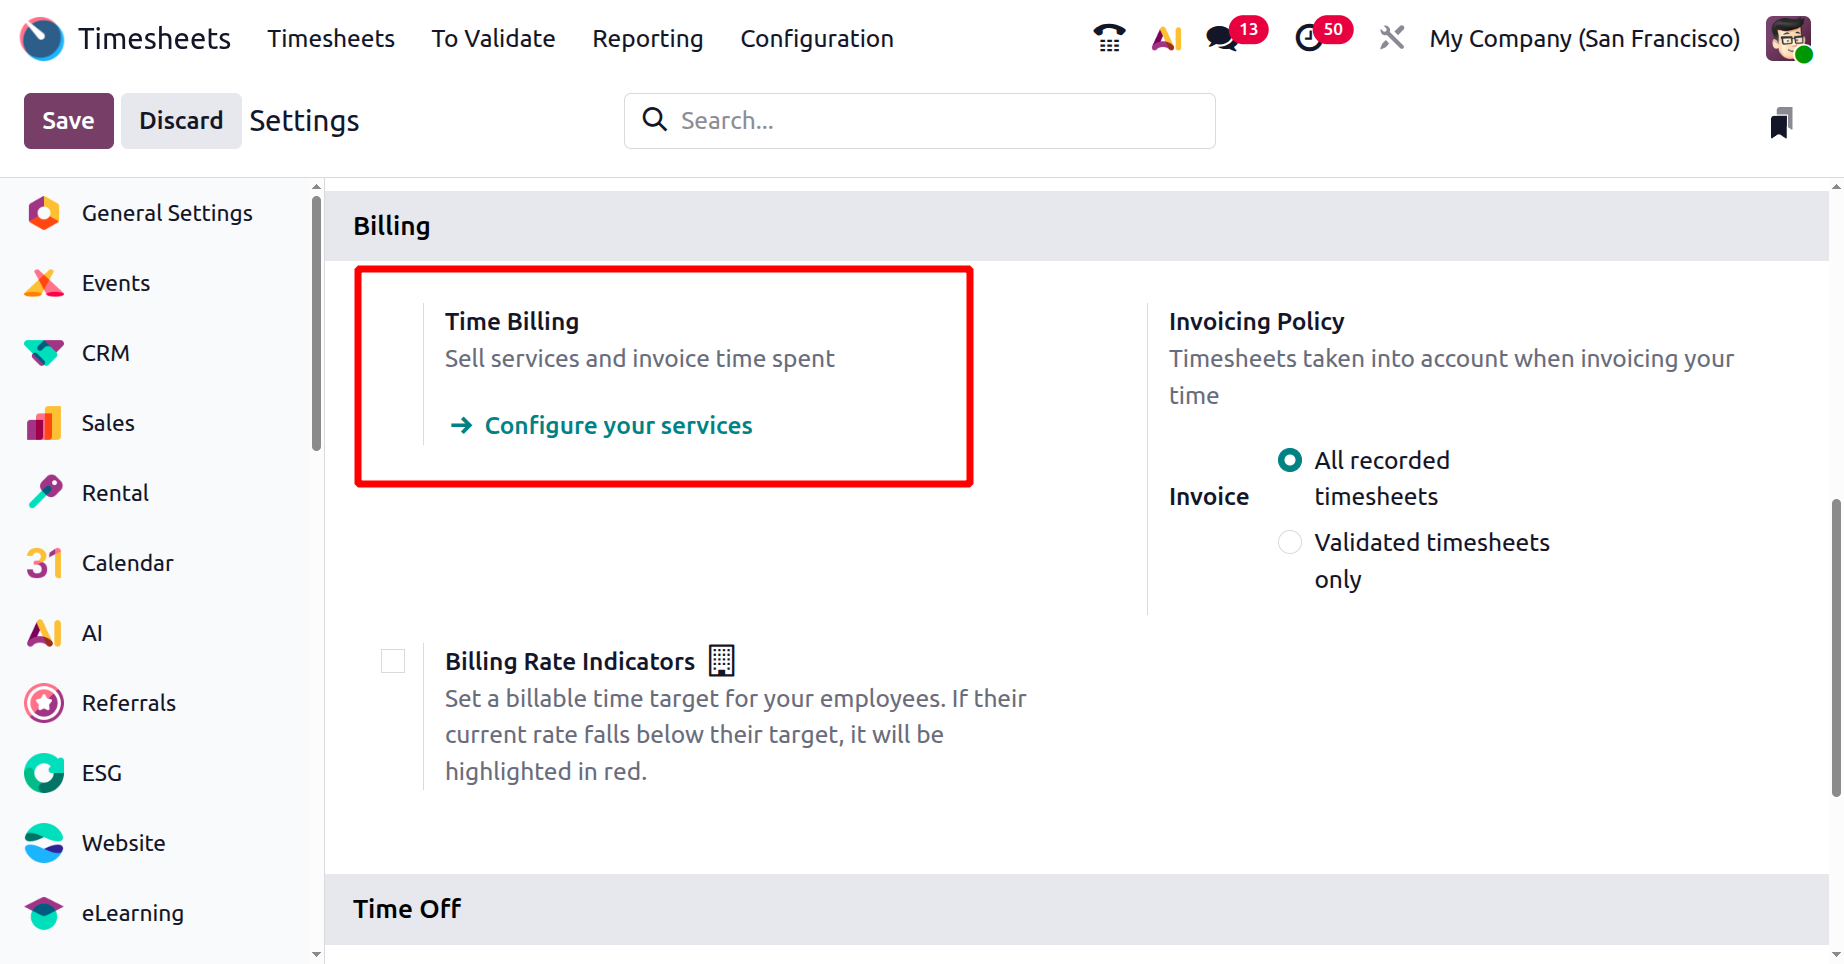
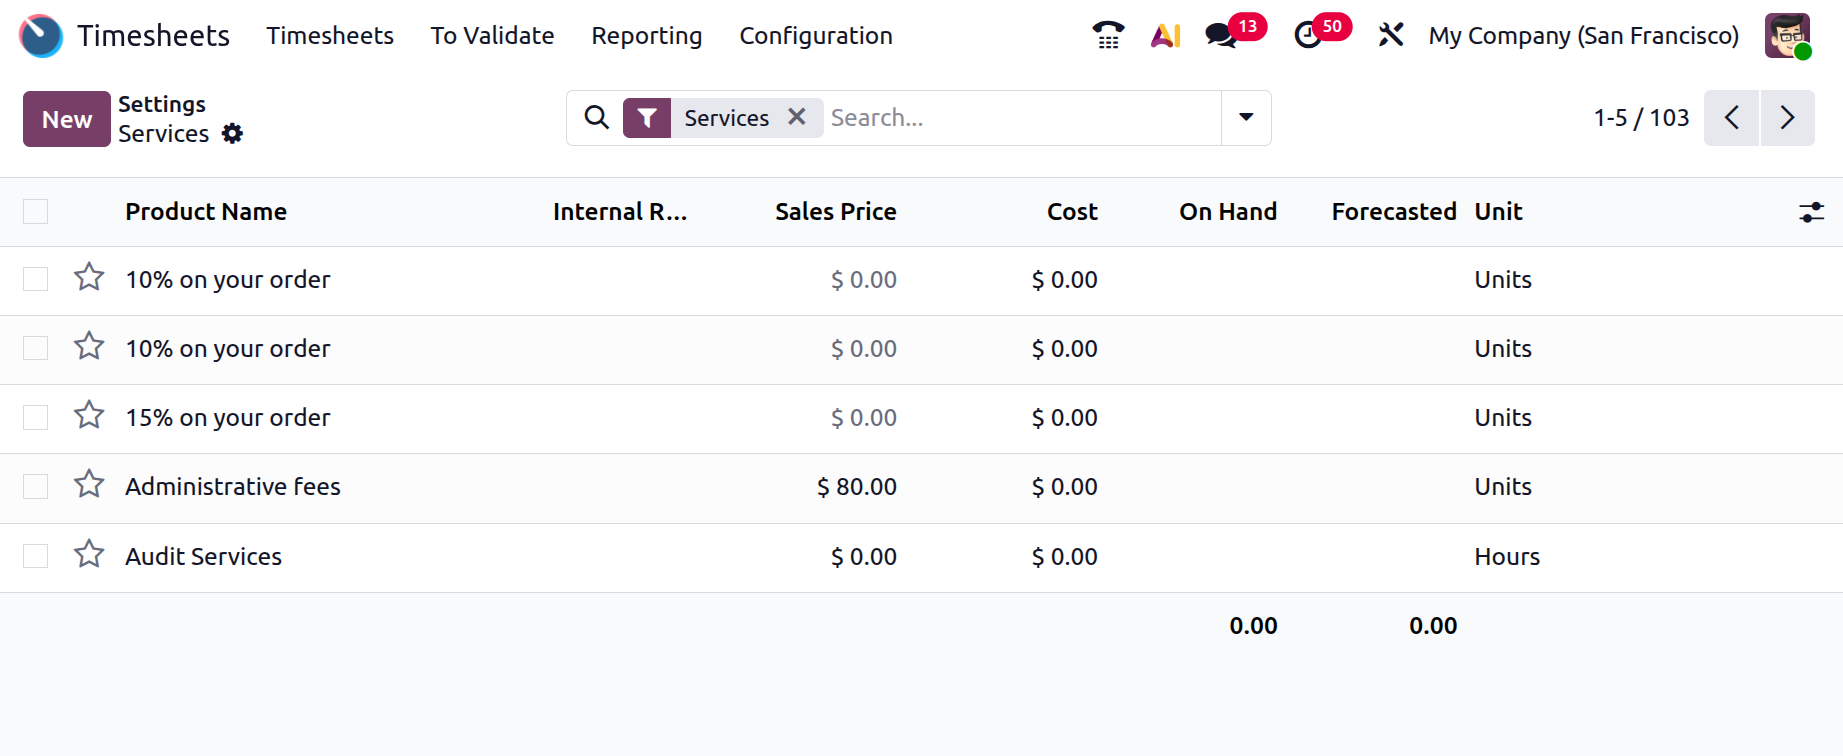
The 'Billing' menu's 'Time Billing' option makes it easier to sell services and create invoices based on timesheets that have been logged.
When users choose "Configure Your Service," a new window with all configured services is displayed. The 'New' button can be used to create new service offerings. Within the product settings, timesheet-based billing can be selected as the invoicing policy for service products.
Employees' goal billing rates can be set using the 'Billing Rate Indicators' option; if the actual rate is less than the target, discrepancies are indicated in red.
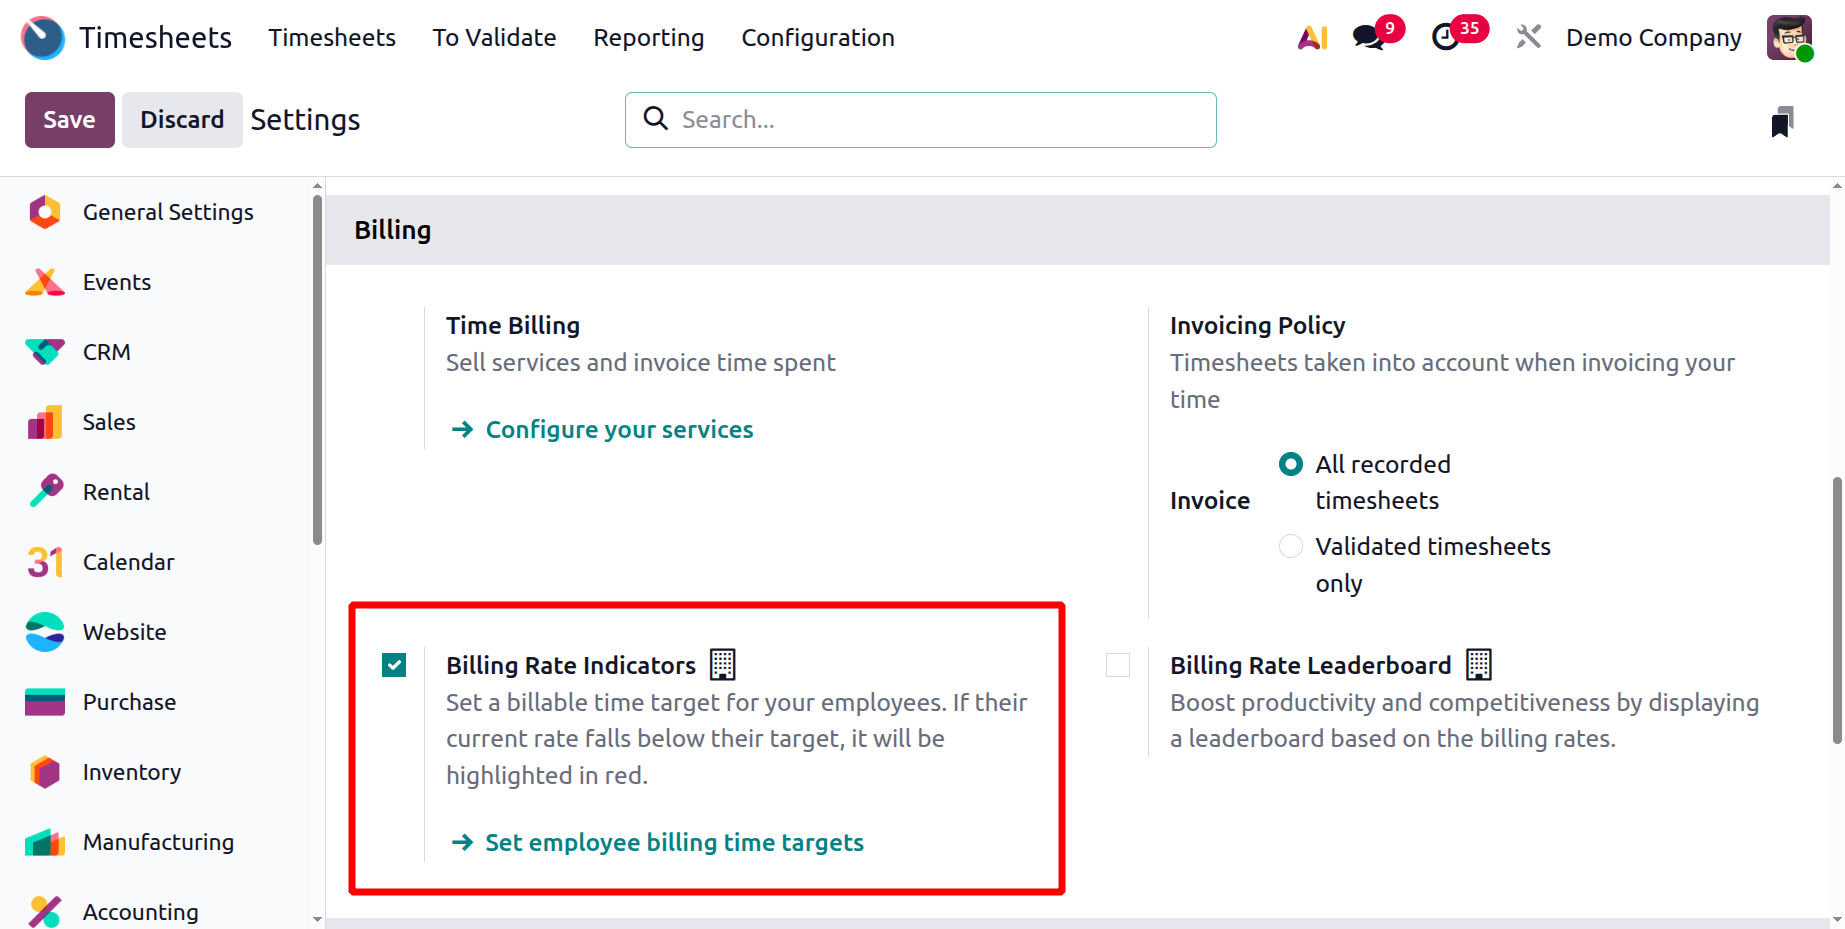
By giving visible feedback on an employee's time tracking effectiveness in relation to a predetermined target, Billing Rate Indicators in Odoo 19 timesheets serve to monitor and encourage employee performance. They are set up by turning on a "Billing Rate Target" in the timesheet settings, which enables users to choose an employee's desired percentage or number of hours. Once enabled, you can set a monthly billing time target for each employee in hours or days through their employee form or directly from the settings. A target rate can also be entered as a percentage.
Then enable the Billing Rate Leaderboard. By presenting a ranking based on billing rates, the "Billing Rate Leaderboard" increases competition and productivity. By presenting a leaderboard based on employees' billing rates, the leaderboard contributes to increased productivity and competitiveness.
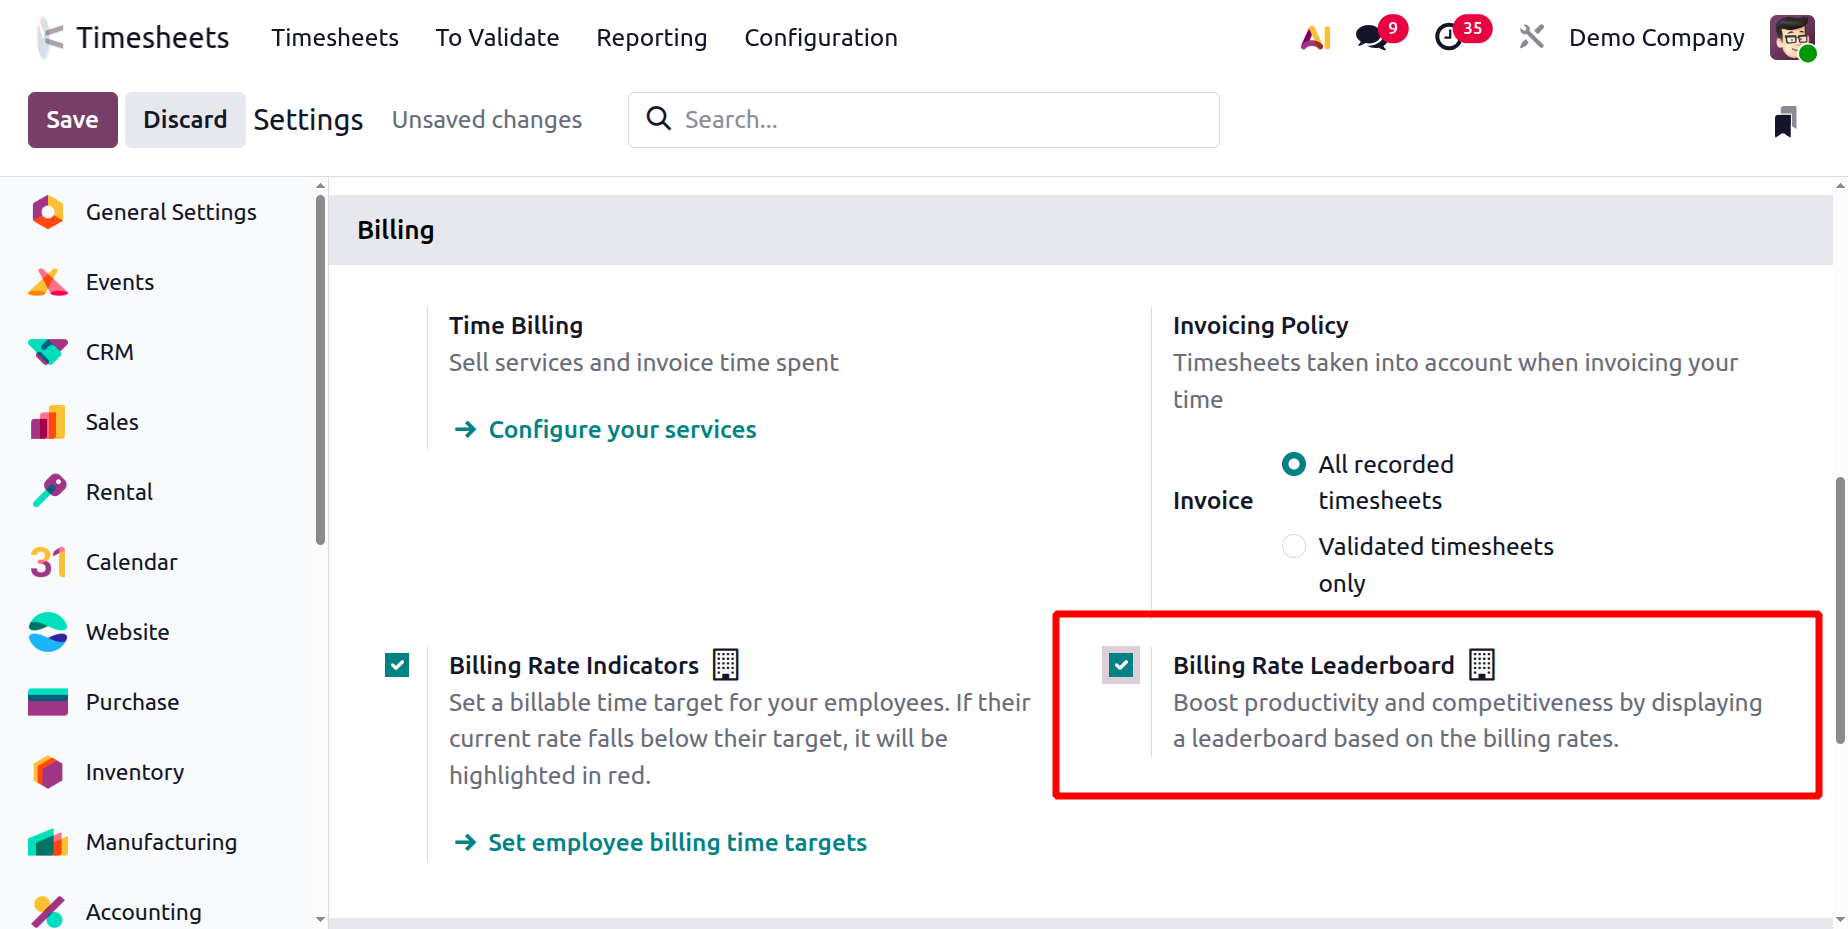
Once the parameters are enabled, just save it. The employee must log in using their credentials in order to see the leaderboard.
Next, open the Timesheet module. There is an extra leaderboard on the right side of the My Timesheets’s screen, as can be seen in the screenshot.
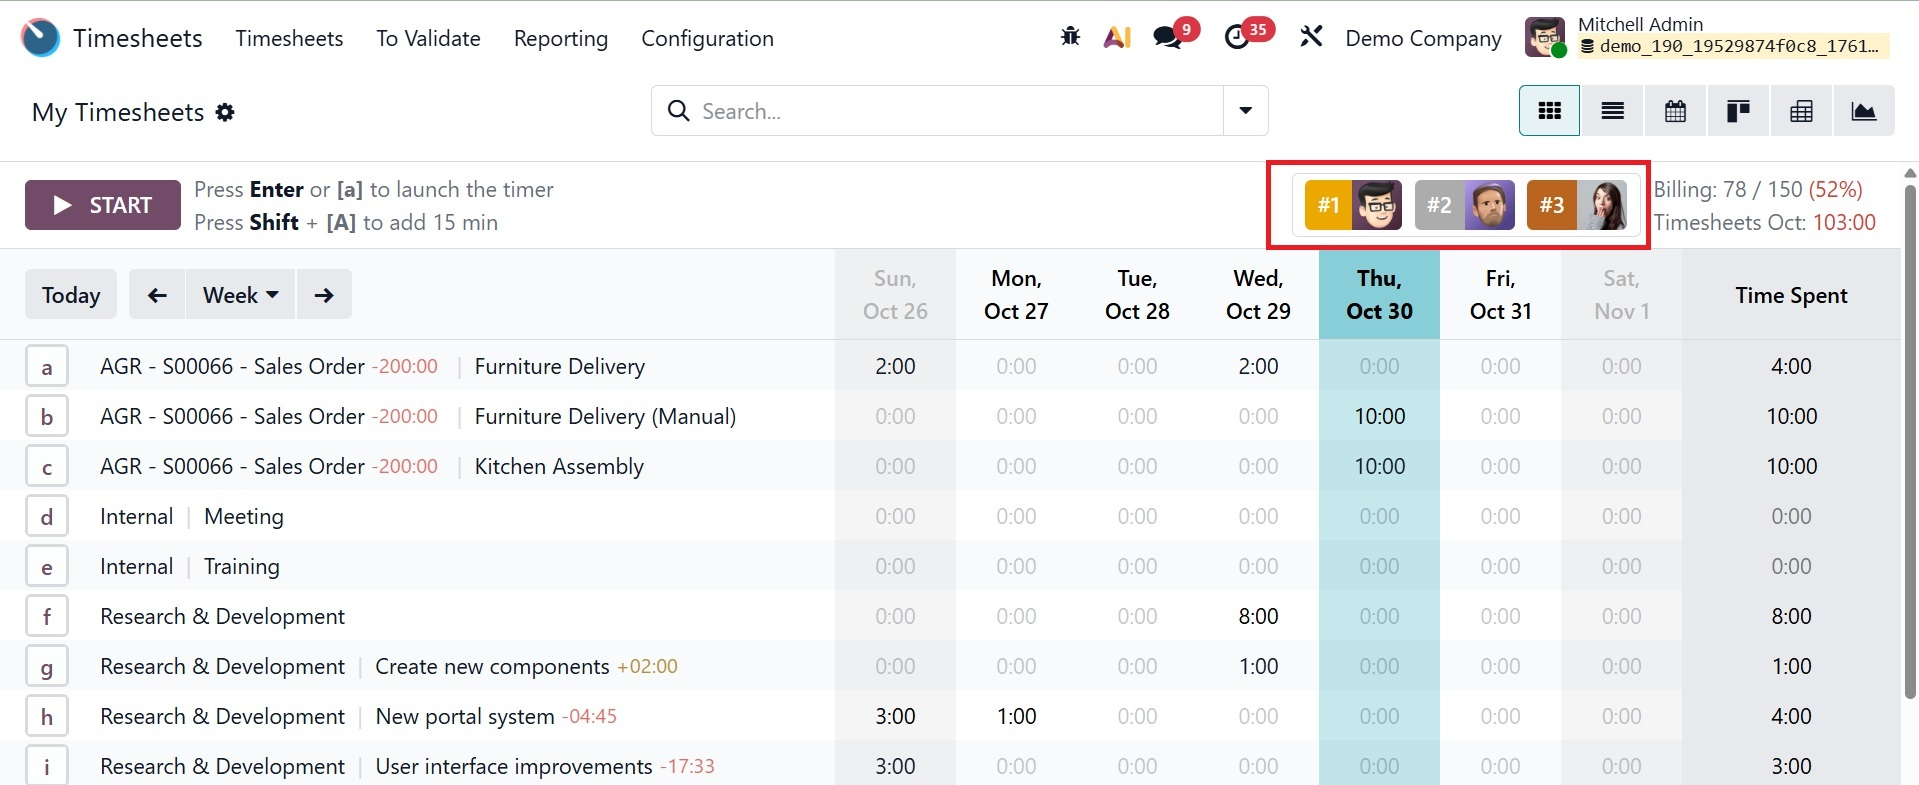
Click on the leaderboard to see it. The Billing Rate Leaderboard is showing. Their total added time and the percentage of both added time and total time are shown on the leaderboard. The billing rates of the other staff members are then listed.
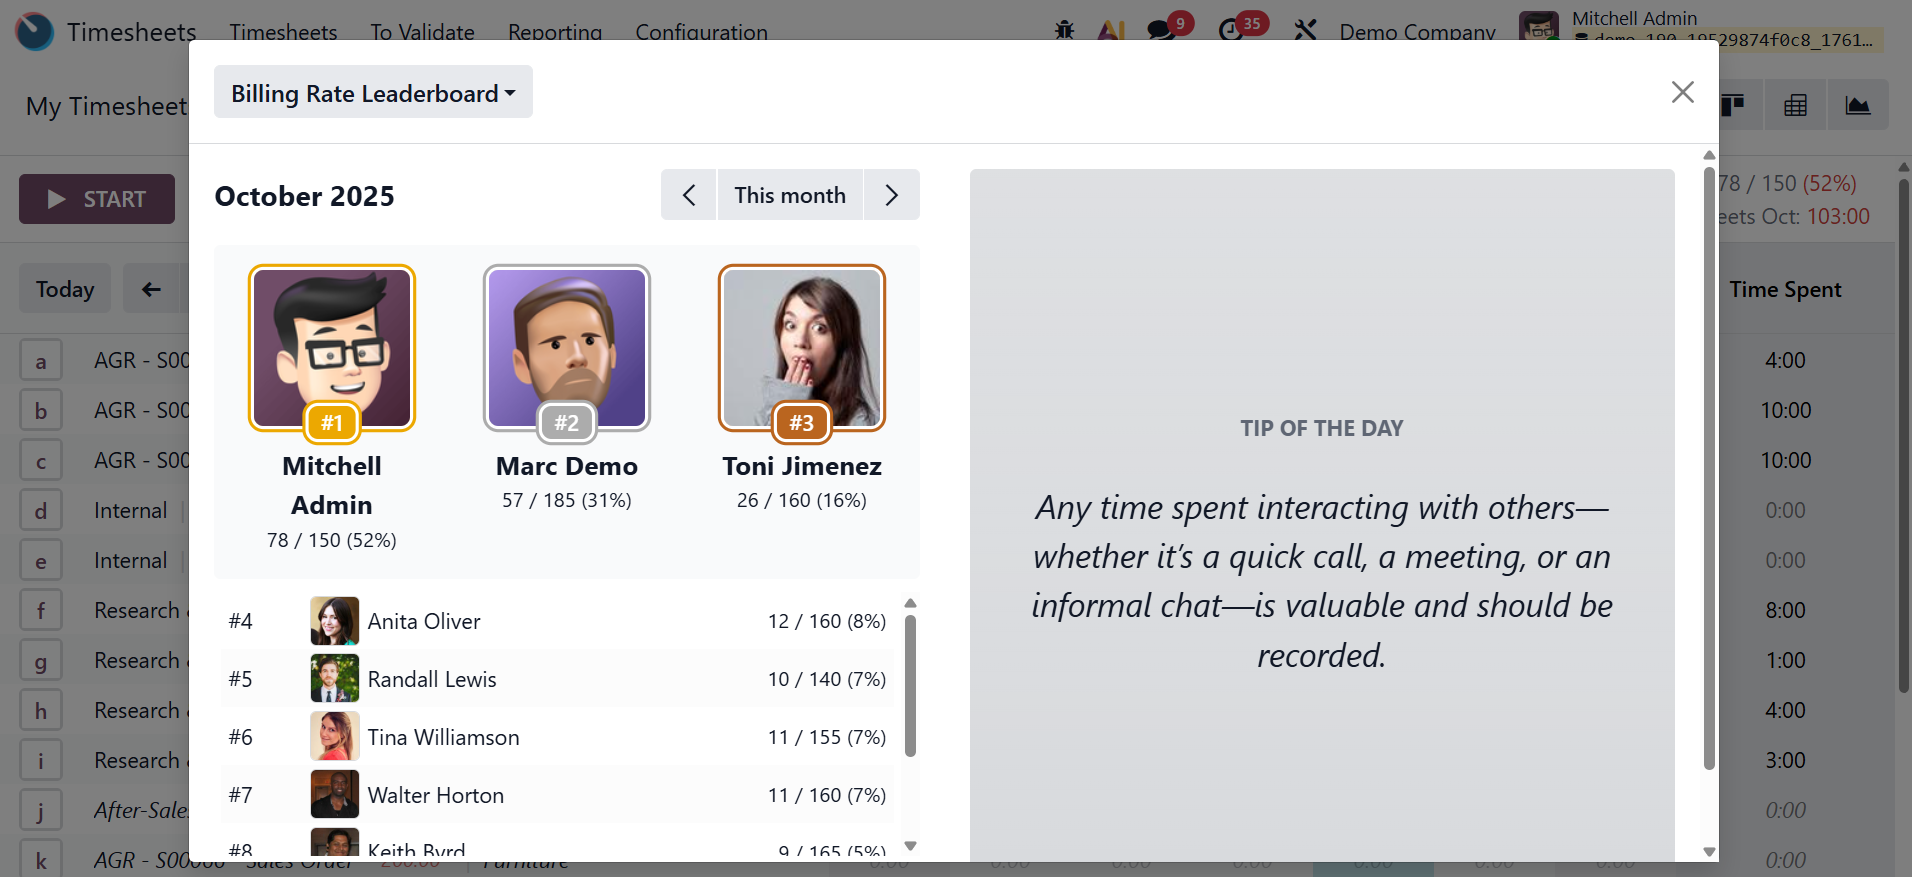
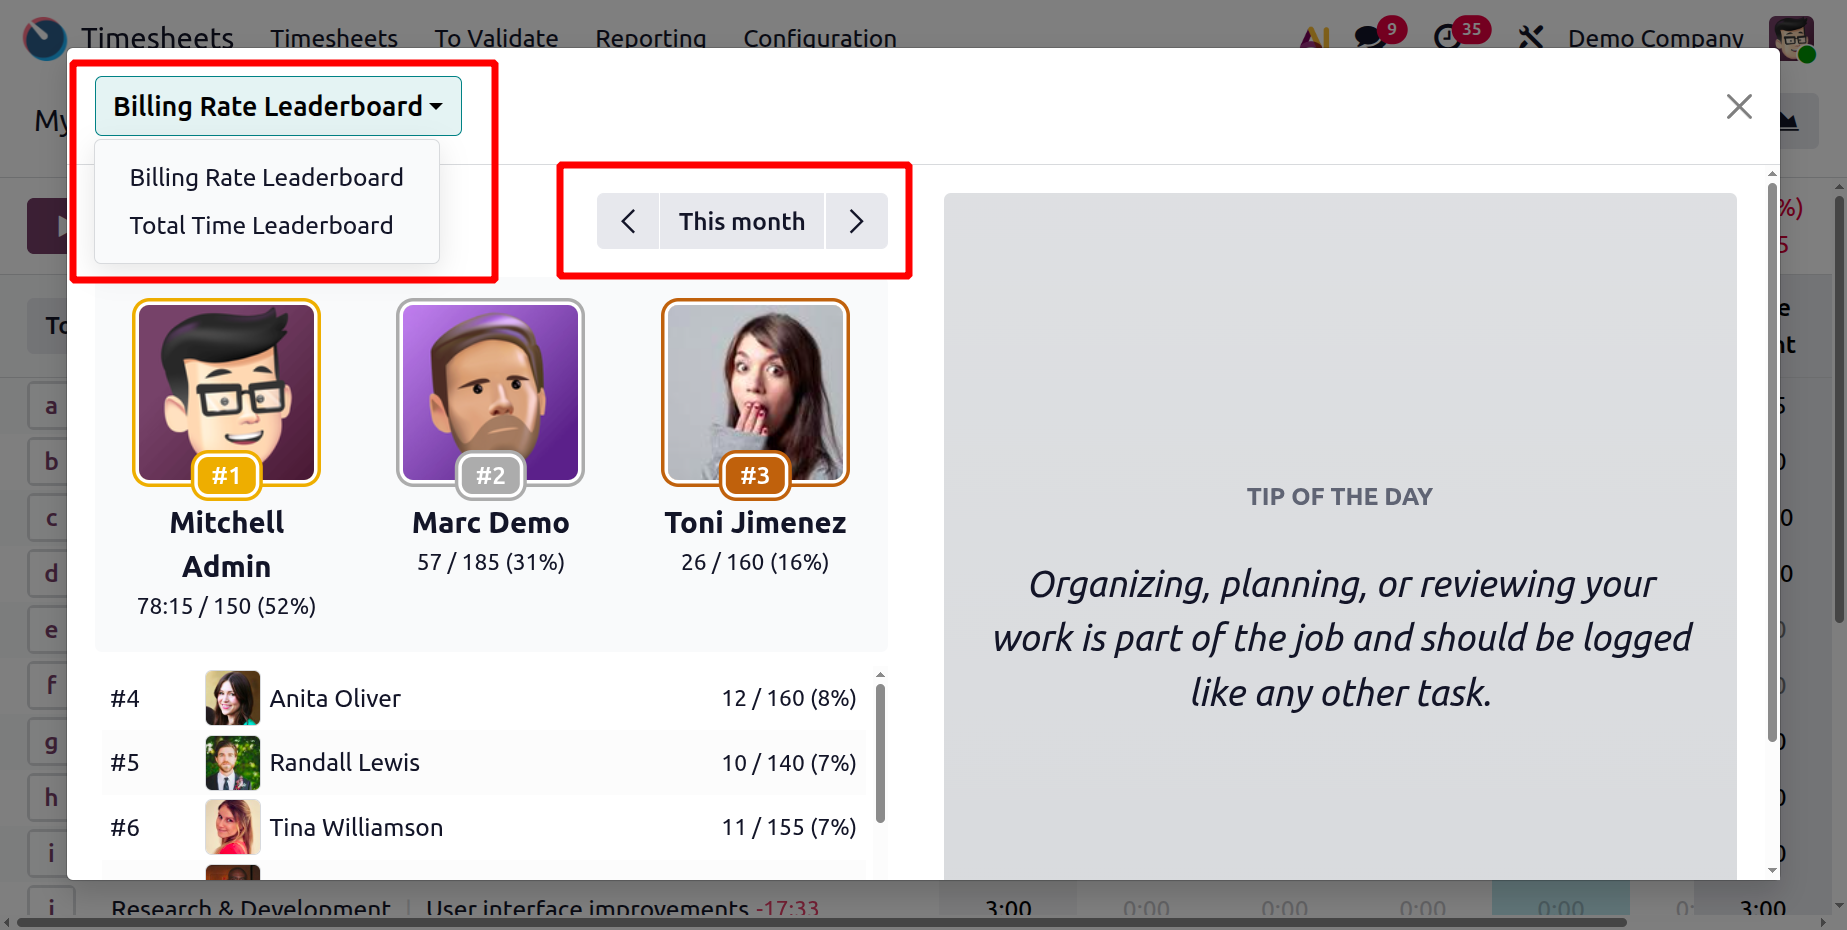
Both the Total Time Leaderboard and the Billing Rate Leaderboard are shown on the leaderboard, as illustrated below. The other employees' billing rates are listed next. It is also possible for the employee to view the prior month's leaderboard. A filter with an arrow that enables the employee to change the month is displayed in the screenshot below.
- Tip of the Day:The billing rate and total time leaderboard are improved by daily encouraging tips that are shown on the right side of the leaderboard, as in the screenshot above. The advice is chosen at random and is updated every day.
The "Invoicing Policy" of the Timesheet module outlines how and when billable hours are recorded on timesheets that clients receive. This functionality, which may be set up when creating a service product in Sales or Invoicing or through the Configuration Settings window, as demonstrated below, is crucial for service-based organizations that charge by time.

"All recorded timesheets" or "Validated timesheets only" are the two options available in Odoo's Timesheet settings for the invoicing policy. The first option invoices all logged hours, whereas the second option requires manager approval of the timesheet before it can be invoiced. This decision dictates when employee hours can be billed to a client.
- All recorded timesheets – This option allows you to invoice customers for all logged hours, even if they have not been approved yet.
- Validated timesheets only –This option allows invoicing only after a manager approves the timesheet, ensuring billing accuracy and control.
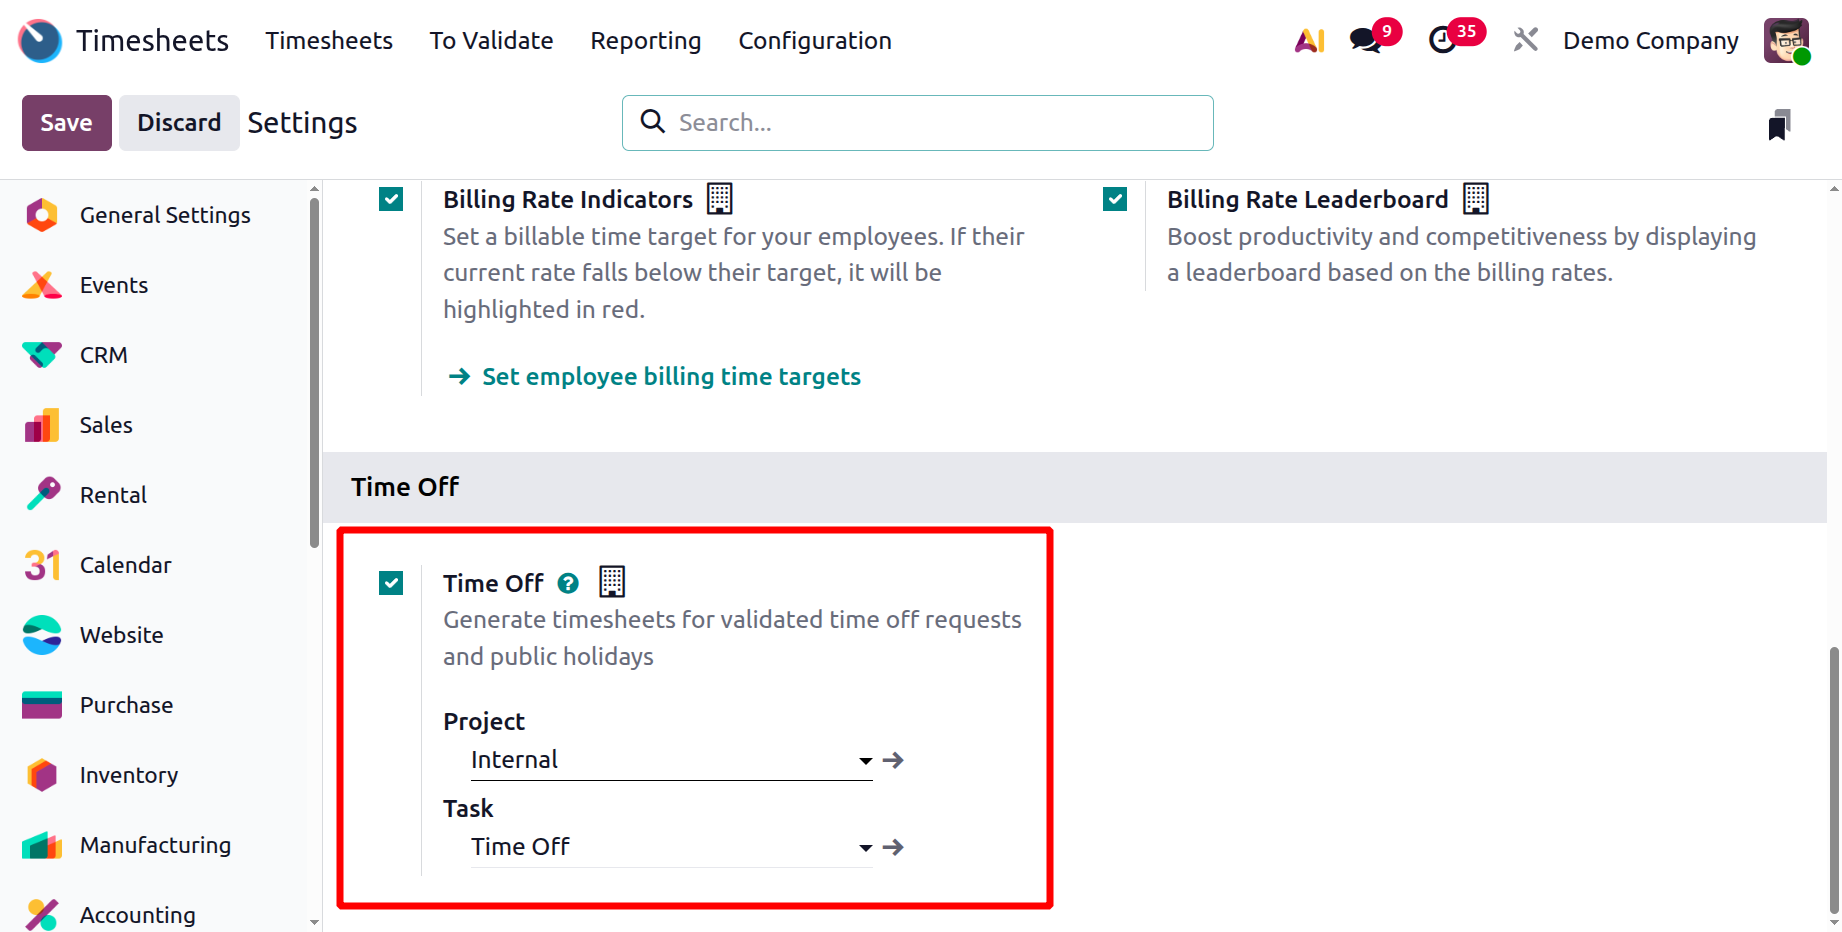
Last is the Time off section. Furthermore, by specifying the Project and Time Off options, the 'Time Off' option guarantees that authorized time-off requests and legal holidays are automatically reflected in employees' timesheets if needed.
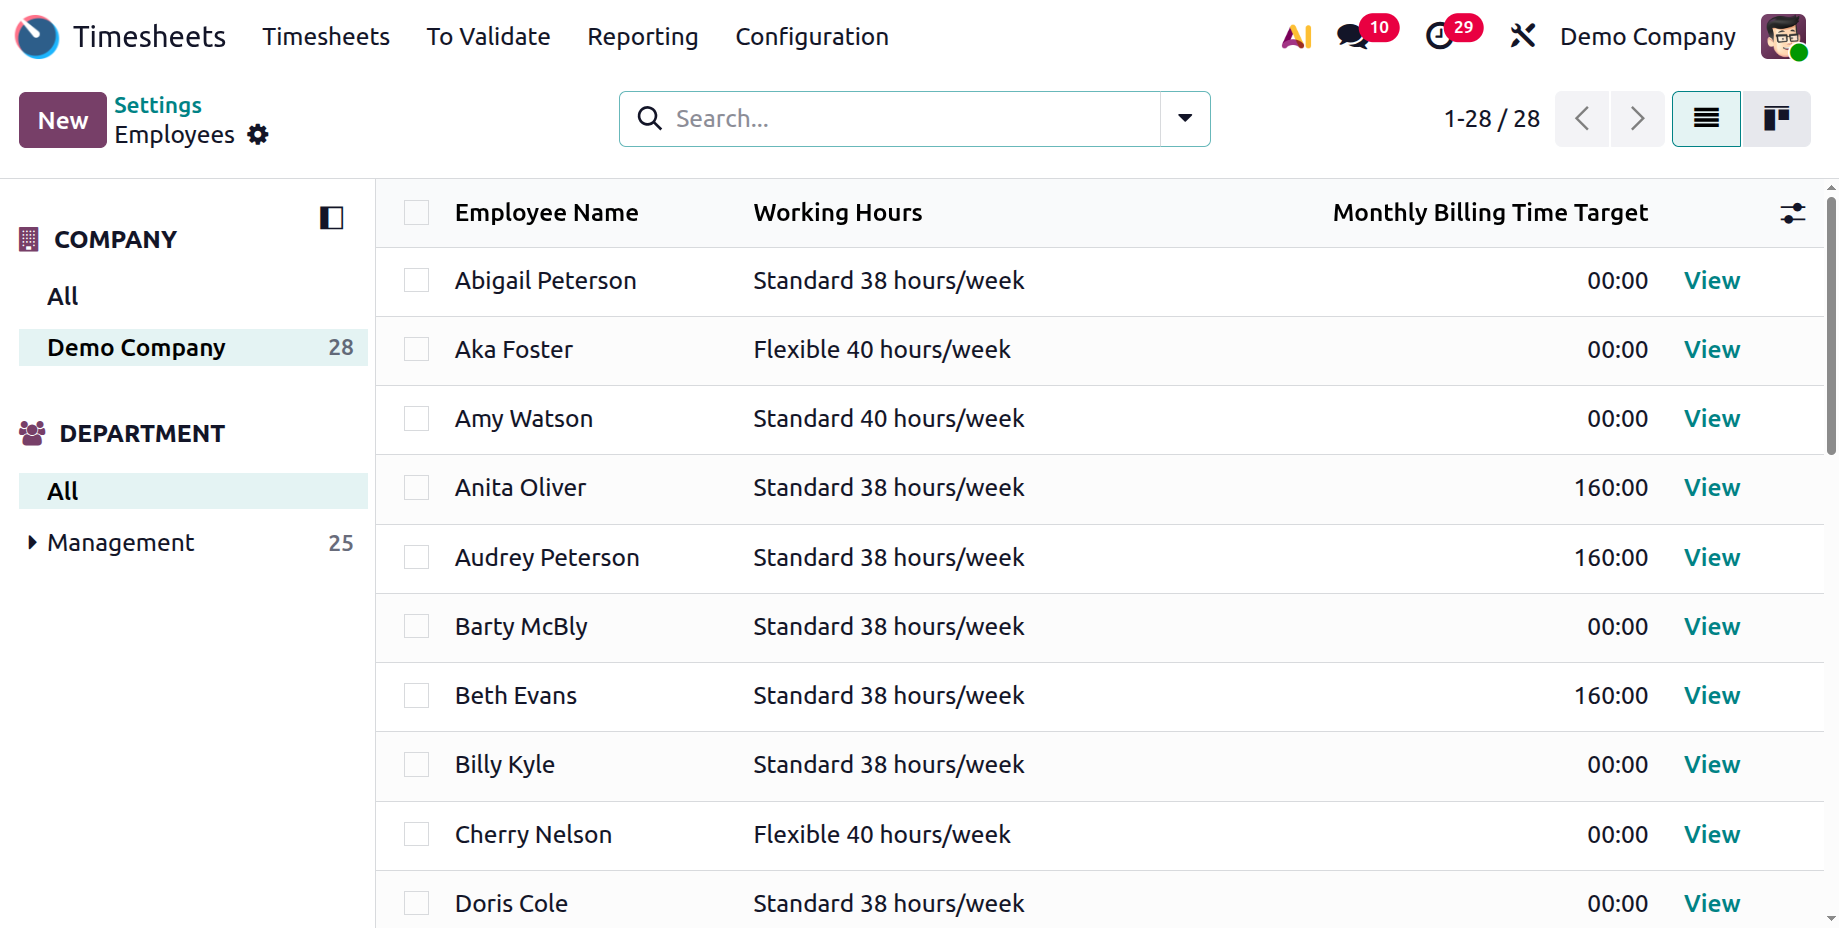
1.2 Billing Time Target
You can define a desired number of billable working hours per employee (or team) for a given period of time using the Billing Time Target parameter in the Odoo 19 Timesheet setup. As in the screenshot below, you can view the filters, which helps you to see billing targets according to the department and firm that each person works for.
Under the Company, you have:
- All: Displays billing time goals for workers from every business in the system.
- Demo Company:Only employees of the Demo Company are shown billing time targets.
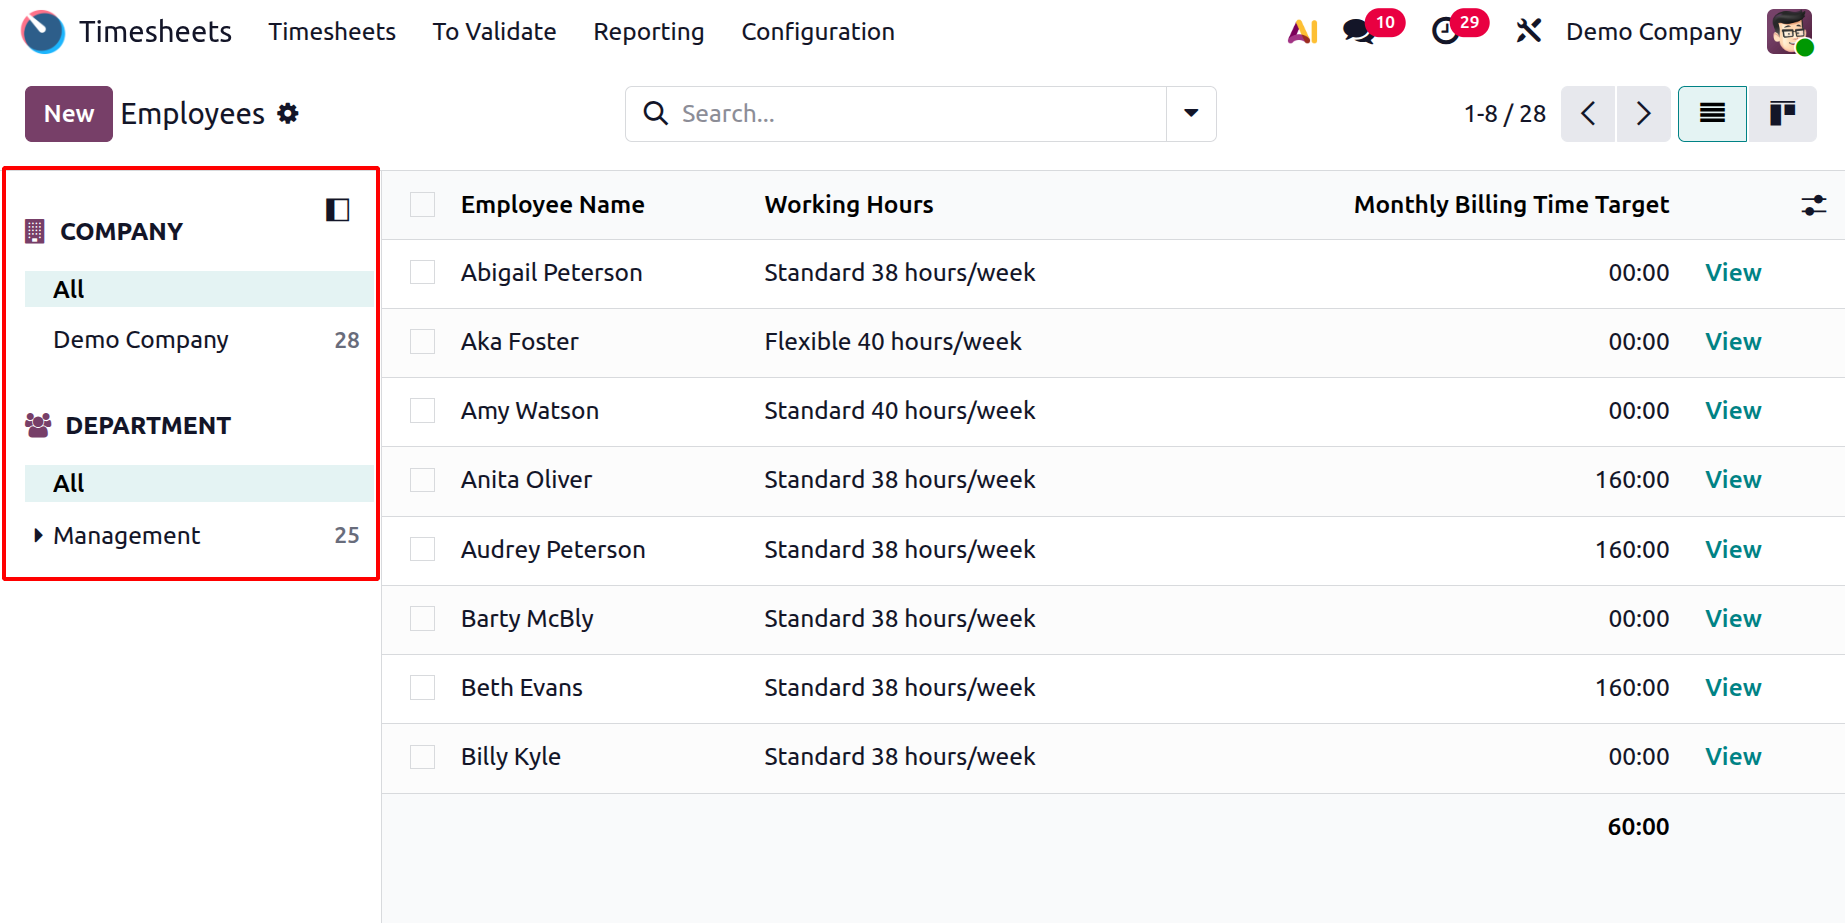
And under the Department, you have the options like:
- All:Shows the billing time goals for every department.
- Management:Only staff in the Management department are shown billing time targets.
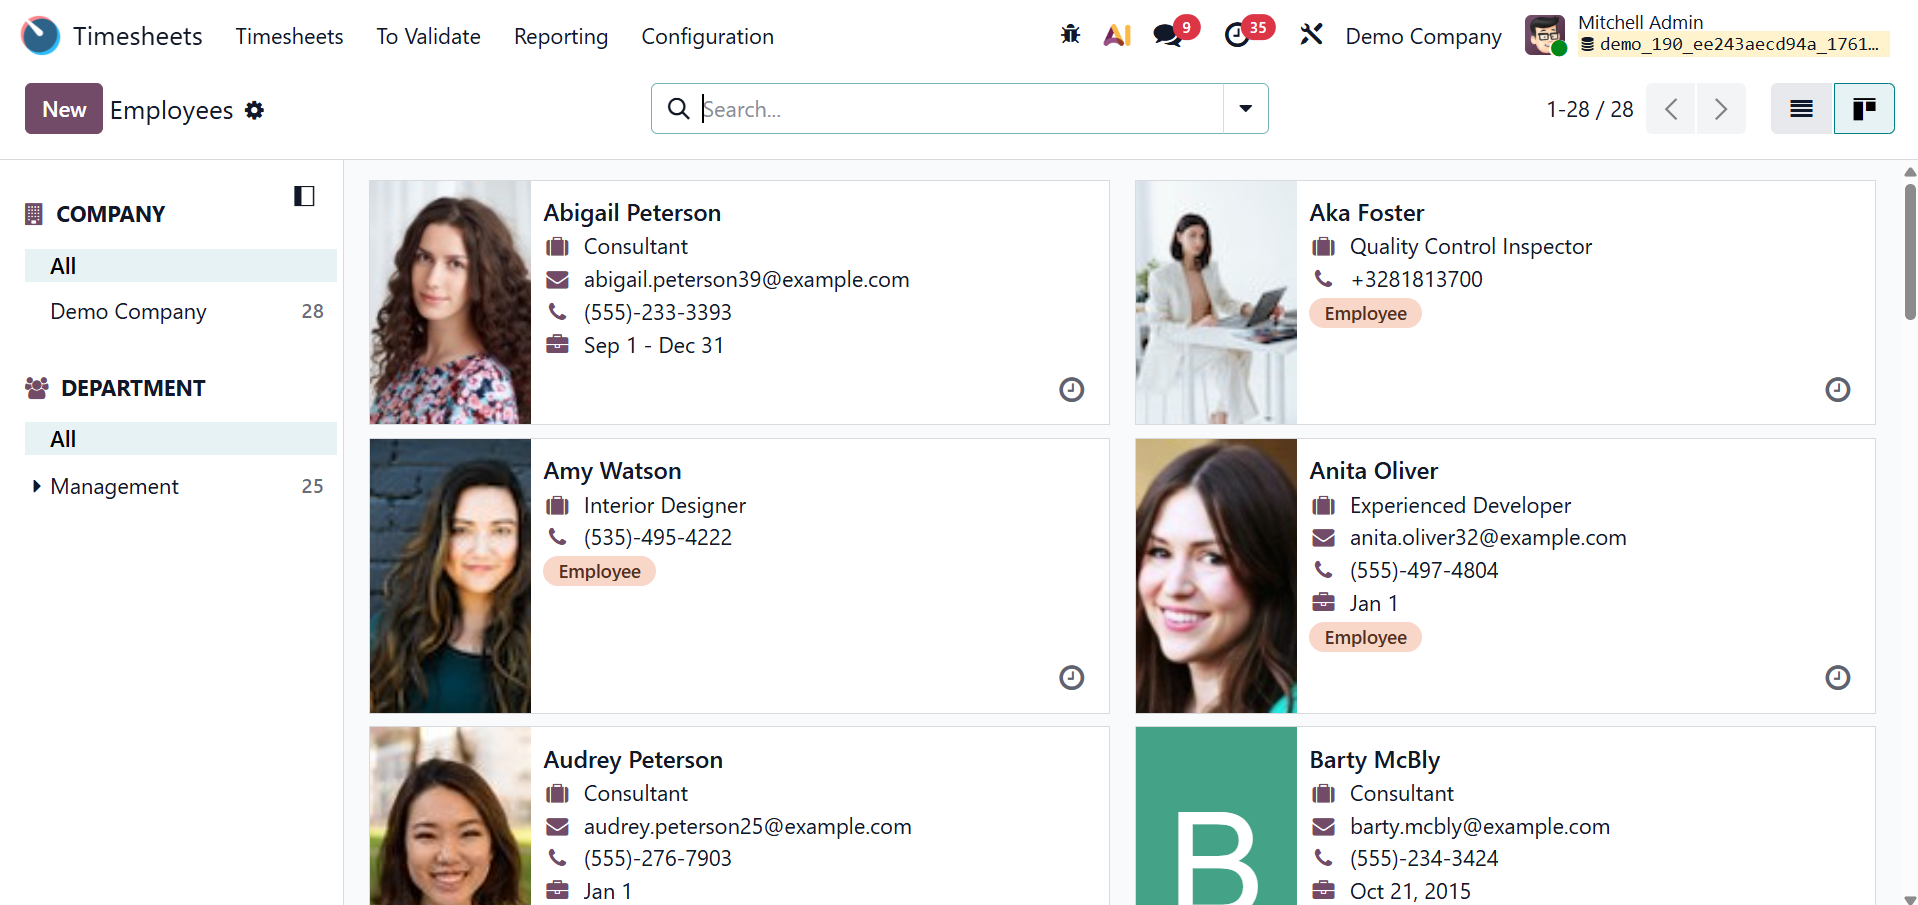
You can also have the Kanban view here, as shown below.
Now, select a particular employee from the provided list and go for the Payroll tab, as shown below.
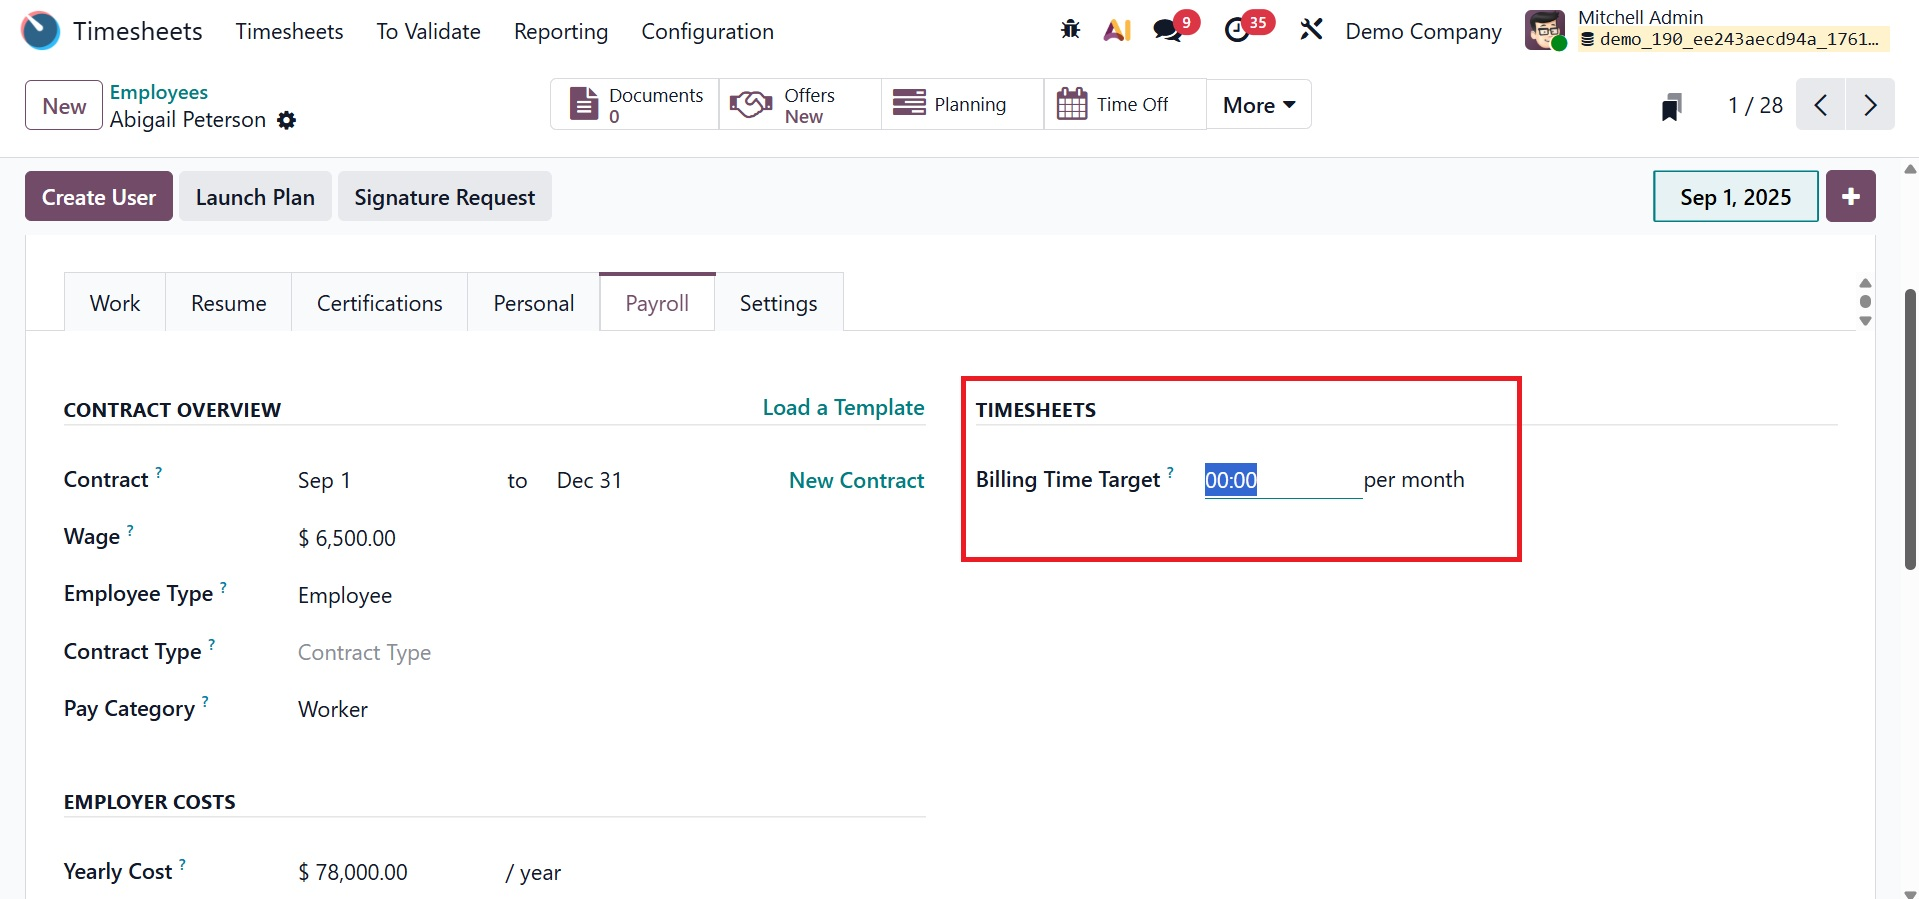
The option is where you establish a target for the amount of billable hours that an employee should record during a given time frame, such a month. When activated, it serves as a performance indicator to encourage staff members and is used in tandem with the billing rate leaderboard to monitor performance in relation to this goal.
1.3 Tips
Employee informational tips can be managed and edited using the 'Tips' panel in Odoo 19's Timesheet module. It offers helpful tips, reminders, and best practices for managing timesheets. Administrators can add, edit, or remove entries from the dashboard-style list of accessible tips displayed by the interface.
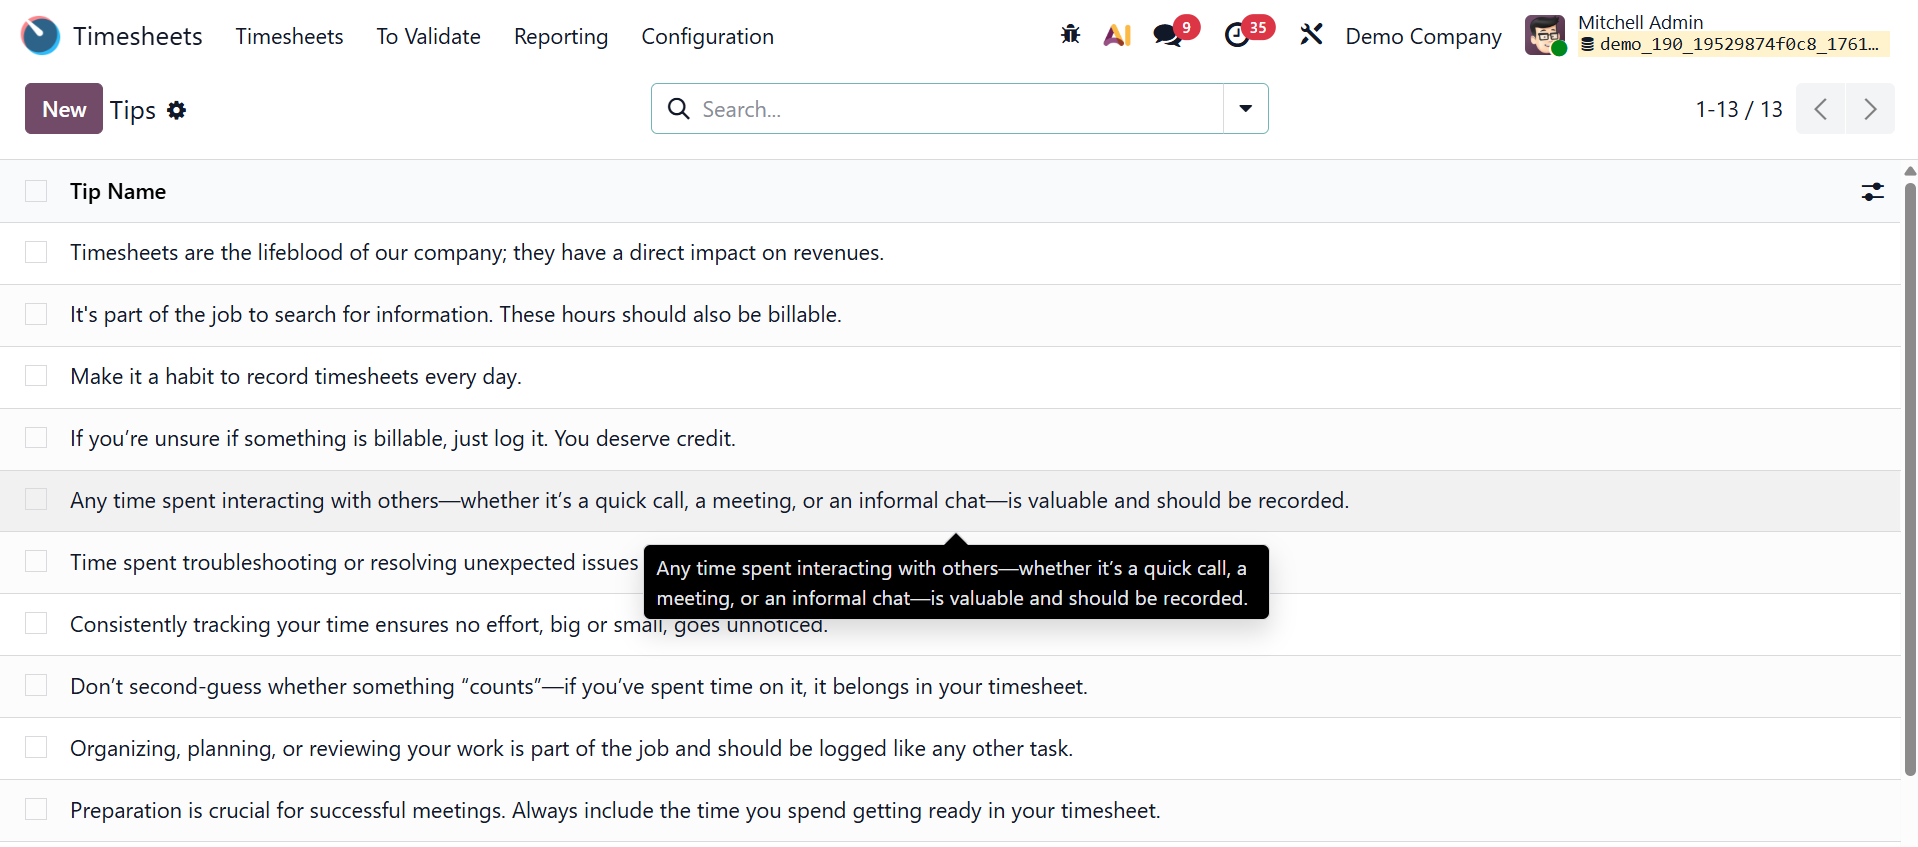
As seen in the screenshot above, you can easily add a new entry by selecting the "New" button, which opens a new editing line on the dashboard window. For improved user guidance, you can add descriptive language to a new tip entry. This encourages precise timekeeping and upholding uniform standards among teams.