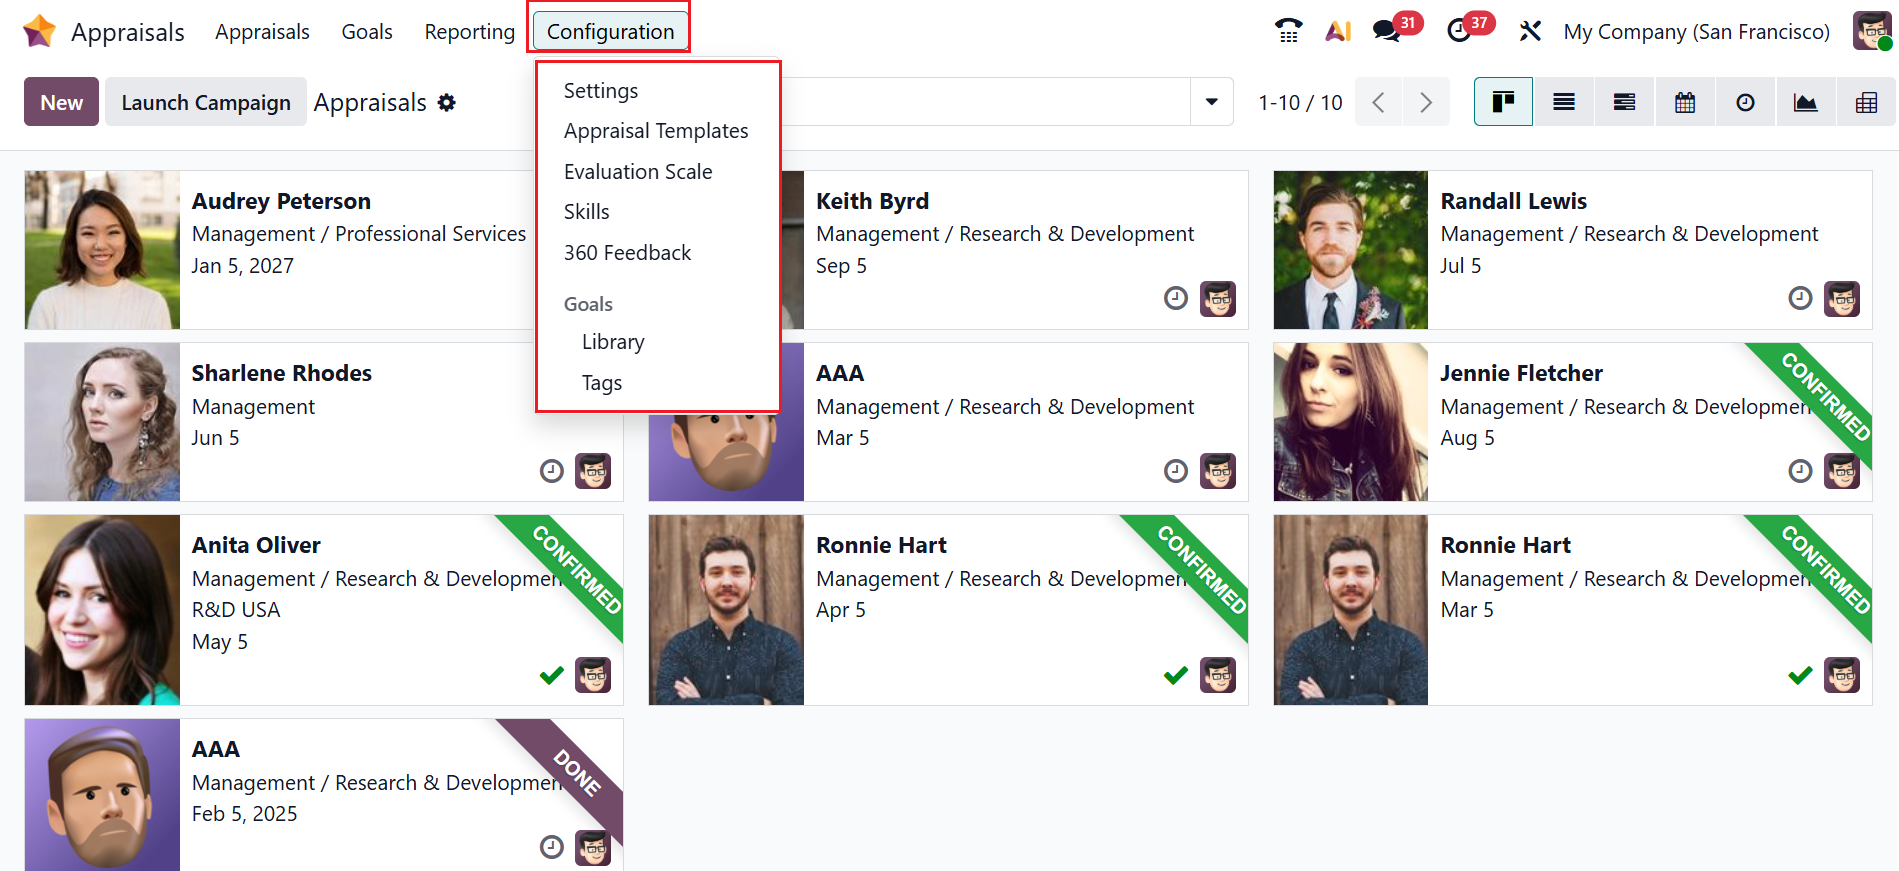
Configuration
In Odoo 19 Appraisals, the Configuration menu allows you to configure the appraisal process to meet your company’s needs. From there, you can configure Settings, Appraisal Templates, Evaluation Scale, Skills, 360 Feedback, Library, and Tags.
1.1 Settings:
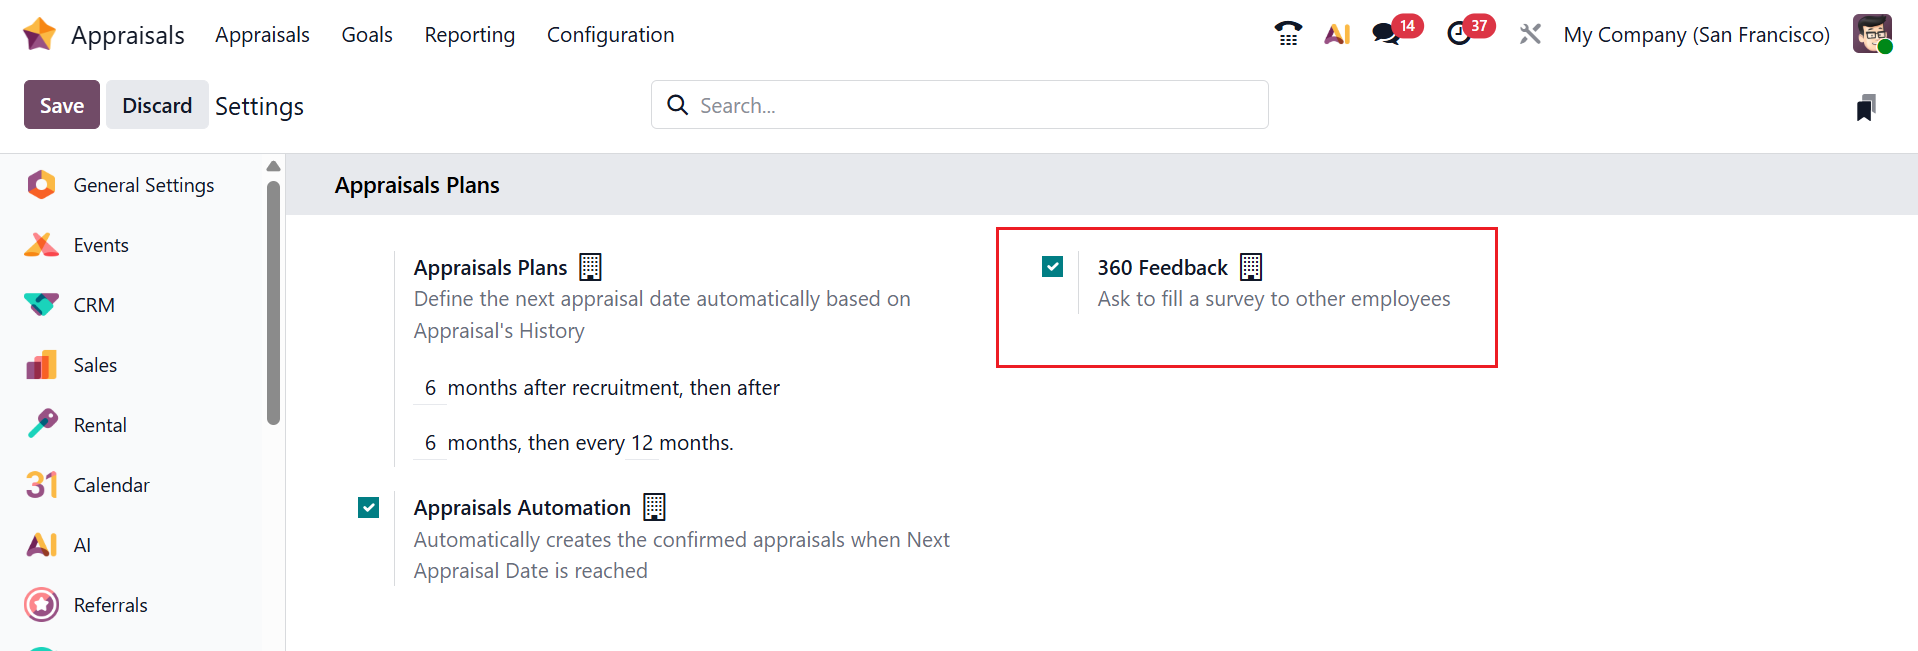
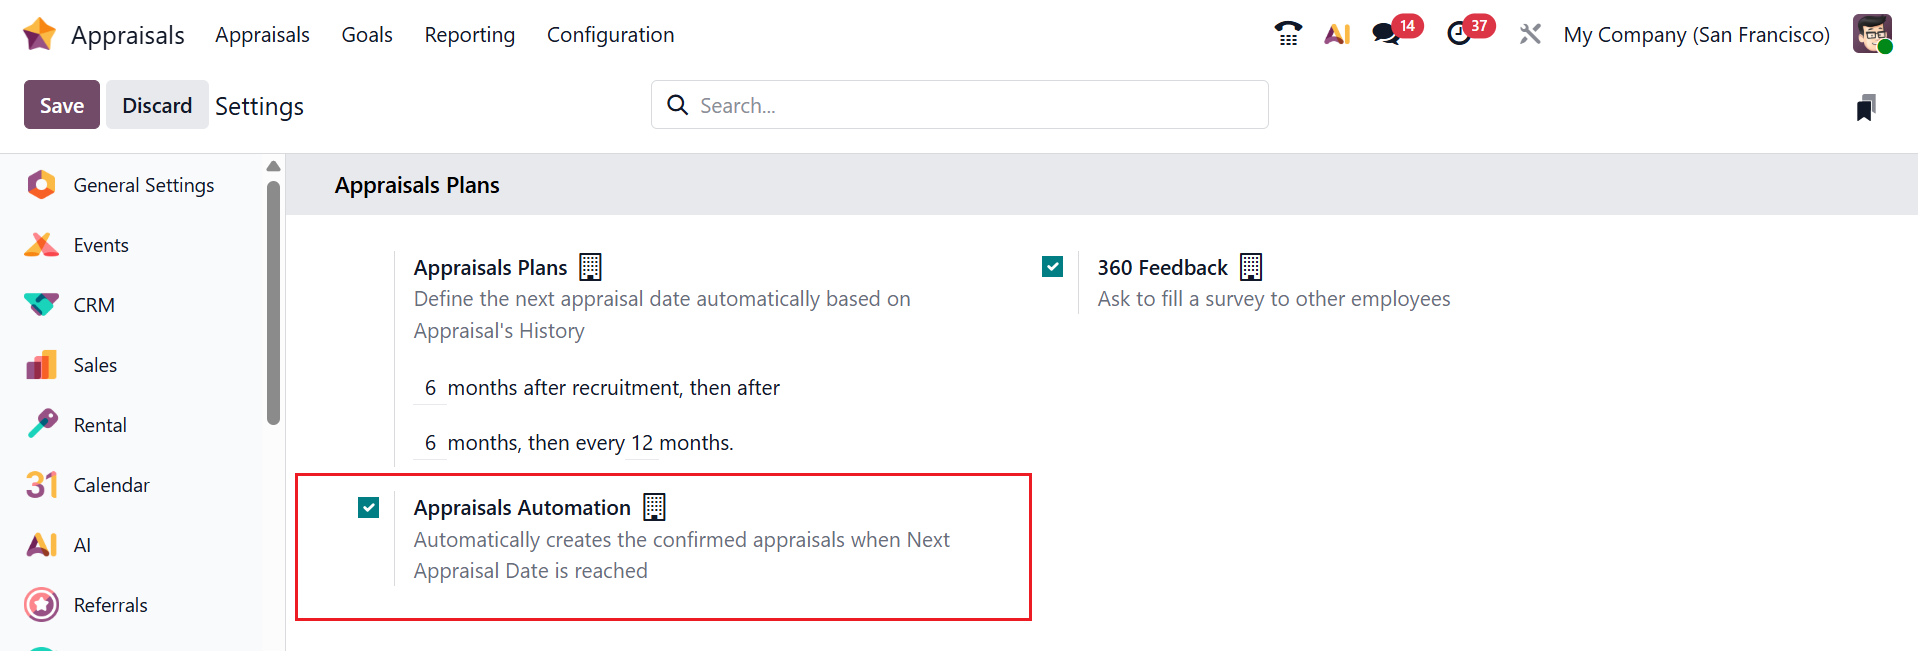
In Odoo 19 Appraisals, the Settings option allows administrators to enable and customize appraisal features for the company. These settings help tailor the appraisal process to match your organization’s performance review policy. Under the Appraisals Plans section, you can see three options: Appraisals Plans, 360 Feedback, and Appraisals Automation.
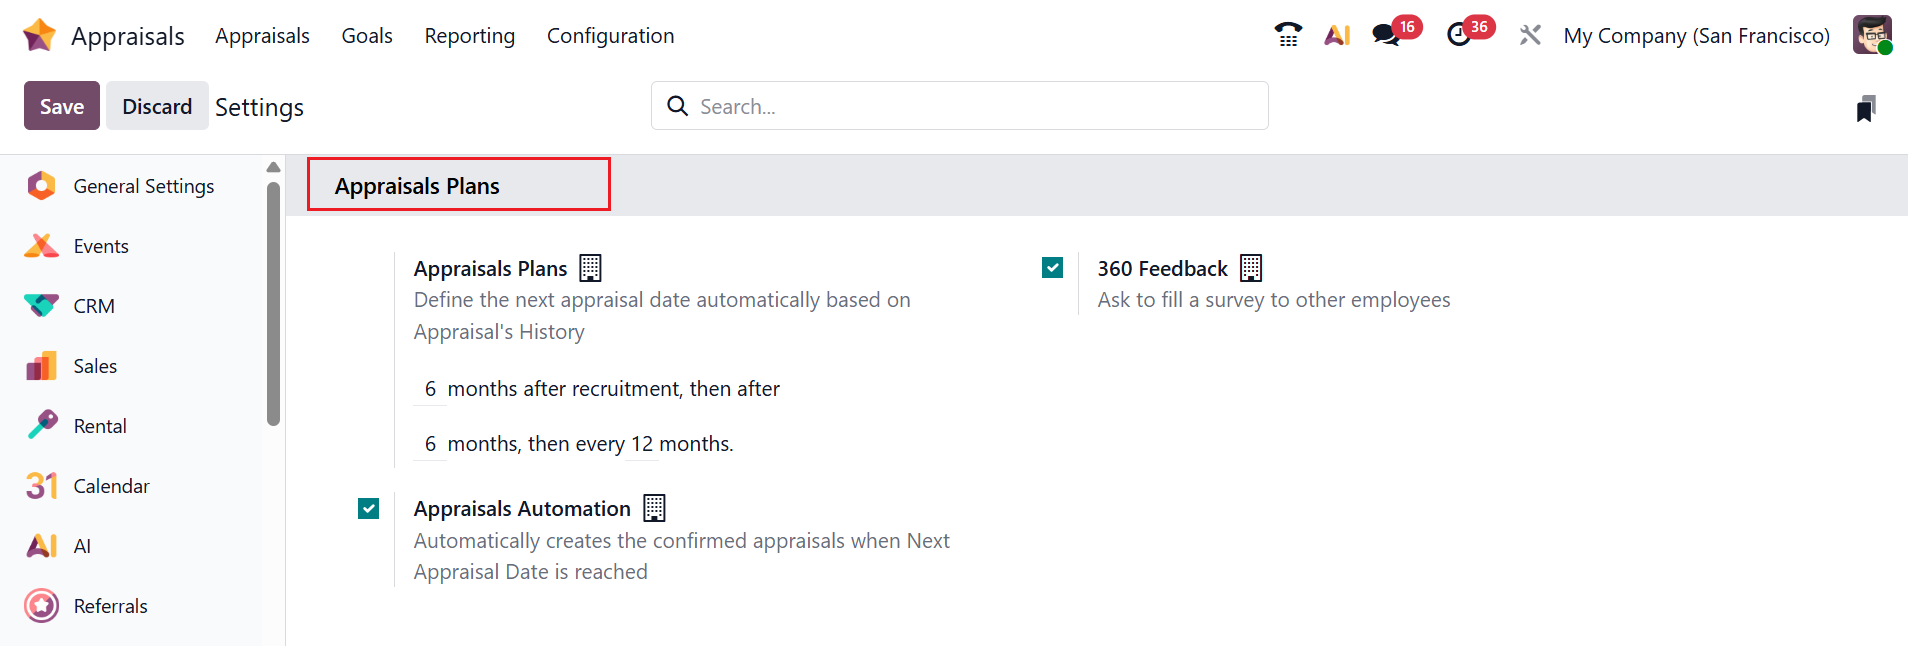
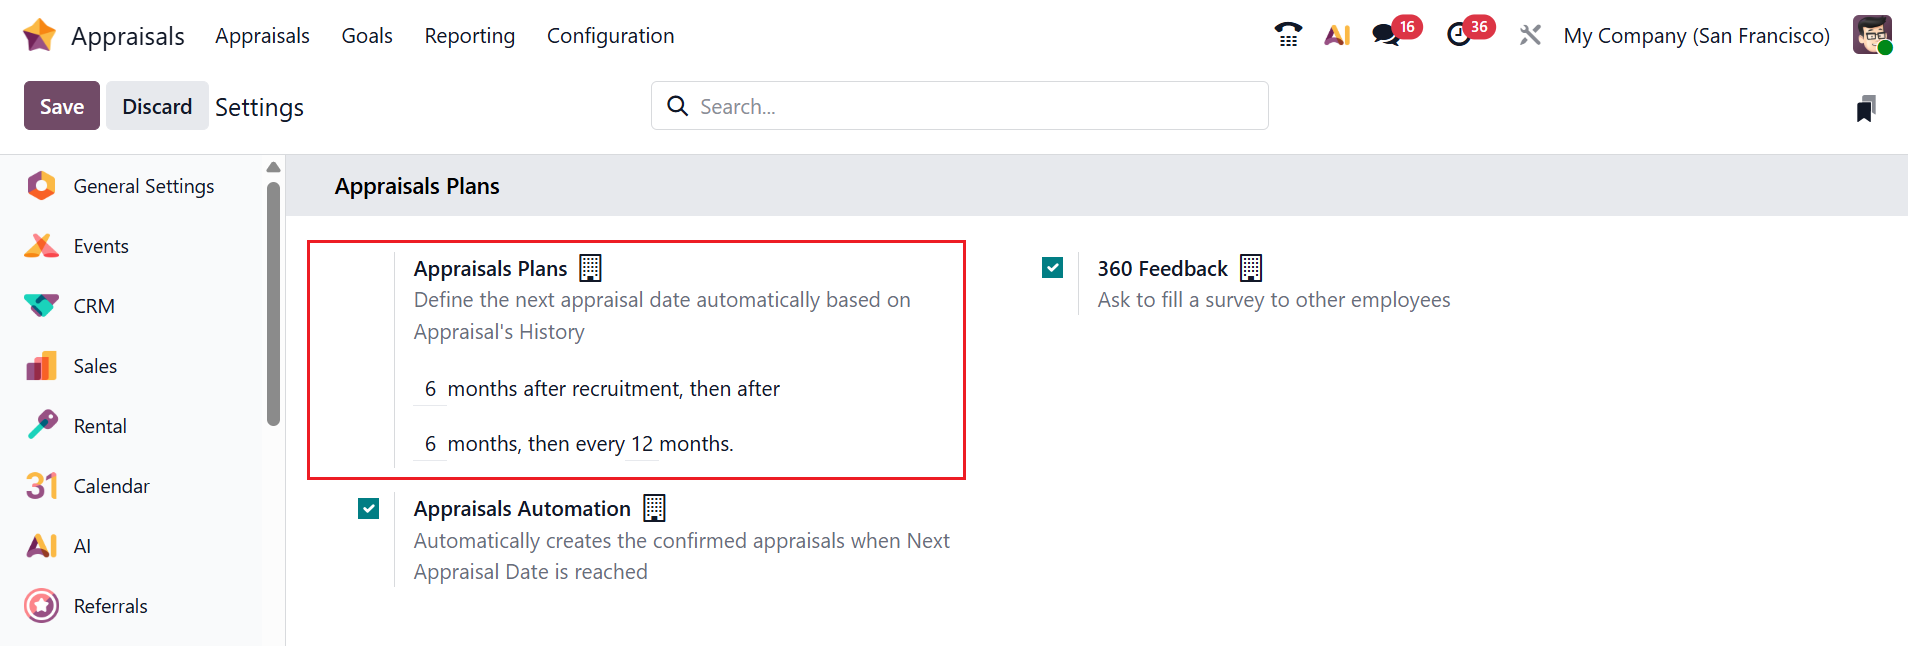
In Odoo 19 Appraisals, Appraisal Plans define how and when employee evaluations are automatically scheduled. You can configure plans to trigger appraisals at specific intervals (for example, every 6 months or annually) based on the employee’s hire date or last appraisal date. This helps HR teams standardize and automate the performance review cycle.
Enable the 360° Feedback option to allow feedback to be collected from multiple sources, such as managers, peers, and subordinates, rather than only from a direct supervisor. This provides a more comprehensive and balanced evaluation of an employee’s performance.
Enable the Appraisals Automation option to automatically schedule and create appraisal records based on predefined appraisal plans. This ensures timely performance reviews and reduces administrative workload for HR teams.
1.2 Appraisal Template:
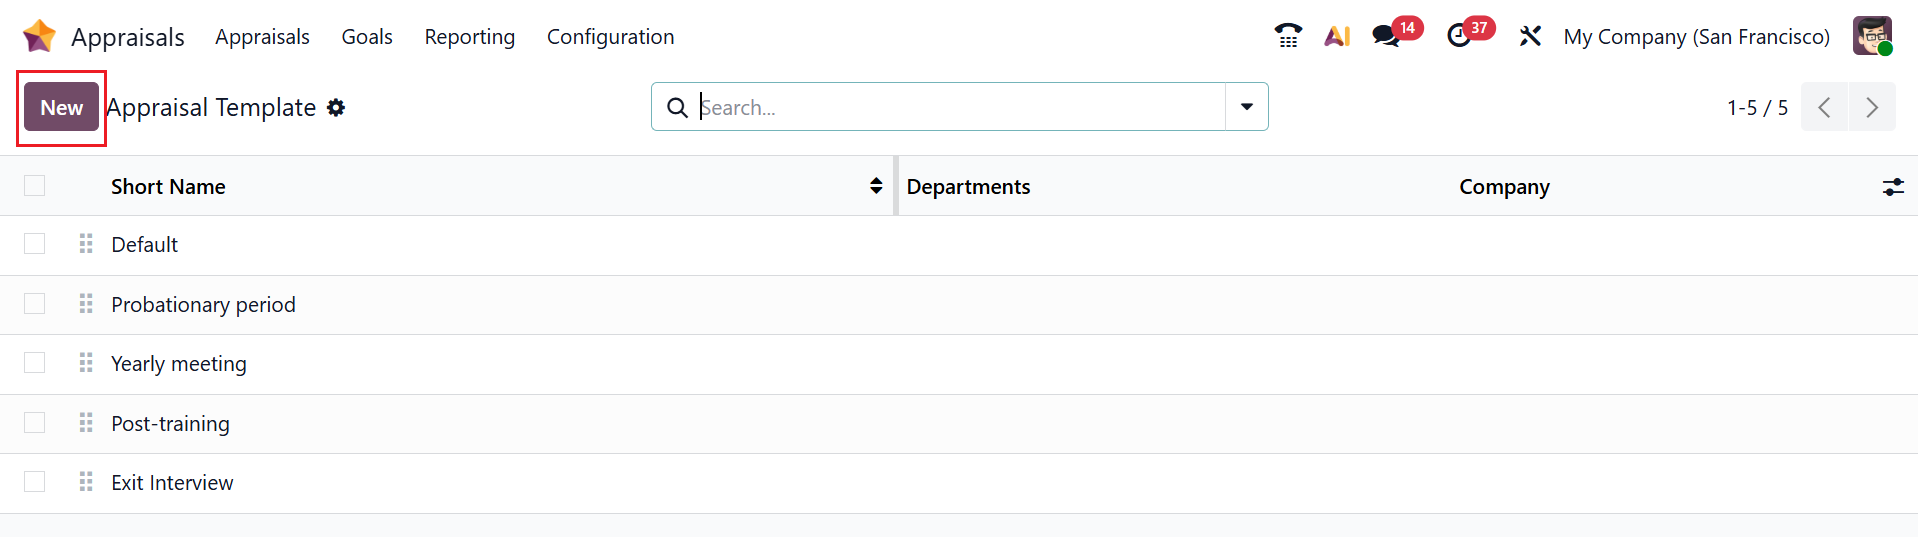
In Odoo 19, the Appraisal Template provides customizable templates that define evaluation forms used to assess employee performance. These features enable HR teams to standardize and automate performance reviews throughout the organization. Here, you can see a list of appraisal templates with details such as Short Name, Description, and Company. To create a new appraisal template, click the New button.
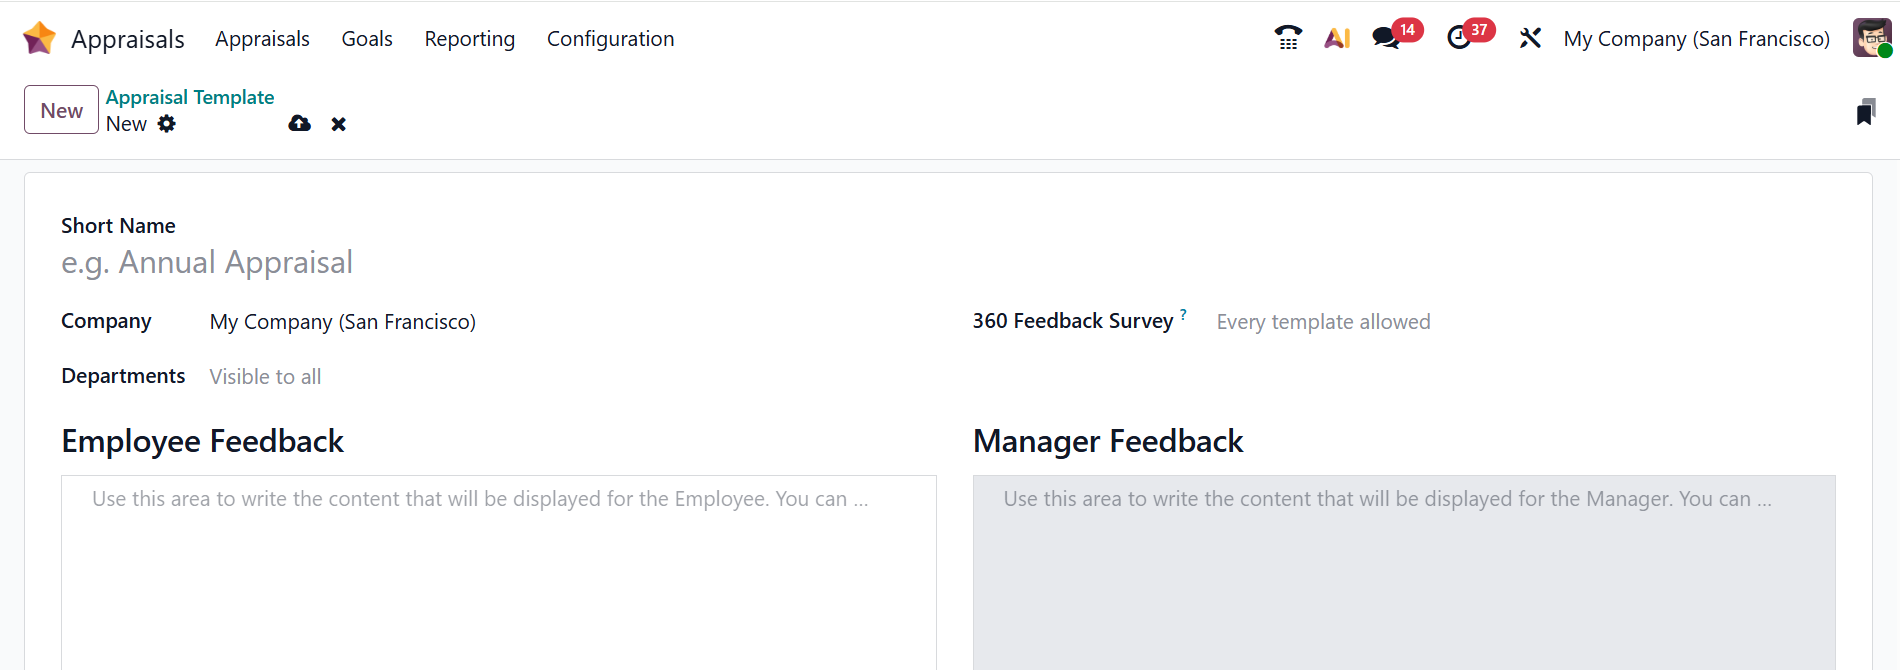
Here, add the details for the new appraisal template, such as Short Name, Company, Departments, 360 Feedback Survey, Employee Feedback, and Manager Feedback
1.3 Evaluation Scale:
In the Odoo 19 Appraisal, the Evaluation Scale defines the rating levels used to assess employee performance. It helps standardize scoring across appraisals by assigning clear values and descriptions to each performance level. Here, you can see a list of the evaluation scale with details such as Name and Company. To create a new evaluation scale, click on the New button as shown below. A new line will appear to add name and company details. Then, save it.

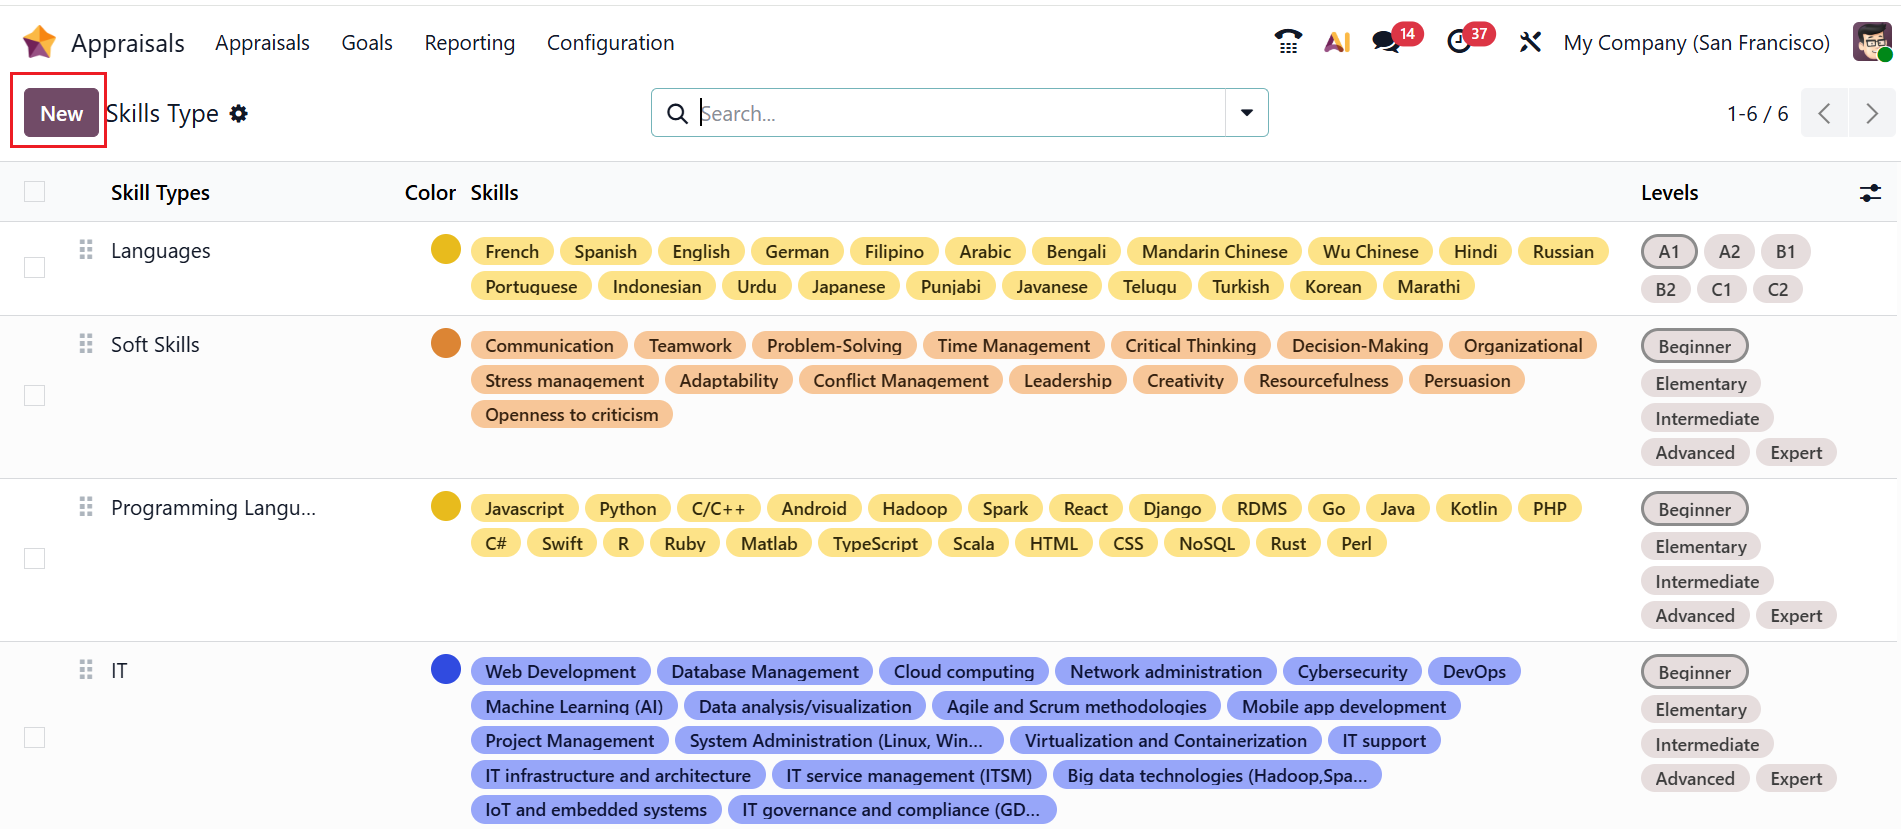
1.4 Skills Type:
In Odoo 19 Appraisals, Skill Types are categories used to group employees for evaluation based on their skills. They help to structure appraisal forms by organizing individual skills under broader competency areas. This makes performance reviews clearer, more consistent, and easier to analyze across employees and departments. Here, you can see a list of skills with details such as Skill Types, Color, Skills, and Levels. Click the New button to create a new skill type.
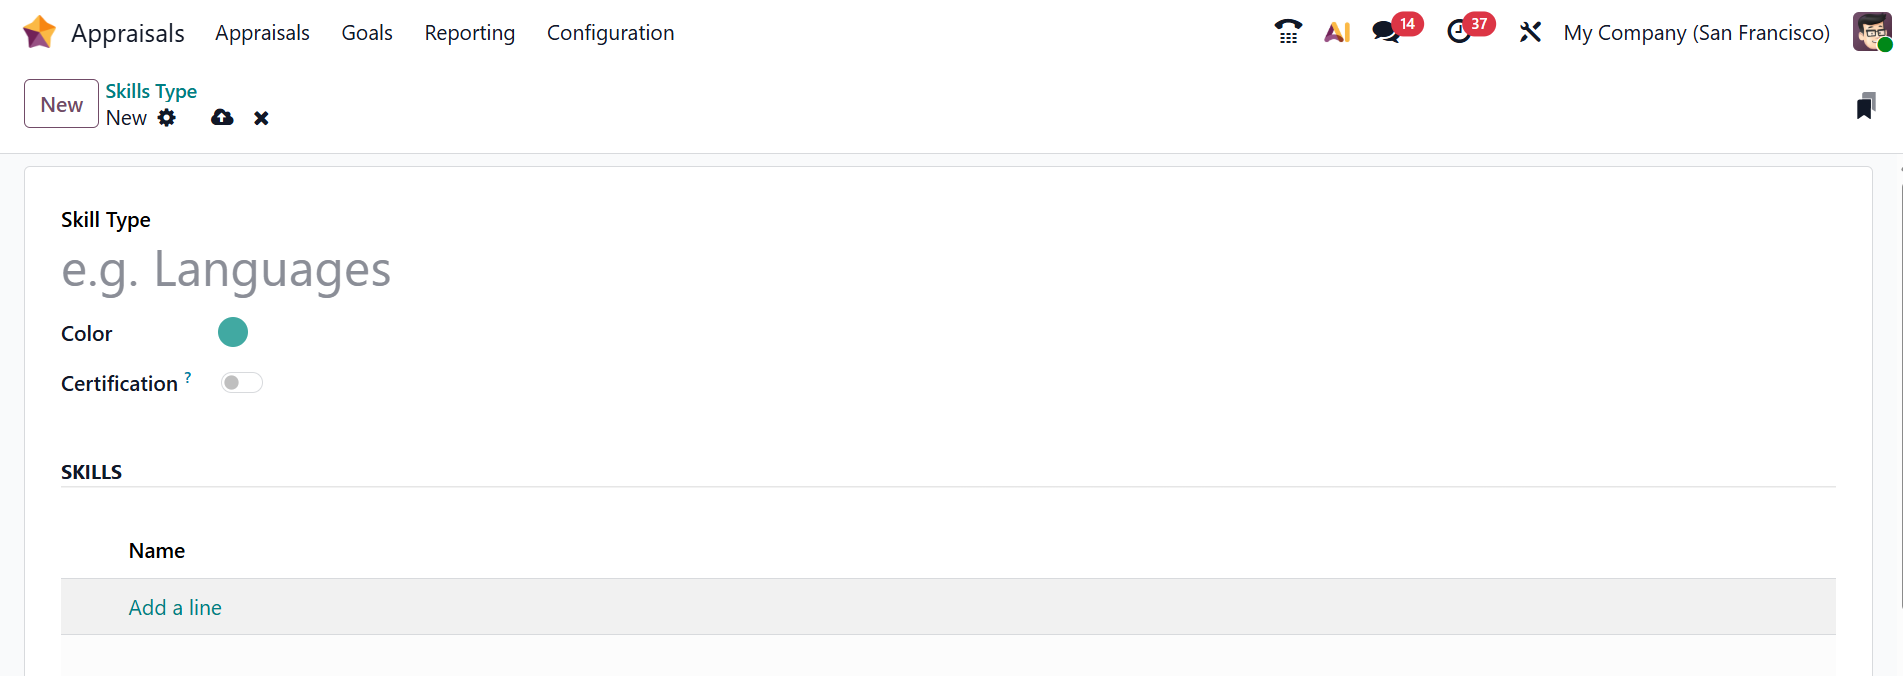
Here, add a name for the skill type under the Skill Type and select a color. Enable the Certifications option for the skill type. Under the Skills section, you can add skills by clicking on the Add a line button.
1.5 360 Feedback:
In Odoo 19 Appraisals, 360 Feedback is a performance evaluation method where feedback about an employee is collected from multiple sources, such as managers, peers, subordinates, and sometimes the employee themselves. It offers a comprehensive view of performance by evaluating skills, behaviors, and competencies from multiple perspectives. This approach helps identify strengths, improvement areas, and supports more balanced and objective appraisals.
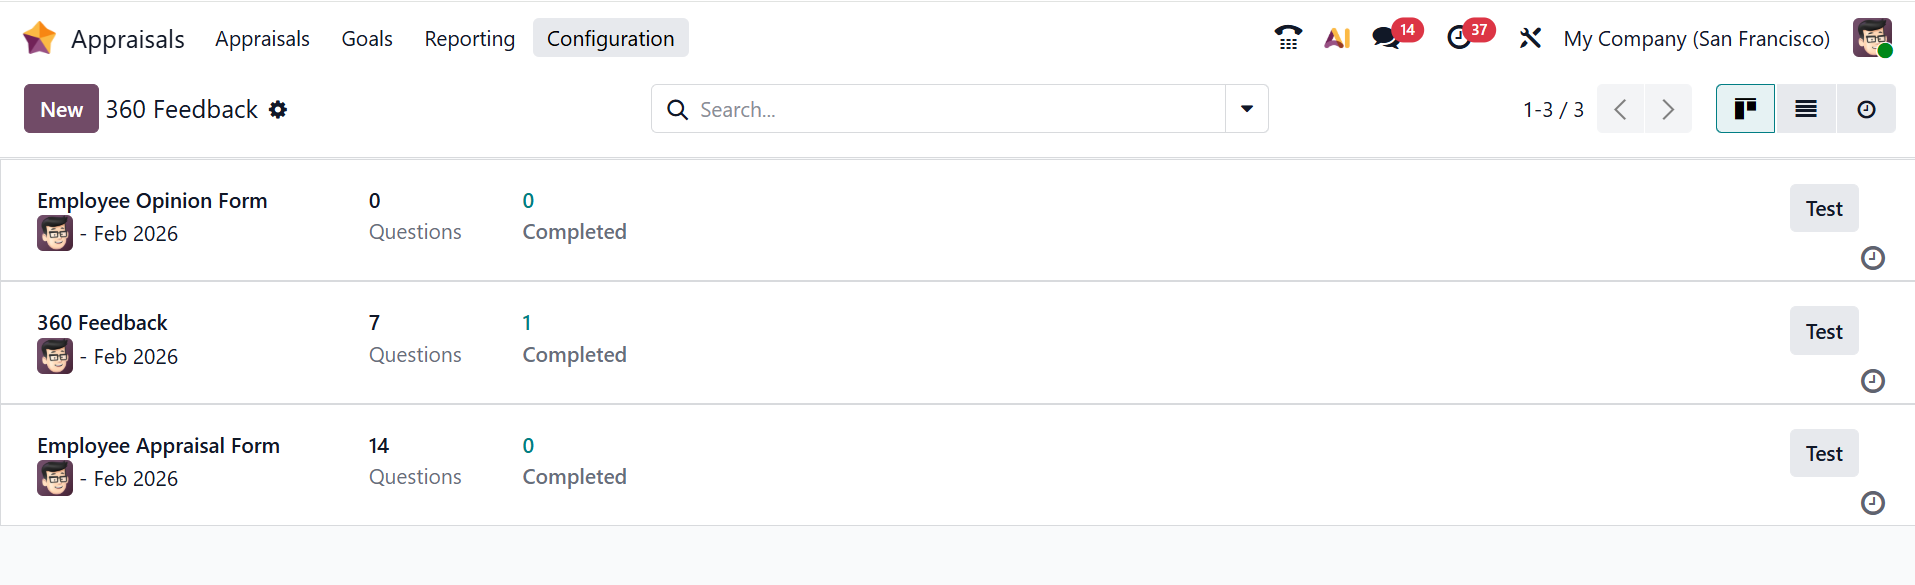
Here, you can see a list of surveys with details such as their average duration, questions, and completed counts. The Surveys window can also be used to plan activities, create tests, share surveys, start live sessions, and view results. To add a new 360 Feedback survey, click the New button.
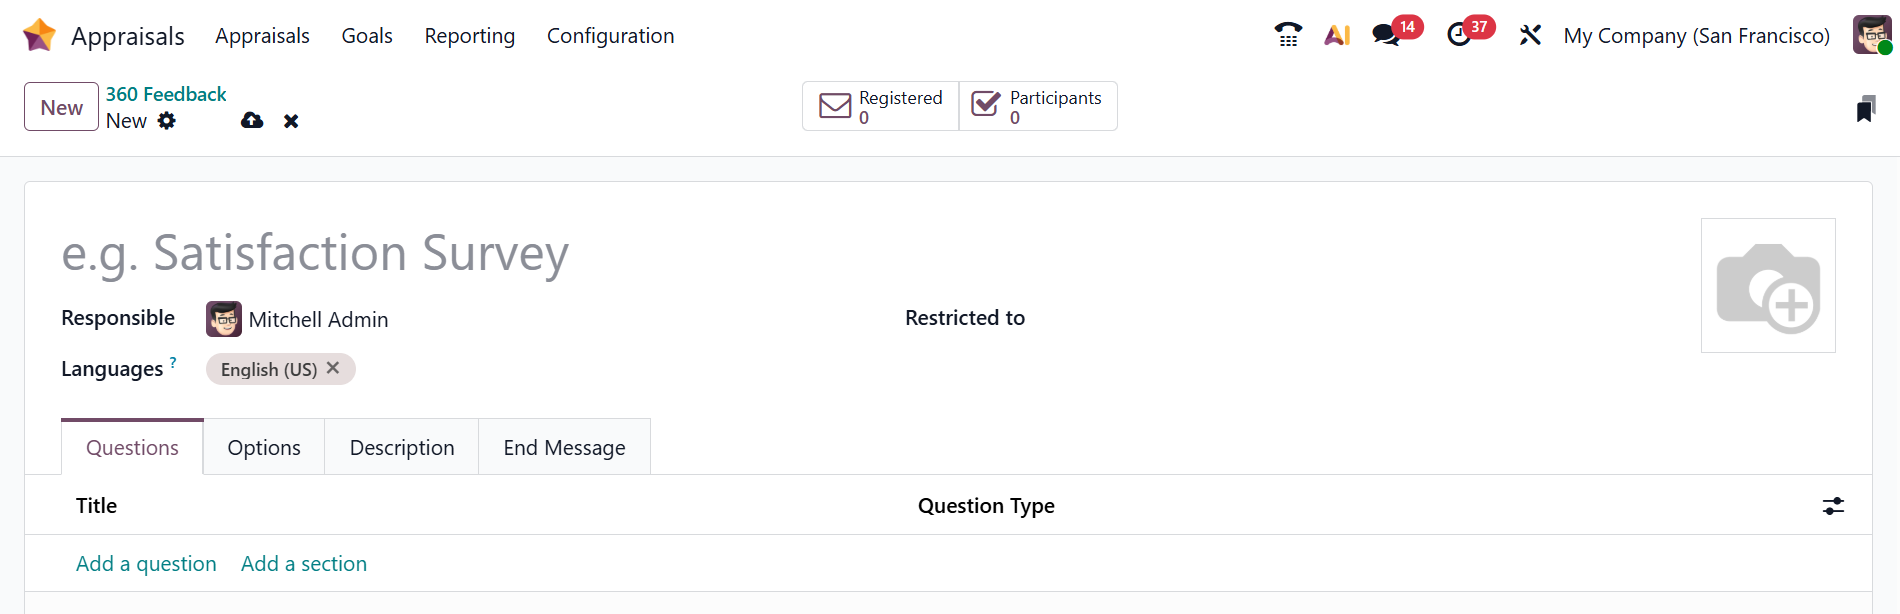
Enter a name in the Survey Name field. In the Responsible field, select an employee responsible for the survey. You can also restrict any particular person from the survey in the Restricted to field. Under the Questions tab, click on the Add a question button to add questions to the survey. A new pop-up window will appear, allowing you to enter the question and choose the question type. Under the Options tab, you can manage the questions and participants. Enter the survey details under the Description tab. Under the End Message tab, add a message that will display when the survey is completed.
1.6 Library:
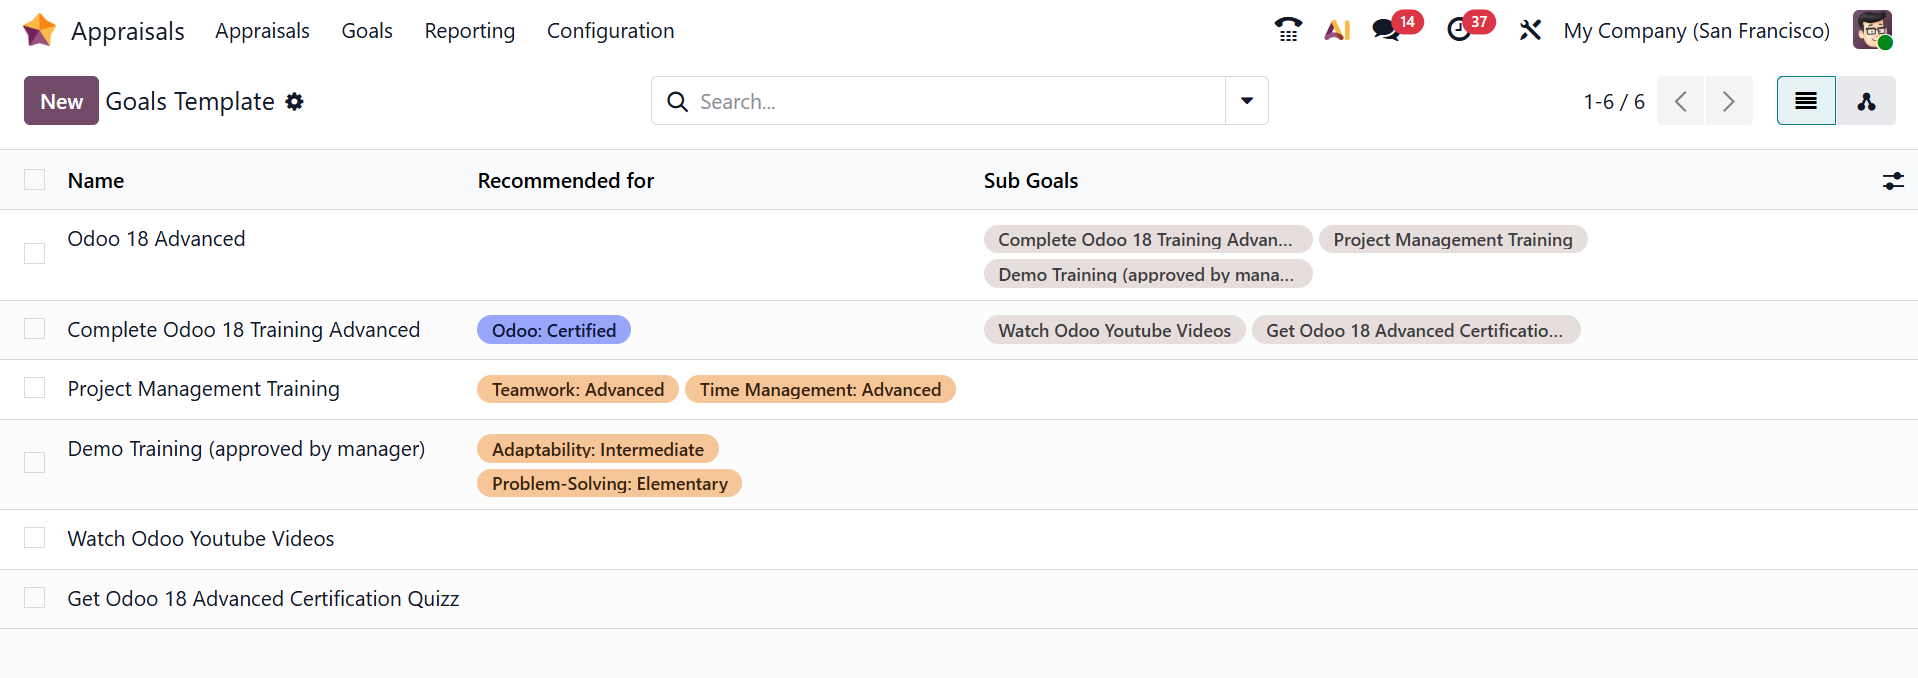
In the Odoo 19 Appraisals, the Library dashboard shows a list of goal templates that allow HR managers to create predefined performance objectives that can be reused across employees or departments. These templates help standardize goal setting, ensure alignment with company objectives, and make it easier to assign, track, and evaluate employee performance consistently. Here, you can see the details of goal templates, such as Name, Recommended for, and Sub Goals. Click the New button to create a new goal template.
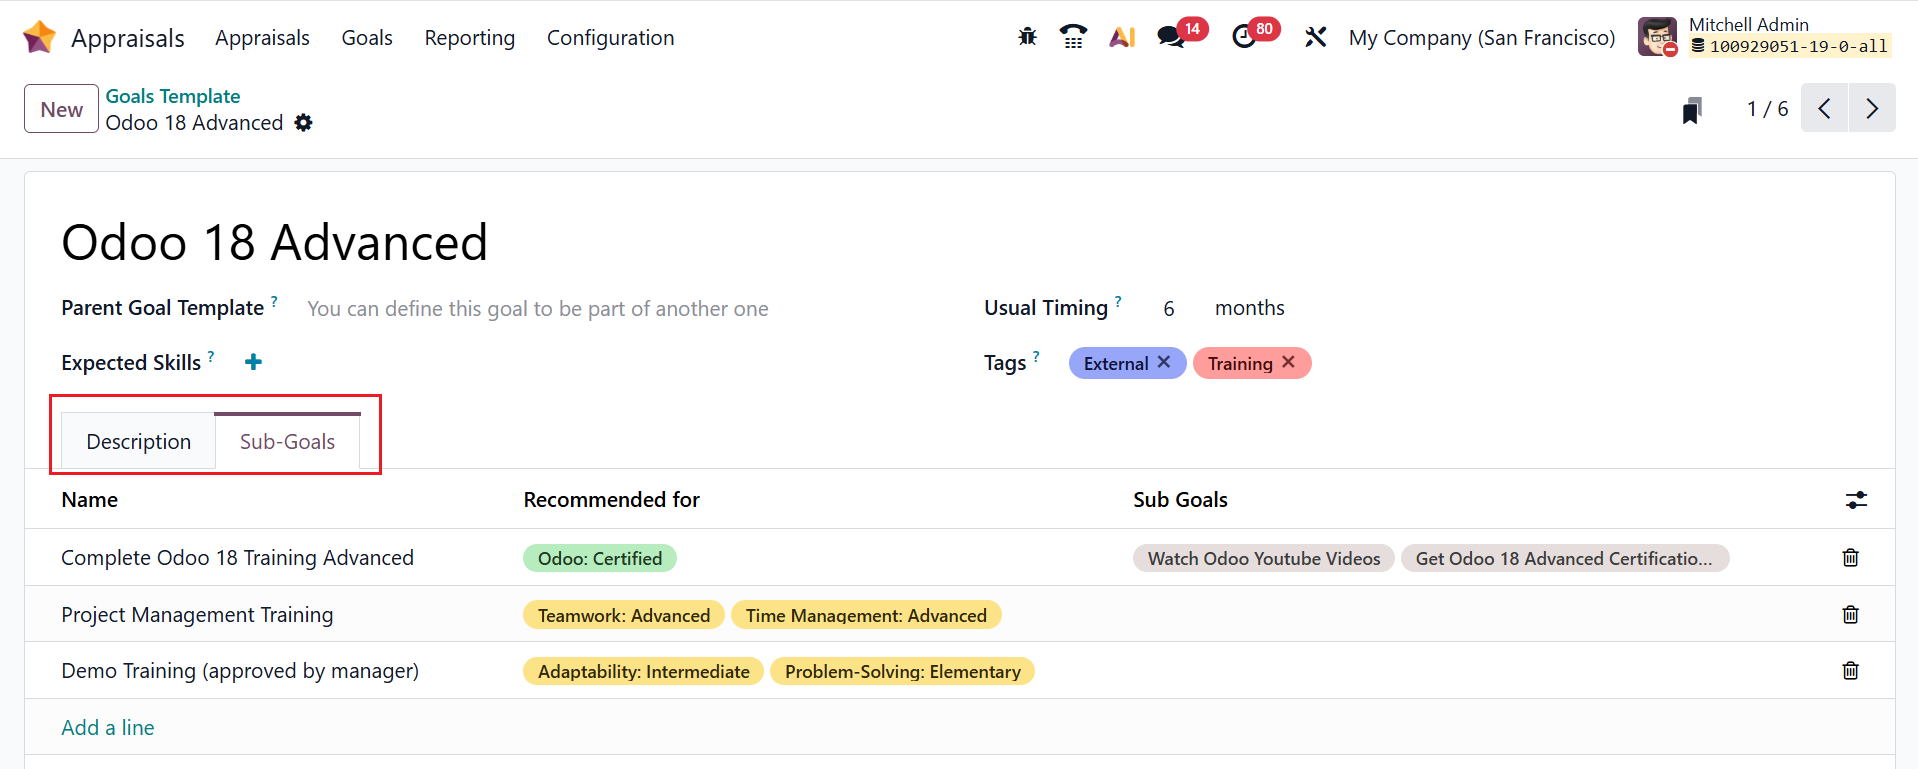
Here, add a name for the goal template and select a parent goal template. In the Usual Timing field, select the average timing to complete the goal. In the Expected Skills field, select the skills recommended for the goal. You can add appropriate tags for the goal template. Under the Description tab, add the information about the goal. Under the Sub-Goal tab, click on the Add a line button to add sub-goal templates to the goal.
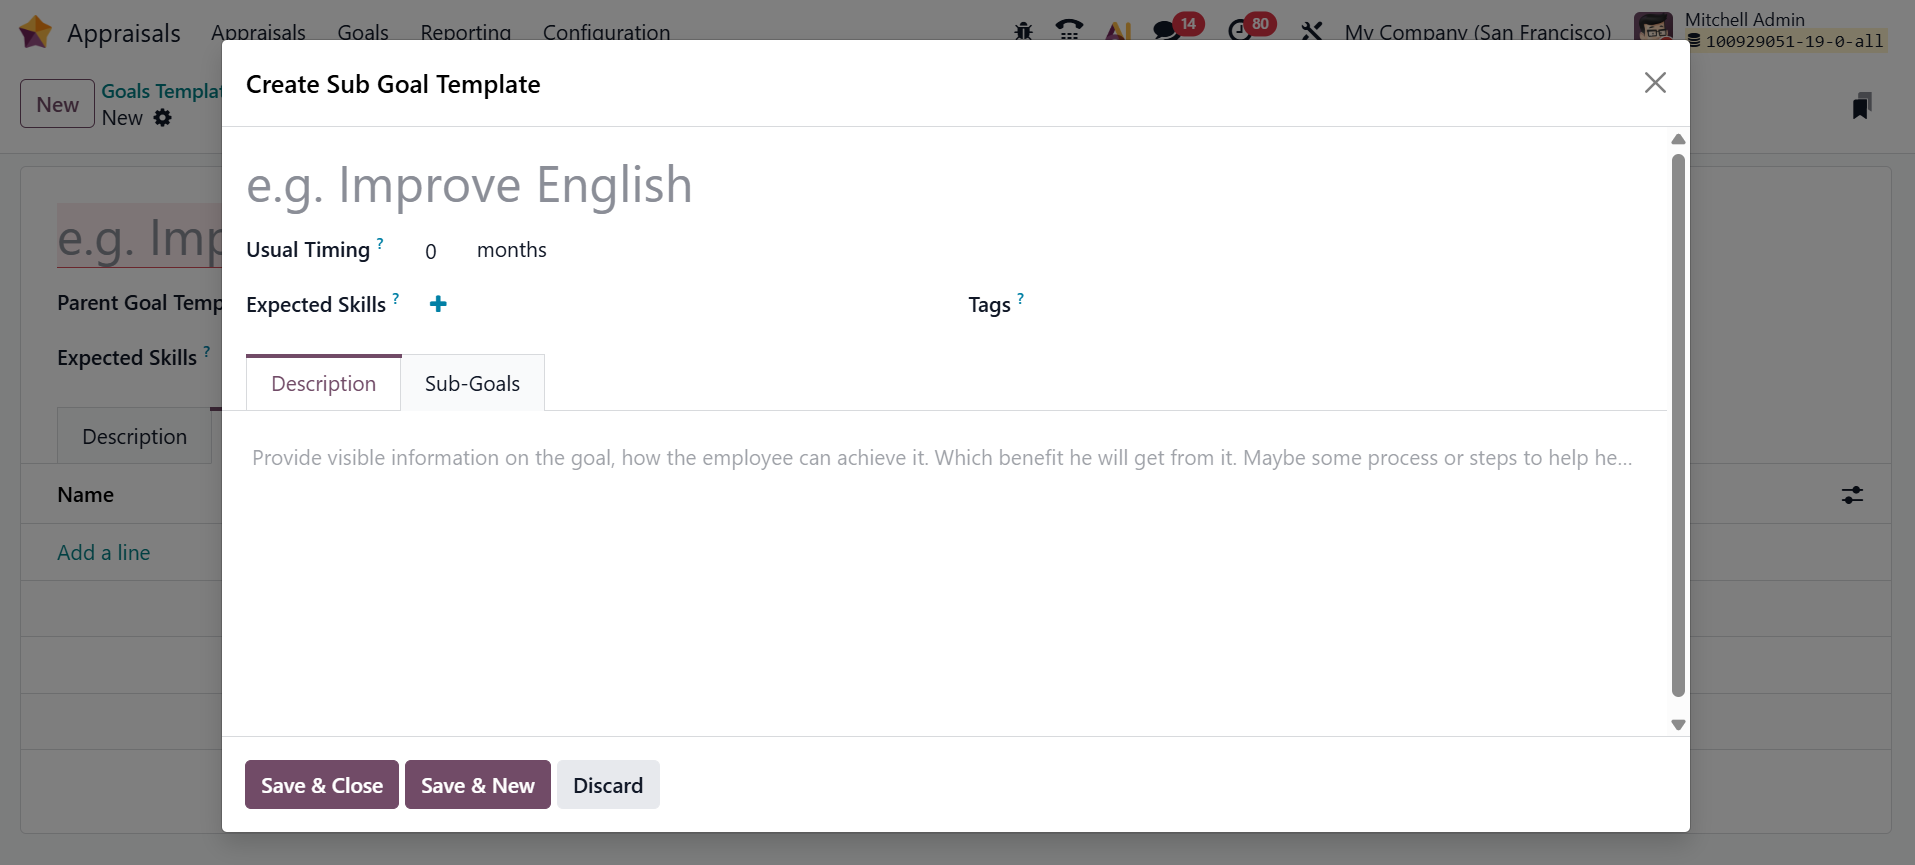
A new pop-up window will appear where you can add the details of the sub-goal template, such as Name, Usual Timing, Expected Skills, Description, and Sub-Goals, as shown below:
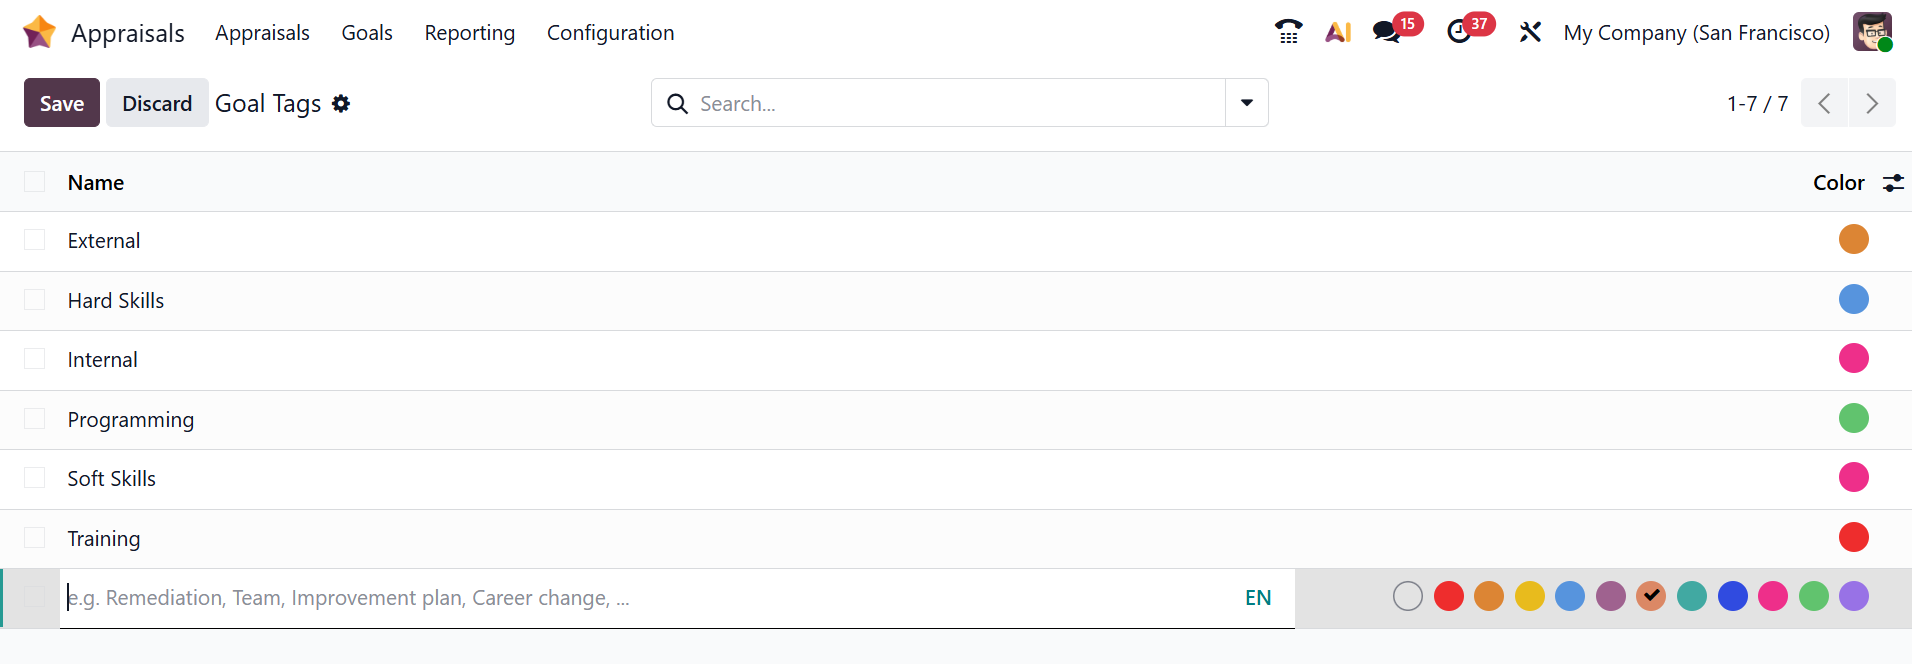
1.7 Tags:
In Odoo 19 Appraisals, Goal Tags are used to categorize and organize employee goals based on specific themes such as skills, departments, or performance areas. They make it easier to filter, track, and analyze goals across different employees, ensuring better alignment and structured performance management. To add a new tag, click on the New button, and a new line will appear where you can add the name and color for the tag and save it.