Efficient coordination and effective time utilization play a critical role in the success of any organization. In Odoo 19 Enterprise, the Calendar module serves as a centralized platform for organizing and managing both internal and external events. It enables users to easily schedule meetings, track activities, and collaborate across teams within a single digital workspace.
The Calendar module seamlessly connects with other Odoo applications such as CRM, Projects, and Appointments, creating an integrated workflow that enhances overall productivity. From client interactions and team meetings to performance evaluations and project follow-ups, all events can be organized and monitored from one unified system.
Upon accessing the Calendar module, users are presented with an intuitive dashboard that displays a clear overview of upcoming meetings and scheduled events, making planning and coordination more efficient and streamlined.
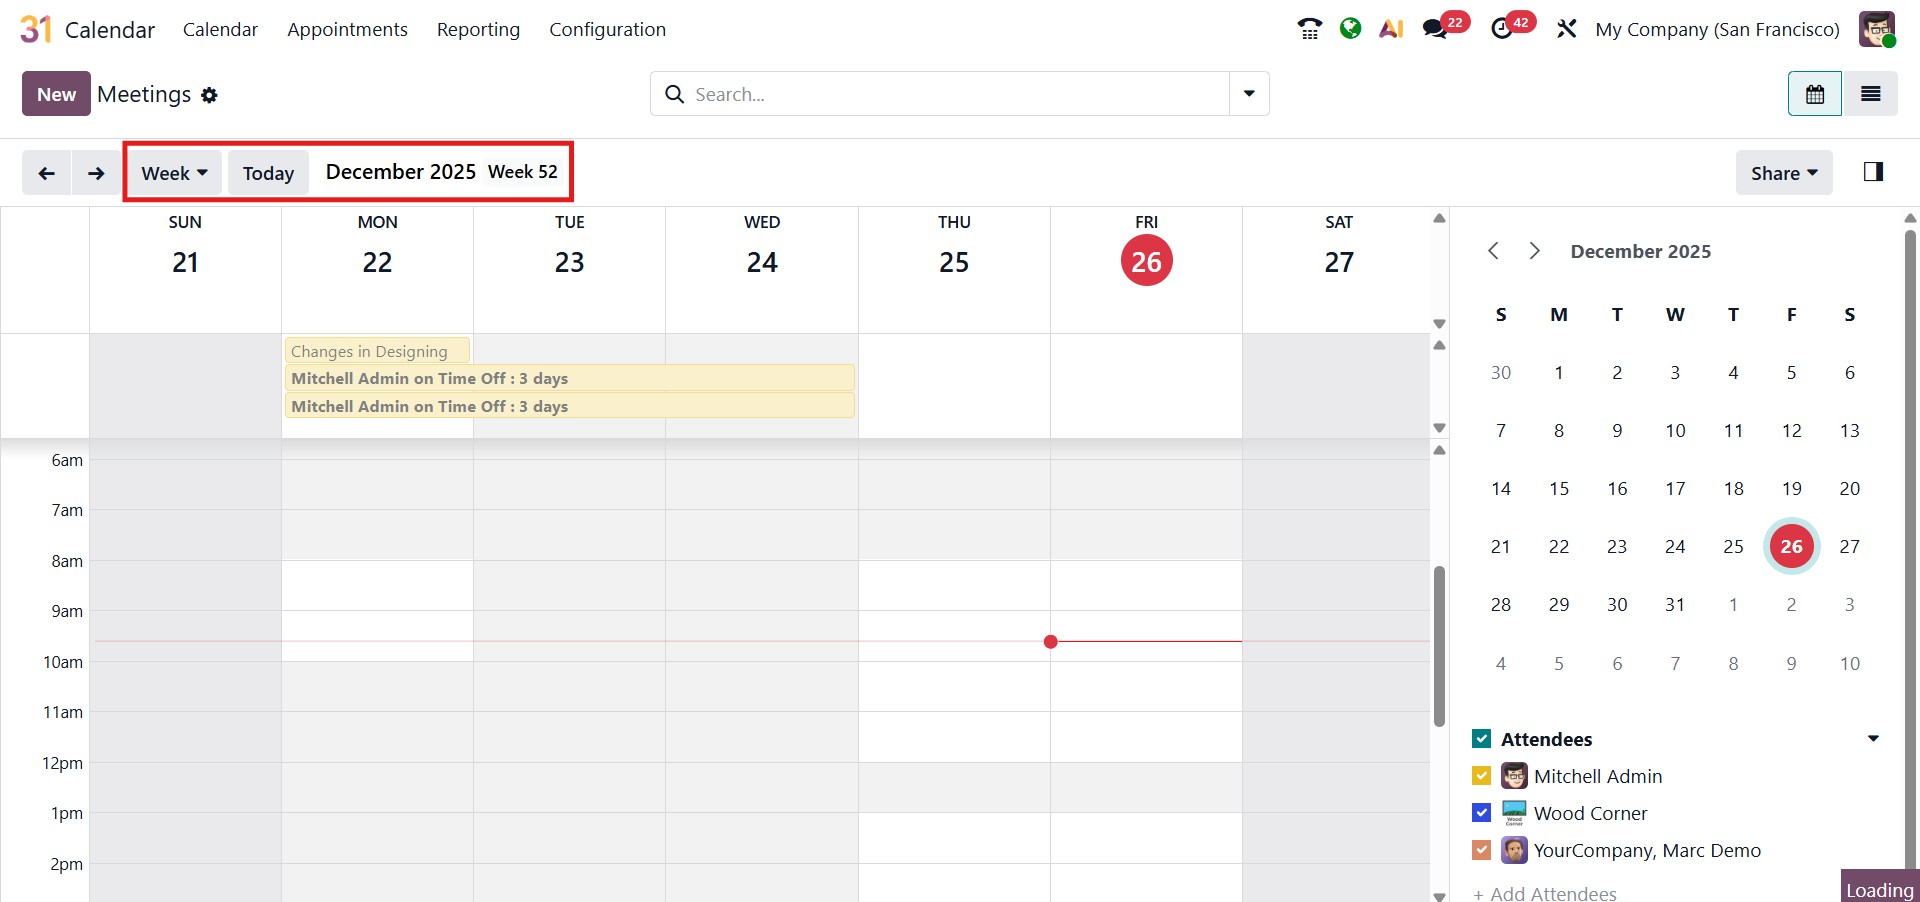
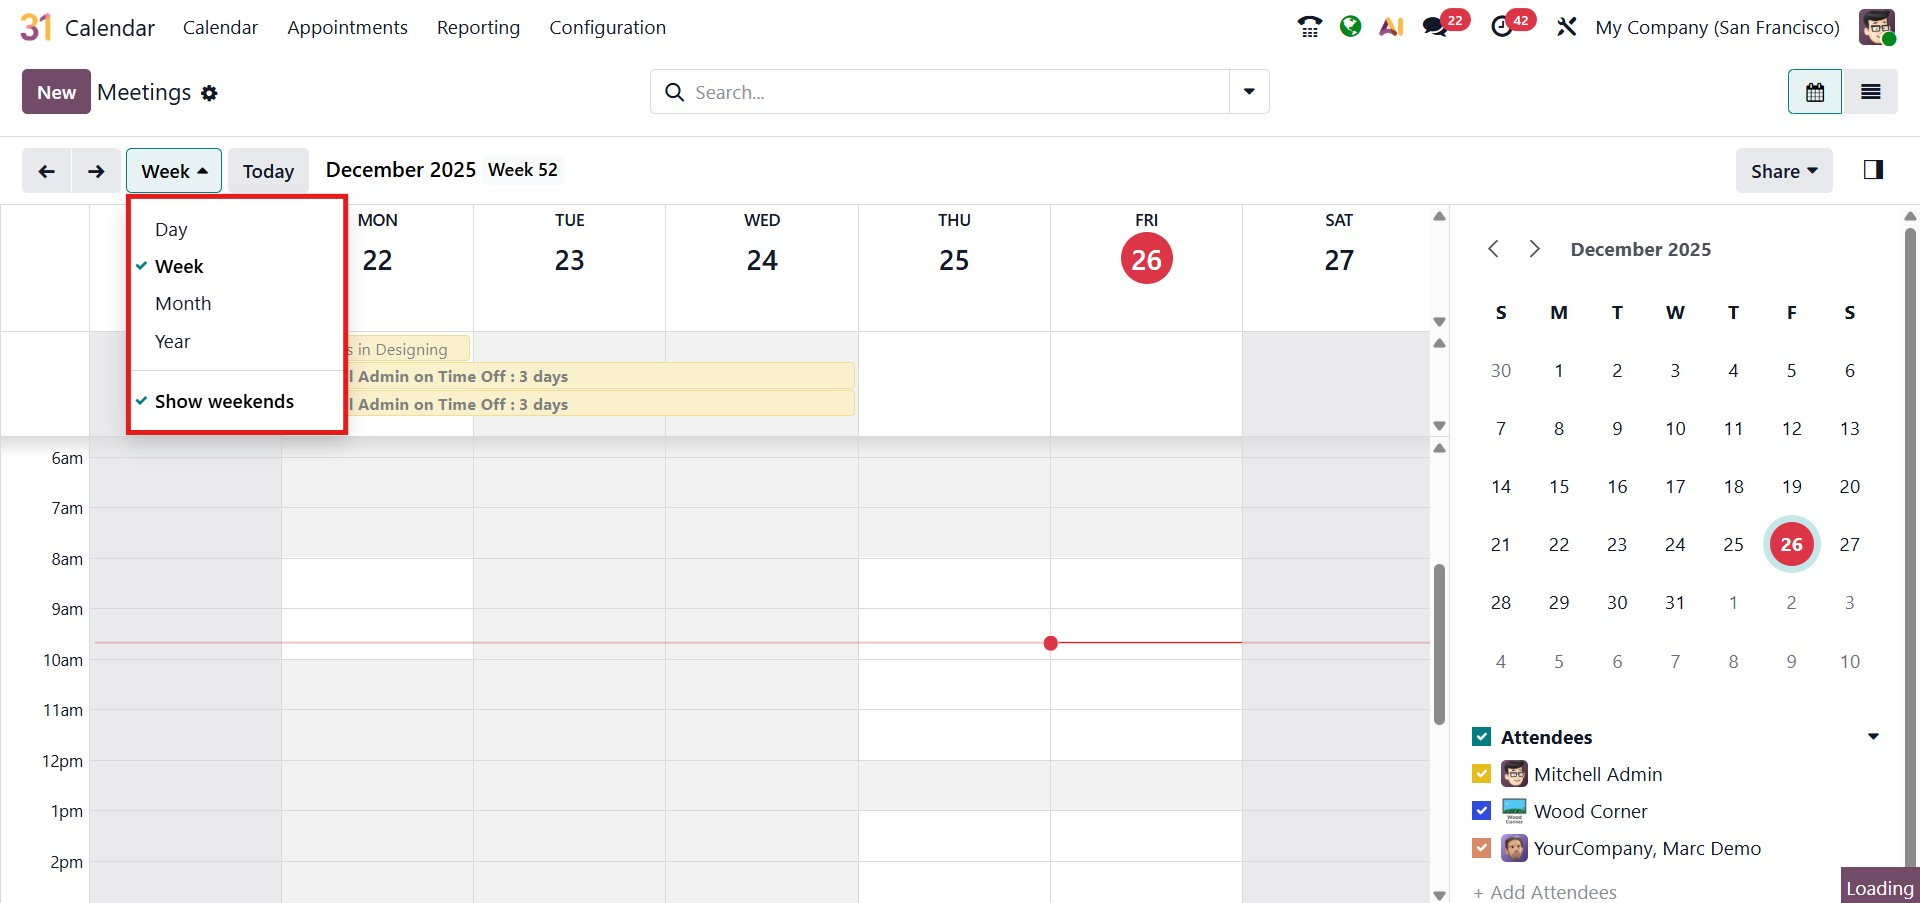
At the top of the interface, users can switch between Day, Week, Month, and Year views to display the calendar in the format that best suits their planning needs. Additionally, a Show Weekends option is available, allowing users to include or hide weekends according to their preferences.
You can navigate through different dates using the arrow icons located on either side of the calendar header. To instantly jump back to the current date, simply select the today button.
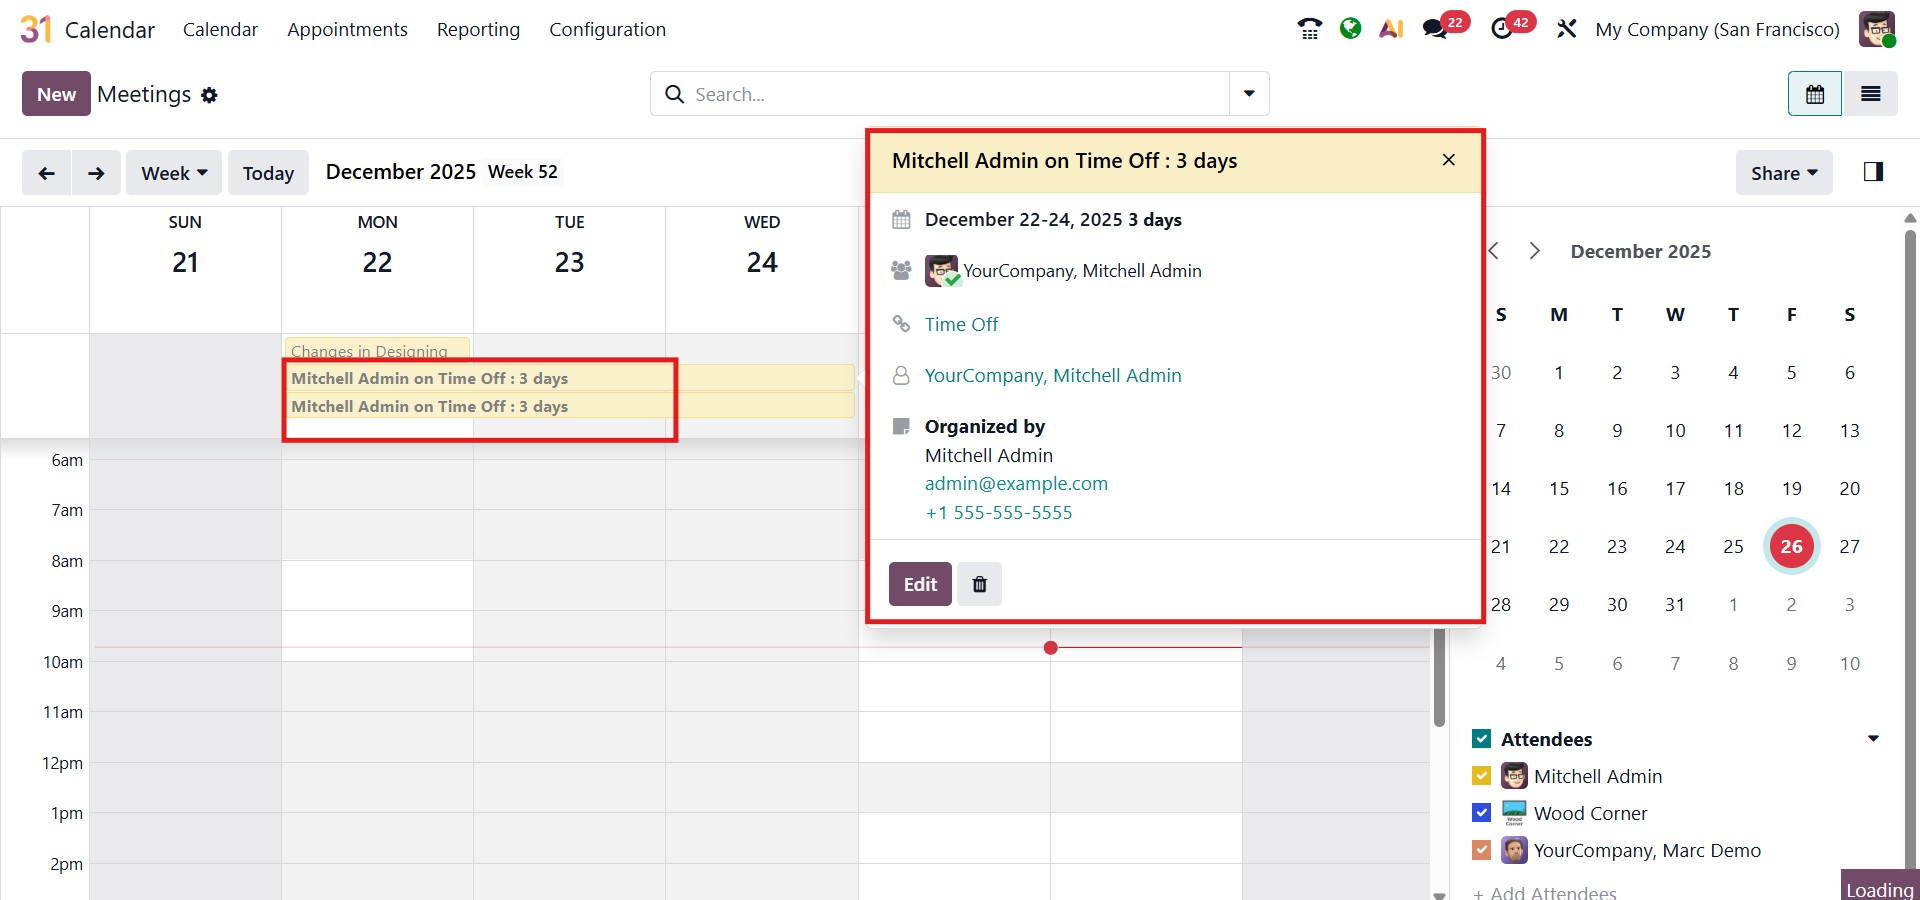
All scheduled meetings appear on the calendar as color-coded blocks. Selecting a meeting opens a brief overview window displaying its details, while clicking on an empty time slot or date allows you to quickly schedule a new meeting.
1. Creating a New Meeting
To create a meeting, click on the preferred date or time slot within the calendar view. This opens the New Event pop-up window, where you can start by adding a meaningful title for the event. You can then specify the start and end dates, and enable the All Day option if the event lasts the entire day.
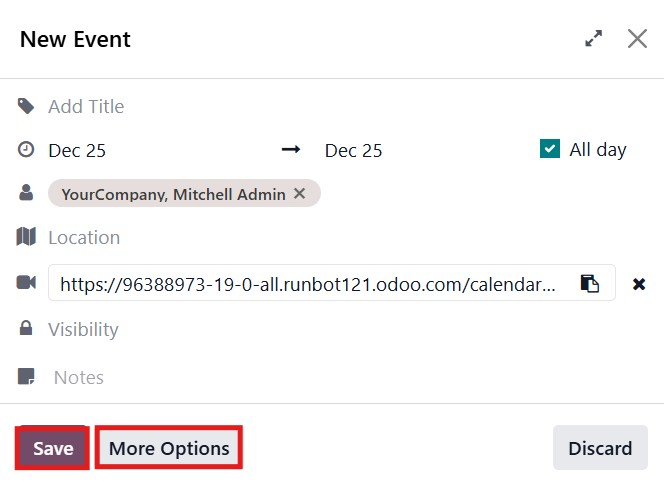
Participants can be added directly by selecting users from the system, making it easy to invite internal attendees. The form also allows you to define the meeting location or include an online meeting link for virtual sessions. Additional options, such as visibility settings, let you choose to whom it should be visible as Public, Private, or Internal users, and notes can be configured as needed. Once all details are entered, click Save to schedule the event, or choose More Options to access advanced settings.
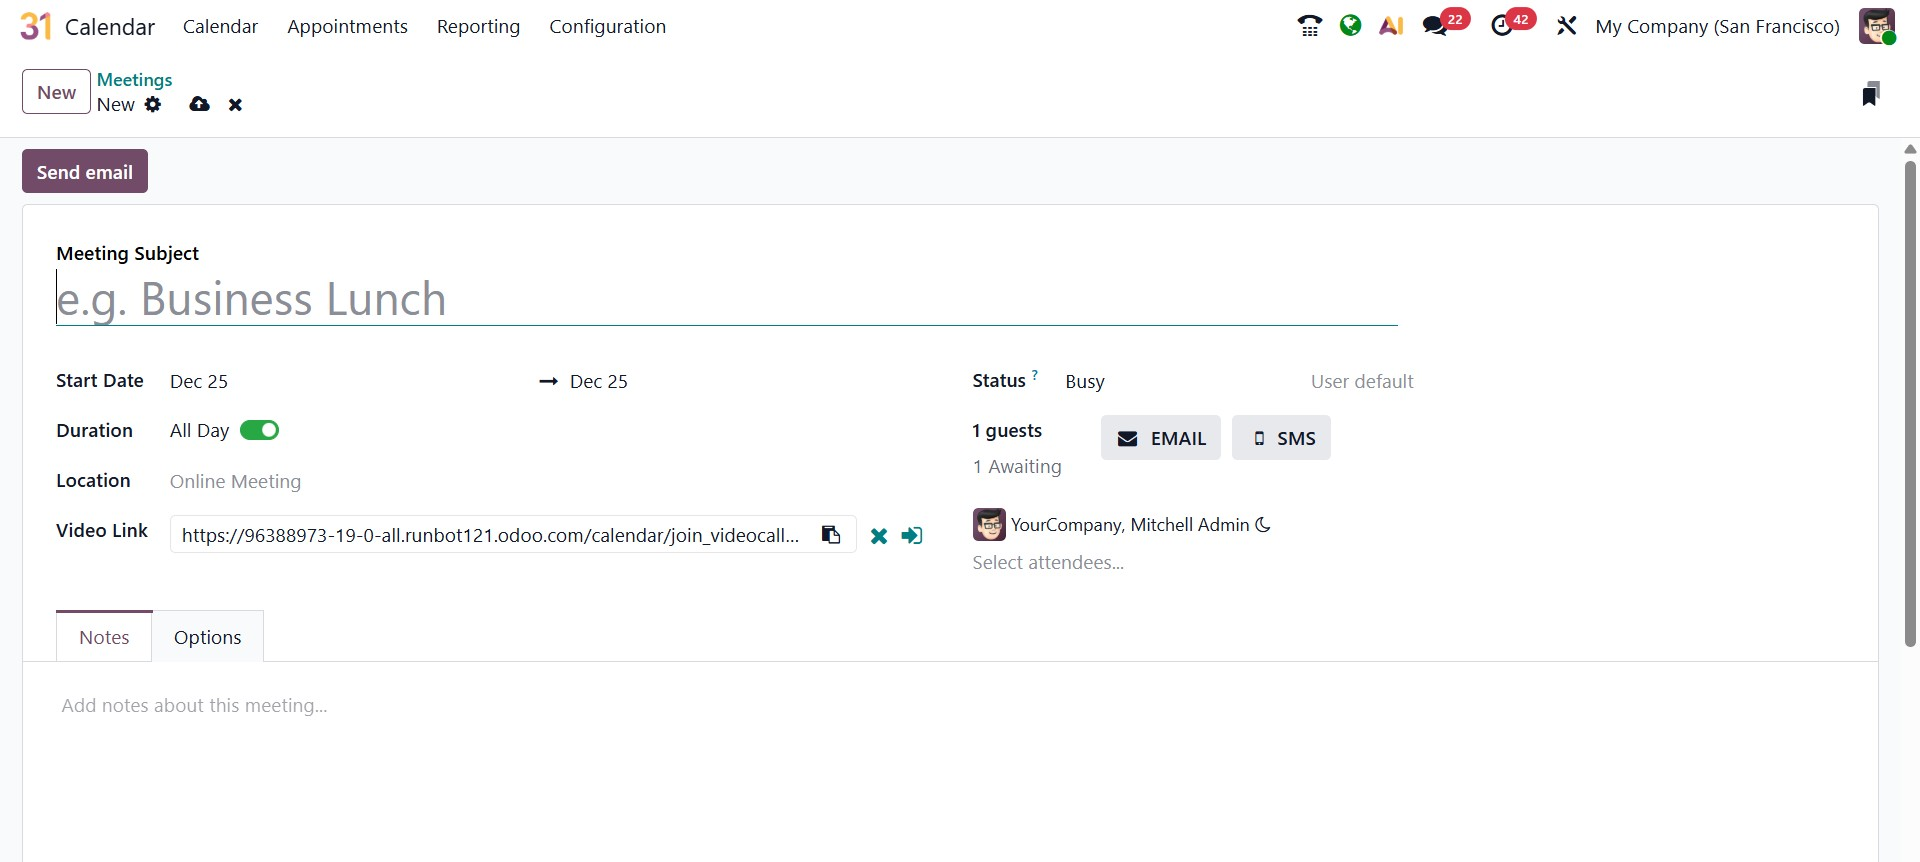
When you click More Options, the system opens a comprehensive event form that allows you to manage all meeting details in one place. You start by entering the Meeting Subject, which clearly defines the purpose of the event. Next, you can set the Start Date and End Date, and if the meeting spans the entire day, simply enable the All Day toggle to block the full date without specifying time slots.
The Status field indicates your availability (such as Busy), helping others understand your schedule. You can also specify the Location of the meeting, whether it is an in-person venue or an online session. For virtual meetings, Odoo 19 allows you to add or generate a Video Link, making it easy for participants to join remotely.
Attendees can be added directly from the system, and their participation status is displayed in real time. From this screen, you can also send email or SMS invitations to notify guests instantly.
Additional details can be included under the Notes tab, where you can outline the agenda, discussion topics, or any important instructions for attendees. The Options tab helps to organize and manage meetings more effectively. In this section, the Organizer field displays the user responsible for the meeting, which by default is the person creating the event, but can be changed if required.

You can assign Tags to the meeting to categorize it and make it easier to identify later. These tags help group similar events, such as internal discussions, client calls, or review sessions. The Calendar Description field allows you to add detailed information about the meeting. This can include the agenda, objectives, preparation notes, or any instructions participants should review in advance.
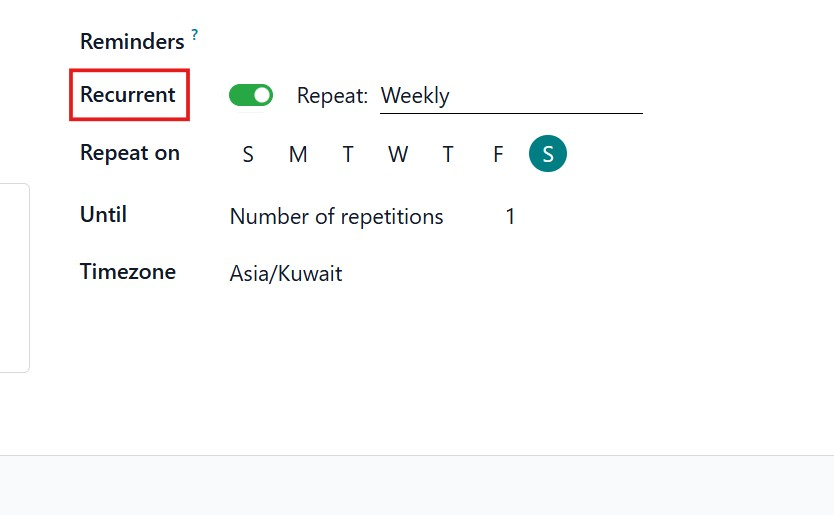
On the right side of the tab, the Reminders option lets you configure notifications, so attendees receive alerts before the meeting starts. Additionally, the Recurrent toggle can be enabled to schedule repeating meetings, allowing you to define recurring events without creating them individually. Once recurrence is activated, extra fields appear, such as Repeat (to choose the frequency), Repeat on (to select specific days), Until (to control the end of the recurrence), and Timezone (to ensure accurate scheduling across regions). Together, these options enhance planning accuracy, improve communication, and ensure meetings are well-structured and easy to manage within Odoo 19.
In the Odoo 19 Calendar module, all invited participants are listed in the Attendees section of the meeting. From here, you can view their availability directly on the calendar, making it easier to avoid overlapping schedules and conflicts. To add more participants, simply select the plus (+) icon next to the attendee list and choose additional users.
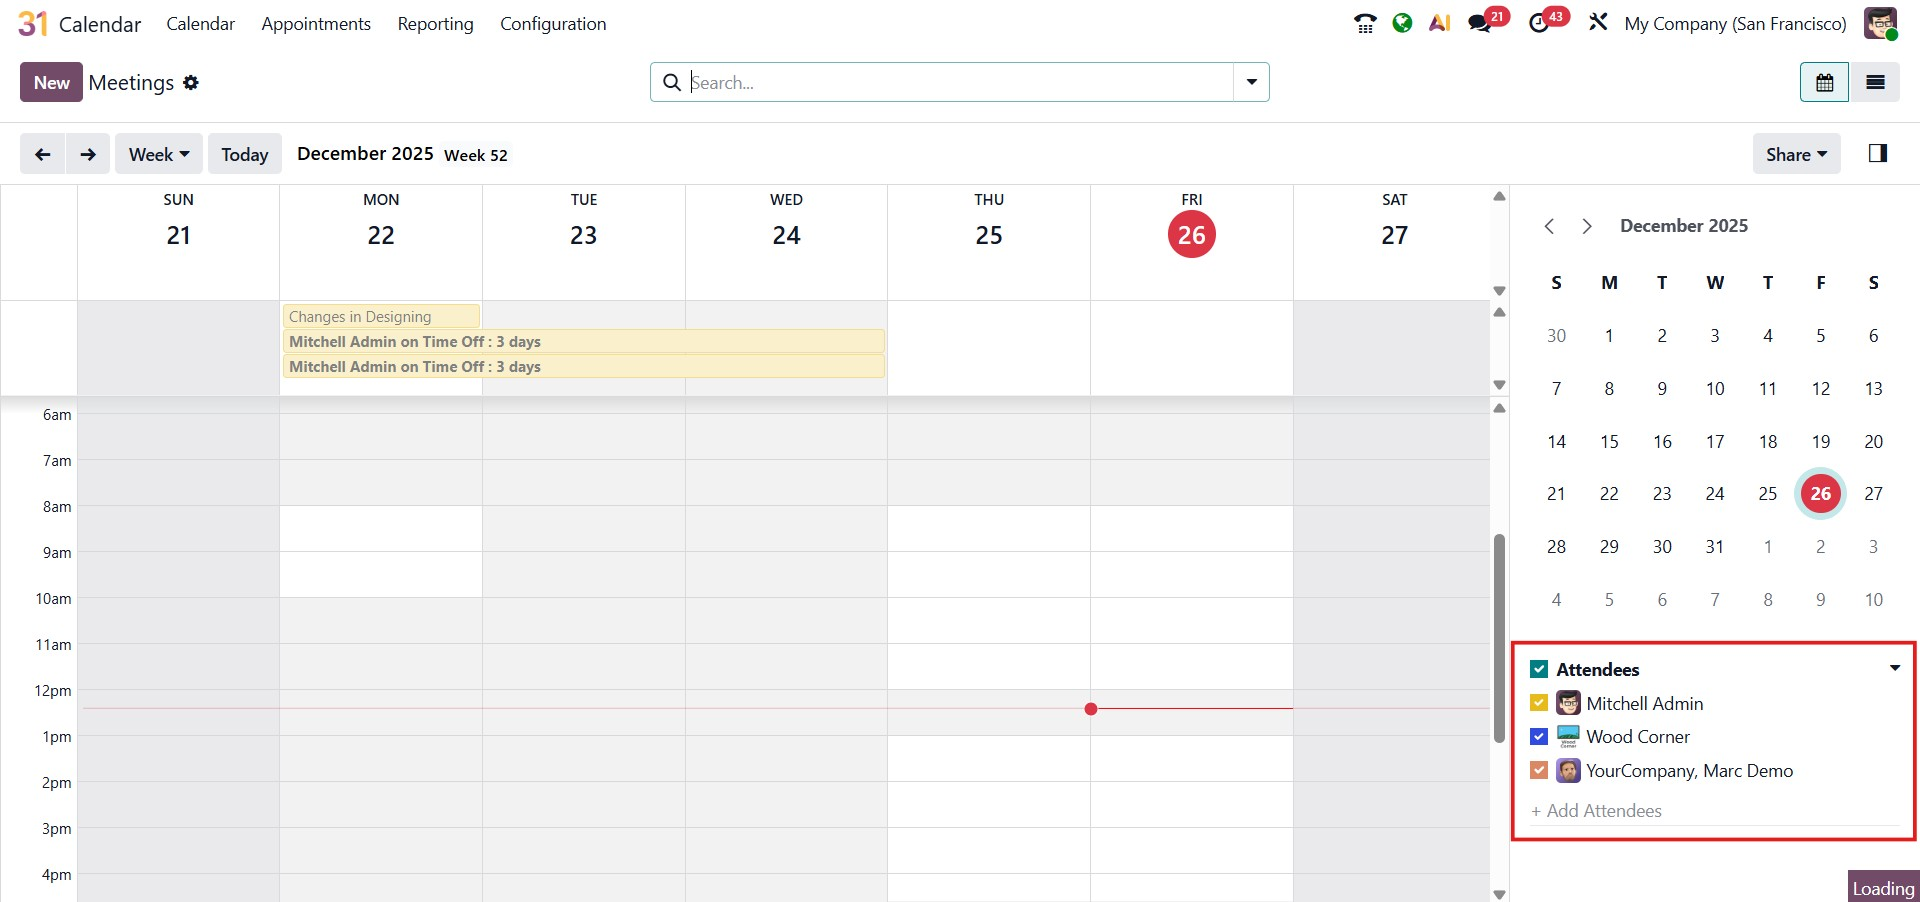
In Odoo 19, more advanced attendee handling can be done from the Invitations section of the meeting. From this area, you can add or remove participants, manage their contact details such as email addresses or phone numbers, and monitor their response status, whether the invitation has been accepted, declined, or is still pending.
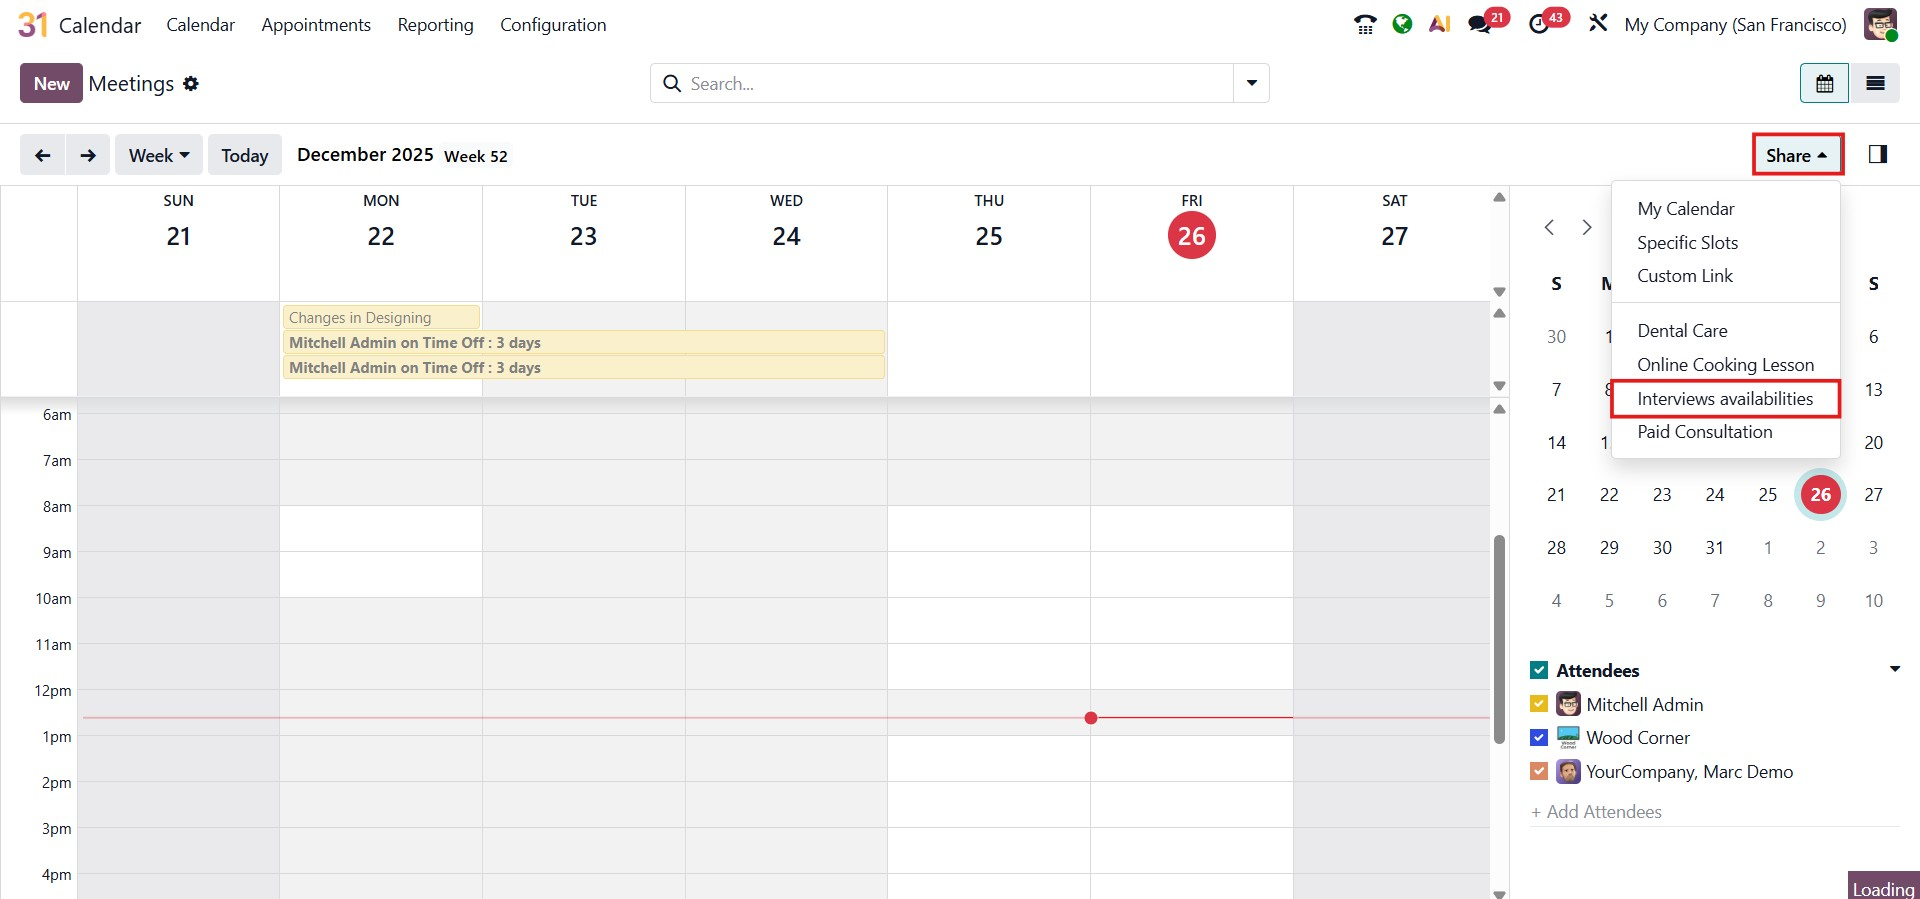
Odoo 19 also includes a convenient Share Interviews Availabilities feature, accessible directly from the Calendar module’s main dashboard. This option allows you to suggest multiple available time slots when coordinating meetings, which is particularly helpful when working with external clients or partners. Using the Day view, you can click and drag across the calendar to highlight your available time periods. Any selected slot can be edited or removed easily by clicking the delete icon on the corresponding time block.
After selecting your available time slots, click Configure to open the associated appointment settings, where you can fine-tune the schedule and adjust additional meeting preferences.
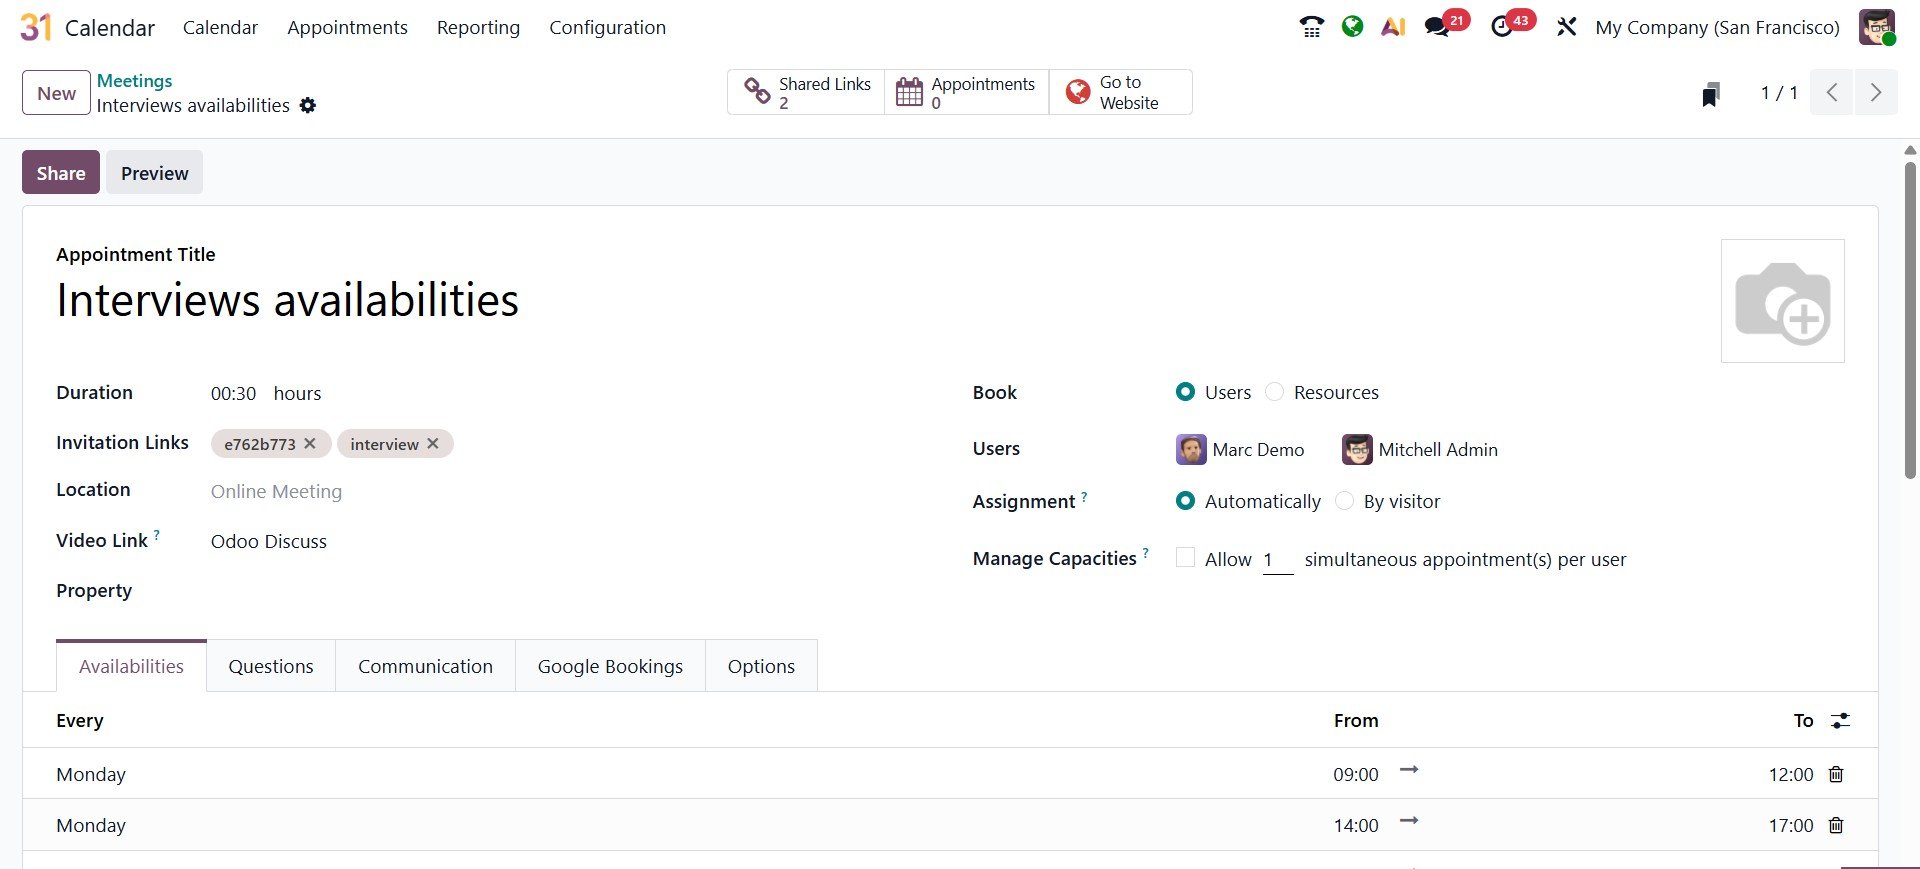
At the top of the form, you can define the Appointment Title, which represents the purpose of the meeting, such as interviews, consultations, or support sessions. The Duration field specifies how long each appointment slot will last. For example, setting the duration to 30 minutes ensures that every booked session follows this time frame. Invitation links can be generated and shared externally, allowing participants to book appointments directly through a secure link. You can also define the Location of the appointment, whether it is an in-person meeting or an Online Meeting, along with a Video Link such as Odoo Discuss for virtual interactions.
Under the Book section, you can choose whether appointments should be scheduled with Users or Resources. Once selected, the relevant users or resources can be assigned, making them available for booking. The Assignment option determines how bookings are handled; appointments can be assigned automatically by the system or selected manually by the visitor.
The Manage Capacities option allows you to control how many appointments can be scheduled simultaneously per user. This is especially useful when handling high-demand sessions or managing workload distribution.
In the Availabilities tab, you can configure when appointments can be booked. Here, you define specific days and time ranges during which users are available. Multiple availability slots can be added for the same day, enabling flexible scheduling such as morning and afternoon sessions. These defined time windows ensure that bookings align with actual working hours.
The Questions tab makes it easy to collect essential information from participants during the booking process. You can add new questions by clicking Add a line, then choosing the appropriate Question Type, providing a Placeholder Answer, and marking the question as Required if a response is mandatory. This helps ensure that all necessary details are gathered before the appointment is confirmed. For more complex or detailed questionnaires, users can leverage the capabilities of Odoo’s Survey application.

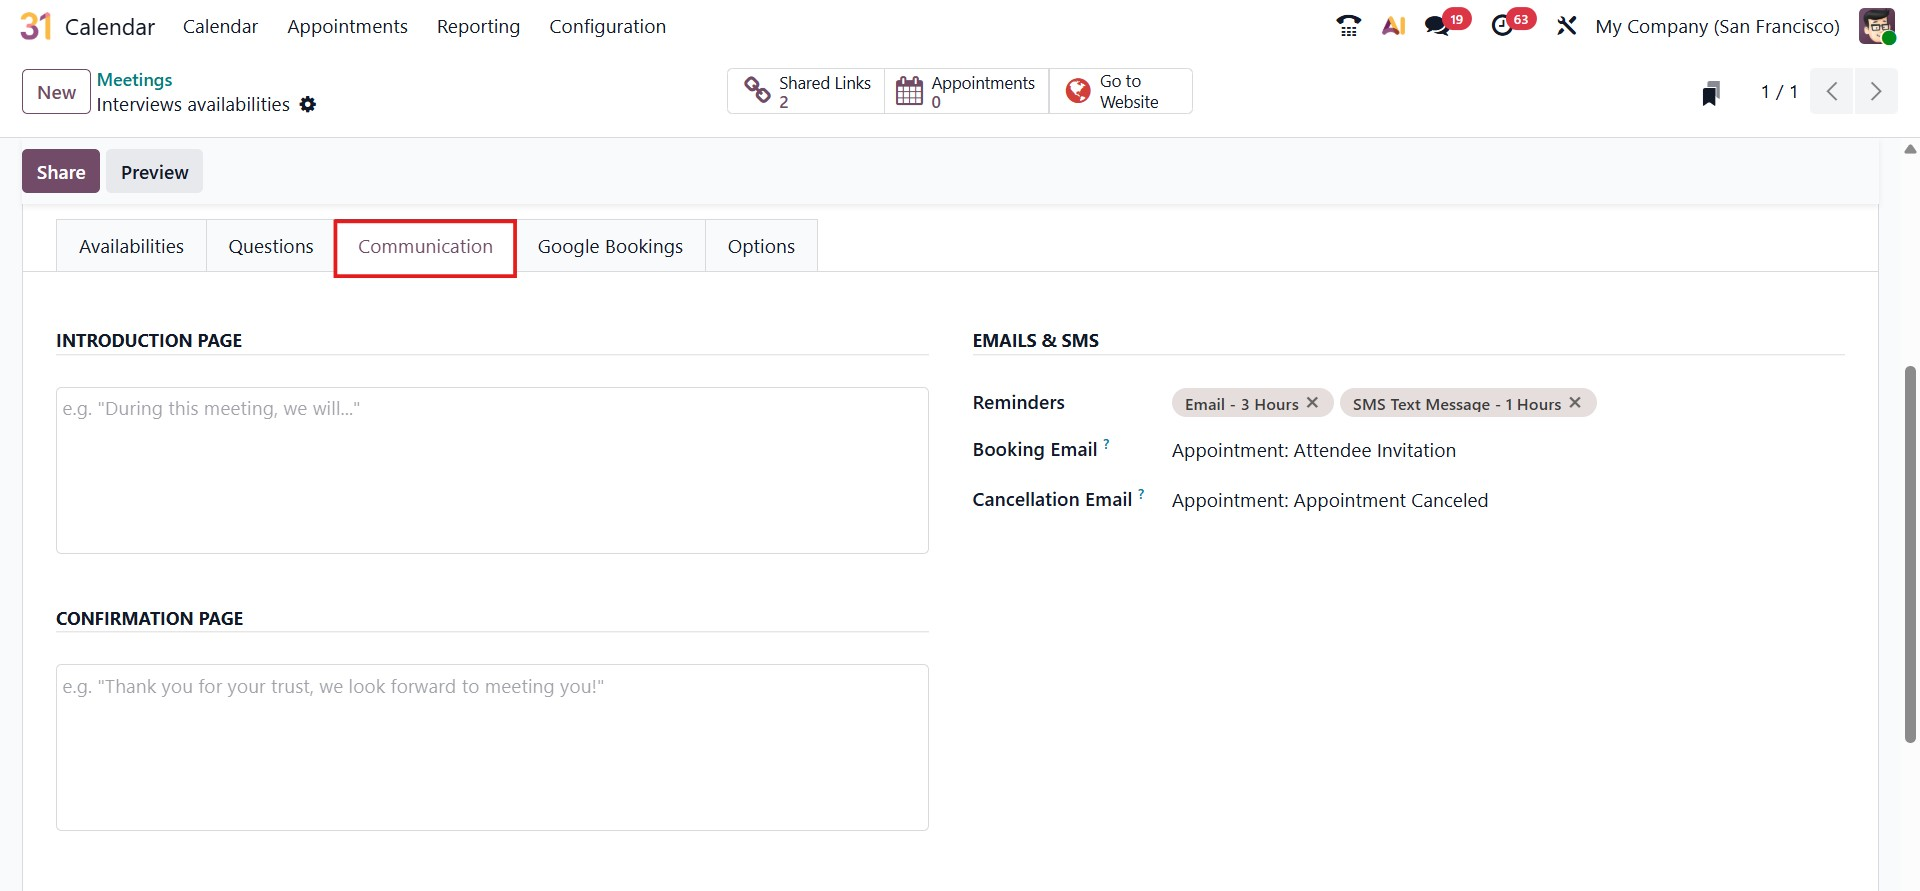
The Communication tab allows you to manage how information is shared with attendees throughout the appointment lifecycle. In the Introduction Page section, you can add a short message that appears before the booking is confirmed, helping attendees understand the purpose of the meeting or any preparation required in advance.
The Confirmation Page section lets you define a message that is displayed after the appointment is successfully booked, such as a thank-you note or next steps for the attendee.
On the right side, under Emails & SMS, you can configure automated notifications. The Reminders field enables you to schedule email and SMS alerts to notify attendees prior to the appointment's start time. You can also select the templates used for the Booking Email, which is sent when an appointment is confirmed, and the Cancellation Email, which is triggered if the appointment is canceled. These settings ensure clear and timely communication, improving the overall booking experience.
The Google Bookings tab enables you to integrate your appointment scheduling with Google Reserve, allowing customers to book appointments directly from Google services. By clicking Synchronize with Google Reserve, you can connect the appointment type to your Google Merchant account and make your availability visible on Google Search and Google Maps.
This integration helps expand your reach by allowing potential clients to discover and book appointments without visiting your website. Once connected, Odoo automatically syncs available time slots, ensuring that bookings made through Google are reflected in your calendar in real time.

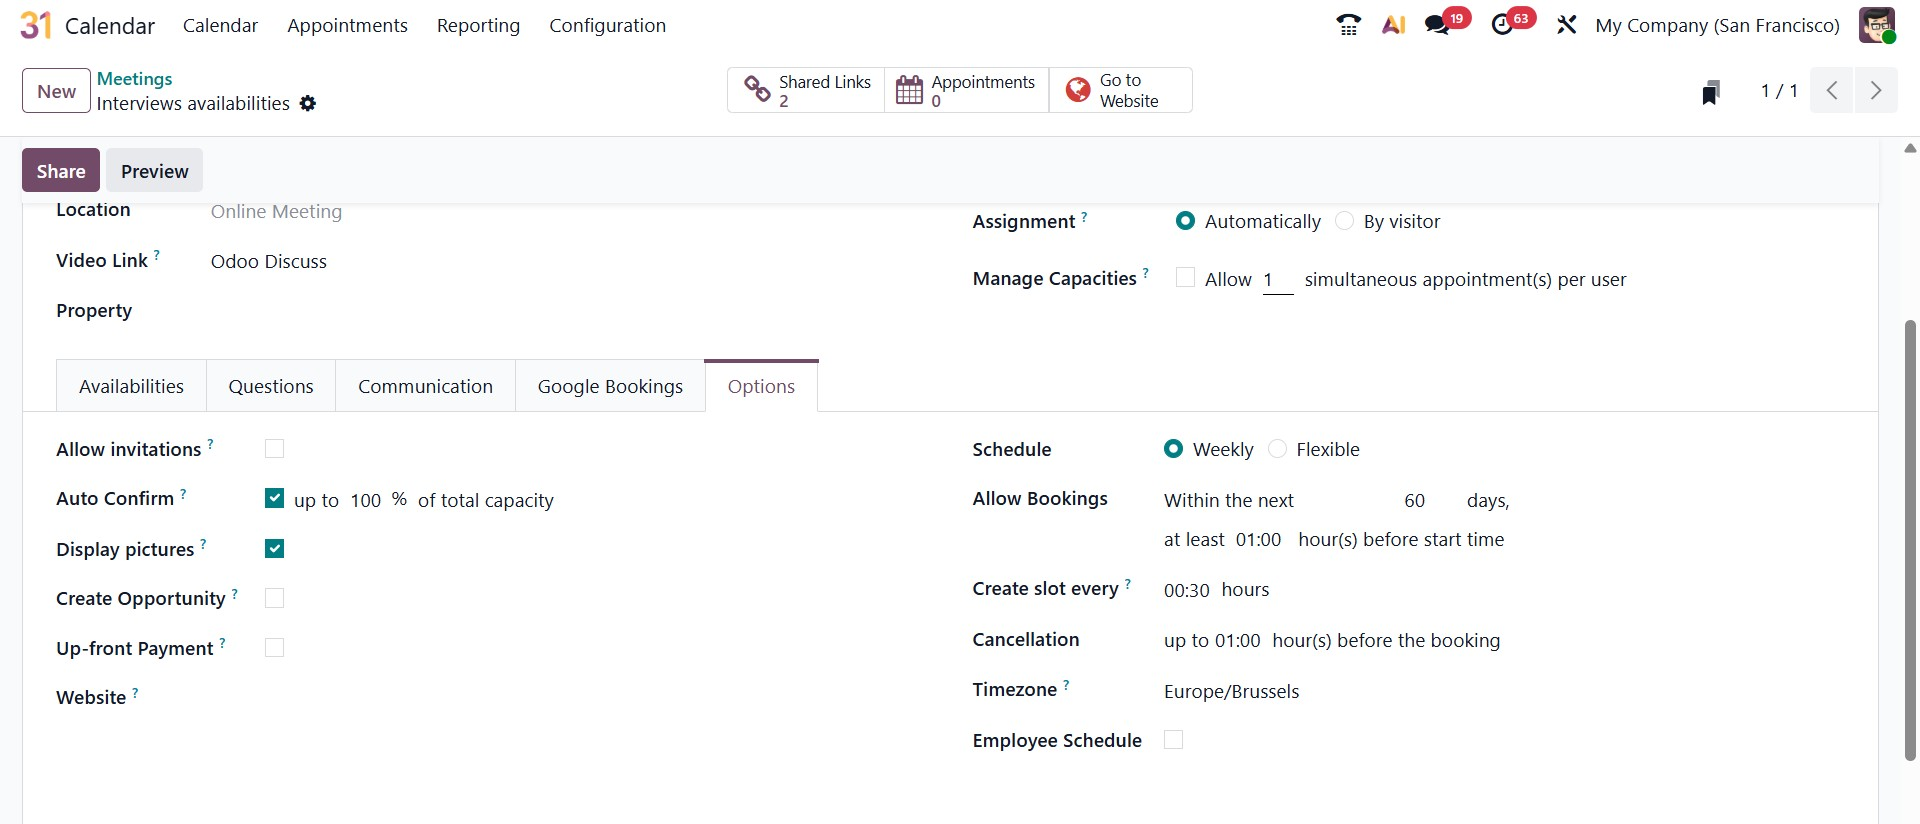
The Options tab allows you to fine-tune how appointments are published, scheduled, and processed. From this section, you can control whether the appointment type is available on the Website, making it accessible to external users for booking. You can also define the Timezone used for scheduling, which by default follows the system configuration but can be adjusted if needed.

You can decide whether to Allow Invitations, enabling participants to share the booking link with others. The Auto Confirm option determines whether appointments are confirmed automatically based on available capacity, reducing the need for manual validation. Enabling Display Pictures shows the profile images of assigned users on the booking page, creating a more personalized booking experience.
If the appointment is linked to sales activities, enabling Create Opportunity will automatically generate a CRM opportunity whenever a booking is confirmed. The Up-front Payment option allows you to require payment before an appointment is finalized, with supported payment methods configurable through Odoo’s payment settings.
On the scheduling side, you can define whether the appointment follows a Weekly or Flexible schedule. The Allow Bookings setting controls how far in advance appointments can be booked and enforces a minimum notice period before the start time. The Create Slot Every field determines how frequently time slots are generated, ensuring consistent availability intervals.
You can also specify the Cancellation deadline, limiting how late an appointment can be canceled. The Timezone setting ensures that bookings are displayed correctly for both internal users and visitors. Finally, enabling the Employee Schedule ensures that available slots respect the assigned users’ working hours.
In Odoo 19, calendar synchronization with external services such as Google Calendar and Outlook Calendar is designed to keep schedules aligned across multiple platforms. To activate this integration, open the Calendar module and navigate to Configuration, click Settings. In this section, you can enter the required Client ID and Client Secret, which are generated from your respective Google or Microsoft developer account.
After saving these credentials, click Connect to establish the link between Odoo and the external calendar service. Once connected, events are automatically synchronized, ensuring consistency across systems. If you need to suspend the synchronization temporarily, you can enable the Pause synchronization option, which stops updates without disconnecting the integration entirely.
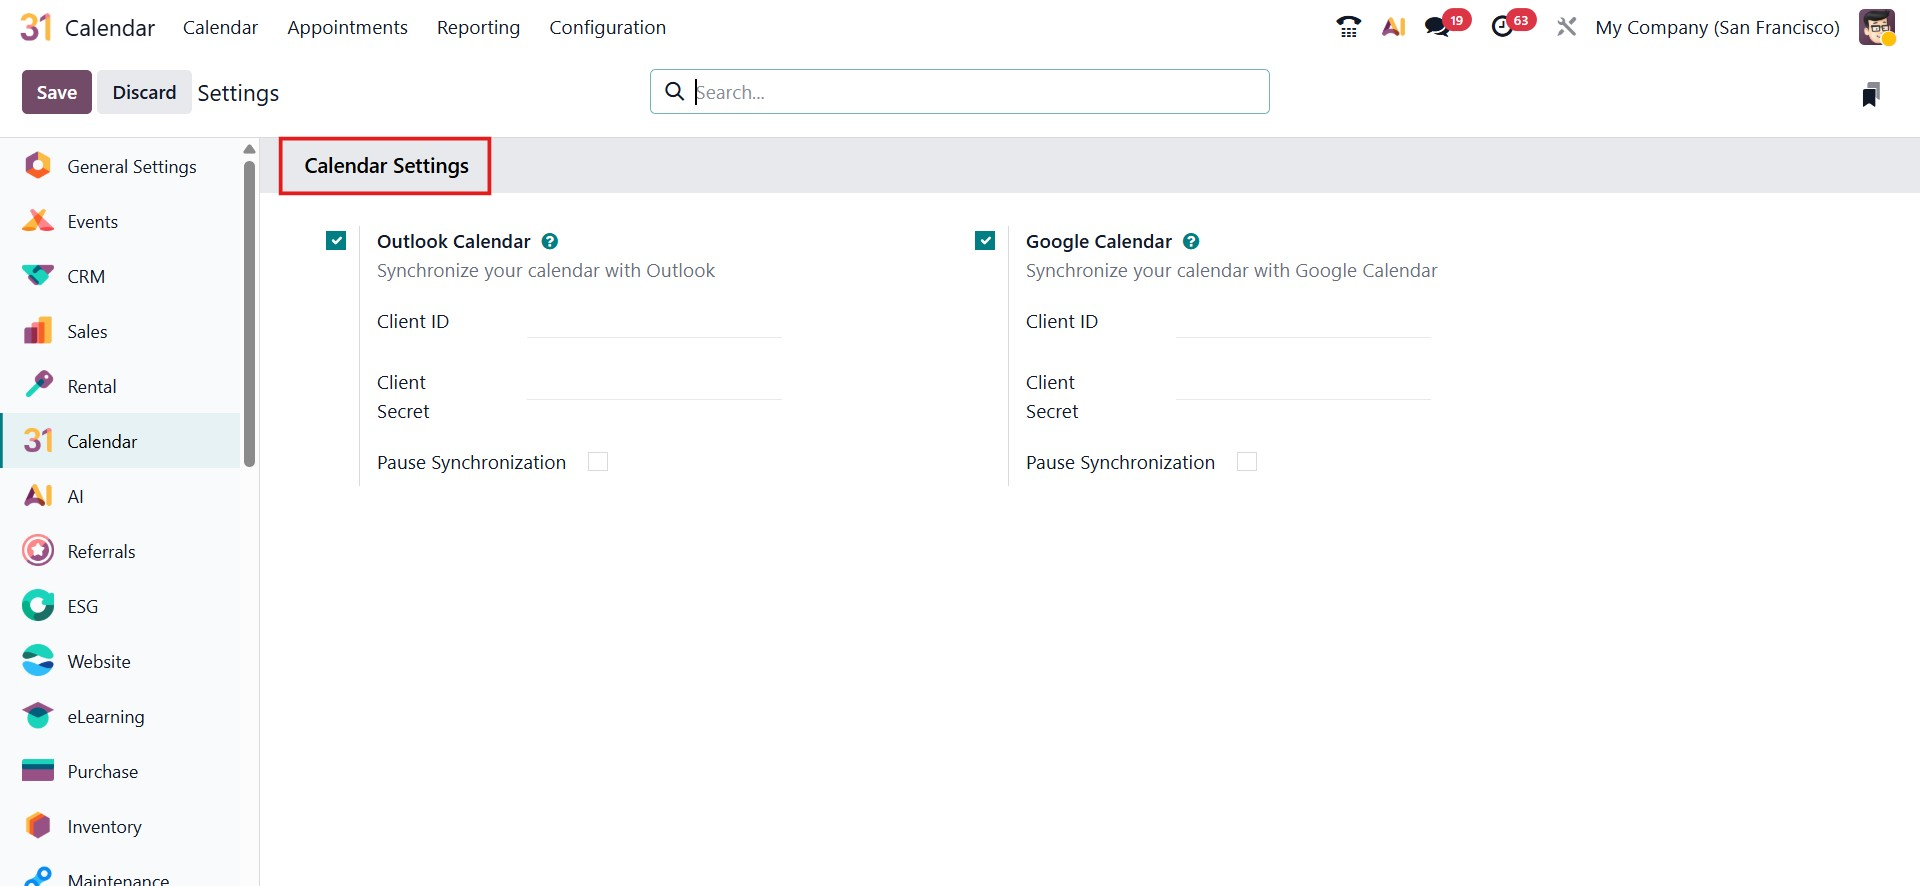
After the connection is established, events created in the external calendar are automatically synced, and any meetings scheduled in Odoo are reflected in the linked third-party calendar. This two-way synchronization keeps all calendars up to date and ensures accurate, consistent scheduling across platforms.
With the Odoo 19 Calendar, organizing and managing meetings becomes more efficient and streamlined. Its intuitive interface, strong scheduling features, and smooth integration with other Odoo applications make it a valuable tool for enhancing collaboration, improving time management, and increasing overall productivity.