Employee
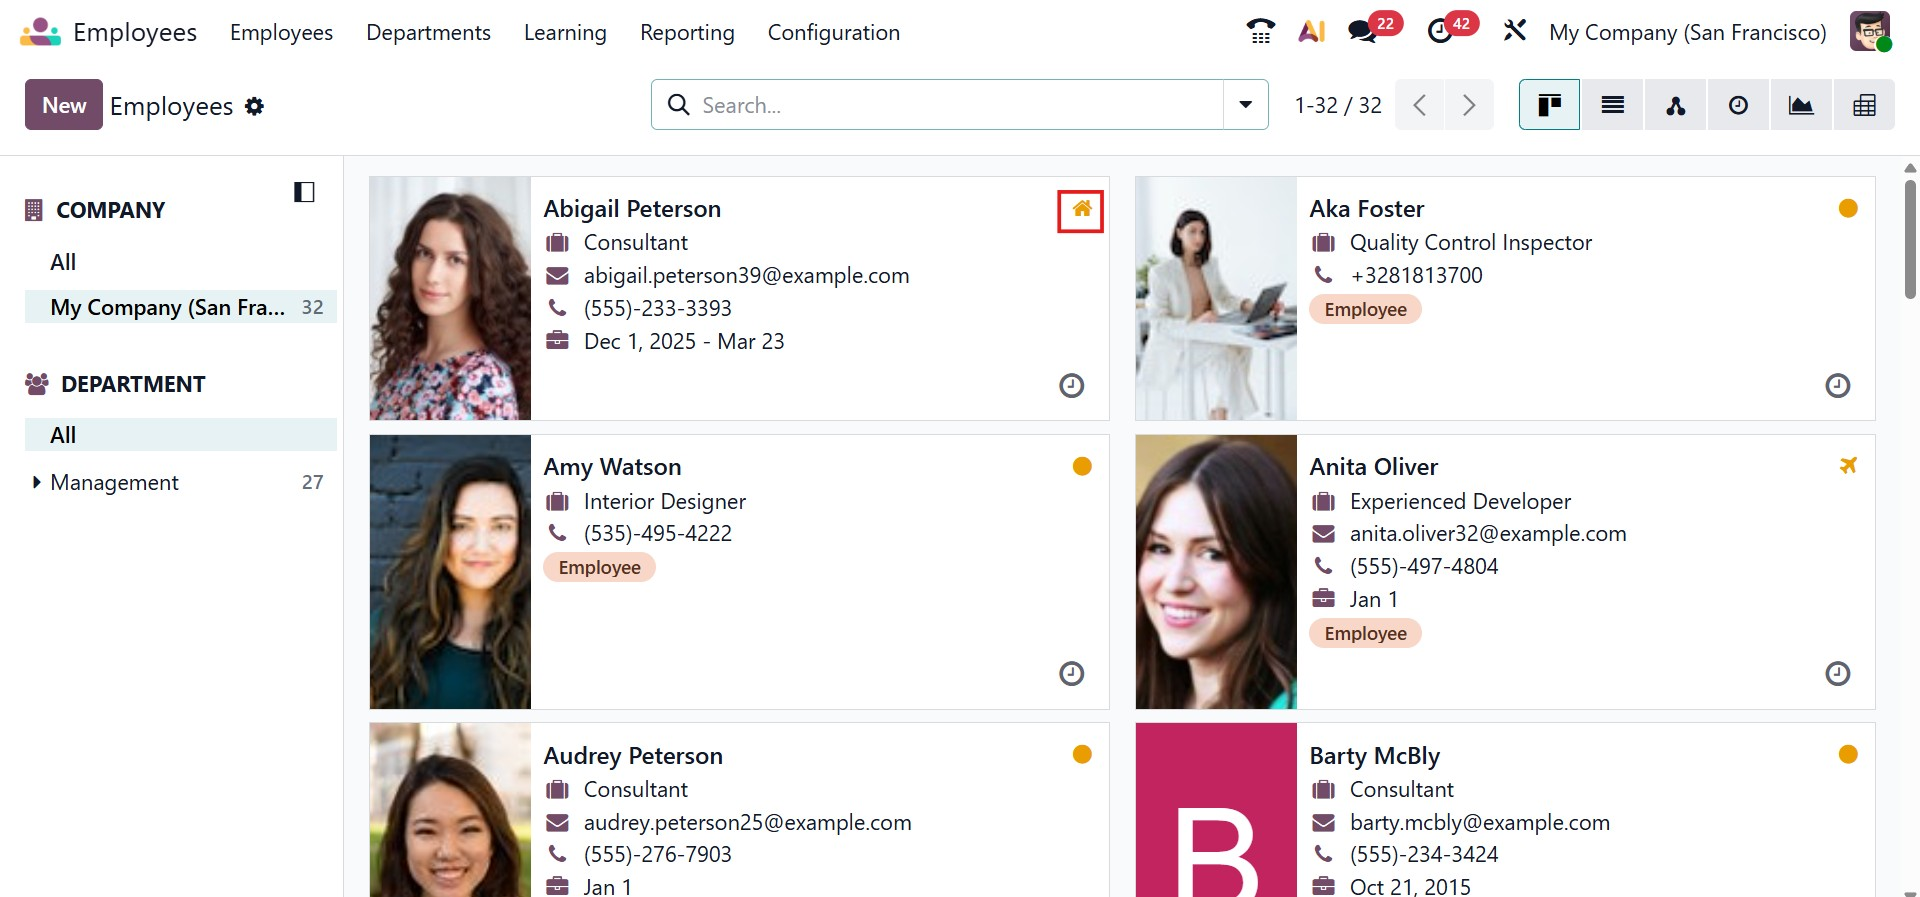
Upon opening the Employee module in Odoo 19, the system initially displays the Employees page, which functions as a dashboard in the administrator view. This page presents employee records in a Kanban (card) layout, offering a clear visual overview of the workforce. Each employee profile card presents essential information, including the employee’s name, job position, contact details, profile photo, and contract status. An icon displayed at the top of the card, represented by a building or a house, indicates the employee’s work location, making it easy to identify whether the individual is working from the office, remotely from home, or from another location.
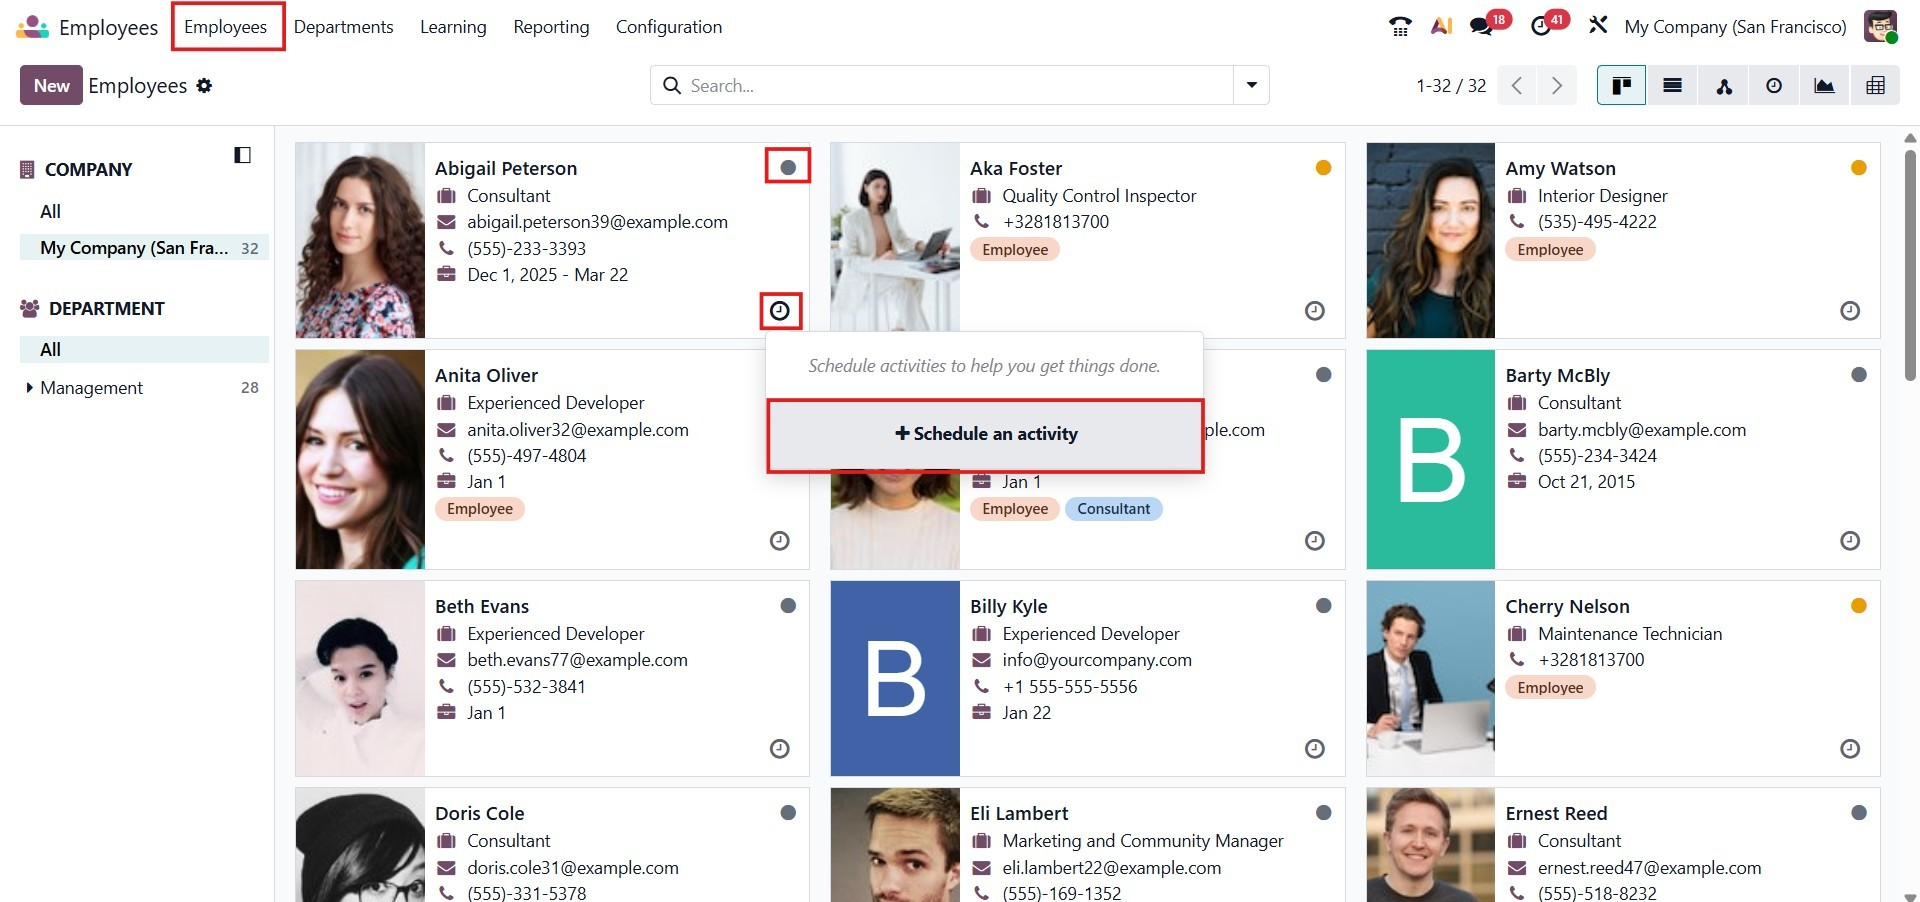
Additionally, every employee card includes an activity scheduling icon. If any activities are already planned for an employee, they are indicated directly on the card. By clicking this icon, users can easily schedule new activities related to that specific employee.
Selecting any employee card opens the employee form view, where the complete employee profile can be created, edited, or reviewed in detail.
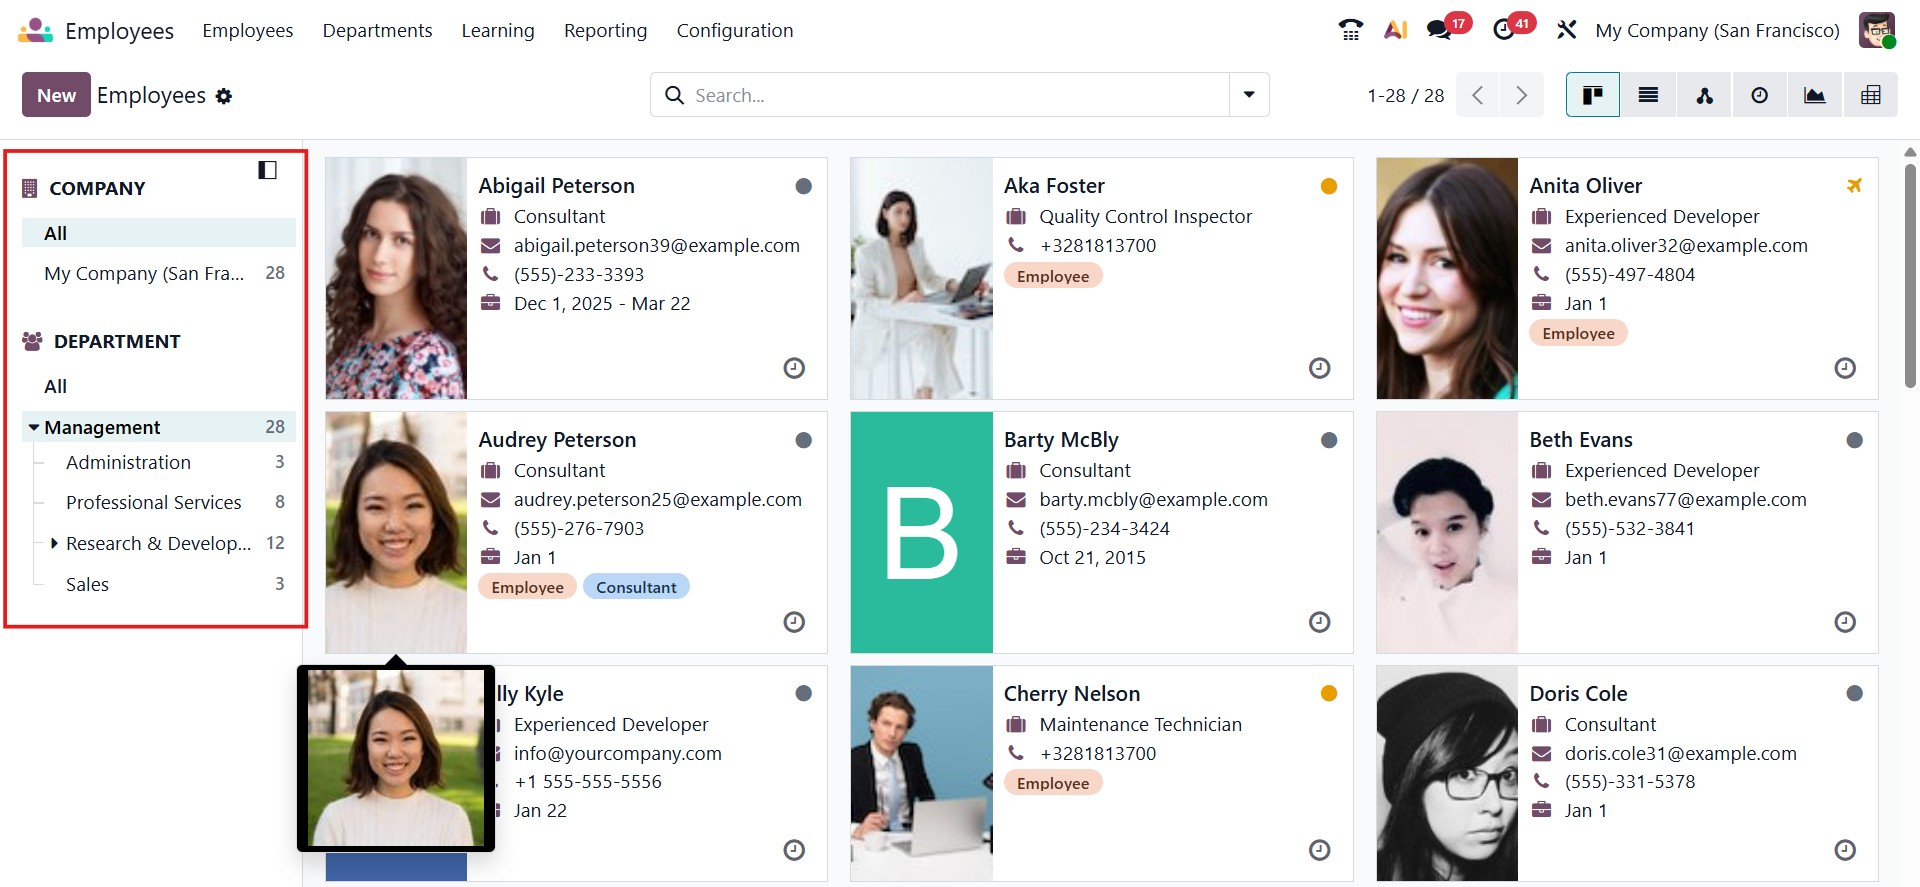
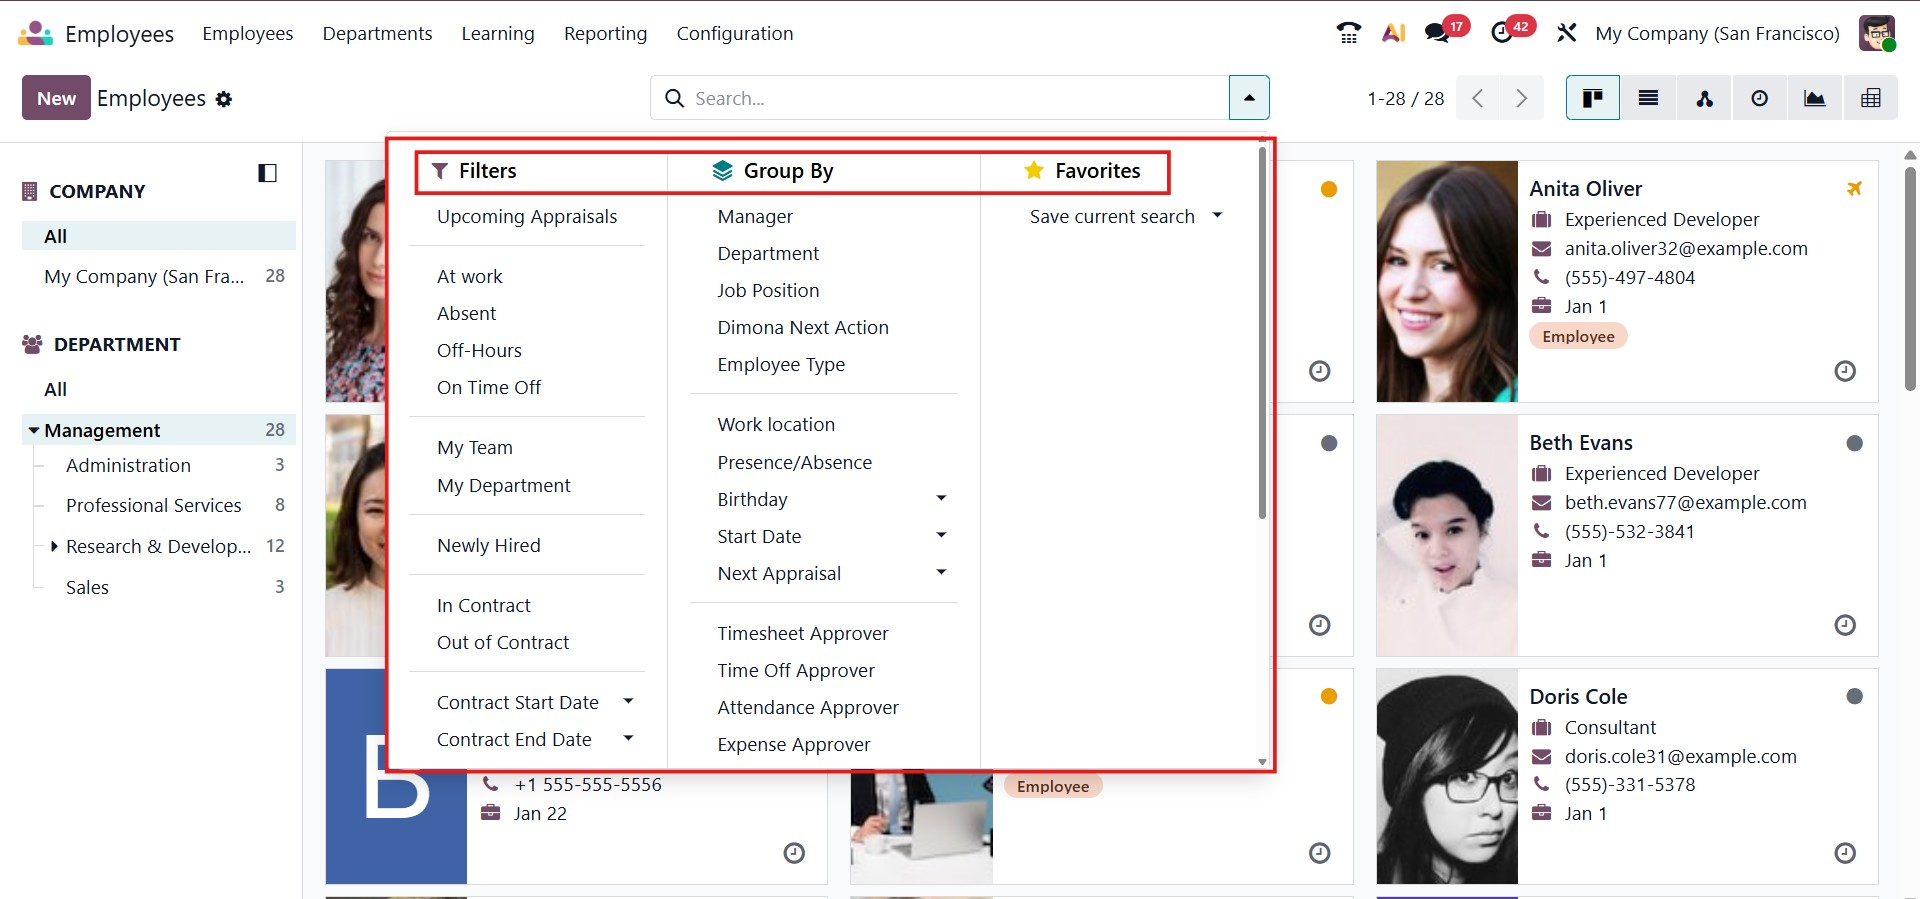
In a multi-company environment, Odoo 19 makes it easy to organize and view employees by company using the filter panel on the left side of the screen. This allows users to quickly switch between companies and manage their respective workforces without confusion. Employees can also be grouped and viewed based on their Departments, providing better structural clarity within the organization.
By default, the Employee module provides several predefined filters, including At work, Absent, Off Hours, On Time Off, Newly Hired, My Team, My Department, In Contract, Out of Contract, Contract start date, and Contract end date. Additionally, employees can be organized using the Group By option, which allows records to be categorized based on criteria such as manager, presence status, department, job position, skills, and tags.
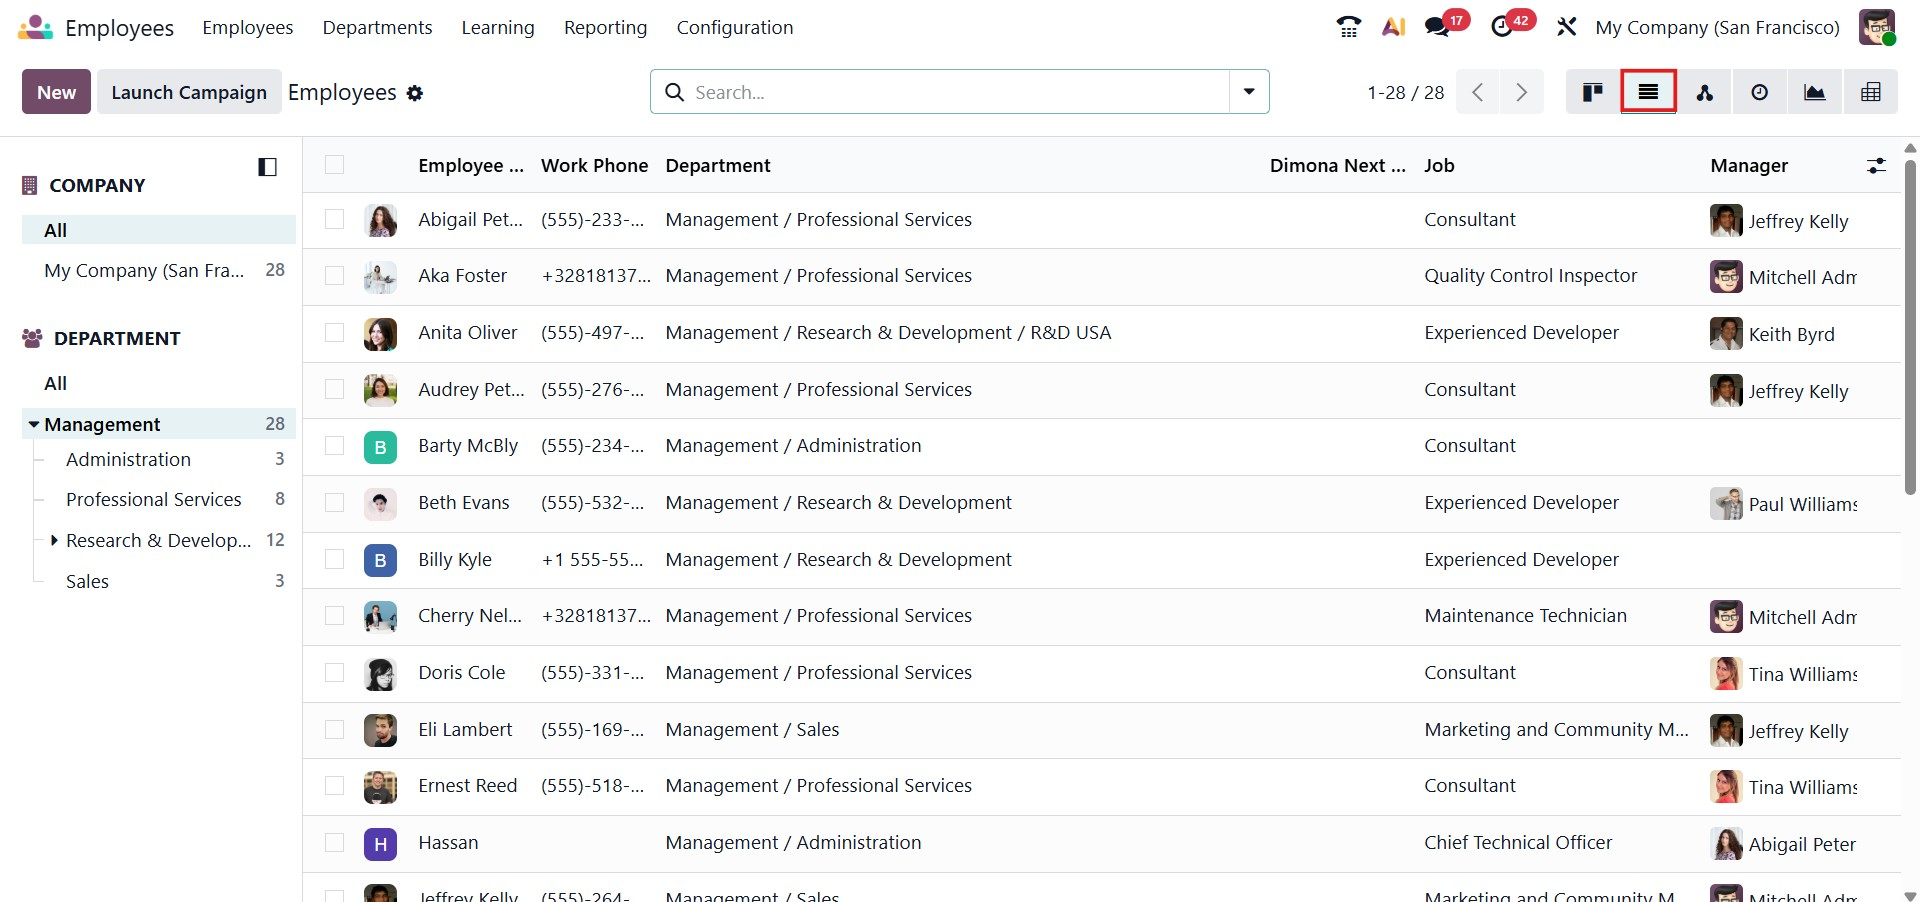
In the List View of the Employee module in Odoo 19, key details such as the employee’s name, work phone number, work email, first contract, scheduled activities, next activity, company, department, job position, and manager are clearly displayed. From this view, you can create a new employee profile by clicking the New button.
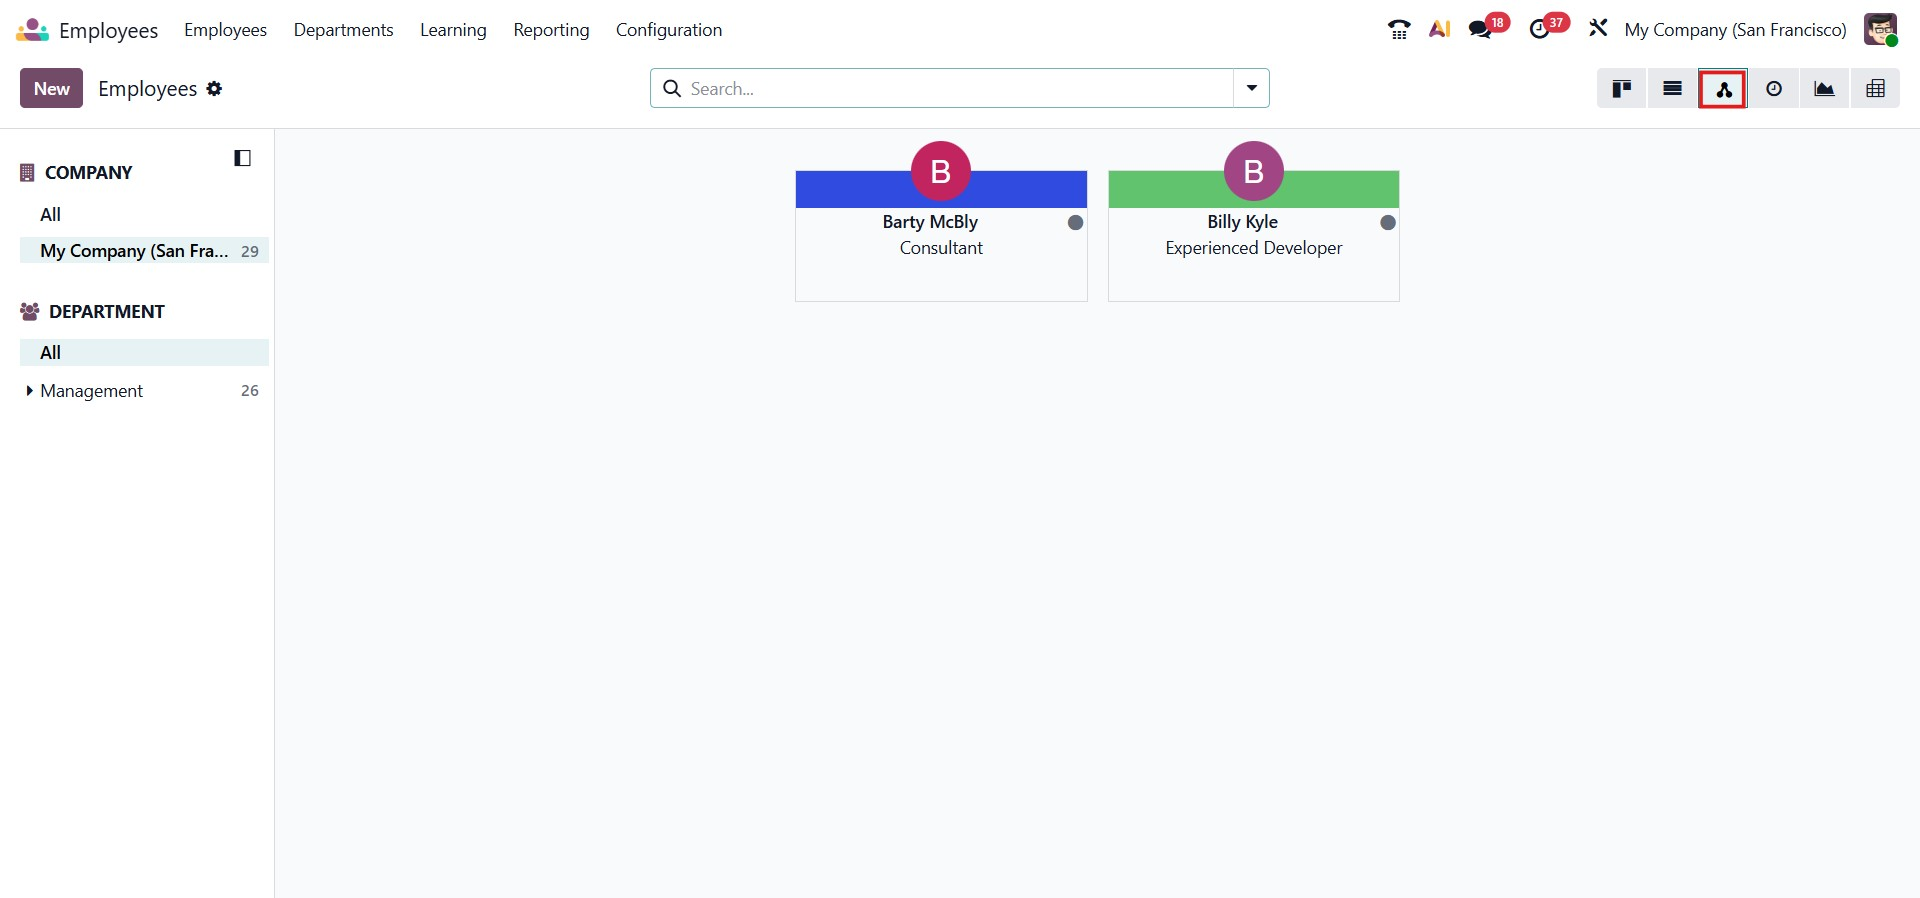
In addition to the list view, Odoo 19 also provides an alternative employee view, as shown in the interface, offering users flexibility in how employee data is displayed and accessed.
When creating or editing an employee record, the system opens a form view where you can enter and update employee information. Here, you can specify details such as the employee’s name and their position within the organization in the relevant fields.
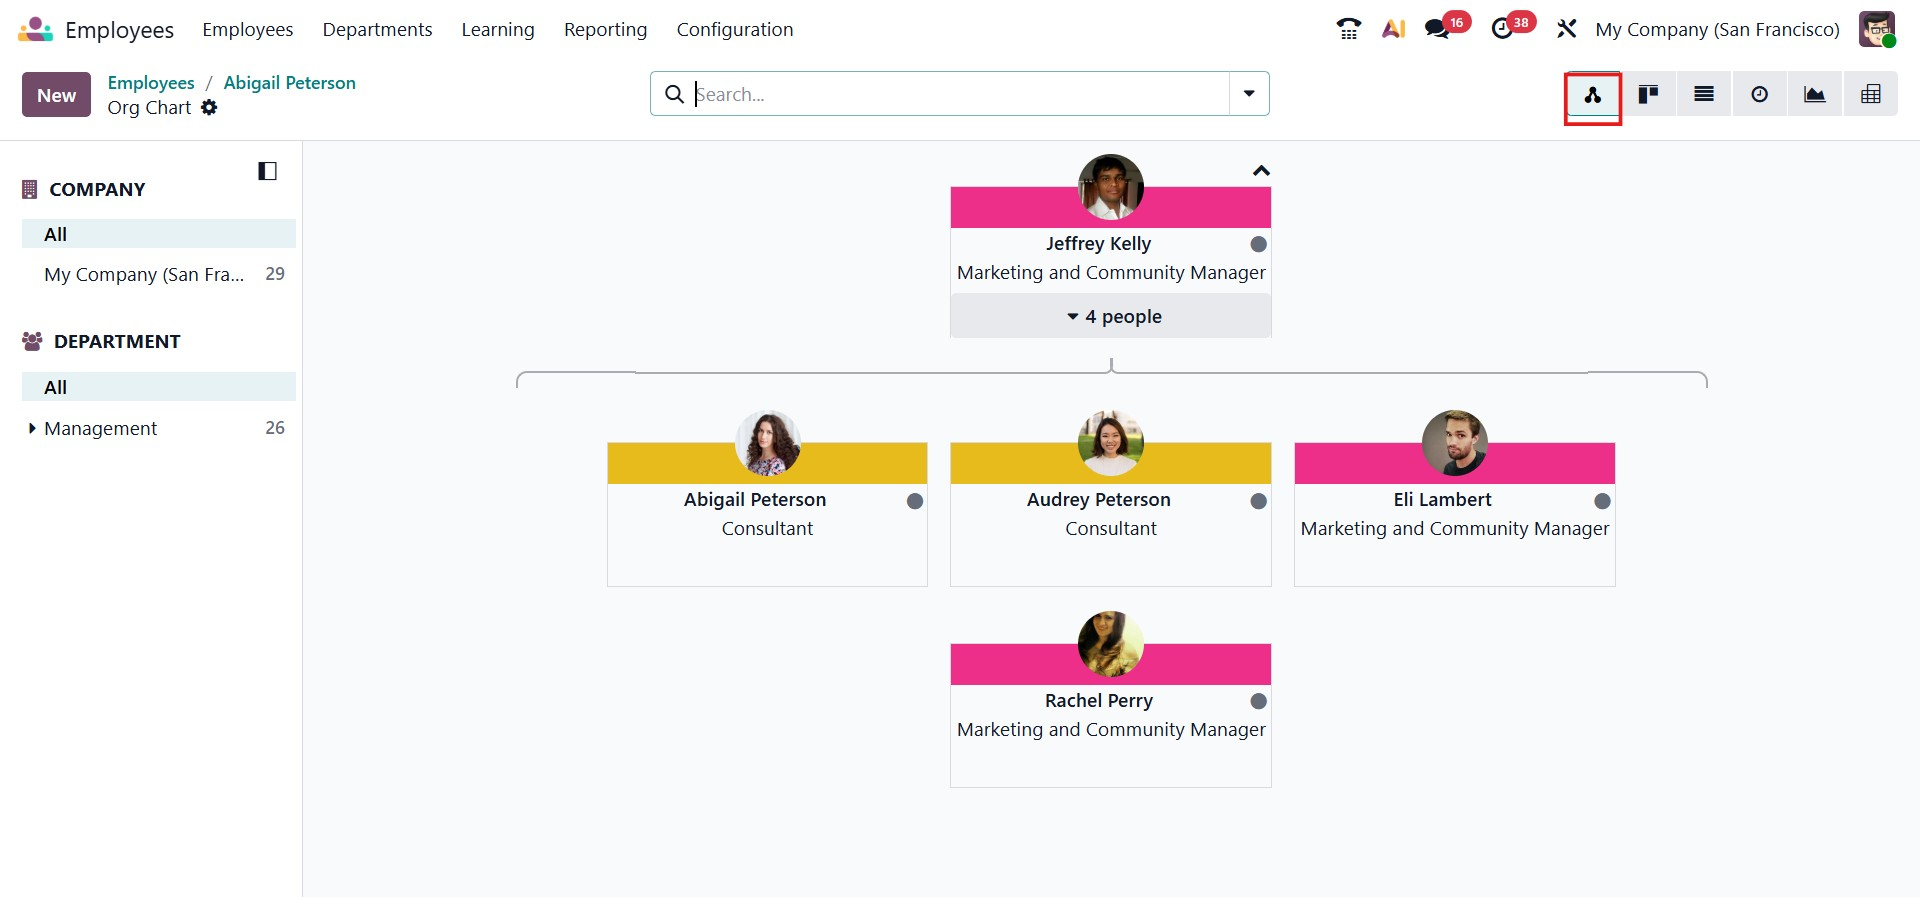
Odoo 19 also has an improved hierarchy view that makes it easier to visualize and manage the company hierarchy. Managers can conveniently modify reporting relationships using a simple drag-and-drop interface, allowing quick and intuitive updates to the organizational structure.
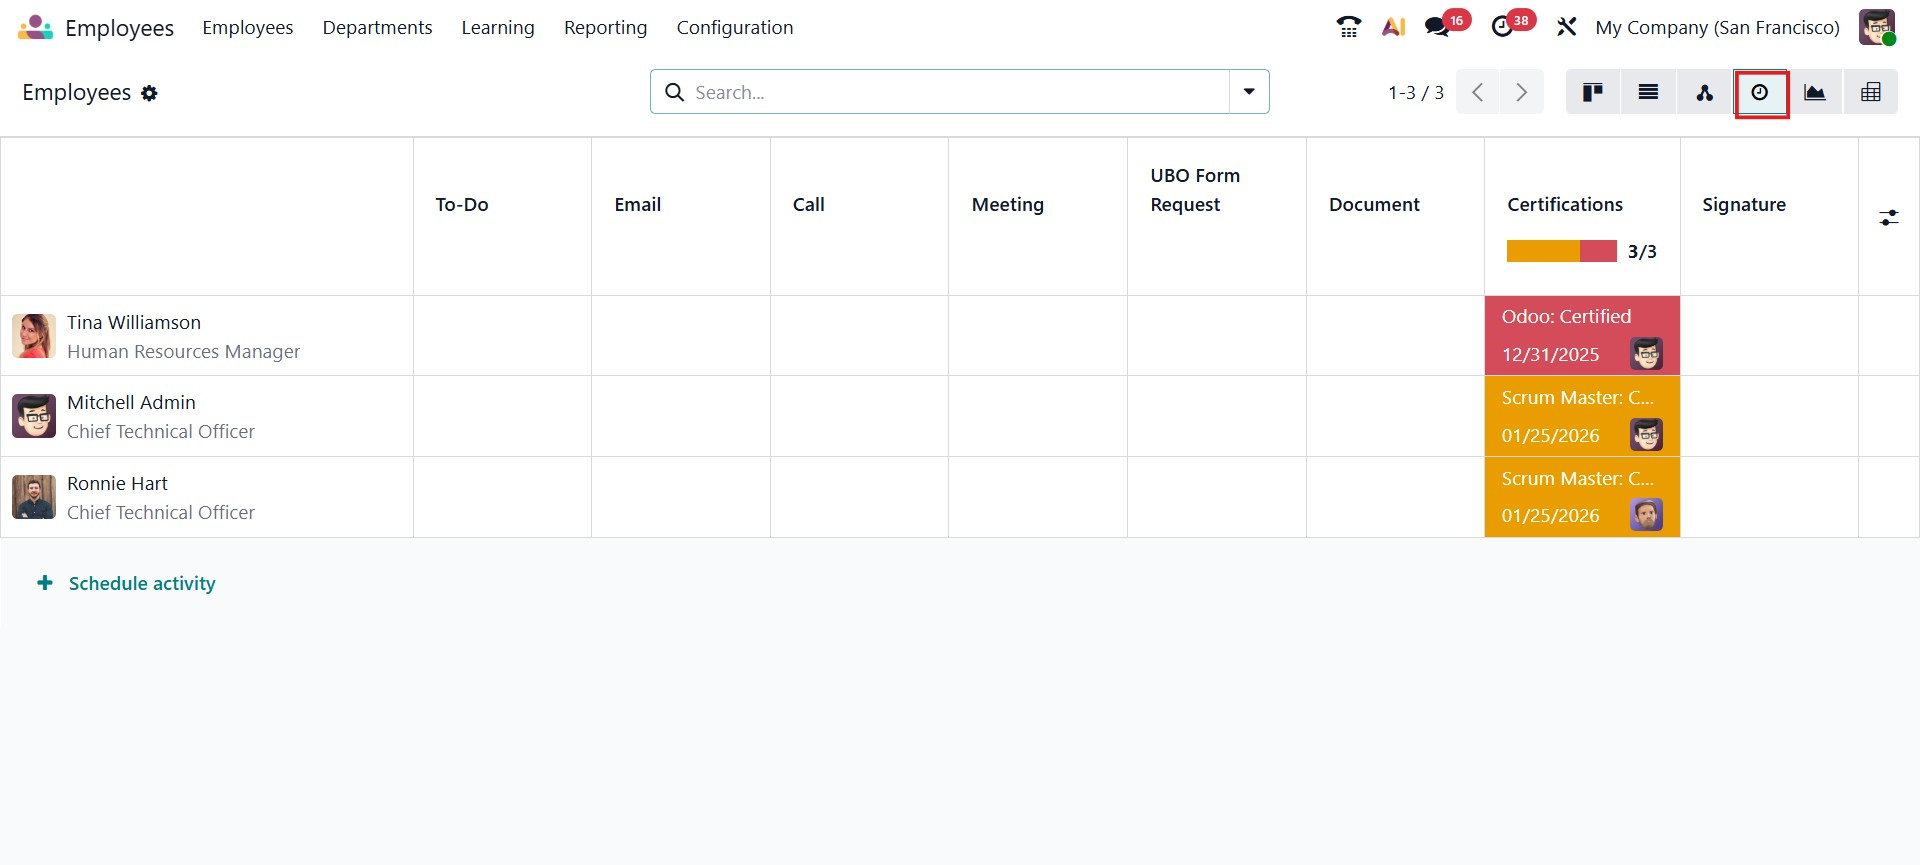
The Activities View focuses on employee-related scheduled activities, allowing users to view, track, and manage all planned tasks in one place. This view is particularly useful for ensuring that employee-related actions are completed on time.
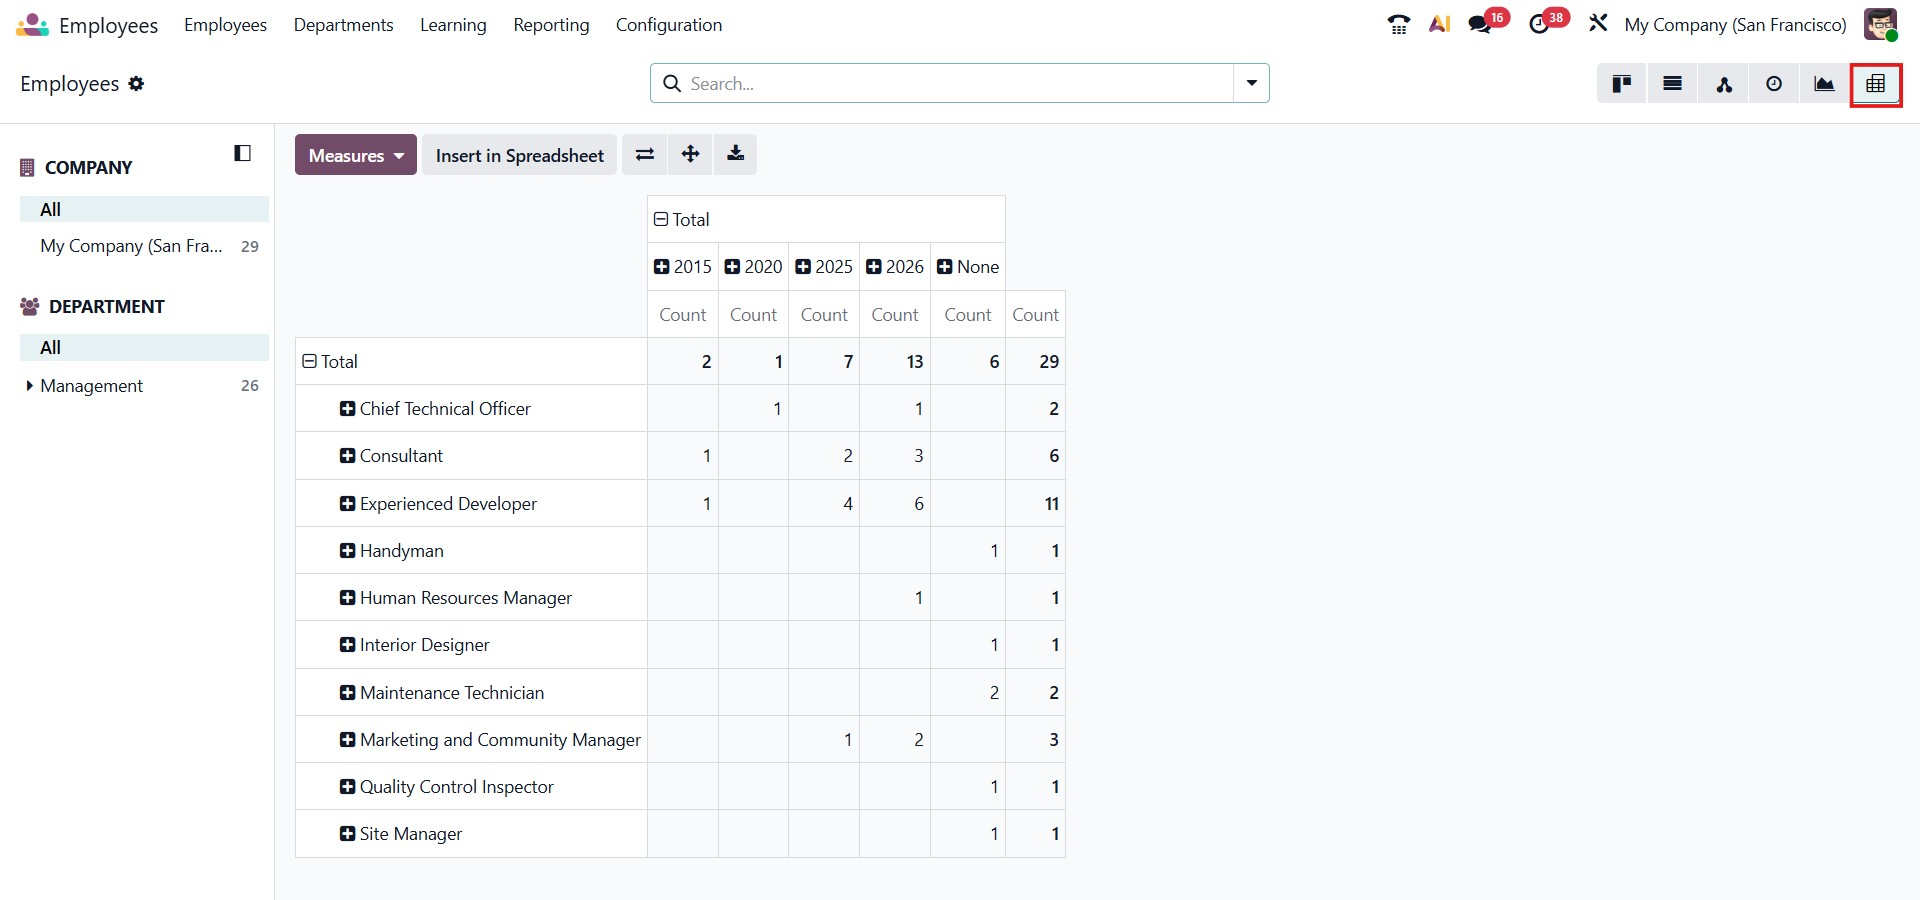
The Graph View presents employee information in visual formats such as bar charts and line graphs, enabling users to compare employees across different dates and analyze employee counts for better trend identification.

Additionally, the Pivot View supports advanced data analysis by aggregating employee records and displaying totals and breakdowns by dimensions such as departments and years, making it a powerful tool for reporting and strategic decision-making.
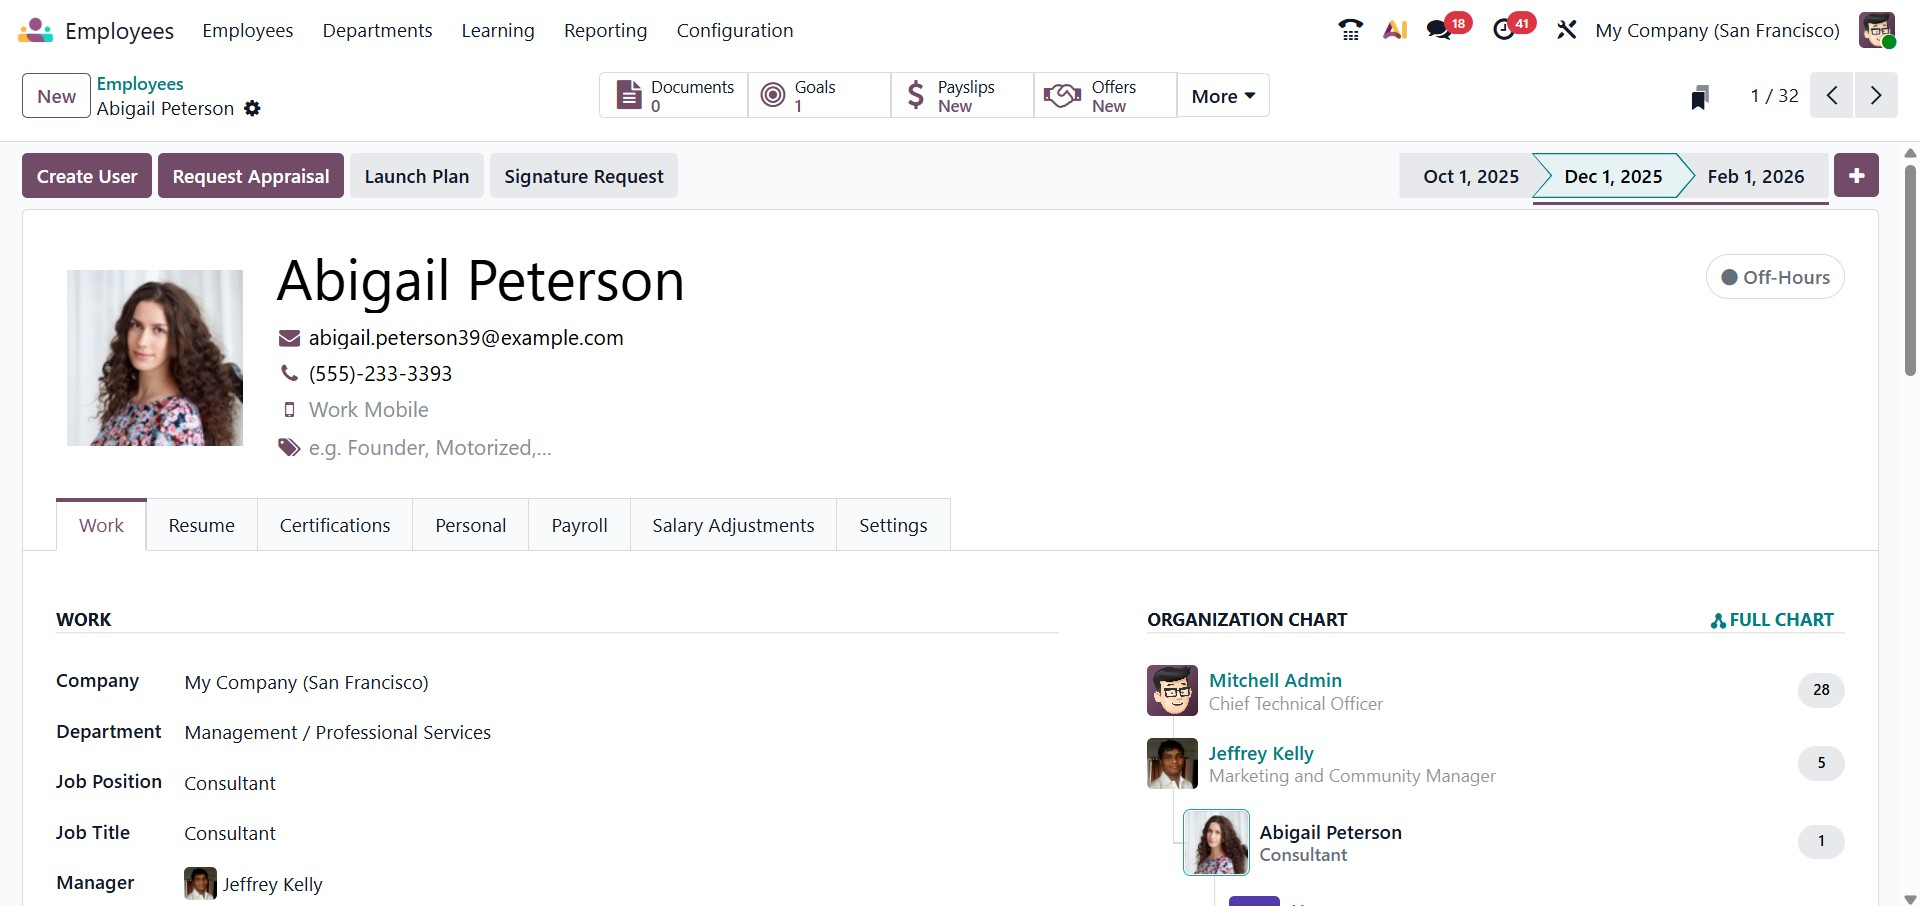
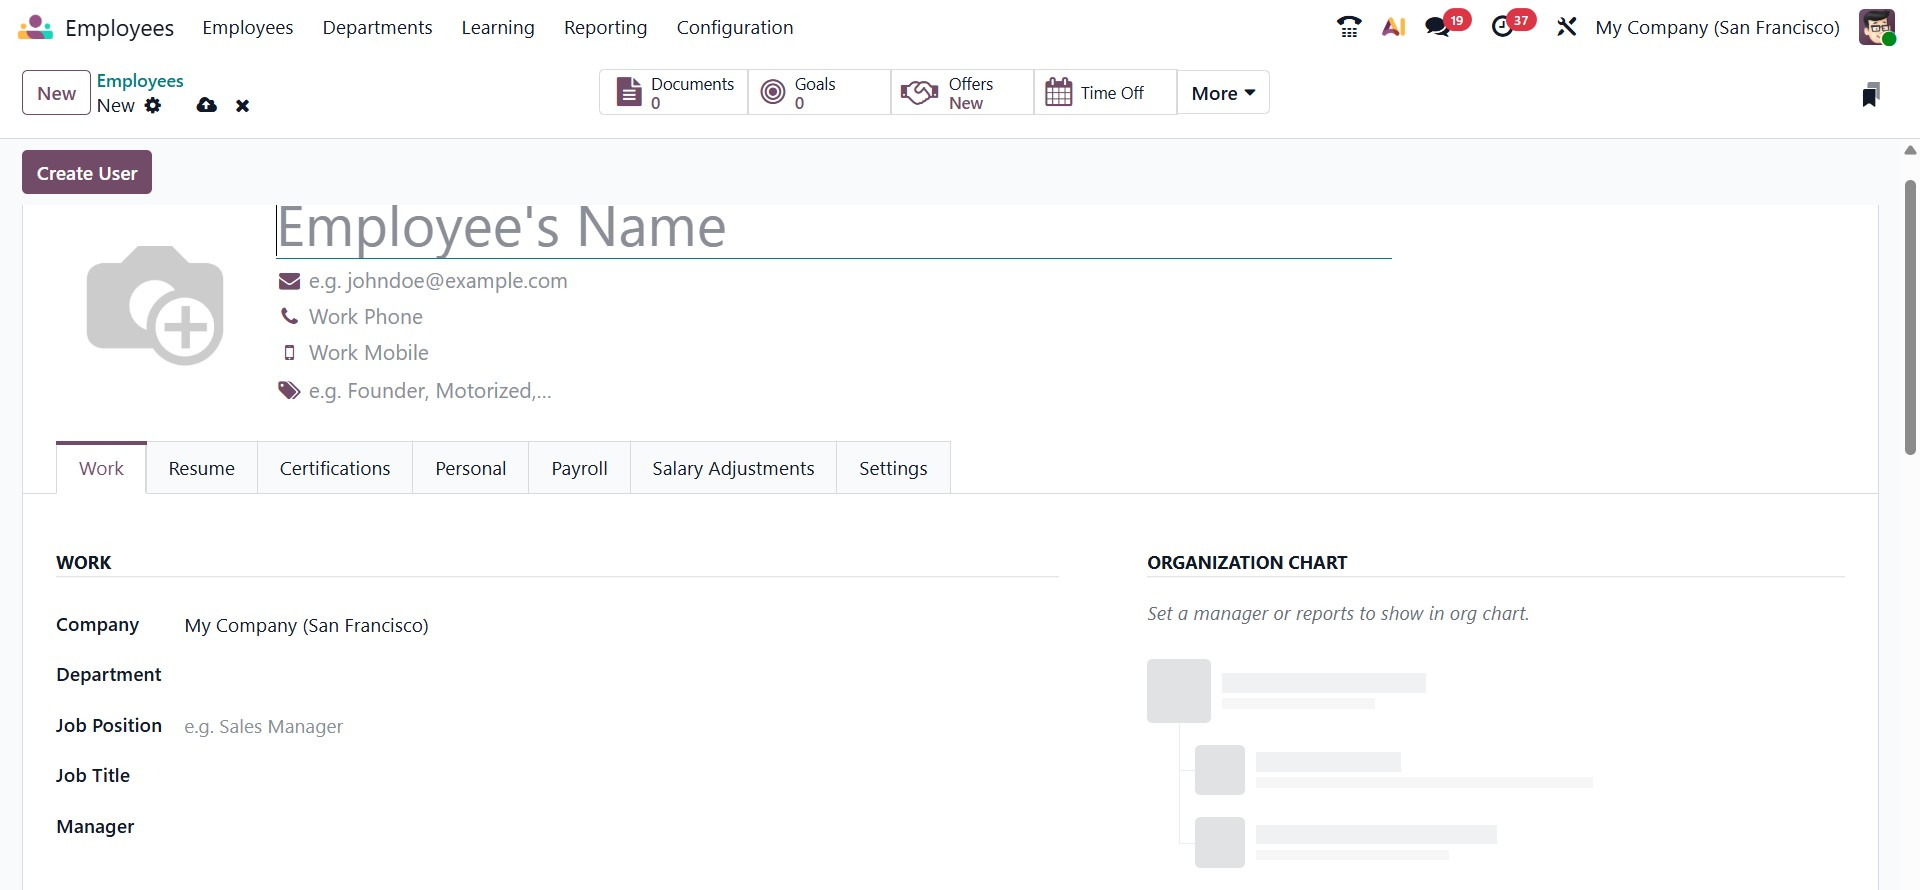
In the employee form view, the Work tab includes fields for essential job-related details such as Company, Department, Job Position, Job title, Manager, and Location, providing a complete overview of the employee’s role and responsibilities within the organization.
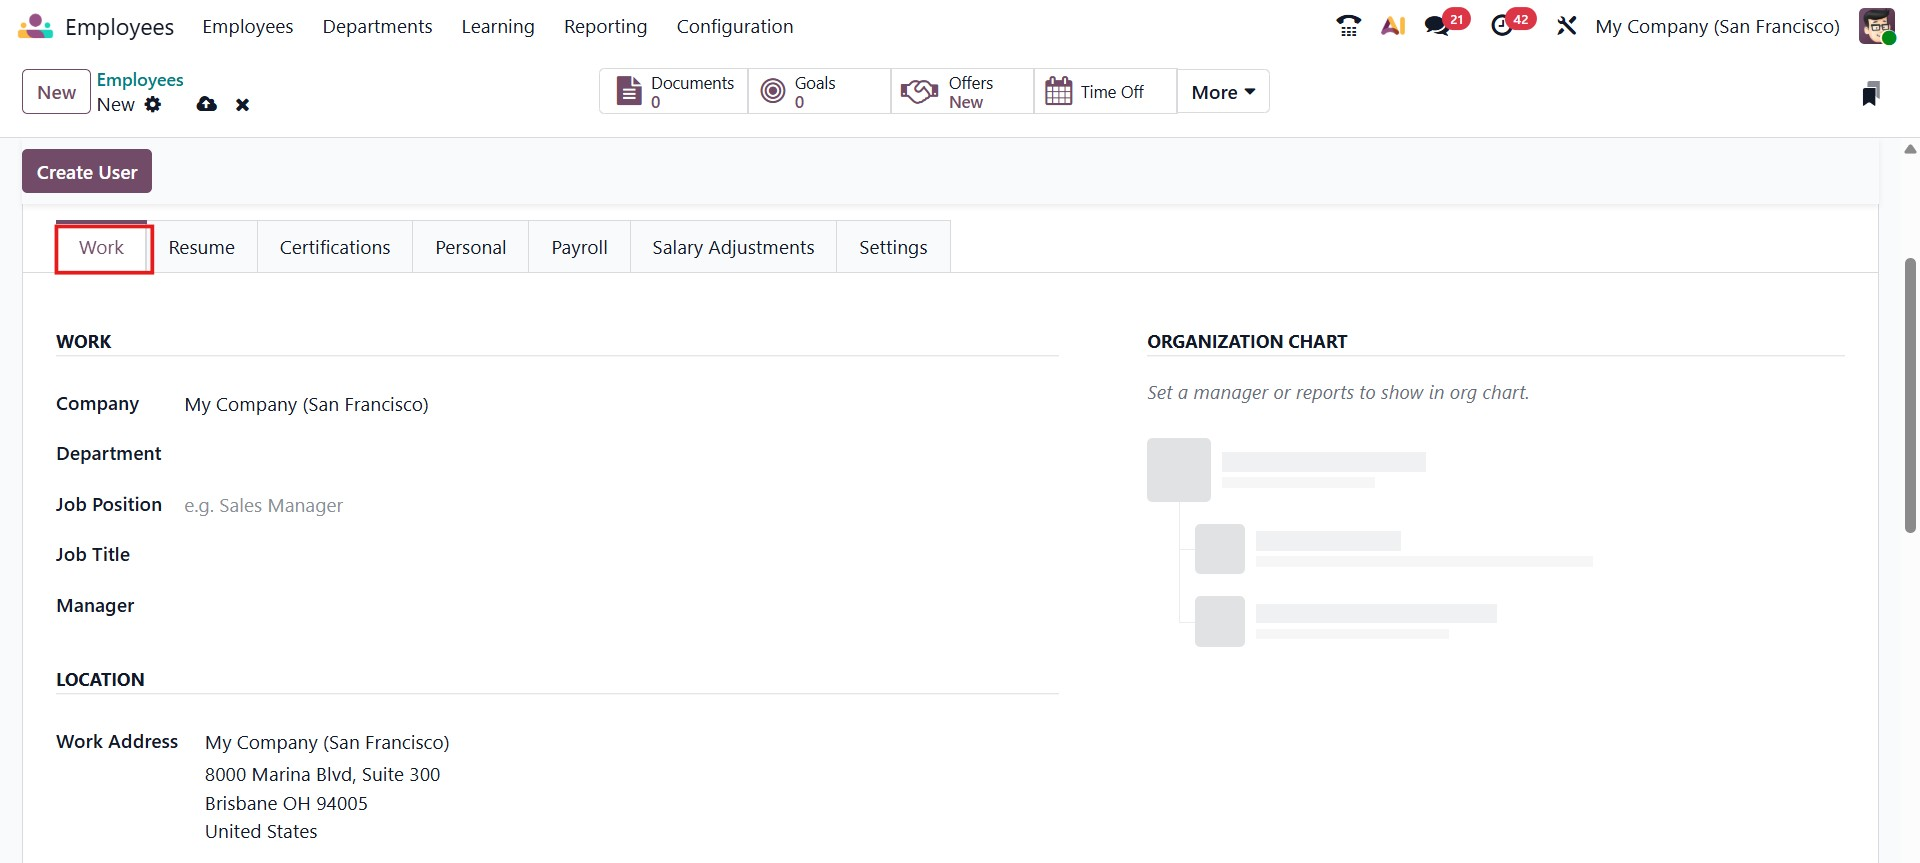
In the Location section, you can specify the employee’s work address and work location.
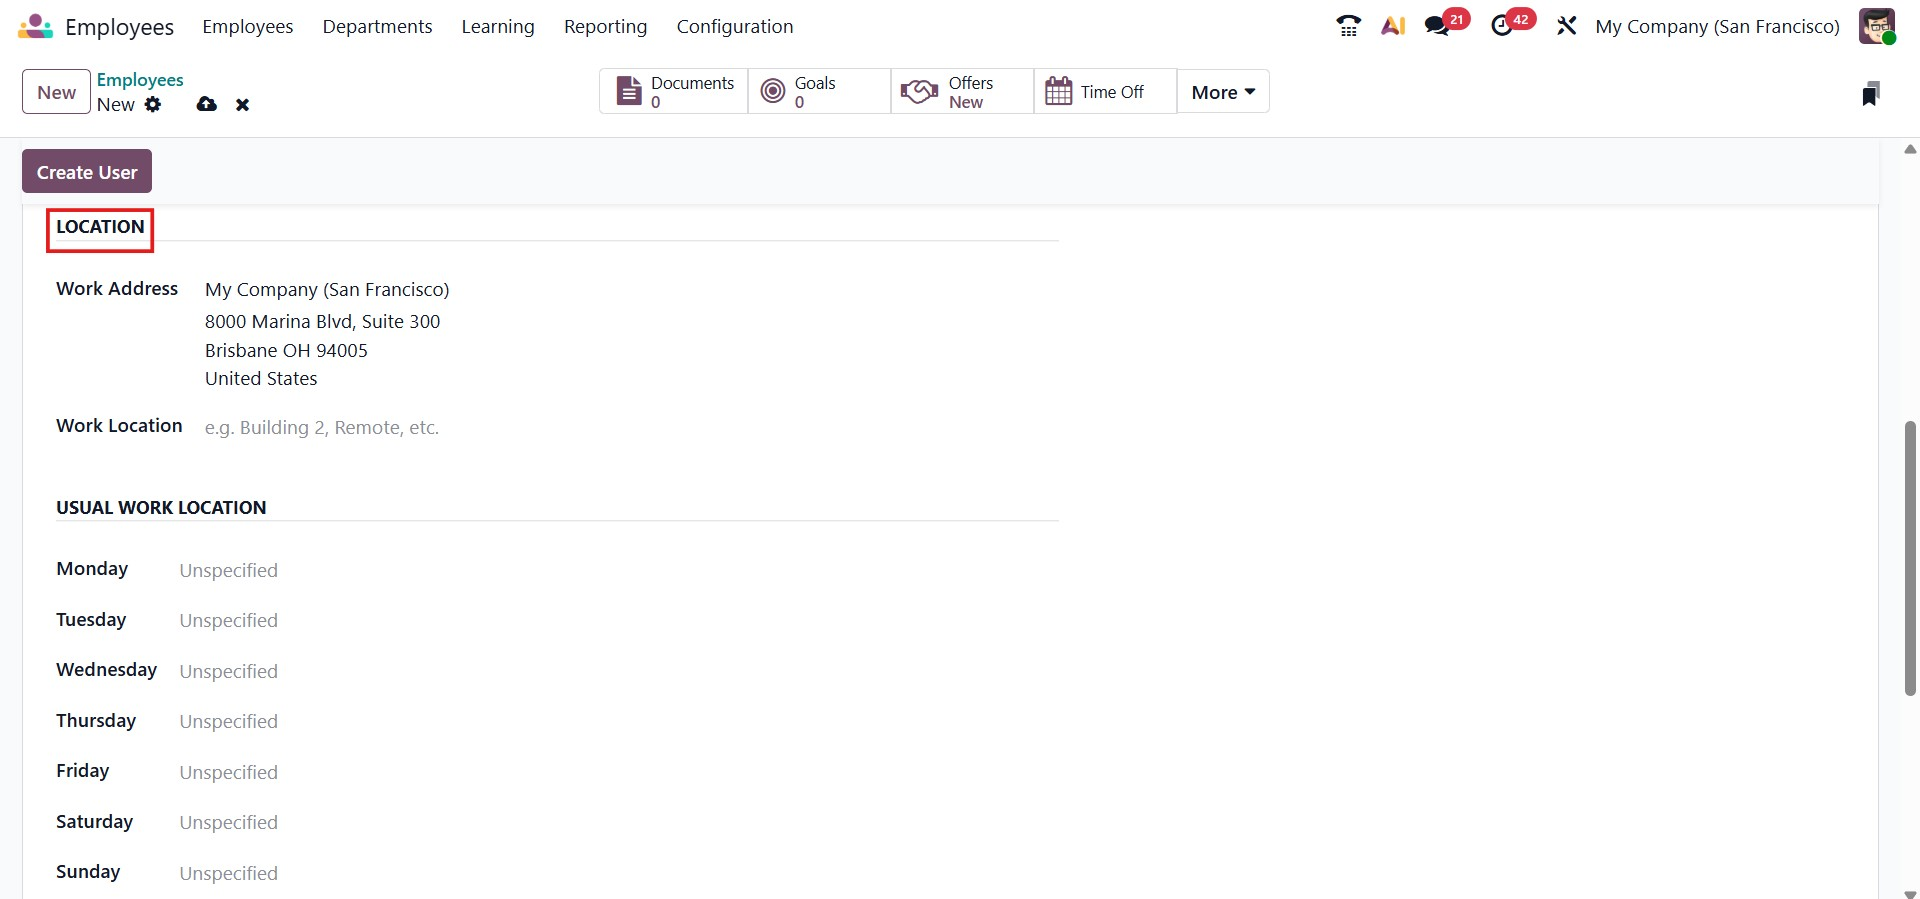
The Remote Work section enables you to specify an employee’s work location for each day of the week, such as working from the office, at home, or from another location. This information is automatically refreshed every week, making it easy to track where an employee is expected to work on any given day.
Based on the settings configured in this section, the employee’s profile card on the dashboard displays a corresponding icon in the top-right corner. As shown in the example, the icon indicates that the employee is scheduled to work from the office.
You can also assign relevant tags to each employee for easier identification and filtering. The employee form includes dedicated fields to specify details such as the employee’s company, department, manager, and coach, along with their work mobile number, work phone, and work email address. Additionally, a designated field is provided to upload and display the employee’s profile photo.
To update an employee profile with qualifications and experience, you can upload the employee’s skills and resume directly to the profile. For this purpose, navigate to the Resume tab available within the employee form, where relevant documents and details can be added and managed.
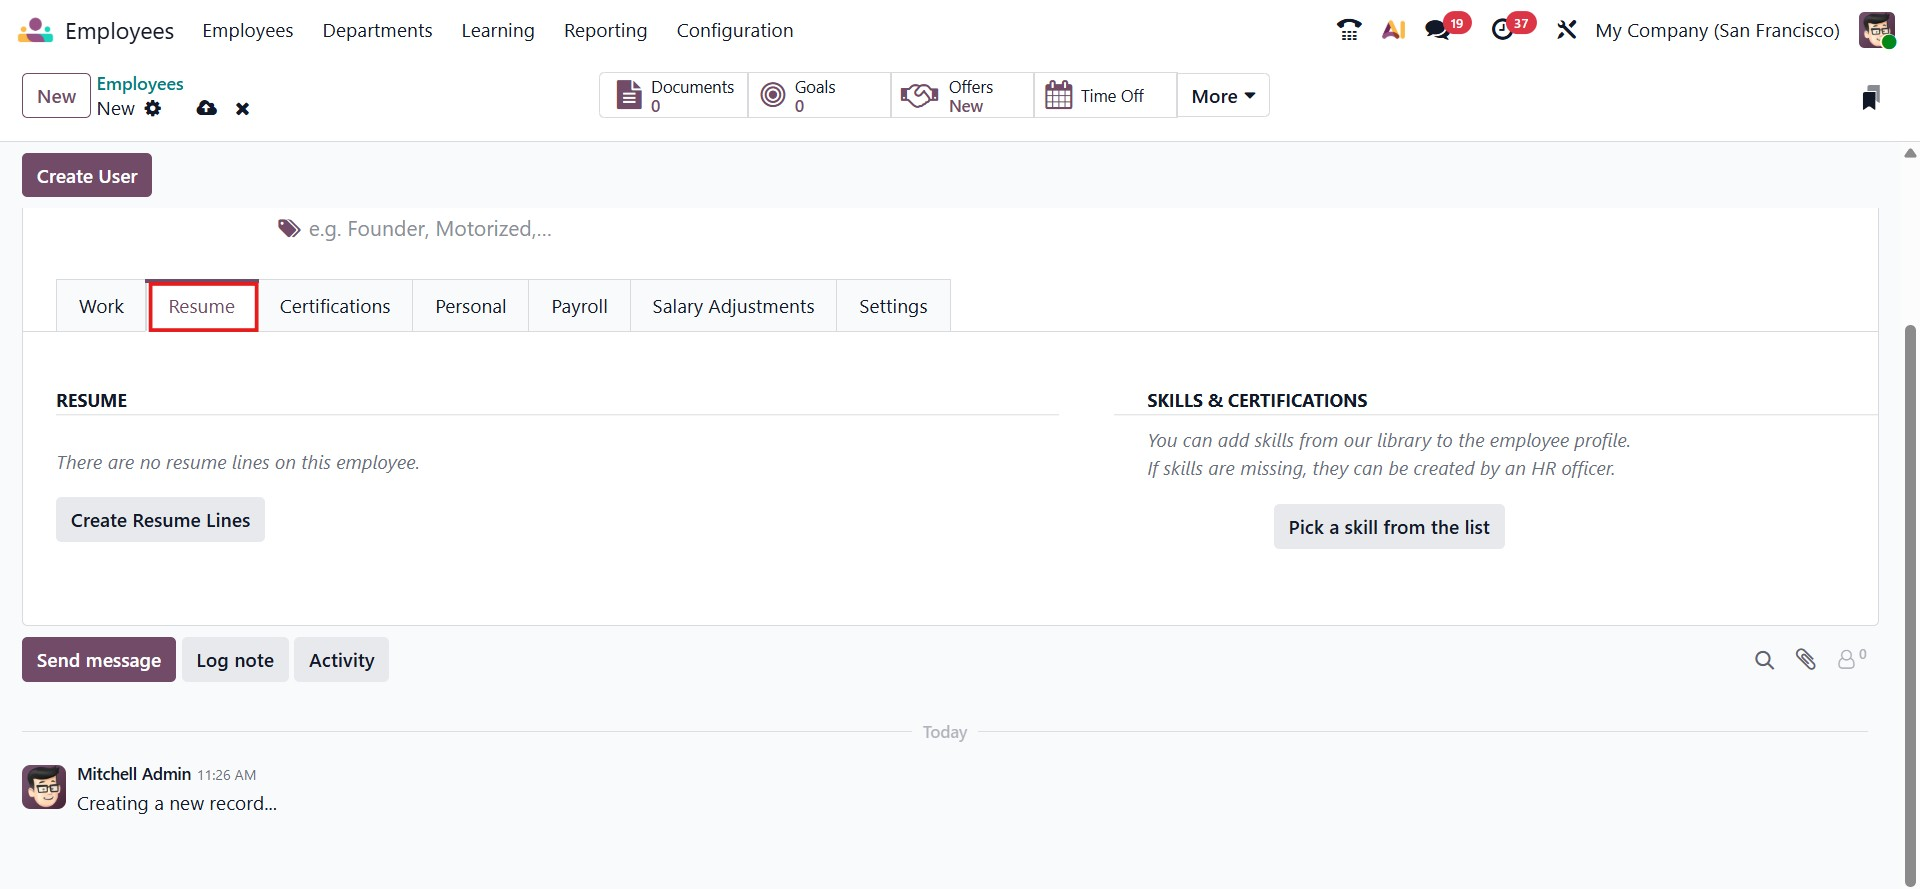
To add resume lines to an employee profile, click on Create Resume Lines within the Resume section. Under this tab, you can record information related to the employee’s education, professional experience, internal certifications, training programs, and other relevant qualifications. Once the button is selected, a pop-up window appears, allowing you to enter and save the required details.

Enter a Title for the resume line and choose the appropriate Type, such as Other Experience, Education, Internal Certification, Side Projects, or Training. If required, new resume line types can be created from the Configuration menu of the module. Specify the duration by filling in the Date Start and Date End fields, and provide additional details in the Description field. Users also have the option to upload certificate files directly to the resume line, making it easy to store and access supporting documents in one place.
Once the resume lines are added, they are displayed clearly under the Resume tab. You can continue to include more entries by clicking the Add button to update the employee’s profile with additional qualifications or experiences.
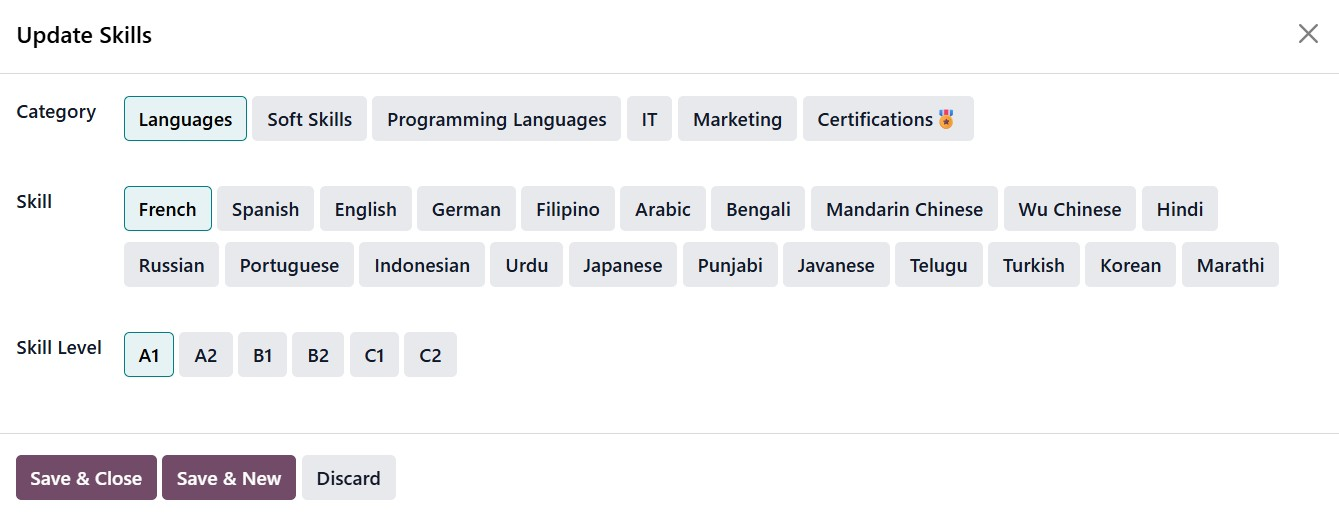
To add an employee’s skills, click the Pick a skill from the list button in the Skills & certification section. This opens a pop-up window where you can select the relevant skill category and specify the particular skill or talent. In the Skill Level field, record the employee’s level of proficiency for that skill.
Additional skills can be added using the Add button available in the Resume tab, allowing you to build a comprehensive skill profile for each employee.
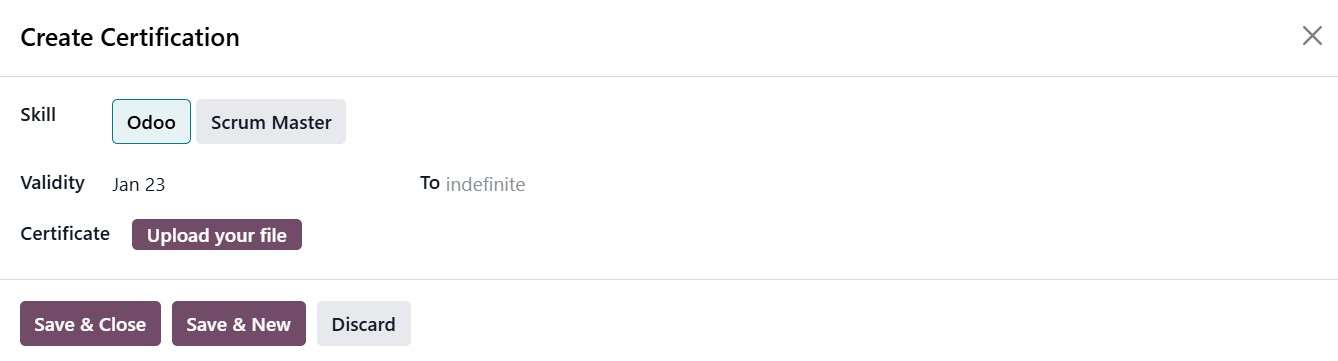
The Certifications section allows you to record any certifications held by the employee. To add a certification, simply click Add a Line, which opens a small pop-up wizard where you can select the relevant skill or certification.
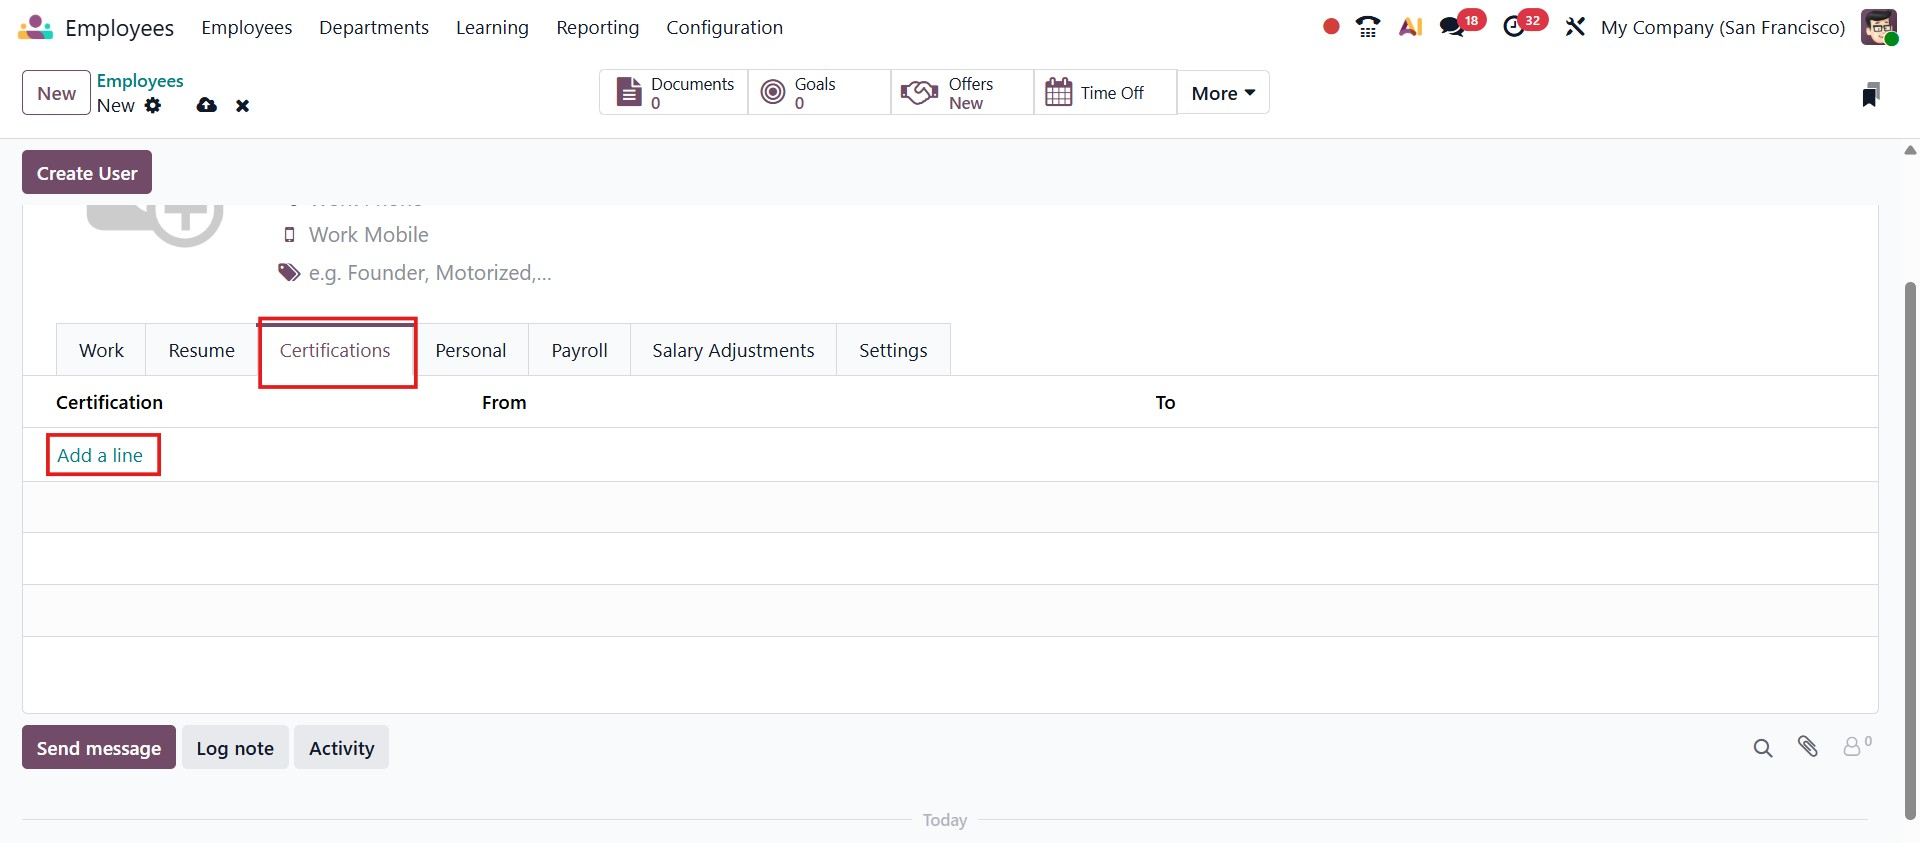
From here, you can choose the skill, for example, Odoo or Scrum Master, and define its validity period by setting an expiration date. After saving, the certification is added to the employee profile. Odoo 19 supports adding multiple certifications for a single employee.
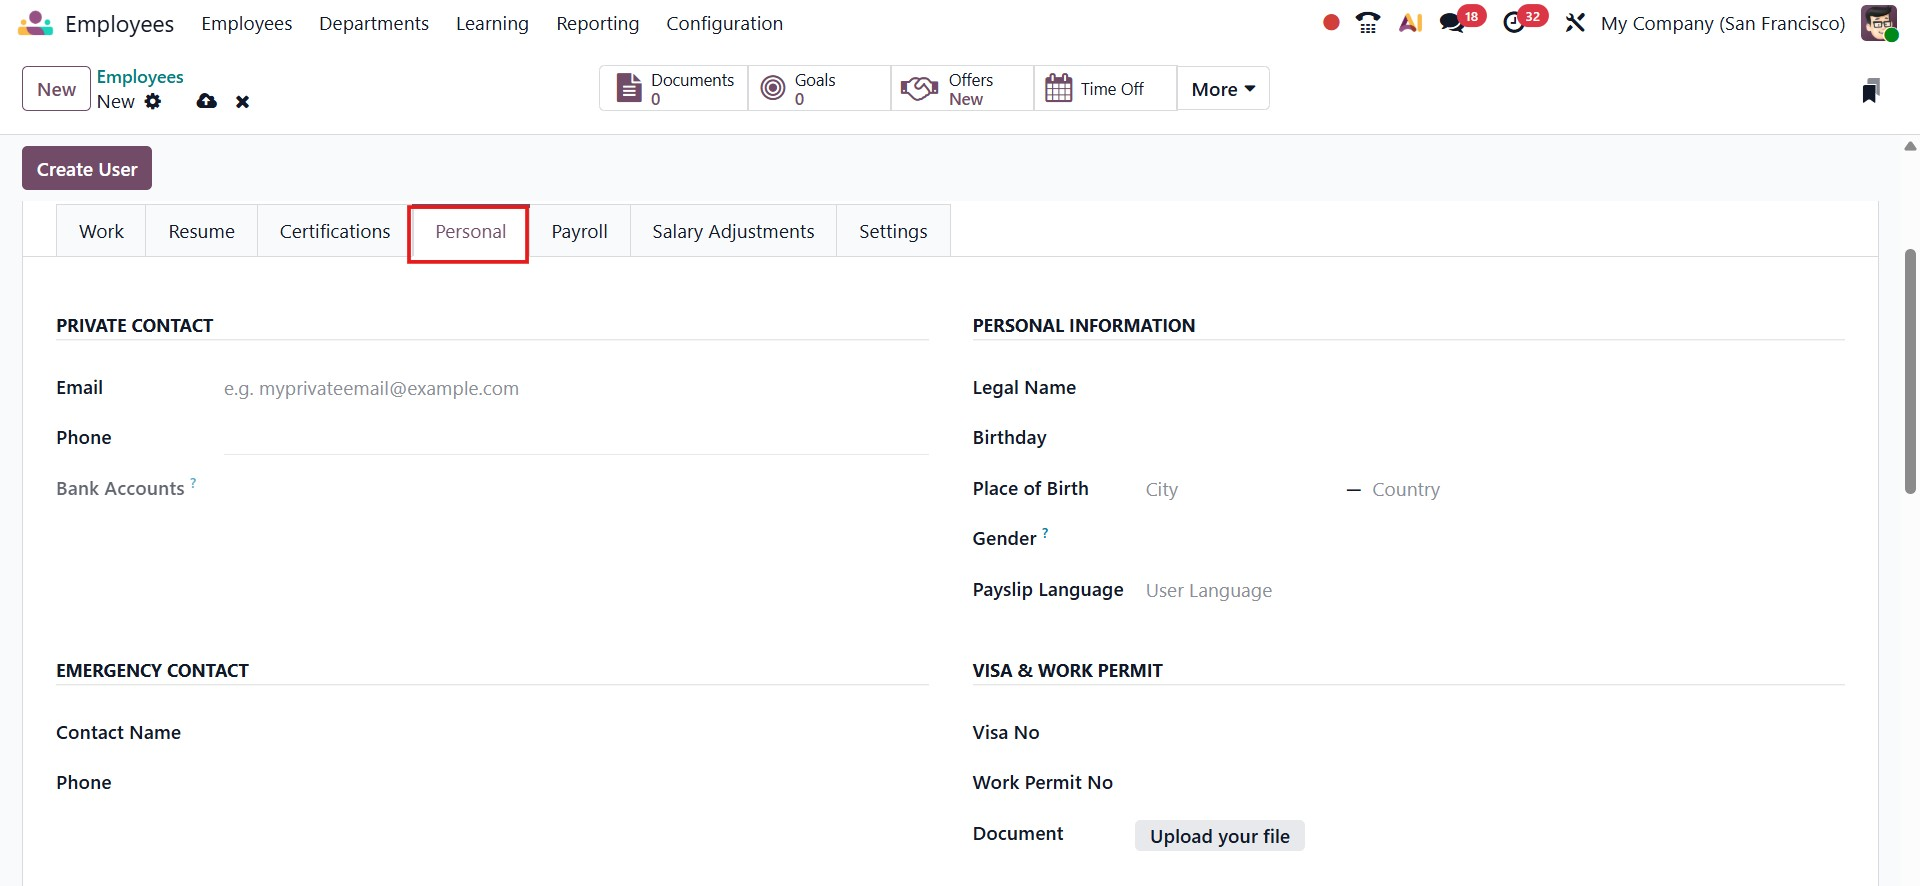
Next, the Personal tab contains the employee’s personal details, including private contact information, personal data, visa and work permit details, emergency contacts, and citizenship information. This tab also includes sections such as Location, Education, and Family, where you can record details like marital status, spouse information, and legal name. As the name suggests, this area is dedicated entirely to personal information.
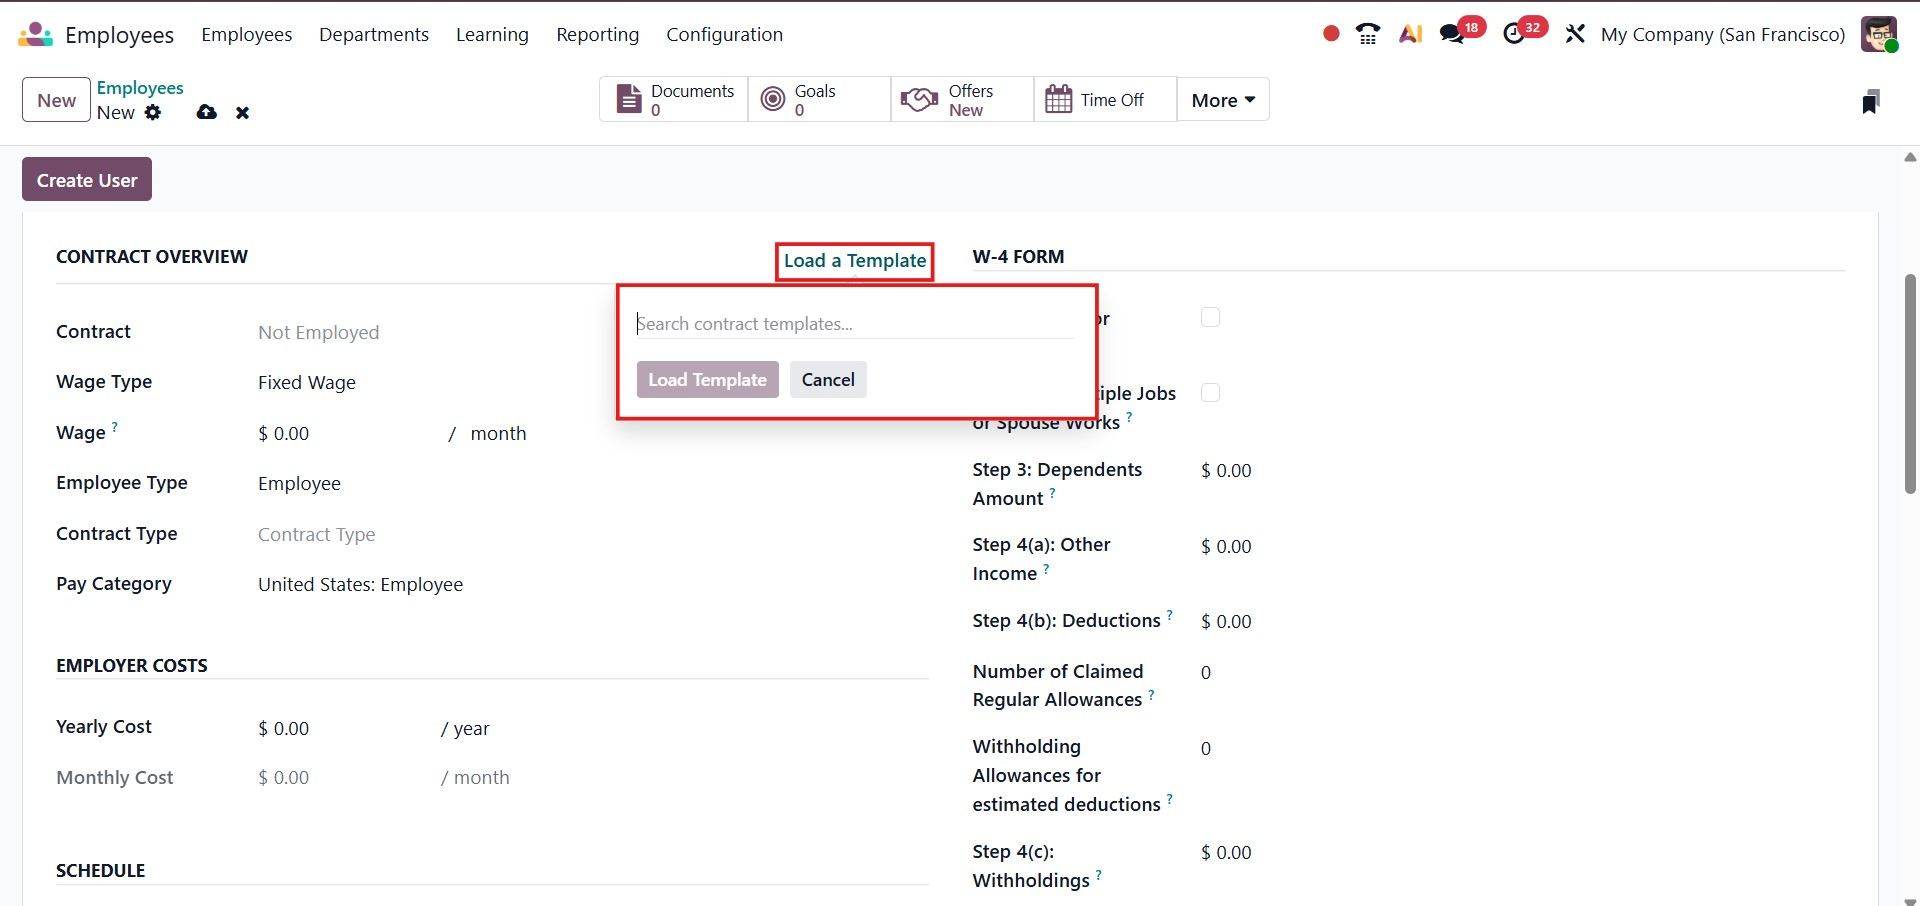
The Payroll tab is a crucial part of an employee’s profile. In this section, you can view a clear contract overview, including the contract start and end dates that define the period during which the contract is valid.

If you need to load a contract template or create a new contract, you can do so by clicking the option.
The contract can be viewed and managed at the top of the form through stage indicators, allowing users to easily track different contract periods in a clear, timeline-style view.
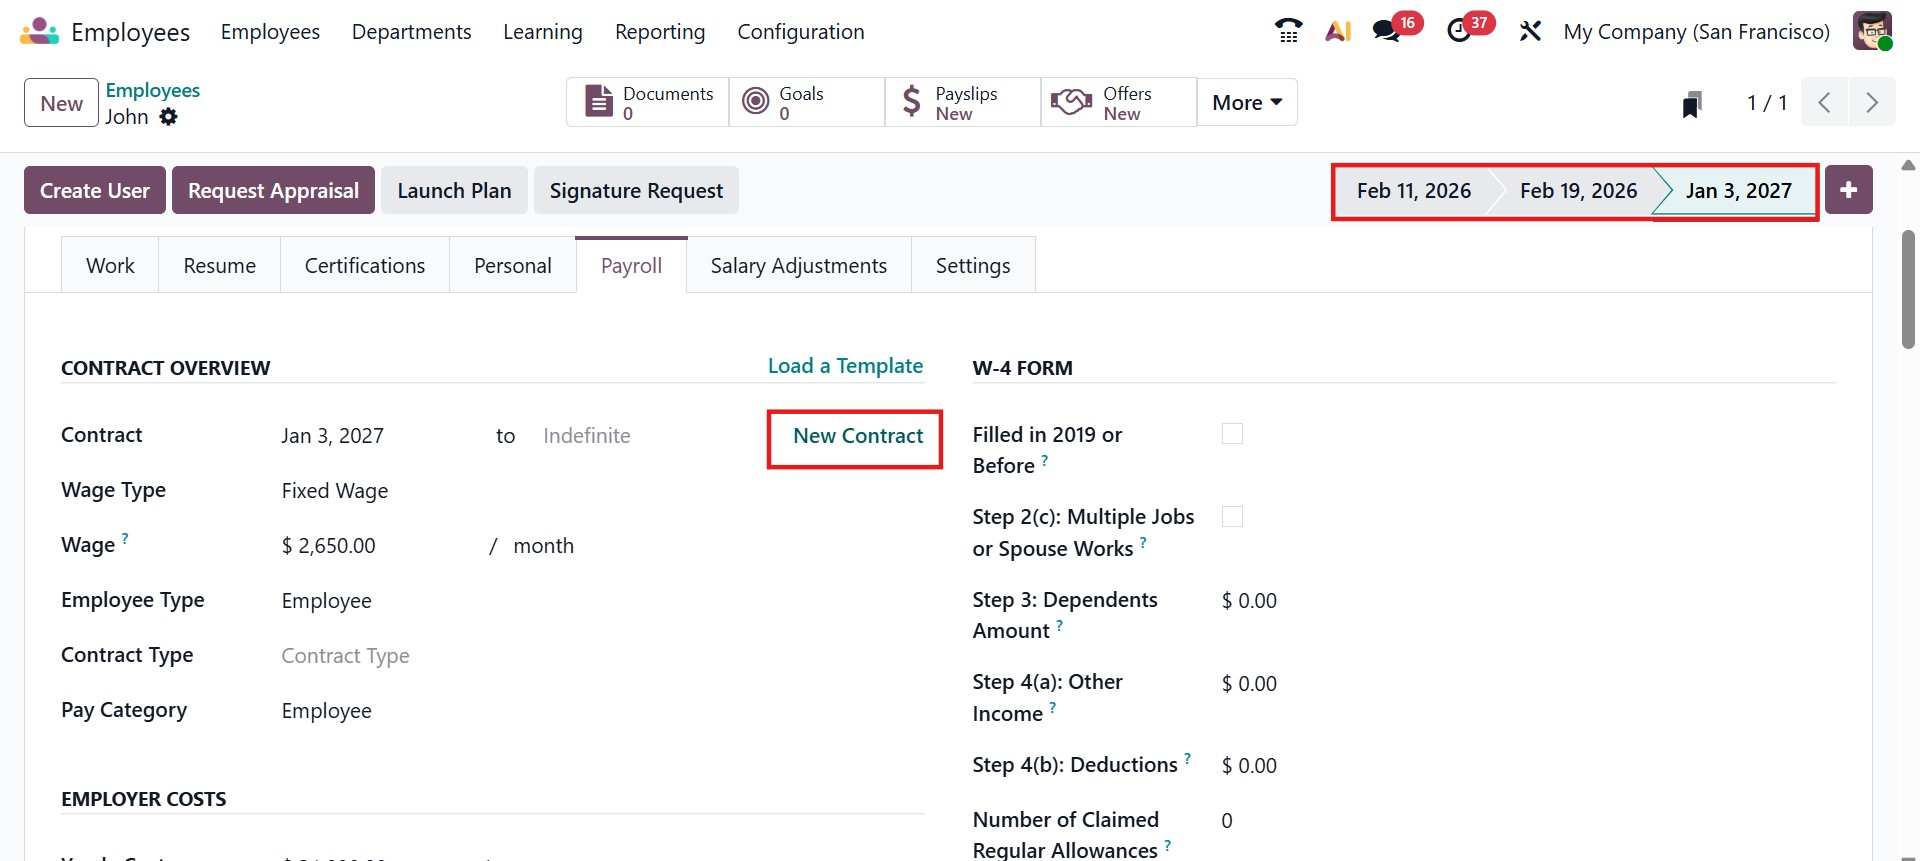
The employee’s wage is displayed and can be configured here, along with details such as the employee type, contract type, and pay category. The system also shows the Employer Cost, providing visibility into the yearly cost, monthly cost, and wage at the time of contract signature.
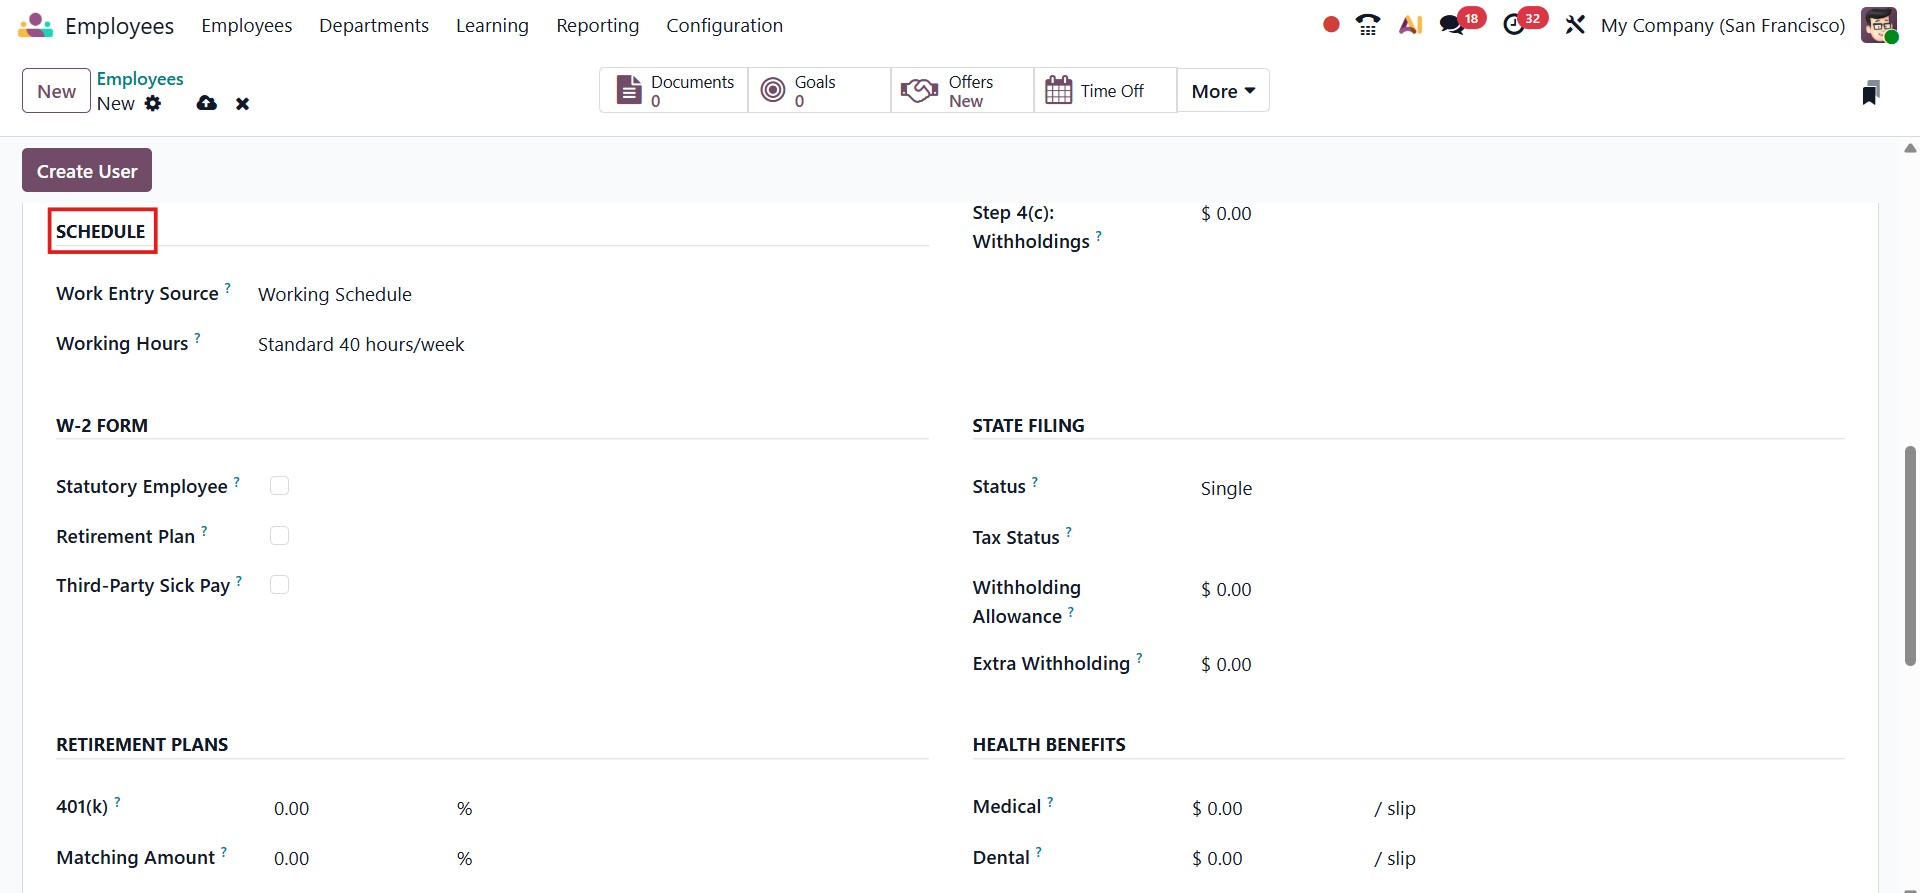
The Schedule section within the employee contract in Odoo 19 defines how the employee’s working time is structured and processed. The Work Entry Source field specifies how attendance data is generated, ensuring that work entries are accurately created for payroll. The Working Hours field allows you to select the applicable working schedule, such as Standard 38 hours/week, which determines the employee’s weekly working time and can be adjusted to other configurations like 40 or 35 hours per week based on job requirements.
In Odoo 19, the employee profile also includes a dedicated Salary Adjustments section, which allows HR managers to manage temporary or permanent changes to an employee’s pay.
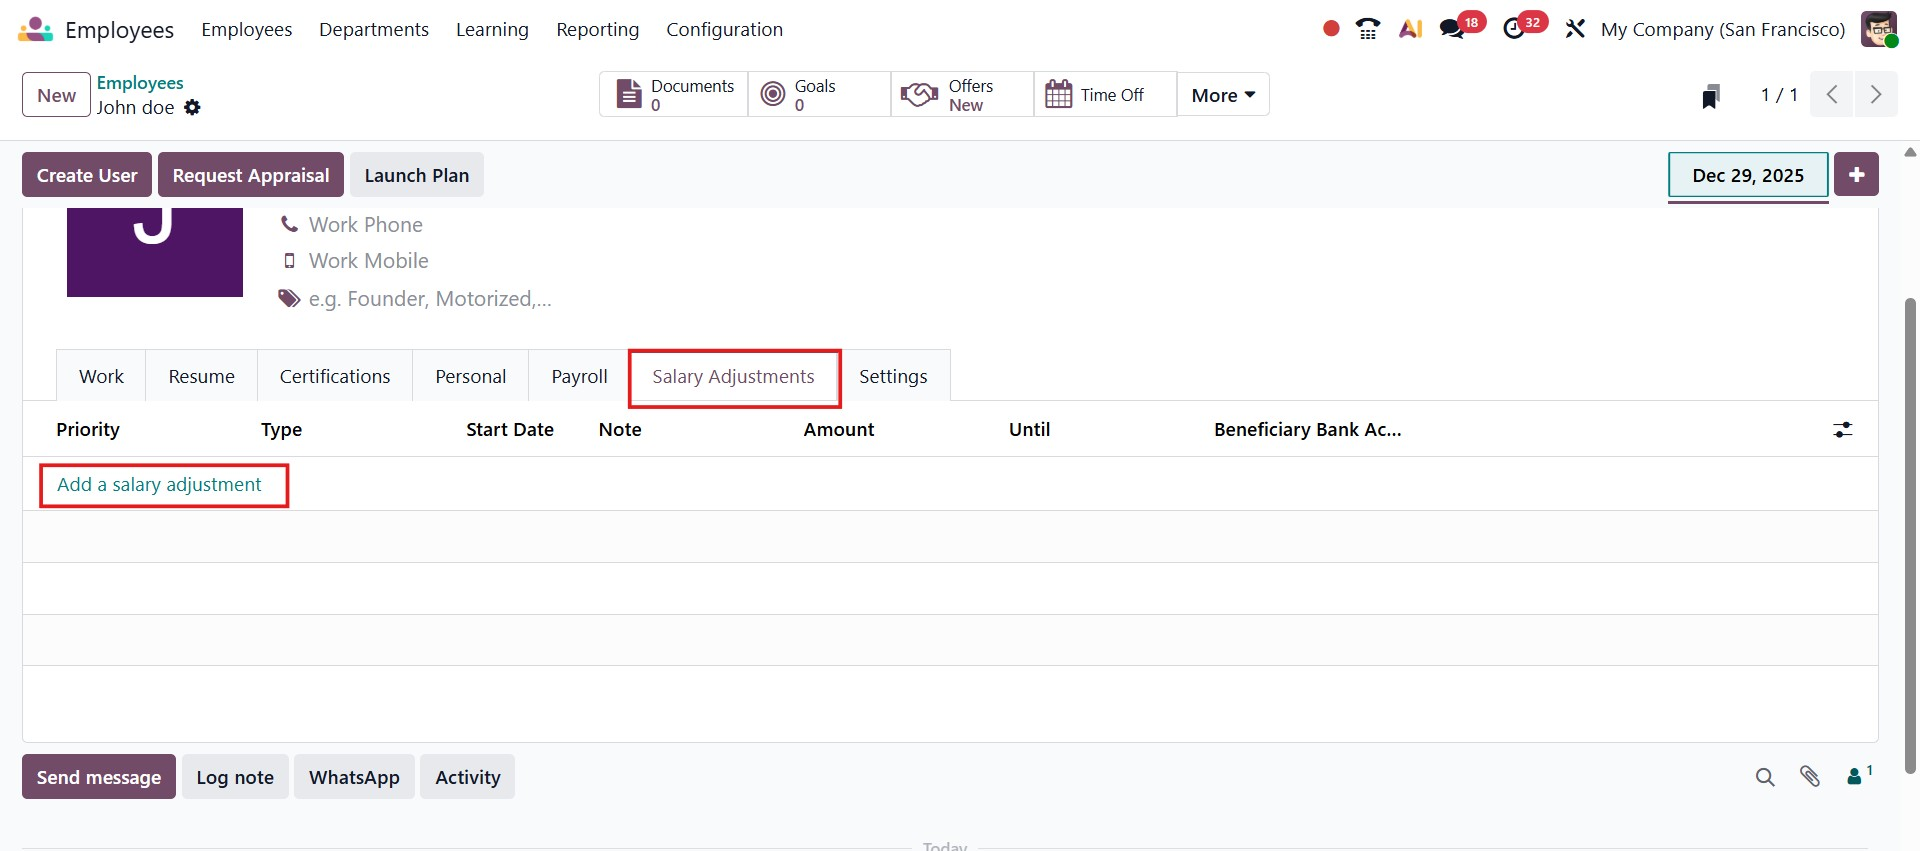
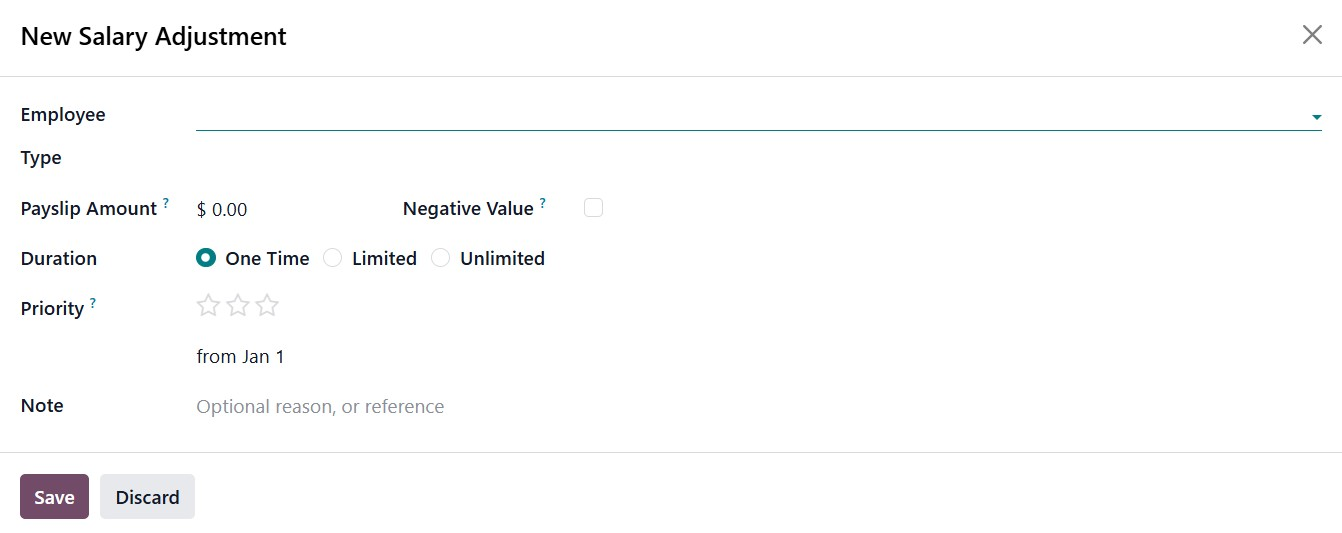
By clicking Add a salary adjustment, a form opens where you can define the adjustment details, such as the adjustment Type, Amount, and whether the value is positive or negative. You can also specify the Duration of the adjustment, whether it is a one-time adjustment, limited to a specific period, or applied indefinitely.
Additionally, this section lets you set the Start Date, priority, and optional notes for reference or justification. Salary adjustments are clearly listed with details such as priority, type, start date, amount, and validity period, ensuring transparency and easy tracking of pay changes. This feature is especially useful for handling bonuses, deductions, allowances, or temporary salary revisions without modifying the main employment contract.
In Odoo 19, the Settings tab of the employee profile provides advanced configuration options that control access rights, approvals, planning, and operational integrations.
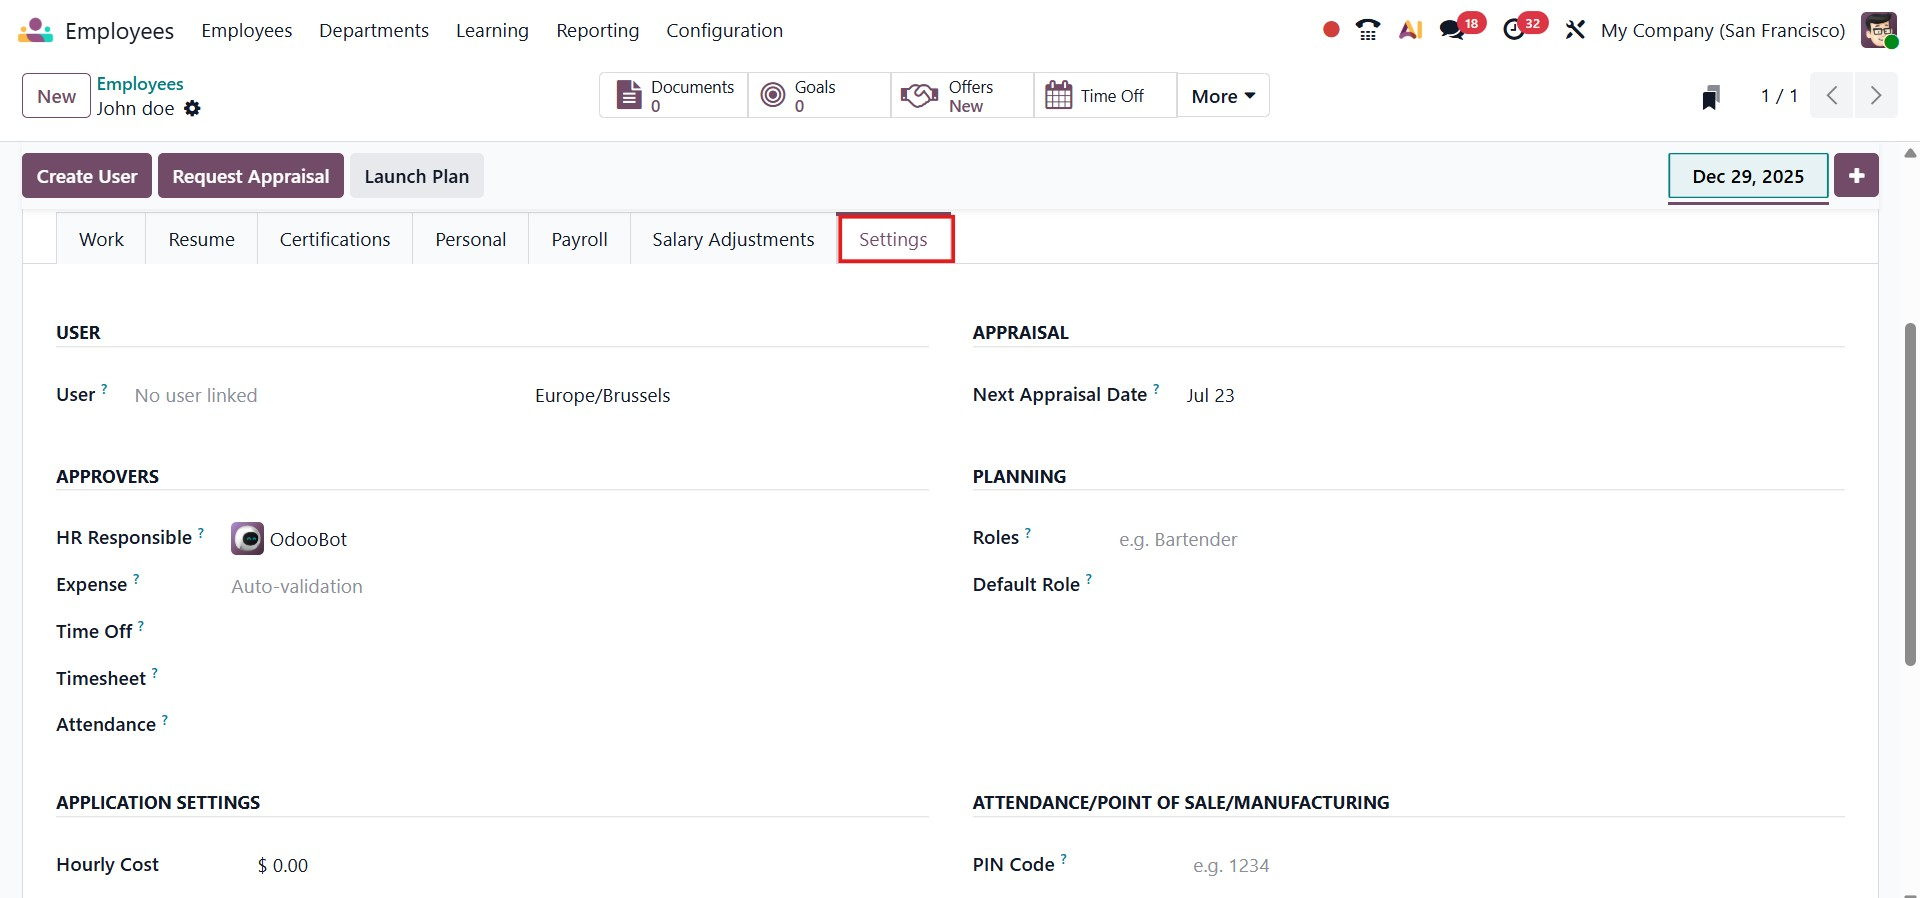
Under the User section, you can link the employee to an existing system user. The Approvers section allows you to assign responsible persons for various workflows, such as HR responsible, Expenses, Time Off, Timesheets, and Attendance, ensuring that approval processes are properly defined.
The Appraisal section lets you specify the employee’s Next Appraisal Date, helping HR teams plan performance evaluations in advance. In the Planning section, you can assign roles and define a default role for the employee, which will be used when scheduling shifts and planning resources.
Under Application Settings, you can configure the employee’s hourly cost and analytic distribution, which are used for cost analysis and reporting across projects and operations. Finally, the Attendance / Point of Sale / Manufacturing section allows you to set a PIN code and RFID/Badge number for attendance tracking and POS usage, as well as define an overtime ruleset to manage overtime calculations accurately.
Once the employee profile setup is complete, several smart buttons become available in the form view, allowing you to quickly track and manage employee-related activities.

Selecting the Documents smart button displays all files and records associated with the employee. In addition, you can use smart buttons such as Planning, Time Off, Timesheets, and Work Entries to access and manage the corresponding information directly from the employee profile, making navigation and monitoring more efficient.
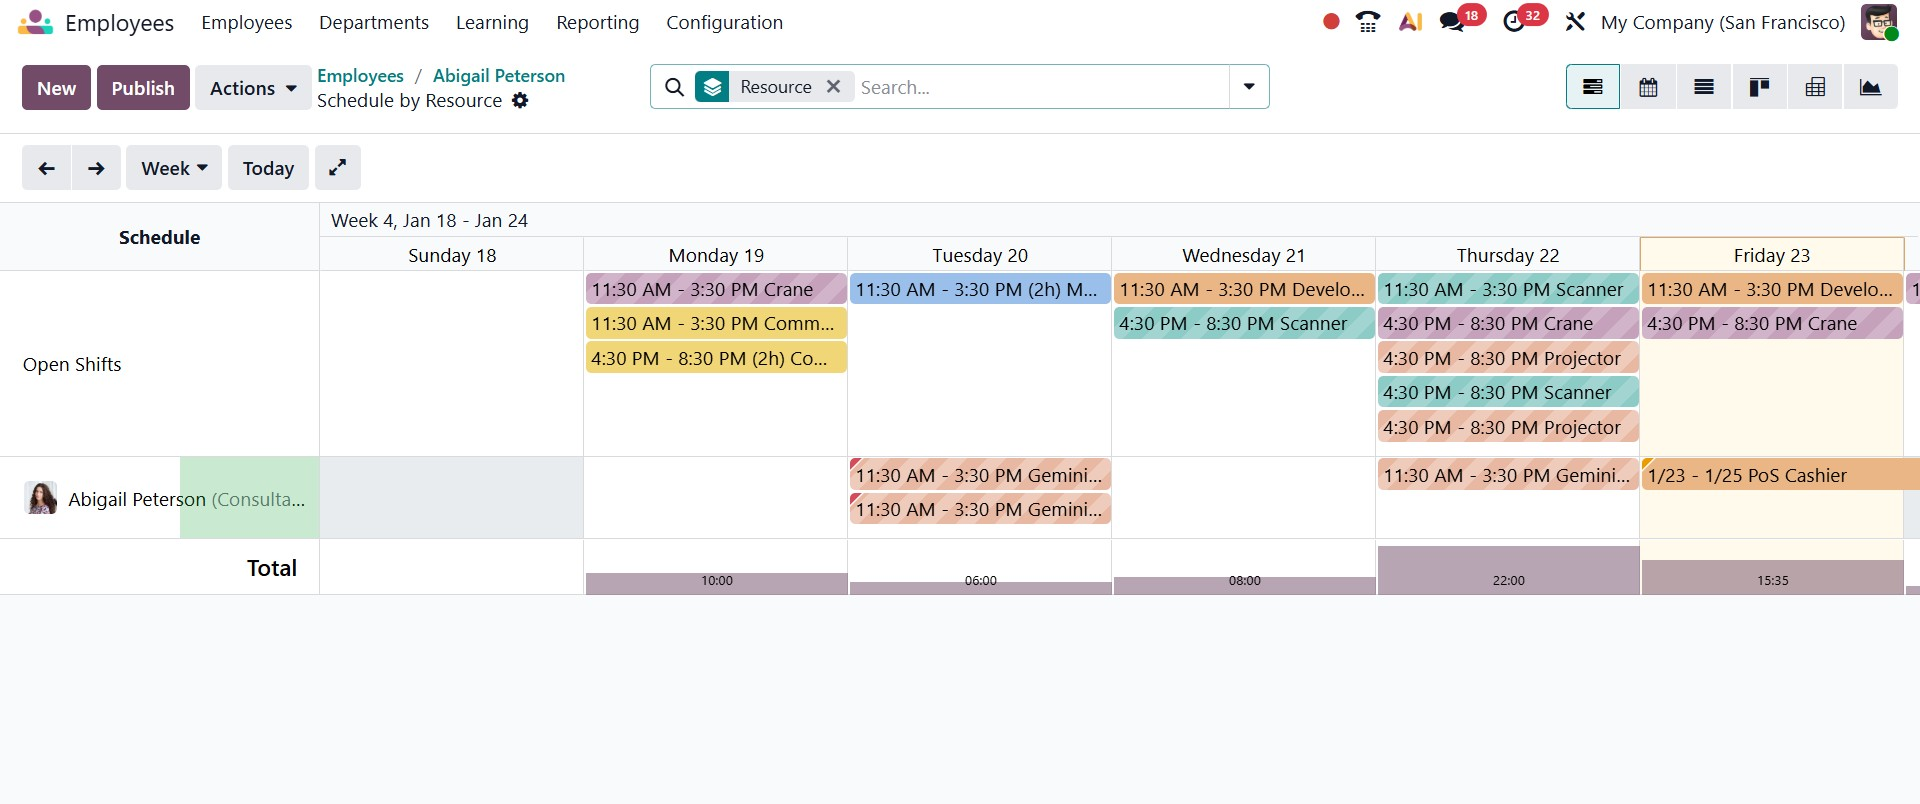
By clicking the Planning smart button, you can view all tasks and shifts scheduled for the employee. These are displayed in a Gantt view, which clearly outlines the planned activities along with their timelines. From this view, you can also schedule new tasks or assignments for the employee, making workforce planning more efficient.
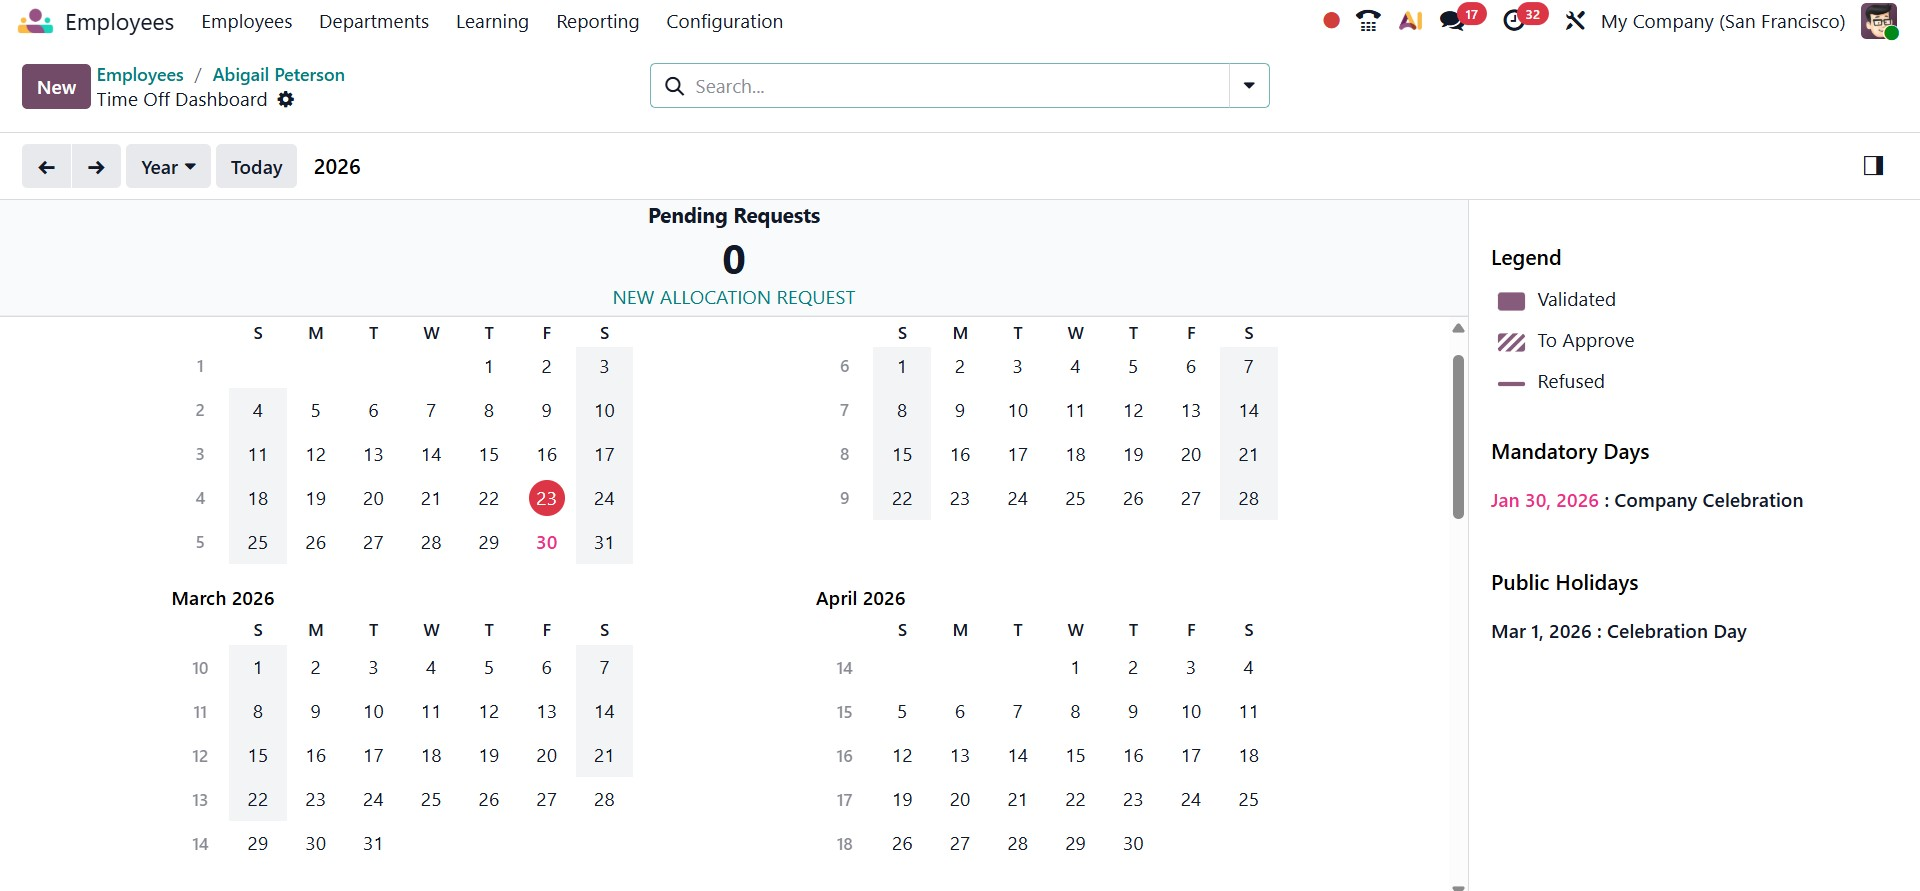
The employee's monthly and yearly time off can be viewed by selecting the Time Off option.
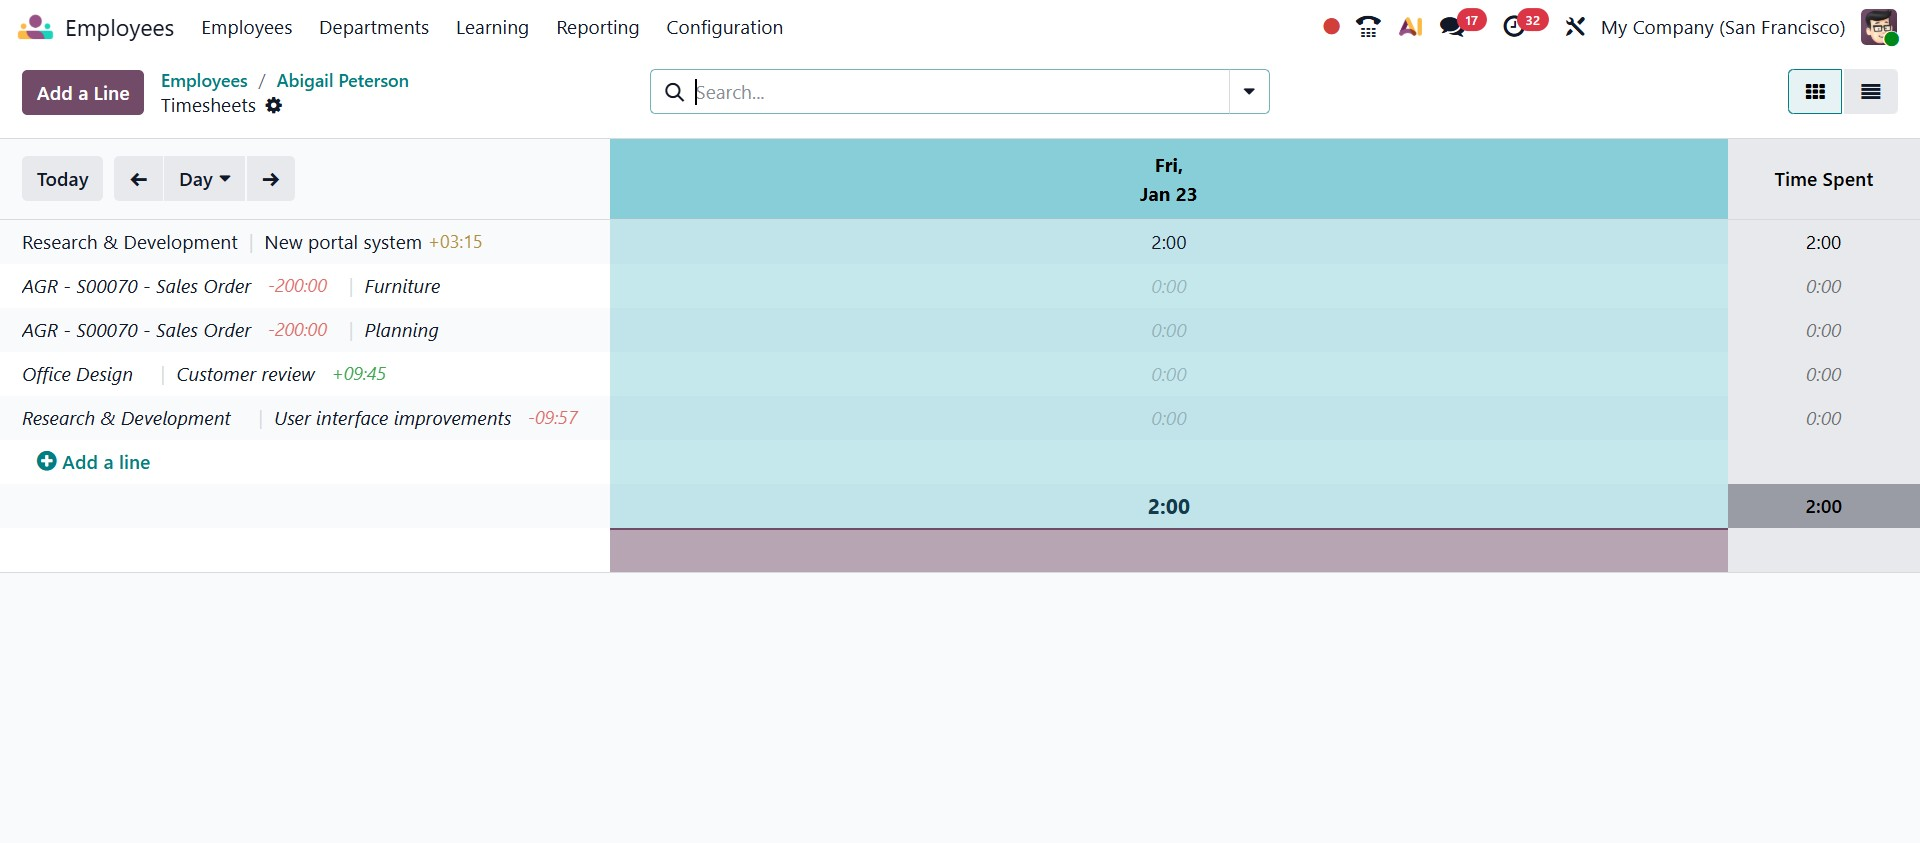
Selecting the Timesheets smart button opens the employee’s timesheet, where the time recorded for each task is displayed. This view allows you to review how the employee’s working hours are distributed across different activities.
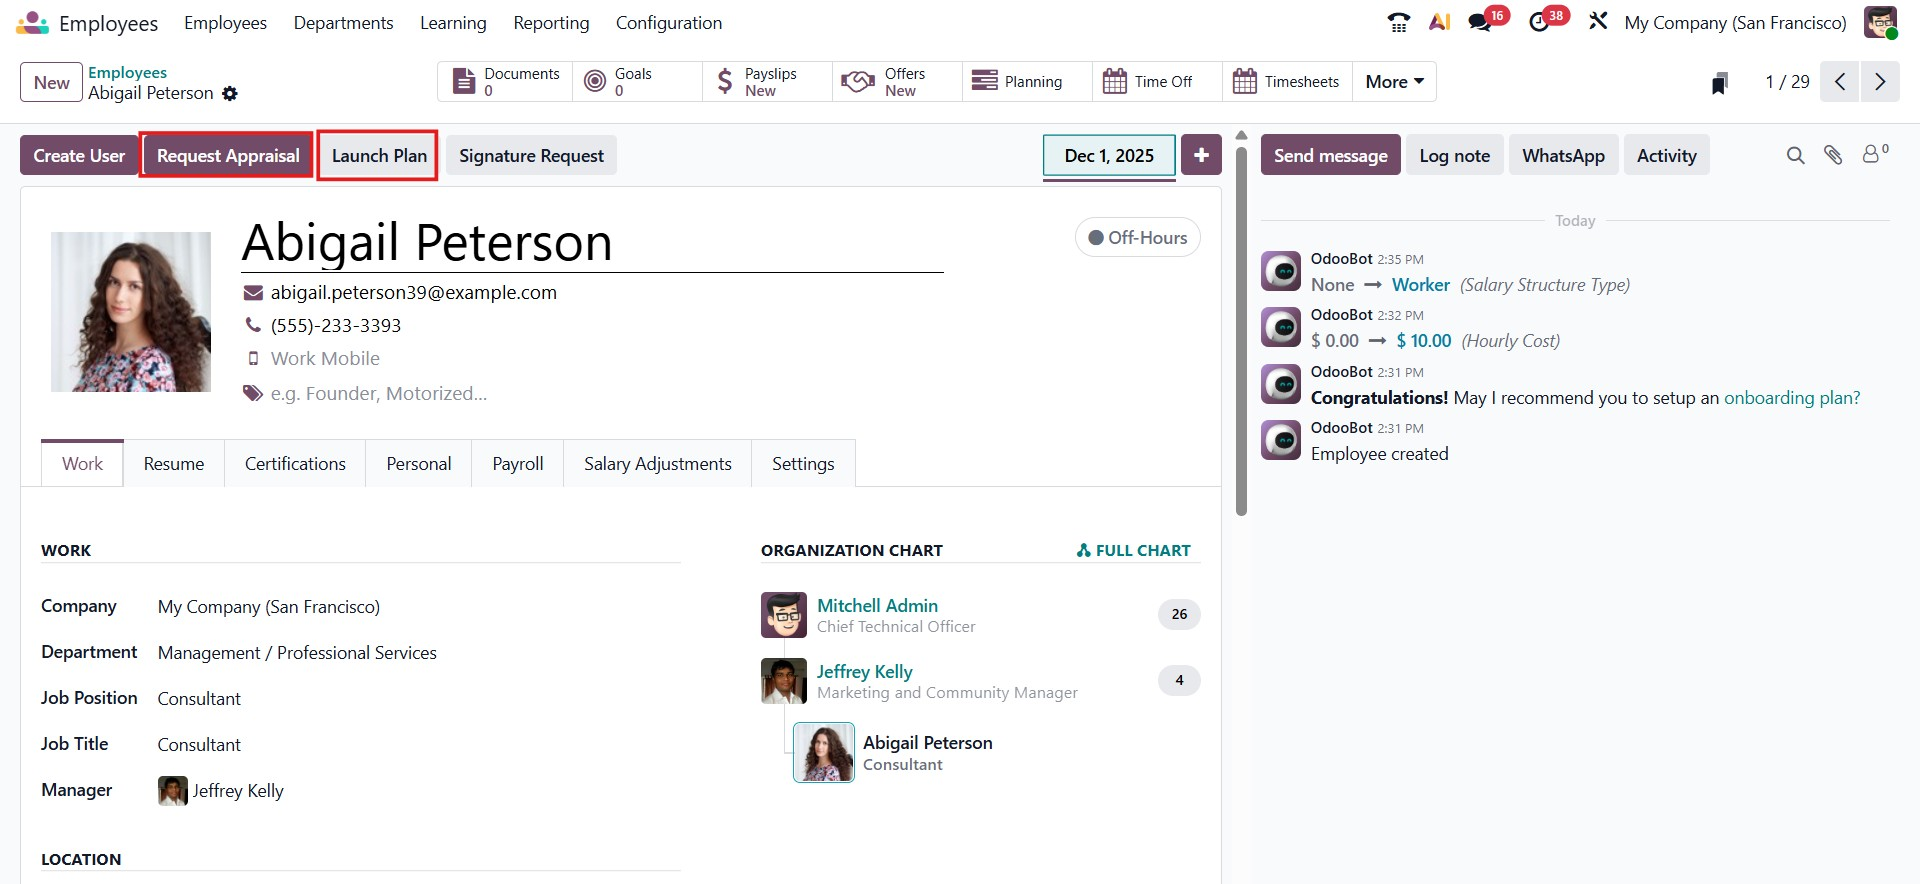
By clicking the Launch Plan button, you can initiate the employee’s onboarding or offboarding process directly from the profile. The Request Appraisal button allows you to submit an appraisal request for the employee when required.
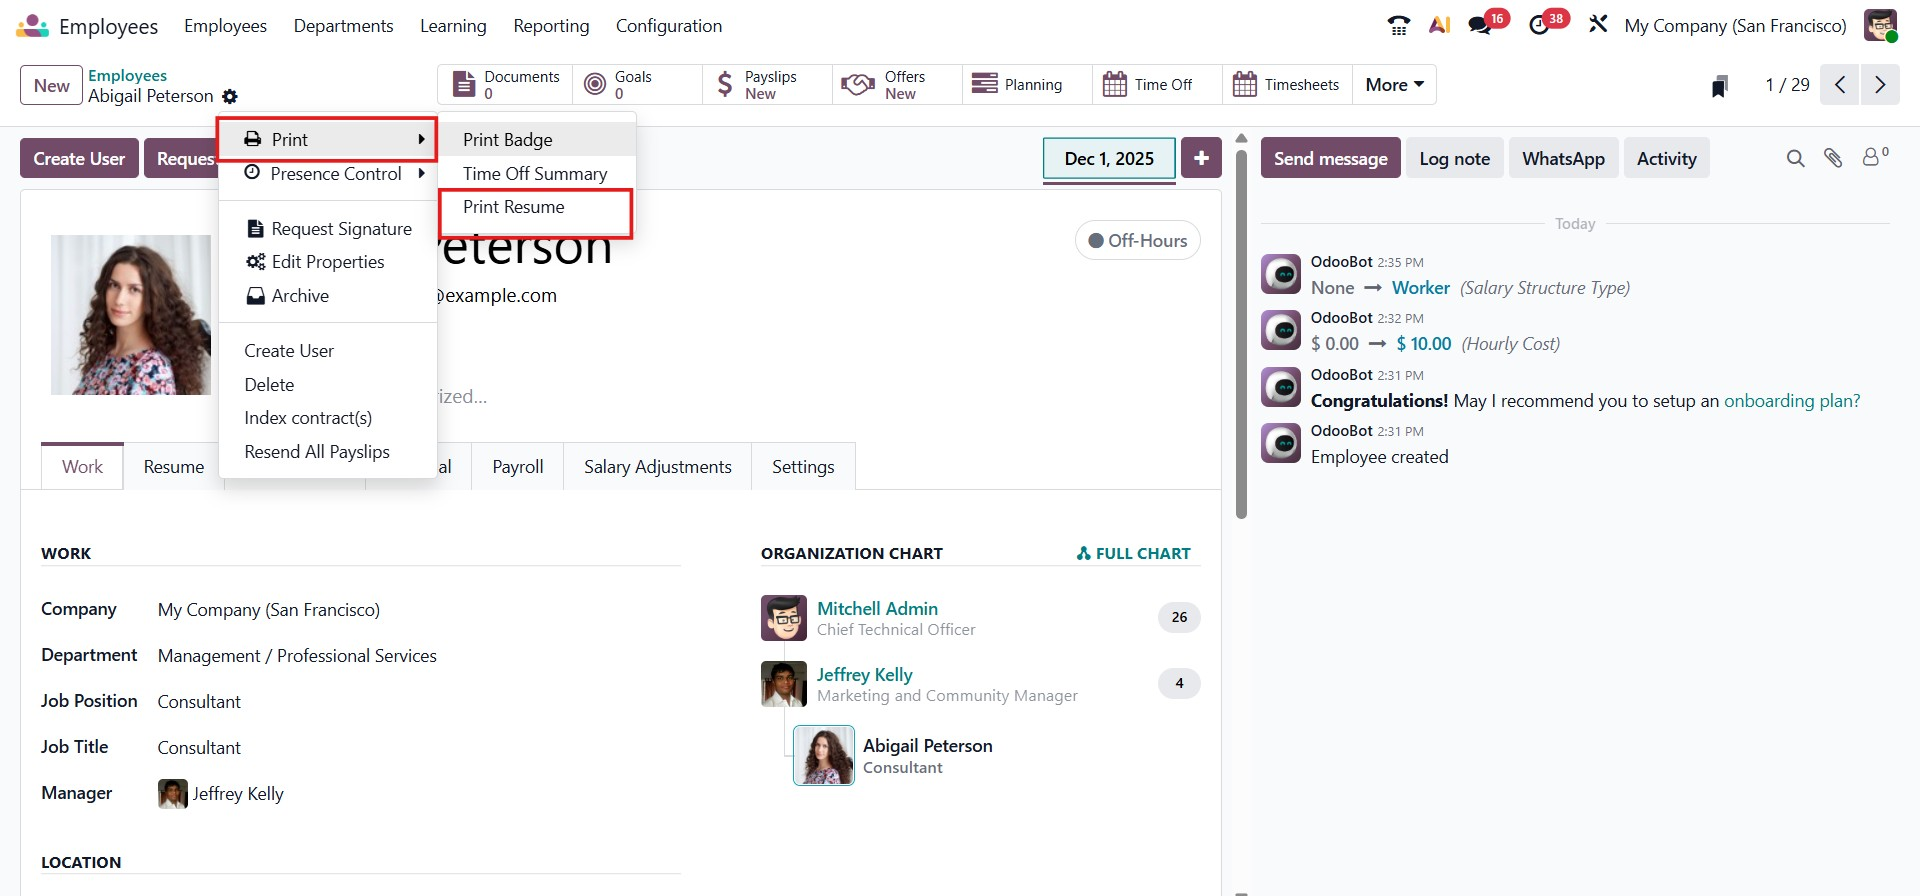
Additionally, the Action menu includes a Print Resume option, which enables users to quickly generate and print the employee’s resume with ease.
1.1 Organizational Chart
In Odoo 19, the employee organizational chart can be accessed directly from the Employees menu by selecting the Organizational chart option. This view provides a clear visual representation of the company’s reporting structure.
The chart displays the number of employees reporting to each individual. By clicking on this indicator (for example, showing three subordinates), you can expand the view to see the details of the employees who report to that manager. If you need to change an employee’s reporting line, you can simply drag and drop the employee under a different manager, making it easy to update the organizational hierarchy.