The Fleet module in Odoo 19 provides a complete and well-structured solution for managing the full lifecycle of company vehicles. It covers every major aspect of fleet operations, including vehicle acquisition, maintenance scheduling, fuel usage monitoring, driver allocation, insurance handling, and leasing management. Core functionalities include vehicle registration and status tracking, fuel cost control, driver assignment records, lease and insurance administration, and automated alerts for renewals and maintenance activities. By using the Fleet module, organizations can lower operational expenses, extend vehicle usability, maintain compliance with insurance and lease agreements, and enhance overall driver supervision. To begin working with Odoo 19, you can install the Enterprise Edition either by downloading the source code directly or by using Docker containers for a quicker and more efficient deployment.
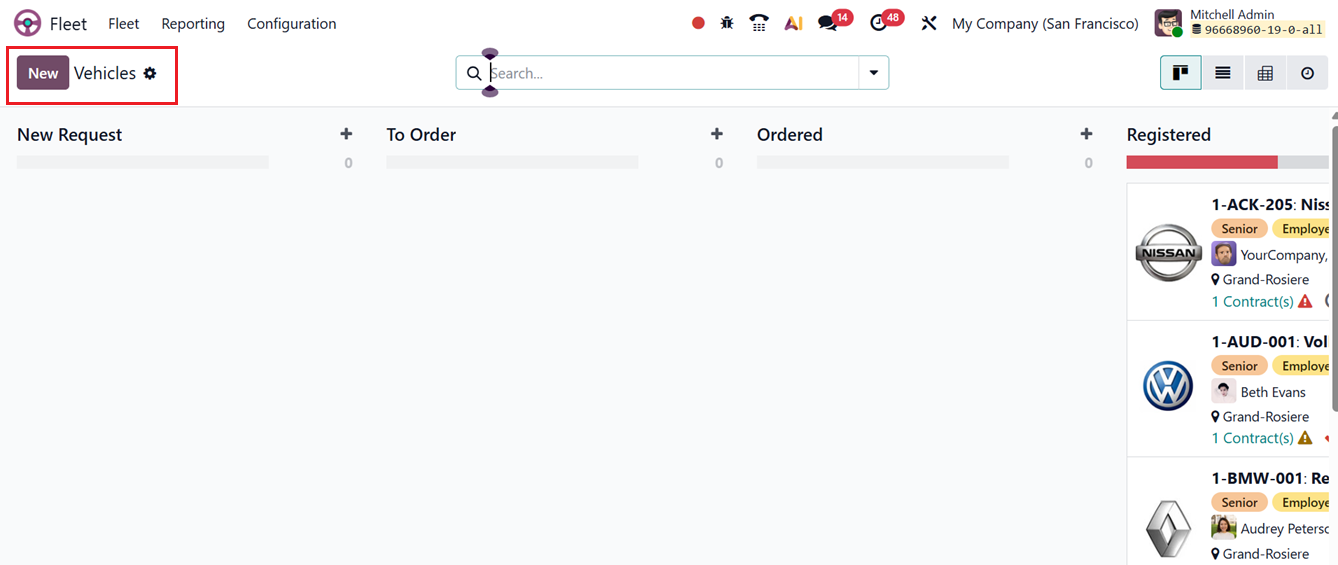
The Fleet module features a dedicated ‘Vehicles’ dashboard that displays vehicles across multiple stages, such as New Request, To Order, Ordered, Registered, Reserve, Downgraded, Waiting List, and others. This visual overview helps users easily monitor the current status of each vehicle in the fleet.
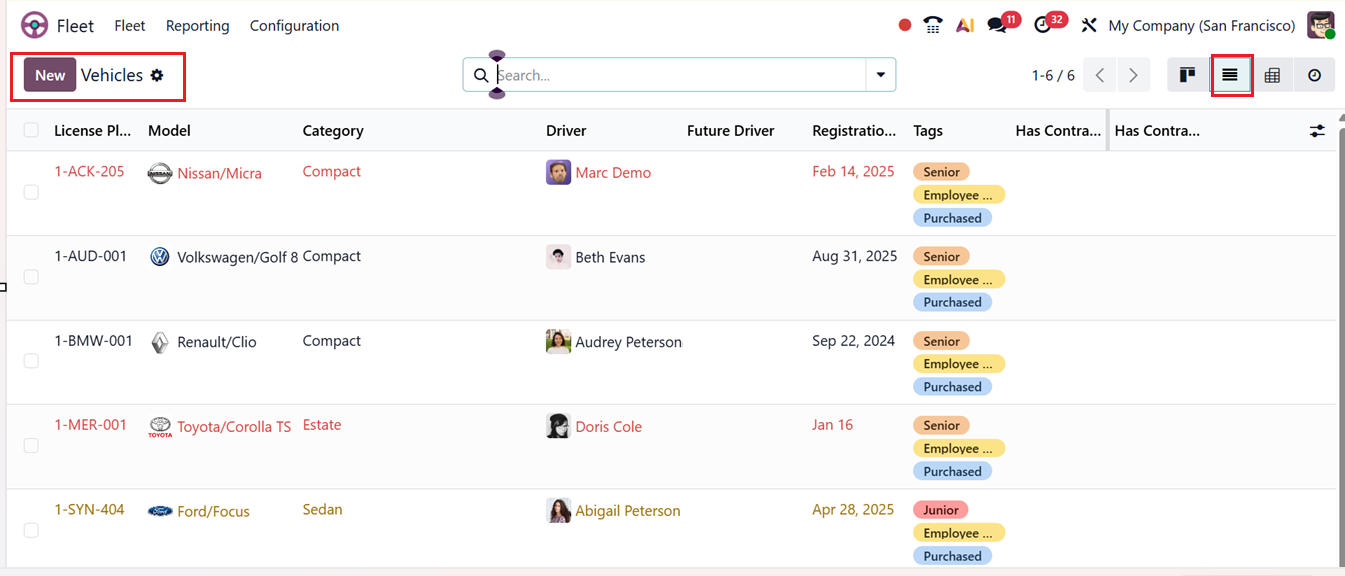
Alongside the default Kanban view, the Fleet module also supports List, Pivot and Activity views, allowing users to choose the most convenient way to manage and analyze their data. The list view shows the dashboard of vehicles with their License Plate Number, Model, Category, Driver, Future Driver, Registration Date, tags, Has Contracts to renew and Has Contract Overdue, as shown in the screenshot below.
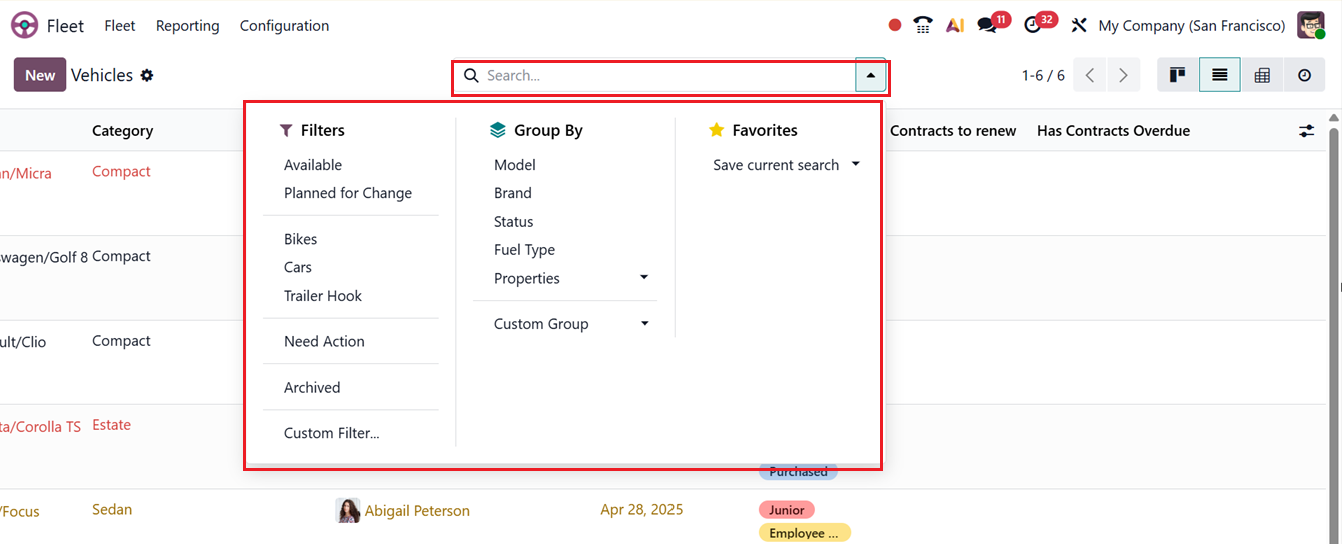
You can utilize the advanced search bar options to Filter, Group By and save current search to Favorites. You can also create customized filters and groups using Custom Filter and Custom Group options, as shown in the screenshot below.
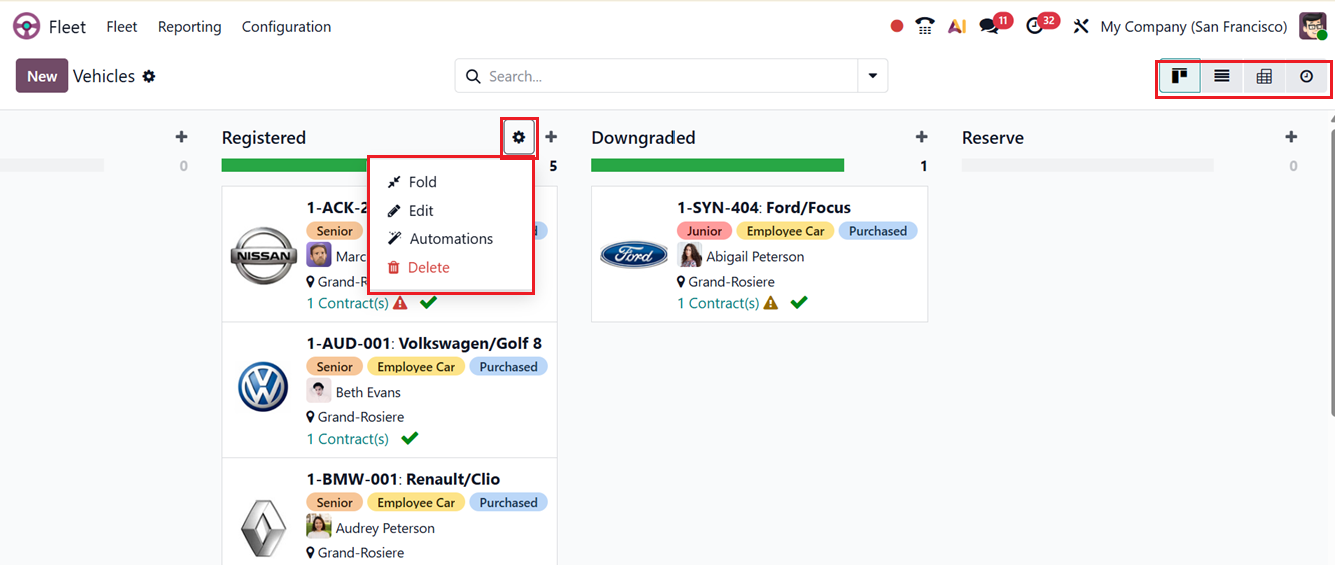
Each stage includes a settings menu that allows users to Fold stages in Kanban view, Edit stage details, Delete stages and apply Automated actions as required, as shown in the screenshot below.
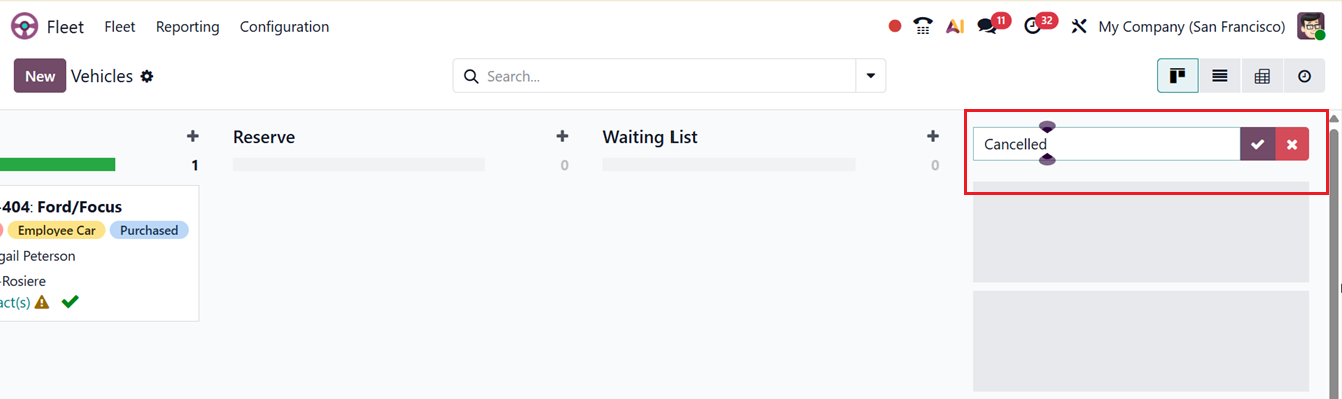
Custom stages can be added for specific vehicle workflows by using the ‘Add State’ option. Then, edit the stage name inside the displayed field and save the name using the (Tick) icon. Also, you can edit the stages using the ‘Edit’ option, as shown below.
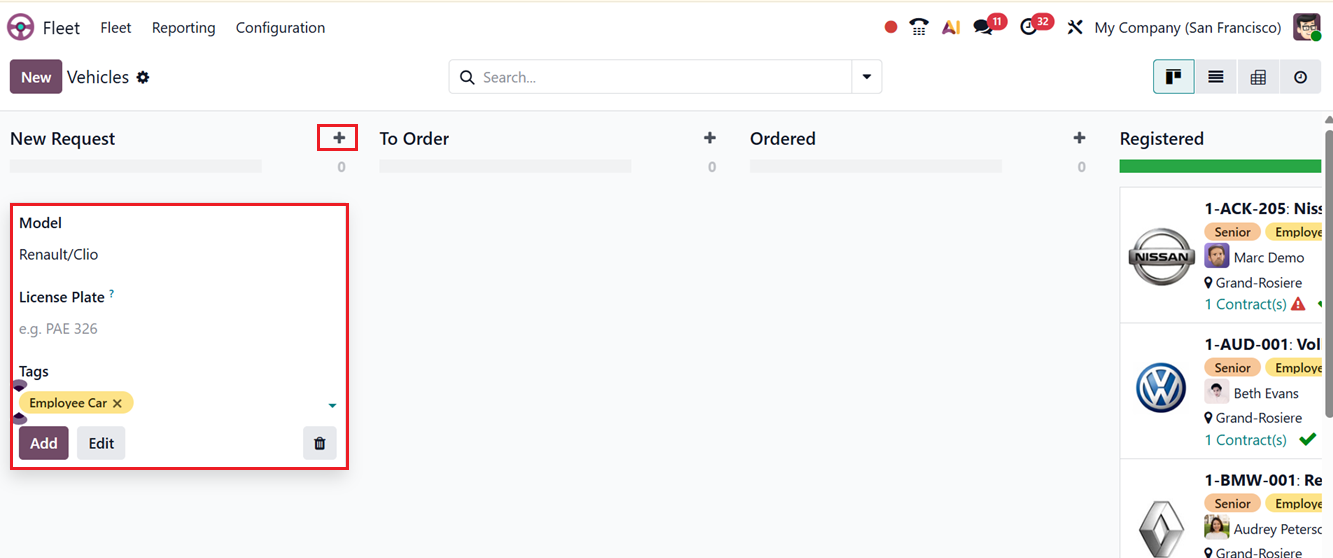
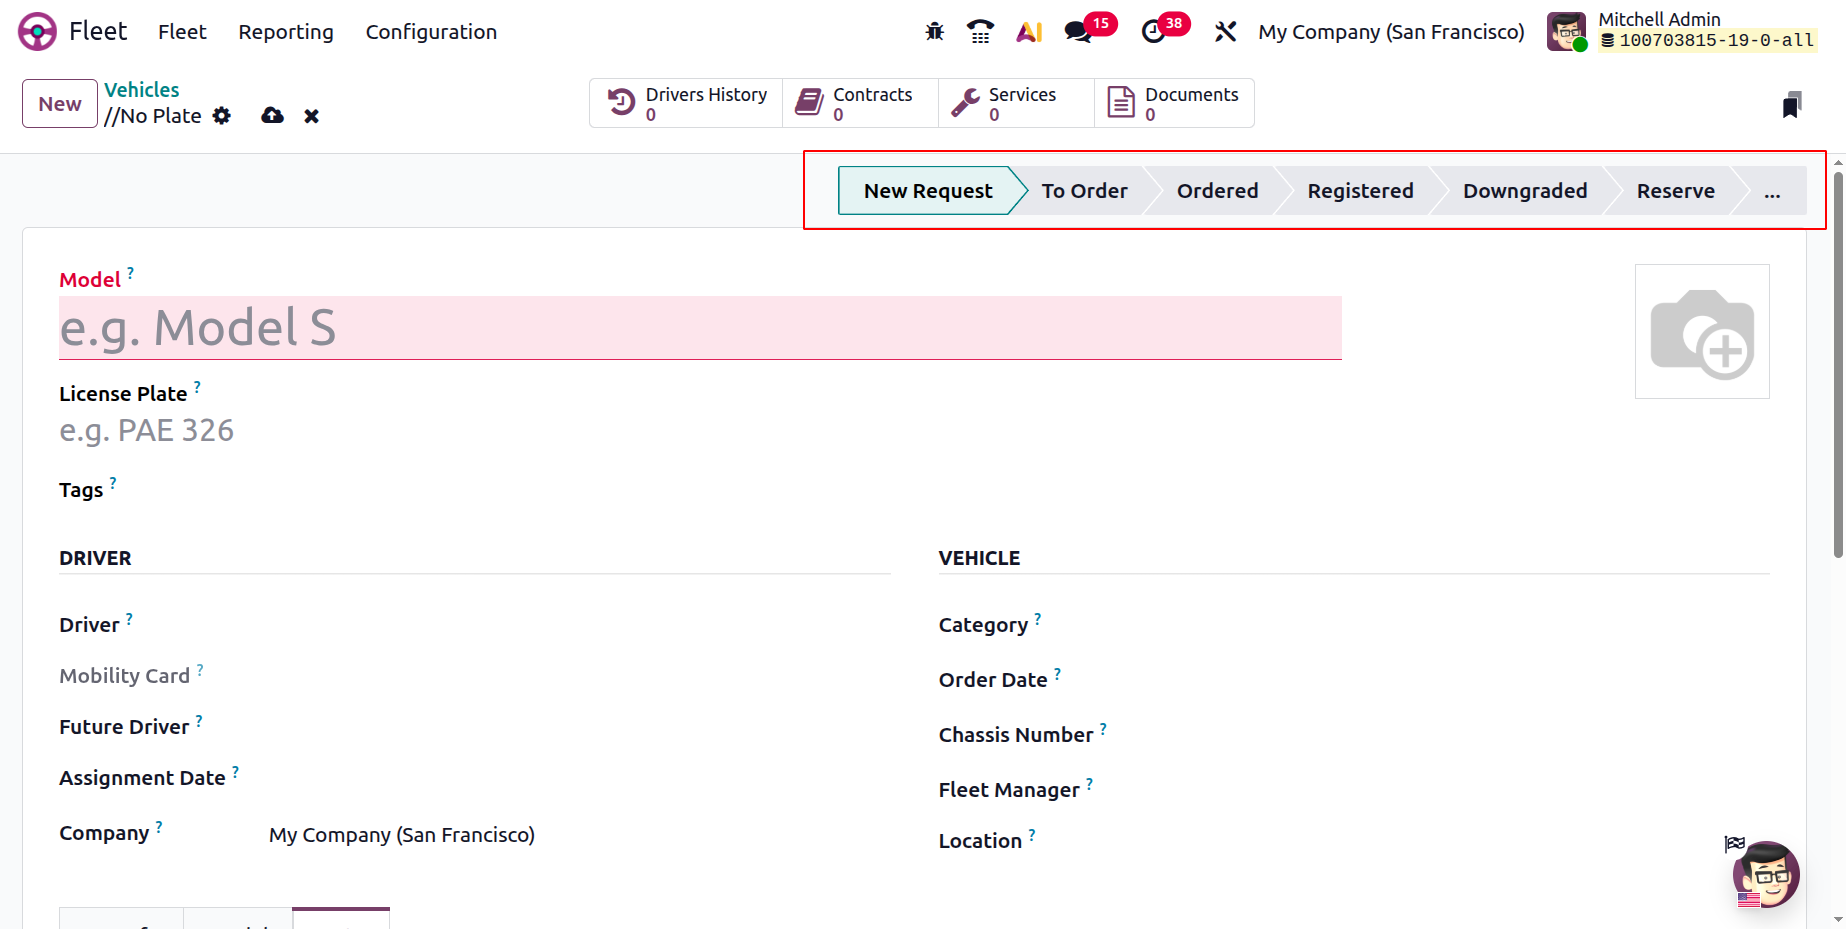
New vehicle request entries can be created through the New button or by clicking the + icon from the relevant stage’s kanban card. Then, mention the vehicle Model, Licence Plate Number, Tags and add the vehicle request using the ‘Add’ button, as depicted in the screenshot below.
When adding a new vehicle, you must enter essential details such as the license plate number and vehicle model. In the Driver section, you can record the Driver’s name along with the mobility card details. If the vehicle is scheduled to be assigned to another driver later, the future driver’s address can be entered in the Future Driver section. You can also specify the Assignment Date, which represents the date from which the vehicle becomes available for use. This date is treated as the official availability date of the vehicle within the system. The Company name will be automatically displayed in the relevant field, as shown in the screenshot below.
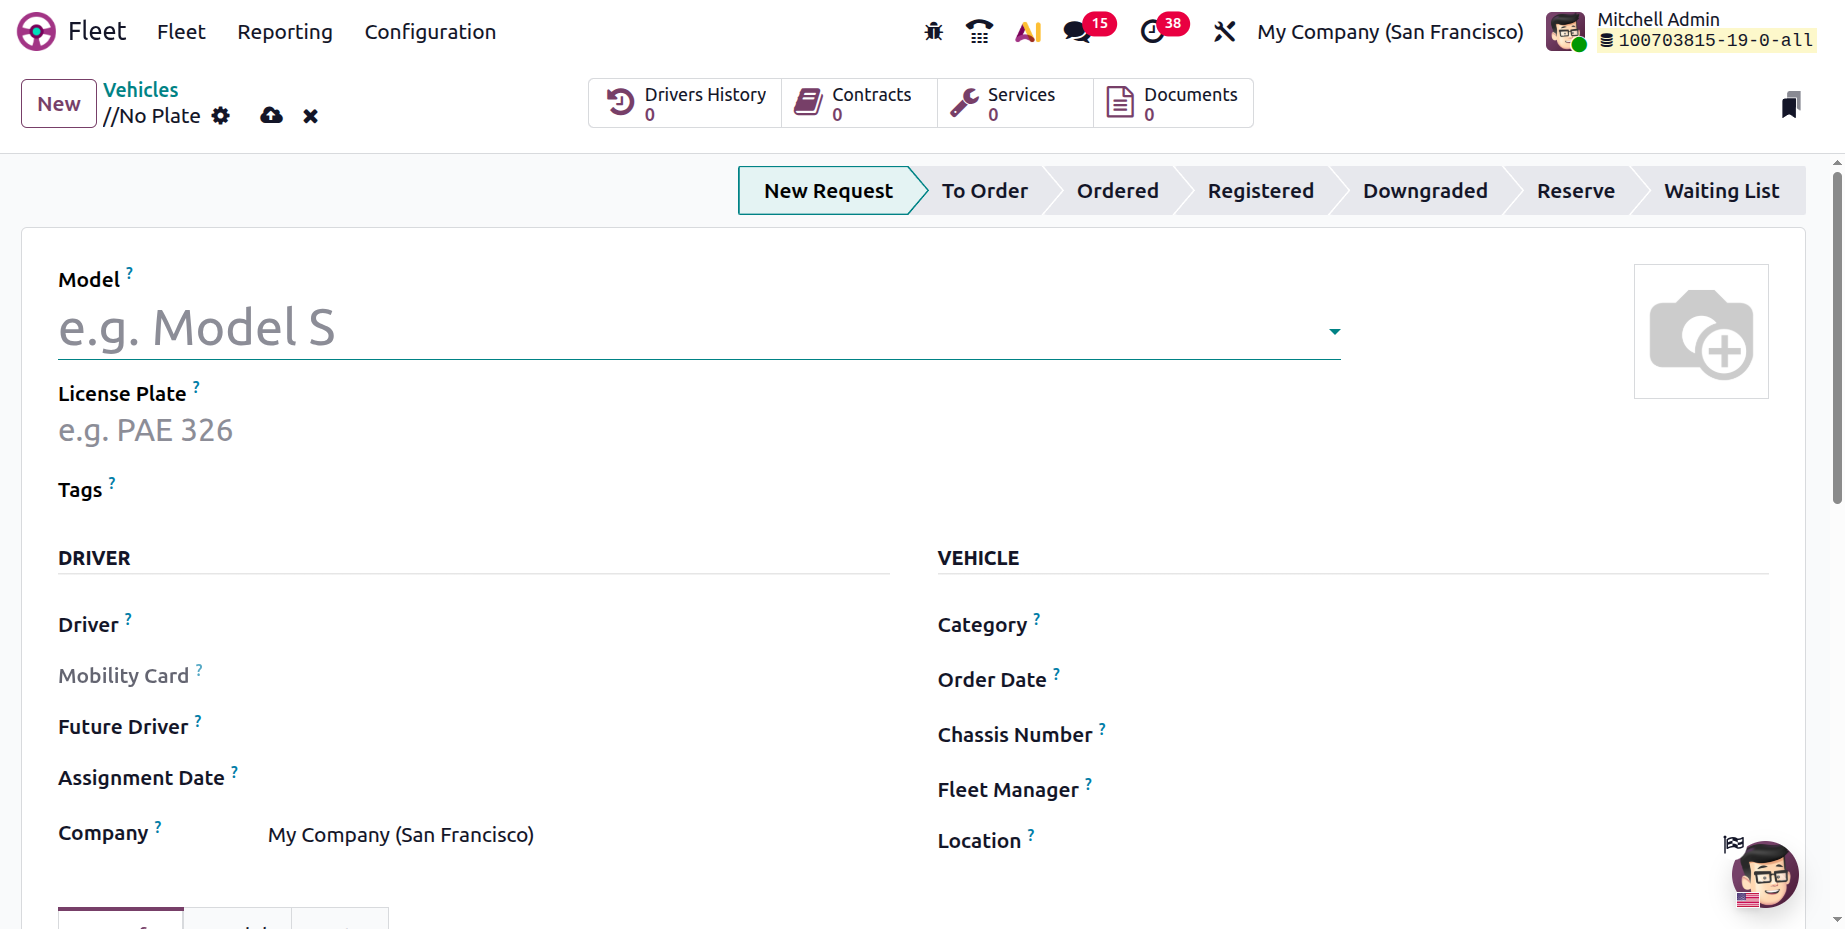
The VEHICLE section allows you to enter important details such as the vehicle Category, and the vehicle Order Date. Then, mention the unique number mentioned in the vehicle motor in the Chassis Number field.
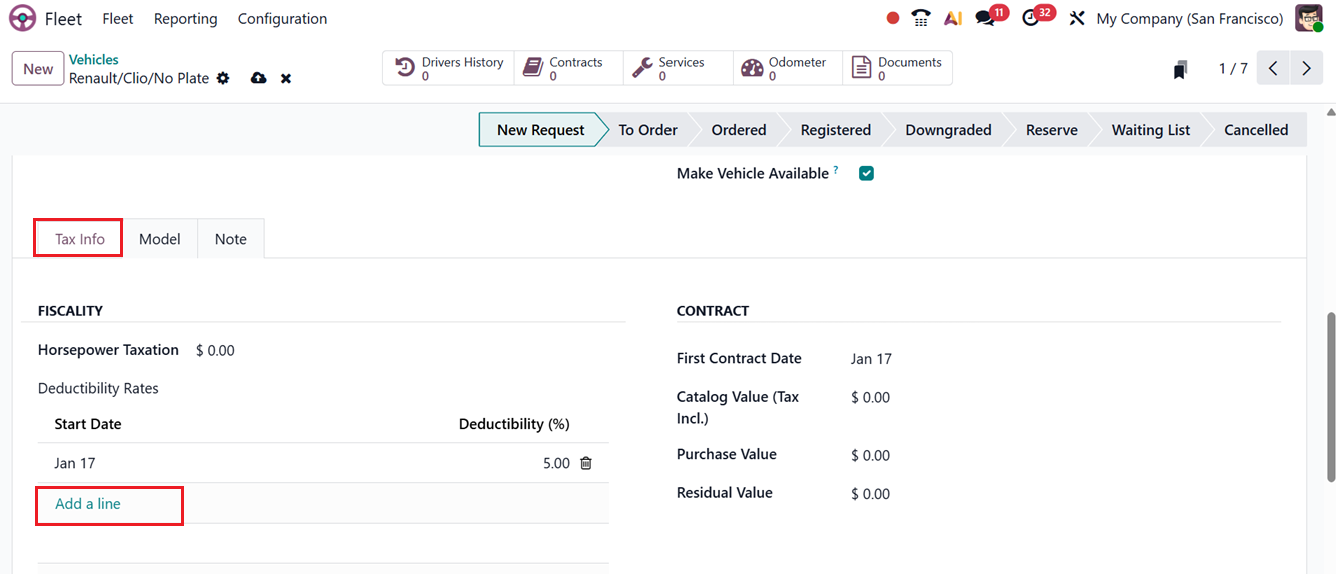
In the Last Odometer field, edit the Odometer measure of the vehicle at the moment of this log. Also, you can specify the person responsible for this vehicle assignment in the Fleet Manager field. Finally, mention the Location of the vehicle and activate the Make Vehicle Available option to make this vehicle selectable for the Salary configurator.
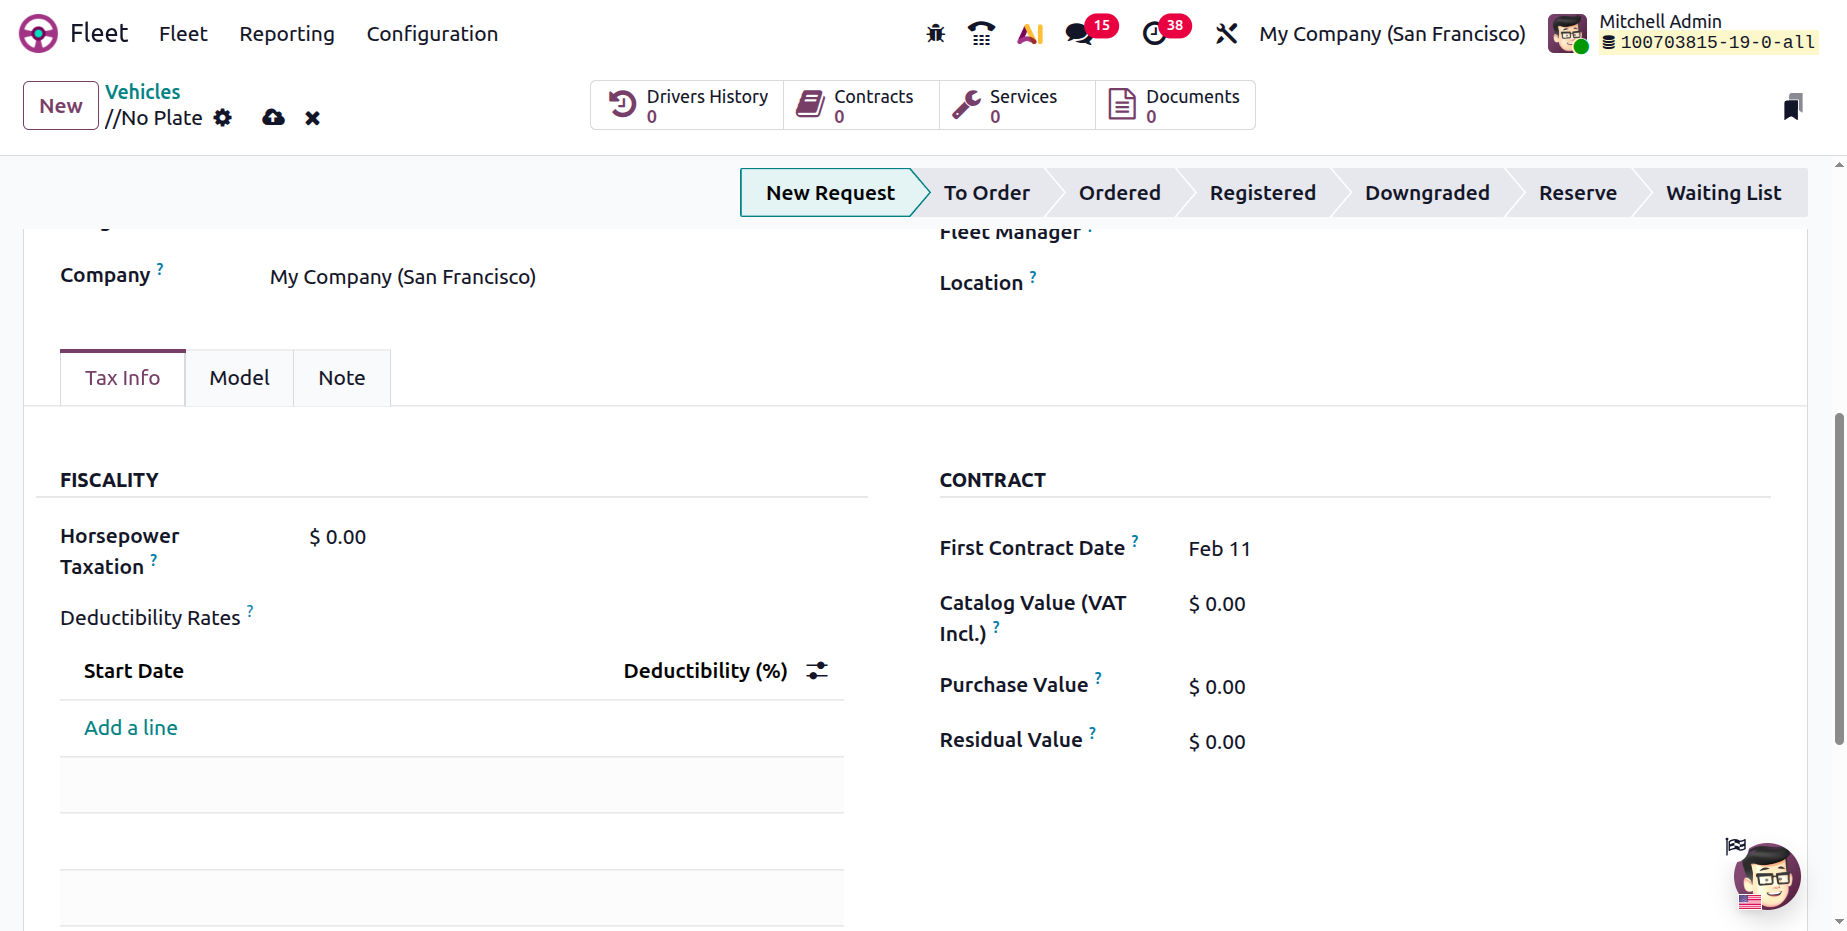
In the Tax Info tab,you can edit the FISCALITY and CONTRACT specifications. The FISCALITY Section allows you to define values like Horsepower Taxation, a feature used to calculate vehicle taxes based on engine horsepower, as required by local tax regulations. It helps companies apply the correct tax rules for fleet vehicles and ensures compliance with fiscal policies. Then, you can set the Deductibility Rates with the Start Date along with its applicable Deductibility percentage. Additional fiscal records can be added by clicking the available Add a line button, as shown in the screenshot below.
Within the CONTRACT section of the Tax Info tab, you can record information such as the First Contract Date, Catalog Value (Tax Incl), Purchase Value, and Residual Value. These details help track the financial and contractual aspects of the vehicle.
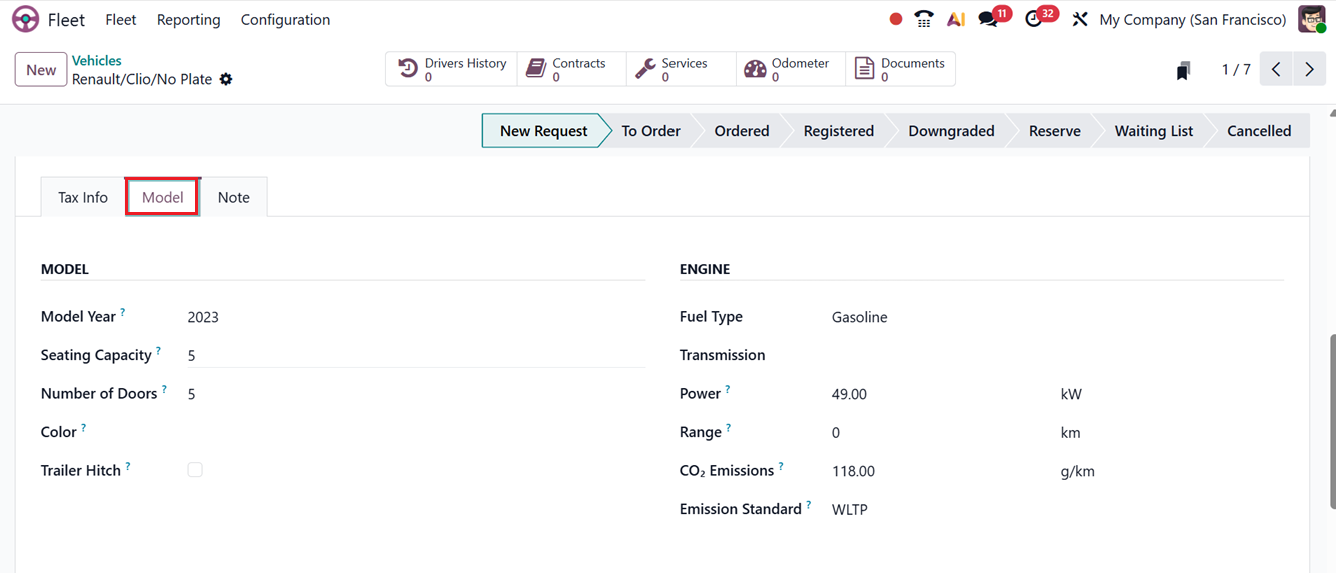
The Model tab of the vehicle creation window displays technical and visual details, including the Model Year, Seating Capacity, Number of Doors, Color, Trailer Hitch details. Then in the ENGINE section, you can also define the engine specifications, such as
- Fuel Type:Specifies the type of fuel the vehicle uses, such as petrol, diesel, electric, or hybrid. This helps track fuel consumption, plan refueling or charging, and analyze fuel-related costs.
- Transmission: Indicates whether the vehicle has a manual or automatic transmission. This information is useful for assigning vehicles to drivers, planning maintenance, and matching vehicles to driving requirements.
- Power: Represents the engine’s power output, usually measured in horsepower or kilowatts. It helps evaluate vehicle performance and suitability for specific tasks, such as heavy loads or long-distance travel.
- Range: Shows the maximum distance the vehicle can travel on a full tank or battery charge. This is especially important for electric and hybrid vehicles when planning routes and charging schedules.
- CO₂ Emissions: Records the amount of carbon dioxide produced by the vehicle. This data supports environmental reporting, sustainability tracking, and compliance with emission regulations.
- Emission Standard: Defines the regulatory emission standard the vehicle meets (such as Euro 6). It ensures compliance with legal requirements and helps manage fleet sustainability and environmental impact, as shown in the screenshot below.
Any additional or descriptive information related to the vehicle can be documented in the Note tab, ensuring that all relevant details are stored in one place.

Then, you can see the stages of the created vehicle contract such as New Request, To Order, Ordered, Registered, Downgraded, Reserve, Waiting List and Cancelled from the pipeline stages area, as shown in the screenshot below.
Depending on the modules installed in the system, the vehicle form may also display several smart buttons. These buttons provide quick access to related records and actions. In this case, you can see smart buttons such as; Driver History to review previous driver assignments, Contracts to manage agreements related to the vehicle, Services Logs to track maintenance records, Odometer Logs to monitor mileage and Documents tab can be used to store and manage vehicle related information and documents.
The Contracts smart button enables users to review and update contract-related data. Accessible from the Fleet menu, this feature displays key contract details such as contract name, start and end dates, linked vehicle and driver information, vendor details, recurring costs, and current status. Contract data can be viewed in Activity, Graph, Pivot, or Kanban formats.

Contracts
In Odoo 19 Fleet Module, the Contracts window can be used to manage and track vehicle-related agreements like leasing, insurance, and maintenance. They help monitor dates, costs, renewals, and ensure timely follow-ups.
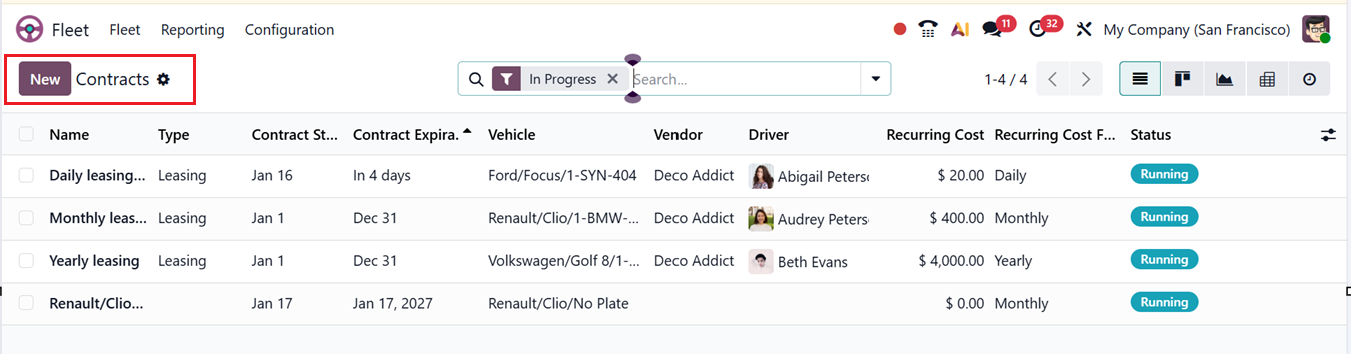
In the displayed list view window, you can see the available Contracts Name, Type, Contract Start Date, Contract Expiration Date, Vehicle, Vendor, Driver, Recurring Cost, Recurring Cost Frequency and Status details, as shown in the screenshot below.
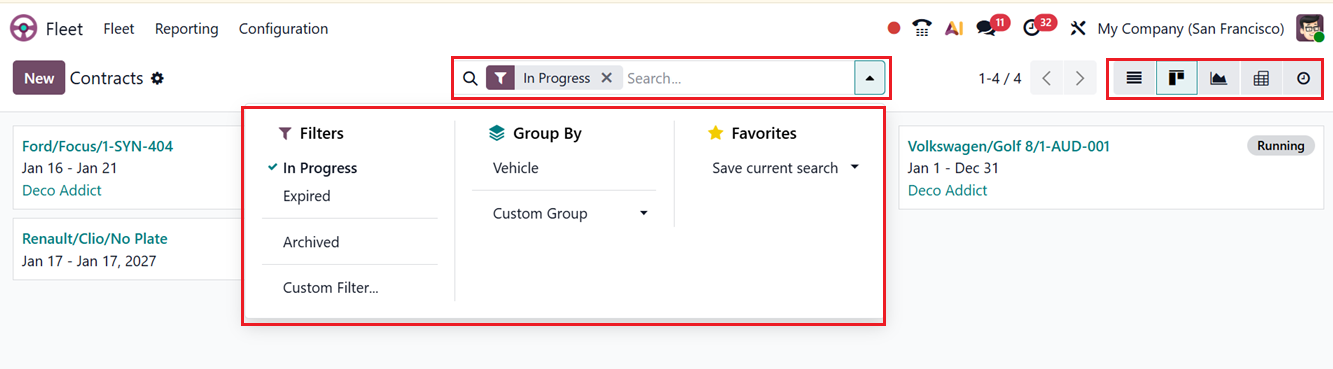
The system offers different view options to display data in a clear and flexible way. These include List, Kanban, Graph, Pivot and Activity views. Odoo also provides several built-in filters along with a custom filter option. The default filters include In Progress, Expired, Archived and also you can create customized filters using the ‘Custom Filter’ option. In the ‘Group By’ section, you can utilize the Vehicle option to group contracts based on a particular vehicle or create customized groups using the Custom Group option. Finally, the Favorites option can be used to save recent searches.
All records shown in the window can be imported or exported to an Excel file using the Import records and Export All option included in the ‘Action’ menu next to the New button. You can also create documents or any articles using the Knowledge interface, Add data to the Dashboard and link menu to spreadsheet using the Spreadsheet option.
To create a new contract, users can click the New icon and complete the required fields, including the Contract Name and edit the vehicle information in the INFORMATION tab, as shown in the screenshot below.
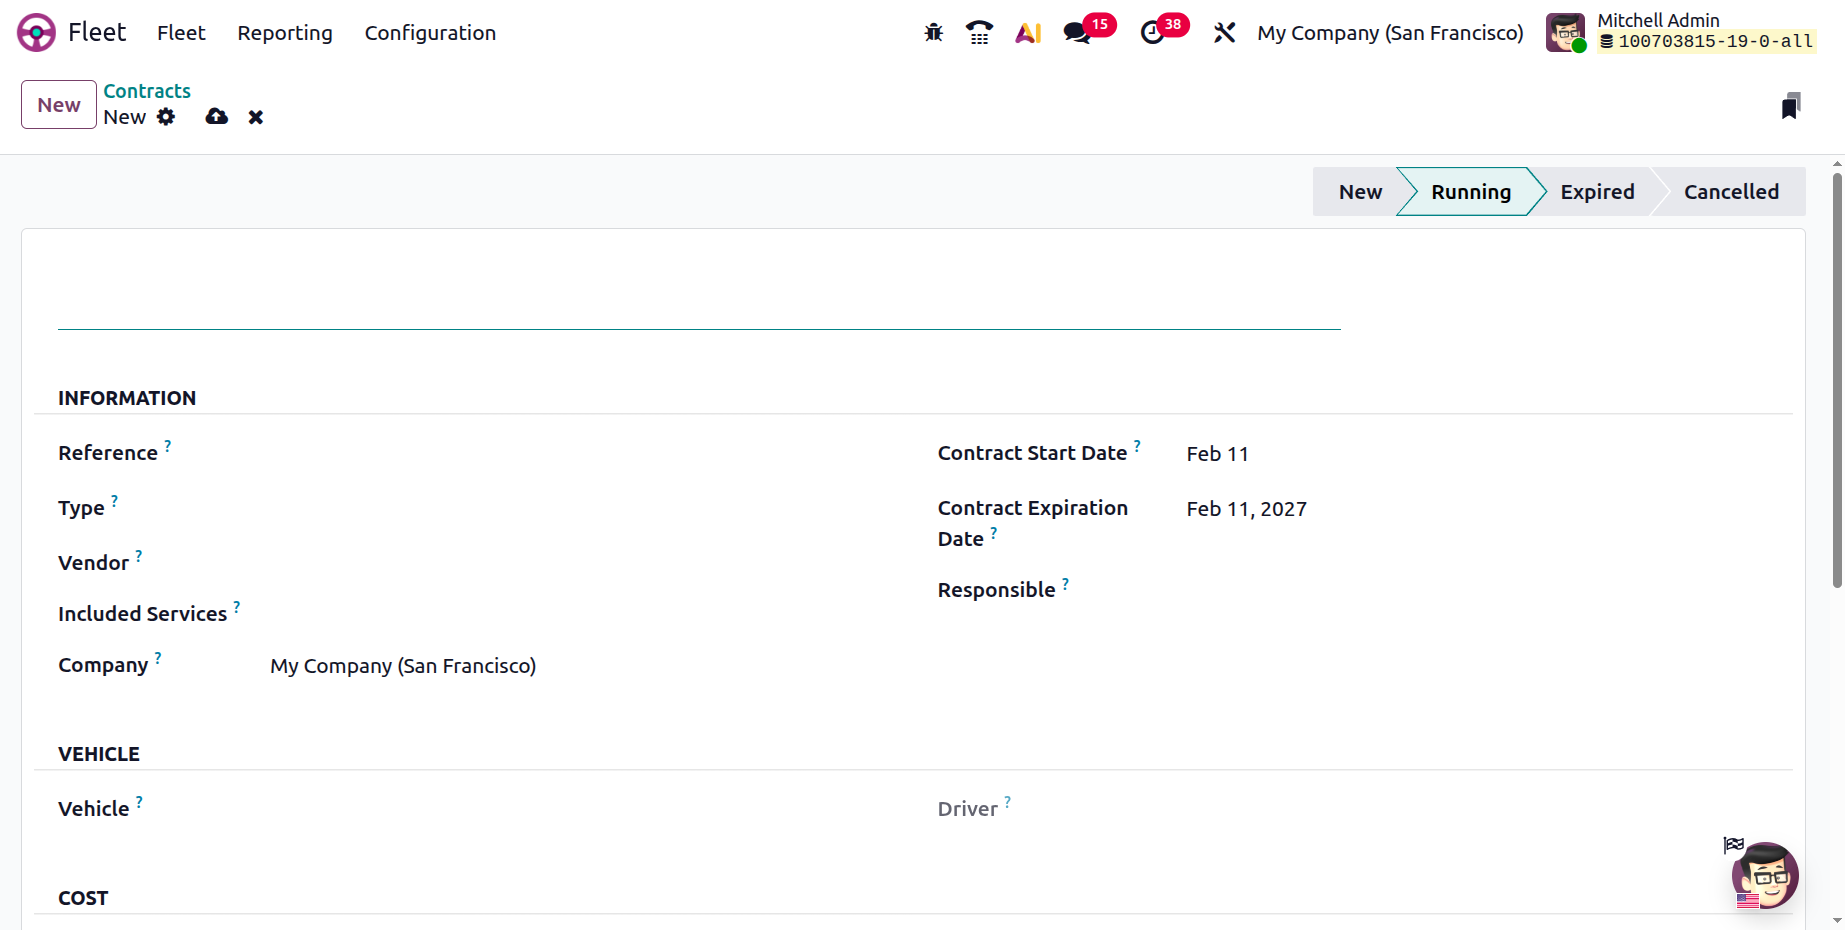
In the INFORMATION tab , specify the Reference field records a unique identifier for the contract, while the Type specifies the nature of the agreement, such as leasing, omnium, or repair. The Vendor field identifies the service provider, and Included Services lists the services covered under the contract. The Company field assigns the contract to a specific company in a multi-company setup. The Contract Start Date and Contract Expiration Date define the validity period of the contract, and the Responsible field designates the employee in charge of managing and overseeing the contract.
The VEHICLE tab is used to specify the vehicle model number and the driver who is registered as being responsible for the vehicle. The COST section is used to configure the contract’s Activation Cost, which is paid when the contract is activated. It also allows you to set the Recurring Cost based on daily, weekly, monthly, or yearly intervals, or choose No for contracts without recurring charges.
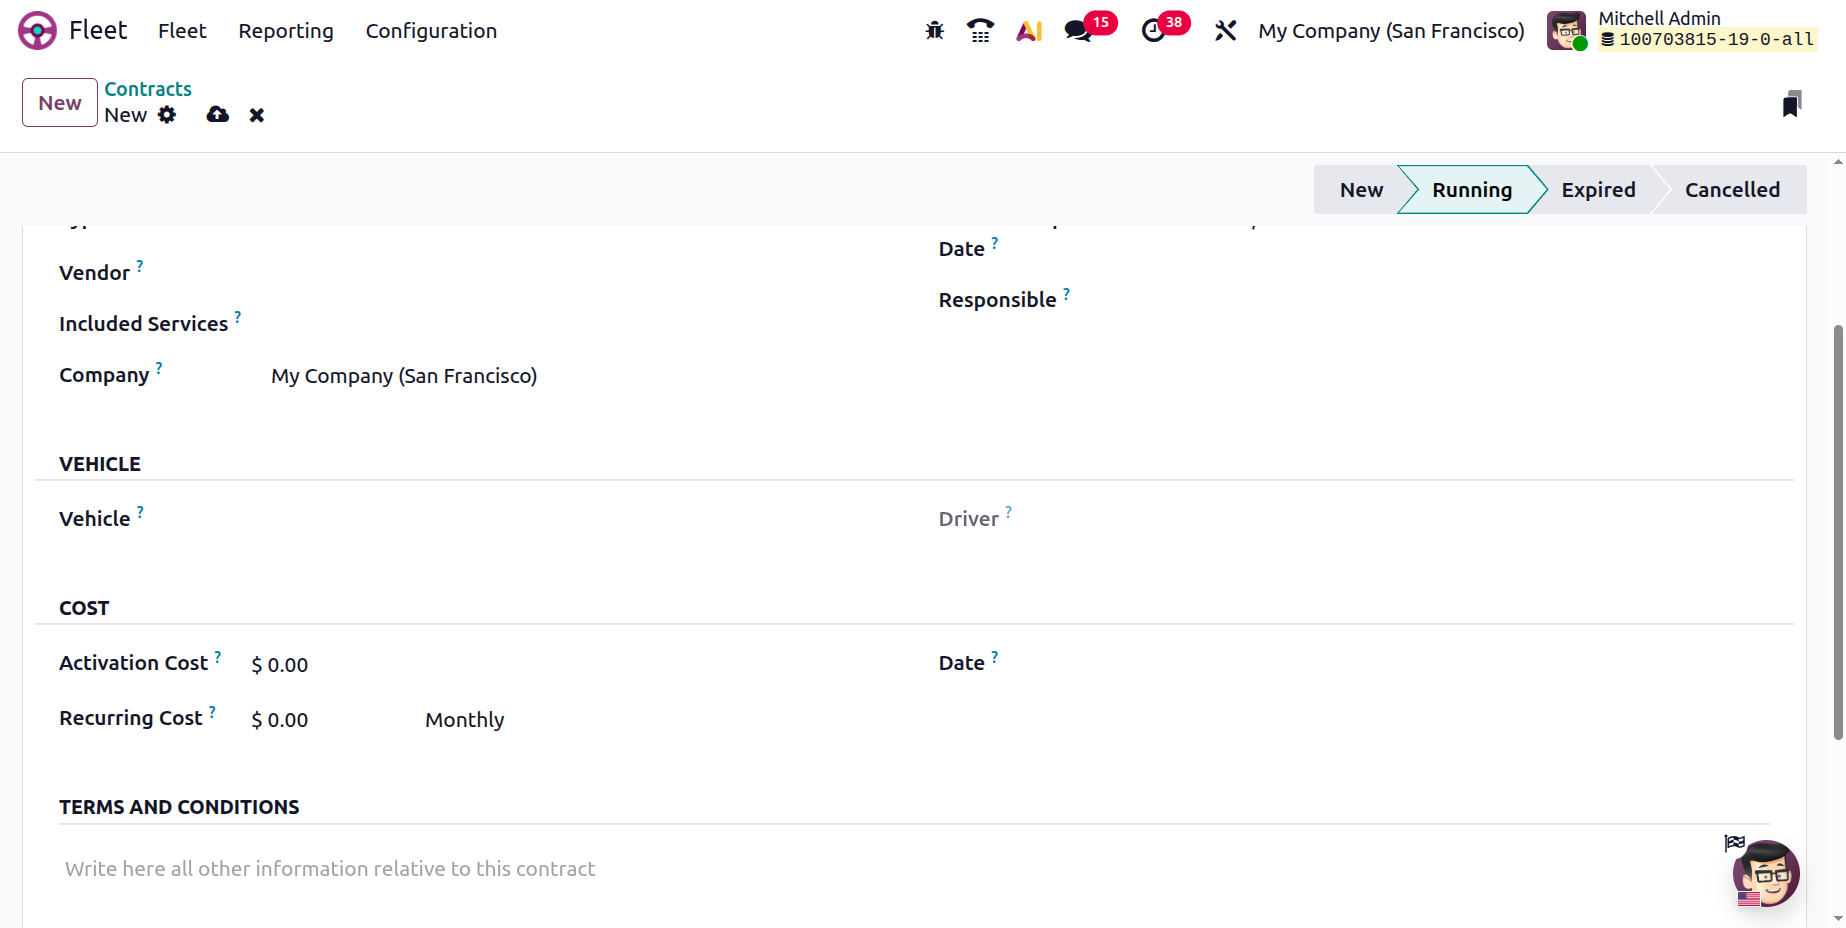
Finally, you can specify the Date on which the recurring cost is applied. Then, any additional notes or conditions regarding the contract can be recorded in the TERMS AND CONDITIONS tab.
Once completed, the contract can be saved for future use. The Employees smart button shows all staff involved in the vehicle contract, including drivers and managers, helping track responsibilities and maintain accountability.
Services
In Odoo 19 Fleet Module, the Services menu helps manage and track all vehicle maintenance and service activities. It allows you to schedule routine maintenance, maintain a complete service history with dates, costs, and vendors, assign service providers, monitor expenses, and ensure the overall health of your fleet. This centralizes maintenance management, making it easier to plan, track, and control all service-related tasks efficiently.
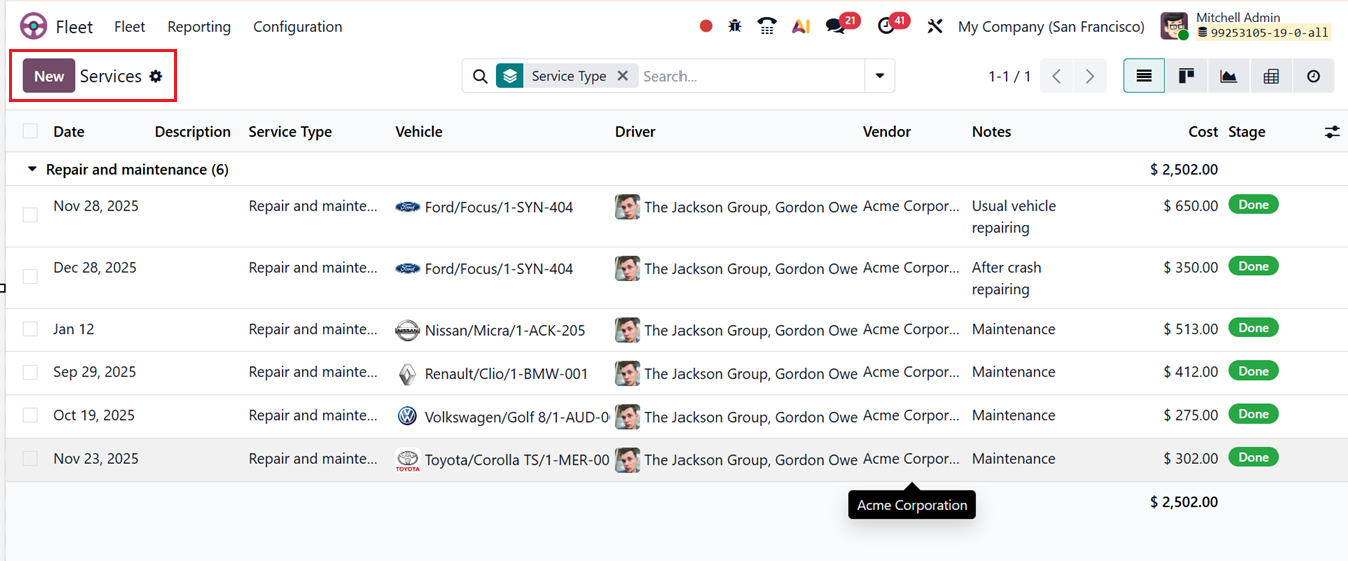
The Service window provides a comprehensive overview of all vehicle service records, displaying information such as service Date, Description, Service Type, Vehicle, Driver, Vendor, Notes, Cost and Stage, as shown in the screenshot below.
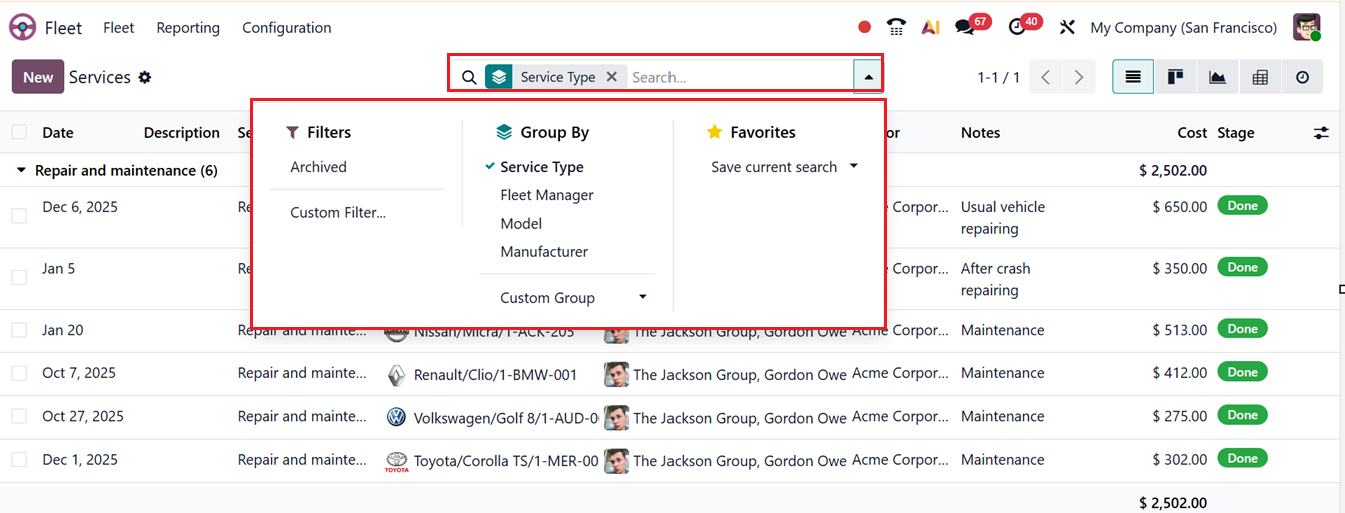
The dashboard can be viewed in different formats, including List, Kanban, Graph, Pivot, and Activity views. Using the advanced search bar, you can Filter and Group data with predefined options or create your own using the Custom Filter feature. In the Group By section, data can be grouped by Service Type, Fleet Manager, Model, Manufacturer, or custom groups using the Custom Group option. Additionally, the Favorites feature allows you to save recent searches for quicker access and better analysis, as shown in the screenshot below.
When creating a service entry using the ‘New’ configuration form, start with a brief ‘Description’ explaining the nature of the work. Then, you must choose a ‘Service Type’ which is a predefined category used to classify and group vehicle services and repairs, allowing records to be organized for easier tracking and analysis, as shown in the screenshot below.
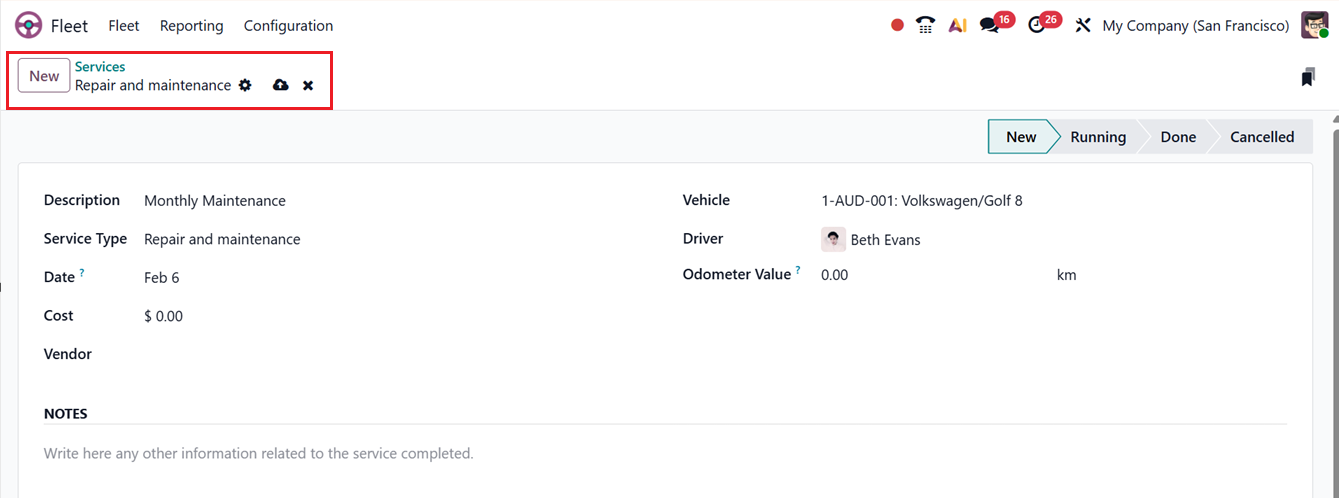
Each service entry presents a complete set of details to clearly document the work involved. Then, mention the ‘Date’ of the service or repair was carried out or scheduled. Then choose the ‘Vehicle’ on which the work was completed, and the ‘Driver’ assigned to that vehicle at the time. Information about the ‘Vendor’ responsible for performing the service can be included in the relevant field.
The total expense for the service or repair can be added in the ‘Cost’ area supported by the ‘Odometer Value’ of the vehicle at this log moment. Then, you can also add any additional ‘NOTES’ that offer further context or clarification in the NOTES area.
After saving the Service details, you can check its current progress status, which may be marked as New, Running, Done, or Cancelled, as shown in the screenshot below.
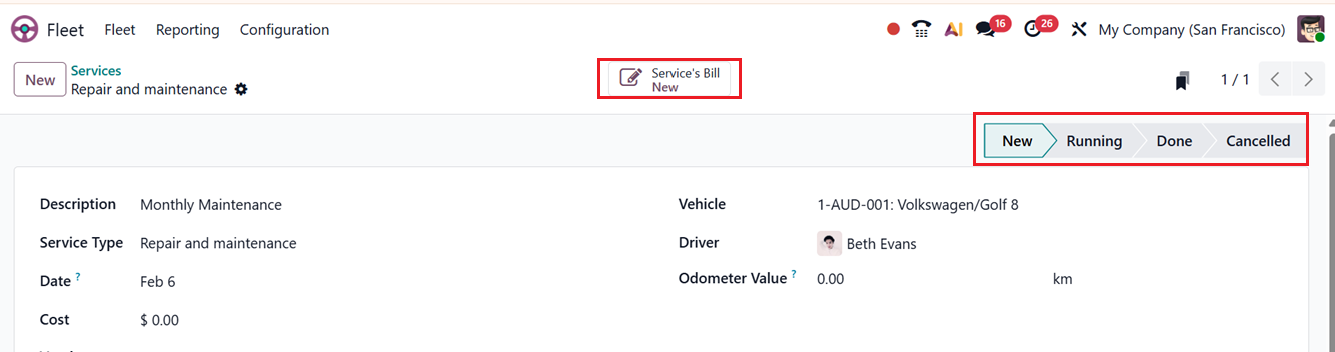
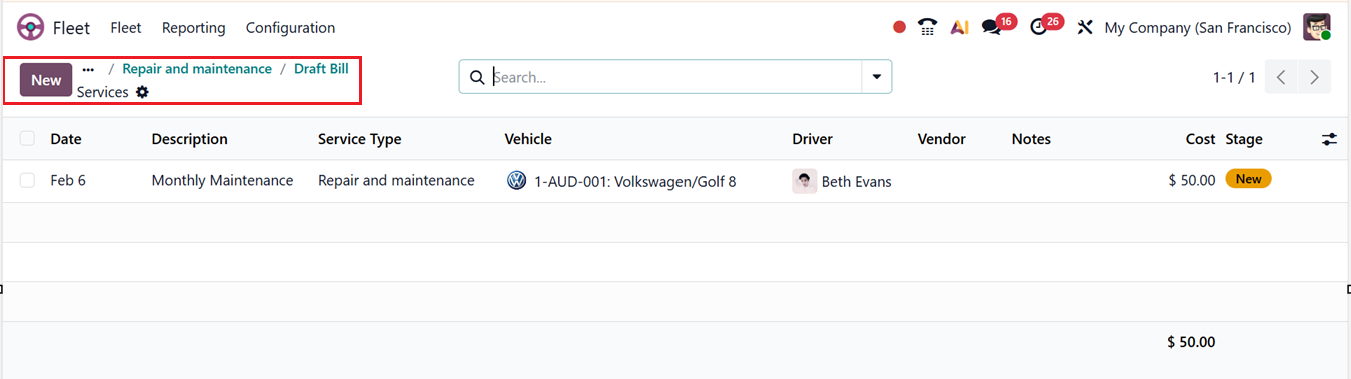
Inside the ‘Services Bill’ smart button, you can see the record of a draft bill of this particular vehicle service along with the Vendor, Bill Reference number, Bill Date, Accounting Date, Payment Reference that is used to set on journal entries, Recipient Bank details, Due Date of the bill and Journal entry of the bill, as shown in the screenshot below.
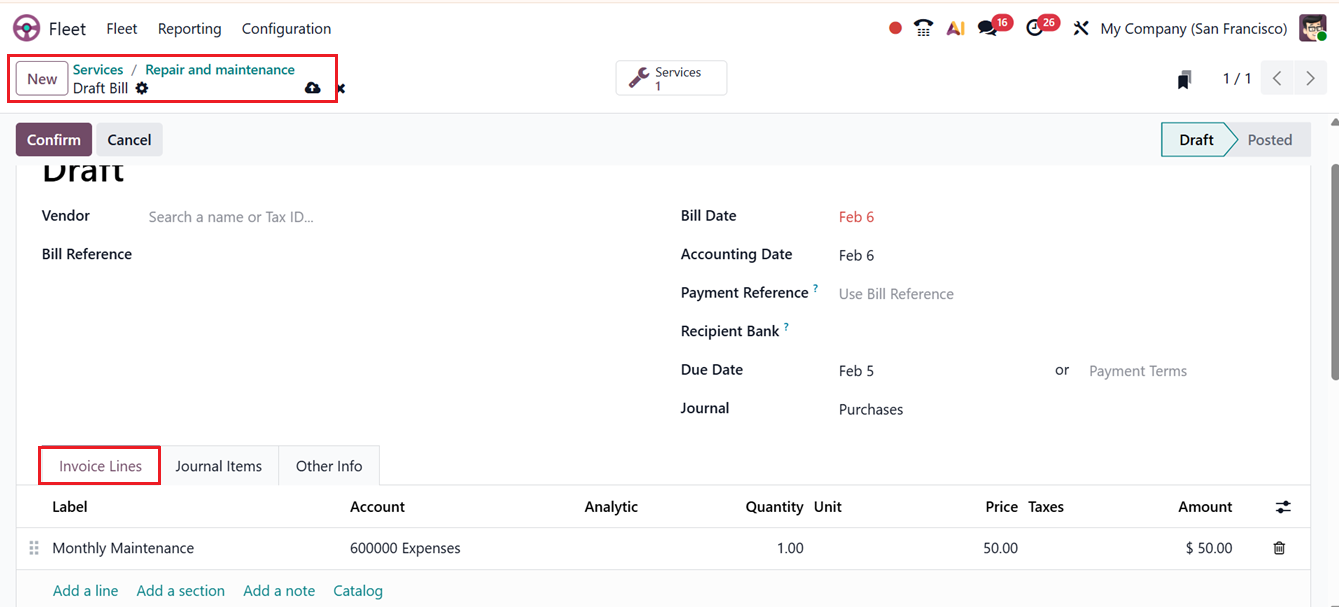
Inside the ‘Invoice Lines’ tab, you can see the Label(Description) of the service with its expense Account, Analytic Account, Quantity, Price, Taxes and the total Amount details. You can also add extra bill entries in the Invoice Lines tab using the ‘Add a line’ button.
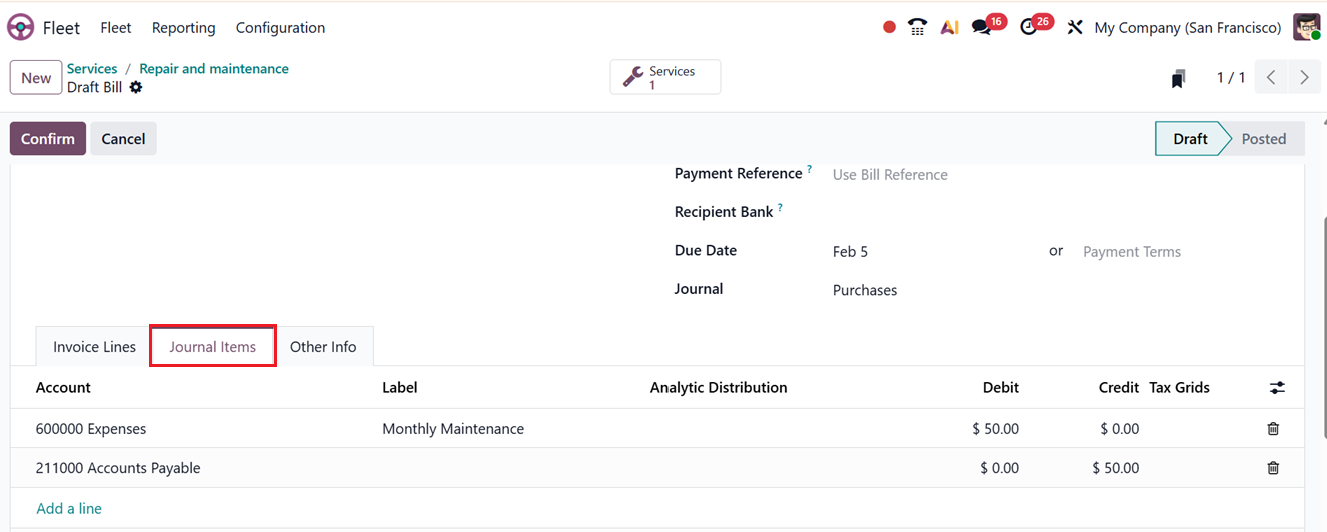
The ‘Journal Items’ tab will show the details of this bill including the Account, Label,Analytic Distribution, Debit, Credit along with Tax Grid details, as shown in the screenshot below.
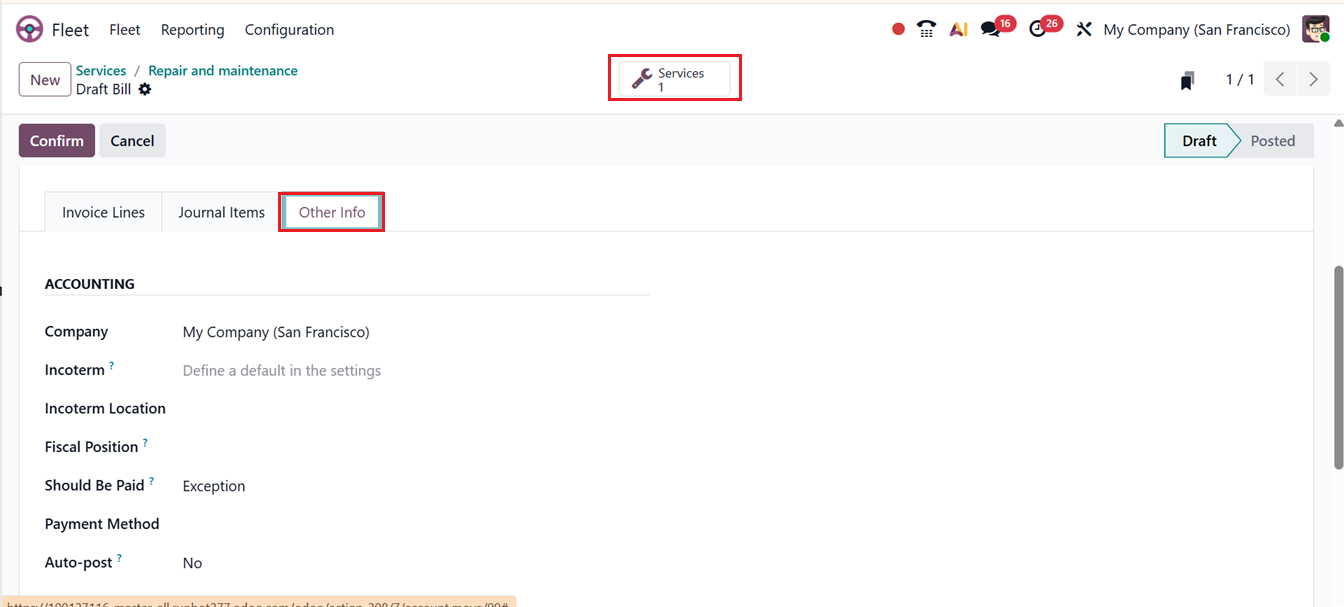
The ‘Other Info’ tab will display the accounting information including;
- Company:Specifies the company to which the service record belongs.
- Incoterm: Defines the international commercial terms that determine responsibilities for shipping costs and risks between the company and the vendor; a default Incoterm can be set in the system settings for consistency.
- Incoterm Location: Indicates the specific location associated with the selected Incoterm, clarifying where the responsibility for goods or services is transferred.
- Fiscal Position: Determines the tax mapping rules applied to the service based on the vendor or transaction, ensuring taxes are calculated correctly according to local regulations.
- Should Be Paid?: Indicates whether the service expense requires payment processing, helping distinguish between billable services and those that do not generate a payable amount. You can choose between Yes, No and Exception options according to the service type and other conditions.
- Payment Method: Specifies how the service cost will be paid, such as cash, bank transfer, or another configured payment option, supporting accurate financial tracking.
- Auto-post?: Controls whether the related accounting entry is automatically posted once created,or in any recurring invoices.
After managing all the details, you can see the individual service tasks related to this vehicle servicing using the ‘Services’ smart button.
Within the Services dashboard, you can manually add additional service tasks and their associated costs that arise during the execution of already assigned work by using the New button, as shown below.
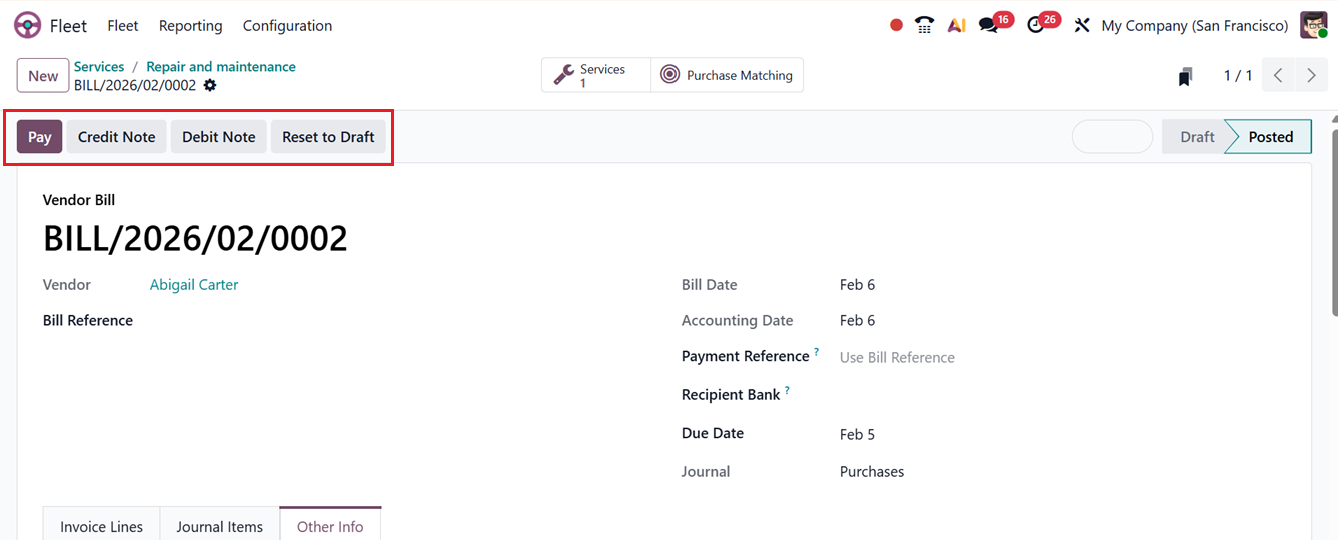
After checking all the details, you can confirm the service draft bill using the ‘Confirm’ button. This will lead you to the next payment procedure. This can be done through the ‘Pay’ button.
The Debit Note and Credit Note buttons will allow invoices or bills to be adjusted without modifying the original records, with Credit Notes reducing or reversing amounts for refunds or overbilling and Debit Notes increasing amounts for additional or missed charges, ensuring accurate accounting and a clear audit trail. You can also cancel the payment process and reset the bill into draft mode using the ‘Reset to Draft’ button.
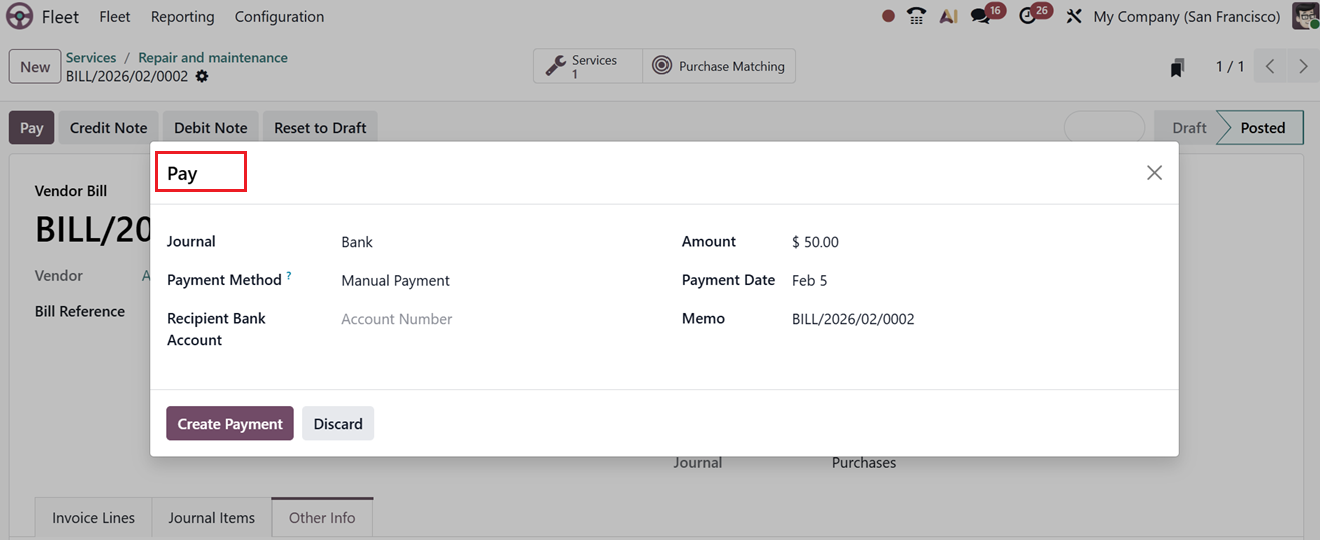
After continuing with the ‘Pay’ button, you can manage the Journal, Payment Method, Recipient Bank Account Number, Amount, Payment Date and Memo details. Finally, click on the ‘Create Payment’ button, as shown in the screenshot below.
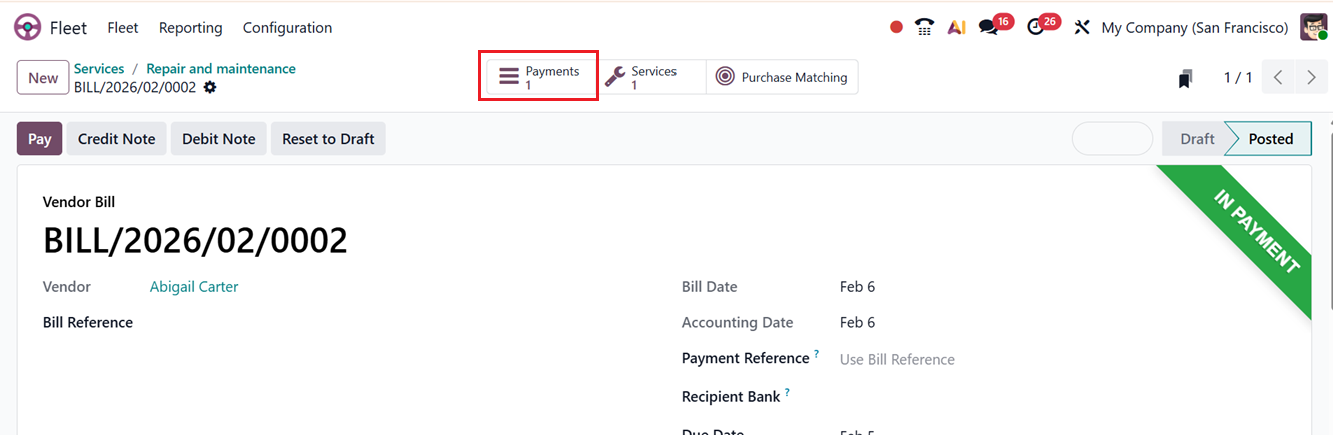
Then, the payments will be posted to the service bill and you can see the ‘’IN PAYMENT' ribbon. To completely confirm the payment, go to the ‘Payment’ smart button.
From the ‘Payment’ form, validate the payment using the ‘Validate’ button.

Finally, the payment will be confirmed and the bill will be paid.
Odometers
In Odoo 19 Fleet, the Odometers menu is used to record and track vehicle mileage or usage over time. It allows users to log odometer readings manually or automatically, helping monitor how far each vehicle has traveled. These records are essential for scheduling preventive maintenance, tracking vehicle performance, calculating running costs, and analyzing usage trends to ensure timely servicing and efficient fleet management.
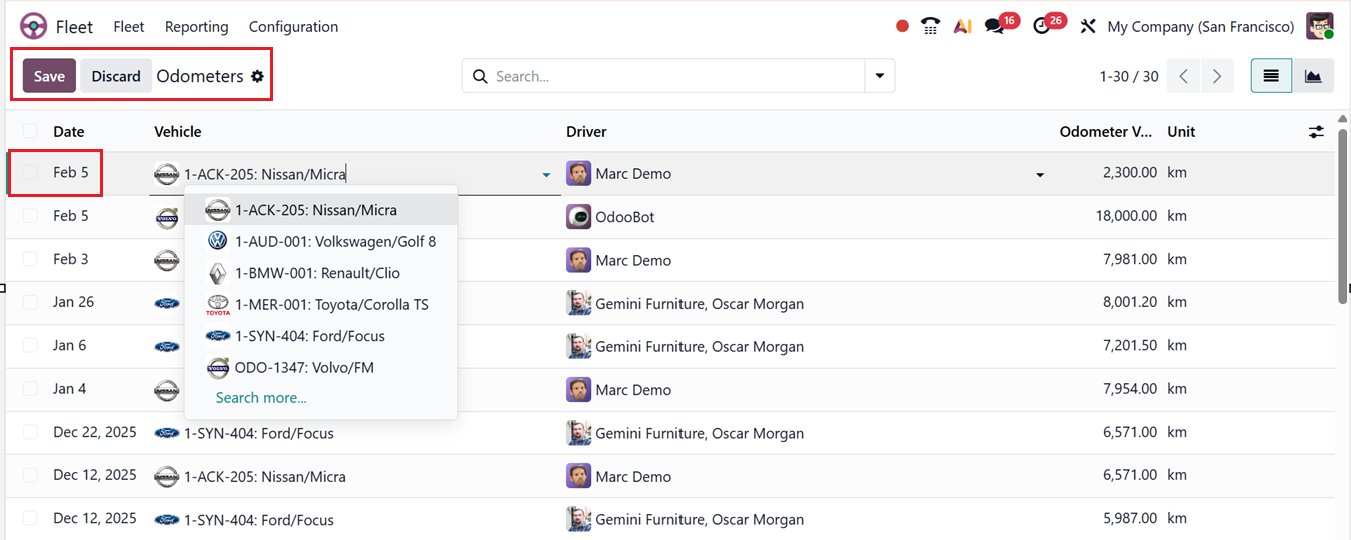
You can see the list view of the available Odometer readings of your company's fleets along with their log Date, Vehicle name, Driver, Odometer Value and Unit details, as shown in the screenshot below.
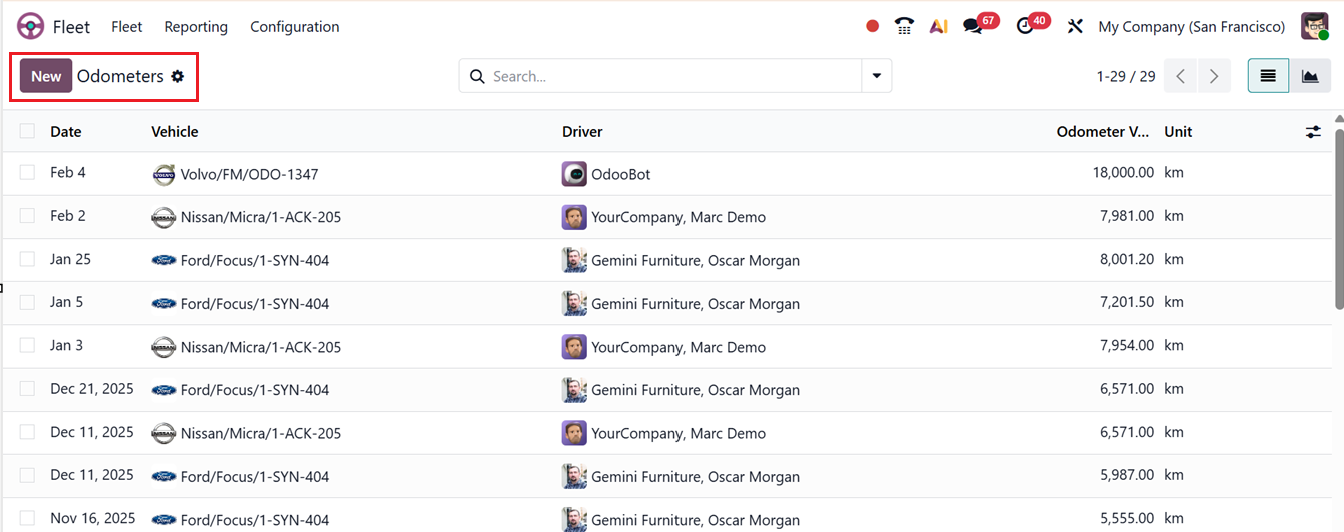
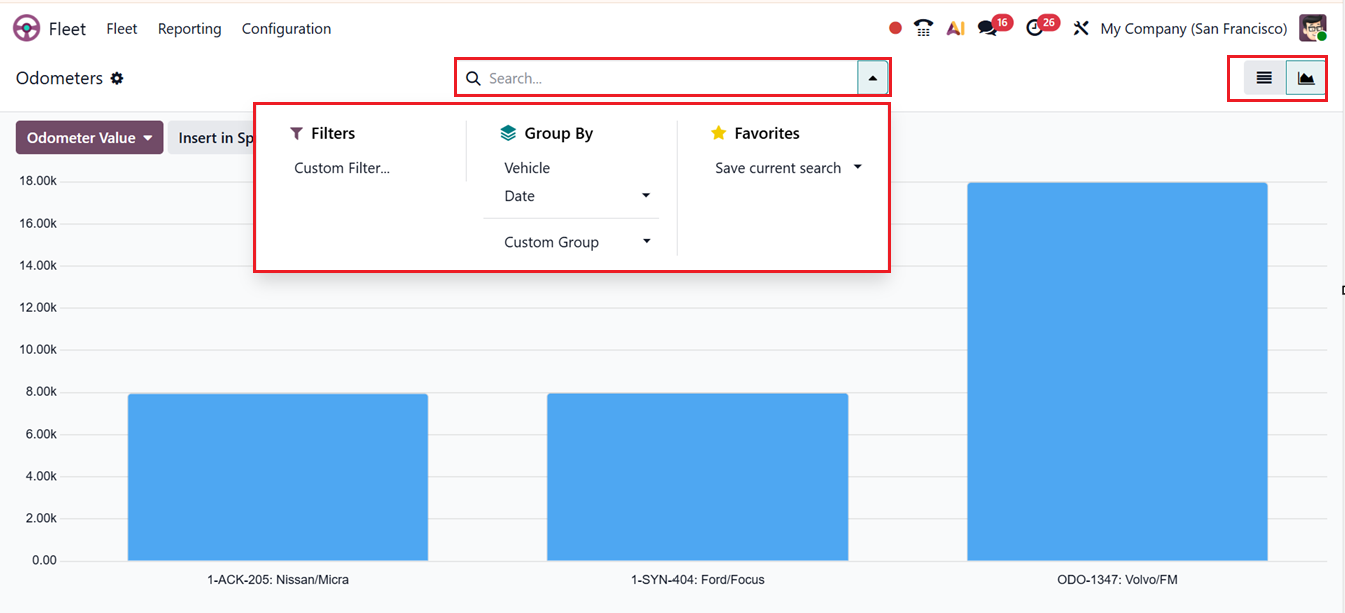
The dashboard can also be displayed in List and Kanban views. The advanced search bar allows you to filter and group records using predefined options or by creating Custom Filters and Custom Group options. Additionally, the Favorites feature lets you save frequently used searches for faster access and more efficient analysis.
In the List view, you can add a new odometer entry using the New button. When a new odometer record is opened, an editable line appears on the dashboard. Then, you can simply update the required fields and click on the Save button to record the mileage in the fleet database, as shown in the screenshot below.