Configurations Menu
In Odoo 19 Fleet Module, the Configurations menu is used to manage and customize the settings and master data that govern how the fleet module operates. It allows users to define essential parameters such as general Settings, Manufactures, Models, Categories, Service Types, Vehicle Status, Tags and Activity Types to ensure that all fleet operations are standardized and consistent.
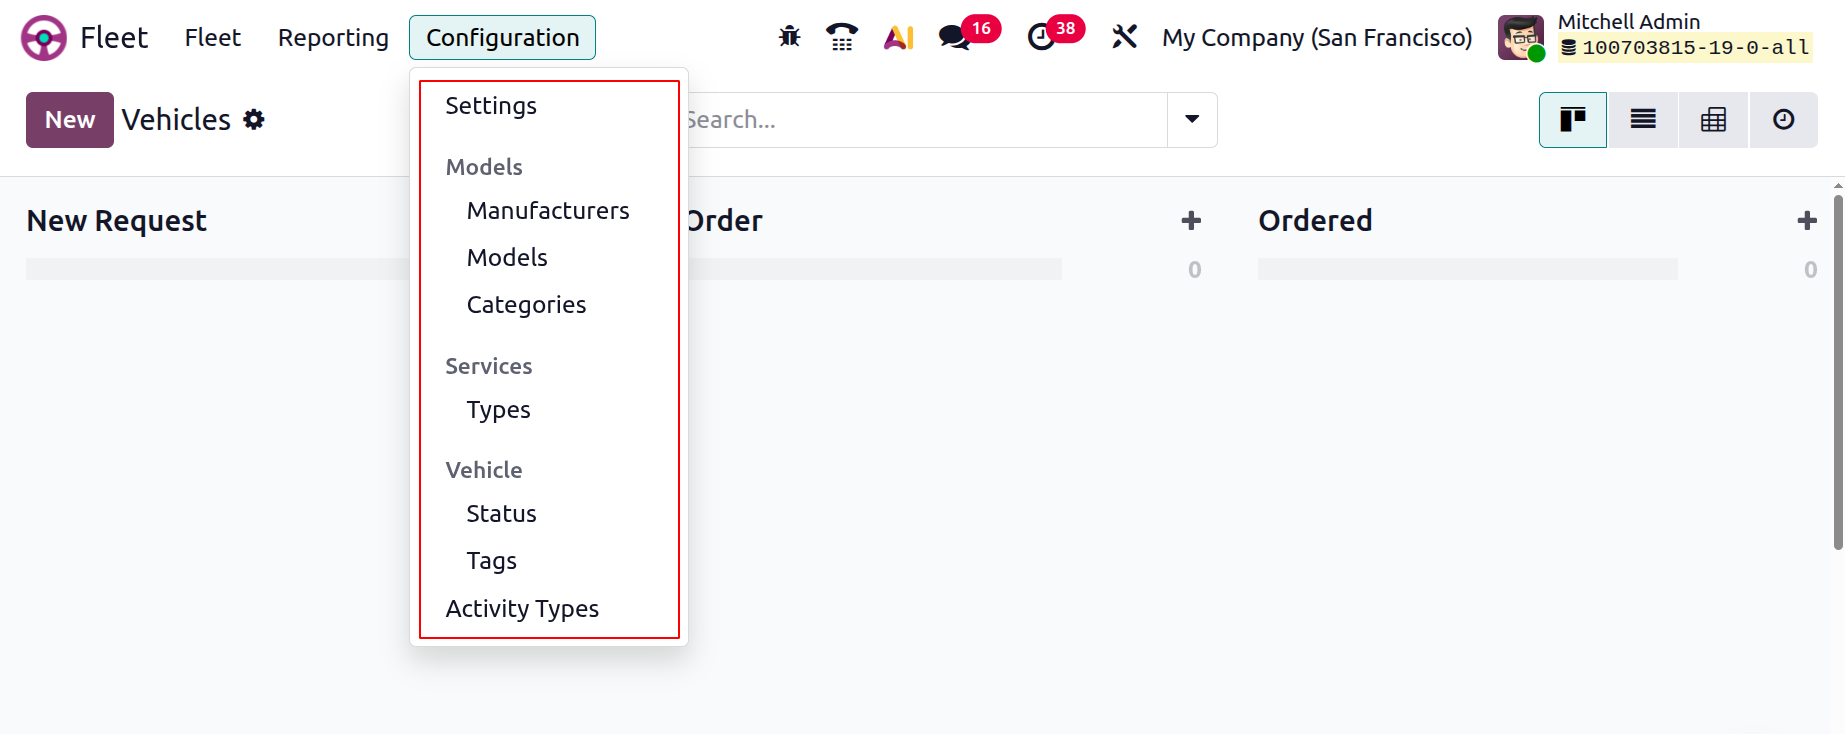
By using the Configurations menu, administrators can control default behaviors, streamline workflows, and maintain accurate records, making fleet management more organized and efficient.
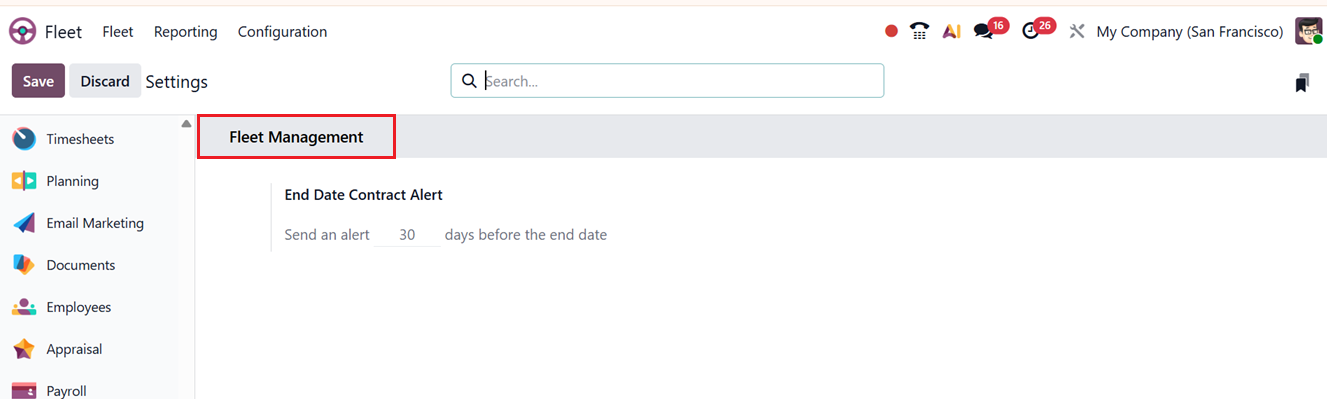
Settings
Within the Settings menu, users can enable the End Date Contract Alert feature in the Fleet Management tab section. This option sends automated notifications a specified number of days before a contract reaches its end date, helping prevent missed renewals.
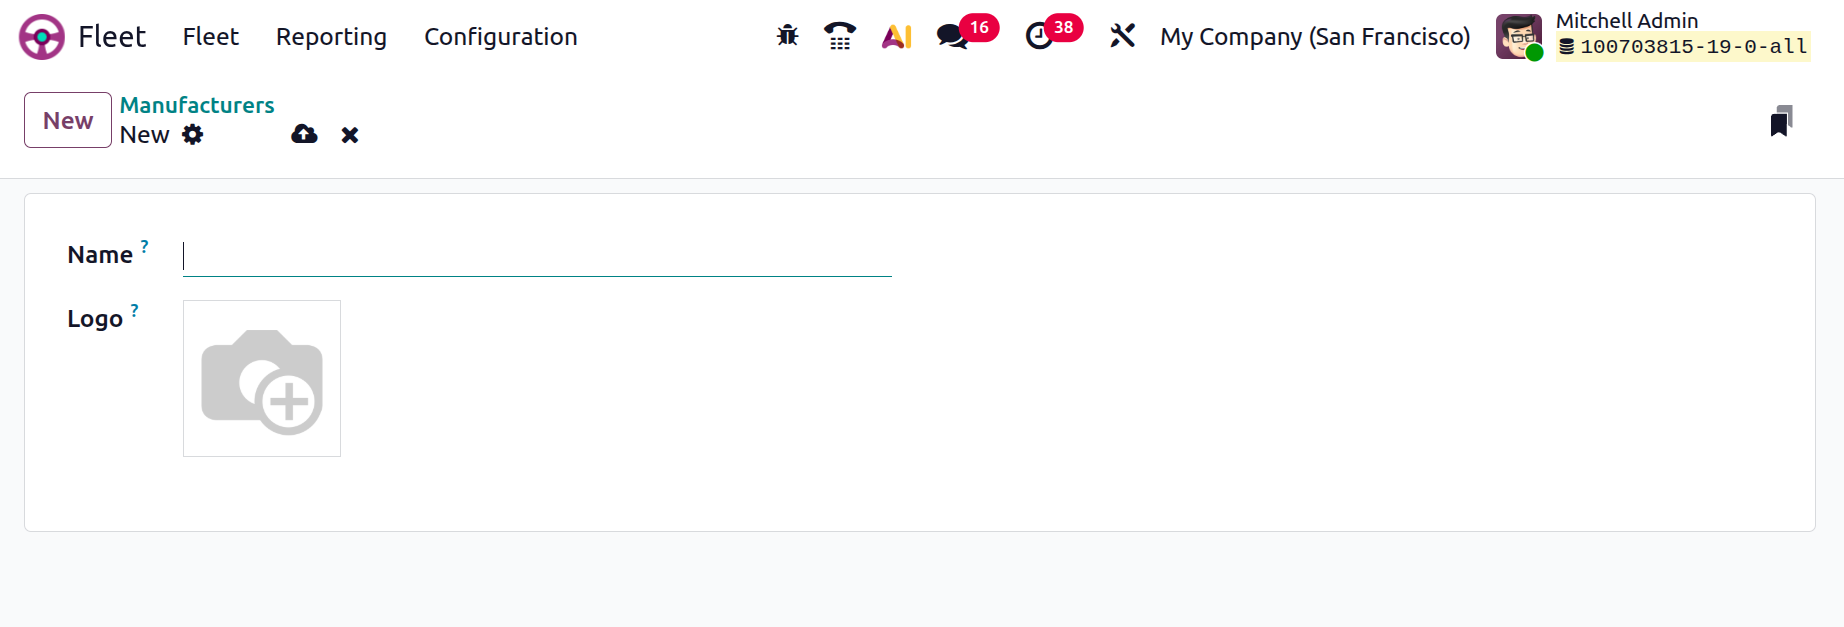
Manufacturers
The Manufacturers configuration section allows users to manage vehicle brands used within the fleet. From the Configuration menu, you can view existing manufacturers and create new ones. This dashboard view is available in List and Kanban views. In the Kanban view, each manufacturer record includes the brand name and logo, as shown in the screenshot below.

You can simply create a new Manufacturer using a New form and simply edit the Manufacturer Name and upload their Logo, as shown in the screenshot below.
As soon as you save the new Manufacturer, it will be saved in your Fleet database and you can manage their models and other configurations directly from the Manufacturers dashboard using the Configuration option provided in the vertical menu of the kanban view, as shown in the screenshot below.

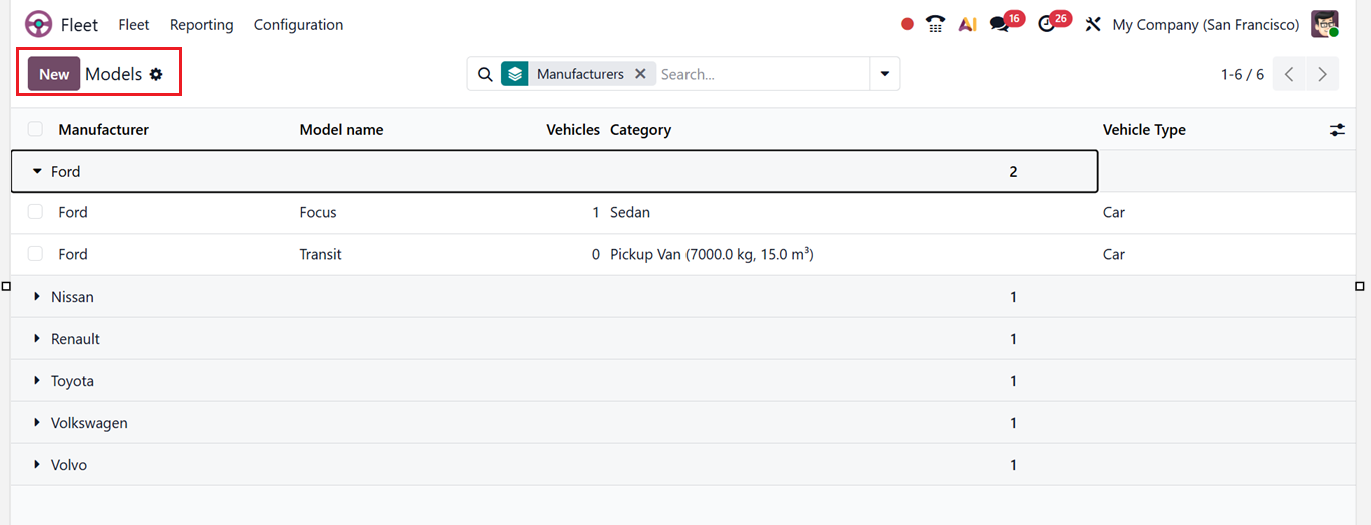
After saving a manufacturer, you can add their different vehicle models can be added or managed using the Configuration button or simply opening the manufacturer dashboard. This will show the dashboard of available vehicle models if configured or you can create new ones using the ‘New’ button.

Next, we can discuss the process of creating a new vehicle model.
Models
The Models configuration area allows administrators to define and manage vehicle models, improving organization and categorization. The dashboard displays available models along with their manufacturer, model name, associated vehicles, category, and vehicle type.
You can refine displayed data using filters, group-by options, and saved favorites. Creating a new model involves opening a configuration form and entering details such as Model name, Manufacturer, Vehicle Type, and Category, as shown in the screenshot below.
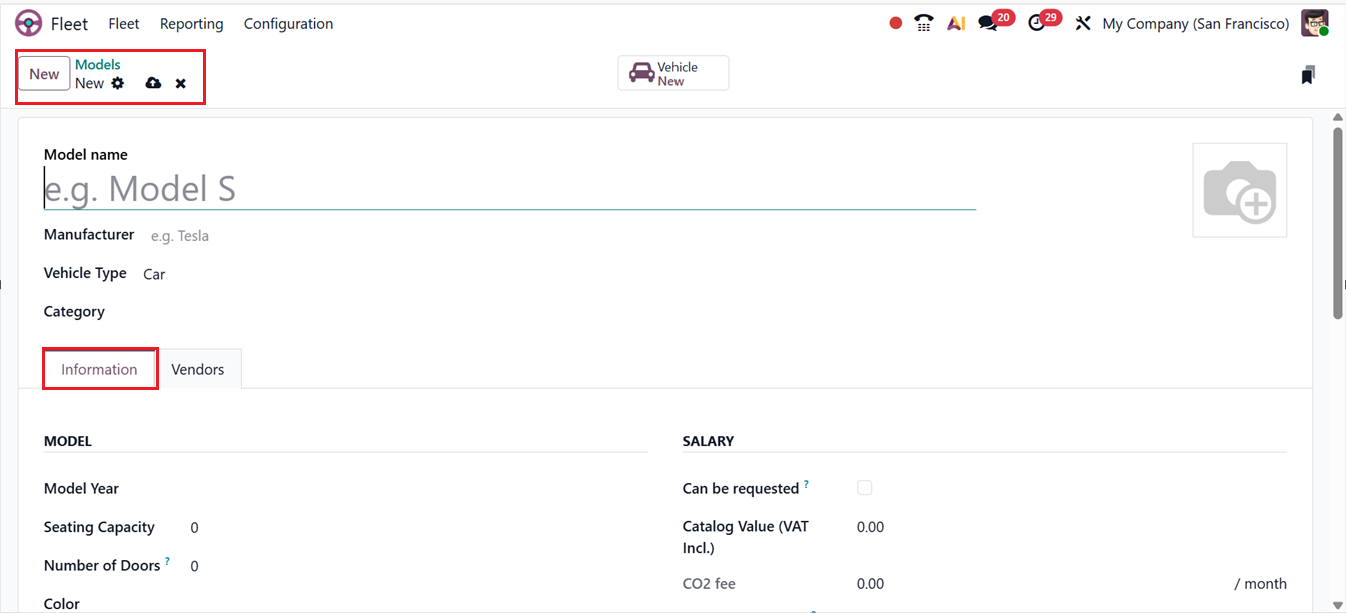
In the’MODEL’ and ‘ENGINE’ sections of the Information form tab, you can define details including;
- Model Year:Defines the production year of the vehicle, which is important for depreciation calculations, resale value estimation, and maintenance scheduling.
- Seating Capacity: DSpecifies the number of passengers the vehicle can accommodate, which helps in planning assignments for passenger transport and compliance with safety regulations.
- Number of Doors:D Records the total doors of the vehicle, useful for categorization and operational planning.
- Color:D Color of the vehicle
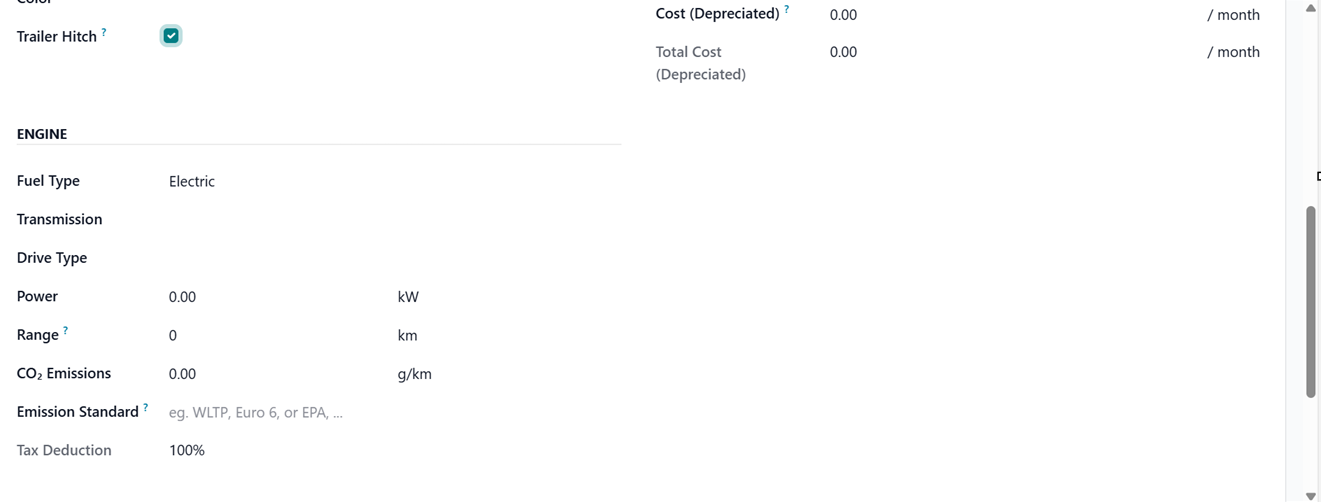
- Trailer Hitch:D A trailer hitch is a rear-mounted vehicle device used to safely tow trailers or equipment by providing a secure towing connection. Activate or deactivate the option if the model has a trailer hitch option.
- Fuel Type:D Identifies the type of fuel the vehicle uses (e.g., petrol, diesel, electric, hybrid), crucial for fuel cost tracking, environmental compliance, and route planning.
- Transmission:D Indicates the type of transmission (manual, automatic, or semi-automatic), which can affect driver assignment and operational preferences.
- Power:D Records the engine’s power output (e.g., horsepower or kilowatts), which is useful for performance evaluation, fuel consumption estimates, and matching vehicles to operational needs.
- Range:D Represents the maximum distance the vehicle can travel on a full tank or charge, helping in route planning and operational efficiency.
- CO₂ Emissions:D Records the vehicle’s carbon dioxide emissions, useful for regulatory compliance, sustainability reporting, and environmental impact analysis.
- CO₂ Emission Standard:D Specifies the emission standard the vehicle complies with (e.g., Euro 6), ensuring adherence to local and international environmental regulations.
Then, you can see an extra form section named ‘SALARY’ in the ‘Information’ tab of the form, which appears only when the company’s localization is set to Belgium. Here, you can define various monthly cost values for this vehicle model, except for the Catalog Value (VAT Included), as shown in the screenshot below.
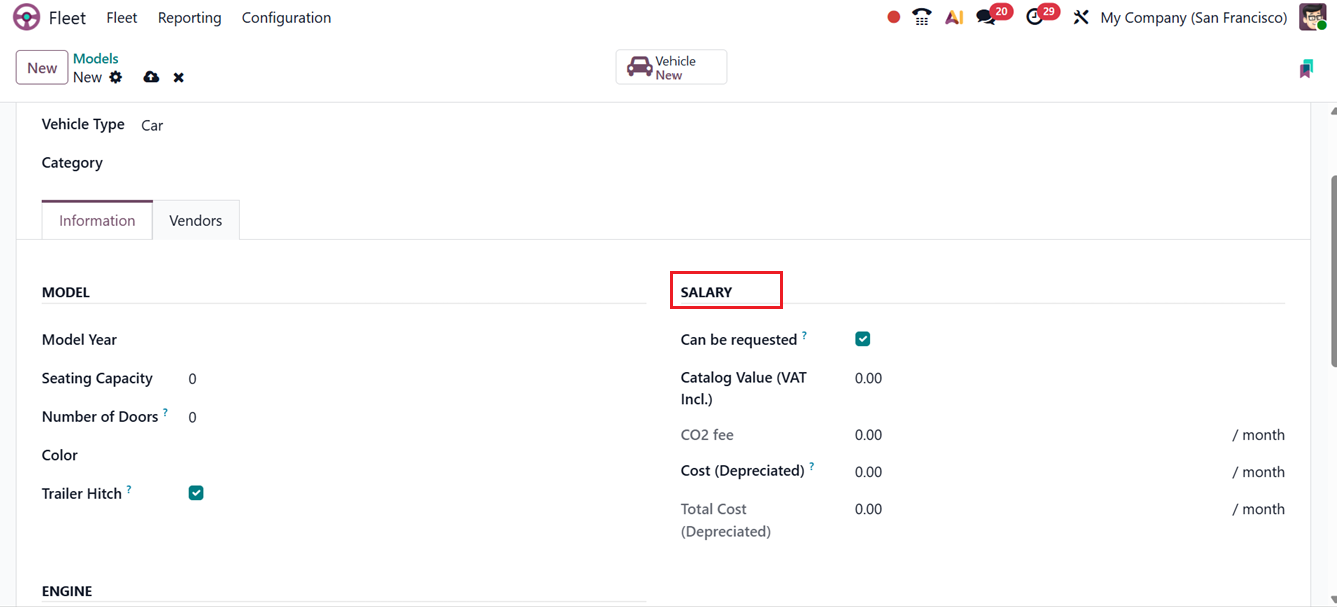
Inside this SALARY, section, you can see the form fields including;
- The Can be requested option allows employees to request this vehicle model if it is included in their employment contract.
- The Catalog Value (VAT Incl.) represents the vehicle’s manufacturer’s suggested retail price at the time of purchase or lease.
- The CO₂ fee reflects the carbon dioxide emission tax paid to the Belgian government and is automatically calculated based on Belgian regulations using the value entered in the CO₂ Emissions field in the Engine section; this fee cannot be edited manually, and any change to CO₂ emissions will automatically update it.
- The Cost (Depreciated) field records the monthly vehicle cost shown in the salary configurator, which affects the assigned employee’s gross and net salary and depreciates over time according to local tax laws, though depreciation occurs only through the linked vehicle contract rather than automatically on the model.
- The Total Cost (Depreciated) combines the depreciated cost and the CO₂ fee and is also depreciated over time.
By filling out these fields, fleet managers create a comprehensive vehicle model profile, which supports efficient fleet allocation, maintenance planning, cost analysis, and regulatory compliance.
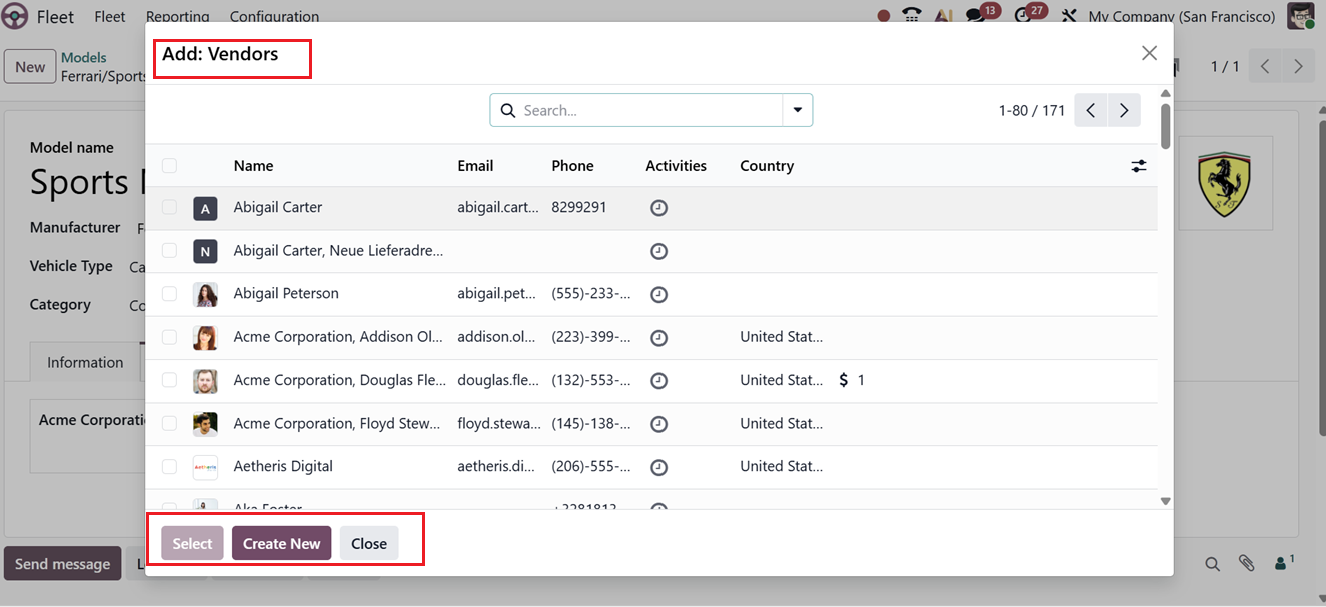
Then, the vendors supplying the model can be added under the Vendors tab using the ‘Add Vendors’ button, as shown in the screenshot below.
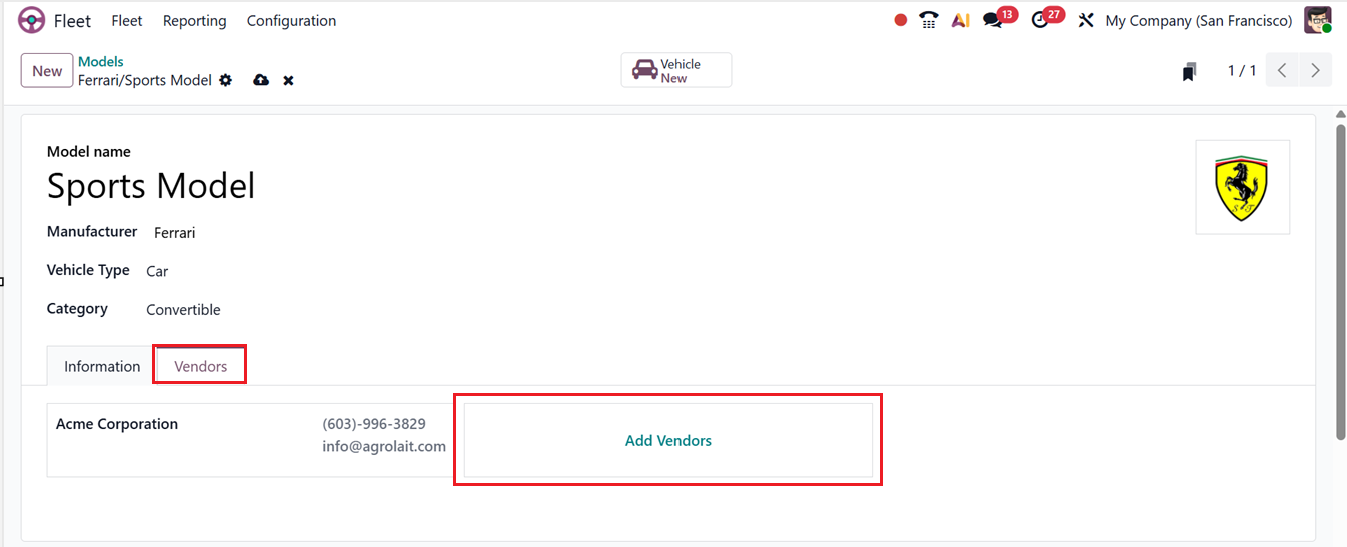
When you click on the Add Vendors button, Odoo will display the vendor list that has already been created. You can select an existing vendor from this list, or you can create a new vendor directly if it does not already exist in the system using the Inventory module if it is installed.
Categories
Vehicles are categorized and arranged into logical groups in Odoo 19 Fleet according to departmental, policy, usage, and vehicle type requirements. Grouping similar vehicles for analysis, contracts, or employee assignments helps fleet managers apply rules consistently, streamline reporting, and manage cars more effectively.
You can utilize the Categories feature from the Configuration menu to organize vehicles by classification. In the Categories dashboard, you can see existing categories displayed with details such as Name, Max Weight, and Max Volume details, as shown in the screenshot below.
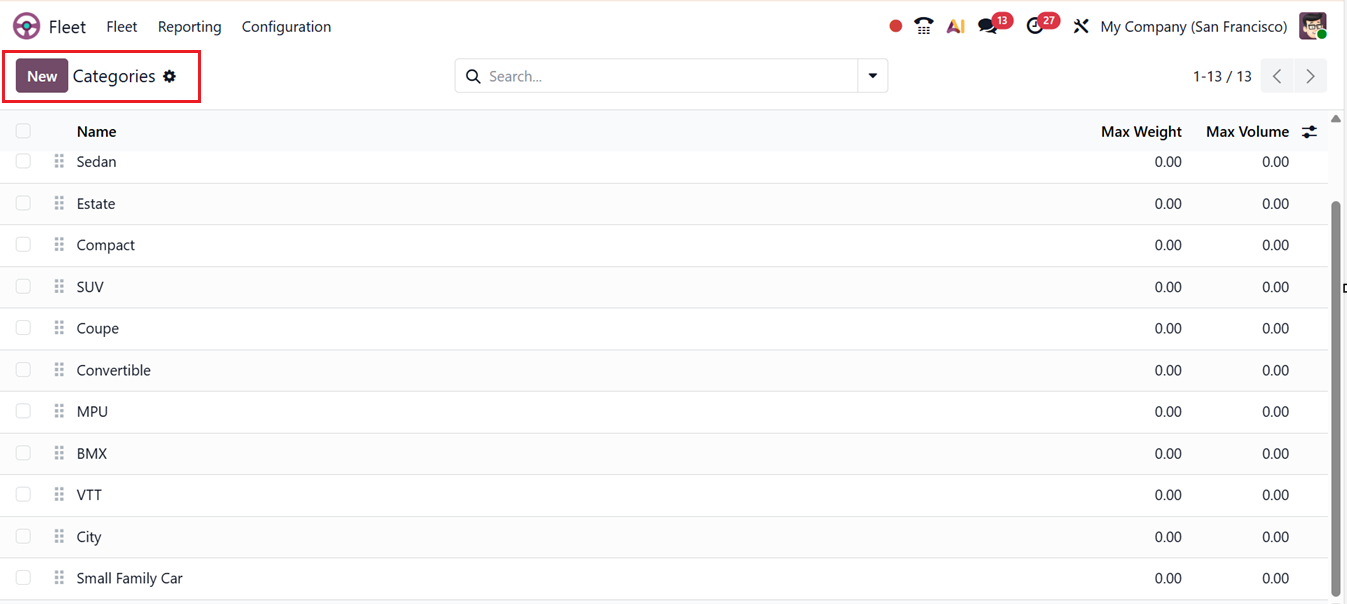
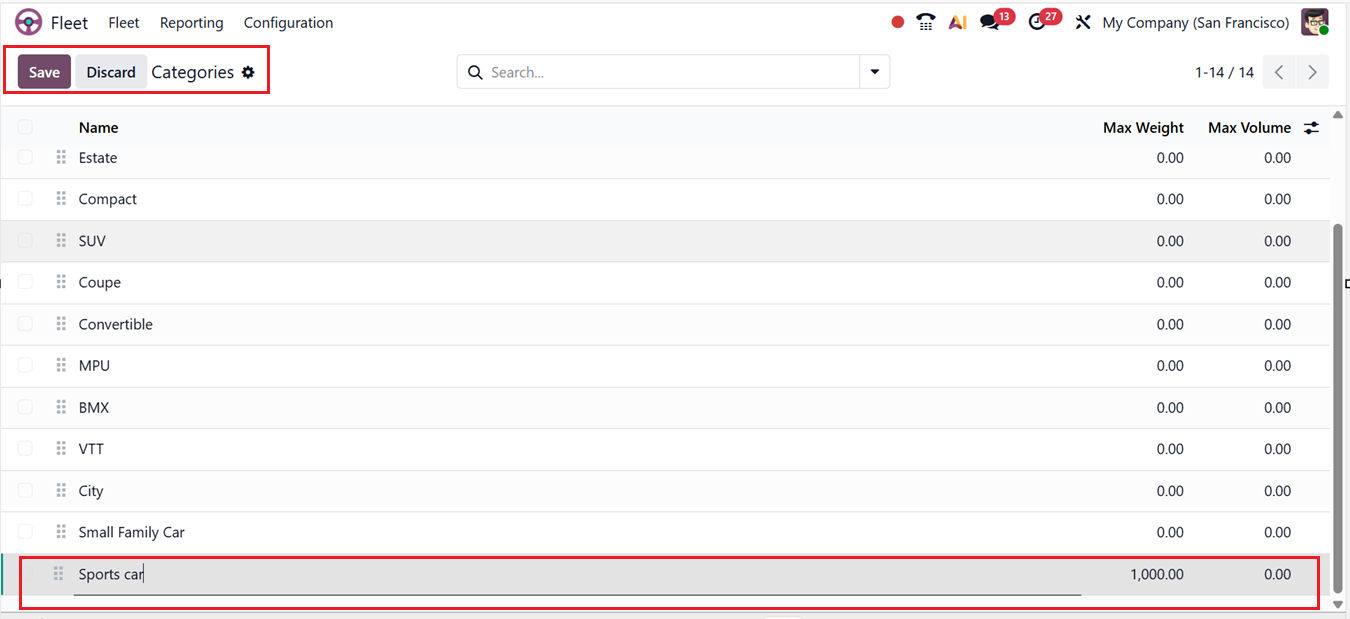
Then, new categories can be created quickly using the New button and completing the relevant fields in the newly displayed editing line.
Service Types
Vehicle services and repairs, including maintenance, inspections, tire replacements, fuel services, and mechanical repairs, are categorized and arranged in Odoo 19 Fleet using predefined categories called ‘Service Types’. Through their assistance in organizing service data, it becomes simpler to schedule preventive maintenance, follow maintenance history, evaluate service costs, and provide comprehensible reports for the whole fleet.
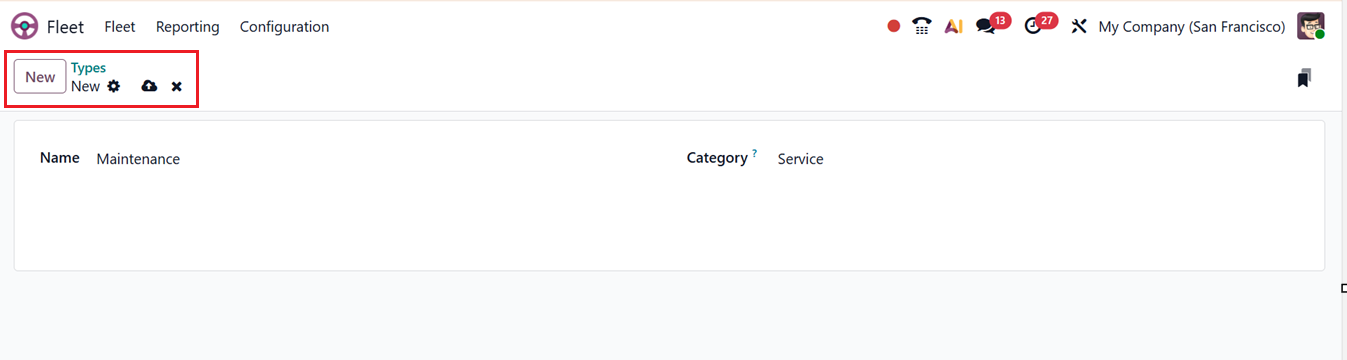
You can create and manage different service types from the ‘Types’ option of the Configuration menu. This will show the dashboard of available service types based on their Name and Category, as shown in the screenshot below.
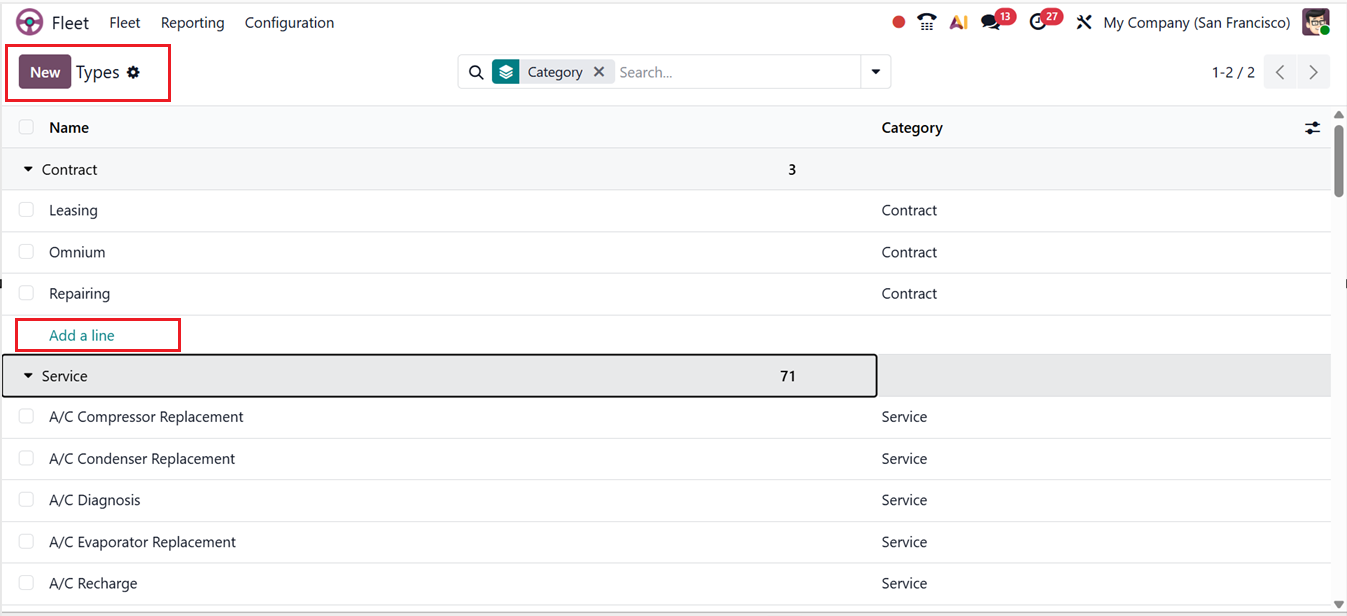
Then, you can create new types using the ‘Add a line’ button provided under the different category sections or using the ‘New’ button. Then, simply add the service type Name and relevant Category in the editing field.
Status
The Status option from the Vehicle section of the Configuration menu in Odoo 19 Fleet shows the availability or current state of a vehicle in the fleet management system. Fleet managers can effectively manage assignments, schedule maintenance tasks, and keep an eye on the availability of the entire fleet by using it to track whether a vehicle is in Request stage, To Order, Ordered, Registered to an employee etc, as shown in the screenshot below.
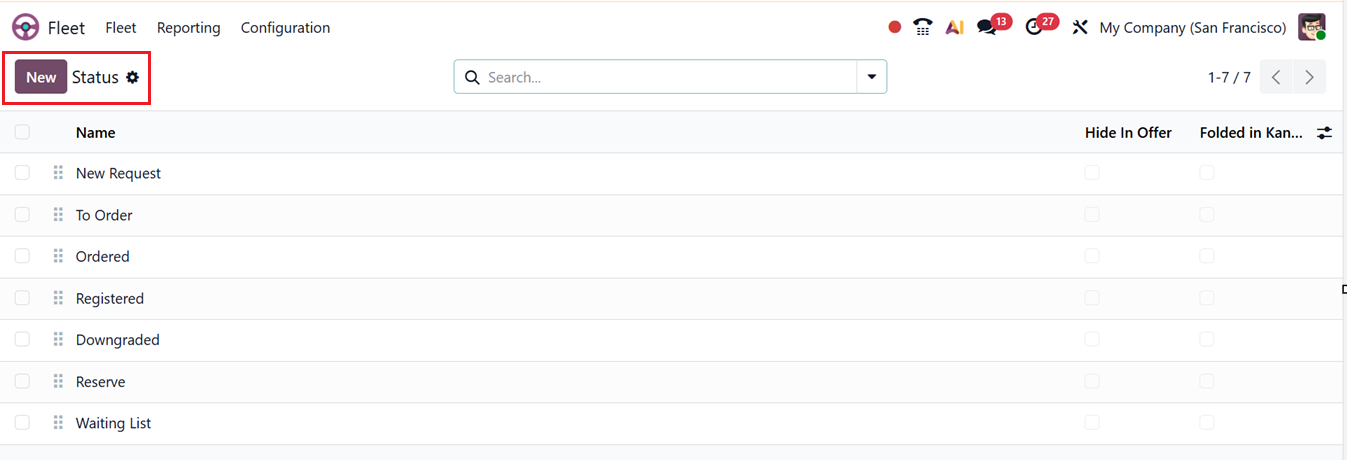
You can create new stages using the ‘New’ button and editing the Status Name. The Hide in Offer hides vehicles in that stage from offer or selection views, while Folded in Kanban collapses the stage by default to keep the Kanban view clean and focused. Finally, save the status.

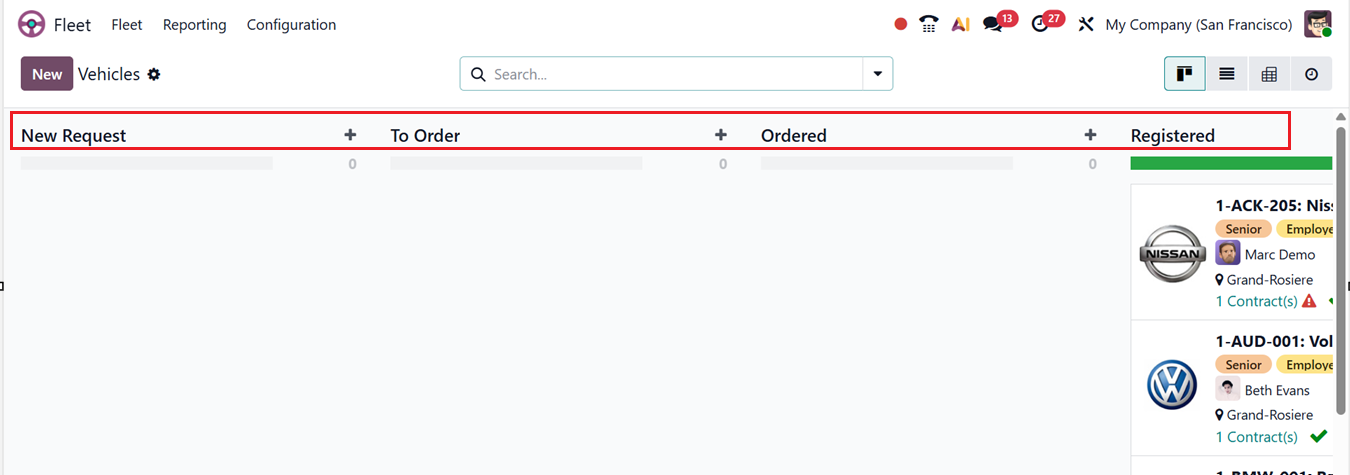
These are the stages displayed when opening the Vehicles dashboard in the Fleet module. So, you can also create new stages using the ‘Add State’ button from the Vehicles dashboard
Tags
In Odoo 19 Fleet Module, Vehicle Tags are customizable labels used to classify and organize vehicles with additional attributes or characteristics. They help fleet managers quickly filter, search, and group vehicles based on specific features such as usage type, ownership, fuel category, condition, or department, making fleet management and reporting more efficient.
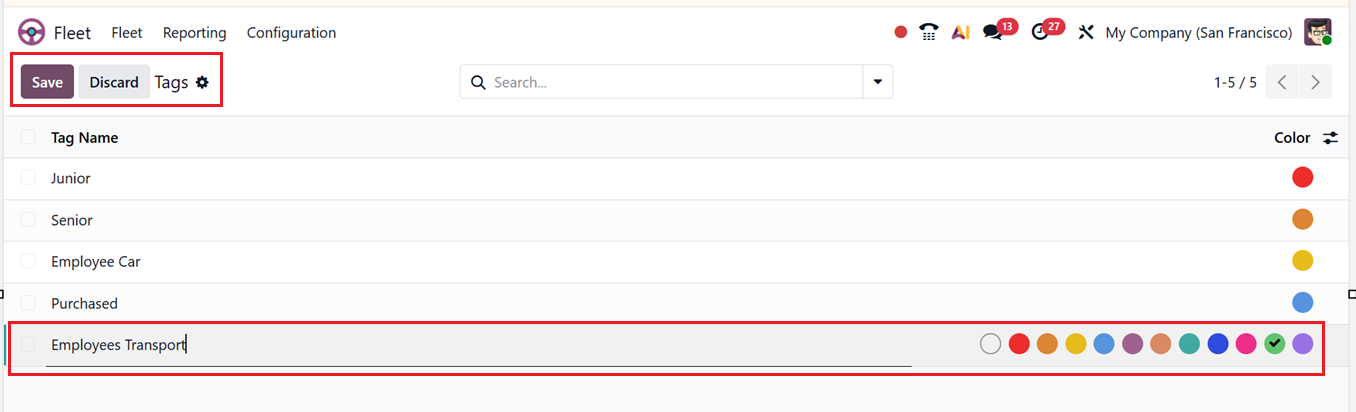
You can manage these vehicle tags using the Tags menu from the Configuration menu. You can see the available tags from the dashboard with their tag name and color. Then, you can create new tags by simply clicking on the New button and editing the Tag Name and choosing a highlight Color for the tag, as shown in the screenshot above.
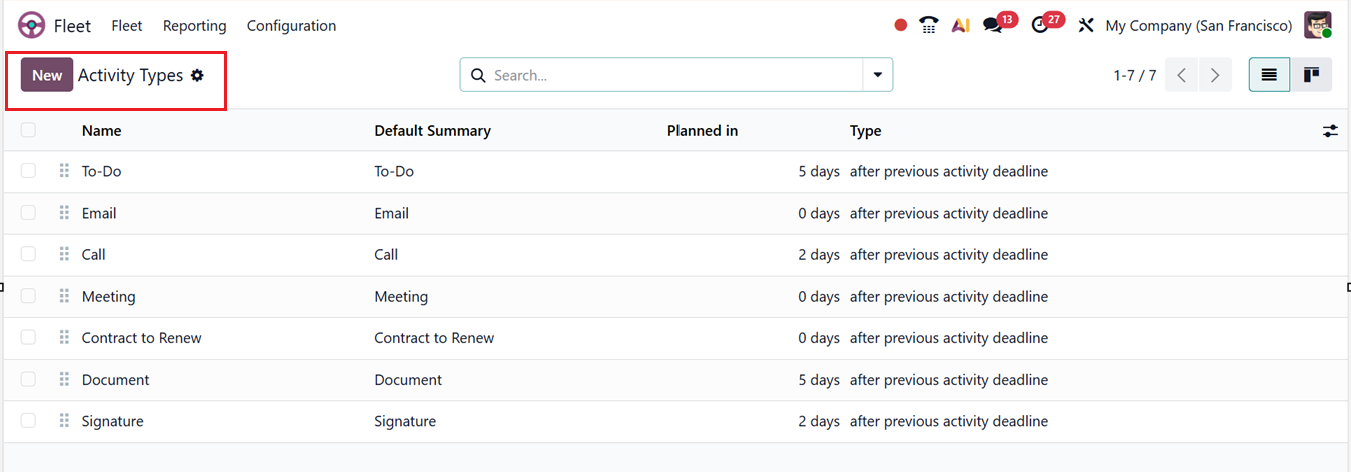
Activity Types
The Activity Types feature helps improve customer engagement by allowing businesses to plan, organize, and monitor interactions in a structured way. It is widely used across sales and customer management modules, making it easier to manage follow-ups and maintain clear communication with leads, opportunities, and customers.
In Odoo 19 Fleet Module, these Activity types can be configured by navigating to the Configuration menu and selecting the Activity Types. This window displays a list of predefined activity types along with details such as their Name, Default Summary, Planned in durations, and Type.
To create a new activity type, users can click the New button and enter a suitable name. Then, each activity type must be linked to an Action, which determines how the activity behaves. Available actions include Upload Document, Phone Call, Meeting, Signature, Grant Approval, Tax Report, or None, as shown in the screenshot below.
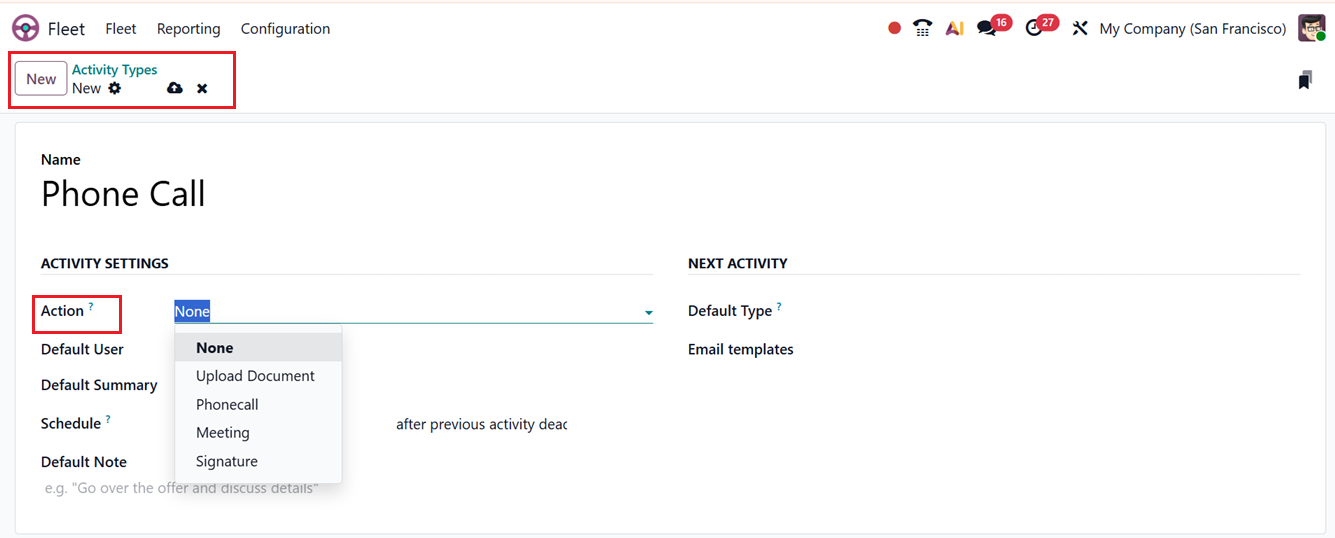
Selecting the correct action ensures proper functionality, such as opening a calendar for meetings or automatically completing an activity after a document upload. You can also assign a Default User and add a Default Summary to clearly describe the task.
The Schedule option allows you to specify how far in advance by days, weeks, or months an action should be carried out. This enables Odoo to effectively plan and manage the action’s deadline.Then, the Default Notes field can be used to edit any notes regarding the activity.
Odoo also supports automated task progression through the NEXT ACTIVITY settings. In the Default Type field, you can select an activity that Odoo will suggest once the current activity is marked as done. Additionally, Email Templates can be linked to activities to send predefined messages when tasks are planned, ensuring consistent and professional communication. After saving the activity type, you can utilize these while creating new vehicle services, contracts or any customer or employee interactions.