Odoo 19 IoT (Internet of Things) is a potent solution designed to directly link physical devices to business processes, resulting in more intelligent, automated workflows. It enables Odoo apps and hardware, such as barcode scanners, printers, weighing scales, payment terminals, and sensors, to communicate seamlessly. Odoo 19 IoT helps businesses decrease manual intervention, enhance accuracy, and boost operational efficiency by serving as a bridge between software and devices.
A key component of Odoo 19 is the IoT Box, which gathers data from linked devices and securely transmits it to the Odoo system in real time. In sectors where real-time data and automation are essential, like manufacturing, retail, warehouses, and point-of-sale settings, this integration is particularly beneficial. Daily operations can be greatly streamlined by automated weighing, instant label printing, or real-time equipment monitoring, for instance.
Additionally, by offering precise, real-time insights into device performance and operational status, Odoo 19 IoT facilitates better decision-making. By reducing human error and expediting repetitive tasks, it also increases productivity. All things considered, the Odoo 19 IoT module helps businesses embrace digital transformation and increase overall efficiency by converting conventional business processes into intelligent, networked systems.
Open the IoT module from the Odoo 19 dashboard, and there you can see three menus: IoT Boxes, Devices, and Configuration.

1. IoT Boxes
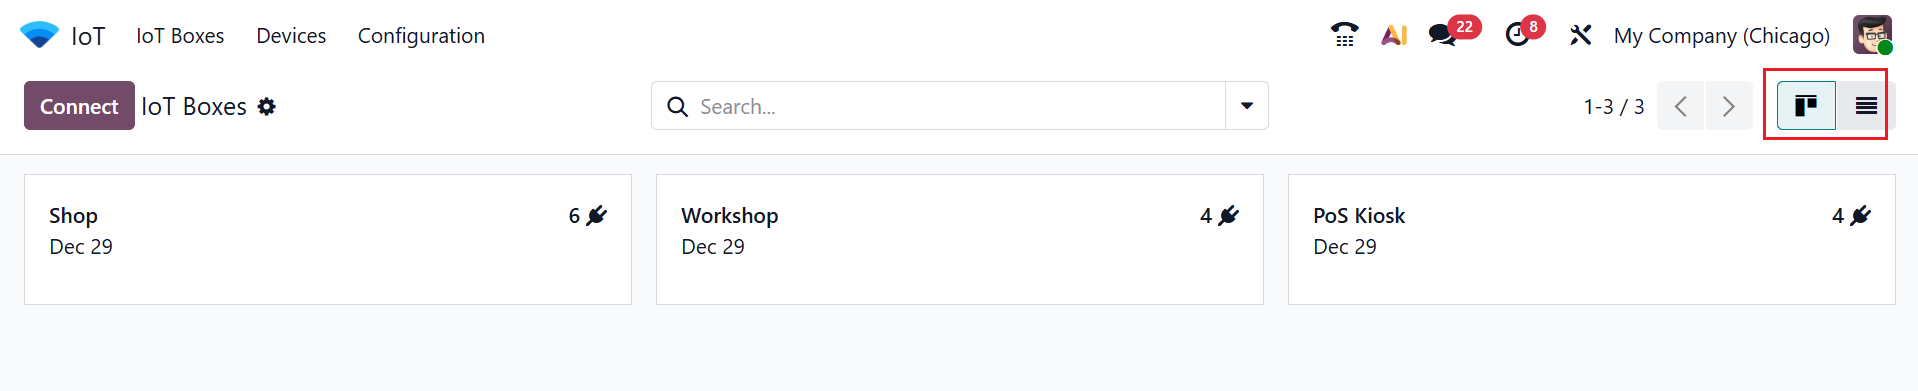
When you open the IoT module, the IoT Boxes menu appears as the main dashboard by default. Each IoT Boxes are arranged as a kanban card as shown below. There, you can see the details of the IoT Boxes, such as the number of connected devices and the date. You can also switch the Kanban view of IoT Boxes to List view.
To manage IoT devices, users can install the Odoo 19 ERP Package application.
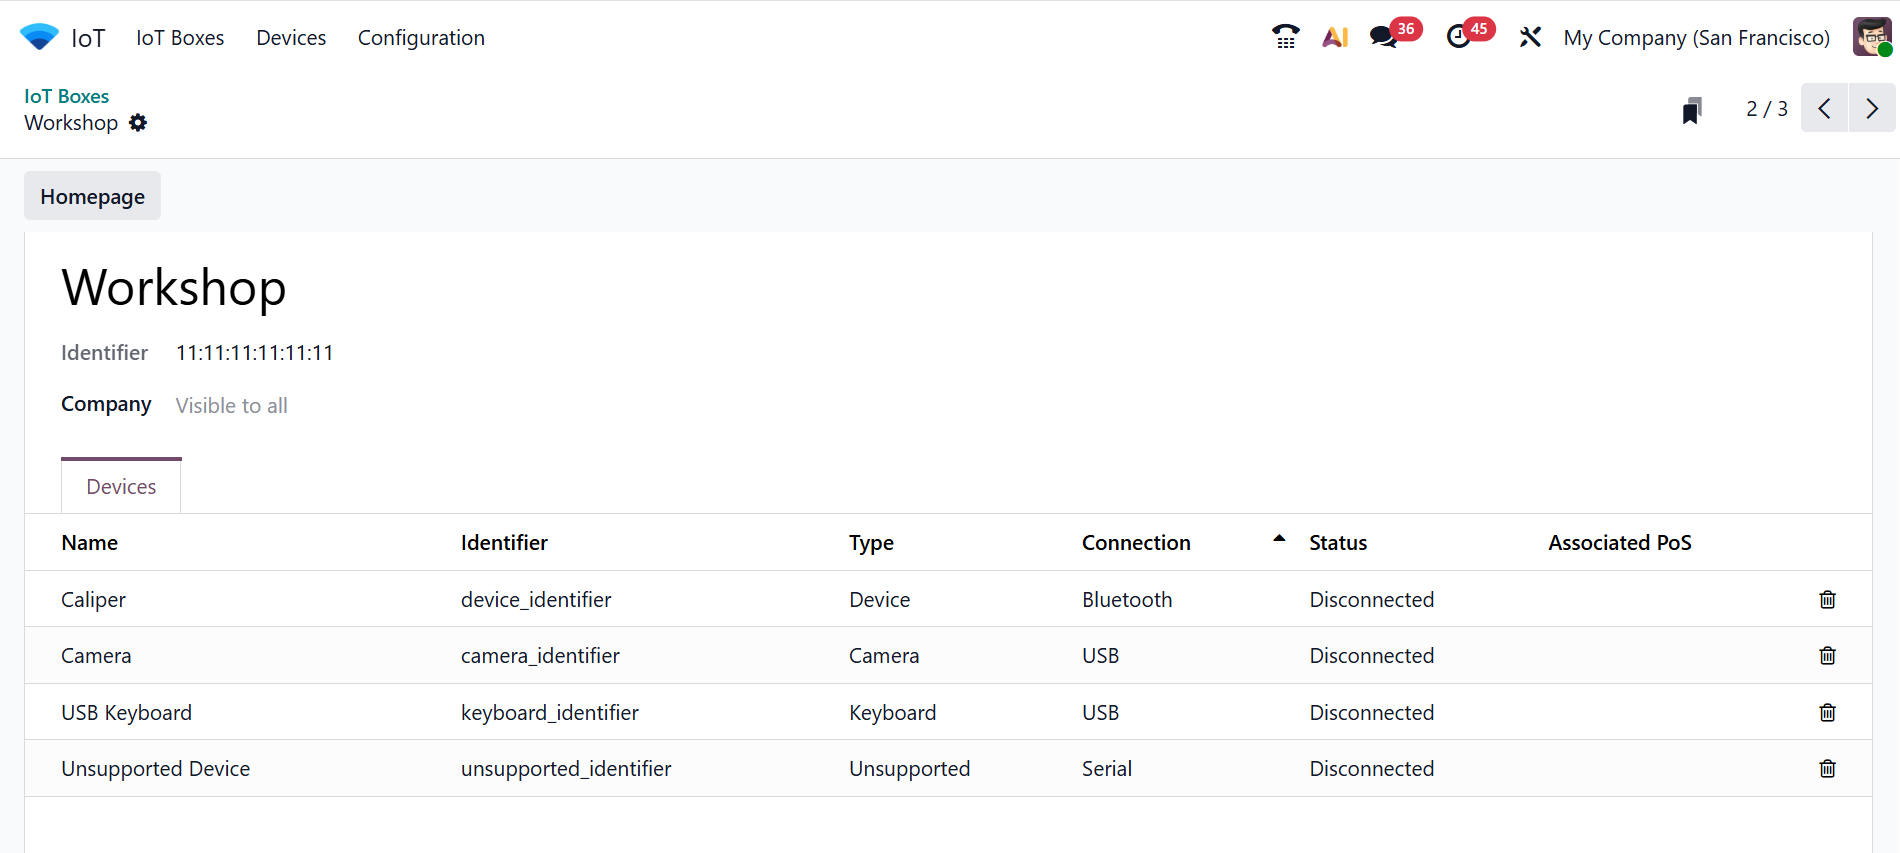
When you move through each IoT Box, you will move to a new window where you can find which devices are connected to the selected IoT Box. Here, you can find the name of the IoT Box, the identifier, and the company.
Under the Devices tab, you can see the details of the connected devices, such as Name, Identifier, Type, Connection, Status, and Associated PoS.
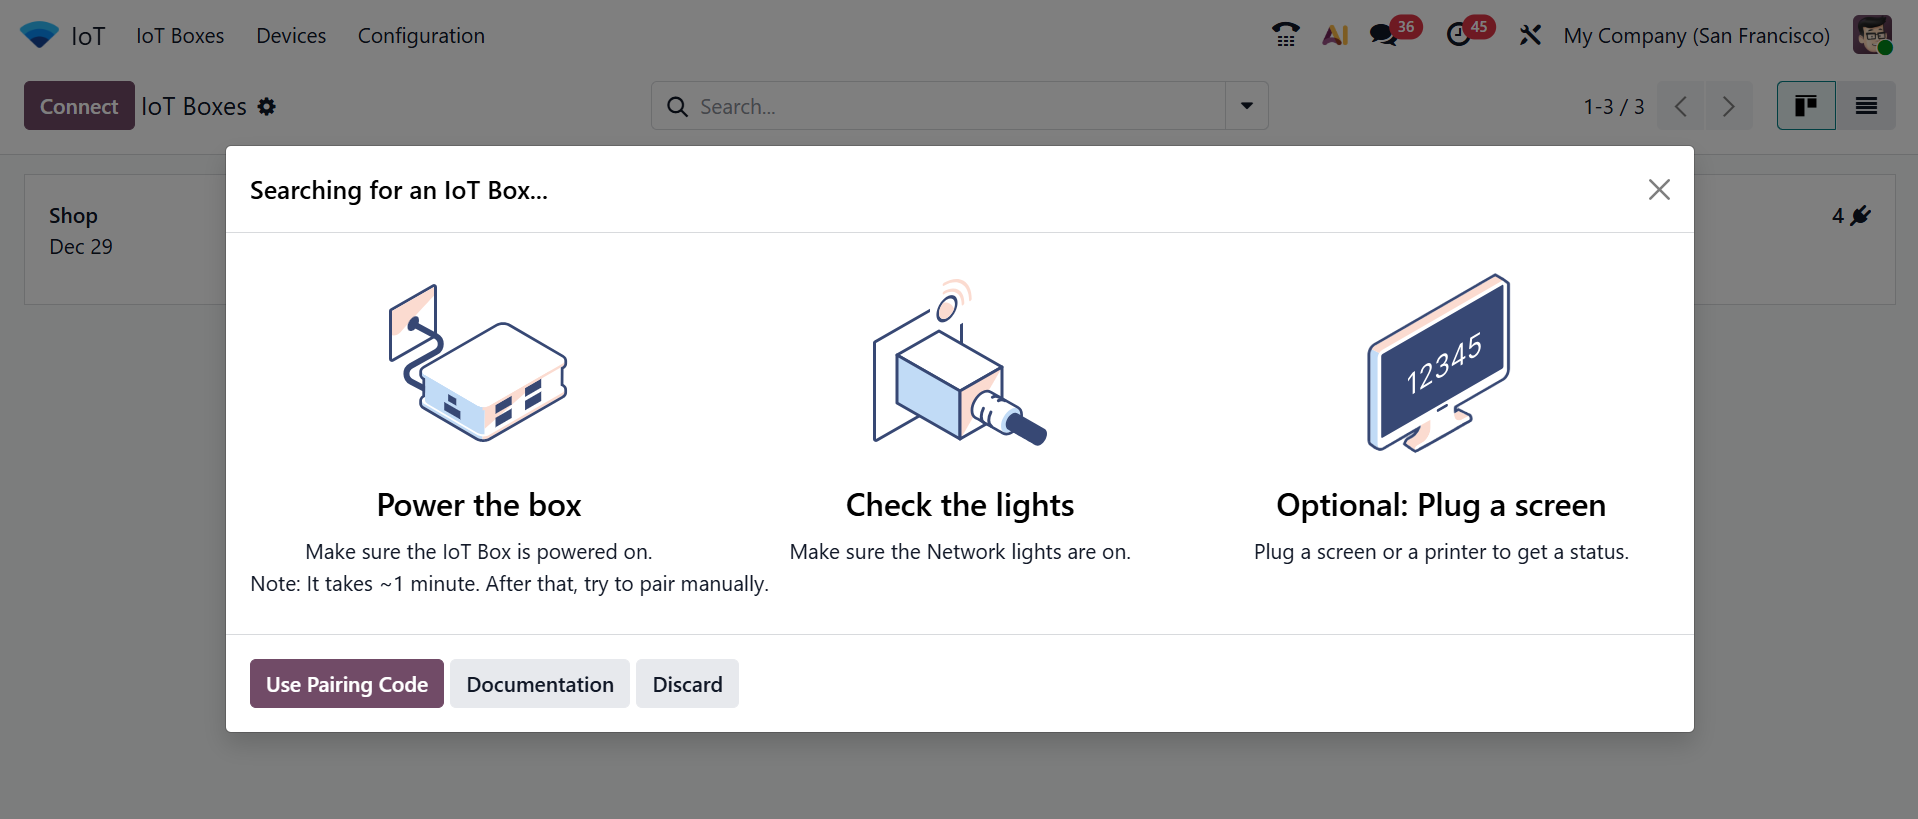
When the Connect button is clicked, a new pop-up window appears, as shown below. There, you can see the instructions for connecting devices such as Power the box, Check the lights, and Optional: Plug a screen. The Documentation button helps you to directly move to the Odoo 19 Documentation, which helps to understand the setup.
Select the Use Pairing Code button to open the pop-up window shown below. Provide the pairing code and choose Connect.
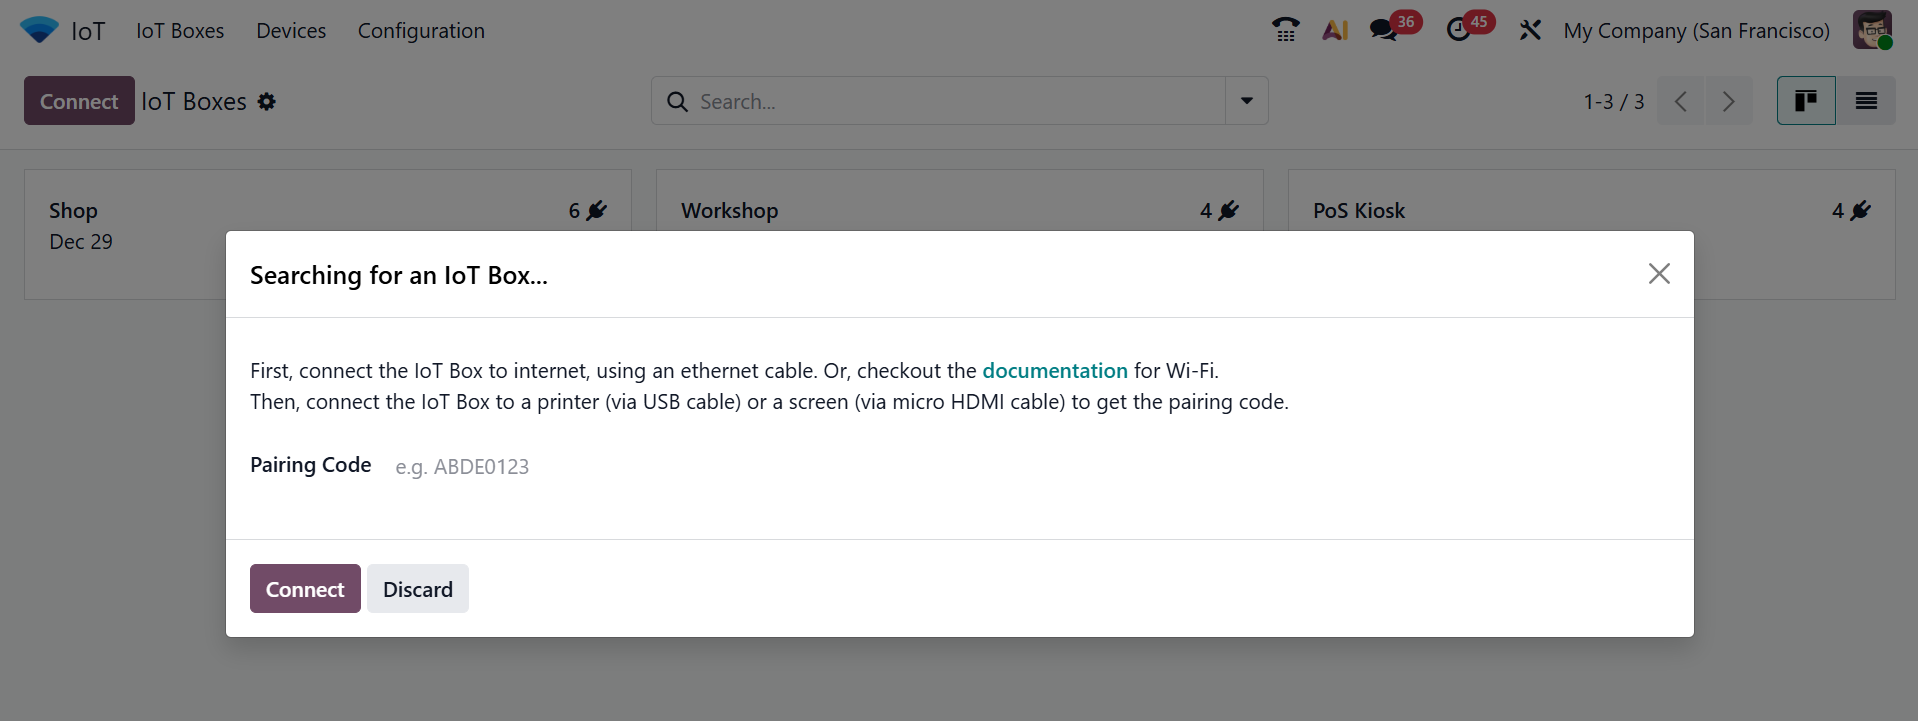
You can connect the IoT boxes to the internet in two ways:
- Ethernet Connection: Using the Ethernet cable, you can connect the IoT box to the internet. To get a pairing code, connect the IoT box to the printer or screen.
- WiFi Connection: You can also connect the IoT Box using the computer’s WiFi connection. In the IoT box homepage, click on the Configure button near the Internet Status section. After a few minutes, the available networks will be displayed. Enter the Wi-Fi password and click Connect.
2. Devices:
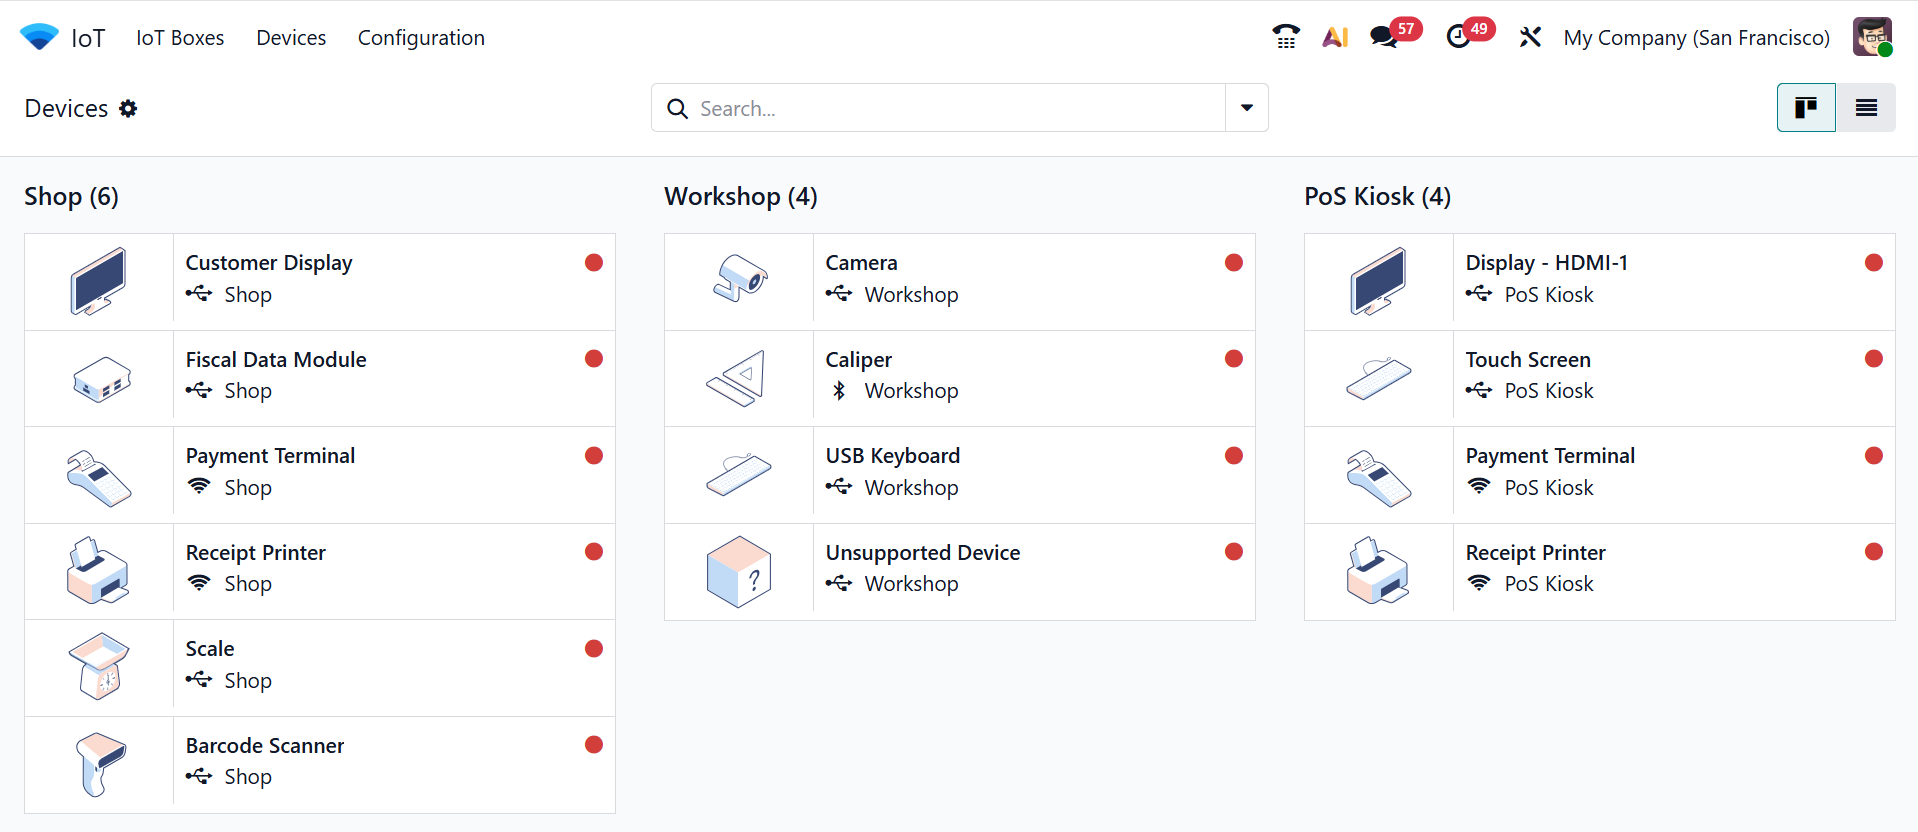
In the Devices menu dashboard, you can see the available IoT-connected devices in a kanban view. The devices are arranged based on the connected IoT Box. Under each device, you can view the connection type as either Ethernet or WiFi. Here, the red color indicates that the device is not yet connected.
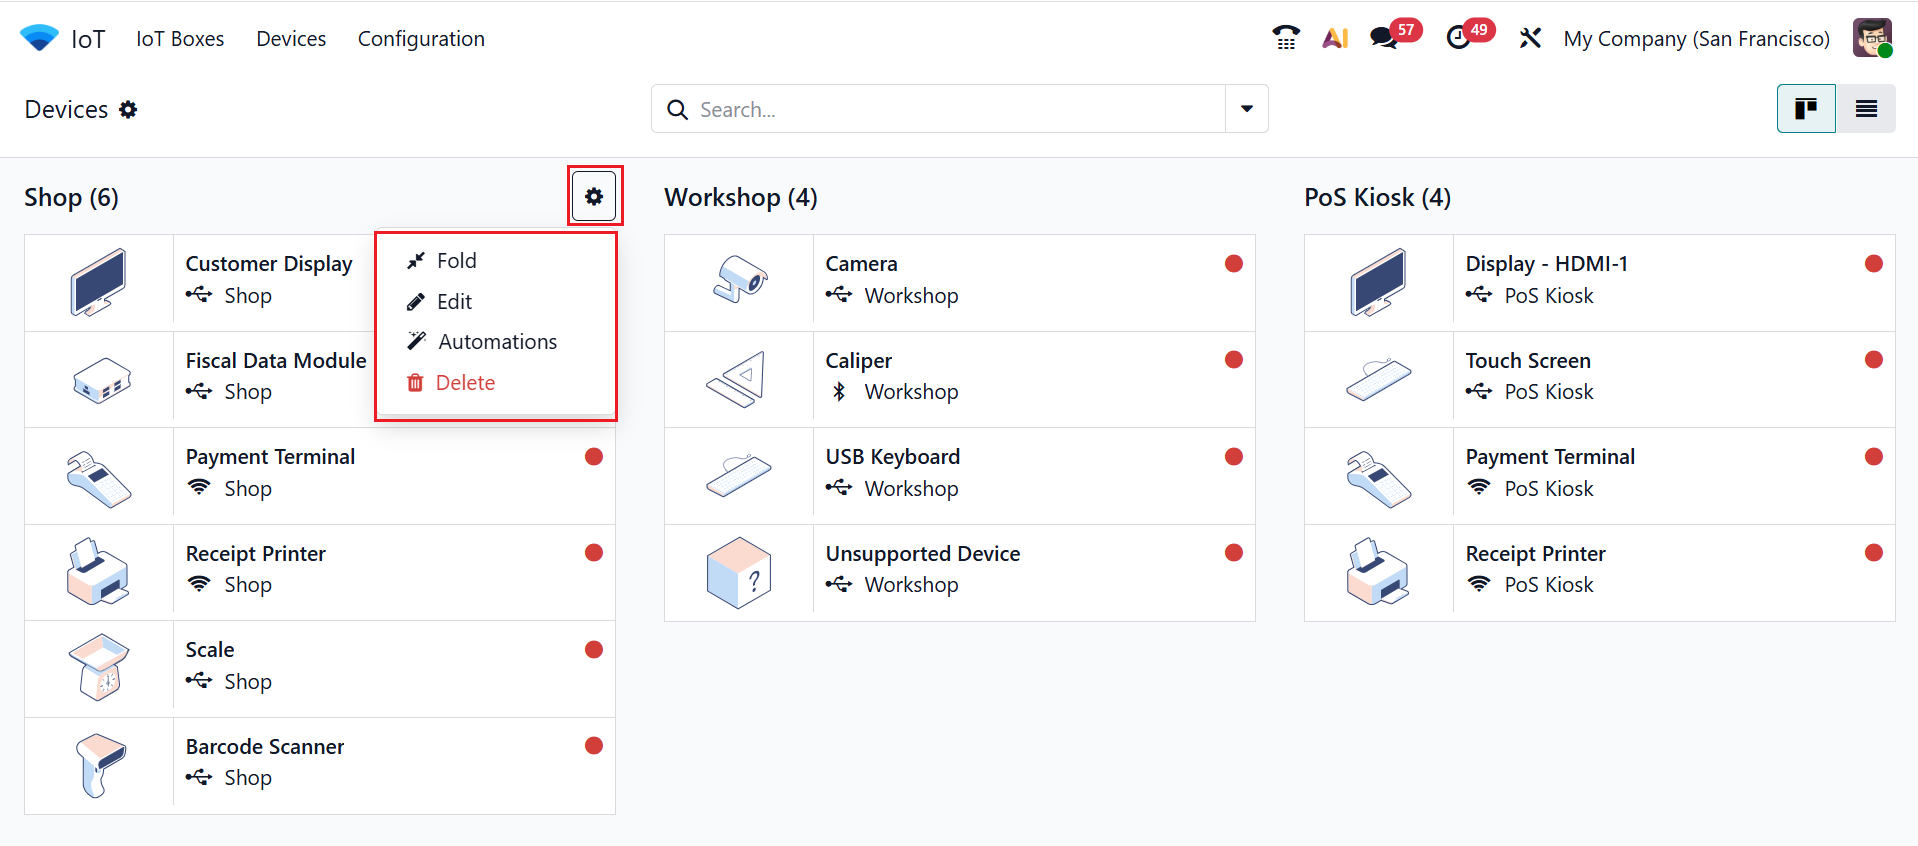
Click on the gear icon to view the options such as Fold, Edit, Automations, and Delete. The Fold option helps you to hide the stage from the dashboard. The Edit option lets you update the details of the selected stage, while Automations allows automatic actions or behaviors to be triggered based on defined conditions. The Delete button helps to permanently remove the data.
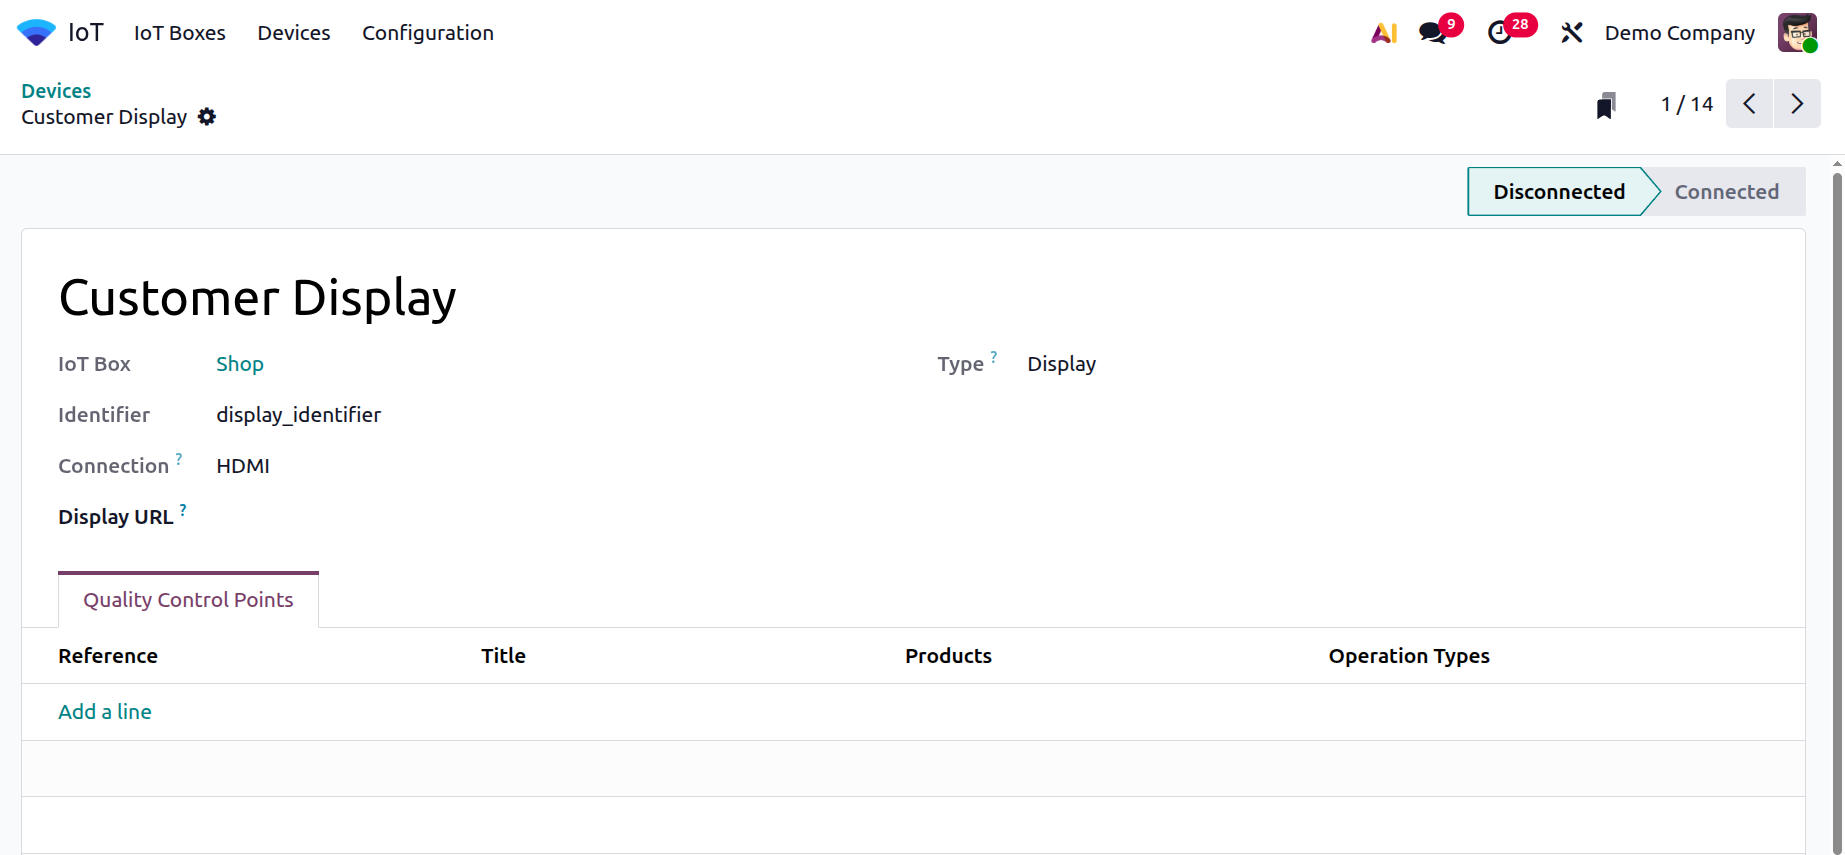
When you open a device from the dashboard, you can view the details of the devices such as the IoT box name, identifier, device type, and connection.
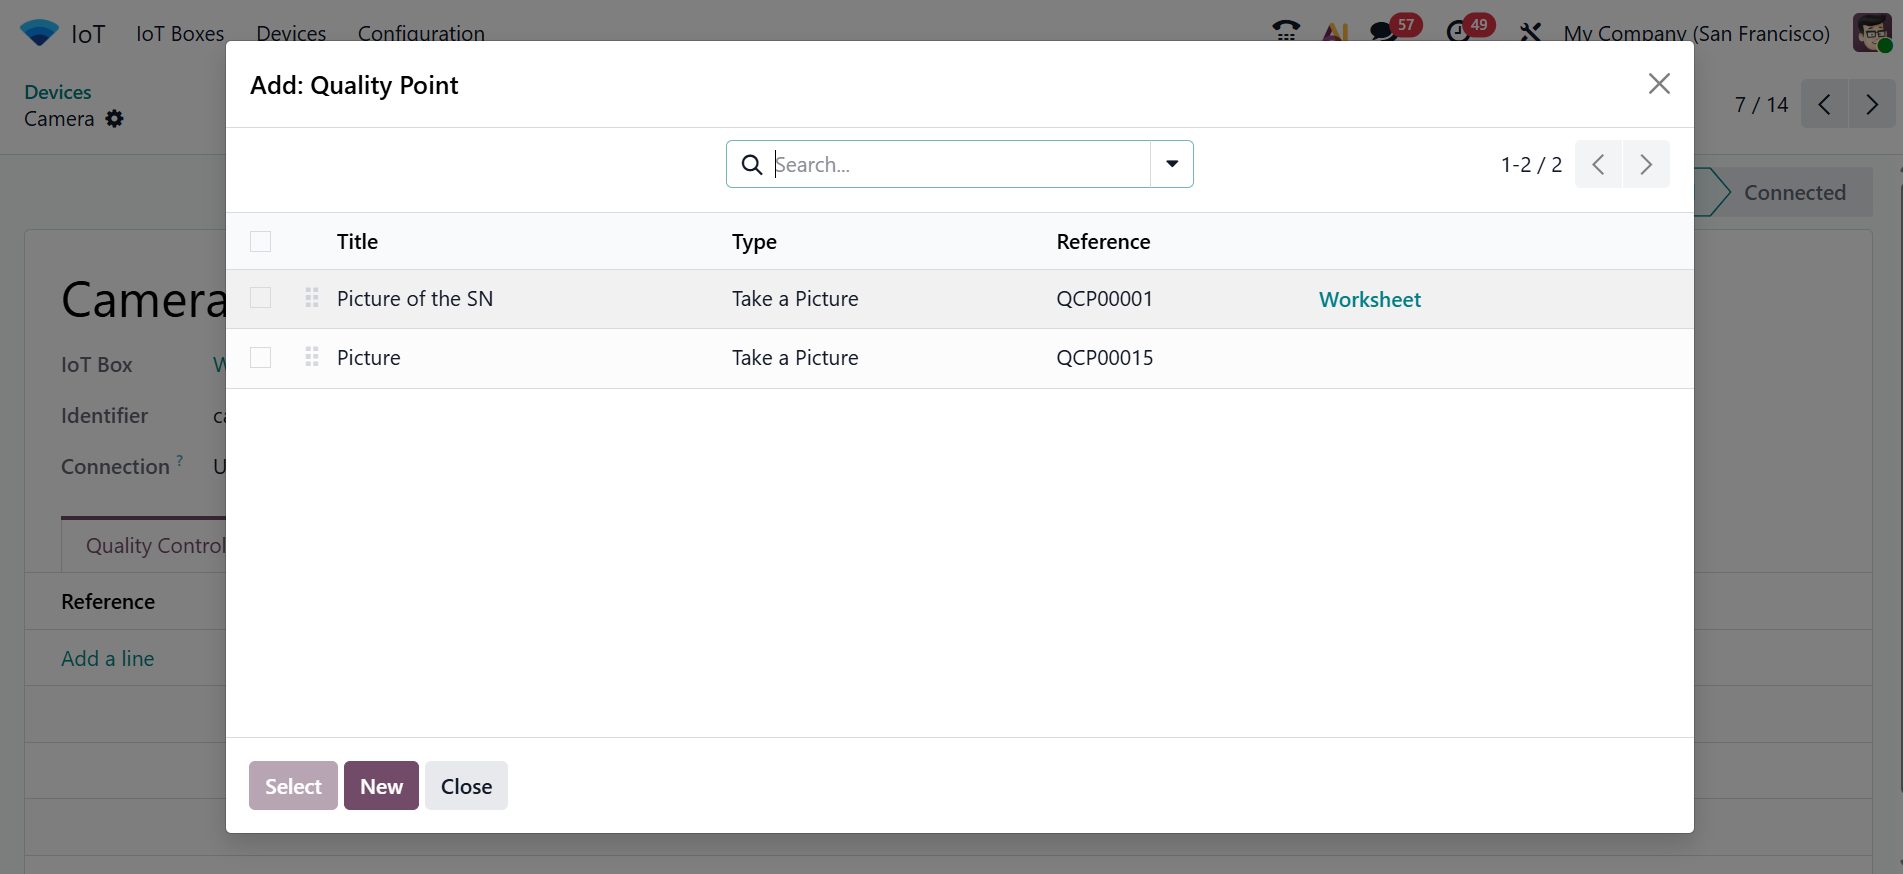
Under the Quality Control Points tab, you can add quality points by clicking the Add a line button. A pop-up screen will appear where you can select quality points as shown below:
3. Configuration:
Under the Configuration menu, you can view the Reporting section with the Reset Linked Printers option. This option shows the list of reports that are linked to IoT printers for automatic printing. Here, you can see that no reports are linked to any printer.
The IoT module in Odoo 19 Enterprise makes it easy to connect machines and devices with business software. It allows tools like scanners, printers, and sensors to work directly with Odoo apps. This streamlines the process, reduces manual effort, and lowers the chance of errors. The setup is simple, and devices can be used across Inventory, Manufacturing, POS, and Quality apps. Overall, the IoT module helps businesses automate daily tasks and manage real-time operations more smoothly, making work faster, easier, and more reliable.