Payslips
The Odoo19 system effectively manages a company's whole payroll application. You can create a contract with a wage structure once employee paystubs have been defined.
If a payslip was generated, Odoo 19 lets you export it as a PDF. Journal entries on accounts can also be discussed in Odoo 19. All payslip, payments, and batches are simple to handle.
Payslips
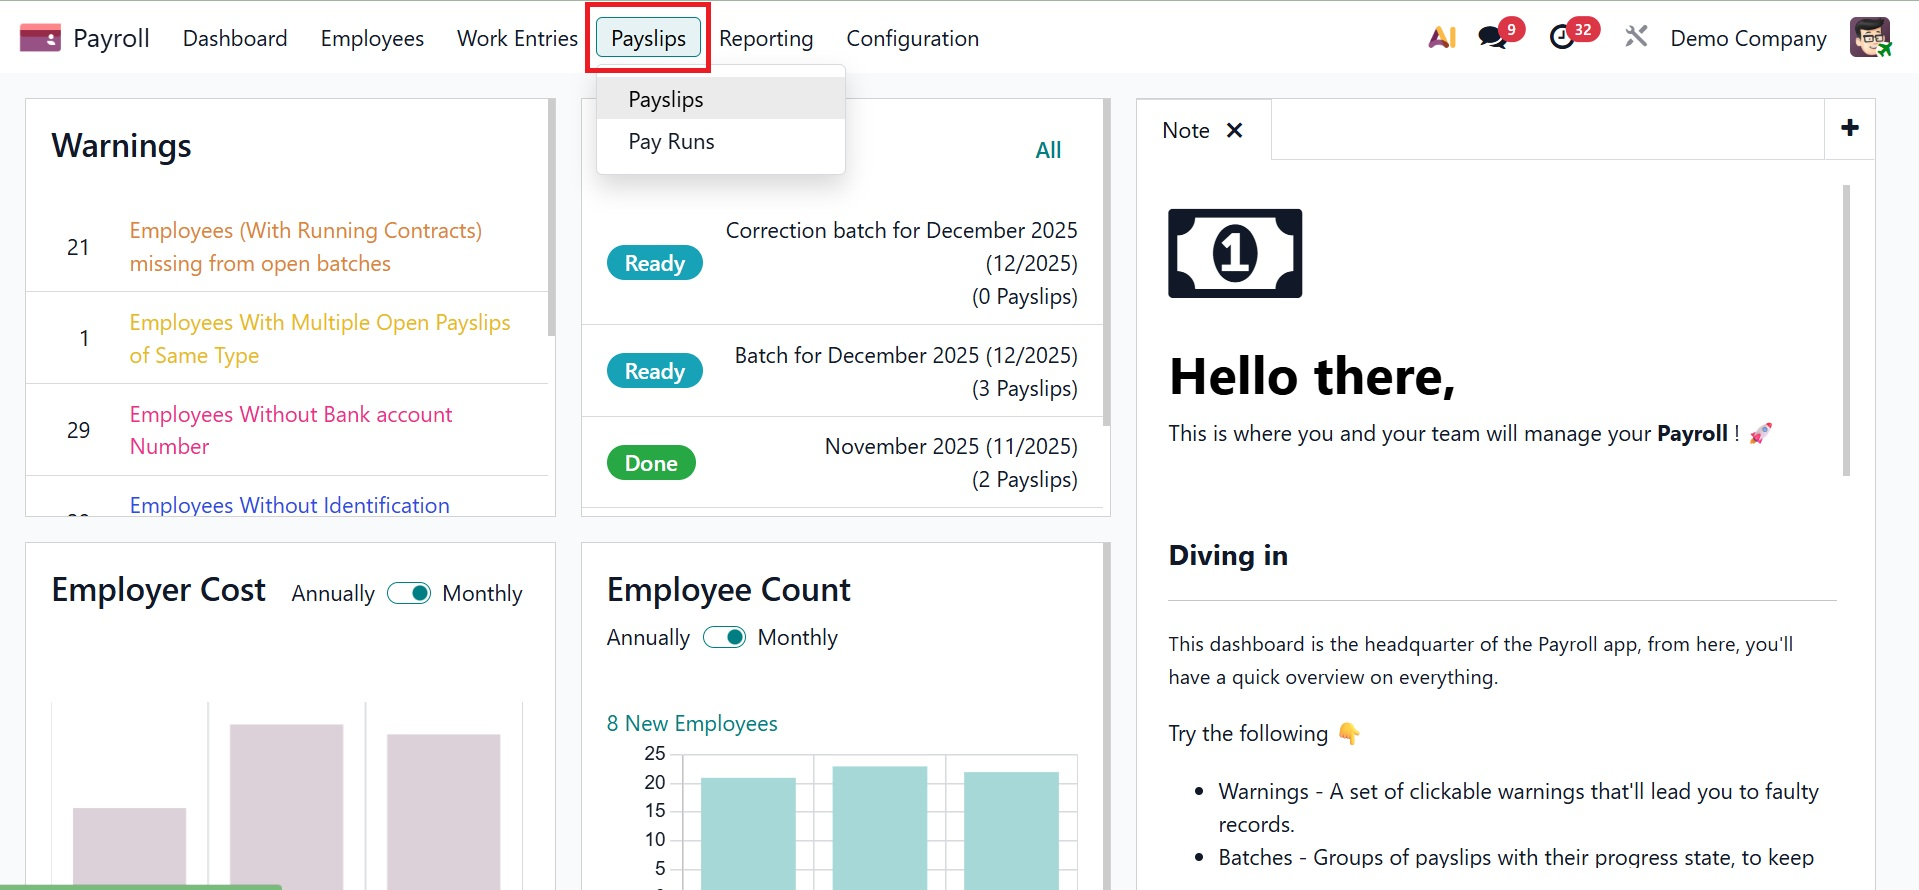
Data on payslips generated for all employees can be accessed by selecting the All Payslips menu from the Payslips tab. The List view displays information about employee payslips, including employee, period, pay run, employee cost, Basic wage, gross wage, net wage, and status.

By selecting the New icon, we can quickly define new pay stubs for employees. You can also create a new payslip using the New Off Cycle option. The new page will look like the picture below.
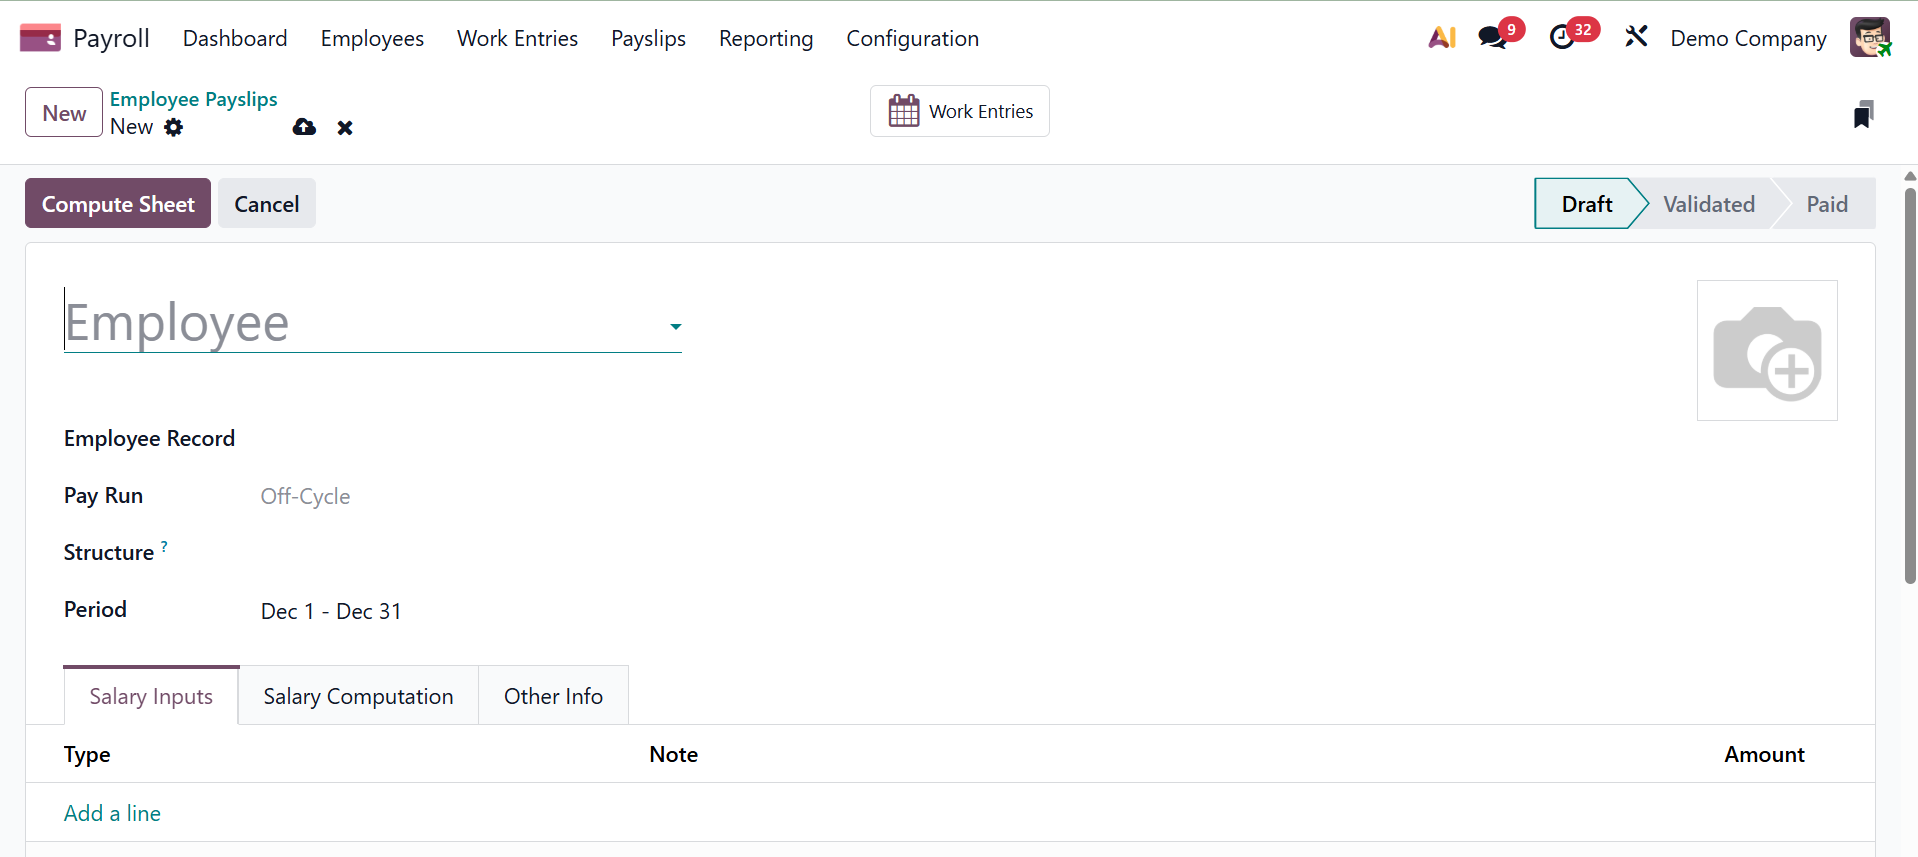
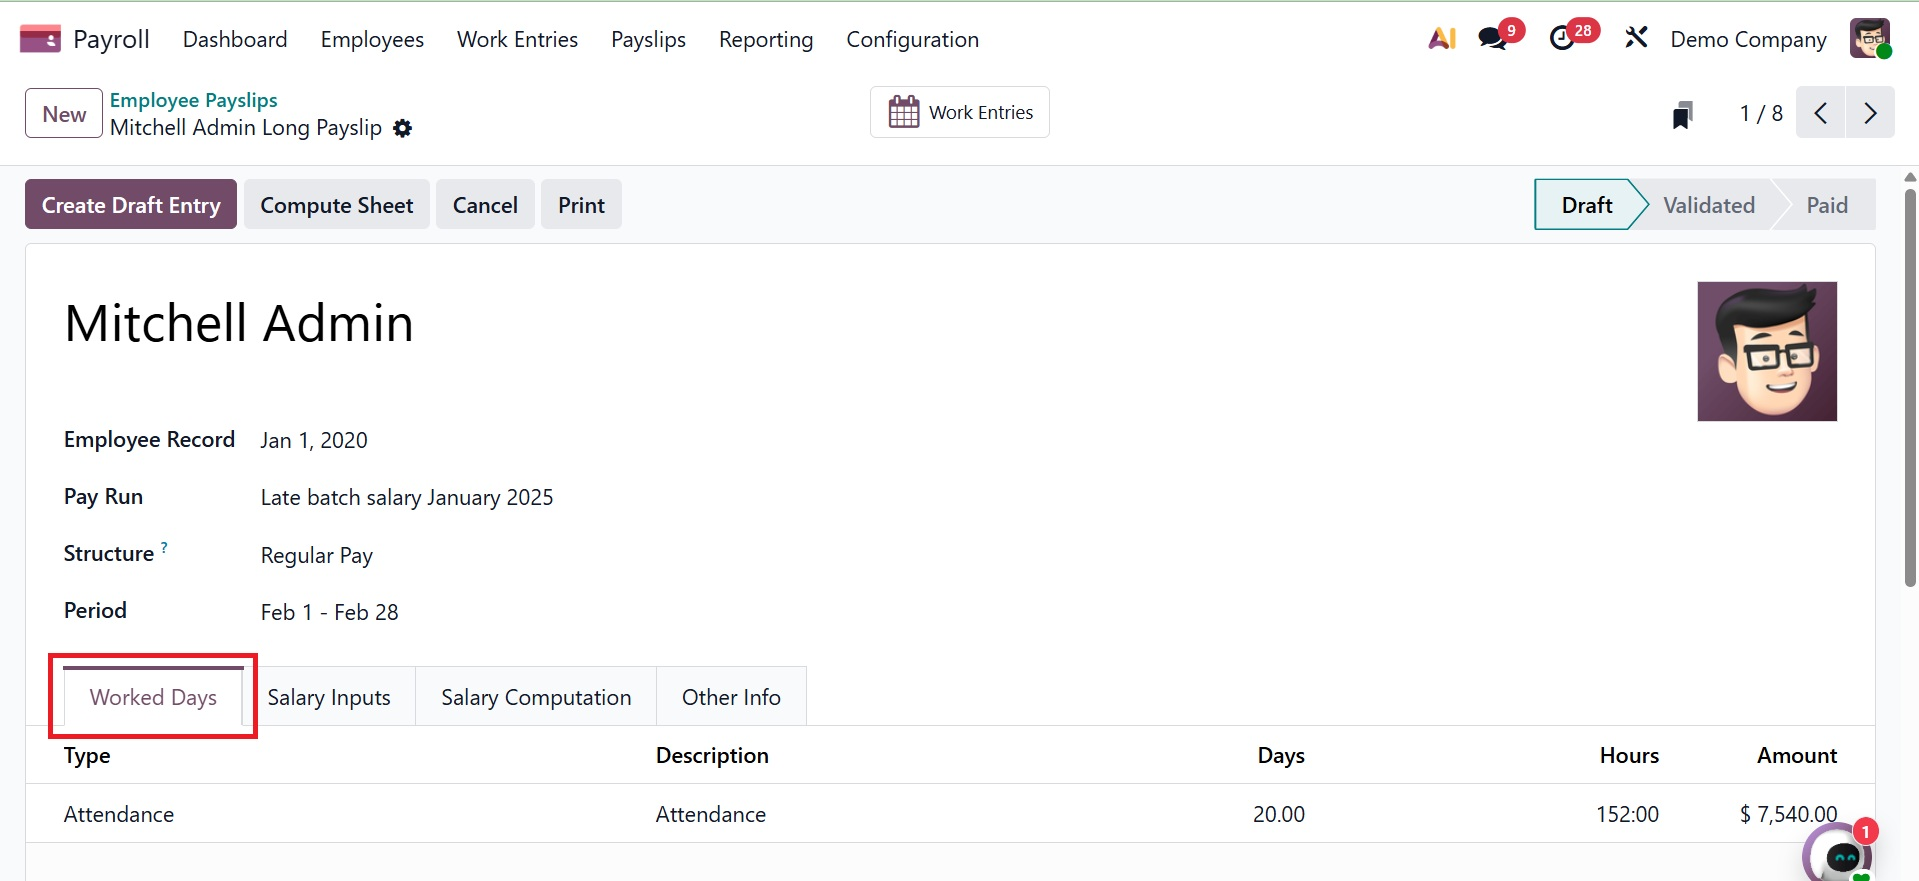
Here, provide the employee, employee record, pay run, structure, and period, respectively.
Employee Record: Connects the payslip to the employee's payroll profile and contract by enabling the selection or viewing of the employee for whom the payslip is generated.
- Pay Run: Enables grouped processing and validation of numerous employee payslips by indicating the payroll batch to which the payslip belongs.
- Structure: Specifies the salary rules used to compute earnings and deductions, as well as the salary structure applied to the payslip.
- Period: Indicates the payroll period (month or pay cycle, for example) that the payslip is computed for.
Below that, you have the tabs, such as worked days, salary inputs, salary computation, and other info.
- The Worked Days tab under the Payslip option of the Odoo Payroll module shows a breakdown of an employee’s worked days, leaves, absences, and time-off entries for the pay period, which is used to accurately calculate salary and deductions.
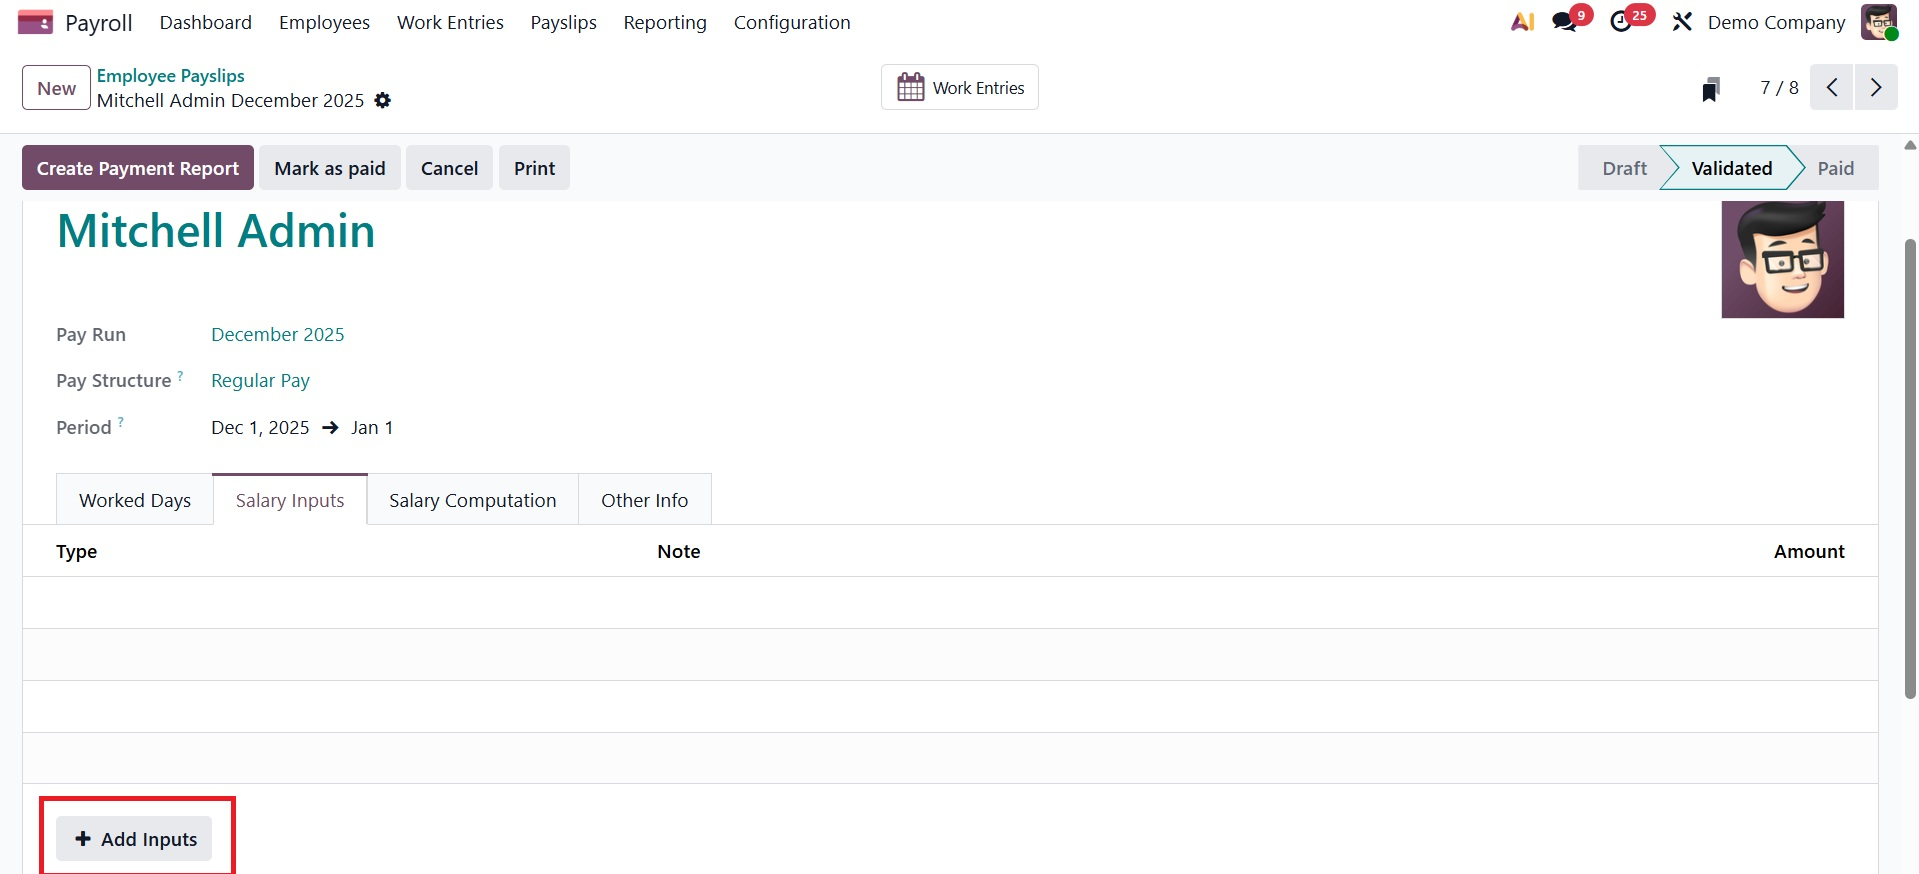
- Salary Inputs tab: Used to add or review additional payroll inputs—such as bonuses, commissions, reimbursements, or deductions—that are not automatically derived from contracts or attendance.
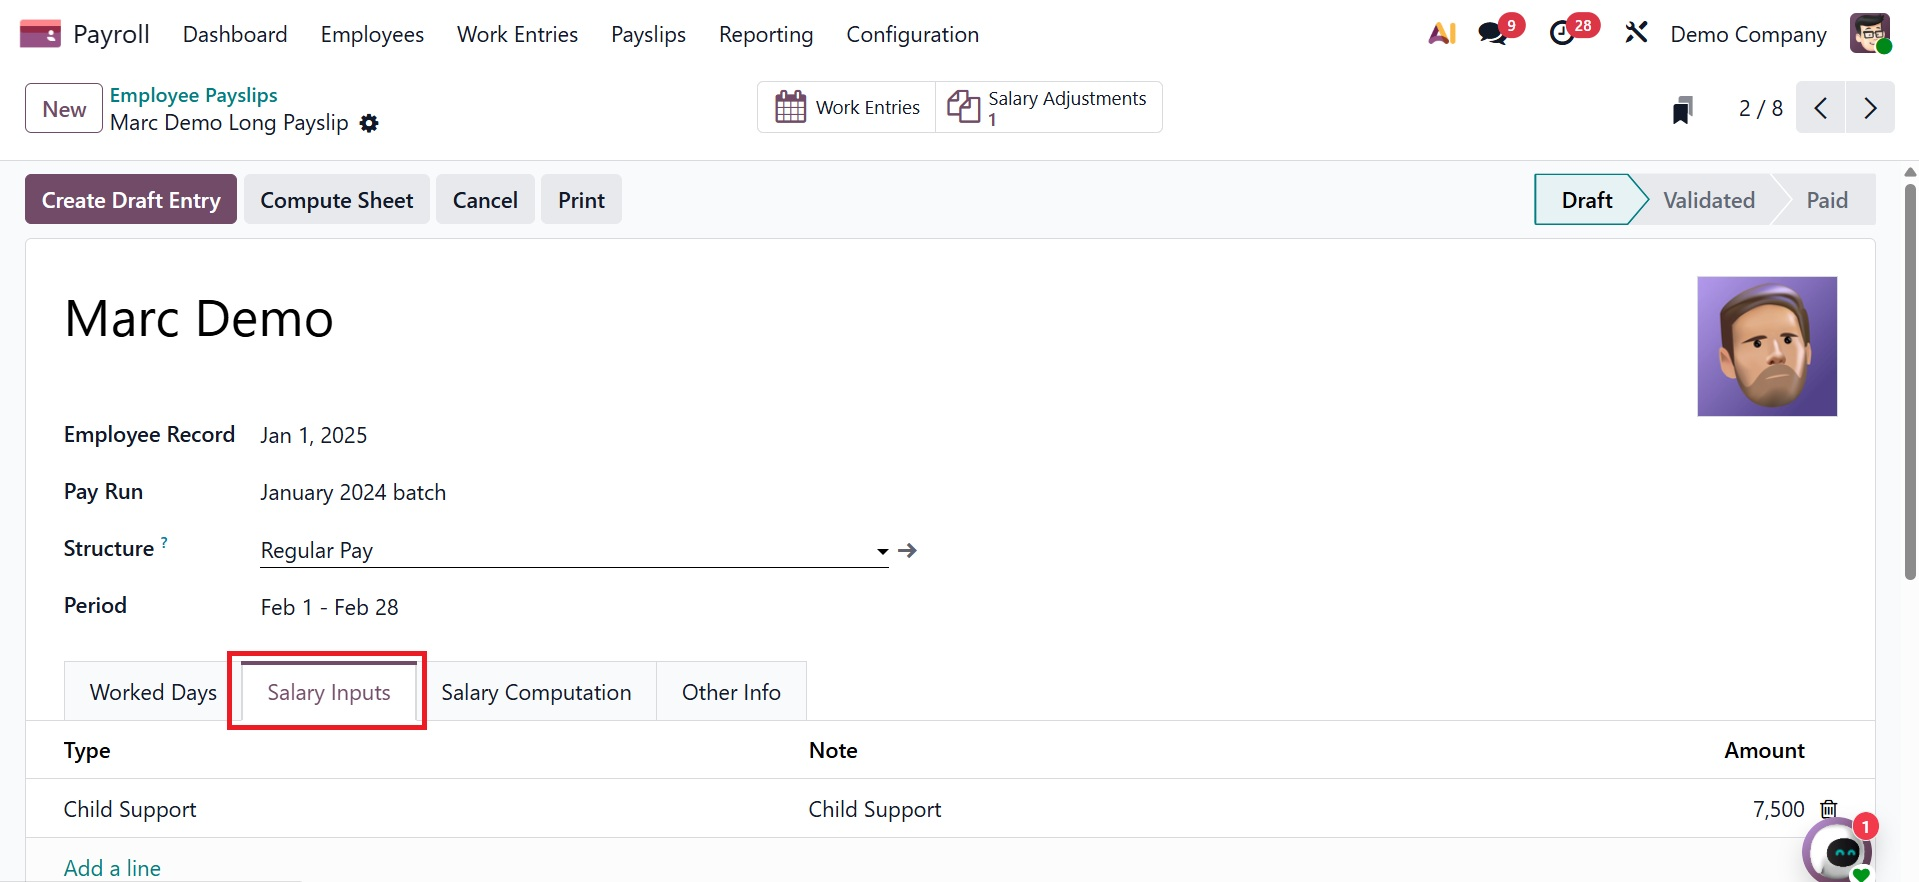
Here, you have an +Add an Input button, used to manually add extra salary components, such as bonuses, commissions, reimbursements, or deductions, that are applied to that specific payslip.
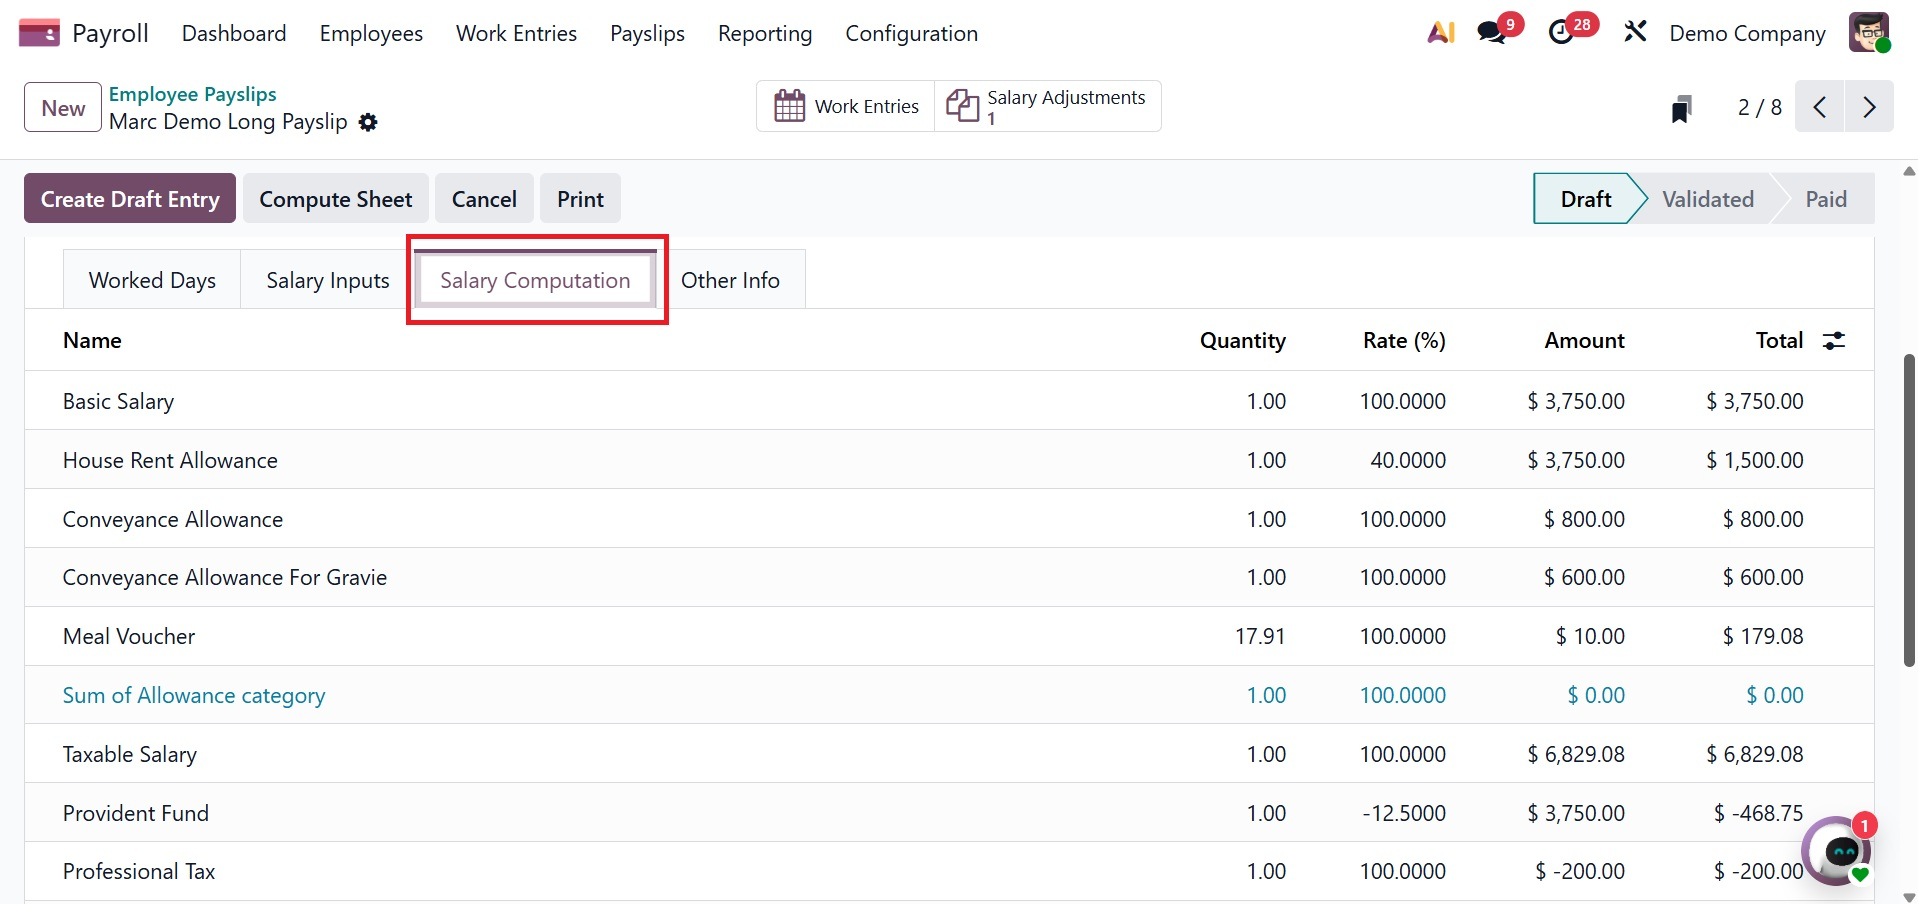
- Salary Computation tab: Displays the detailed calculation of the payslip, showing applied salary rules, worked days, earnings, deductions, and the final net salary amount.
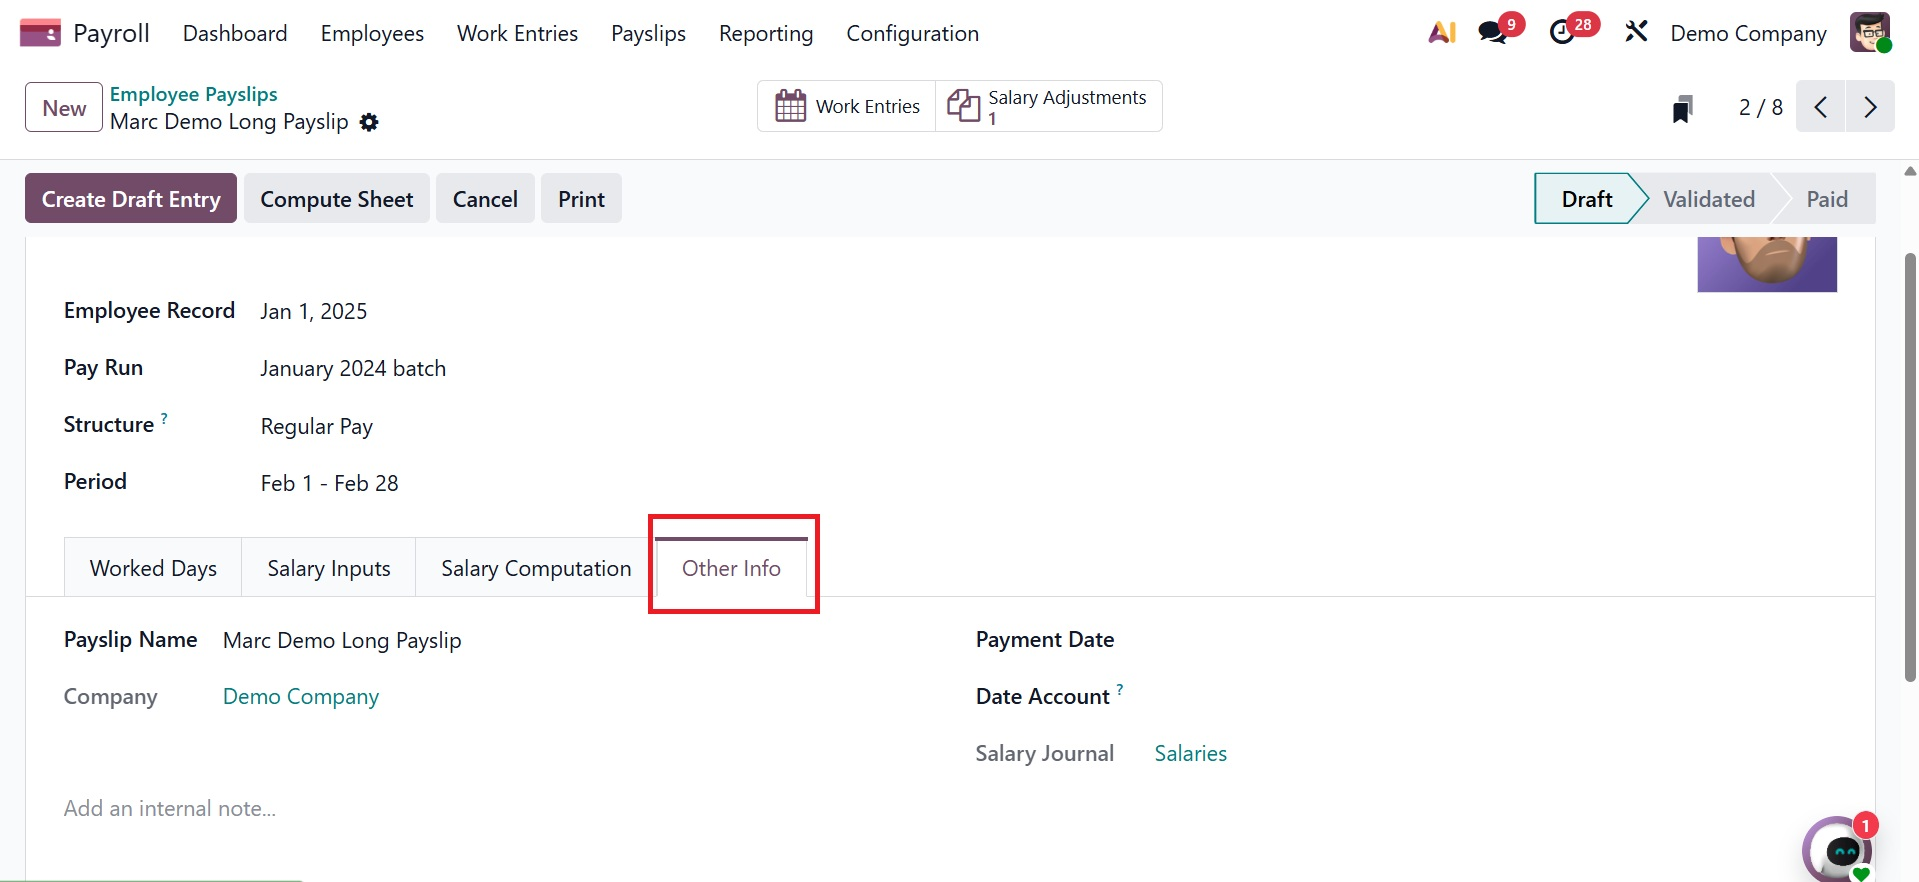
- Other Info tab: Contains supplementary payslip details such as payslip name, company, payment date, date amount, and salary journal used for payroll posting and record keeping.
To compute the payslip, click the Compute Sheet option. The payslip can be processed once all required data has been entered. The employee gets paid after the creation of a payment report and a draft of the journal entry.
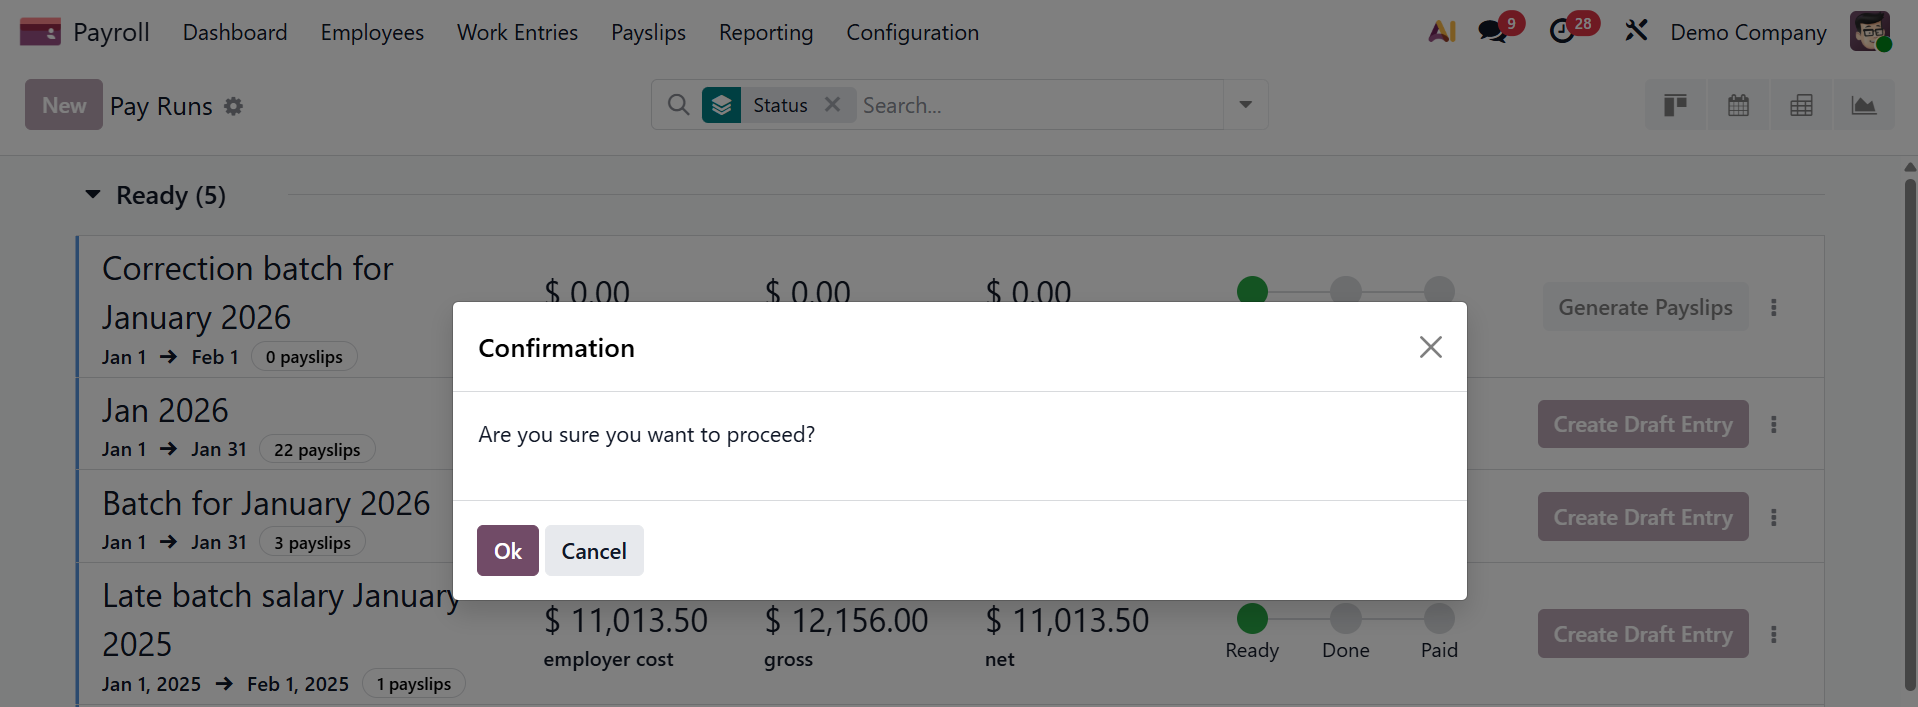
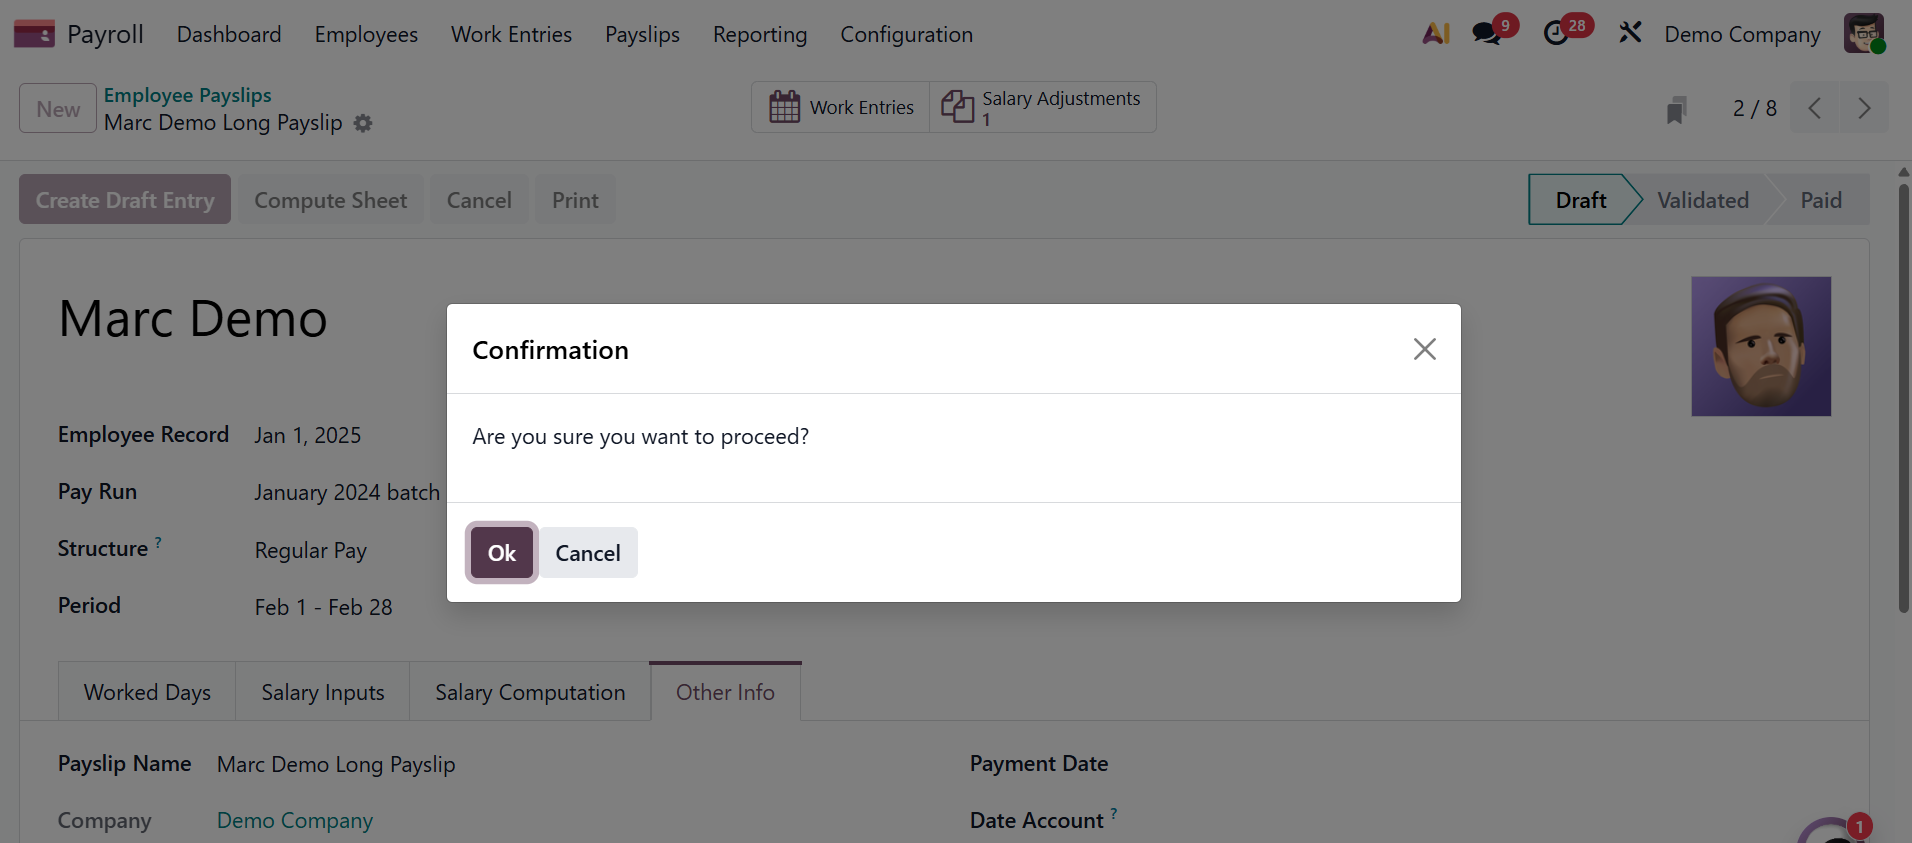
Click the Create Draft Entry option to generate the payslip after all the information on the payslip form is accurate. A pop-up window titled "Confirmation" asks, "Are you sure you want to proceed?". To confirm, click OK.
A Journal Entry (Draft) smart button appears at the top, other buttons appear in the upper-left corner, and the status changes to Done once the payslip draft is created. Other smart buttons include work entries and salary adjustment, as shown below.
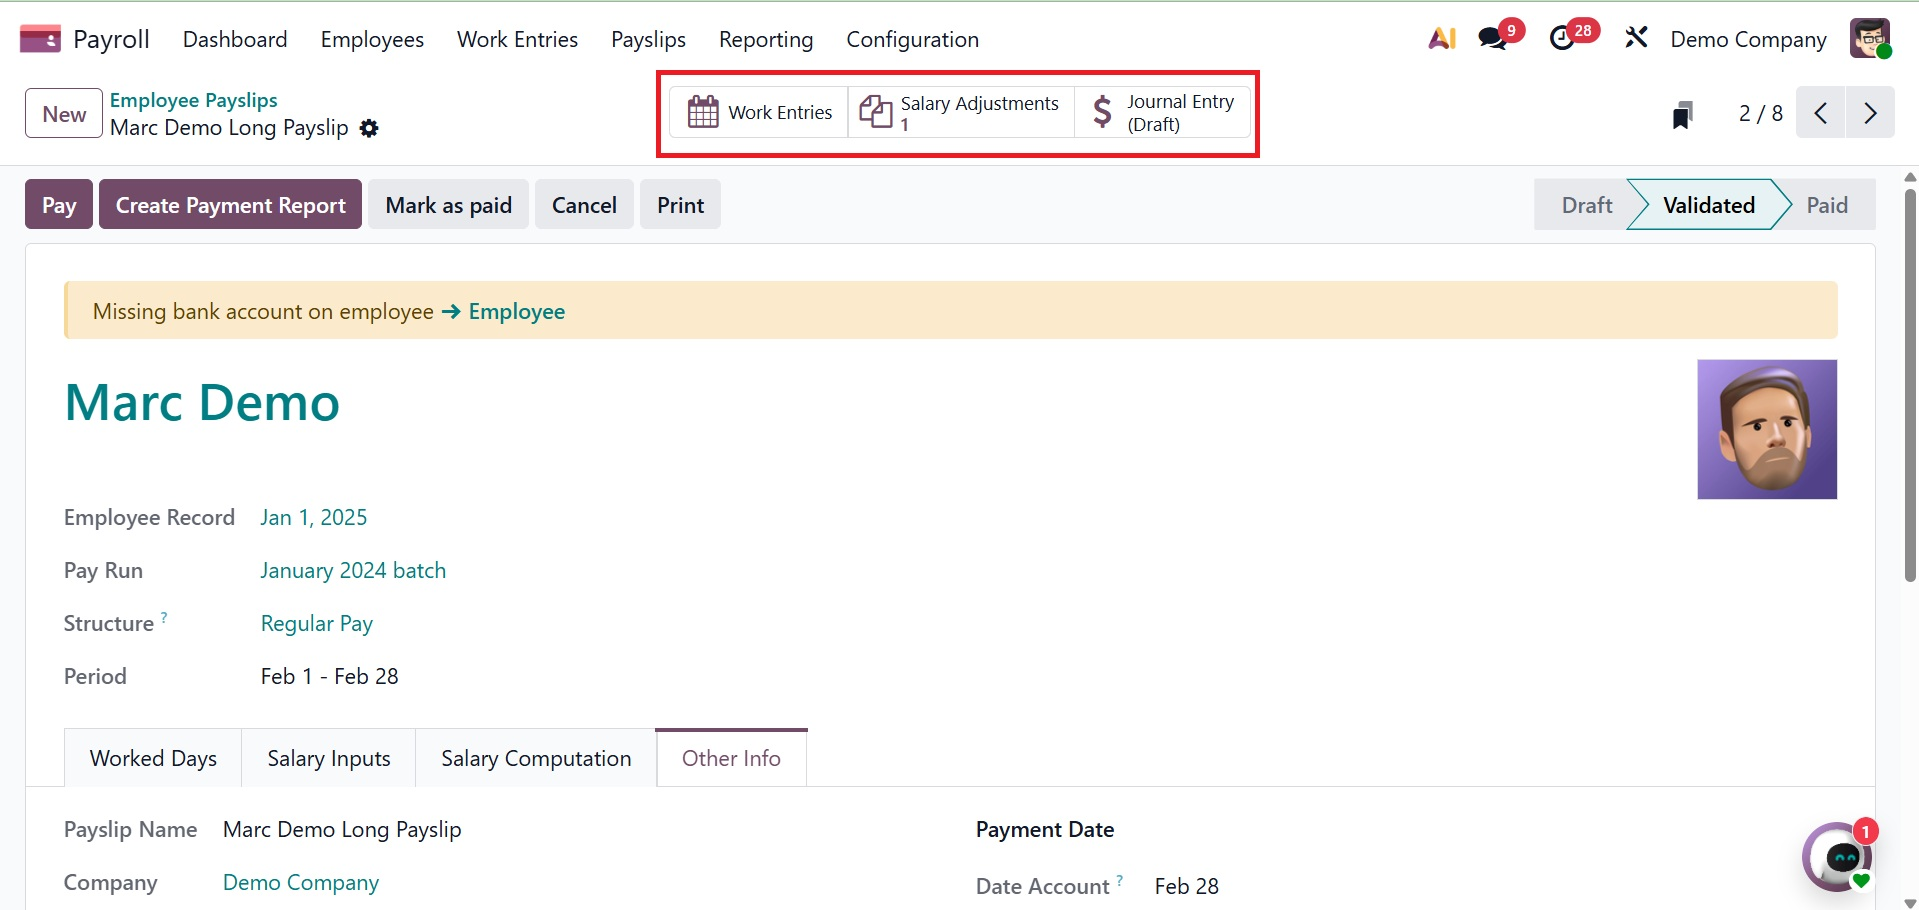
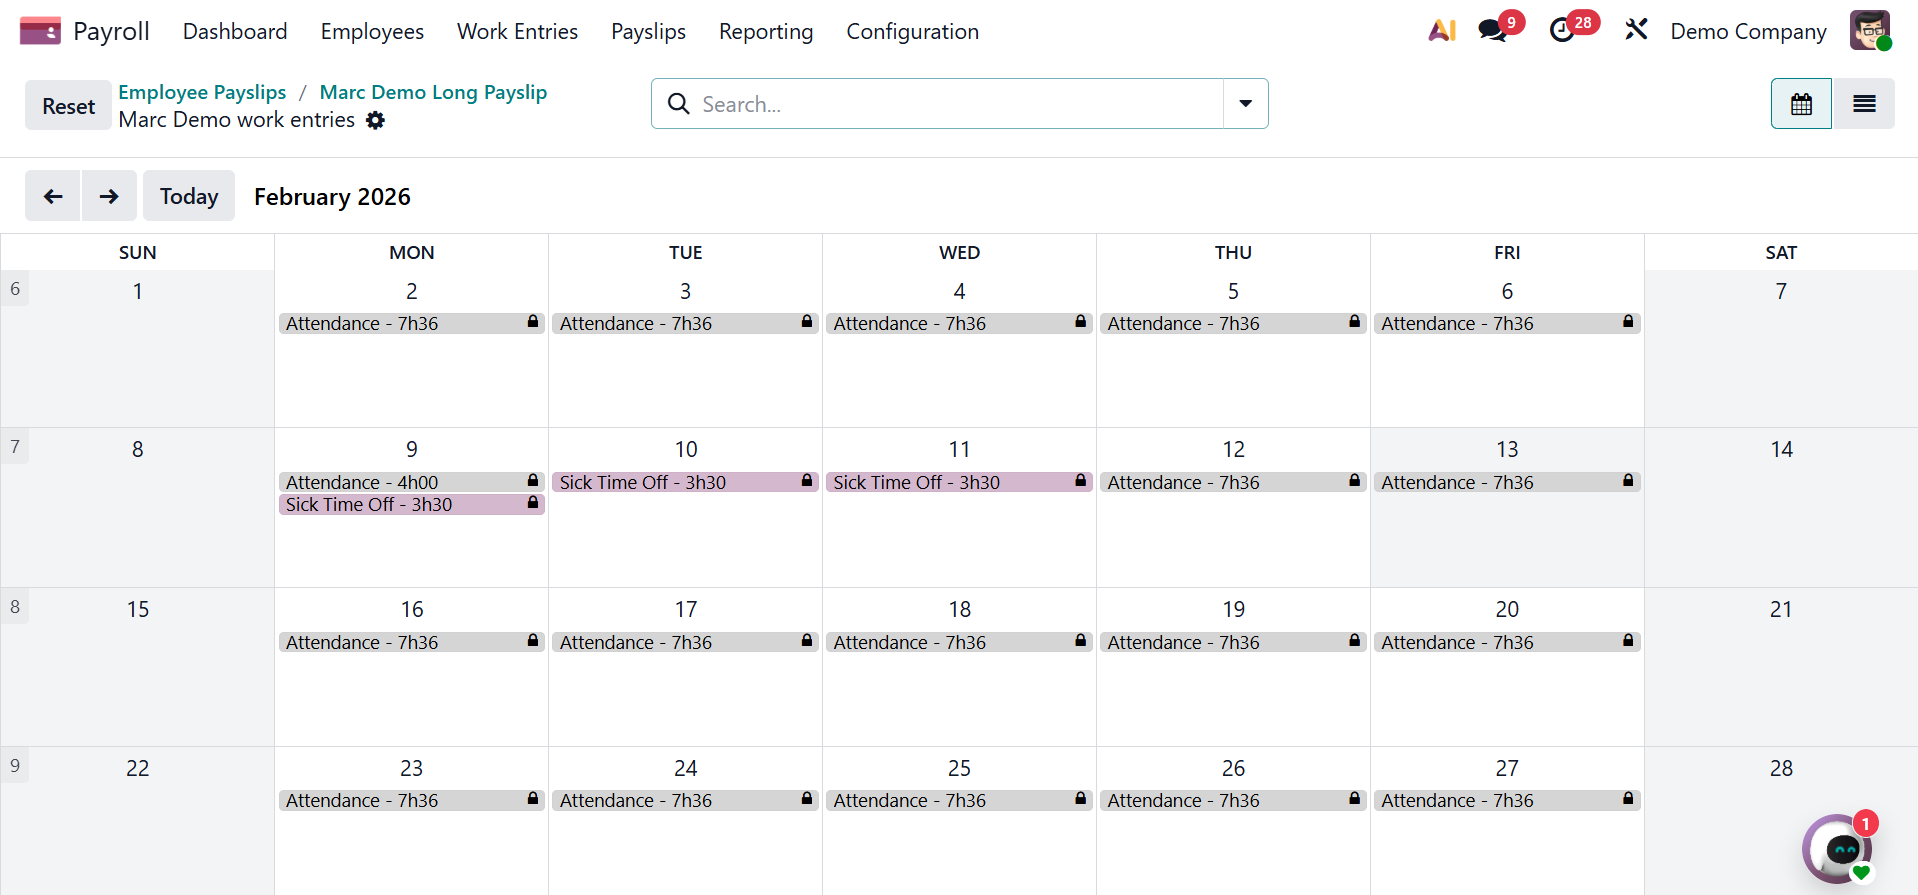
The Work Entries smart button opens the employee's created work entries, which serve as the foundation for payroll and payslip computations. These entries include working time, leaves, absences, and public holidays.
- Salary adjustment: Quick access to authorized salary adjustments or one-time modifications (such increases or corrections) that affect an employee's payroll computation is provided by the Salary Adjustment smart button.
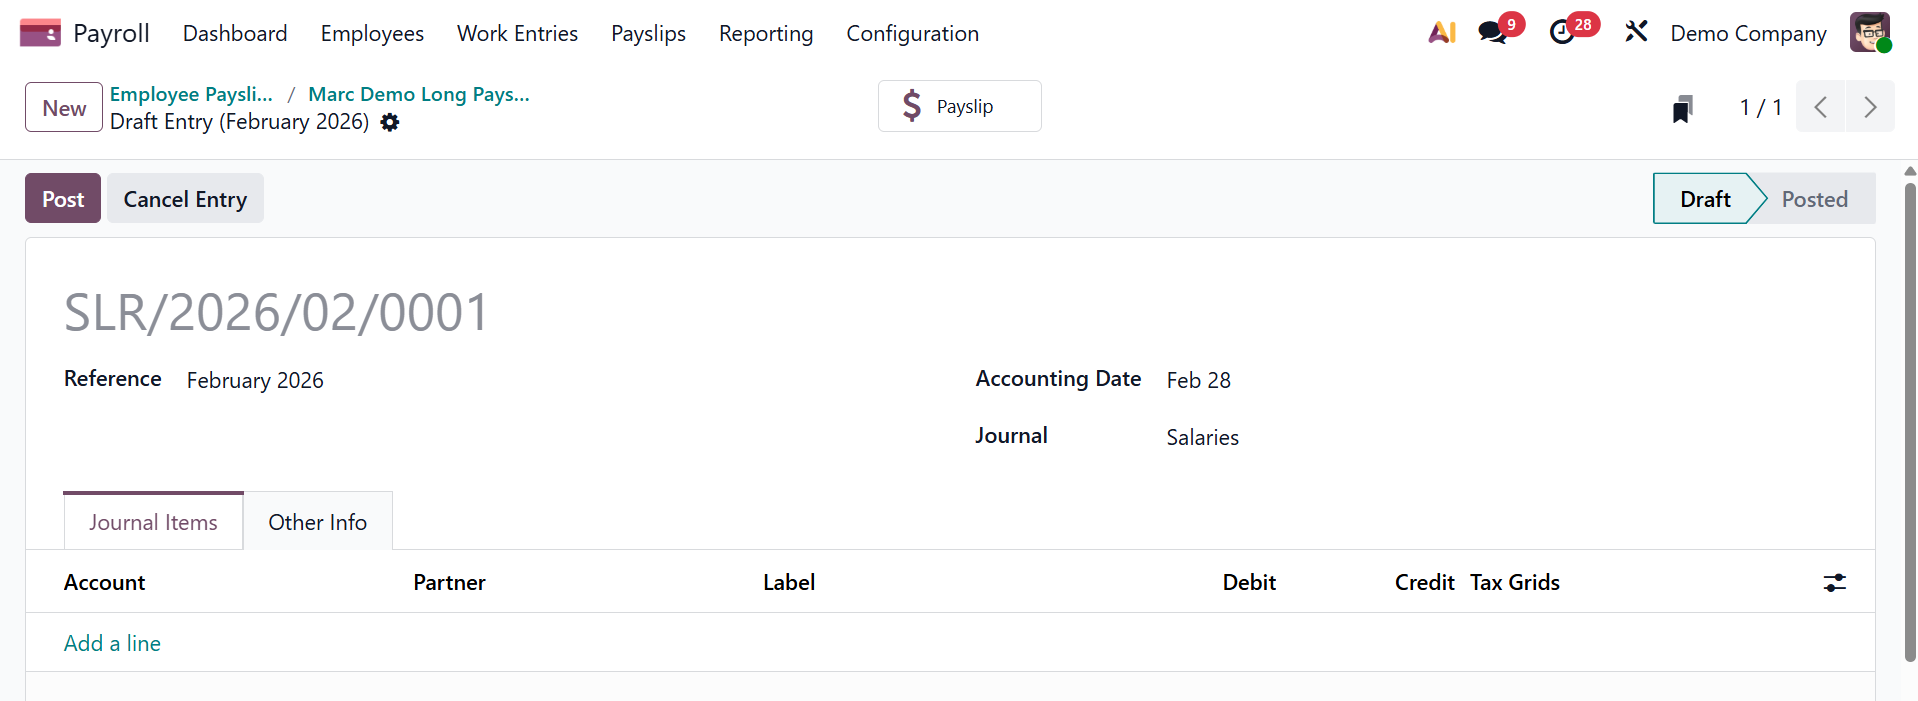
The journal entry smart button will be, as in the screenshot below.
Payrun
Multiple employee payslips for a certain payroll period can be grouped, generated, and processed using the Pay Run option under the Payslip menu of the Odoo Payroll module. This allows for effective salary computation, validation, and payroll posting in a single batch. These payslip pay runs are displayed in a list view, grouped by Status (either Ready, Done, or Paid), by default. Each pay run displays the name, the dates it includes, the number of payslips, and the total employer cost, gross, and net amounts for all payslips.
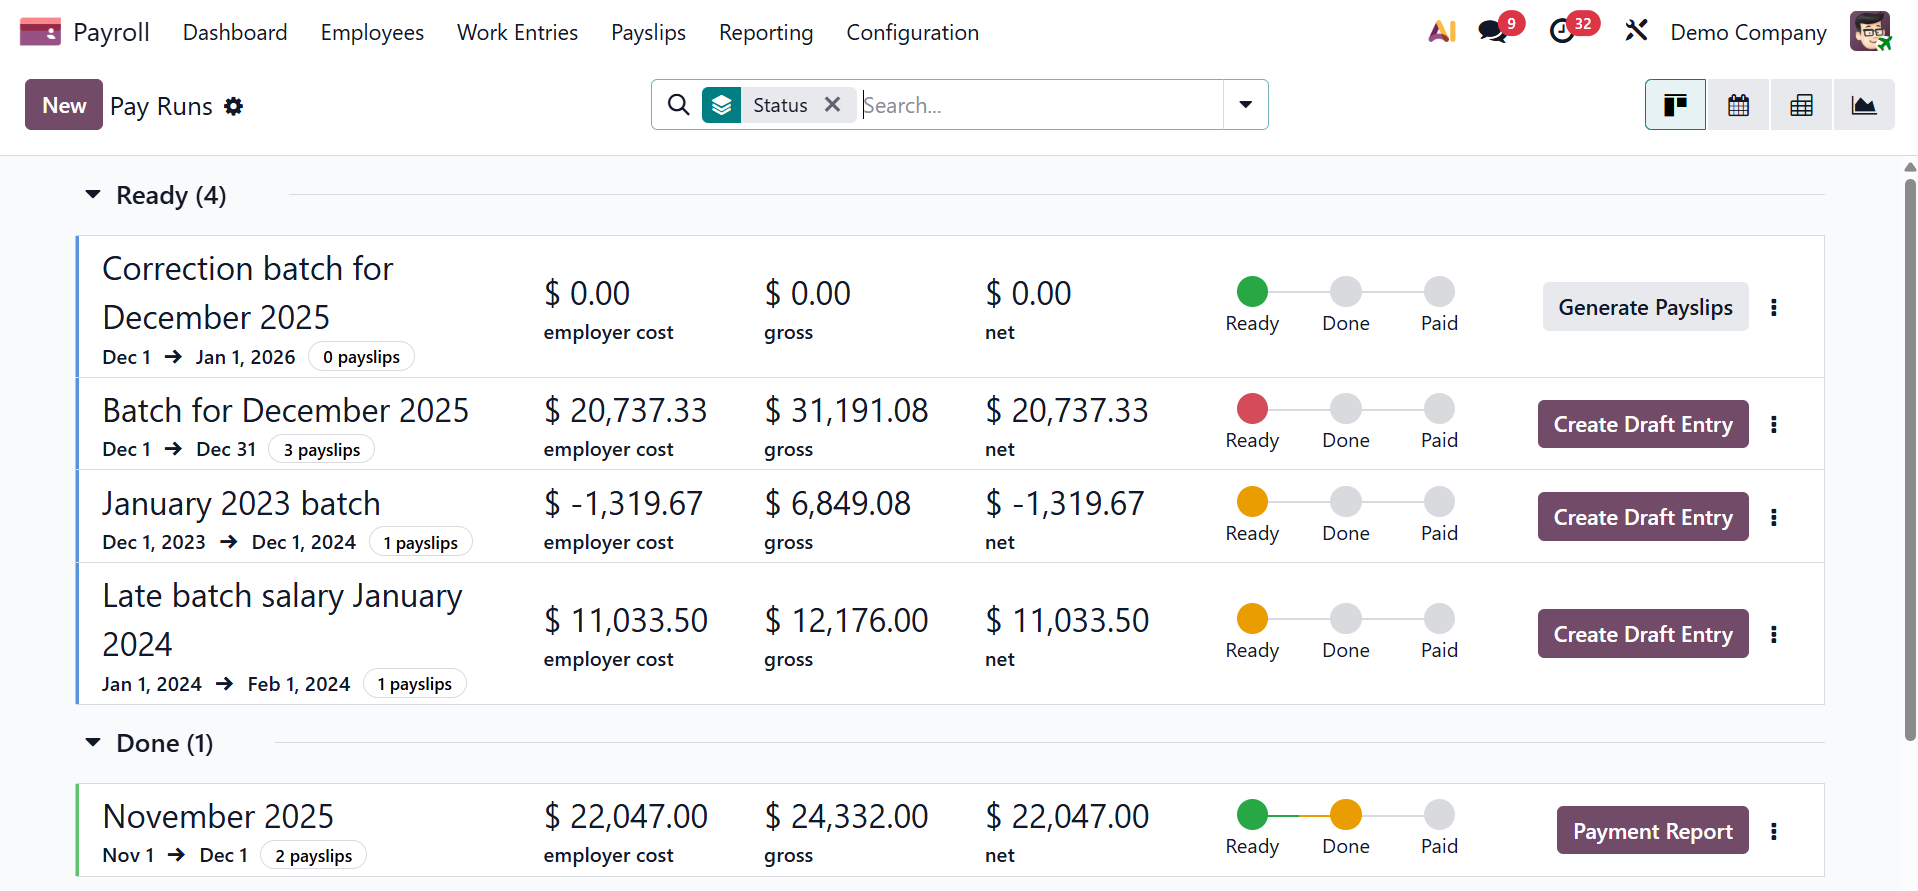
Click the Generate Payslip button after adding any missing work entries and resolving any issues. With a status of Ready, the pay run is generated for every employee.
A pay run needs to be in the Ready status in order to be processed. This indicates that although the payslips have been added and the pay run has been produced, they have not yet been processed.
To confirm and generate a draft of each individual payslip in the pay run, click the Create Draft Entry button and then click OK in the Confirmation pop-up window.