Applications
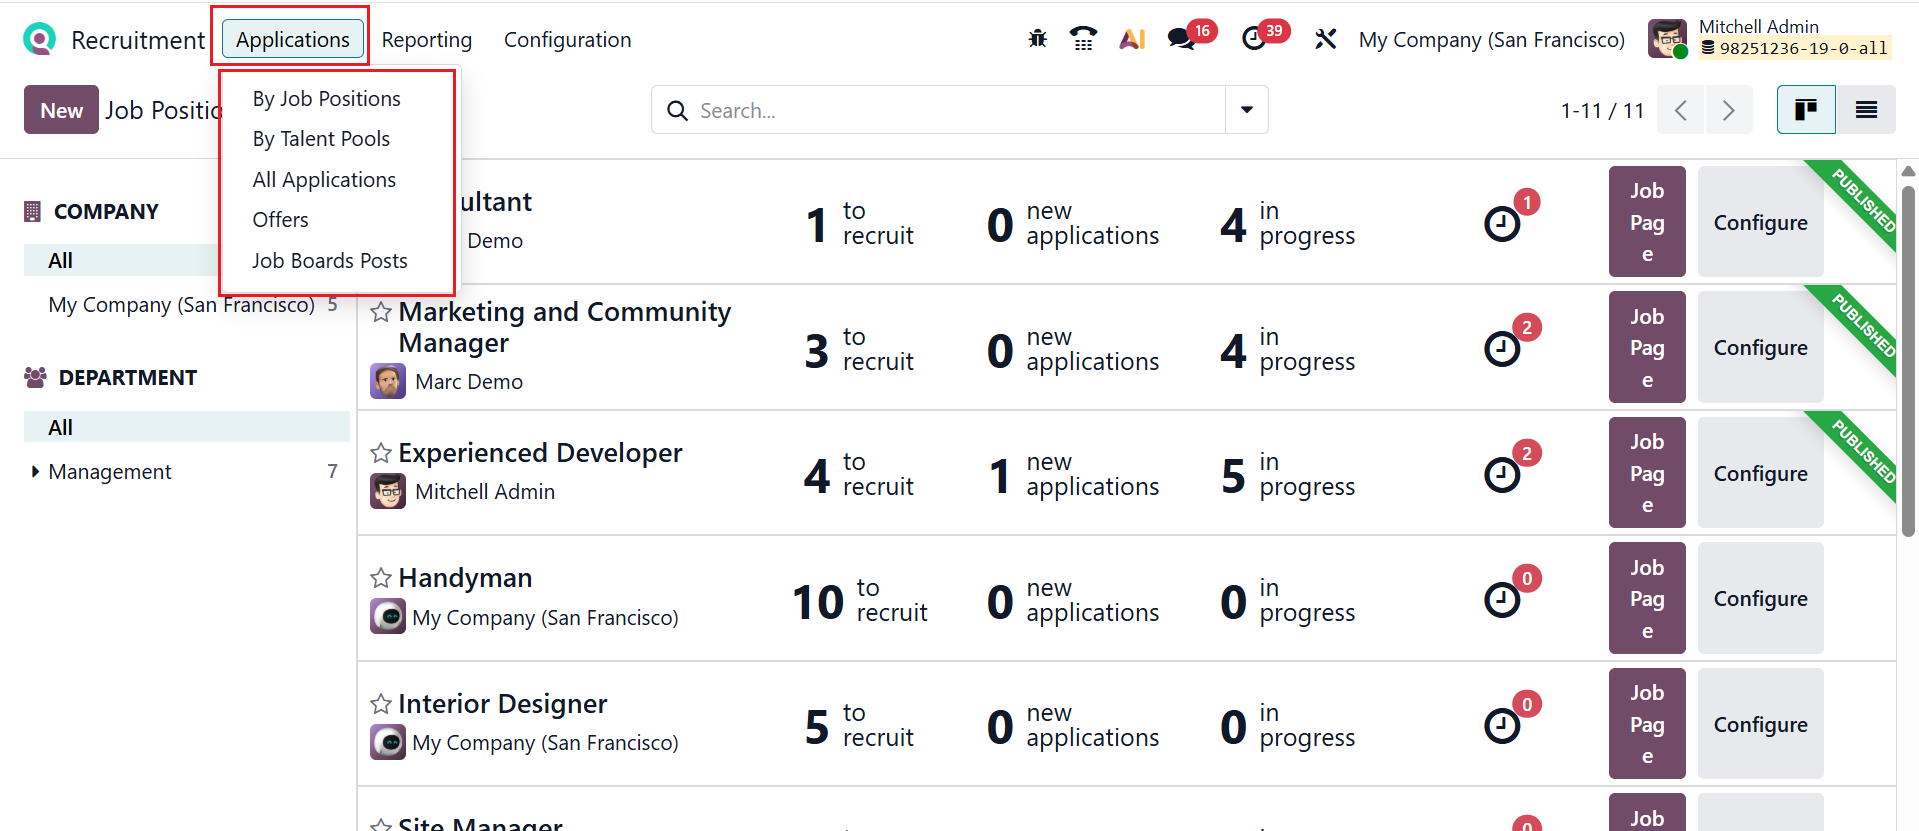
In the Odoo 19 Recruitment module, the Applications menu is where recruiters view, track, and manage all job applications through different hiring stages. The dashboard displays all received job applications in one place. Under the Applications menu, you can see four options: By Job Positions, By Talent Pools, All Applications, and Offers.
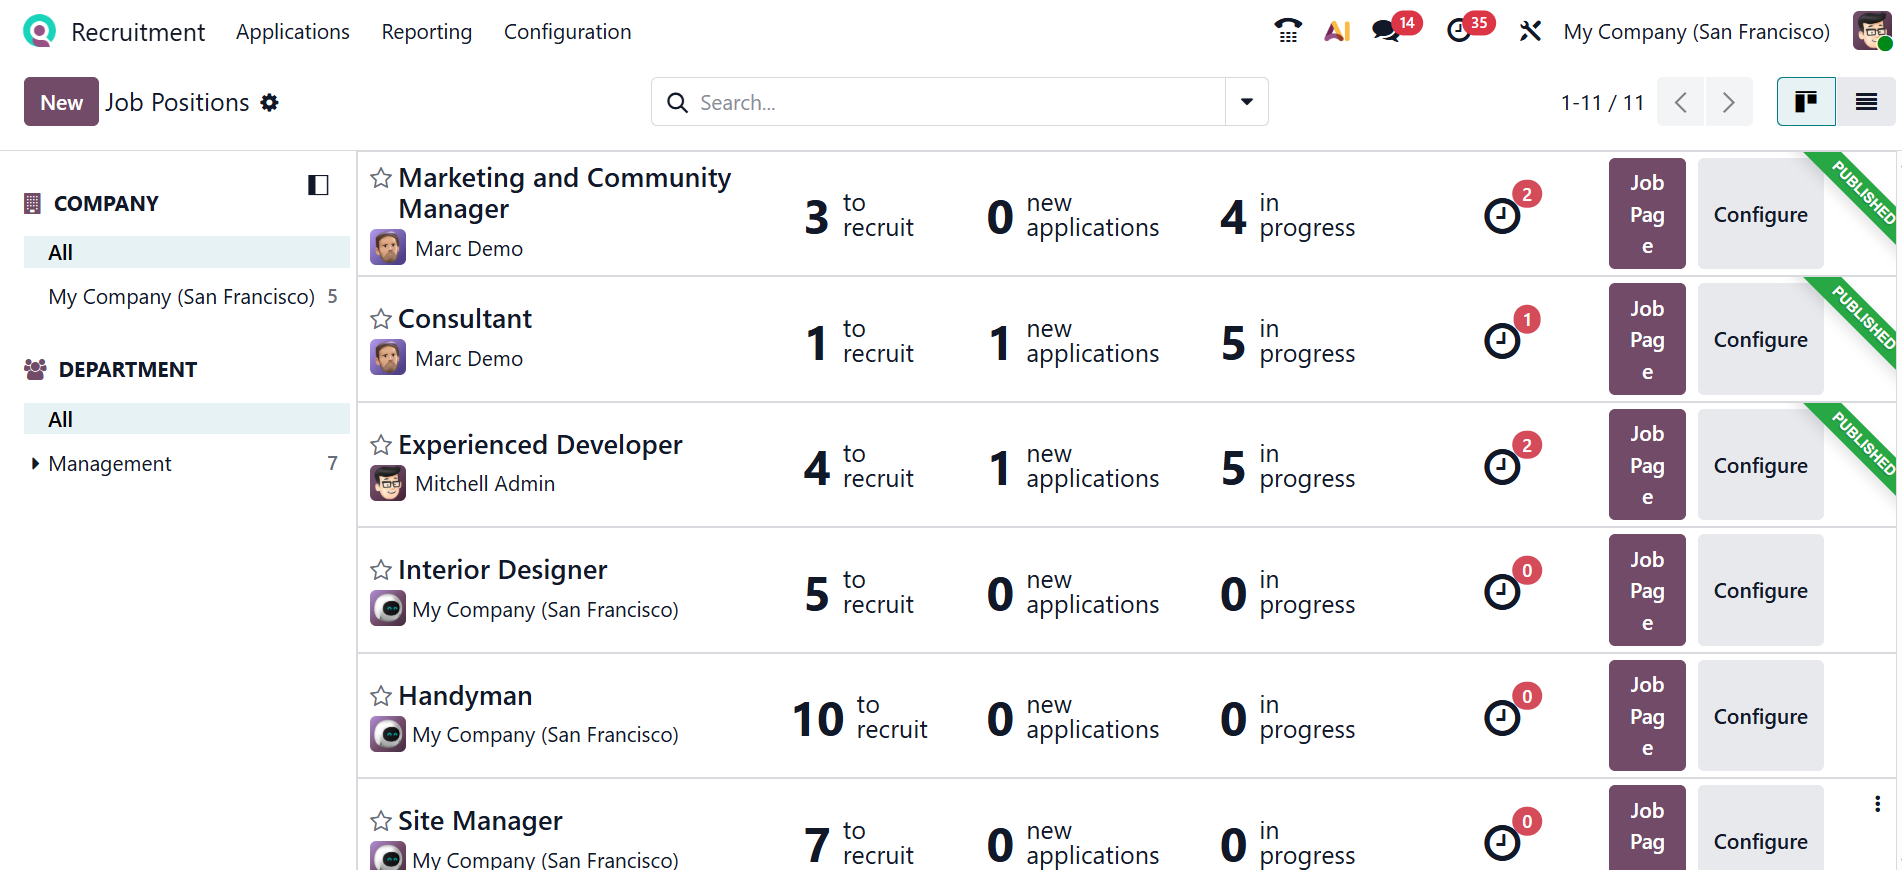
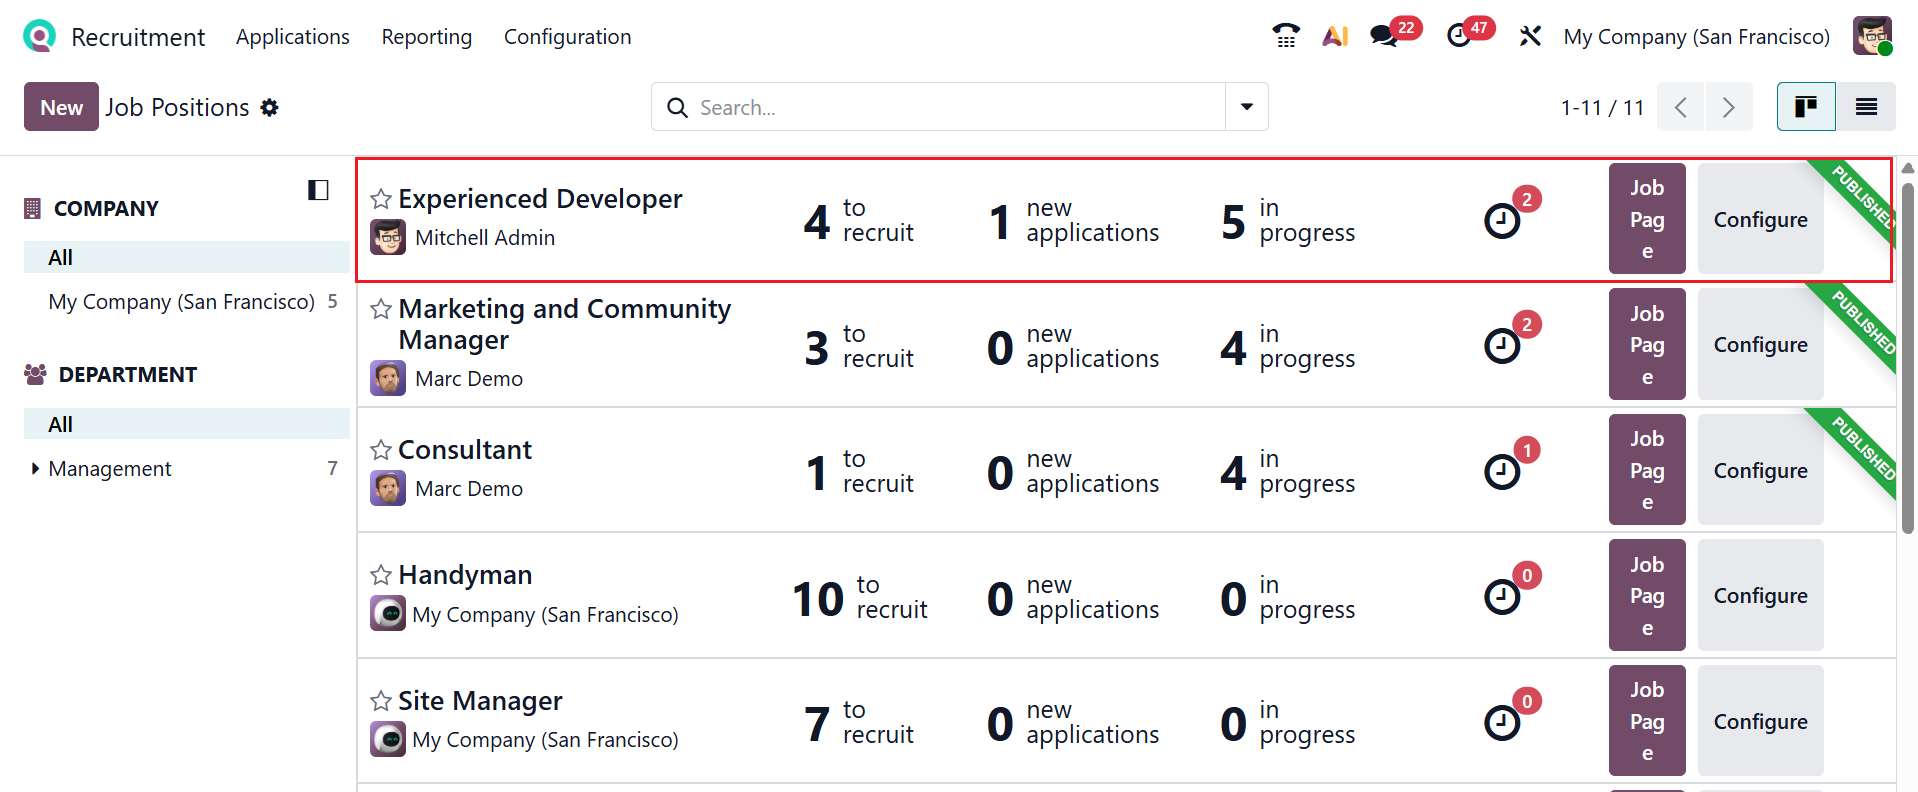
Here, you can see a list of job positions with the number to recruit, new applications, and in-progress recruitments. You can also view the activity, job page, and configuration of the job positions. The left panel shows Company and Department information.
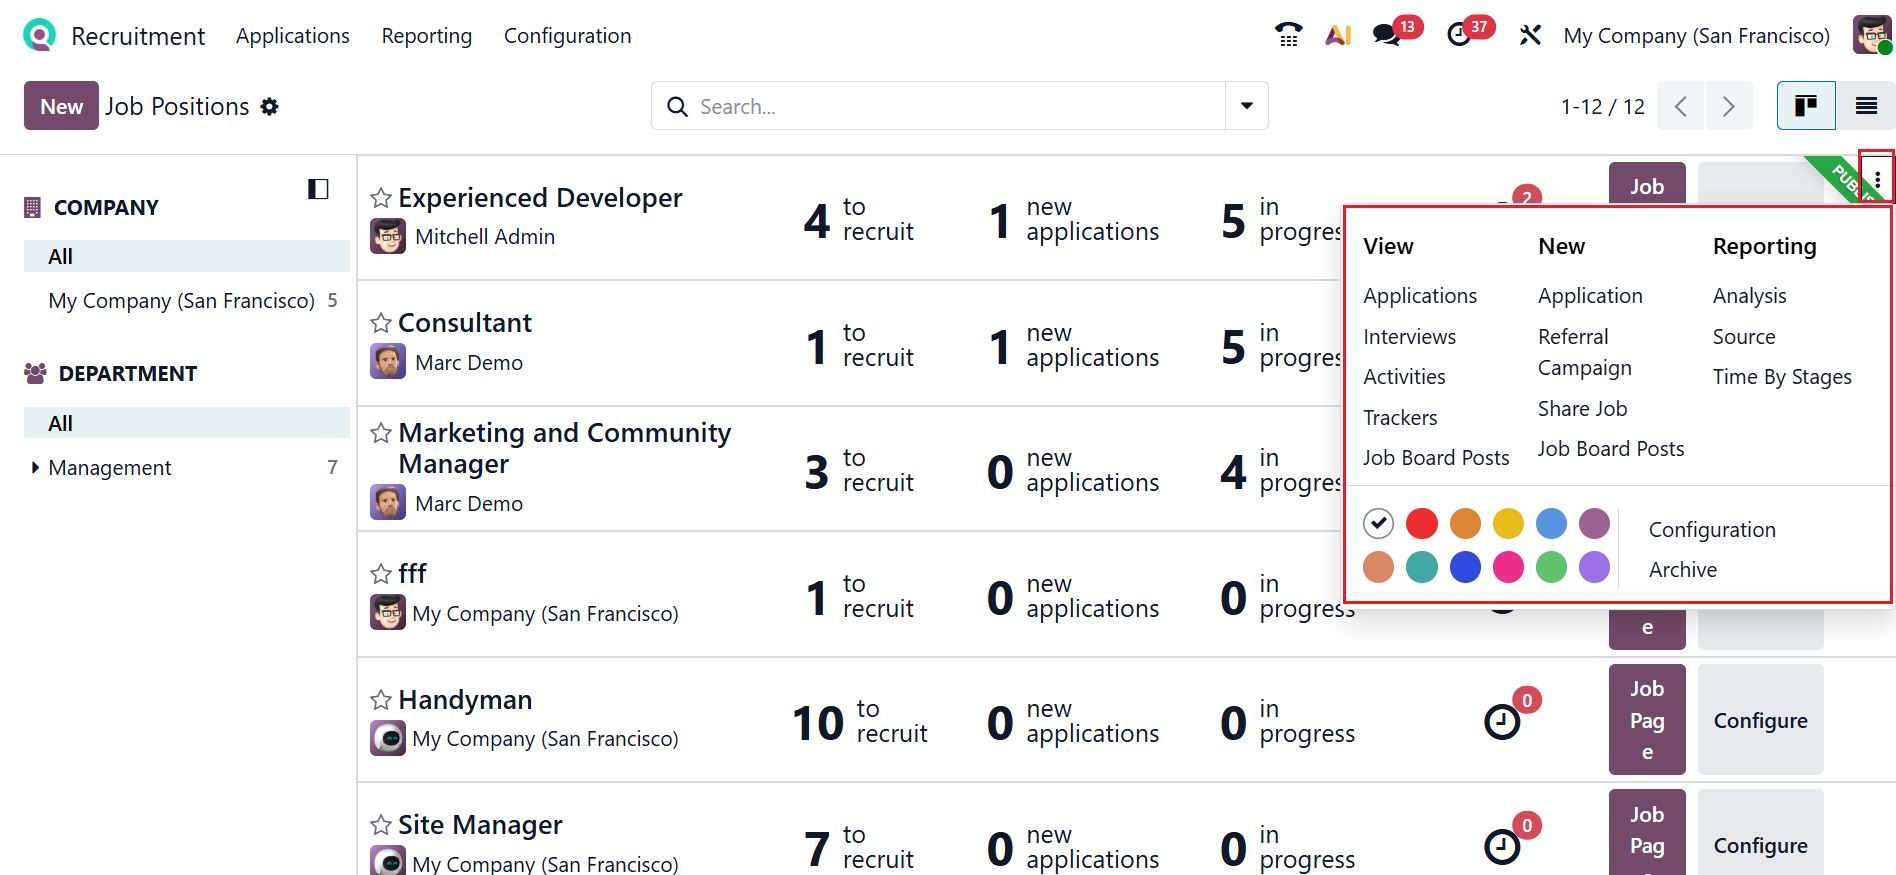
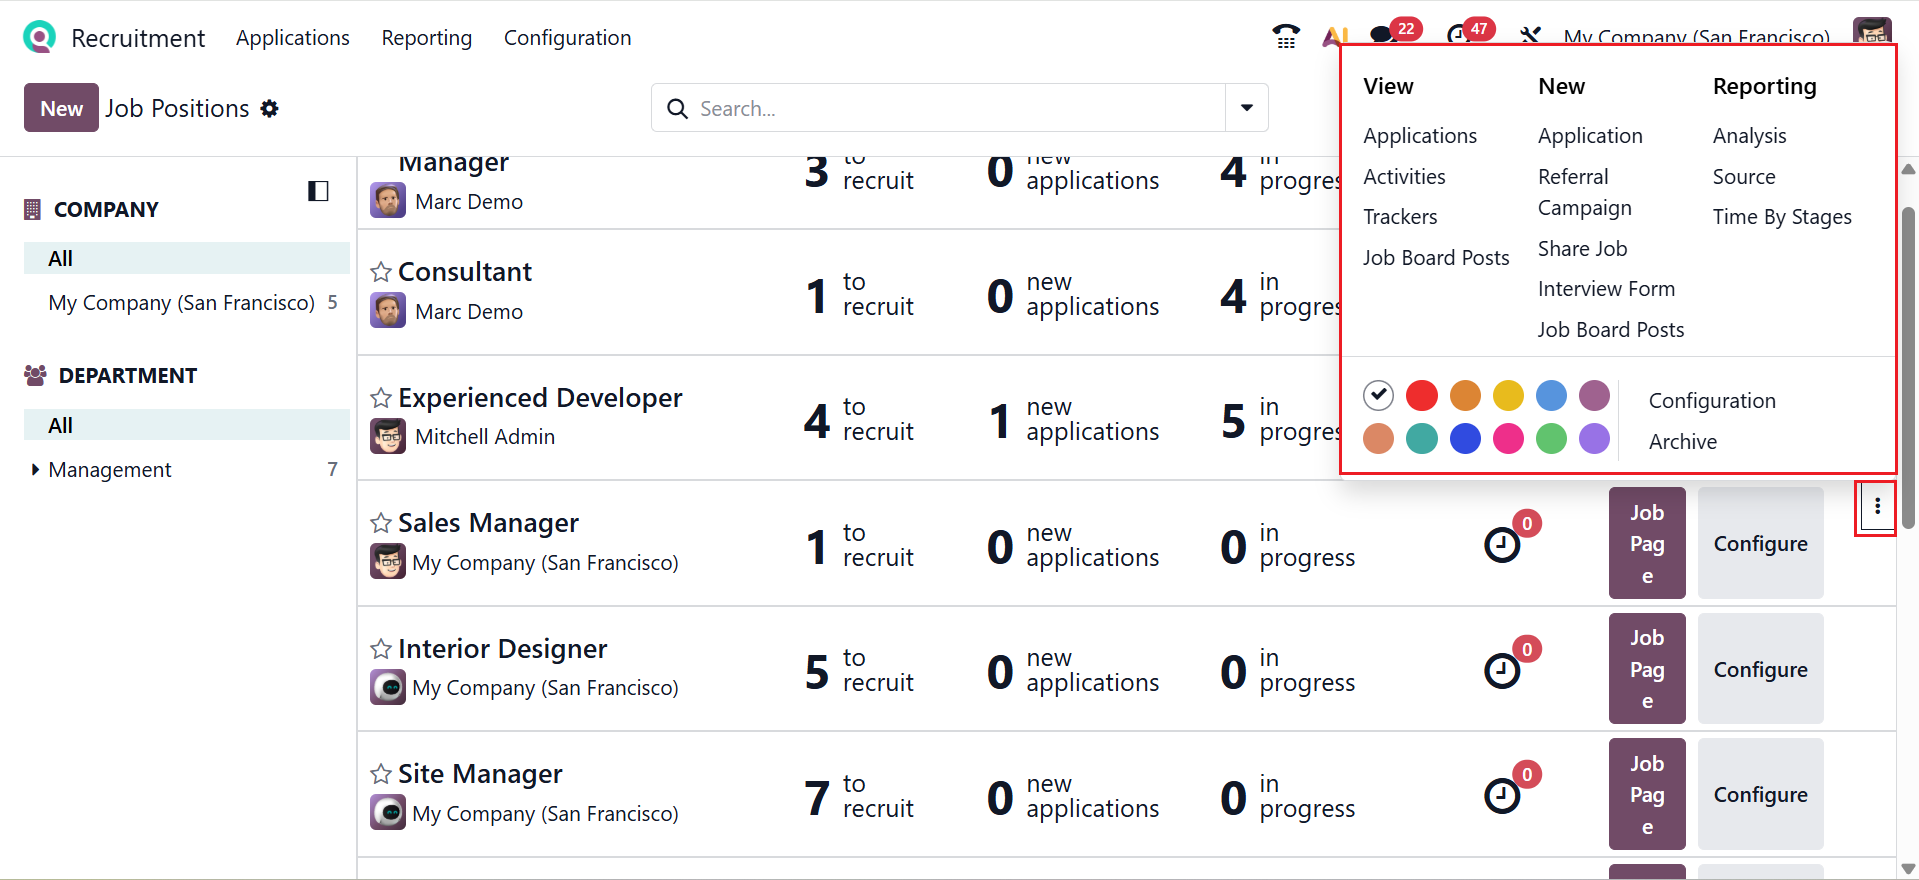
Use the three-dot menu on a job position to access View, New, and Reporting options. You can directly view the Applications, Activities, Interviews, Job Board Posts, and Trackers of the selected job position. You can directly add new Application, Referral, Campaign, Share Job, and Job Board Posts of the selected job position. You can analyze the job position based on Analysis, Source, and Time By Stages. You can also directly edit the details of the job position using the Configuration option. You can also archive and add colors to the job positions.
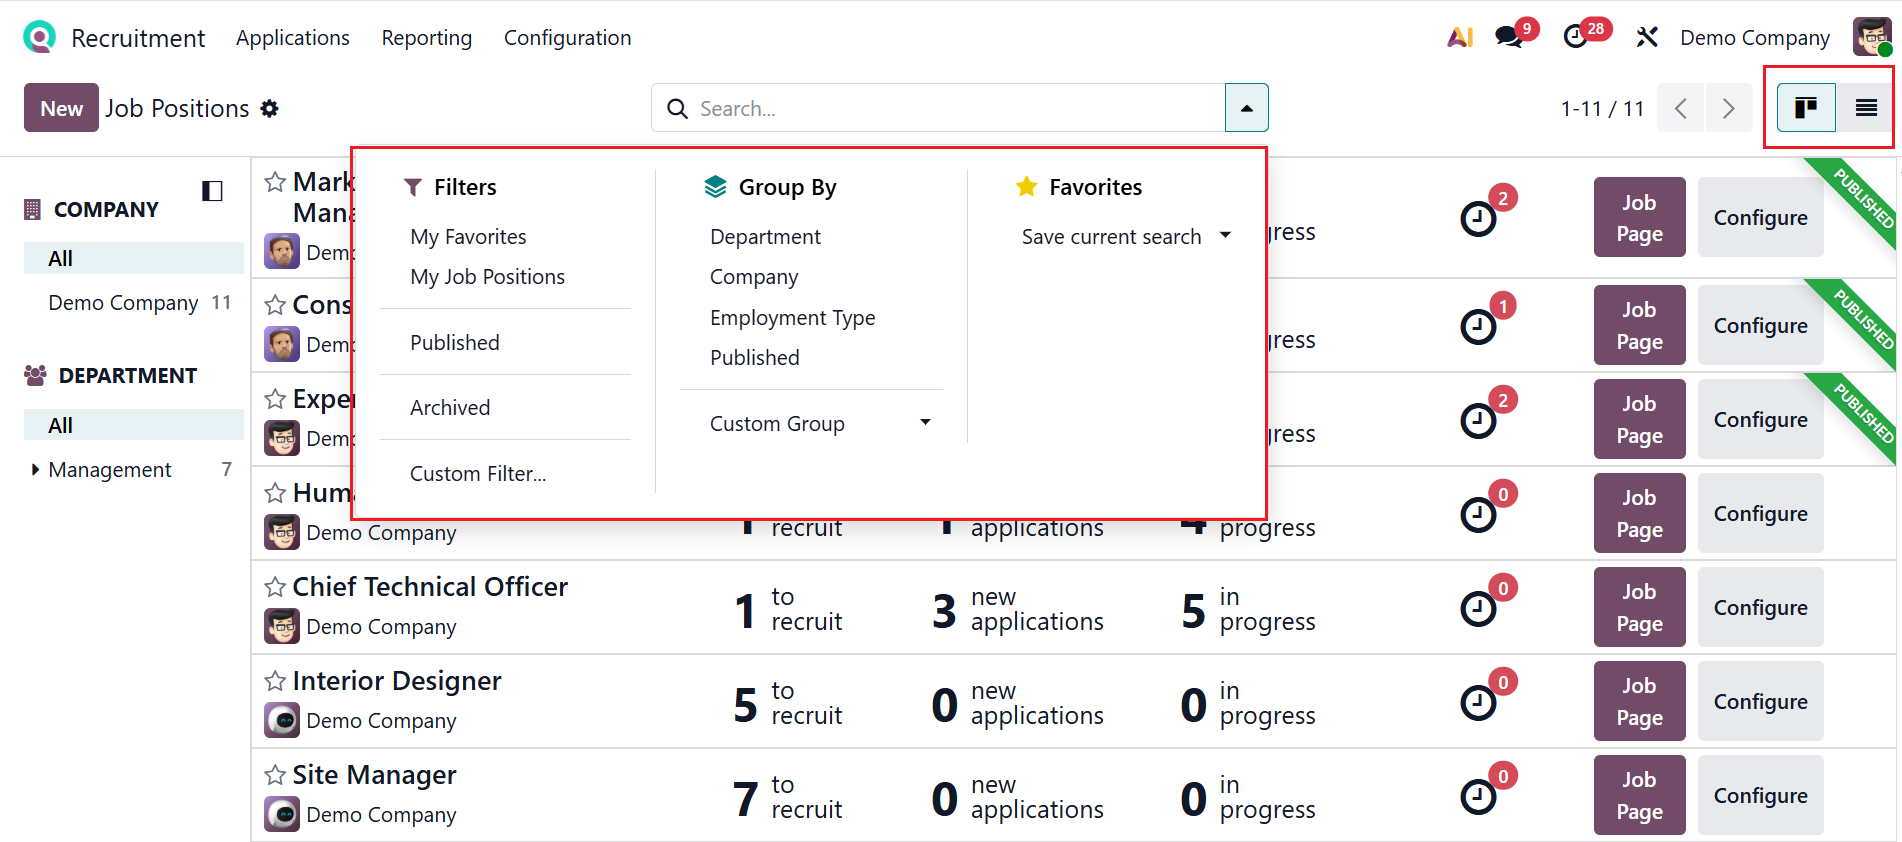
The dashboard can be displayed in Kanban or List views, depending on your choice. Click the drop-down menu in the search bar to view options such as Filters, Group By, and Favorites, as shown below. You can filter the job positions based on My Favorites, My Job Positions, Published, Archived, and can customize using the Custom Filter option. You can group the job positions based on Department, Company, Employment Type, Published, and customize using the Custom Group option. You can also use the Favorites option to save the current search.
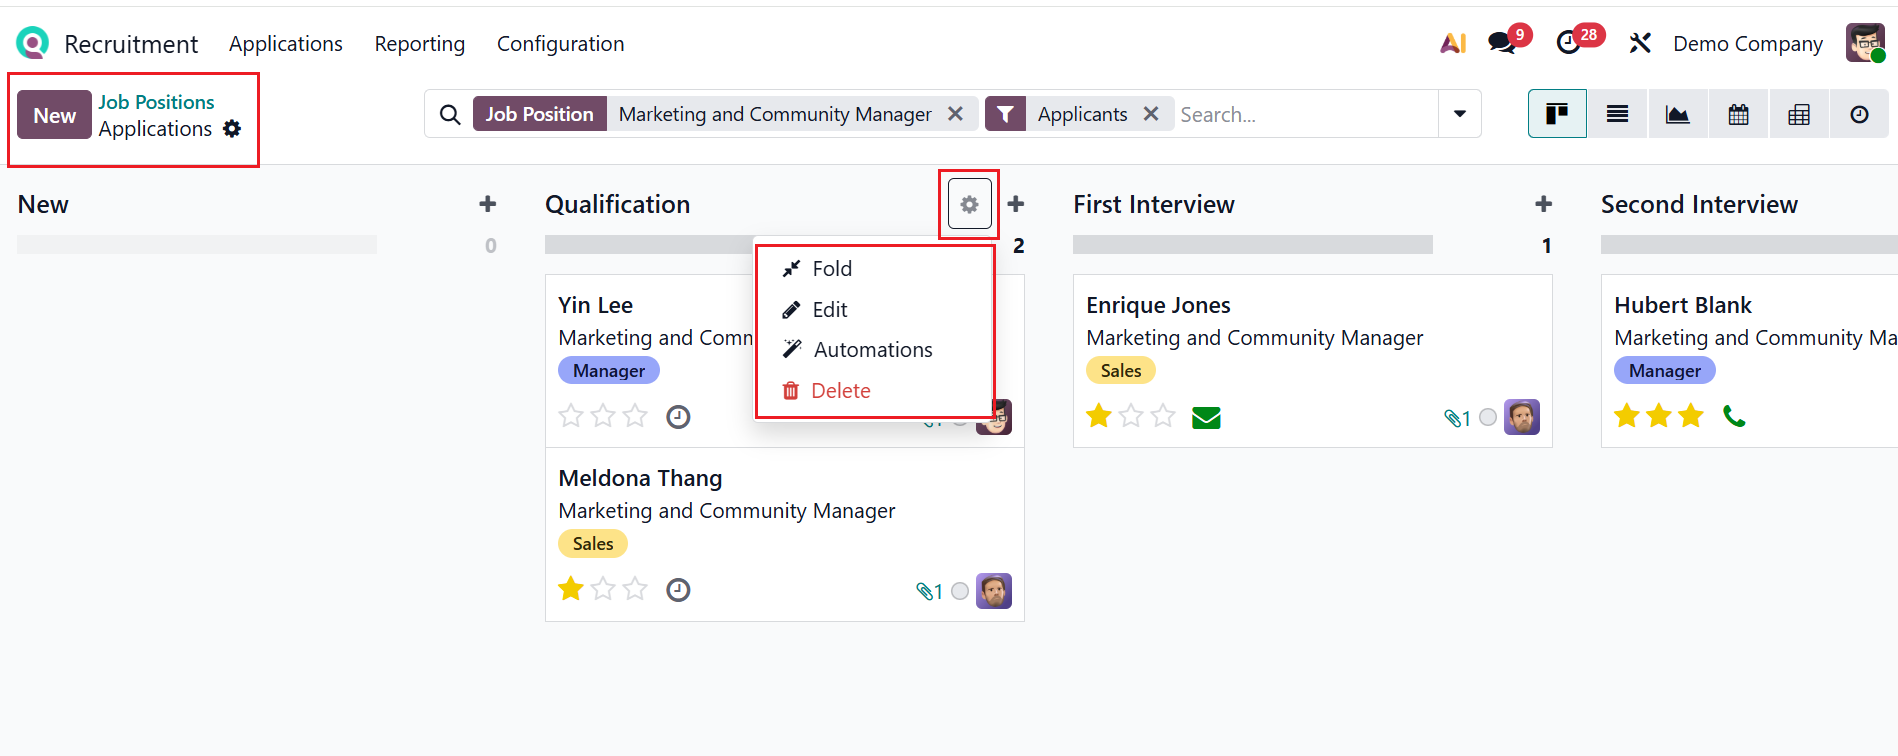
When you click on each job position, a new dashboard will appear as shown below. The stages of the recruitment process are displayed here. Each stage’s gear icon offers four actions: Fold, Edit, Automations, and Delete. You can hide the stages by clicking the Fold option, and the Delete option permanently removes the stages.
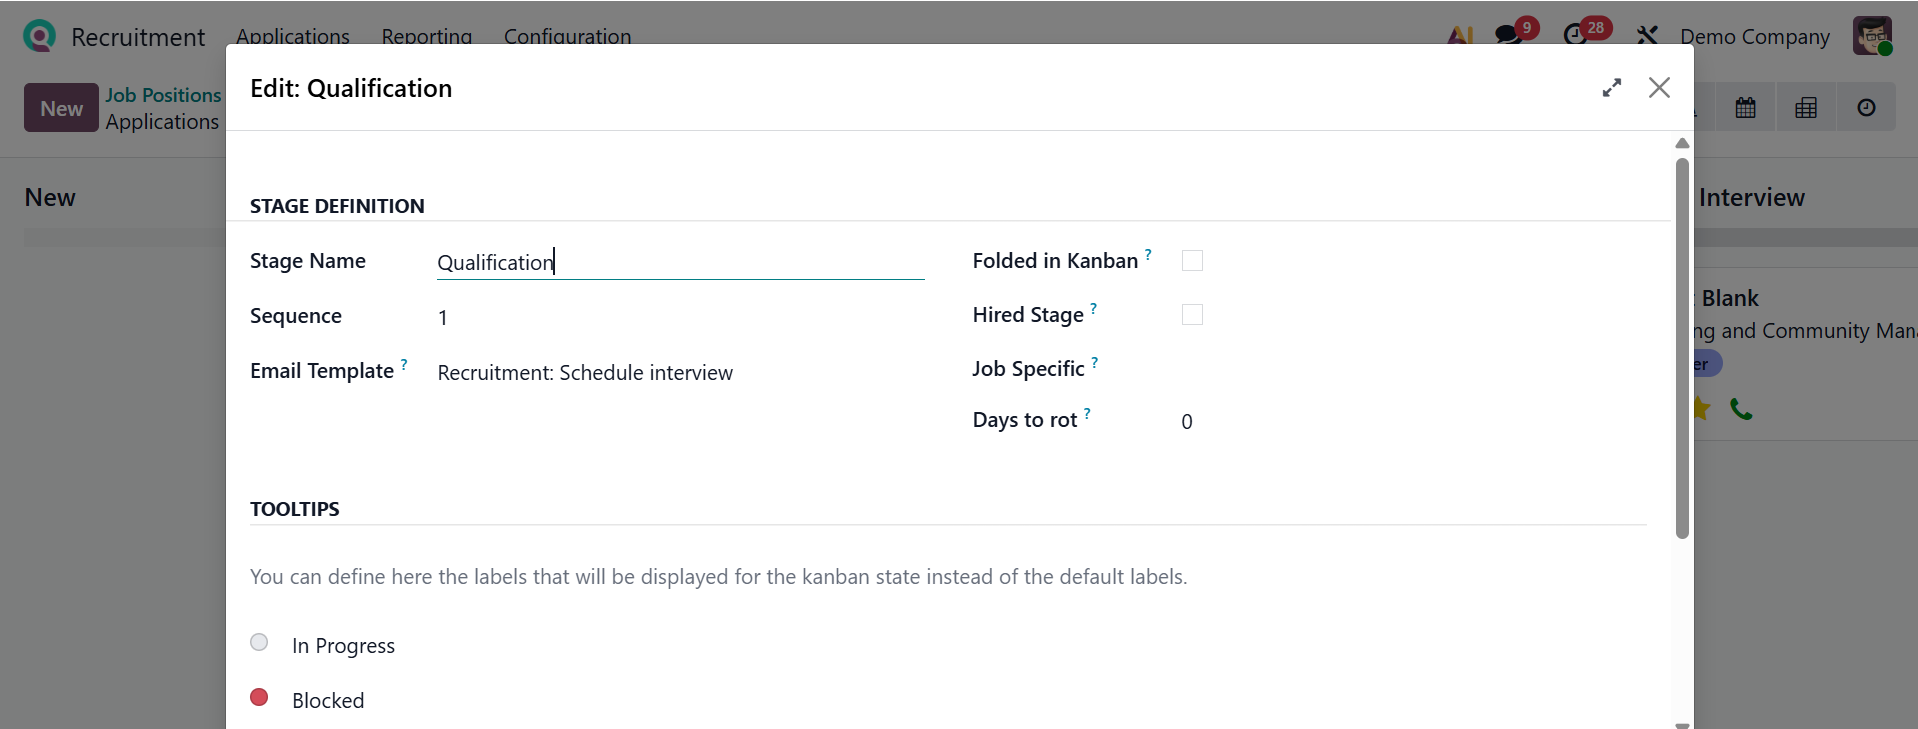
Using the Edit option, you can make changes to the stage. In the Stage Definition section, you can change the stage nameand sequence. You can add the email template for communication with employees. To hide a stage in the Kanban view, enable the Folded in Kanban option. Enable the Hired Stage option to determine the hire date of the applicant. Mention the job to use this stage in the Job Specific field. In the Days to rot field, add the number of days before applicants in this stage become stale.
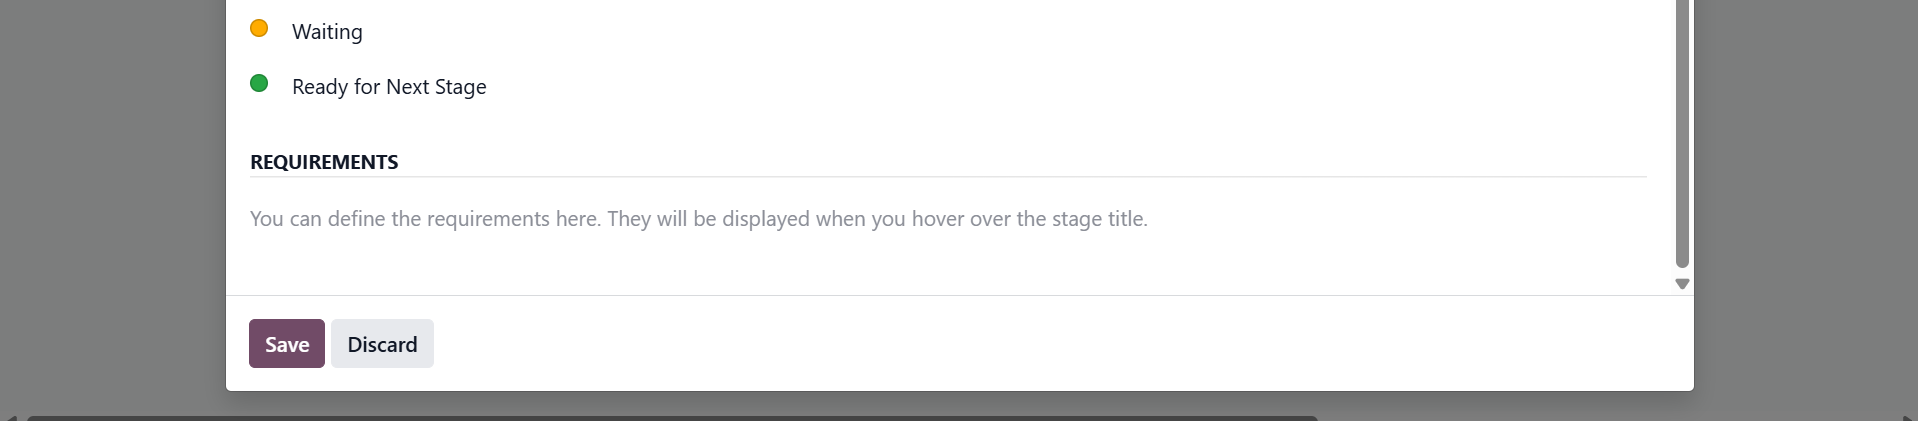
Under the Tooltips section, you can select labels such as In Progress, Blocked, Waiting, and Ready for Next Stage to track the candidate's progress. You can define the job requirements in the Requirements section.
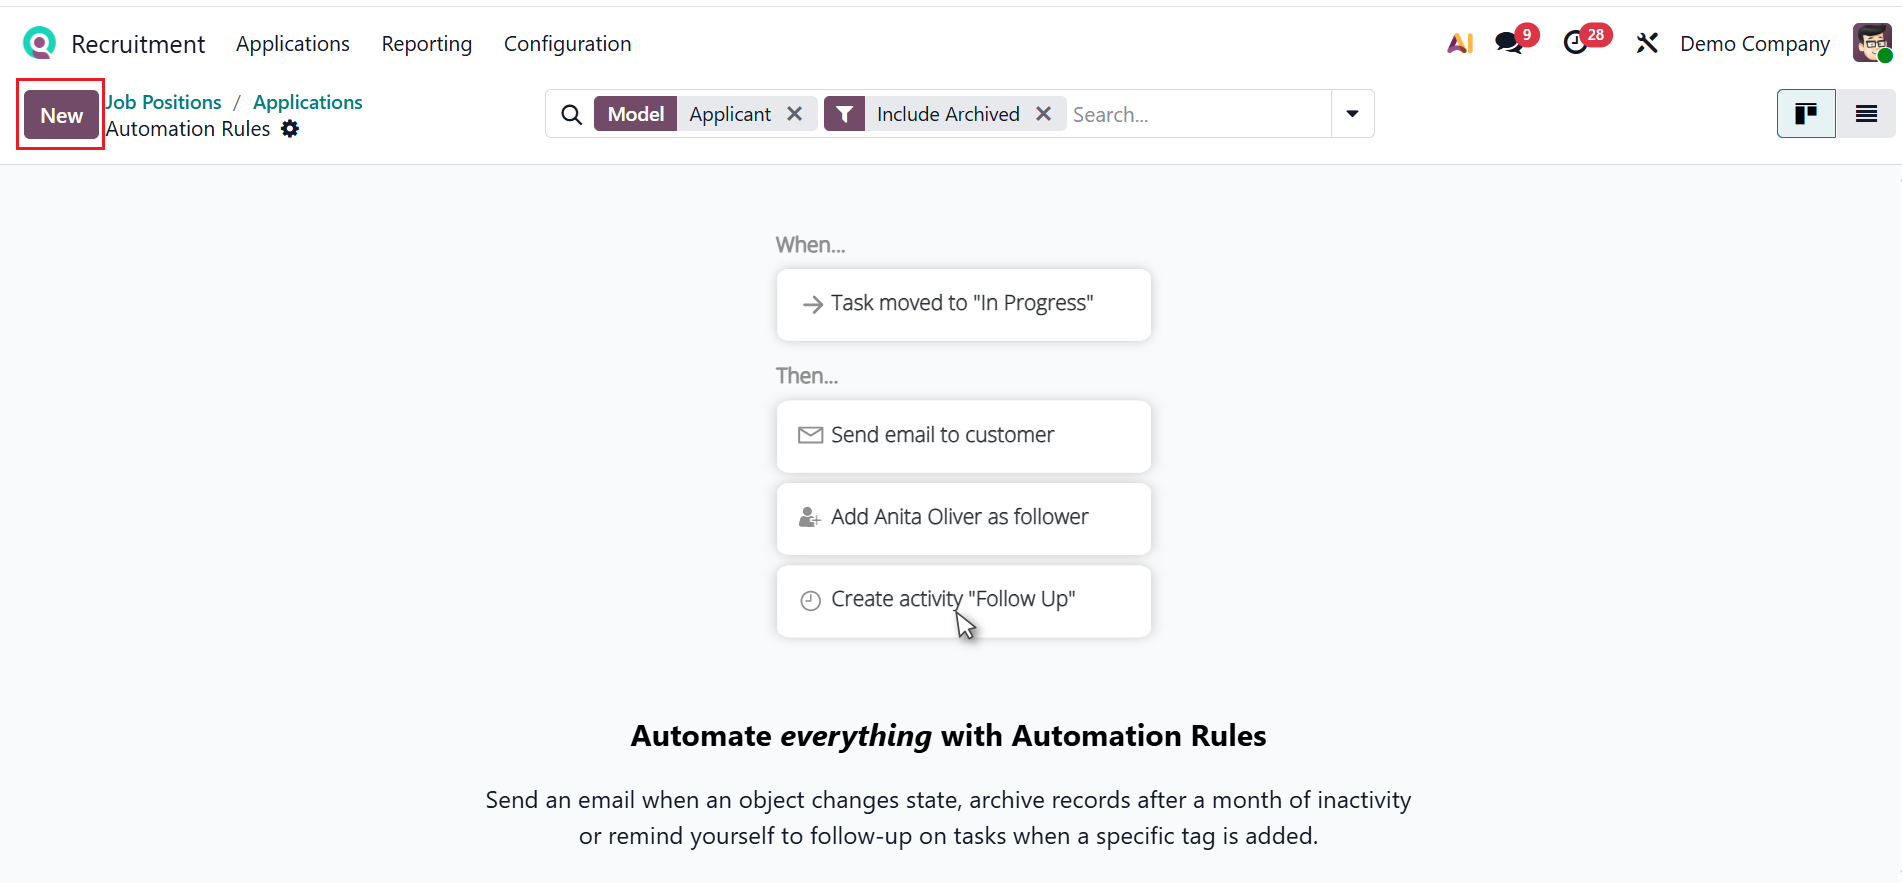
You can set rules and trigger actions based on the conditions using the Automations option. Use the New button to add a new automation rule.
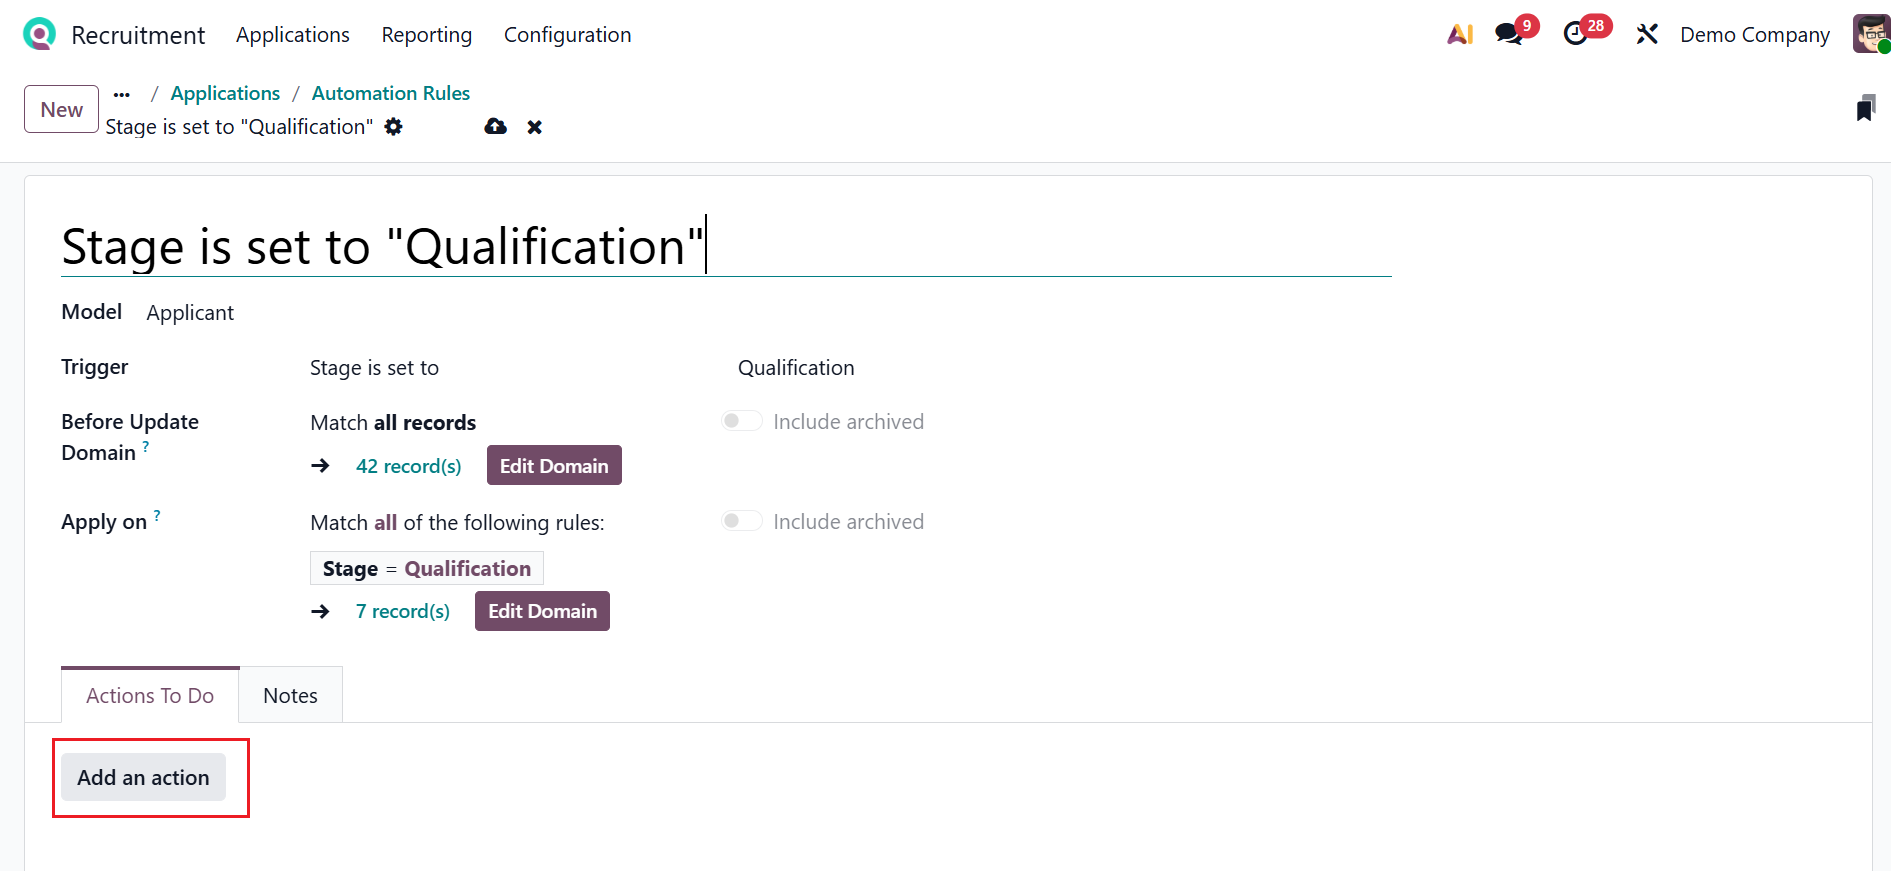
Here, add a name for the automation rule and select a model. Trigger conditions can be set using the dropdown menu, such as when a record is created, updated, or reaches a specific stage in the hiring process. In this example, the trigger is applied when the application stage is set to Qualification. Under the Actions To Do tab, click Add an action as shown below:
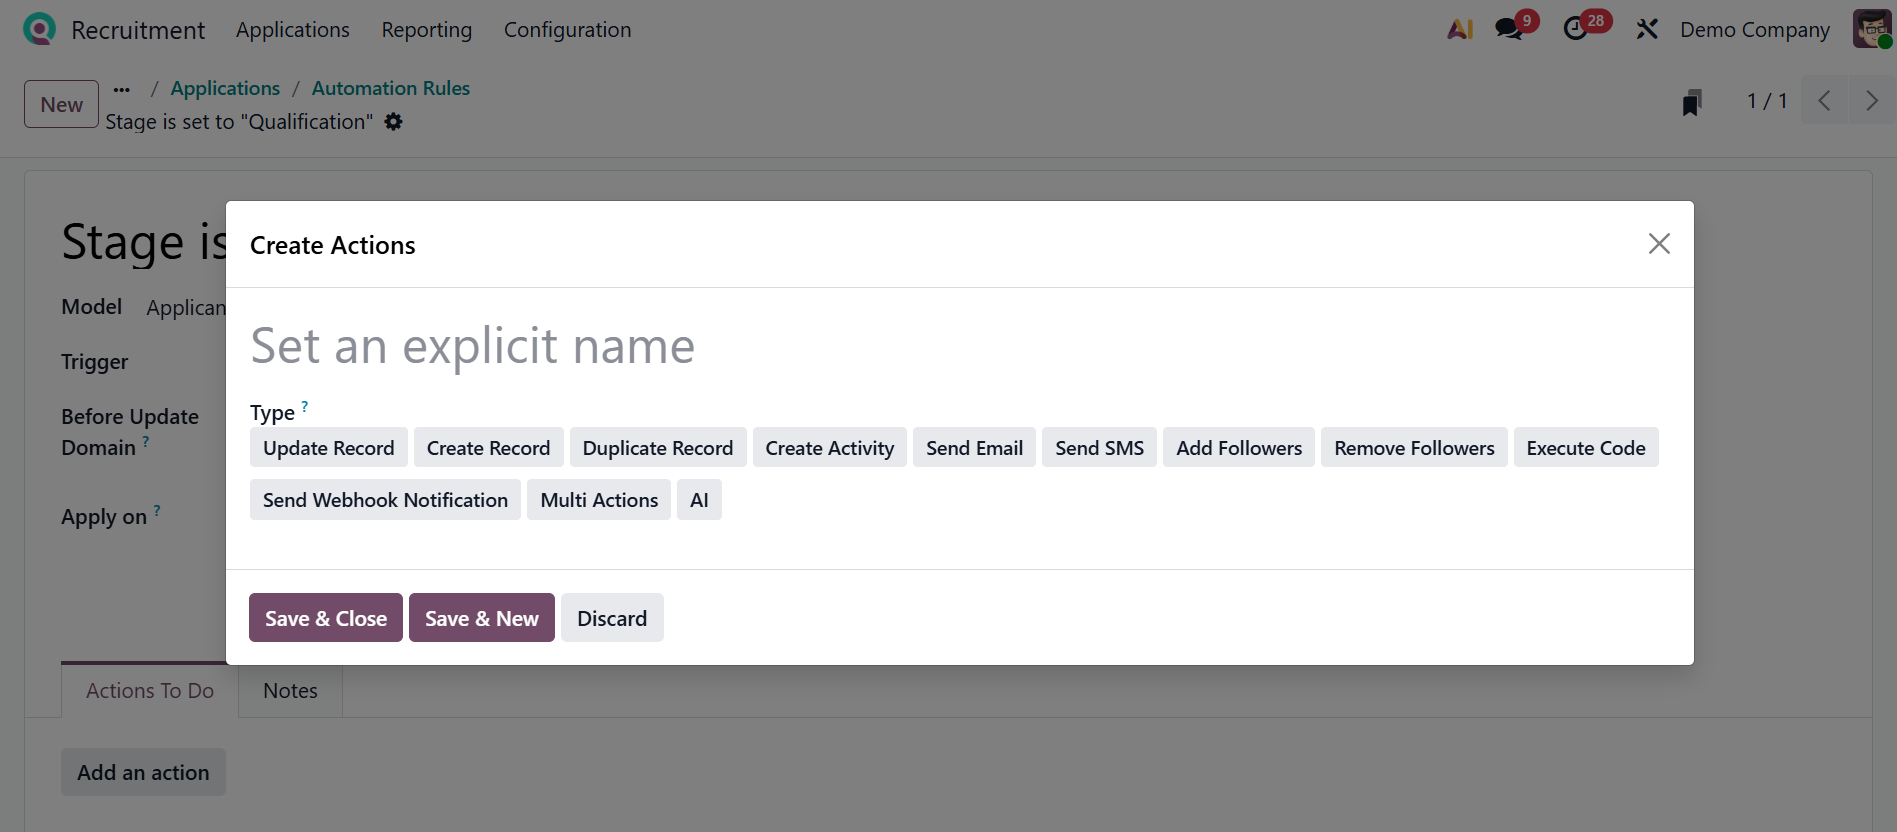
Provide a name for the action and choose a type, including Update Record, Create Record, Duplicate Record, Create Activity, Send Email, Send SMS, Add Followers, Remove Followers, Execute Code, Send Webhook Notifications, Multiactions, or AI."
1.1 By Job Positions:
The By Job Positions menu, as mentioned above, is the main dashboard for the Recruitment module. It helps recruiters clearly track applications for each job role and improves hiring efficiency by making it easier to prioritize positions and balance recruitment workloads. The Published banner on the right of a job position shows that it is active and accepting applications. By clicking on each job position card, you can view the applications of the candidates for the selected job position. By clicking on the Job Page option, you can move to a website for the job vacancy where candidates can view the job details, requirements, and apply online. The Configure option allows HR to edit and manage the job position.
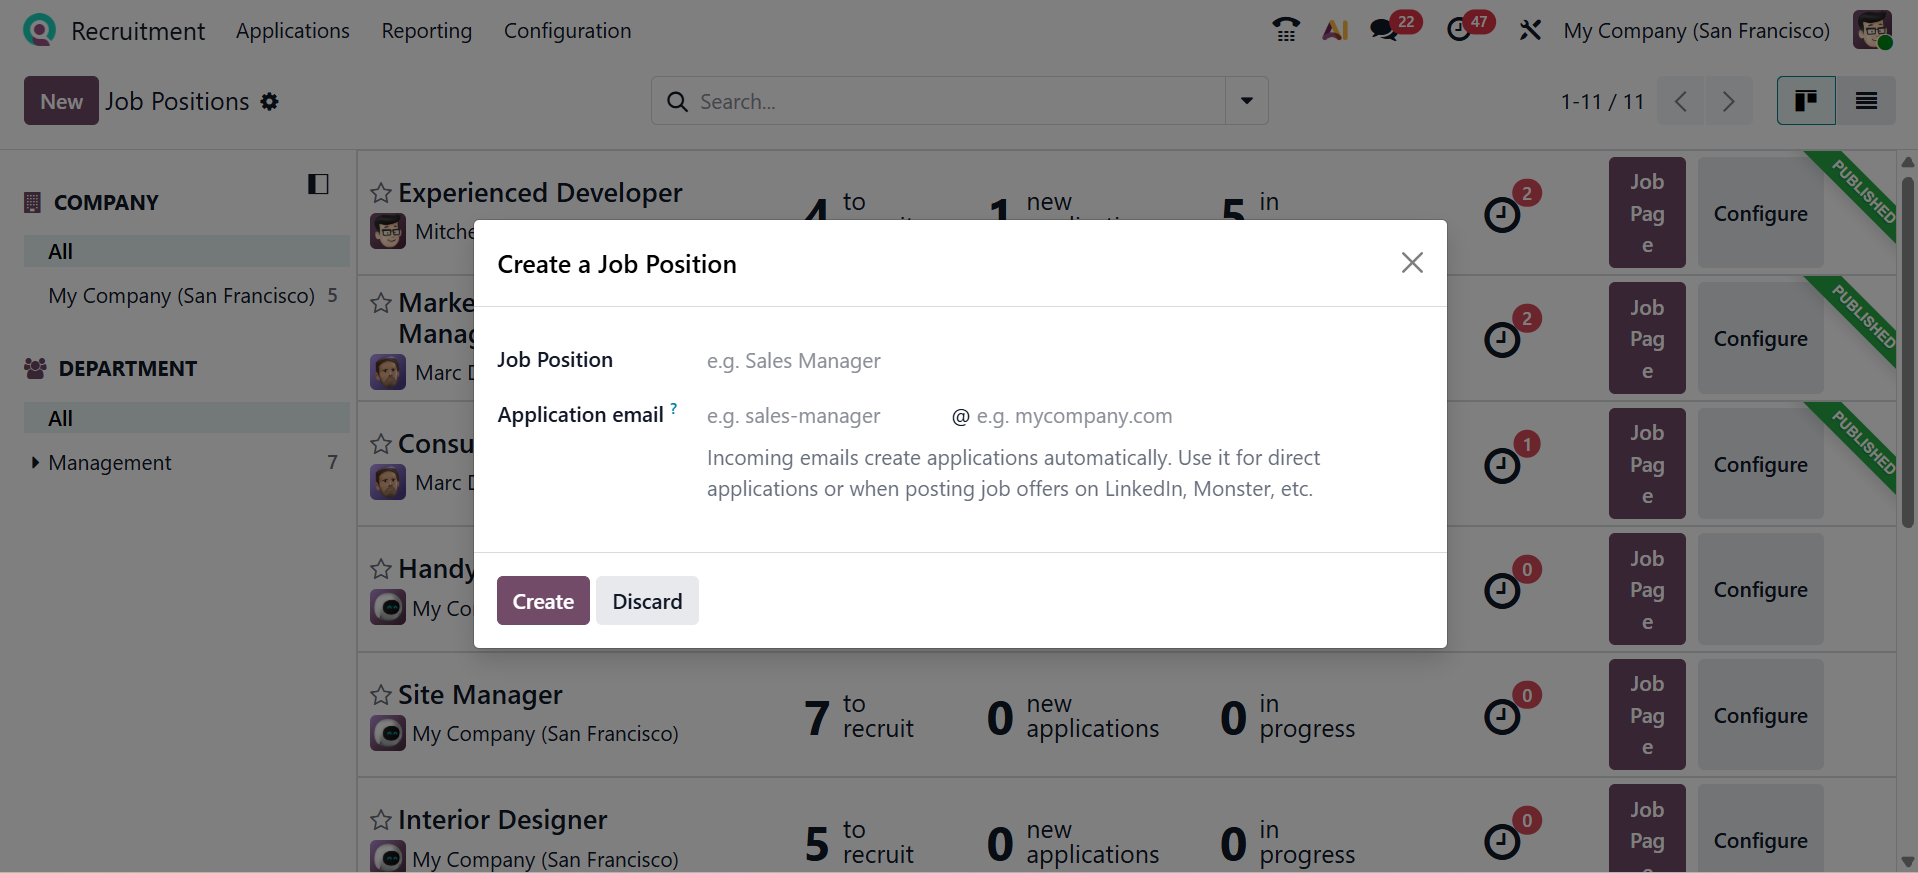
*Creating New Job Positions:
Use the New button to create a job position. A new window opens for entering the job position name. Then, add the Application email and click on the Create button.
On the dashboard, the newly created job position is visible. To add job details and other settings for the new job position, click on the three dotted vertical line and select the Configuration button as shown below:
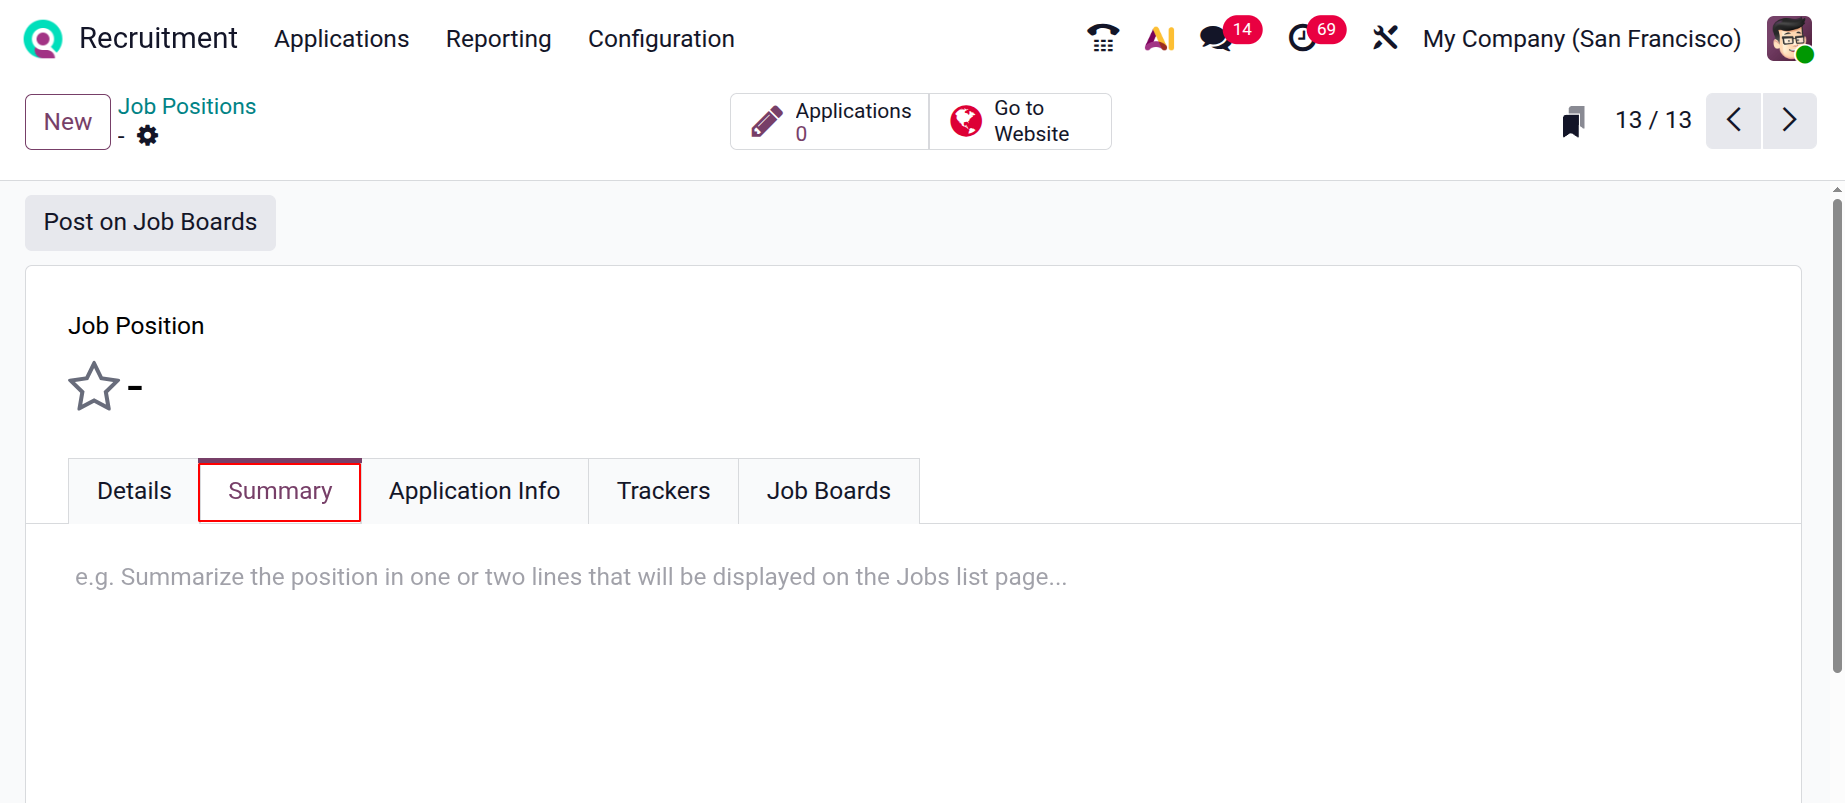
In the Job Position field, add a job title and mark the star based on the priority of the created job position. Here, you can see five tabs: Details, Summary, Application Info, Trackers, and Job Boards. Under the Details tab, you can see four sections, including Hiring Process, Job Posting, Job, and Contract.
In the Recruiter field, add a person who is responsible for recruiting for the job position. You can add multiple people who should perform the interview in the Interviewers field. Add an Interview Form that the applicants can fill out. In the Email Alias field, add an email address to which the applicants can send their resumes. Choose a Website for publishing the job position.
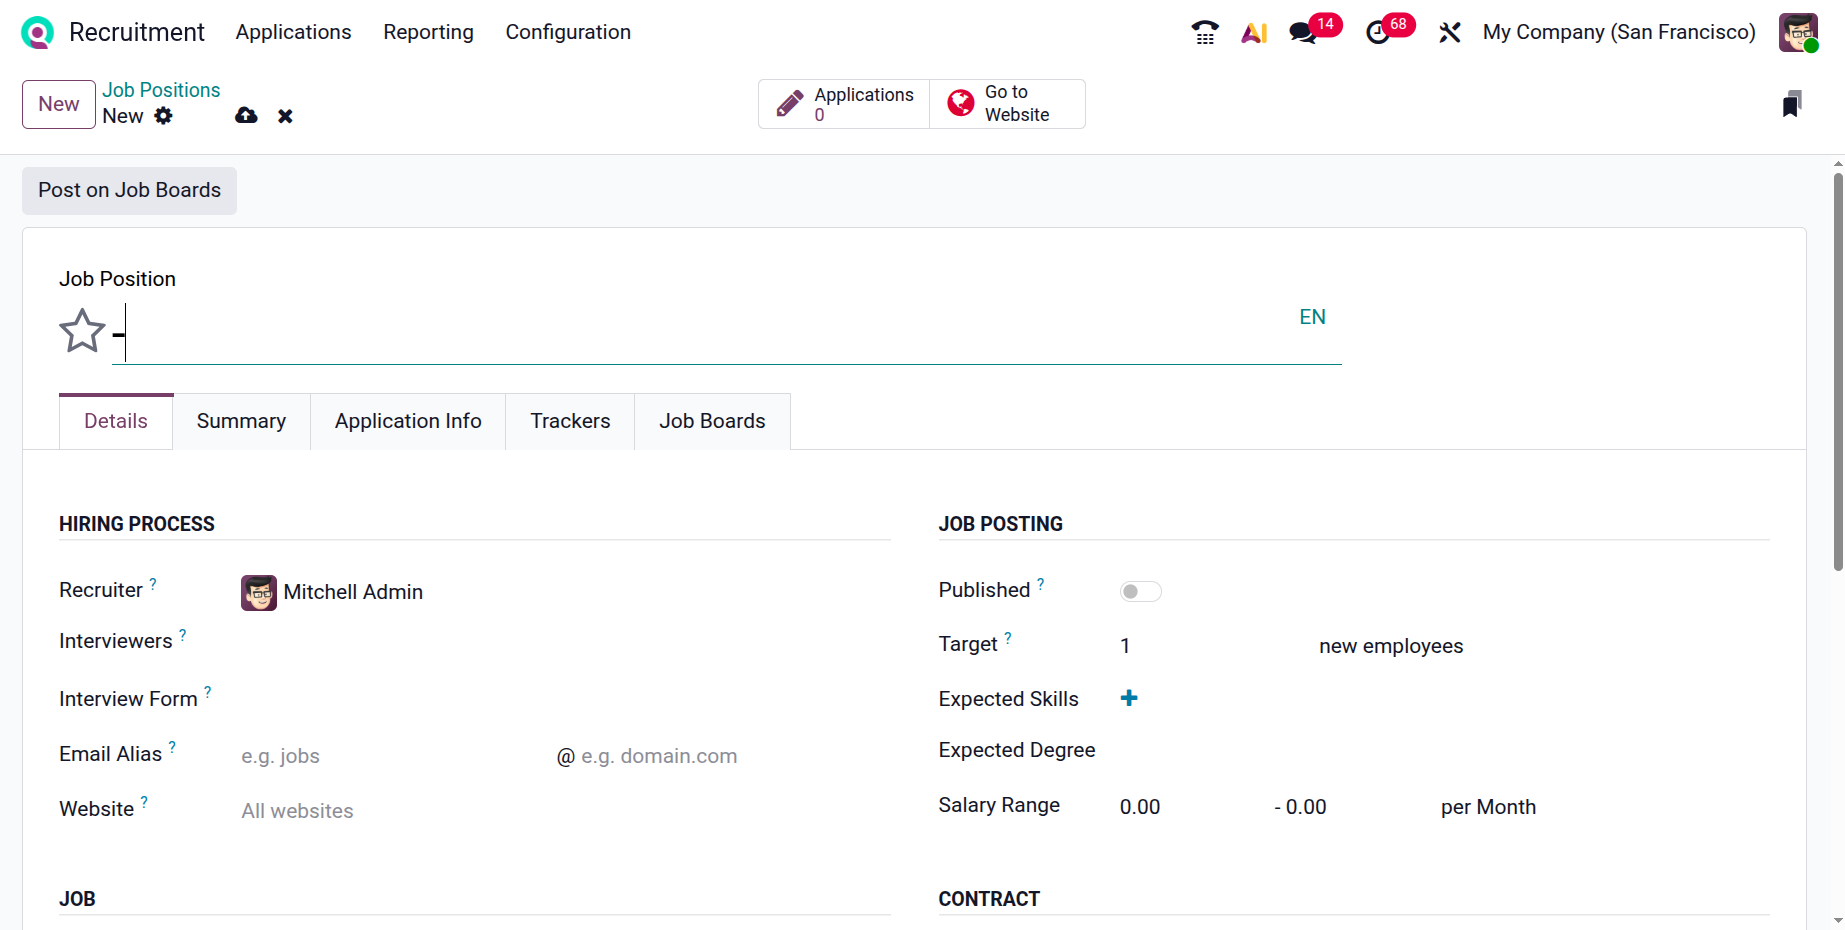
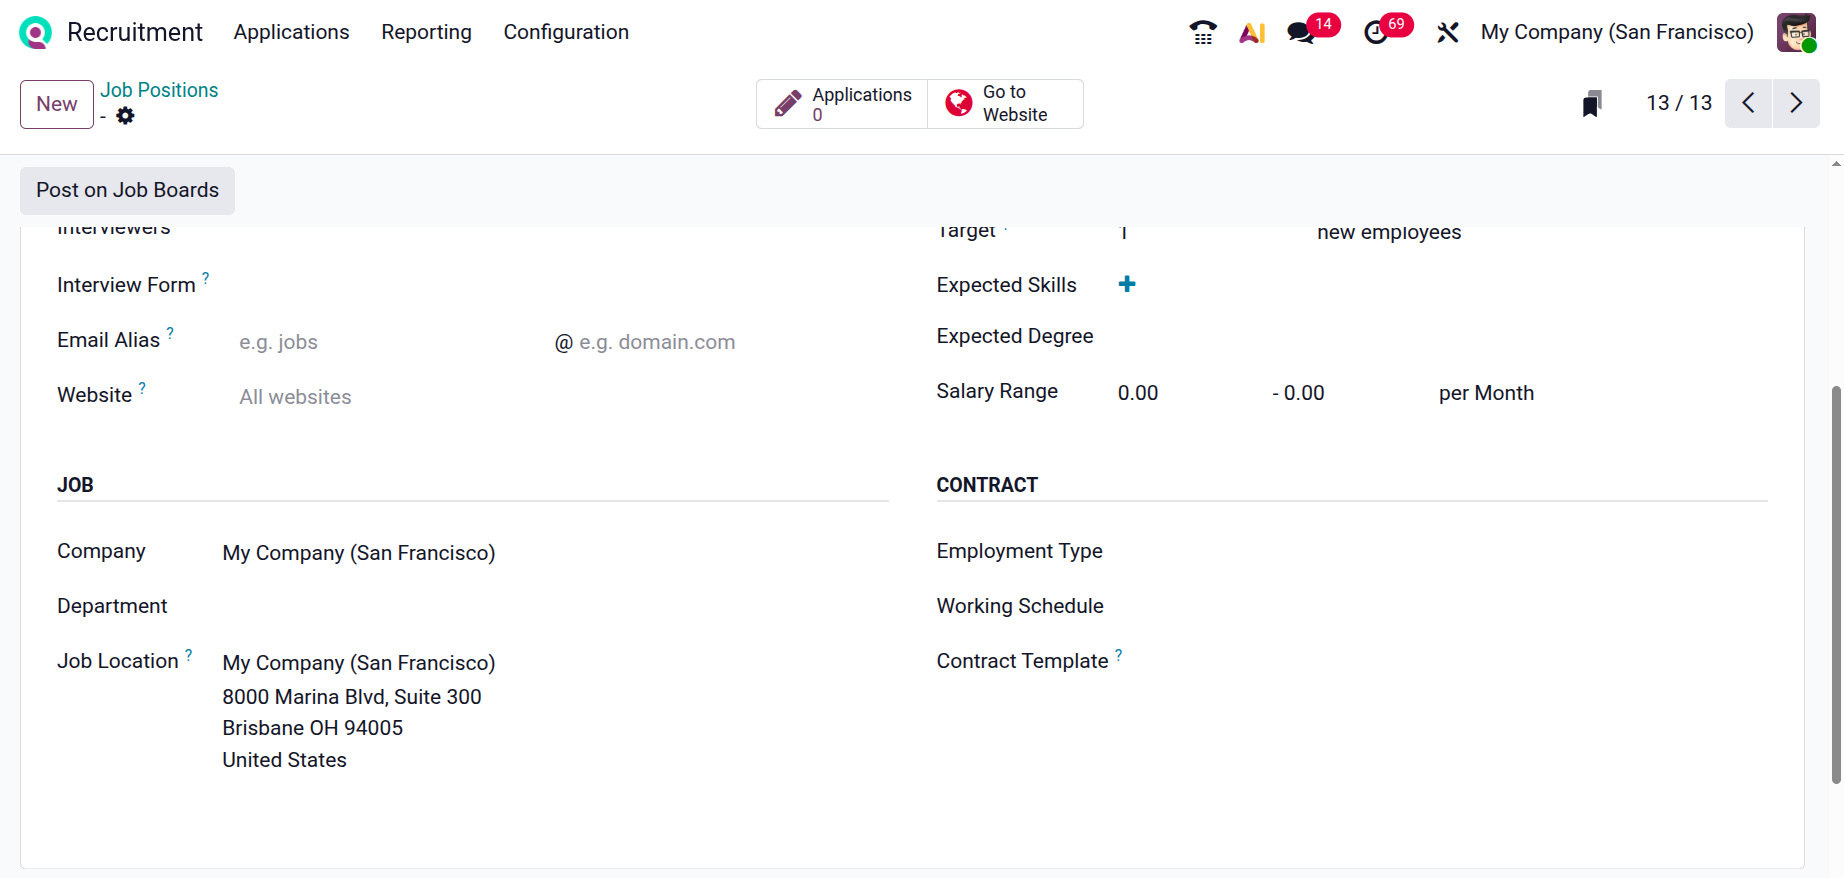
Enable the Published option to make it visible online, and specify the number of employees to hire in the Target field. Then, add the Expected Skills, Expected Degrees, and Salary Range. Then, add the Company, Department, and Job Location details for the job position. Select an Employment Type from the drop-down menu and choose a Working Schedule. In the Contract Template field, you can add a contract to be used when offering the job to an applicant.
Under the Summary tab, you can add a job description to help the applicants understand the role and purpose of the job position.
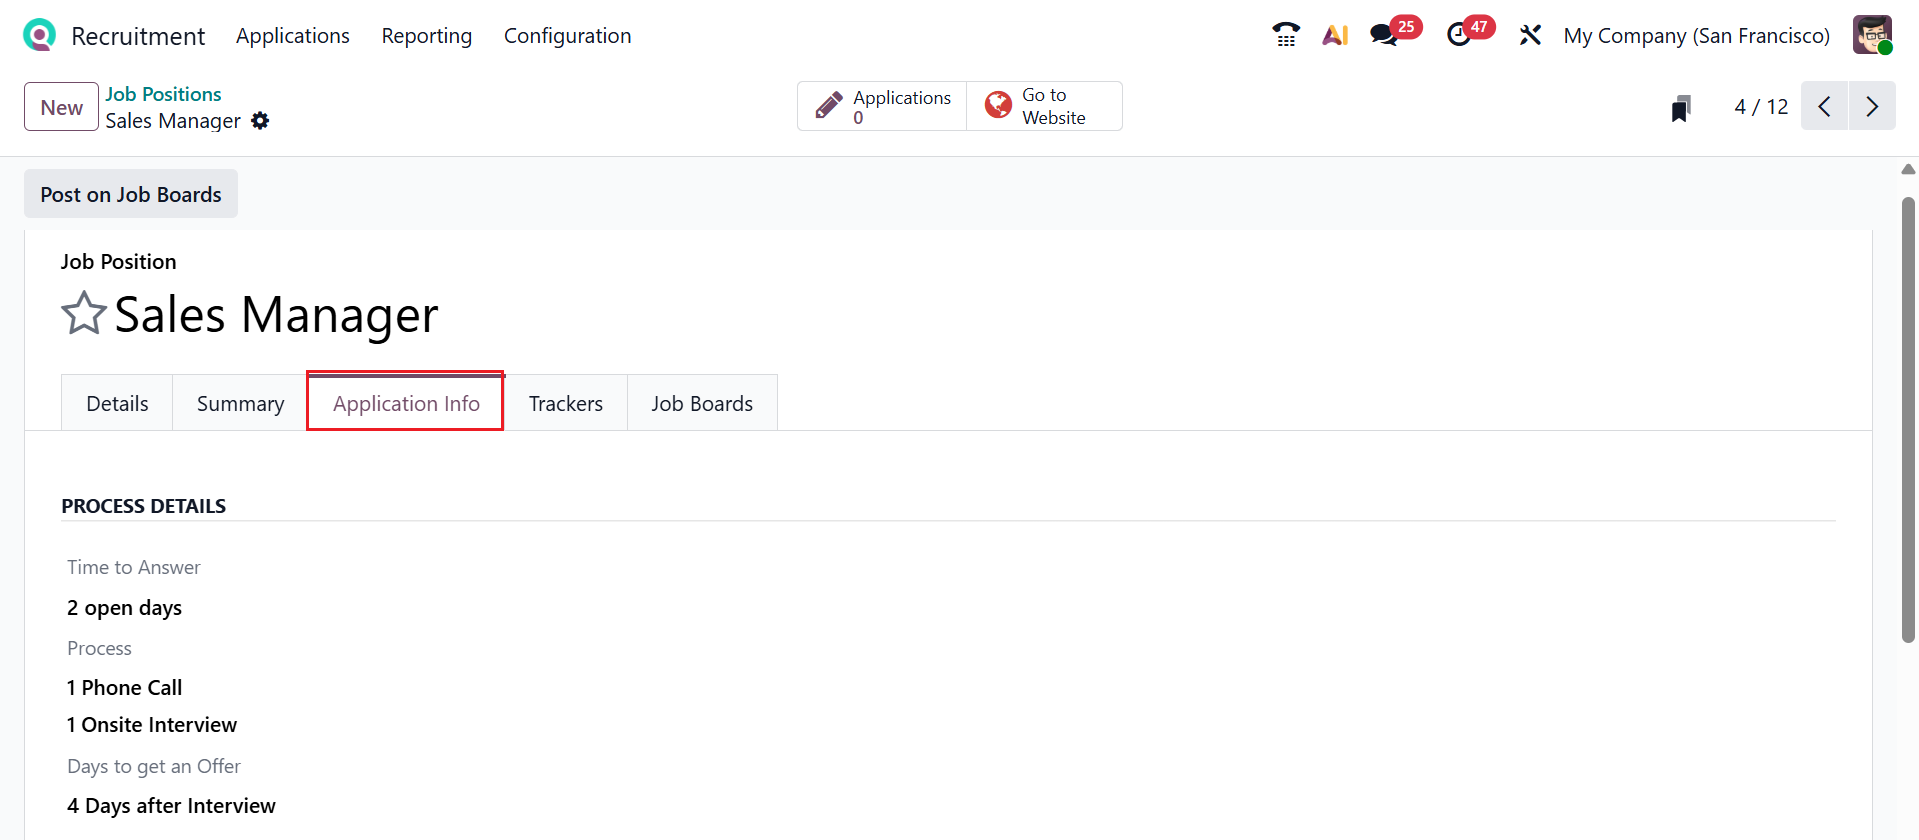
The Application Info tab allows you to enter detailed recruitment information displayed on the job posting. Then, you can modify the details of the recruitment process, such as Time to Answer, Process, and Days to get an Offer, as shown below:
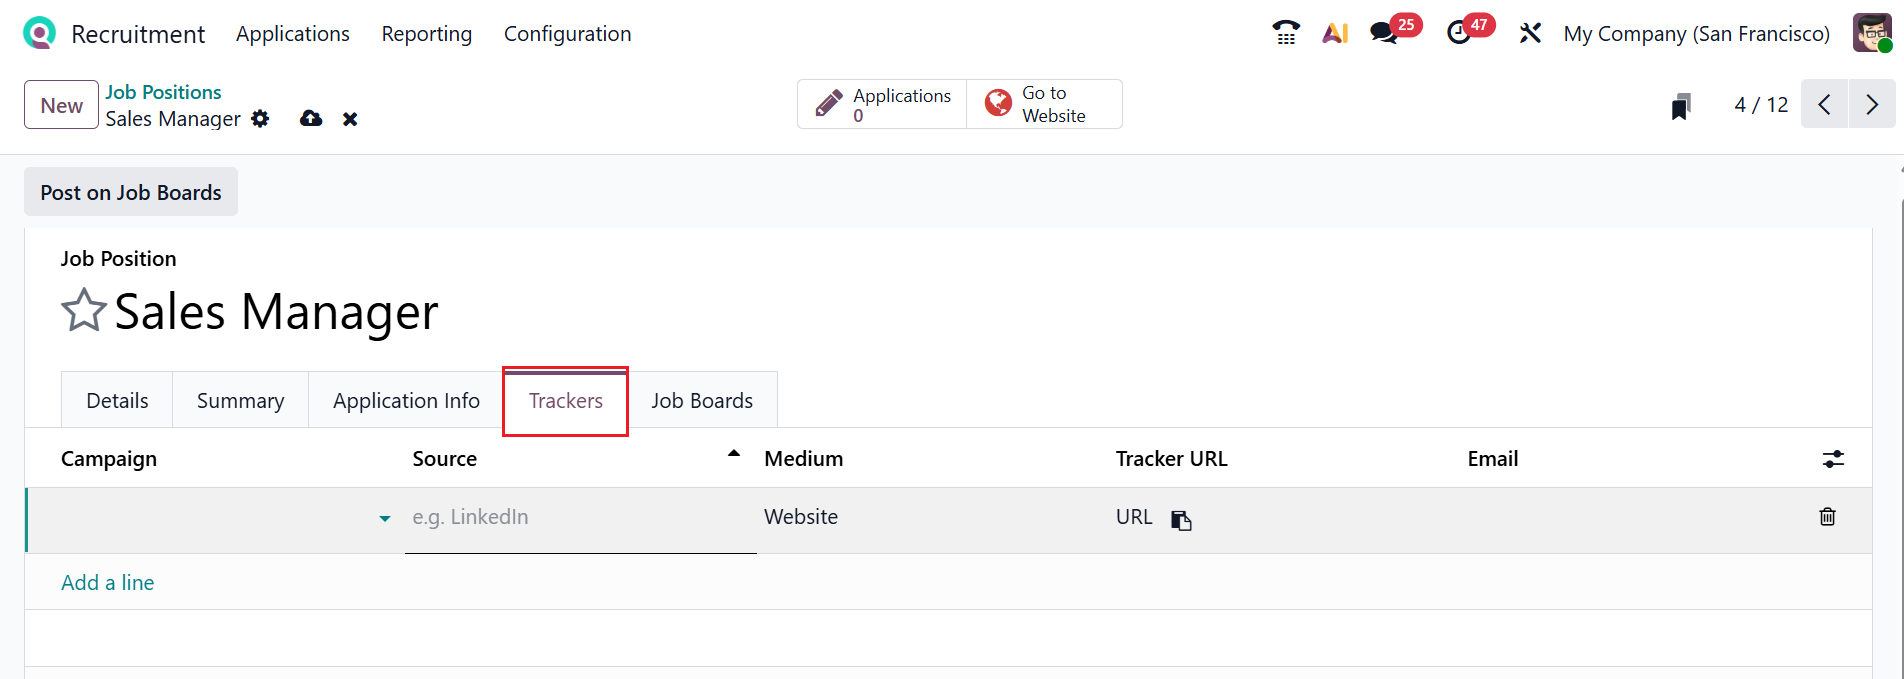
Under the Trackers tab, click on the Add a line button to add the details, such as Campaign, Source, Medium, Tracker URL, and Email, to track how applications are received for that specific job.
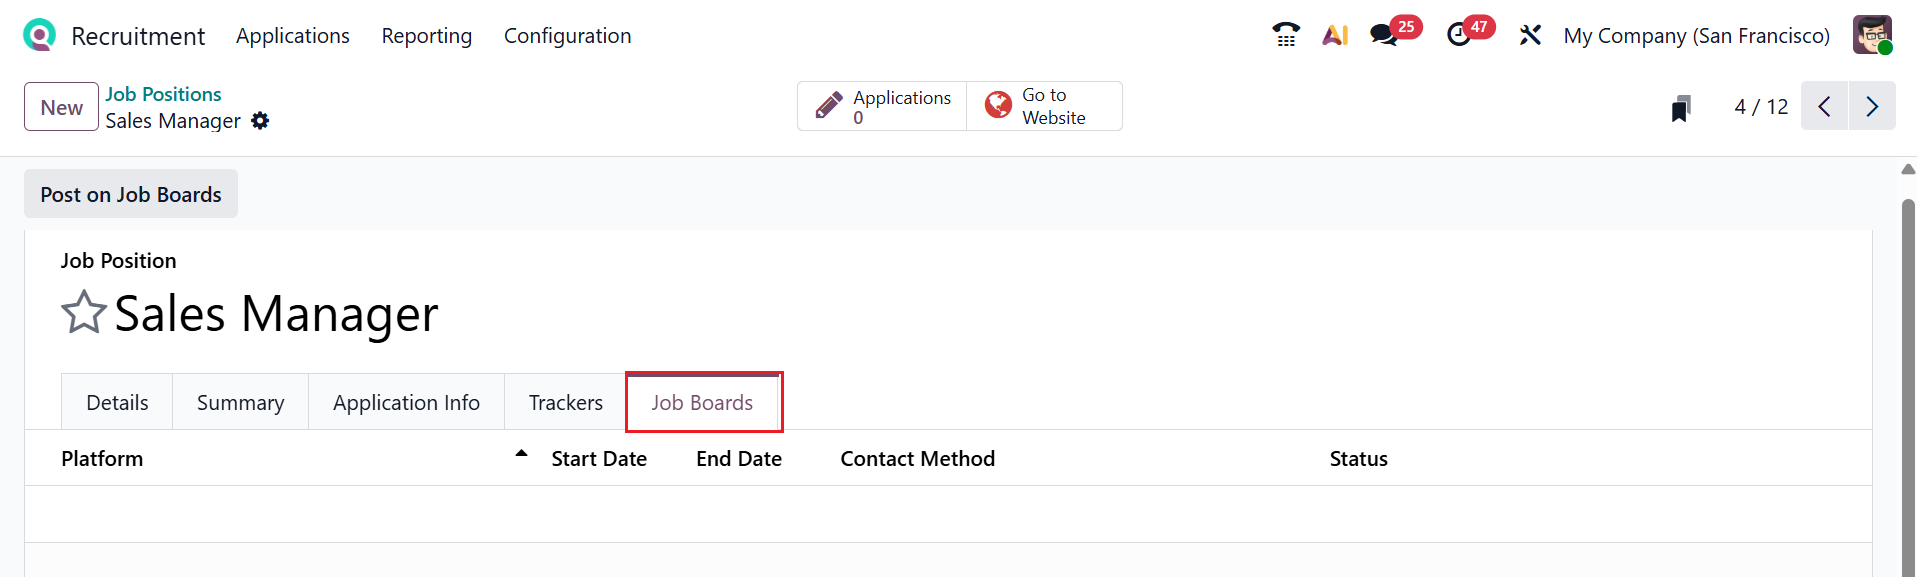
Under the Job Boards tab, you can manage how the job ad is displayed on various sites. This helps to increase job visibility and bring applications directly to the website from multiple channels.
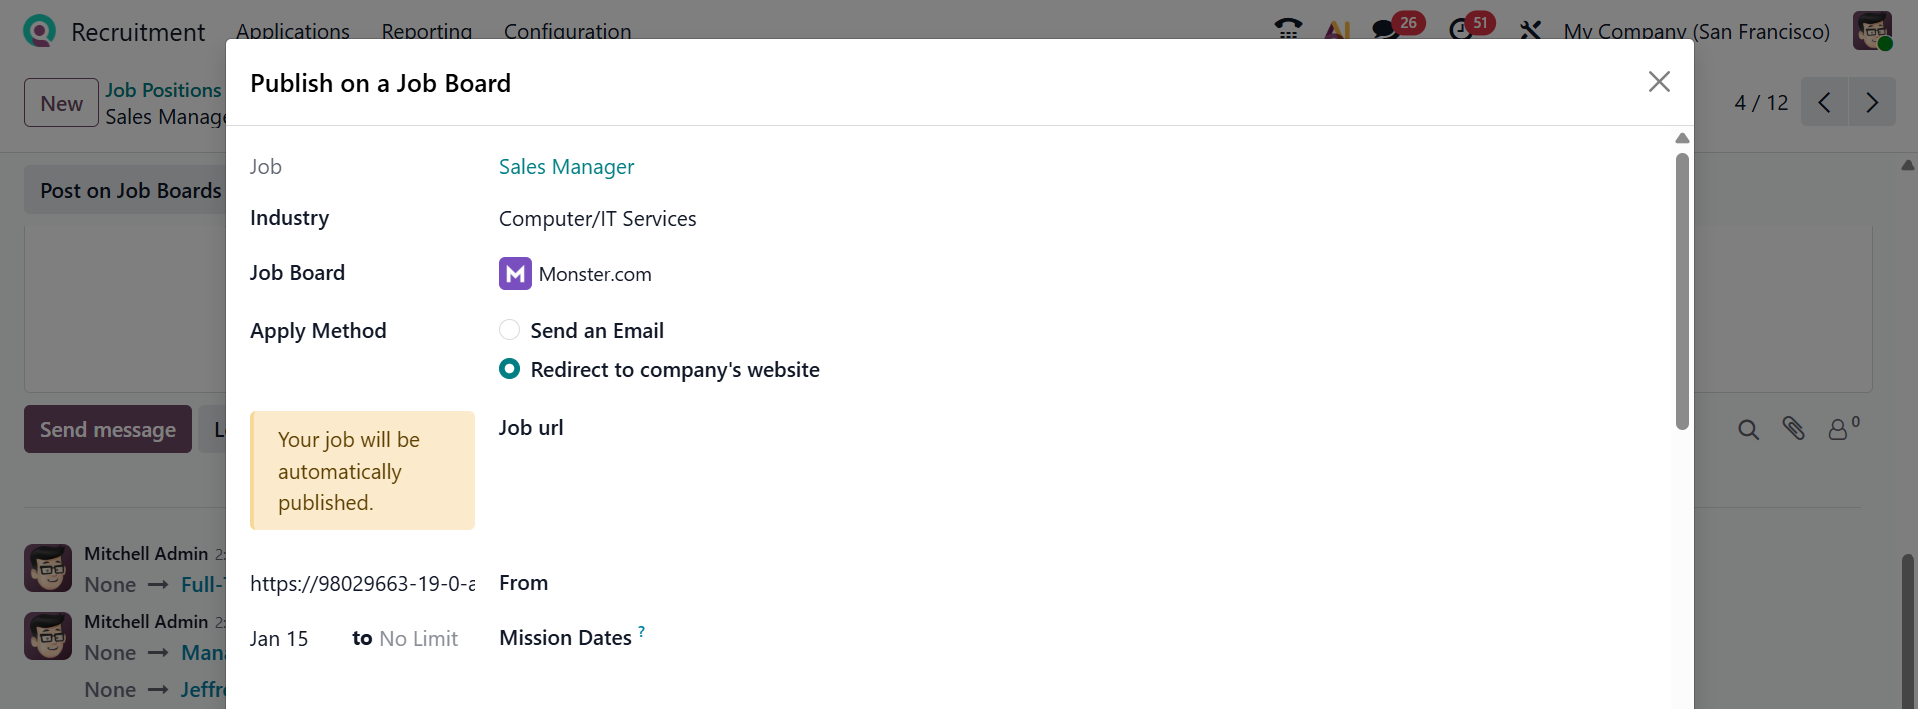
To reach the job position to a wider audience and attract more applicants, click on the Post on Job Boards button. A pop-up screen, as illustrated below, will appear.
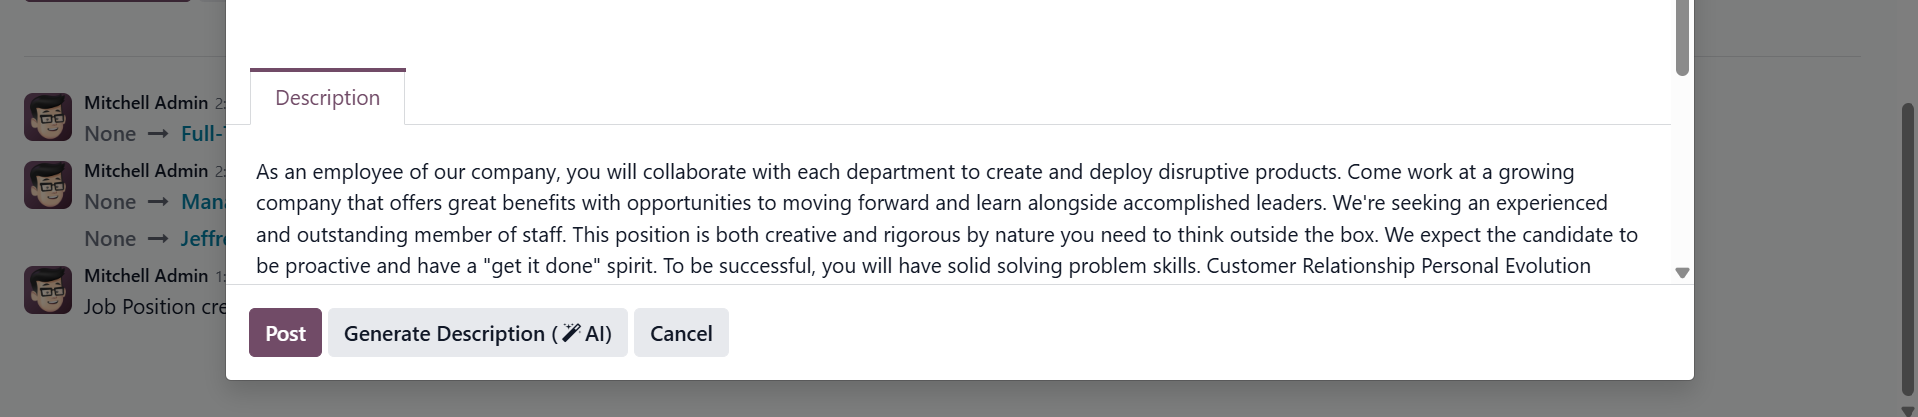
Here, you can see the job position appears in the Job field by default. Add a business sector related to the job position in the Industry field. Choose a job board from the drop-down list. In the Apply Method field, select either the Send an Email or Redirect to the company’s website options to determine how the applicants can apply for the job position. In the Job url field, add the tracking url for the job board listing. You can add the From and to dates for the job board listing. The Mission Dates field allows you to track the applicant’s availability once they are hired. Under the Description tab, you can add a job description manually or create an AI-generated description using the Generate Description (AI) button. Then, click on the Post button.
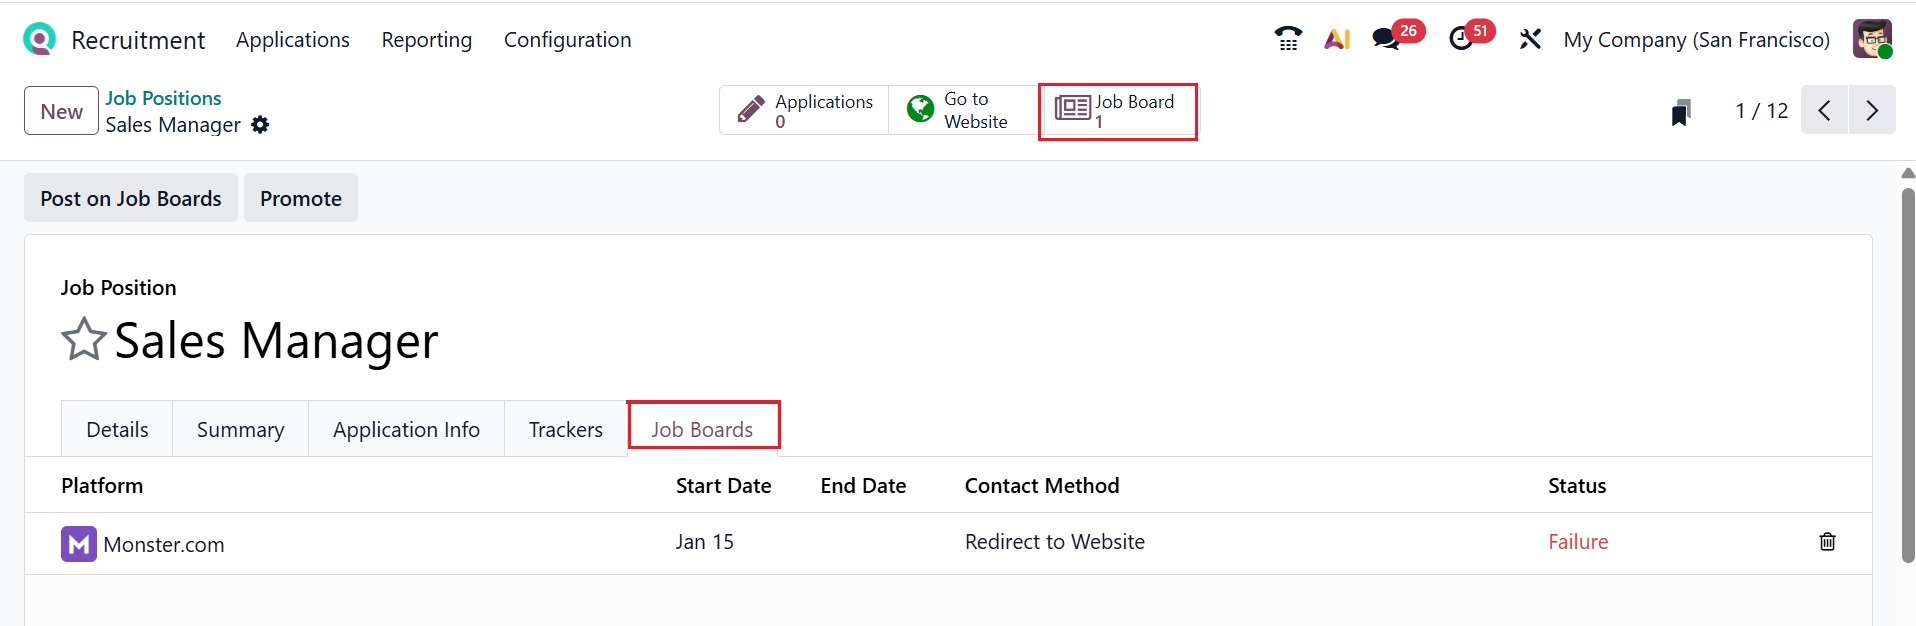
You can see the created job board posts under the Job Boards tab, as shown below. By clicking on the Job Board smart tab, you can also view these posts.
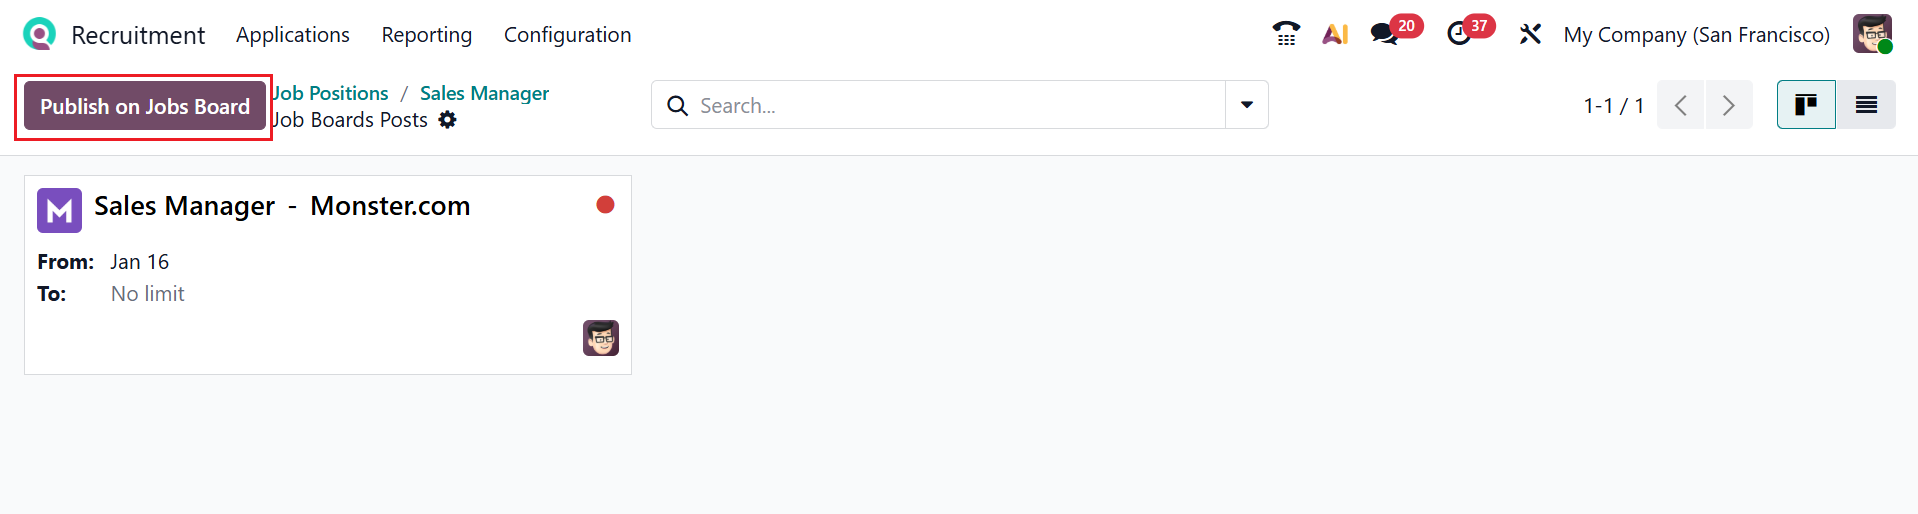
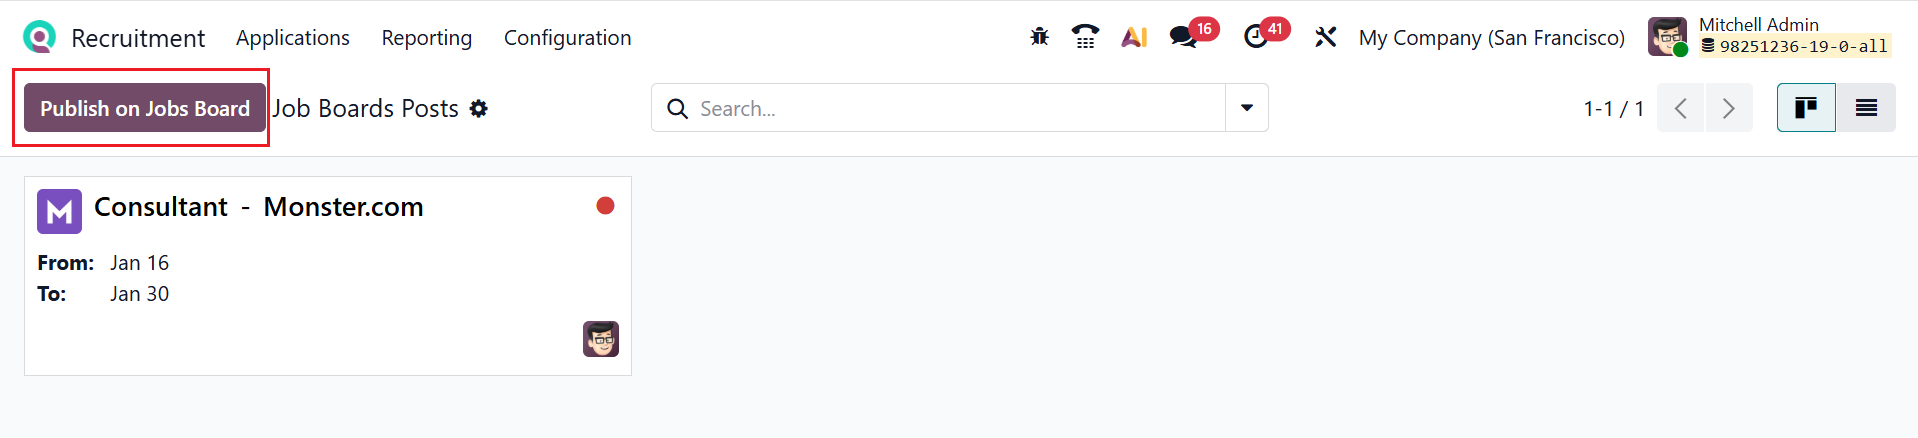
In the Job Board smart tab, the posts are arranged as kanban views by default. Use the Publish on Job Board option to simplify external recruiting, allowing you to attract applicants and manage their applications in Odoo.
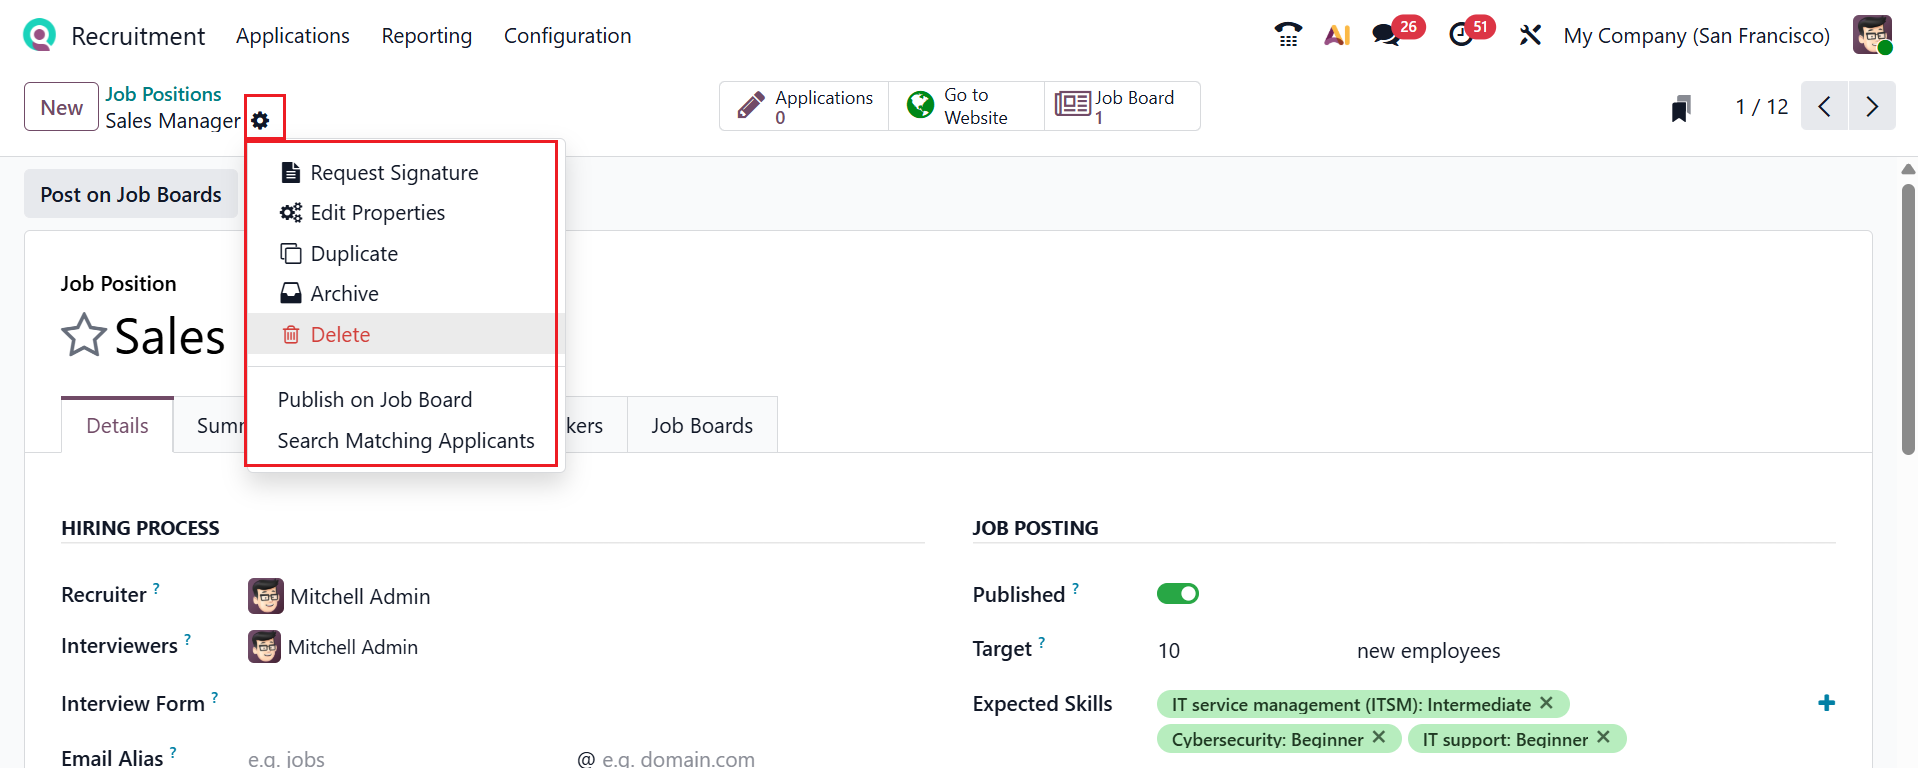
As shown in the screenshot below, click on the Action button to view options, such as Request Signature, Edit Properties, Duplicates, Archive, Delete, Publish on Job Board, and Search Matching Applicants.
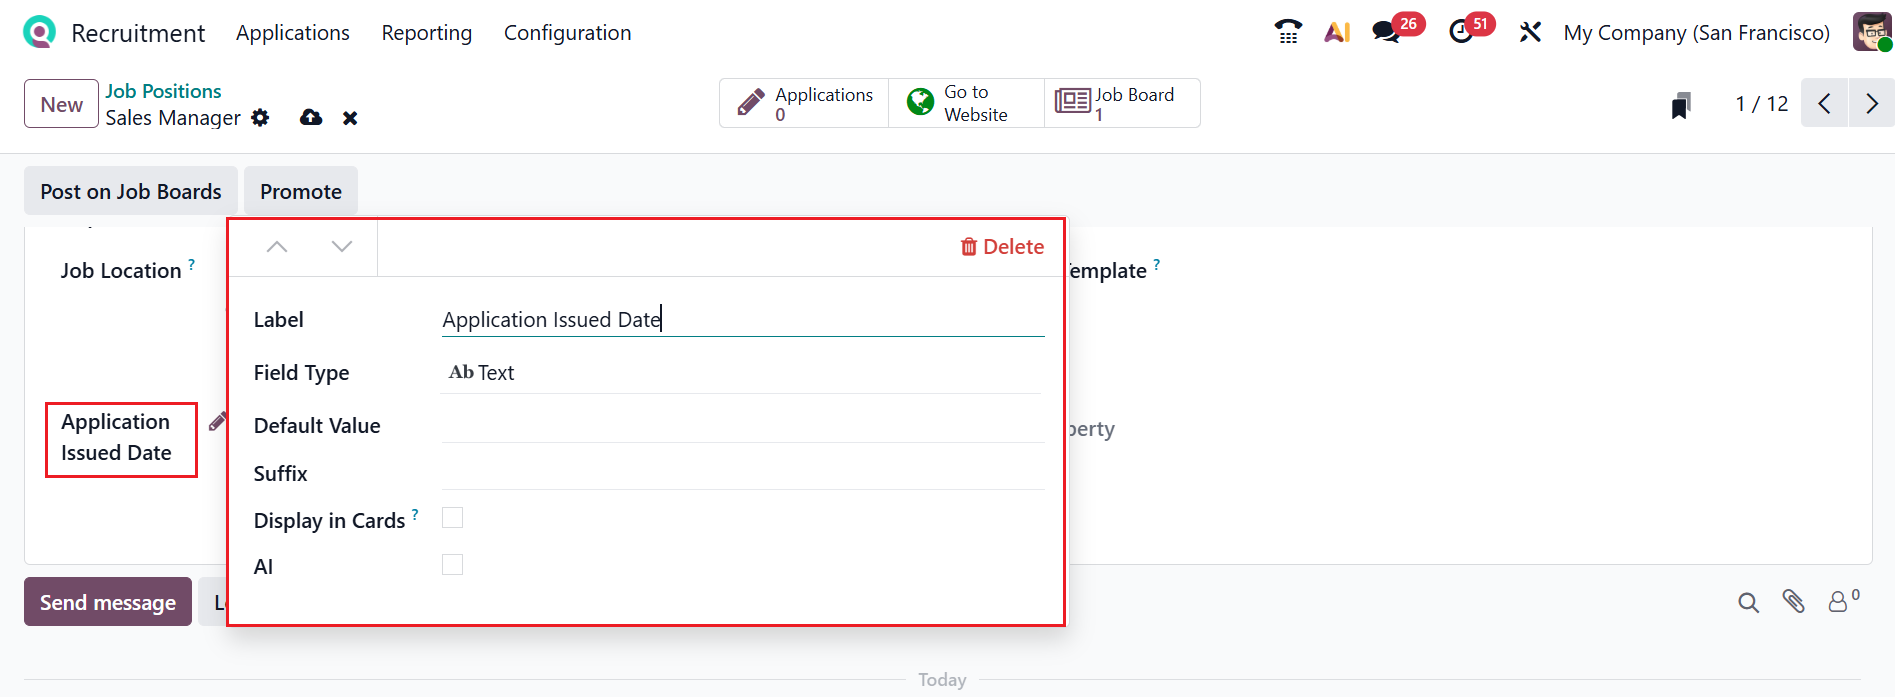
The Request Signature button helps you to request a signature inside the job position document. You can add a new field to the job position form by using the Edit Properties button. A pop-up appears upon clicking “Edit Properties.” Fill in the Label field with the field name and pick the Field Type. Enable the Display in Cards option to appear in the field in job cards. You can also add the Default Value and Suffix of the field.
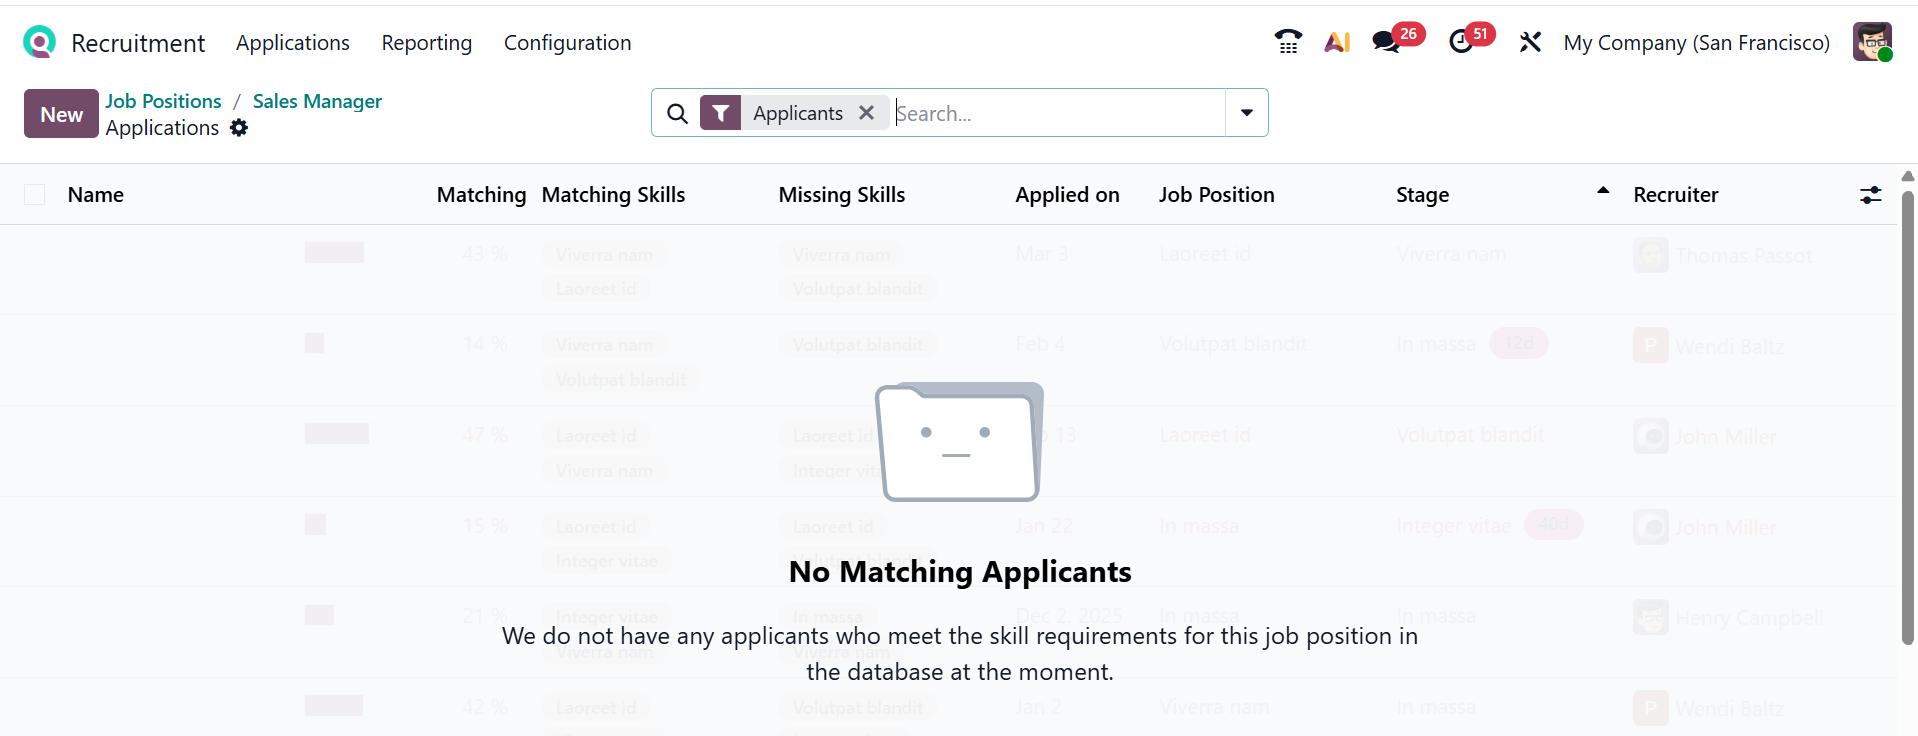
Use Search Matching Applicants to identify candidates that closely match the job requirements. It compares job requirements with the applicant's skills, experience, and profile. When you click on the Search Matching Applicants option, you will move to a new dashboard as shown below:
This feature helps you to reduce manual screening time for recruiters and improves the accuracy and speed of hiring decisions. Here, you can see the details of the candidates, such as Name, Matching Score, Matching Skills, Missing Skills, Applied On, Job Position, Stage, and Recruiter. Click the New button to directly add a new candidate to the job position.
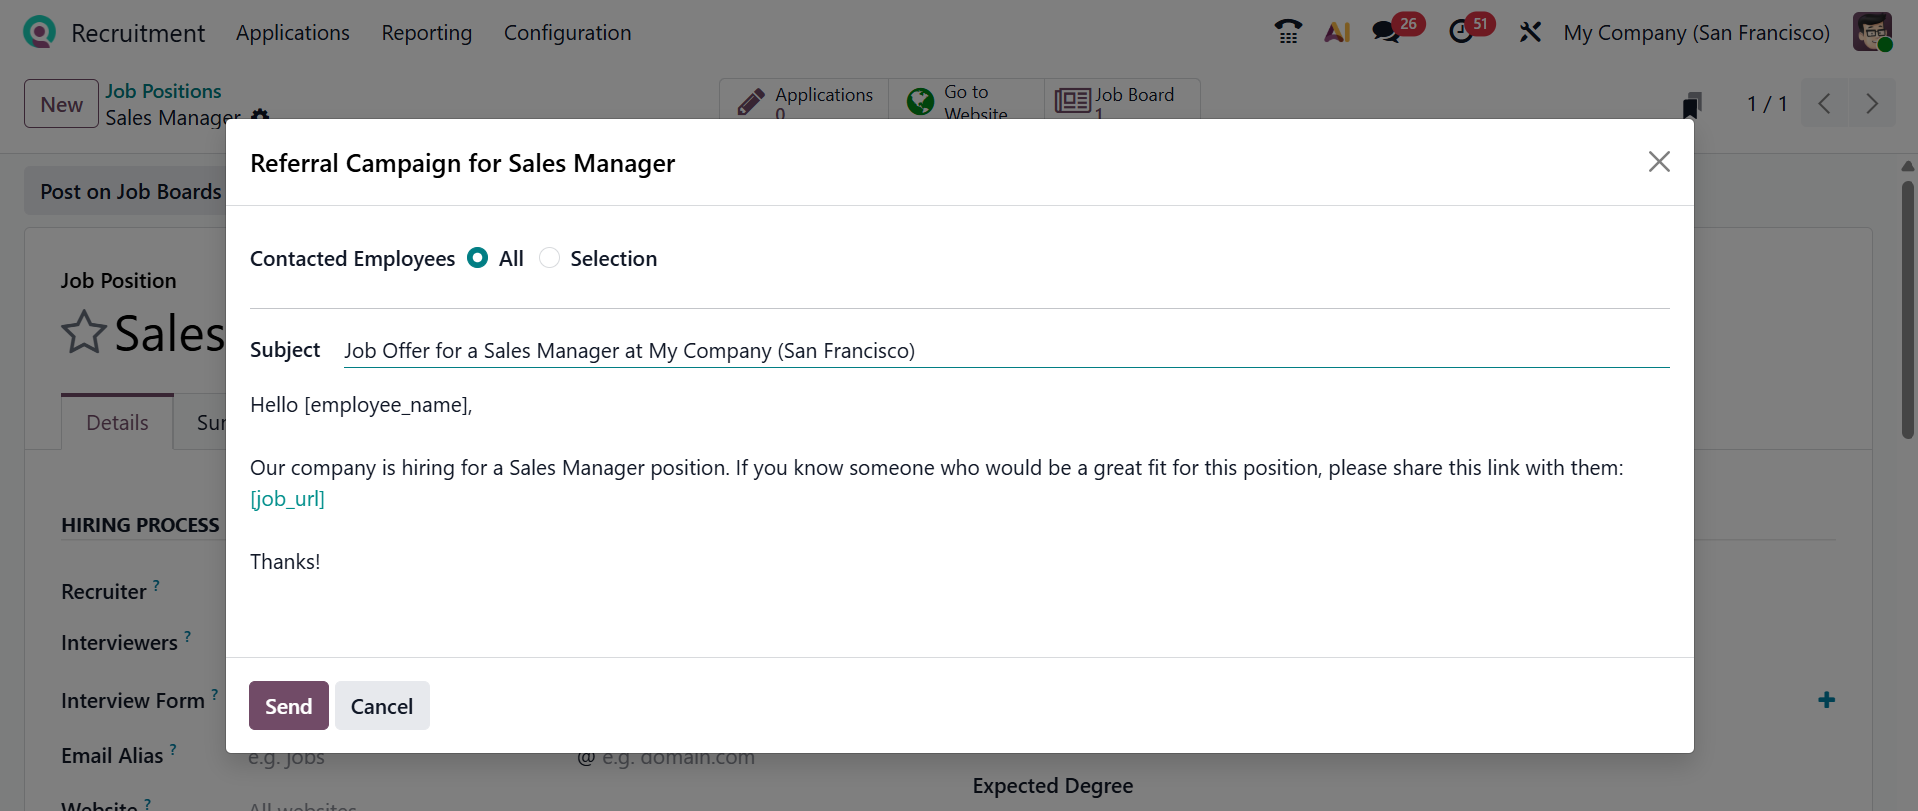
Click on the Promote button, and a new pop-up will appear named Referral Campaigns. Referral Campaign is a recruitment feature that encourages candidates for job openings through a user-friendly network. Staff receive a reward when their referrals apply, progress, or are hired. Choose All or Selection in the Contacted Employees field, add the Subject and Body of the Mail or SMS, and click Send.
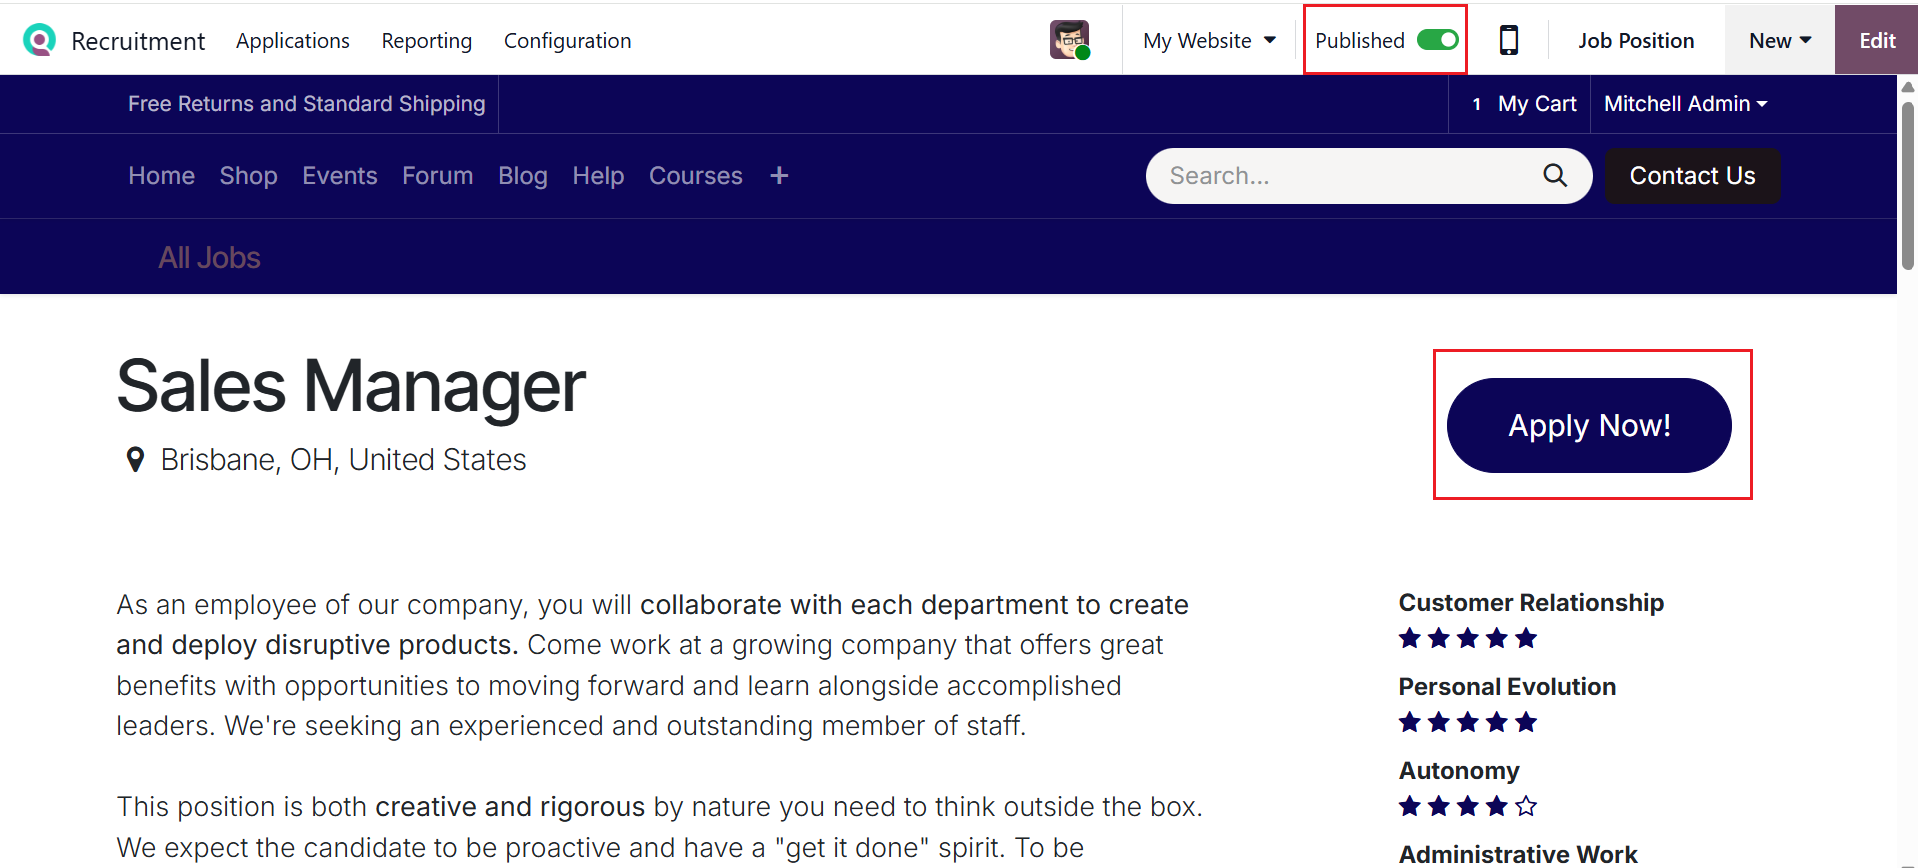
Click the Go to Website smart tab button to view the job posting. Here, you can see the job position as in its published form. An overview of the job position can be seen here. Click Apply Now to open the job application form.
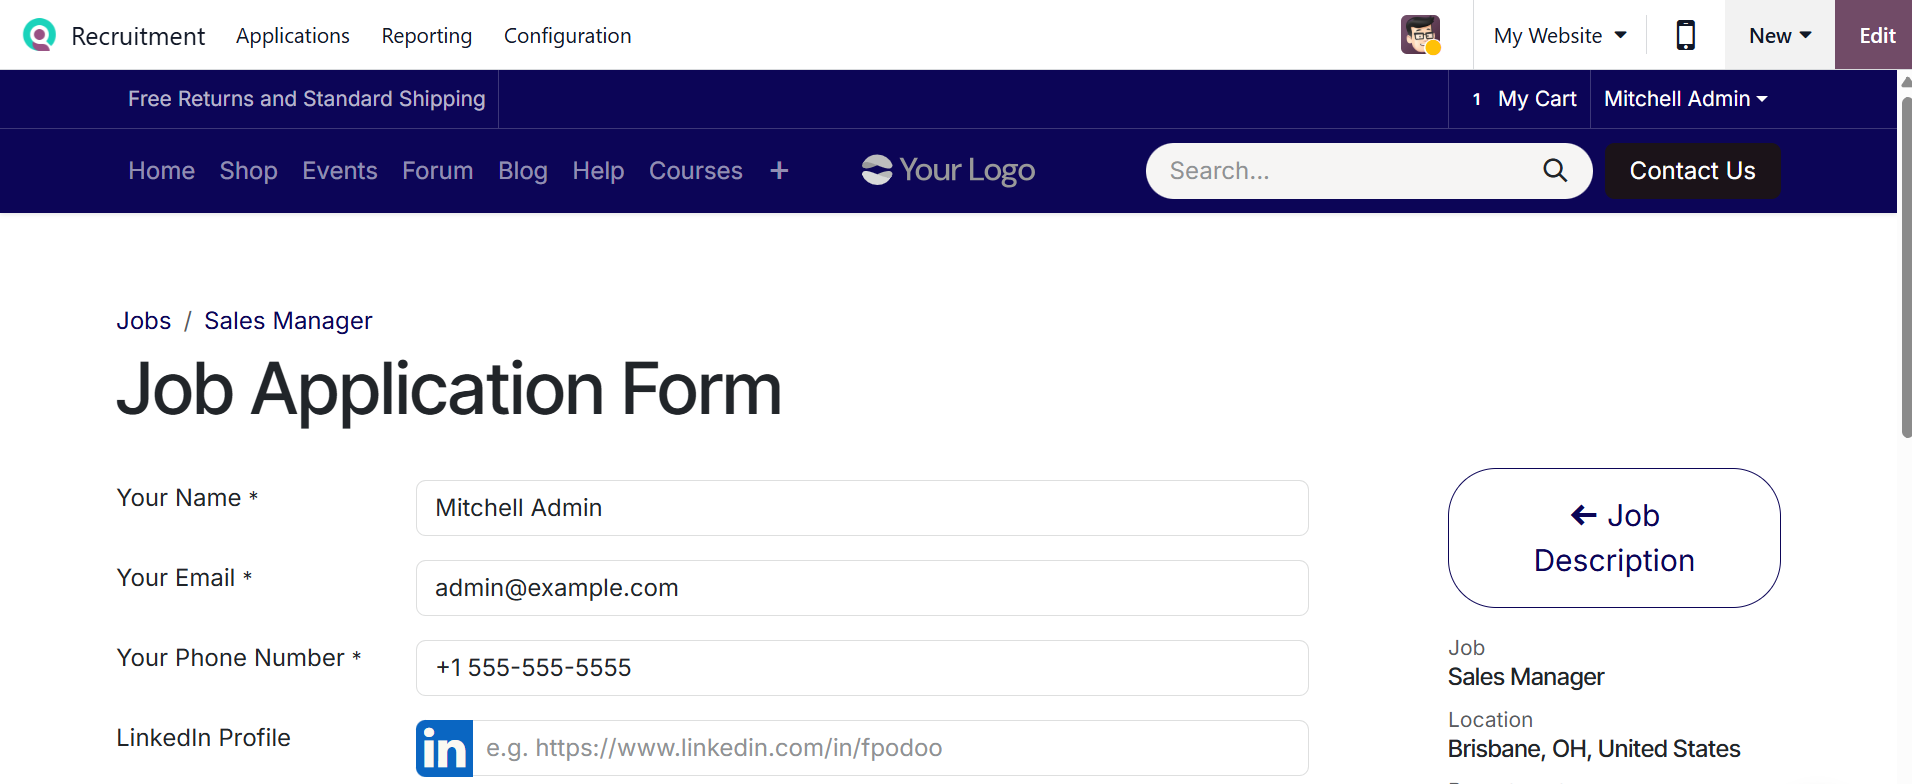
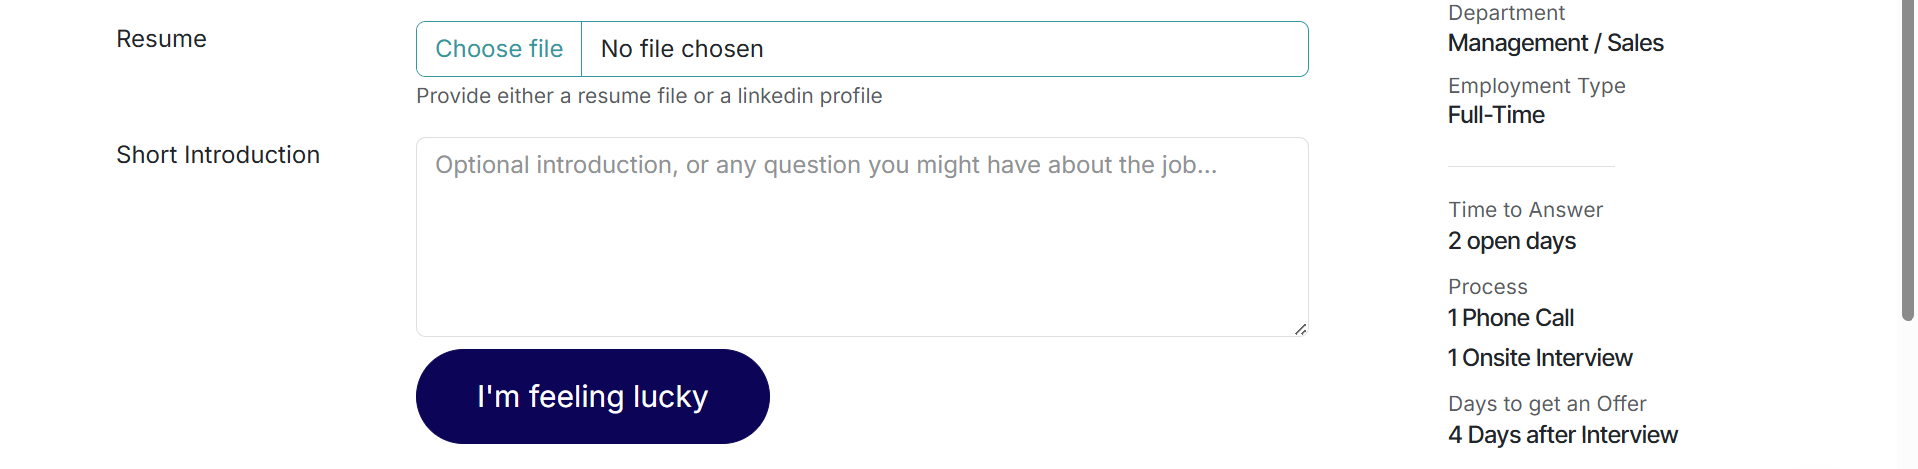
A new form appears for entering your name, email, phone number, LinkedIn profile, resume, and a short introduction. The right panel displays the job and application details. After adding the details, click on the I’m feeling lucky button to submit the form.
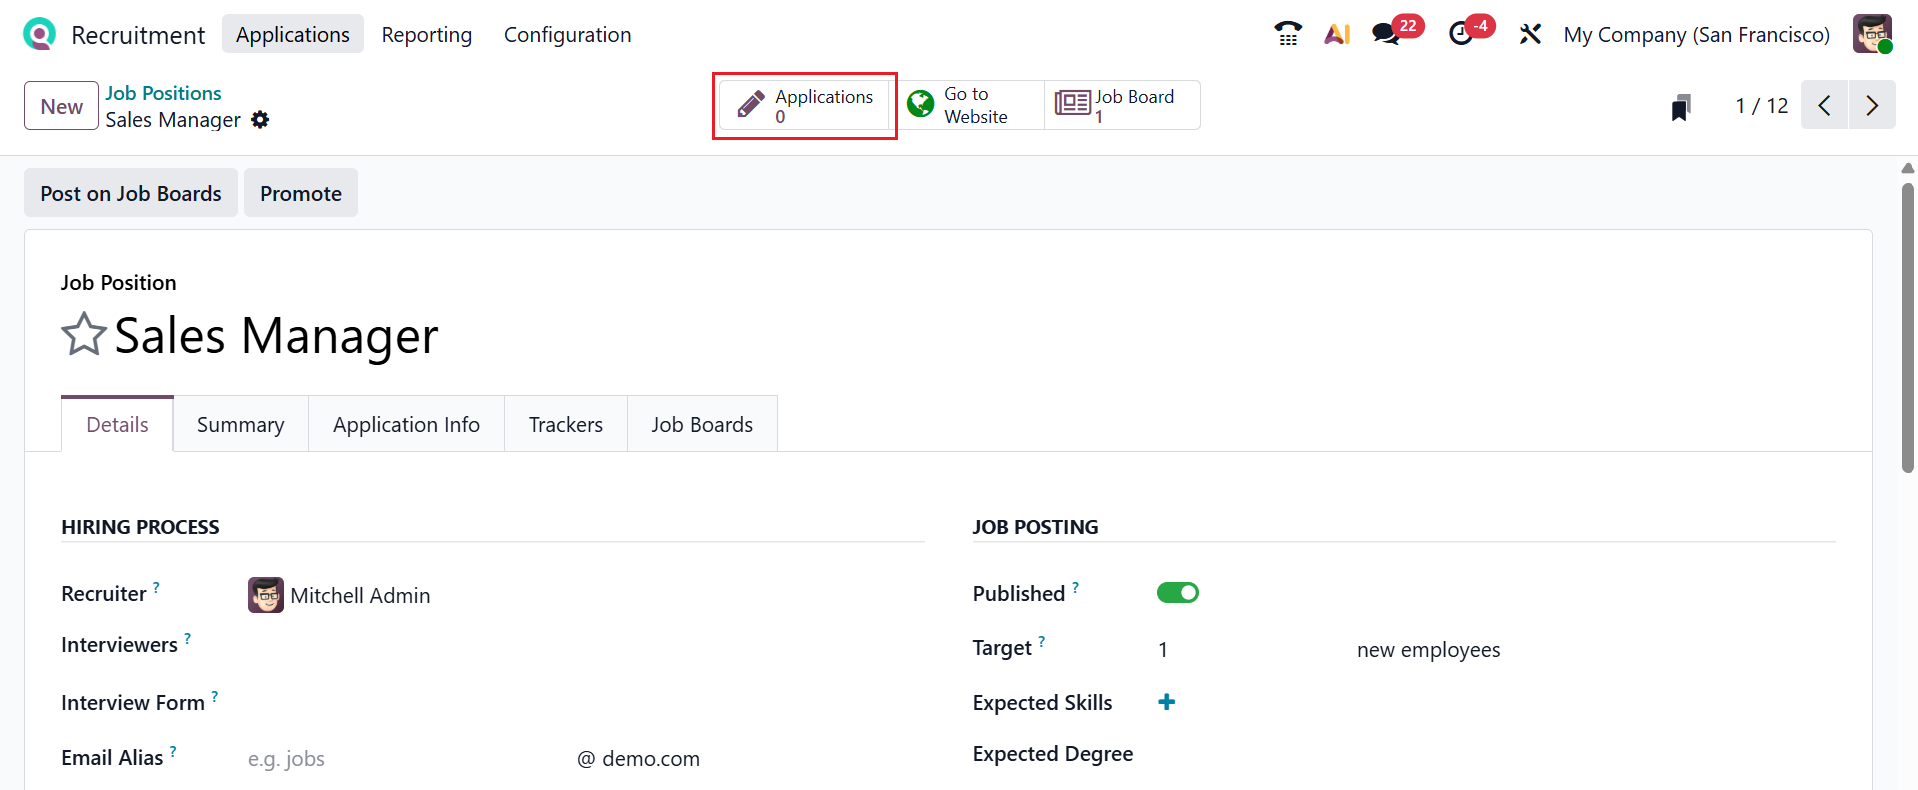
The Application smart button helps you view all the job applications for the job position, as shown below:
1.2 By Talent Pools:
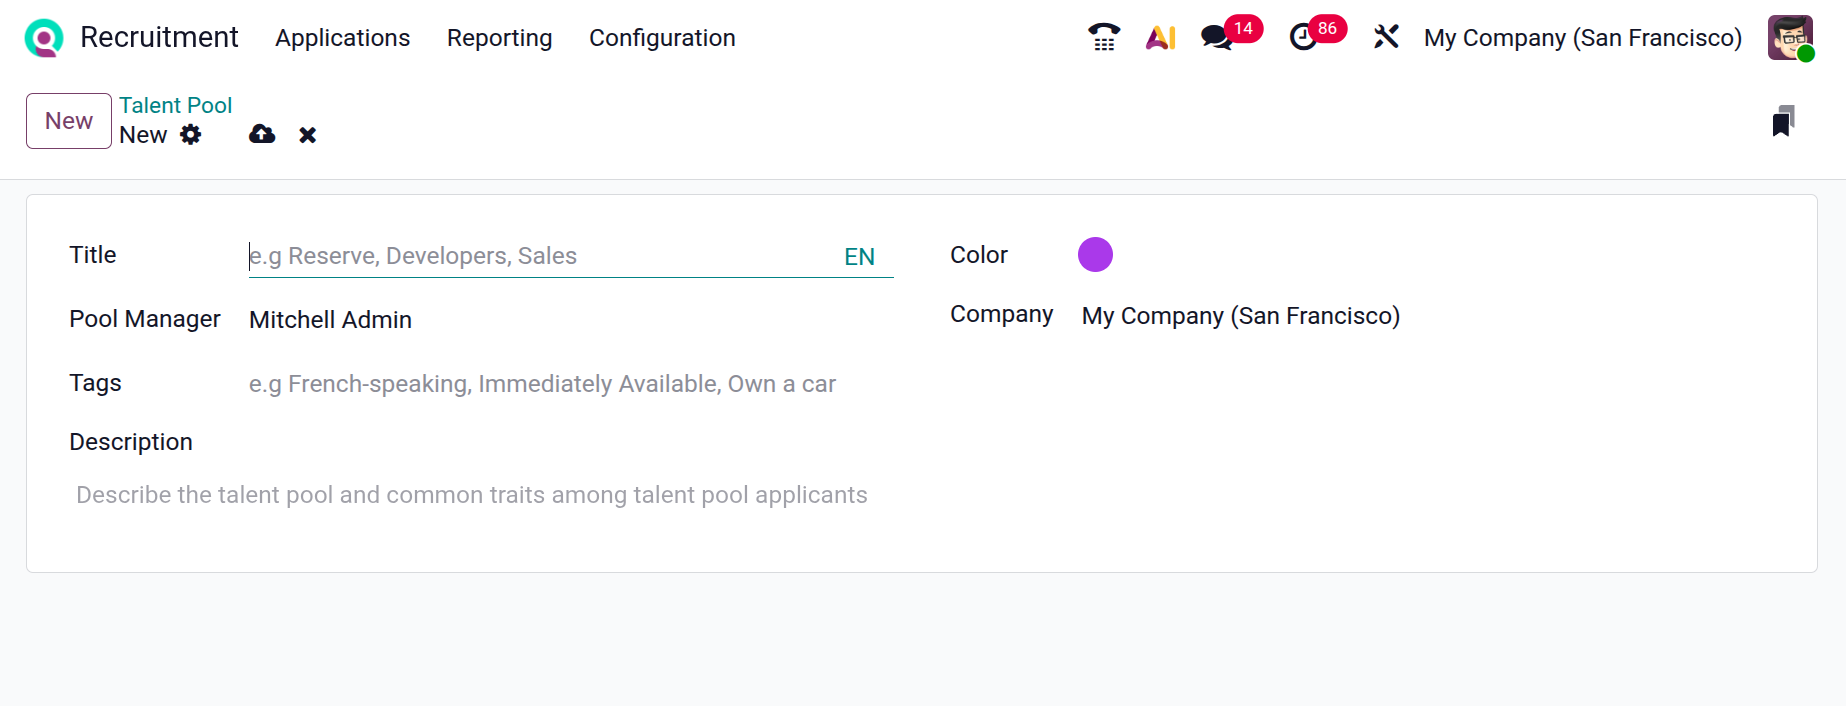
In Odoo 19, By Talent Pools option allows recruiters to group and view applicants based on predefined talent pools, such as job roles, skills, or experiences. It helps quickly identify suitable candidates for current or future vacancies without searching through all applications. To create a new talent pool, click on the New button as shown below:

Add the title for the new talent pool in the Title field. You can add a Pool Manager and a Color. Then, select the Tags, Company, and Description.
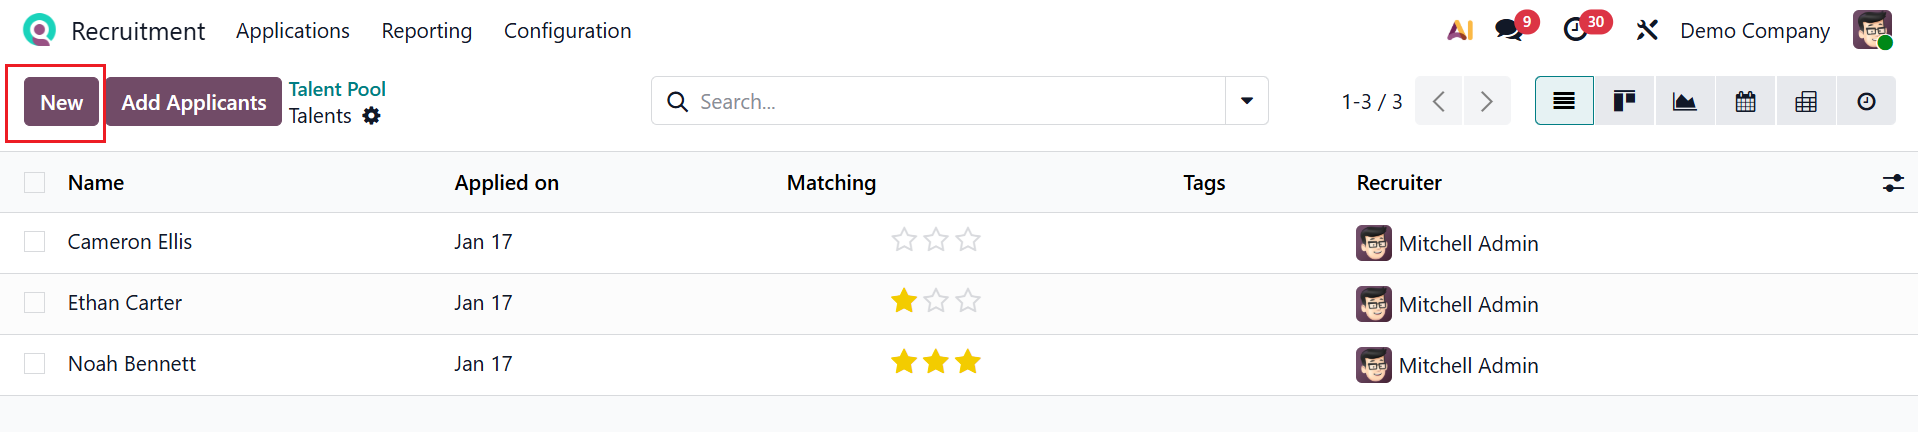
In the selected talent pool, you can add new applicants to the talent pool by clicking on the New button or the Add Applicants button. To add a new applicant, click the New button.
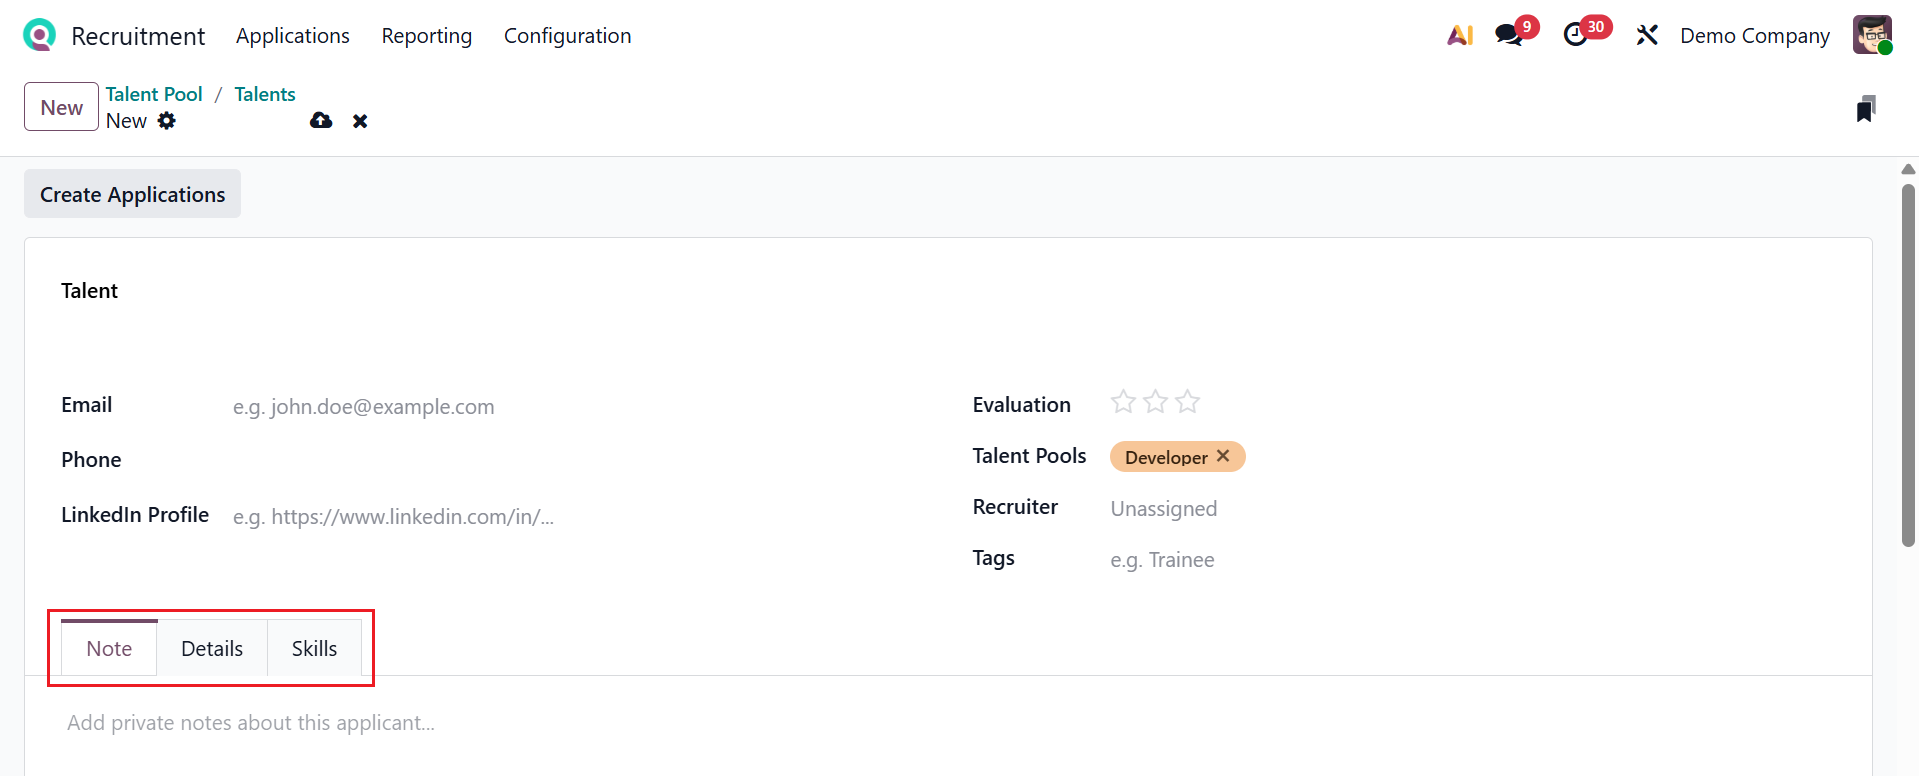
A window will appear where you can fill in the Talent field with the applicant’s name. Then, add their Email, Phone, and LinkedIn profile. You can also add the following details, such as Evaluation, Talent Pools, Recruiter, and Tags.
This section contains three tabs: Notes, Details, and Skills. Under the Notes tab, you can add private notes about the applicant.
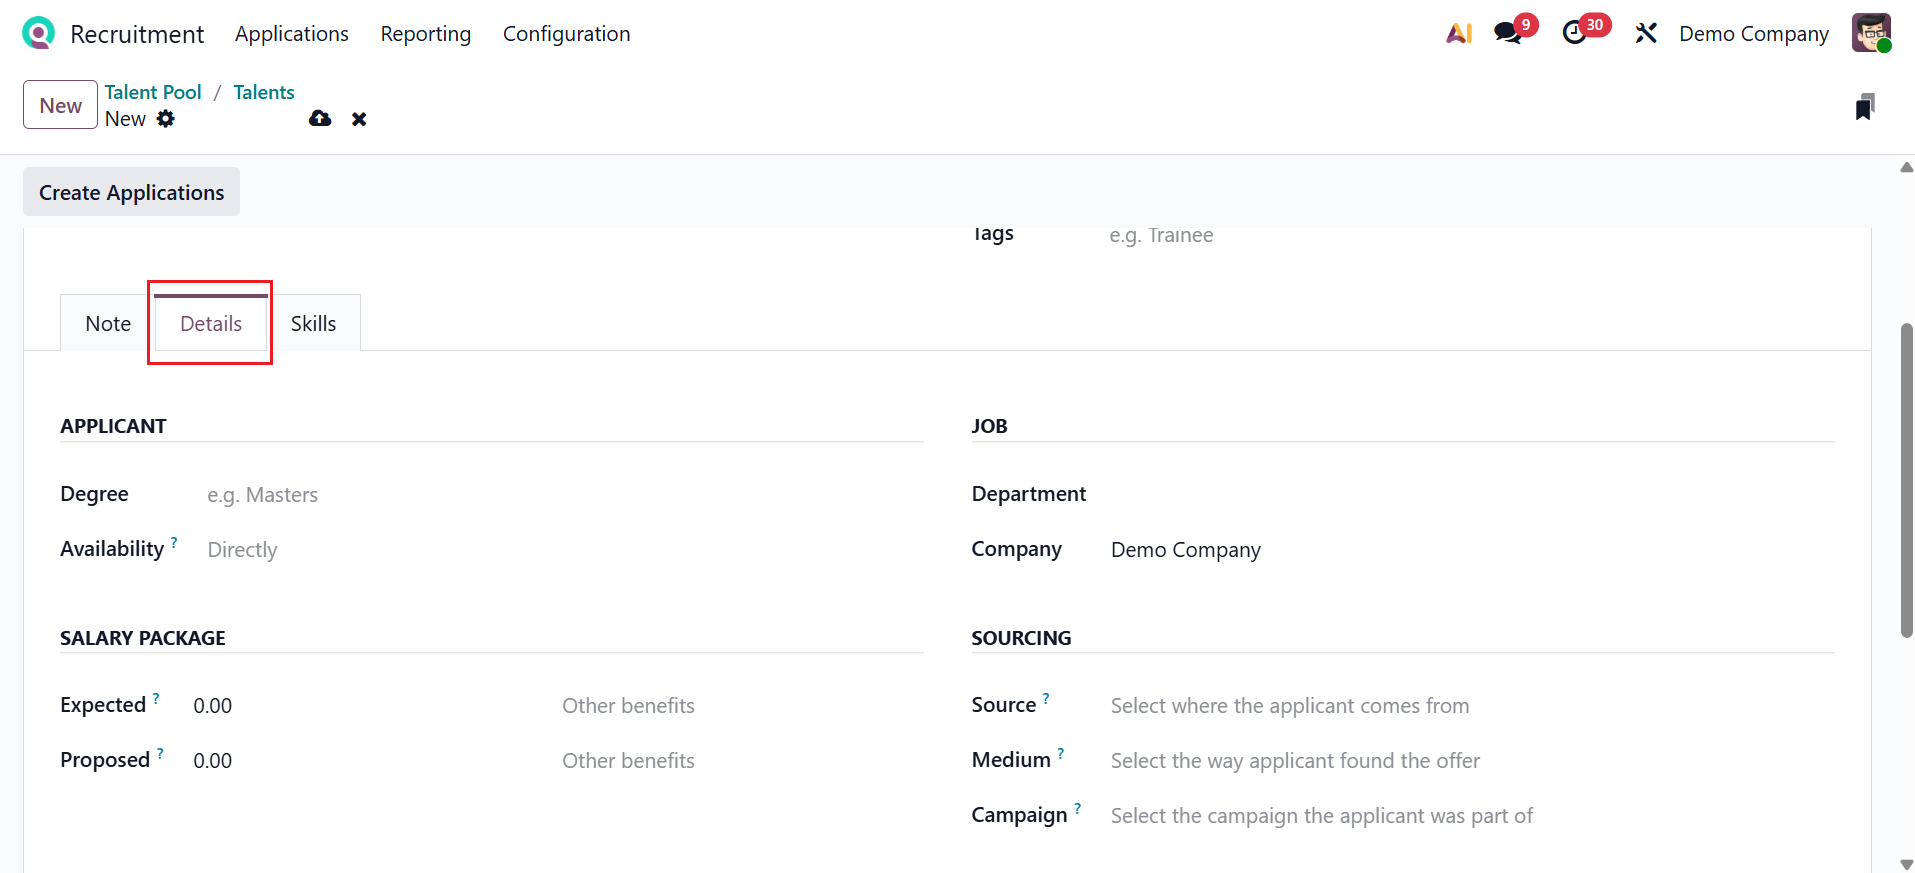
Under the Details tab, you can see four sections to add details of the applicant, such as Applicant, Salary Package, Job, and Sourcing. Under the Applicant section, add the Degree and Availability of the applicant to start working. Under the Salary Package section, add the Expected and Proposed salaries. Under the Job section, mention the Department and Company of the applicant. Under the Sourcing section, add the Source (where the applicant comes from), Medium (the way the applicant found the offer), and Campaign (the campaign the applicant was part of).
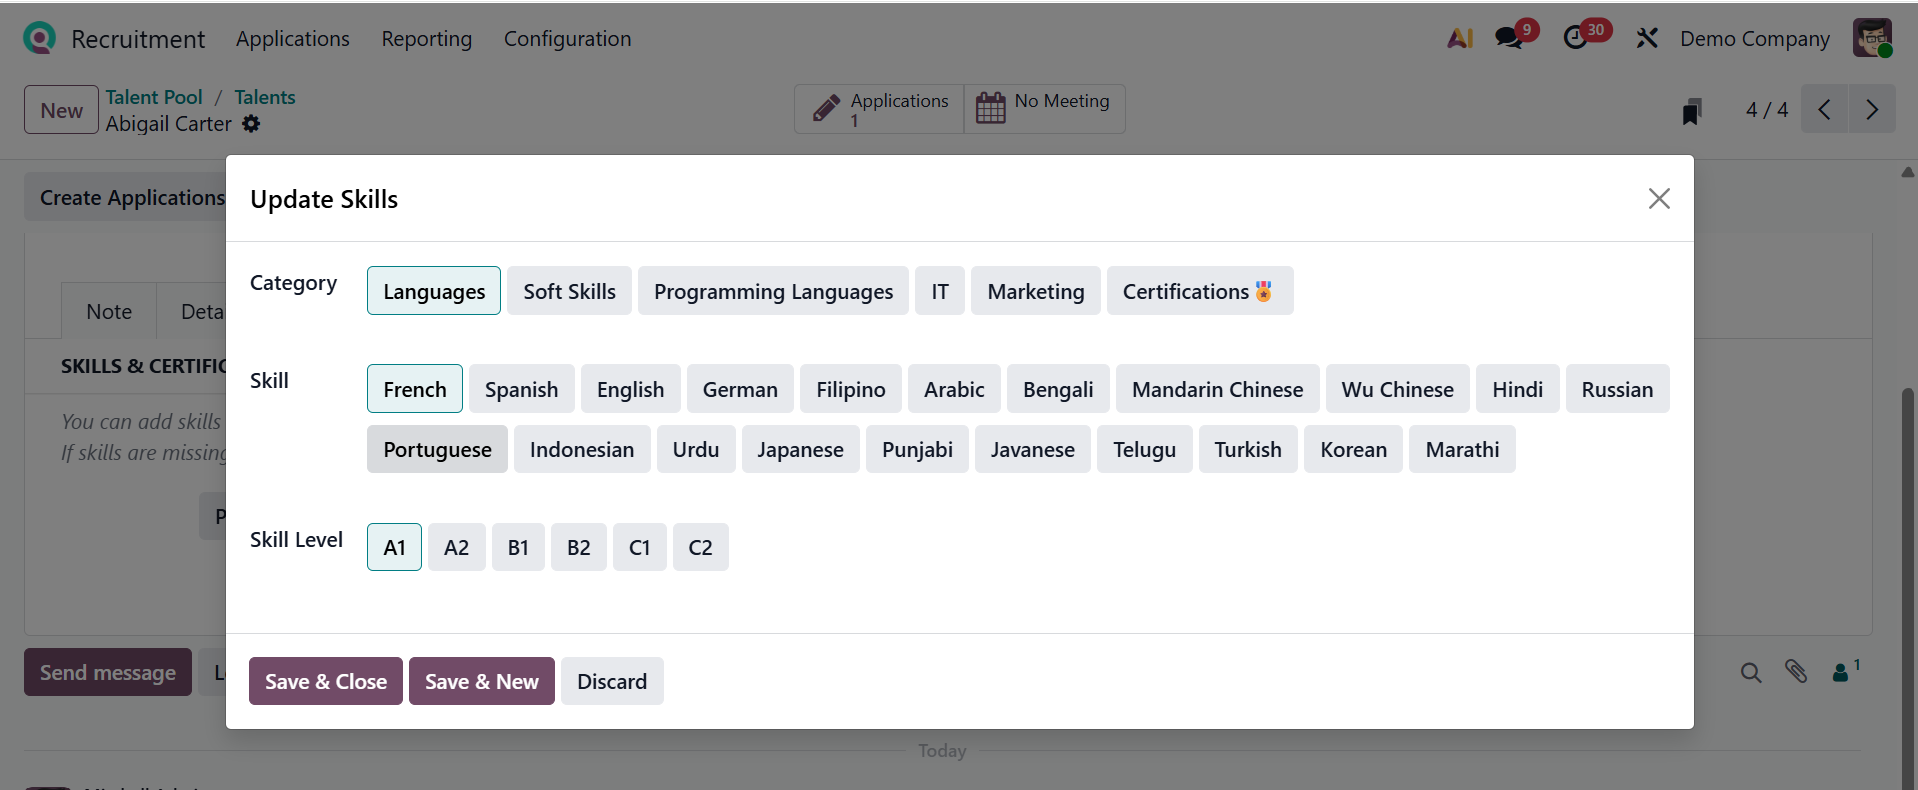
In the Skills tab, click Pick a skill from the list to choose the applicant’s skills in a pop-up window.
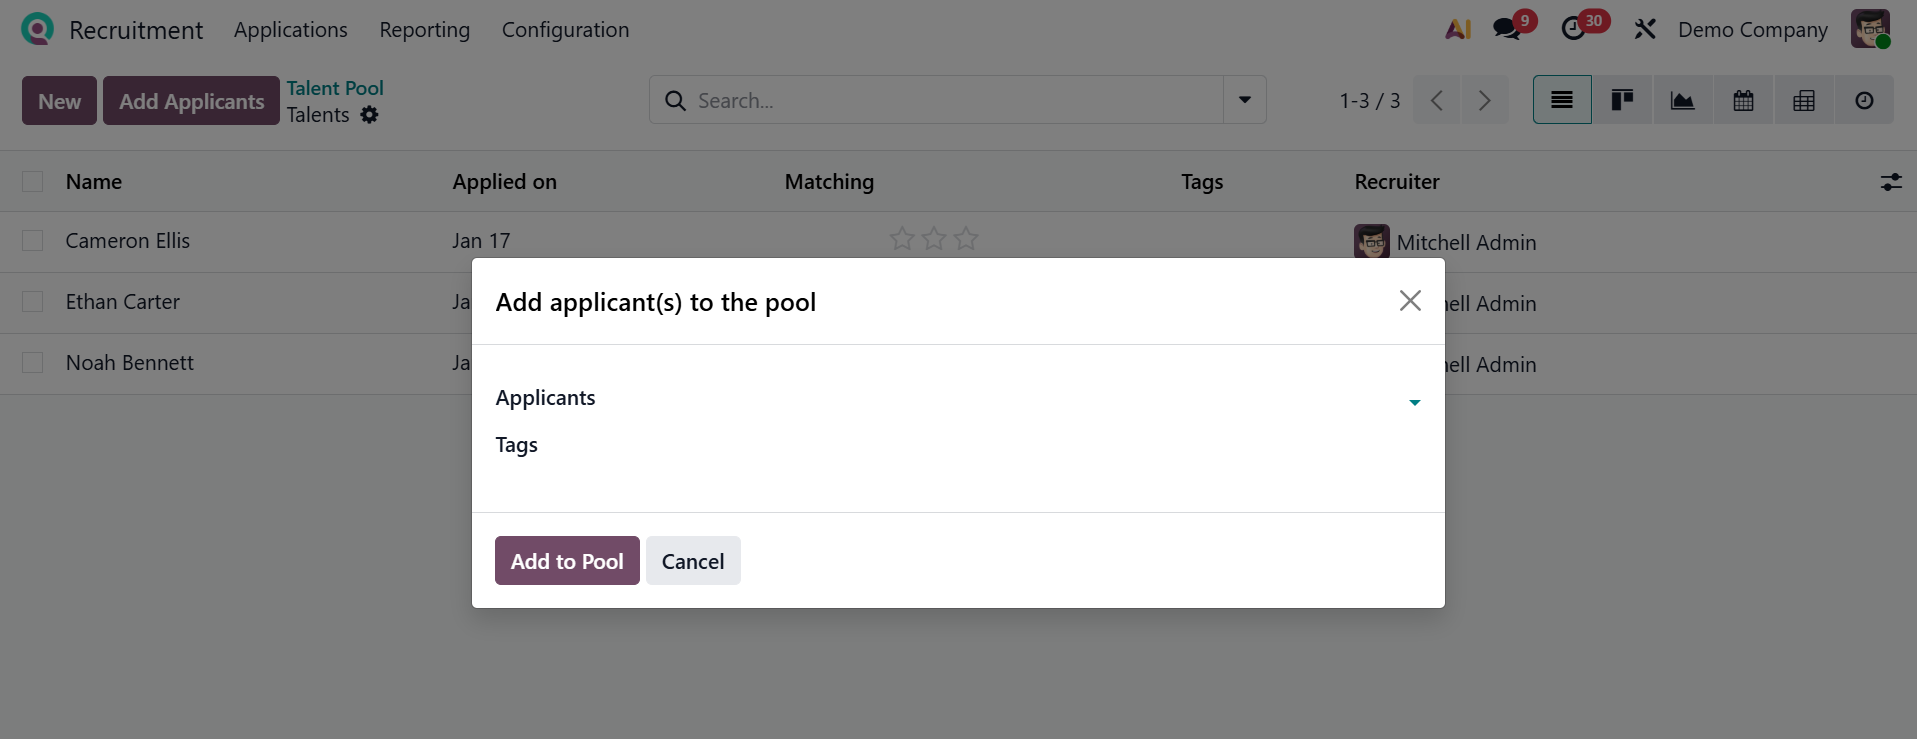
Clicking Add Applicants opens a pop-up window, as illustrated below. There, you can add the name of the Applicant and select appropriate Tags. Click the Add to Pool button to proceed.
1.3 All Applications:
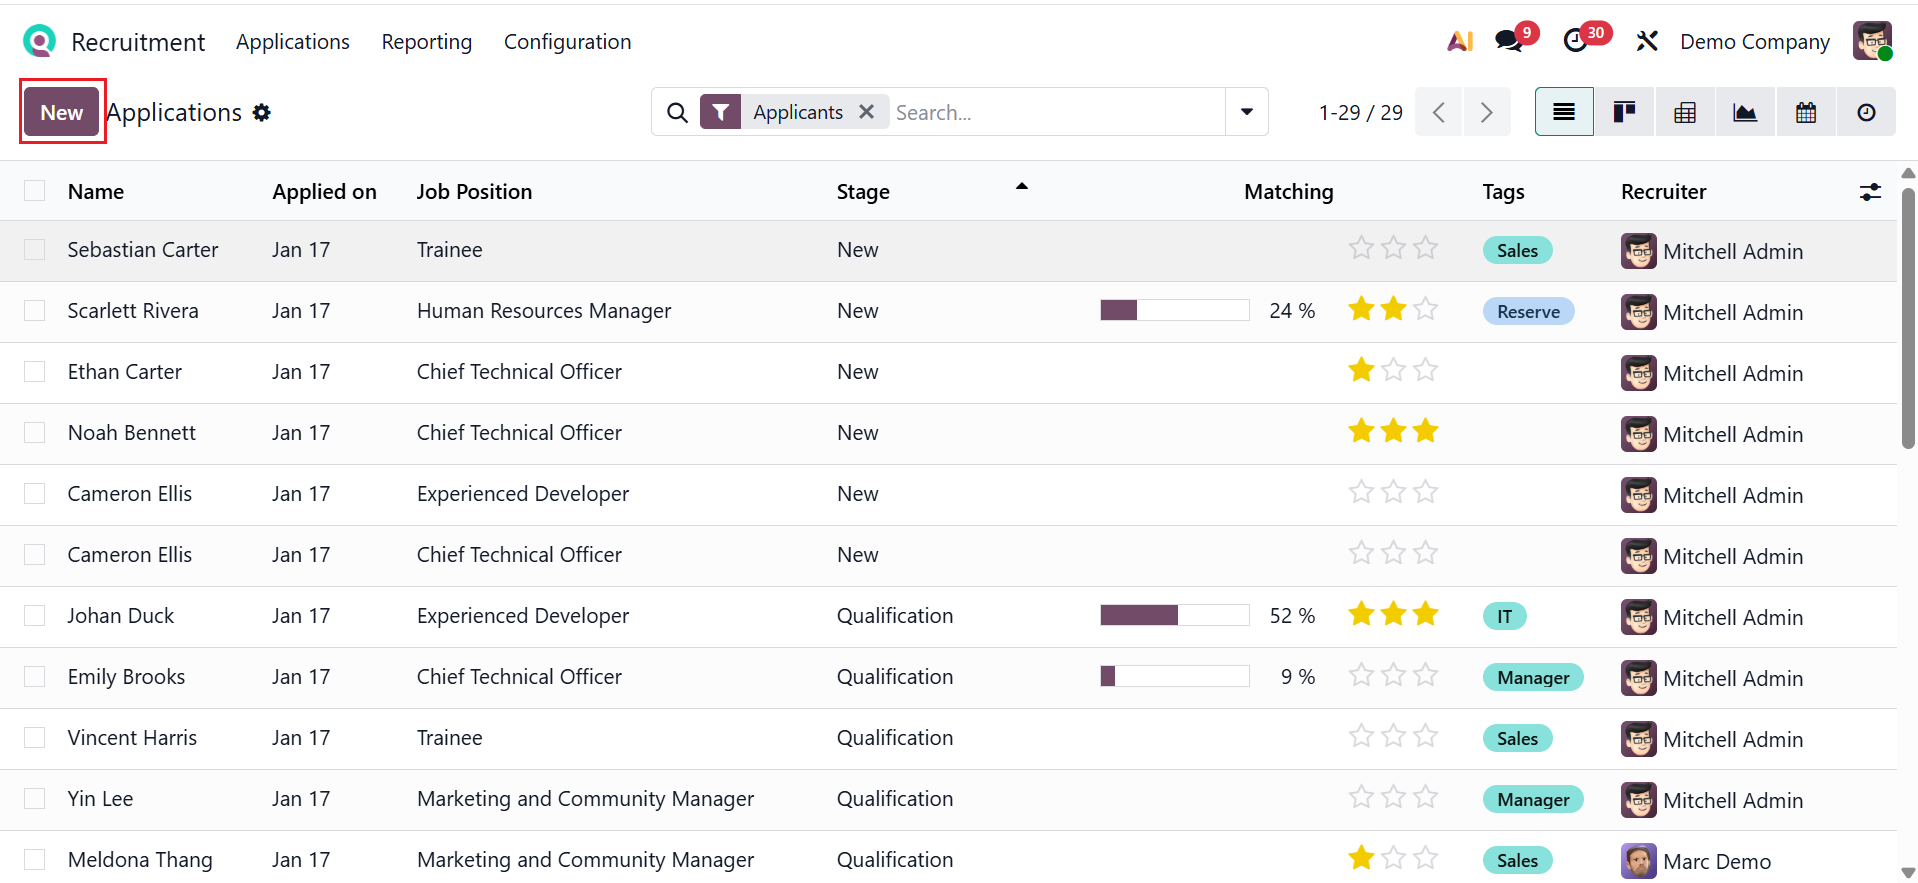
In Odoo 19 Recruitment, the All Applications option shows a complete list of every job application submitted across all job positions. It allows recruiters to easily review, filter, and manage candidates from a single centralized view. Here, you can see the details of the records, such as Name, Applied On, Job Position, Stage, Matching, Tags, and Recruiter. To add an application, click the New button.
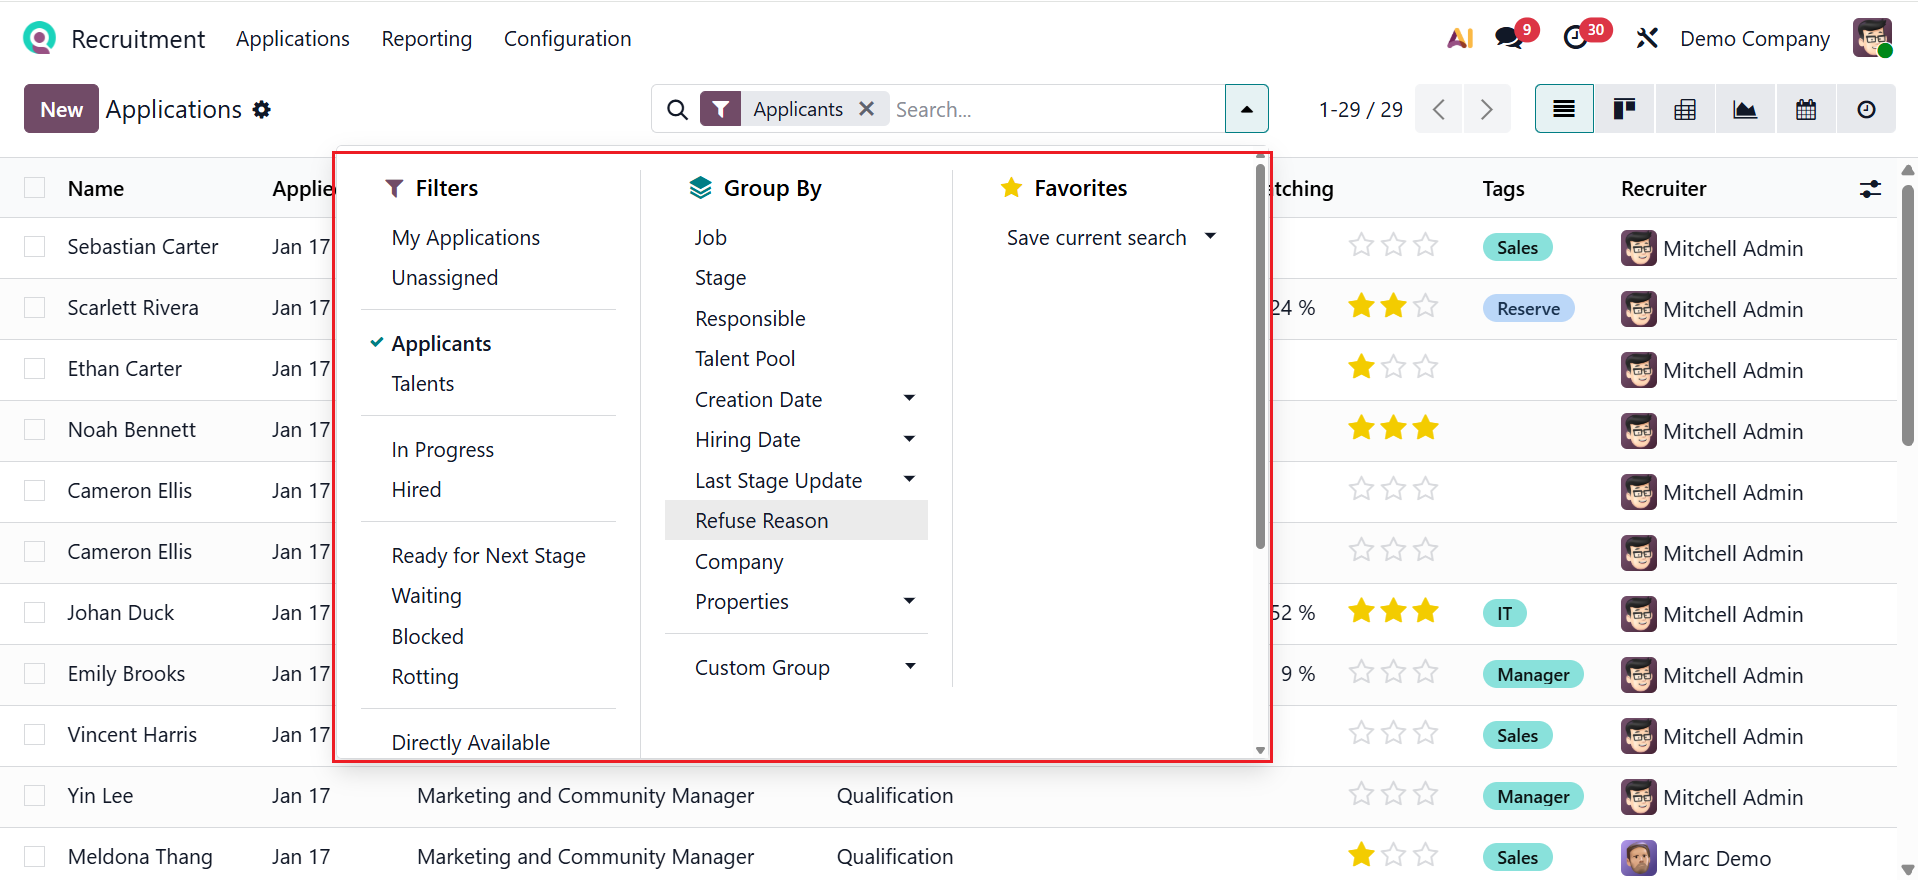
You can then choose from different views: Kanban, List, Pivot, Graph, Calendar, or Activity. Access Filters, Group By, and Favorites from the search bar drop-down menu. You can filter the data based on My Applications, Unassigned, Applicants, Talents, In Progress, Hired, Ready for Next Stage, Waiting, Blocked, Rotting, Directly Available, Creation Date, Last Stage Update, Archived, Refused, and Custom Filter. You can group the data based on Job, Stage, Responsible, Talent Pool, Creation Date, Hiring Date, Last Stage Update, Refuse Reason, Company, Properties, and Custom Filter. You can also save the search as Favorites.
Clicking the New button will open a window where you can add a new application, as shown below. Then, add the following details as mentioned above.
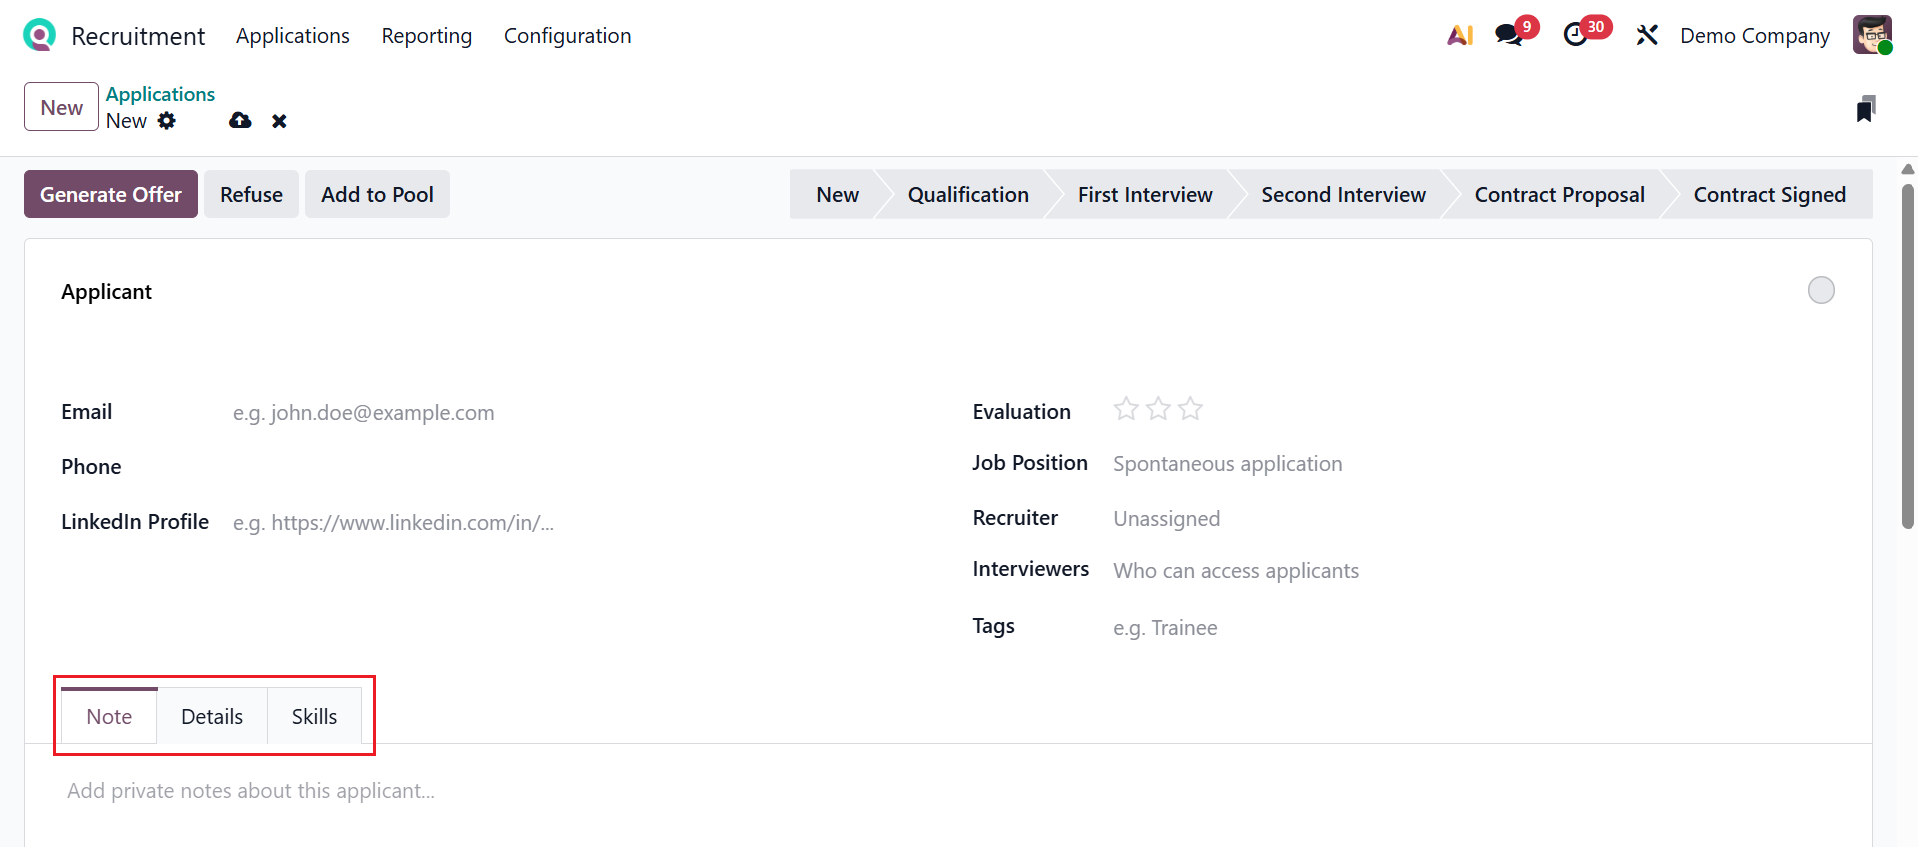
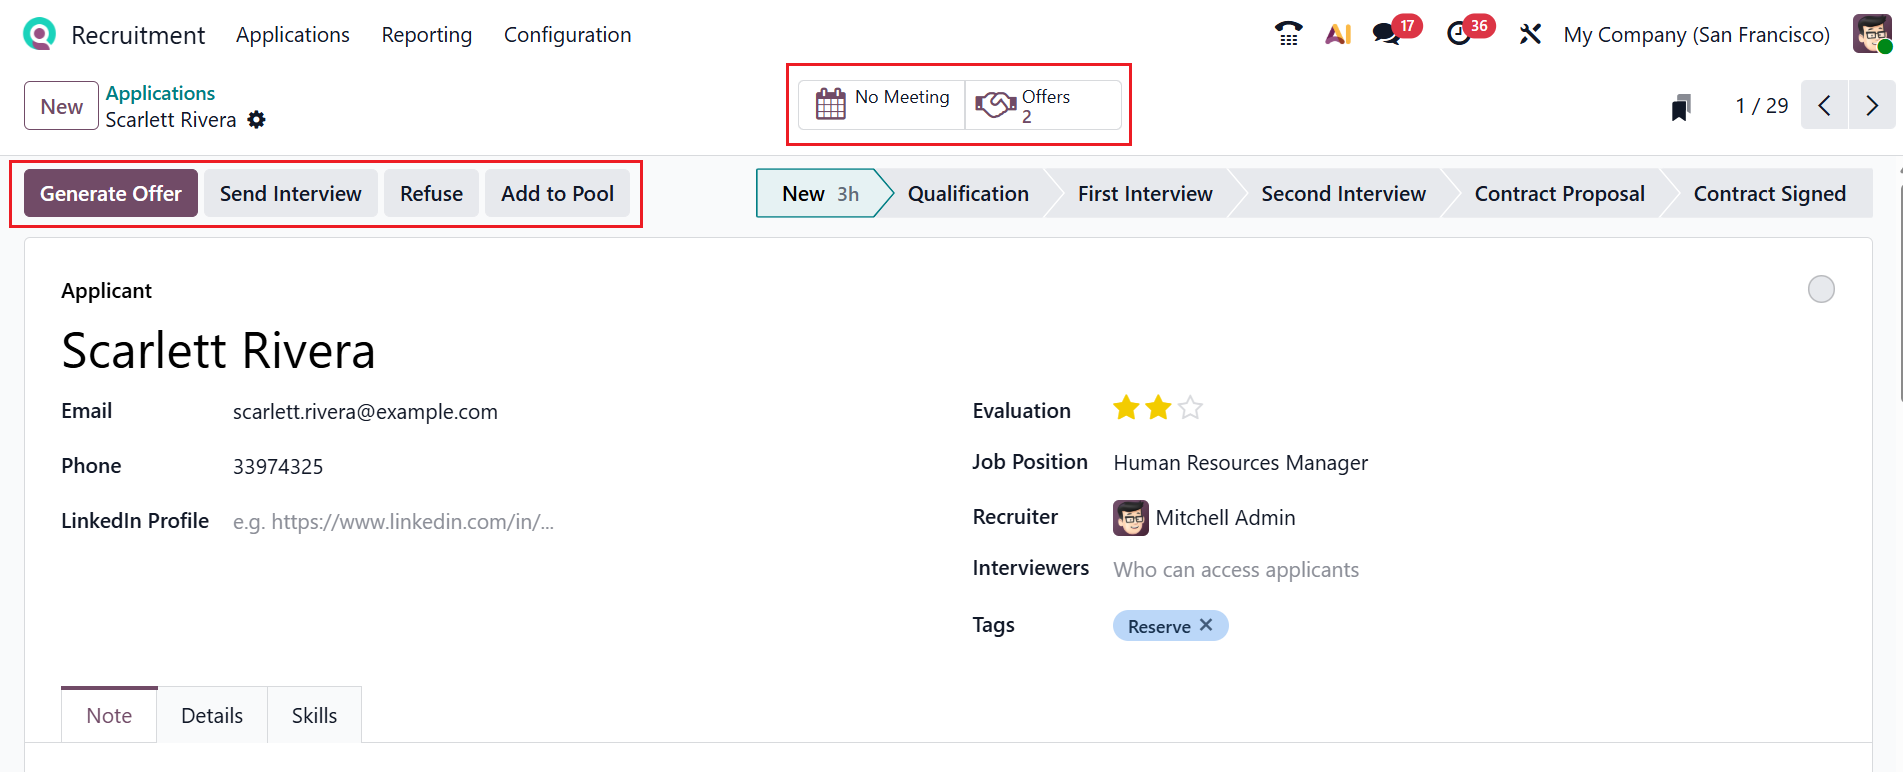
Here, the Generate Offer button helps you to create a job offer, and the Refuse button helps you to reject the application. Click on the Add a Pool button to add the applicants to the talent pools. Interviews with candidates can be scheduled via the Meetings smart button. The Offers smart button shows the list of job offers for the candidates.
*Managing Interviews and Hiring:
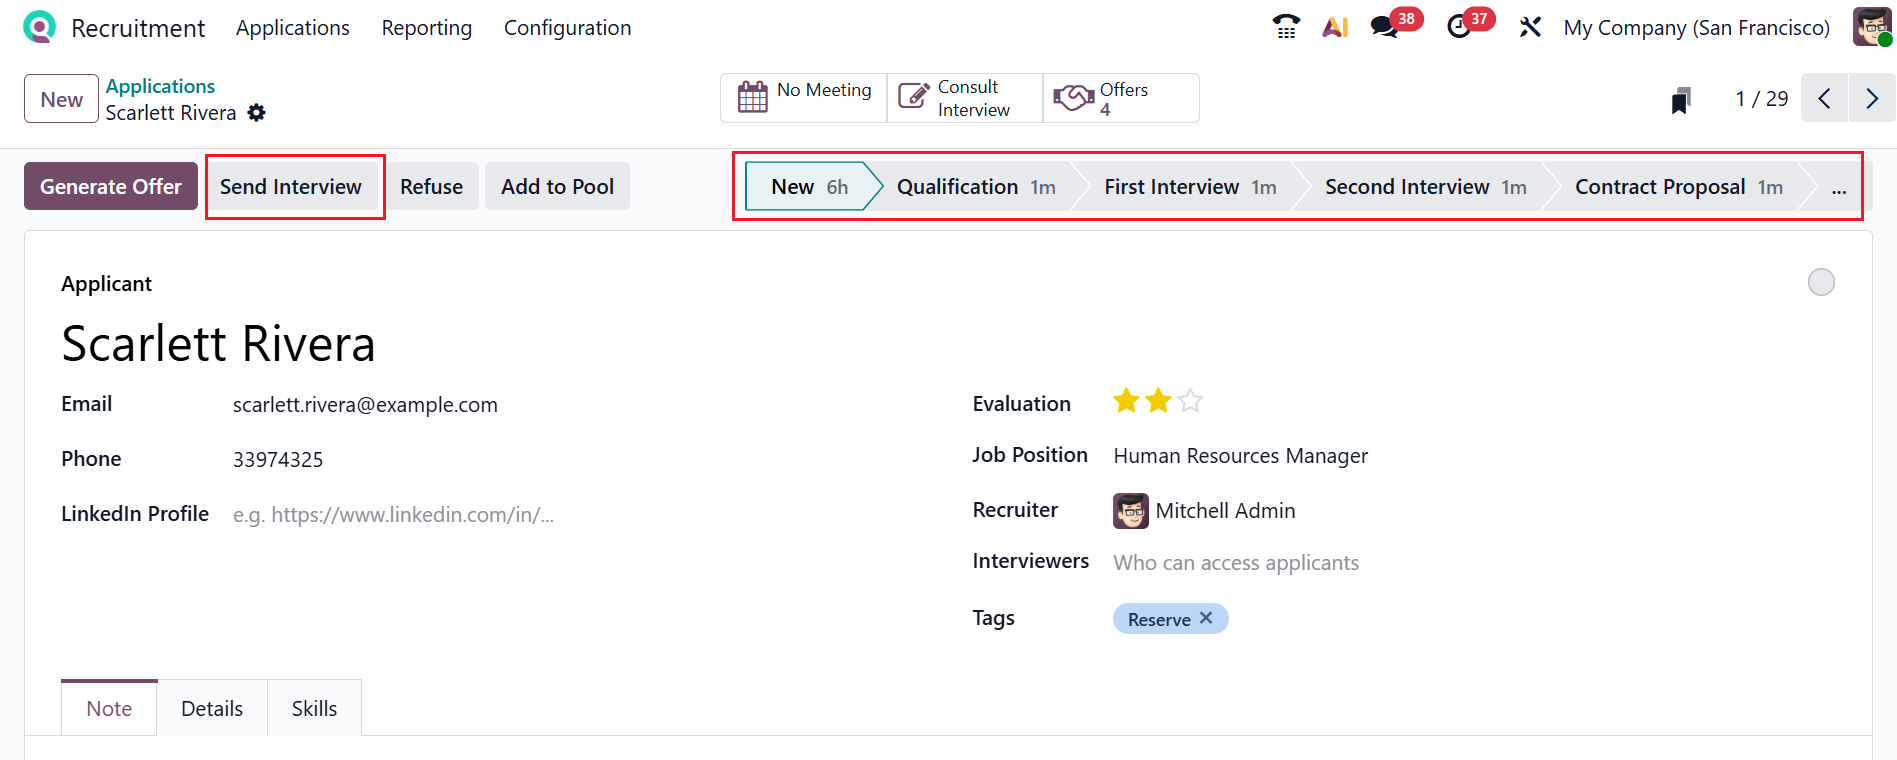
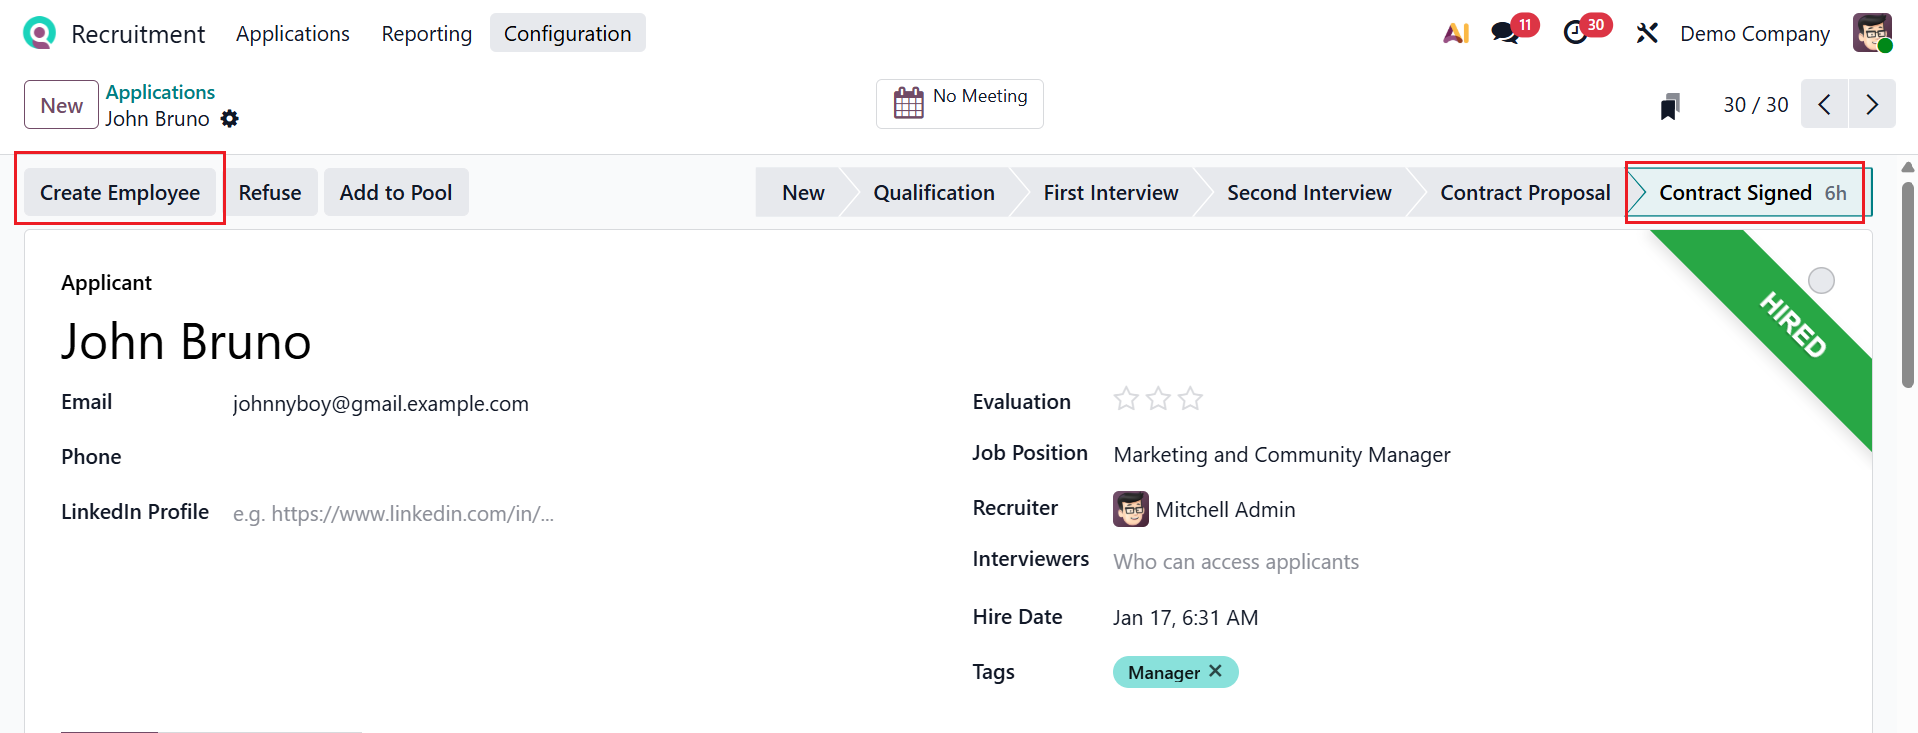
You can see the various stages of recruitment here, such as New, Qualification, First Interview, Second Interview, Contract Proposal, and Contract Signed. You can send an interview to the applicant using the Send Interview button a shown below:
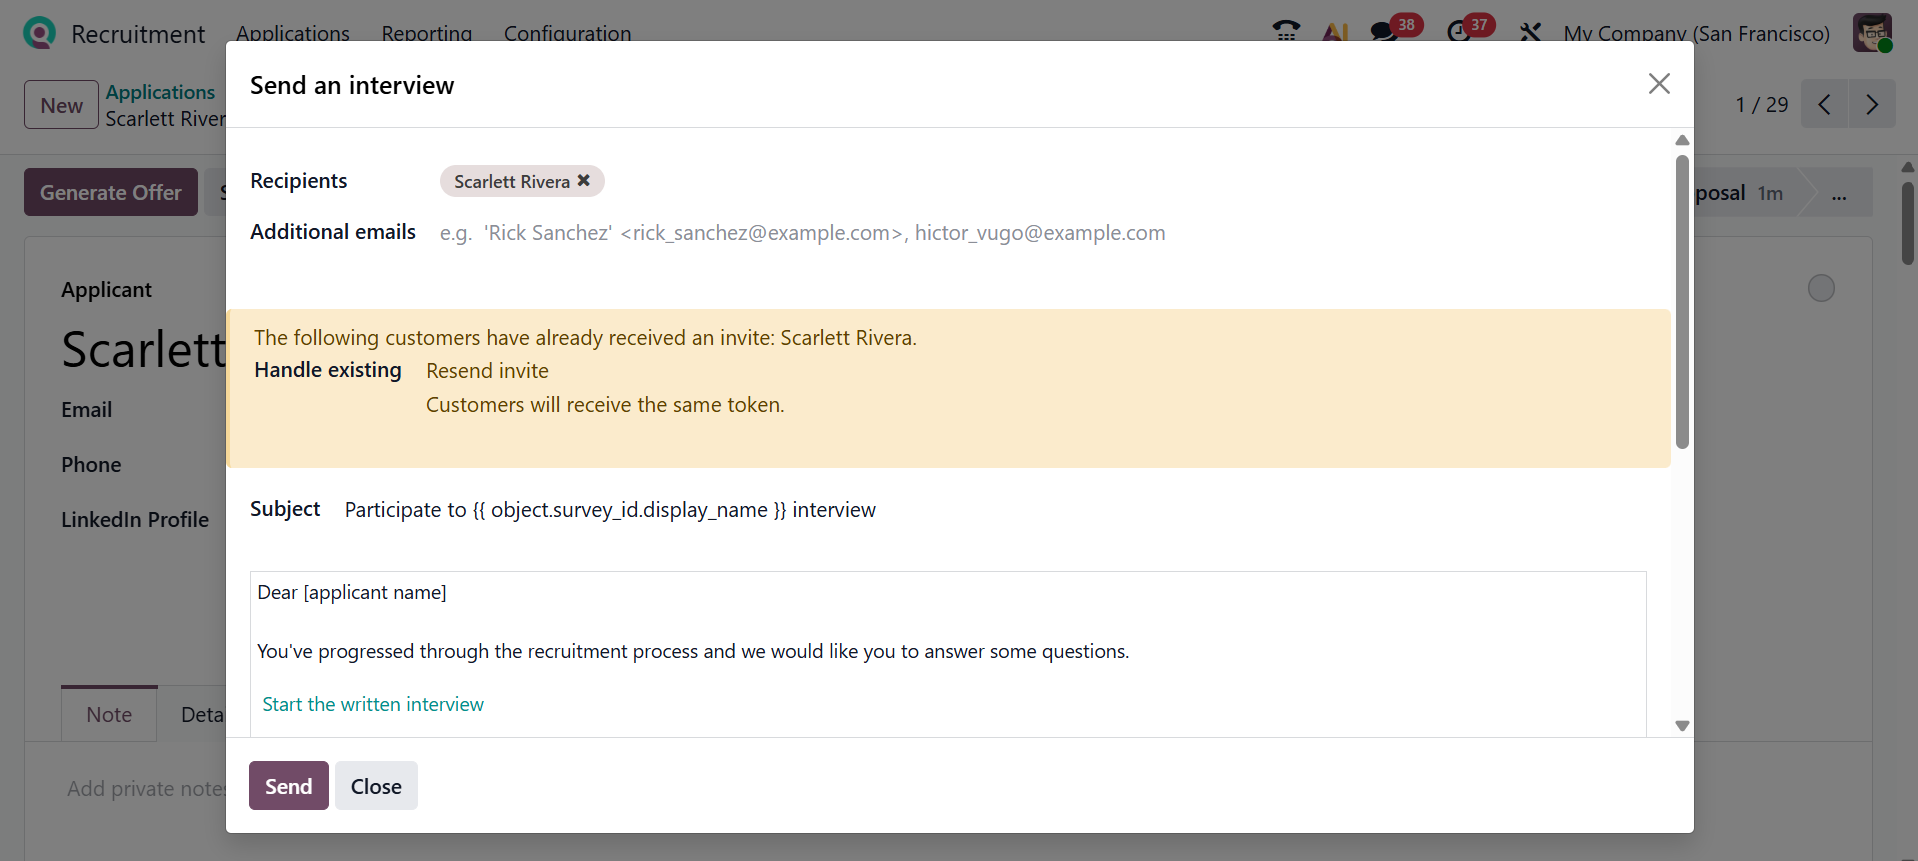
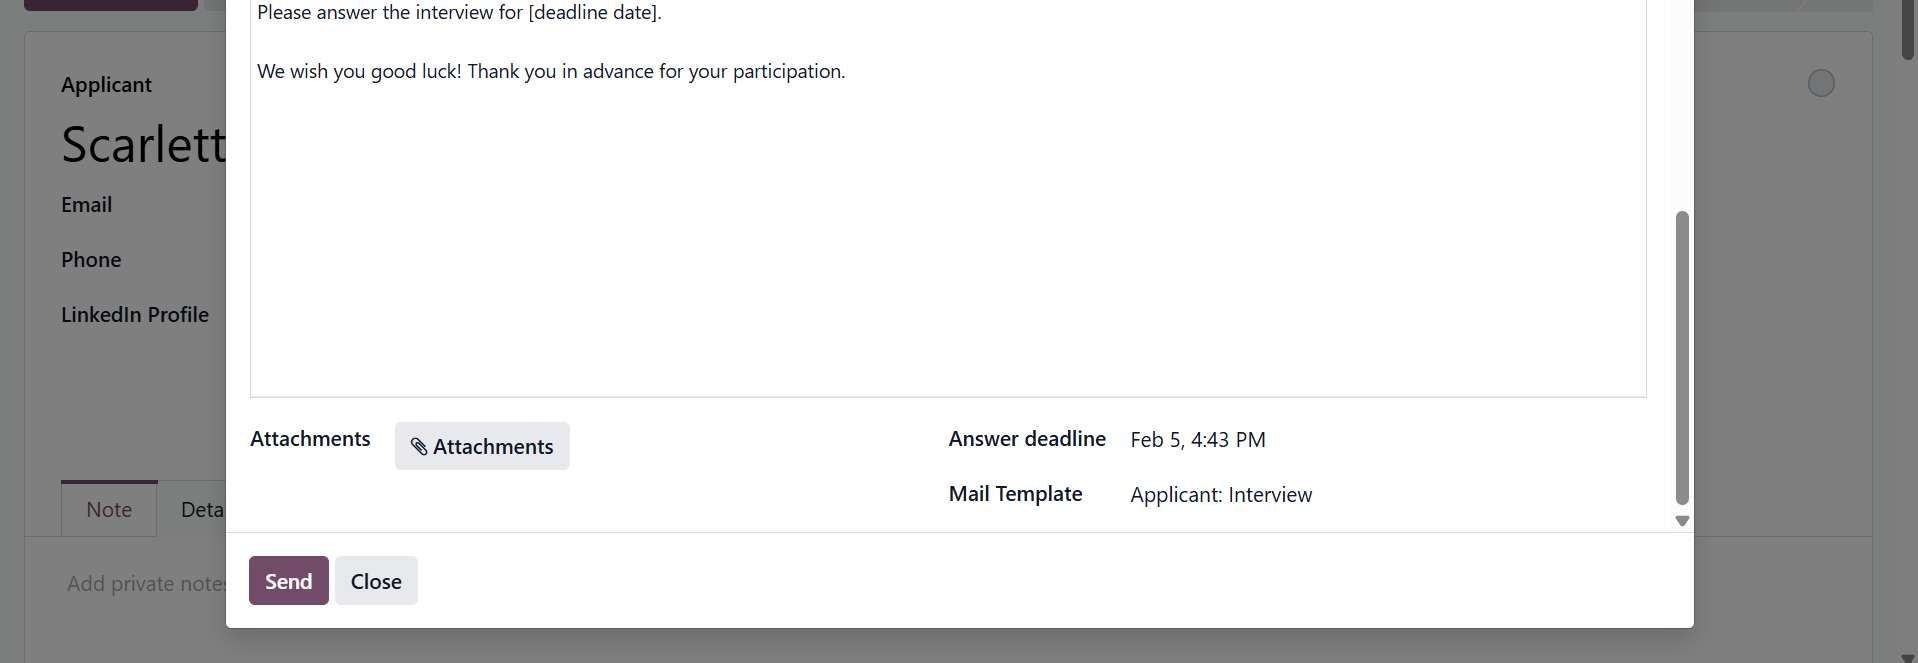
A pop-up screen will appear, where you can add the details such as Recipients, Additional emails, Subject, and Body. If needed, you can add files to the emailed interview by using the Attachments button. In the Answer deadline field, add a specific date to complete the emailed interview. In the Mail Template field, select a template from the drop-down menu. Then, click on the Send button.
After completing the recruitment process, the recruiter signed the contract. When the applicant is hired, their card moves to the Contract Signed stage. Use the Create Employee button to convert them into an employee. If needed, you can refuse the candidate or add the candidate to the talent pool.
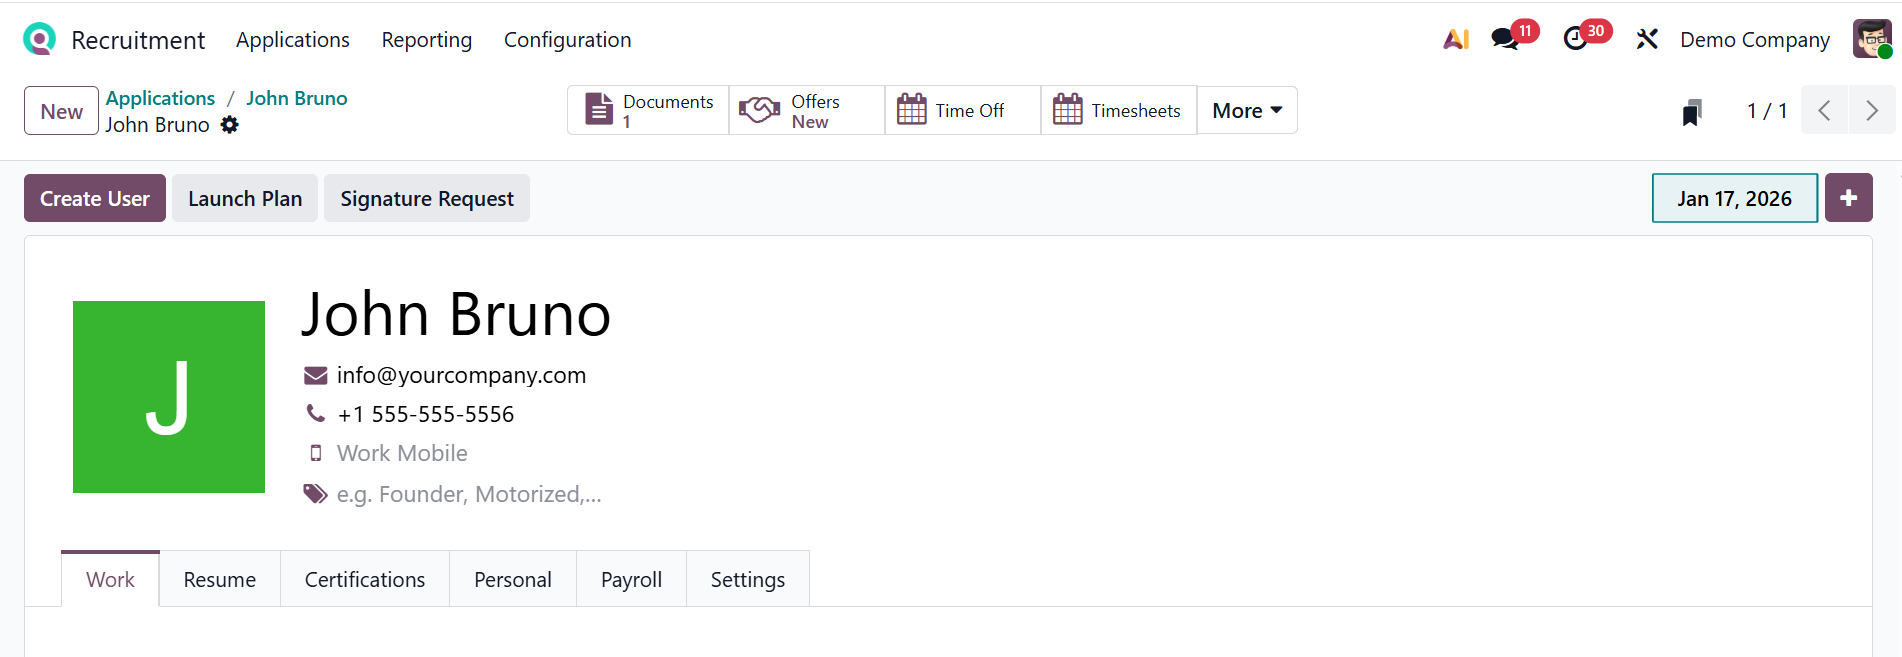
The applicant becomes an employee when you click the Create Employee button. Then, you will move to the employee record form, as shown below, which is already explained in the Employee module.
1.4 Offers:
In Odoo 19’s Recruitment module, the Offers option lets recruiters generate and send job offers to candidates directly from their application, including position, salary, and contract details. Here, you can see a list of job offers, including details such as Date, Title, Employee Budget, Employee Job, and State.

Then, open a pre-configured job offer as shown below. There, you can see the details of the job offer, such as Title, Contract Title, PDF Template, Salary, Job Title, Employee Job, Department, Contract Date, and Salary Simulation Preview.
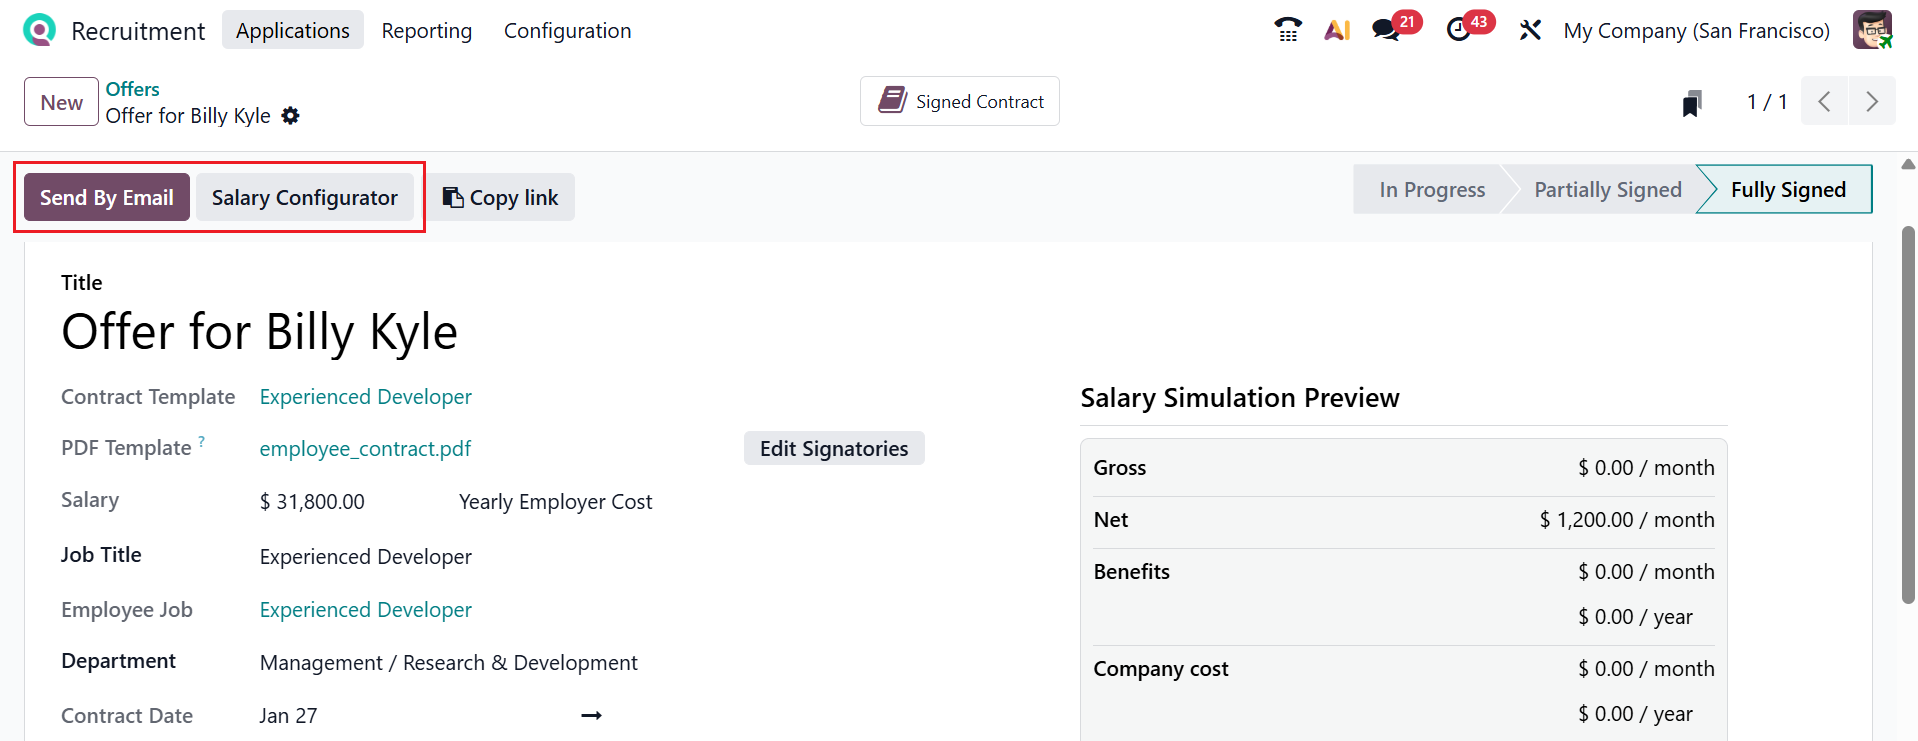

The Salary Configurator button allows recruiters to build a complete compensation package by selecting wage, benefits, bonuses, and perks in one place. It helps standardize offers while giving flexibility to tailor salary structures per candidate.
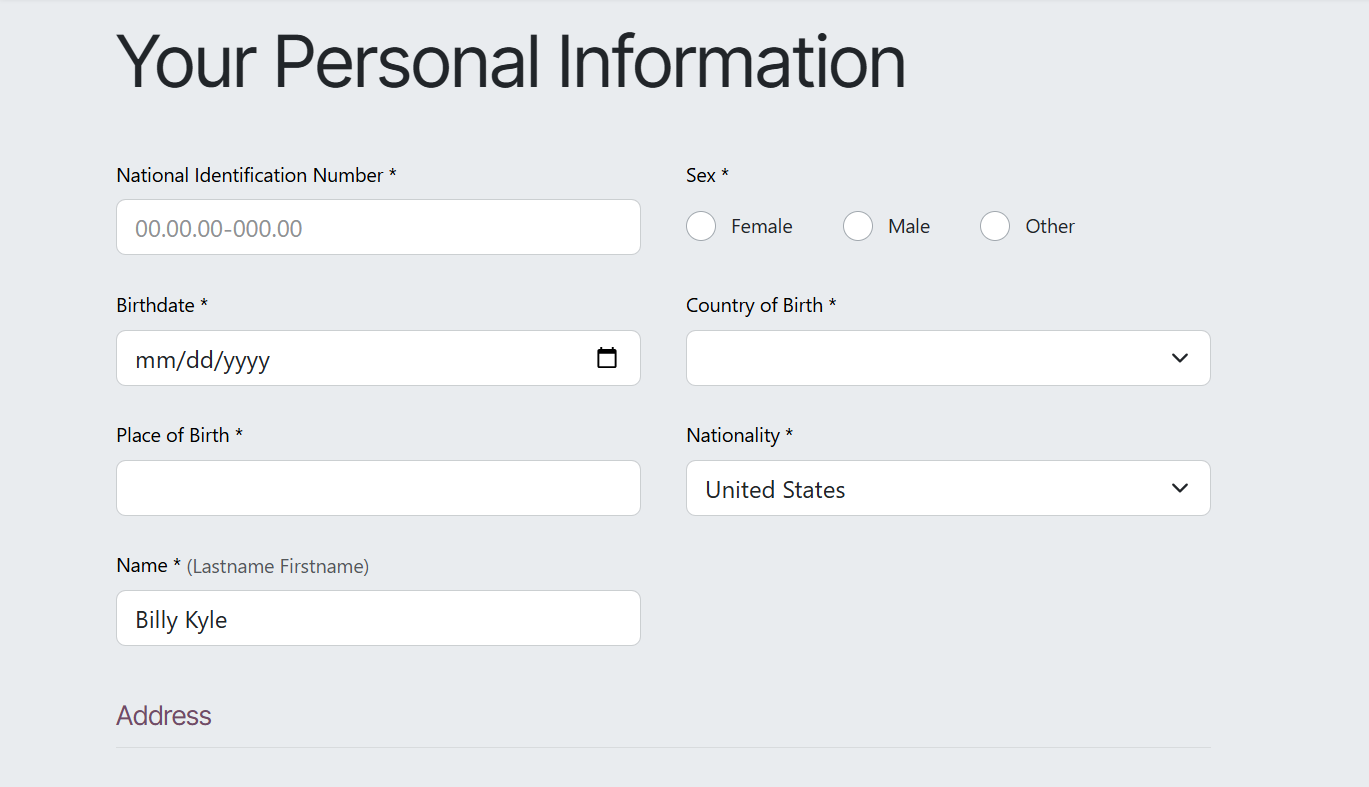
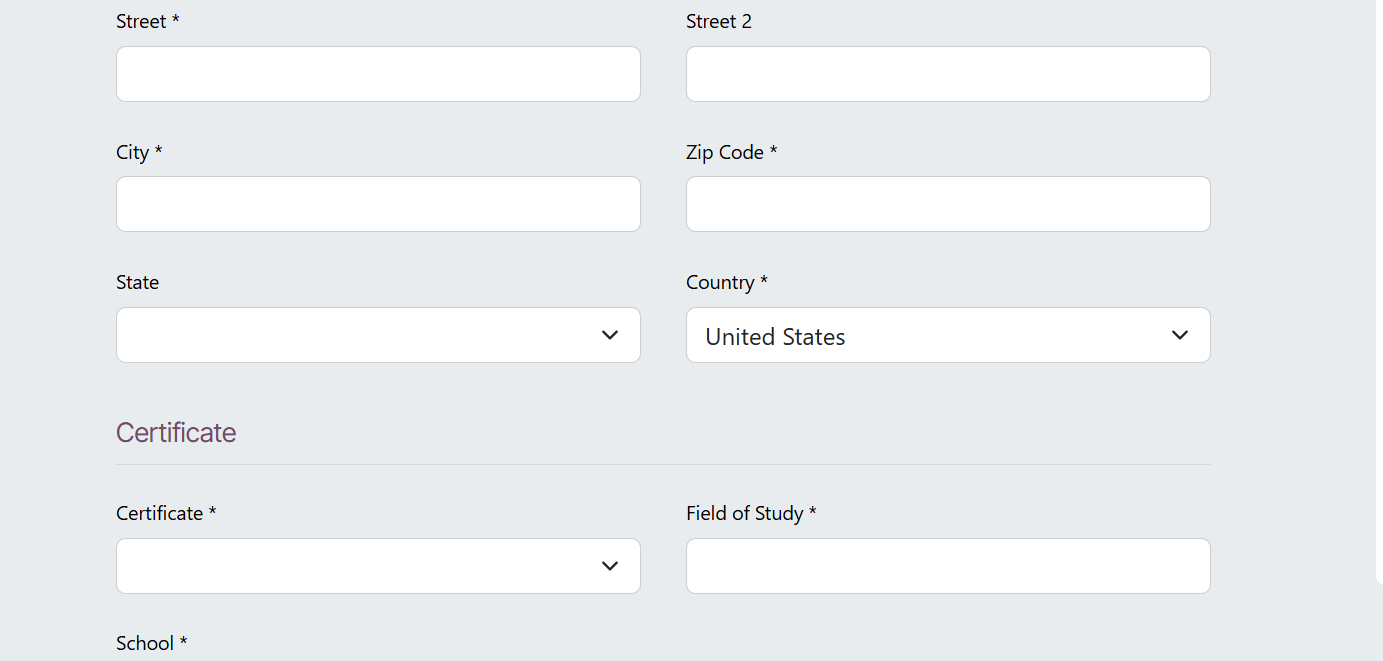
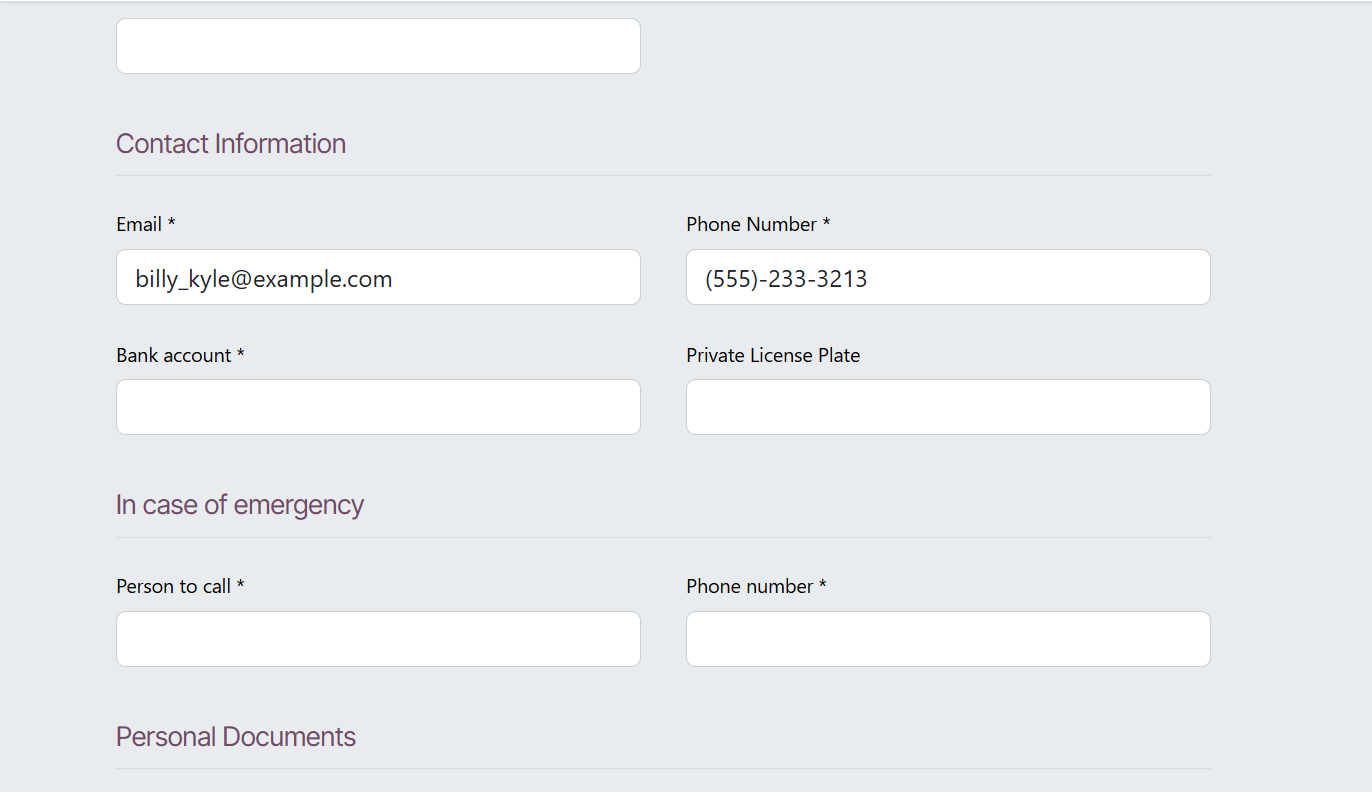
On the right side of the screen, you can view the details of the monthly salary of the employee. You can also specify the number of extra days off. In the webpage below, add the personal information of the applicant.
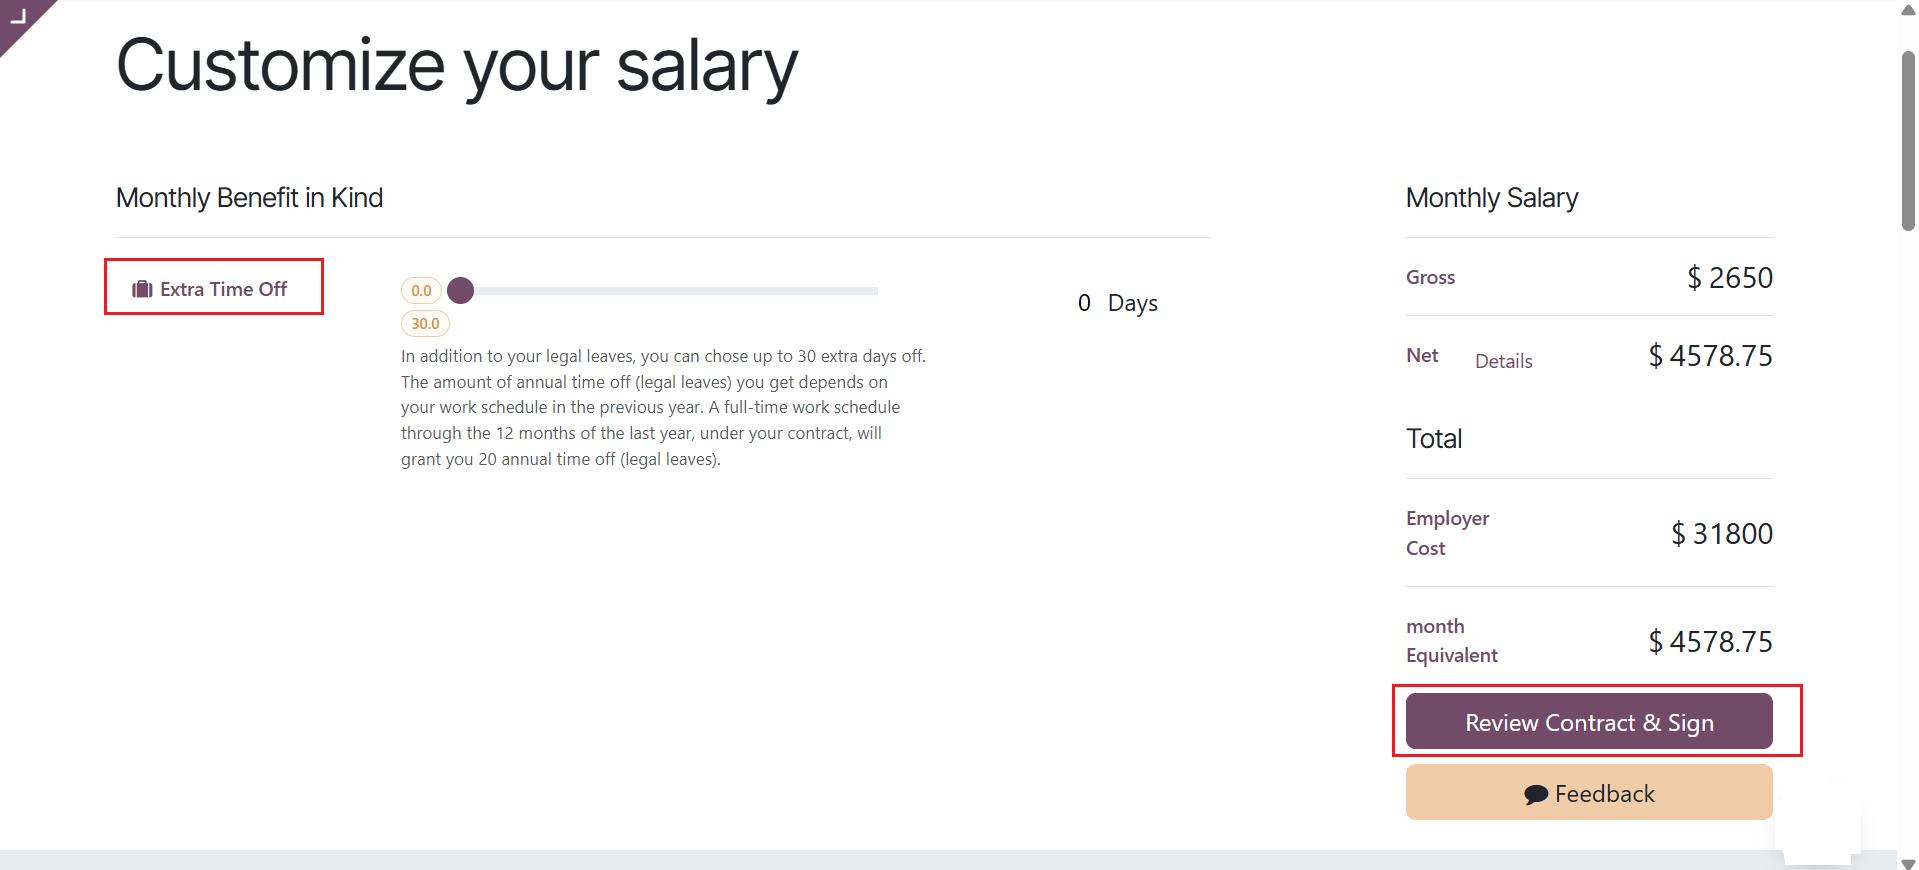

After reviewing the contract information, click the Review Contract & Sign button. You can view a demo of the employment contract here.
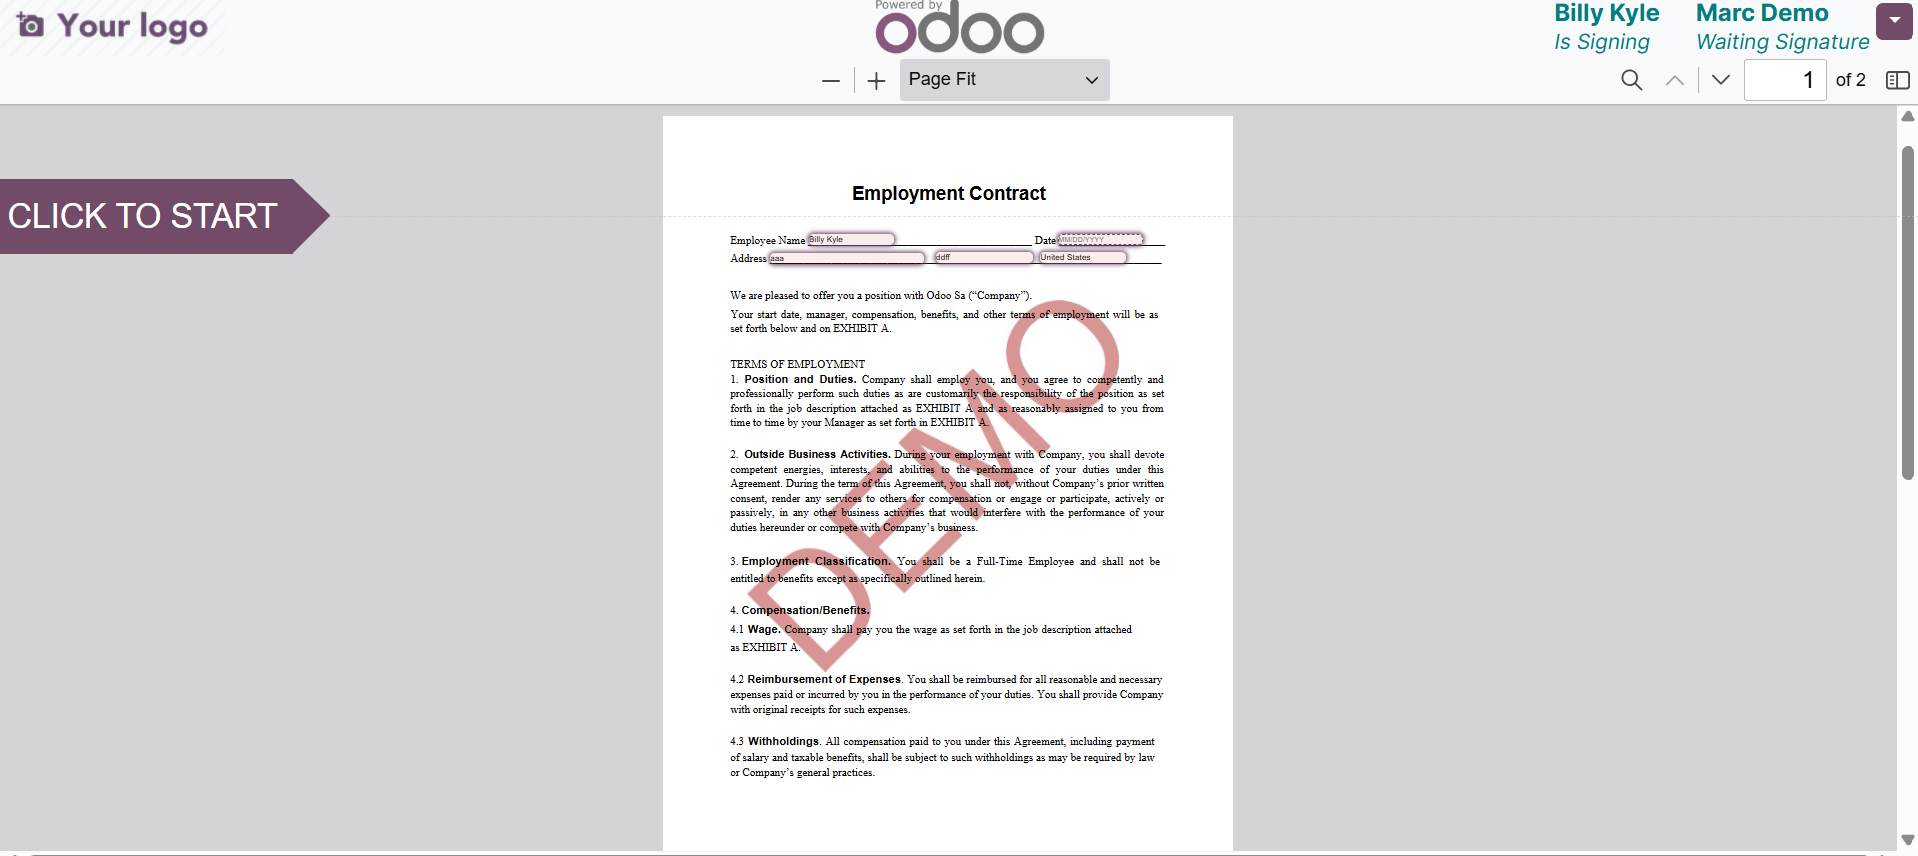
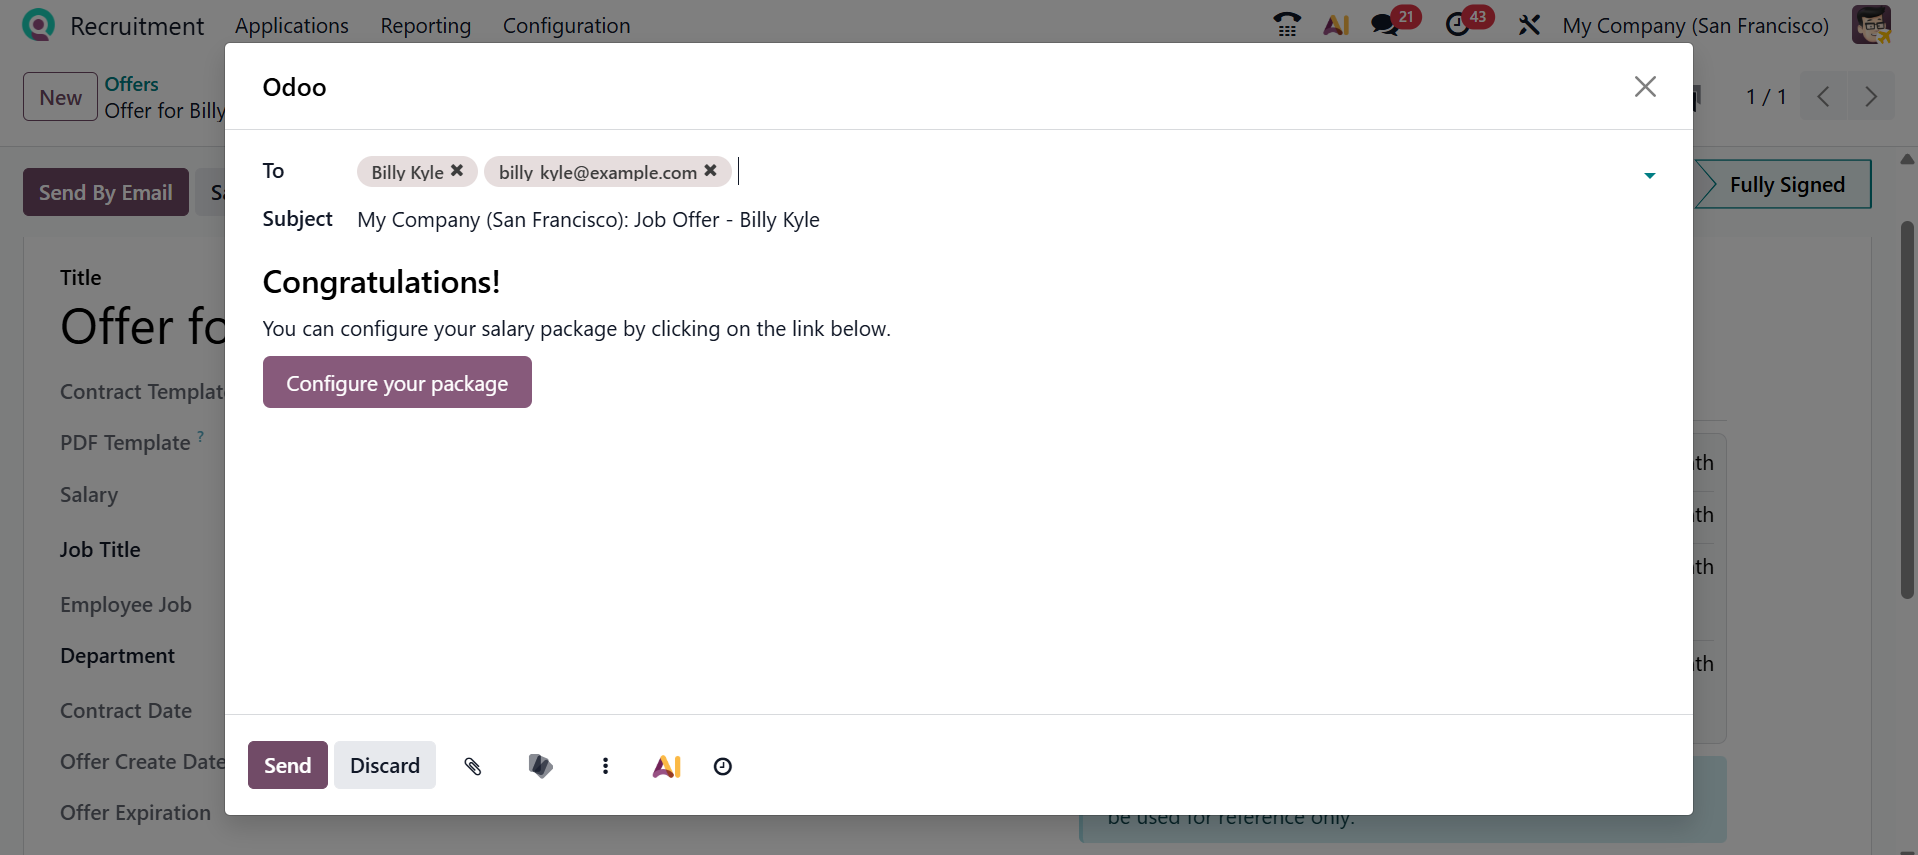
Clicking the Send By Email button will open a new pop-up window, as shown below. The details of the email, such as To, Subject, and Body, are pre-populated based on the email template. You can also modify the salary package by using the Configure your package button.
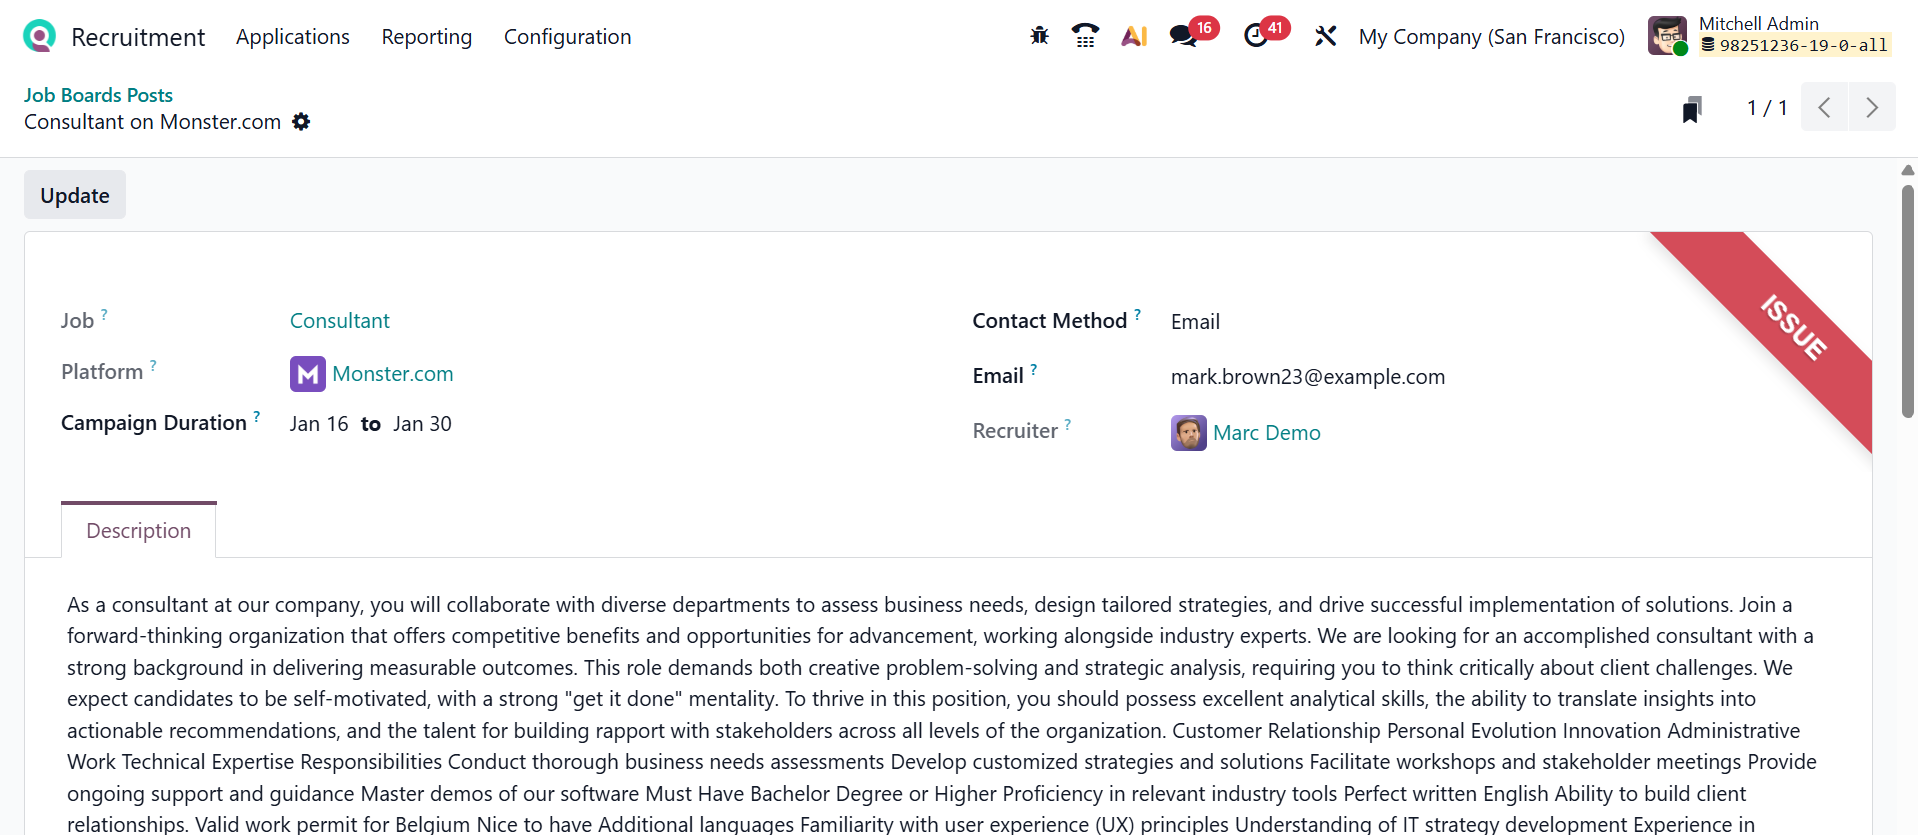
1.5 Job Board Posts:
In the Job Boards Posts option, you can publish the job posts to reach a wider audience and attract more candidates. Each Job Board Posts are arranged as a kanban card with details such as Job Board Icon, Job Board Listing Title, From, To, and User Icon.
When you move through the pre-configured job board post, you can modify Campaign Duration, Contact Method, Email, and Description. Then, click on the Update button.