Configuration
In Odoo 19 Recruitment, the Configuration menu allows recruiters to set up job positions, recruitment stages, interview types, salary structures, and other settings needed to manage the hiring process efficiently. Within the Configuration menu, you’ll find options including Settings, Stages, Employment Types, Sources, Mediums, Degrees, Refusal Reasons, Offer Refusal Reasons, Tags, Departments, Skill Types, Templates, Activity Types, Activity Plans, Emails, and Interviews
1.1 Settings:
Under the Settings option, you can see three sections: Job Posting, Process, and In-App Purchases.
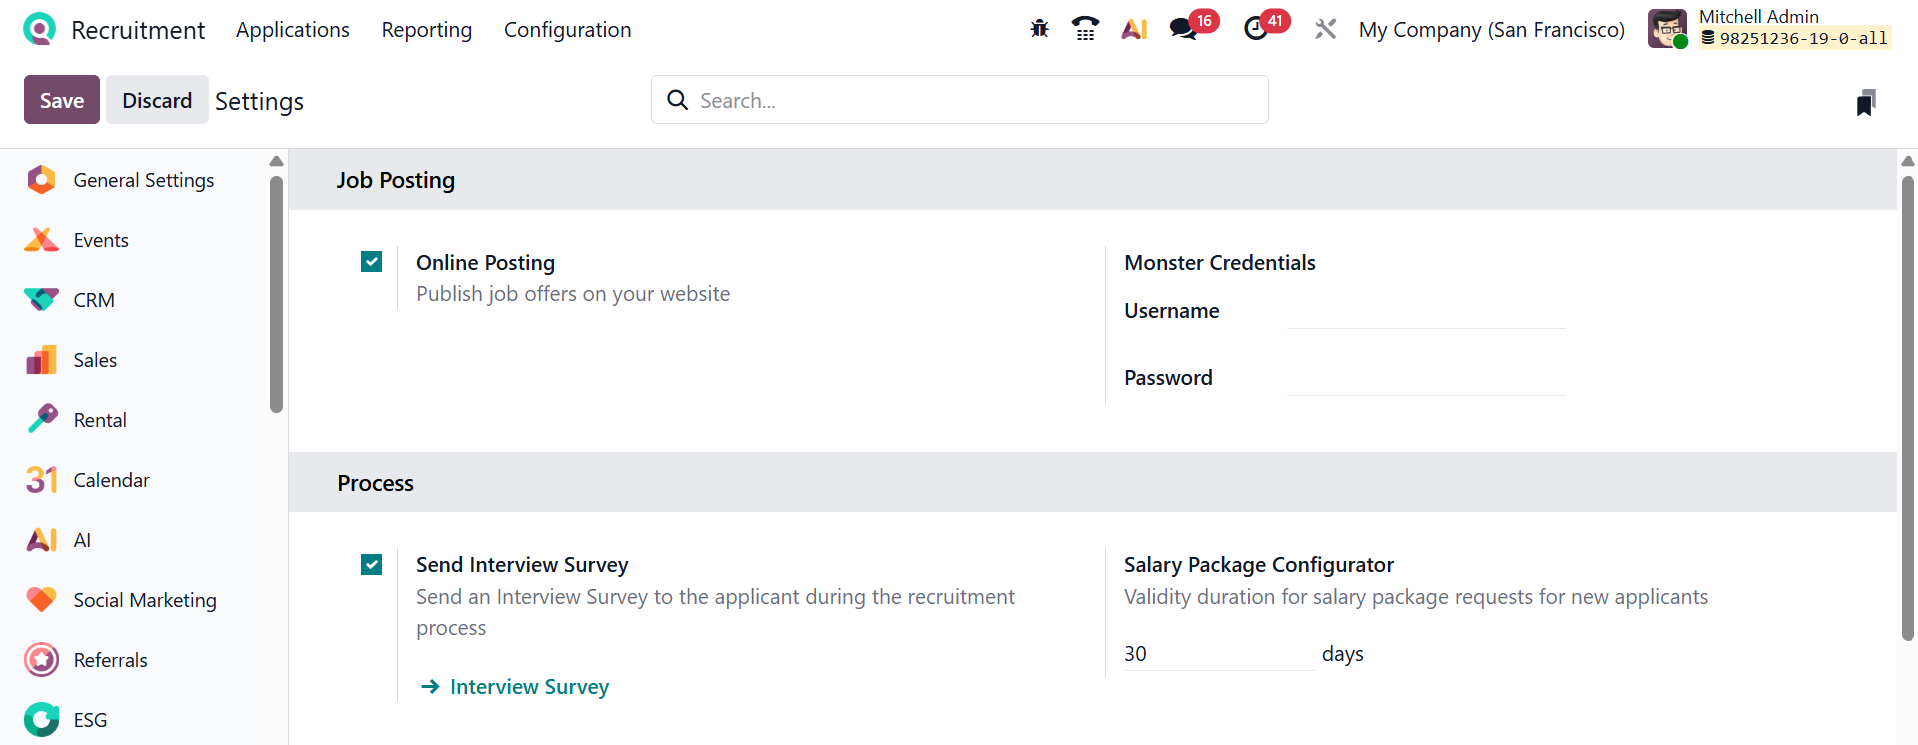
Under the Job Posting section, enable the Online Posting option to allow job vacancies to be published on the company website. By allowing applicants to view and apply for open positions online, the manual sharing of job openings is minimized. Under the Monster Credentials, you can add the username and password to integrate Odoo with the Monster job portal. With the Job Board options, you can oversee job portals, including Monster, LinkedIn, and Indeed.
Under the Process section, you can see two options: Send Interview Survey and Salary Package Configurator. Enable the Send Interview Survey option to send a survey to applicants during the recruitment process. It collects candidate responses before or after interviews. Under the Salary Package Configurator option, you can define how long a salary package offer remains valid for new applicants.
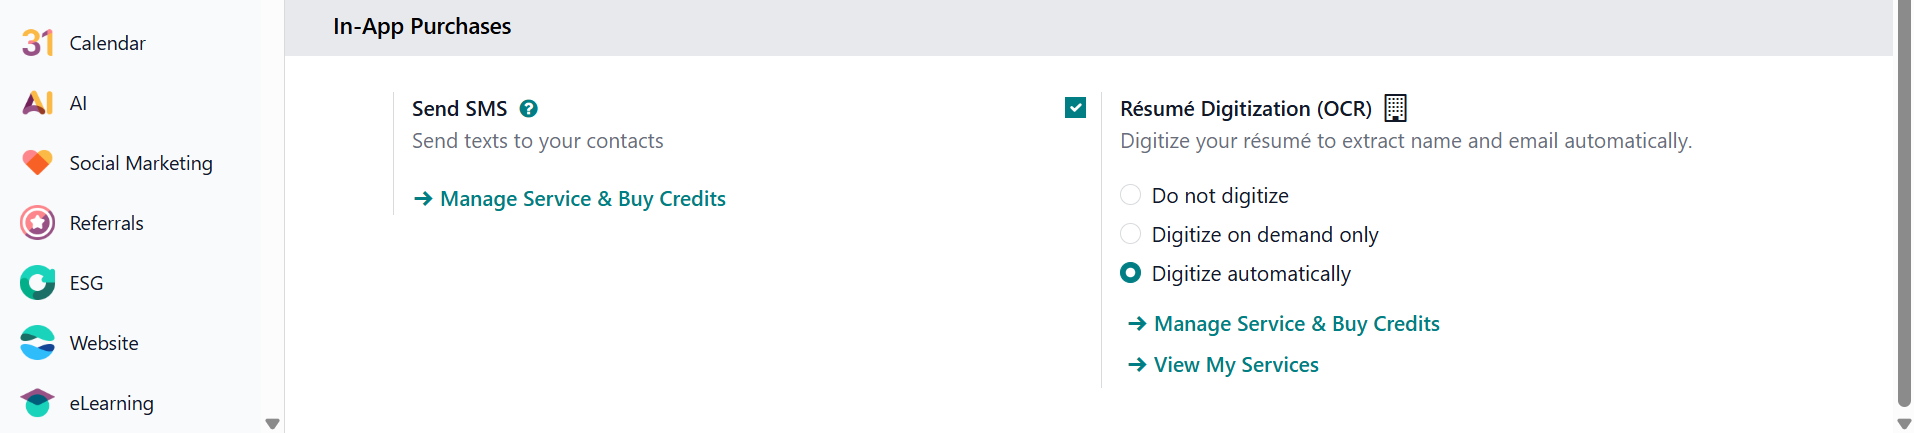
Under the In-App Purchases option, you can see two options: Send SMS and Resume Digitization (OCR). The Send SMS feature allows sending SMS notifications to candidates. It is useful for interview reminders and quick communications. SMS messages require purchased credits. The Manage Service & Buy Credits option is used to buy SMS credits from Odoo. Enable the Resume Digitization (OCR) option to scan resumes and extract key details automatically. You can select Resume Digitization (OCR) as Do Not Digitize (disables resume scanning completely), Digitize Demand Only (scans resumes only when manually selected), and Digitize Automatically (automatically scans every uploaded resume)
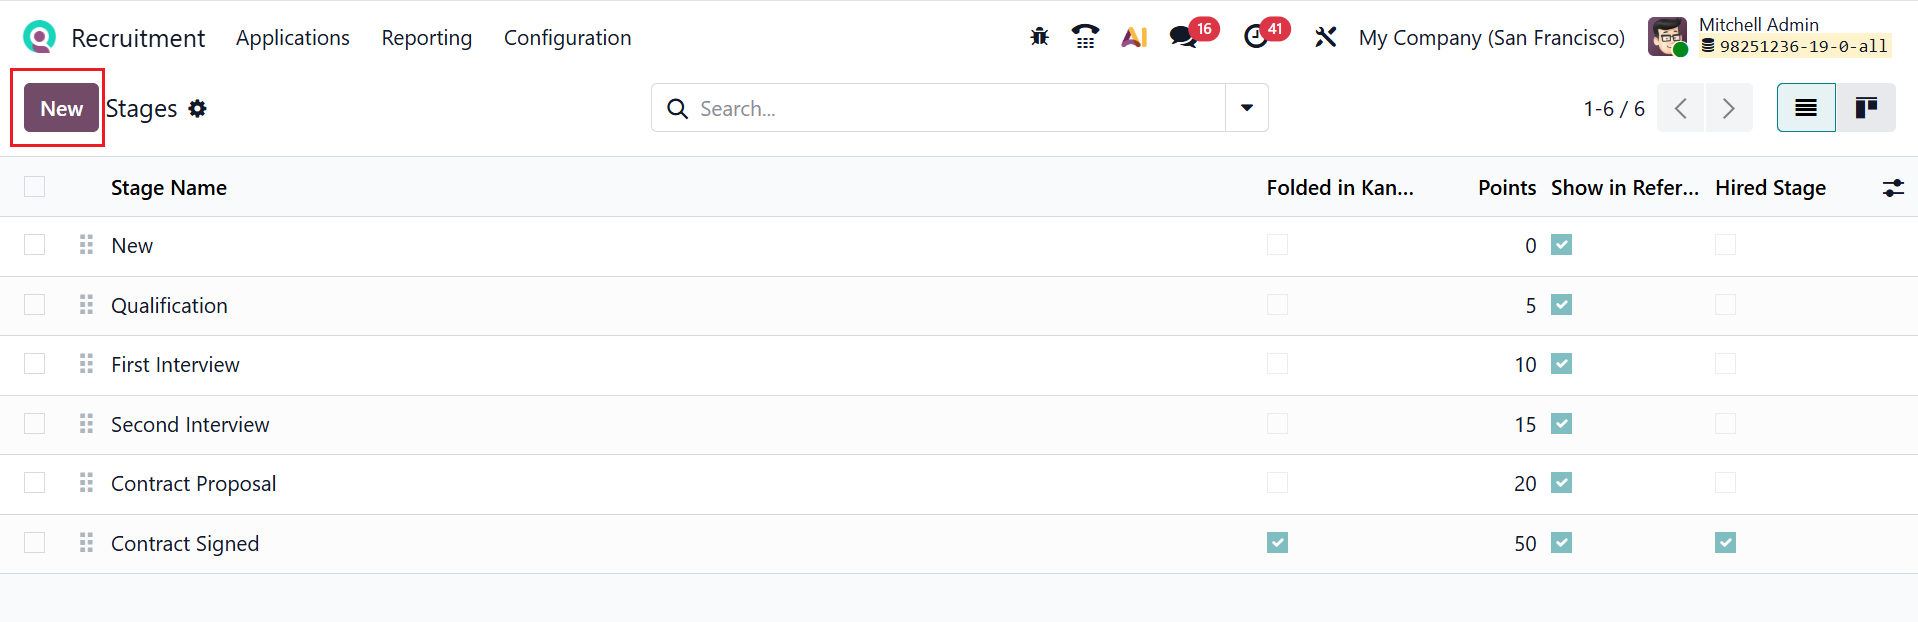
1.2 Stages:
In Odoo 19, Stages are customizable steps that track an applicant’s progress through the hiring process from application to hire. Here, you can see a list of different stages with details, such as Stage Name, Folded in kanban, Points, Show in Referrals, and Hired Stage. As noted above, you can create a new stage by clicking the New button.
1.3 Employment Types:
Employment Types in Odoo 19 specify the form of the job contract, such as full-time, part-time, temporary, or internship. They help categorize job positions and ensure consistency across recruitment and HR processes. Below is a list of employment types already set up. To add another, click the New button, provide the name, and save it.

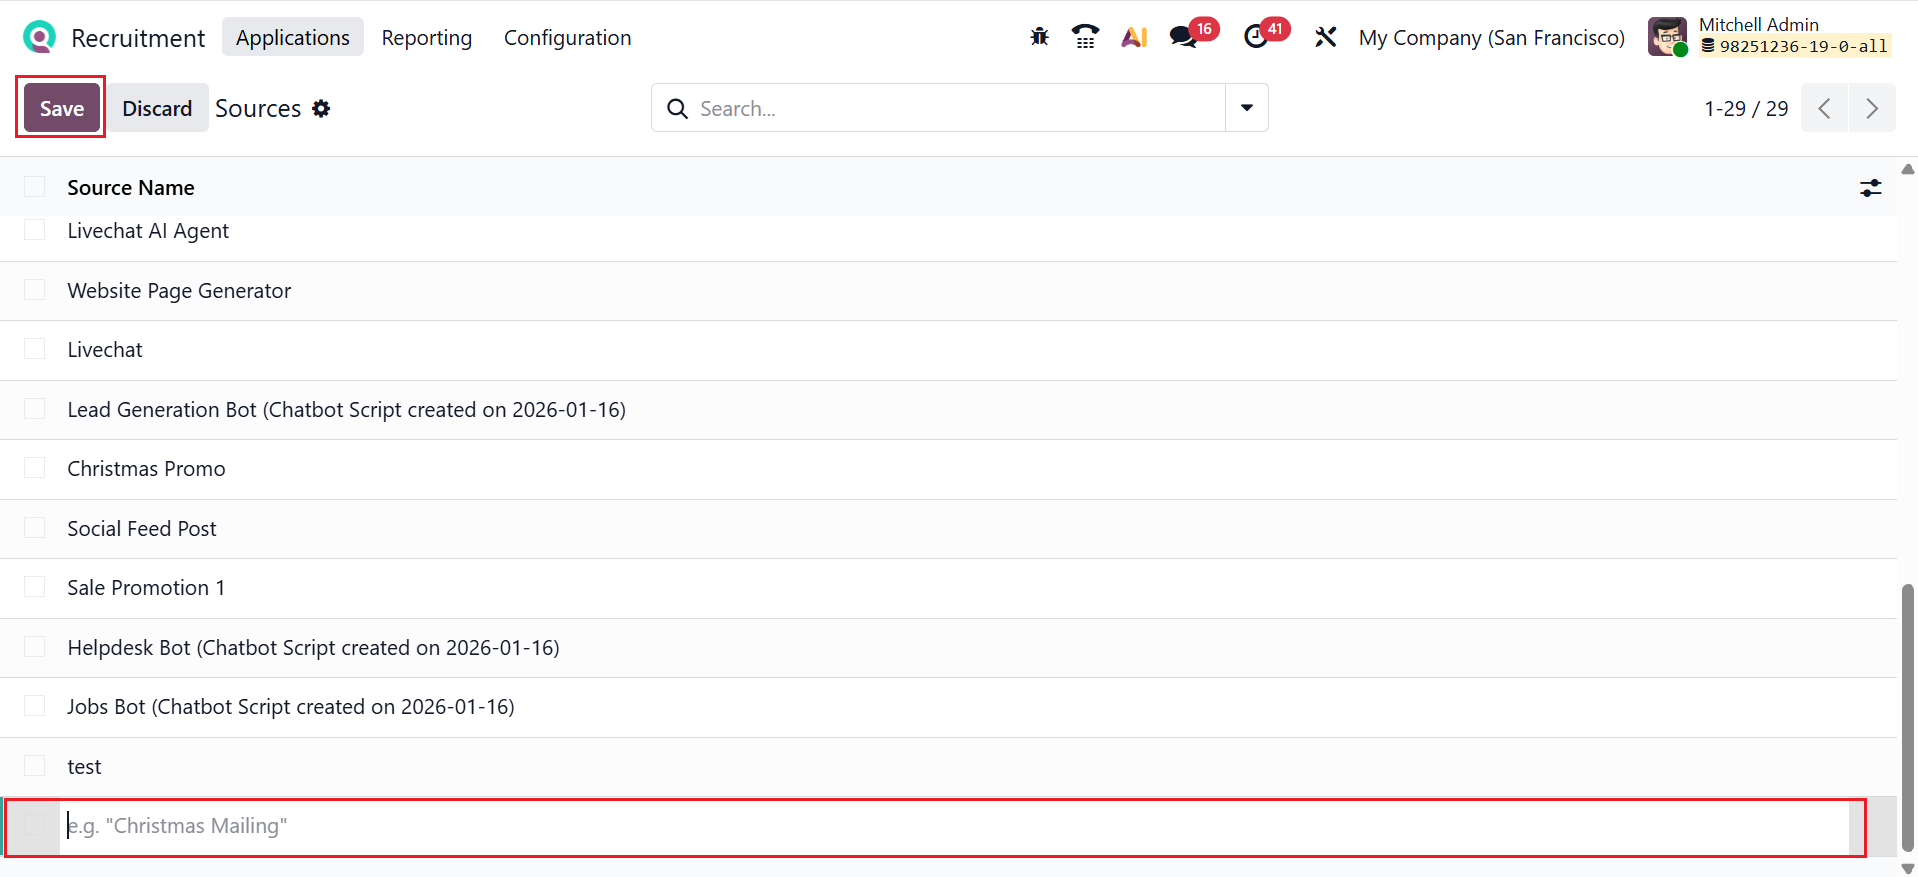
1.4 Sources:
In Odoo 19 Recruitment, Sources identify the origin of a candidate, such as a job portal, employee referral, or company website. These help HR teams analyze which sources bring in the most qualified applicants. Enter the source name in the new line that appears, then save it.
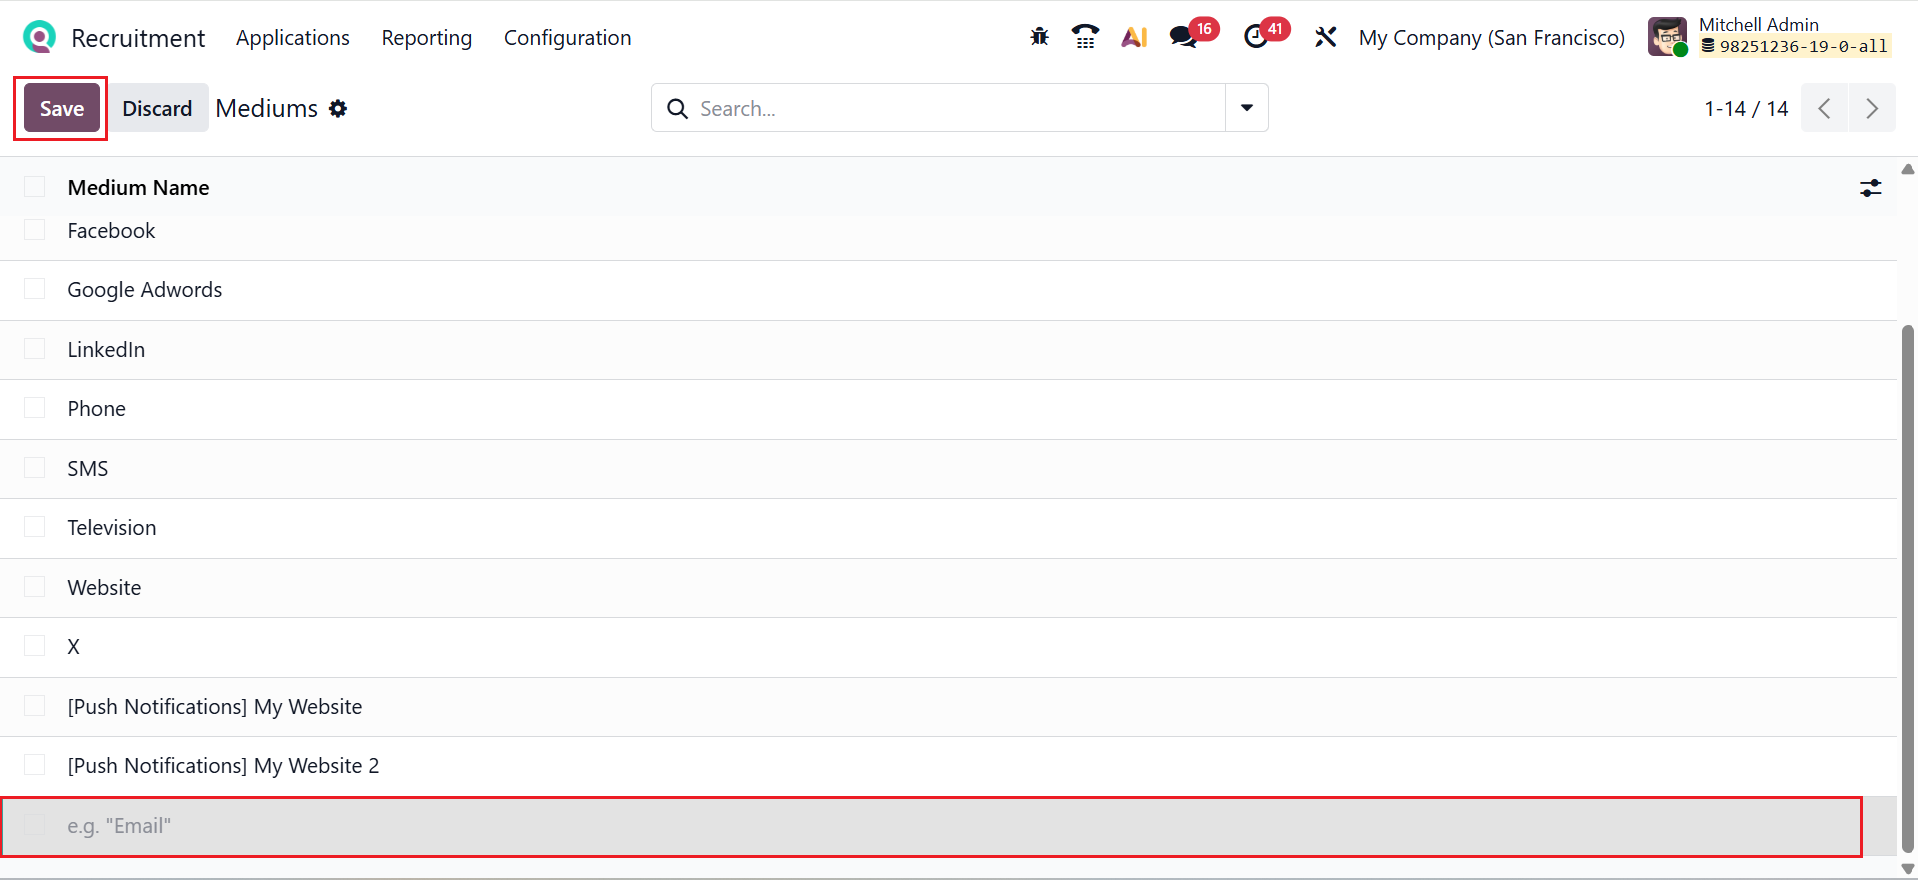
1.5 Mediums:
In Odoo 19 Recruitment, Mediums represent the communication or marketing channels used to attract candidates, such as social media, email campaigns, or online ads. These allow companies to measure the effectiveness of different recruitment channels. Below is a list of pre-configured mediums. To add a new medium, click the New button. A new line will appear where you can enter the medium’s name and save it.
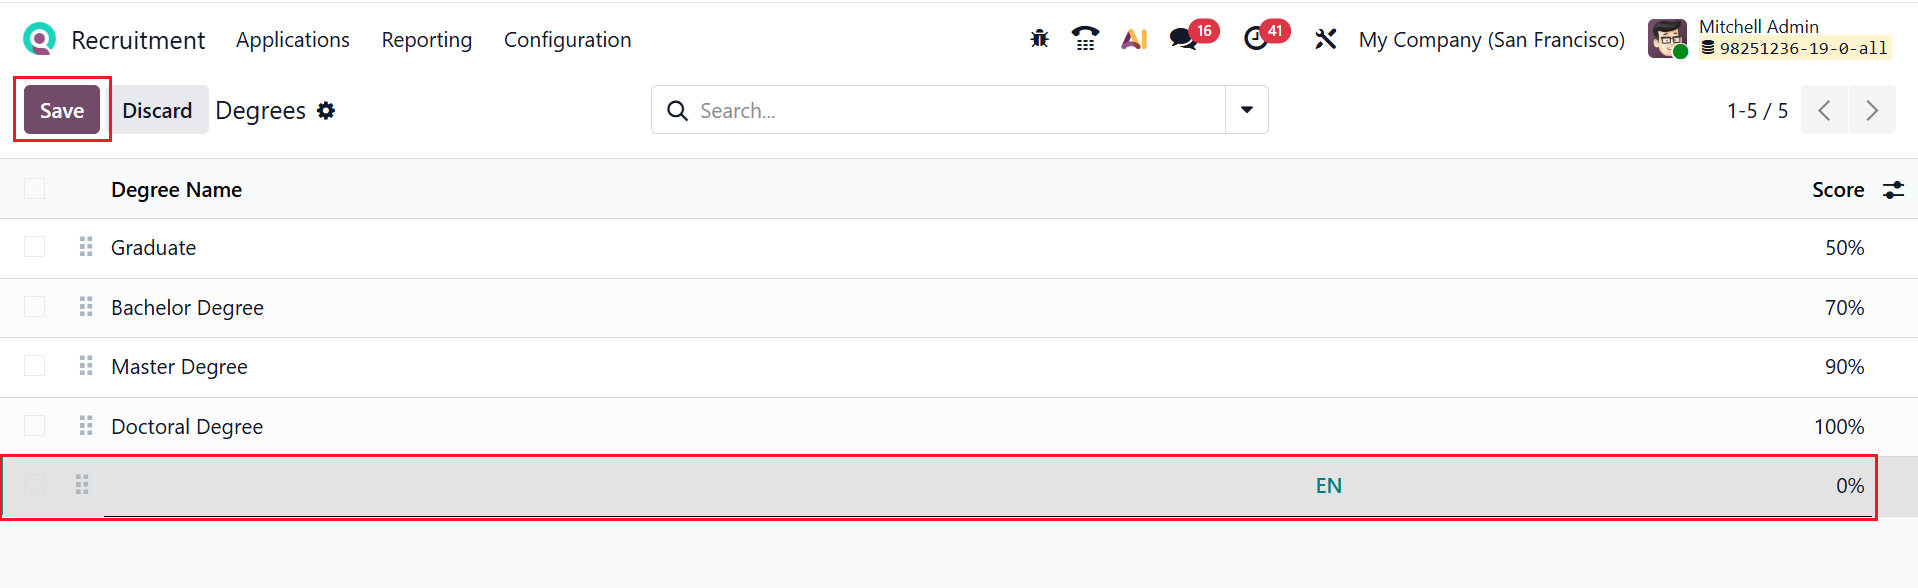
1.6 Degrees:
In Odoo 19 Recruitment, Degrees define the educational qualifications of candidates, such as a bachelor’s, master’s, or doctorate. They help recruiters filter and evaluate applicants based on required education levels. This section shows all pre-configured degrees. Use the New button to add a new one. A new line will appear where you can add the Degree Name and Score. Then, save it.
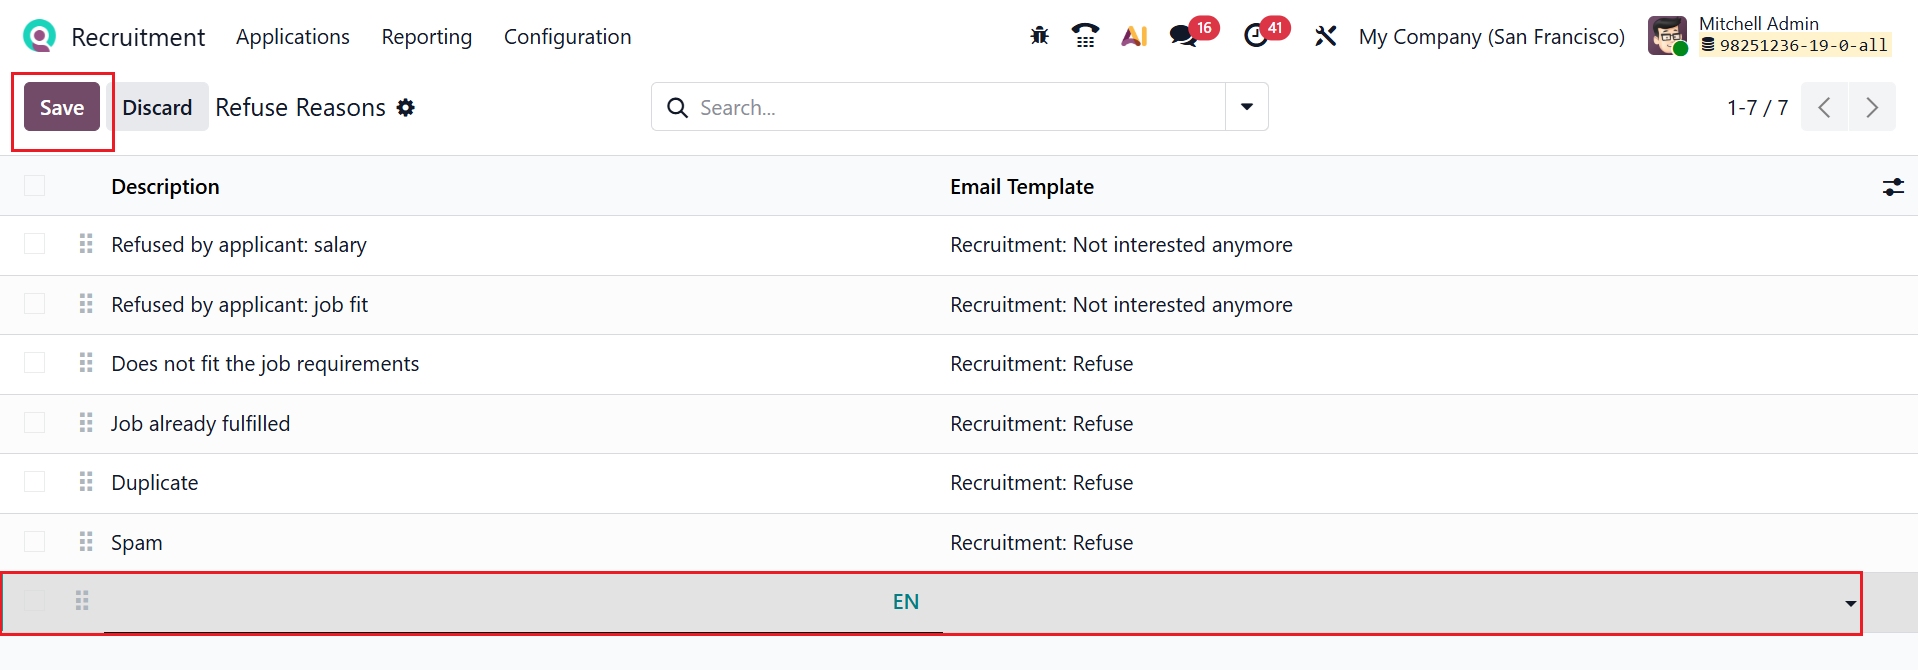
1.7 Refuse Reasons:
In Odoo 19 Recruitment, Refuse Reasons are predefined explanations for why a candidate was rejected during the hiring process. They help track and analyze recruitment decisions, providing insights for improving the hiring strategy. Here, one can view all pre-configured refuse reasons. To introduce a new reason, select the New button. This action will create a new line, allowing you to specify the Description and Email Template. Once complete, save the entry.
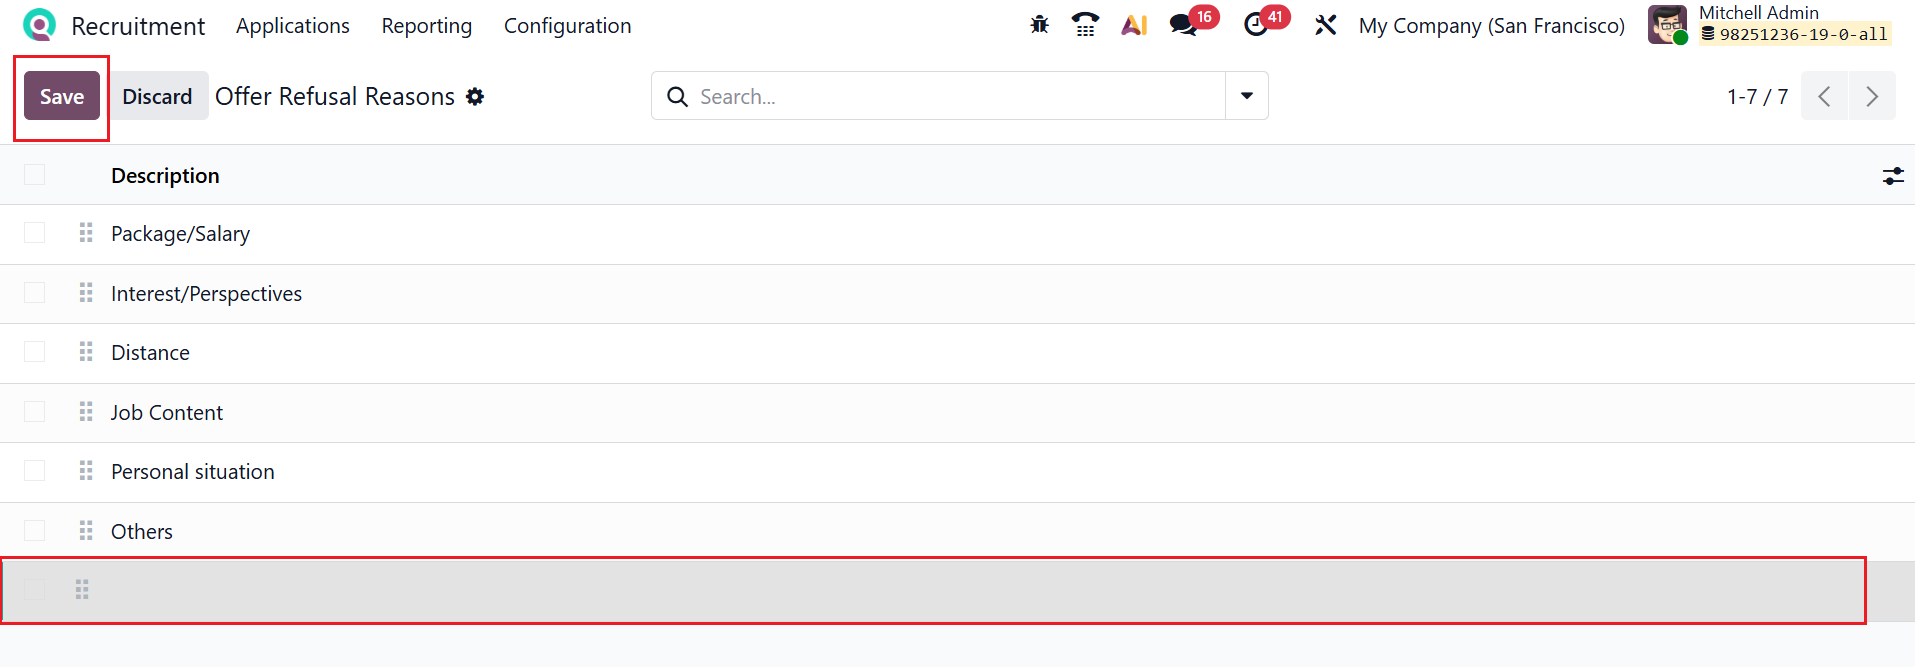
1.8 Offer Refuse Reasons:
In Odoo 19 Recruitment, Offer Refusal Reasons are predefined explanations for why a candidate declined a job offer. They help HR teams understand why offers are rejected and improve future recruitment and hiring strategies. A list of pre-configured offer refusal reasons is displayed here. To add a new reason, click the New button, enter the Description in the new line that appears, and then save it.
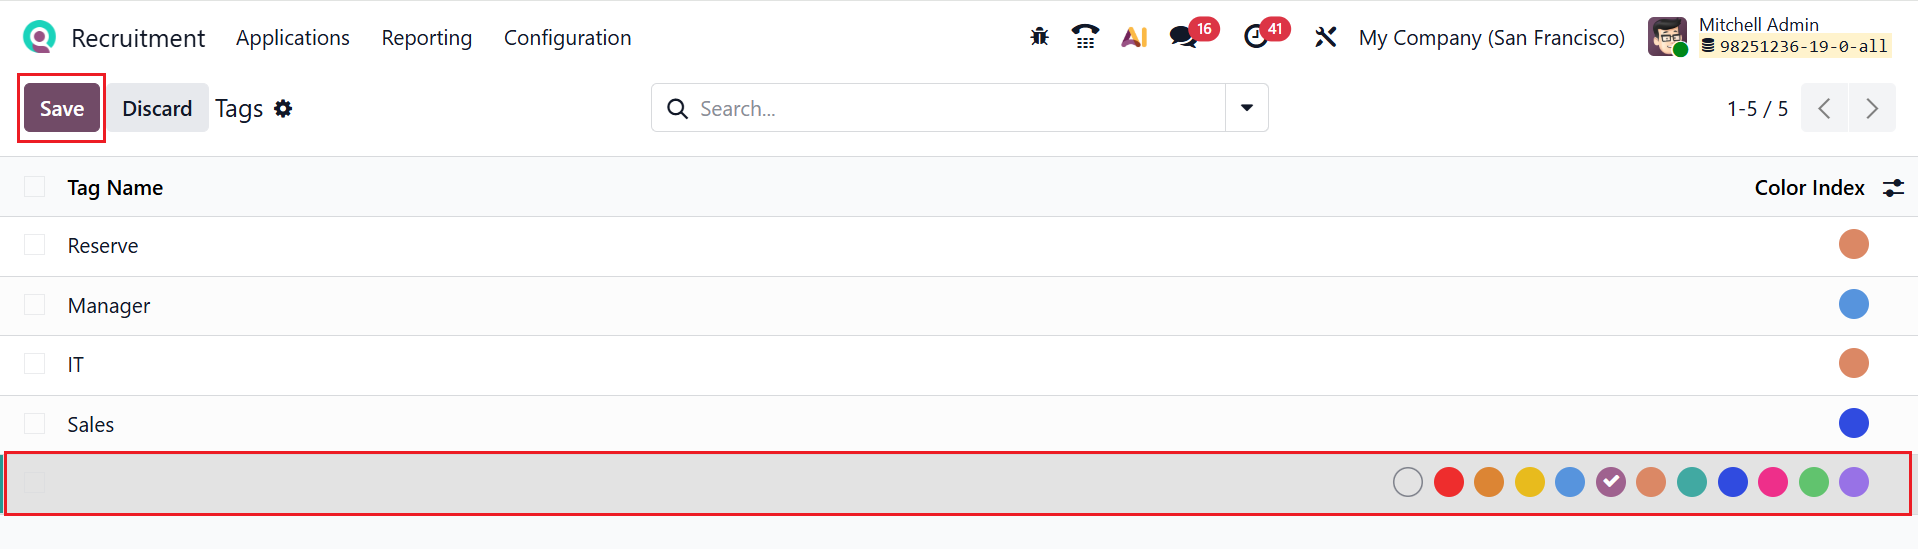
1.9 Tags:
In Odoo 19 Recruitment, Tags are labels that can be assigned to candidates, jobs, or applications to categorize and organize them. They help recruiters quickly filter, search, and group records based on skills, experience, or other custom criteria. A list of pre-configured tags is displayed here. To add a new tag, click the New button. This will create a new line where you can specify the Tag Name and Color Index, and then save it.
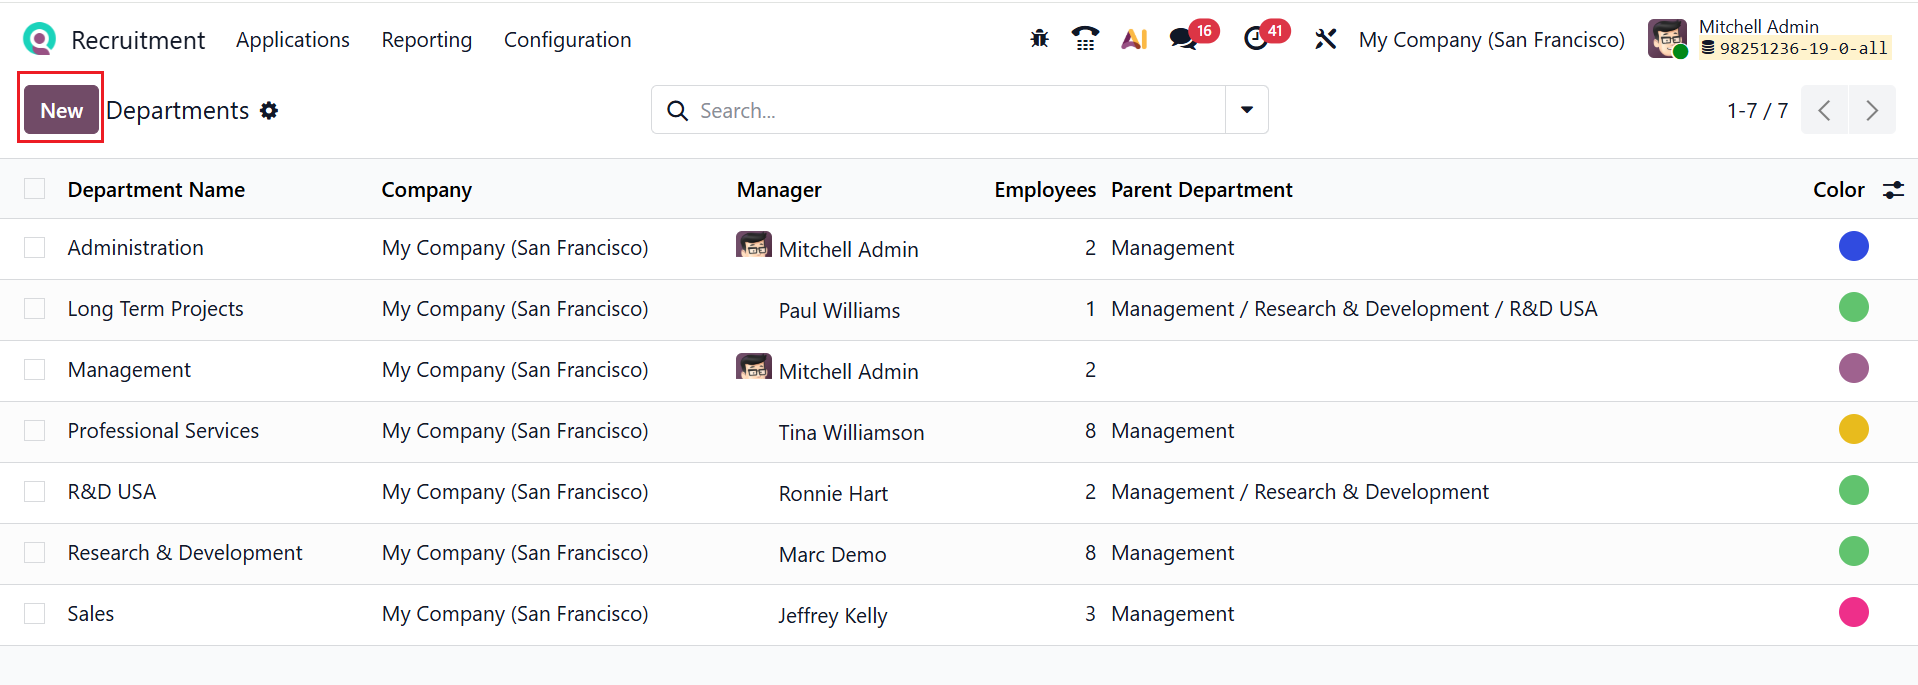
1.10 Departments:
In Odoo 19 Recruitment, Departments represent the organizational units or teams within a company. Here, you can see a list of departments with details such as Department Name, Company, Manager, Employee, Parent Department, and Color. Click on the New button to create a new department as shown below:
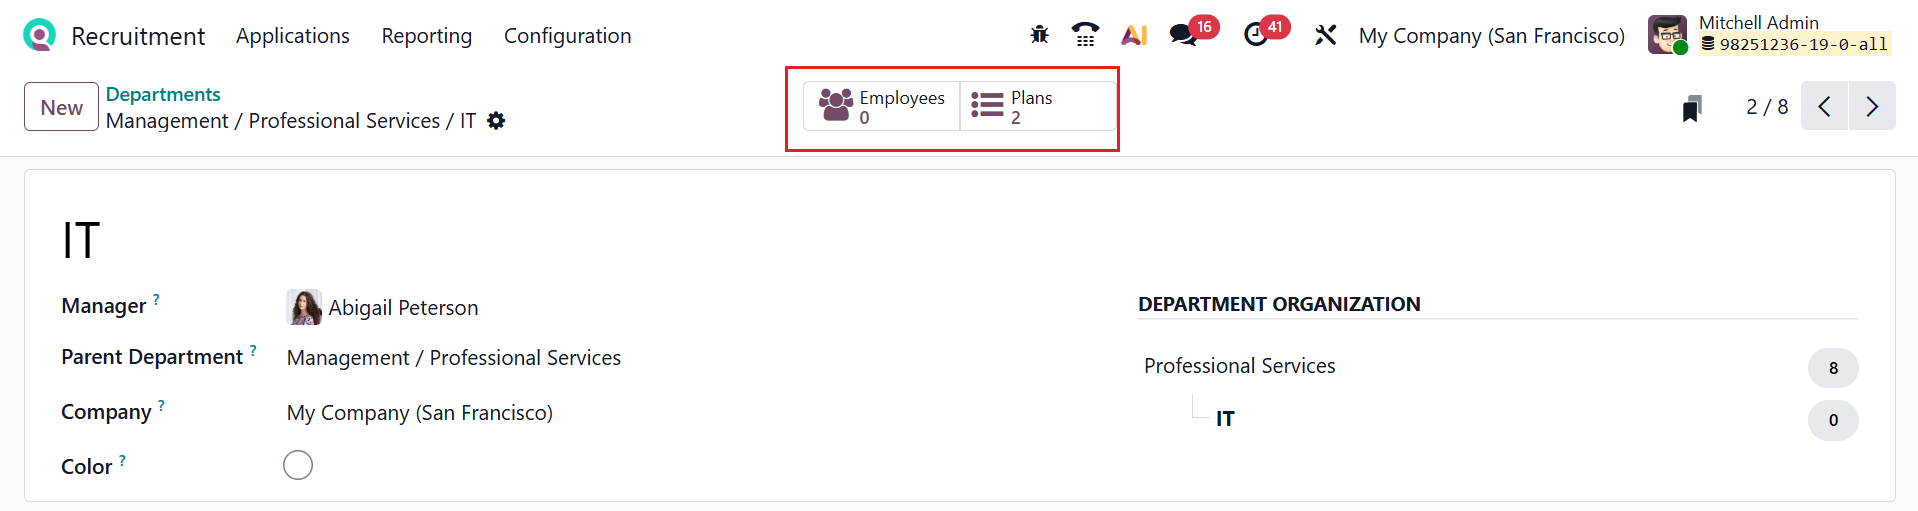
Here, add a title for the department and fill in the following details, such as Manager, Parent Department, Company, and Color. Next, select the Save icon to store the new department. After saving, you can see a Department Organization chart to analyze where the department lies in the organization. You can also see two smart tabs: Employees and Plans. The Employees smart button in Departments shows all employees assigned to that specific department. The Plan smart button under Departments allows you to view and manage onboarding and offboarding plans linked to that department. It helps HR track assigned activities and ensure employees follow the correct processes when joining or leaving the department.
- Onboarding Plan: An onboarding plan is a predefined set of activities that guides new employees through their joining process. This guarantees that employees are provided with the training, resources, and information needed for a seamless integration into the organization.
- Offboarding Plan: An offboarding plan is a structured checklist of activities to manage an employee’s exit from the company. It ensures proper handover, system access removal, and completion of exit formalities.
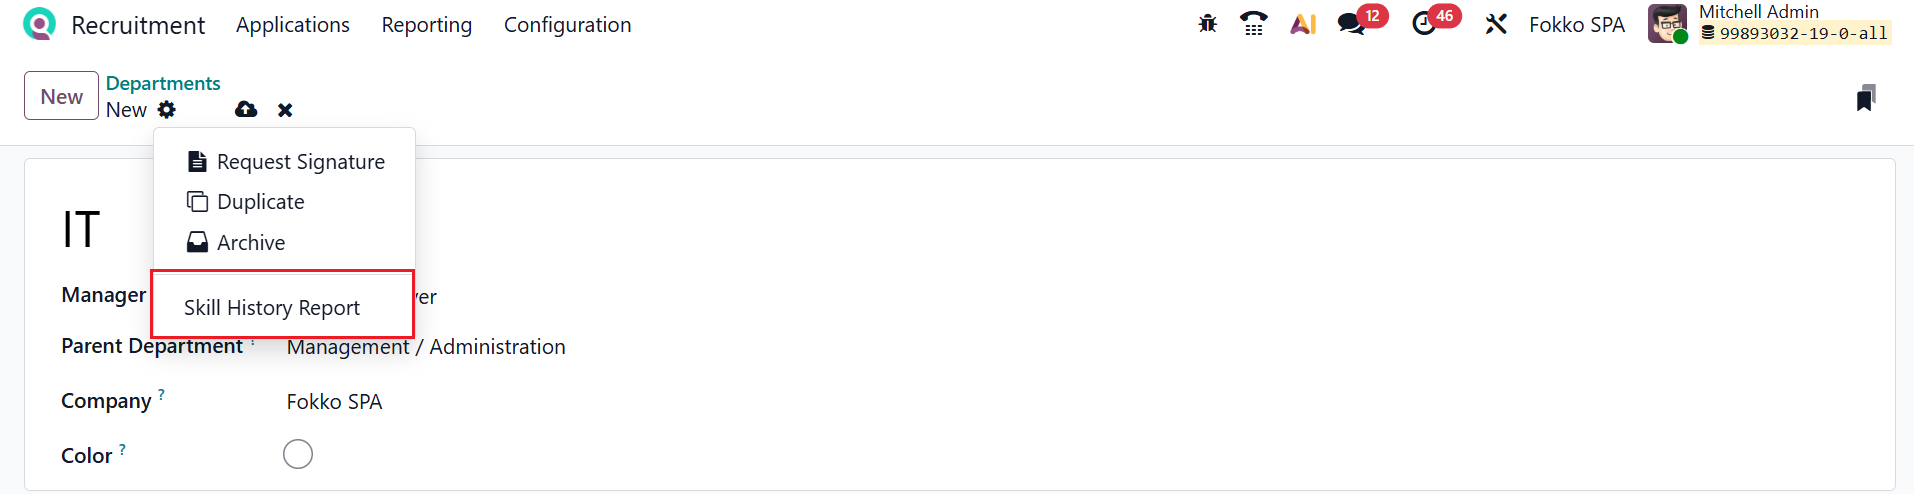
Click on the Action button to view options such as Request Signature, Duplicate, Archive, and Skill History Report. The Skill History Report tracks changes and progress in an employee’s skills over time. It helps HR and managers analyze skill development, updates, and gaps for better workforce planning.
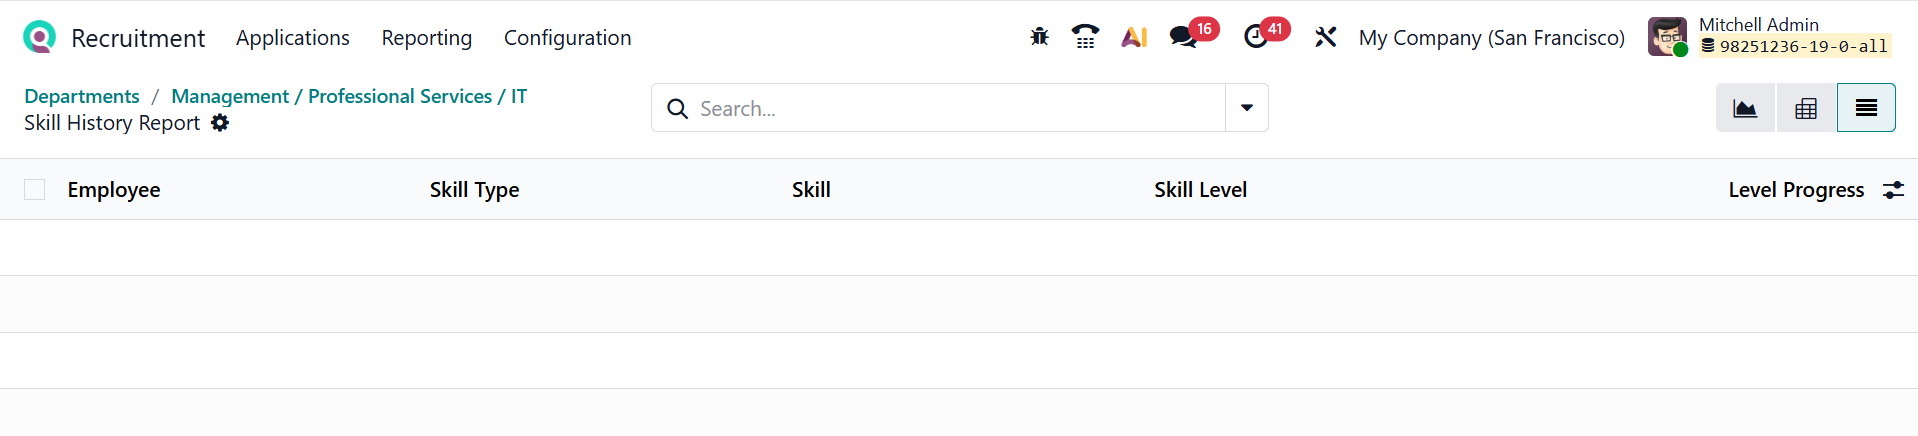
In the Skill History Report window, you can view the details such as Employee, Skill Type, Skill, Skill Level, and Level Progress as shown below:
1.11 Skill Types:
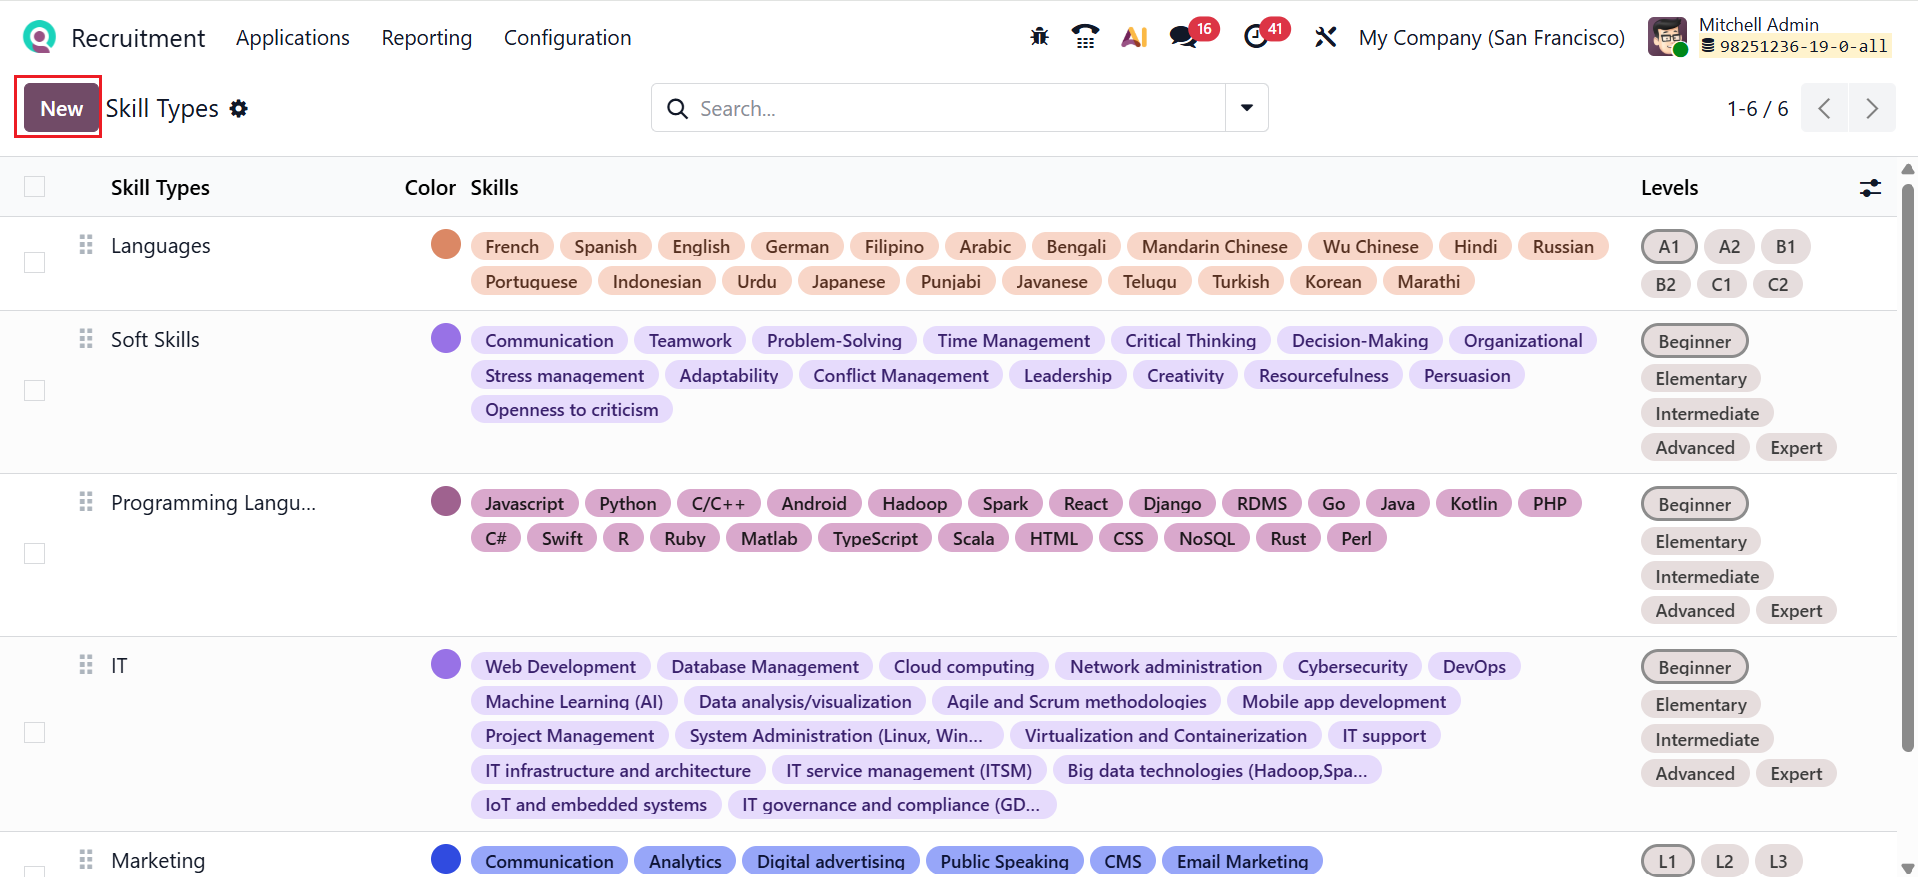
In Odoo 19, Skill Types categorize employee skills into groups such as technical, language, or soft skills. They help organize skills consistently and make it easier to manage, search, and report on employee competencies. Here, you can see a list of skill types with details such as Skill Types, Color, Skills, and Levels. Click on the New button to create a new skill type as shown below:
Here, you can add the name for the skill type and select a color. Enable the Certification field to change the skill type to certification type. In the Skills section, select the Add a Line button to enter skills.
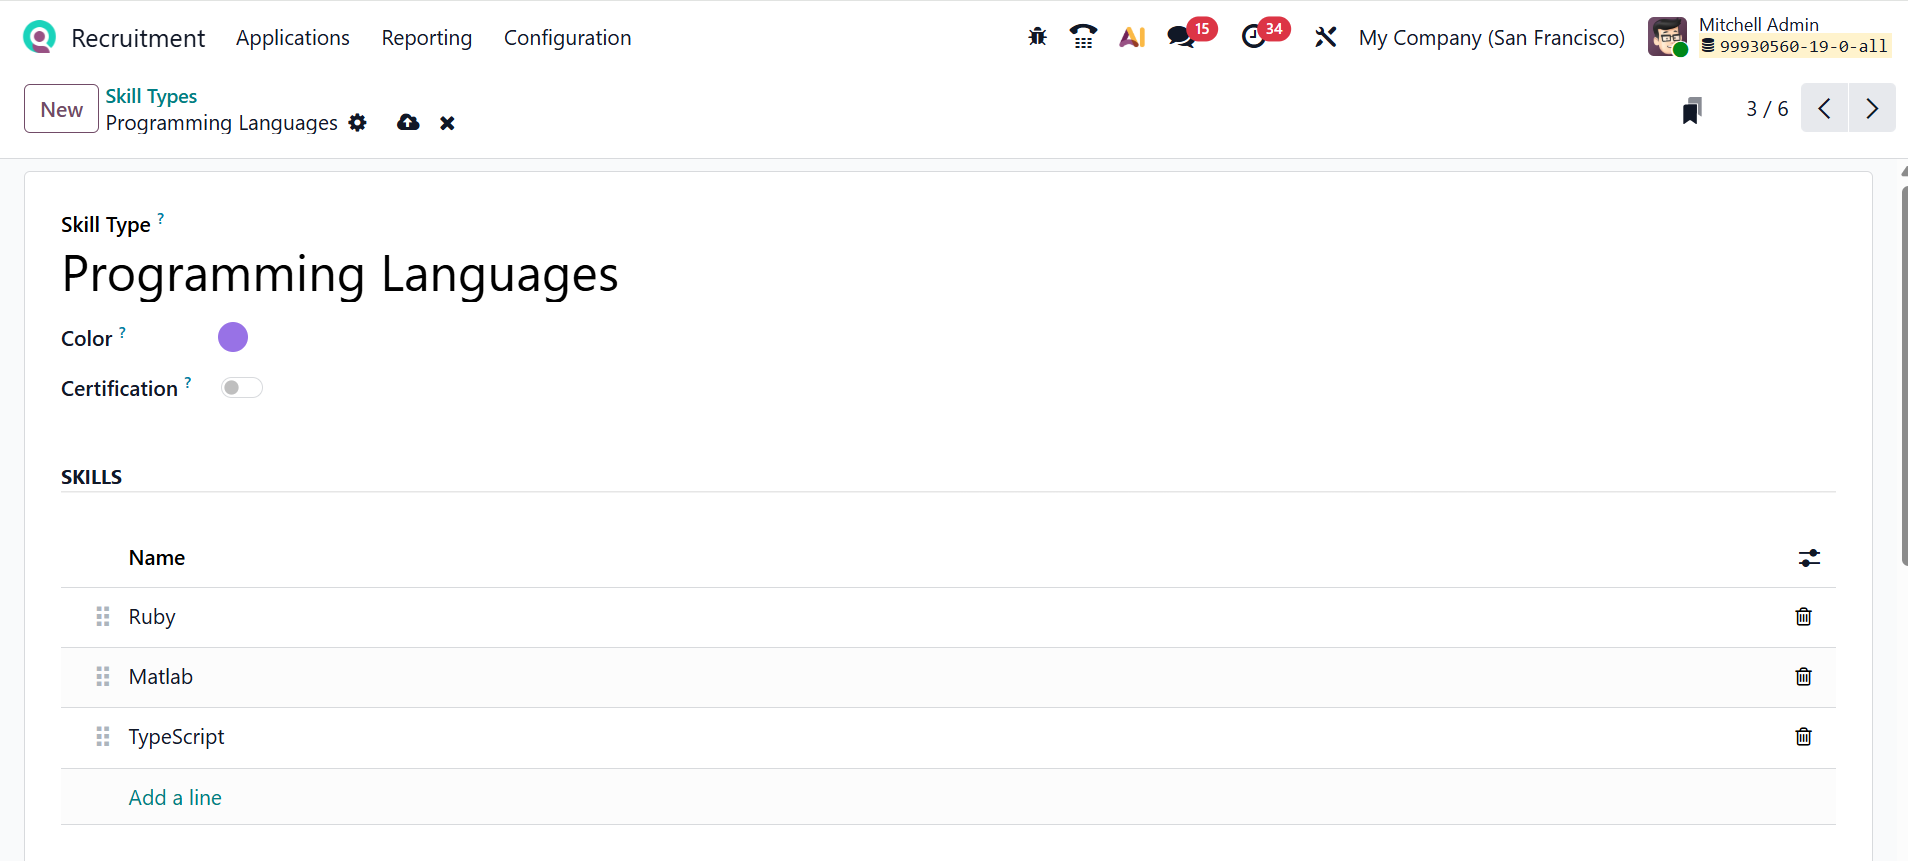
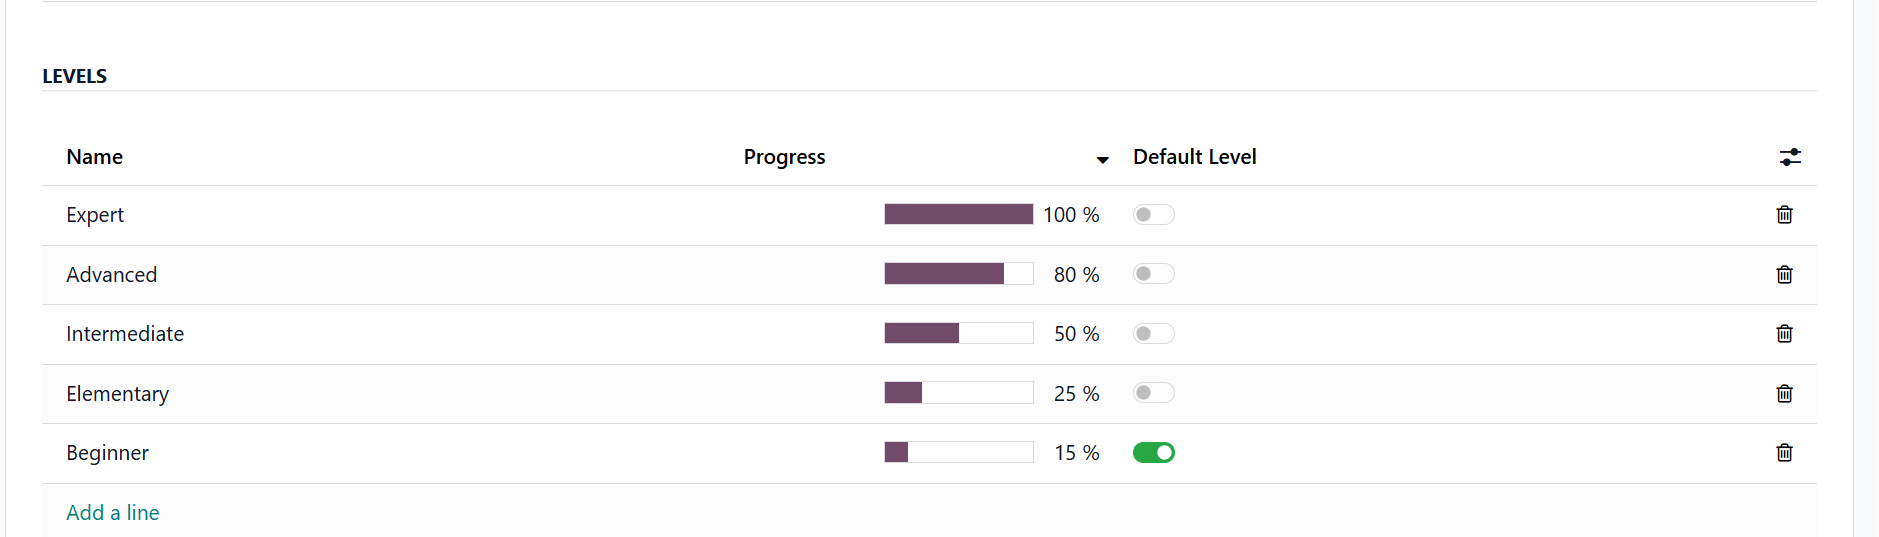
Under the Levels section, click on the Add a line button to add skill levels. The Progress option lets you set the proficiency percentage for each level. Enable the Default Value option to automatically assign the initial skill level of the employee.
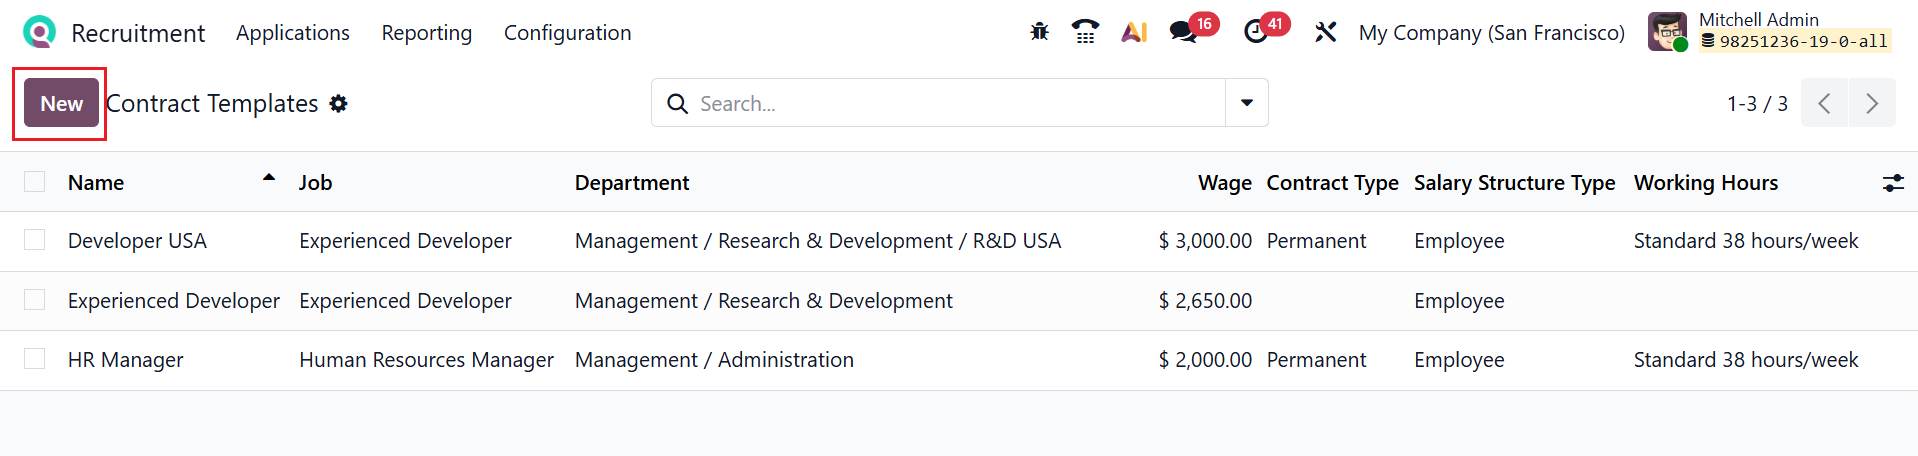
1.12 Contract Templates:
In Odoo 19 Recruitment, a Contract Template is a predefined document that sets standard terms, conditions, and structure for employment contracts, ensuring consistency across new hires. It can include default salary rules, working hours, and other HR details, which are automatically applied when generating an employee’s contract.
Here you can see a list of contract templates with details, including Name, Job, Department, Contract Type, Salary Structure Type, and Working Hours. Click the New button. A form will open where you can enter the details for the new contract template.
Here, you can add a name for the new template and select the Job, Department, and HR Responsible as shown below. Contract Template includes two tabs: Salary Information and Signatories.
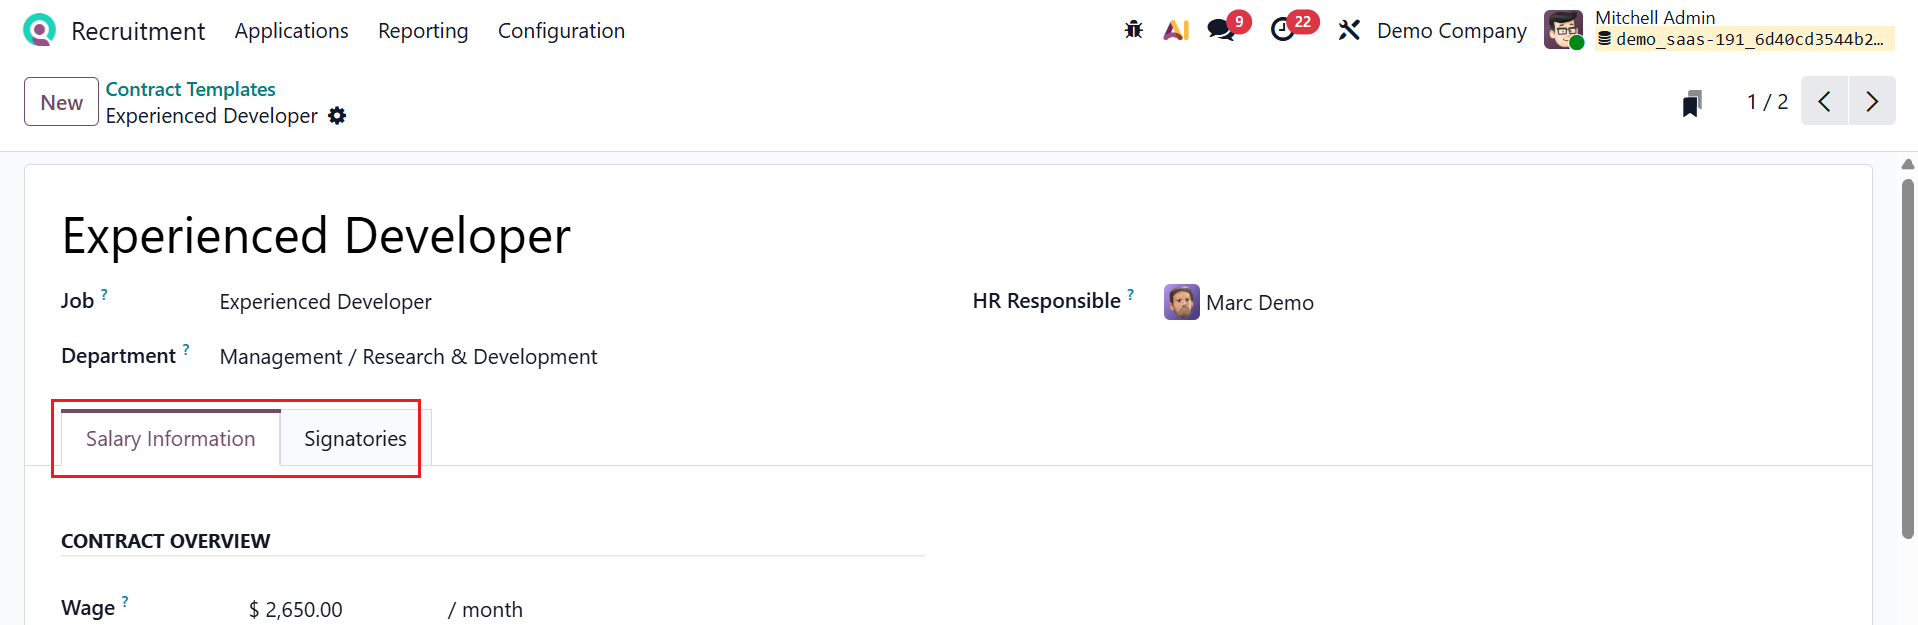
Under the Salary Information tab, you can add the details such as Wage, Contract Type, Pay Category, Yearly Cost, Monthly Cost, and Working Schedule.

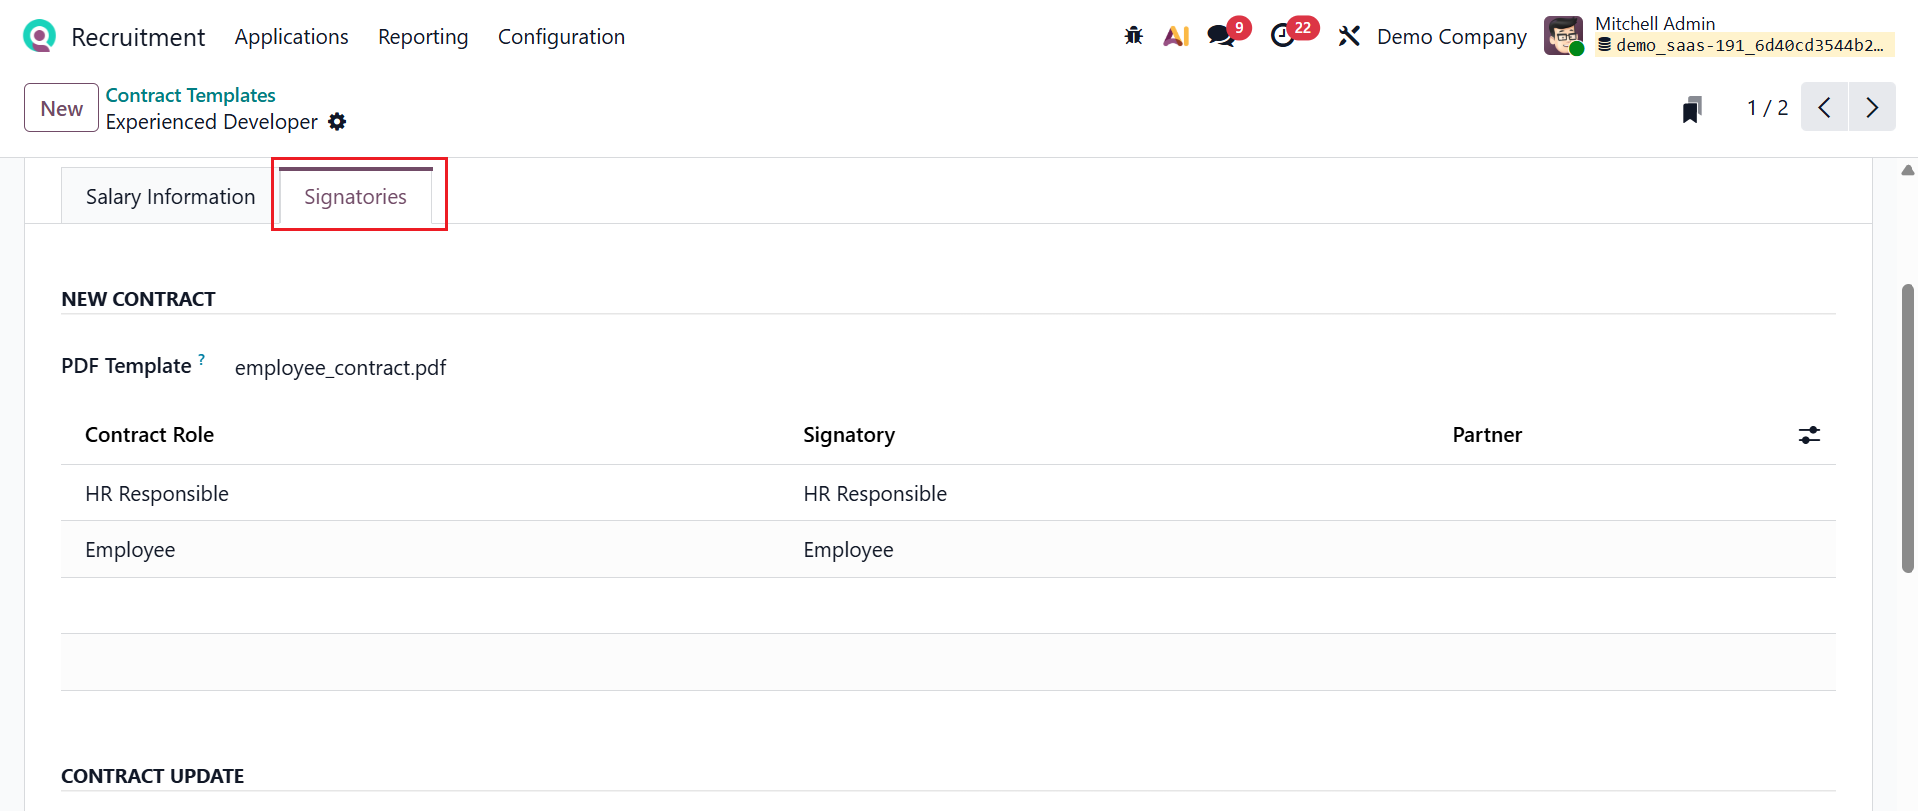
Under the Signatories tab, the employees can sign the document either in a new contract or an updated contract. You can upload a PDF Template in the New Contract and Contact Section.

You can use these contract templates in the recruitment process. When an applicant becomes an employee, click on the Generate Offer button to create a new offer.
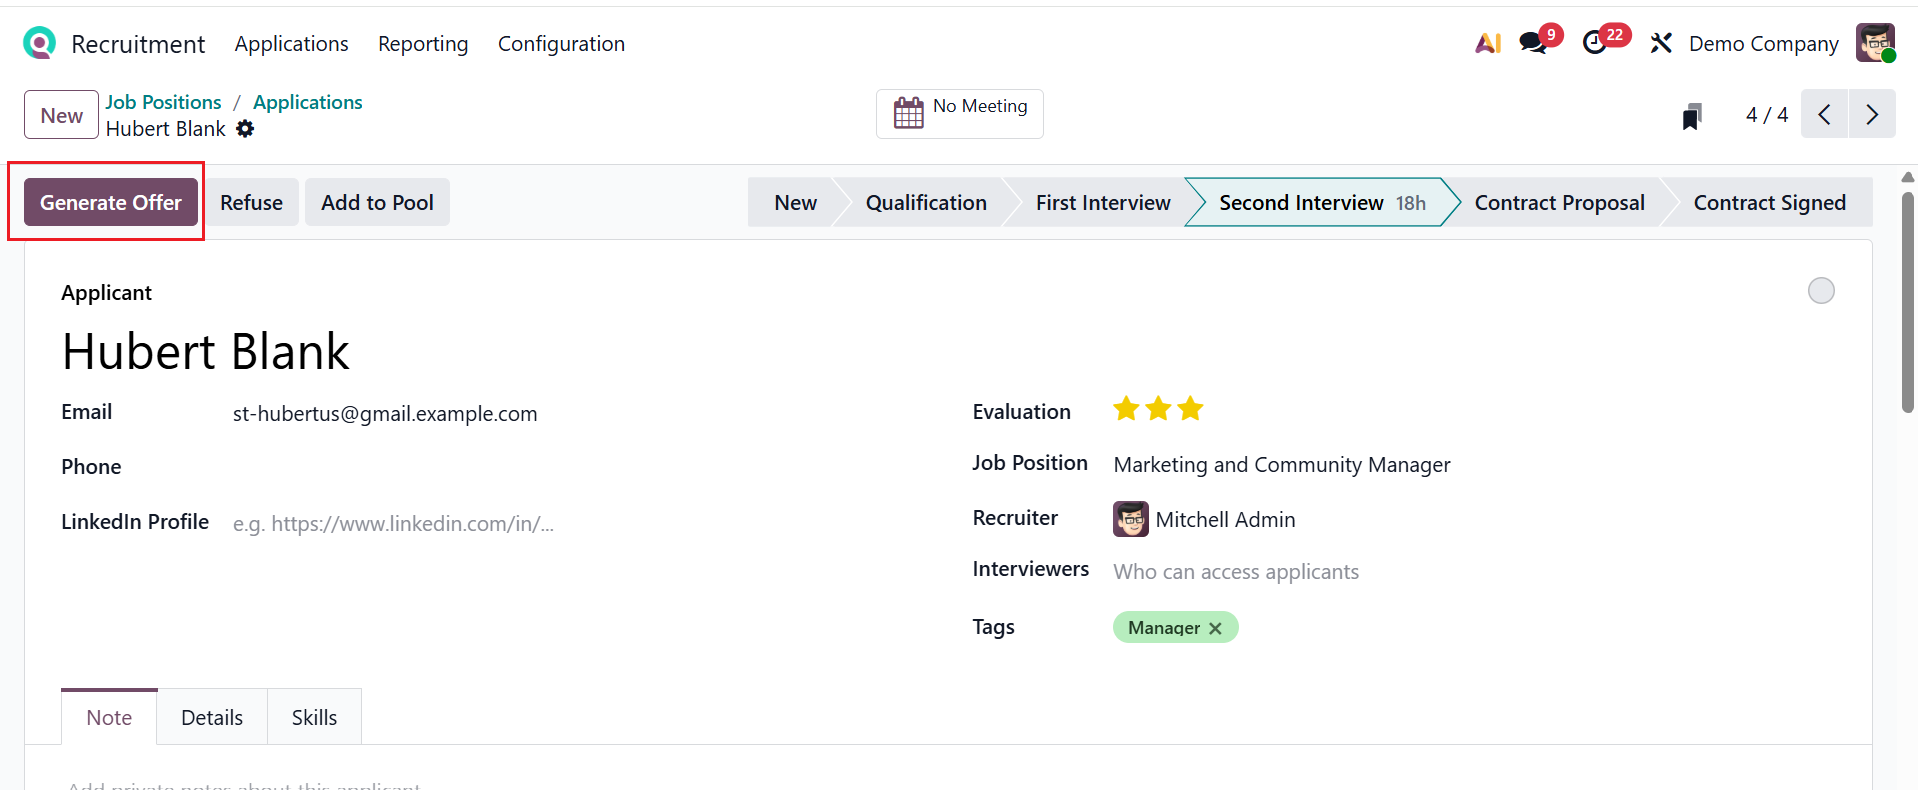
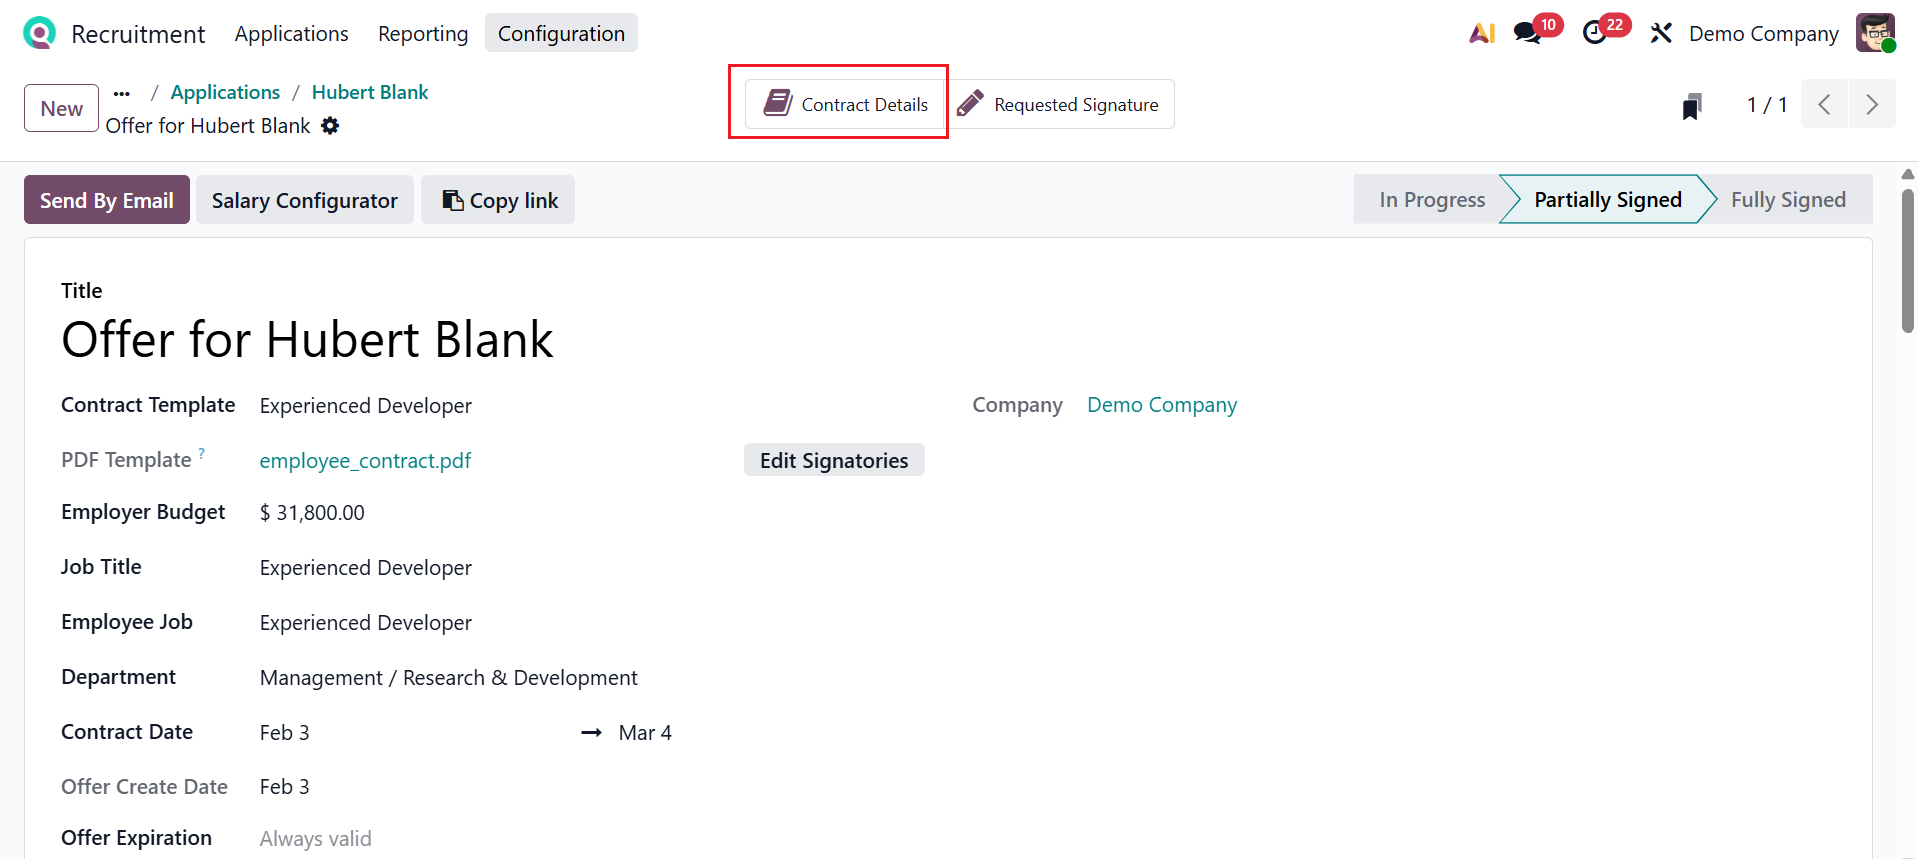
Here, add the newly created contract template in the Contract Template field and add other details as shown below. Use the Send By Email button to deliver the offer directly to the applicant. Click on the Salary Configurator button, and a new window will appear where the applicant can review and sign the contract. When the offer is partially signed, a new smart tab named Contract Details will appear to view the contract details, as shown below:
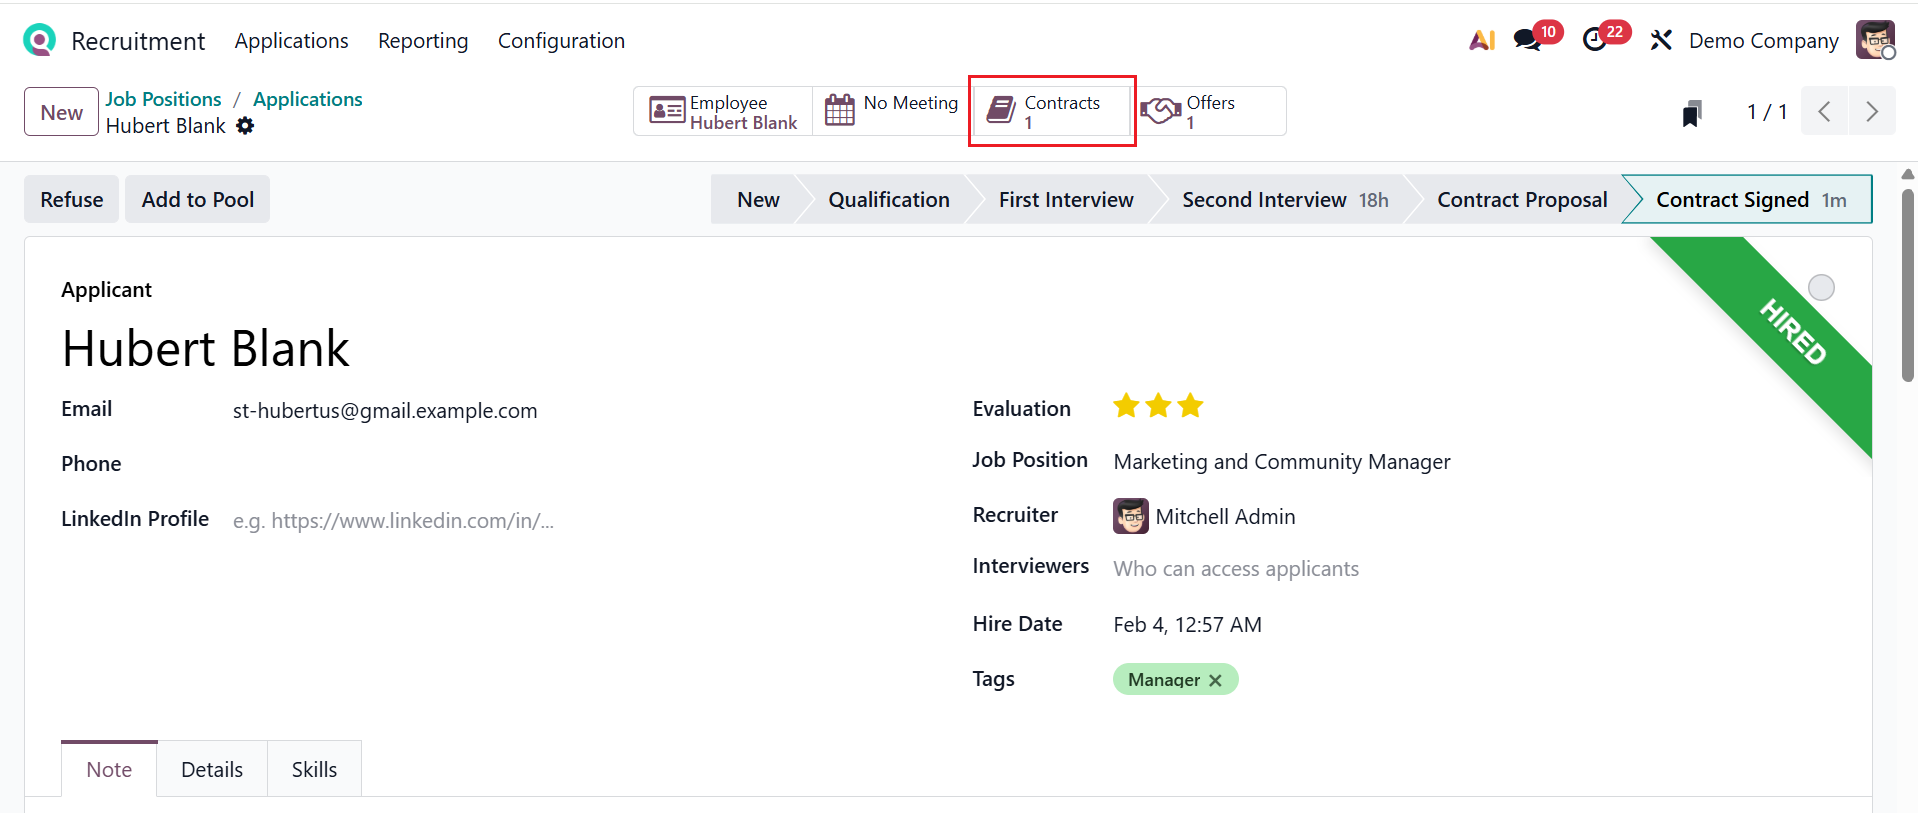
When the offer is fully signed by the recruiter and applicant, you can see that the candidate is in the Hired stage. The Contracts smart tab helps you to view the details of the contract.
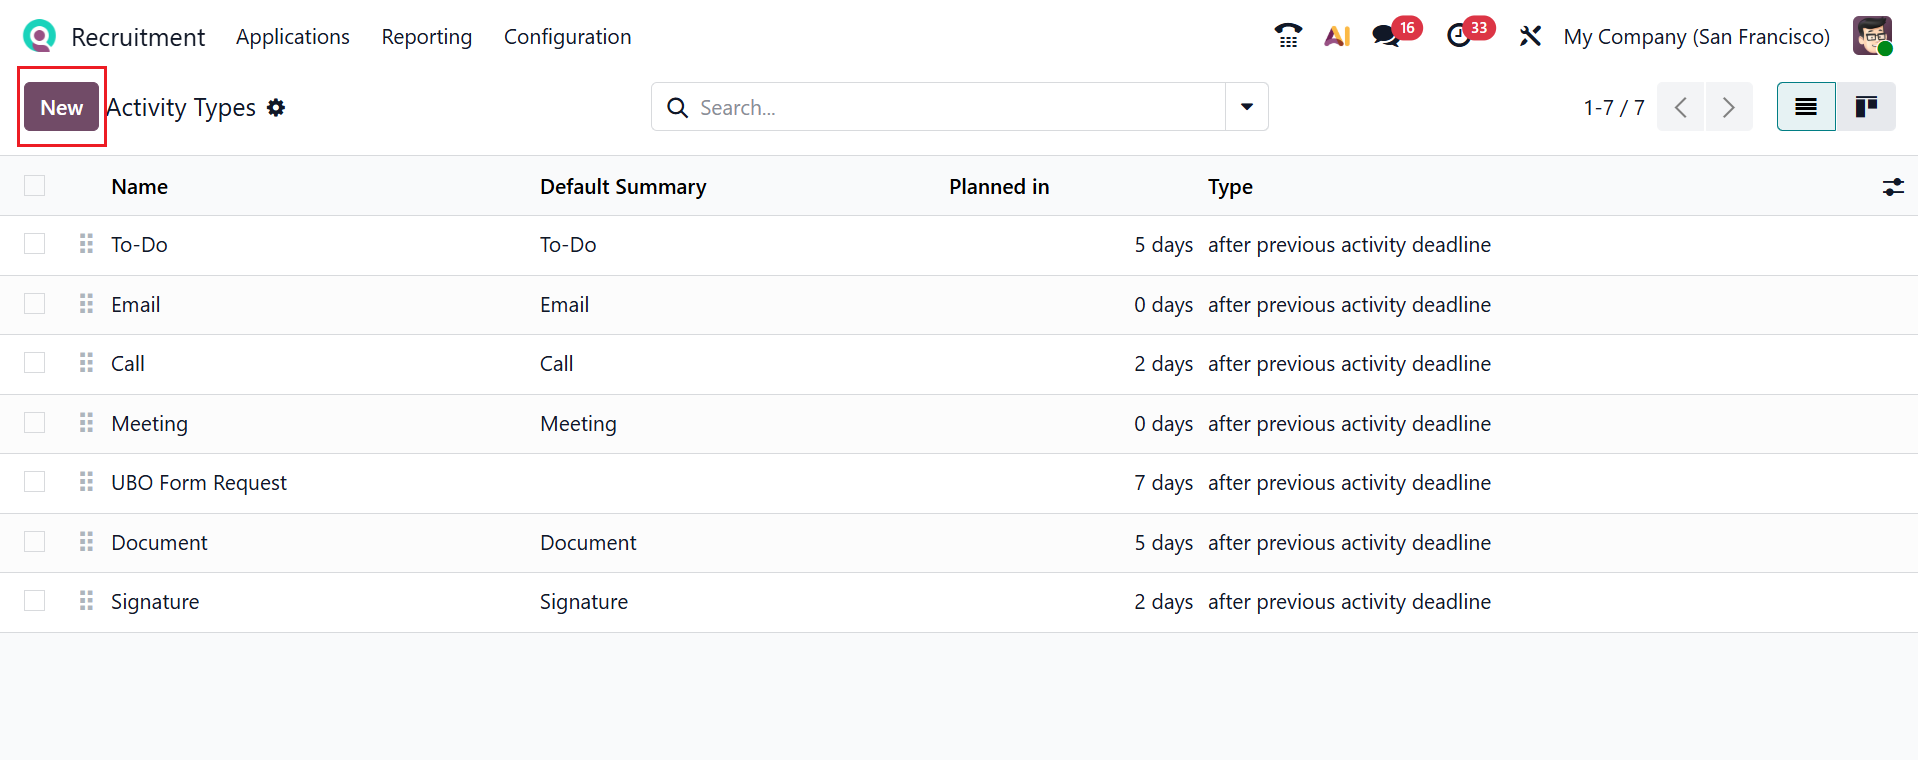
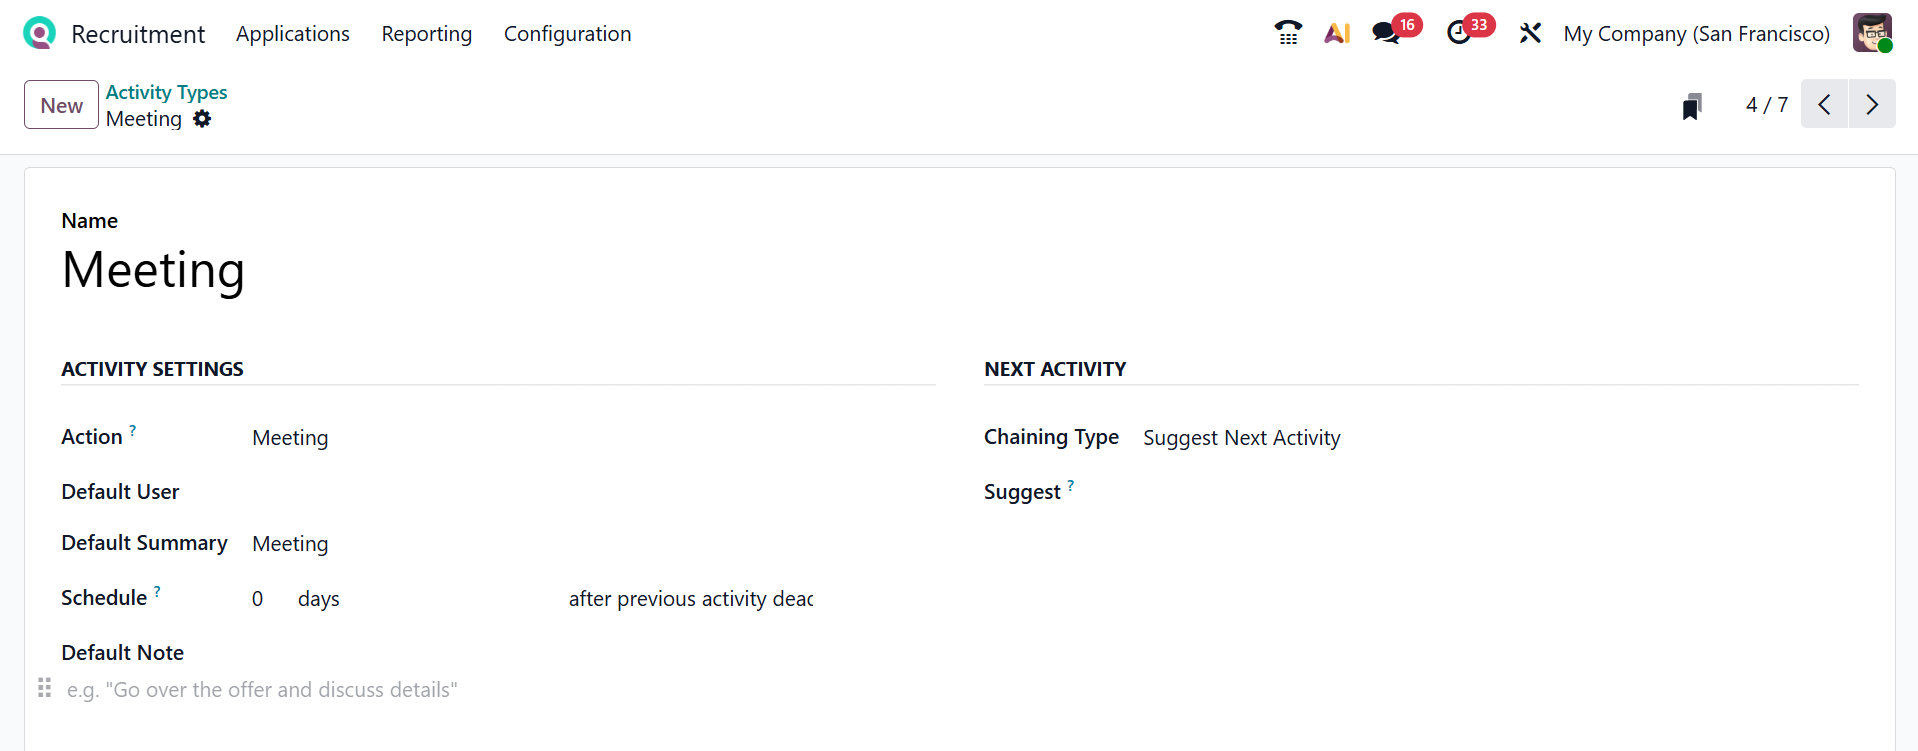
1.13 Activity Types:
In Odoo 19 Recruitment, Activity Types define the kinds of follow-up actions recruiters schedule on applicants, such as calls, emails, interviews, or reminders. They help standardize the recruitment process by setting default deadlines, summaries, and behaviors for each type of activity. Here, you can view a list of activity types along with details such as Name, Default Summary, Planned In, and Type. To create a new activity type, click the New button, as shown below.
First, enter a title for the activity type in the Name field. Then, under the Activity Settings section, provide details such as Action, Default User, Default Summary, Schedule, and Default Note. Under the Next Activity section, add the details, such as Chaining Type and Suggest.
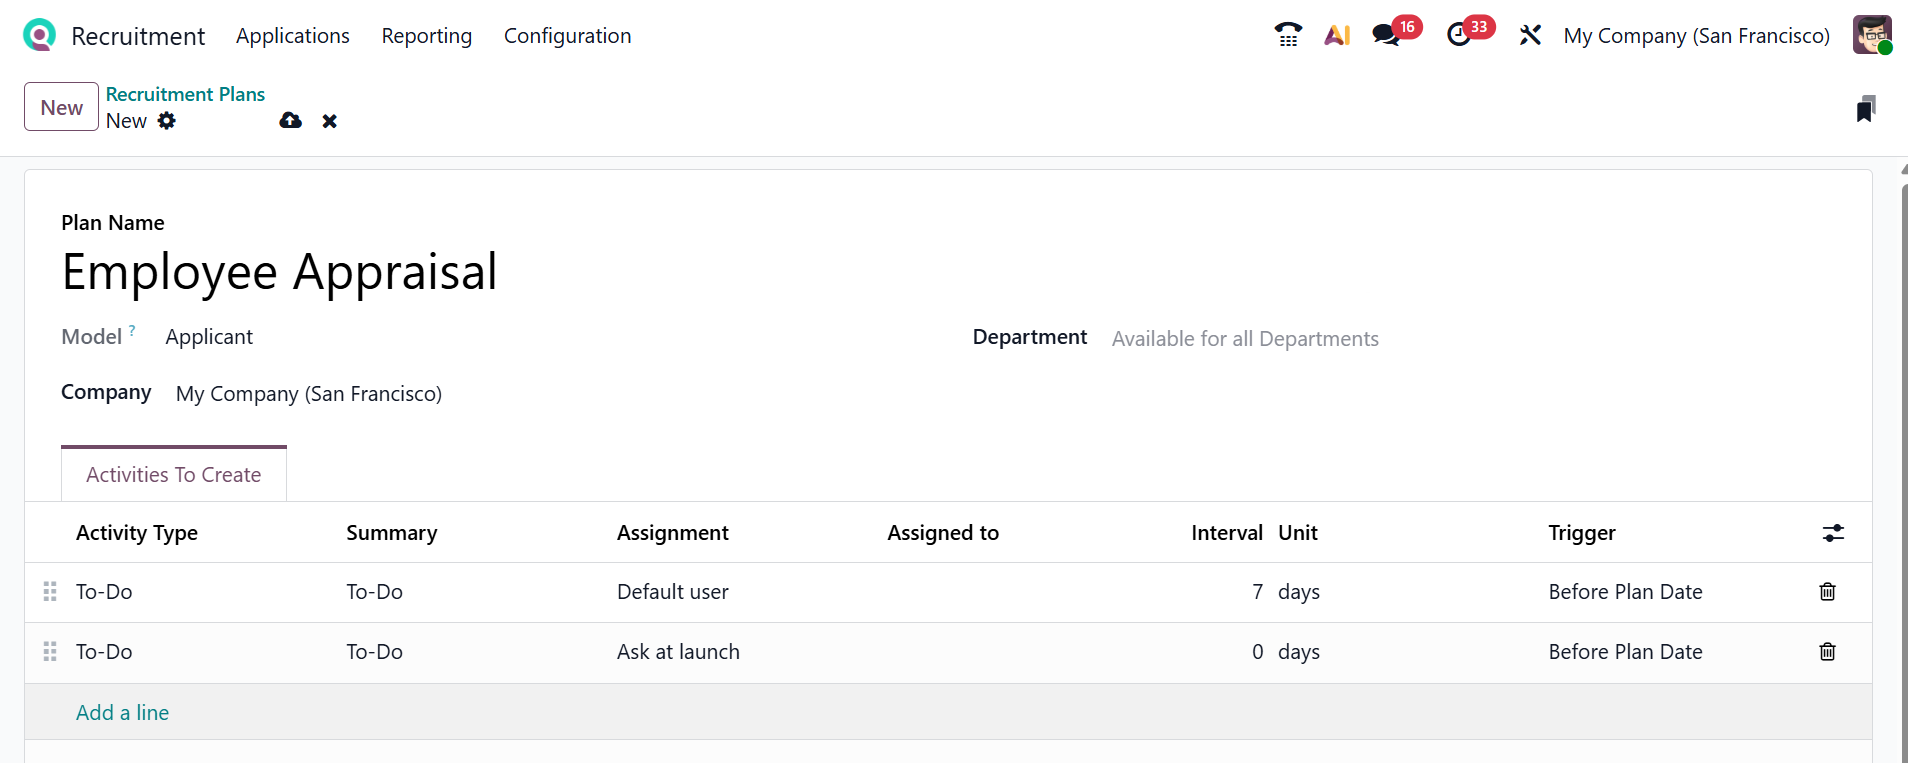
To create a new activity plan, click the New button, as shown below. In the window that appears, enter the details of the activity plan, including Plan Name, Model, Company, and Department.
Under the Activities To Create tab, click the Add a Line button to enter activity details such as Activity Type, Summary, Assignment, Assigned To, Interval Unit, and Trigger. After adding the sequence of activity types, click on the Save icon.

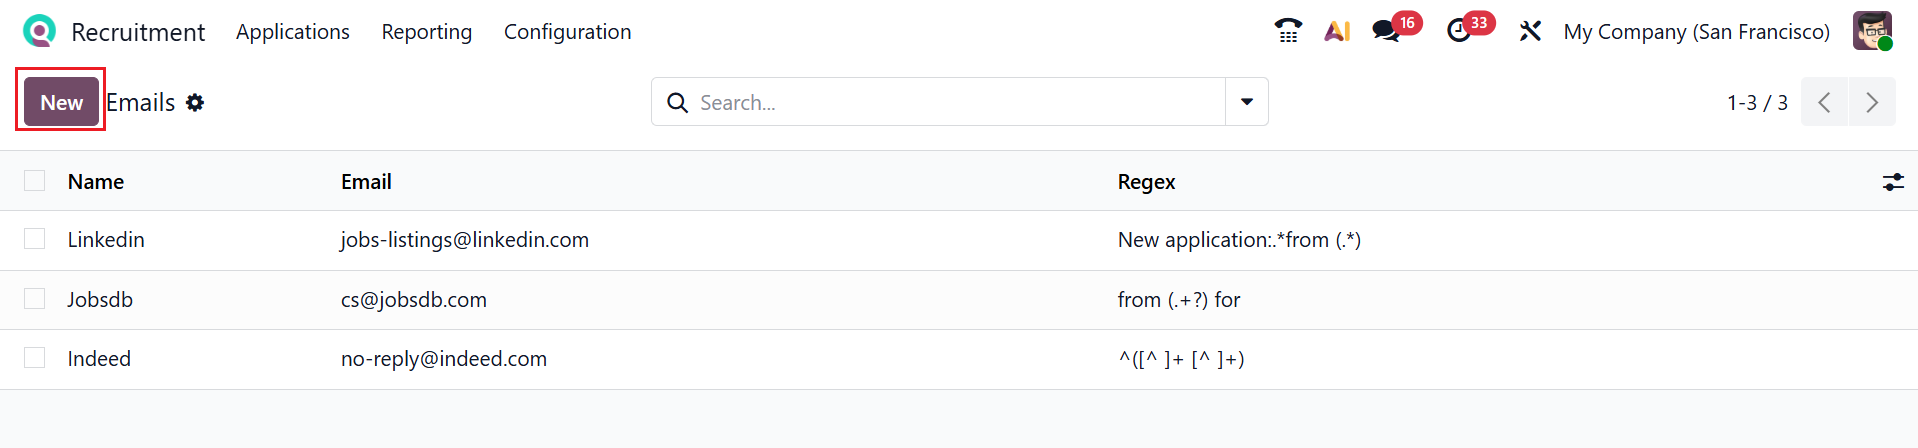
1.15 Emails:
In Odoo 19 Recruitment, Emails are used to communicate with applicants, such as sending interview invites or updates. They help recruiters keep candidates informed throughout the hiring process. Here, you see the list of email sources, email addresses, and Regex patterns for validation. Select the New button to add a new email.
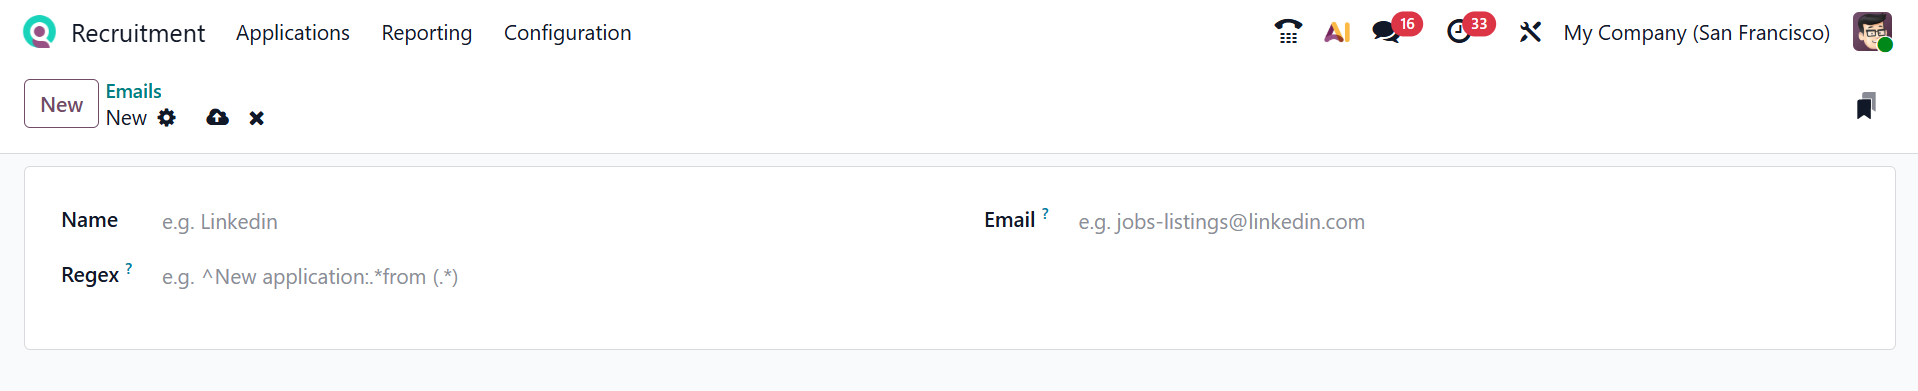
Here, add the details such as Name, Email, and Regex pattern.
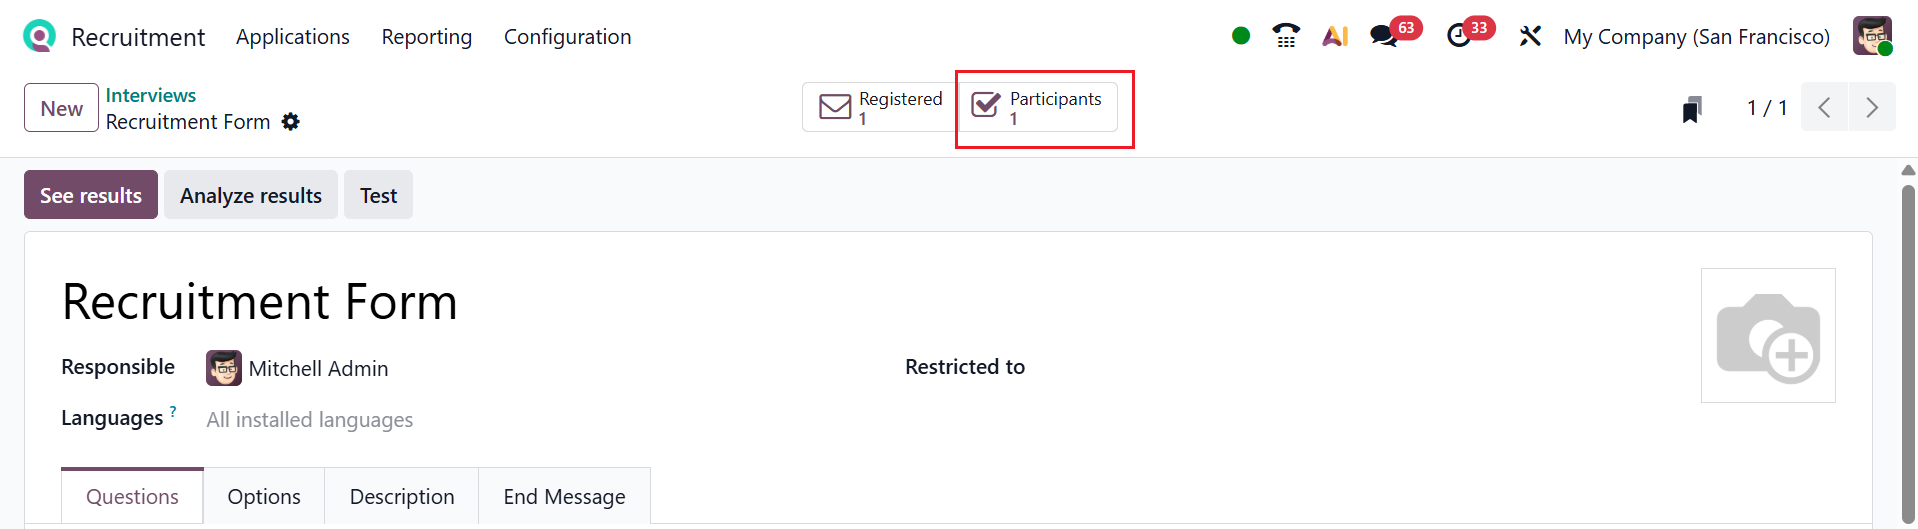
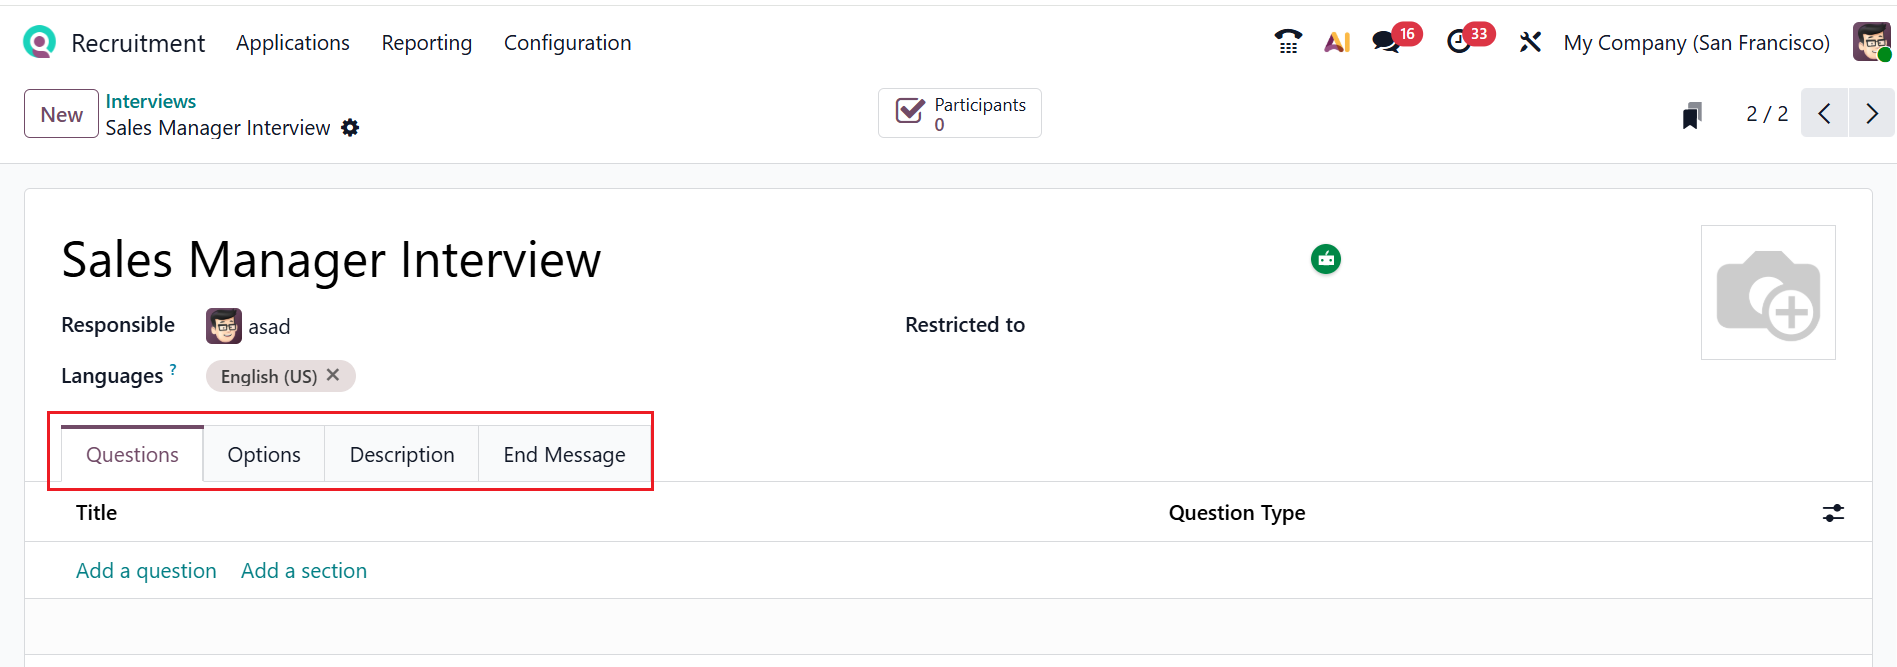
1.16 Interviews:
In Odoo 19 Recruitment, Interviews are scheduled meetings to assess a candidate’s skills and fit for the role. They help recruiters evaluate applicants in a structured way. You can view all interview templates along with their Recruitment Form, Questions, and Completed status. Users can use the Test and See Results buttons to initiate a test or view the outcomes.
To create a new interview form, click the New button, as shown below.
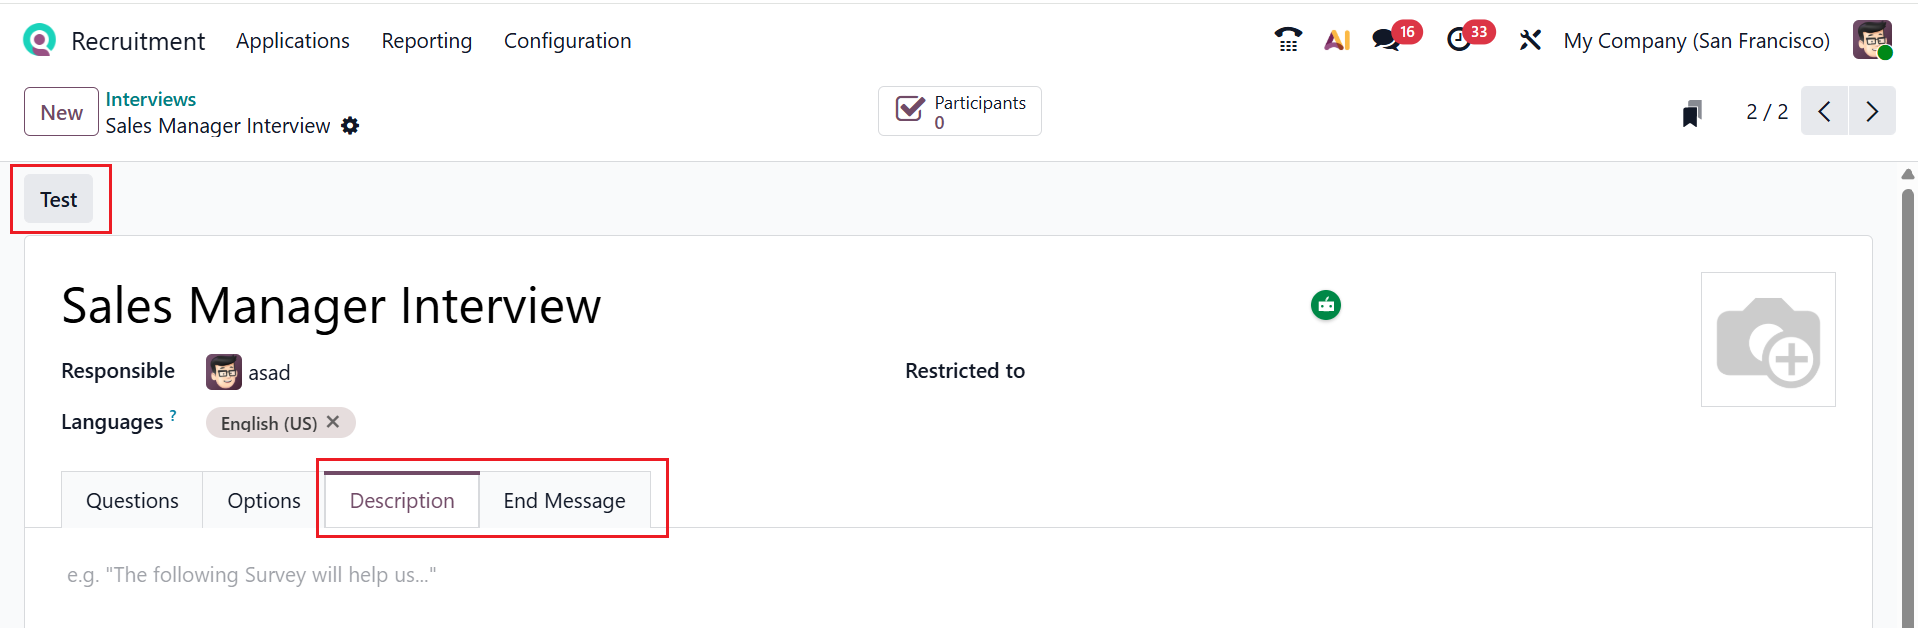
A new window will appear where you can enter details for the interview form, such as Interview Name, Responsible, Language, and Restricted To. The window also contains four tabs: Questions, Options, Description, and End Message.

Under the Questions tab, click the Add a Question button, which will open a new pop-up window for adding the question details, as illustrated below. Then, add a question and select a question type from the listas shown below. Description and Options are the two tabs available here.
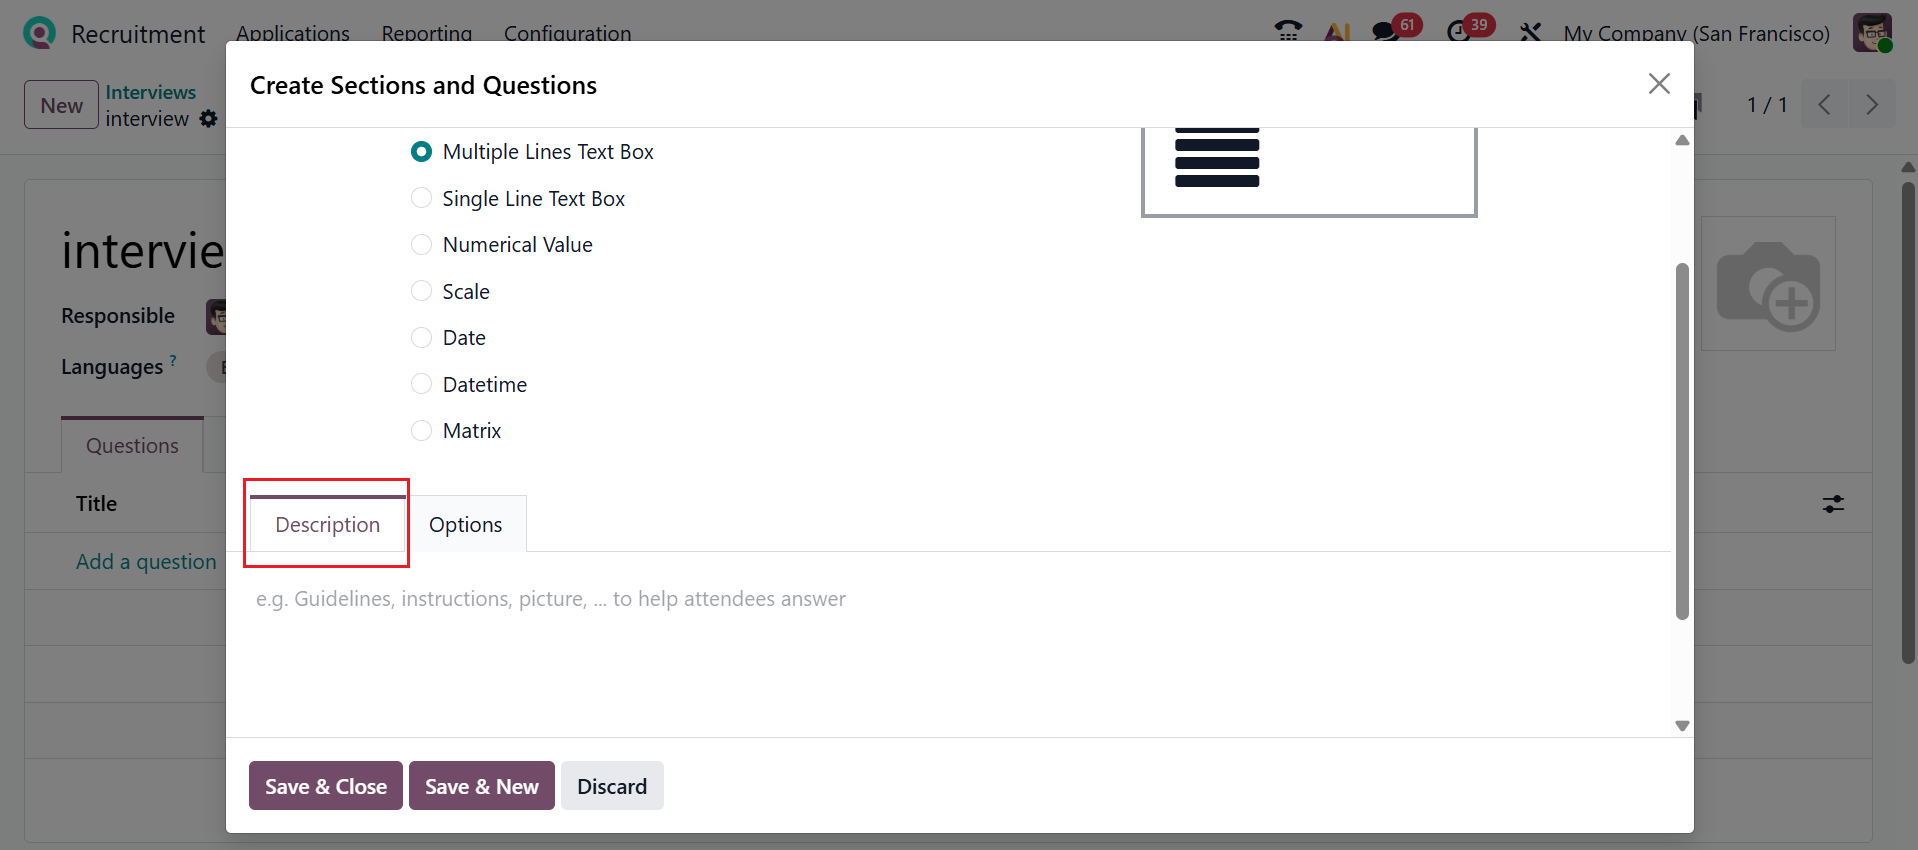
The Description tab allows you to provide instructions or guidelines for participants.
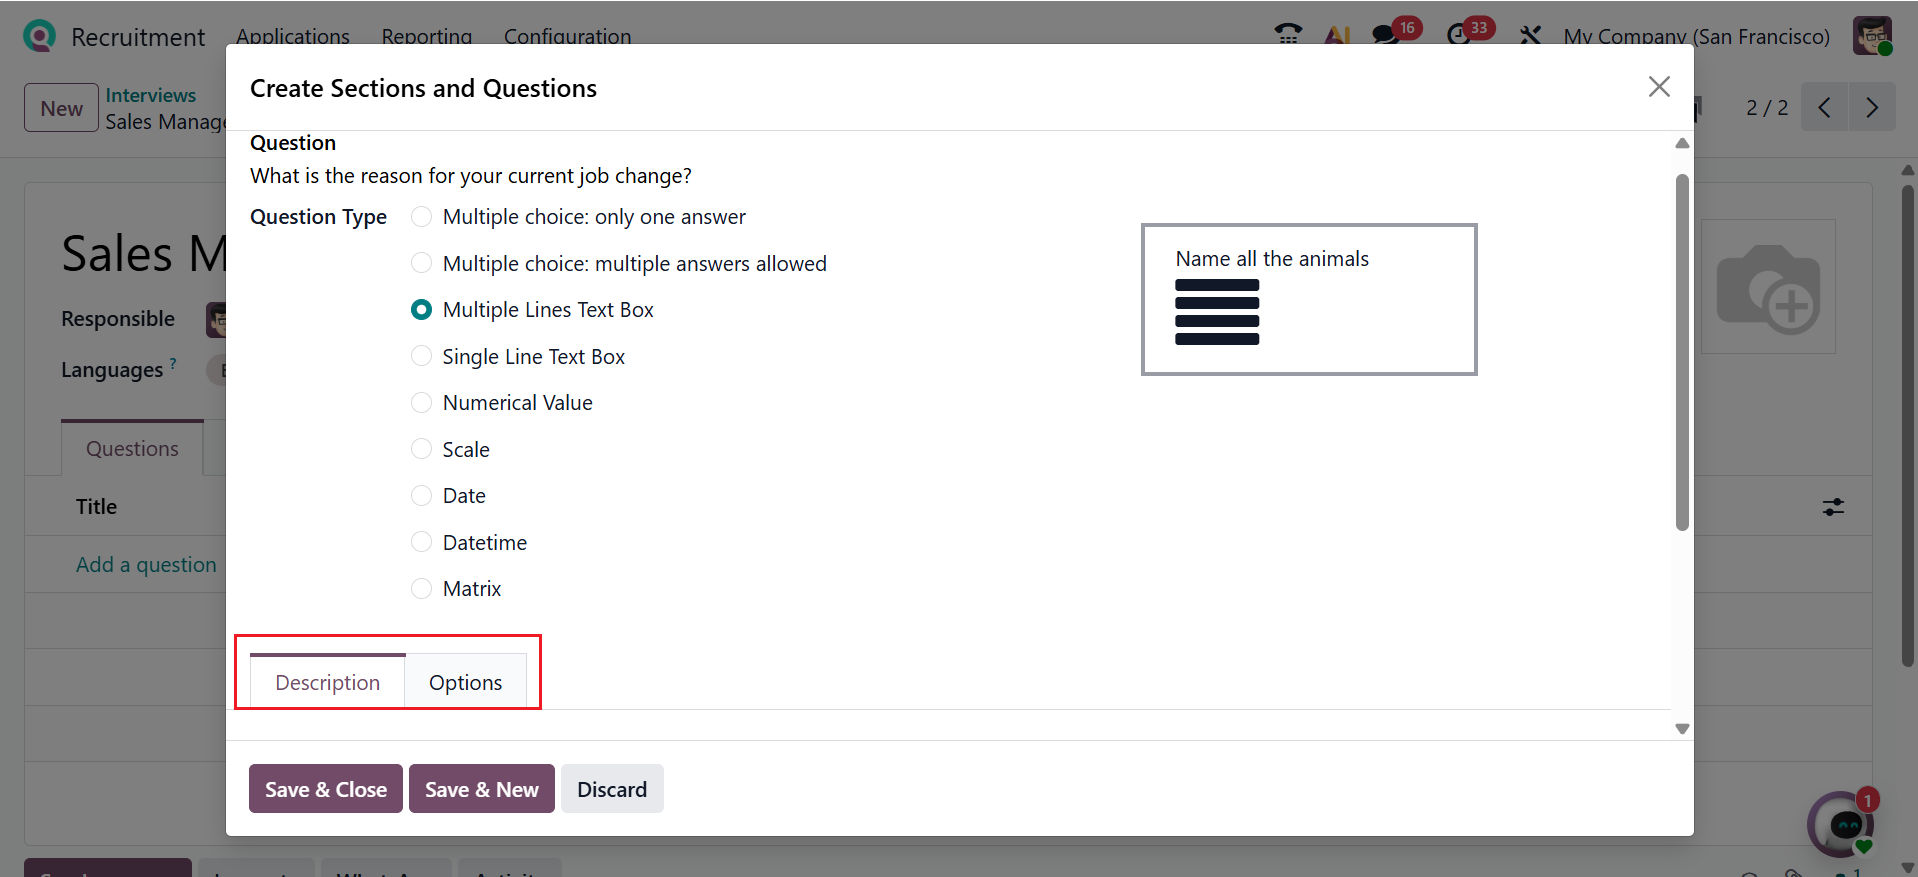
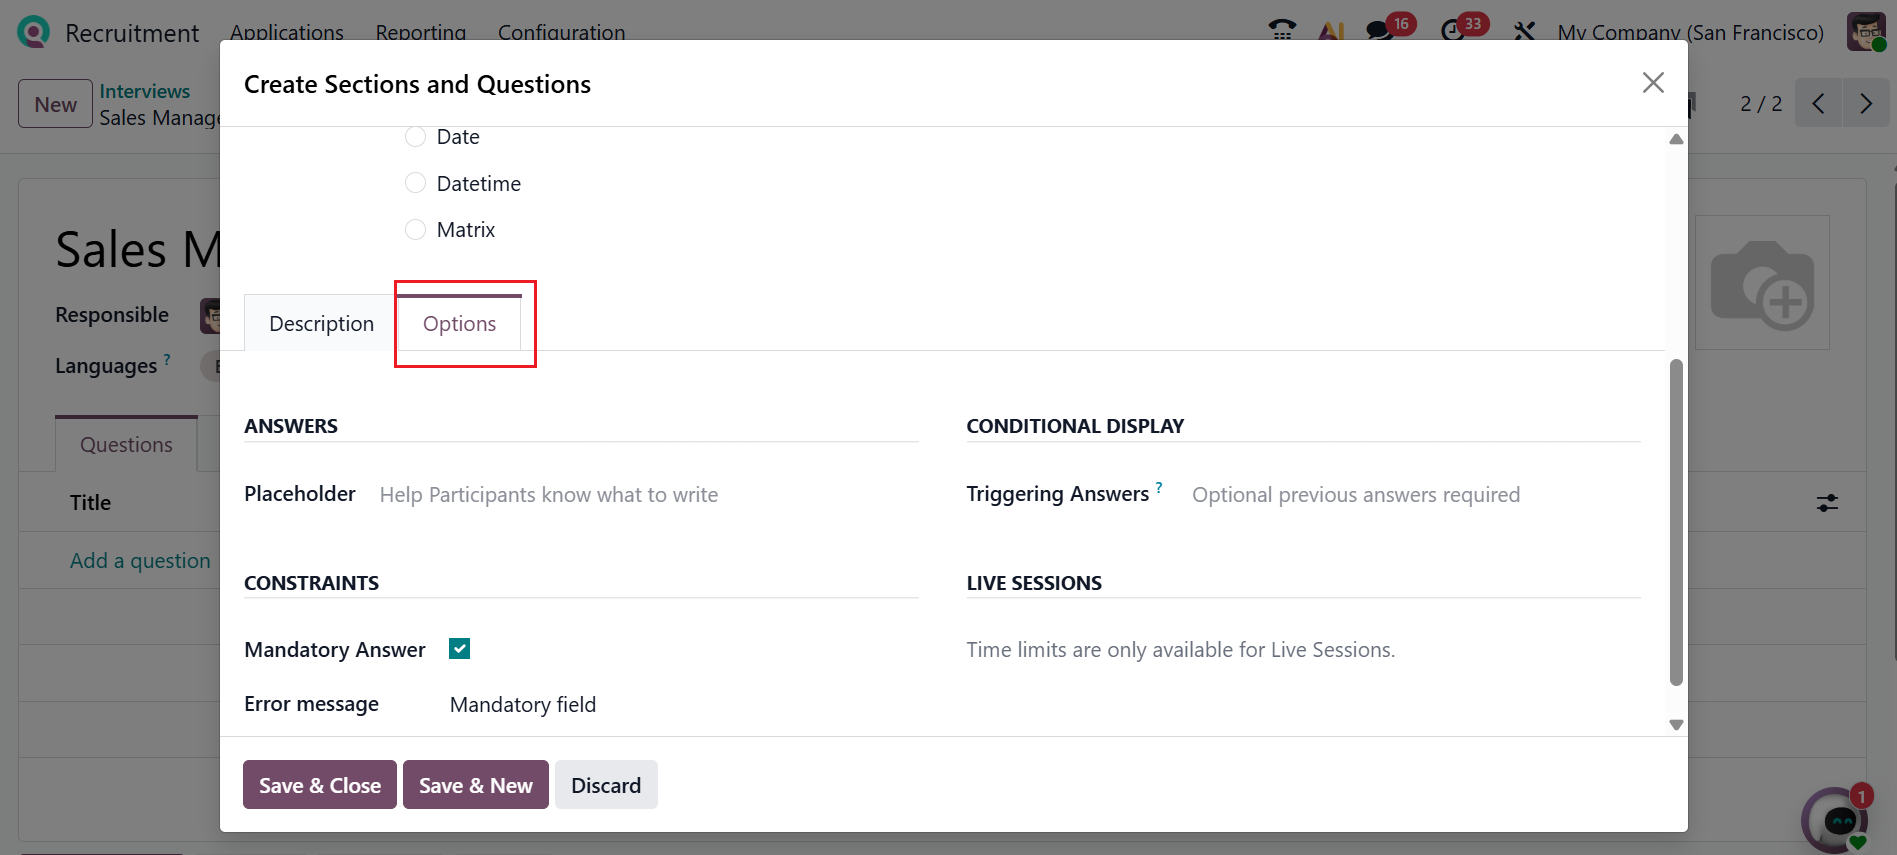
The Options tab lets you customize settings like Placeholders, Triggering Answers, Error Messages, and Mandatory questions.
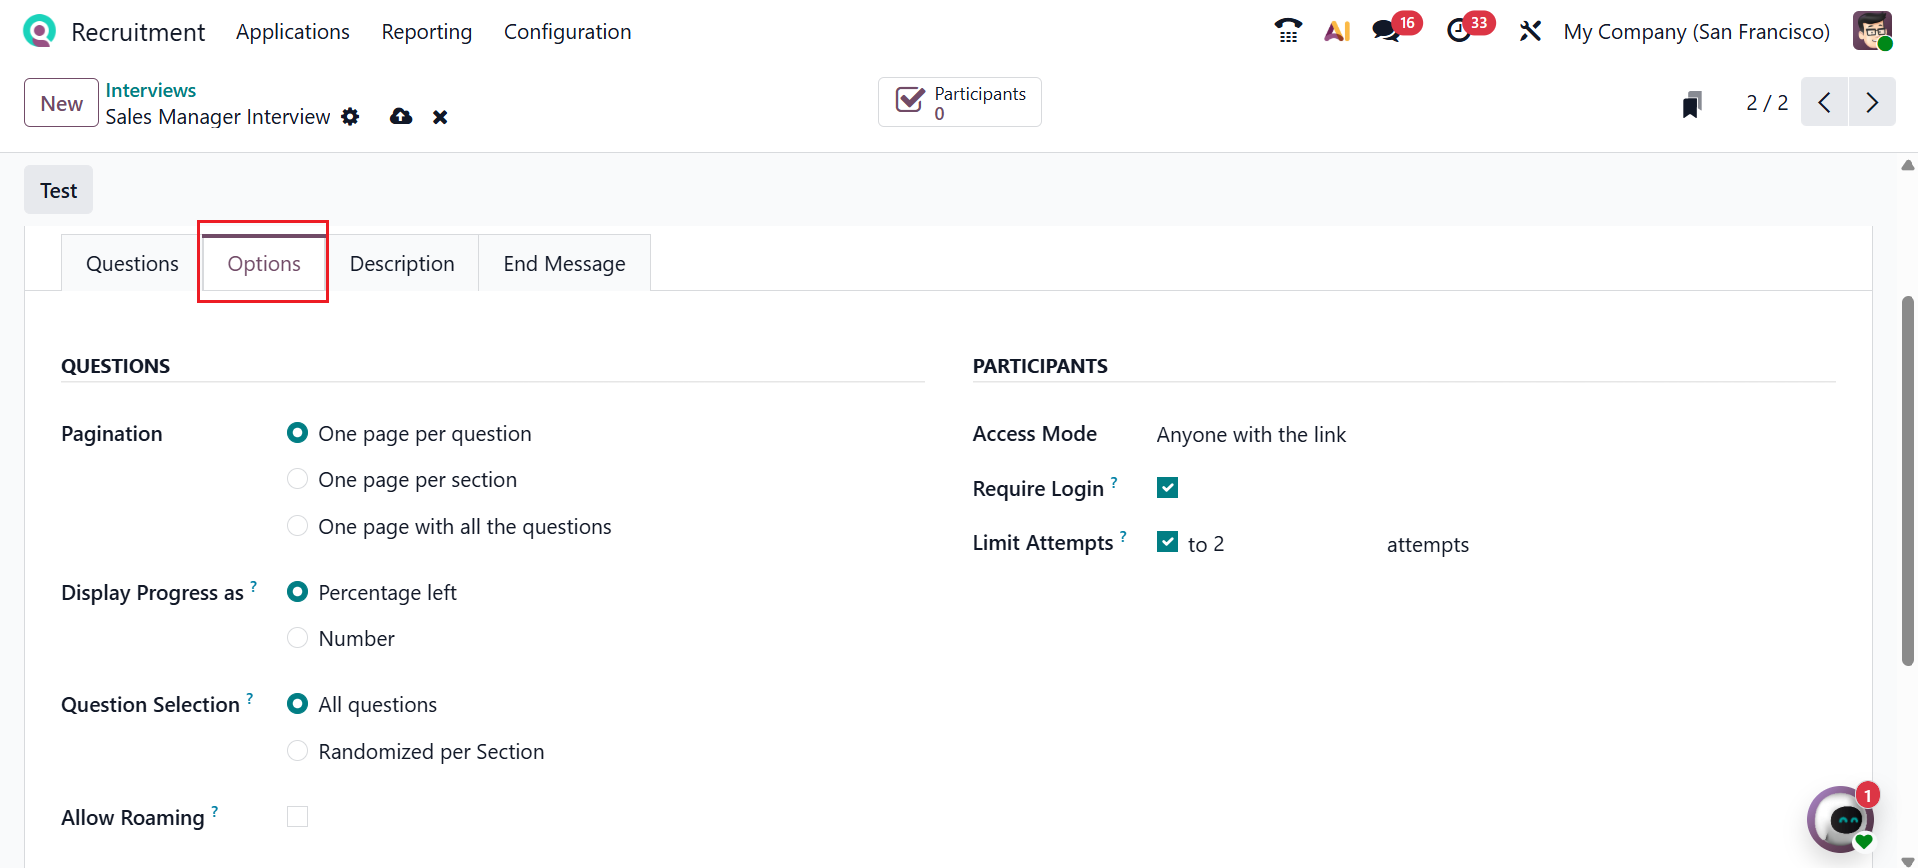
After adding questions, move back to the interview form. In the Options tab, you can set parameters like Pagination, Display Progress, Question Selection, Allow Roaming, Access Mode, Require Login, and Limit Attempts.
Under the Description tab, add a short description about the interview, and you can add an ending message for candidates under the End Message tab. After saving it, click on the Test button to test the interview.
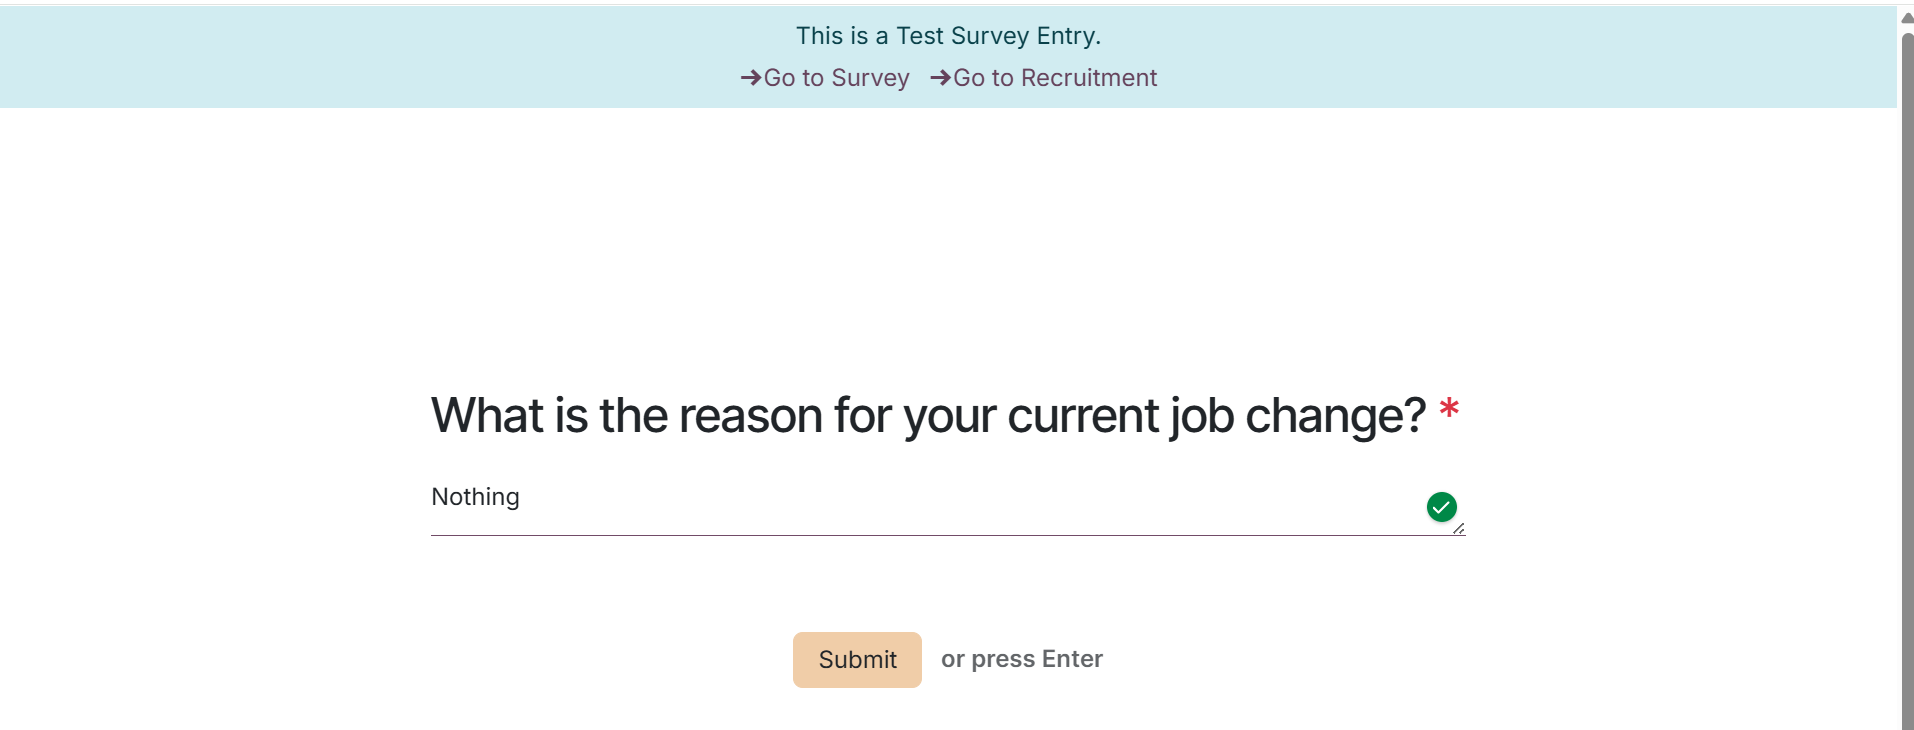
Then, you will move to a new web page as shown below. Click Start Survey to start the interview. Complete each question, then submit the survey by clicking Submit.
Complete each question, then submit the survey by clicking 'Submit.
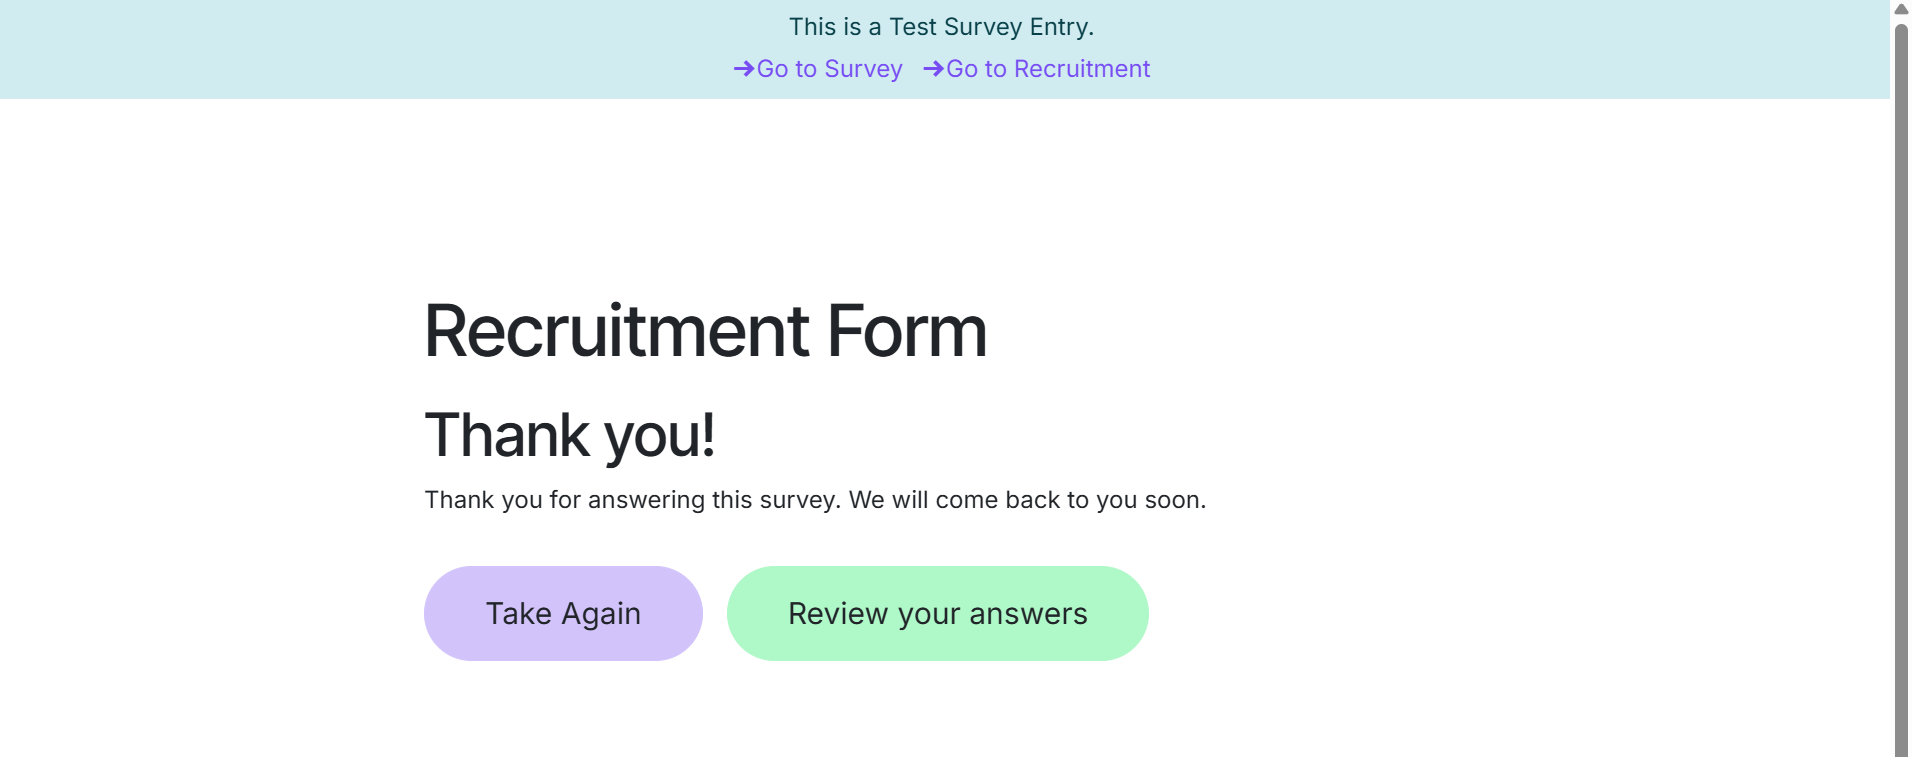
By using the Take Again or Review your answers button, the candidates can retry the interview or view submitted answers.
Once the survey is submitted, use the Participants smart button to review participant data.