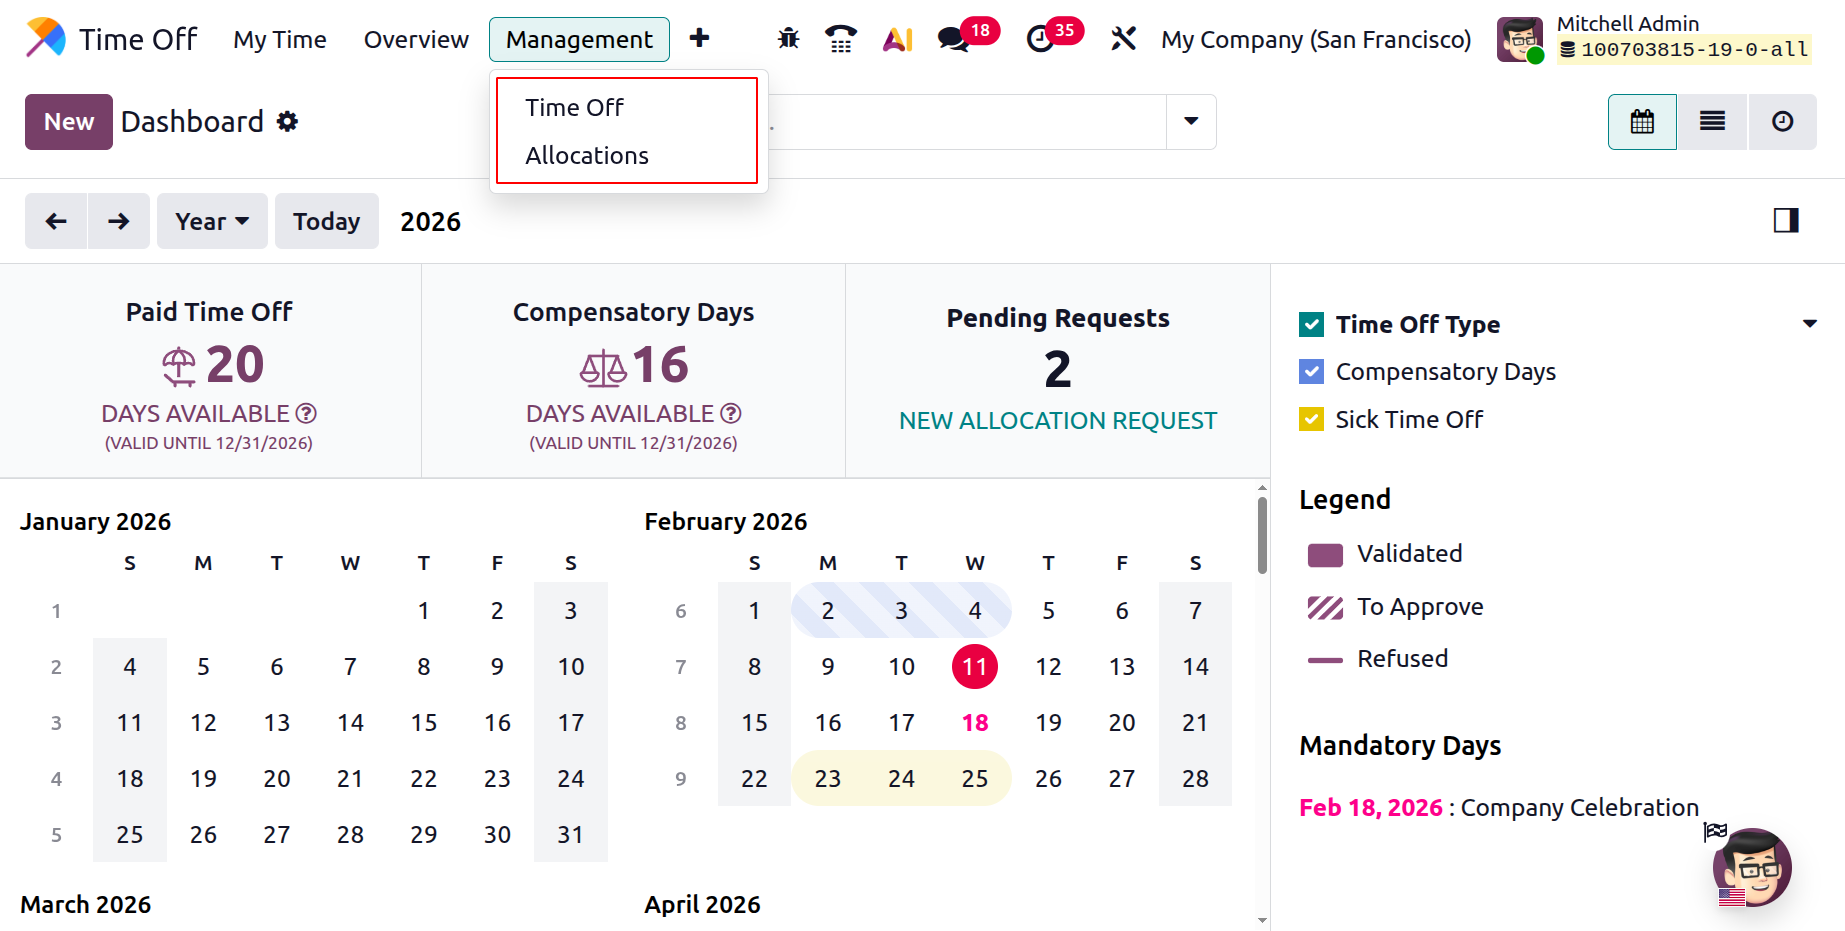
Management
The Management menu in Odoo 19 allows HR managers to handle employee leave and allocations using the Time Off and Allocation submenus.
Time Off
The All Time Off section displays a complete list of leave requests across the organization, including employee names, leave types, descriptions, dates, and approval status.
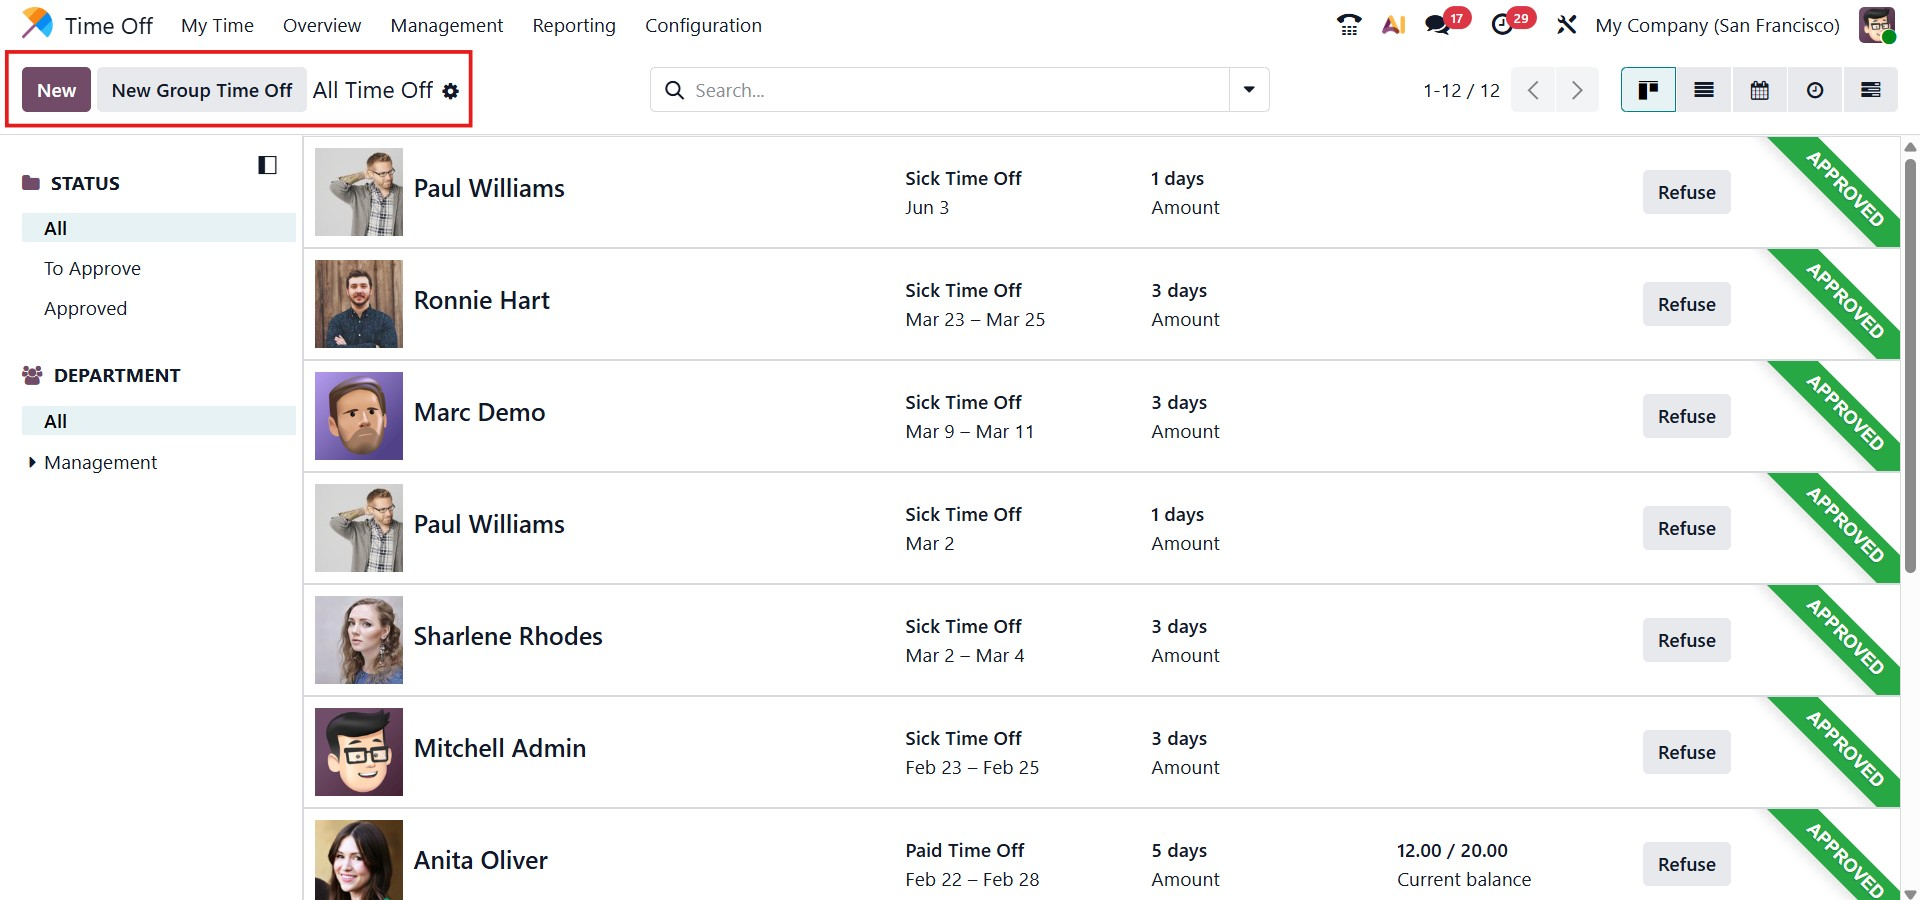
Managers can approve or refuse leave requests directly from this screen using the Approve, Validate, or Refuse buttons. Filters for Department and Status on the left side help users quickly narrow down records. The advanced search bar can also be used to filter, group, and save frequently used views.
To create a new leave request, users can click the New button and choose a request method such as By Employee, Company, Department, or Employee Tag. Users can then select the leave type, enter the dates, enable the Half Day option if required, and attach a file.
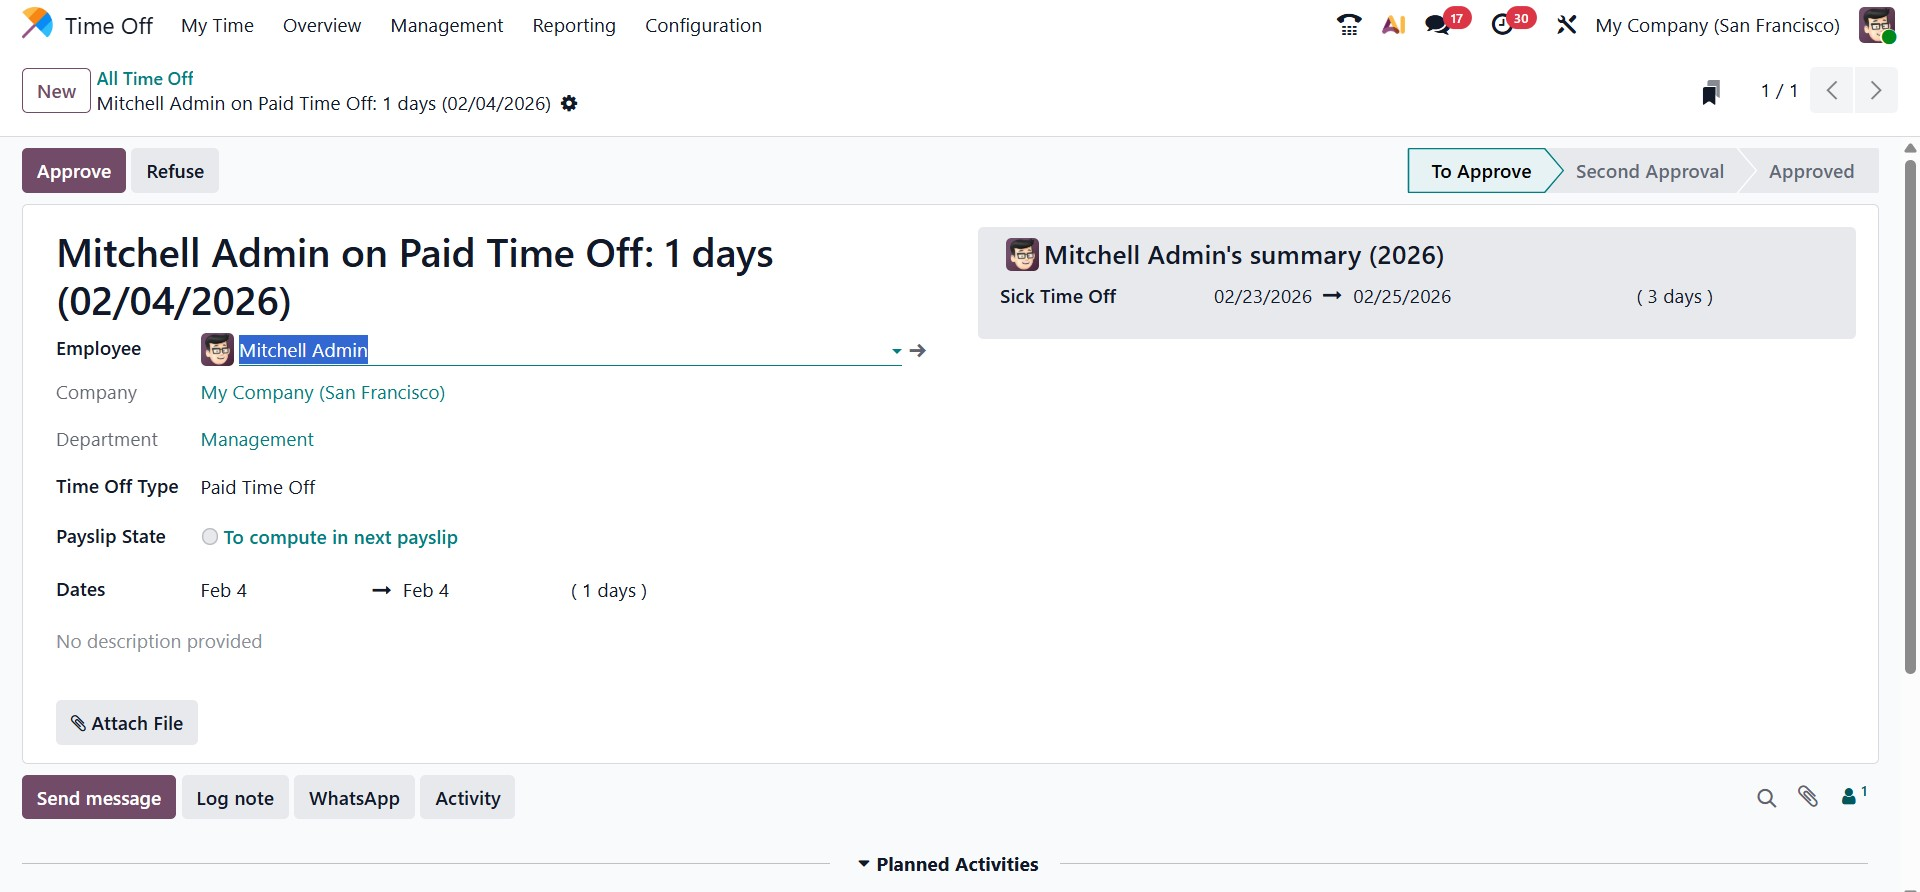
The Payslip State feature in Odoo 19 links time-off records with payroll processing.
- To Compute in Next Payslip means the leave will be included in the upcoming payroll.
- Computed in Current Payslip indicates the leave has already been processed.
- To Defer to Following Payslip means the request will be moved to a later payroll cycle.
Managers can finalize requests using the Approve or Refuse buttons, ensuring accurate payroll calculations.
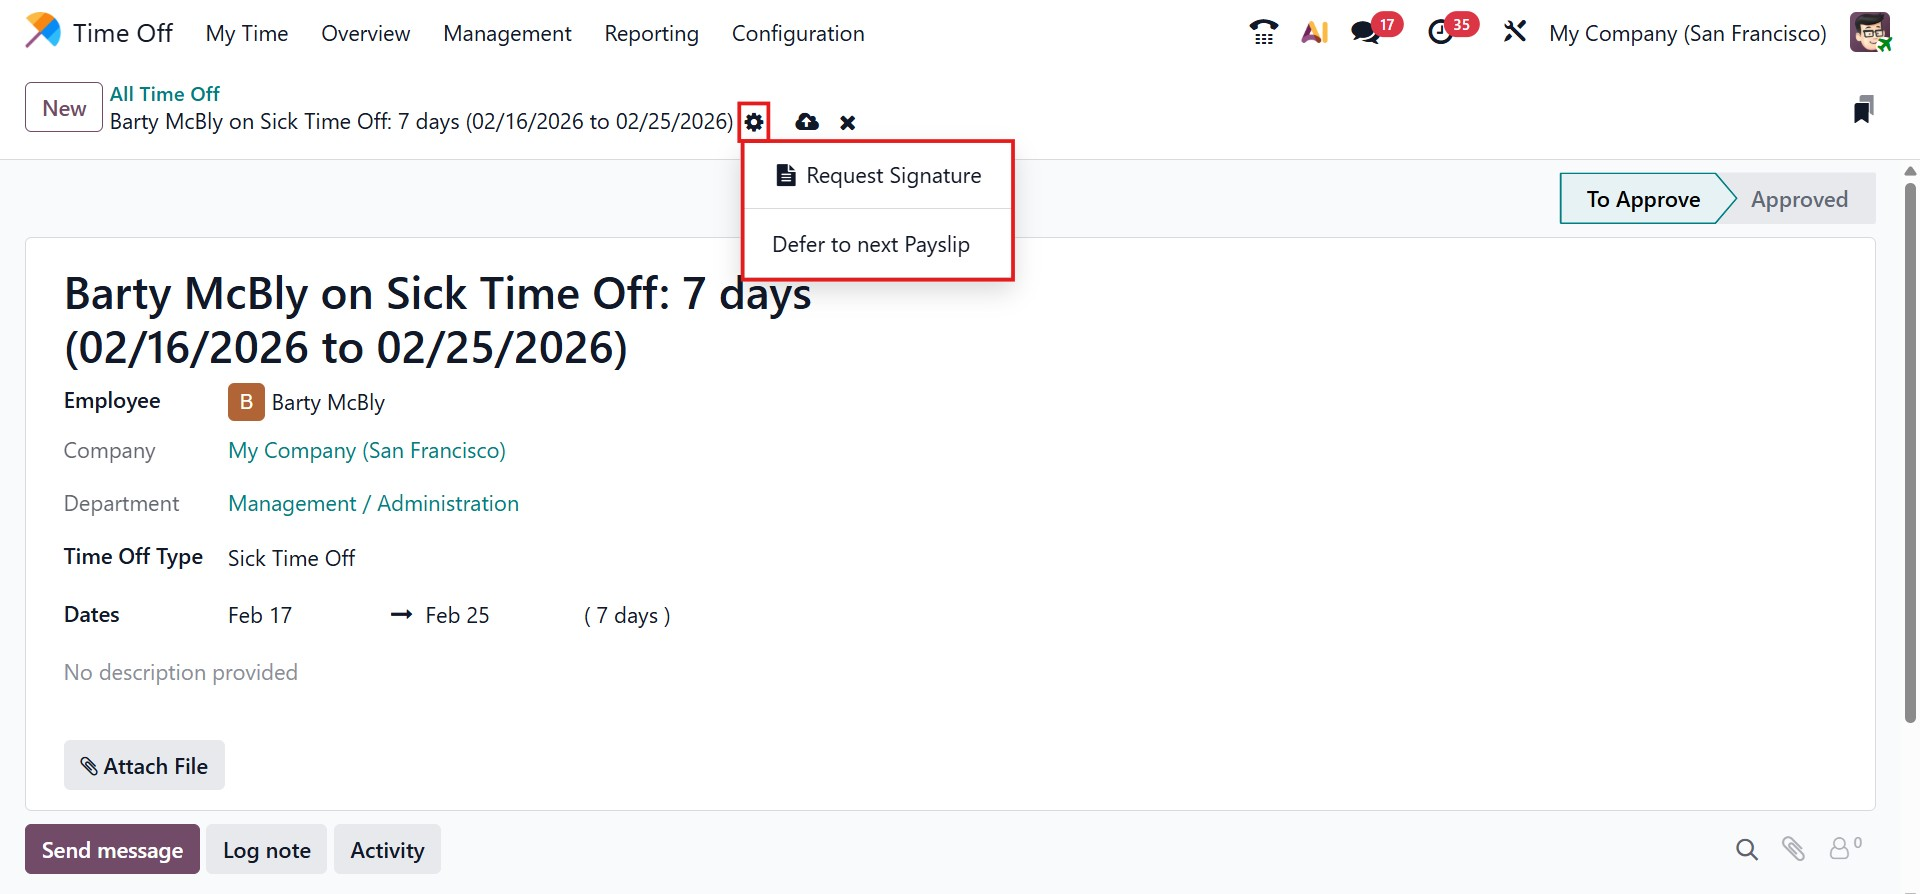
The Action button provides additional options such as Request Signature and Defer to next payslip. Request Signature allows employees to sign attached documents using Odoo’s Sign module. These tools improve policy control, payroll accuracy, and workforce planning.
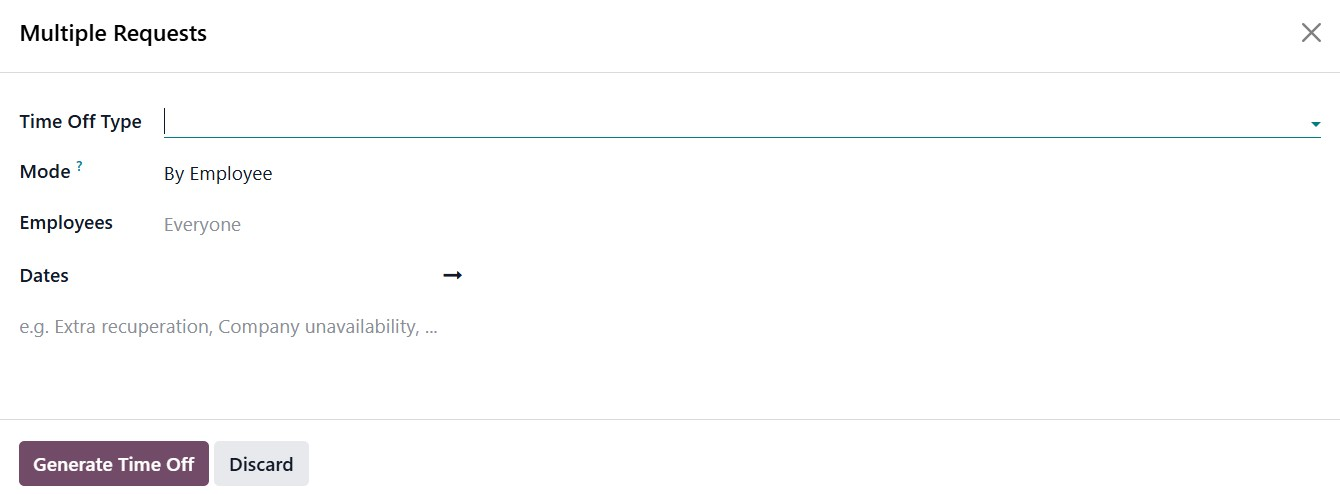
Odoo 19 also provides a New Group Time Off button. This option allows HR managers to create time-off entries for multiple employees at once. By using this feature, managers can select a common Time Off Type, define the applicable dates, and apply the leave to a group of employees, such as an entire department or the whole company. This is especially useful for company-wide holidays, mandatory leaves, or shared recovery days, helping reduce manual work and save time.
Allocation
The Allocation menu shows all leave allocations assigned to employees, including details such as Employee Name, Time Off Type, Description, Allocation Type, Allocated Amount, and Status.
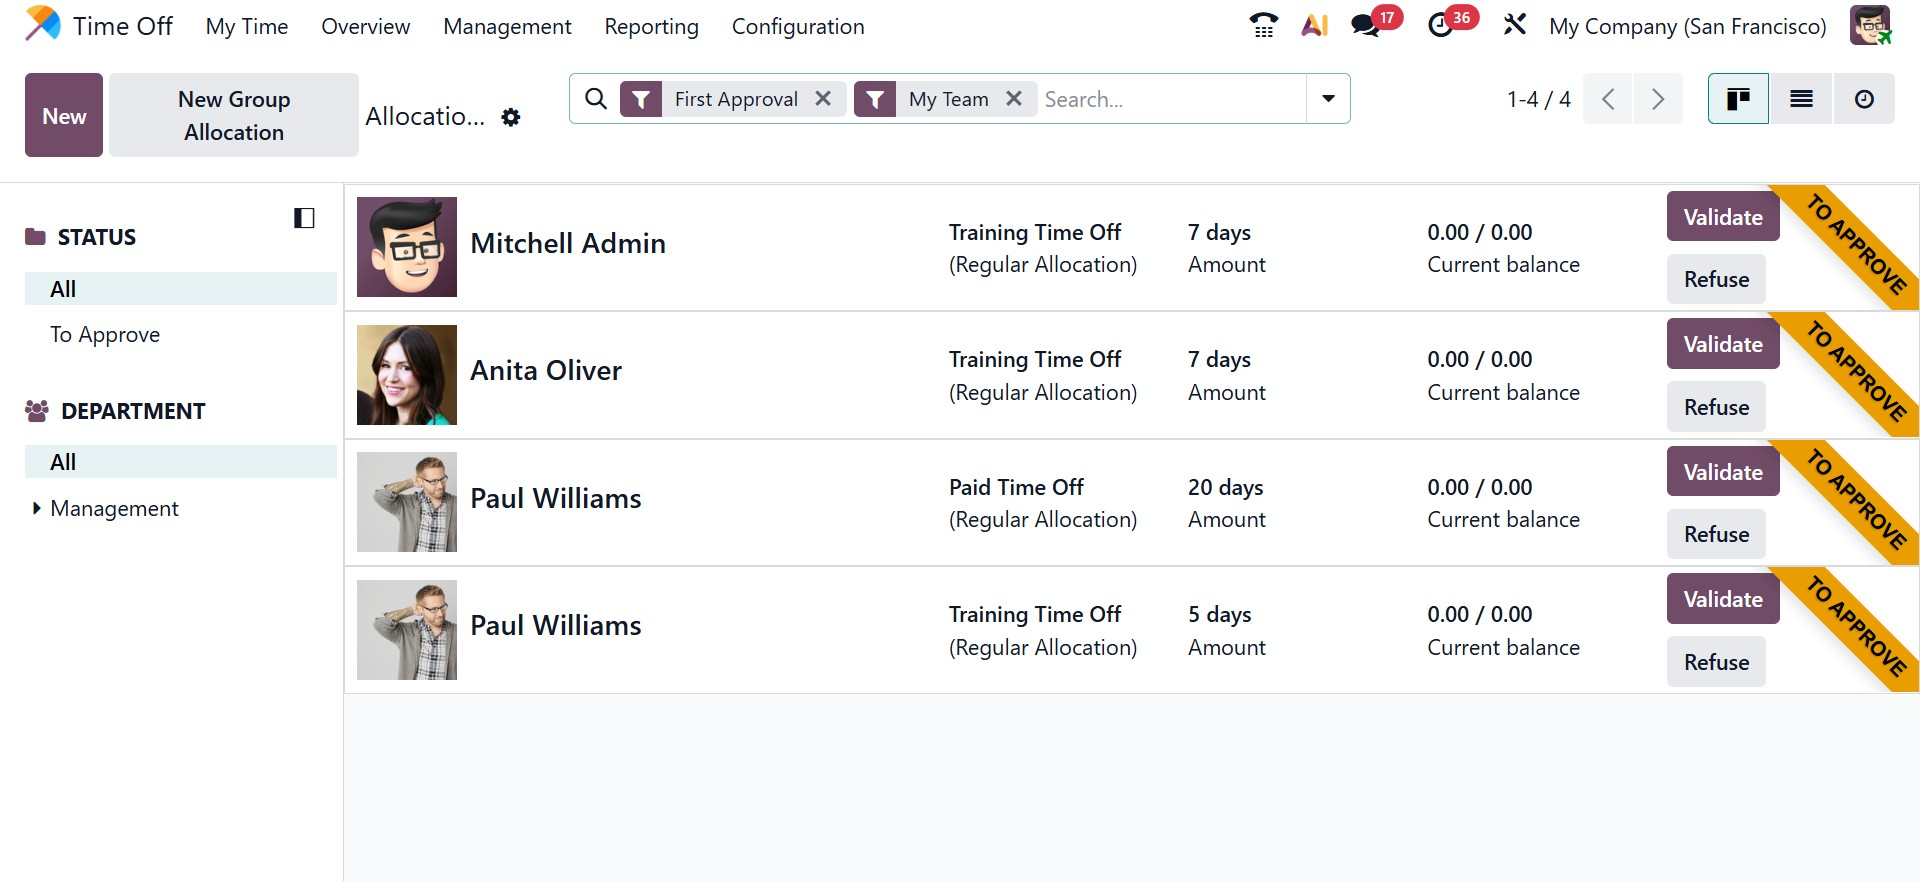
Allocations can be filtered by Status and Department for easier management. Managers can approve or refuse allocation requests using the Approve and Refuse buttons.
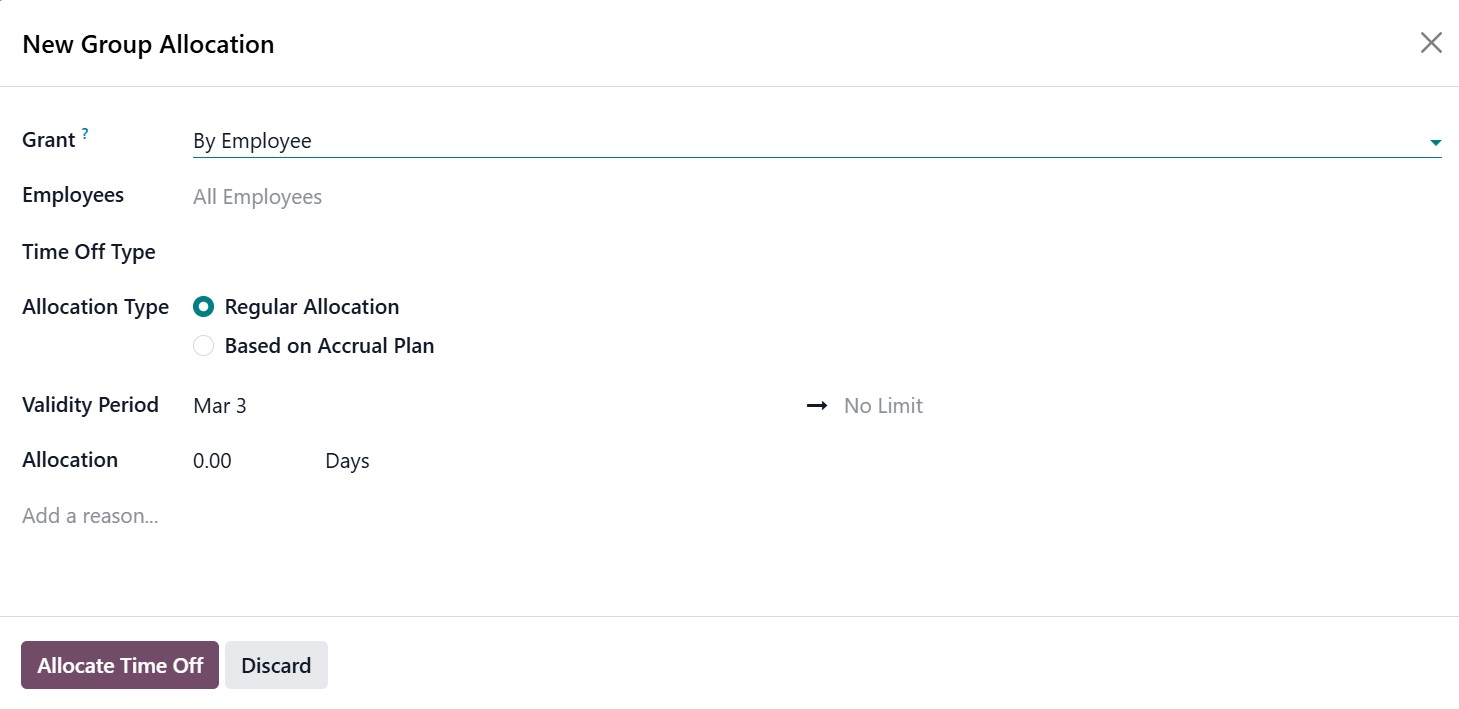
In addition to individual allocations, Odoo 19 also allows group allocations, enabling managers to assign leave allocations to multiple employees at once. By clicking the New button and selecting the appropriate option, administrators can open the Group Allocation window, where they can specify how the leave will be granted, choose the employees or employee groups, define the Time Off Type, select the Allocation Type (Regular Allocation or Based on Accrual Plan), set the Validity Period, and enter the number of allocated days. This feature simplifies the process of granting leave balances to multiple employees simultaneously.
Accrual Allocations
Odoo 19 supports Accrual Allocations, allowing employees to earn leave gradually based on predefined rules. With accrual plans, leave can accumulate automatically on a monthly or yearly basis, and unused leave may be carried forward depending on company policy.
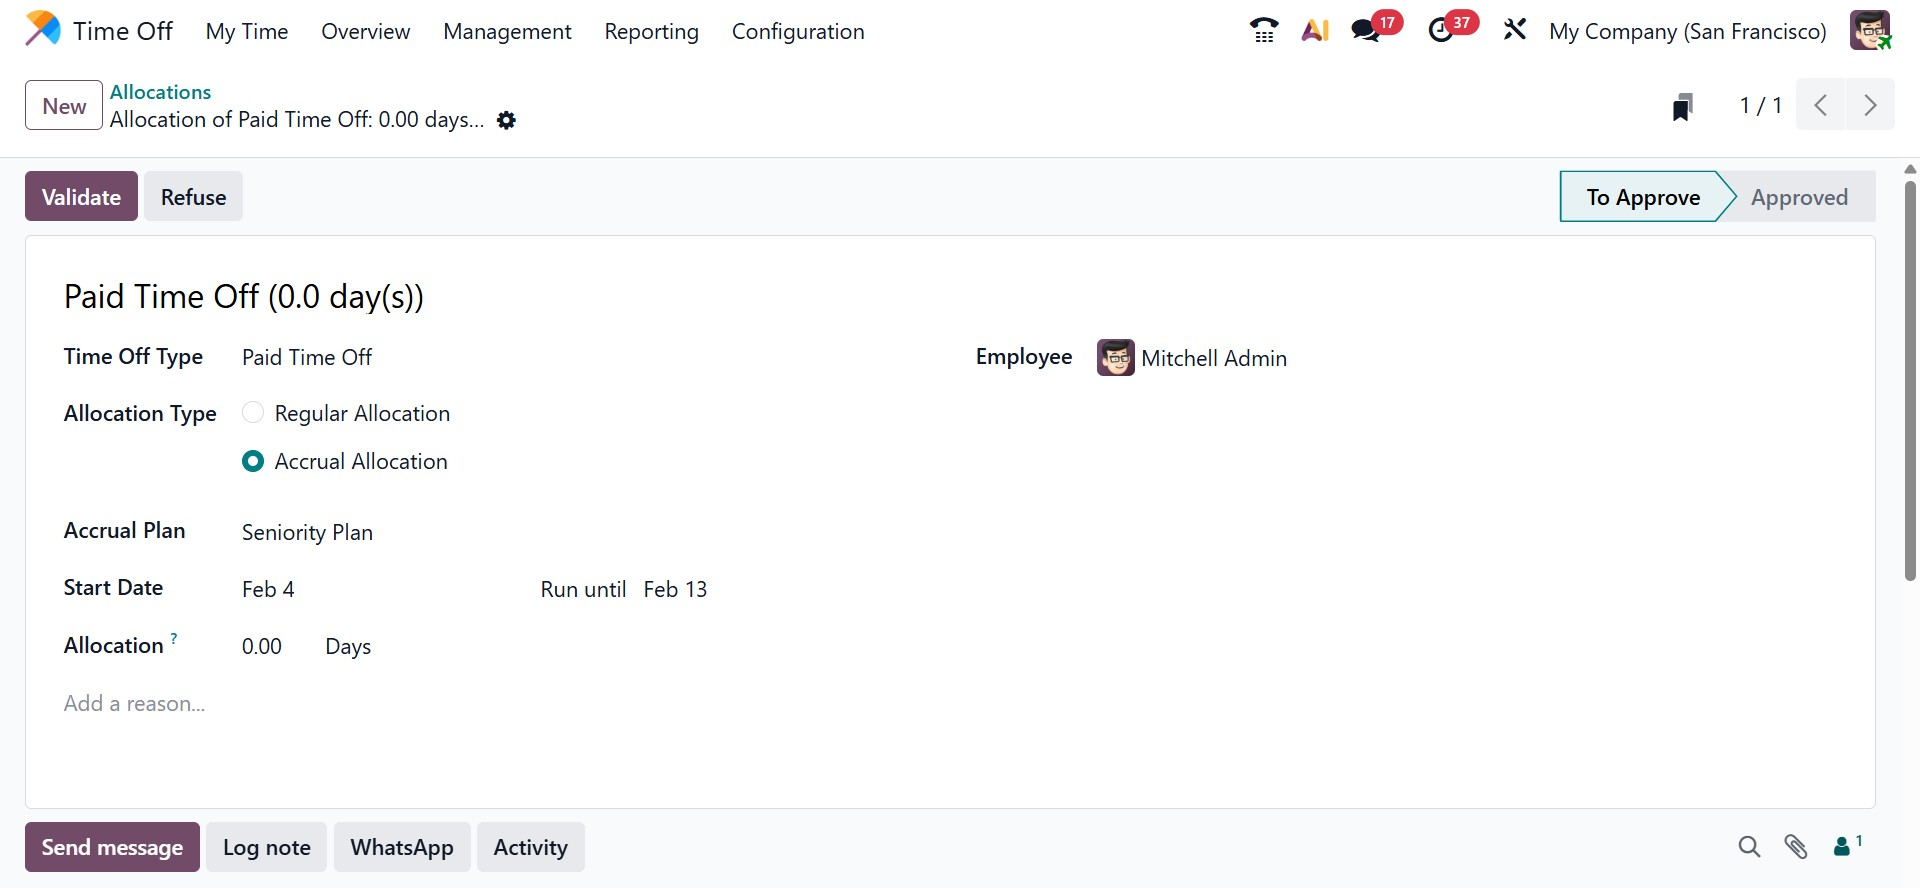
When creating an allocation request, users must select the Time Off Type, choose Accrual Allocation as the Allocation Type, and select the appropriate Accrual Plan. The Start Date, End Date, and Allocation Period can also be defined to control how leave is accumulated over time.
Regular Allocations
Alongside accrual-based leave, Odoo 19 also provides Regular Allocations, which allow managers to grant a fixed number of leave days directly to employees. This approach is typically used for manually assigning leave, such as annual leave adjustments, special leave, or additional leave granted by HR.
To create a regular allocation, users simply choose the Time Off Type, set the Allocation Type to Regular Allocation, specify the employee, and enter the number of days in the Allocation field. A Validity Period may also be defined if the leave is limited to a specific timeframe.
Users can also enter a reason for the allocation in the description field. After saving, the allocation remains in the To Approve stage until a manager approves it. Once approved, the accrual allocation becomes visible on the Time Off Dashboard.
The dashboard shows remaining leave balances along with carried-over leave from previous years. A date can be added to the Balance At field to indicate future leave availability.
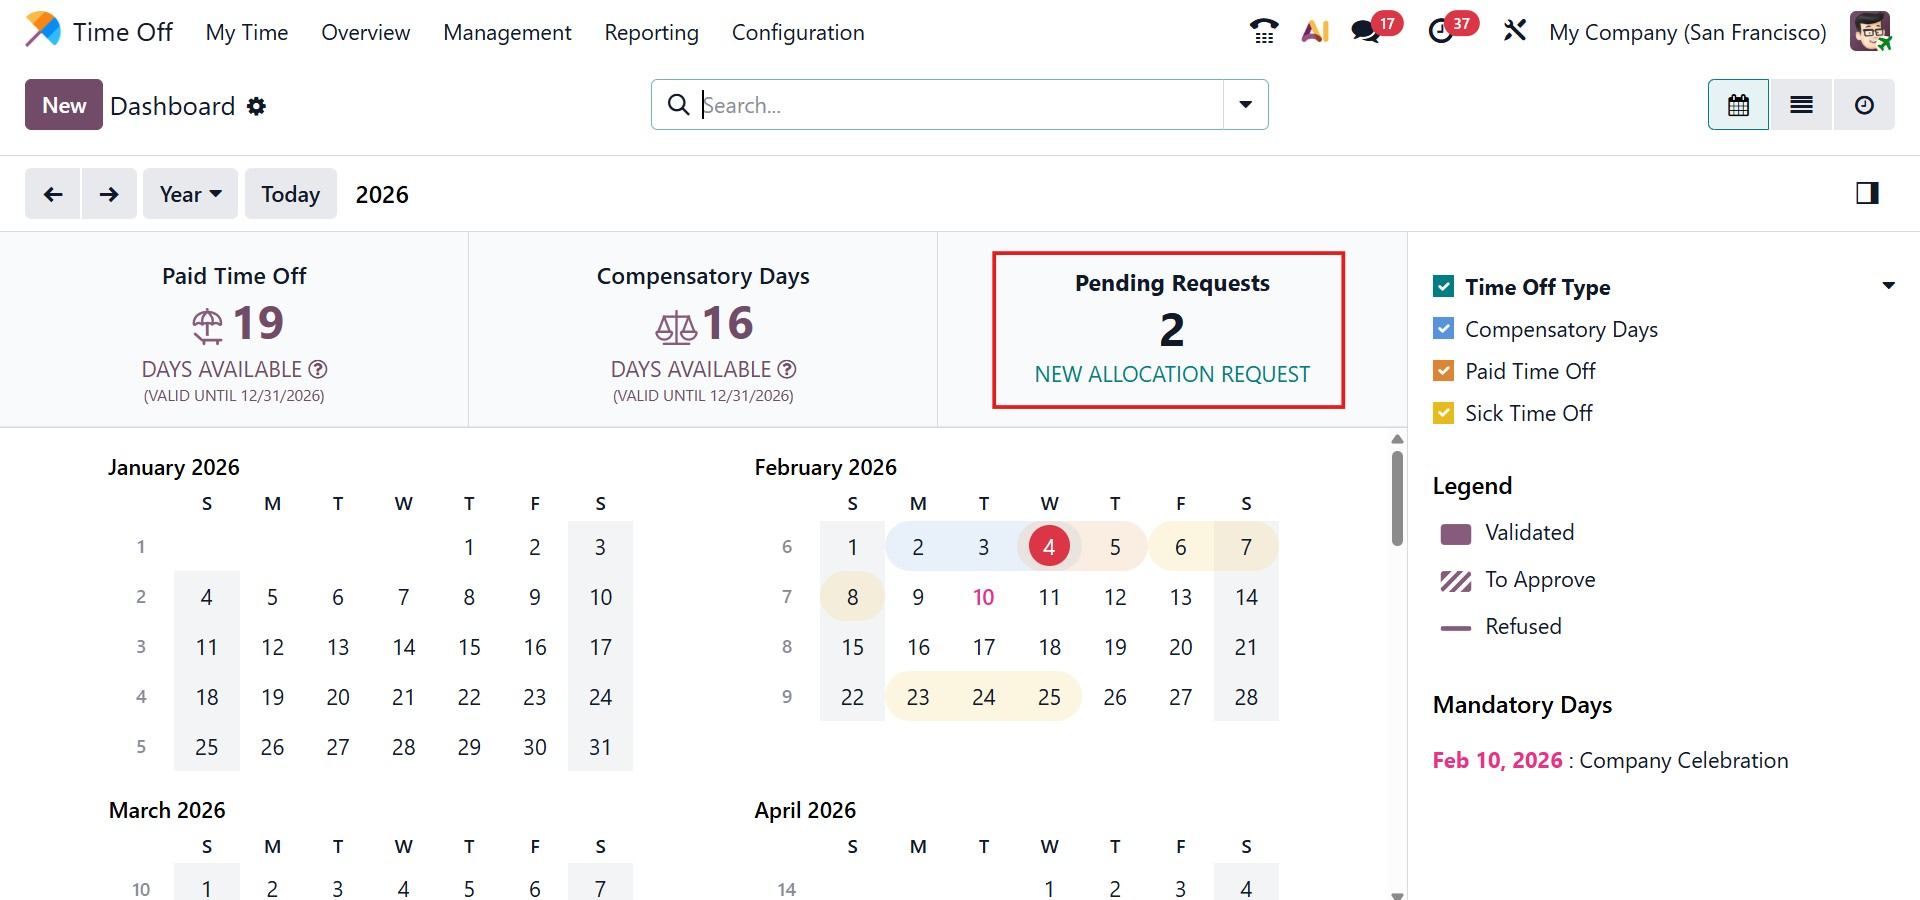
Pending allocations from earlier years and negative balances are also visible. For example, if an employee takes more leave than available, the dashboard clearly shows a negative balance, helping HR teams track and manage leave usage accurately.