My Time Menu
In Odoo 19, the Time Off module can be accessed directly from the main dashboard. When users open the module, they are taken to the My Time Off section, where they can quickly view their leave balance and past requests. The Time Off application includes several useful menus such as the Time Off dashboard, My Time, Overview, Management, Reporting, and Configuration, making it easy for both employees and HR managers to track and manage leave information.
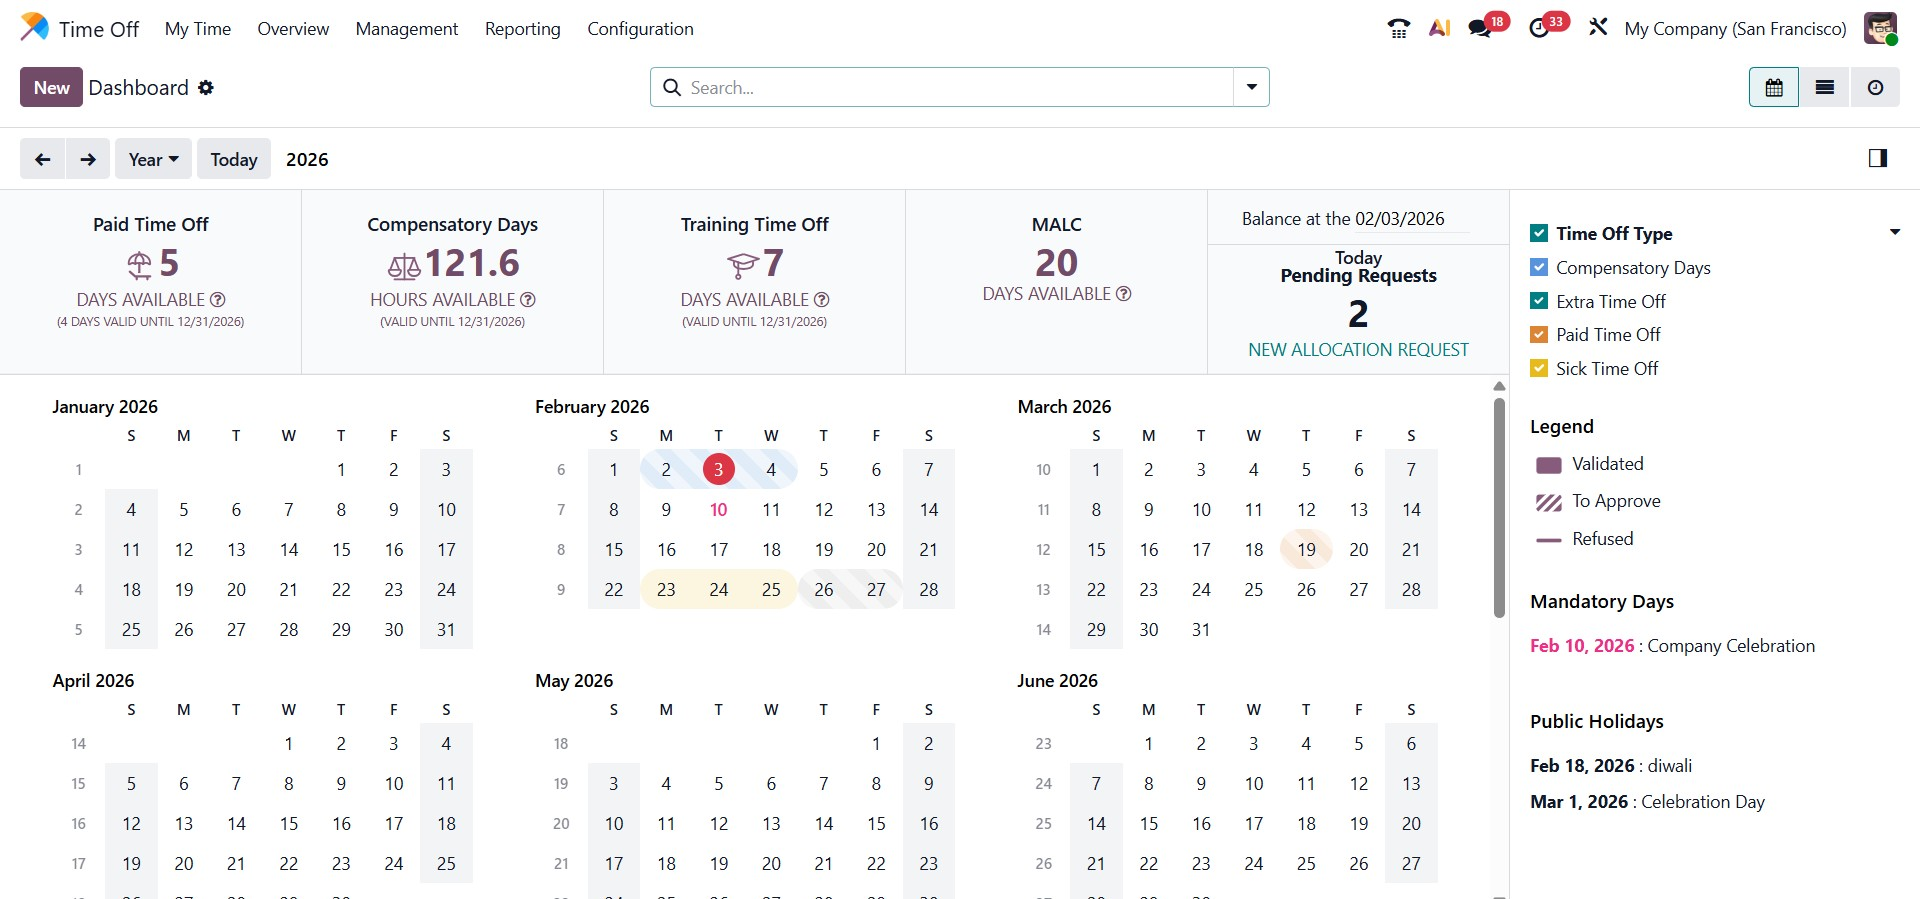
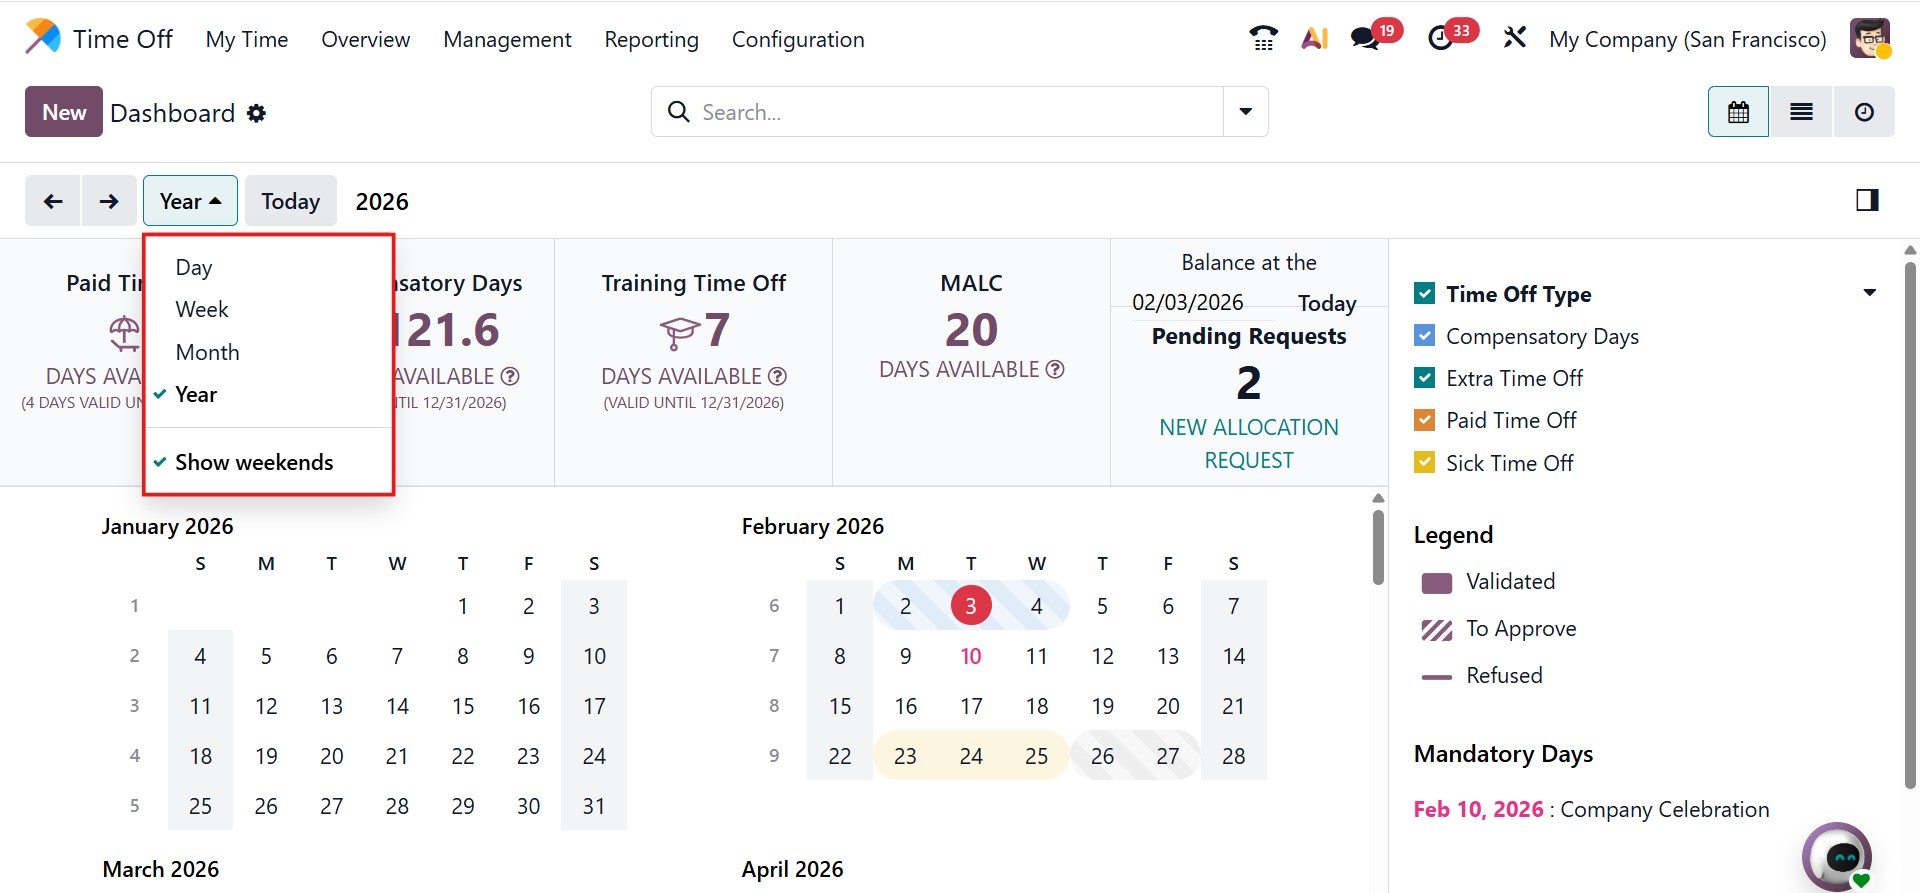
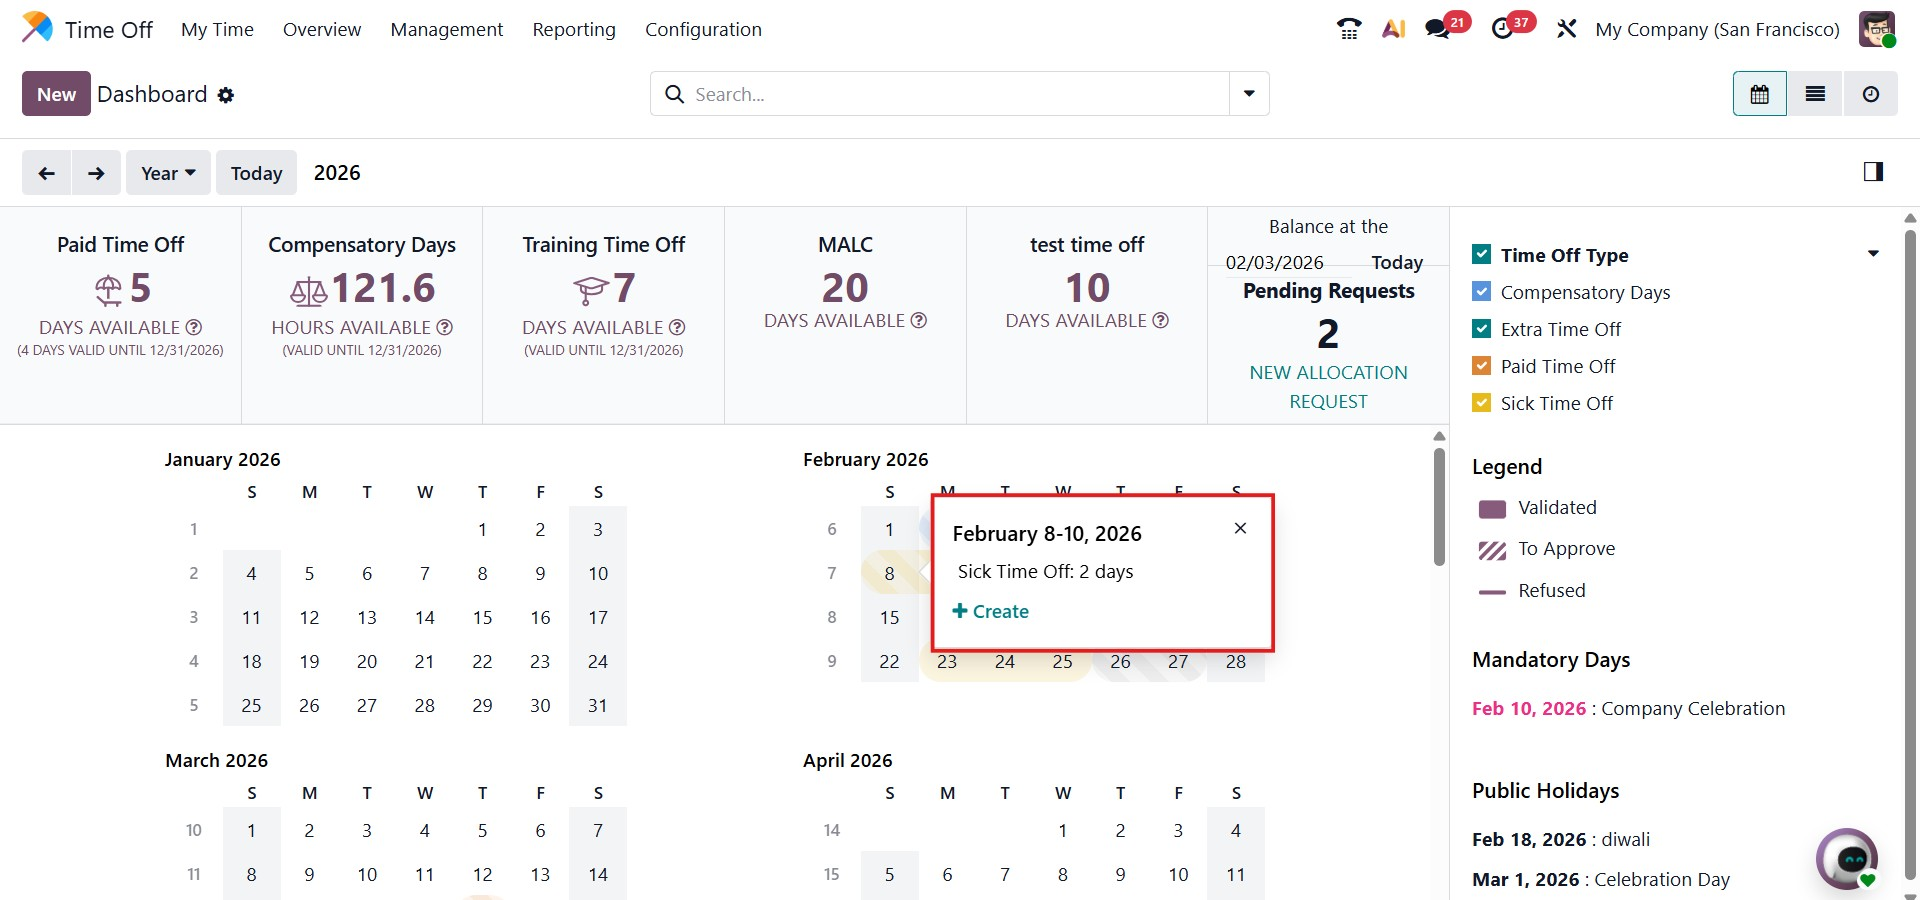
The Time Off module includes a well-designed dashboard that helps users view employee leave schedules on a daily, weekly, monthly, or yearly basis. As shown in the dashboard, leave plans can be displayed for an entire year, with different colors used to represent different types of time off. On the left side, users can view a list of leave types for which employees have requested time off. The right side visually displays the leave timeline for each corresponding type. These patterns update automatically based on the status of the leave request, such as approved, validated, or refused. The dashboard also gives a quick summary of an employee’s available Sick Leave and Compensatory Days throughout their employment period.
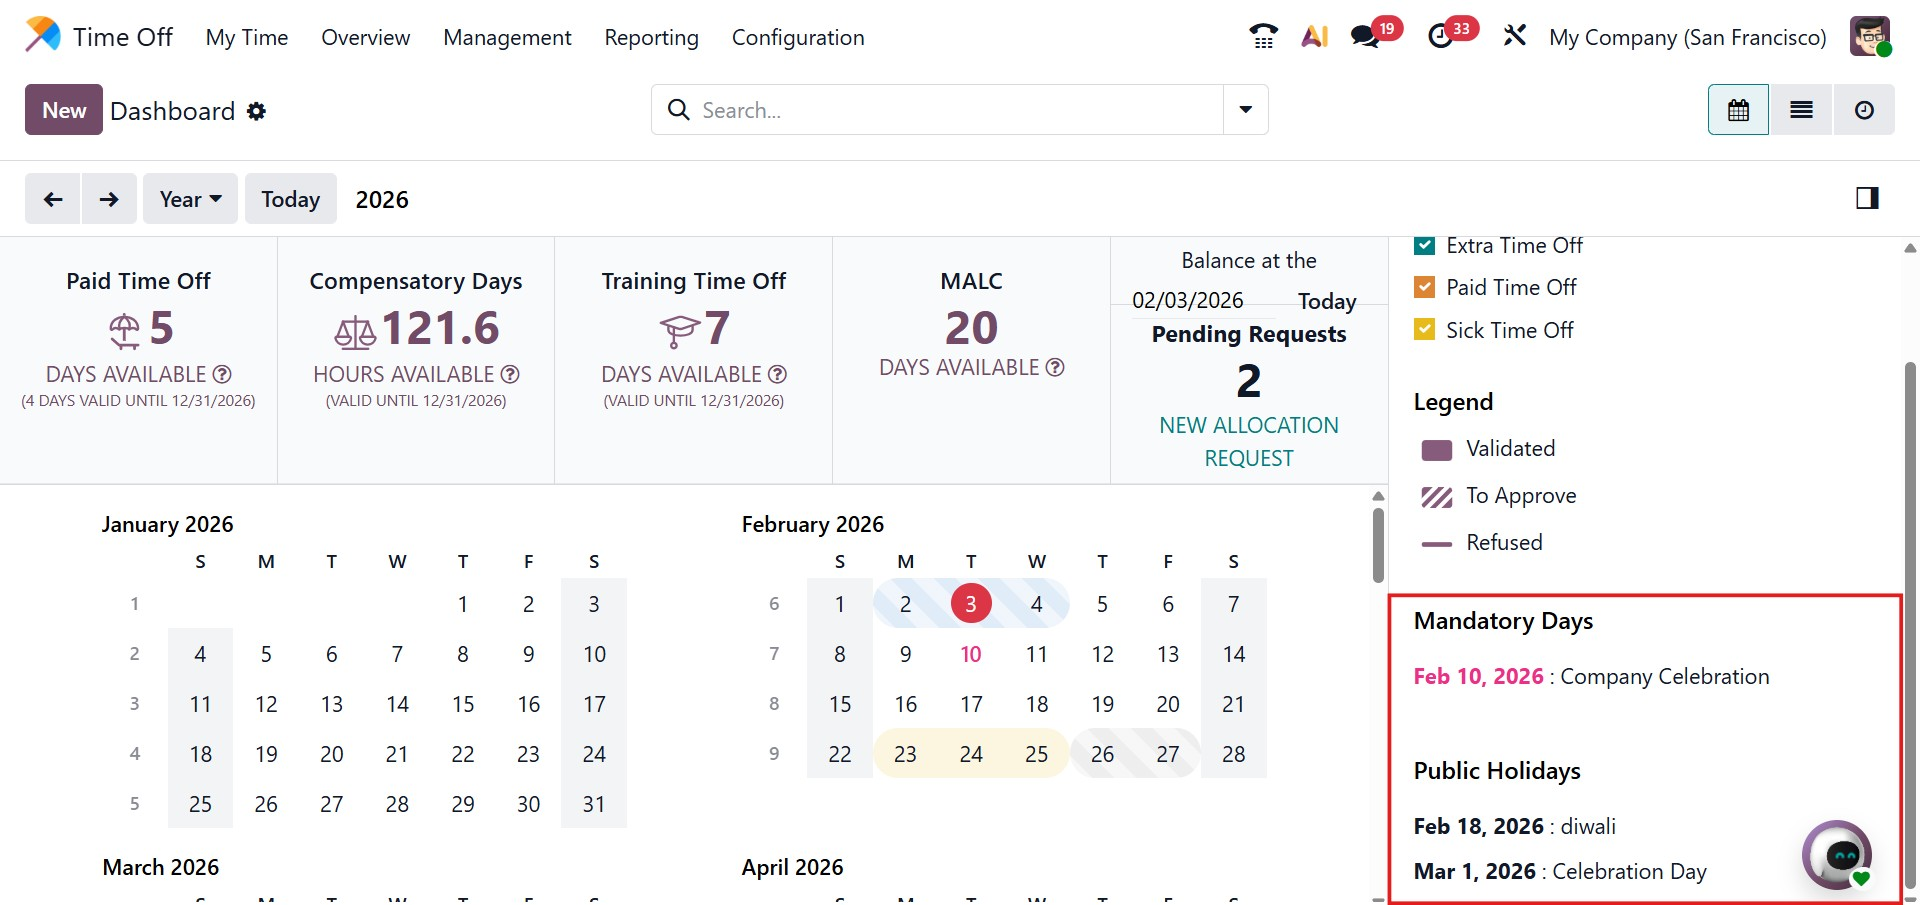
Odoo 19 also highlights Mandatory Days and Public Holidays on the right side of the dashboard, helping employees and managers stay informed about important company and national dates.
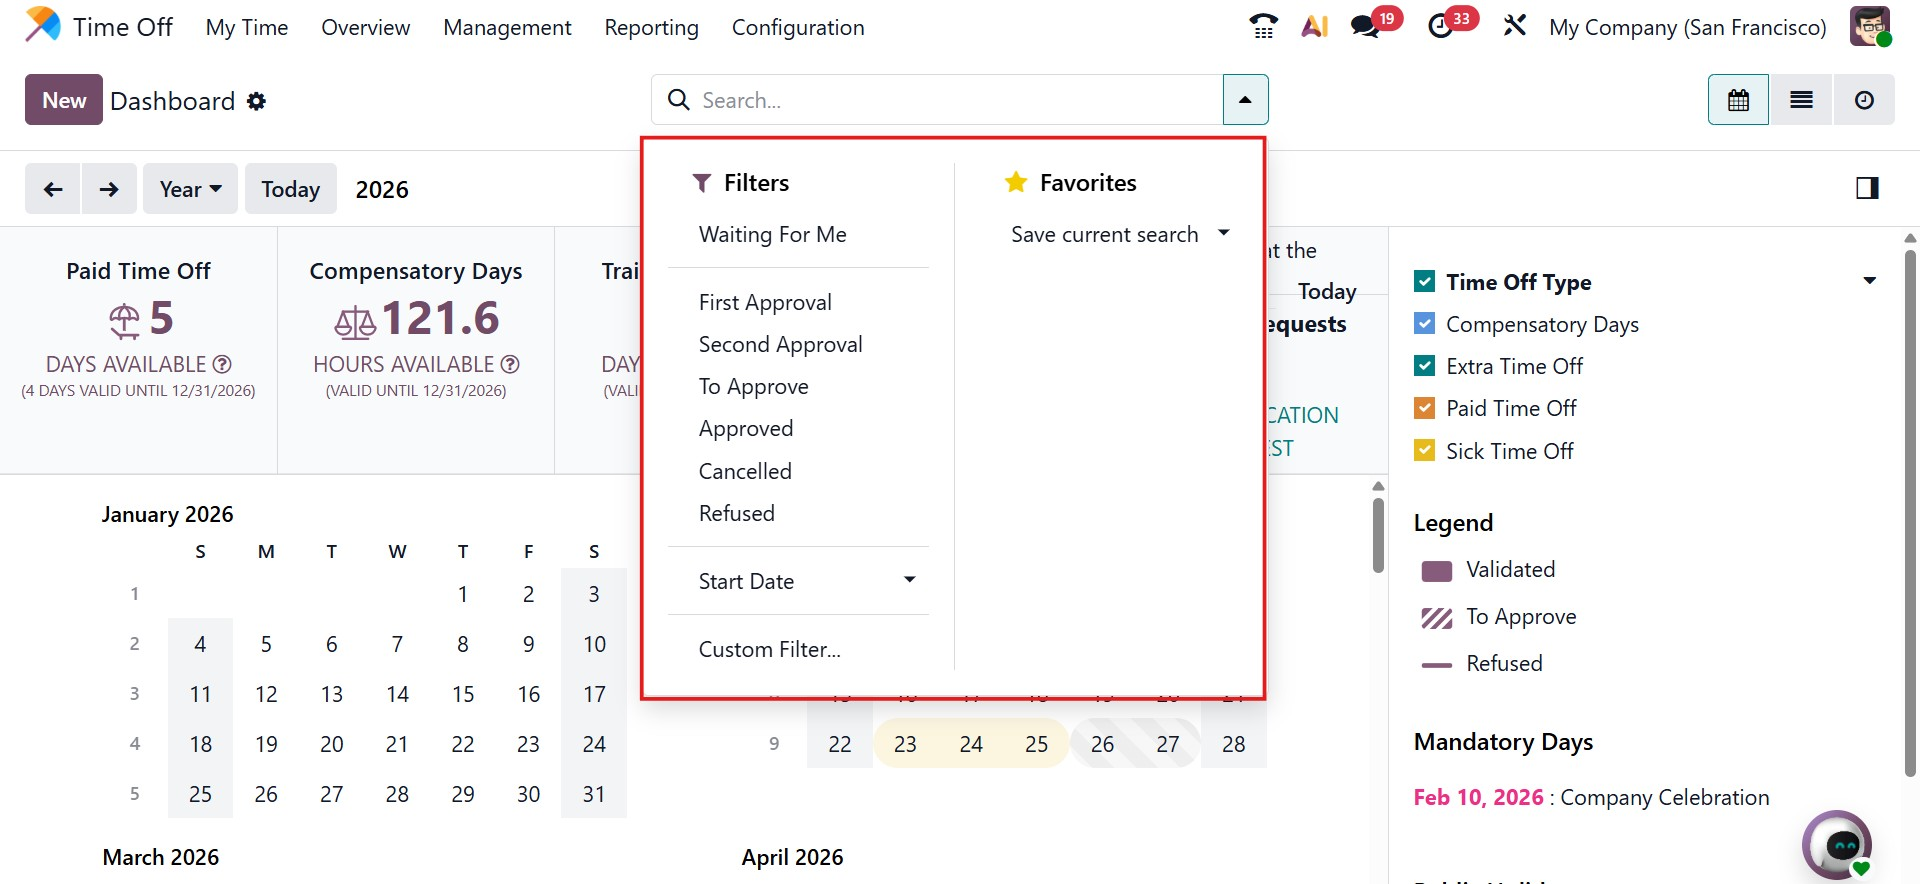
To make leave management easier, the module provides several filtering options in the advanced search bar. These include filters such as Waiting for Me, First Approval, Second Approval, Approved, Current Year, Canceled, and Refused. Users can also create their own filters by using the Add Custom Filter option.
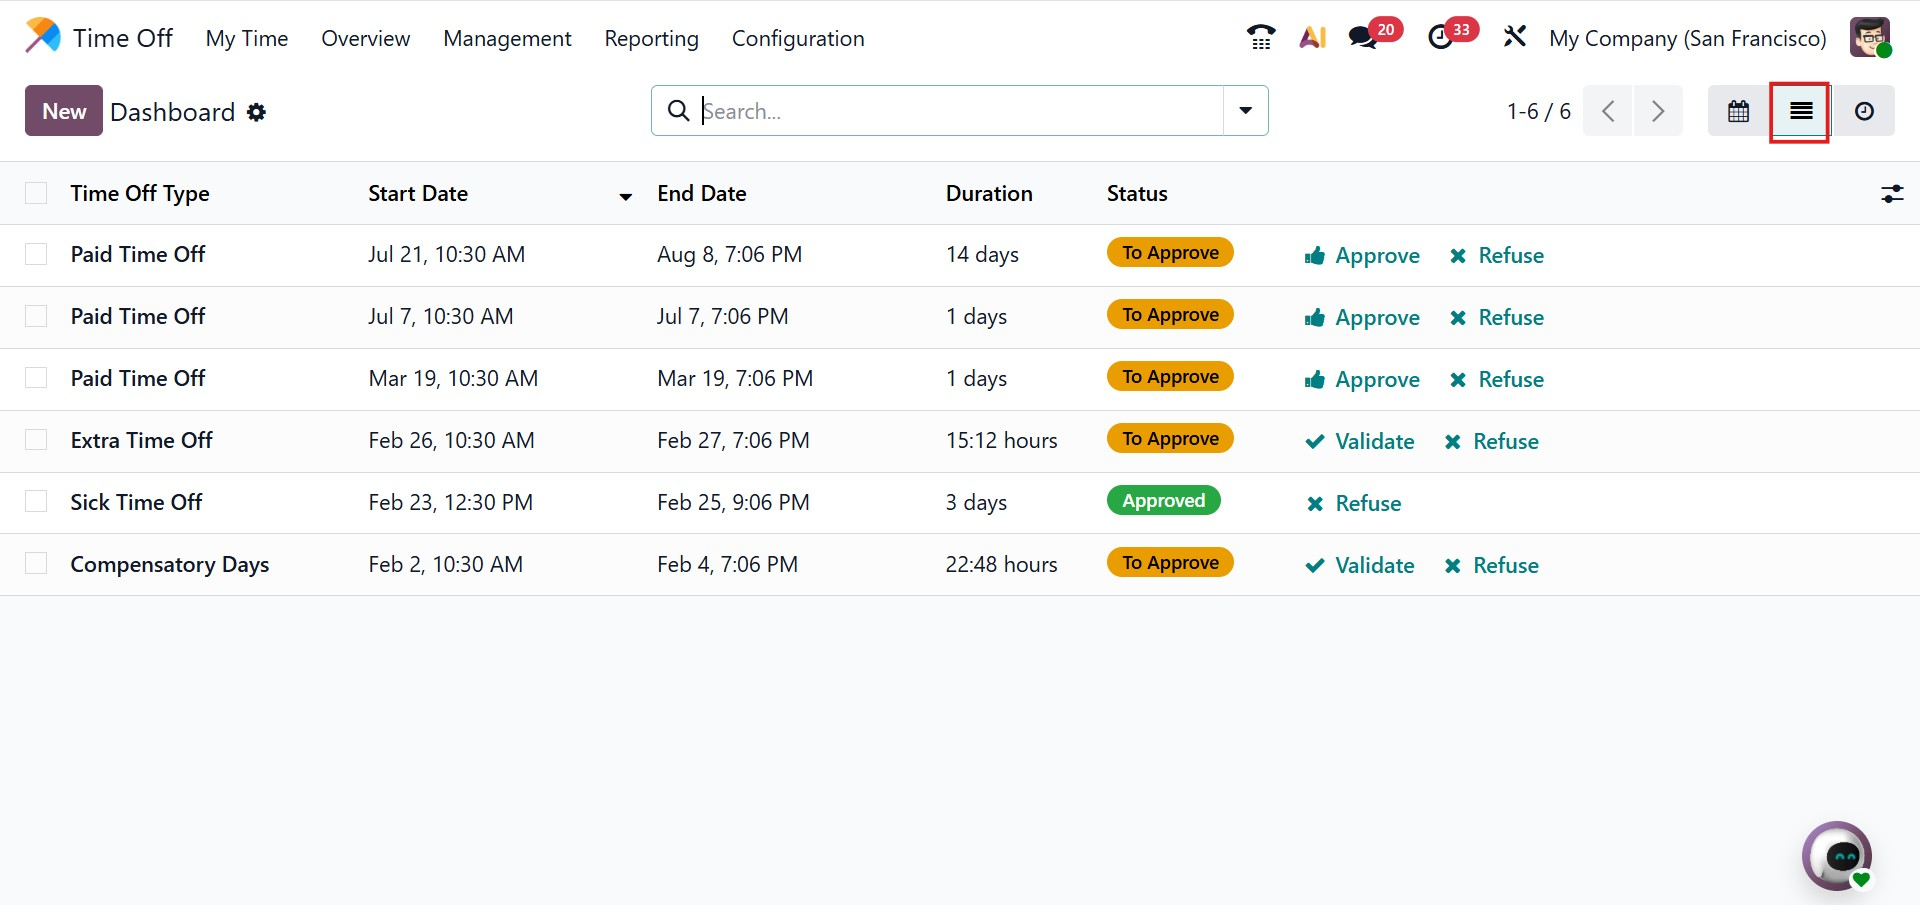
In addition to the Calendar view, the Time Off dashboard can also be viewed in List and Activity formats. The List view displays all time-off requests in a structured manner, showing details such as the Time Off Type, Description, Start Date, End Date, Duration, and current Status.
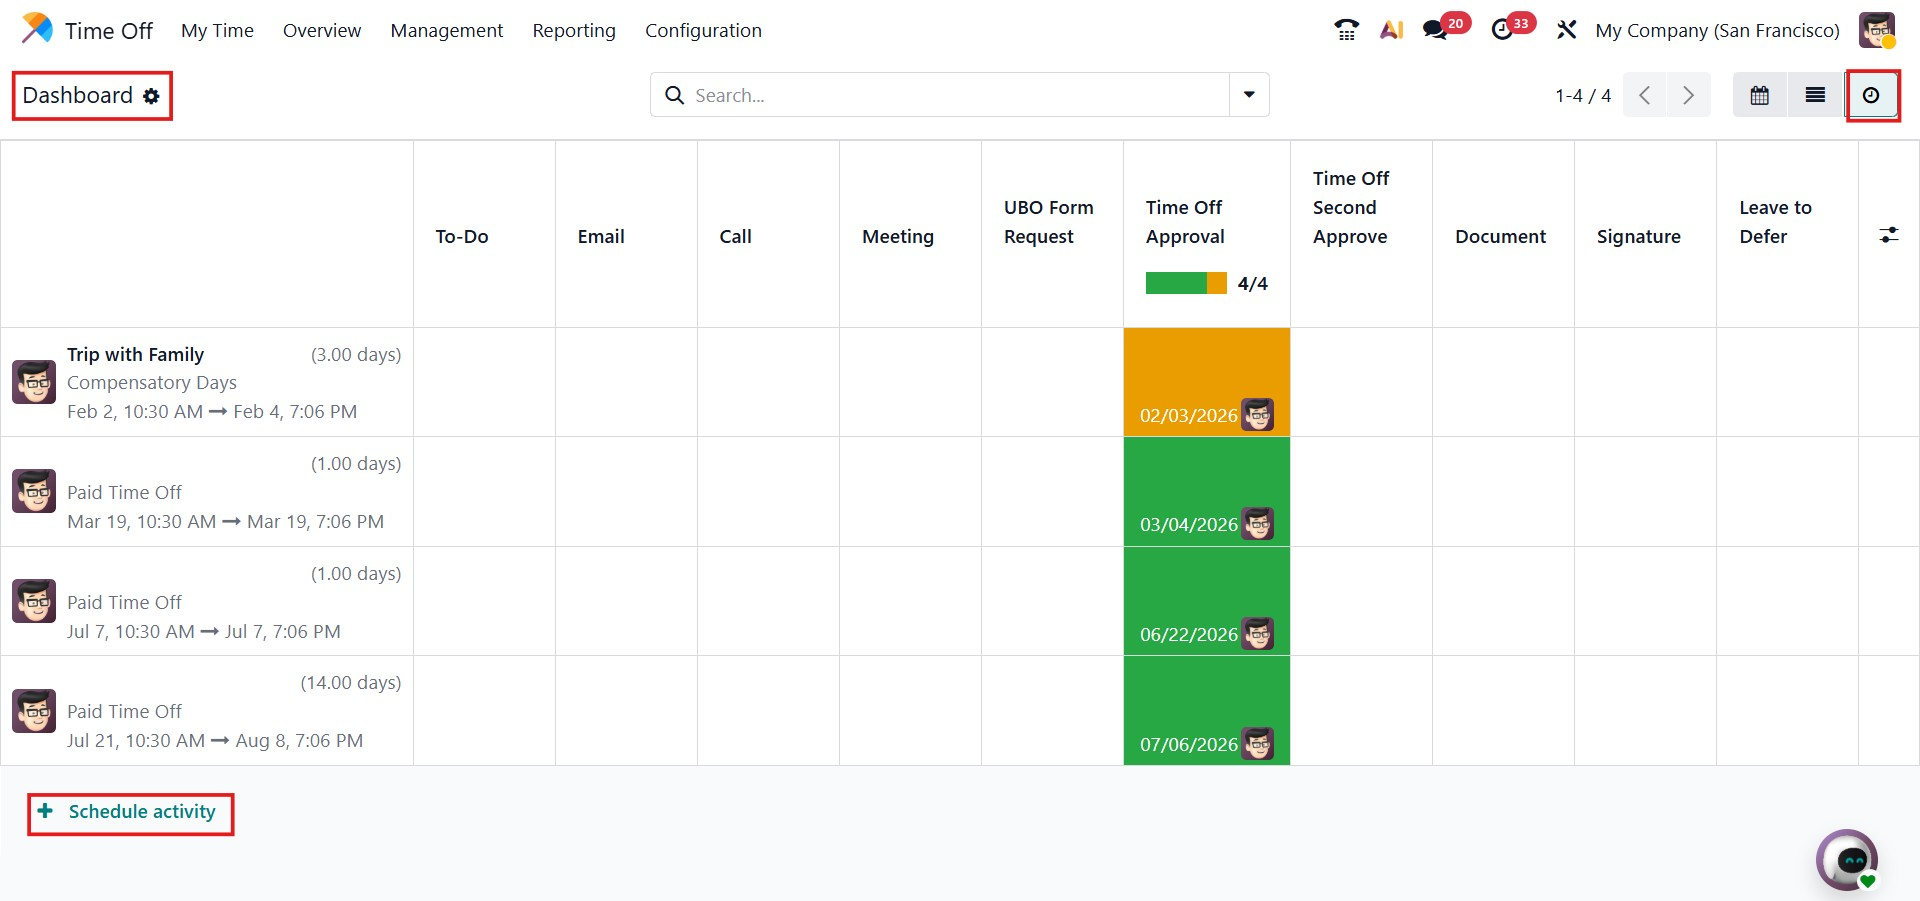
The Activity view displays all scheduled activities related to time-off records. If any activities are planned for a time-off request, they will appear in this view, allowing users to easily track pending tasks, reminders, or follow-up actions associated with the leave request.
Odoo 19 also allows users to request new leave allocations using the New Allocation Request button. Clicking this button opens a pop-up window where users can select the Time Off Type, such as Paid Leave, Sick Leave, Casual Leave, or other options from the dropdown list. In the Allocation field, users can specify the number of days or hours and add a brief description for reference.
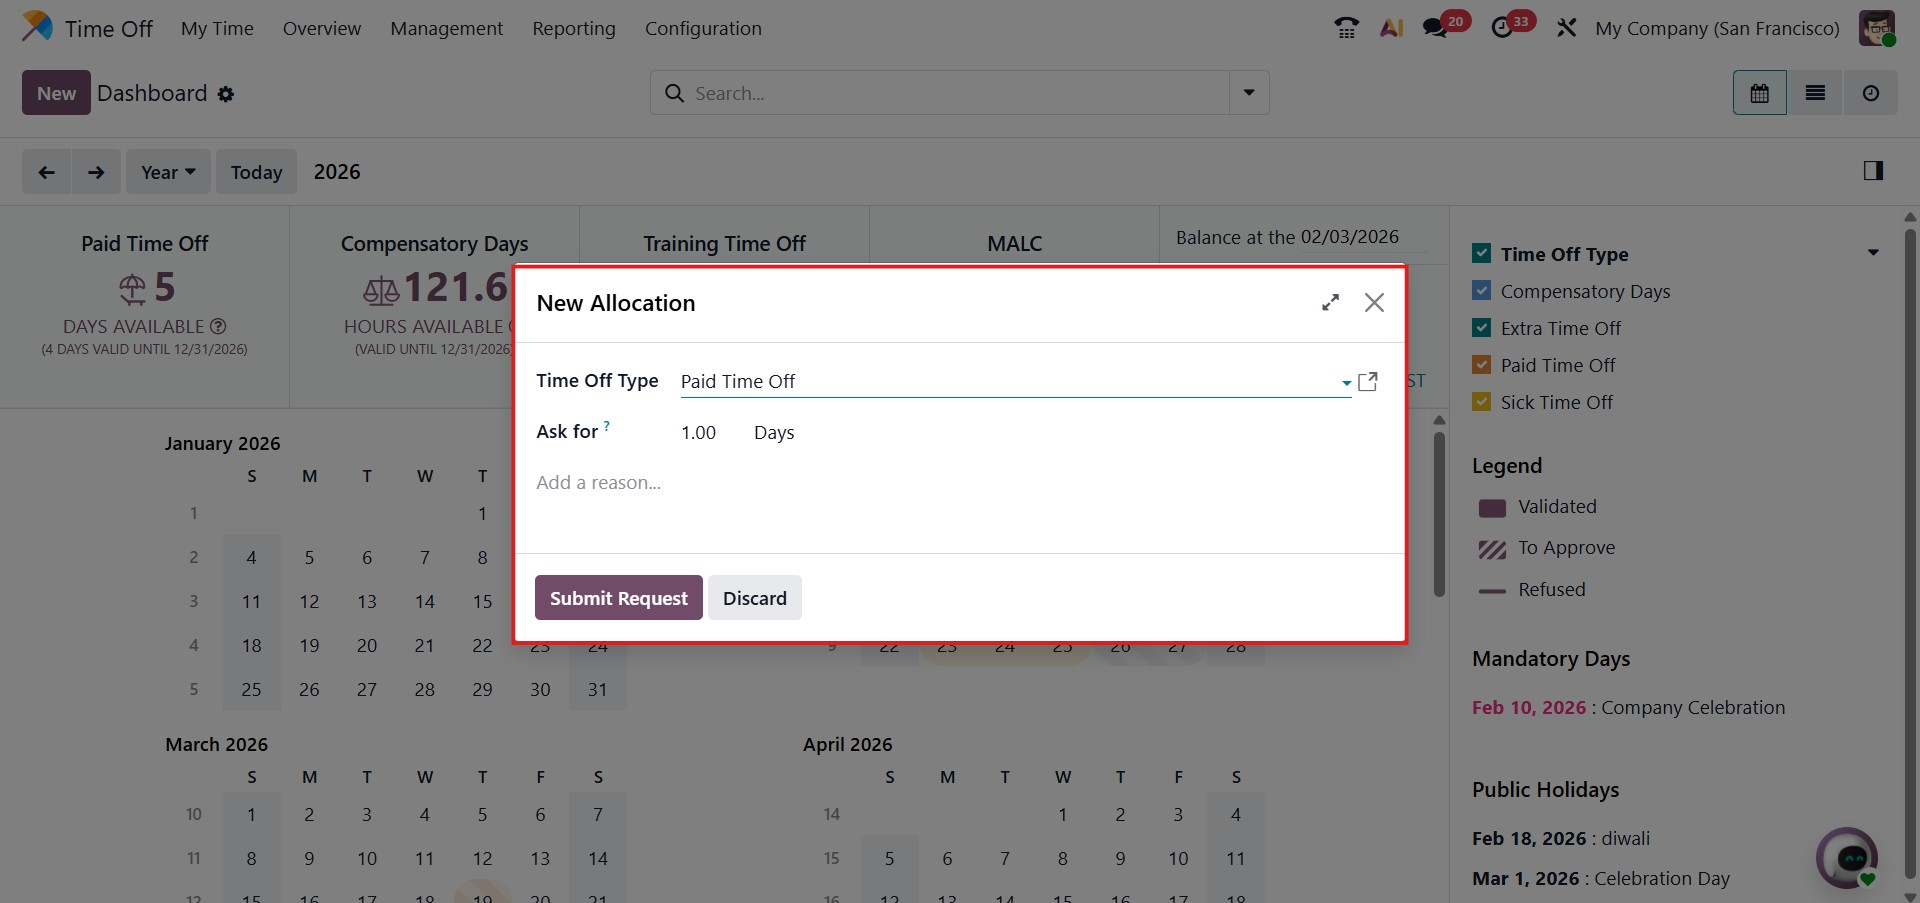
Once all details are entered, clicking Submit Request will store the new allocation request in the Time Off system.
1.1 Requesting a New Time Off
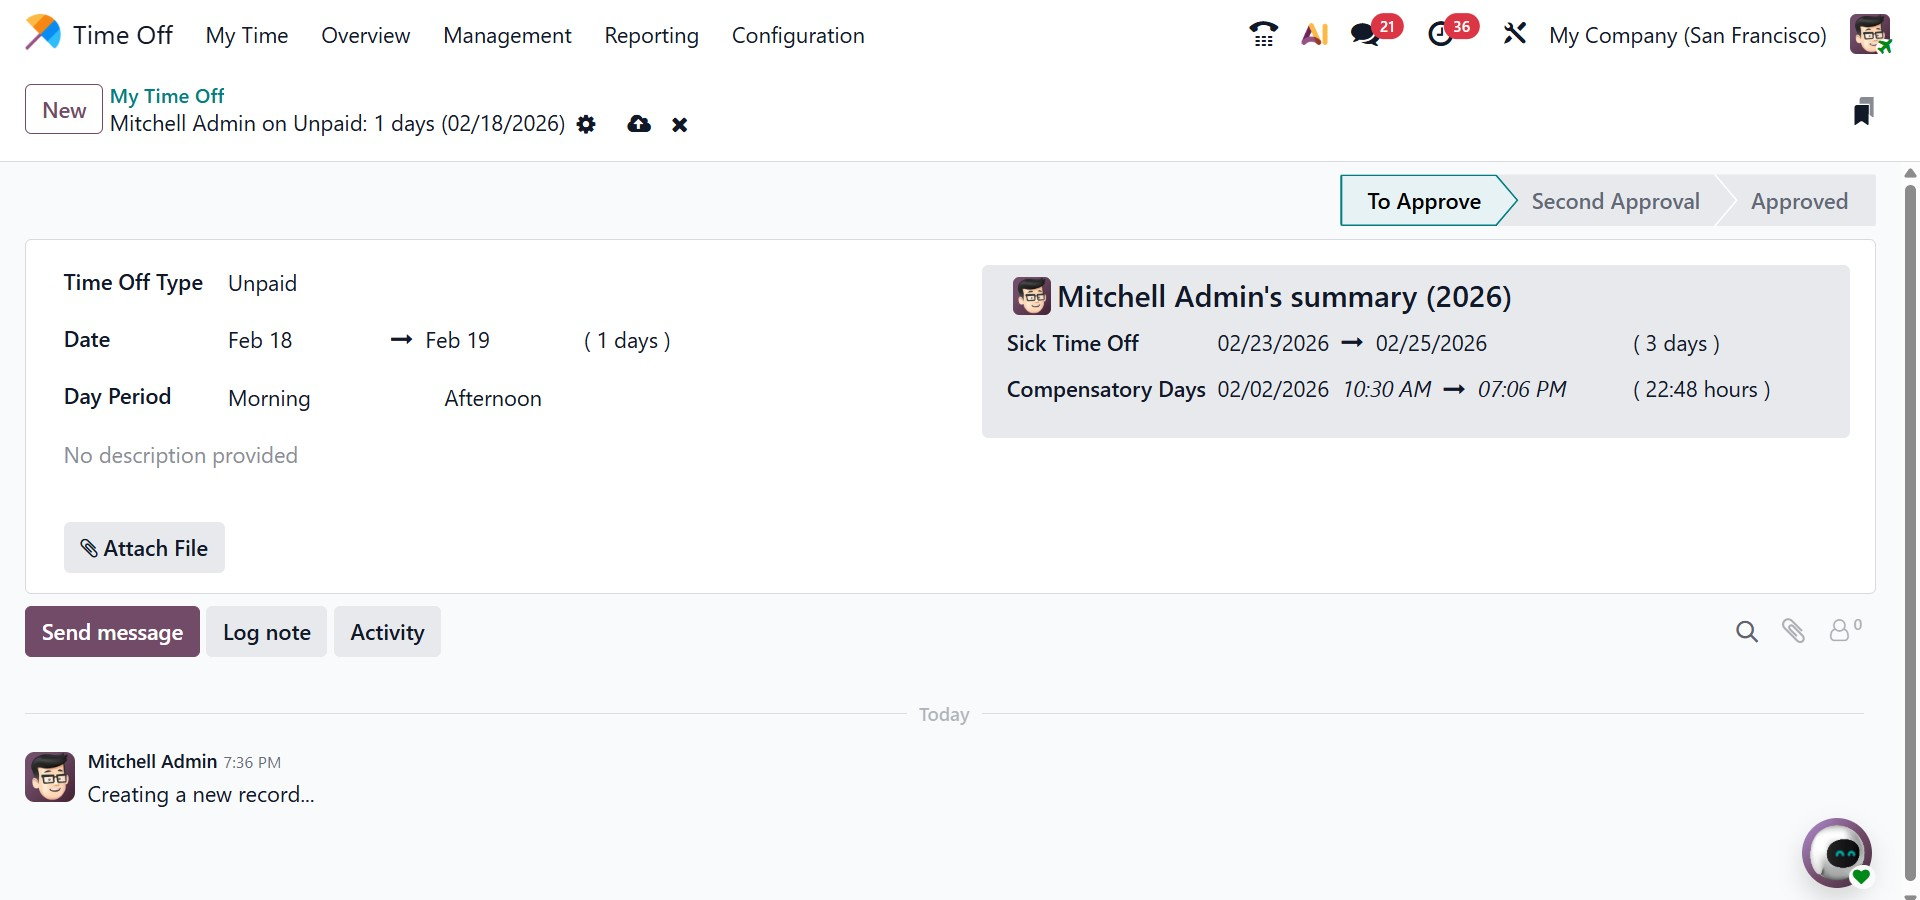
In Odoo 19, users can request new time off by clicking the New button at the top of the Time Off dashboard or by directly selecting dates from the calendar. When creating a new request, a pop-up form appears where users can choose the Time Off Type from a drop-down list, select the start and end dates, and add a short description.
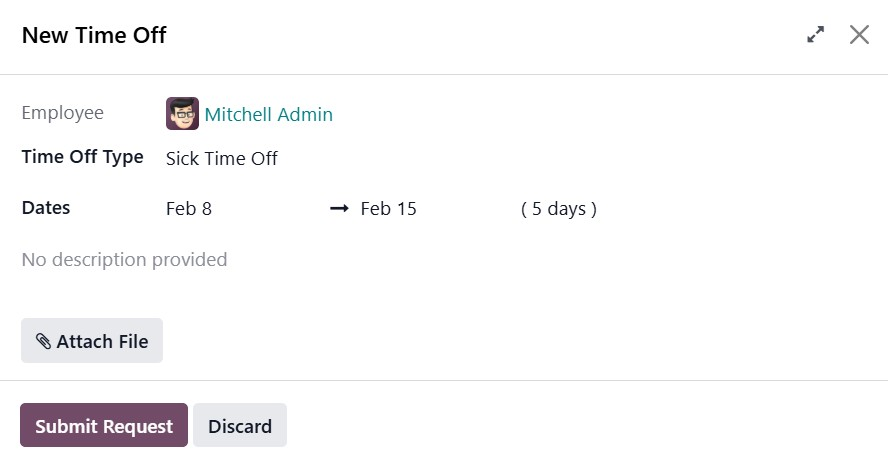
The system automatically calculates the total duration based on the selected dates. Users can also upload any required files or documents in the Supporting Documents section. After completing the form, clicking Save & Close sends the request to the assigned manager for approval.
Once submitted, the new time-off request will appear in the Calendar view of the Time Off dashboard as well as under the My Time Off menu.
Managers can easily review new requests by clicking on the relevant dates in the calendar or by using the Time Off Type filters available on the right side of the screen. Opening a request displays its detailed card view.
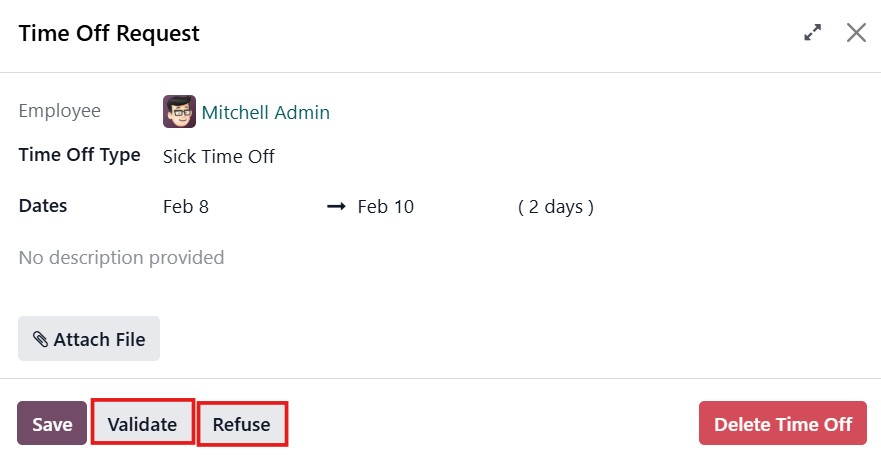
Managers can then approve or reject the request using the Validate or Refuse buttons. In this case, the leave request can be confirmed by clicking Validate.
1.2 My Time Off
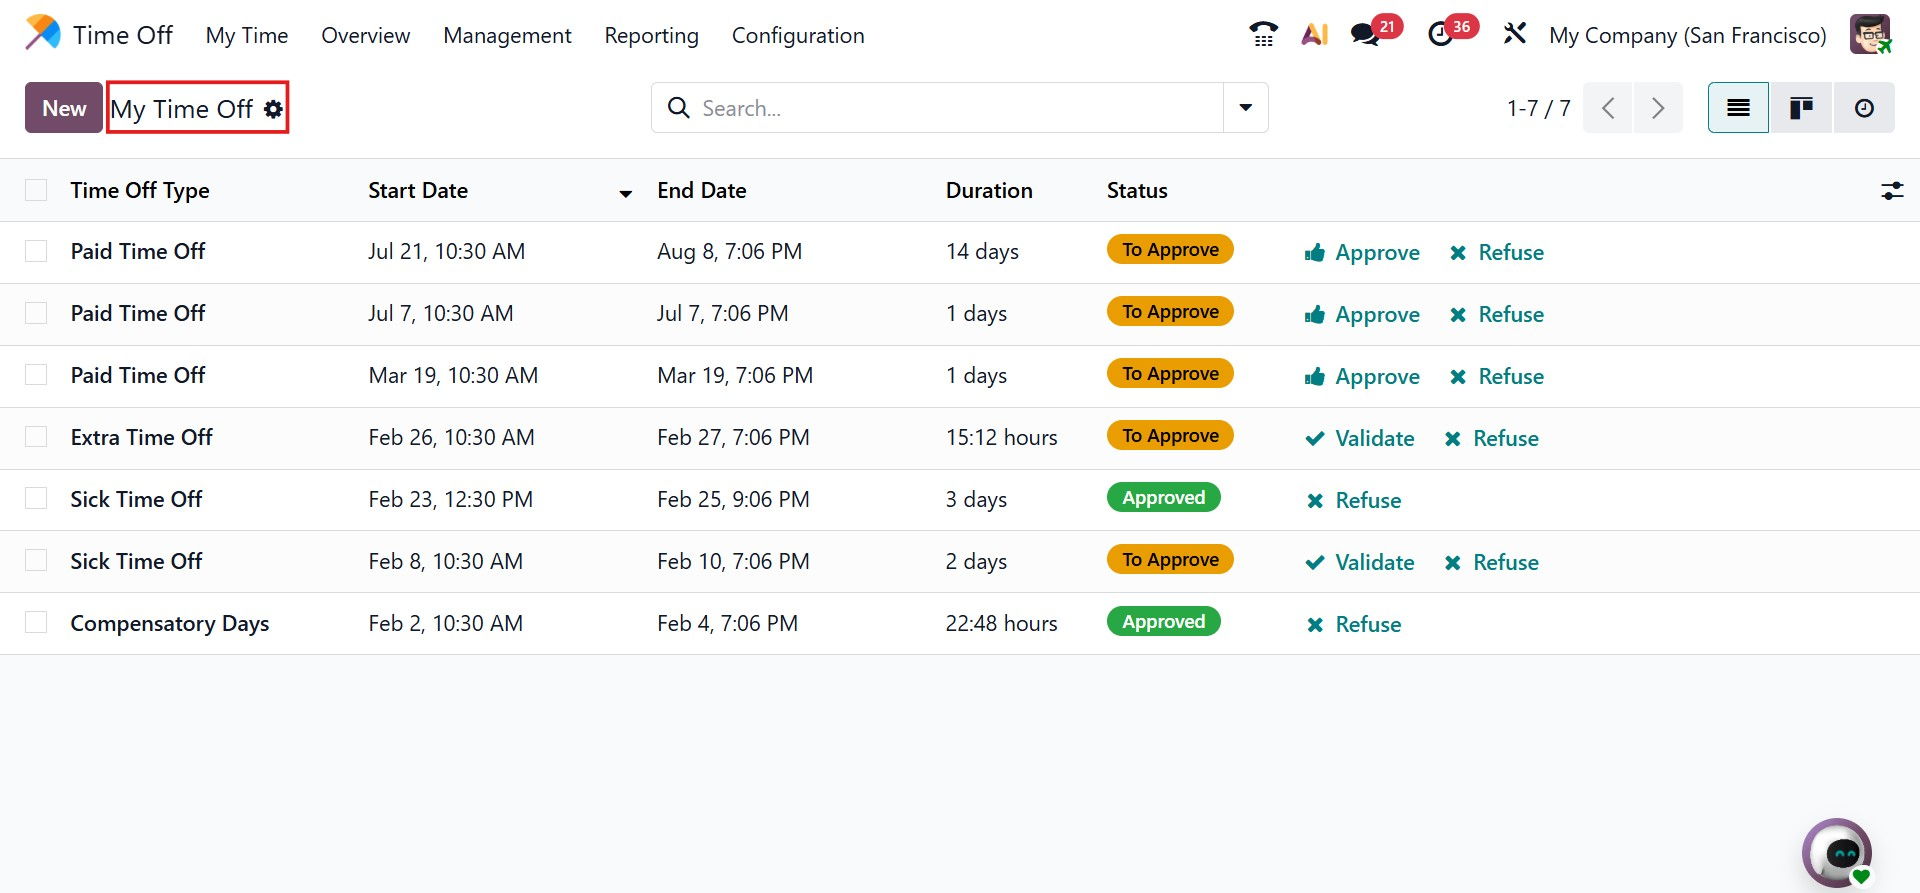
The My Time Off menu allows employees to view all their submitted leave requests in one place. This view displays key details such as the Time Off Type, Start Date, End Date, Duration, and Status of each request. You can Approve, Refuse, and Validate the requests here. Previously approved leave requests are also visible here.
Employees can submit new leave requests from this menu by clicking the New button. The request form works the same way as described earlier, allowing users to select the leave type, choose dates, enter a description, and submit the request for manager approval.
1.3 My Allocation
Time Off Allocation refers to assigning a fixed number of leave days or hours to employees for specific leave types such as vacation, sick leave, or compensatory time. In Odoo 19, HR managers can allocate leave balances, define the leave type, set validity periods, and decide whether approval is required, based on company policies. This ensures that employee leave balances are automatically updated when time off is approved.
The My Allocation submenu under the My Time menu allows employees to view their assigned leave allocations. It shows information such as Time Off Type, Amount, Allocation Type, Accrual Plan, and Status.
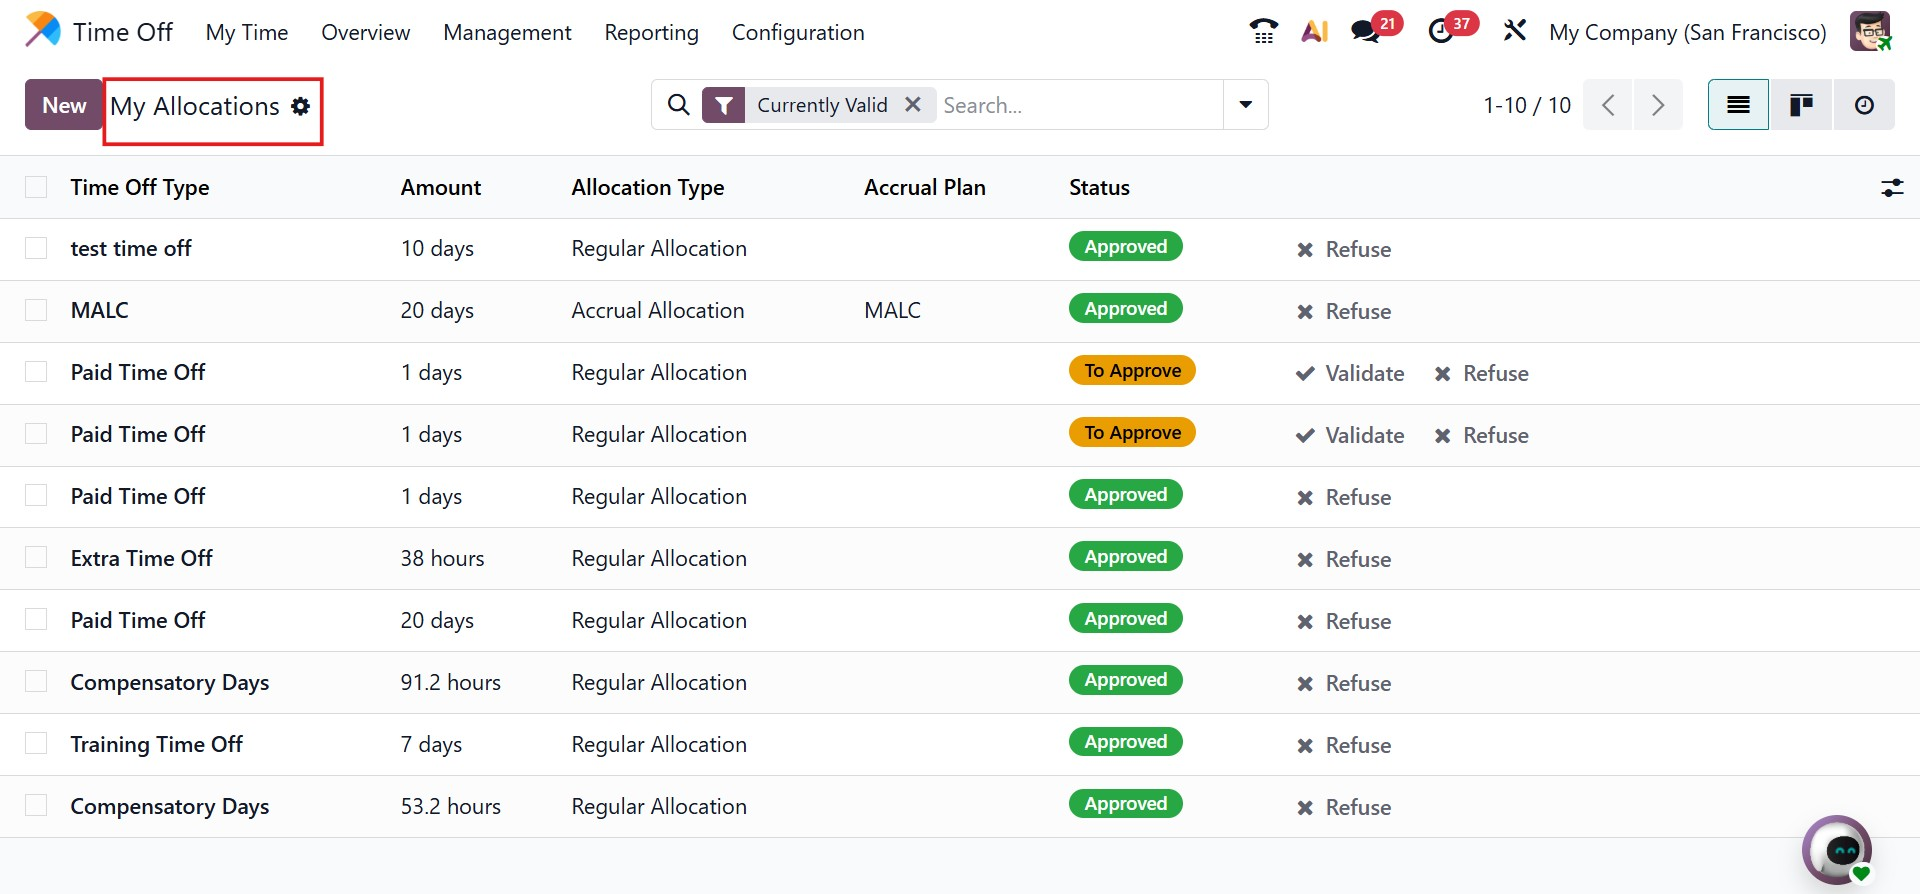
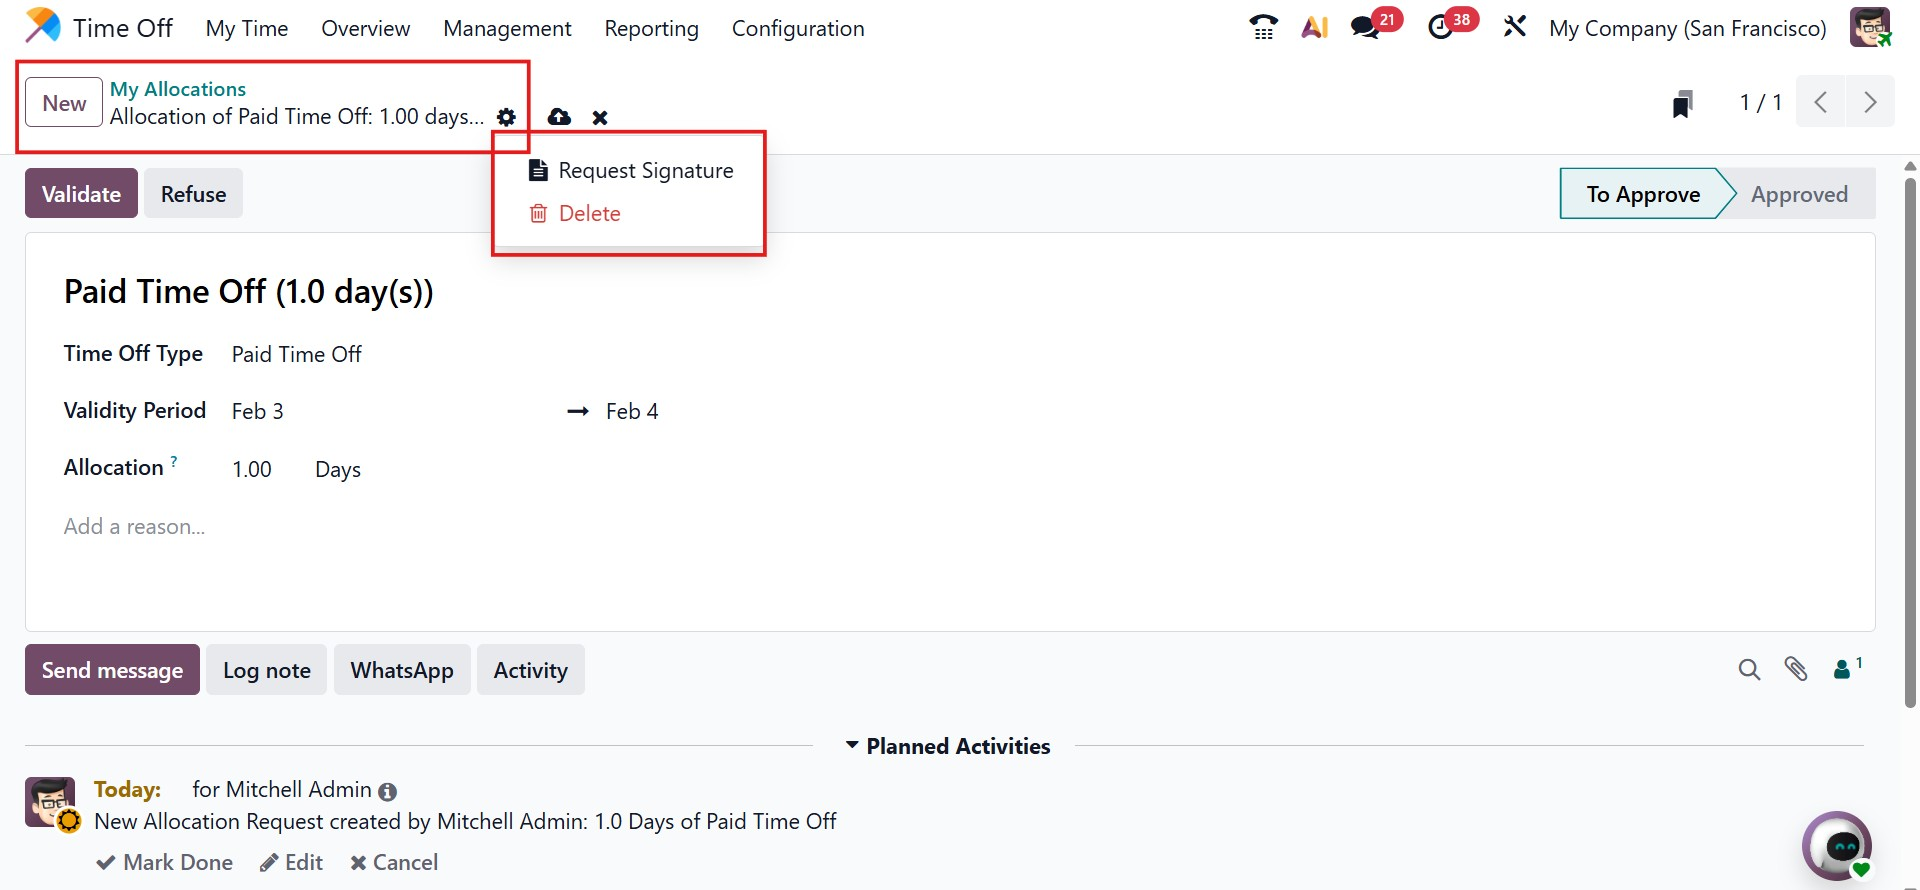
Managers or authorized users can approve allocation requests quickly using the Approve button available in the allocation list. Employees can also request additional leave allocations by clicking the New button, selecting the Time Off Type, defining the Validity Period, and entering the required number of days or hours in the Allocation field.
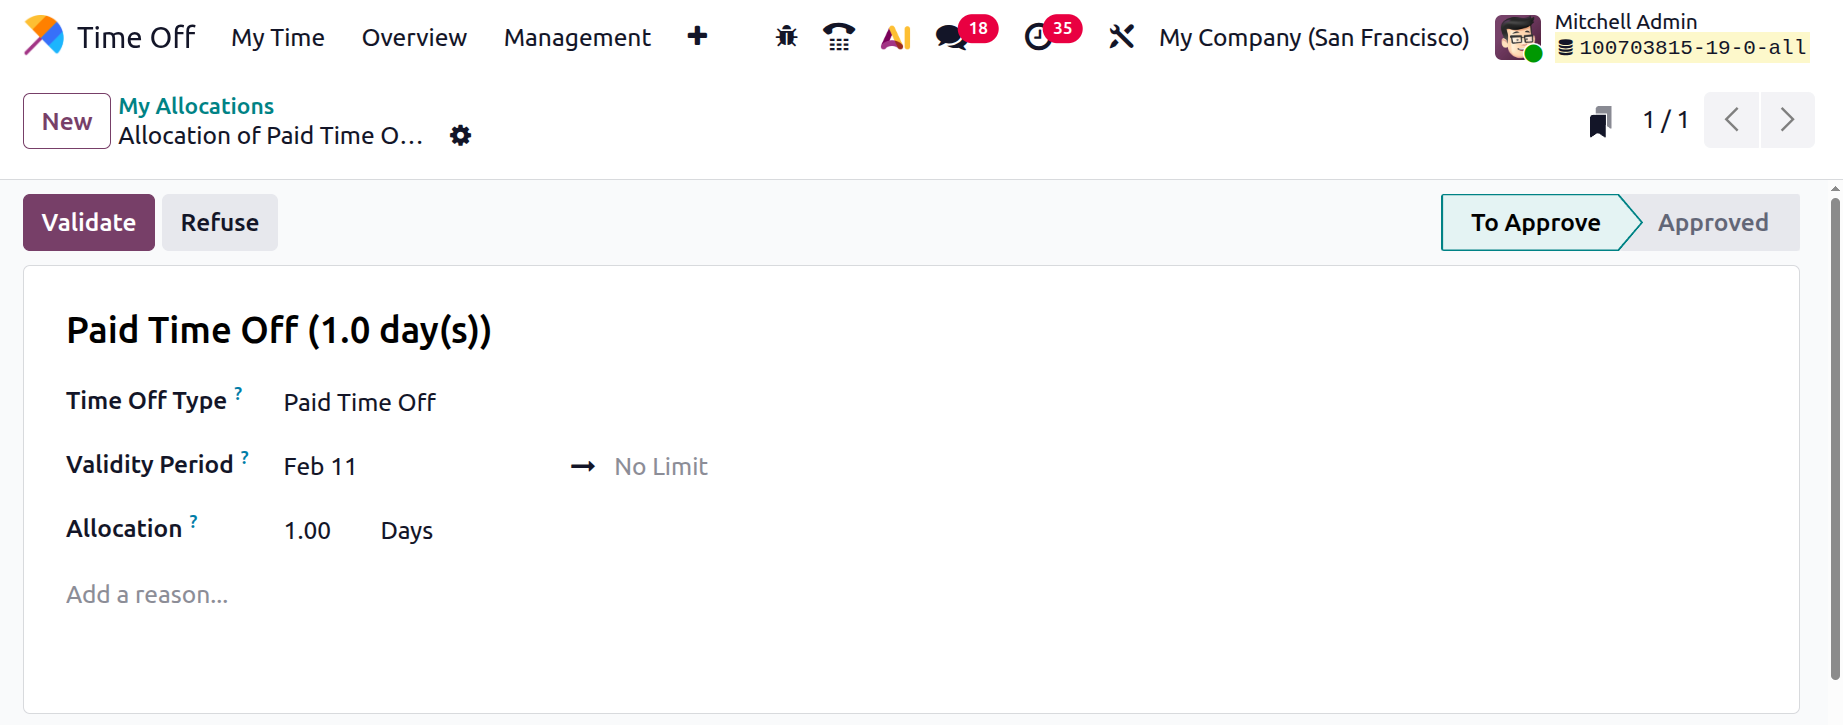
Once submitted, the system calculates the allocation automatically and sends the request to the responsible manager for approval. Users can also add a short description for reference. Clicking Save stores the request in the system.
After submission, the allocation status changes to To Approve. For Accrual Allocations, initial leave amounts based on joining dates are filled automatically and can be adjusted if needed. Employees may also request extra leave if their allocated balance is insufficient.