Odoo 19 WhatsApp module provides a strong and seamless integration to enhance customer engagement and business interactions. In Odoo’s centralized platform, you can organise discussions, send messages, share documents, and automate notifications using Odoo's centralised platform. The integration improves workflow efficiency by connecting sales, support, marketing, and operations through a common communication channel. This module describes how to set up WhatsApp in Odoo 19, utilise its tools efficiently, and enhance customer experiences through automation.
In the Odoo 19 WhatsApp module, you can see three tabs: Templates, Messages, and Configuration.
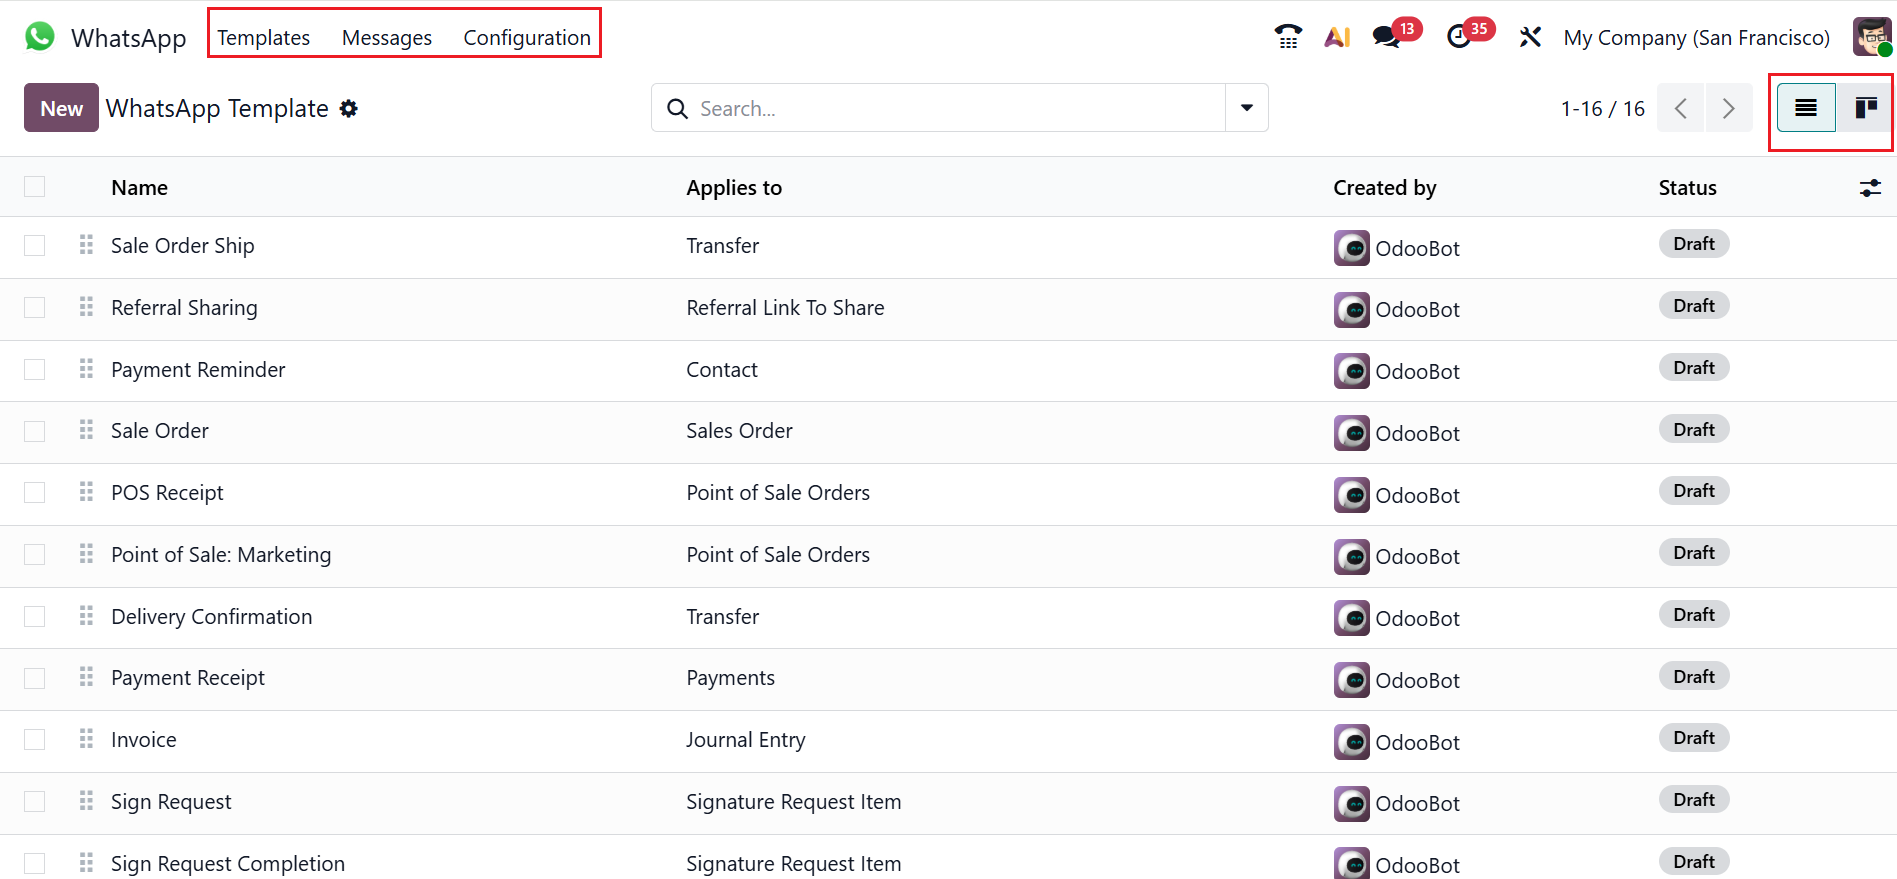
1. Templates
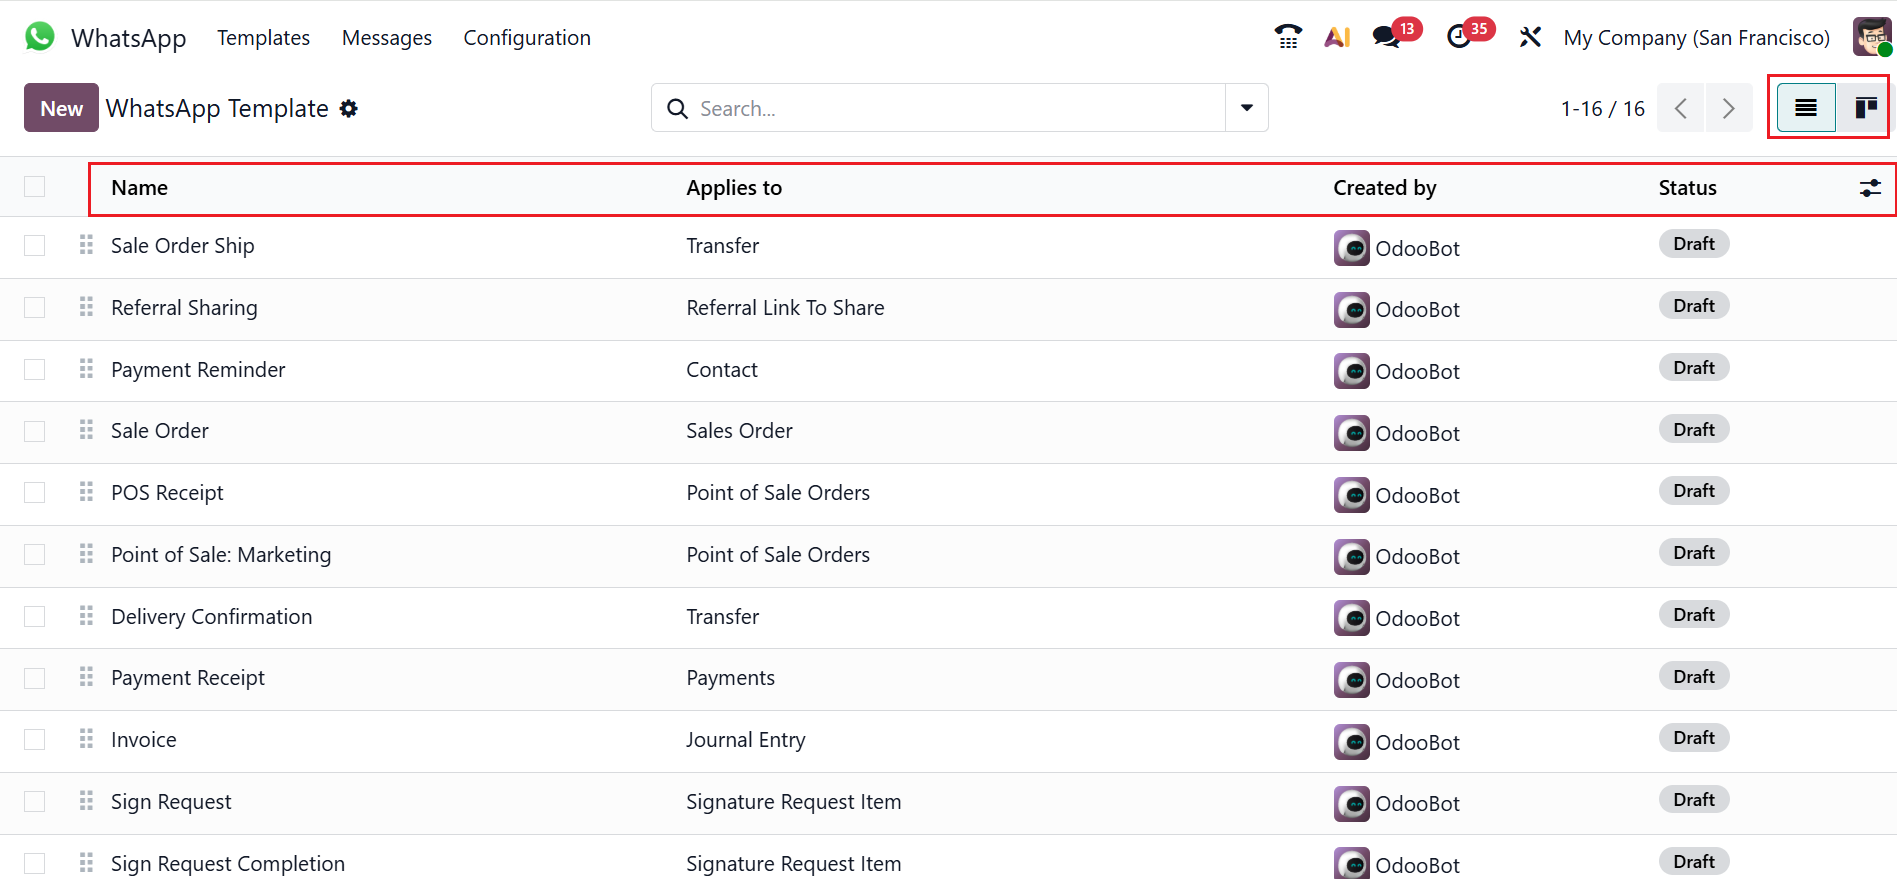
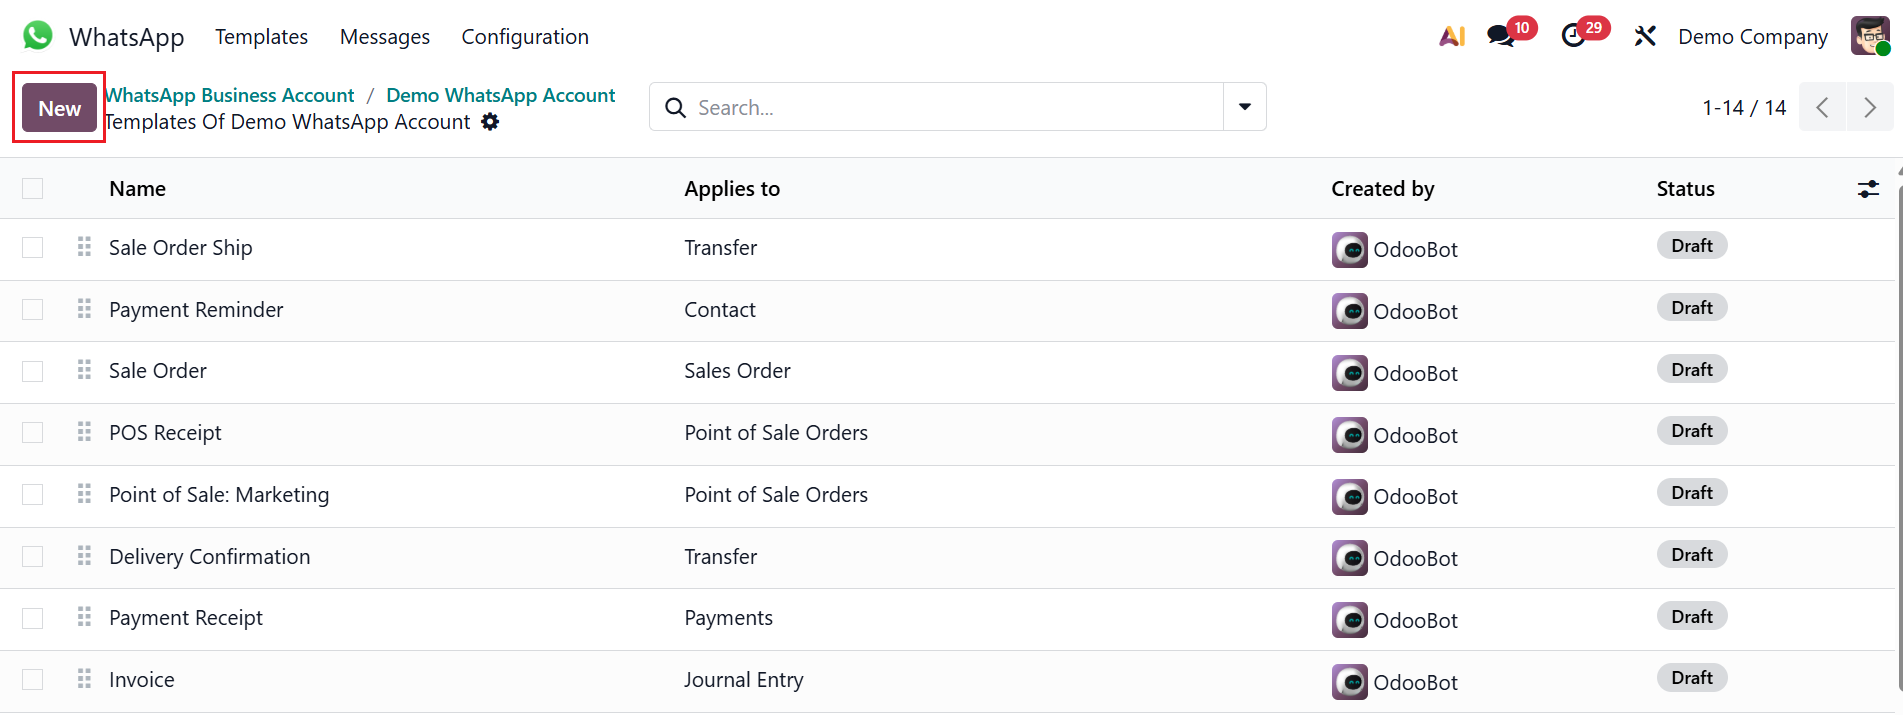
When you open the WhatsApp module in Odoo, you can see a list of WhatsApp templates by default. Here, the details of the WhatsApp templates are displayed, including Name, Applies To, Created By, and Status. When you click on the toggle button on the right side of the screen, you can add more details such as Account, Template Name, Header Type, Created On, and Quality. The WhatsApp templates list view can be switched to a Kanban view.
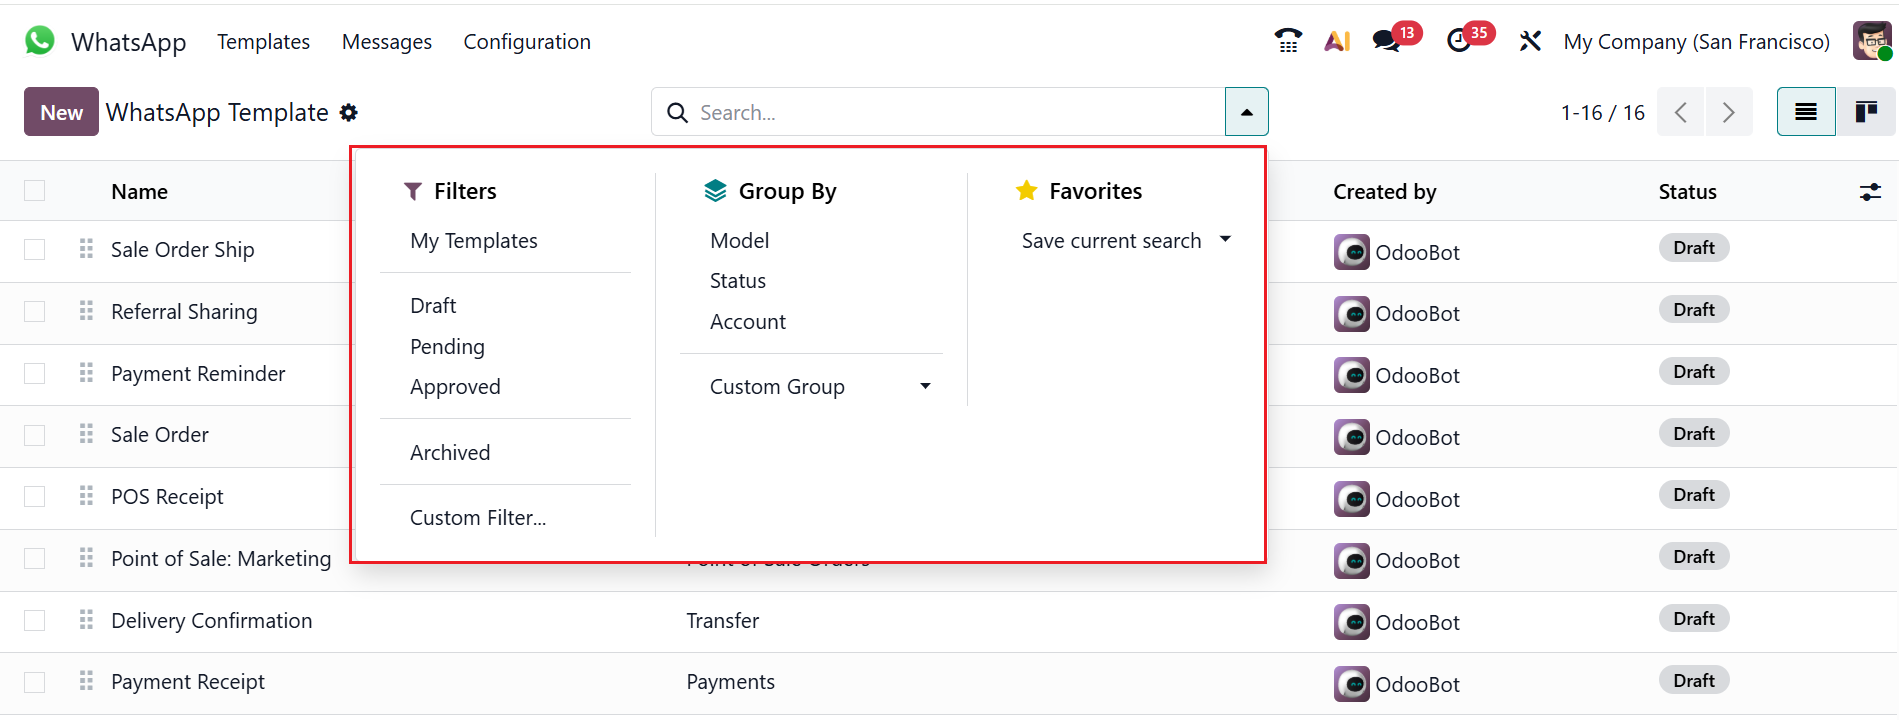
By selecting the search bar drop-down menu, you can access Filters, Group By, and Favorites. The Filters section includes My Templates, Draft, Pending, Approved, Archived, and Custom Filter, while the Group By section provides options such as Model, Status, Account, and Custom Group. The Favorites section helps to save your search for future use.
Select the New button to create a new WhatsApp template, then provide a name for the template. In the Account field, link this template to a specific WhatsApp Business account. In the Applies To field, select a model from the list to add a server action to the template. You should set the Phone field as Phone or Mobile model to determine the recipient’s WhatsApp number. In the Users field, you can add Odoo users who are allowed to access the WhatsApp messages. In the Category field, select either;
- Utility: Provide tools to send messages, templates, and attachments directly from Odoo.
- Marketing: Allows you to create and send WhatsApp promotional campaigns to customers.
- Authentication: Verifies and connects the WhatsApp Business account with Odoo.
Then select a Language, and in the Report field, you can add WhatsApp message analytics. In the Header Type field, select Text, Document, Video, Image, or Location as the header content of the WhatsApp message template. The Footer Message field allows you to add short messages, such as notes or disclaimers, at the bottom of the message.
Use the Body tab to customize the message sent to the customer. Here, you can see dynamic fields (placeholders) inside the message, which is set up under the Variables tab. The +variable button inserts dynamic fields into the message. These dynamic parts include placeholders for names, dates, or anything else. These placeholders are automatically populated with actual data when the message is sent.

Under the Buttons tab, select Add a line to add a new button to the template. Under the Type option, select either Quick Reply, Call Number, or Visit Website. Subsequently, provide other details, including Button Text, Call Number, Website URL, and URL Type.
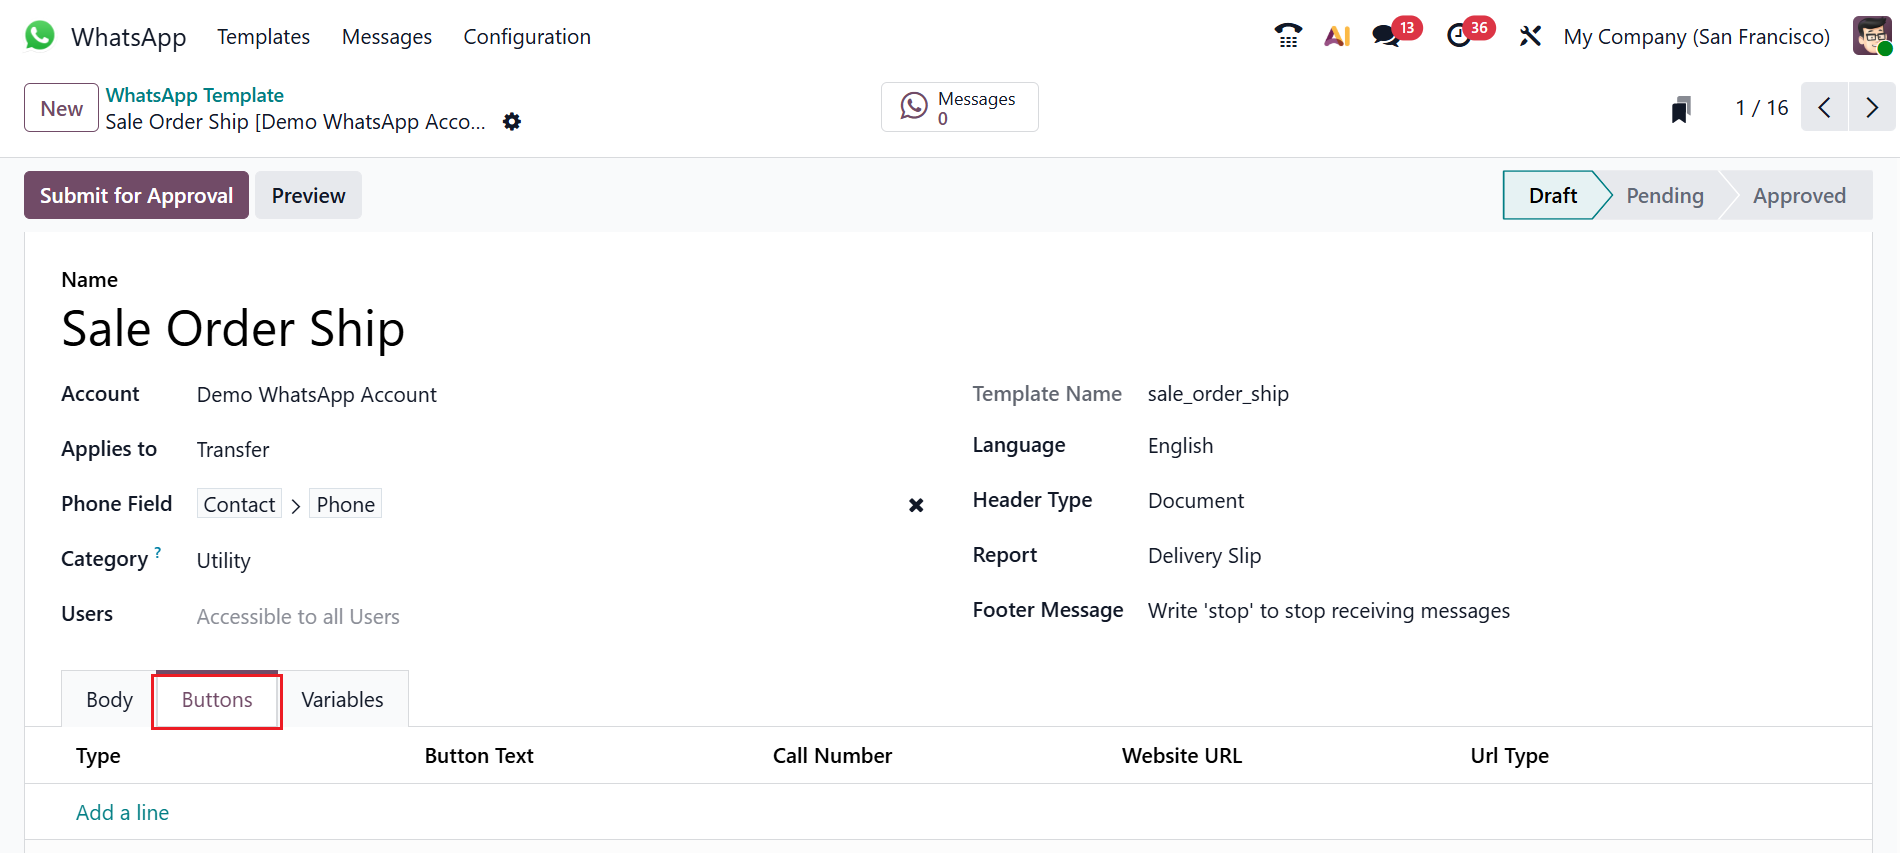
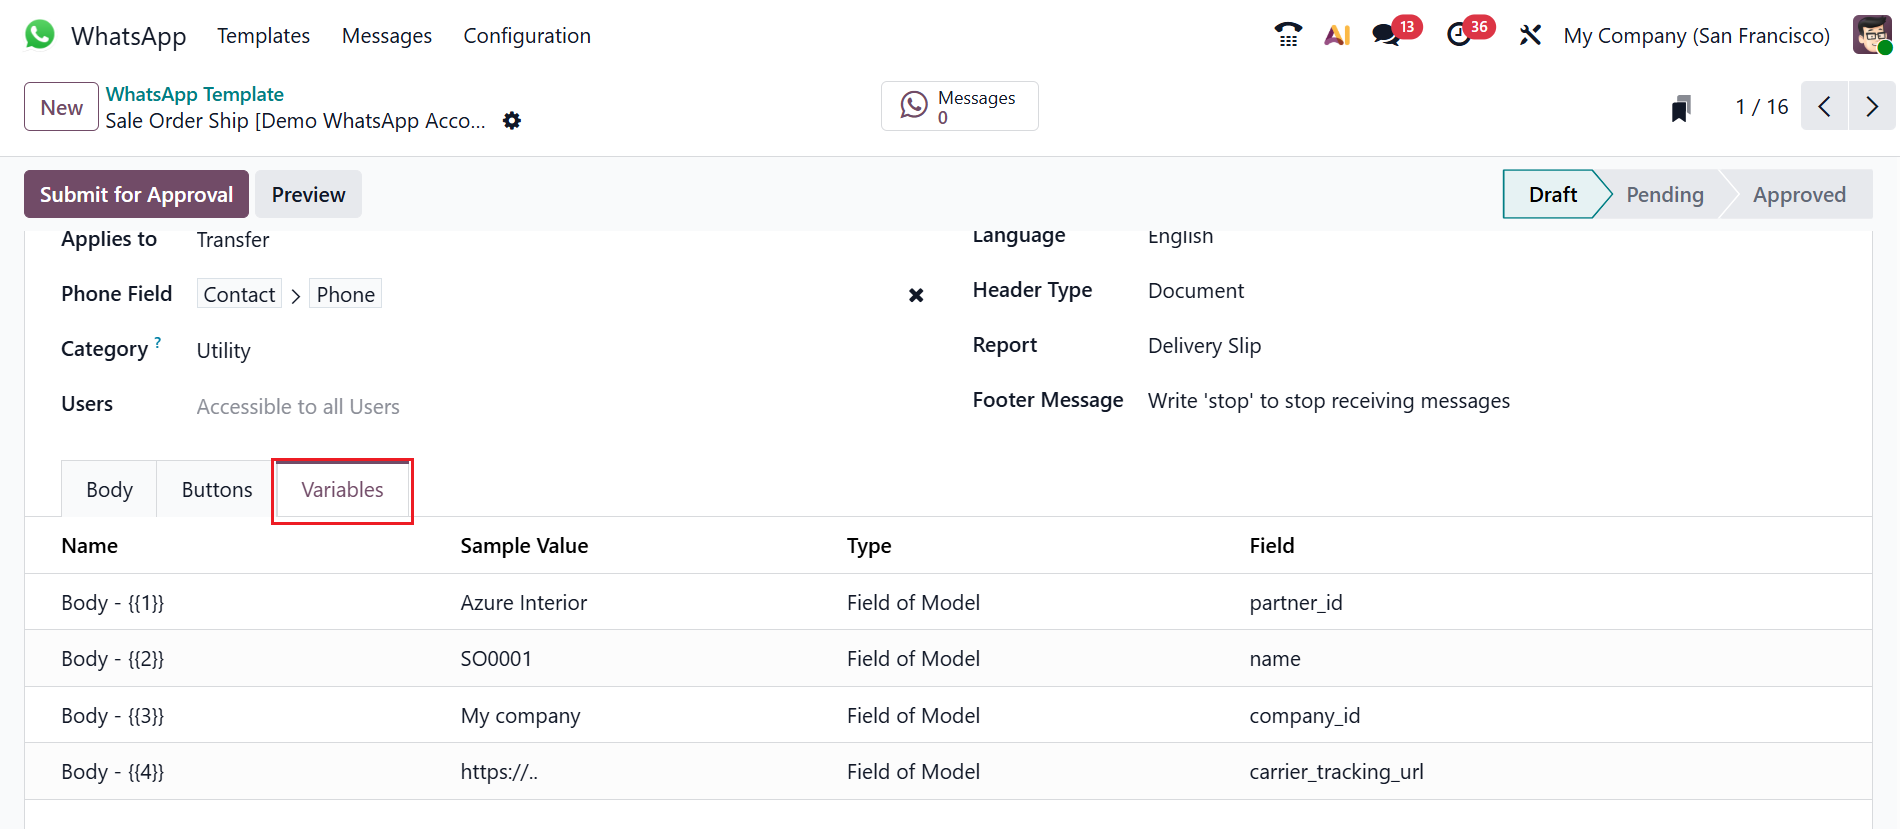
Under the Variables tab, you can configure the dynamic placeholders for your WhatsApp messages instead of the actual customer’s information. Here, you can define these dynamic placeholders linking them to a specific field in a model, as shown below. Select the Type as Field of Model to edit the dynamic placeholders to produce unique data in the message being sent. To ensure the correct model and field under the Field section, firstly edit the Applies To field. Then, select the available field from the search box. Then, click the Submit for Approval button to submit the template for approval. From the Draft stage, it will move to the Pending and Approval stage.
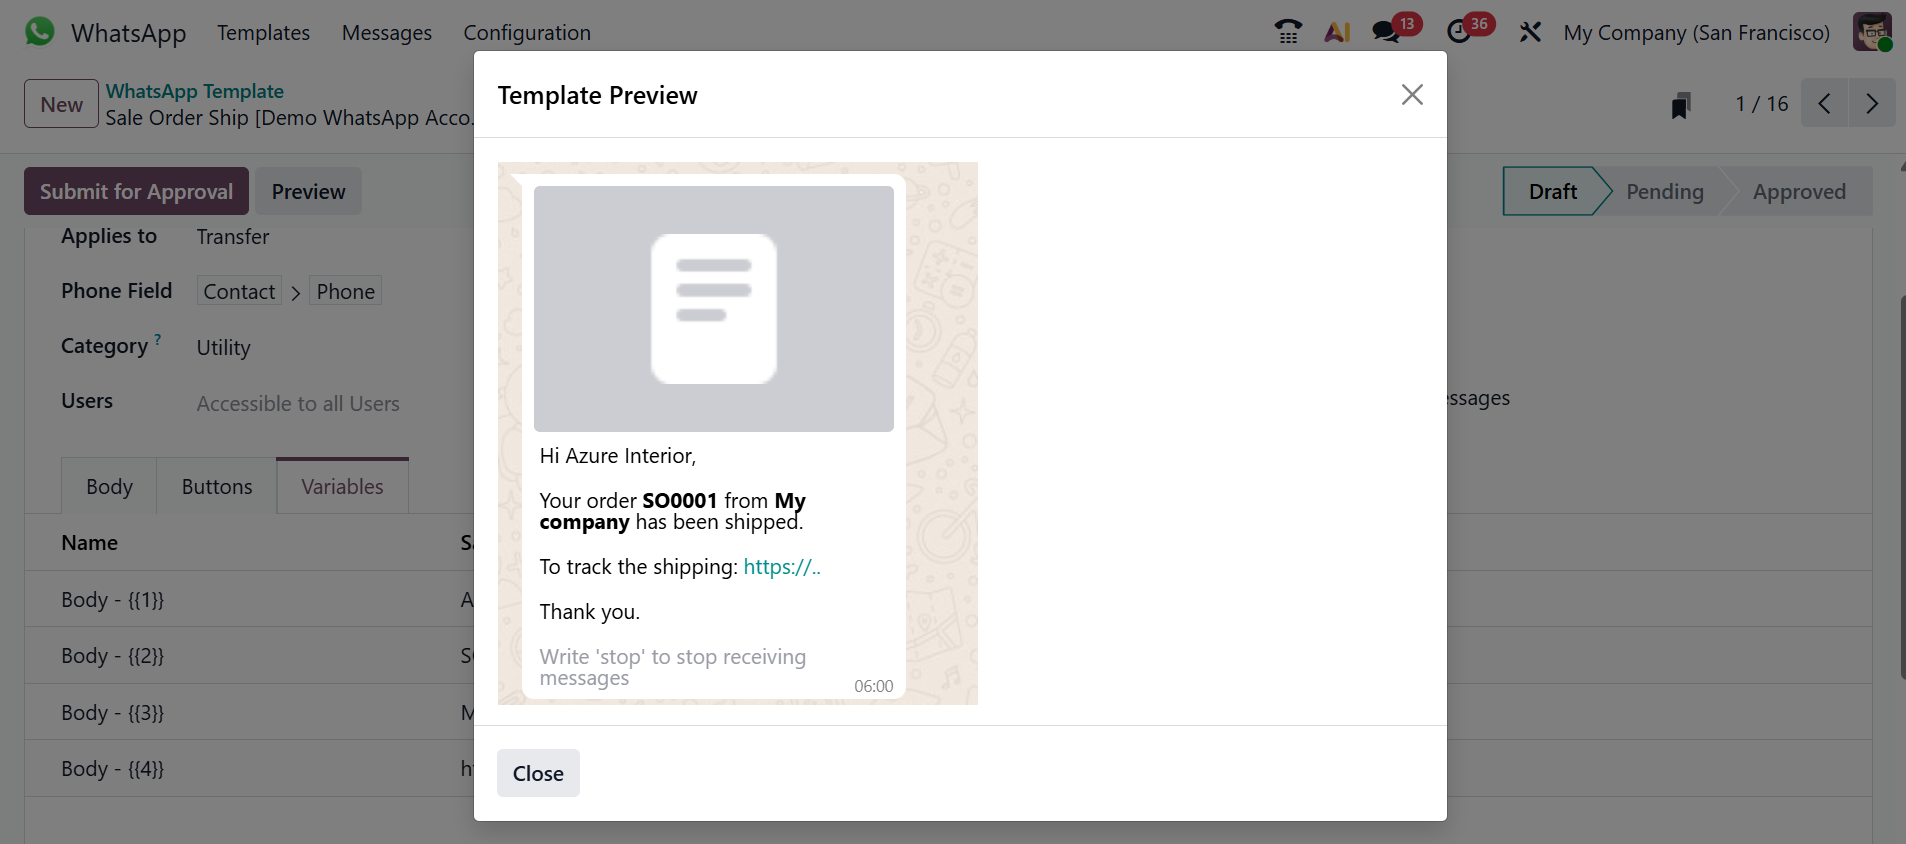
To view the WhatsApp preview, click on the Preview button. A pop-up screen will appear, where you can see the template preview as shown below:
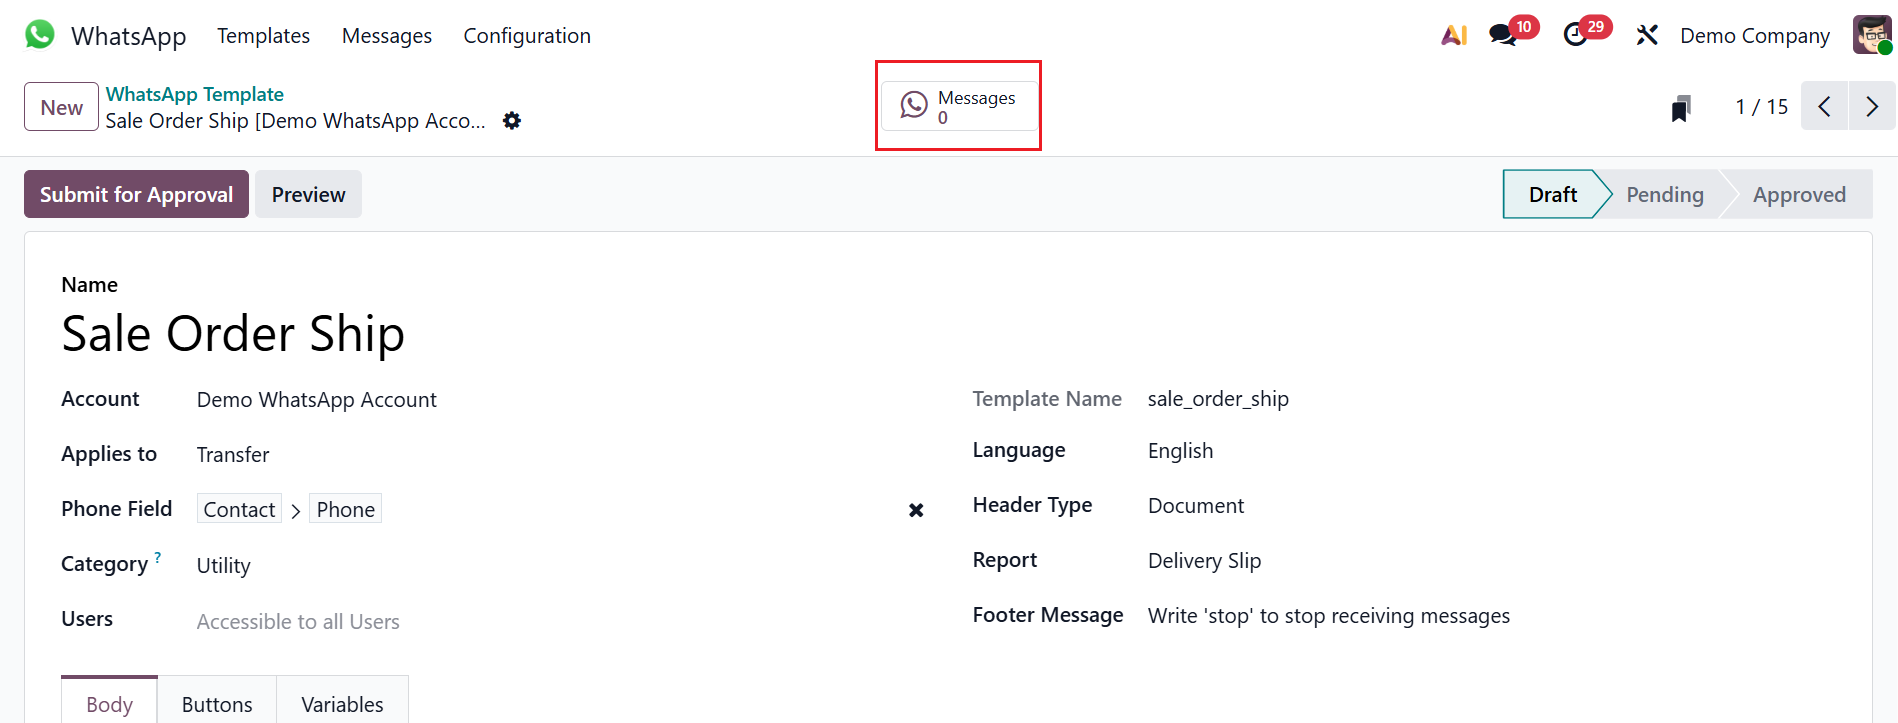
The Messages smart tab shows the messages sent with this template.
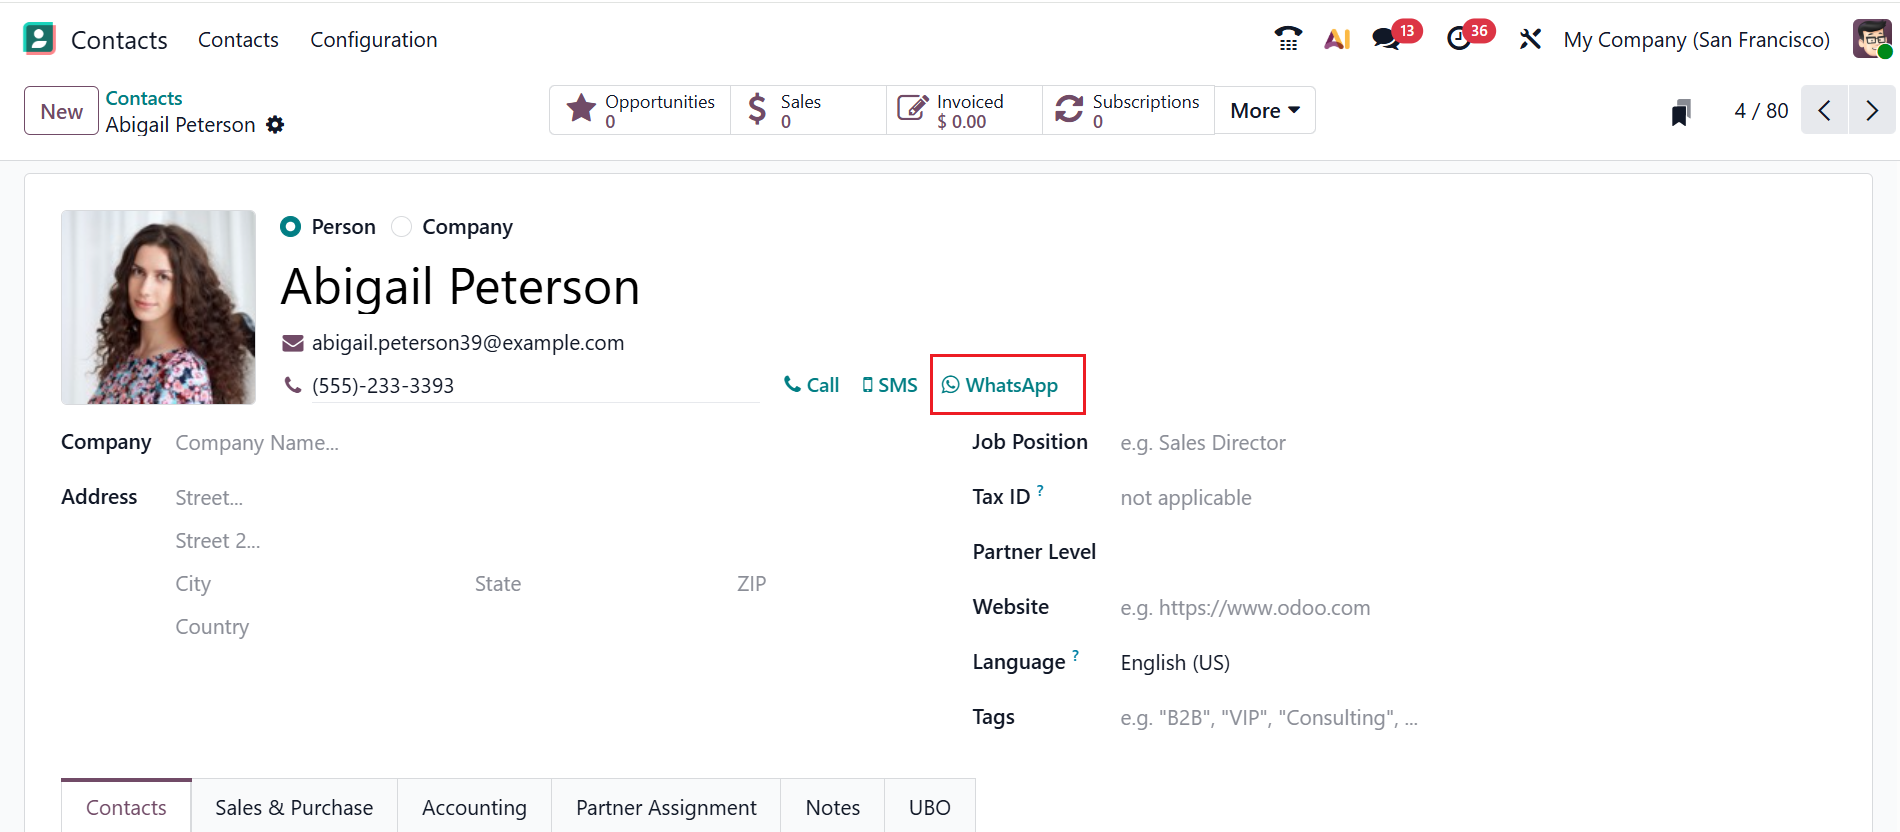
Odoo users can use these WhatsApp templates to send messages to partners directly. In the Odoo 19 Contacts module, you can see a WhatsApp button in the phone number field in the partner’s record page, as shown below.
In Odoo’s chatter area, you can use the WhatsApp option to enhance communication, as shown below. Moreover, the WhatsApp button is available across different tree views in Odoo, helping businesses communicate quickly with customers by sending order confirmations, quotations, reminders, invoices, and updates via WhatsApp.

2. Messages
In the Odoo 19 WhatsApp module, the Messages menu is the central place for storing and managing all WhatsApp communications. It helps to view, track, and manage all WhatsApp messages sent or received through Odoo. Here you can see details of WhatsApp messages, including Created On, Created By, Send To, and Status.
Use the search bar’s drop-down menu to access Filters, Group By, and Favorites. Under the Filters option, you can filter the Messages menu based on Send Messages, Delivered Messages, Read Messages, Failed Messages, Last Week, Last Month, Last Year, Create Date, and Custom Filter. You can group the Messages menu based on Send To, State, Template, and Custom Group. The Favorites option helps to save the favorite search for further use.

3. Configuration
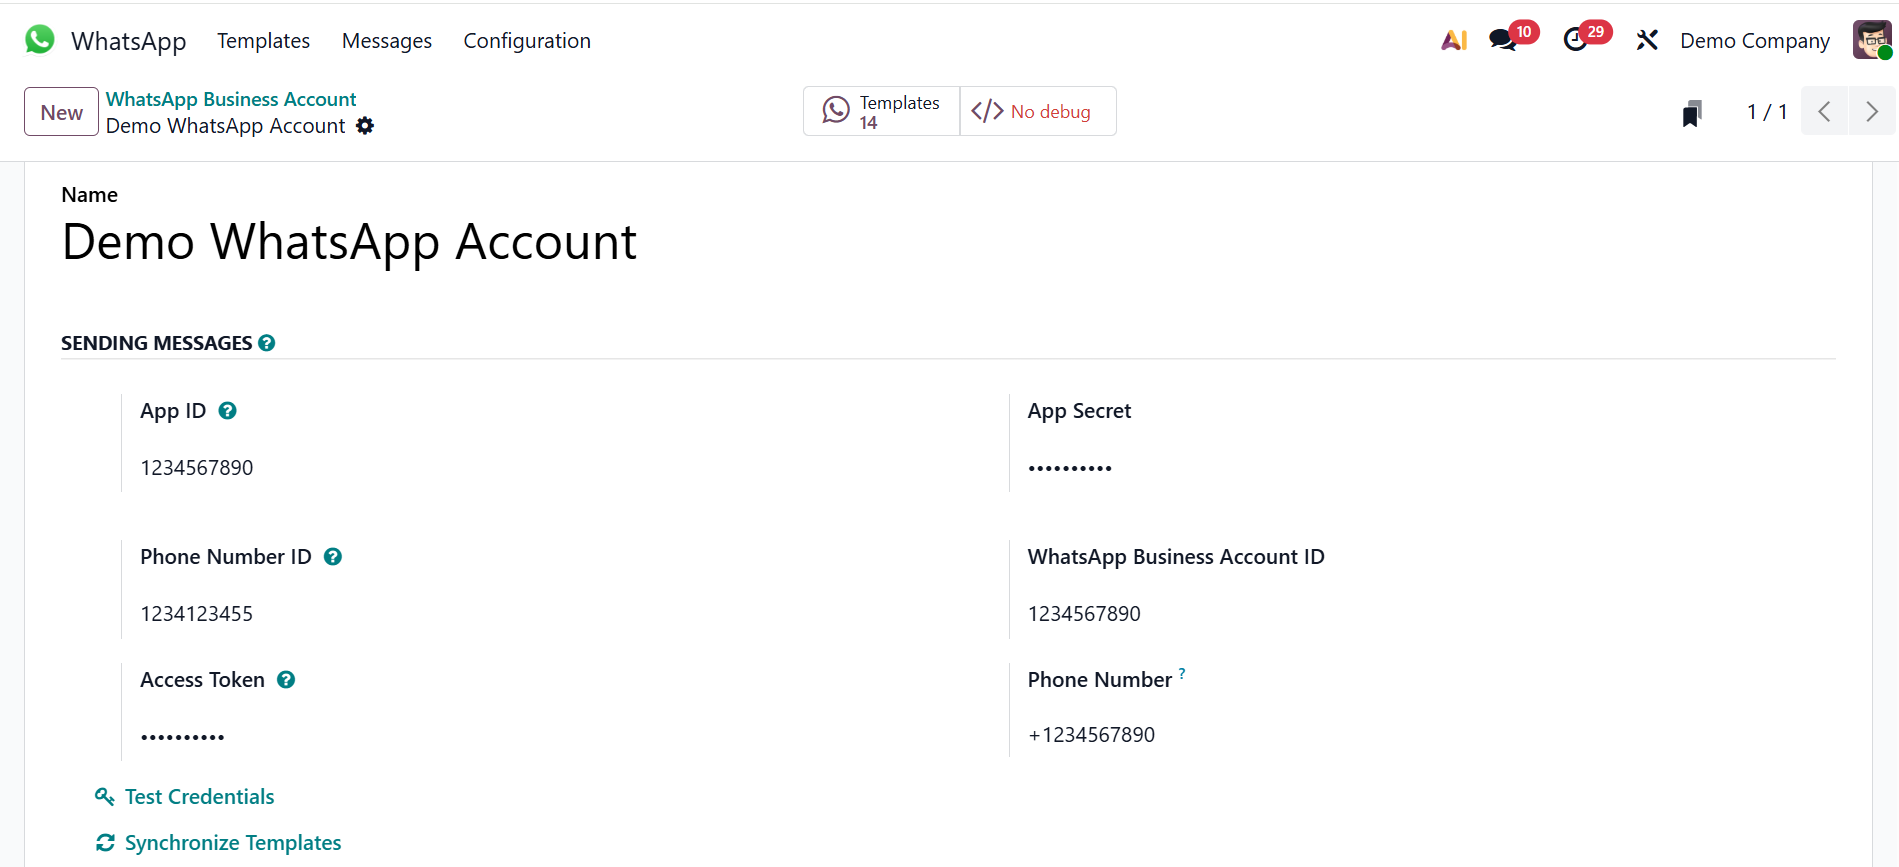
In the Odoo 19 WhatsApp module, the Configuration menu helps to set up all technical and functional options needed to use WhatsApp inside Odoo. Here, you can configure the WhatsApp Business Account for integrating the WhatsApp module. This setup enables Odoo to send and receive WhatsApp messages across various business documents and workflows. Here you can see details of the WhatsApp Business Account, including Name, Phone Number ID, Account ID, App ID, and Allowed Company. To create a new WhatsApp Business Account, click on the New button as shown below:

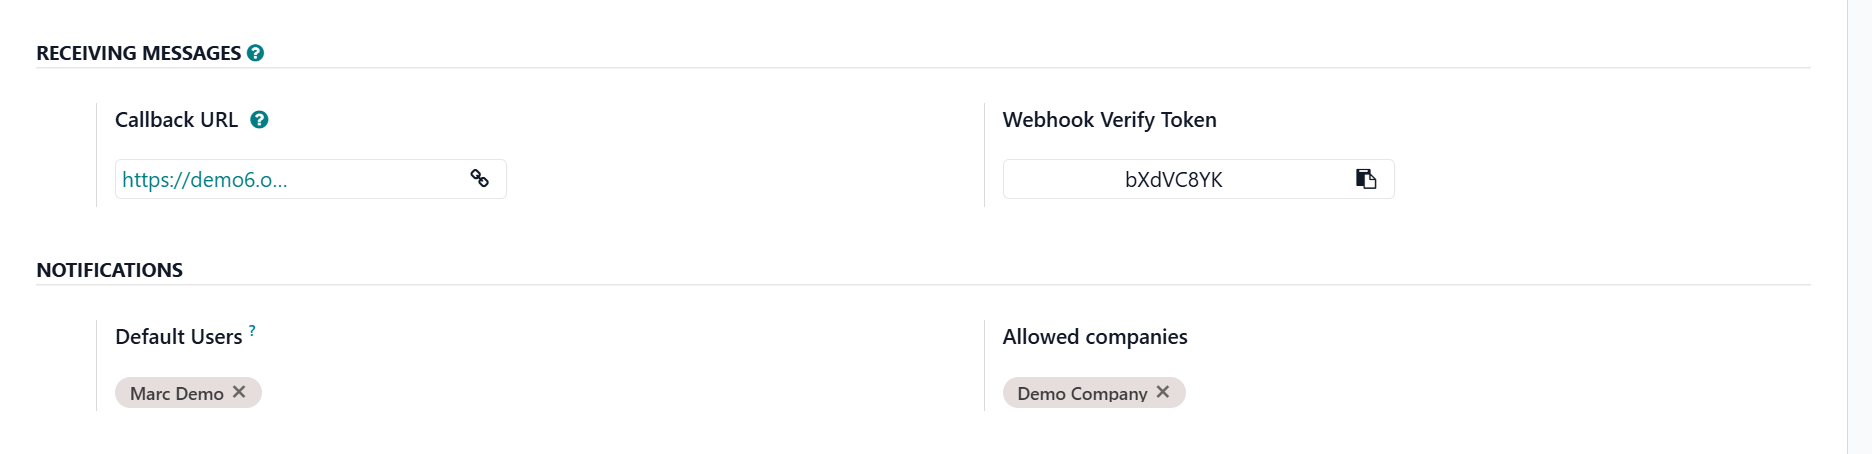
Under the Name field, add a name for your account. Then, add the App ID, App Secret, Phone Number ID, WhatsApp Business Account ID, Access Token password, and Phone Number. The Test Credential button helps to verify the app credentials and passwords. The Synchronize Template button helps sync the available message templates in the Odoo database. Then, you can add the Default Users and Allowed Companies field under the Notifications section. If required, you can add multiple users and companies. WhatsApp can send incoming messages and delivery updates back to your Odoo system by using the Callback URL. The Webhook Verify Token is a code that authenticates the Callback URL.
You can move to the Template menu directly by clicking the Templates smart tab. There, you can manage the WhatsApp message template used only for this business account. Select the New button to create a new template for the WhatsApp Business account.
For today's business world, the Odoo 19 WhatsApp module stands out as a useful solution for efficient communication. Through seamless integration with Odoo, users can manage discussions, automate messages, and track client information all in one place. It enables teams to provide quicker support and more interactions between business processes and real-time communication. The module reduces manual work, improves customer engagement, and keeps all message history linked to each Odoo record. Overall, the WhatsApp module in Odoo 19 enhances efficiency, automation, and customer satisfaction.