Efficient time tracking is essential for accurate payroll, project management, and workforce planning. In Odoo 19, the Timesheets module is closely integrated with the Time Off application to simplify how employee leave and public holidays are recorded. This integration ensures that both approved absences and official non-working days are automatically reflected in timesheets, reducing manual effort and improving data accuracy.
In this blog, we will explore how Odoo handles timesheets for public holidays and validated time off requests, and how these features help organizations maintain consistent and reliable time tracking.
Timesheets for Public Holidays
Odoo 19 enhances time tracking by automatically recording timesheet entries for paid public holidays that fall within an employee's assigned working schedule. This automation eliminates the need for manual timesheet updates while ensuring that project tracking, resource planning, and payroll calculations remain accurate.
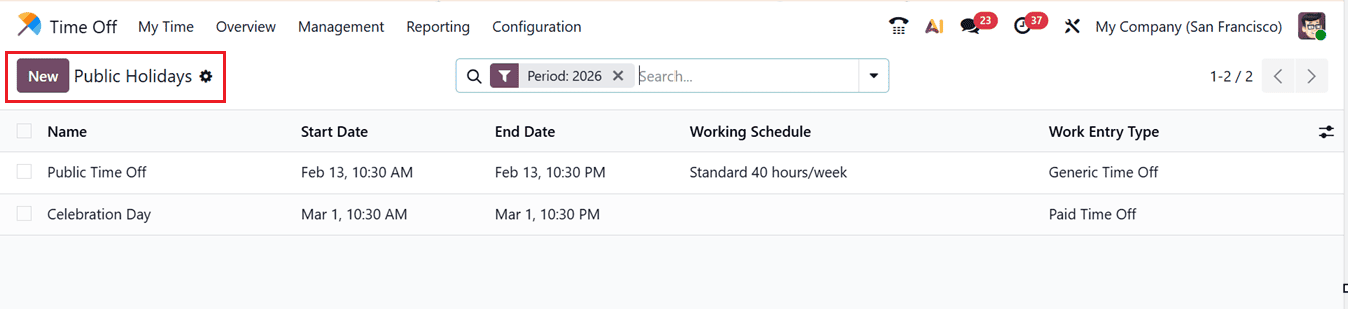
To configure tailored public holidays as per your requirement, navigate to the Time Off module and choose the Public Holidays option from the Configuration menu. This will show the list of preconfigured Publicable Holiday options along with their Name, Start Date, End Date, Working Schedule and Work Entry Type, as shown in the screenshot below.
Employees and managers can view these automatically created records from the Timesheets module’s My Timesheet menu section. This functionality is particularly beneficial for organizations that rely on project-based time tracking, as it ensures that paid non-working days are properly accounted for without disrupting project reporting or employee attendance records.
Restricting Leave Requests on Mandatory Working Days
Odoo also provides greater control over leave management by allowing organizations to designate specific dates as mandatory working days. These are dates when employees are not permitted to request time off due to important business activities, such as month-end financial closures, inventory audits, compliance reviews, or other critical operational events.
To configure these restrictions, go to the Mandatory Days option from the Time Off module’s Configuration menu and create a new record using the ‘New’ button, as shown in the screenshot below.
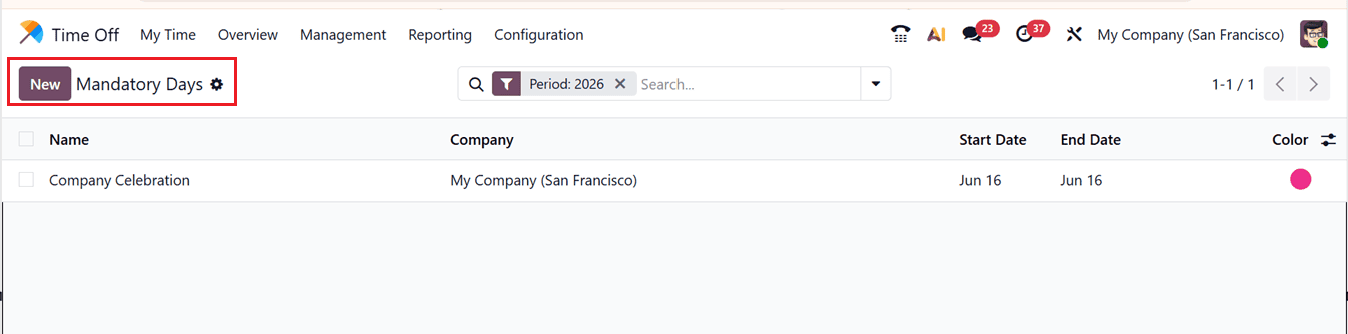
While configuring, specify the date along with a description or reason for the restriction. Once the mandatory day is defined, employees will be unable to submit leave requests for that date, helping organizations maintain adequate staffing during essential business operations.
This feature helps companies improve workforce planning, avoid scheduling conflicts, and ensure business continuity during periods when employee presence is crucial.
Setting Timesheet for Validated Employee Time-Offs
Odoo automatically generates timesheet entries for projects and tasks when a time off request is approved. This feature simplifies timesheet validation by ensuring that approved leave is accurately reflected in employee timesheets without requiring manual entry.
To enable this functionality, first activate Developer Mode. Then, open the Timesheets application and navigate to the Configuration Settings window. Scroll to the Time Off section and enable the Time Off checkbox. Once activated, Odoo will automatically create timesheet entries for validated time off requests as well as public holidays, as shown in the screenshot below.
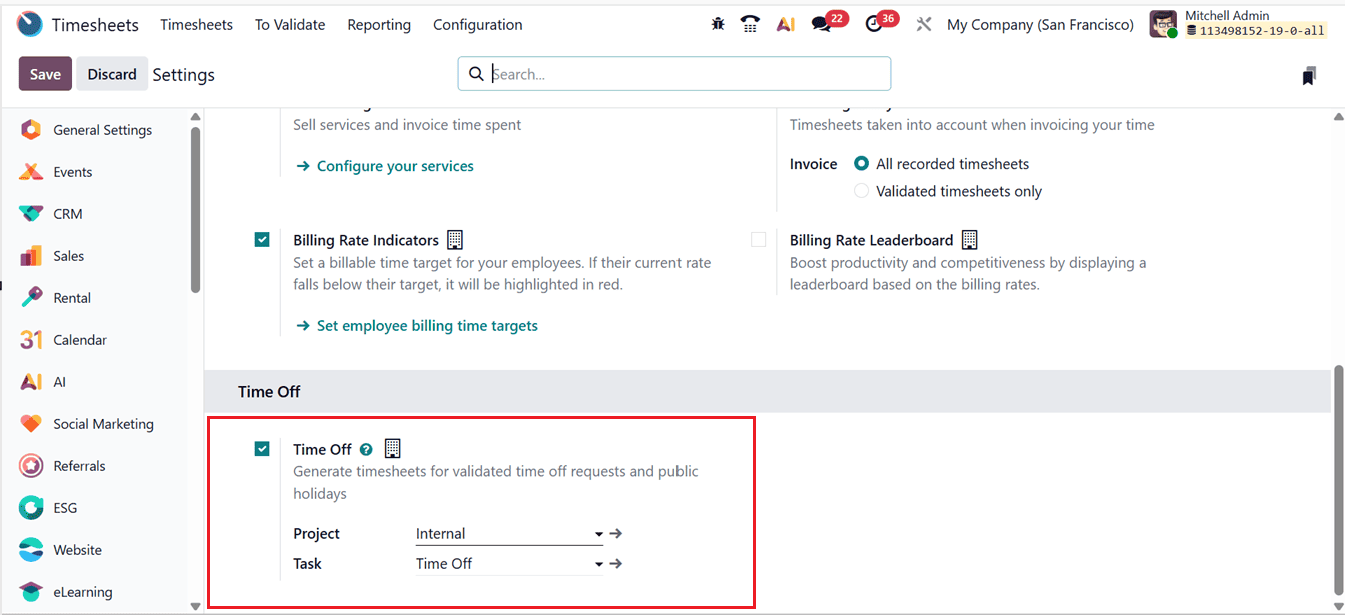
After enabling the option, two additional fields become available: Project and Task. By default, the Project is set to Internal, and the Task is set to Time Off. These settings determine where Odoo records time off entries in the Timesheets application. If necessary, you can select different projects and tasks using the available drop-down menus. The options displayed may vary depending on the applications installed in your Odoo environment.
Time-Off Types
Time Off Types in Odoo 19 allow organizations to define and manage various categories of employee leave, such as annual leave, sick leave, maternity leave, casual leave, or remote work. Proper configuration of these leave types helps businesses accurately track employee absences while ensuring compliance with company policies related to leave allocation, approvals, and payroll processing.
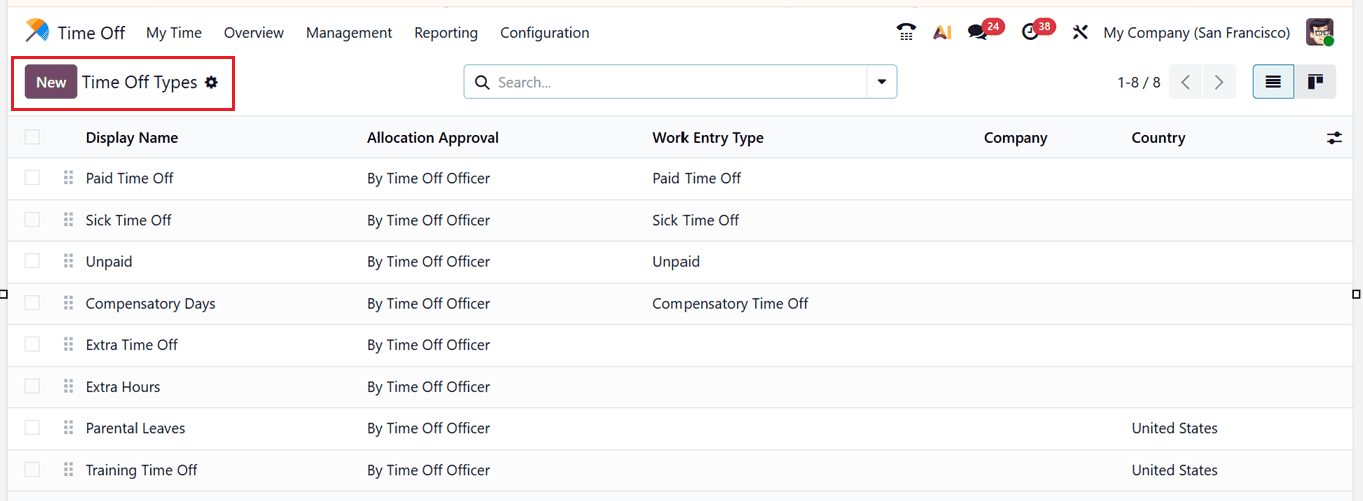
To create or modify a specific time off type, navigate to the Time Off Types option from the Time Off module’s Configuration menu. Here, you can either edit an existing leave category or create a new one.
To check the functionality of ‘Validated Employee Time-Offs’ feature, let’s create a new Time-Off Type using the ‘New’ button and start editing the required details. To determine whether a specific time off type requires approval, it can be set under the Approval field of the TIME OFF REQUESTS section on the time off type form, as shown in the screenshot below.
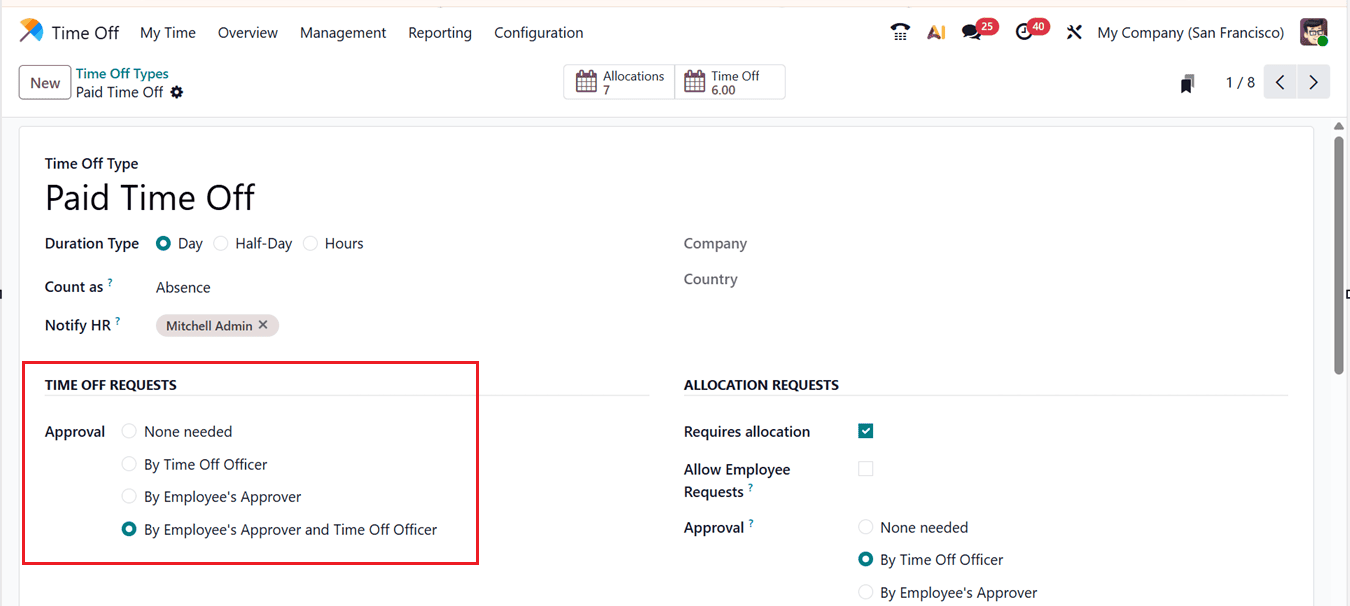
- None needed: Leave requests are approved immediately without requiring any review or authorization.
- By Time Off Officer: A designated leave administrator or time off officer is responsible for approving the request.
- By Employee’s Approver: The request must be reviewed and approved by the employee's designated manager or approver.
- By Employee’s Approver and Time Off Officer: The leave request requires authorization from both the employee's assigned approver and the designated time off officer before it can be approved.
It is important to note that time off categories that do not require validation generate timesheet records immediately after the request is submitted. For time off types that require approval, the corresponding timesheet entries are created only after the request has been validated and approved. Then, edit all the required form fields and save the new Time Off Type.
Requesting Time-Off
Once an employee’s Time Off request is submitted, it will be validated based on its approval settings. Here, Odoo will automatically allocate this time off directly to the employee’s Timesheets, under the relevant Project and Task (as per the ‘Time Off’ configuration in Timesheet Module settings). So, this feature in Odoo provides accurate time tracking and resource planning across multiple projects.
To check this feature, create a new Time-Off request from the ‘My Time Off’ menu of the Time Off Module. So, open a new configuration for using the ‘New’ button, as shown in the screenshot below.
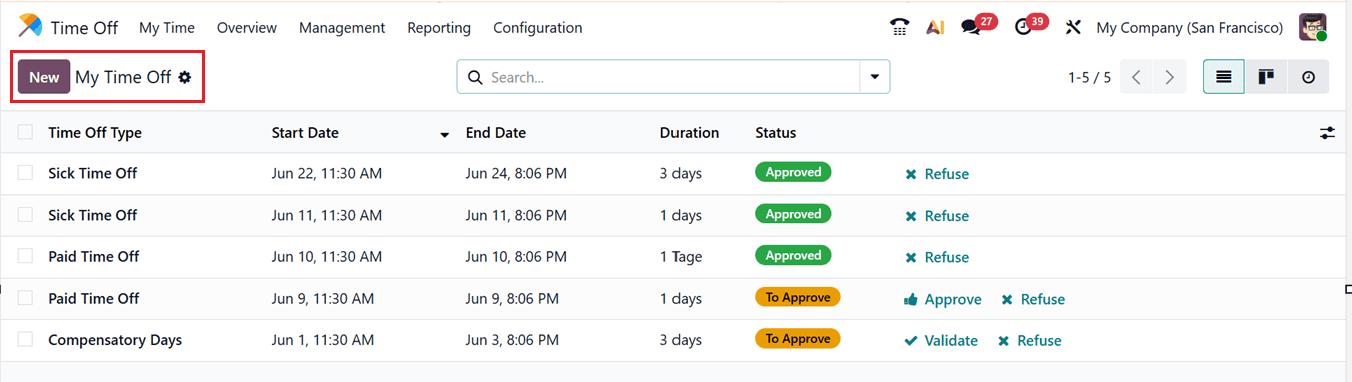
In the new time off request form, begin by selecting the appropriate Time Off Type from the available options, such as Paid leave, sick leave, personal leave etc. Next, specify the start and end ‘Dates’of your time off. By doing this Odoo will automatically calculate the total leave duration based on the selected dates.
You can then enter any notes, messages explanations, or supporting details in the Description field to provide context for your request. After reviewing the information, click on the Save button to submit the leave request, as shown in the screenshot below.
The dashboard calendar in the ‘Time Off’ module will help you to easily view and manage the leave requests. For time off types configured with No Validation, timesheet entries are created automatically as soon as the request is saved. If approval is required, the timesheet is updated only after the request has been approved using the ‘Approve’ button. This seamless integration ensures that employee leave is accurately reflected in timesheets and project tracking records.
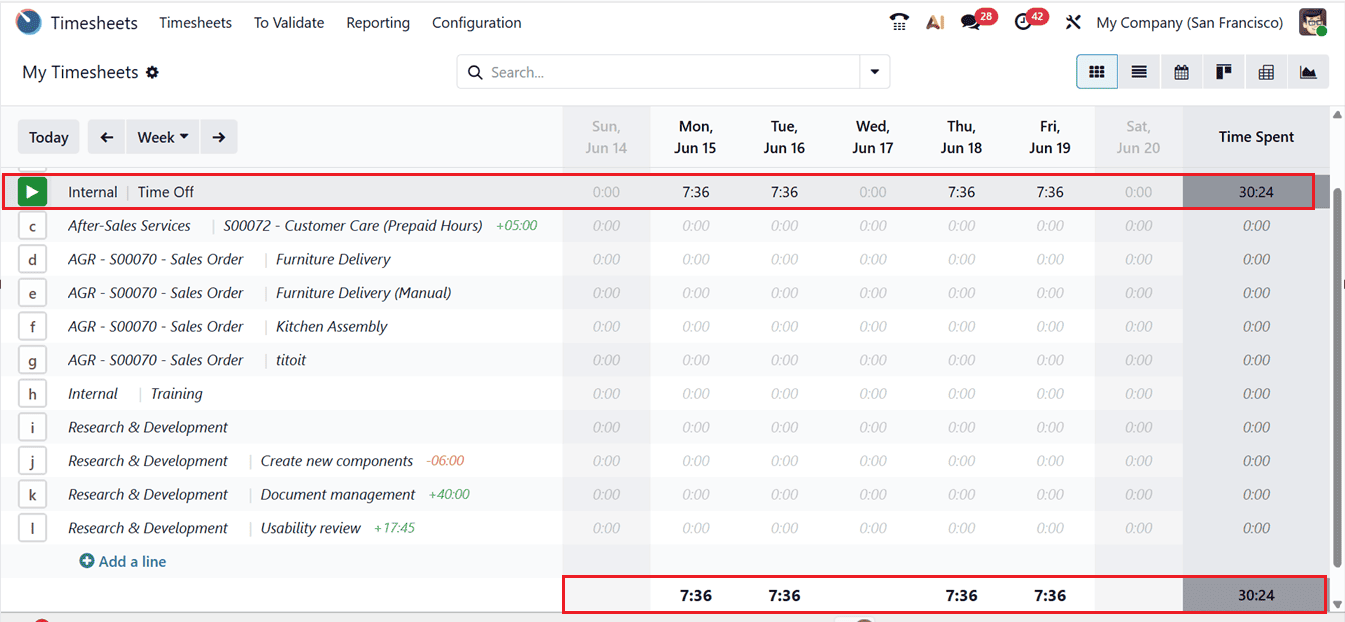
To view the generated timesheet entry, open the Timesheets application and navigate to the relevant time period inside the calendar view. The approved time off will appear in the corresponding timesheet field in the calendar view based on the configuration settings, as shown in the screenshot below.
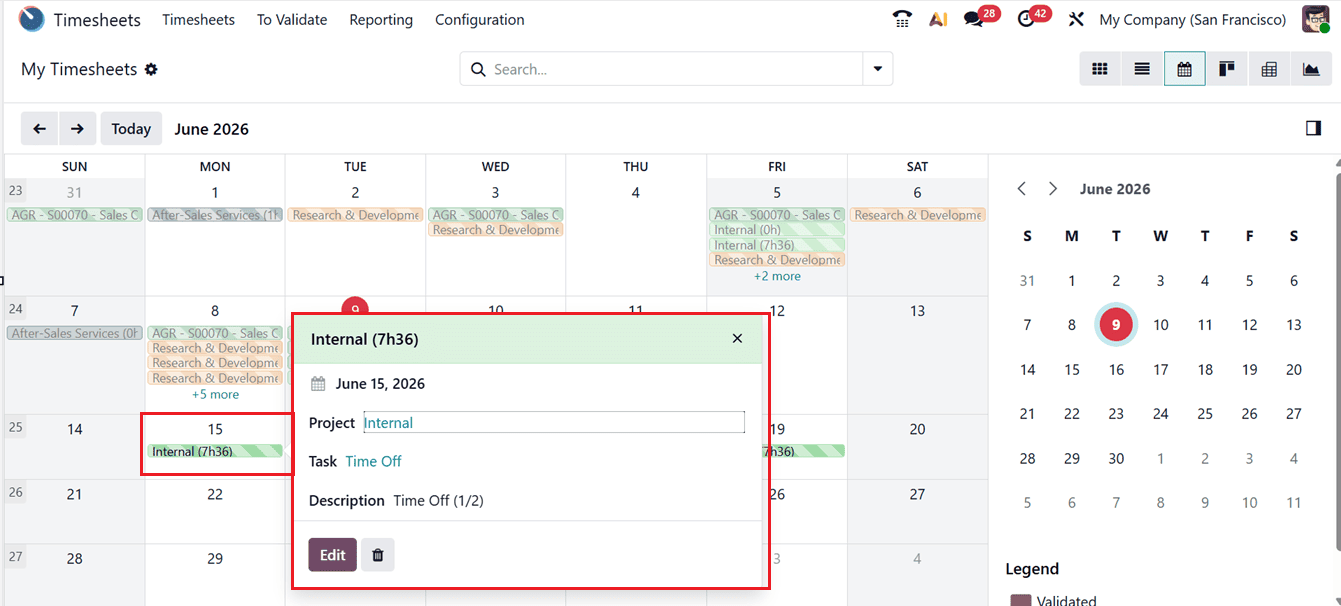
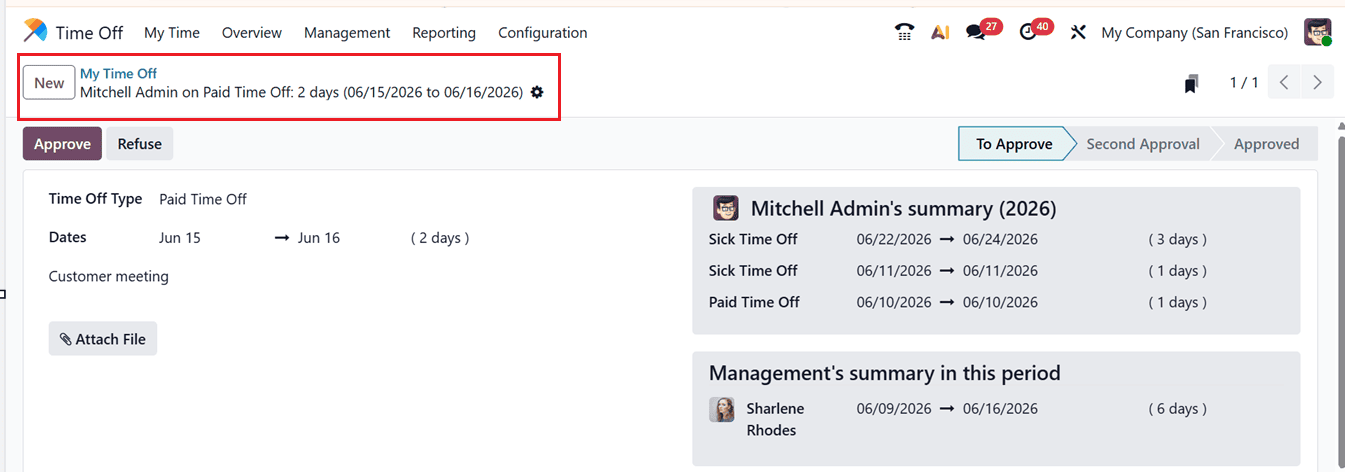
For example, consider an employee who attends internal timeoff during the week of June 15,16 of 2026. Throughout the time, the employee records their time in the Timesheets application under the Internal project and the Time Off task. Since the selected Paid Time Off type is configured to require validation, then if the manager has approved the time off. Odoo immediately creates a timesheet entry under the Internal project and the Time Off task. As a result, the employee's timesheet accurately reflects exact time hours of the Paid Time off and any other previous time offs taken, providing a complete and accurate timecard.
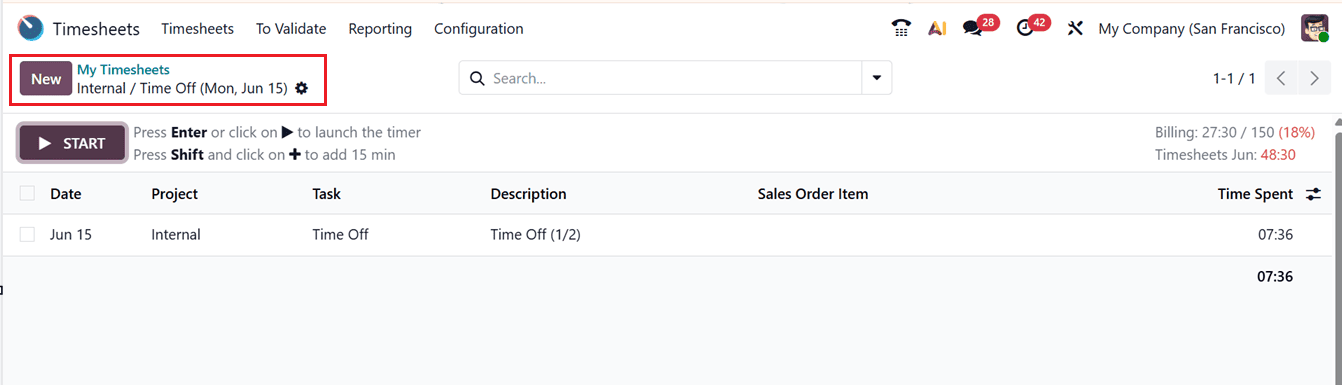
For more detailed information, hover over the entry and click on the magnifying glass icon, as shown in the screenshot below.
Then, you can see the detailed timesheet record of the requested Time Off details, allowing you to review the logged information, as shown in the screenshot below.
Requesting Time-Off by ‘Ignore Public Holidays’
Now, let’s check another Time -Off type feature of Odoo 19 called ‘Ignore Public Holidays' available as a checkbox within the "Time Off configuration form, as shown in the screenshot below.
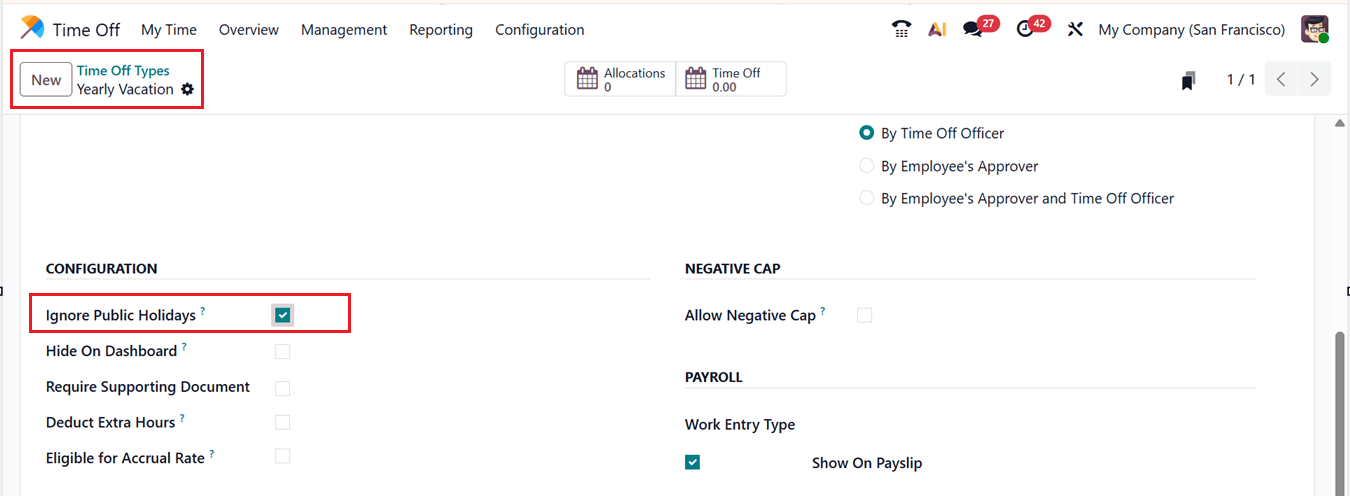
When the ‘Ignore Public Holidays’ option is activated, any public holidays that fall within an employee’s leave period are included in the total leave duration. If the setting is turned off, those public holidays are automatically excluded from the leave calculation, ensuring they do not reduce the employee’s available leave balance.
In conclusion, the integration of leave management and timesheets in Odoo 19 provides a seamless way to ensure all employee absences are accurately recorded. By automatically generating timesheet entries for public holidays and validated time off, Odoo eliminates manual entry errors and improves transparency across attendance and project tracking. This not only streamlines administrative processes but also enhances reporting accuracy for managers and finance teams.
To read more about How to Generate Timesheets for Public Holidays and Time Off in Odoo 18, refer to our blog How to Generate Timesheets for Public Holidays and Time Off in Odoo 18.