Email Marketing
Odoo email marketing is an advanced technique that is beneficial to improve your business and take your business to the next level. This technique allows businesses to pass messages to a group of people who may be existing or future customers. It is a user-friendly application that helps you to create various templates and layouts for your mailings
With Odoo email marketing you can create mailings with various functionalities as it is described in the module. The email marketing techniques are much successful as the customers spend more time online nowadays.
First of all, you should install the Odoo email marketing module from the Odoo app store. You can see the interface on entering the module. The image of the window is depicted below.
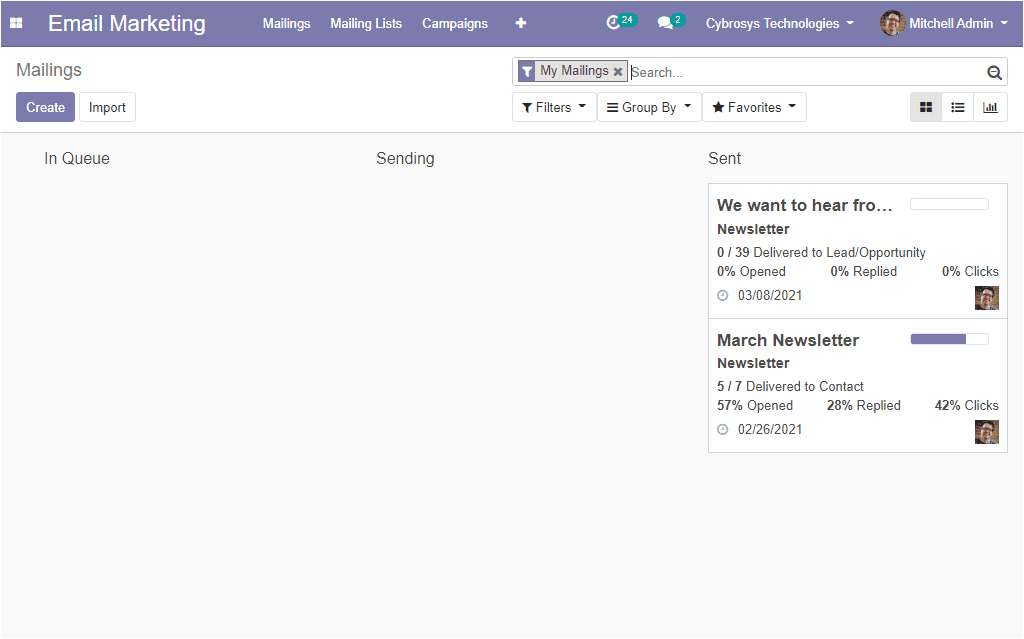
Here in this window, you can see the already created emails in the dashboard. It is arranged in different stages such as In Queue, Sending, Sent.
Mailings
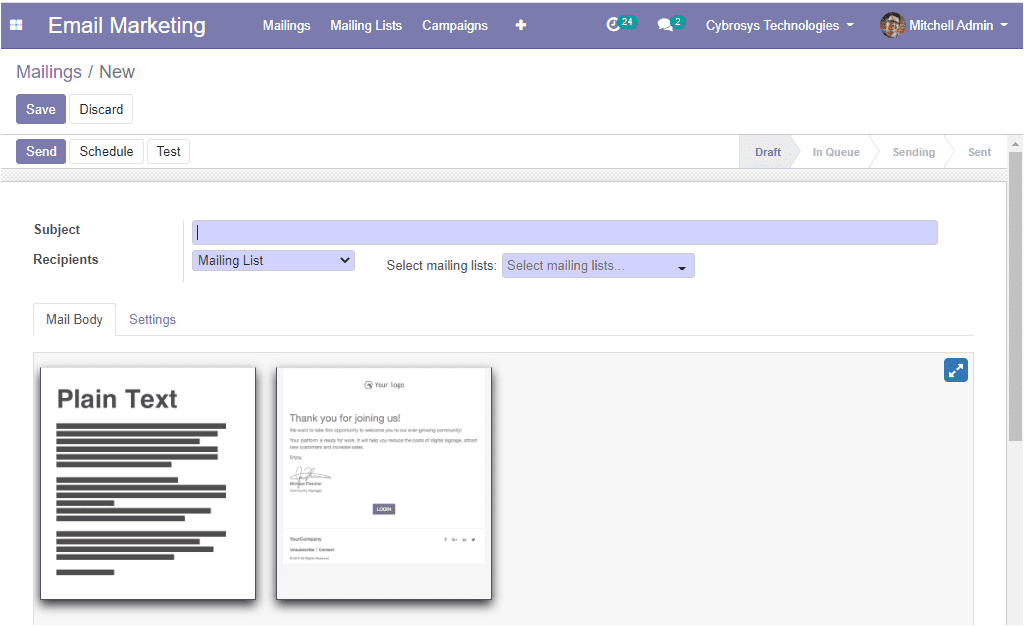
To create mailings in the platform you can take the route Email marketing -> Mailings -> Create. The image of the window is depicted below. Here in this creation form, you can mention the subject of emails to send and can add the recipients from the drop-down menu.
Under the Mail Body tab, you can select the suitable layout and you have the provision to make changes if needed by using the drag and drop options and double-clicking on content.
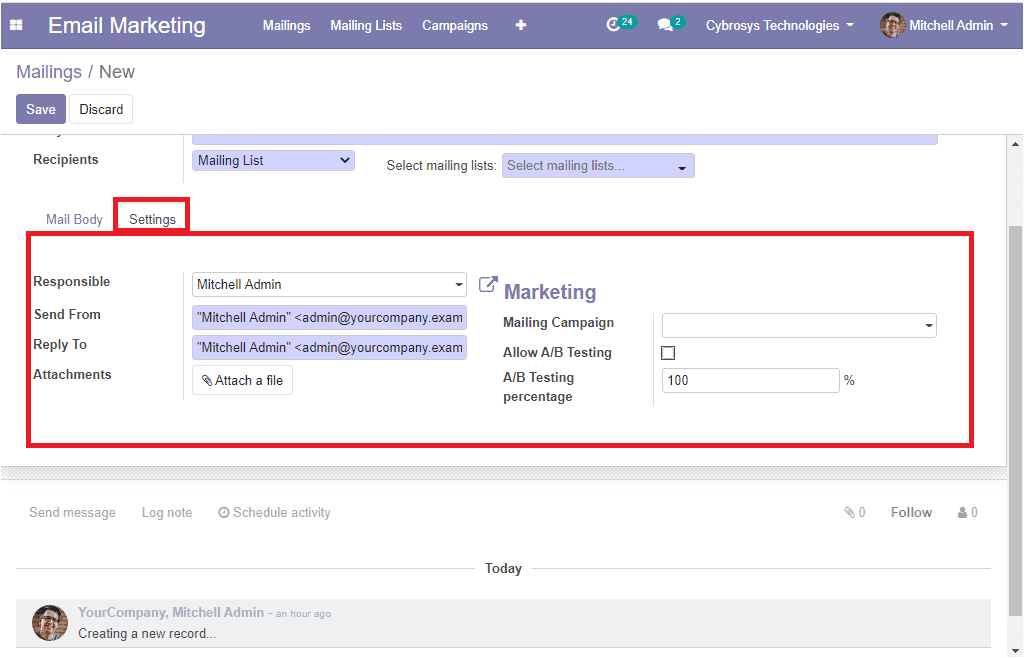
Under the settings tab of the window, you can assign the responsible person, and also you can fill the fields such as to send from, reply to, and can attach files under the attachments option. Additionally, you can define the marketing details and you can choose the mailing campaign from the dropdown menu available also you are able to create a new one by selecting the create option. Moreover, you can enable the option Allow A/B Testing, and if you are enabling the option the recipients will be mailed only once for the whole campaign. This lets you send different mailings to randomly selected recipients and test the effectiveness of the mailings, without causing duplicate messages. Finally, you have mentioned the A/B testing percentage.
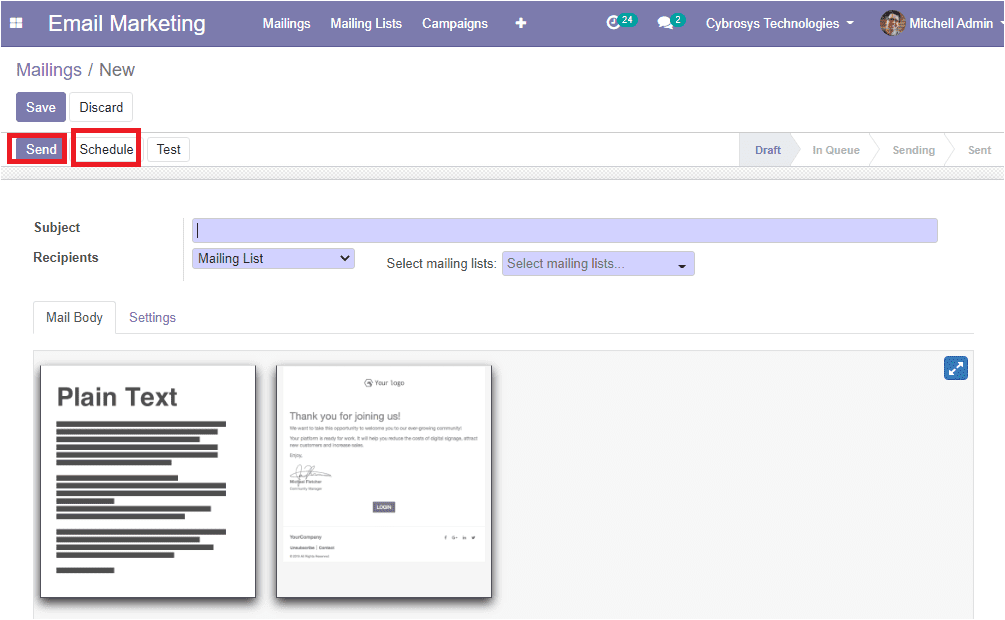
After filling in the all necessary details you can click on the save button to save the details. You can either send the emails or can schedule them for another day in the future by selecting the schedule button available.
So far we were discussing the mailings option in the platform and now let us move on to the Mailing lists.
Mailing lists
For creating email marketing firstly you should have a mailing list. The mailing list will include the email address of the customers or leads. To access the mailing lists option in the platform go to Email marketing -> Mailing lists
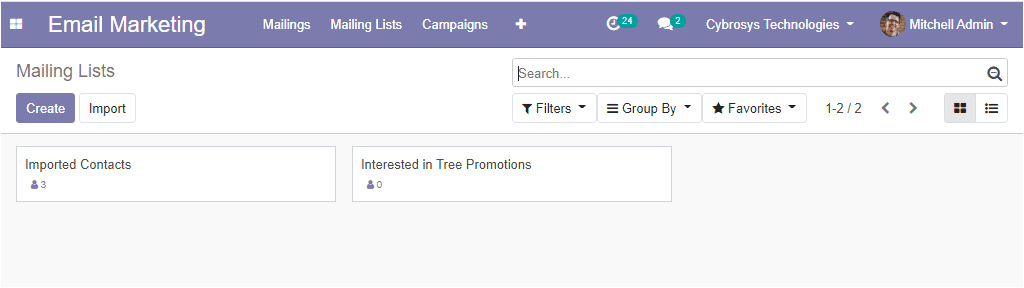
You can create a new mailing list of mass mailings by accessing the create icon available.
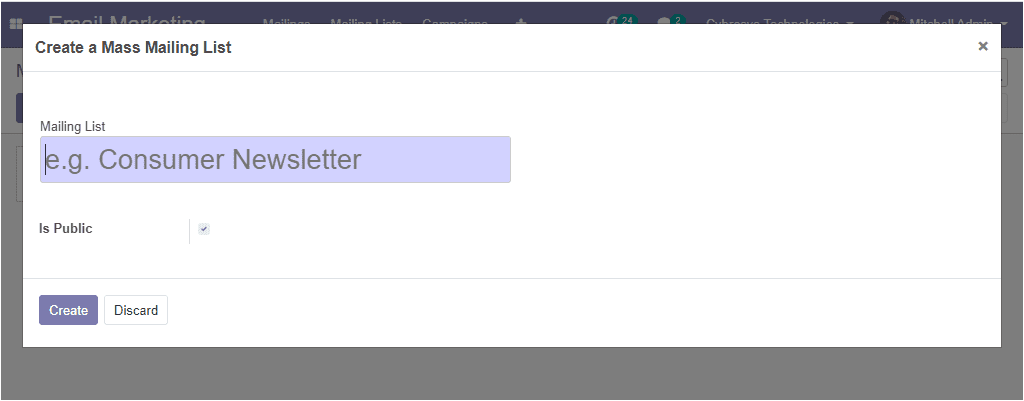
If you enable the option Is Public the mailing list will be accessible by the recipient in the unsubscription page to allow him to update his subscription preferences.
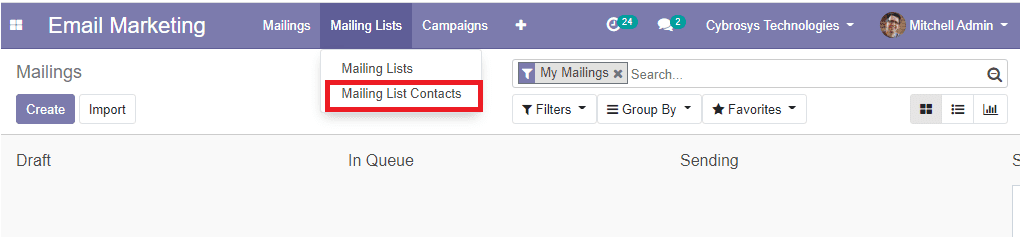
While creating the mailing list in the Odoo email marketing platform you have the provision to add recipients to that mailing list. This can be done by taking the route Email marketing -> Mailing lists -> Mailing lists contacts -> Create.
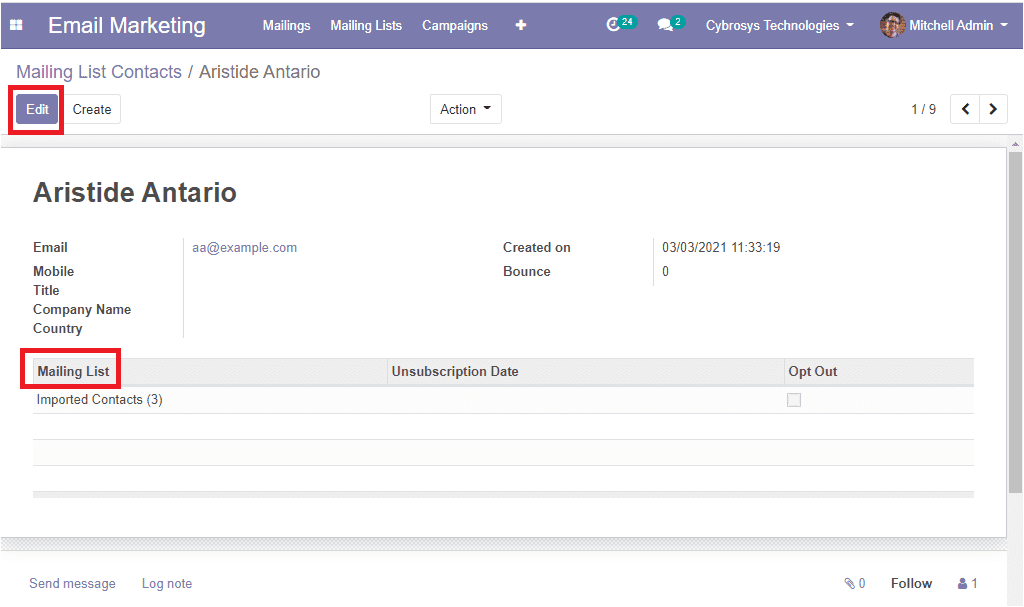
Here in this window, you can view a list of all contacts under all your mailing lists and the contacts that you created individually. This window includes the details of mailing lists, contacts name, created date and time, company name, email address, bounce, and blacklists. The image of the mailing lists window is depicted below.
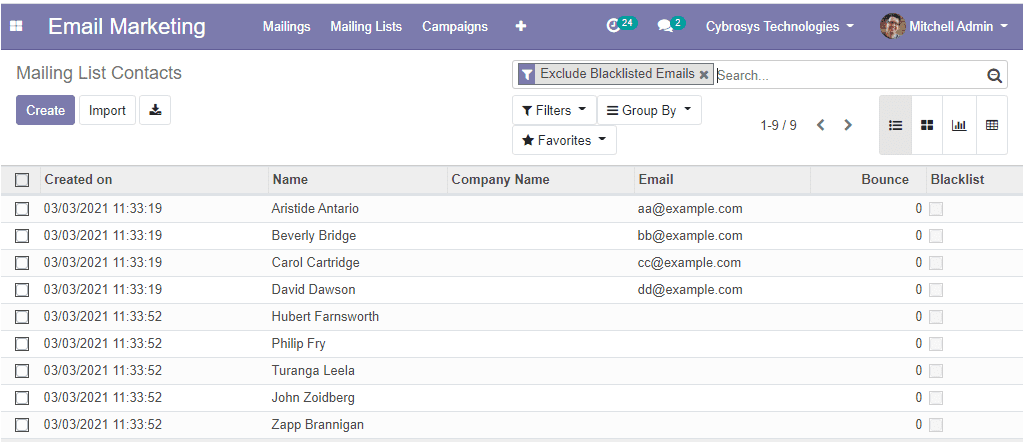
You can click on each contact to view different mailing lists to which the contact is associated. Moreover, you can add new lists by clicking on the edit button available.
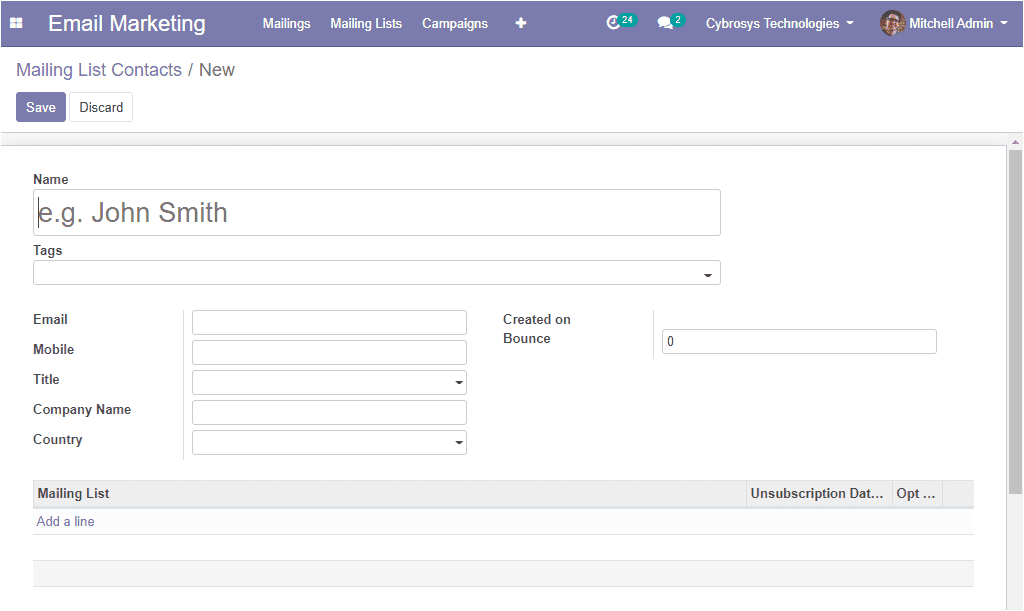
In this creation form, you can provide the details such as name, tags, Email and mobile number, title, company name, country, created on bounce. Additionally, you can add the mailing list by selecting the Add a line option. The new mailing list contact creation form is depicted below
As we clear on the mailing lists option in the platform and now we can move on to the blacklist option available.
BlackList
In the Odoo Email marketing module you have the option to blacklist a contact by going to Email marketing -> Configuration -> Blacklists.
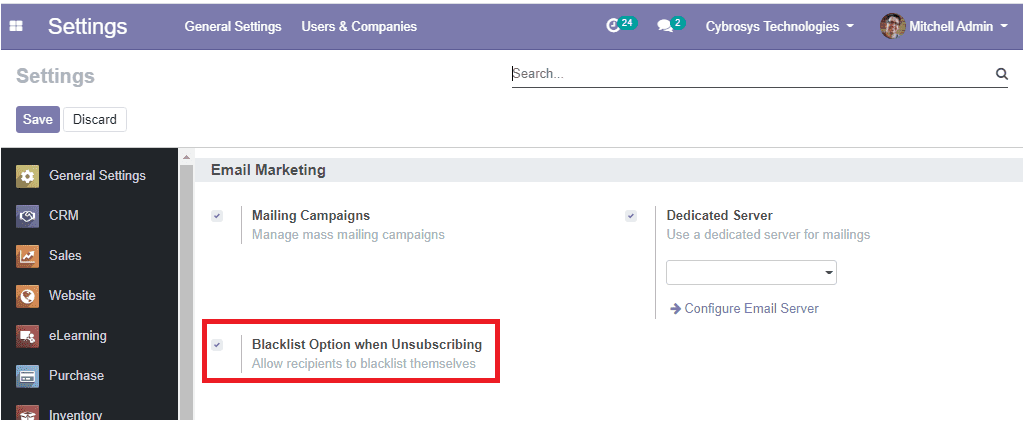
For activating this option you should go to the settings menu of the email marketing module and check the box near the option Blacklist Option when Unsubscribing. The image of the window is depicted below.
After checking the box you can click on the Save button. Now you can access this feature from the configuration tab of the email marketing module. The image of the window is depicted below.
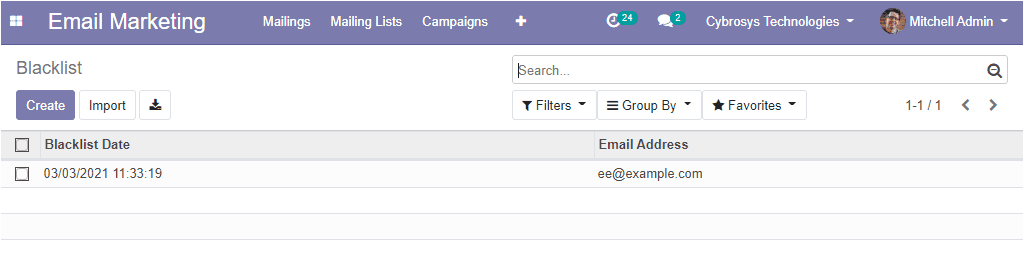
Here you can see the blacklist details that are already created and you can create a new one by selecting the create icon. Using the following window you can add a contact to the blacklist by providing the respective email address. If you enable the Active option the blacklisted contact will not receive any more mass mailing.

The simple and user-friendly Email marketing module in the Odoo platform is the perfect way to deal with the promotions of your business. This is an affordable and convenient technique that brings more satisfaction to your efforts. You can easily track your bounce rate, revenues and moreover, you can follow the opportunities that are generated.