Manufacturing Module
The process of converting raw materials into finished goods or products is a very complicated and challenging task. The companies that deal with numerous manufacturing items need to follow each manufacturing request separately. All the challenges and difficulties can be managed with the help of ERP software. The ERP software implementation like Odoo will reduce your hurdles and the Odoo Manufacturing module allows you to deal with all operations such as managing Bill of Materials, plan manufacturing orders, track the work orders, and many more in the manufacturing process. The integration of this module with inventory management is an added advantage and so we can keep the stock automatically updated with each manufacturing procedure.
First of all, we can install the manufacturing module from the Odoo applications.

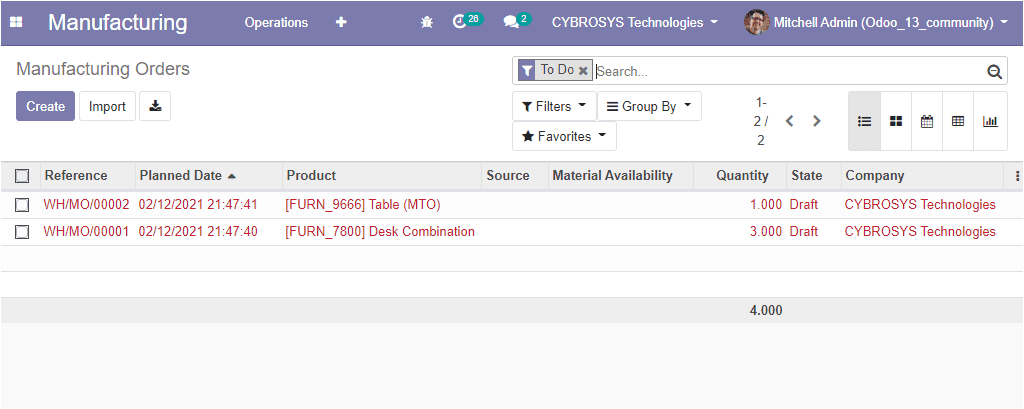
On entering the manufacturing module you will be depicted with the Manufacturing Orders window as depicted below. In this window, all the manufacturing orders described in the platform could be seen along with product description, quantity, planed date, company name, and the reference code.
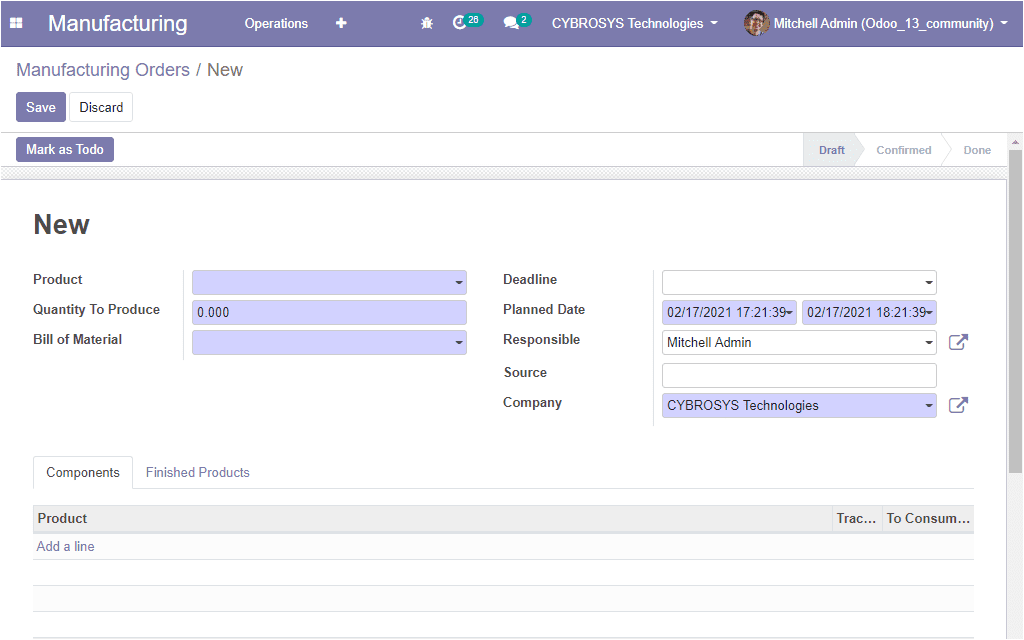
You can also create new manufacturing orders by clicking on the Create icon. The creation window is depicted below. In the creation window, you can fill all the required fields such as product name, the quantity to produce, the bill of materials option will allow you to define the list of required components to make a finished product. Additionally, you can set a deadline for the order which is the informative date allowing you to define when the manufacturing order should be processed at the latest to fulfill delivery on time. Moreover, you can assign the planned date which is the date at which you plan to start the production. Also, you can allocate the responsible person, source, and company.
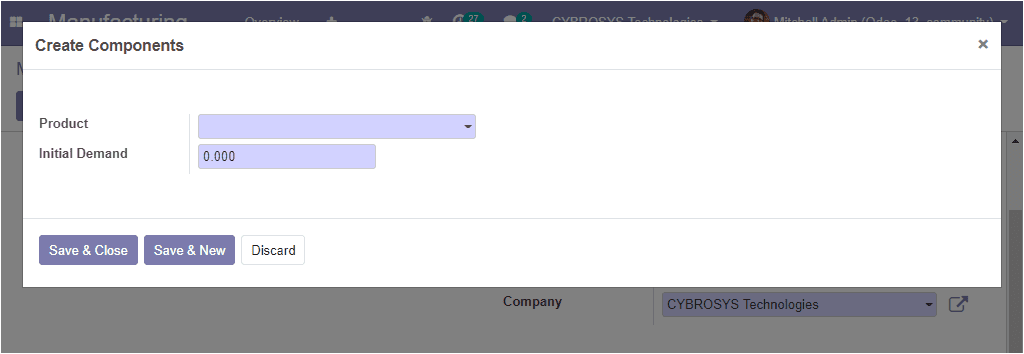
Under the components tab, you can add products by clicking on the add a line option. If you are clicking on the add a line option you will be depicted with a new pop-up window where you can allocate the product and the initial demand. The image of this create components window is depicted below
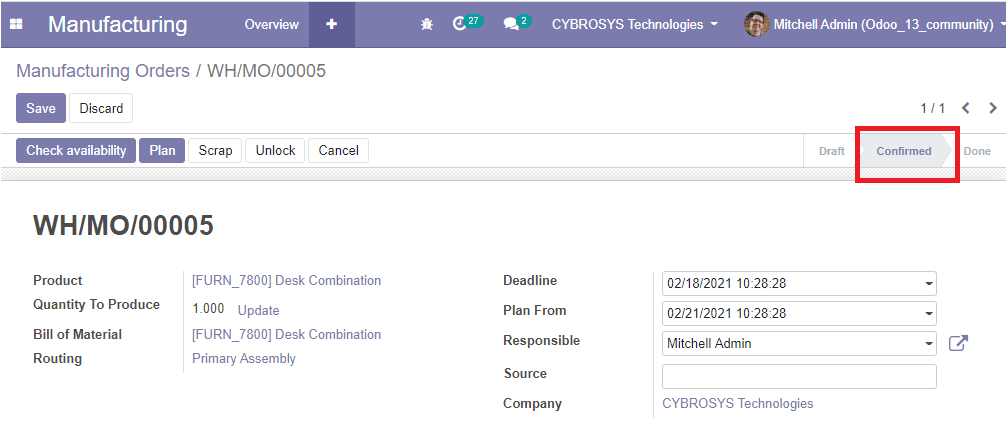
After filling up all the required fields in the creation form you can select the Mark as Todo button available on the top left side of the window.

On entering the mark as todo button the status could be changed from draft to confirmed.
Now you can select the Check availability button to know the availability of raw materials in inventory. If there is sufficient stock in the inventory the red indication on products will be turned to black color. The out-of-stock products will be shown in red colour

Here in this window, we can see that one of the items, the drawer black is unavailable and it indicates in the red color. As we clear on how to create manufacturing orders and now we can discuss how to manage manufacturing with routings and work centers.
Manage manufacturing with routings and work centers
Odoo allows the advanced method manufacturing with routing and work center for conducting the manufacturing process. As compared to the simple step method this method can be considered more convenient and it will facilitate the configuration of the detailed manufacturing process including the setting up of Work centers, Routing, and Work order management.
For enabling this feature what you want to do is to go to the settings and activate the option.
Manufacturing -> Configuration -> Settings and activate the Work orders feature available under the Operations menu.
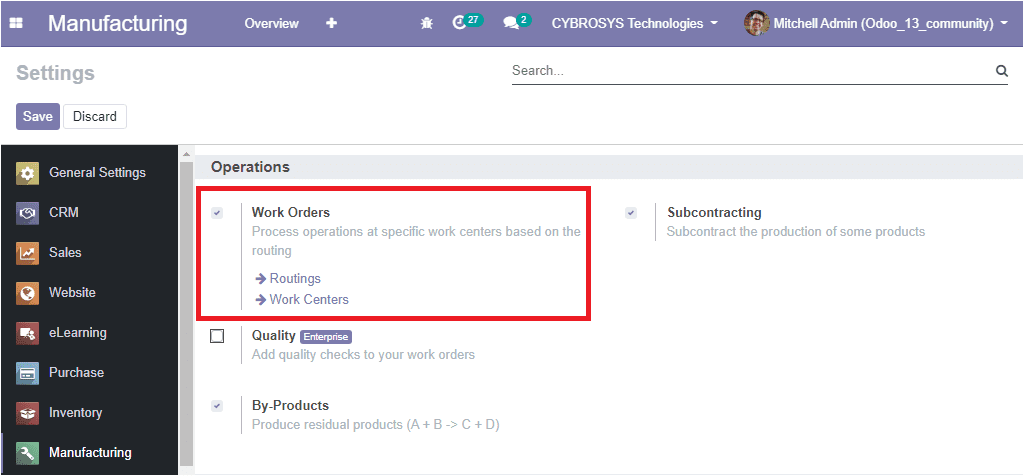
After checking the box near the option work orders, you can save the changes by clicking on the Save button. Now you can create a new manufacturing order by taking the route Manufacturing -> Operations -> Manufacturing order.
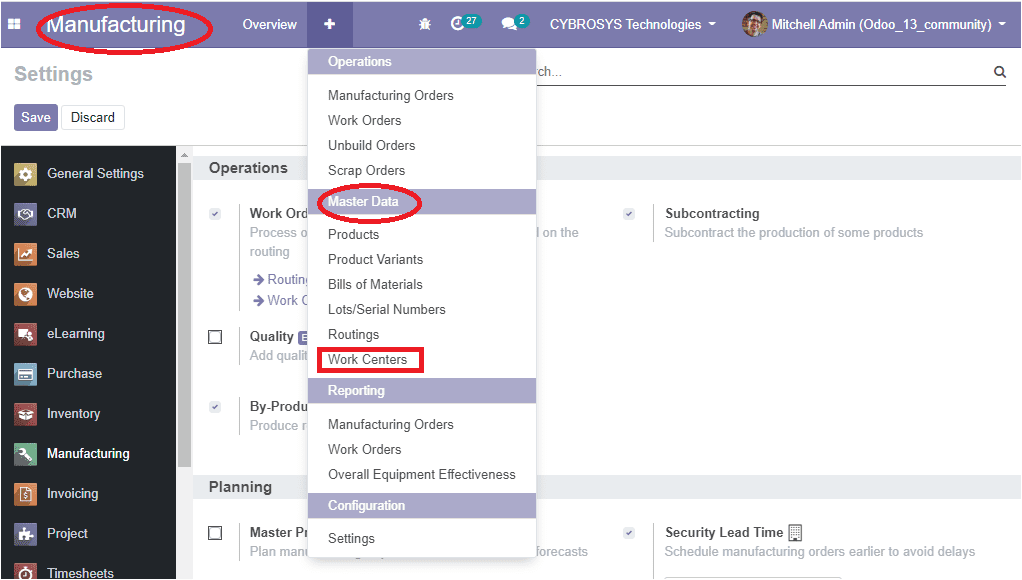
The enabling of the work orders option will allow you to create new work centers and routings in your manufacturing module. For accessing the work centers option, you can go to Manufacturing -> Master data -> Work centers. The image of the window is depicted below.
The work center window of this platform is depicted below.

In this window, we can see all the work centers described in the platform and we can create a new work center by accessing the create icon available on the top left side of this window. The work center creation window is depicted below. By using this creation form you can create a new work center and you can fill the required fields such as work center name, alternative work centers that can be substituted to the respective one in order to dispatch production. You can allocate the code along with the working hours and the company.
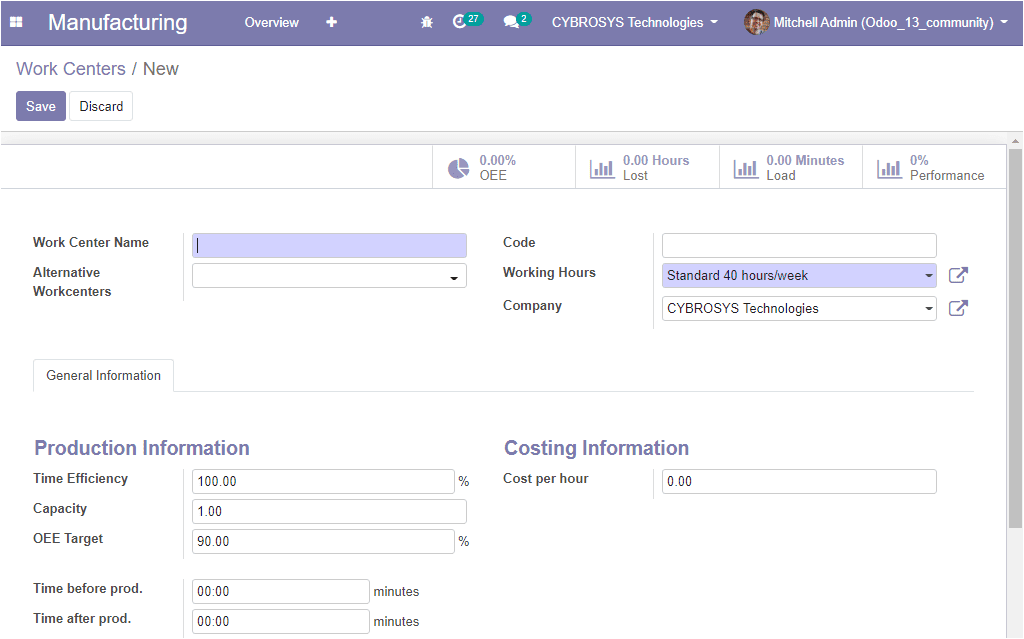
Now you have to fill the following fields under the General information tab. You can add the production information such as
Time Efficiency: This field is used to calculate the expected duration of a work order at this work center. That means if a work order takes one hour and the efficiency factor is a hundred percent, then the expected duration will be one hour. If the efficiency factor is two hundred percent, the expected duration will be 30 minutes.
Capacity: It is the number of pieces that can be produced in parallel. In case the work center has a capacity of five and you have to produce ten units on your work order. The usual operation time will be multiplied by two.
OEE Target: This is the Overall Effective Efficiency target in percentage.
Time before prod: this is the time in minutes before the production needed for the setup.
Time after prod: The time in minutes for the cleaning after completing the production.
Additionally, you can specify the cost of the work center per hour under costing information. Also, you can insert a description on the work center. As we are clear on the work center feature available in the platform and now we can move on to the configuration of routings.
Configuration of Routing
In the Odoo manufacturing module, the advanced feature routing can be used to specify the manufacturing operations that must be done in work centers to develop a certain product. It allows you to record the time duration for each manufacturing action and understand the next steps. Moreover, it helps to add a new view where we can include different instructions related to the work. So that we can avoid mistakes. With the dominant feature routings, Odoo allows you to get all the details and keep track of every step for the manufacturing process and help to reduce the hurdles of the manufacturing operations.
Routing completely depends on the manufacturing company process. Every product has its own routes. If the company has the similar type of manufacturing process, you can create the same type of routing. Also, you can create multiple routings when the company has a different manufacturing process.
For accessing this feature you can go to Manufacturing -> Master data -> Routing
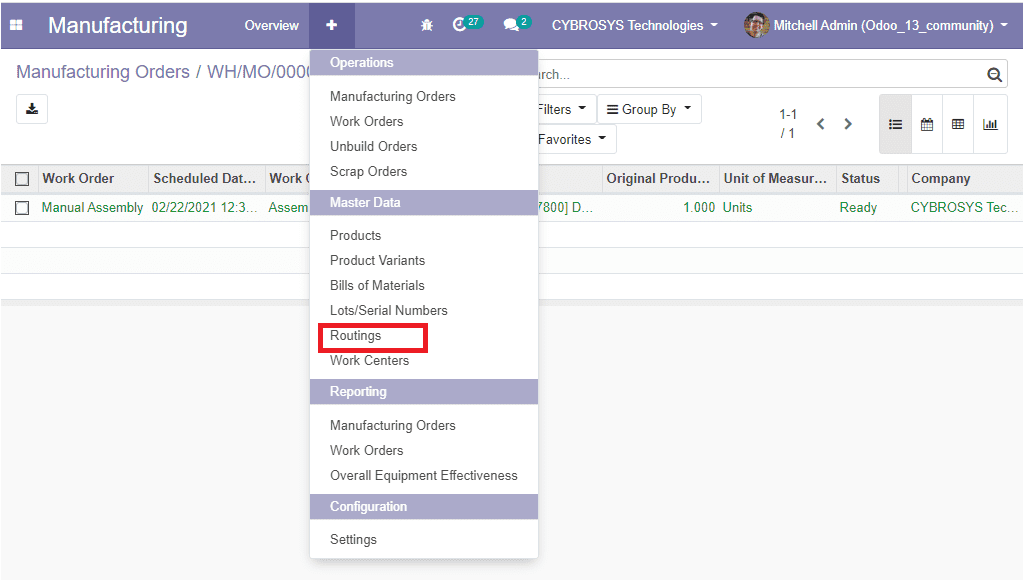
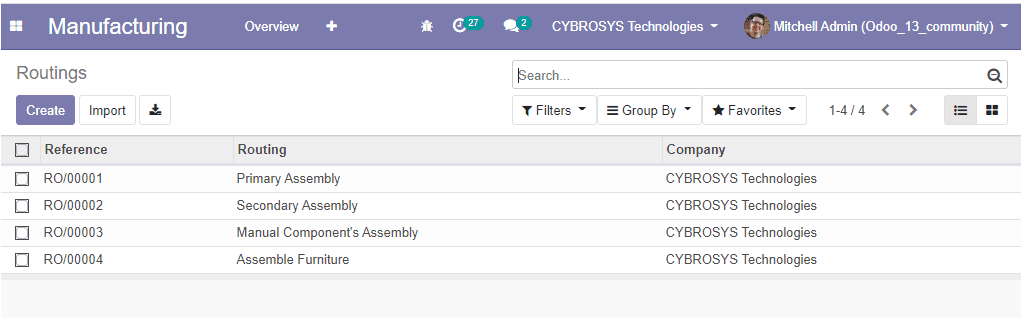
The routing window of this platform is depicted below and where you can see all the routes described in the platform in a list view along with the reference number and company name.
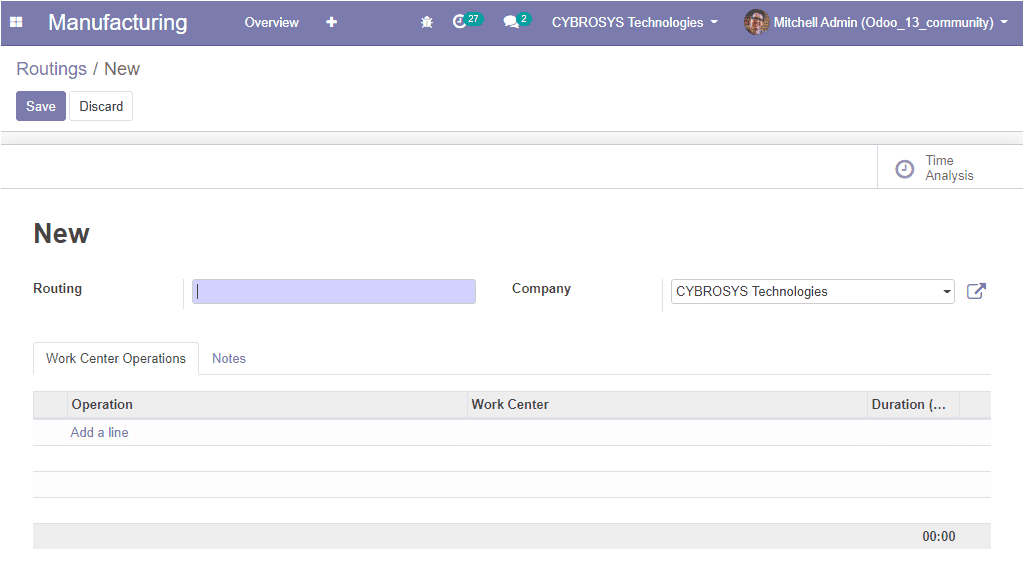
Now you can click on the create button to create new routings. The routing creation window is depicted below. Using this creation form you can configure new routes. For that you can add the details such as Routing name, Company, and you can add work operations by clicking the Add a line option available under the Work center Operations tab.
Whenever you click on the add a line option you will be able to see a pop-up window as depicted below and you can create operations using this window. Here in this window you can allocate a name for the operation and can define the work center. The work center can be defined using the drop-down menu where you can select the work center described in the platform or can create a new one using the create and edit option available. Additionally, you can give the sequence order when displaying a list of routing work centers along with the company details. In addition, there is an option - Start Next Operation which is to schedule the next work order after the previous one and here we can either select once all products are processed or once some products are processed.
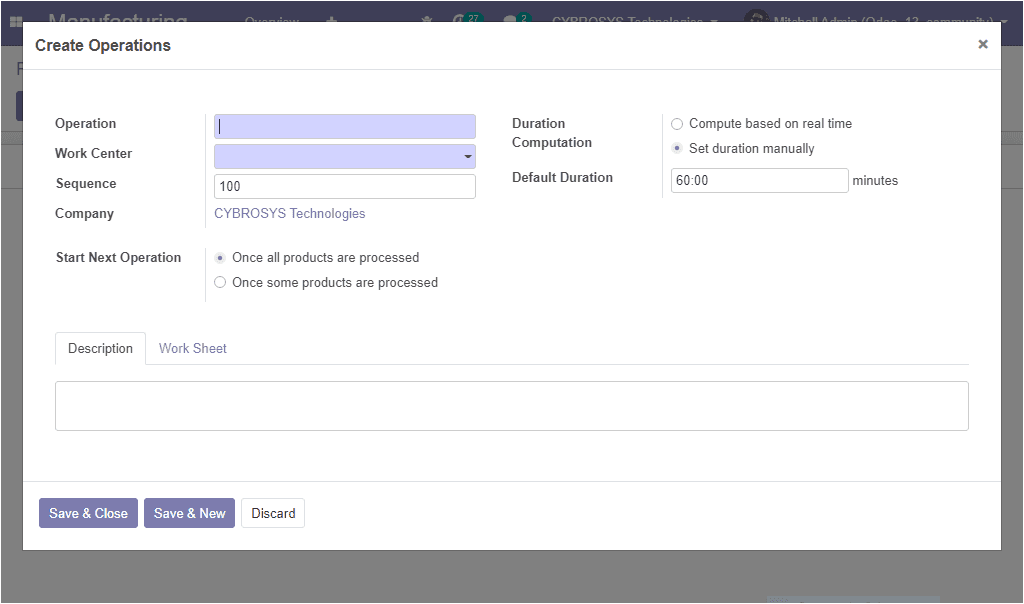
Furthermore, there are two options available in duration computation which are, Compute based on real-time and Set duration manually along with the option for setting default duration.
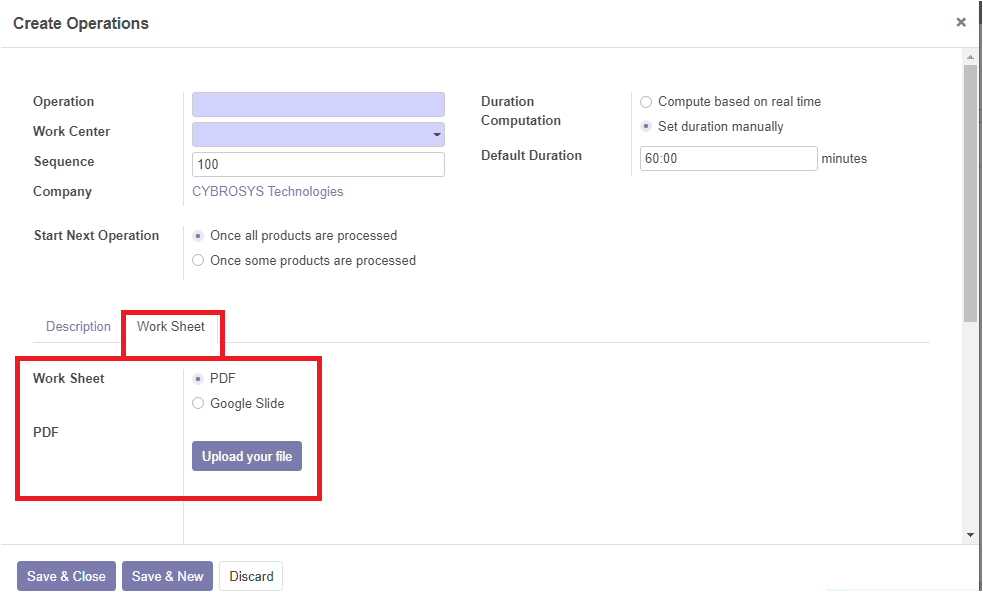
Under the description tab, we can explain the process involved with each operation and we can upload the process flow as an attachment file under the worksheet tab.
After filling in all the required fields, you can submit the save & close button. Now you can see the created operation under the work center operation tab as shown below.

So far we were discussing the configuration of routings and now we can analyze the configuration of the Bill of Materials option in the platform.
Configuration of Bill of Material (BoM)
We all know that for manufacturing a product, first we should prepare a list of components and their quantity. The Bills of Materials are a kind of documents that describes the complete list of raw materials required for making a finished product. The Bills of Material (BoM) will provide a clear picture of the quantities, routings and individual steps to be followed in the particular manufacturing process.
In the Odoo platform, these raw materials and components for manufacturing are termed as Bill of Materials(BoM). Let us see how the BoM is created in Odoo 13 community edition
You can access this feature by taking the route Manufacturing -> Master data -> Bill of Materials. The below image depicts the BoMs window.
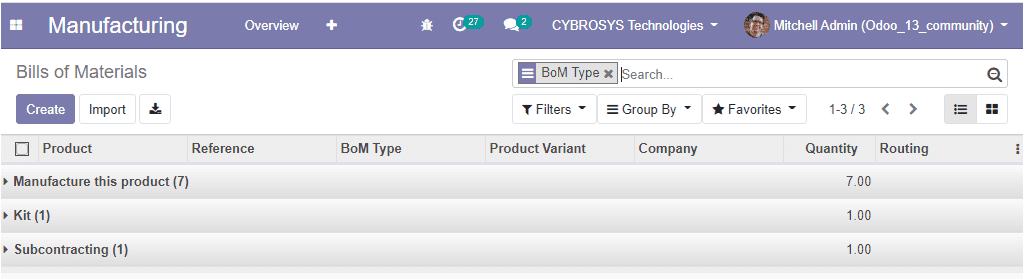
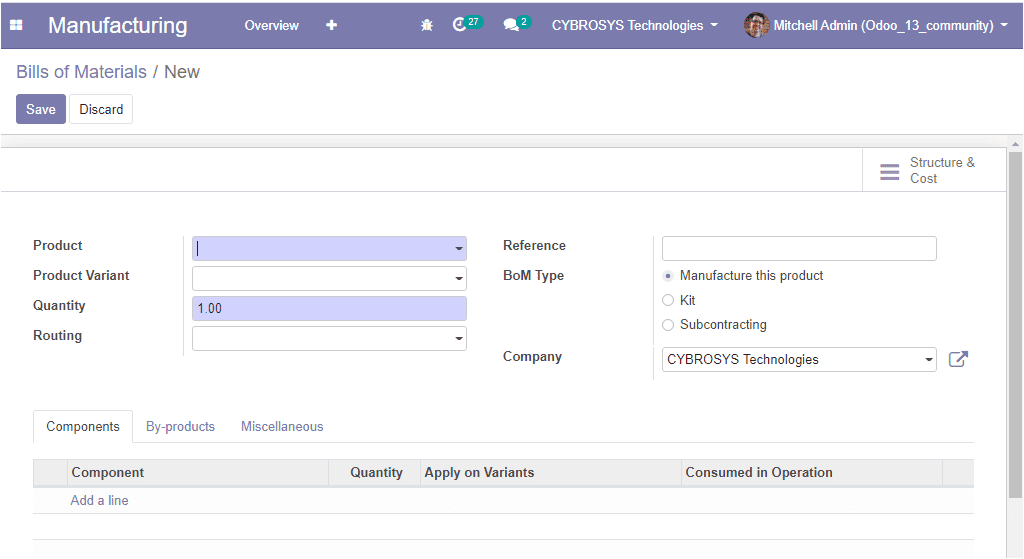
We can create a new Bill of Materials by selecting the create icon available on the above BoM window. The creation window is depicted below. In this creation window, you can assign the product name and product category along with the details of product quantity and routing. Routing defines the manufacturing operations to be done in work centers to produce certain products. Generally, the routing is attached to a bill of materials and it will define the assembly of products needed for the manufacturing or to produce final completed products. Furthermore, the reference field is used to distinguish different BoM or the same product. Additionally, you can specify the BoM type as Manufacture this product, or Kit, or Subcontracting. Moreover, you can define the company if your Odoo platform is used to run multiple companies.
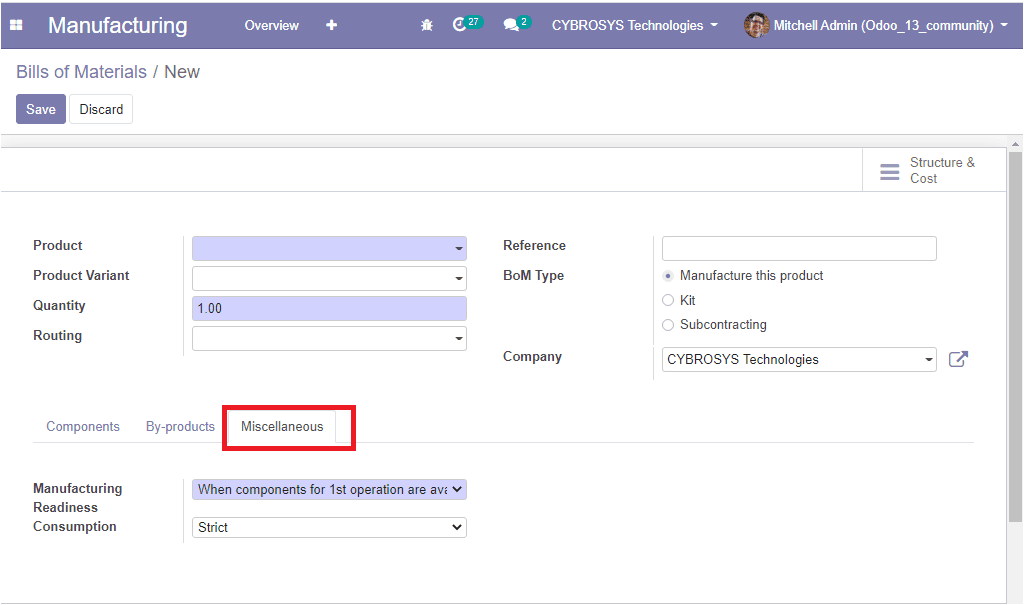
Under the Components tab, you can add product quantity and each raw material for your product by clicking the Add a line option. You can also add by-products by clicking the add a line option available under the By-products tab. Additionally, under the Miscellaneous tab you can define when a manufacturing order is considered as ready to be started in the option manufacturing readiness. Furthermore, you have one more field named Consumption and it defines if you can consume more or fewer components than the quantity defined on the BoM
Now you can create a new manufacturing order for the products by entering the details on the following required fields such as product name, quality to produce, BoM routing, deadline, plan from, responsible, source and company, etc.
For that you can go to manufacturing -> operations -> Manufacturing orders.
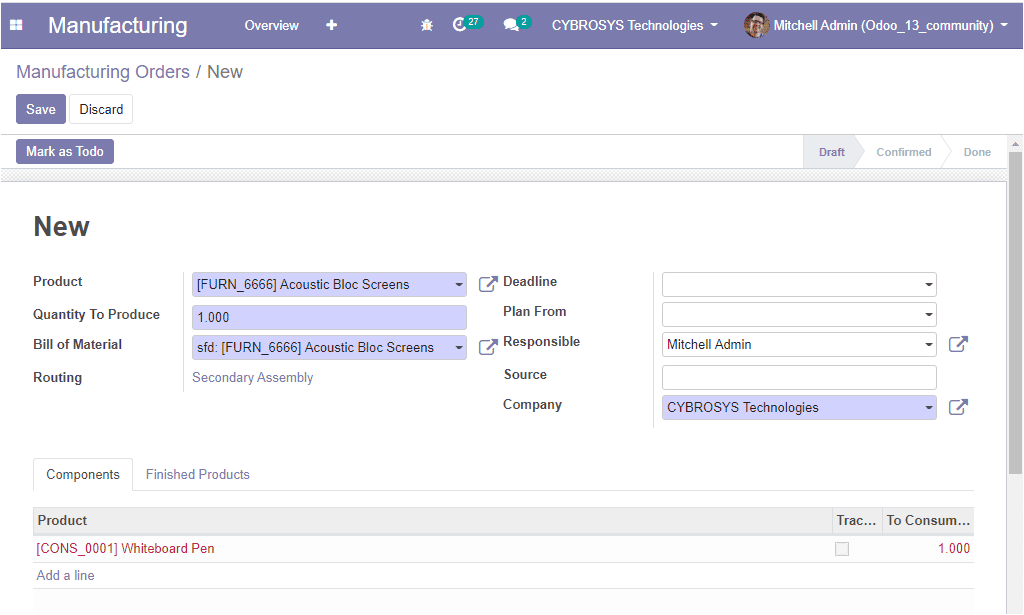
After filling in all the required fields you can click on the save button to save the details. After that you can click on the Mark as Todo button. This action will lead to changing the status from draft to confirmed. Now we can check the availability of products by clicking the >check availability
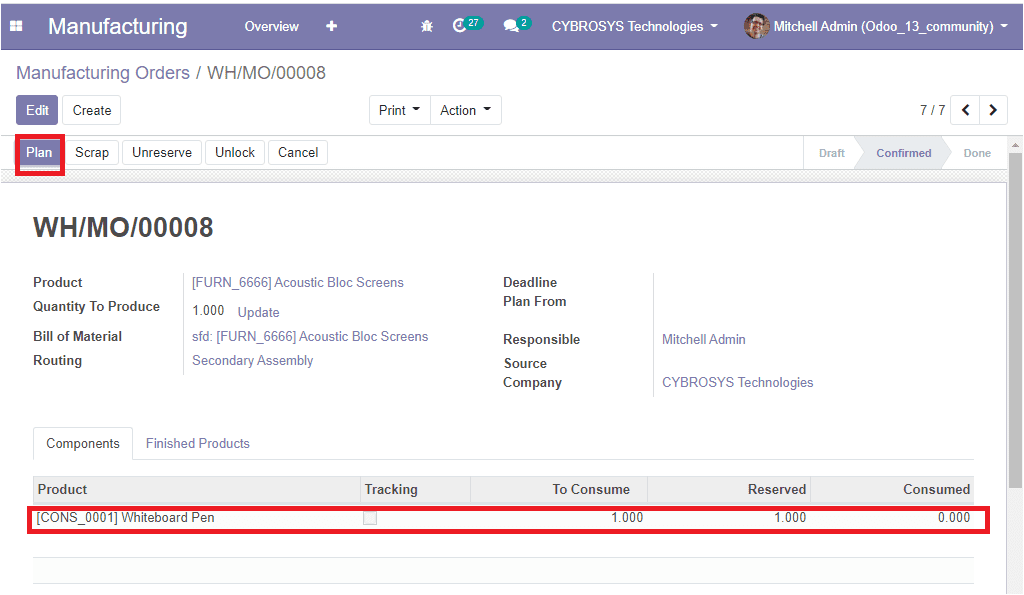
After clicking on the Plan button available on the left top corner of this window the stage of the manufacturing order is to be changed again. Now the manufacturing order is going to the Planned stage and you can also view the Work orders button. Using this button you can view the various types of orders.
Now let us see the various work orders below.
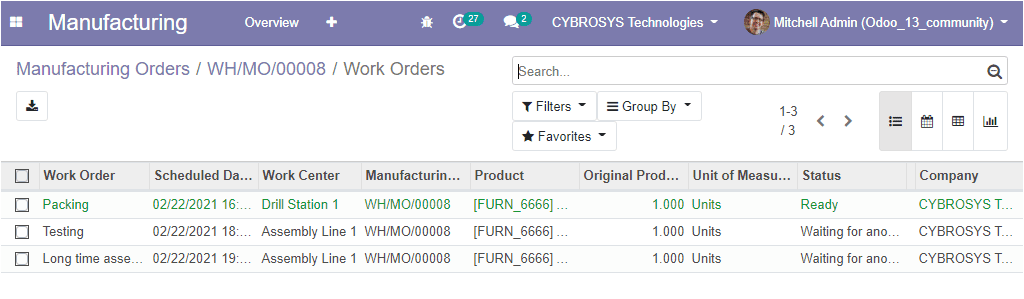
In this window, you can see the various work orders viewed like Packing, Testing, Long time assembly. Here you can see that your first work order will be in a ready state or certain others are in a pending state and waiting for another work order. It will automatically get changed to the ready state after the first work order gets completed.
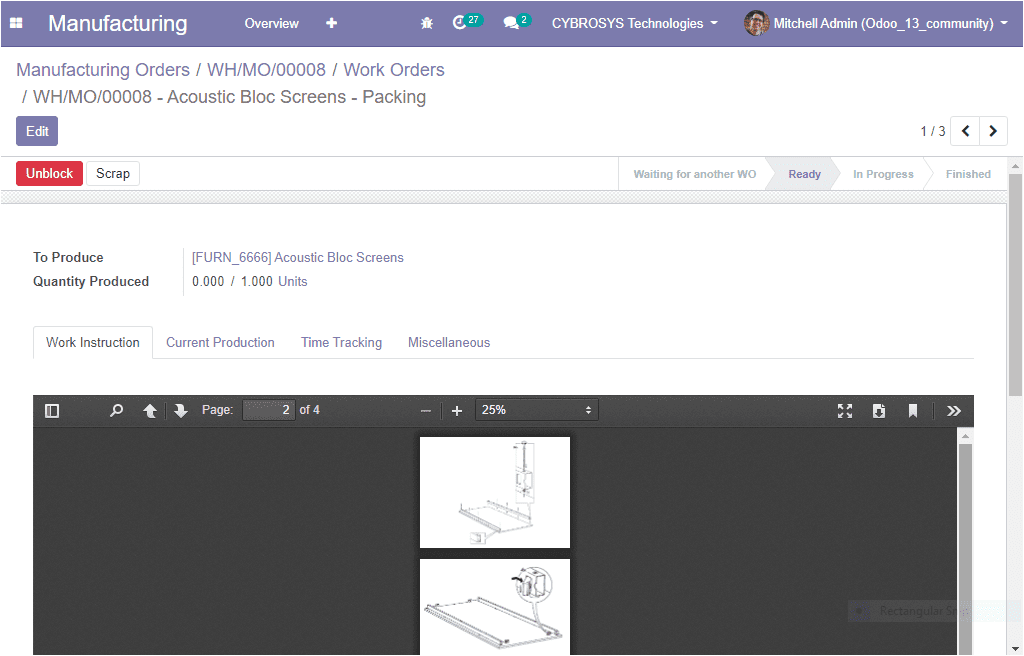
This is the window of the work order in the ready state. So far we were discussing the configuration of the Bill of Materials in the platform and now we can discuss the configuration of scrap management.
Scrap management
Scrap is the discarded or removed or expired products in the manufacturing business and here in Odoo you can manage a scrap product from any point of company operation such as, while receiving a good, or throughout the internal transfer, etc. It is one of the most useful features available in the Odoo platform and you have the provision for creating scrap at any stage of the production line. You can enter the scrap entry by simply clicking the scrap button available in different stages.
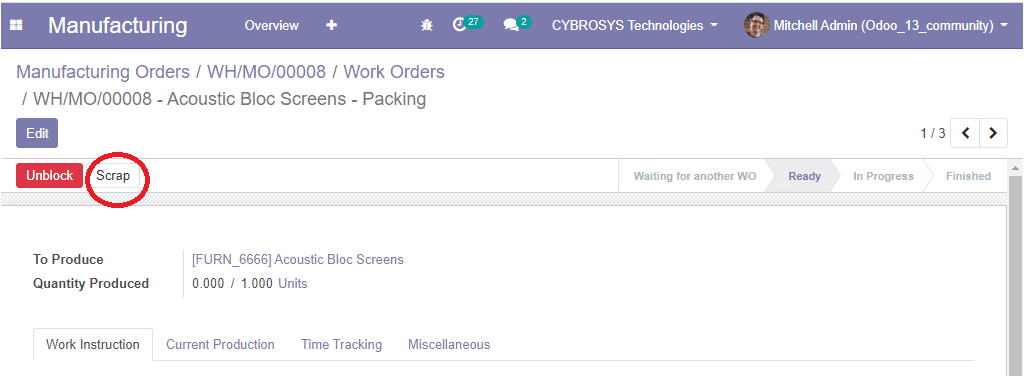
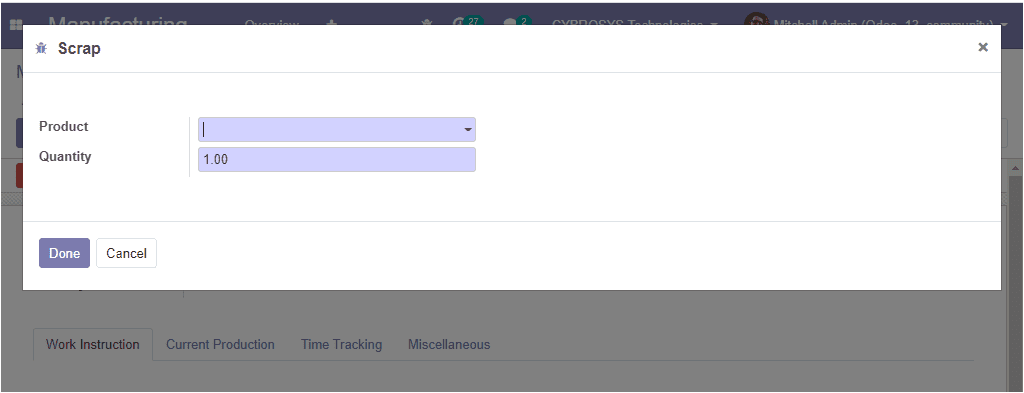
If you are clicking on the scrap button available in the window you will be depicted with a window as shown below. Here, you can fill the fields in the scrap window such as product and its quantity. After that, you can click on the Done button. Now the scrap entry will be inserted into the inventory automatically.
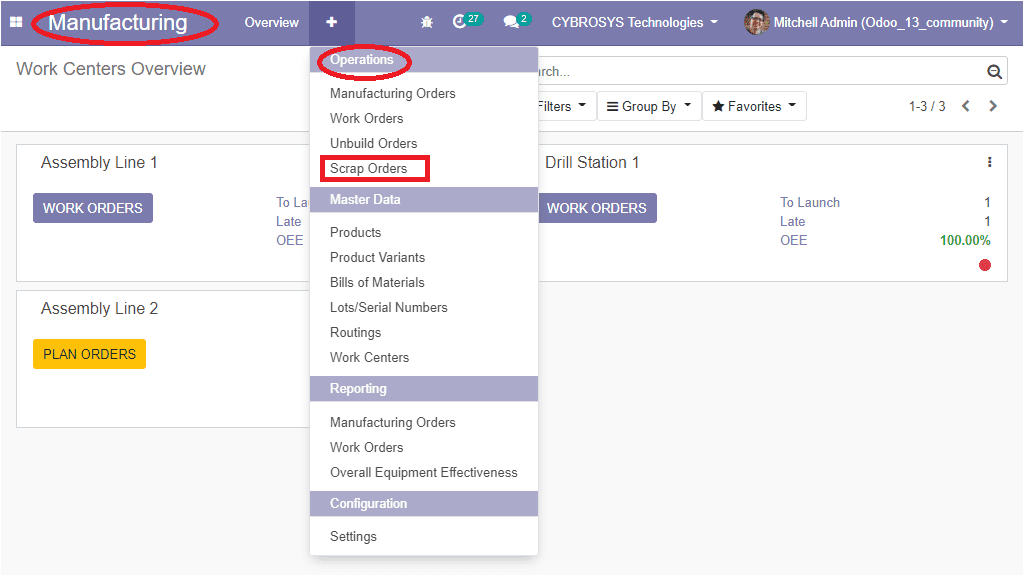
It is also possible in this platform to create the fresh scrap entry by taking the route Manufacturing -> Operations -> Scrap orders.
On entering the scrap orders, you will be depicted with a scrap orders window as shown below, here all the scrapped orders will be depicted.

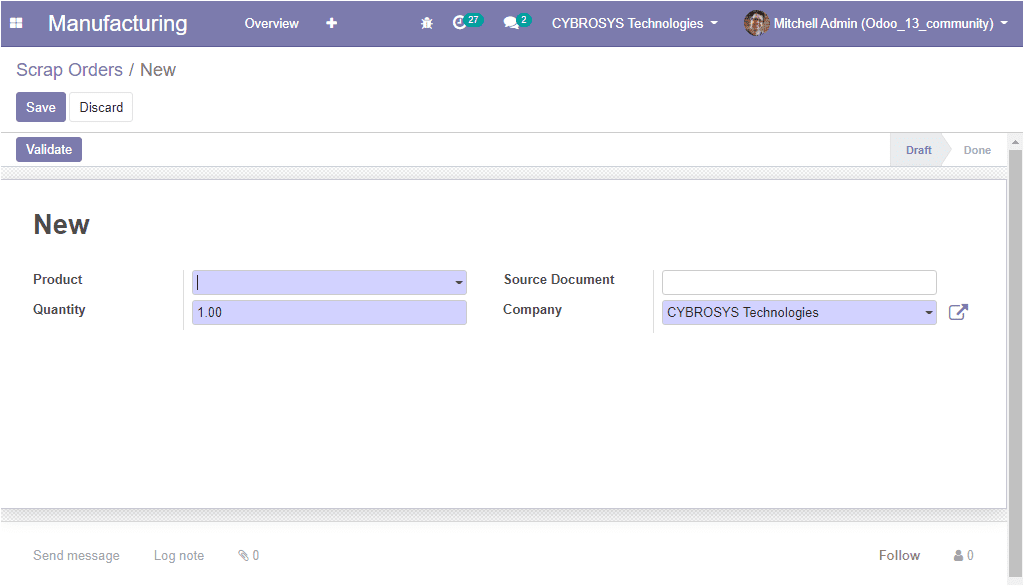
Upon clicking the create icon you can enter the new scrap orders and the creation window is depicted below. In this creation form, you can specify which product should be considered as scrapped and can allocate the quantity, source document, and company.
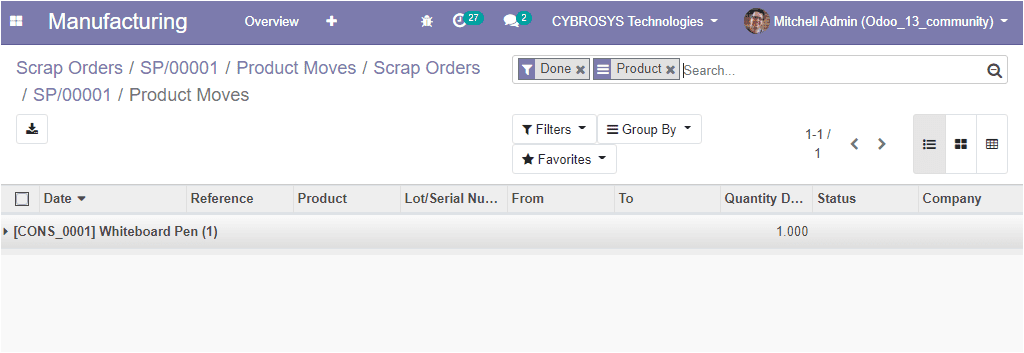
After filling in all the fields you can click on the Validate icon. Now the status will be displayed as Done. You have the provision to view the created scrap order by clicking on the Traceability button.
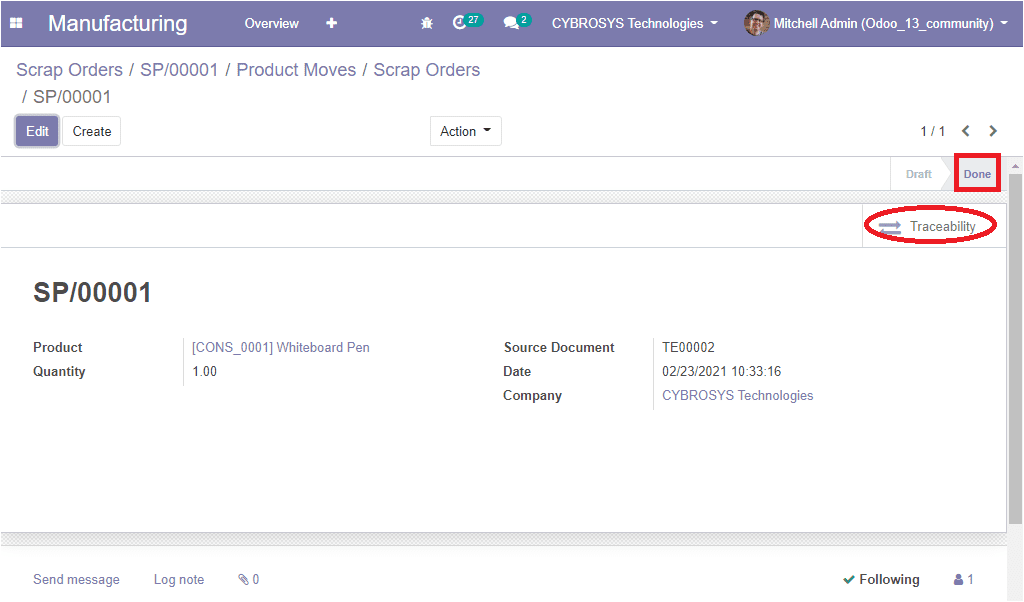
The below image shows the scrap orders window where you can view the created scrap order.
As we are clear on the scrap management option available and let us have a look at the other option to unbuild orders in the platform.