- Enable Debug mode.
- Then select the form view.
- Inside the view, select the view tab left and select XML.
- Add new Button throw code and type must be action.
- Then create a Server action and provide the id of the record as the button name.
Done.
Adding a Button
Adding Button from UI is a bit off-topic from Studio. Using some XML code, we can
add the Button. For that first, we need to enable debug mode. If you don't know
how to enable debug mode you can add ?debug = 1 in the URL after the
web as shown in the below picture.
Or you can use any debug mode browser extension.
After enabling debug mode, next we need to create a new server action. This Server
action will work when we click on the button.
● First, go to settings. Inside the settings, we can see the Technical menu.
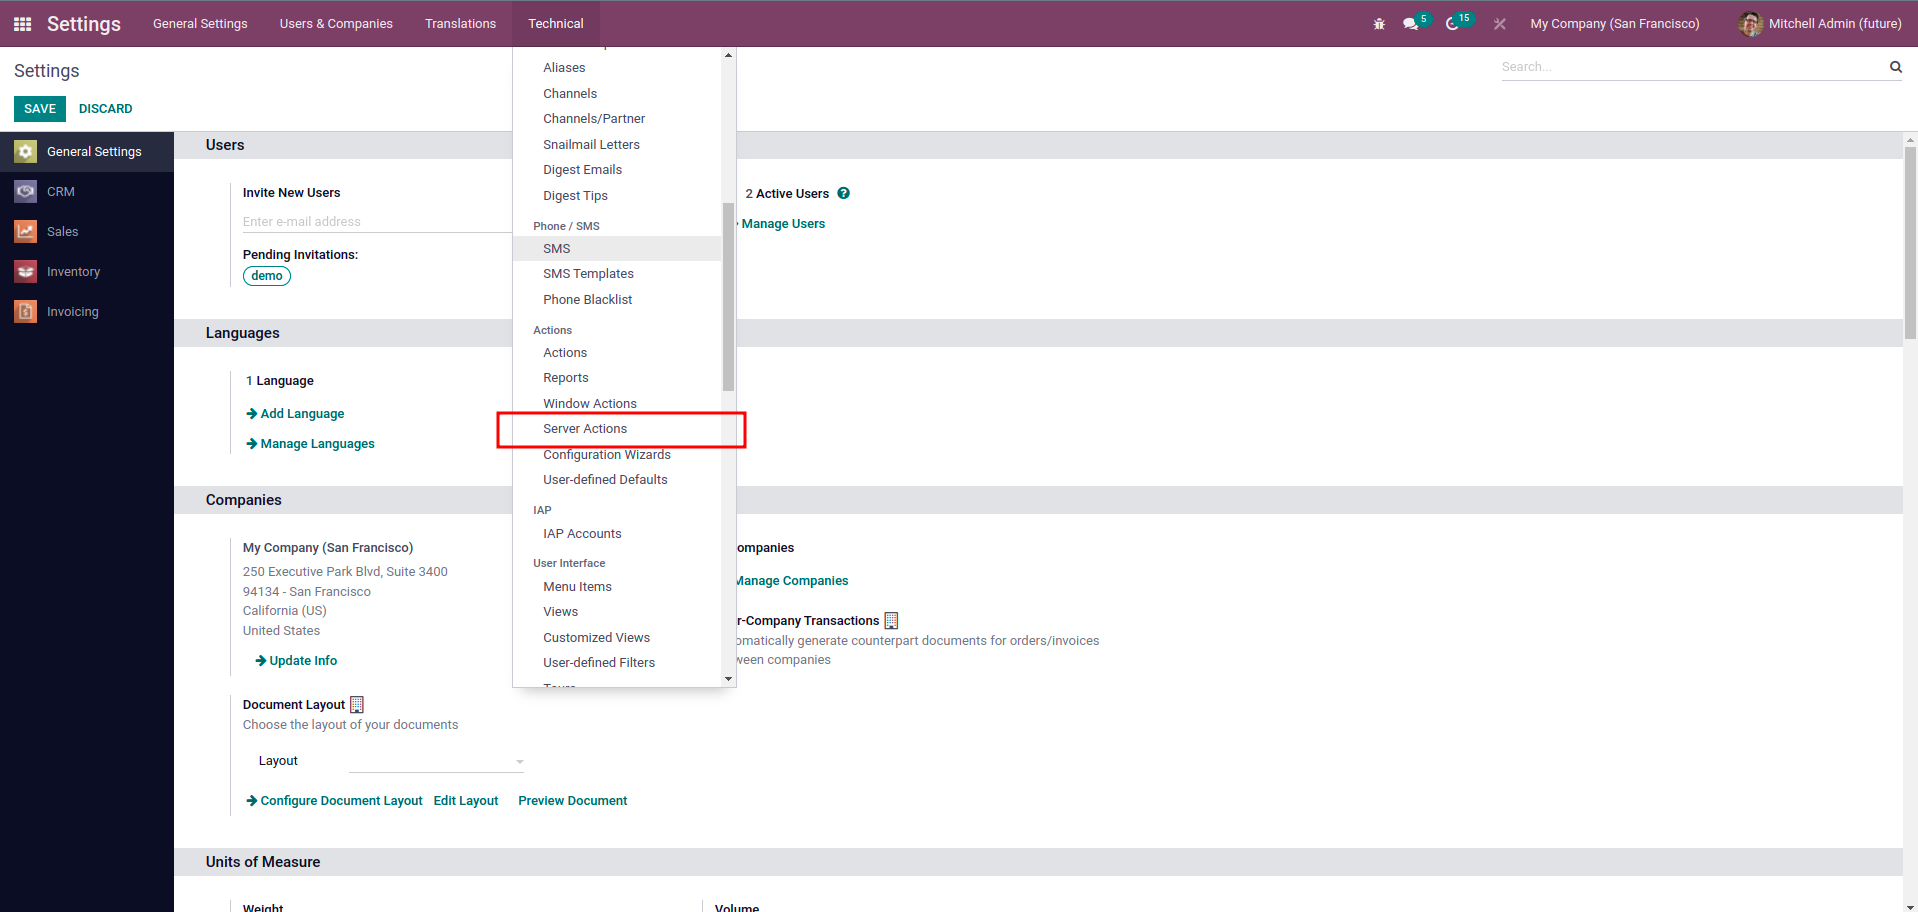
● Under the Technical Menu, we can see the Server Action. Click on it.
● Next, click on the Create button.
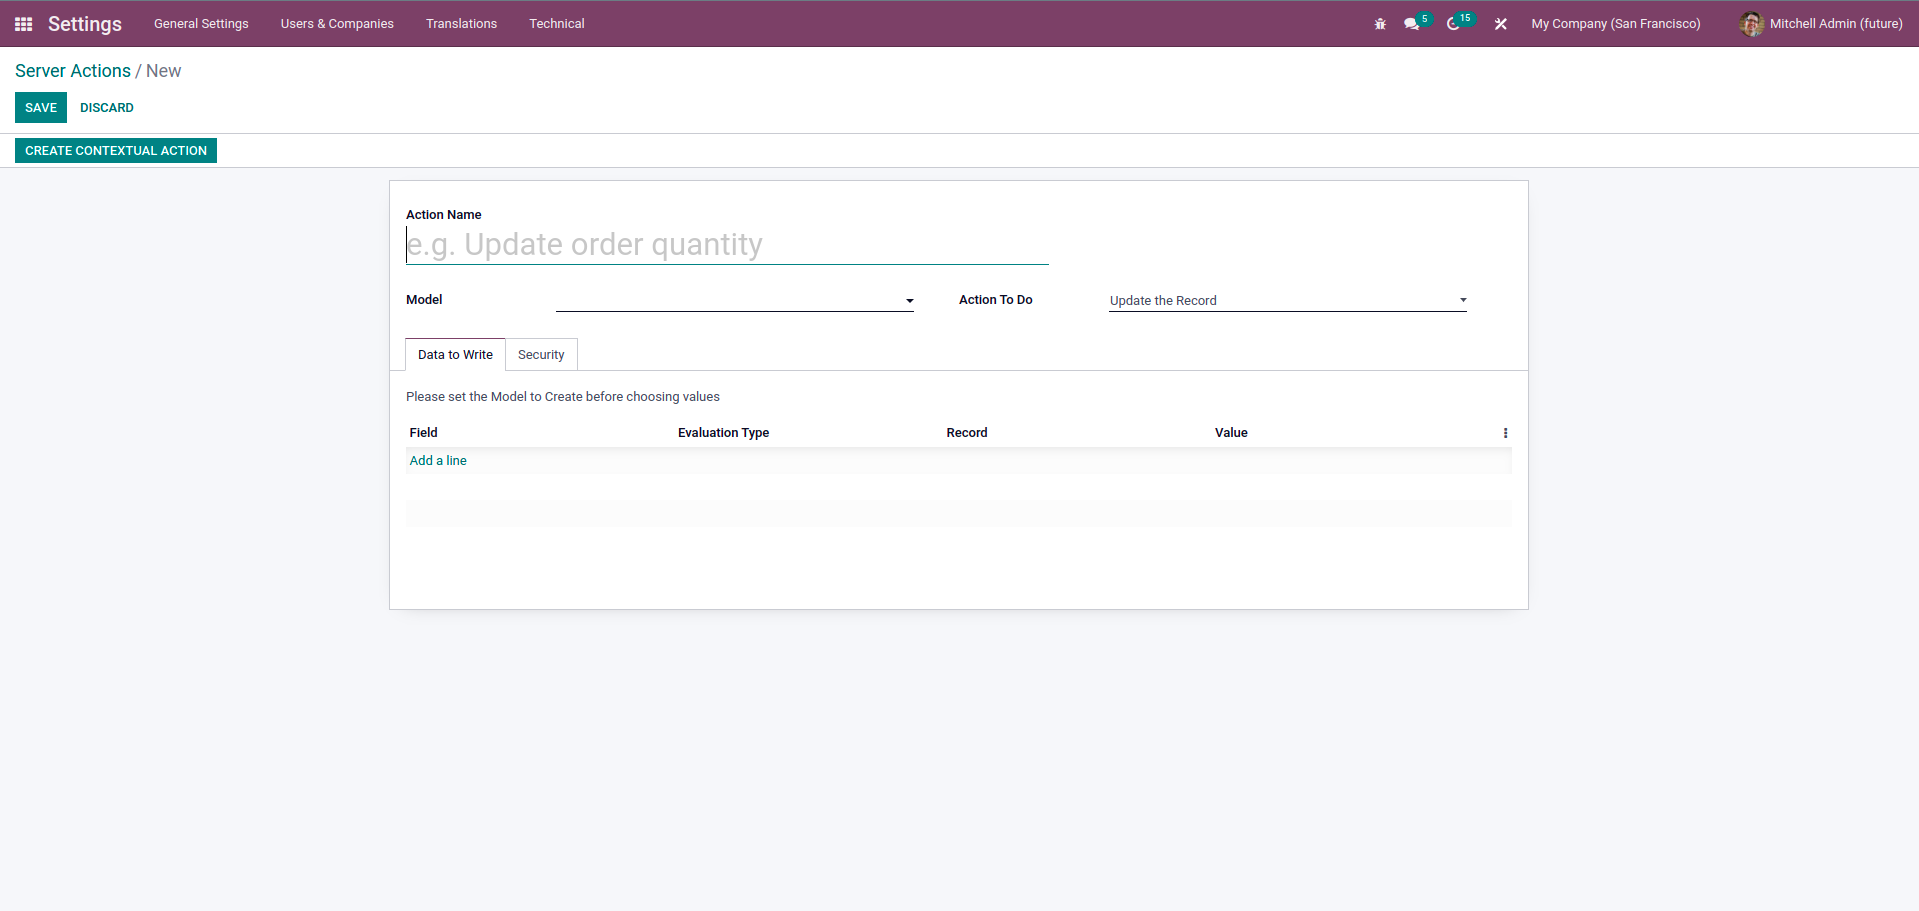
● Fill the necessary fields.
Fields
● Model - Select the model you want to add the button or you want to perform an
action.
● Action To-do - We have a set of actions that we can perform on the record. So
we can check that.
- Update the record - If we need to set any field value in the
corresponding
view when clicking on the button, we can select this Update the record and specify
the field at the bottom.
- Create a new record - If we need to create a new record when
clicking
on the record, we can select this action and specify the fields and their values
at the bottom.
- Execute Python Code - If we need to perform complex operations
or complex actions we can write python code.
- Execute several actions - If we need to work a set of child actions
we can select the child server action at the bottom.
- Send Email - If we need to send an email we can select this action
and specify the email template we need to use.
- Add Followers - If we need to add some followers to our record
we can use this action and specify the followers in the Add Follower field.
- Create the next Activity - If we need to schedule an action we
can use this action and configure the activity at the bottom.
- Send SMS text Message - If we need to send SMS Text messages we
can use this action and select the SMS Template.
● After filling all the fields, we can save this record.
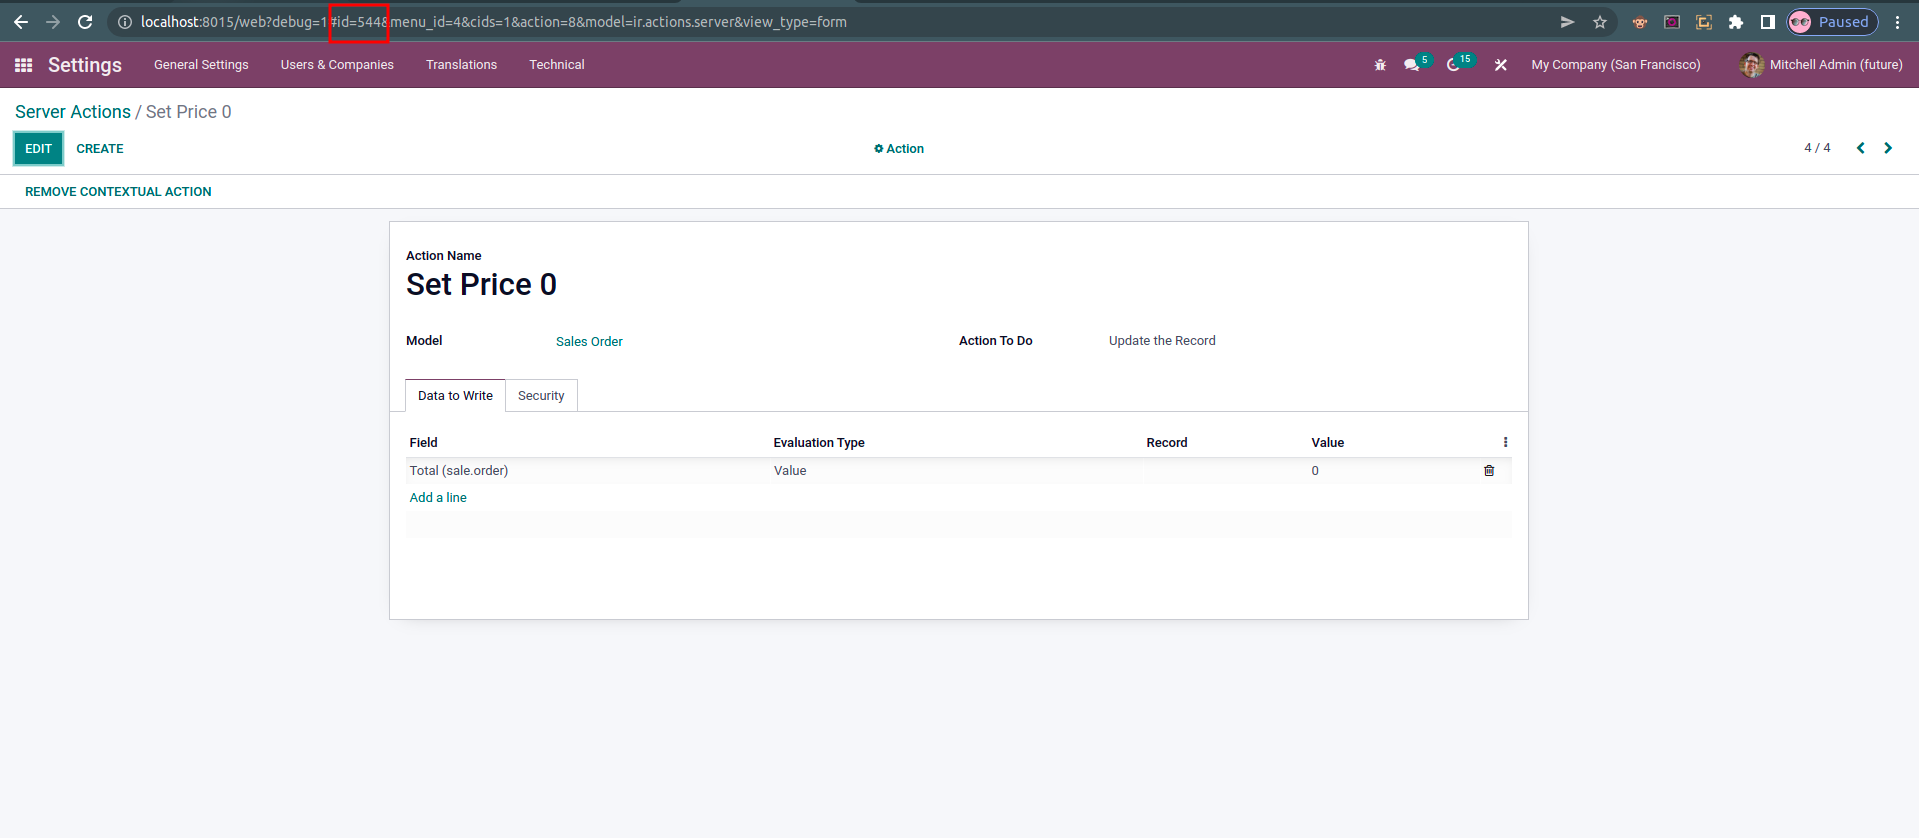
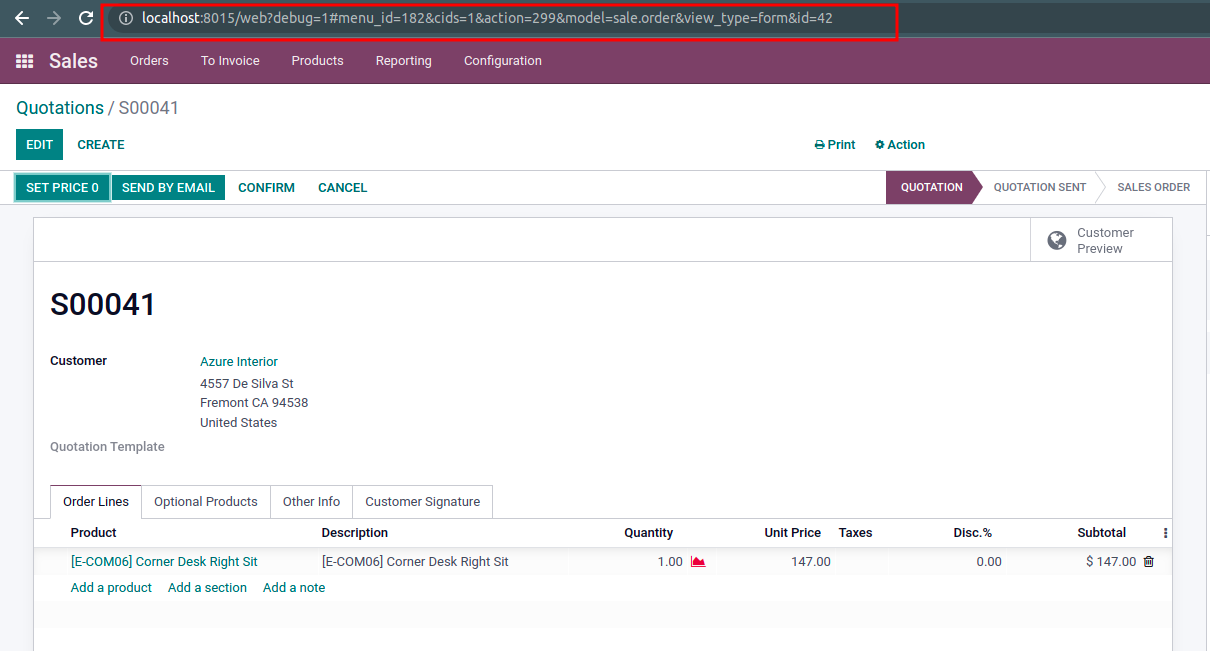
● Now, copy the id of the record from the top URL.
Next, we can open the view to add the button. Currently, I am adding a new Button
in the sales order form by opening the studio.

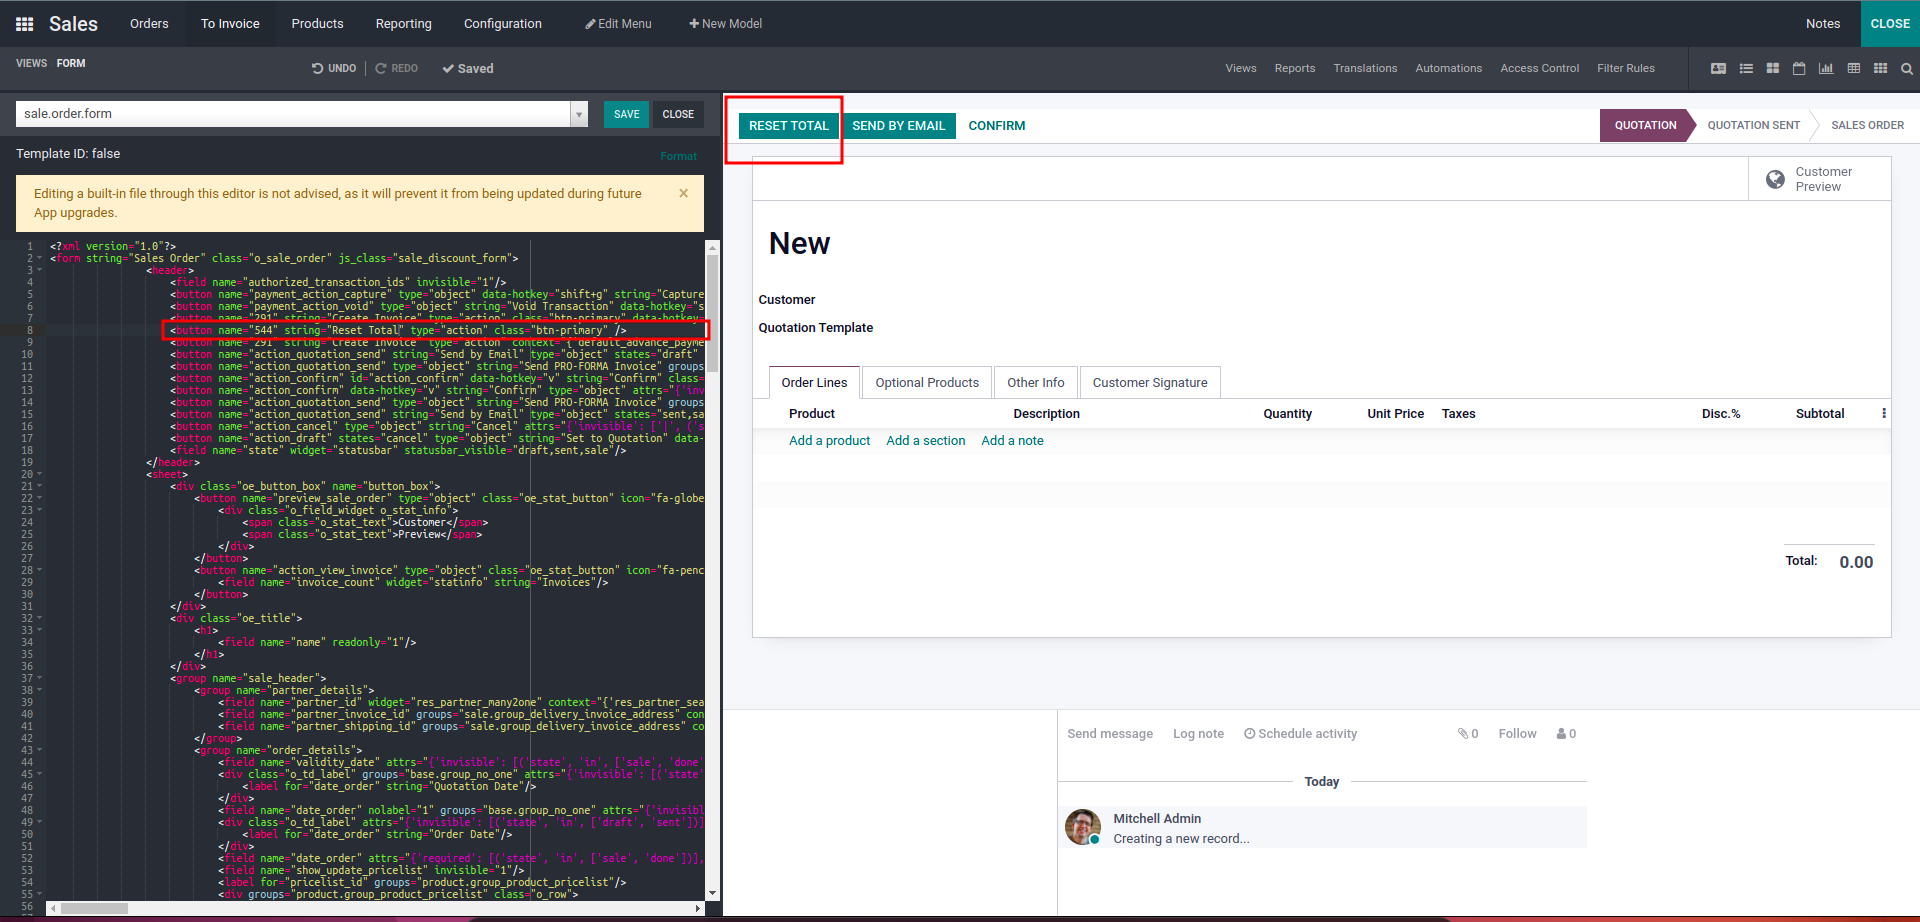
Inside the Studio, we can see a view tab on the left side. Under the View tab, we
can see an XML button. Click on that button and it will open the corresponding view
XML code.
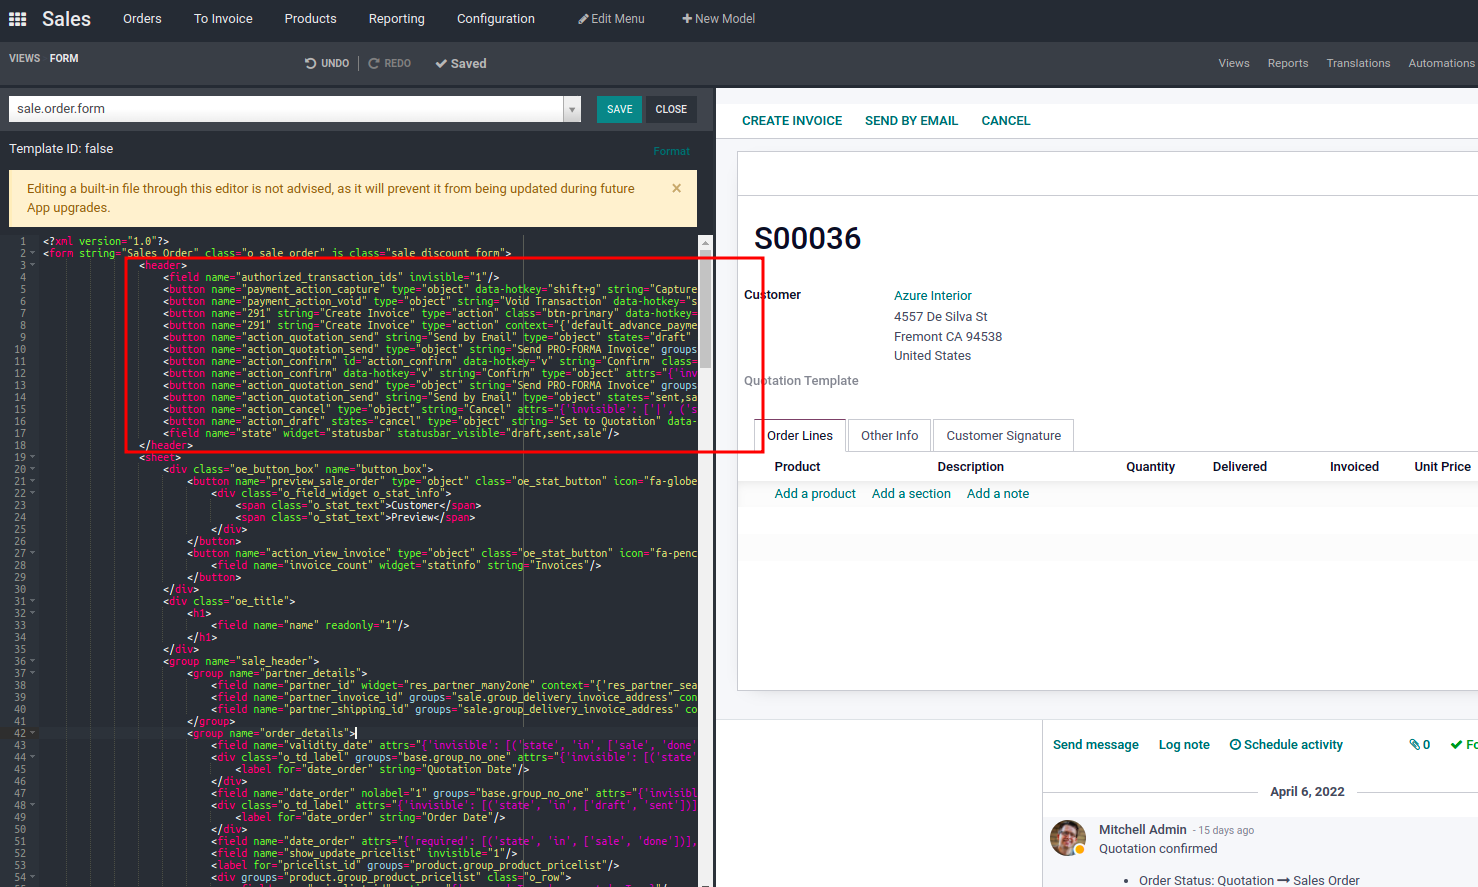
Inside the XML code, we can see all defined buttons in the Header section. So, we
need to add the button code inside the header.
<button name="id of the record we just copeyed" string="Name that visible on
                                the Button" type="action" class="btn-primary"/>