Let's incorporate buttons to execute specific actions using the Studio module. The process of creating a new button differs from other Studio features as it involves some XML coding.
Firstly, enable the debug mode by accessing it through the general settings or by adding the term ?debug=1 in the URL after the “web”, as illustrated below:

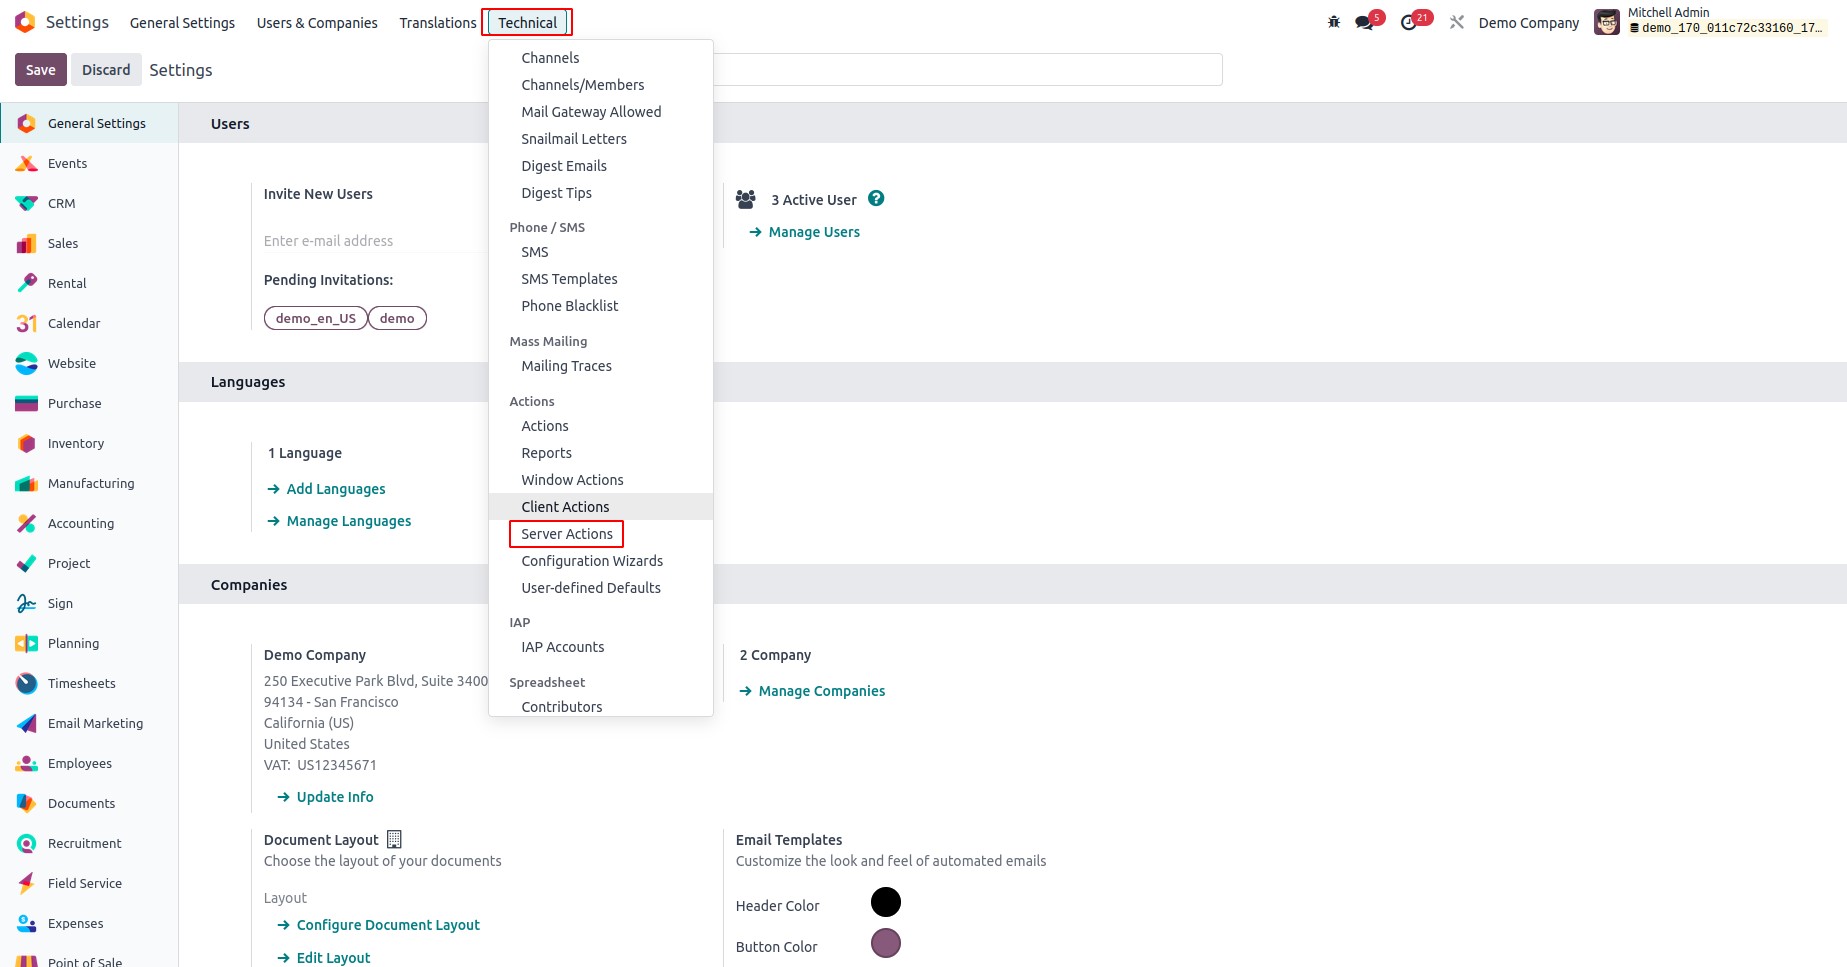
With the debug mode enabled, the next step involves creating a server action to execute a specific function when the new button is clicked.
Navigate to "Server Actions" under the Technical menu in Settings. Note that this menu is visible only when the developer mode is activated.
Click the 'New' button to initiate the creation of a new Server Action, and proceed to fill in the necessary fields as prompted.
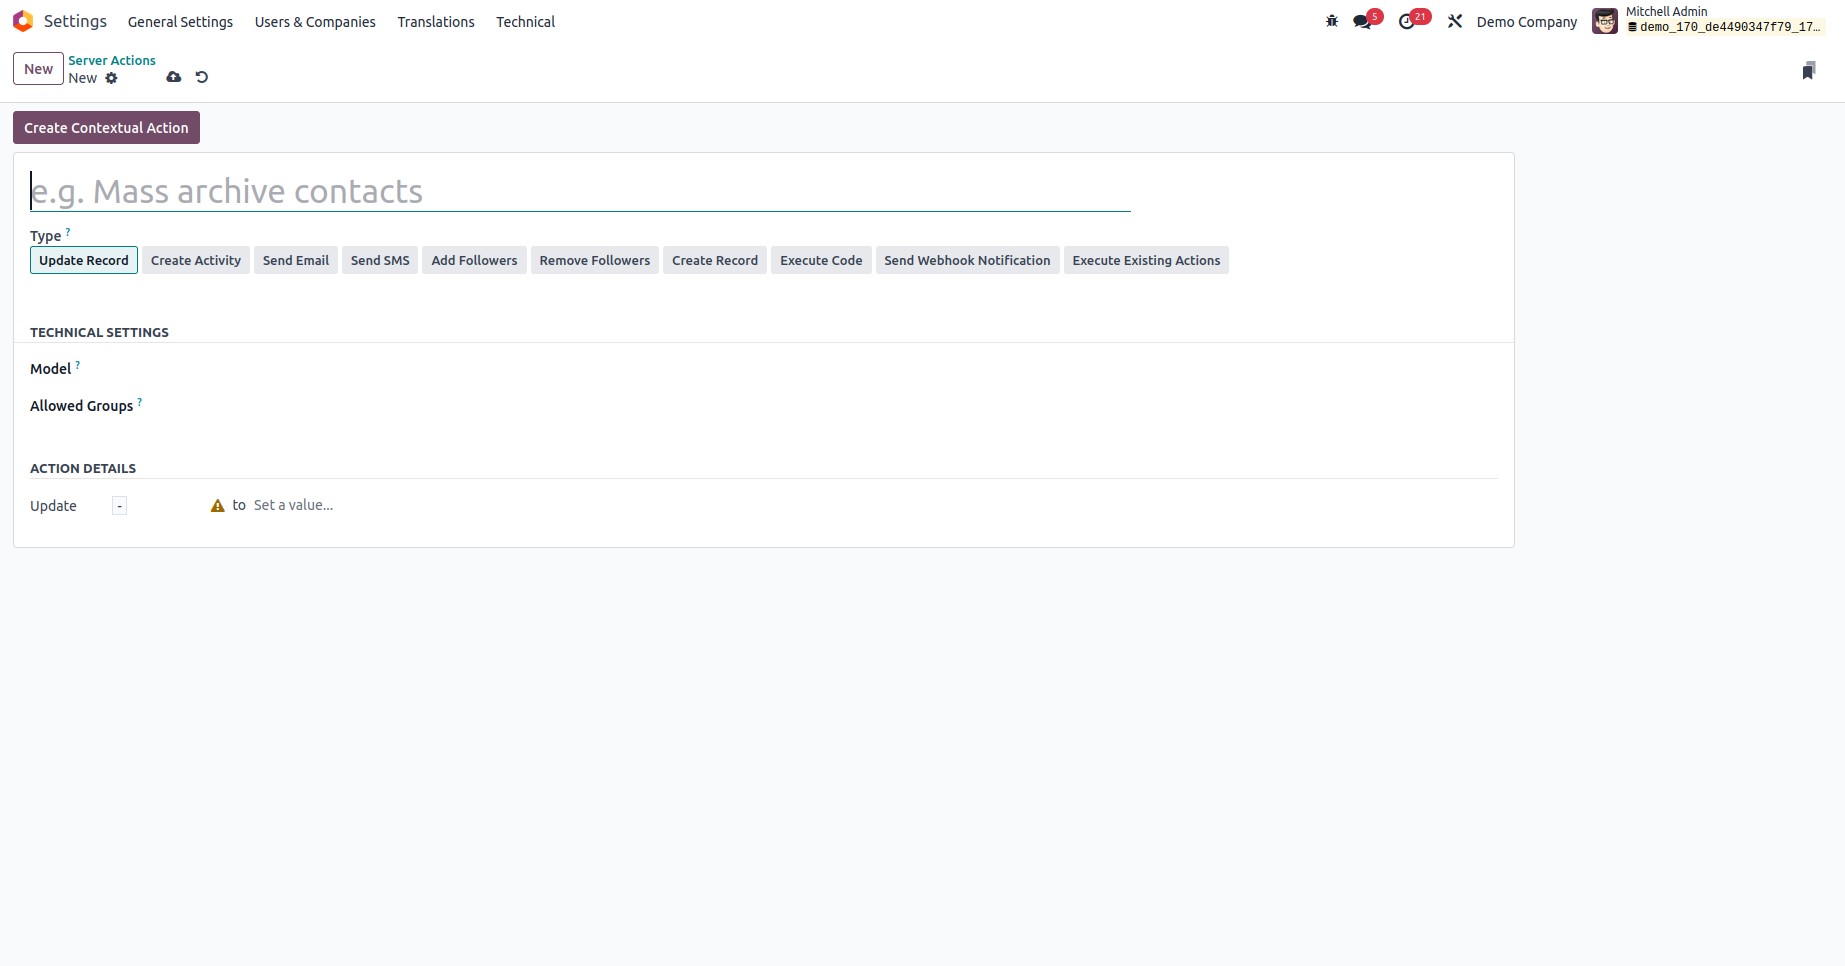
Fields on the form:
- Action Name- Assign a name that succinctly identifies the purpose of your action.
- TypeType of Server action.
- Update Record- If your intention is to update a record in the corresponding view, such as setting a field's value, choose this action. Subsequently, you'll need to specify the particular field for the update.
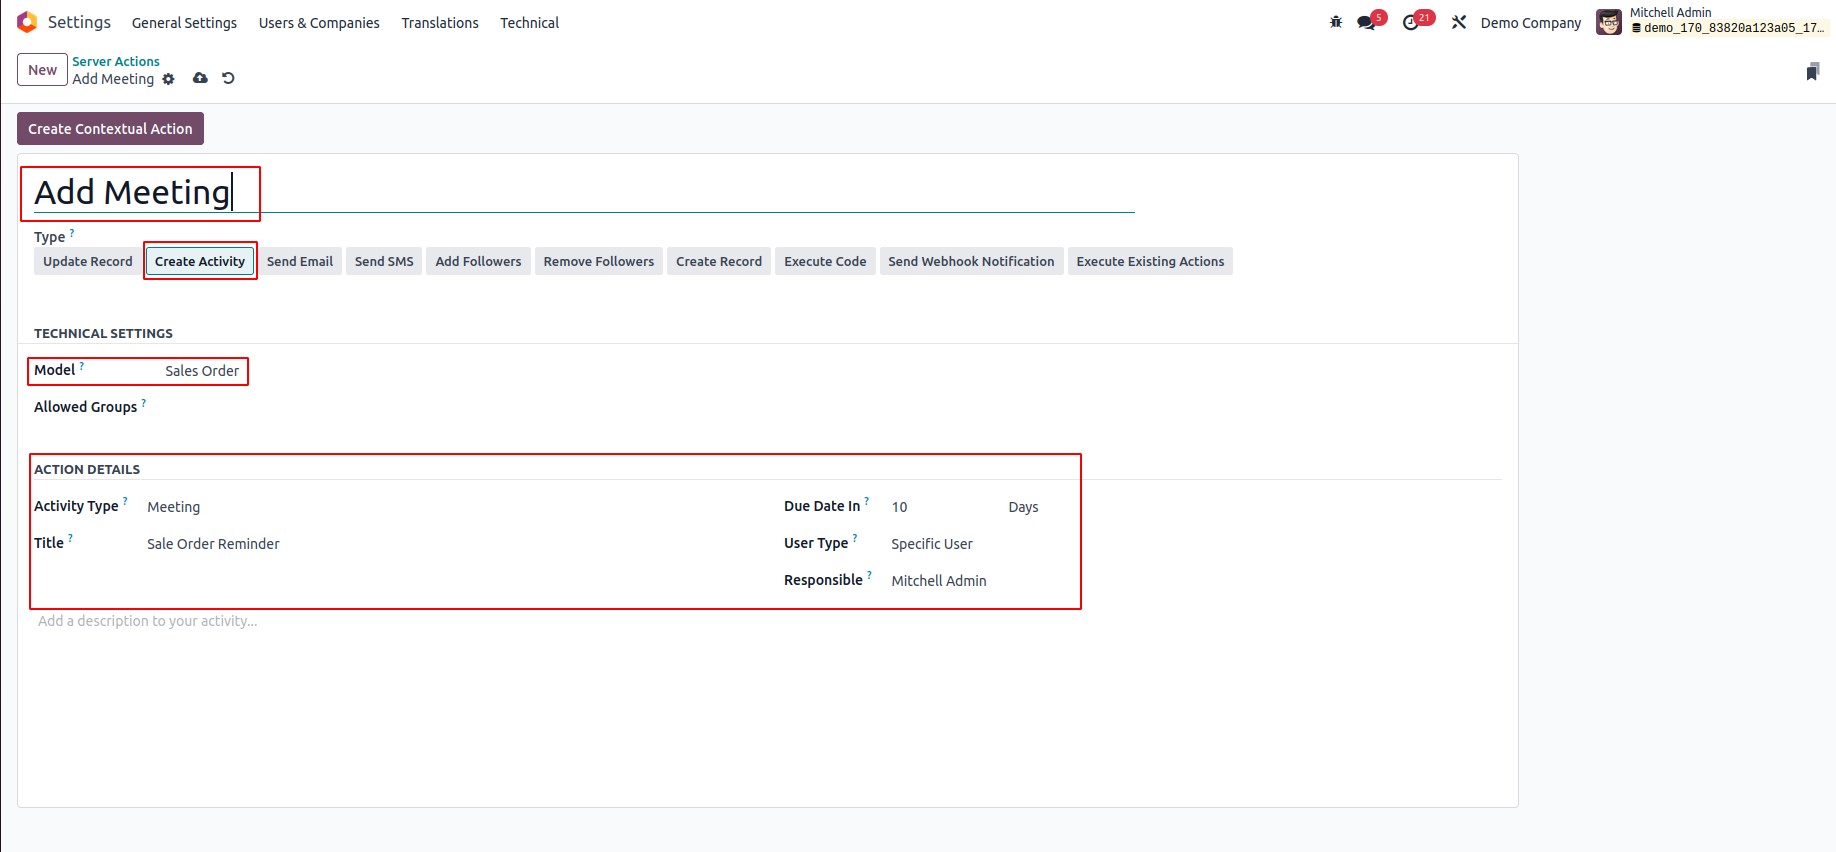
- Create Activity- Opt for this option if you intend to add an activity upon clicking the button.
- Send Email Select this action if you wish to send an email with the button click. Subsequently, you'll need to specify the Email Template and Send Email As to be used for this action.
- Send SMS Utilize this option if you aim to send an SMS upon clicking the button. Following this, you'll need to specify the SMS template and Send SMS As for this action.
- Add Followers Opt for this action if you intend to add followers to the selected record. Subsequently, you'll need to include the followers in the "Followers to add" field.
- Remove Followers Opt for this action if you intend to remove followers from the selected record. Subsequently, you'll need to include the followers in the "Followers to remove" field.
- Create Record Choose this action if you intend to create a new record upon clicking the button. Following this, you'll need to specify the Record to Create, Name and the link Field.
- Execute Code Opt this if you wish to perform calculations or complex operations upon button click. Following this, you'll need to write the corresponding code to execute the desired operation.
- Send Webhook Notification If you want to trigger a POST request to an external system, also known as a webhook, choose the action that allows you to send an HTTP request. Specify the necessary details such as the URL of the external system's webhook endpoint, and any required fields to be sent in the request body.
- Execute Existing Actions Opt for this action if you aim to execute a set of child actions. Following this, you'll need to specify the child server actions that should be carried out as part of the parent action. This allows for the streamlined execution of multiple actions in a cohesive manner
- Model Select the model to which you want to add a button.
- Allowed Groups Specify the user groups that have the authority to execute the server action. Leave this field empty if you want to permit execution by any user, regardless of their group affiliation.
Complete all the required fields, and subsequently, save the server action. You can identify the server action's ID in the URL, as demonstrated below.
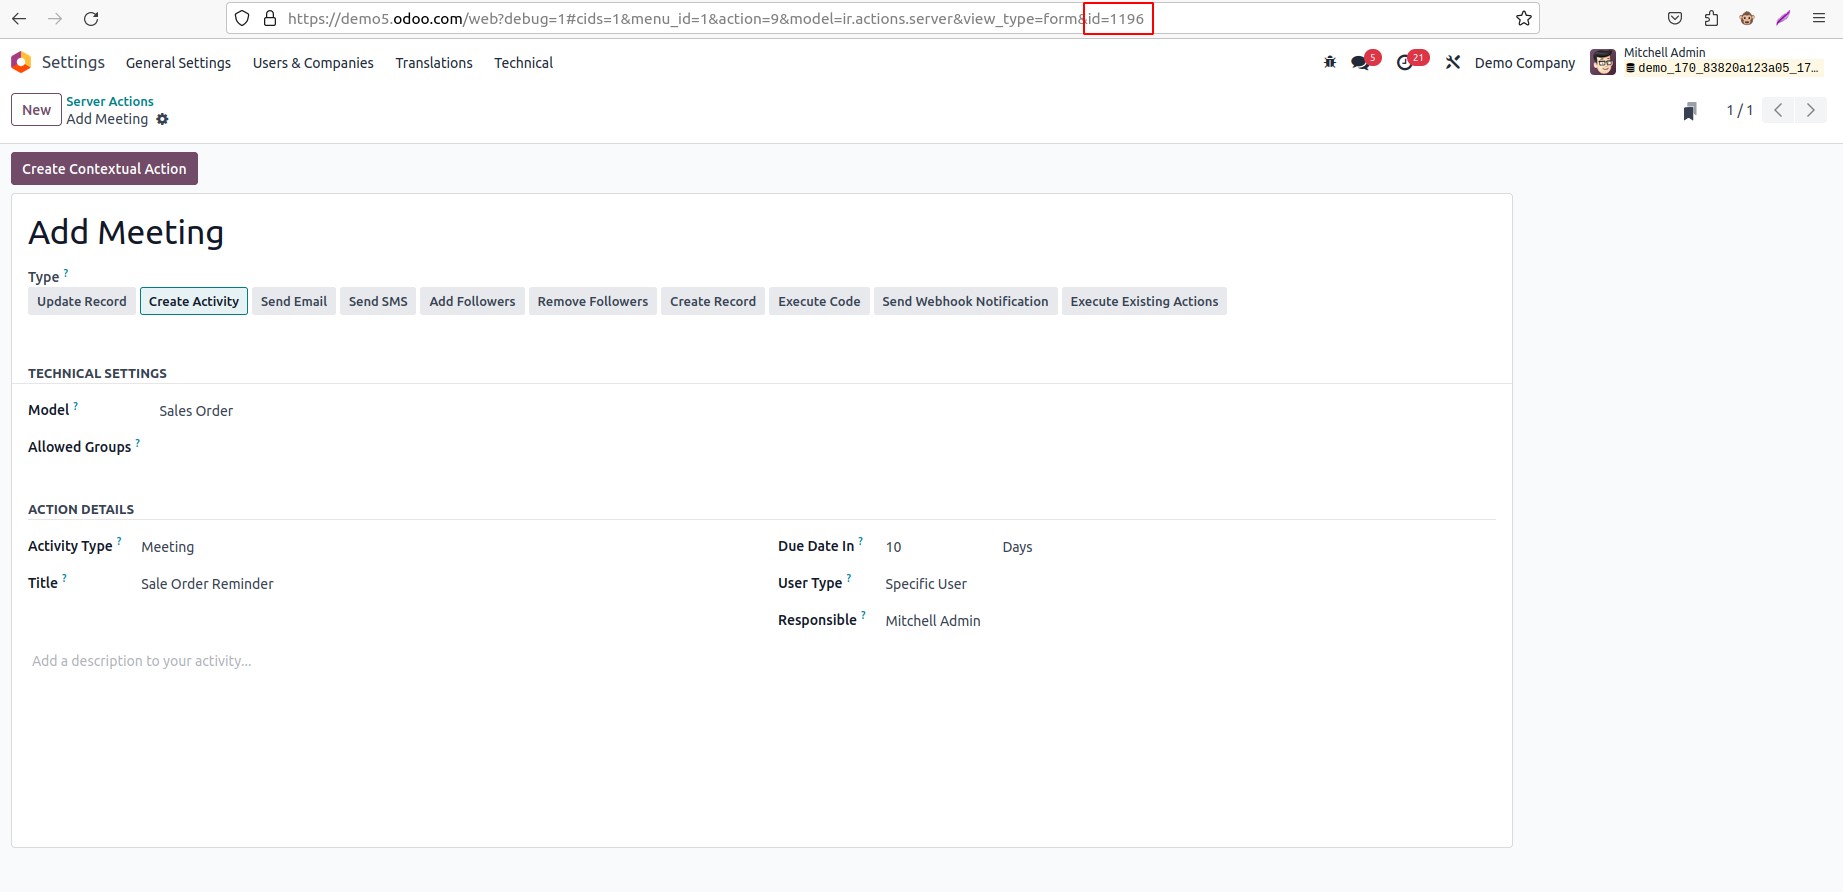
Copy the ID of the server action. Following that, proceed to the specific view where you wish to incorporate your button, such as the sales order form view, and access the studio.
There are two distinct approaches to incorporating buttons into the interface.
- Using XML code
Within the studio screen, navigate to the "View" menu, and subsequently, select the "XML" tab for further customization, as depicted below.
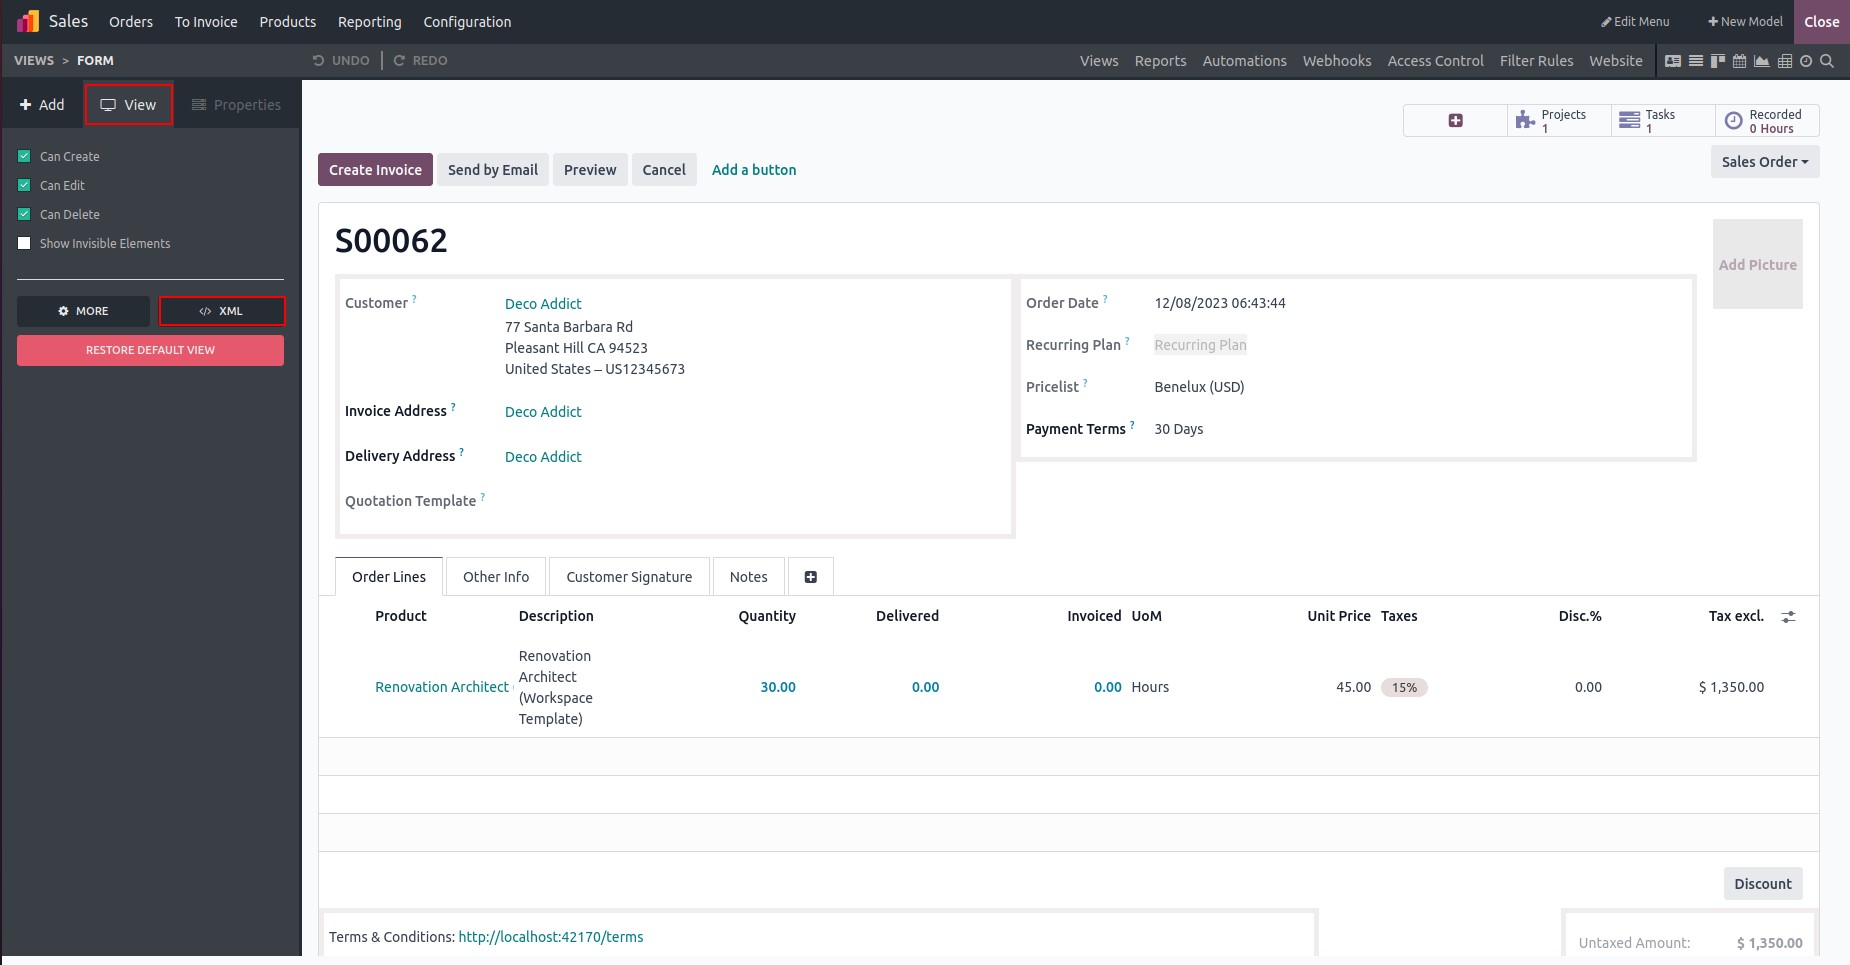
The XML code for the chosen view is visible on the left side. Within the header tag, you can find the code corresponding to the buttons already present in that view.
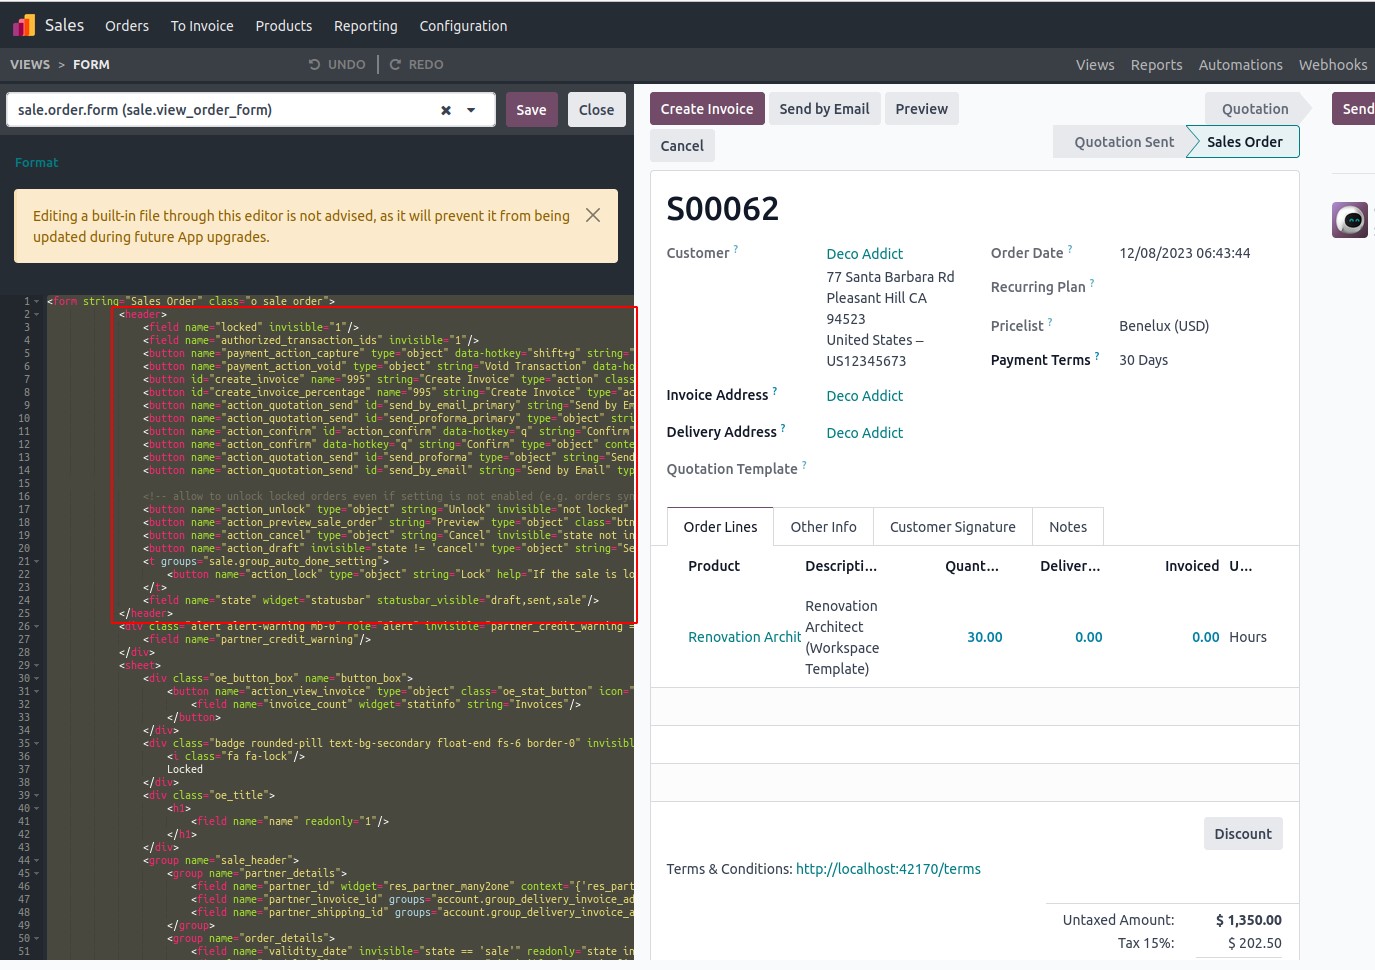
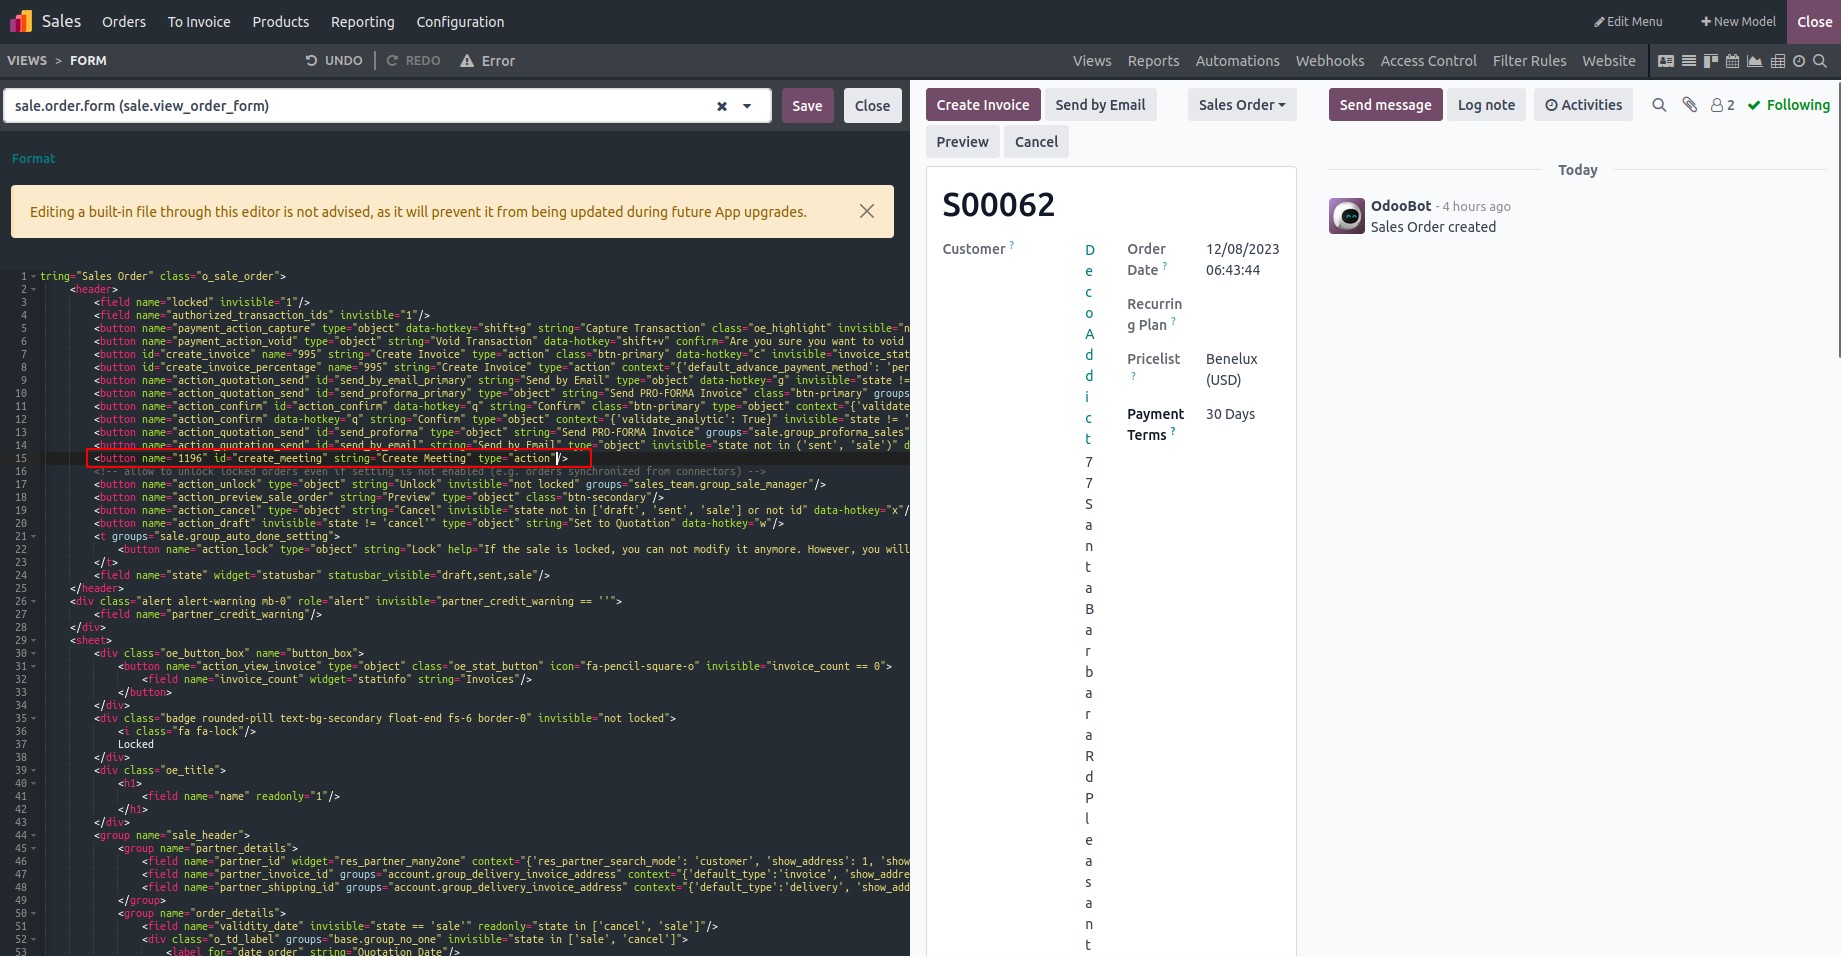
Define the new button within the section, similar to the example provided below. Include the ID of the created server action as the name attribute for the button.

Upon completing the aforementioned steps, your button will be visible in the view.
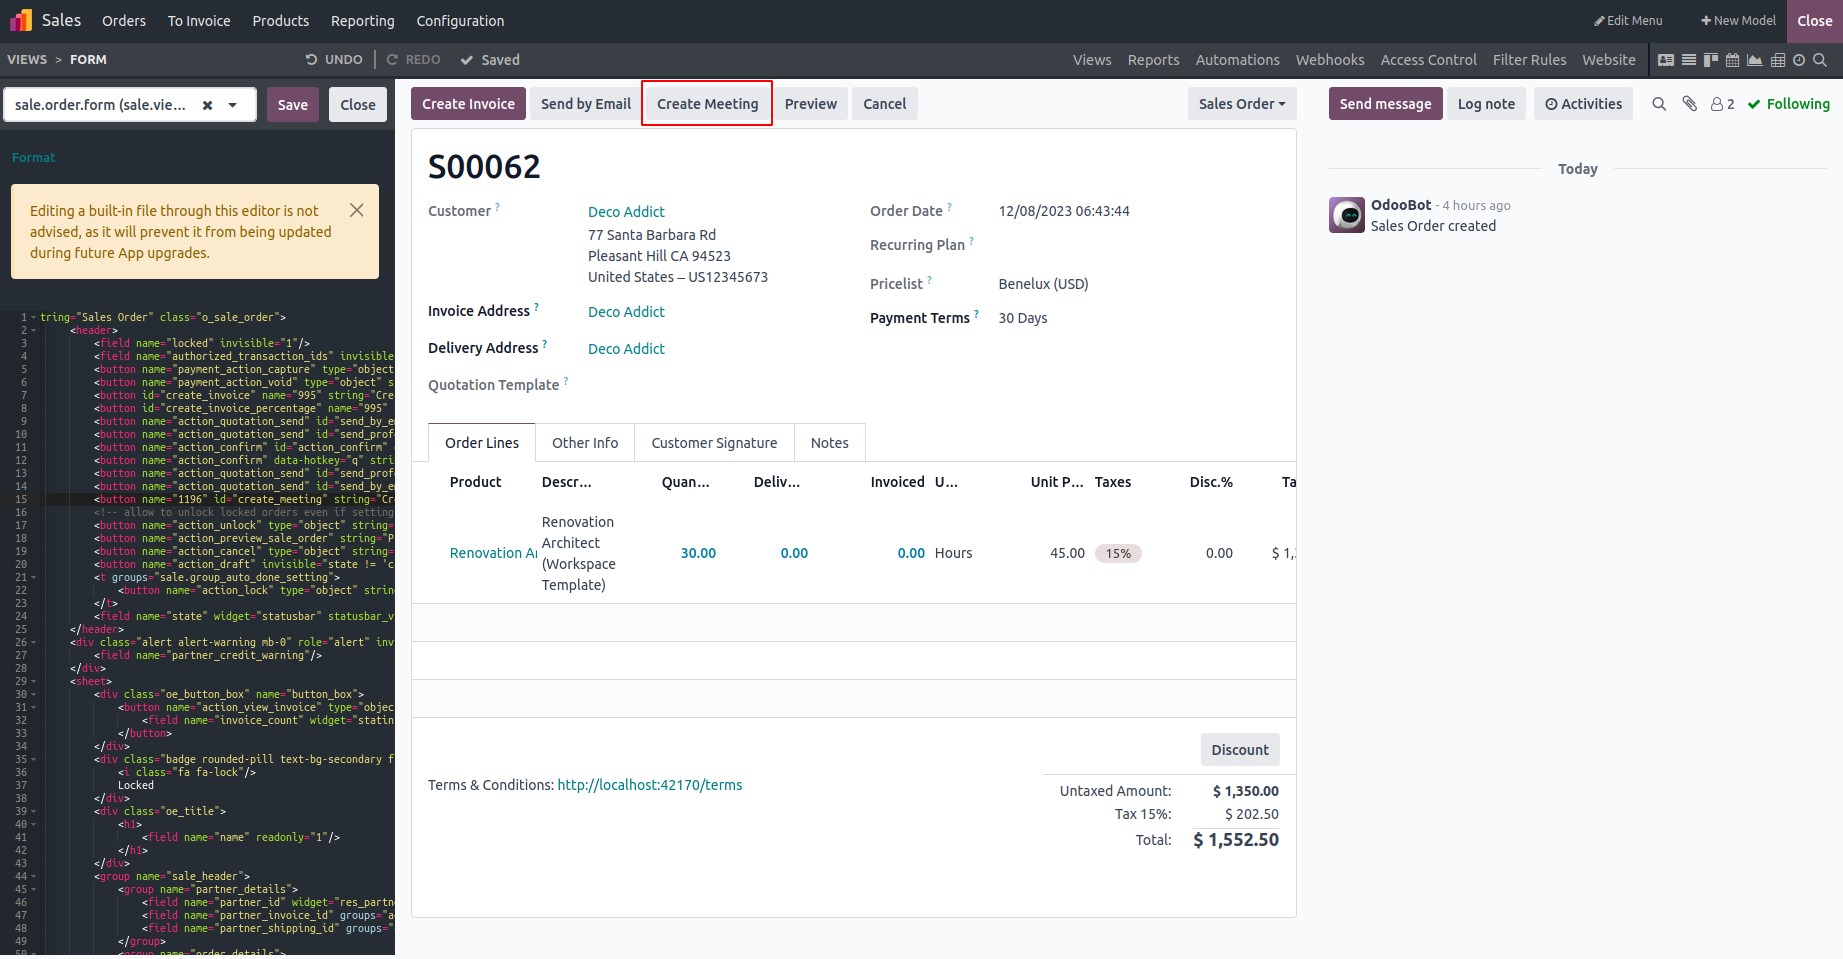
Clicking on it will trigger the execution of the defined server action as shown below.

- Using ‘Add a button’
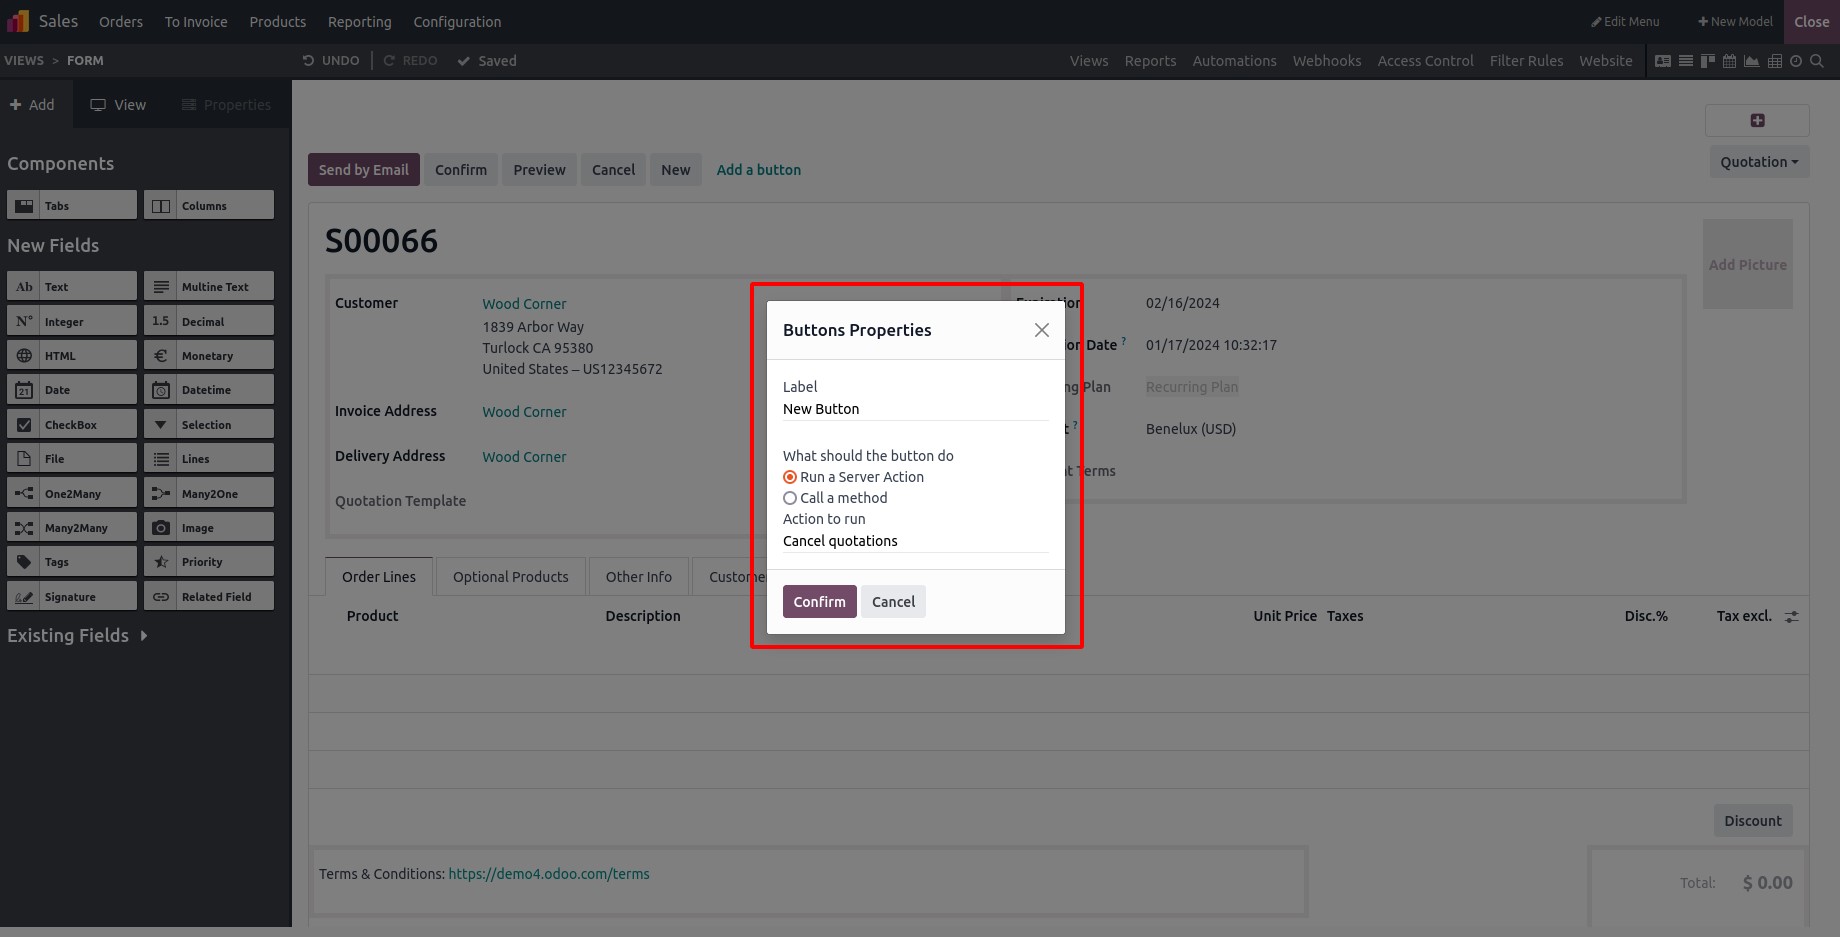
Click ‘Add a button’ inside the Studio view of the Sale Order view.

Next, assign a label to the button, specify the type of action, and designate the action to be executed.
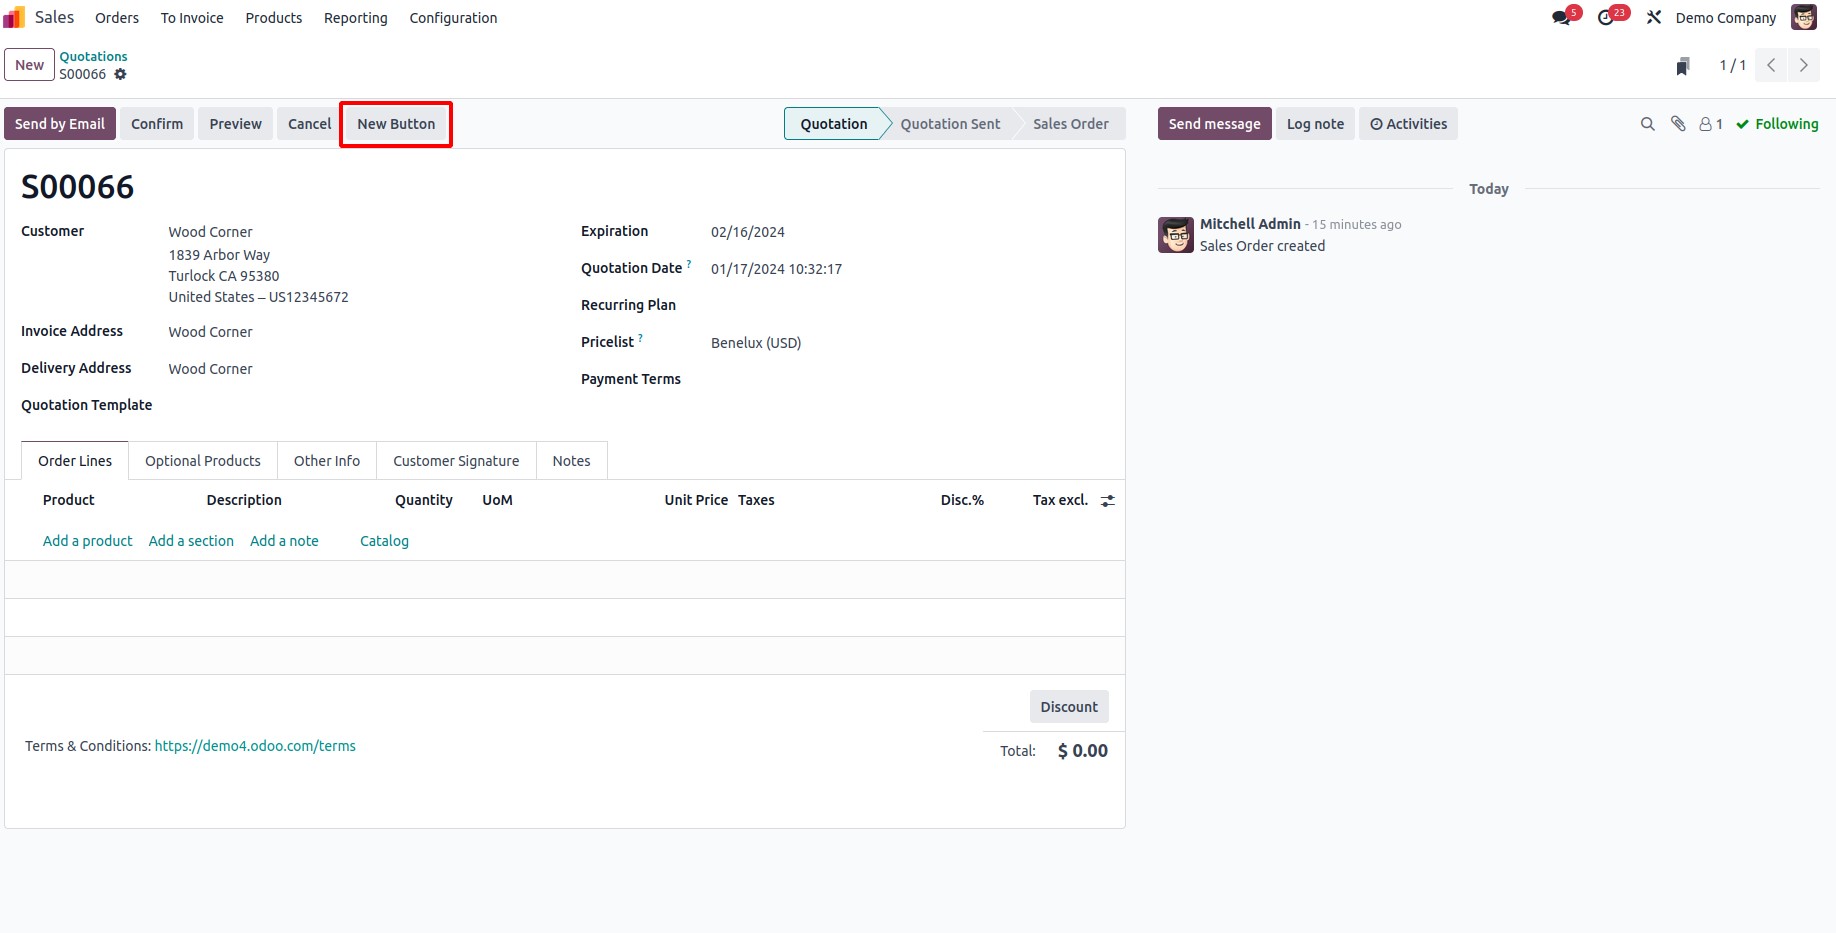
The button has been included in the view, appearing as illustrated below.
In conclusion, Studio Book V17 empowers users to effortlessly integrate customized buttons through XML coding, enhancing the execution of specific actions within the platform. This streamlined process adds versatility and functionality to tailored views.