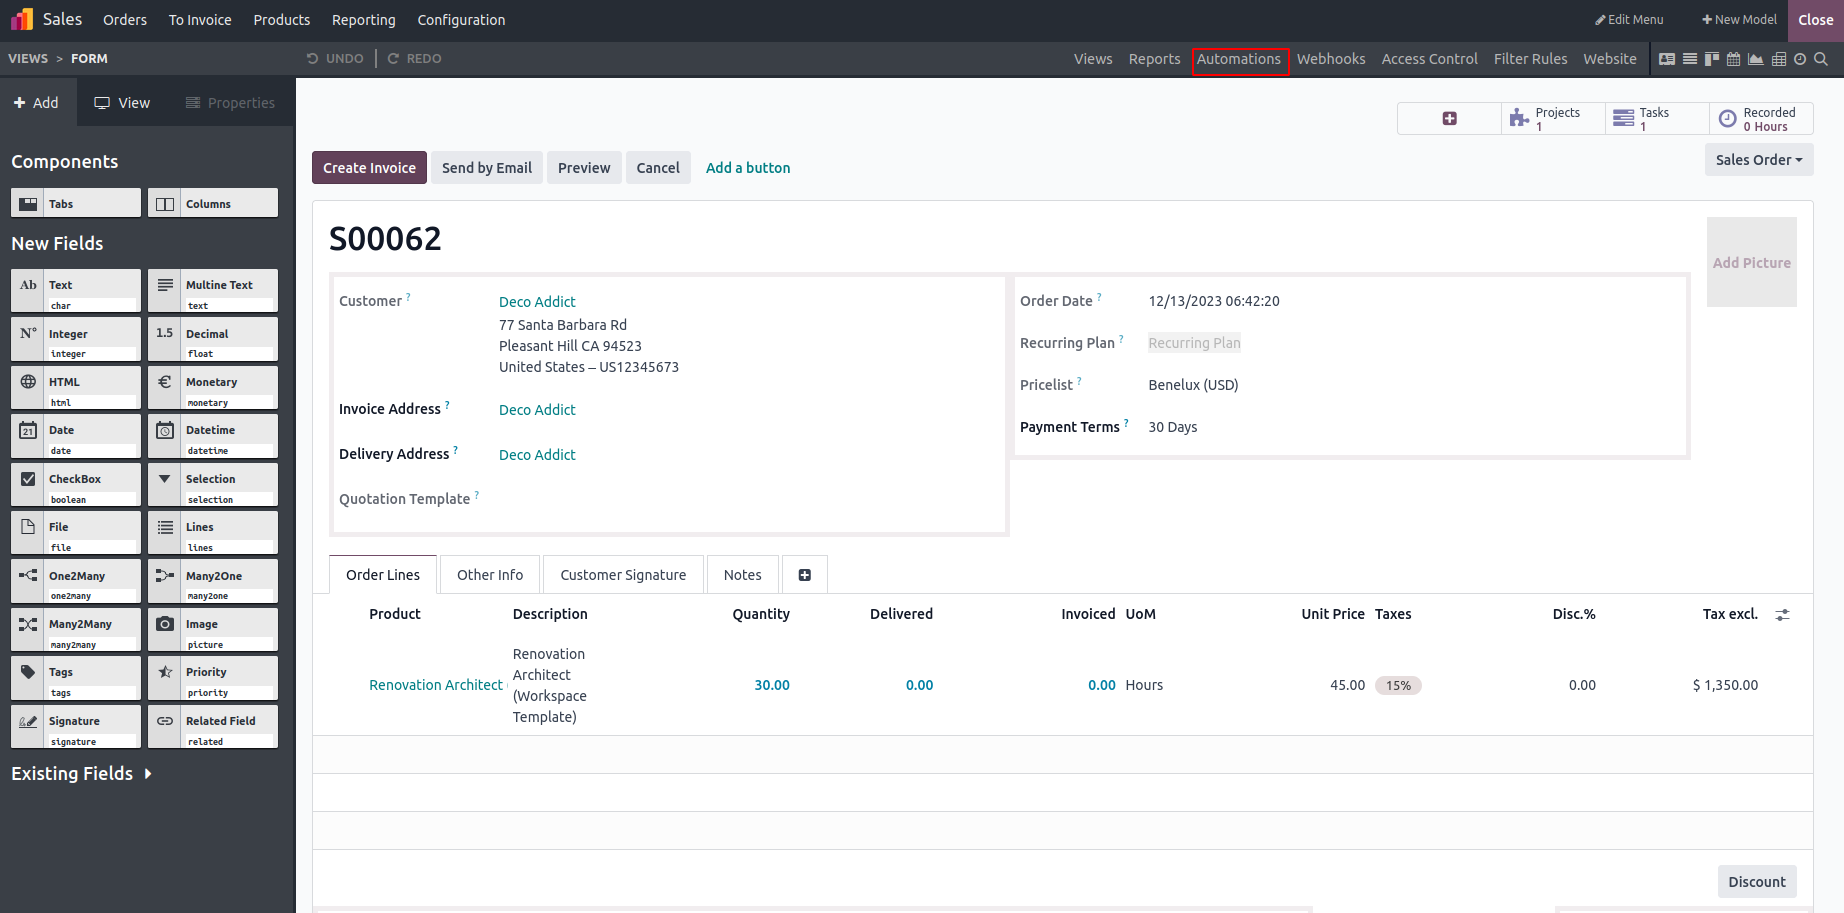
We can use automated actions to start some processes on their
own when specific criteria are met. Let's use the example of
changing the product's cost when it goes from being in use to
being deprecated. When the product form view opens in studio
edit mode, click the Automation button at the top, as
indicated in the picture below.
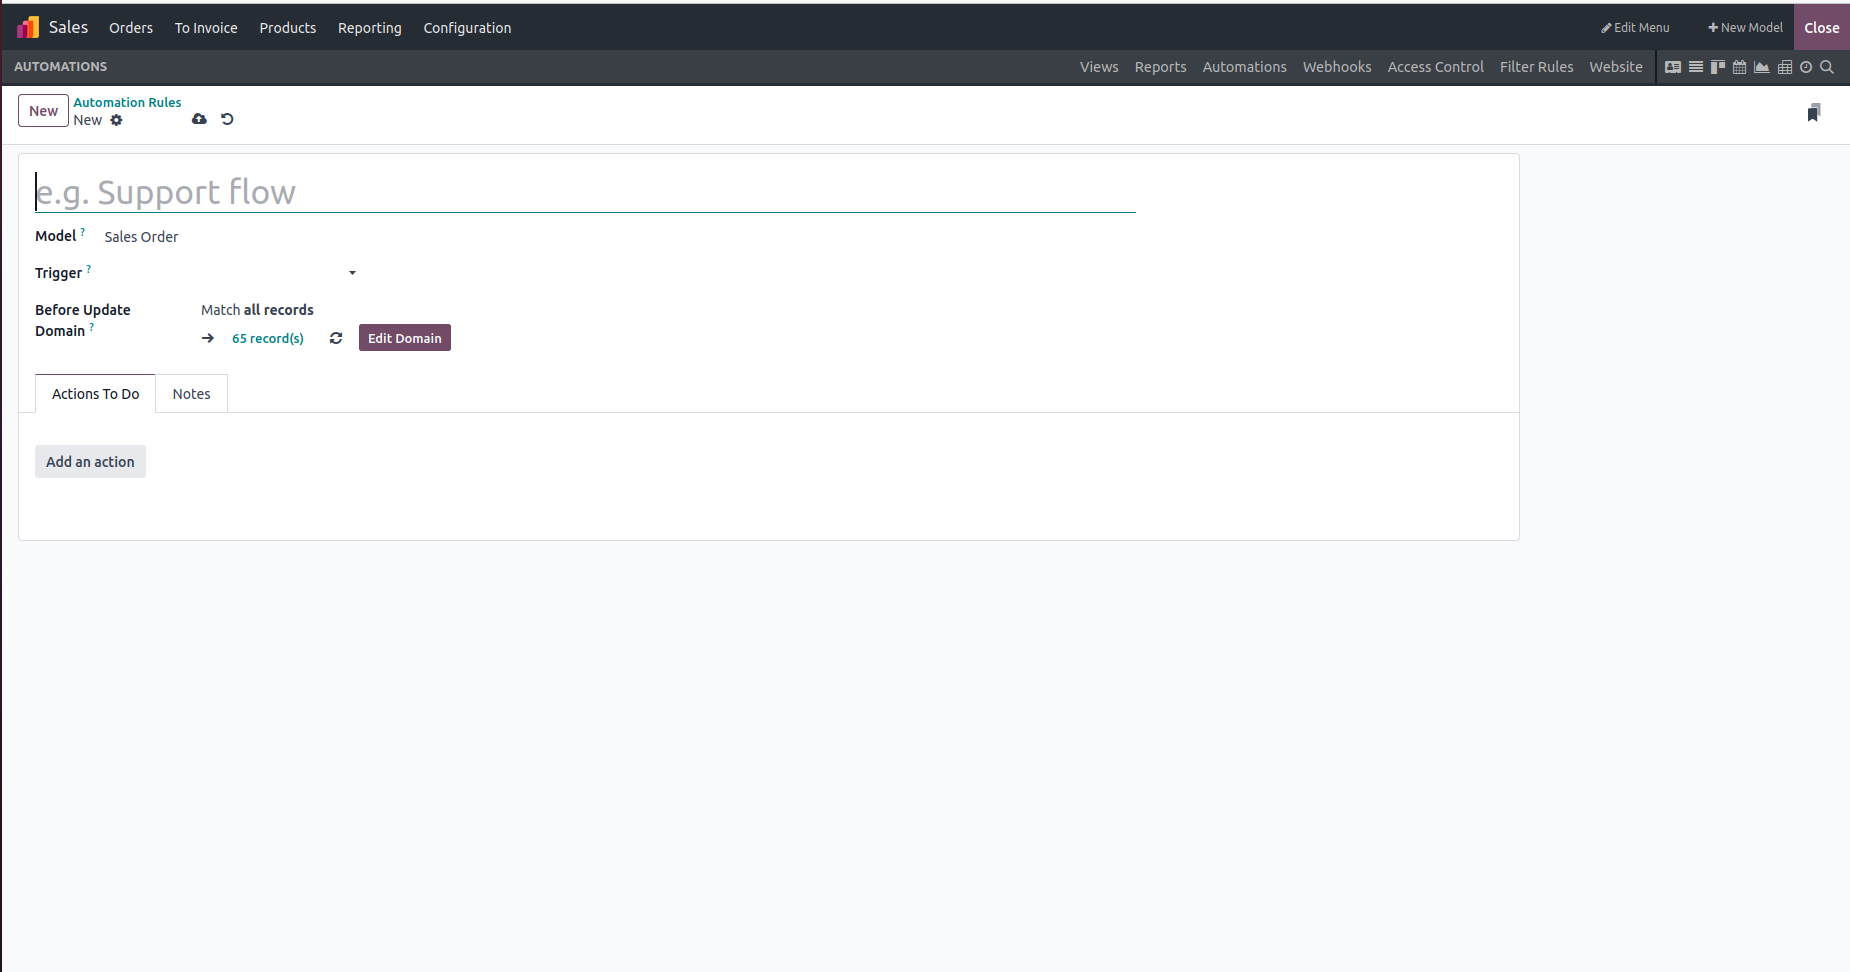
Create a new Automation rule.
-
Action Name: This is the identifier for the automated
action. It provides a clear and descriptive name for the
action.
-
Model: This refers to the data model or entity on which the
automated action will operate. It specifies the type of data
that the action will be applied to.
-
Trigger: The trigger defines when the automated action
should be executed.
-
Before Update Domain: This is a condition that must be
satisfied before a record can be updated. It acts as a
prerequisite for the update action.
-
Apply On Domain: This condition needs to be met before the
action rule is executed. It specifies the criteria for the
action to take effect.
- Actions To Do Tab: Here we can add the actions.
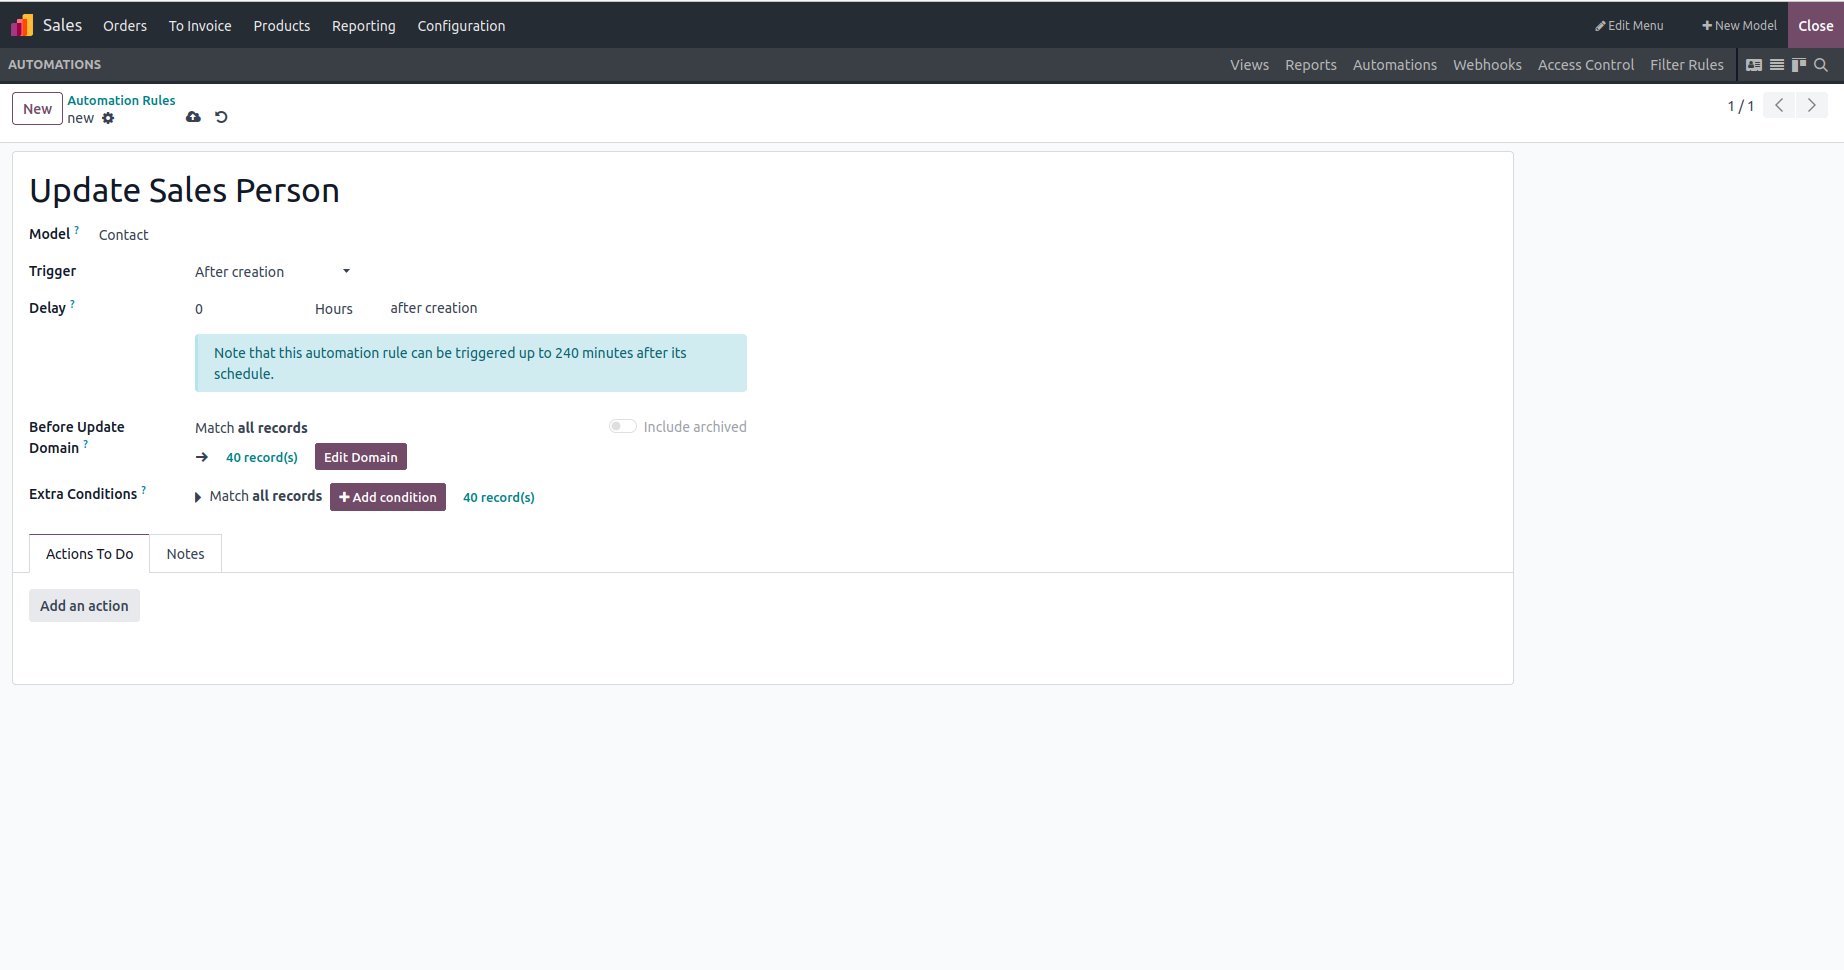
The image depicts an automation rule named "Update Sales
Person" for the "Contact" model, set to trigger after
creation. Subsequently, actions can be incorporated
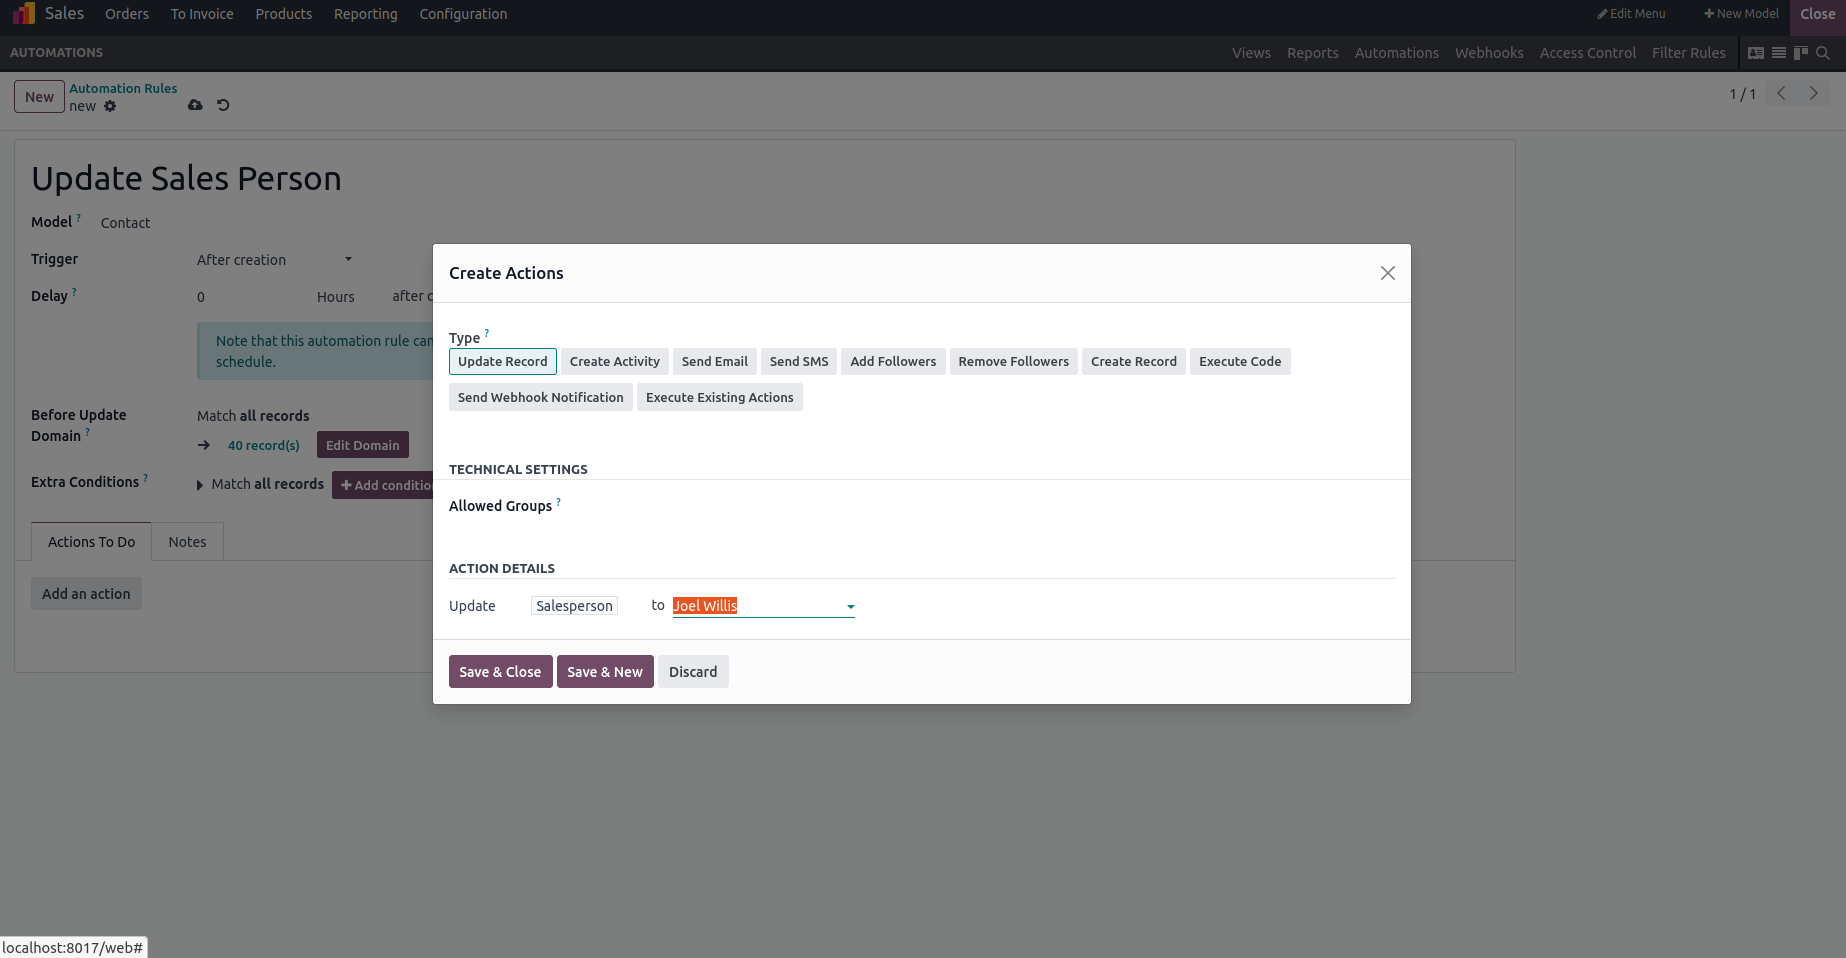
-
Type: Indicate the type of server action you want to
perform.
-
Update Record: Select this option if your goal is to
update a record in the associated view, such as modifying
a field's value. Specify the particular field to be
updated.
-
Create Activity: Choose this option if you intend to add
an activity when the button is clicked.
-
Send Email: Opt for this action to send an email with
the button click. Specify the Email Template and Send
Email As for this action.
-
Send SMS: Utilize this option to send an SMS upon
clicking the button. Specify the SMS template and Send SMS
As for this action.
-
Create Record: Opt for this action if you want to create
a new record upon clicking the button. Specify the Record
to Create, Name, and the link Field.
-
Add Followers: Select this action if you want to add
followers to the chosen record. Specify the followers in
the "Followers to add" field.
-
Remove Followers: Choose this action if you intend to
remove followers from the selected record. Specify the
followers in the "Followers to remove" field.
-
Execute Code: Choose this option if you wish to perform
calculations or complex operations upon button click.
Write the corresponding code for the desired operation.
-
Send Webhook Notification: Select this action if you want to trigger a POST request to an external
system (webhook). Specify details such as the URL of the external system's webhook endpoint and any
required fields for the request body.
-
Execute Existing Actions: Opt for this action if you aim to execute a set of child actions. Specify
the child server actions to be carried out as part of the parent action. This allows for the
streamlined execution of multiple actions in a cohesive manner.
-
Allowed Groups: Indicate the user groups that are
authorized to execute the server action. If you wish to allow execution by any user, irrespective of
their group affiliation, leave this field empty.
An action has been added to update the salesperson to Joel Willis.
Note that this automation rule can be triggered up to 240 minutes after its schedule or we can manually
trigger the scheduled action corresponding to automation.
It is observed that the salesperson for the contact has been successfully updated to Joel Willis.