Calendar
It is essential to make certain meetings and decisions in order to enhance the relationship between the employees and the staff working in the company. Well-structured planning and scheduling of activity is essential for such kinds of meetings. And such meetings help you in making the meeting well conducted in a company for the success of the company. There is the Calendar module in the Odoo Software, which helps you to make well-structured kinds of meetings that are internal as well as external. The process can be done within single steps.
On the main page of the calendar module, you will get already created as well as scheduled meetings of various days of the month. If you want to know the meetings of a particular day, then simply go to a particular date and know the scheduled meeting on that particular date.
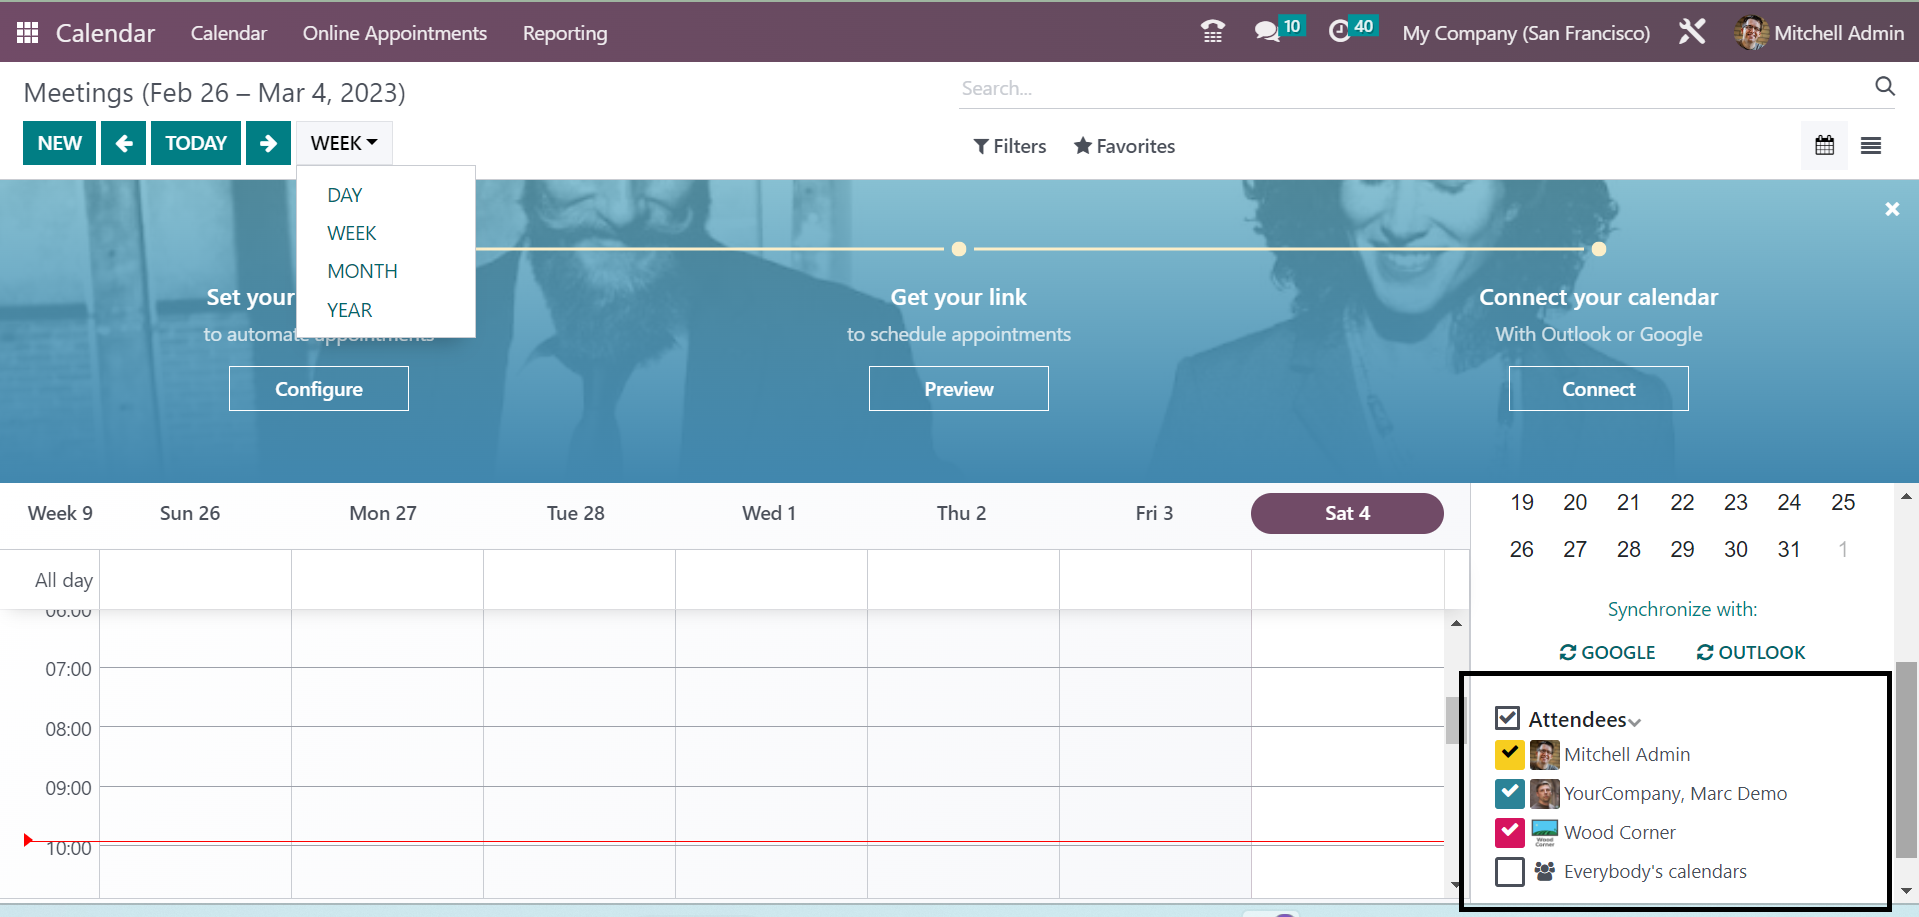
On the rightmost side of the page, you will get those who are going to attend the meeting that is scheduled. You can introduce new attendees to the meeting using the + icon provided. The further details regarding the meeting will be understood using the selection of the particular meeting on which you have to know more about.

On selecting a particular meeting, you will get the further details, such as Description of the meeting, Privacy, and related Tags. you can make use of the Edit icon if you have to make further editing on the scheduled meeting on the particular date.
In order to make a similar kind of meeting, then, just go to a particular date on which you have to schedule the meeting. On selecting a date, you will get a window on which you have to provide some details as follows.
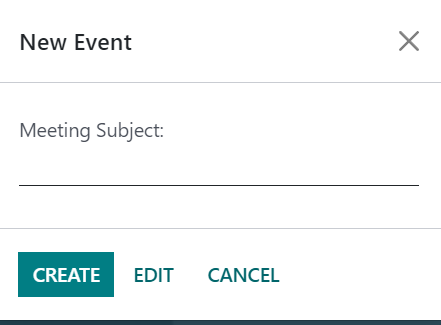
In this small window, you can provide the subject for the meeting in the provided space. Then, click on the edit icon provided in the window; then you will get a page as shown in the screenshot below.
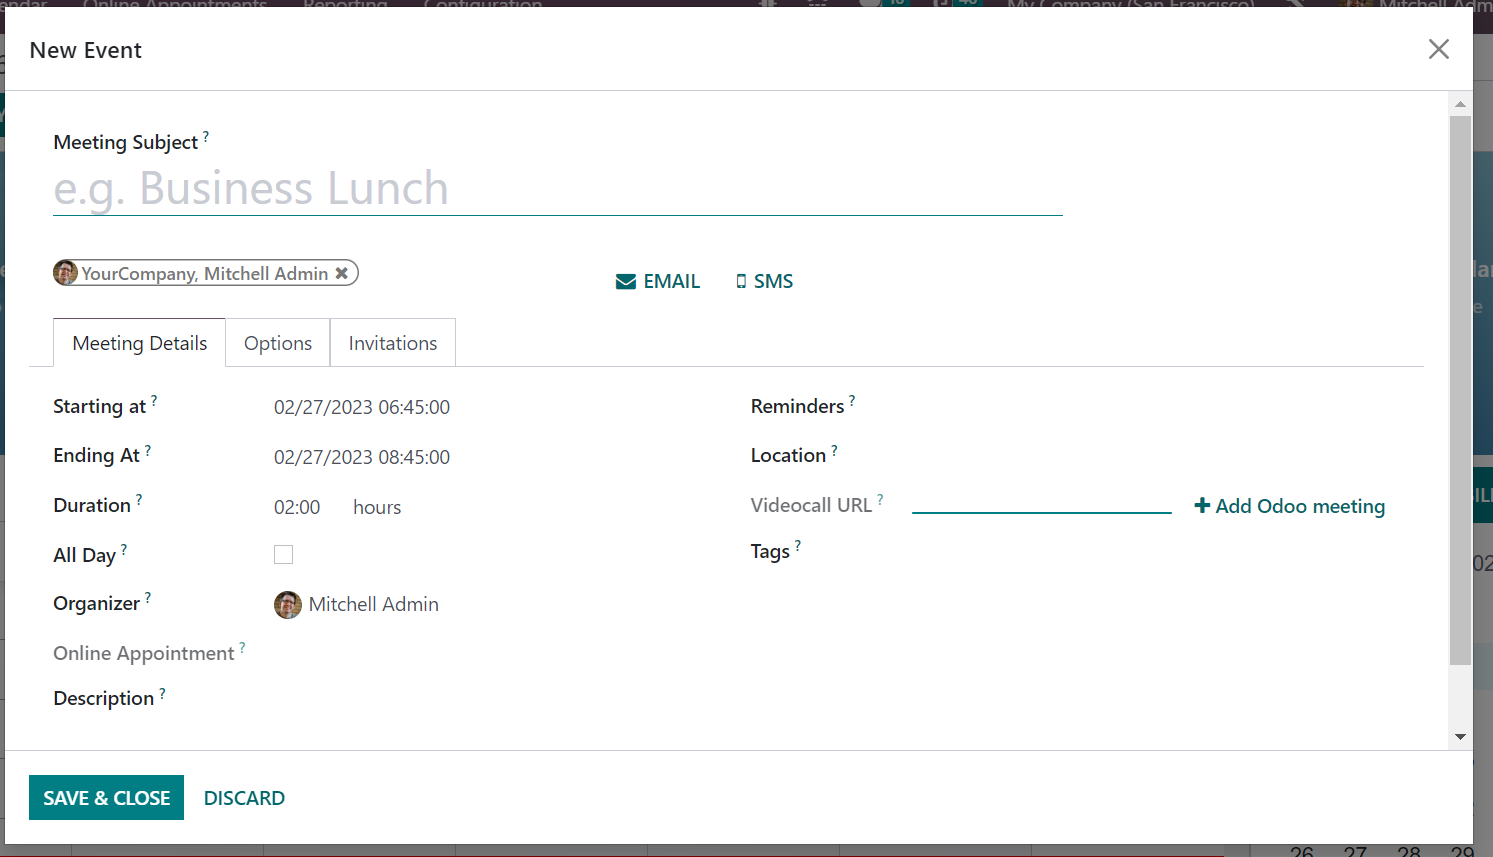
On providing the subject of the meeting, you have the Meeting details and Options tab to provide some data. Under the Meeting Details option, you can provide the starting date and Ending date of the meeting in the provided space. The duration of the meeting can be provided in the given space. All Day option can be triggered if the meeting has to be scheduled for everyday. You can mention the organizer and provide a description of the meeting that you are going to schedule in the given spaces. The Email and SMS option helps you to send the notification on the meeting to those attendees who are going to be in this meeting. You can also keep reminders, provide the space for the meeting in the location option, video call URL, and can also add Odoo meetings as well. Related tags can be added on the provided space.
Under the Options tab, you can trigger the recurrent option, if the meeting has to be repeated at a particular interval of time.
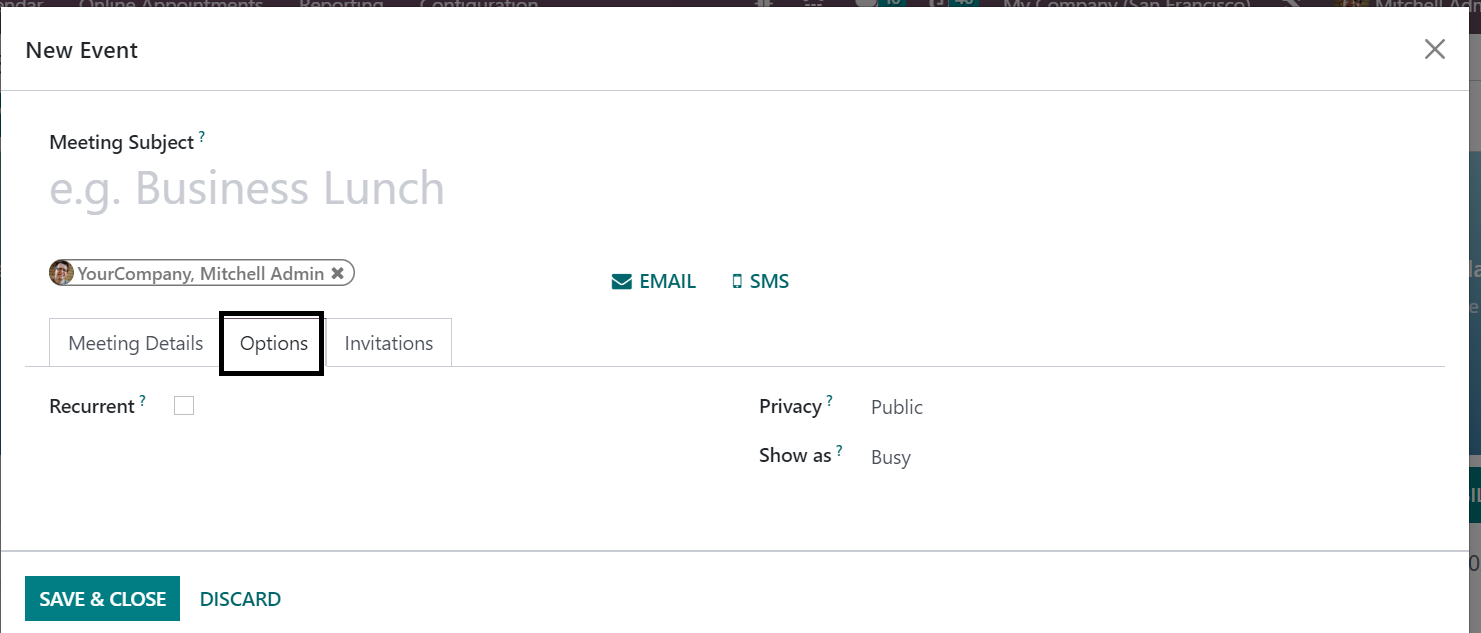
Here, you have a space to make the meeting as Public or Private under the privacy option. The status of the attendees can also be set as Busy if required. Now, you have an Invitation tab in order to get the details of the attendees in the meeting.
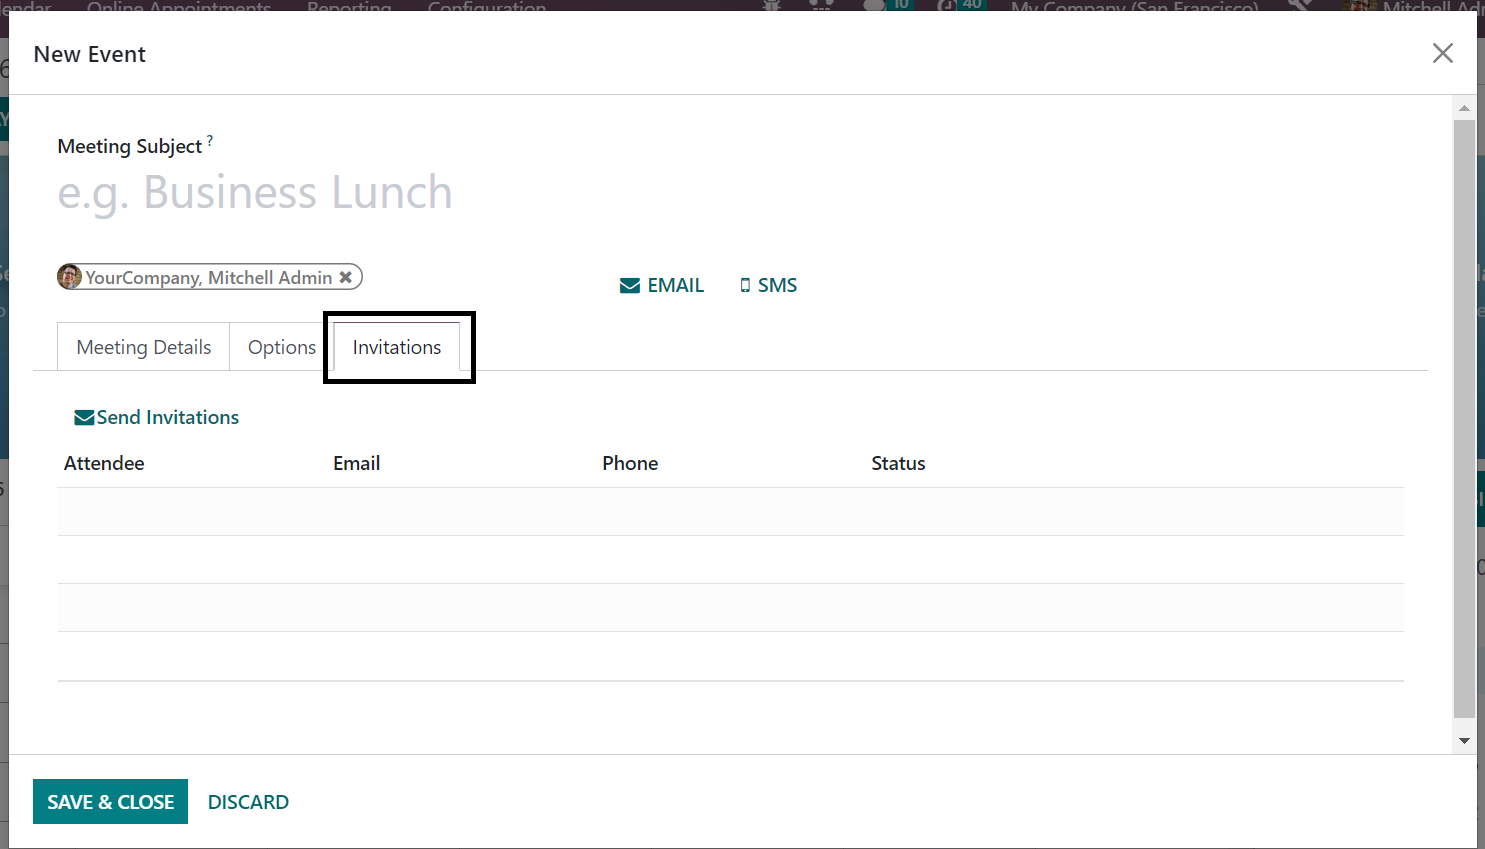
As you can see, under the Invitation option, you will get space to provide the name of the attendees, email and phone number. You will get the status of the invitation as accepted, rejected, or requires action. Finally, go to the Save icon. A meeting can be scheduled using the Add icon in the main page also. You can also sync cyour calendar with google.
For that, you have an option of connecting with google in the main apge of the calendar module.
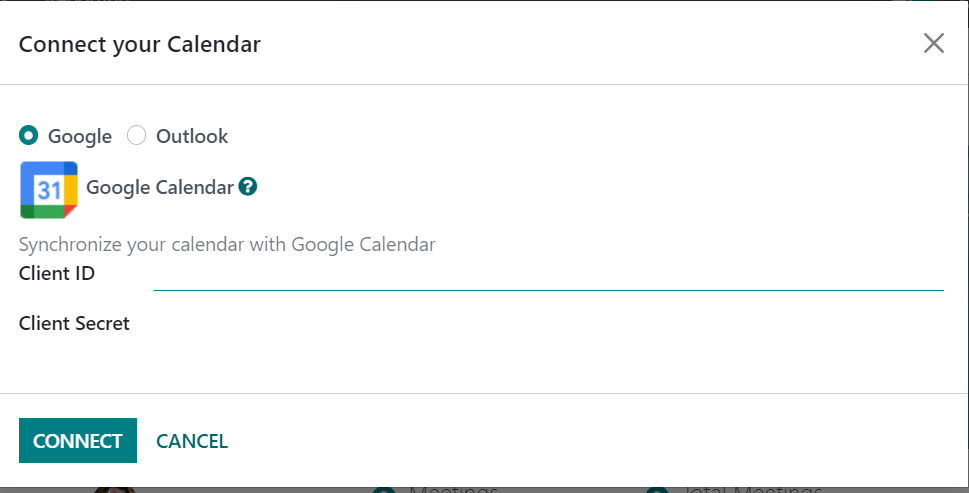
Here, you can mark it as google or outlook. The option helps you to synchronize the calendar with the google calendar. You can provide the client ID and client secret. Then, go to the connect option. So that, you will get connected with the google calendar.
Online Appointments
On looking at the presence of the employees and clients in the company, you can easily arrange for online appointments under the Calendar module in the Odoo ERP. When you are done with the installation of the Appointment module in the Odoo, which is available in the app store of the Odoo Software, you can easily regulate and manage the appointments. Their feature helps you in reducing the risks in the meetings with the employees and others. You will get the option on the main page of the Calendar module itself. The page provides certain information, as shown below.
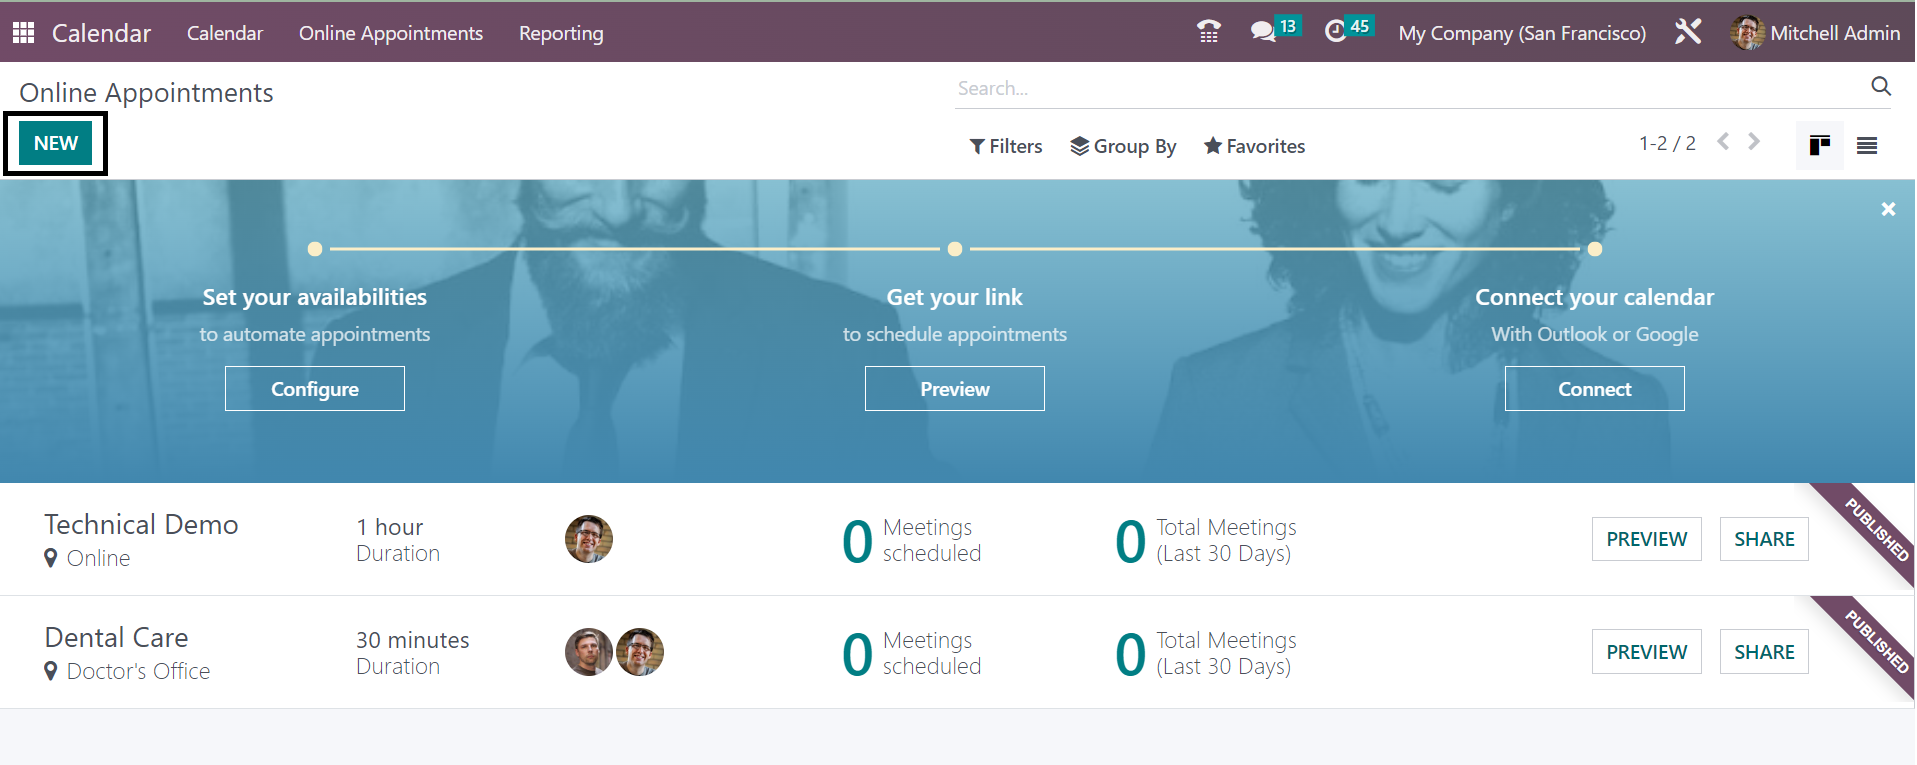
As you can see in the above screenshot, you will get the list of already created online appointments. In order to make a similar kind of appointment, just go for the Create icon, as marked in the above image.
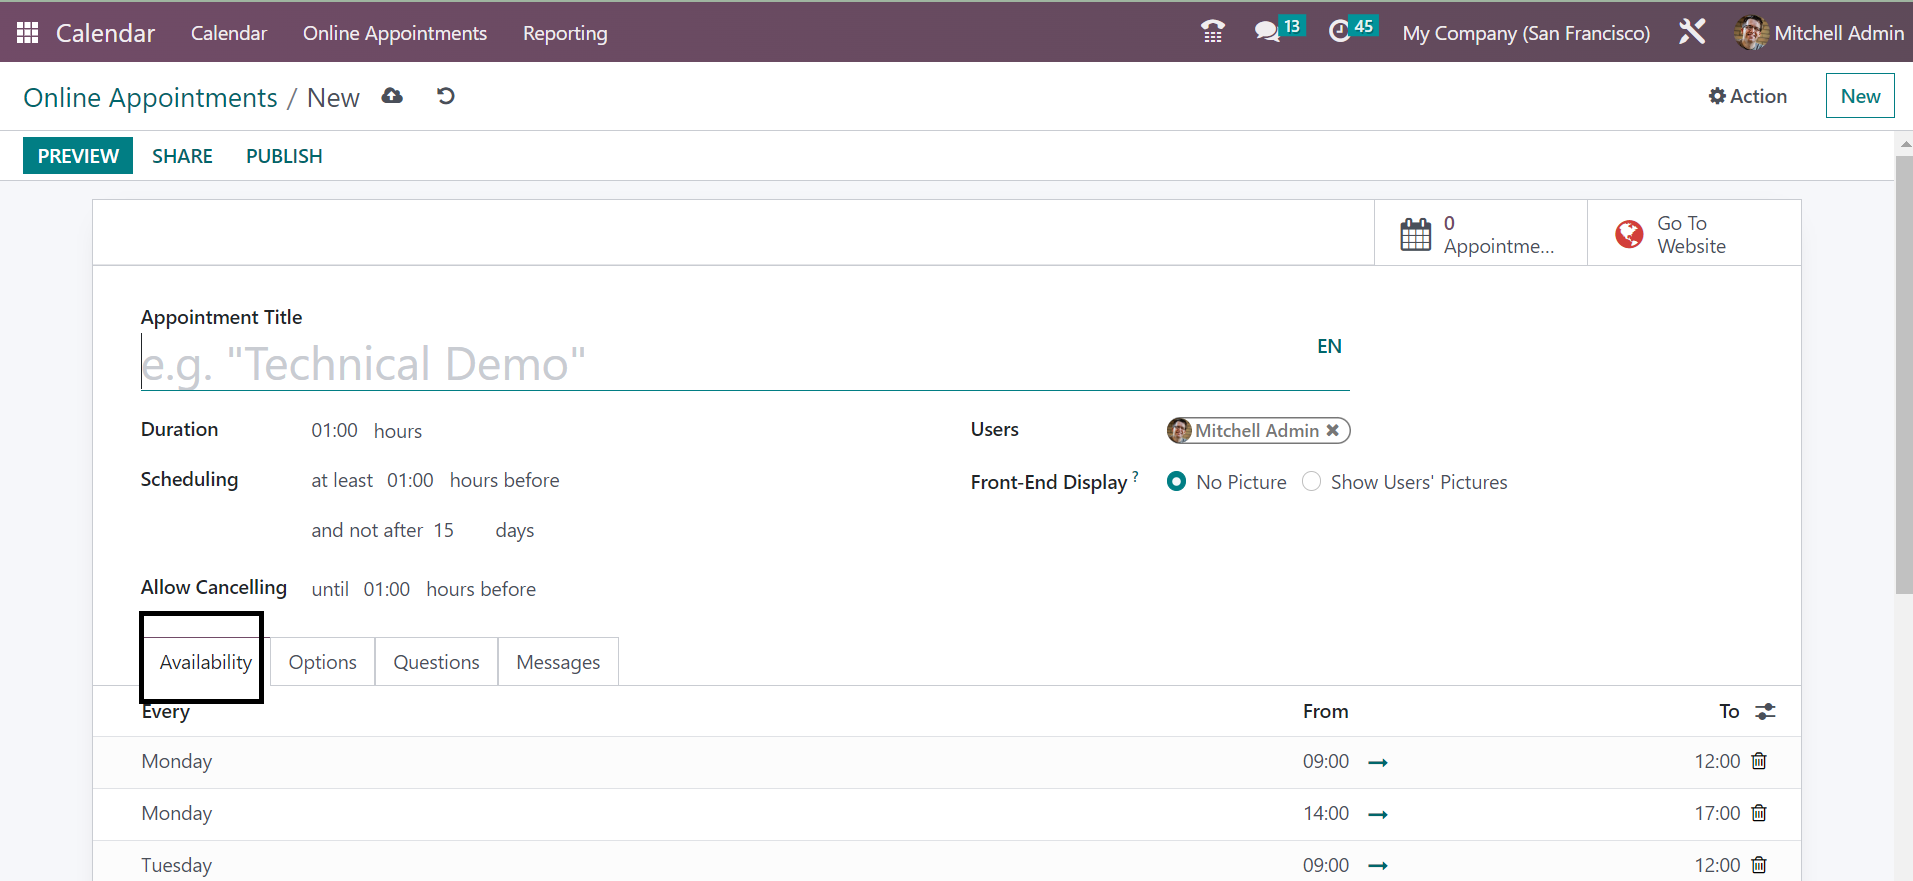
On the creation page, you will get some space for providing certain data regarding the creation of online appointments. You have to provide a name for the appointment under the Appointment Title option. The Duration of the meeting can be provided under the Duration option. You can arrange the scheduling of the meeting according to the time taken for the appointment in the allotted space. You can also make use of the allow canceling option in order to cancel the appointment in the provided time period. The users can be given, and the Front end display can be set as no picture or show users pictures.
Under the Availability Tab, you can provide the available days in a week for the appointment with the help of the Add a Line option.
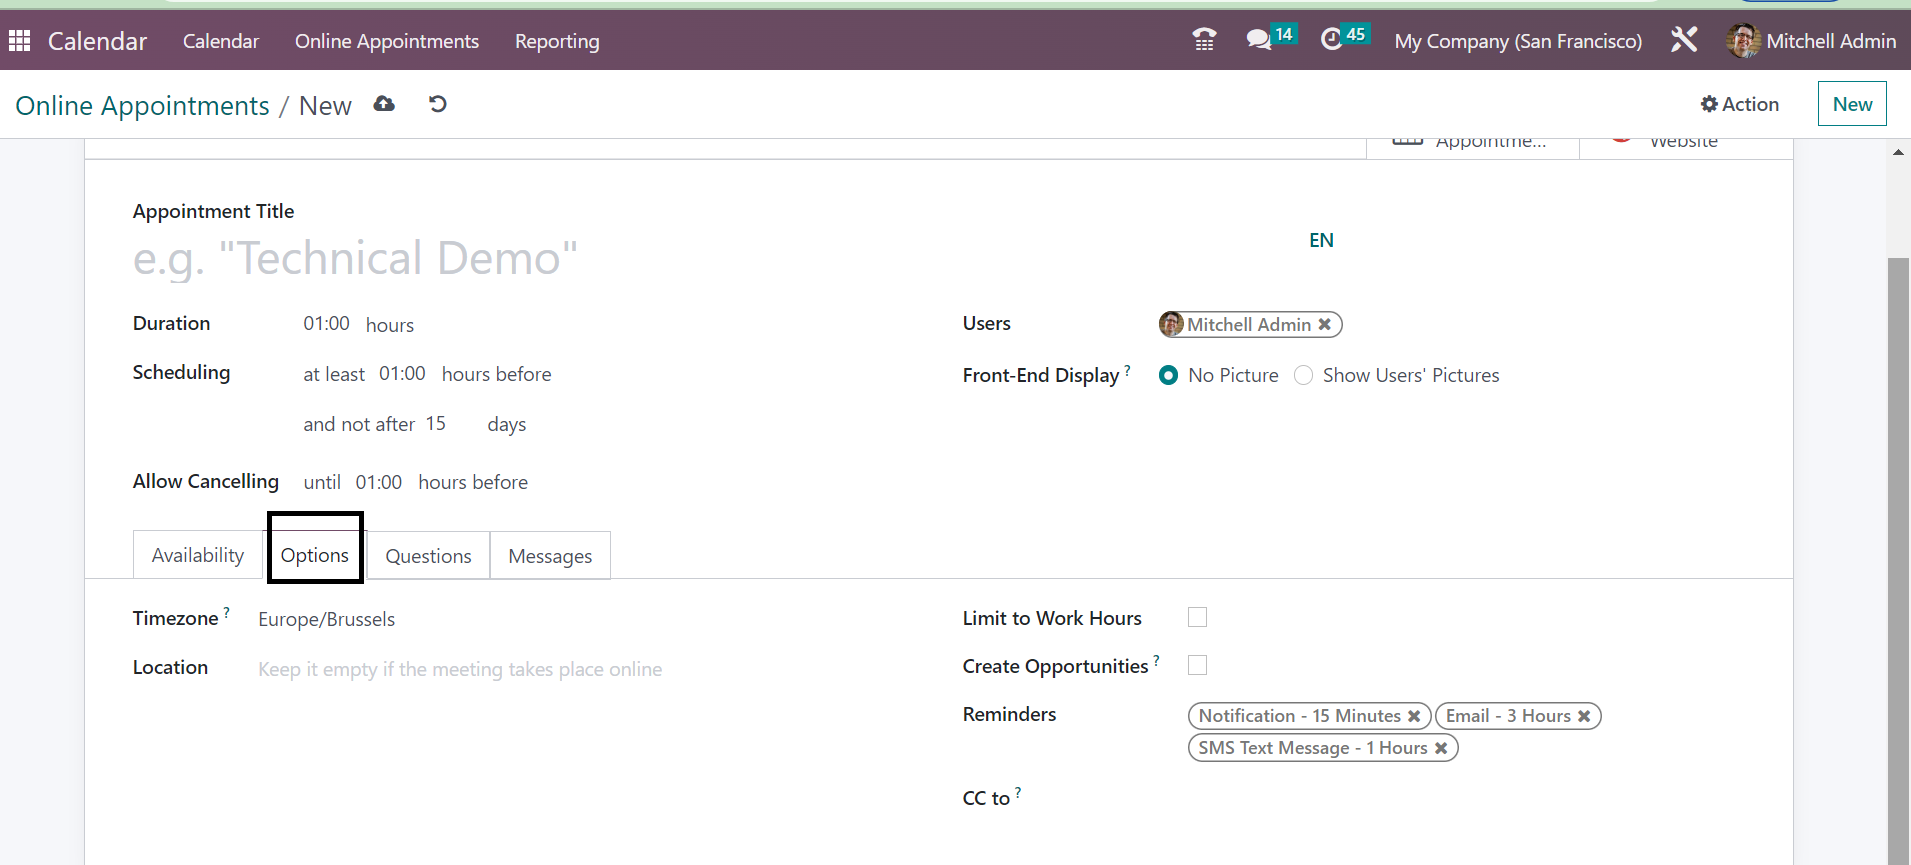
Under the Options Tab, you will get some options, such as Timezone, Location, Limit to work hours option to trigger, create opportunities option to trigger, as well as Reminders to add in the allotted spaces. You can also send the appointment to whom you had set on the CC to option.
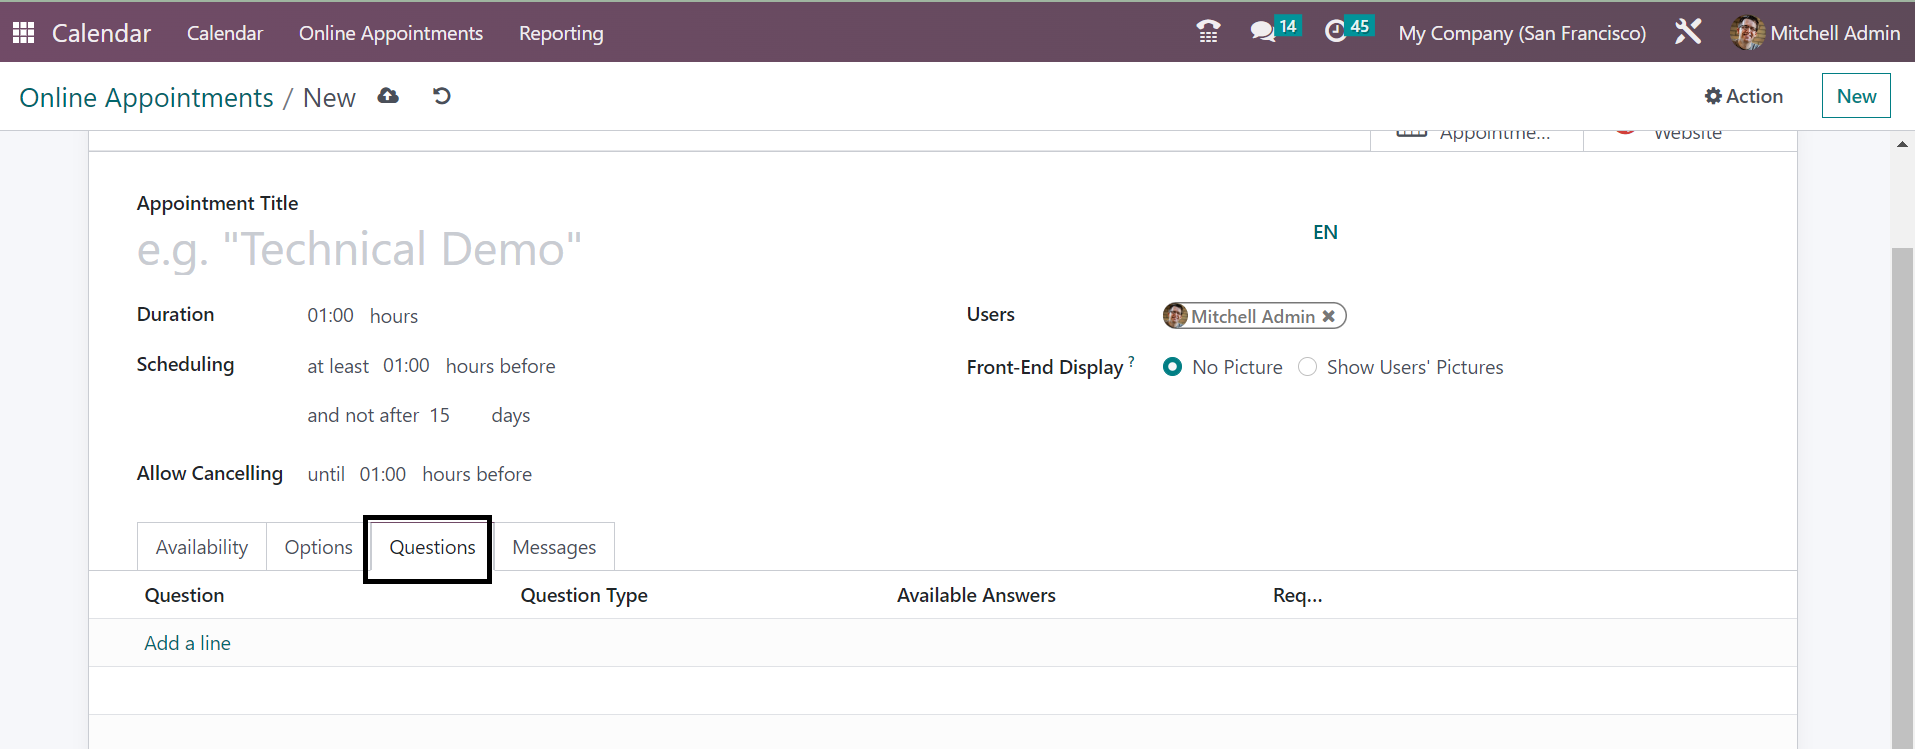
As shown in the above image, you will get the Questions Tab, which helps you to add the questions related to the appointment that you are going to have. In order to include the questions, you can go for the Add a Line option, which leads you to a new page, as shown below.
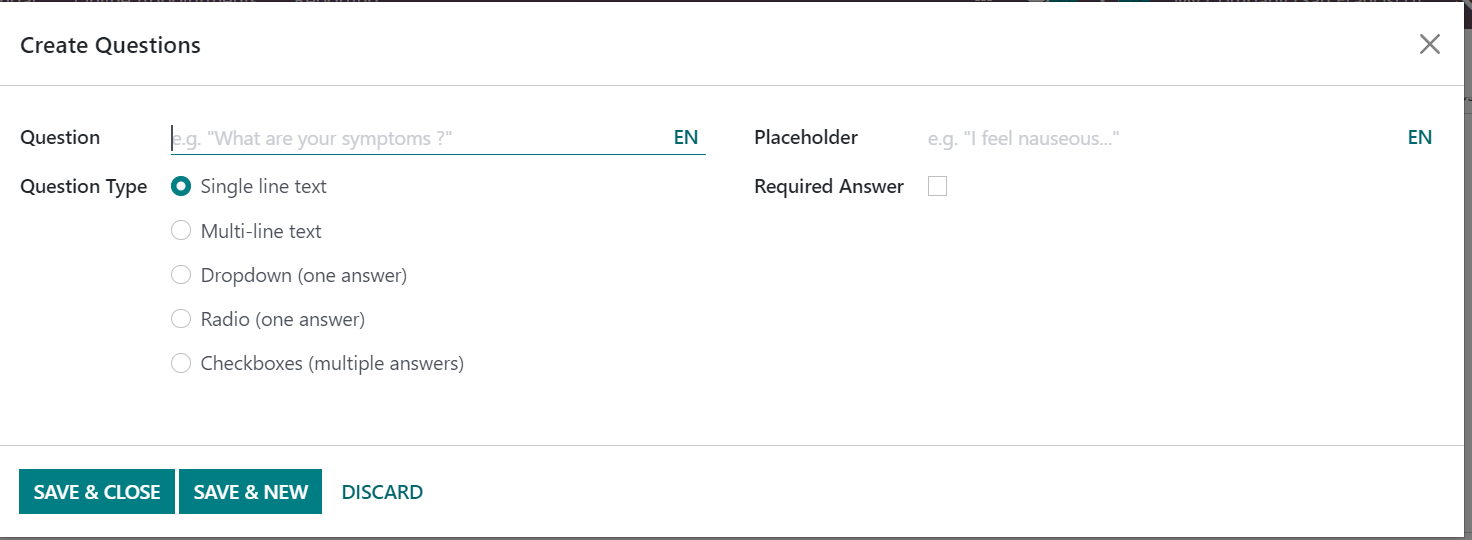
On the questions creation page, you can mention the questions in the provided space. The question type can be set as single line text, multi-line text, dropdown, radio, or checkboxes. You can provide the placeholder and trigger the required answer option if the answer to the question is necessary.
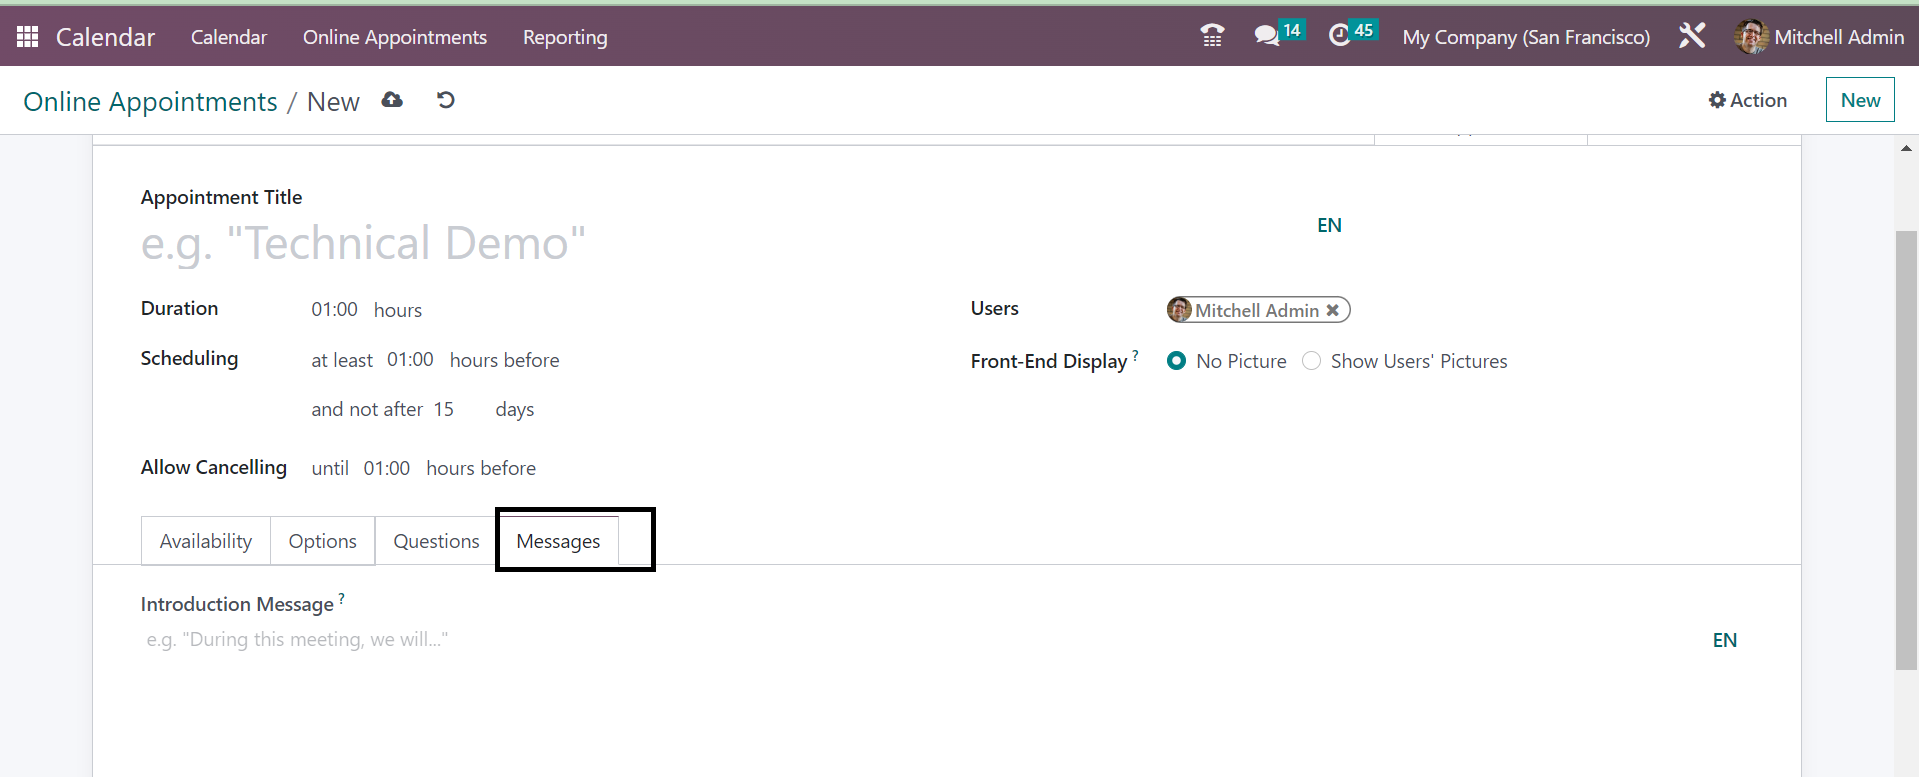
Now, the next Tab in the online appointment creation page is Message. The option helps you to add an introduction and confirmation based on the appointment that you are going to have. On completing the creation process, you can go to the Save icon.
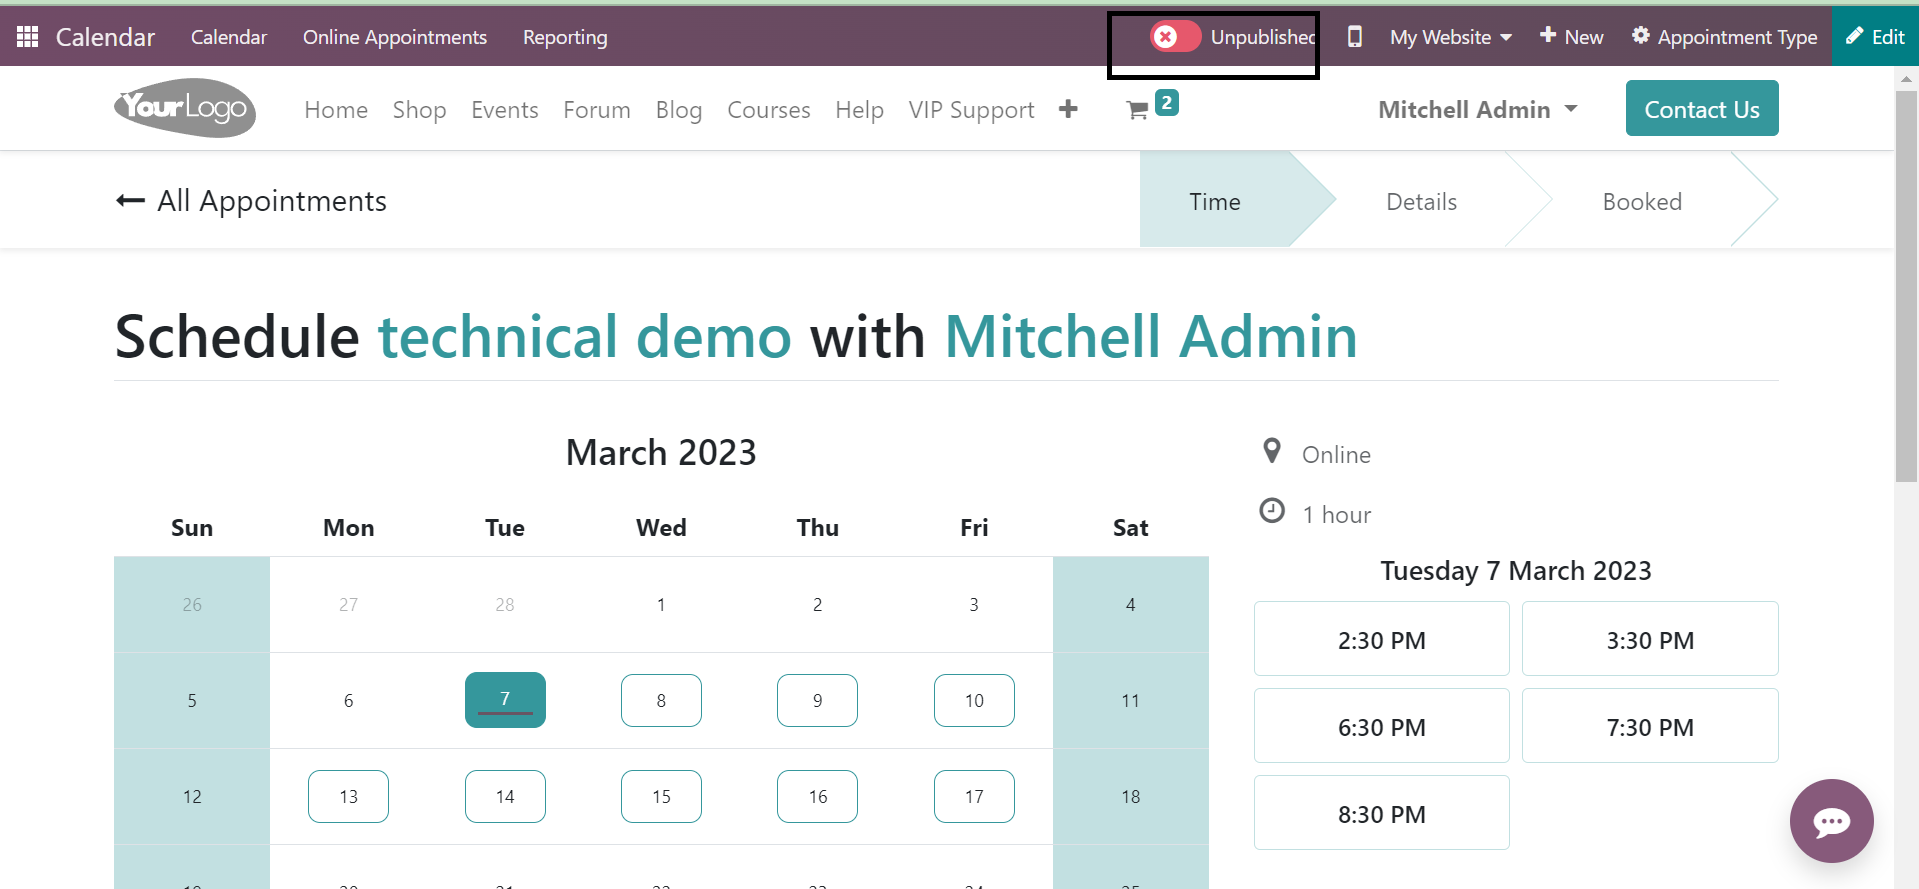
If you want this appointment to get published on the website, just go for the Go To Website option, as shown in the image below.

You can make the unpublished status on the page as published in the marked space in the image below.
On completing the publishing of the online appointments you will be provided with a share option.
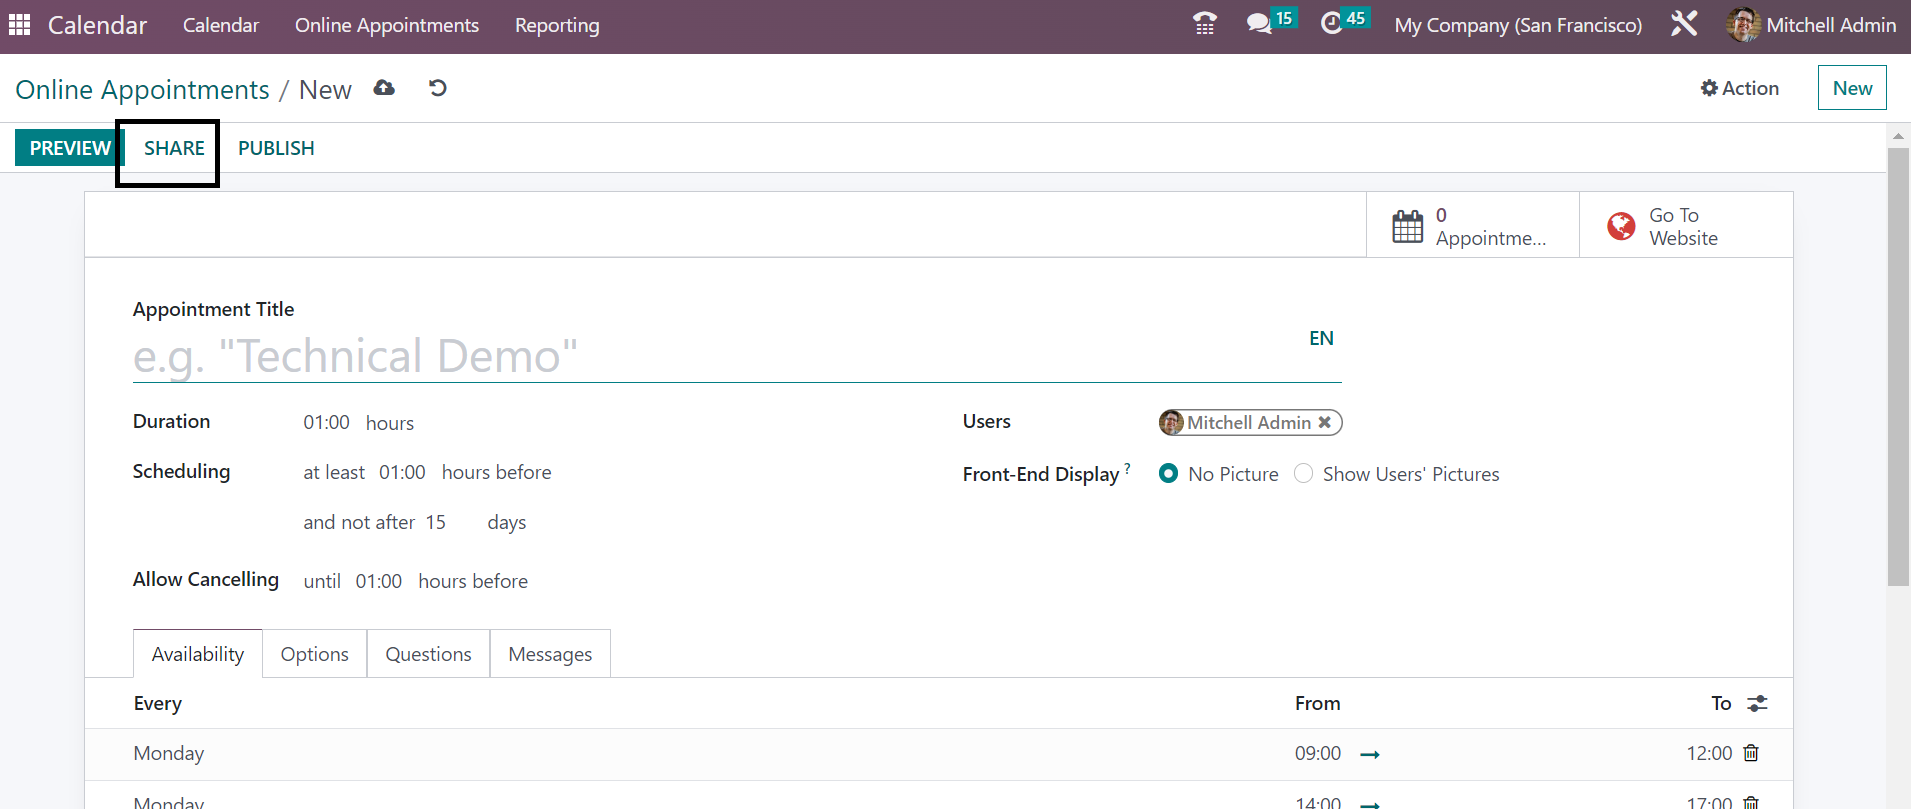
The share option helps you to share the link of the online appointment that you have created with the others in the company.
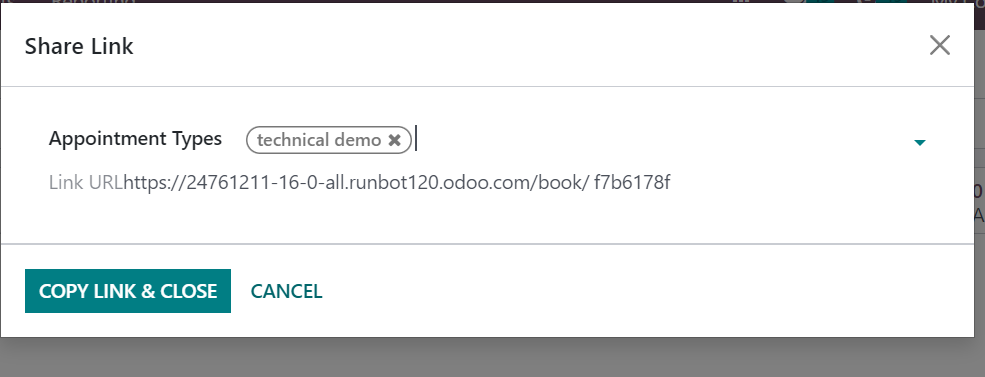
As in the image, the link provided can be copied and sent to others.
Configuration
Under the configuration option of the Calendar module, you will get the option of reminders, which helps you in setting alarms for the appointments, that can be online too.
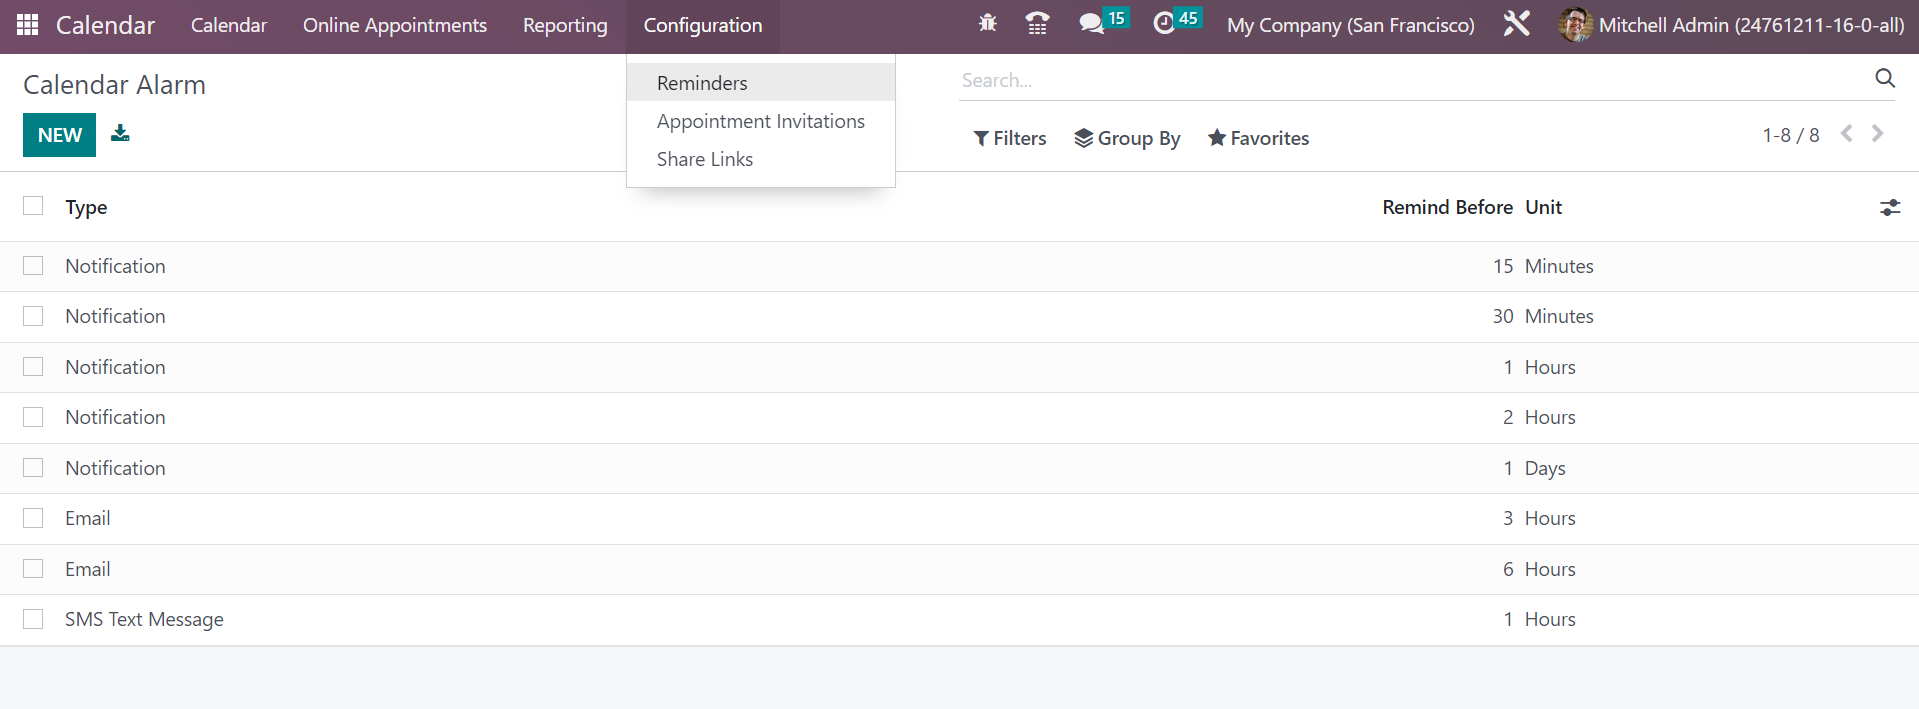
This option under the Calendar module helps you in reminding of the appointments that are going to get commenced. Reminders can be made more than one that assists the employees in order to avoid forgetting of a particular appointment. As shown in the above screenshot, you will get the calendar alarms from the reminders option in the configuration menu. On the page, you have all the created alarms on particular appointments. The page includes the information, such as type, reminder before, and unit options. In order to make a similar kind of reminder or alarm to the appointment, you can just go to the Create icon provided on the leftmost side of the page.
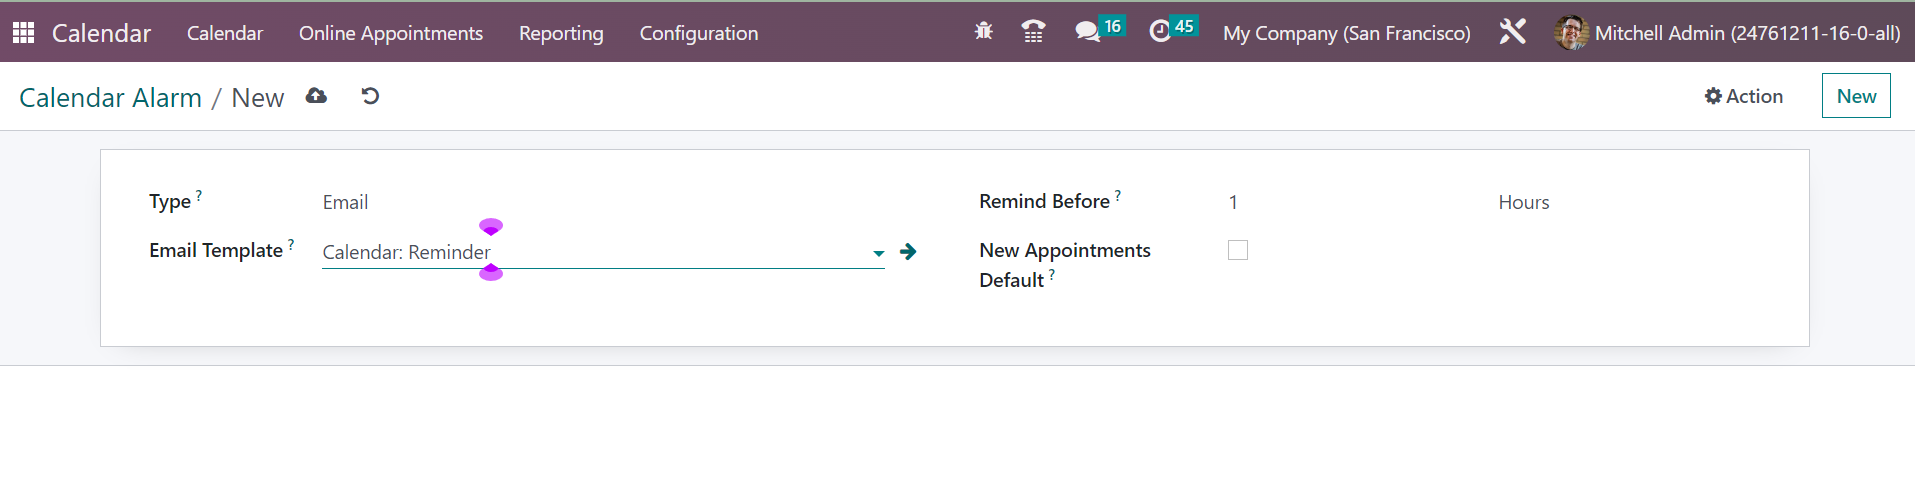
Here, you can provide the type of the reminder in the first space provided. The type can be Email, SMS, or notification. You have the space for including the email template as well. Now the Remind before option helps you to set the alarm at a specific minute, hours, or days before the commencement of the appointment. You can also trigger the new appointments default option in order to include alarms on new appointments. Now, go for the Save icon in order to get this newly created alarm added to the existing list. You have the appointment invitation and share link options as well under the configuration menu. All the shared links of the appointment will be available under the shared link page.
Reporting
The reporting option in the Calendar module helps you to analyze and understand the appointments that are made under this module. The online appointments and all other appointments will be available in this feature. The reporting of online appointments will be seen in the online appointment option under the reporting option.

As in the image, you will get the reports in graphical, pivot, calendar, and list view. Under the graphical view, you have a line, bar, and pie chart. Under the MEASURES option, you have a count and duration option, which can be selected according to our needs. The reports can be seen on a daily, weekly, or yearly basis as well.
So far we have gone through various uses of the Calendar module in the Odoo ERP Software and its distinct features in it. Surely, the module will be of great help in managing and controlling the appointments that can be online as well. You will get the reports of those appointments as well, which helps to analyze the appointments assigned on particular days.