SUBSCRIPTIONS
Subscription is one of the best and most influential marketing tools that can help your business to maintain a good relationship with customers. If you are wondering about how subscriptions can help to improve customer relationship management, then here is the explanation. With the best strategies, it is possible to retain the customer relationship for a longer period using subscriptions. Customers are more likely to buy products and services from the vendor or company to where they have a subscription. It prompts them to make more purchases with the same organization. With the assistance of an ERP system, you can systematically generate new subscription plans and update renewal programs.
Odoo open-source software offers a dedicated module for users to manage subscriptions and odoo-book-16-Subscription-related services. The Subscription module will manage everything related to subscribers of the various programs offered by the company. The advanced dashboard of this module will show the subscription status of each customer. Once you install the Subscription module from the Odoo AppStore, you will get the module icon on the main dashboard of Odoo. Clicking on the Subscription icon will lead you to the main dashboard of the module as shown below.
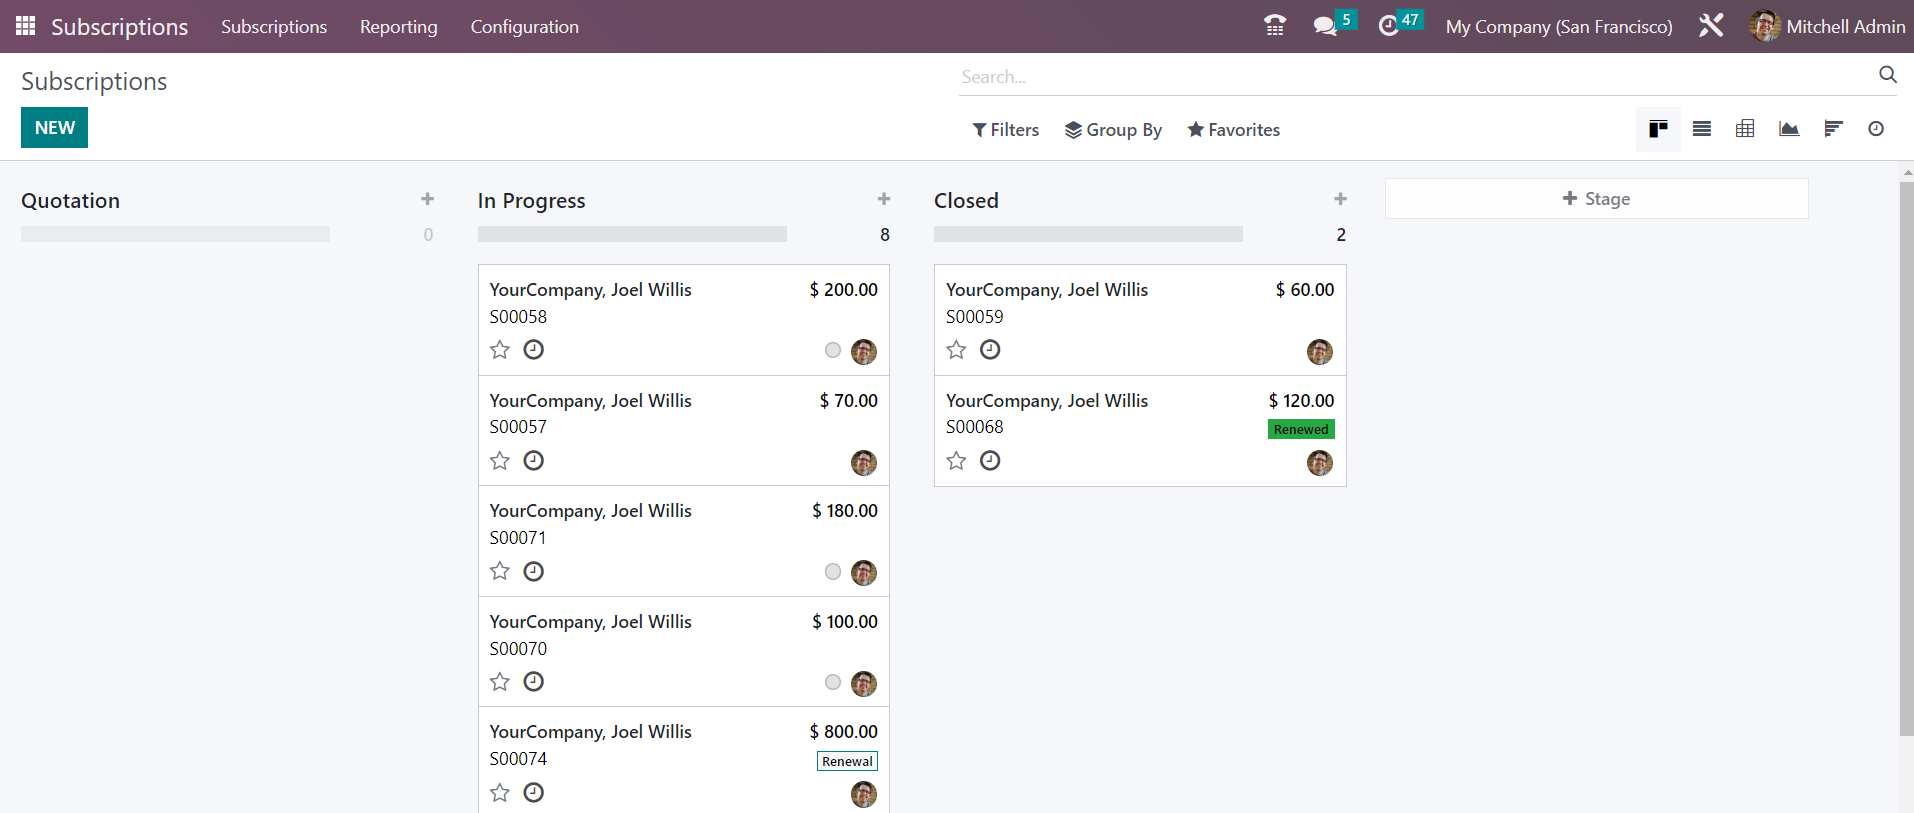
From the Kanban view of this platform, you will be able to see the subscription of different customers under different stages. In order to create new stages, you can use the +Stage button available on the screen. If you want to add a new subscription under a particular stage, you can use the + icon given on the title of each stage. In order to schedule various activities for the subscriber, you can use the clock icon given on each subscription. The available Filters are My Orders, Unassigned, Subscriptions, Alive, To Renew, Failed Payment, Closed, Not Started Yet, Good Health, Bad Health, Order Date, and Date of Next Invoice. In the Group By option, you can find Salesperson, Sales Team, Customer, Template, Stage, End Date, Next Invoice Date, Recurrence, Pricelist, and Referrer options for grouping the available subscriptions.
Apart from the Kanban view, you can alter the view into List, Pivot, Graph, Cohort, and Activity. Now, let’s create a new subscription using the New button.

This is the form view of the subscription that appears after clicking on the New button. Before creating a new subscription for customers, you can create a new subscription plan and respective product in the module. After that, you can configure the plan and product into the new subscription. Apart from that, it is possible to create quotations using the subscription product from the sales module. After confirming the sales order, Odoo will automatically record the corresponding subscription in the Subscription module.
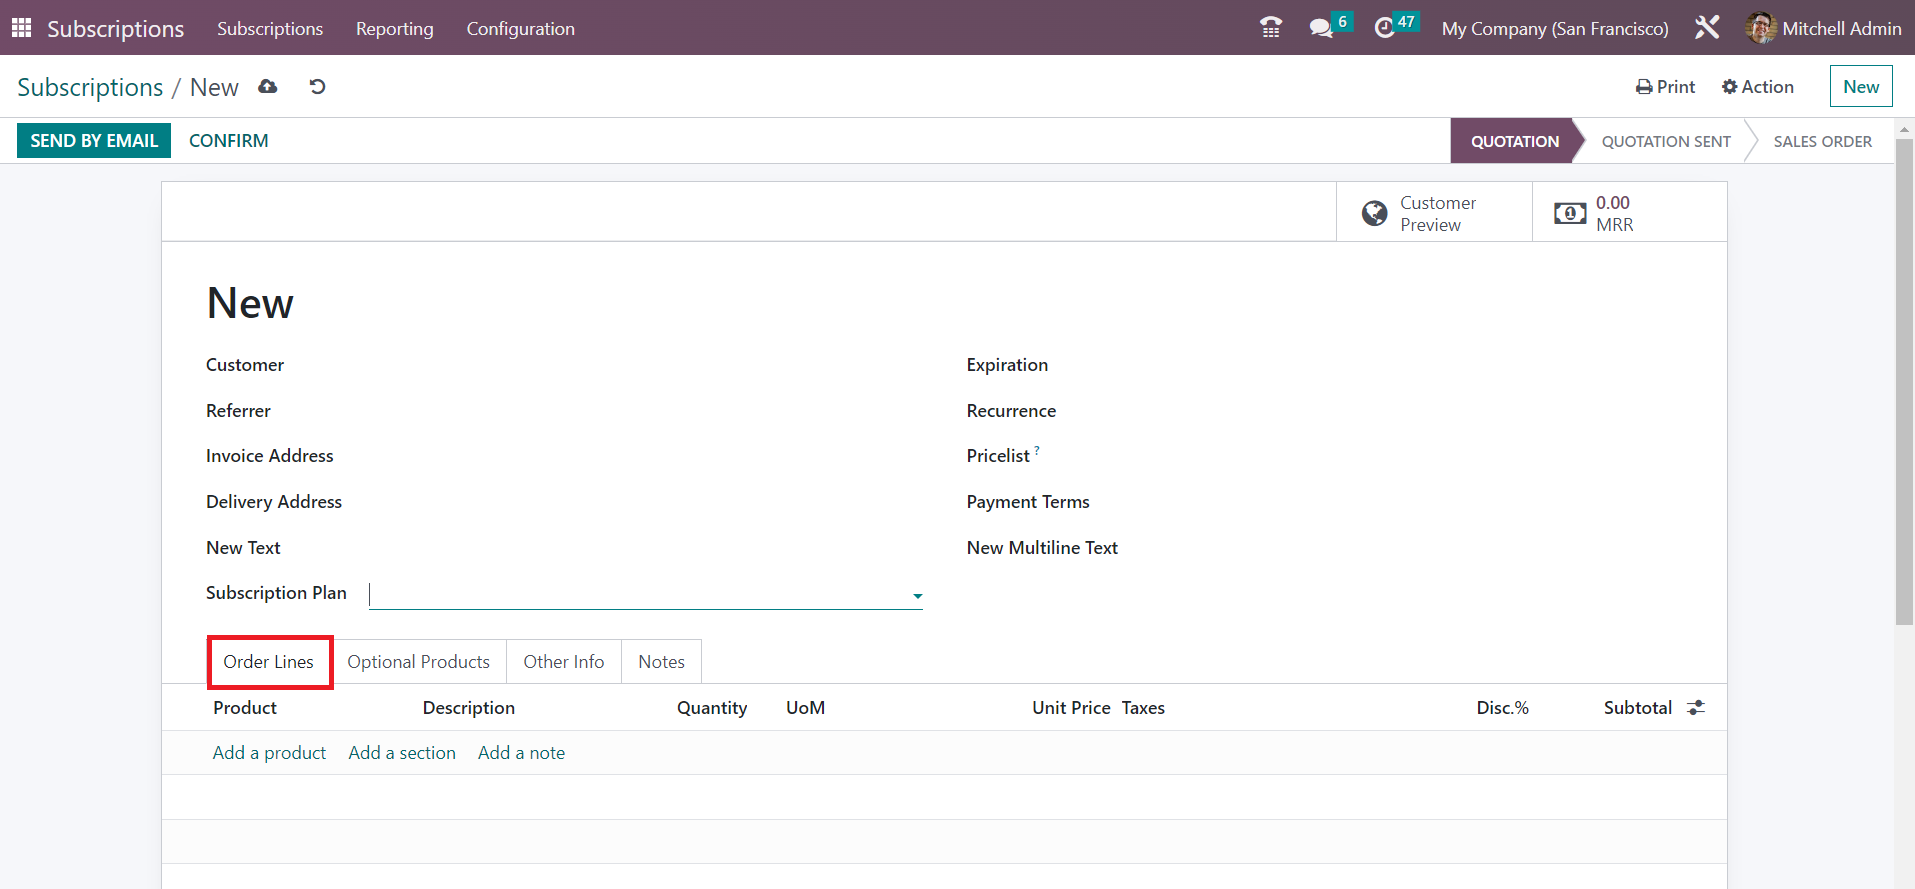
Here, you can mention the name of the Customer in the given space. The name of the Referrer who suggested this subscription to the customer can be mentioned in the corresponding field. In the respective fields, you can specify the Invoice Address, Delivery Address, New Text, and Subscription Plan. The details related to the invoicing policy and payment terms will be included in the subscription plan. The subscription will end on the date mentioned in the Expiration field. If the customer wants to repeat the subscription in a regular interval, you can mention the Recurrence period. The Pricelist, Payment Terms, and New Multiline Text related to the subscription can be added in the respective spaces.
You can use the Order Lines tab to mention the subscription products one by one. For this, you can use the Add a Line button. This tab will show the details of the Product, Description, Quantity, UoM, Unit Price, Taxes, Discount %, and Subtotal.

You can use the Optional Products tab to add the optional products that come along with the subscription plan.
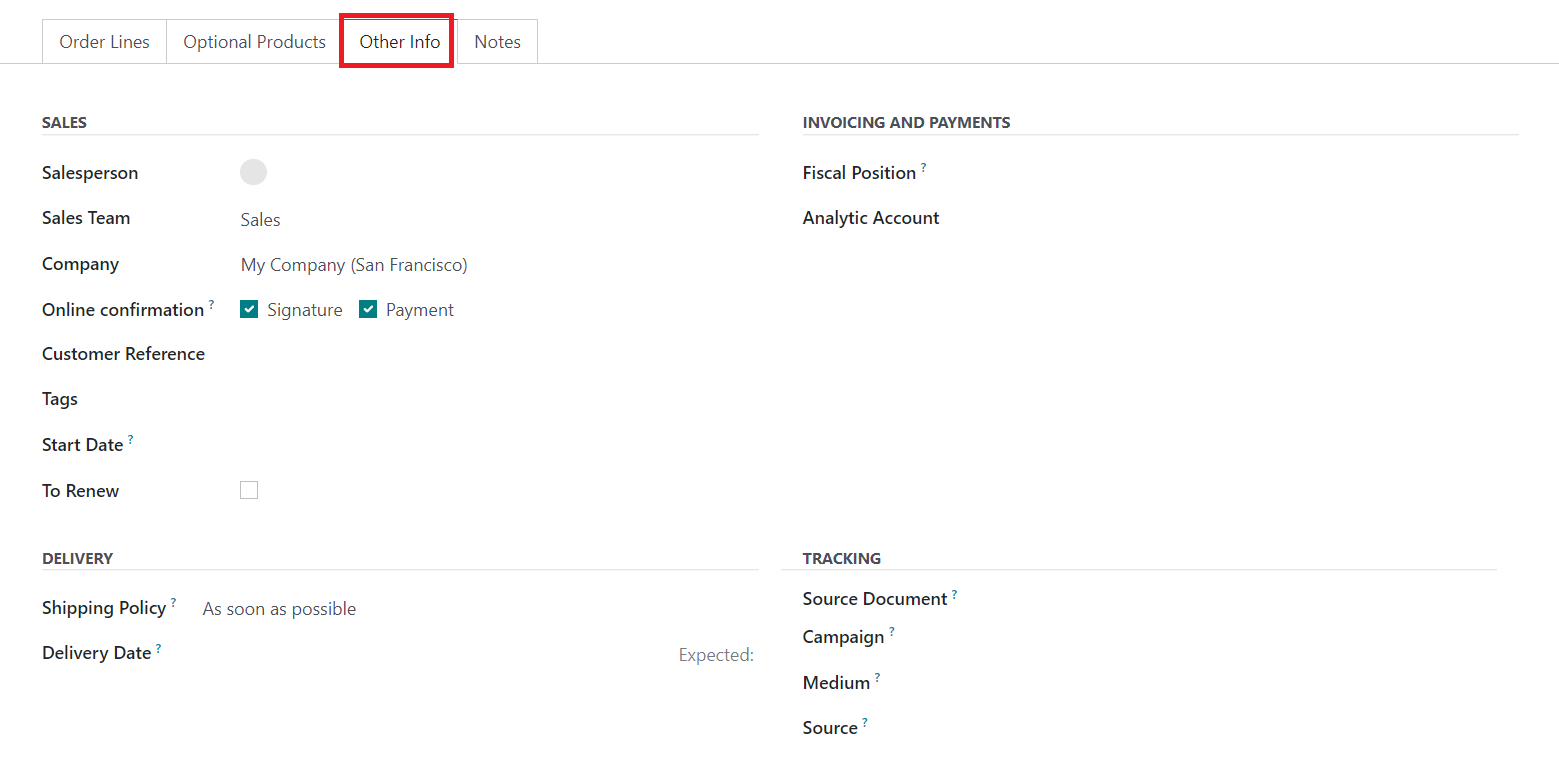
In the Other Info tab, you can add details related to the Sales, Delivery, Tracing, Invoicing, and Payments. Under the Sales session, you can assign a Salesperson and Sales Team to manage this subscription. The name of the Company will be available in the respective field. If you want to allow the customer to sign and complete payment via online, you can activate the Signature and Payment option from the Online Confirmation field. Suitable tags for this particular subscription can be mentioned in the Tags field. You can set a date in the Start Date field and the subscription period will begin on this particular date. If you are creating this subscription as a part of the renewal plan, you can enable the To Renew field. The Fiscal Position and Analytic Account can be provided in the respective field for the management of invoicing and payments for this subscription.
In the Delivery session, you can set the Shipping Policy for this subscription as As soon as possible or When all products are ready based on the demand of the customer. Along with this, you can set a Delivery Date for the subscription in this session. For Tracking purposes, you can provide Source Document, Campaign, Medium, and Source in the respective fields.

Any internal notes related to the subscription can be specified in the Notes field.
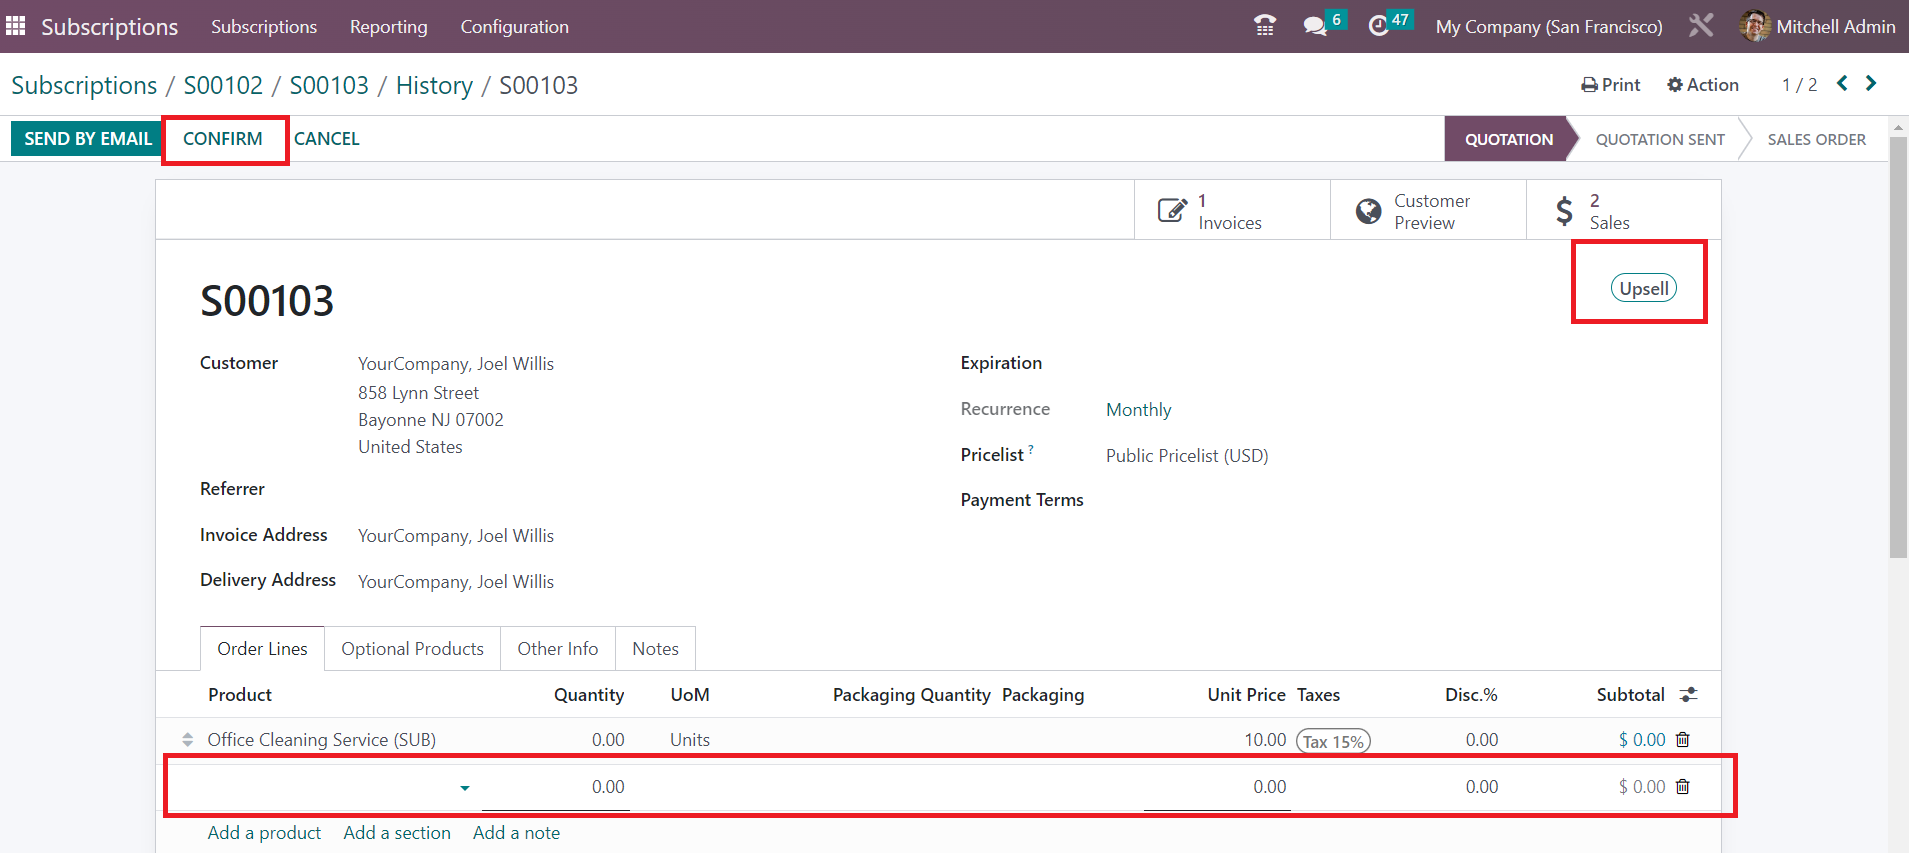
After adding all details, you can click on the Confirm button to confirm the quotation for the subscription.
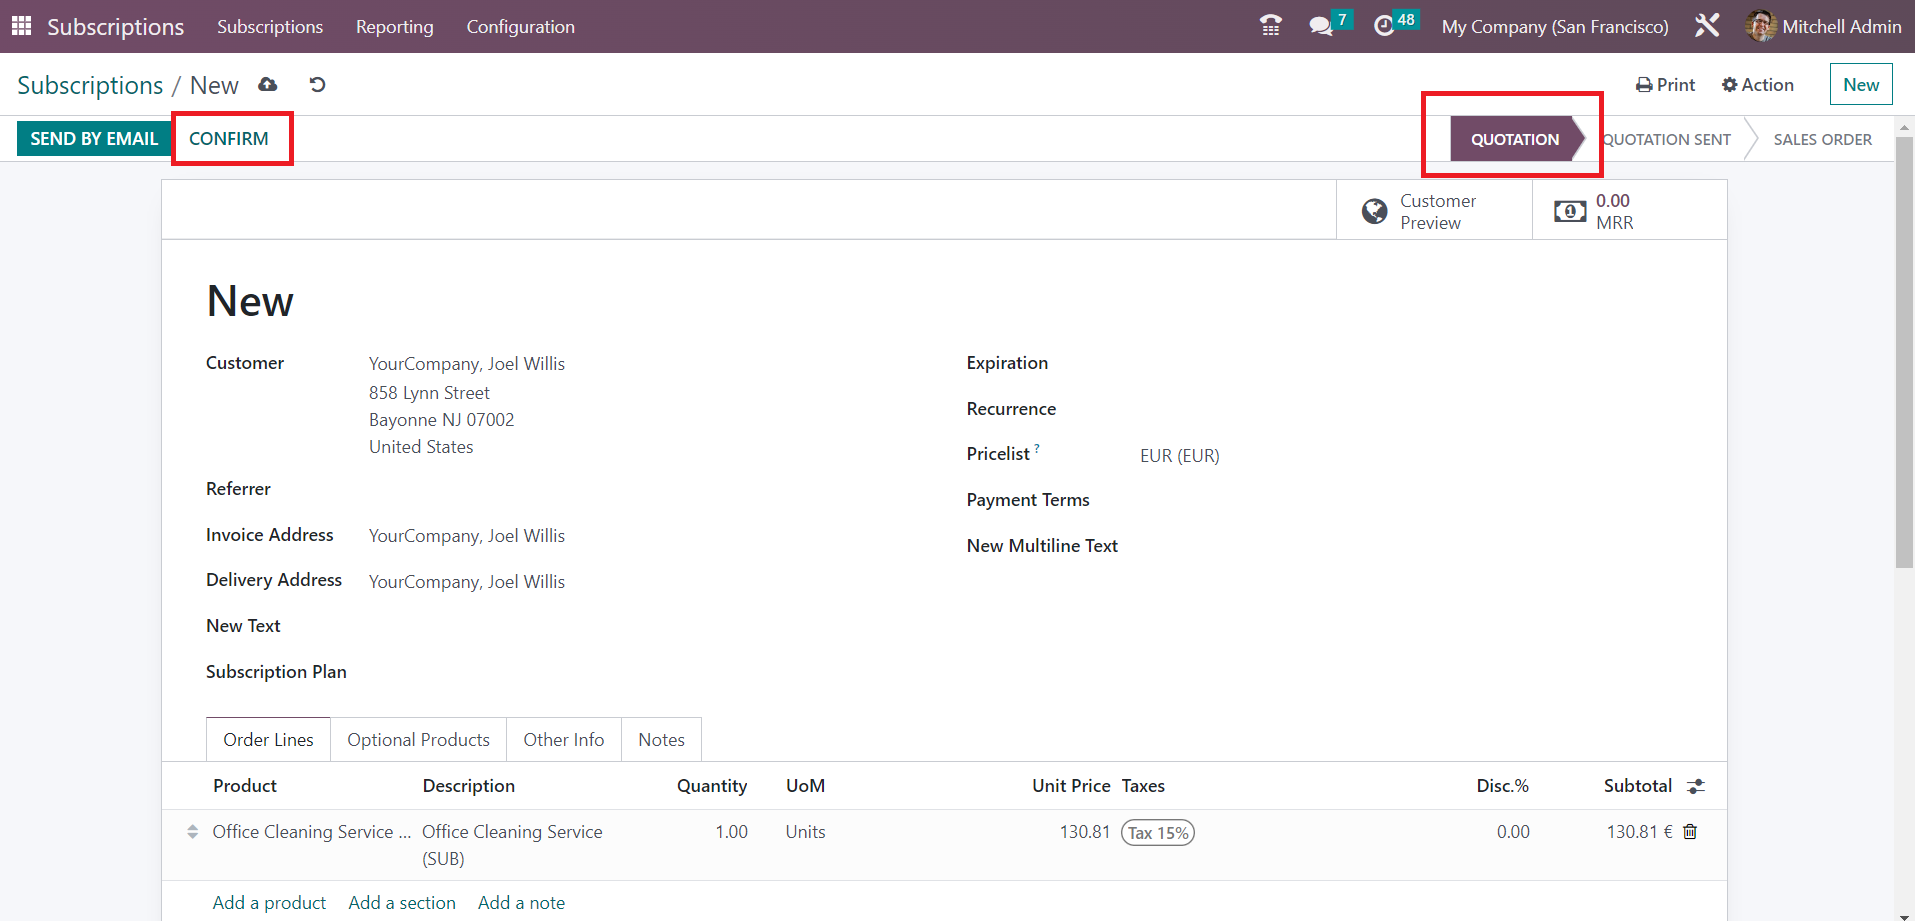
The Send By button will send this quotation via mail to the respective customer. The Customer Preview smart button can be used to get a customer’s preview of the quotation. If the customer is satisfied with the quotation, they can sign the quotation and complete payment online from the customer preview window.
Clicking on the Confirm button will confirm the Sales Order. Now, you can generate an invoice for the sales order using the Create Invoice button.
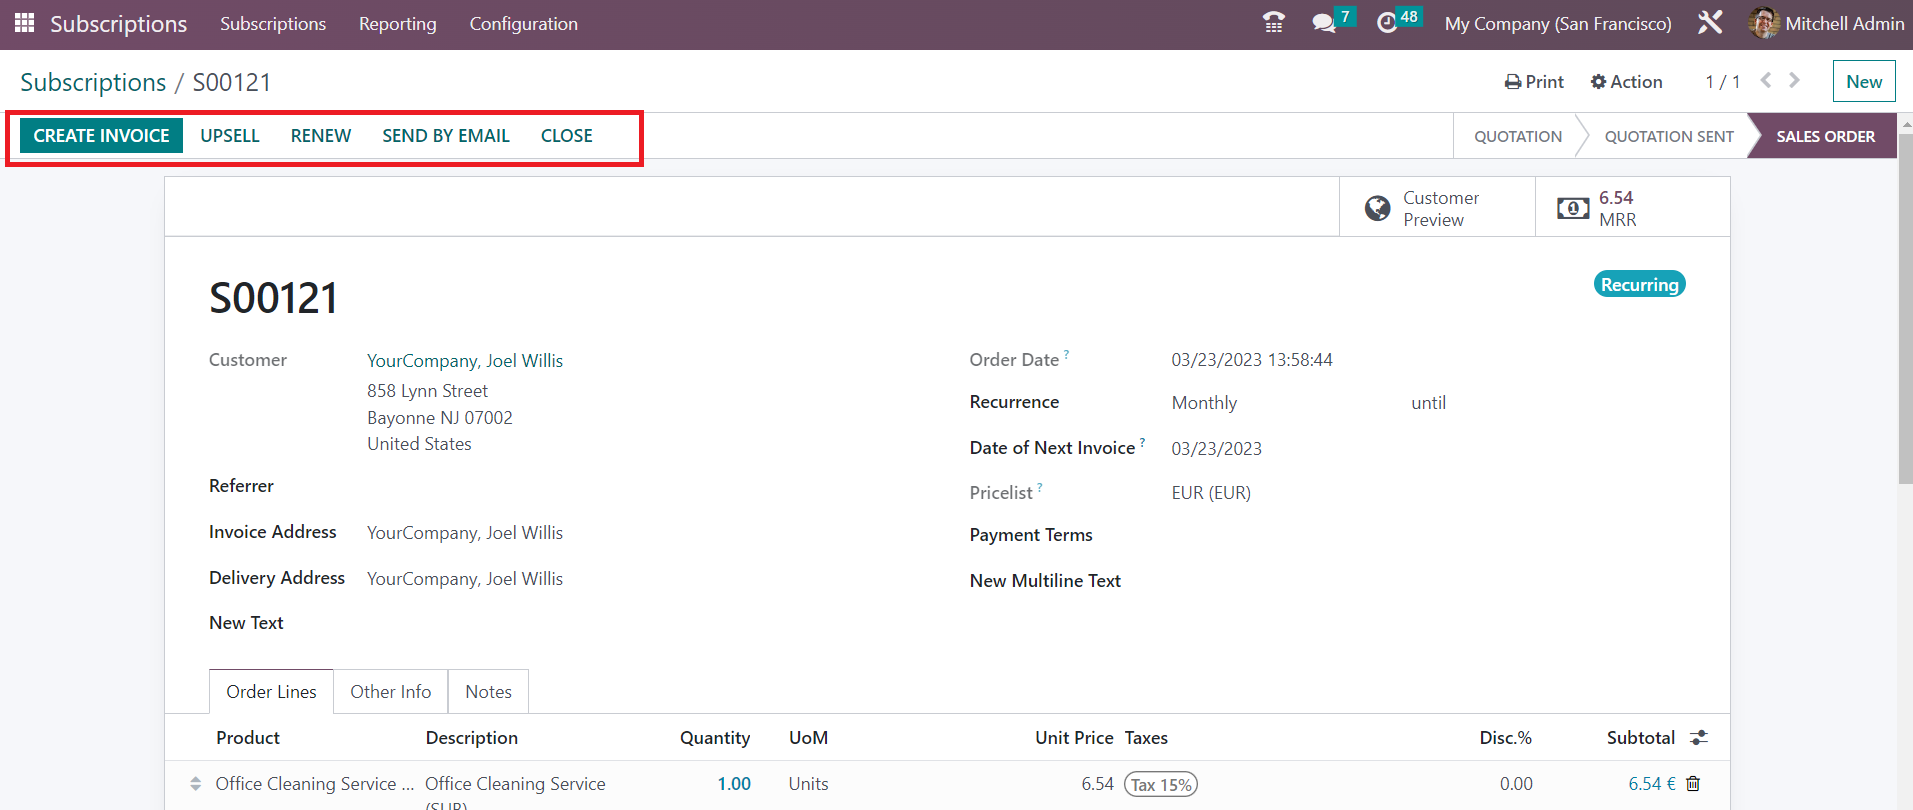
The Renew button can be used for the renewal process. If you want to offer more features to the customer after starting the subscription, you can use the Upsell button
Subscriptions to Renew
At the end of the duration of the subscription, the customer can renew their subscription in the Odoo Subscription module. Before the end date, you can renew the subscription to get the same benefits. In order to manage the renewal of subscriptions, Odoo offers a separate platform in the module. Under the Subscription menu of the module, you can find the Subscriptions to Renew option.
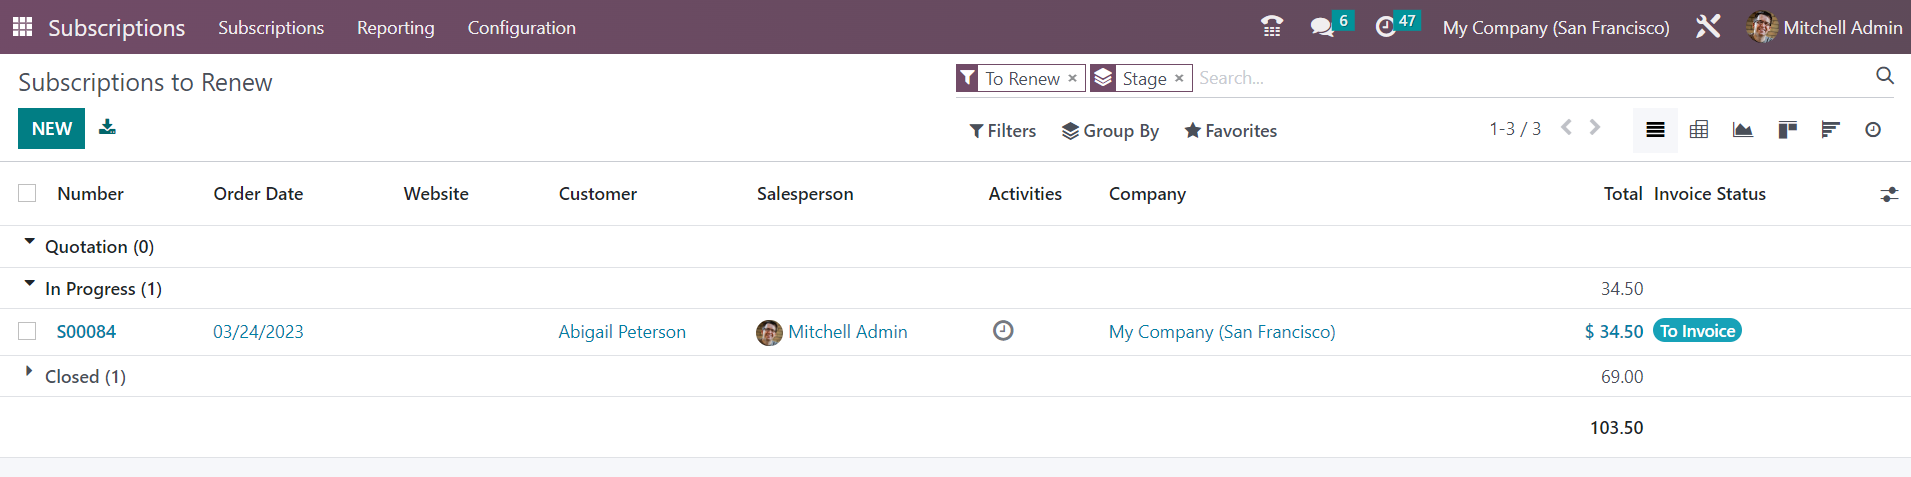
This platform will show all subscriptions that need to be renewed. The list view displays the Number, Order Date, Website, Customer, Salesperson, Activities, Company, Total, Invoice, and Status. In order to manage the renewal of a subscription, you can select that subscription from the window.
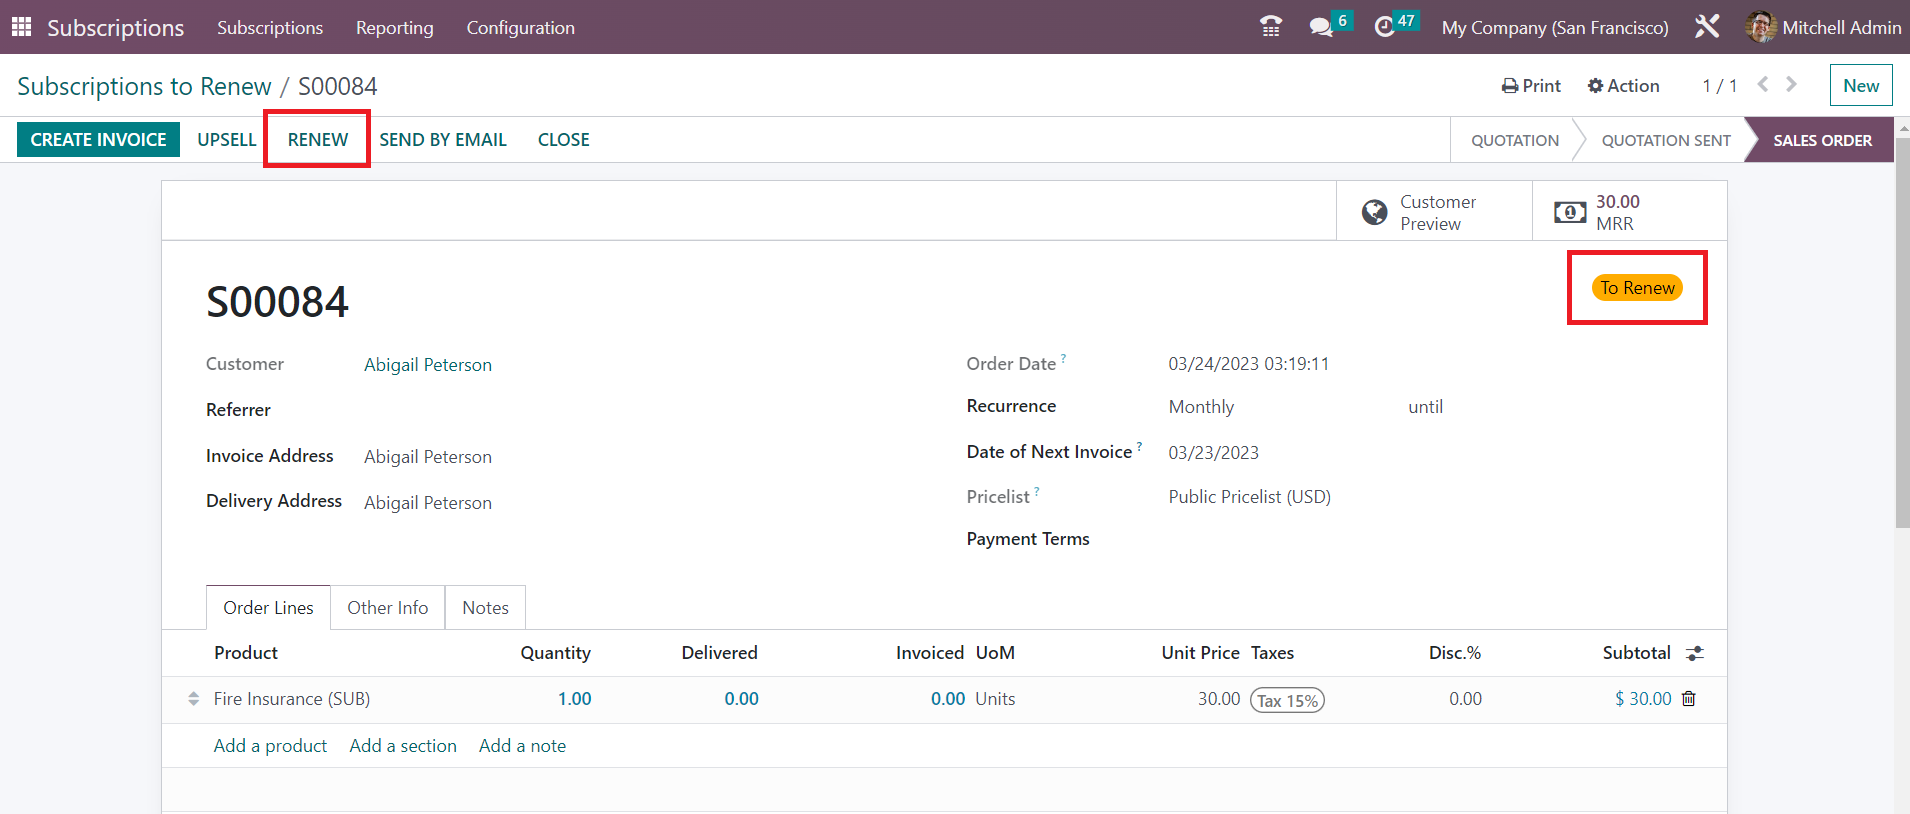
A form view of the renewal window will open as shown in the screenshot above. Here, you can see the status of the subscription as To Renew. In order to perform the renewal operation, you can use the Renew button. This will generate a renewal sales order for the subscription as shown below.
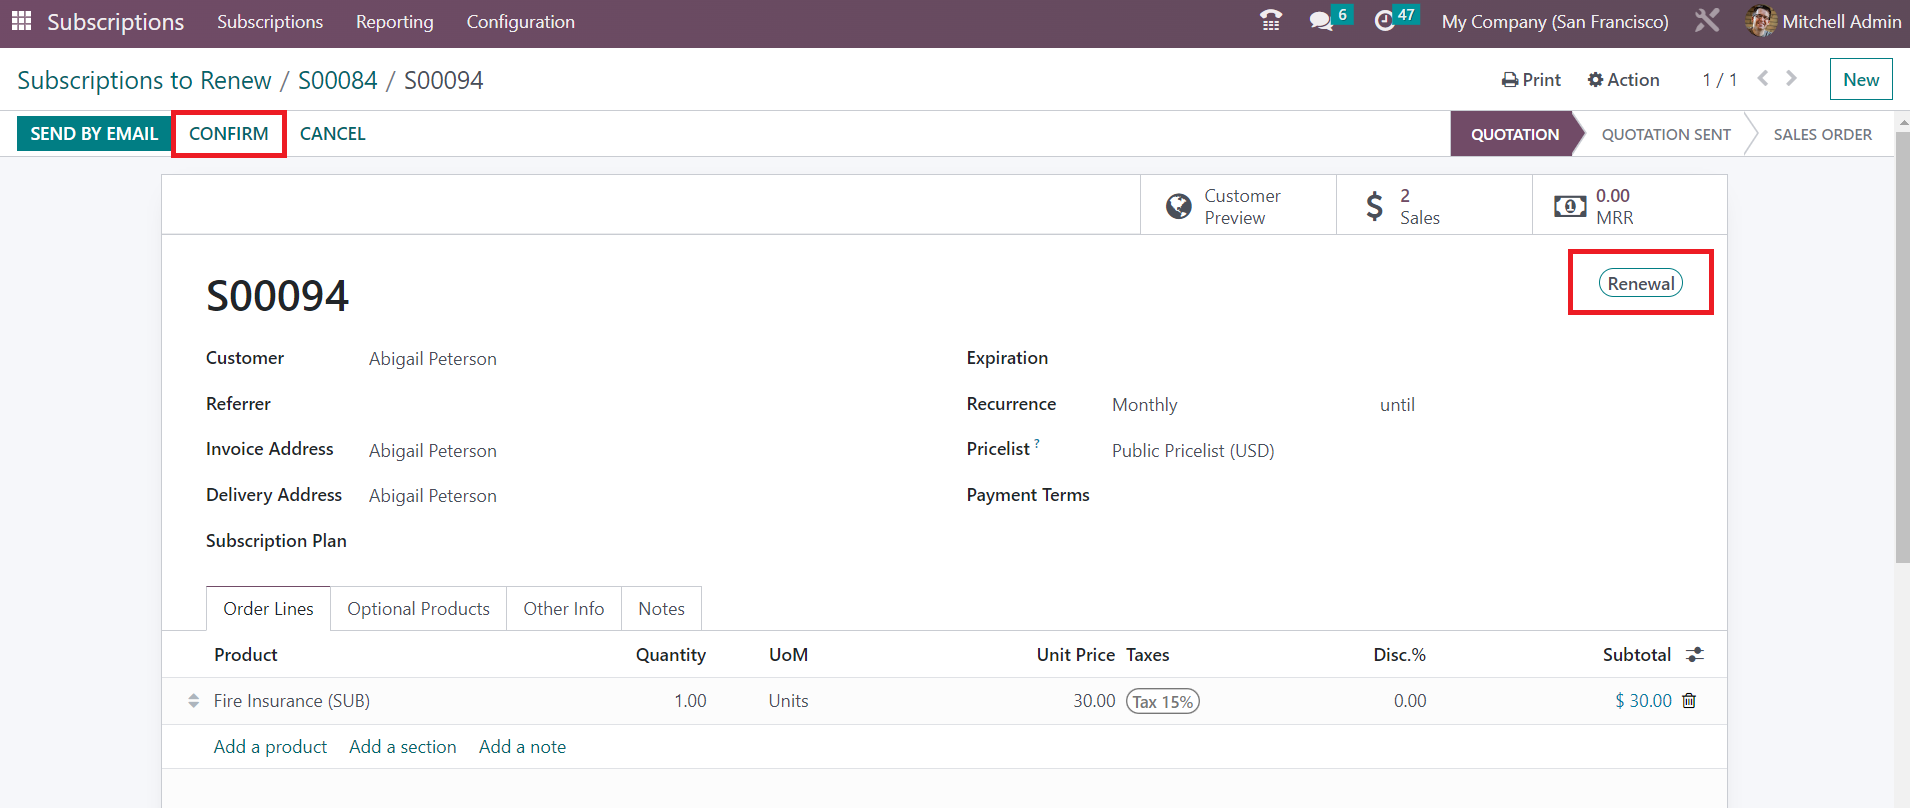
This is the Renewal sales order of the subscription. You can click on the Confirm button to confirm the order and then generate an invoice. Once you confirm the order, your subscription will be renewed.
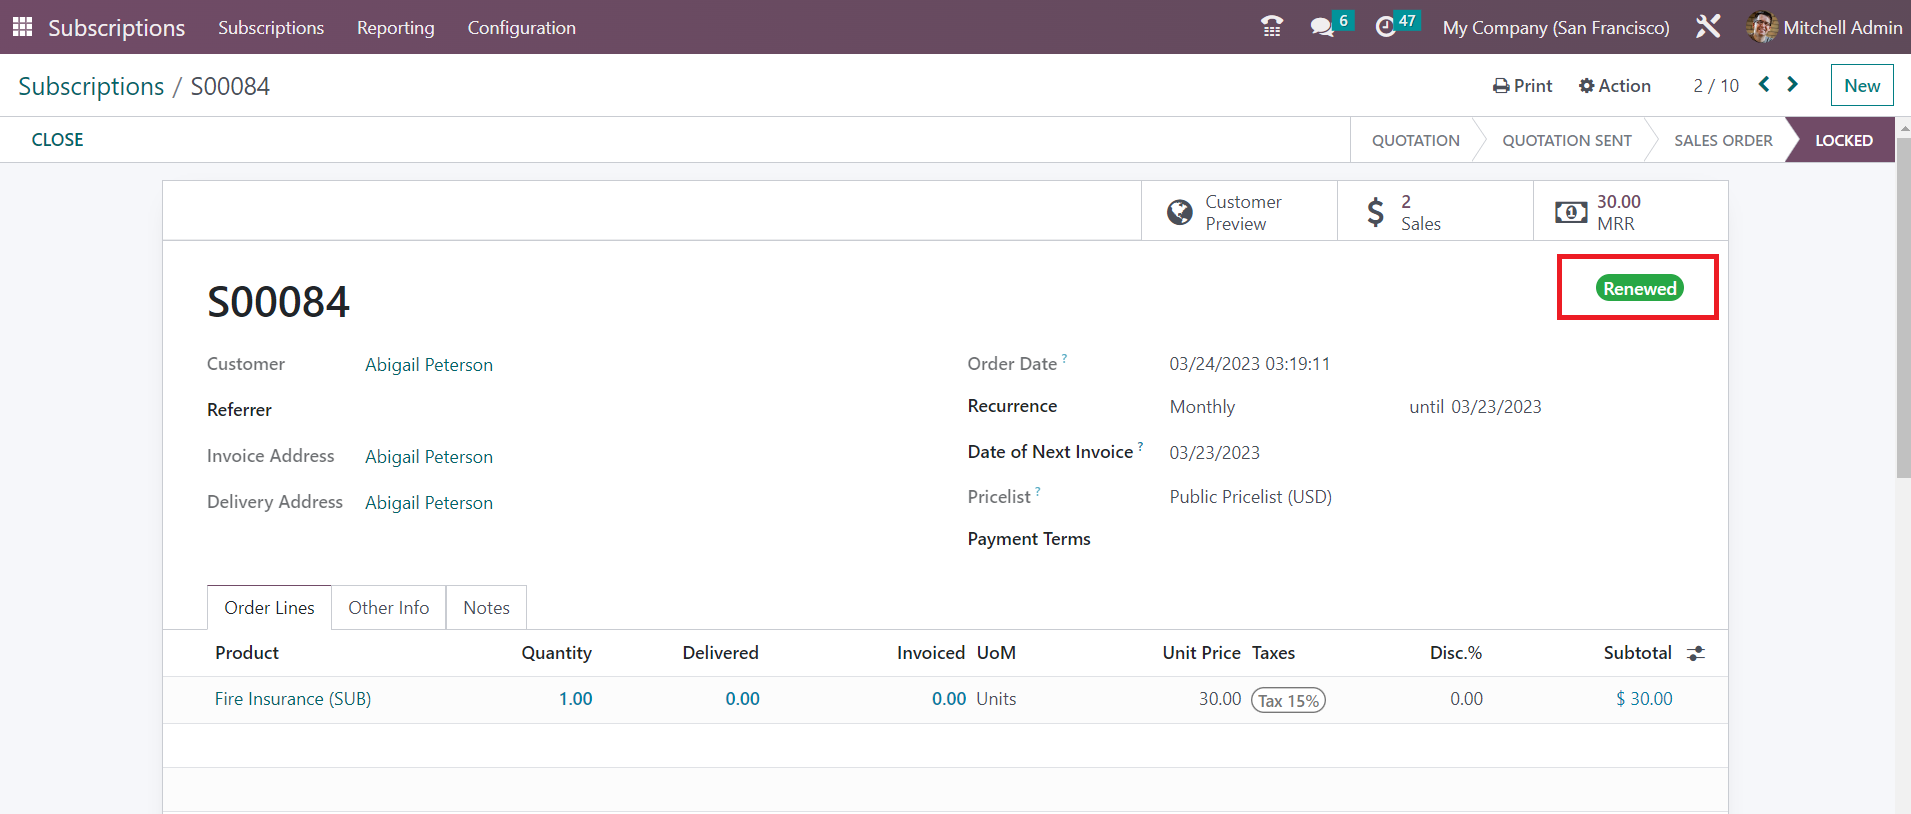
The status of the old subscription can be seen as Renewed, as highlighted in the screenshot above. By following this method, you can renew your subscription.
Upsells
Upsell is an effective marketing strategy used to sell more products of a company. Via upsell, you can upgrade old subscriptions to new subscriptions by including additional offers and subscription products. This can be used to provide more convenient and beneficial offers to your customers. You can find the Upsells option in the Subscription menu of the module. This platform will show the list of sales orders generated for upselling products.
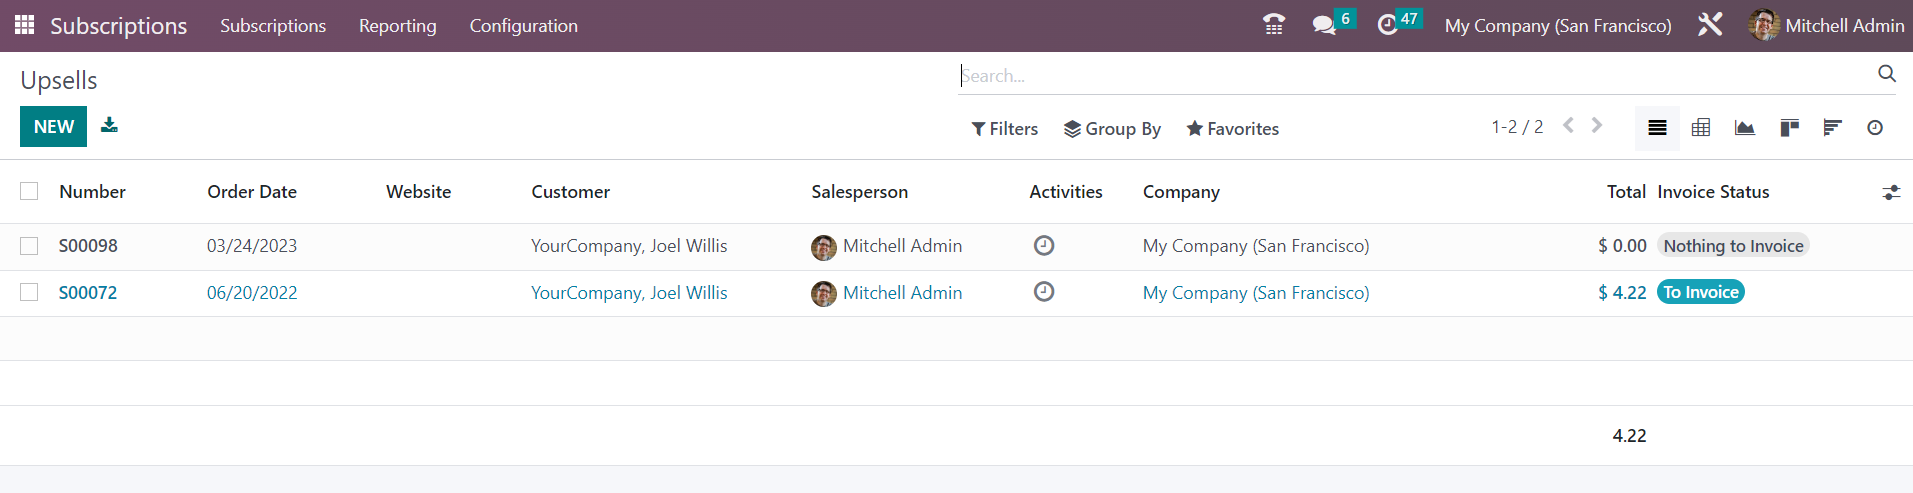
The window displays the Number, Order Date, Website, Customer, Salesperson, Activities, Company, Total, Invoice, and Status.
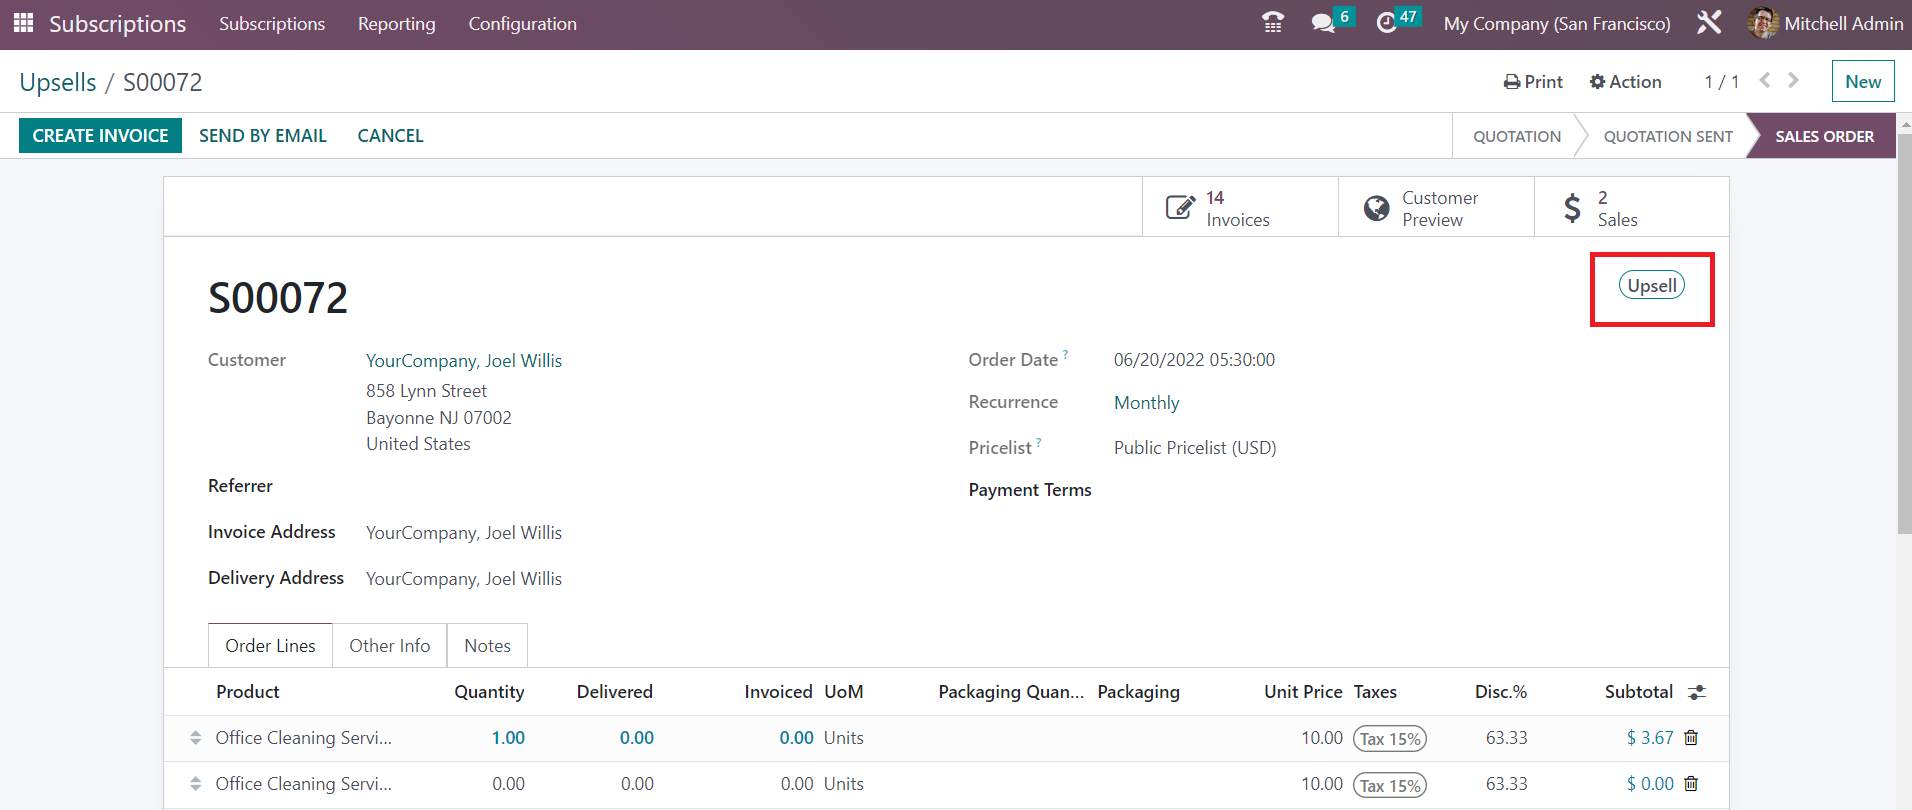
You can find the Upsell status on the sales orders as shown in the screenshot above.
Now, in order to add upsell products to an existing subscription, you can select one subscription from the main dashboard of the module.
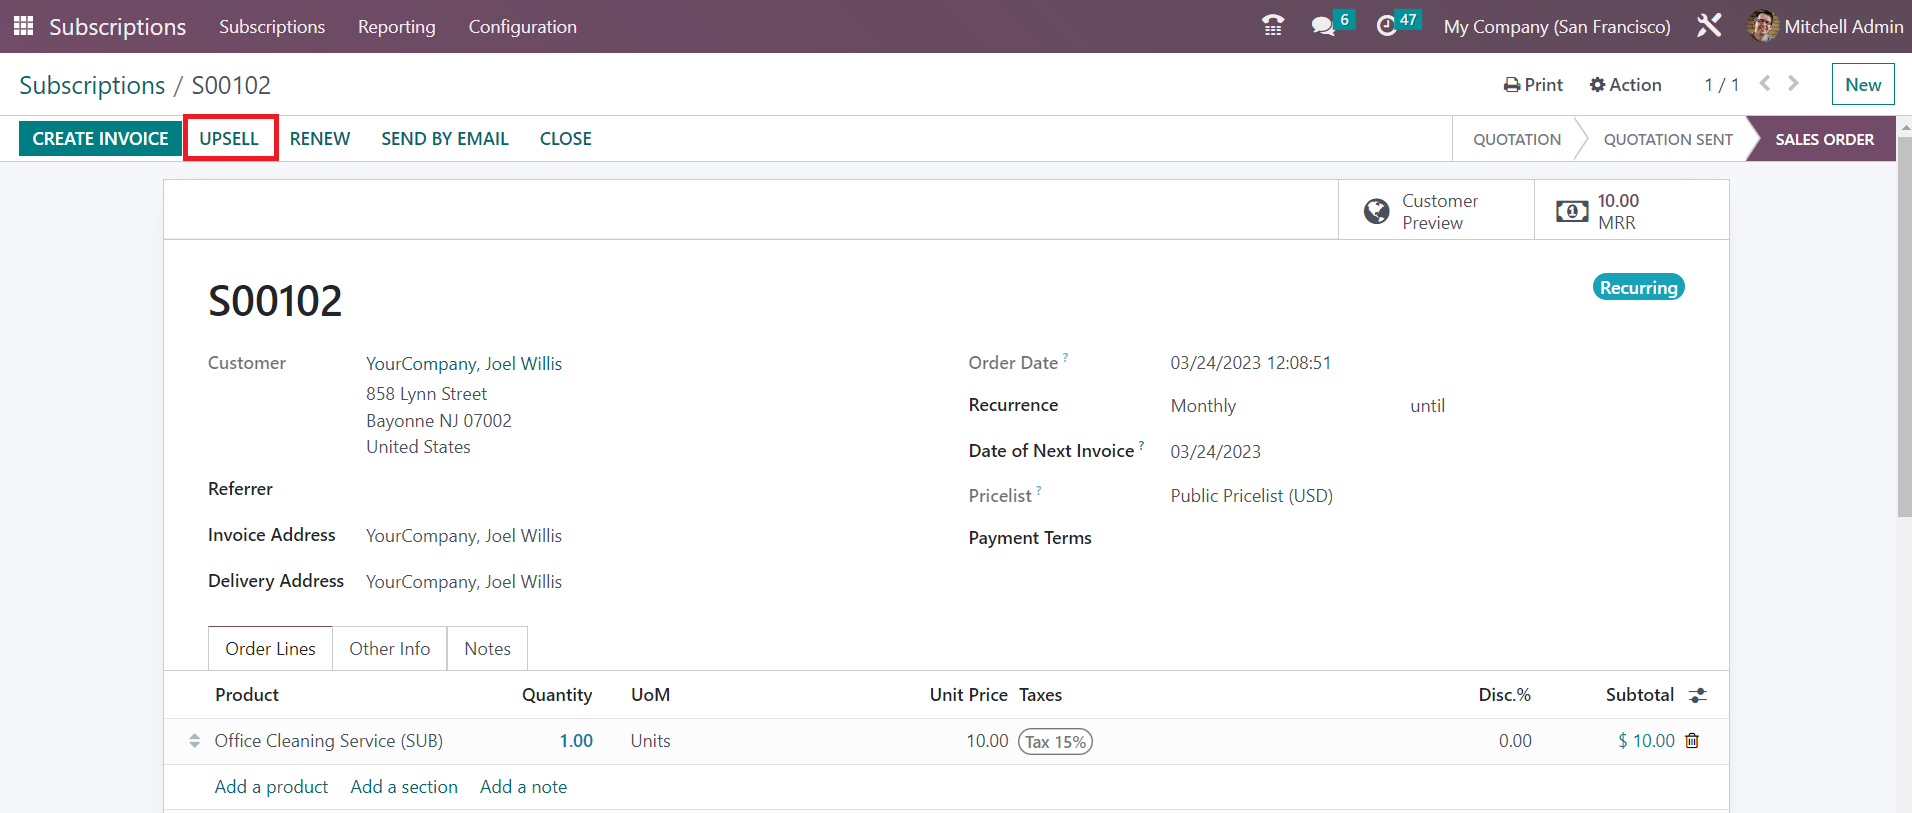
In the form view, you can find the Upsell button as shown in the image above. Clicking on this button will generate a quotation for the upsell products. You can add new products to this quotation. The quotation with new products can be sent to the respective customer for approval.
Once you get approval from the customer, you can use the Confirm button to convert the quotation into a sales order. The new upsell products will be added to the subscription once you confirm the order.
Subscription Products
The configuration of the subscription product is the same as that of the product configuration we detailed in the modules like Sales and Inventory. In the Subscription module, you can configure products under the Products menu. In order to get the list of the subscription products, you can use the Filter Can be Recurring on this platform.
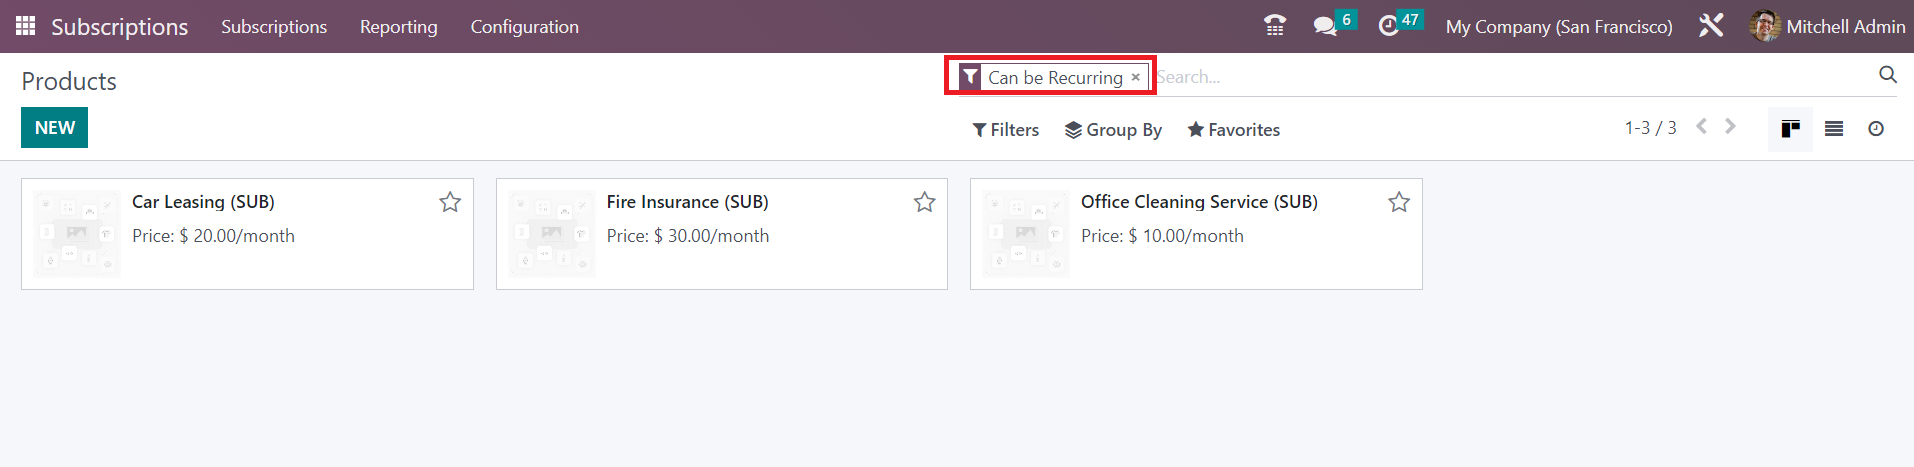
Using this filter will give the details of the recurring products on your screen.
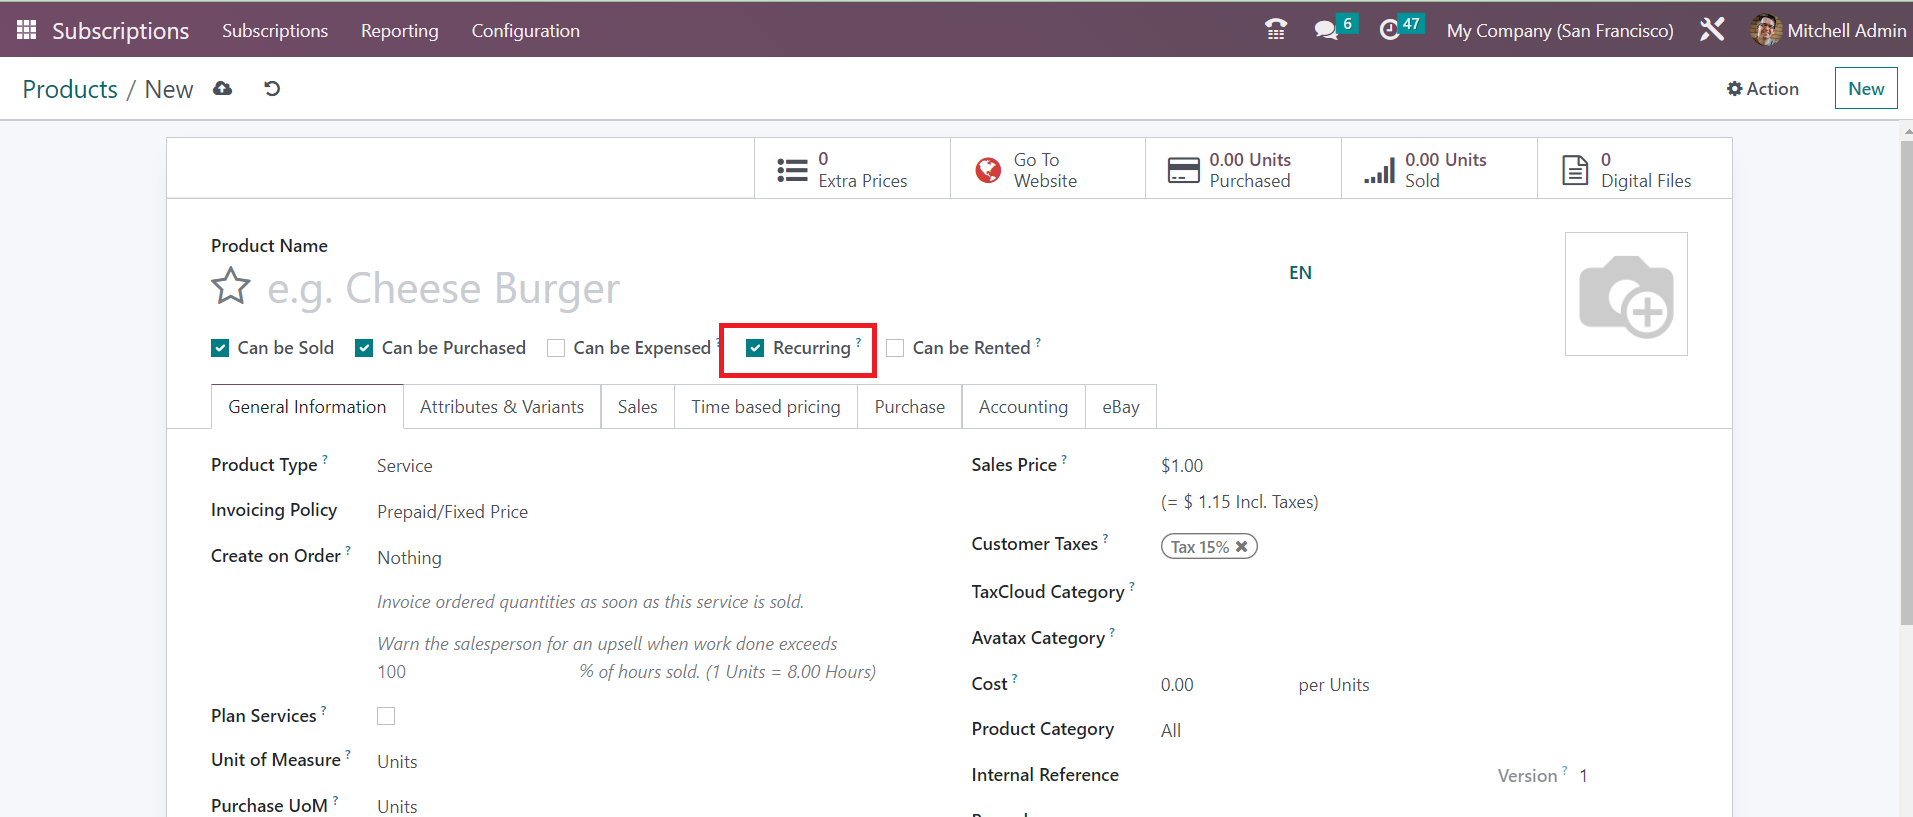
While configuring a subscription product, don’t forget to enable the Recurring option from the form view. By doing so, Odoo will automatically generate a subscription for this product whenever you confirm a sales order with this product.
Subscription Plans
Before creating a new subscription, you can create suitable subscription plans for your customers in the Subscription module. The subscription plans in Odoo 16 act like a template for new subscriptions. Using these plans, you can easily create new subscriptions for customers. In order to create templates for subscription, you can go to the Configuration menu and select the Subscription Plan option. The platform will show some pre-configured plans, as shown below.
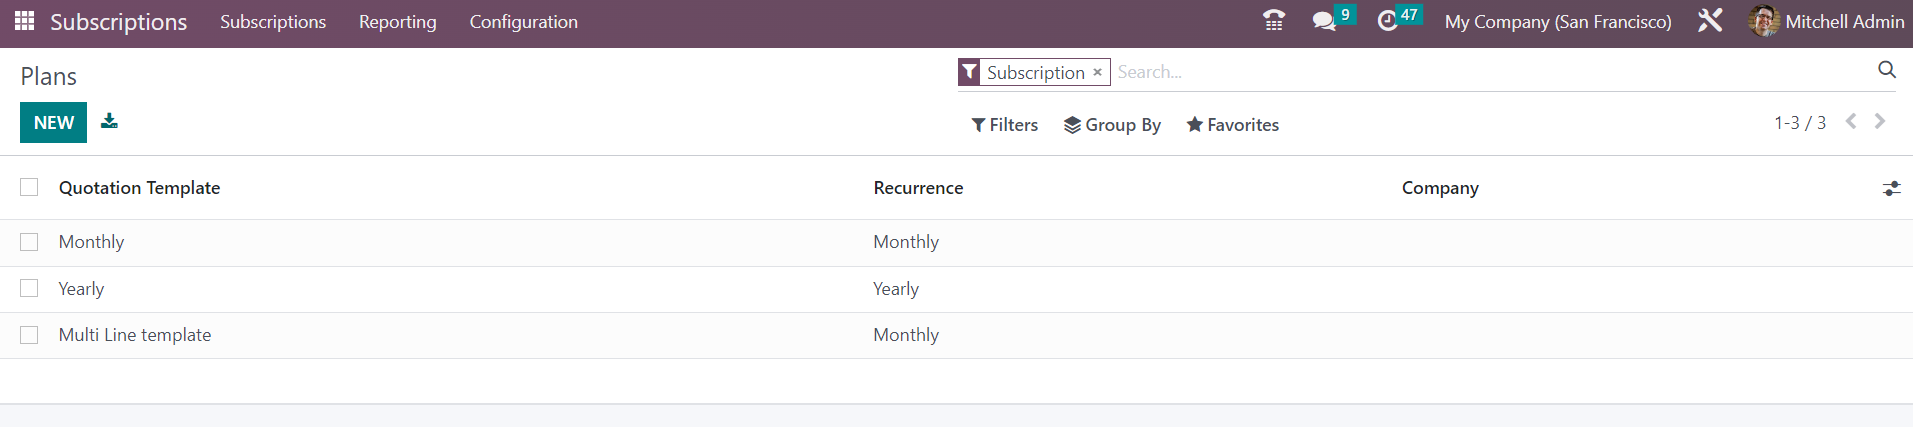
The list view includes the Quotation Template, Recurrence, and Company. Use the New button to create a new subscription plan.
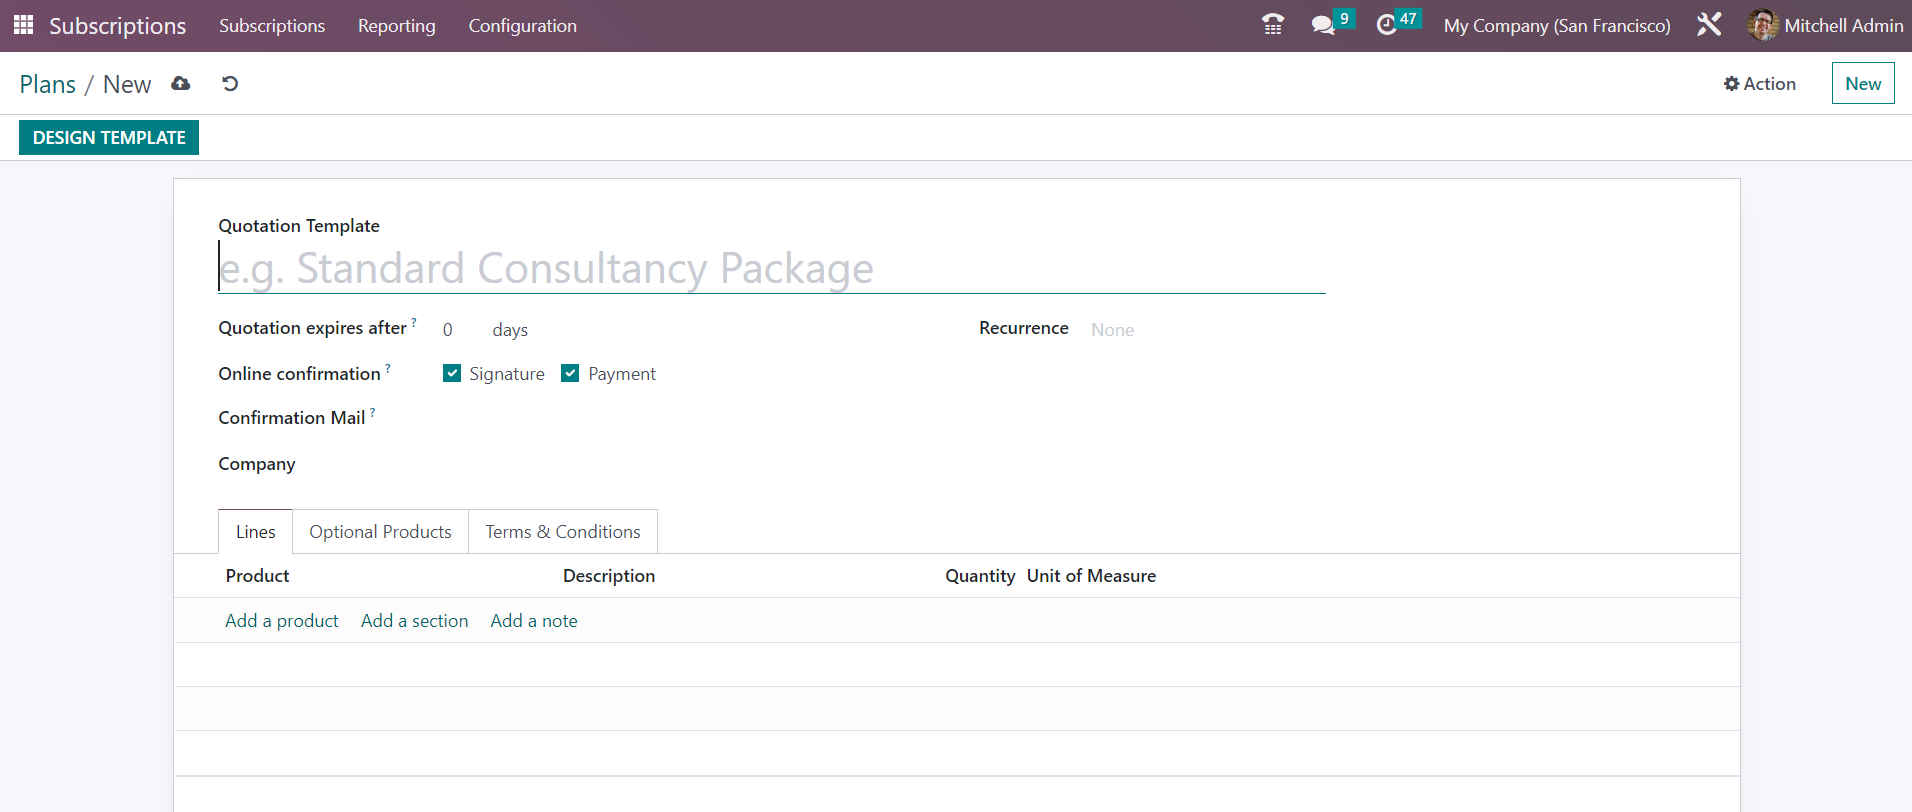
In the given space, you can provide a suitable title for the Quotation Template. The number of days for the validity date computation of the quotation can be specified in the Quotation Expires After field. By doing so, Odoo will automatically set the Expiration of the quotations created with this plan. By activating the Signature and Payment options from the Online Confirmation field, Odoo allows you to request an online signature and payment to the customer in order to confirm the order automatically. You can add an email template in the Confirmation Mail field. This mail will be sent to the customer at the time of the order confirmation. The name of the Company can be specified in the corresponding field. Set the Recurrence period of the plan from the given options.
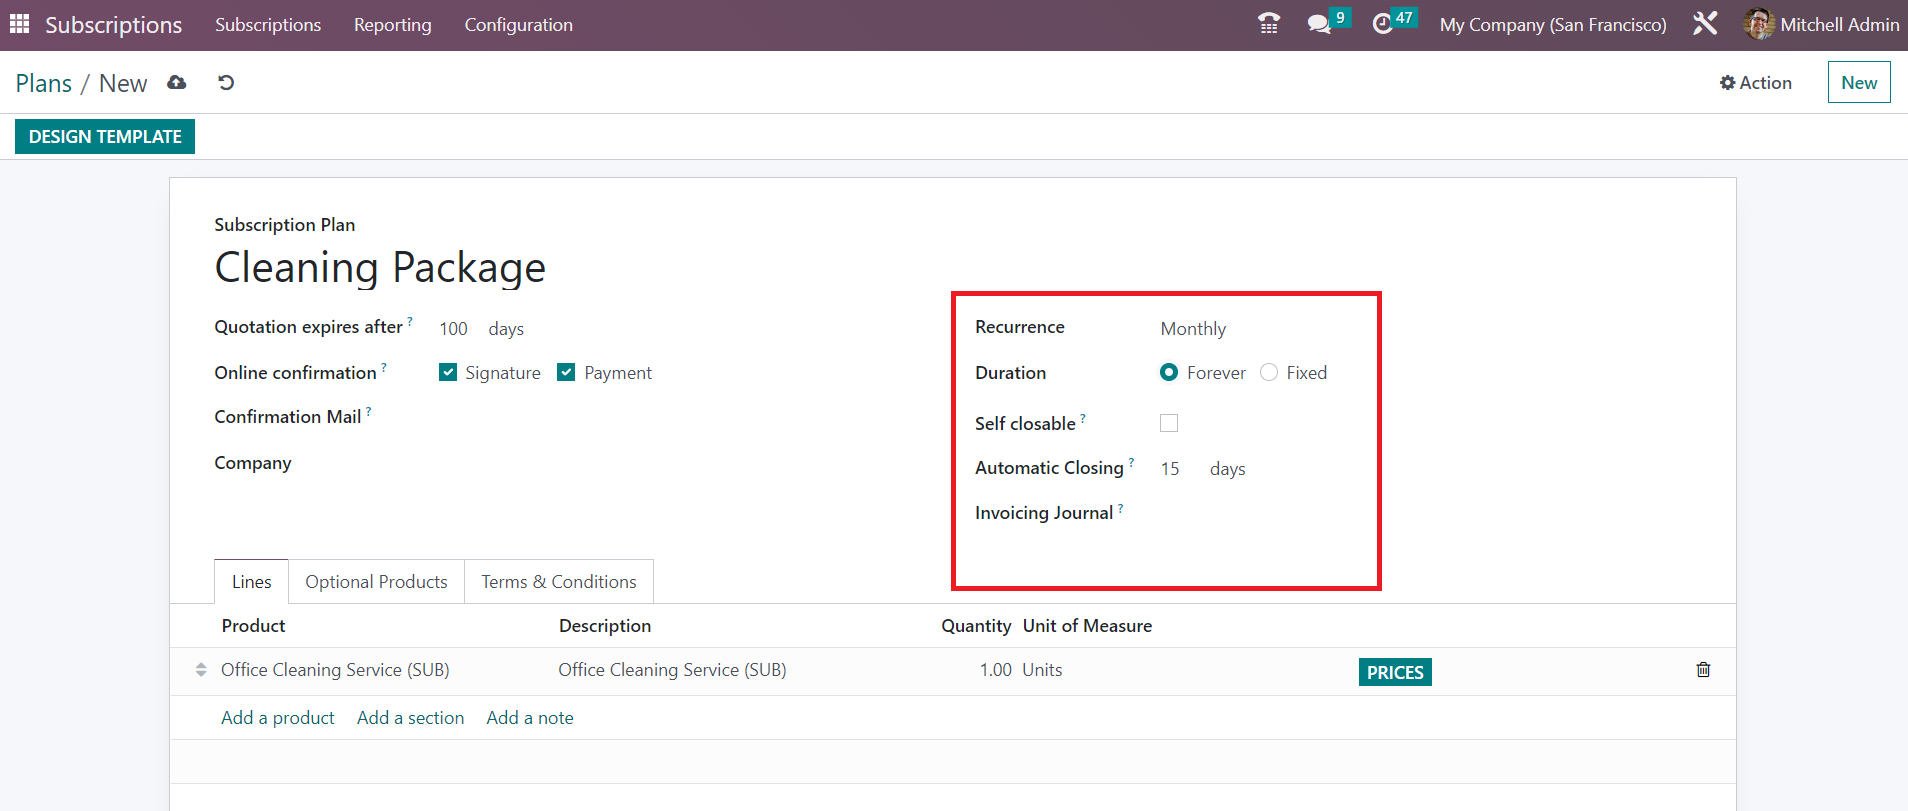
You will get some additional fields after selecting the Recurrence. The Duration of the plan can be set as Forever or Fixed. By activating the Self Closable feature, the user will be able to close his account from the front end. In order to close the orders automatically after particular days, you can use the Automatic Closing field. If the chosen payment method fails to renew the subscription after this time, the subscription will be automatically closed. You can add a suitable Invoicing Journal to this template. The subscriptions with this template will invoice in this particular journal.
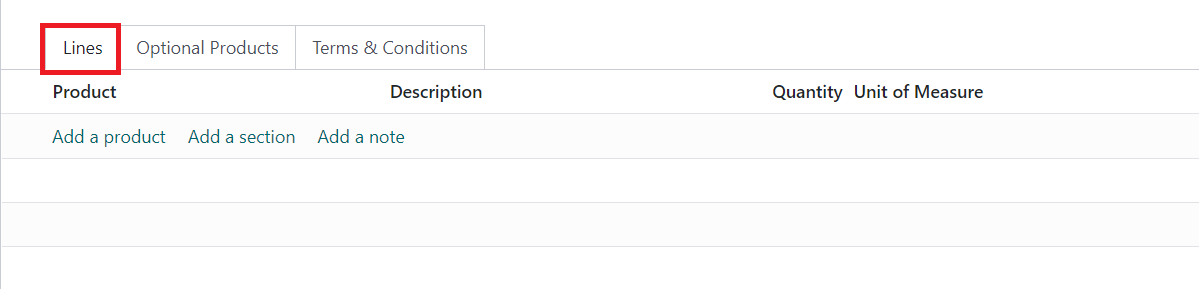
Under the Lines tab, you can mention the subscription products one by one using the Add a Product button. These products will be added to the Order Line when you select this subscription plan in a quotation.

The Optional Products tab can be used to add additional products that come along with the subscription plan.
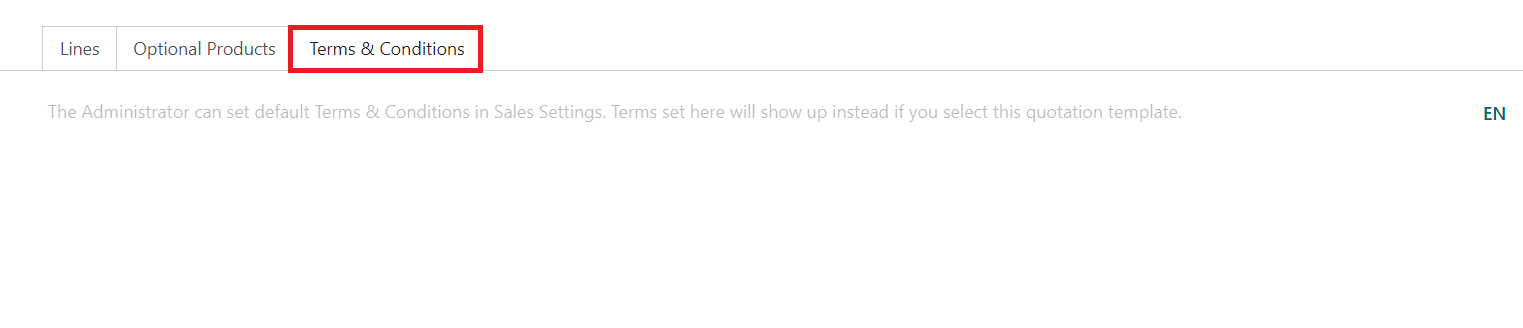
The Terms & Conditions for the subscription plan can be specified in the tab shown in the screenshot above.
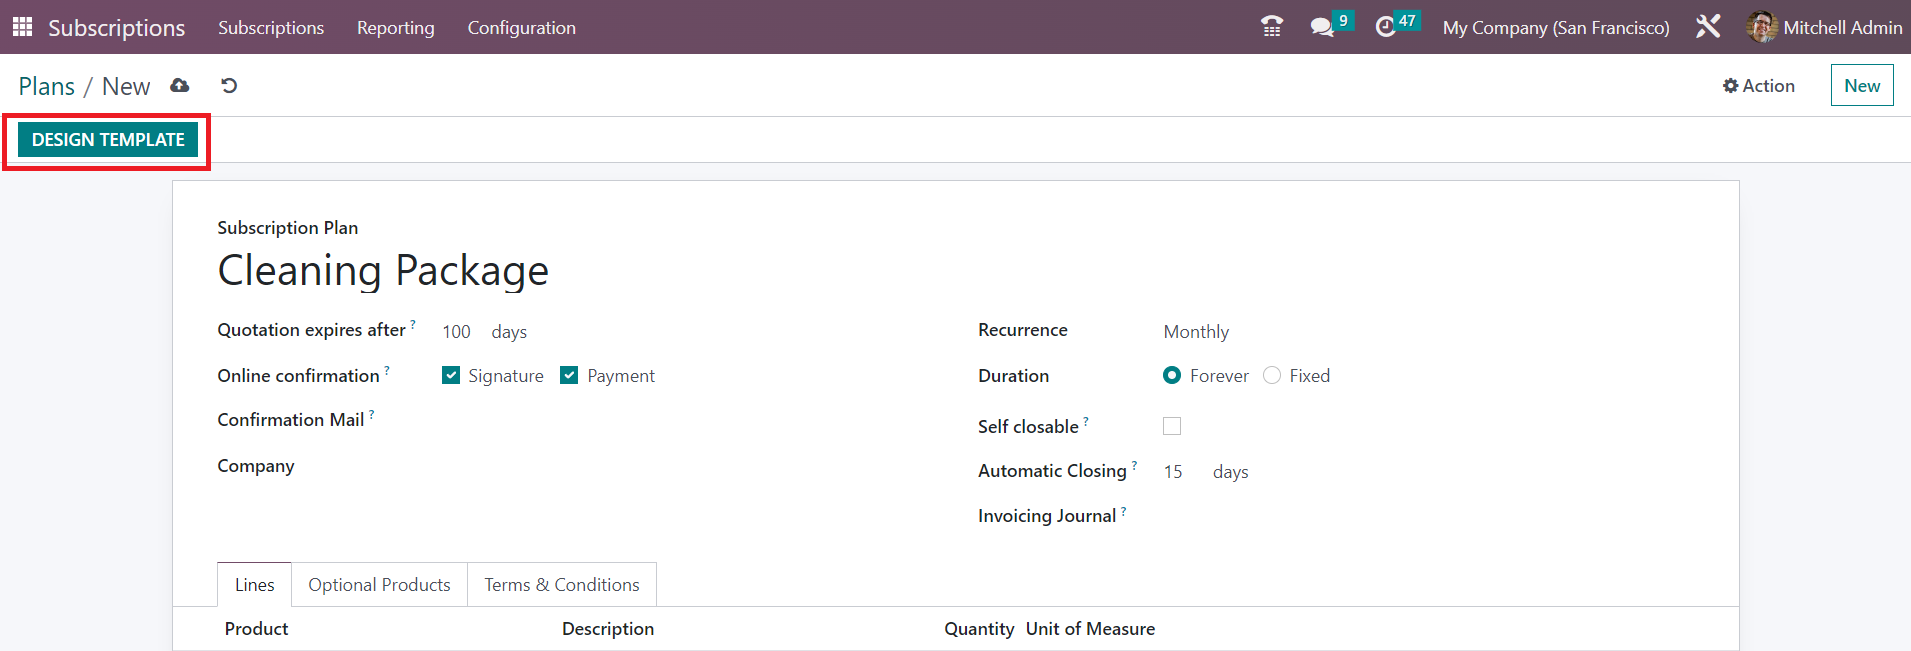
After creating the subscription plan, you can use the Design Template option to design the template from the Odoo Website builder.
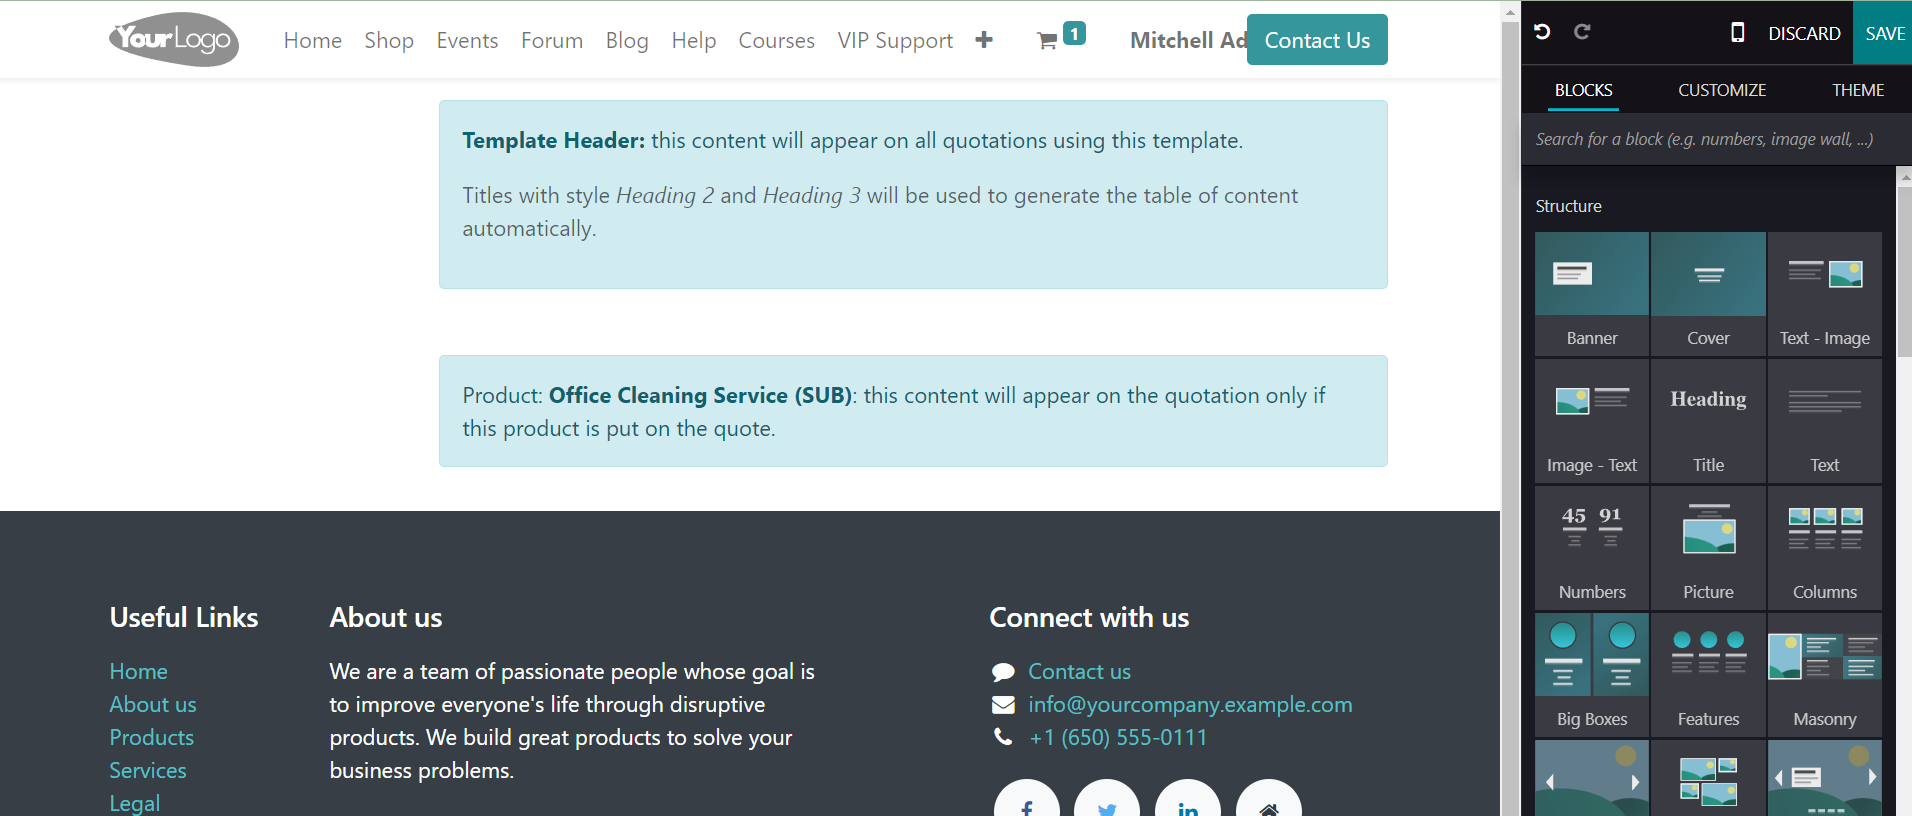
Using the editing panel available in the Odoo website builder, you can easily drag and drop suitable building snippets to the template and design it according to your requirements.
The Recurrence period of the subscription can be configured from the Configuration menu of the module. Clicking on the Recurrence Periods option will open a window as shown below.
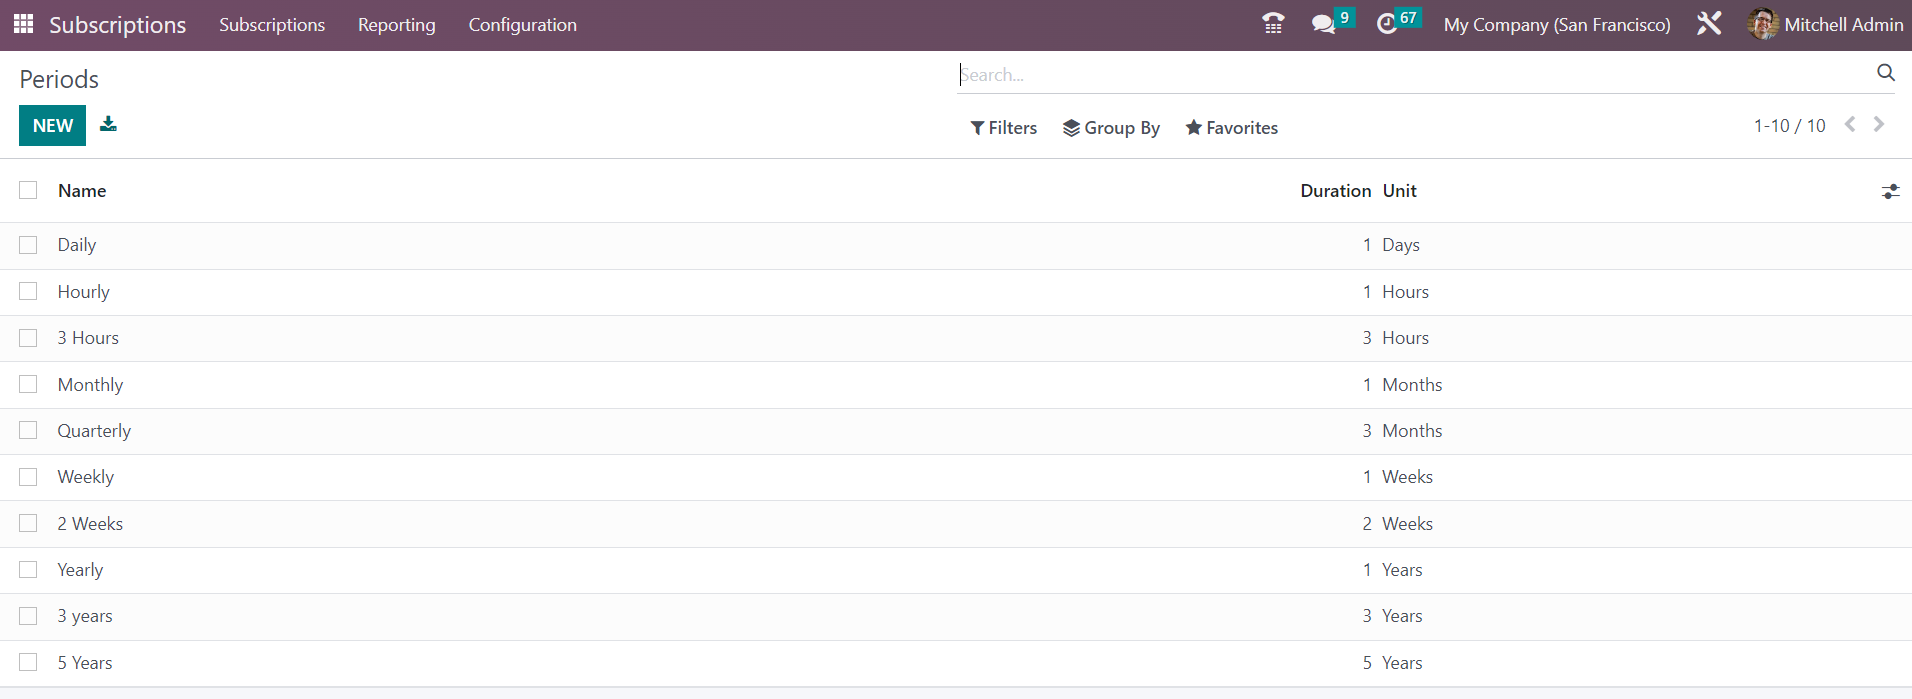
This is the list of available recurrence periods in this database. You can create a new recurrence period by clicking on the New button.
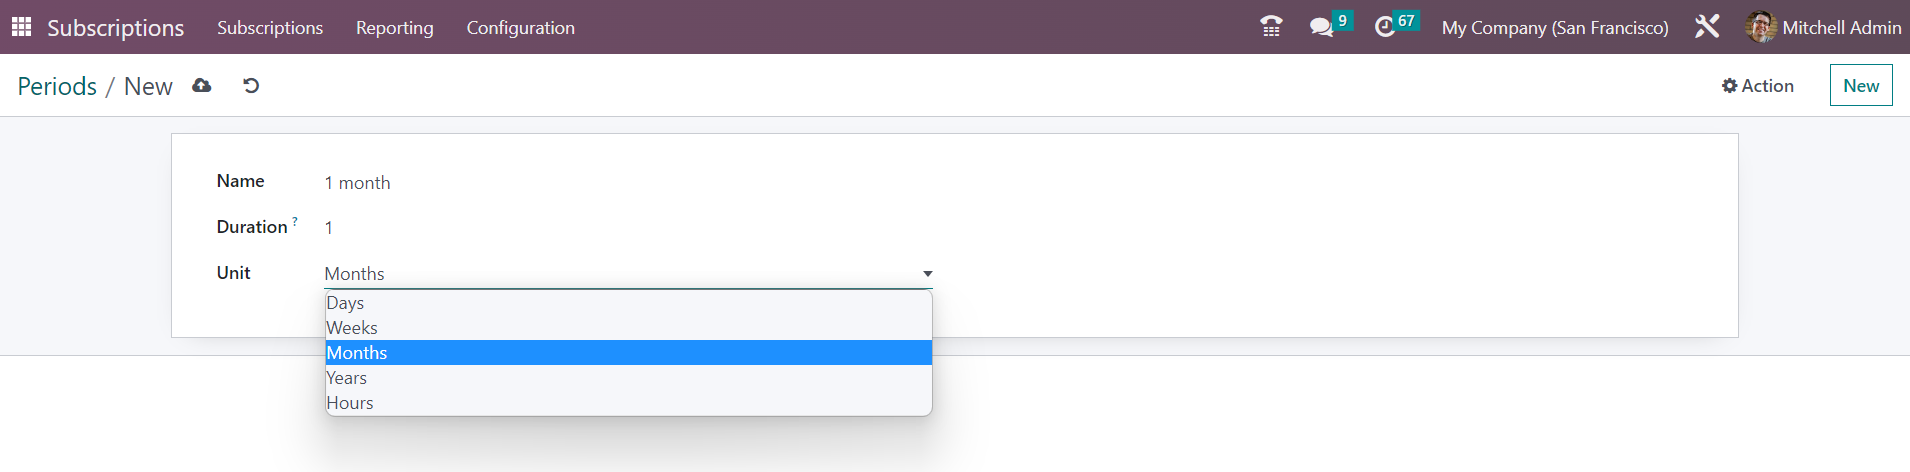
You can mention the Name, Duration, Unit of the period in the given space.
Subscription Stages
Stages will help you to easily identify the status of each subscription at a glance. Configuring various stages will simplify the organizing process of subscriptions in the module. You can use the Subscription Stages option available in the Configuration menu to manage and create stages.
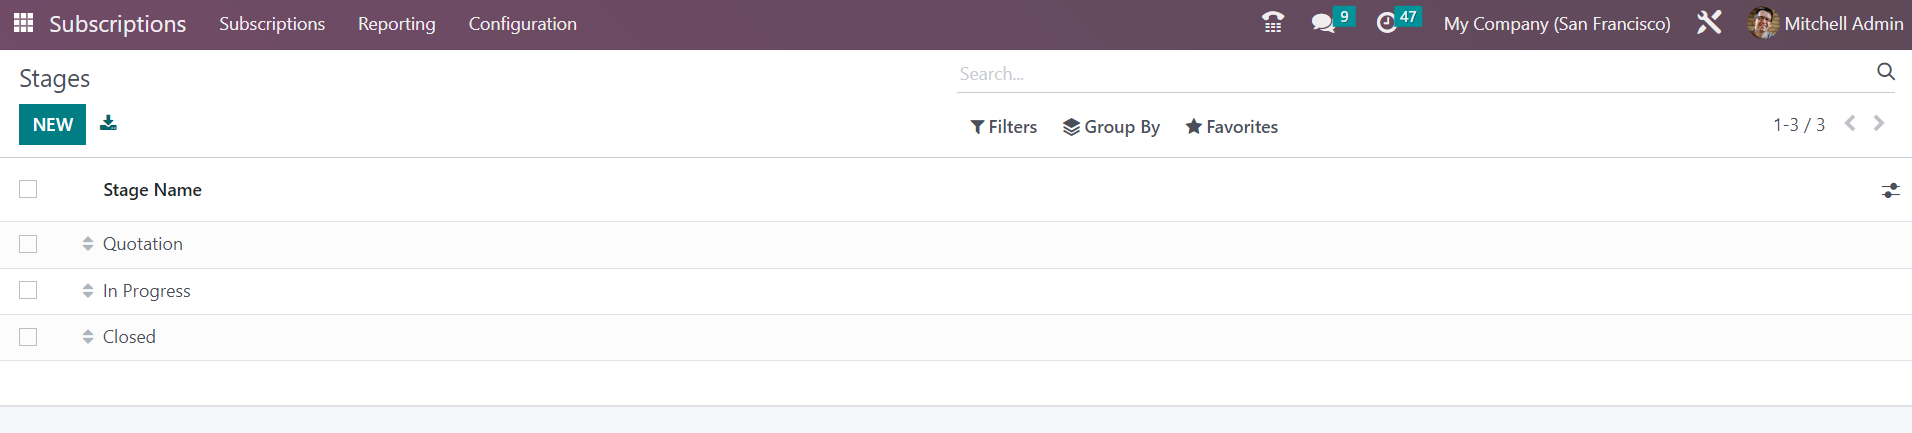
The window will show the already configured list of stages as shown in the image above. You can use the New button to create a new stage.
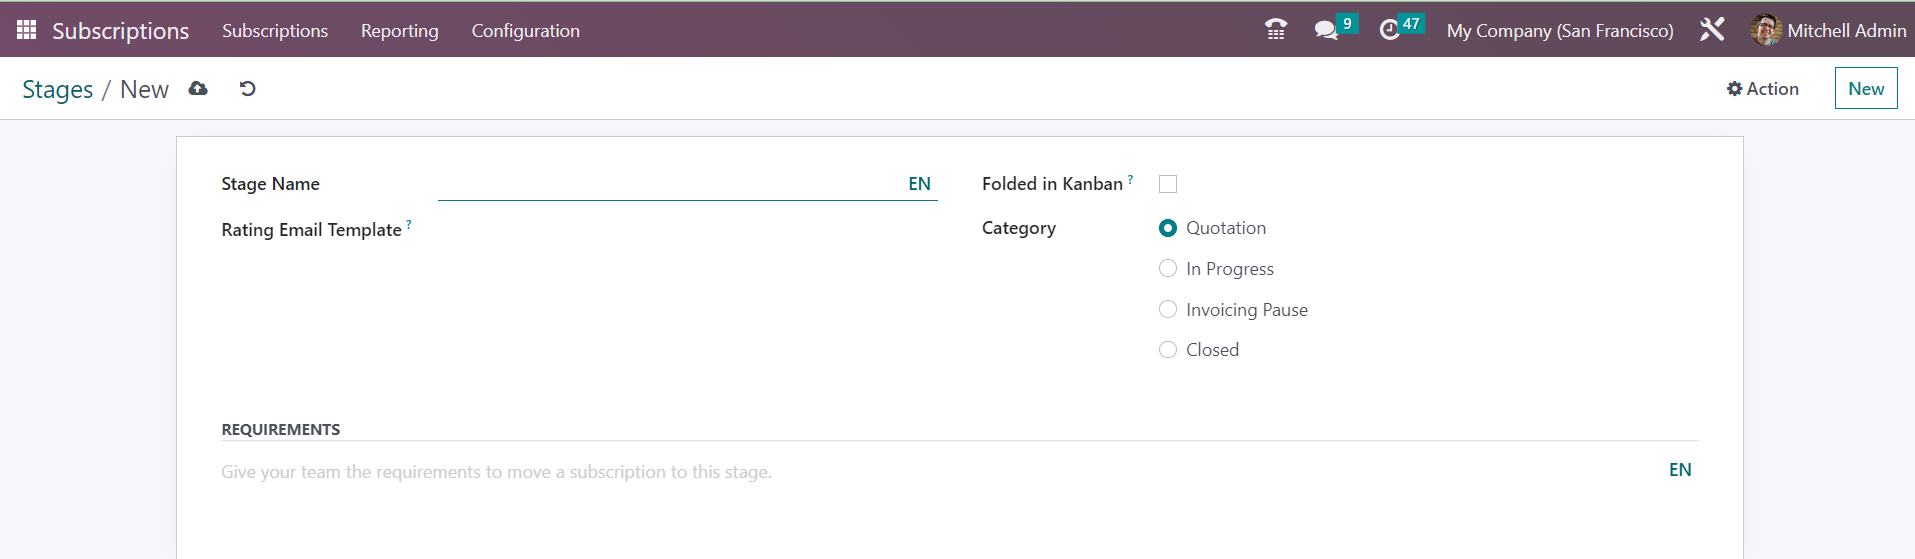
Clicking on the New button will open a new form view, as shown above. Provide a suitable name for the stage in the Stage Name field. In the Rating Email Template field, you can add an Email Template. By adding a template here, Odoo will automatically send an email to the concerned customer when a subscription is moved to this stage. If you want to fold this stage in the Kanban view of the subscription dashboard, you can enable the Folded in Kanban option. You can select a suitable Category for the stage from the given options. The available categories are Quotation, In Progress, Invoicing Pause, and Closed. You will get a Requirements tab here where you can specify the internal requirements for this stage. It will appear as a tooltip over the stage’s name. You can create more stages for the subscription like this.
Alerts
The Alerts option available in Odoo will allow you to send reminders to your customers. You can use this feature in the Subscription module to send alerts to customers regarding the expiry of the subscription or payment dues. Go to the Configuration menu and select the Alerts option. Odoo will open a new window as shown below where you can observe the pre-configured list of alerts.
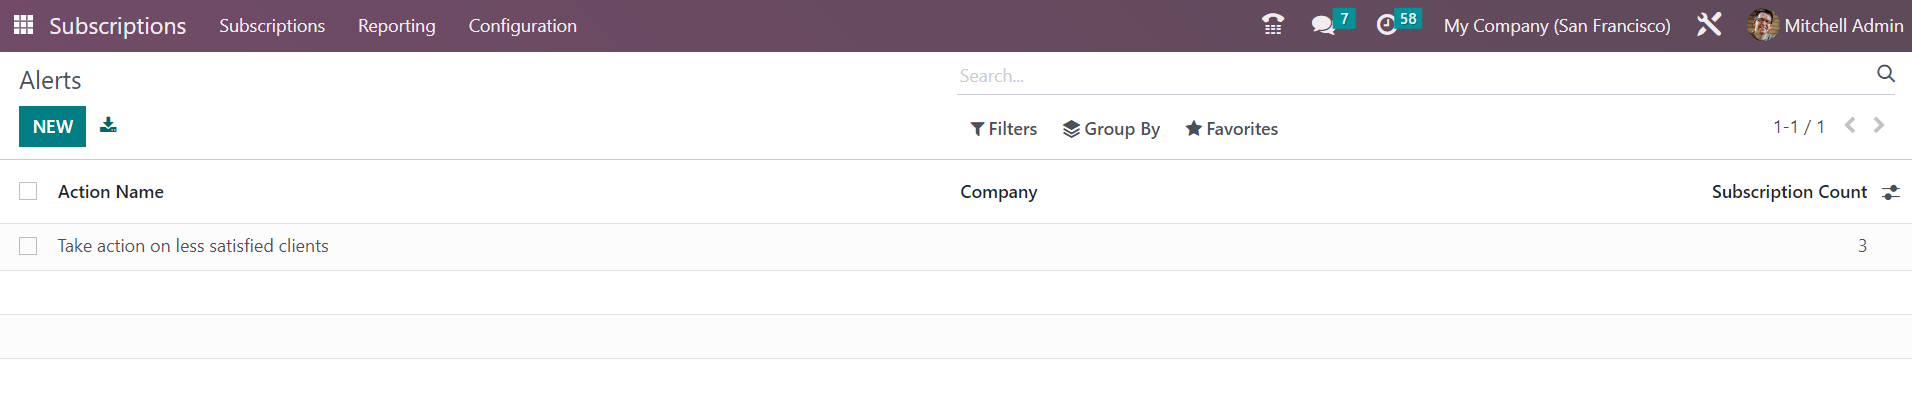
The preview of the list includes the Action Name, Company, and Subscription Count. Now, use the New button to create a new alert.
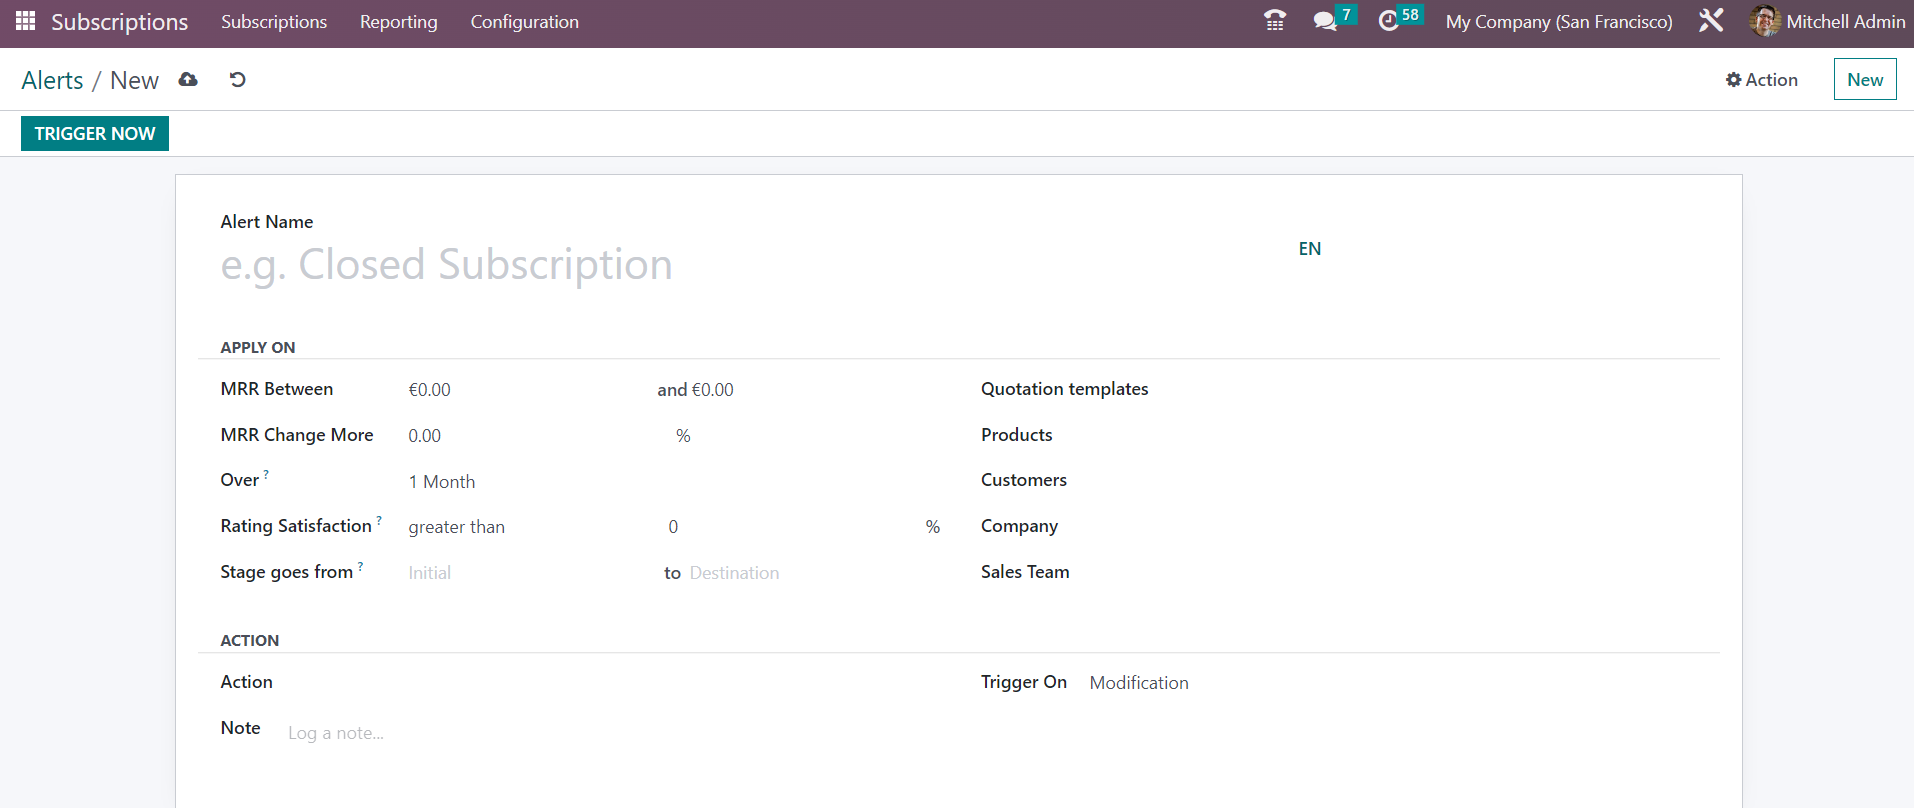
In the form view, you can provide a name for the alert in the Alert Name field. Under the Apply On tab, you can set conditions for the alert. You can set conditions on MRR Between, MRR Change More, and Period over which the KPI is calculated. You can trigger alerts according to the Rating Satisfaction. You can set rules as greater than or less than the mentioned percentage. Similarly, it is possible to trigger alerts on changes of stages. The respective stages can be specified in the Stages goes from field. If you want to set this alert on any particular Quotation Template, Product, Customer, Company, and Sales Team, you can mention details in the corresponding fields.
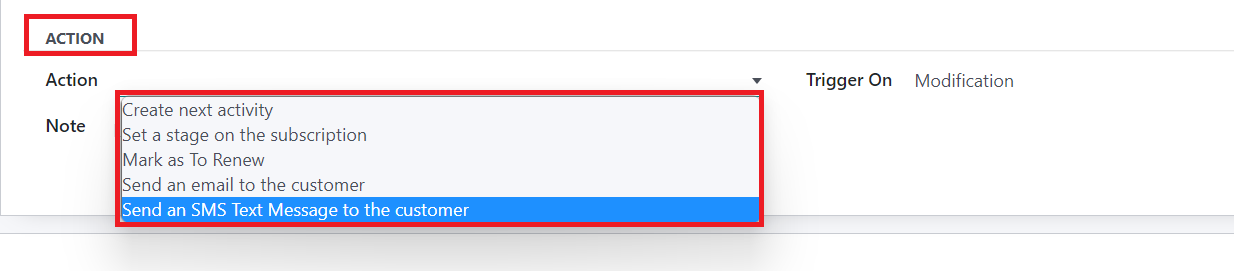
Now, you can use the Actions tab to define an action for this alert. The action can be set as Create next activity, Set a stage on the subscription, Mark as to renew, Send an email to the customer, or Send an SMS text message to the customer. You can trigger this action on Modification or Timed Condition. The Note field can be used to add internal notes related to this alert.

Finally, you can use the Trigger Now button to trigger the alert in Odoo.
Close Reasons
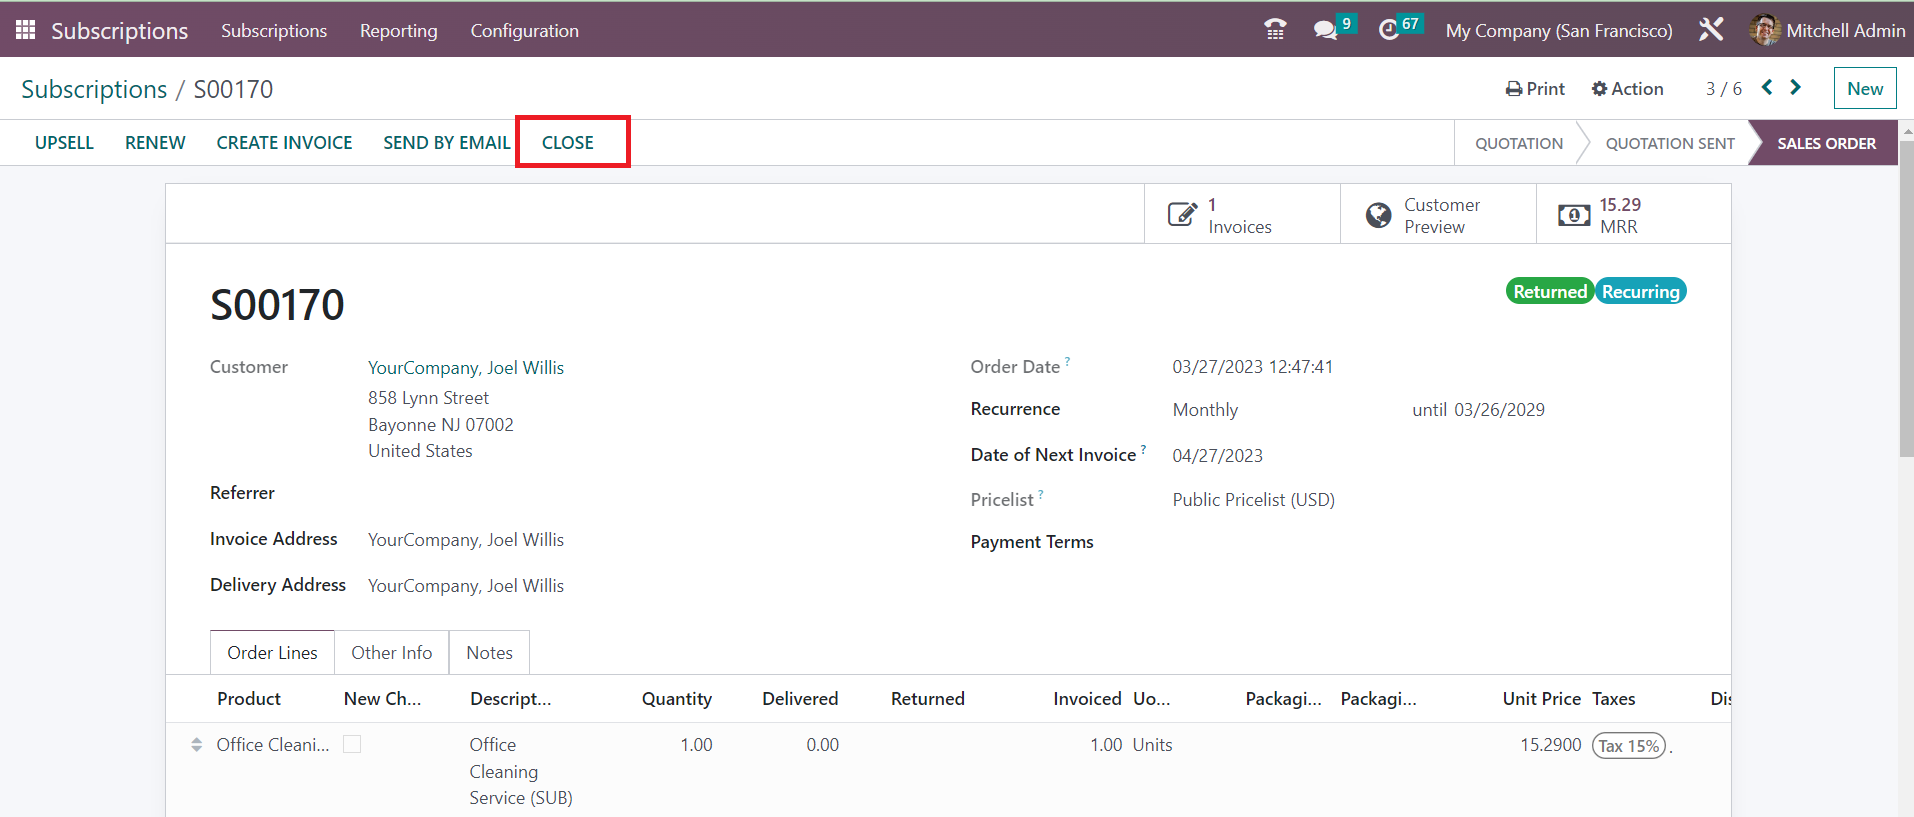
There may be situations where the subscription needs to be closed before the ending date. In such cases, it is important to mention the reason before closing the subscription. In the form view of the subscription, you can find the Close button which can be used at the time of closing a subscription.
As soon as you click on this button, you will get a new pop-up window as shown in the screenshot below.
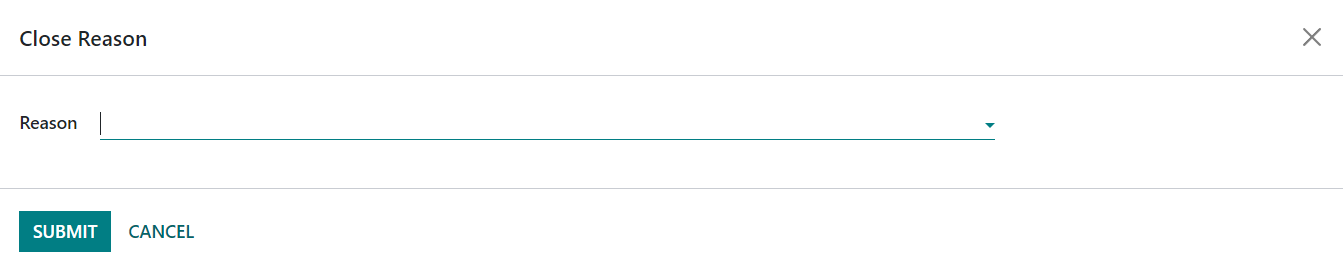
Here, you can select the most appropriate reason for closing the subscription in the given field. Then, you can click the Submit button and the subscription will be closed.
You can create a list for such reasons in the Odoo Subscription module. For this, you can go to the Configuration menu and select the Close Reasons option.
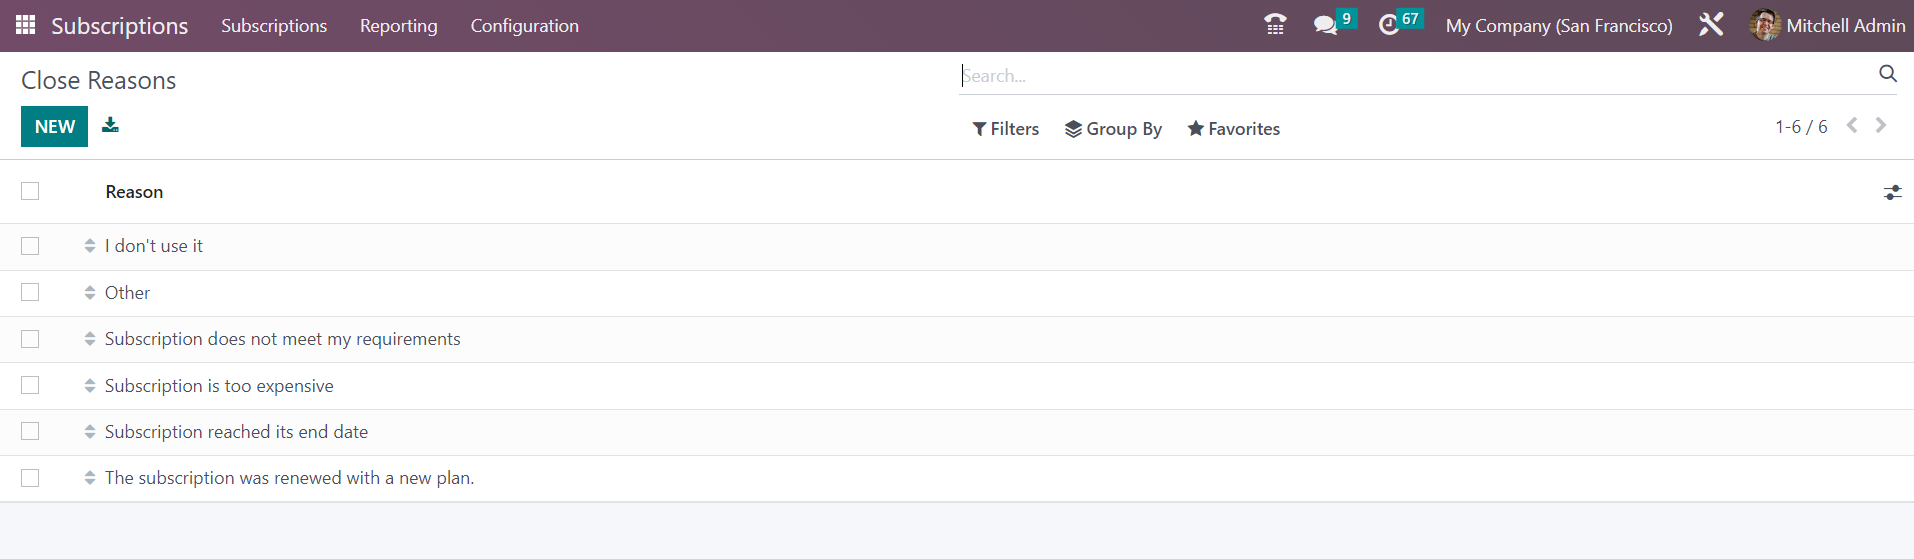
The already created close reasons can be observed here. You can create a new one using the New button. It will open a new line under the existing list where you can mention the Reason. Click the Save button and you can use this reason next time while closing a subscription.
Reporting
In order to understand the workflow of operations in a company, it is necessary to have an adequate platform that offers accurate reports. Such platforms will help the user to get a clear view of the overall activities done during a particular period. In the Odoo Subscription module, you will get the Reporting feature that allows you to perform various analysis operations related to the module. Here, the user will get reporting platforms for Subscriptions, Retention, Revenue KPIs, and Salesperson Dashboard.
The Subscriptions Analysis window is shown below. This is the pivot table of the report.
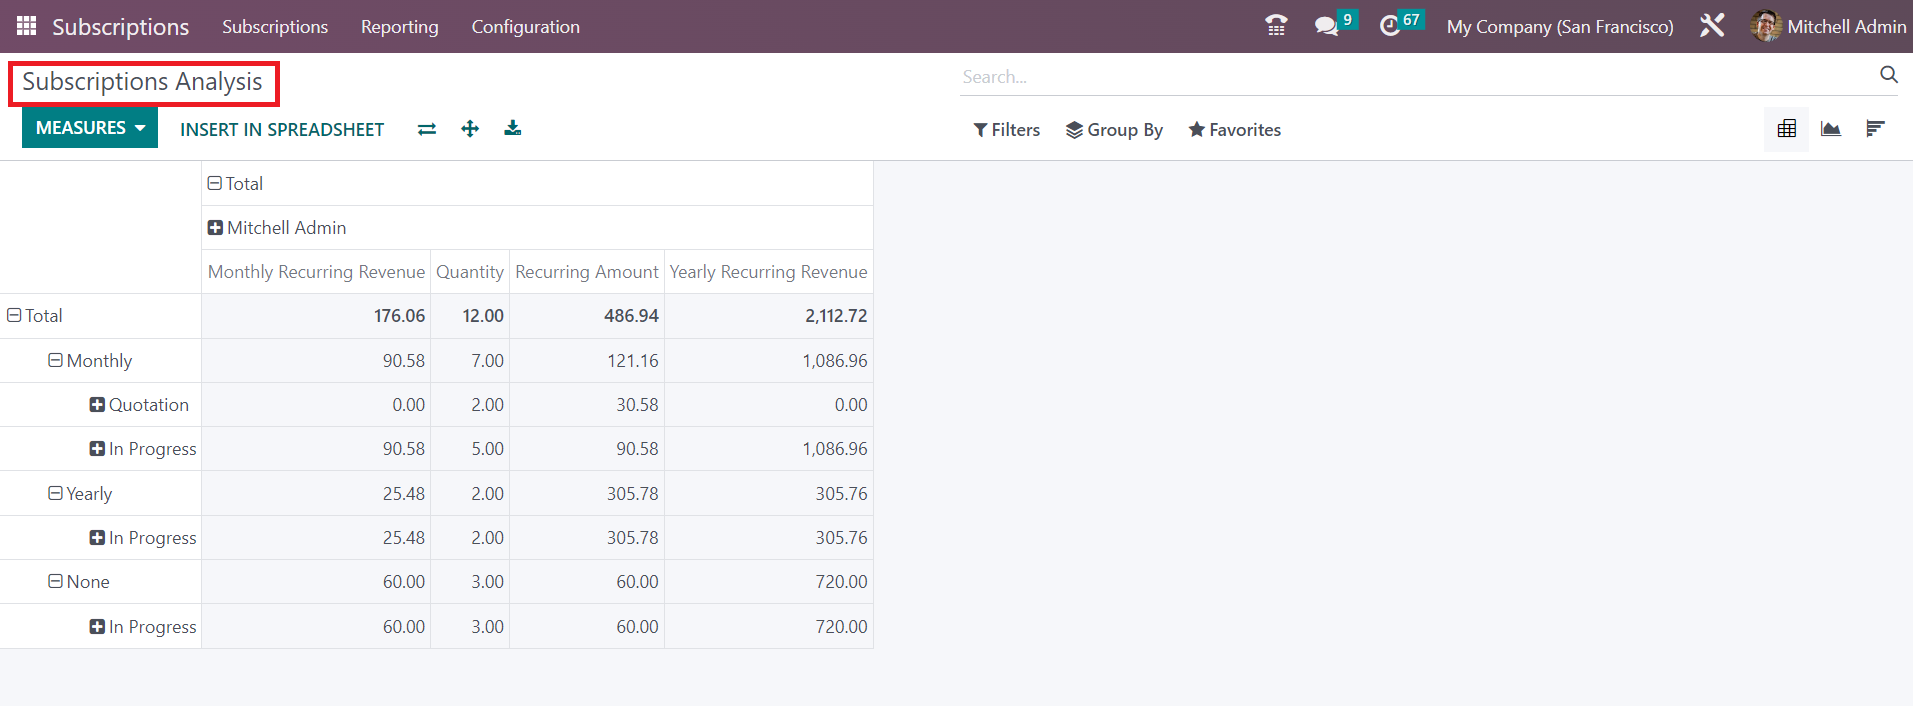
You can use Monthly Recurring Revenue, Quantity, Recurring Amount, Yearly Recurring Revenue, and Count as the Measures for the report. As Filters, you can find the My Subscriptions, Running, To Renew, Expired, Good Health, Bad Health, Order Date, and End Date. In the Group By option, you will get Stage, Salesperson, Customer, Country, Industry, Template, Order Date, and End Date options for grouping the report.
The Retention Analysis window can be accessed by selecting the Retention option from the Reporting menu.
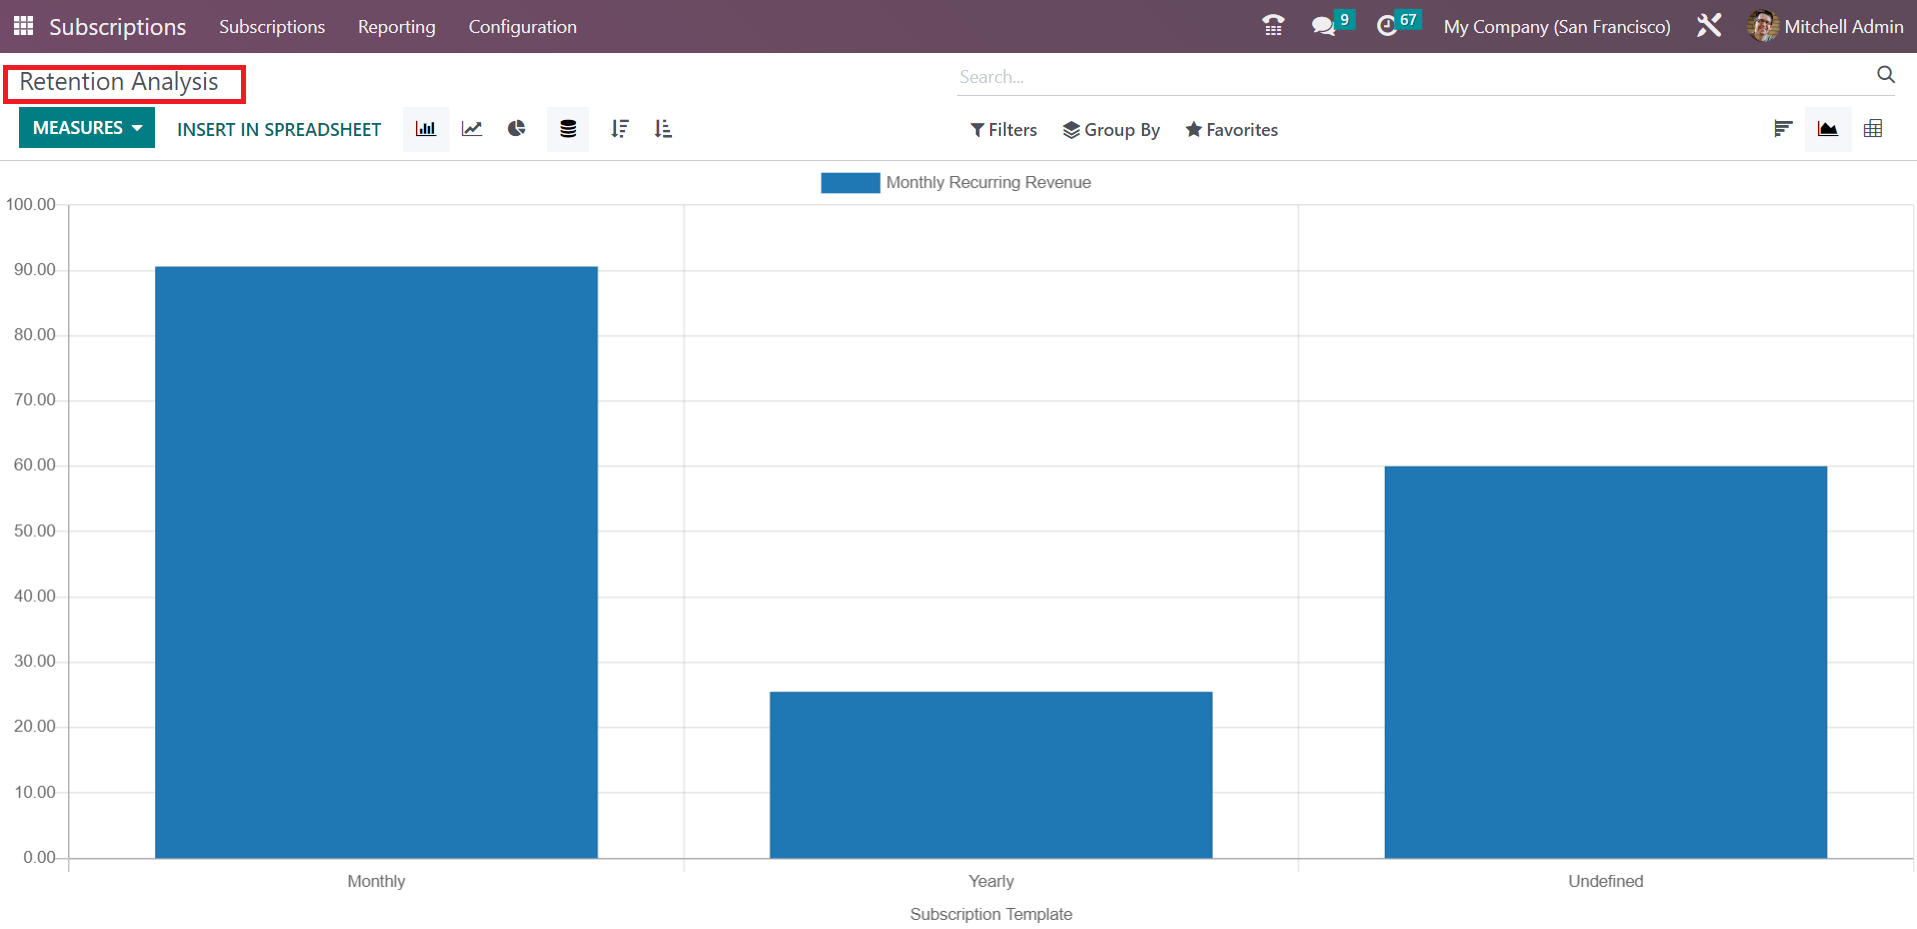
Here, the user will get the same Measures, Filters, and Group By option that we mentioned in the Subscription Analysis window. You can view the report in Cohort, Pivot and Graphical views.
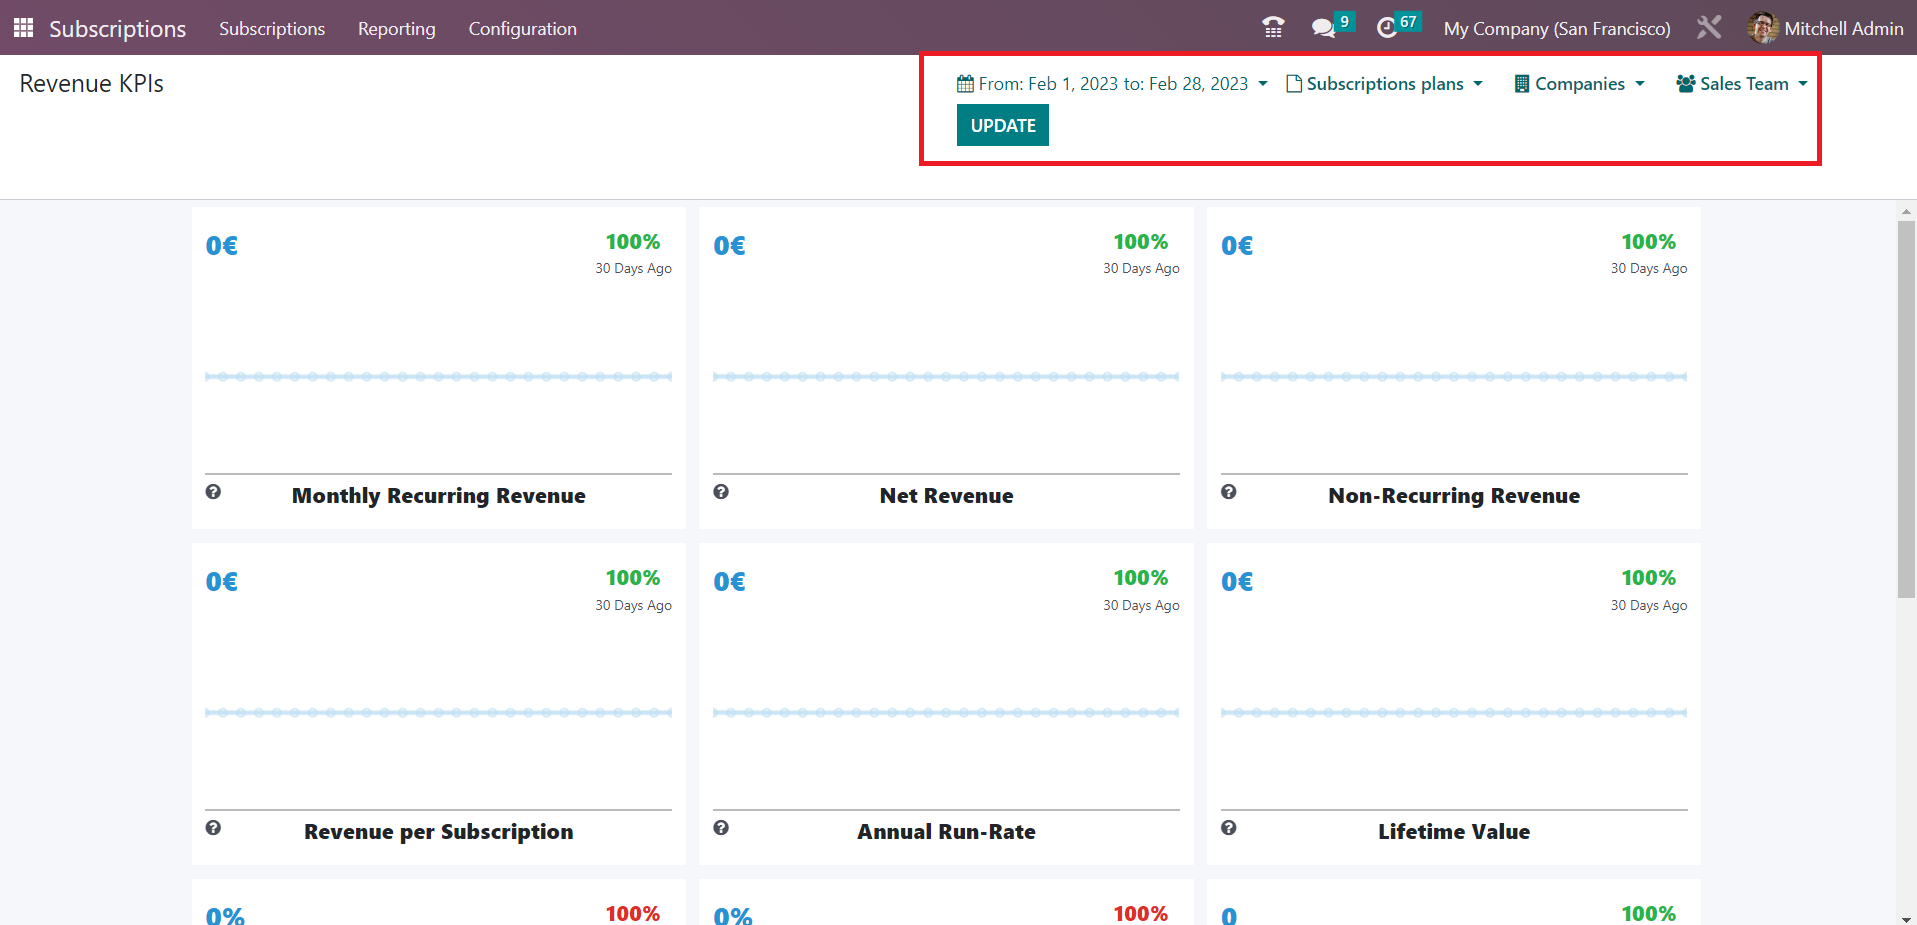
The reporting window of the Revenue KPIs is given below. You can generate Revenue KPI reports of a particular period by adjusting the date and year in the given space. It is possible to customize the report according to the subscription plans, companies, and sales team.
The salesperson will get a dedicated platform to get an advanced view into the subscriptions assigned to them. They can set a particular period in the given space to get the report of that period.
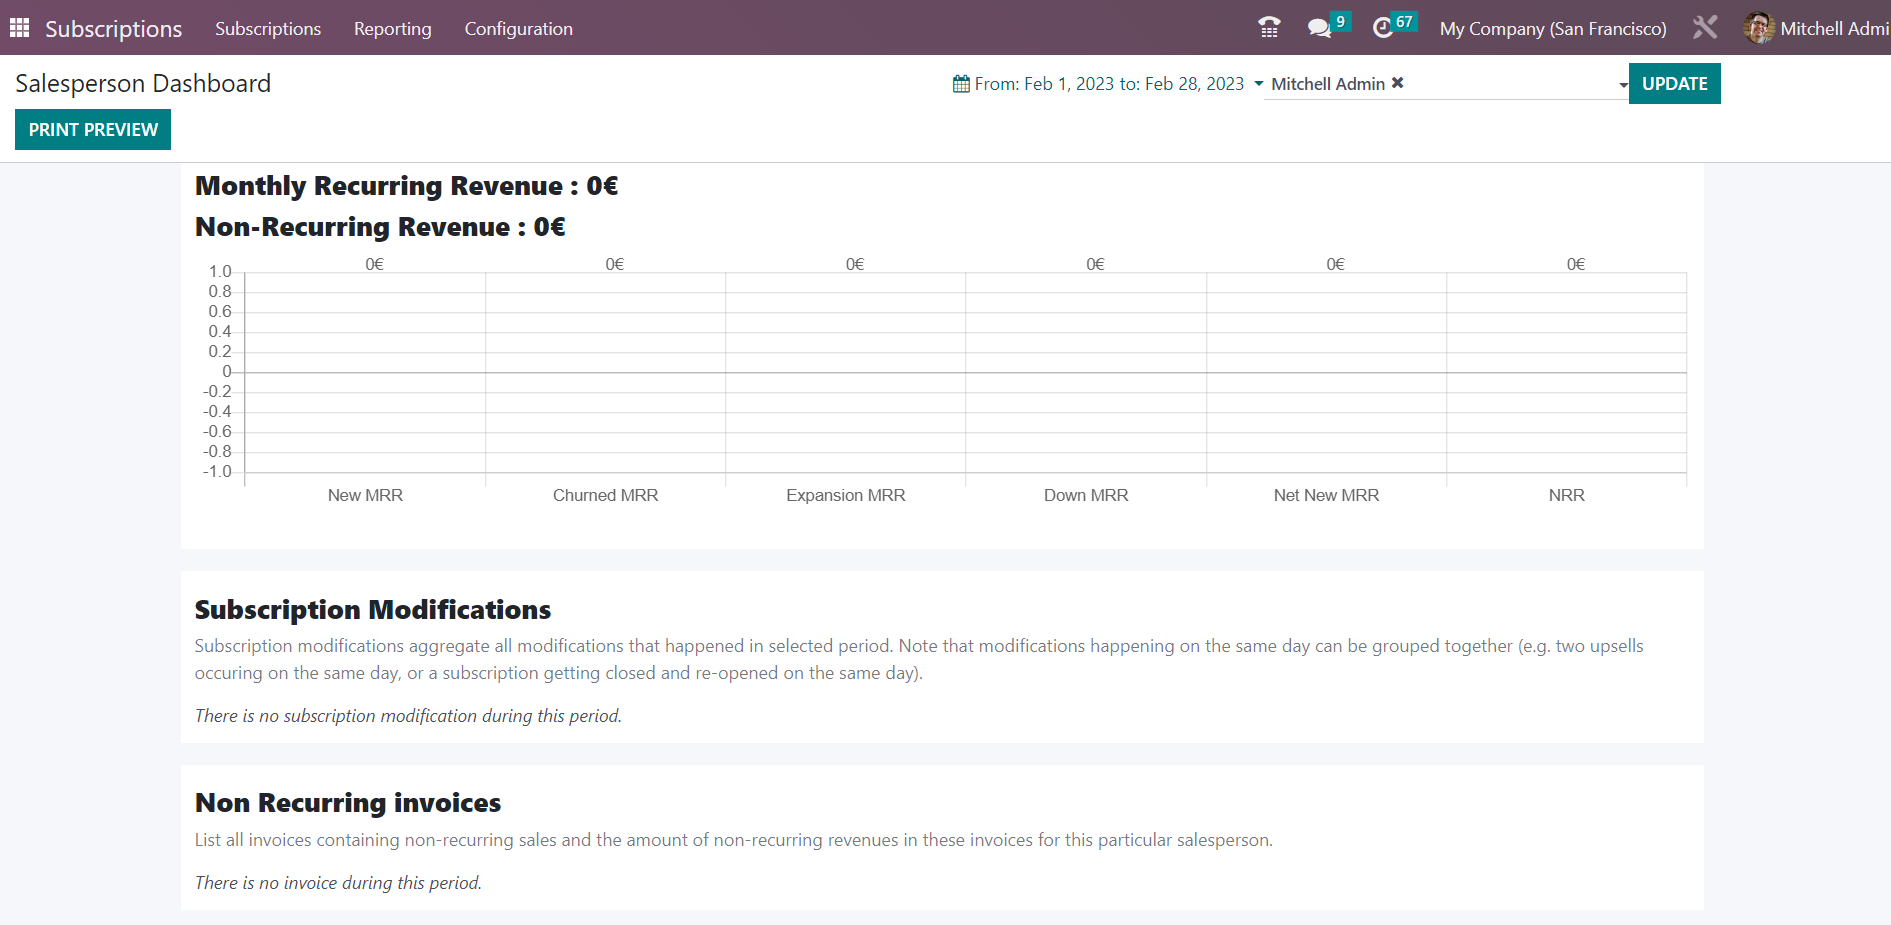
The salesperson can observe Monthly Recurring Revenue, Non-Recurring Revenue, Subscription Modifications, and Non Recurring Invoices on this platform. Using the advanced Odoo 16 Subscription module, the user can effortlessly manage all subscription related activities in a professional manner.