Planning
Business organizations all around the world basically function based on pre-planned activities. Creating pre-planned operations will always ensure a seamless working environment in a company. The activities organized in an organization will mainly emerge from the plans drafted by the offices. The success rate of execution of such activities will be high since these are planned by considering the analysis of various regulations of operations, procedures of a company, and major focuses of the company during a financial term. Planning should always maintain a direct connection with the functions of an organization. Otherwise, the actual purpose behind considering planning in an organization becomes meaningless.
Odoo offers an automated solution for systematically organizing and running the business activities of a business organization. This dedicated resource planning business management software is capable of managing all your business activities using the most advanced technologies. The users will get the Planning module in the Odoo ERP system to plan their activities based on the calendar outline. One can effortlessly schedule activities related to company operations by checking the available date and time. The integration facility offered by the module will permit you to expand the functionalities by integrating with other modules in Odoo, such as Employee, Payroll, Attendance, Project, Manufacturing, and many more.
Scheduling
When you select the Planning module from the main dashboard of the module, you will be directed to the scheduling platform of the module. This platform is designed in a calendar pattern so that you can easily schedule your activities according to the available date.
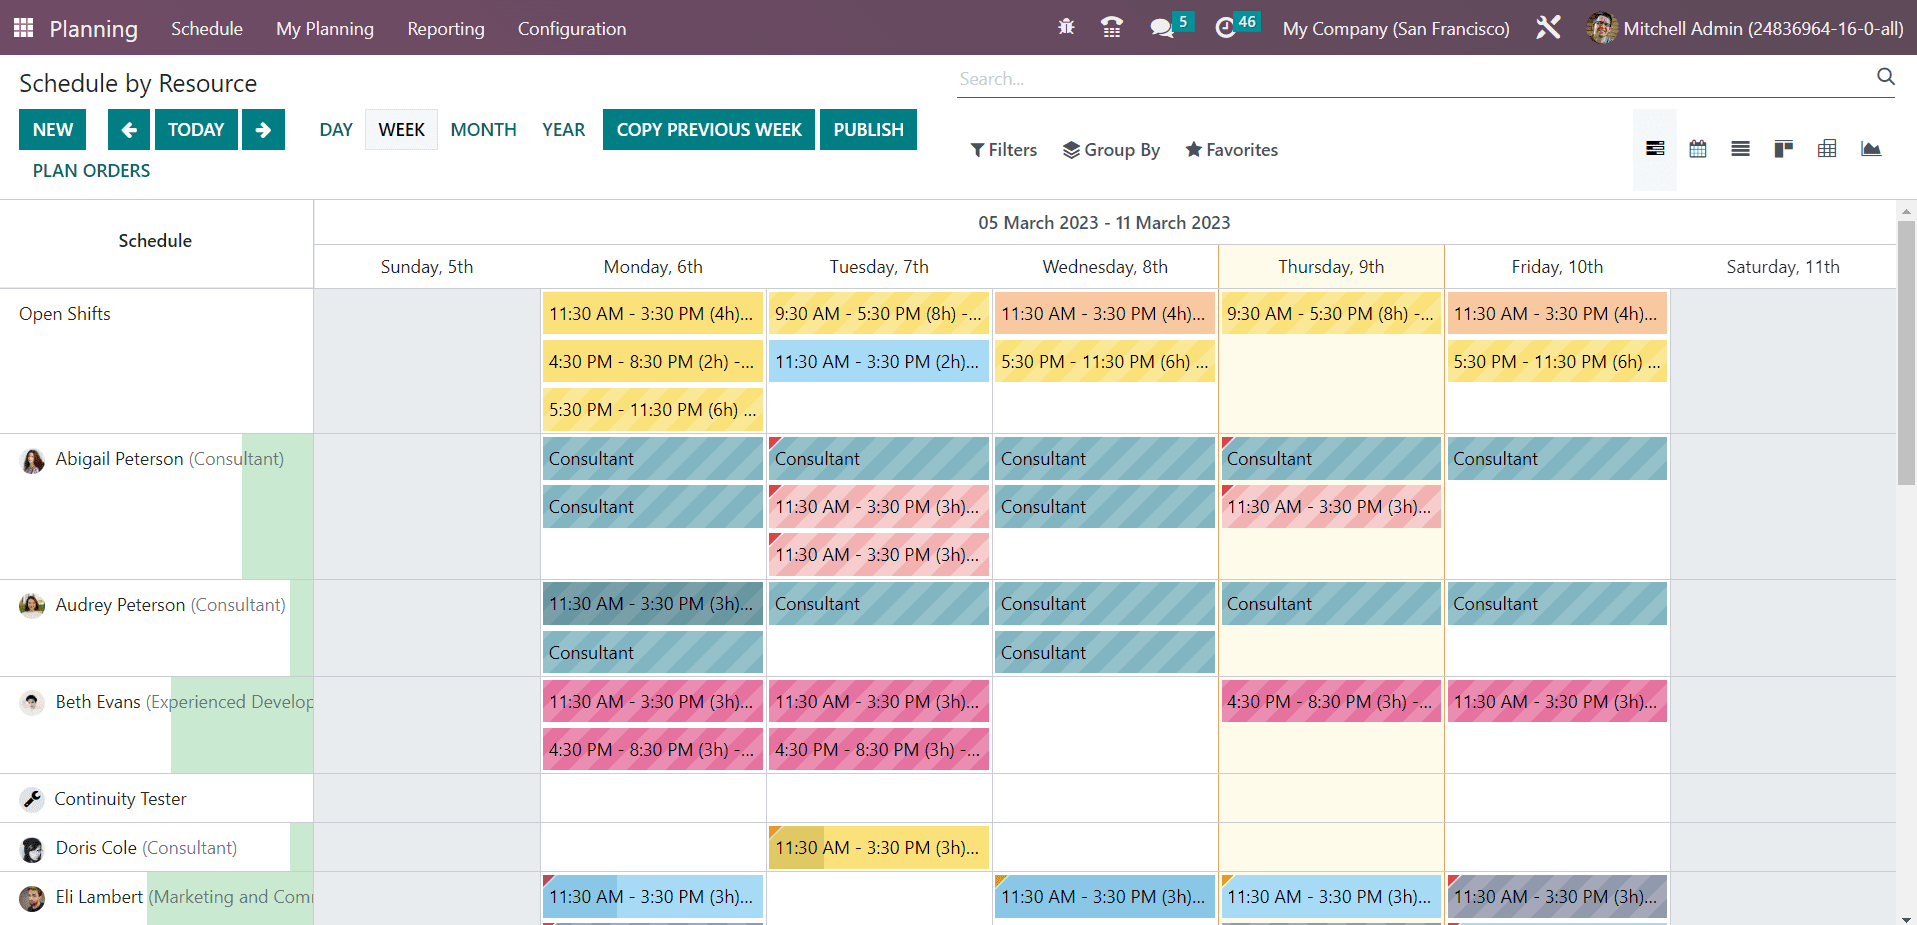
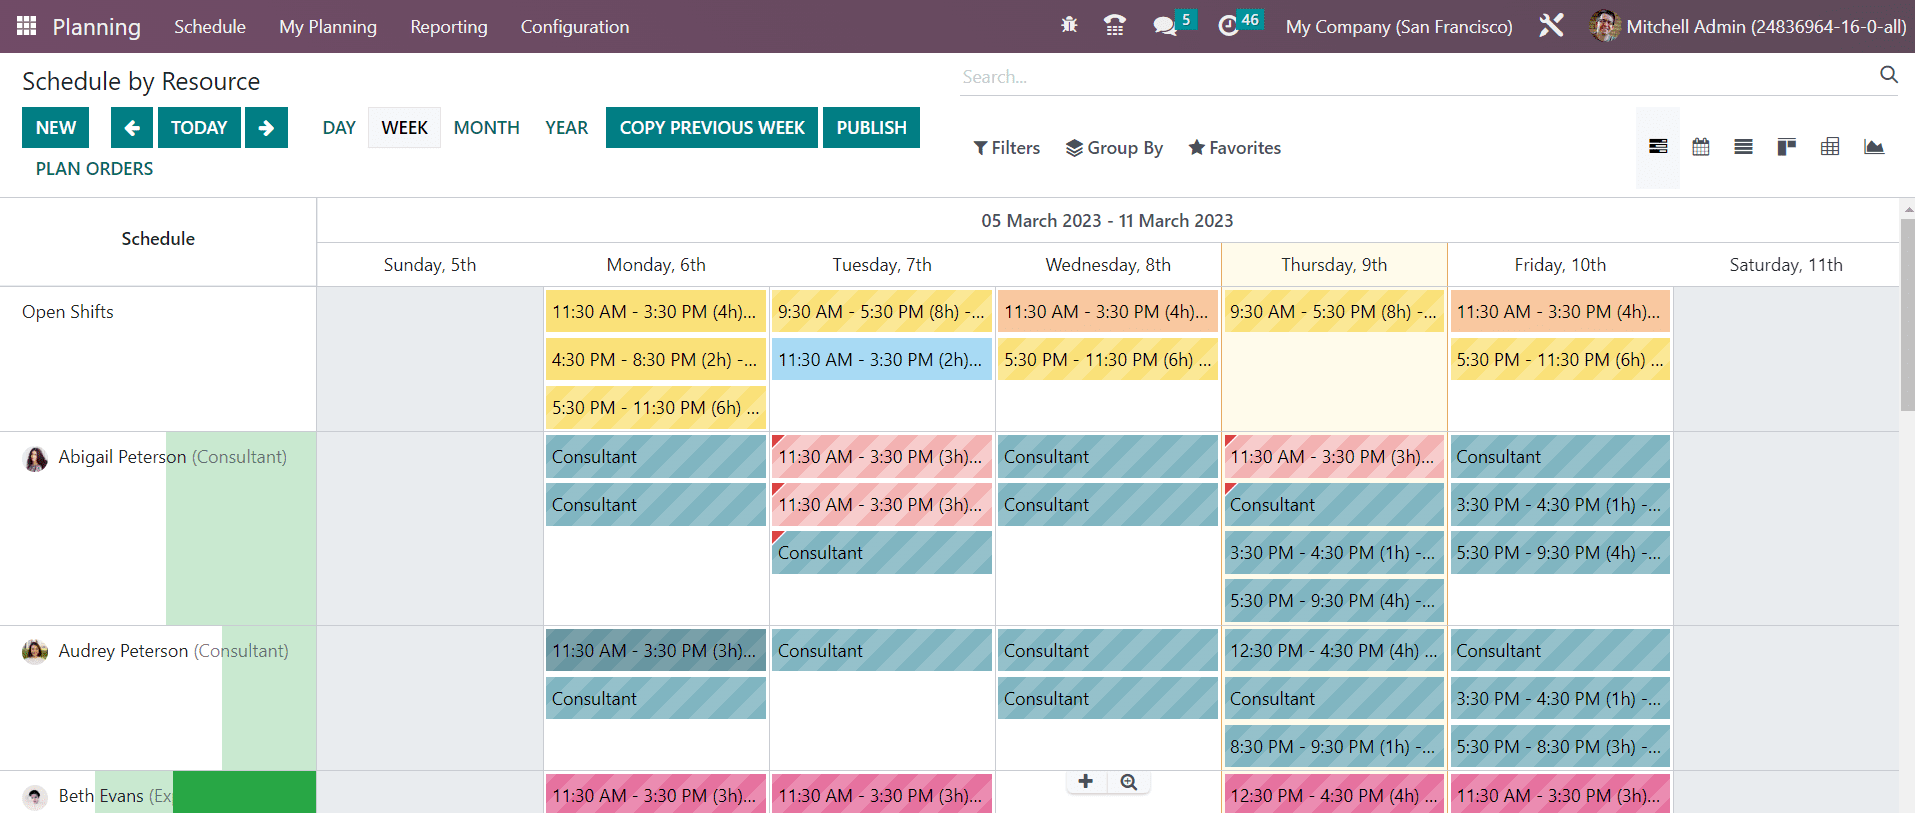
You can schedule activities by Resource, Role, Project, and Sales Order. The screenshot shows the schedule by resource. You can view the plans based on Day, Week, Month, and Year. You can select a suitable view according to your convenience. The schedule of each resource person can be observed here.
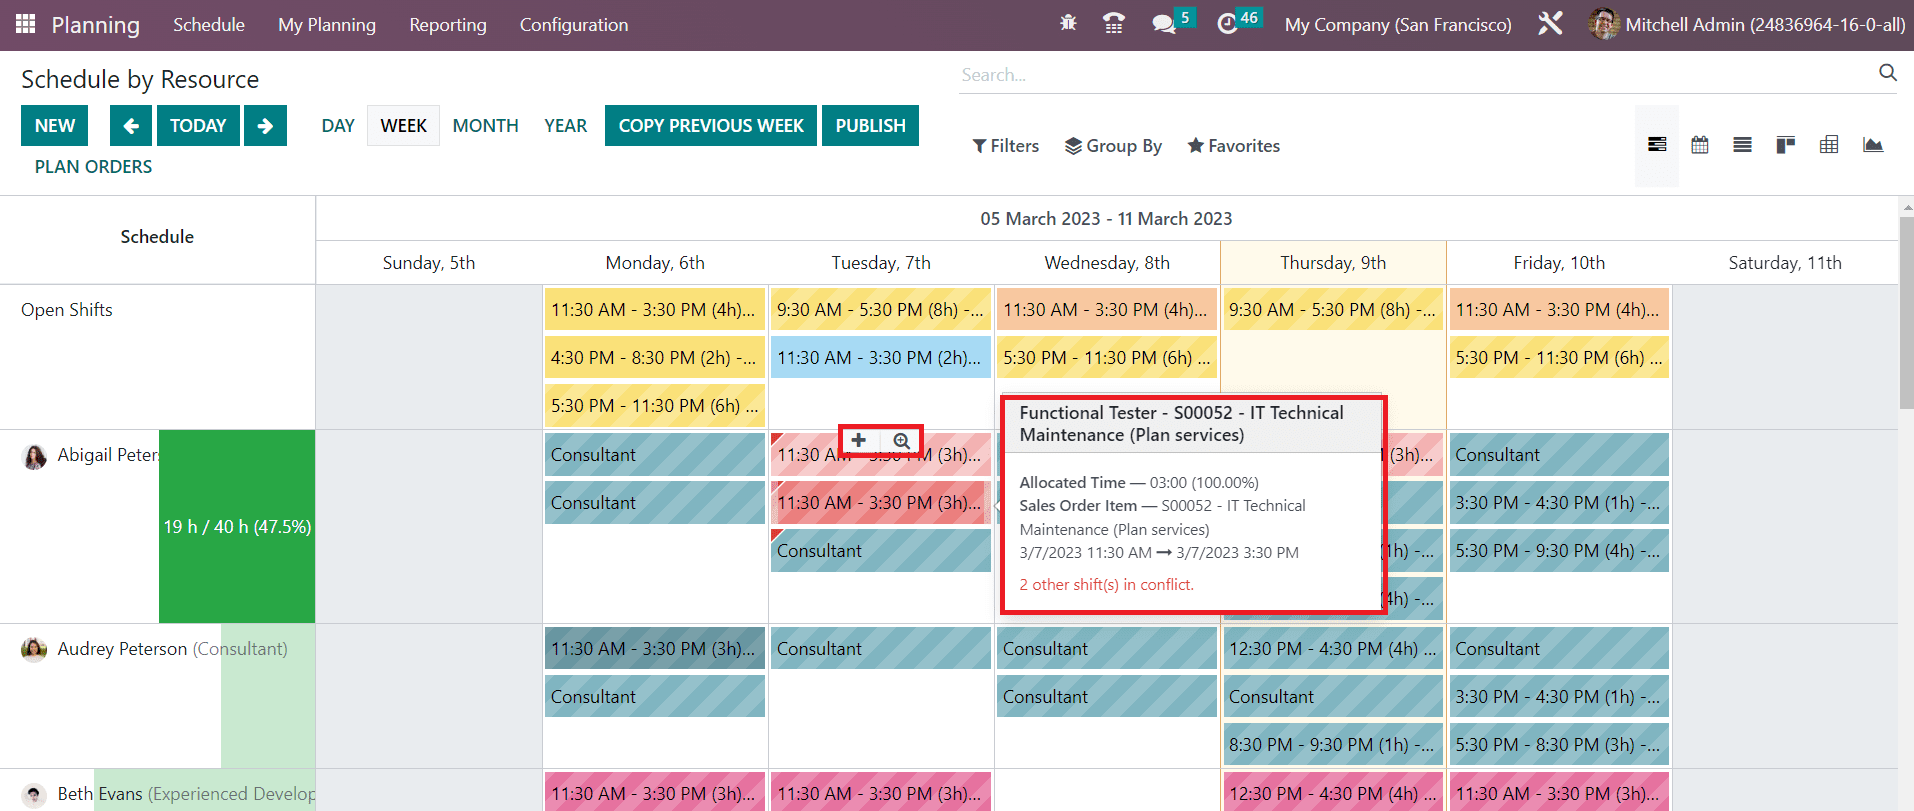
In order to get a preview of the schedule, you can place the cursor on a particular schedule. As shown in the screenshot above, the preview will show the details of the schedule. You can find a small red label on the schedule if the employee has more than one shift at the same time.
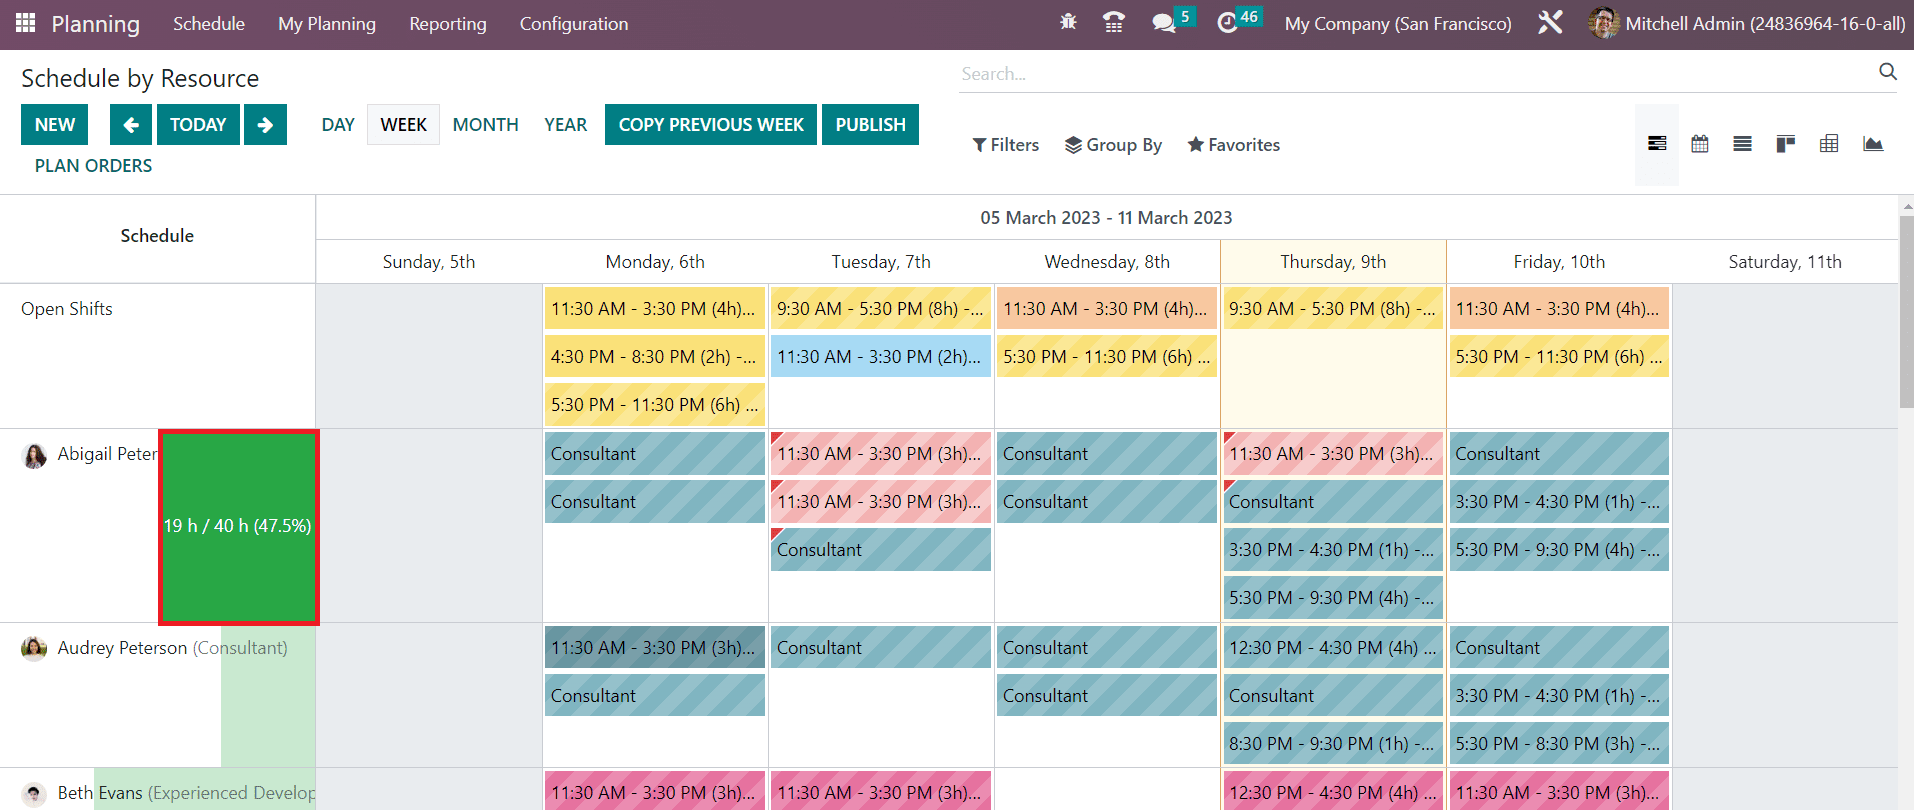
Next to the field of the resource person, you will get the total occupied hours of the employee based on the selected day, week, month, or year. The Plan Orders button can be used to assign unassigned-sales orders to available employees. If you want to copy the shift from the previous year, you can use the Copy Previous Week option. Clicking on the Publish button will give a pop-up window.
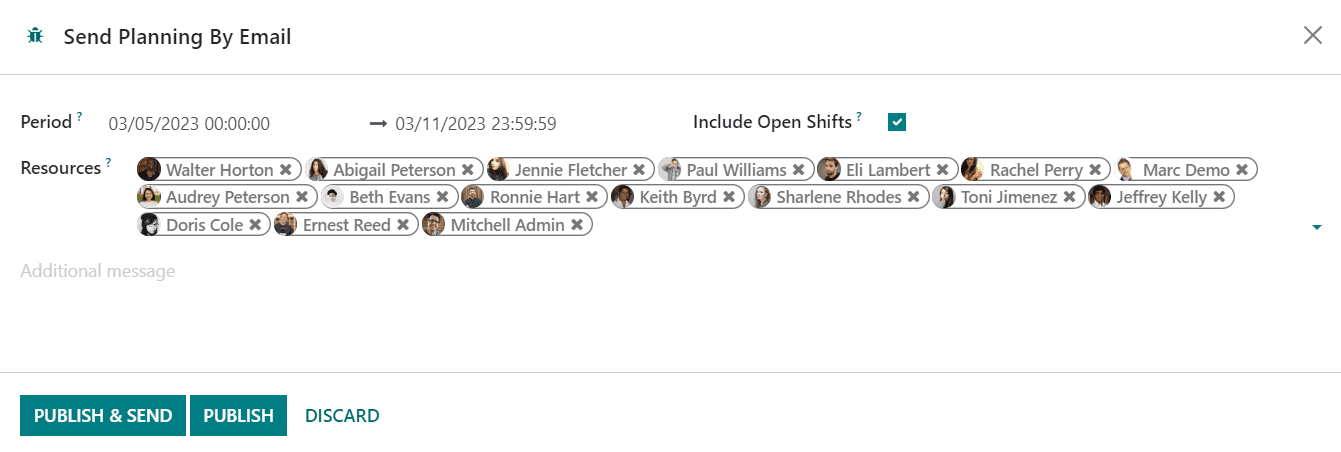
This window can be used to send planning by email to the mentioned resources.

The New button can be used to plan a new activity. You can also use the + icon that appears on the screen while you place the cursor on any particular date. This will open a pop-up window as shown below.
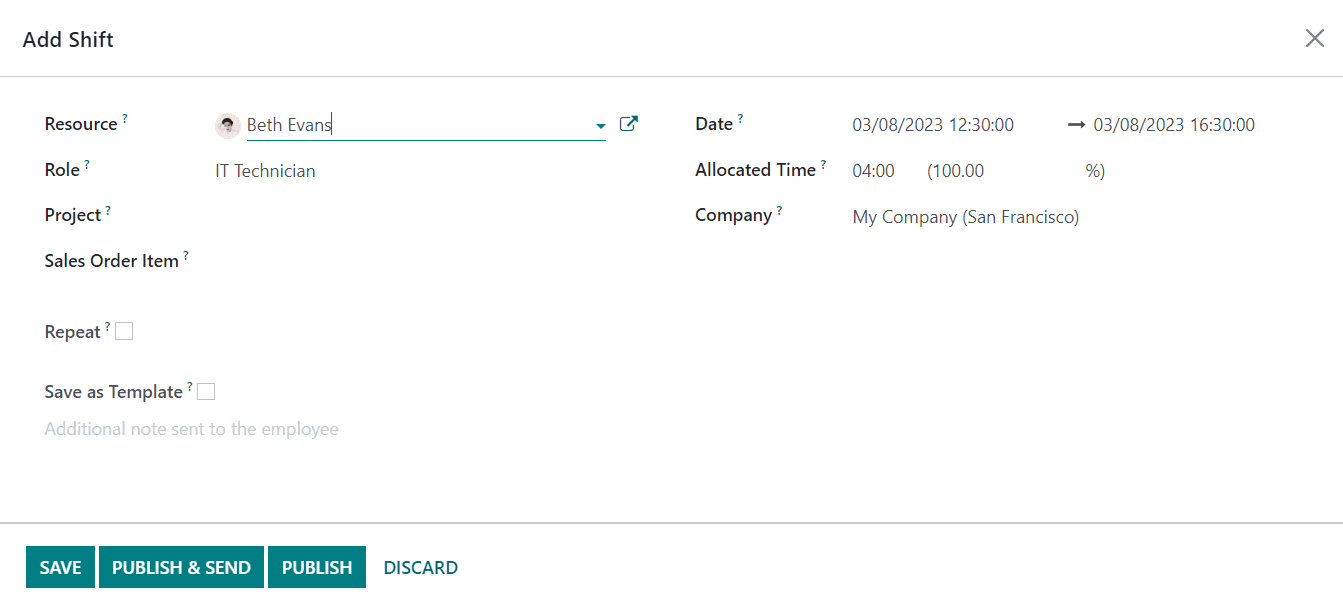
The name of the Resource and Role will be available in the window. If not, you can mention the data in the corresponding fields. Specify the Project and Sales Order Item for which this activity will be planned. In order to repeat the schedule, you can activate the Repeat field. Modifications made to a shift only impact the current shift and not the other ones that are part of the recurrence. The same goes when deleting a recurrent shift. You can disable this option to stop the recurrence. To save the shift as a template, activate the Save as Template option. The Date, Allocated Time, and Company will be available in the respective fields. You can add any additional note in the given space and it will be sent to the employee along with the schedule details. You can use the Save button to save the shift and use the Publish & Send button to perform the respective actions.
Here, you will get Open Shifts, My Shifts, My Team, My Department, My Role, My Project, My Sales Orders, Shifts in Conflicts, Employees on Time Off, No Timesheets, Human, Material, Billable, Non-Billable, Draft, Published, To Send, Future, Next Week, This Week, Tomorrow, Today, Yesterday, Last Week, and Past as default Filters in this platform. Under the Group By option, you will get Department, Manager, Resource, Role, Sales Order, Sales Order Item, Project, Company, Start Date, and End Date options.
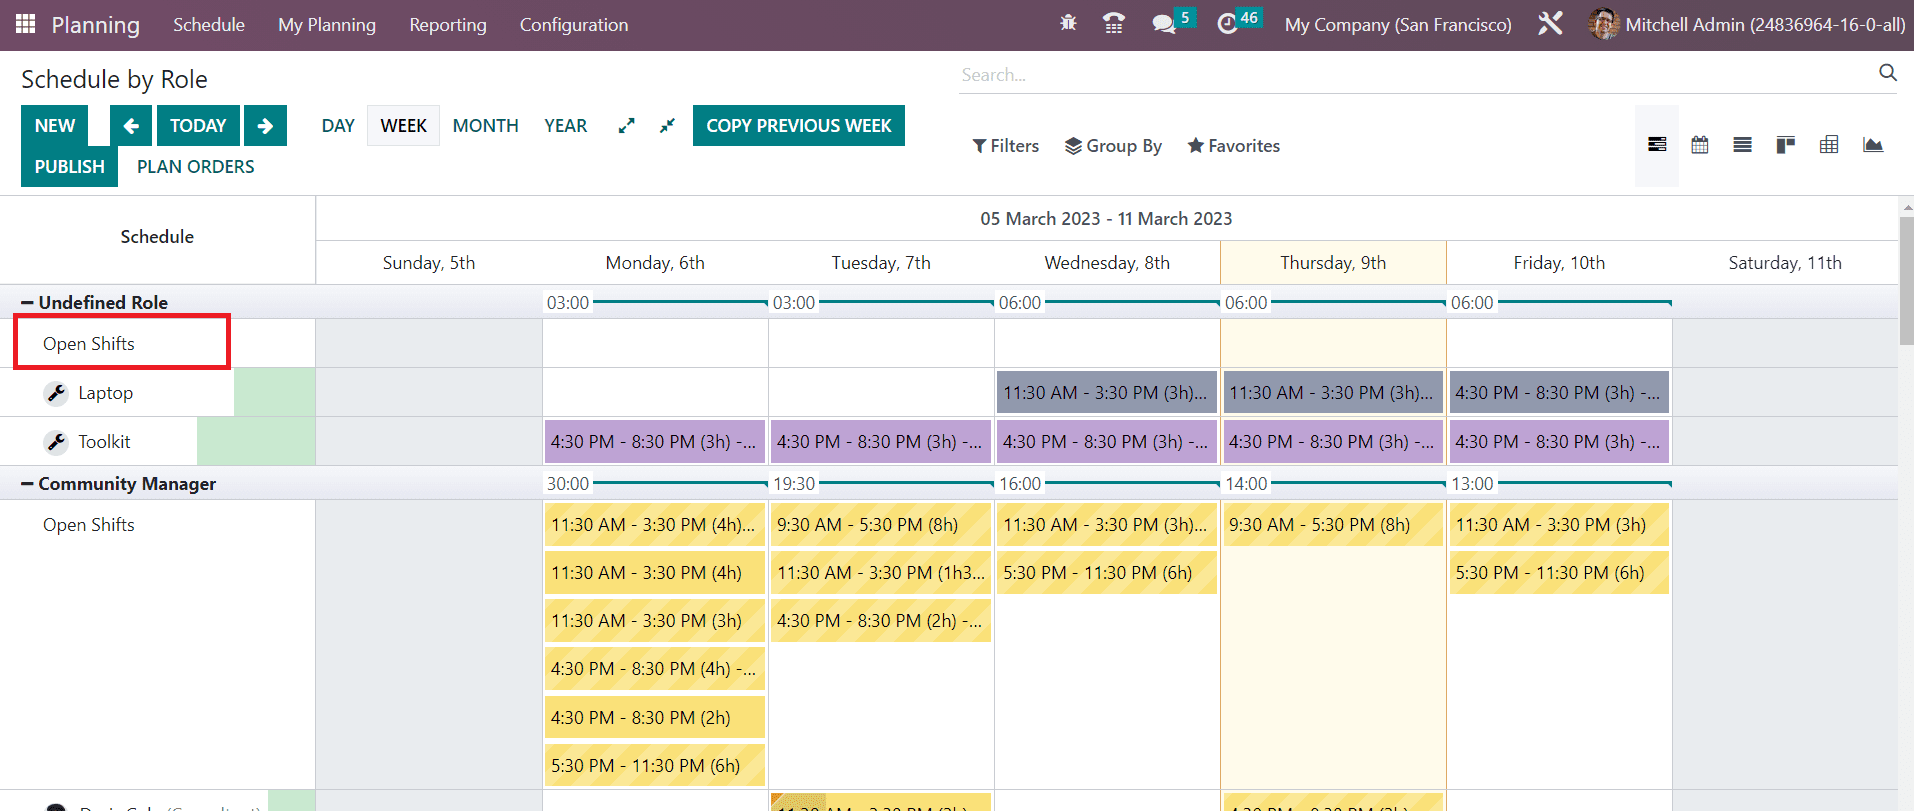
As we mentioned earlier, the same schedule pattern will be available based on role, project, and sales order in the By Role, By Project, and By Sales Order menus, respectively.
My Planning
In the Planning module, the user will get a dedicated menu called My Planning, where they can observe their schedules. You can use this platform to view all your schedule at a glance. This will help you to schedule your activities without any overlapping.

You will get the necessary details of your shifts from this window. The schedules will be organized in this window according to the planned date and time. The user will get knowledge about the published shifts here. The systematic organization of the schedule will help the employee easily identify overlapping shifts.
Open Shifts
There may be situations where the employee could not finish the assigned work within the scheduled time due to some technical or personal issues. No matter whatever the situation might be, it is essential to complete the scheduled activity to meet the target of the company. In such cases, Odoo offers an option to schedule the pending activities in open shifts.
If the assigned employee couldn’t finish the work on the scheduled date, others can take the shift and complete the scheduled activity. This feature is called the Open Shifts in Odoo Planning module.
It is possible to allow employees to unassign themselves from the assigned activities in the Odoo Planning module.
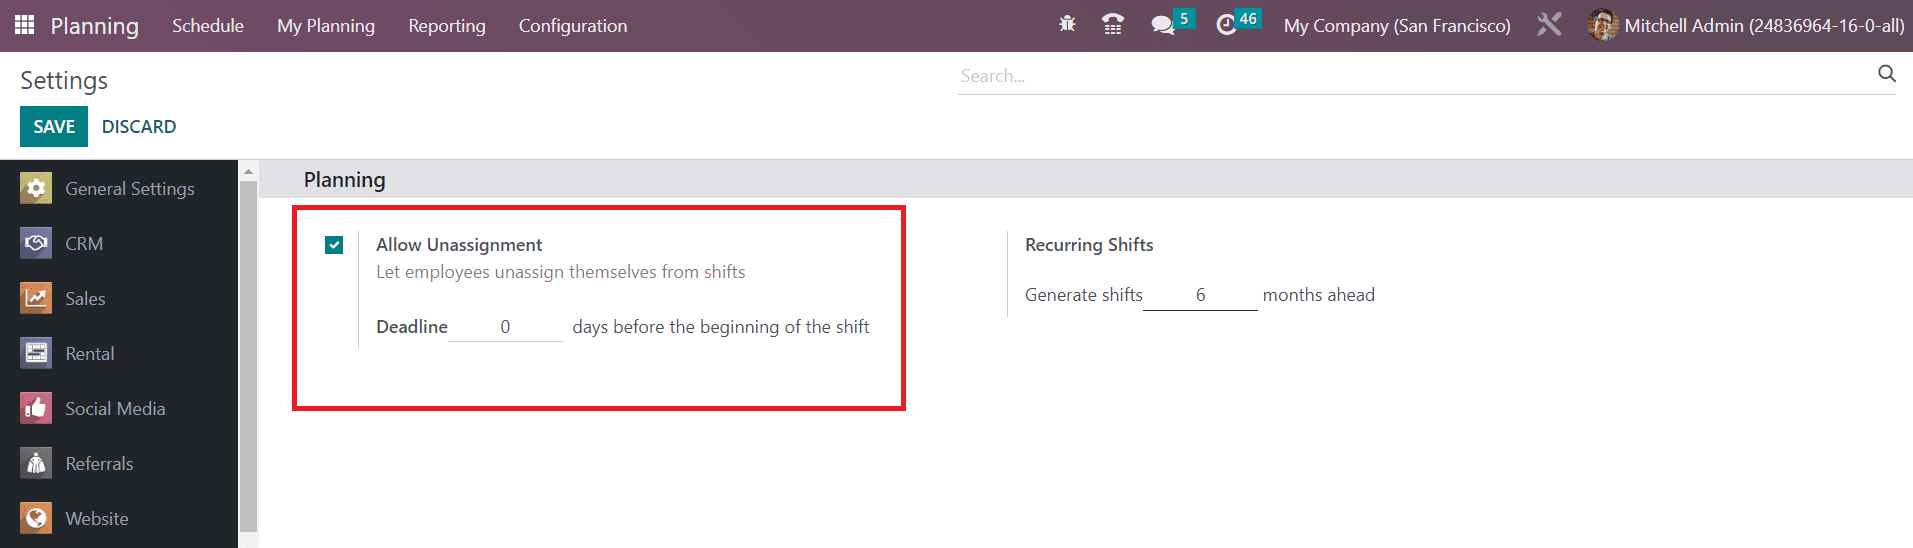
For this, you can activate the Allow Unassignment option. Activating this option will let the employees unassign themselves from the shifts. The admin can set a deadline here. By doing so, the unassignment can be performed till the deadline.
Roles
Assigning different roles to employees will help them to get a clear understanding about their duties and responsibilities they should perform according to the assigned role. By doing so, the admin can easily assign activities to the employees according to their roles. It will provide a perspective about the activity they should perform by taking the role. You can configure such roles from the Configuration menu of the module. Under the Configuration menu, the user can find the Roles option as shown in the image below.
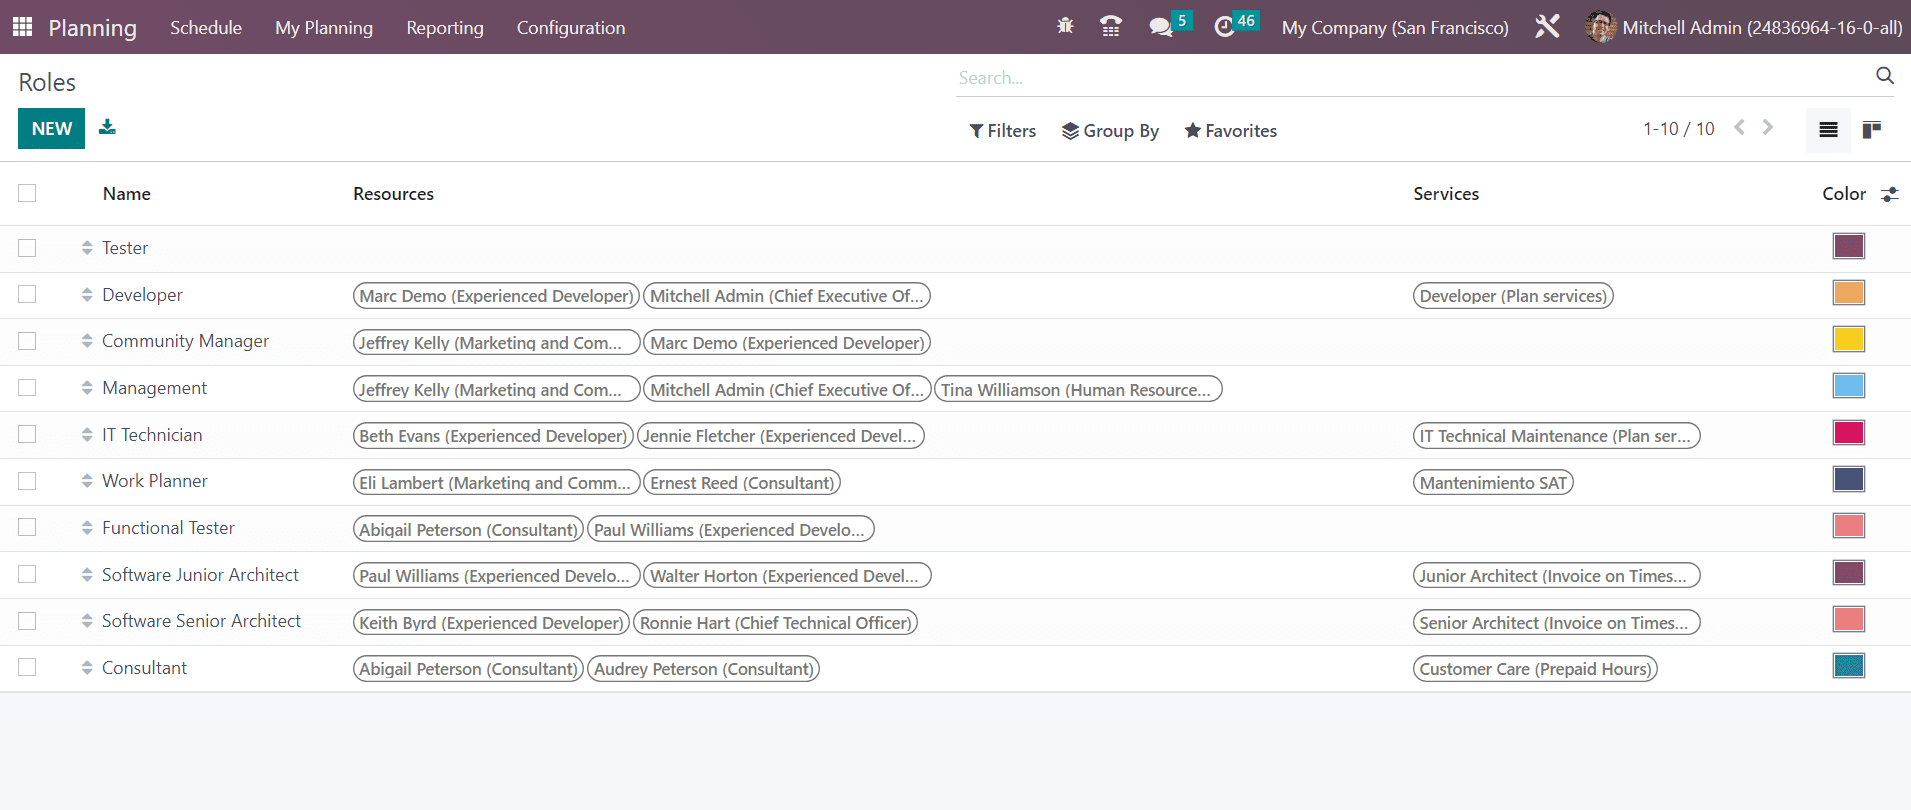
The list view shows the Name, Resource, and Services of the roles. You can create a new role using the New button.
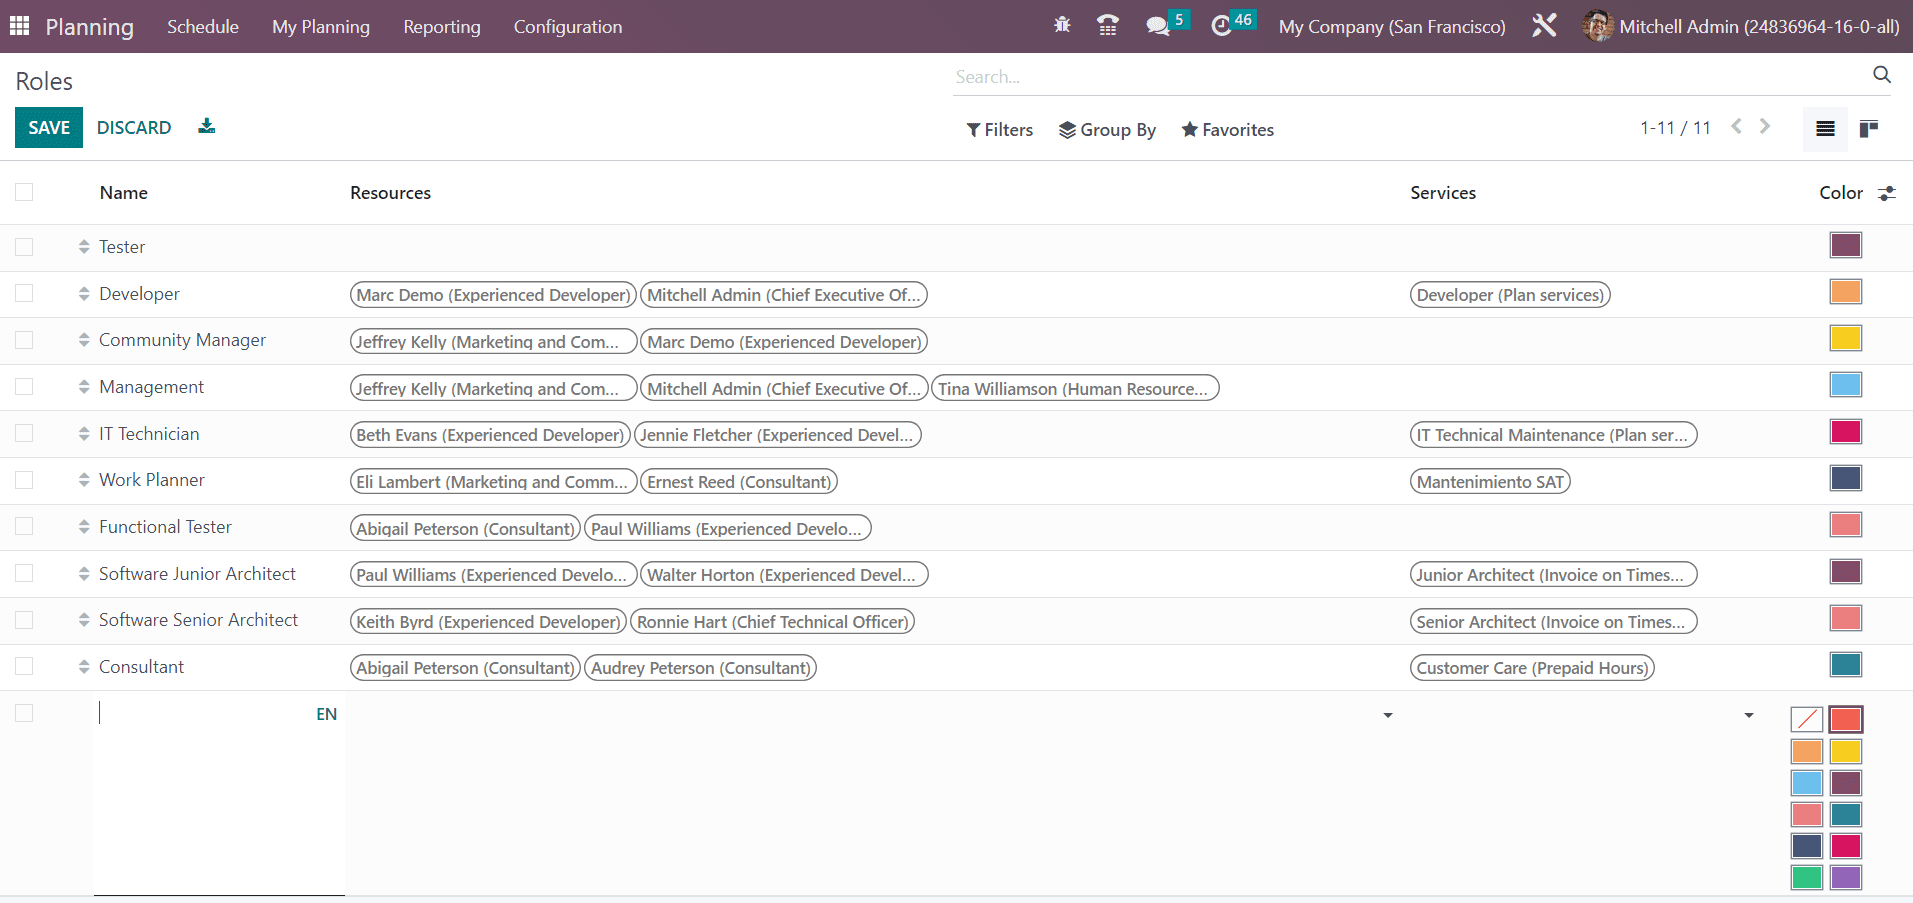
When you click on the New button, you will get a new line under the available list. Here, you can provide the Name of the role in the given space. In the Resources field, you can assign employees to this role. The Services that the Resources provide under this role can be specified in the respective field. You can set different colors for different roles for the purpose of quick identification.
Materials
In the Odoo 16 Planning module, you will get a new option under the Configuration menu which can be used to configure the materials required or used in a scheduled activity. In order to configure such materials, you can go to the Configuration menu and select the Materials option.
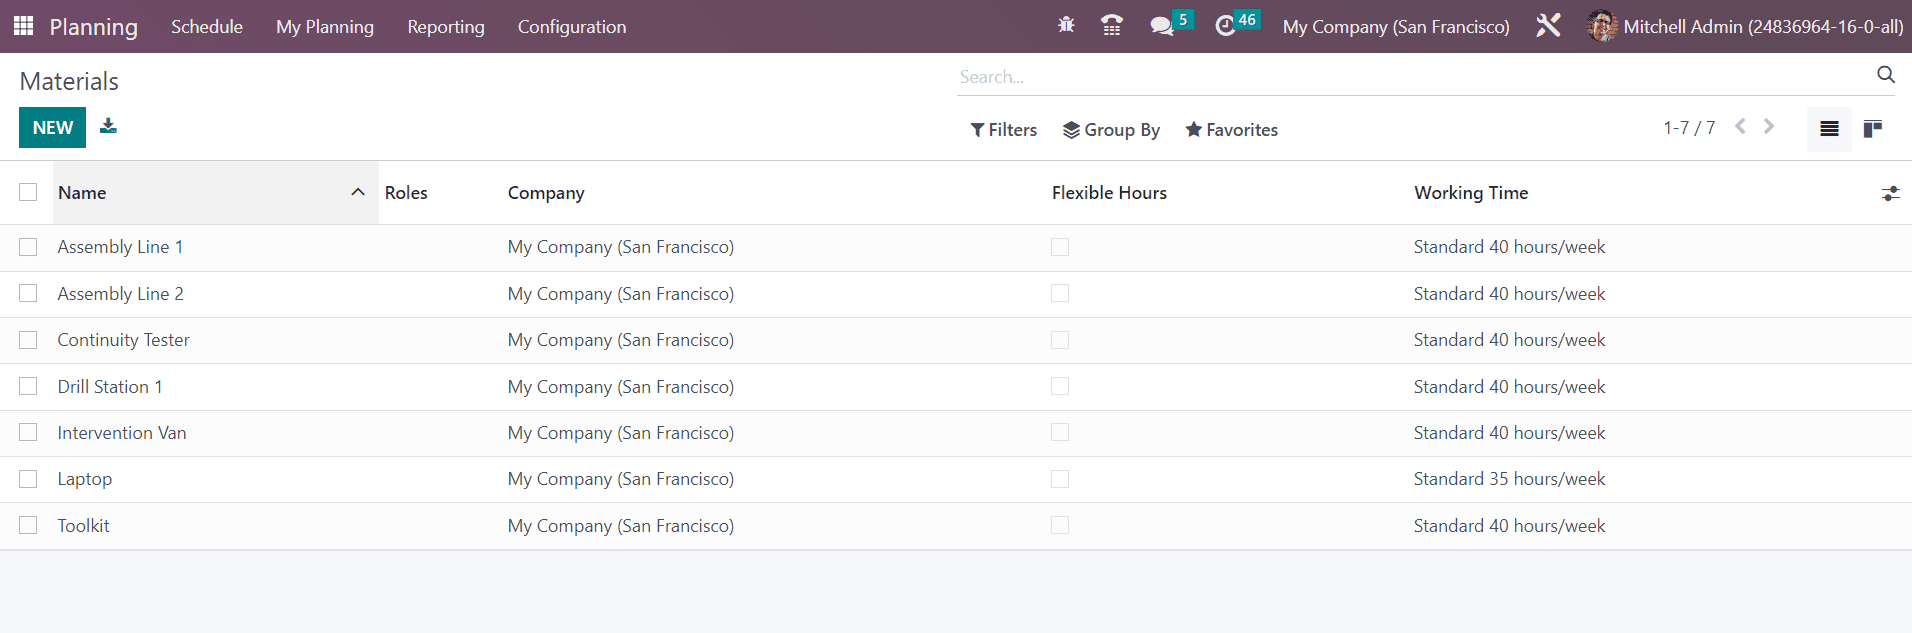
Here, you can observe the already created list of materials with their Name, Roles, Company, Flexible Hours, and Working Time. In order to add new material, click on the New button. This will open a new line under the available list. Provide a name to the material in the given field. In the respective fields, you can mention the Roles, Company, Flexible Hours, and Working Time. Don’t forget to click on the Save button to save the newly created material.
Shift Templates
At the time of the creation of new schedules, it is possible to add shift templates in the Odoo Planning module. By doing so, the pre-configured data available in the template will be automatically added to the new schedule. This will save your time from mentioning details manually. In Odoo, you will get the option to save a new schedule as a template during the time of configuration. You can also create a new shift template from the Configuration menu of the module. For this, go to the Configuration menu and select the Shift Template option.
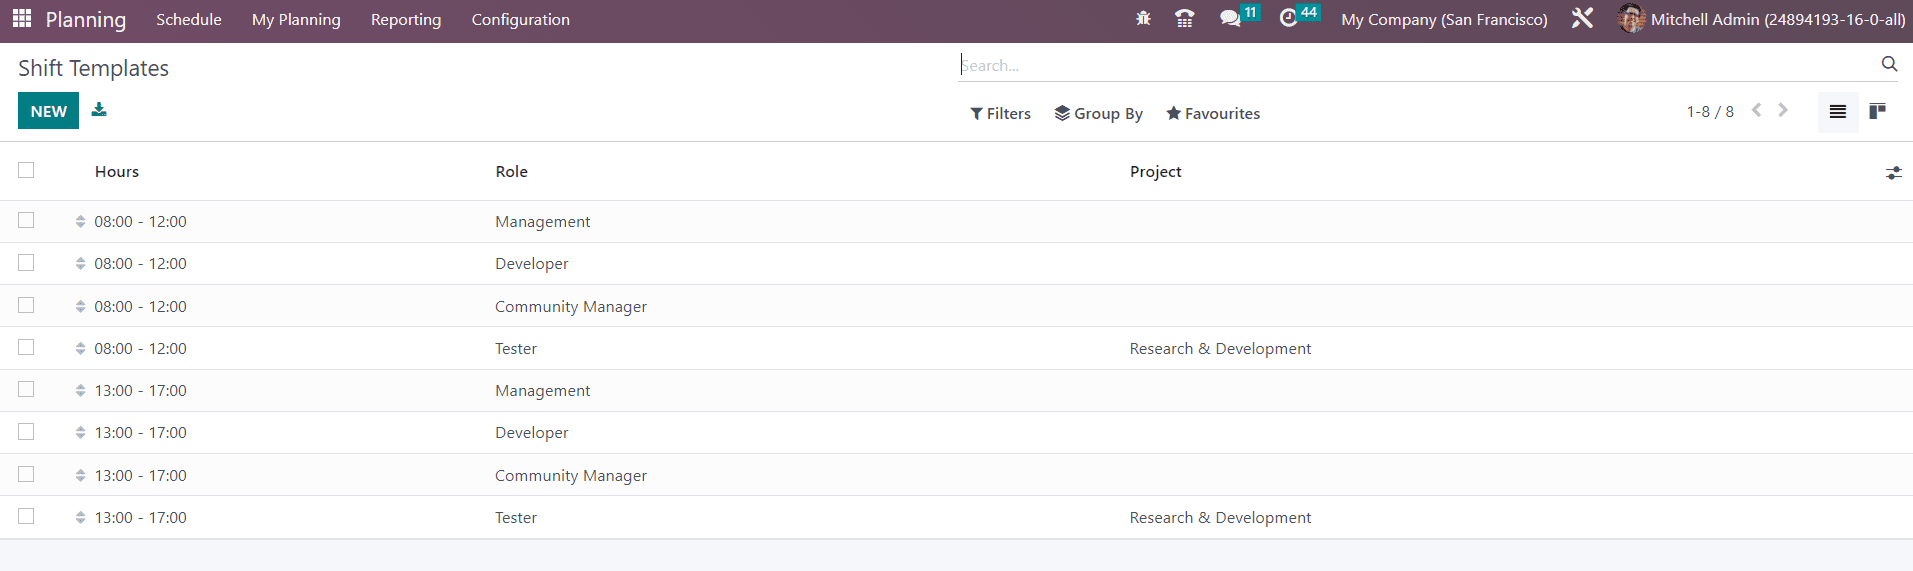
You can observe the already configured shift templates here with Hours, Rule, and Project. Click on the New button to create a new shift template.

A new form view will appear as shown in the image. Here, you can mention the Planned Hours, Duration, Role, and Project in the respective fields.
Reporting
The Planning Analysis platform available under the Reporting menu can be used to analyze the activities scheduled using the Planning module.
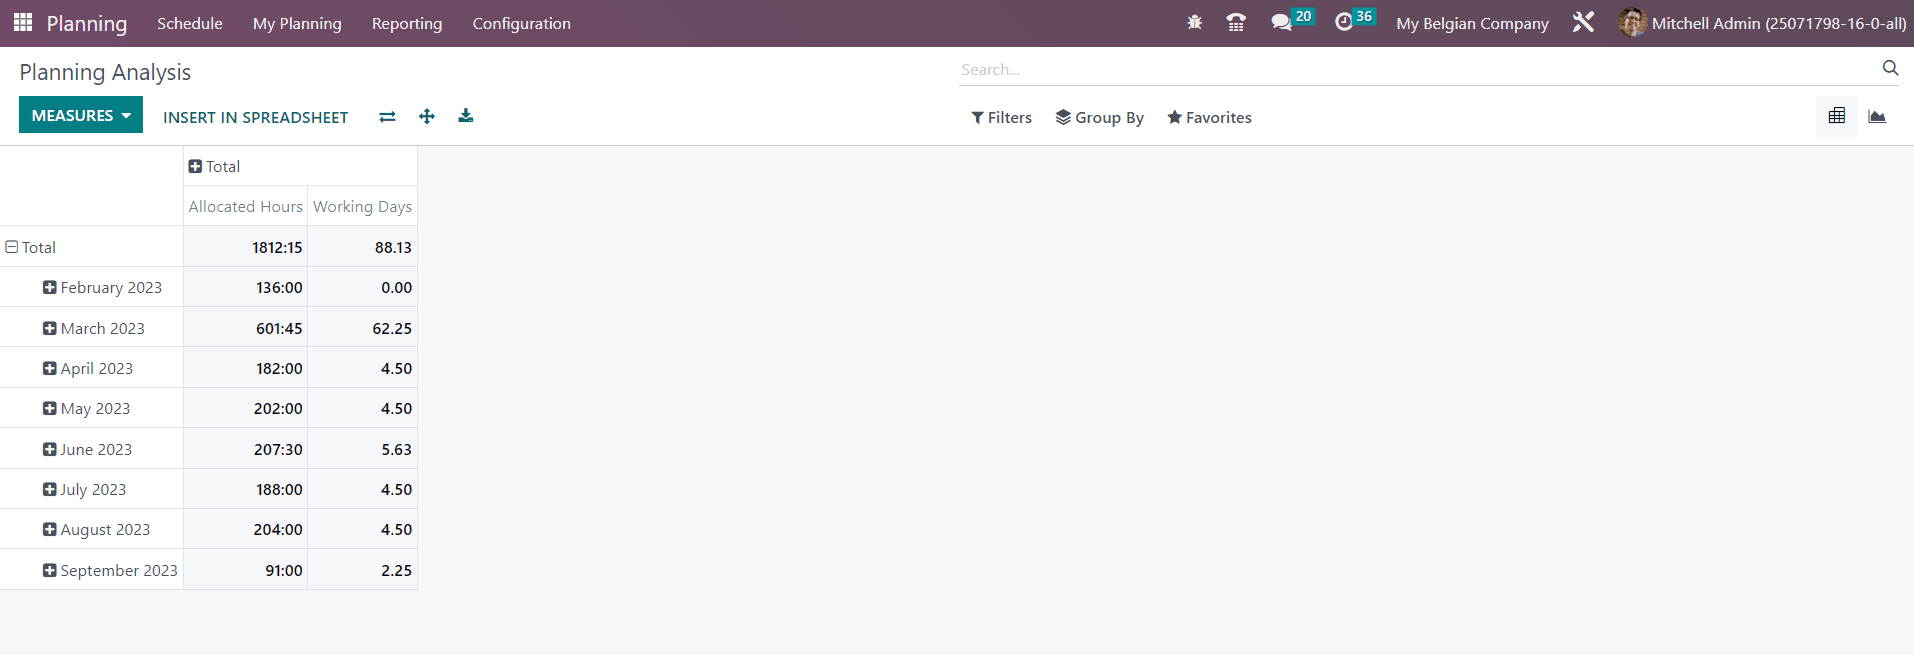
This is the Pivot view of the report. You can use suitable filters and group by options on this platform to get desired reports. You can change the measures of the reports using the Measures menu.
Planning module offered by Odoo 16 will assist you in simplifying the scheduling operations of the company in an efficient manner.