Lunch
In order to maintain a productive atmosphere inside a company, it is essential to consider the health of each employee. It will be difficult to approach each employee to ensure their requirements and preference for their lunch. During such situations, Odoo can help you to improve the food supply system of your company. This ERP system will allow each employee to order foods as per their preference using the credits allowed for them. The Lunch module will help them to save time by allowing ordering during their free time so that they don’t have to wait in never-ending queues. Once you install the module from the Odoo App Store, you can click on the module to open it.
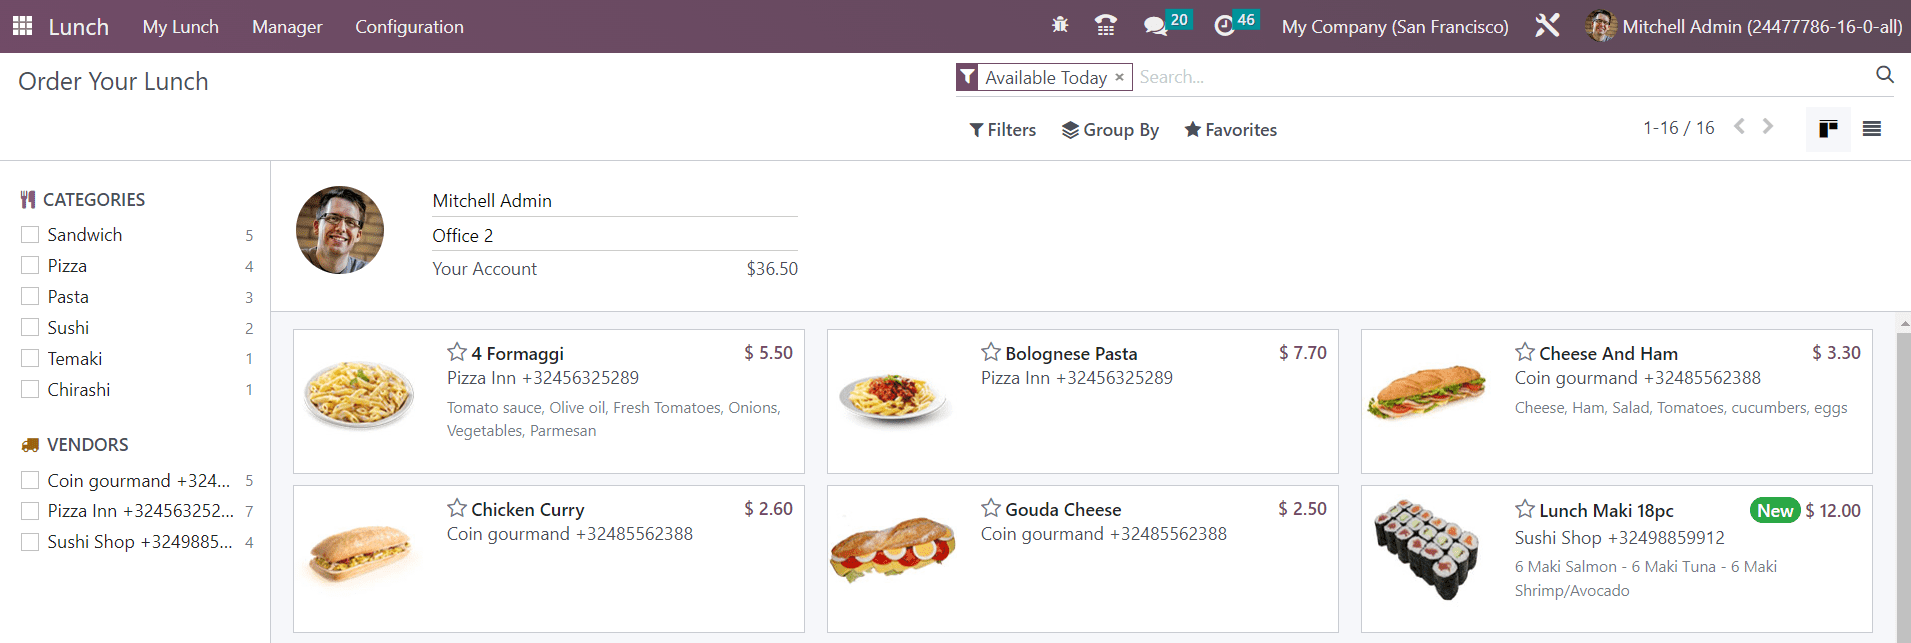
This is the lunch dashboard you get when you open the module. As you can see in the screenshot, the dashboard shows all major courses for your lunch. The employees can select items from this dashboard and place their orders. On the left side of the screen, you will get the categories and vendors. If you want to order items from a particular category or vendor, you can use this panel. You can use Available Today, Archived, and days of a week as filters. The available Group By options are Vendor and Category.

On the lunch dashboard, you can find your profile as shown in the screenshot above. It will show your name, office address, and your account balance. You can order lunch using this account balance.
Now, let’s take a look at how to make orders in the Lunch module. In order to make orders, you can click on the food item according to your preference. Once you click on the product, you will get a pop-up window as shown in the image below.
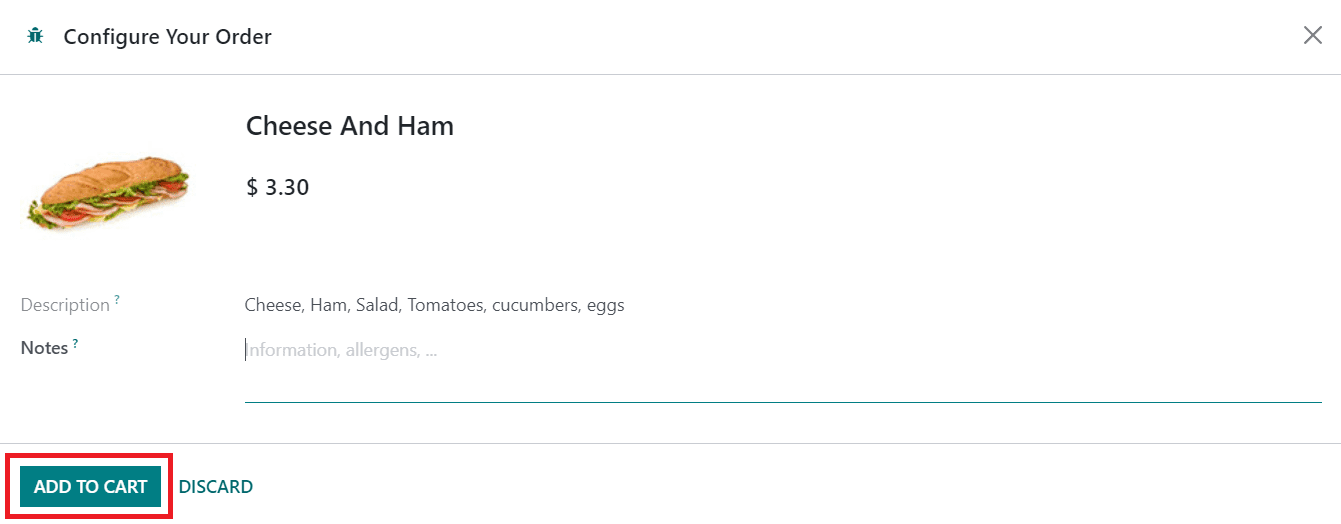
The window will display the name of the product along with an image. You will also get a Description related to the food item. Any additional information can be found under the Notes section. Sometimes, the window will show the Extras field, if the vendor offers any extras with the main course. You can use the Add To Cart button to add this product to your cart.
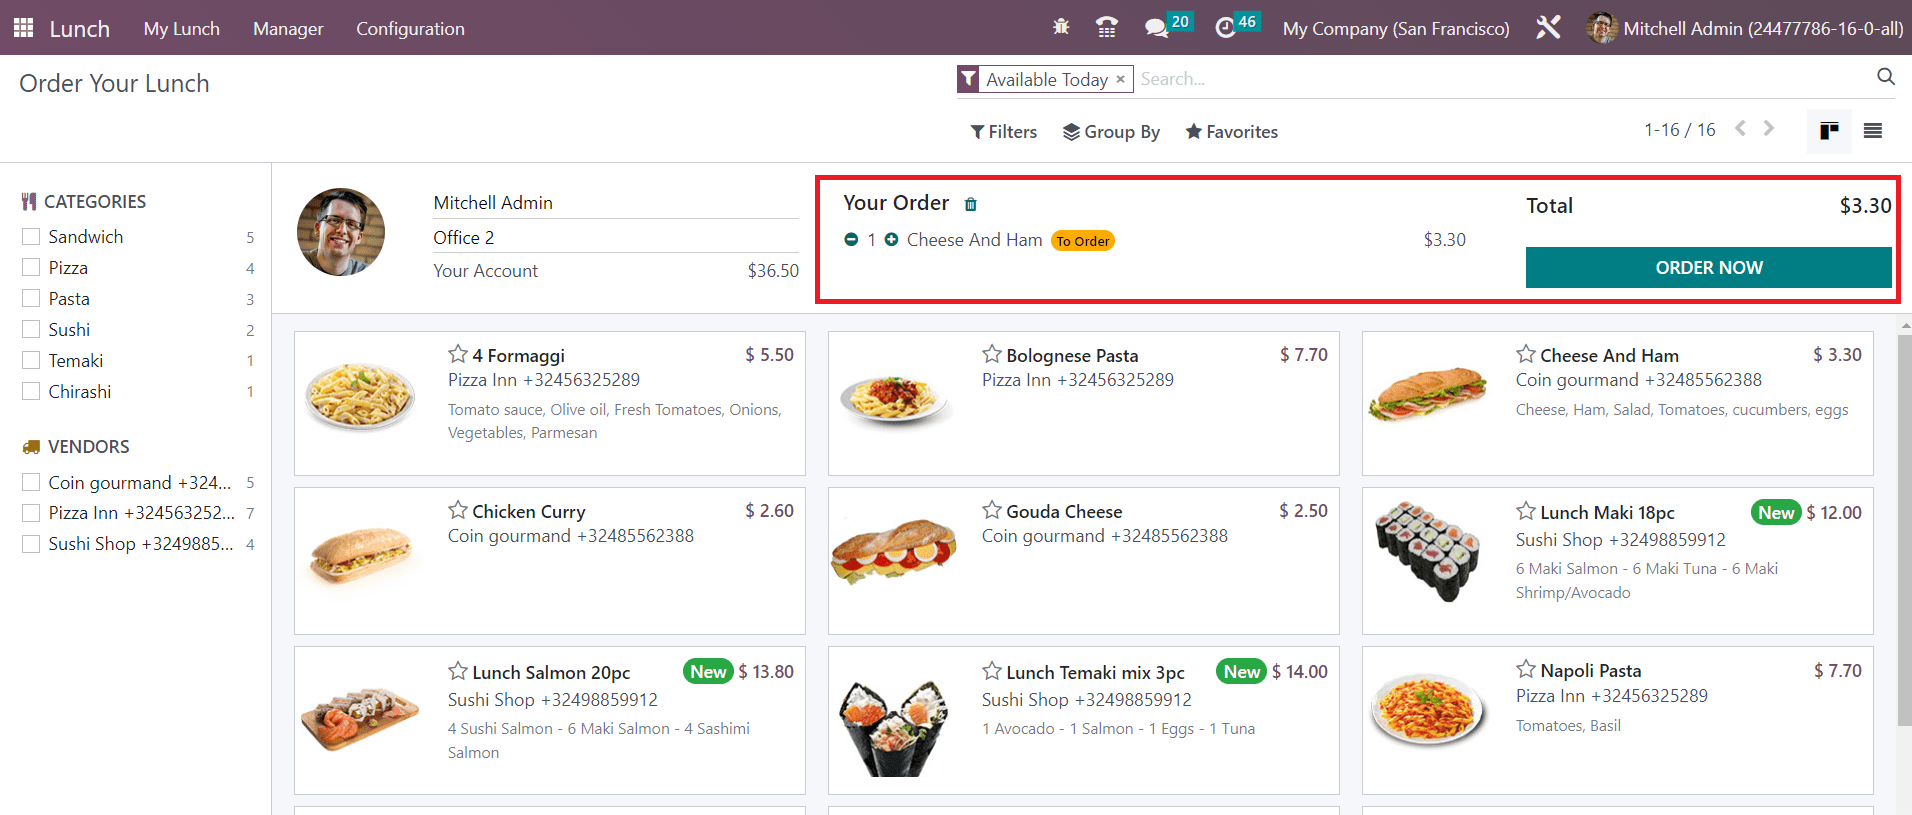
Clicking on this button will add this product to your cast as depicted in the image above. It will be shown on the dashboard with the title Your Order. You can cancel the order using the Delete button.
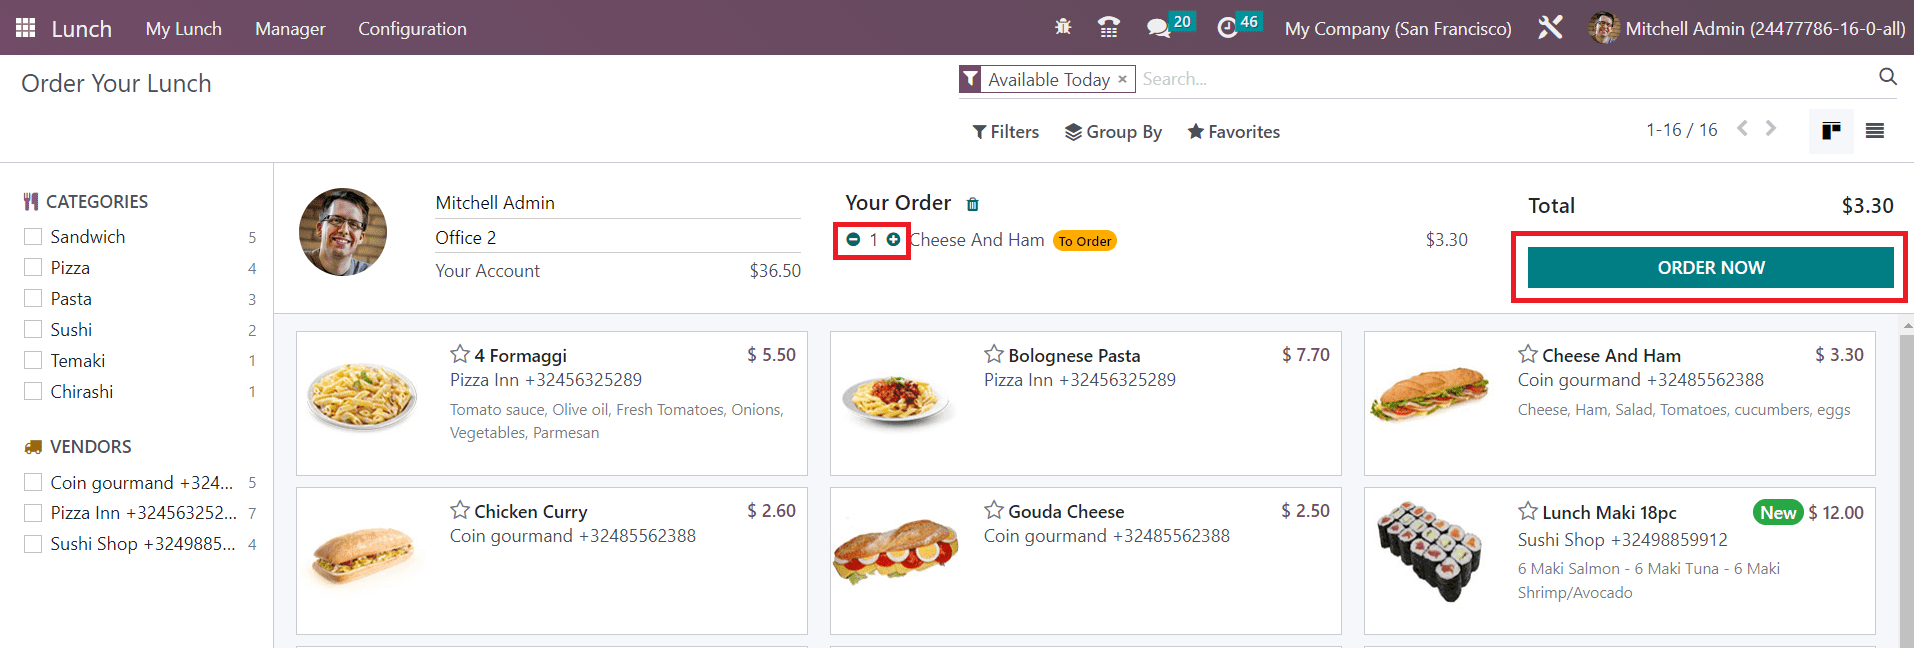
You can decide the number of the product, using the available icons next to the product name. Once you decide the quantity of the product, you can click on the Order Now button.
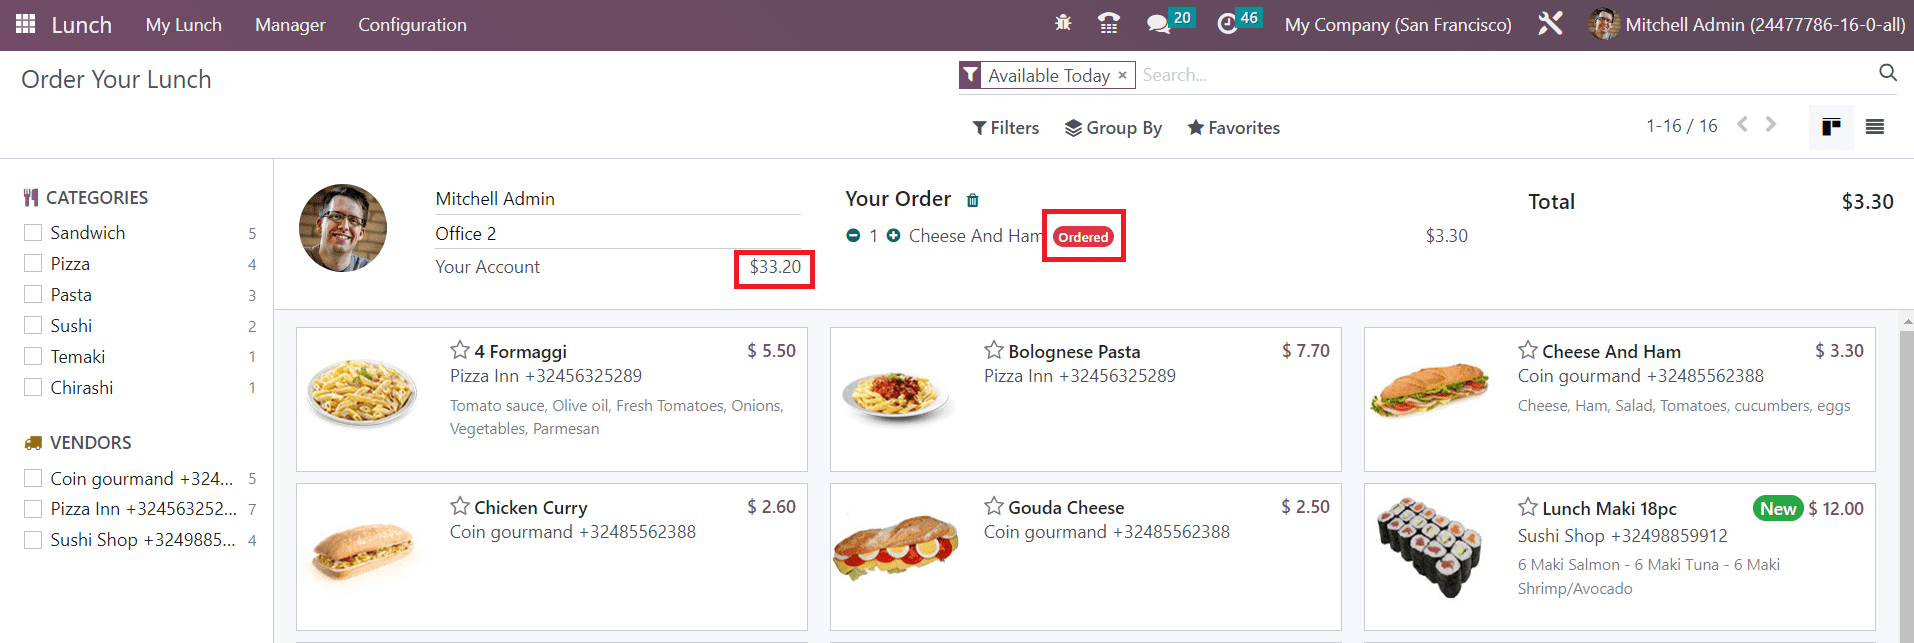
Your order will be placed when you click on the Order Now button and the amount will be reduced from your account balance.
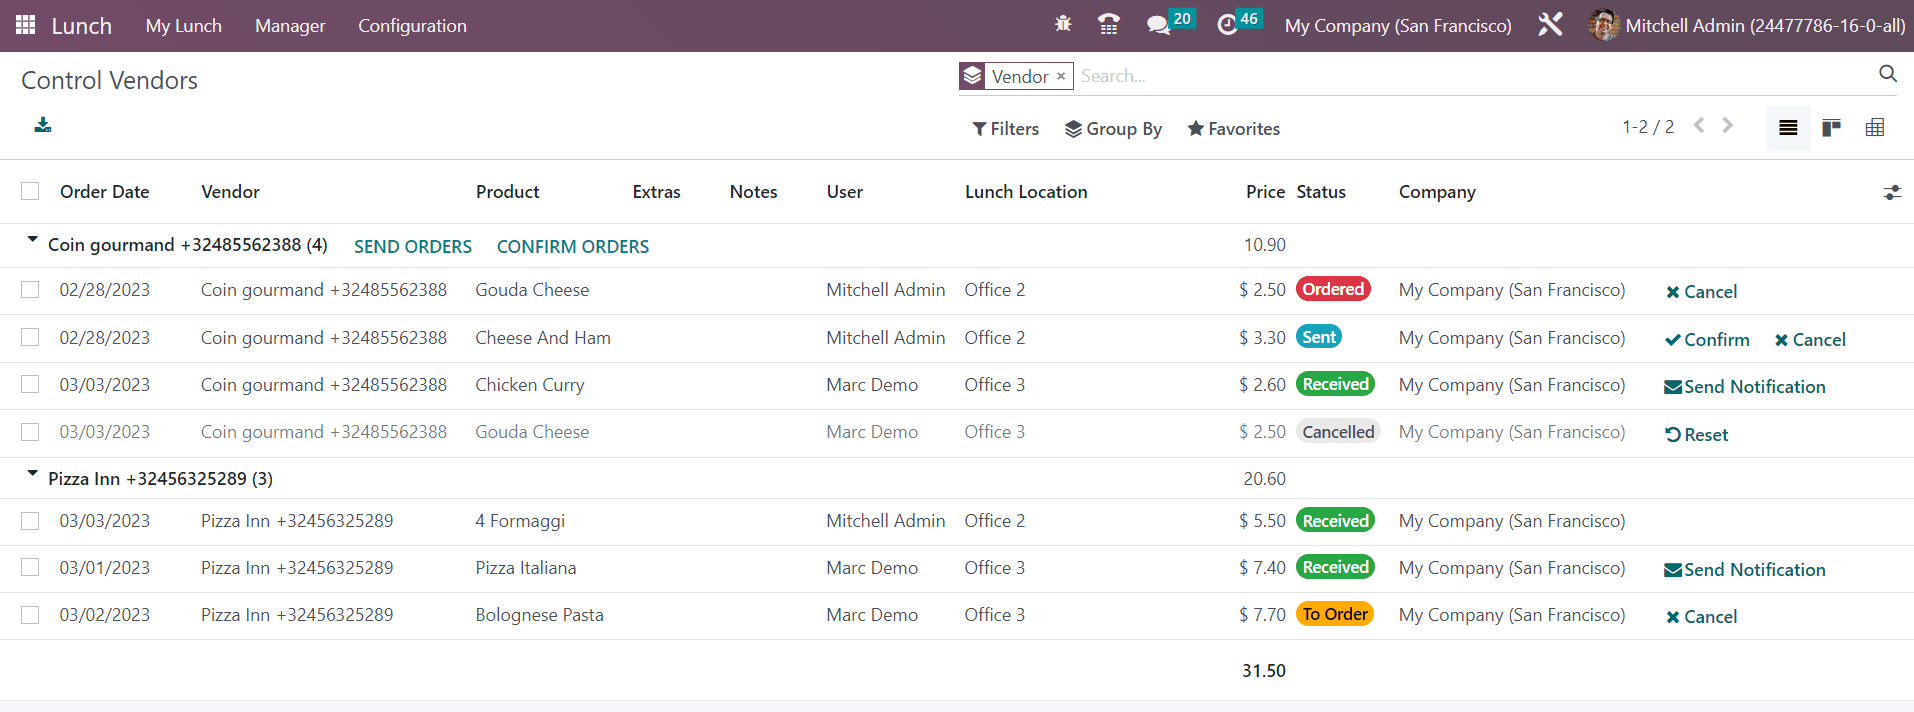
Under the My Lunch menu, you will get the My Orders option, which will allow you to view all your orders. This platform will show the Order Date, Vendor, Product, Extras, Notes, User, Lunch Location, Price, Status, and Company.
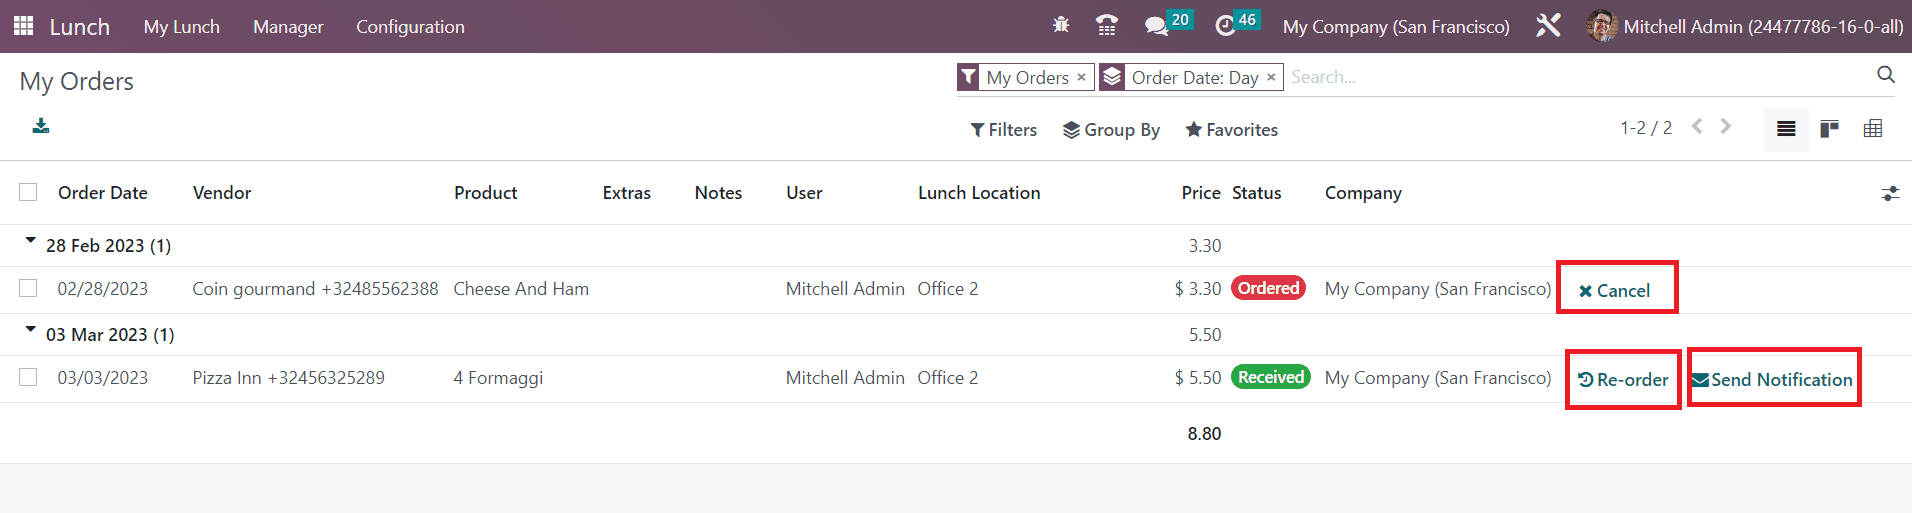
For ordered lunch, you will get a Cancel button to cancel the order. In the case of the received orders, you can use the Reorder button to order the same lunch again. The Send Notification button will send a notification to the respective vendor.
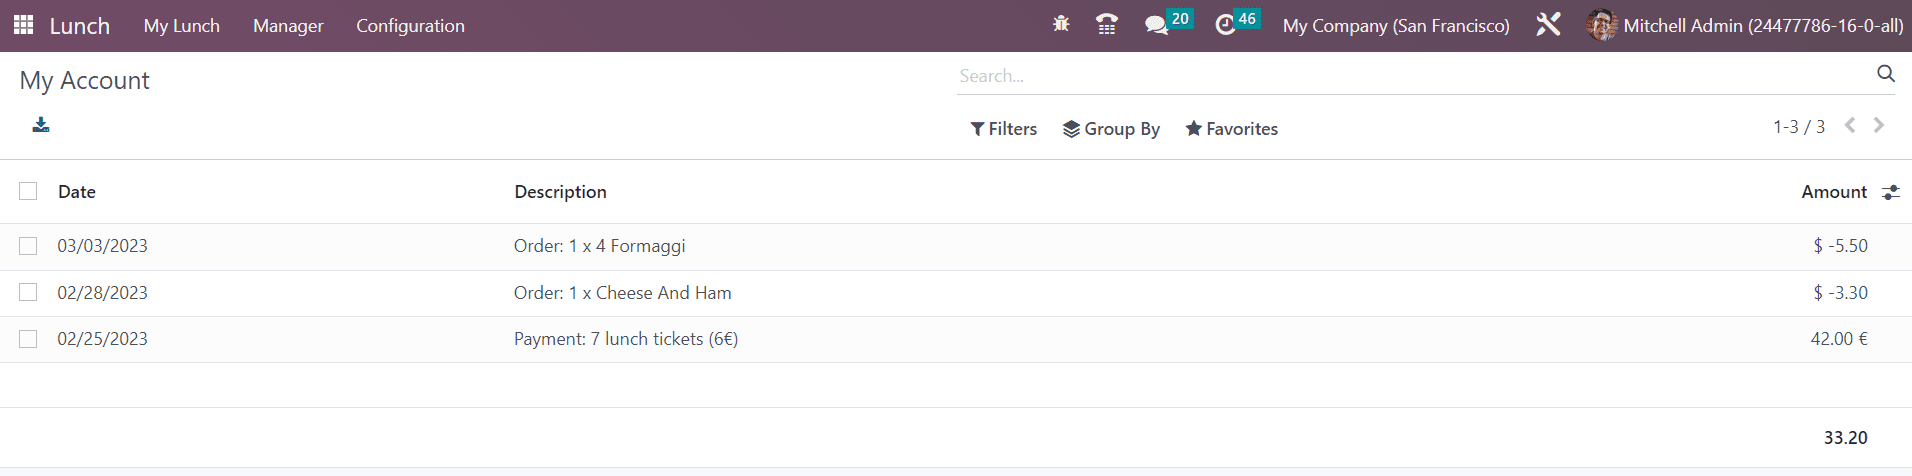
You can use the My Account History option available under the My Lunch menu to get information about your account history. It will show the Date, Description, and Amount.
The manager can easily monitor all activities using the Manager menu available in the Lunch module. The Today’s Orders option will show the orders placed in that particular day.
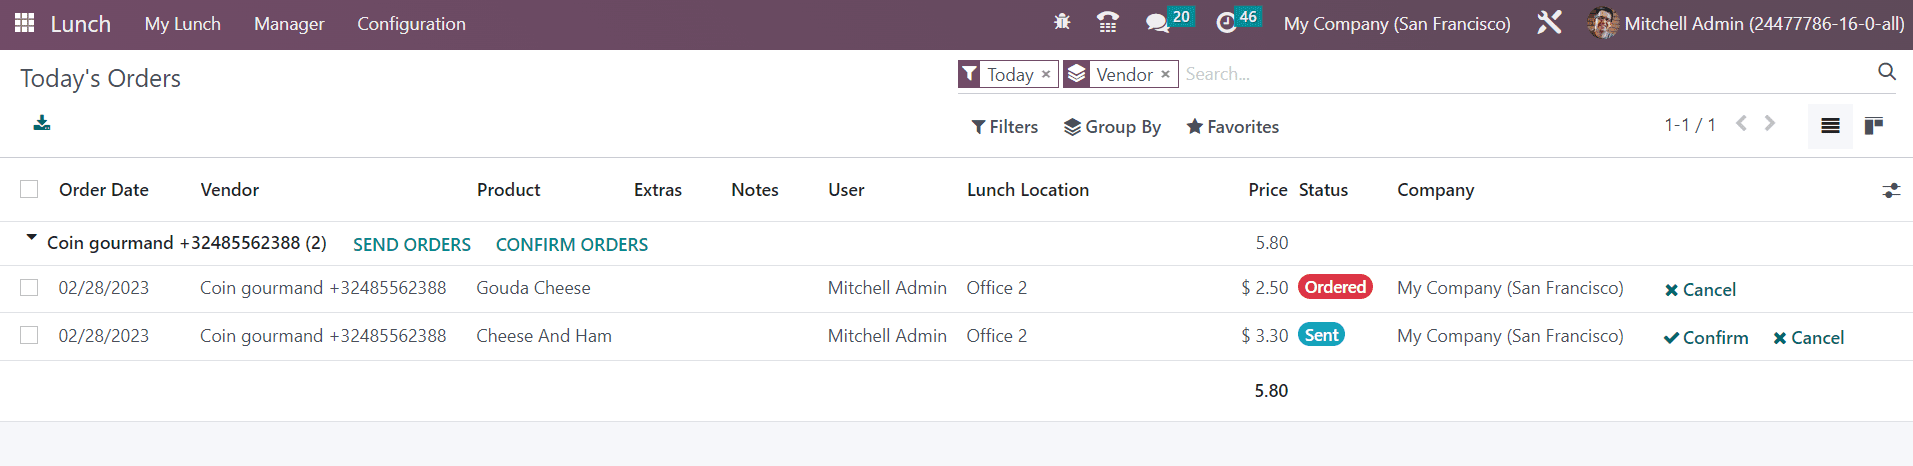
The manager can view the Order Date, Vendor, Product, Extras, Notes, User, Lunch Location, Price, Status, and Company from this window. The Cancel and Confirm buttons will be available here to cancel and confirm the orders respectively. Using the Send Orders button, the manager can send orders to the respective vendor.
The Control Vendors option can be used to observe the orders under different vendors. The manager can view the vendors and orders for the vendors separately.
The Control Accounts platform will show the information about account balance of the employees.
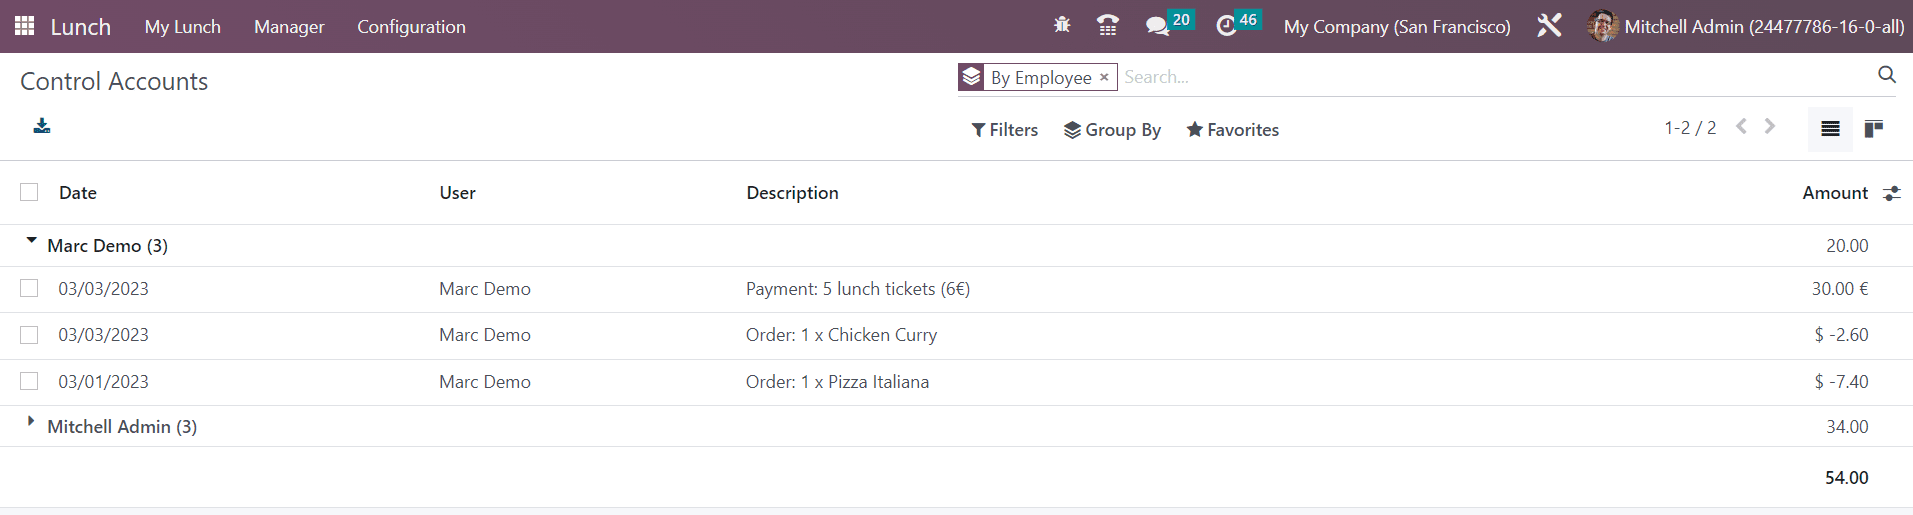
The account history will show the Date, User, Description, and Amount. These details will be available separately according to the user.
The manager can control the cash moves using the Cash Moves option.
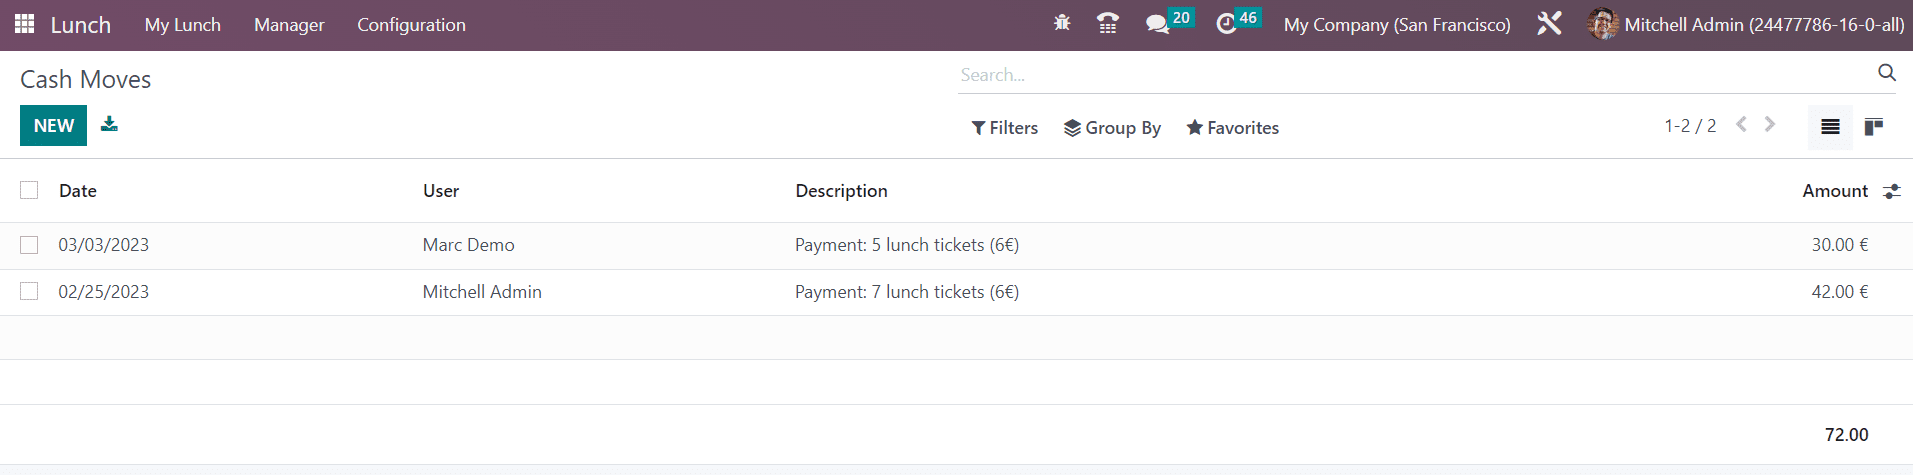
This platform will show the Date, User, Description, and Amount. It is possible to manually record the cash moves using the Create button.
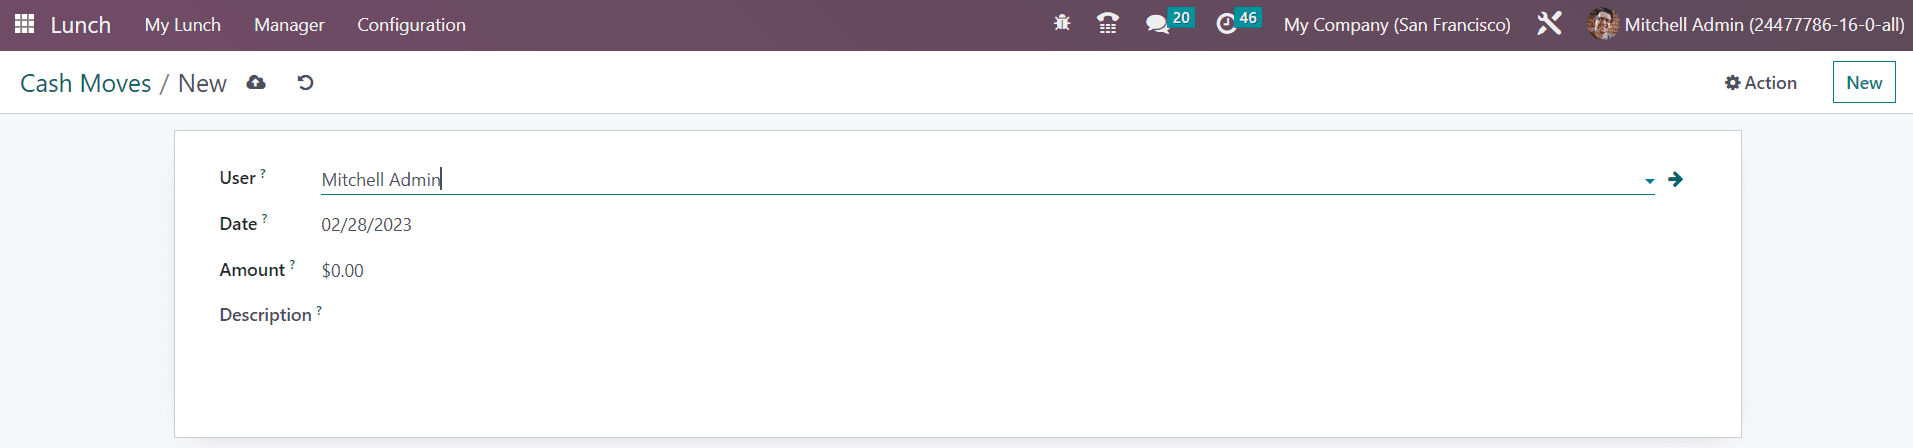
Here, you can mention the User, Date, Amount, and Description in the respective fields.
Configuration
The Configuration menu of the Lunch module contains Settings, Vendors, Locations, Products, Product Categories, and Alerts options. Let’s check each of these options in this section.
Settings
In the Settings menu of the module, you will get the Lunch Overdraft option, where you can set the maximum overdraft that your employees can reach.
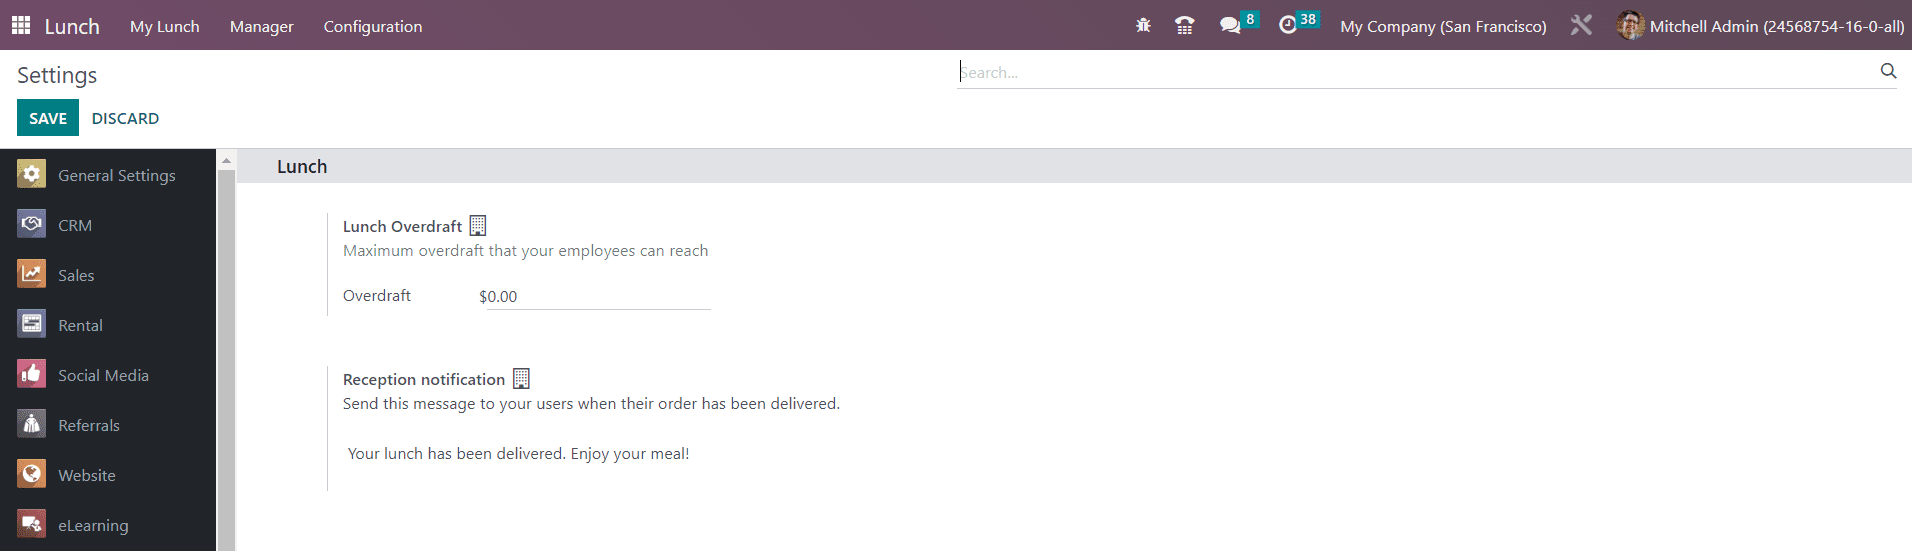
You can set a Reception Notification on this platform. This message will be sent to users when their orders have been delivered.
Vendors
Using the Vendors option, you can configure multiple vendors to the Lunch module. Here, you can find the already configured vendors.
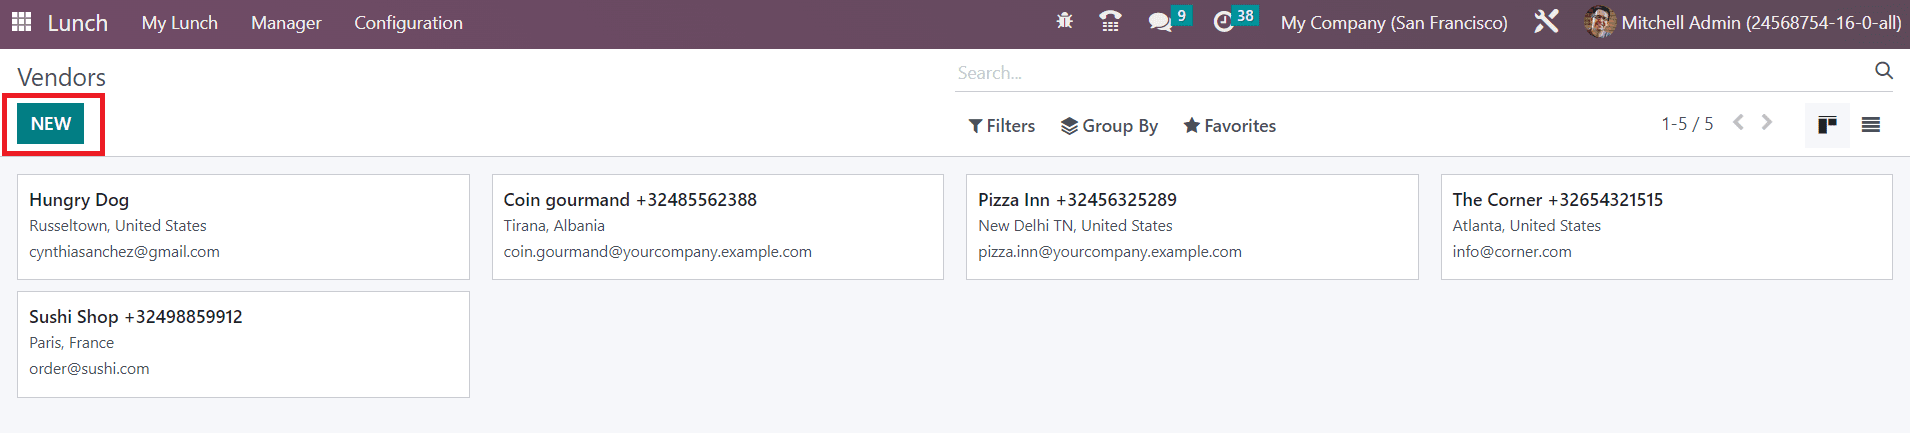
The New button will help you to configure a new vendor to the database. You will get a new form view as shown in the screenshot below.
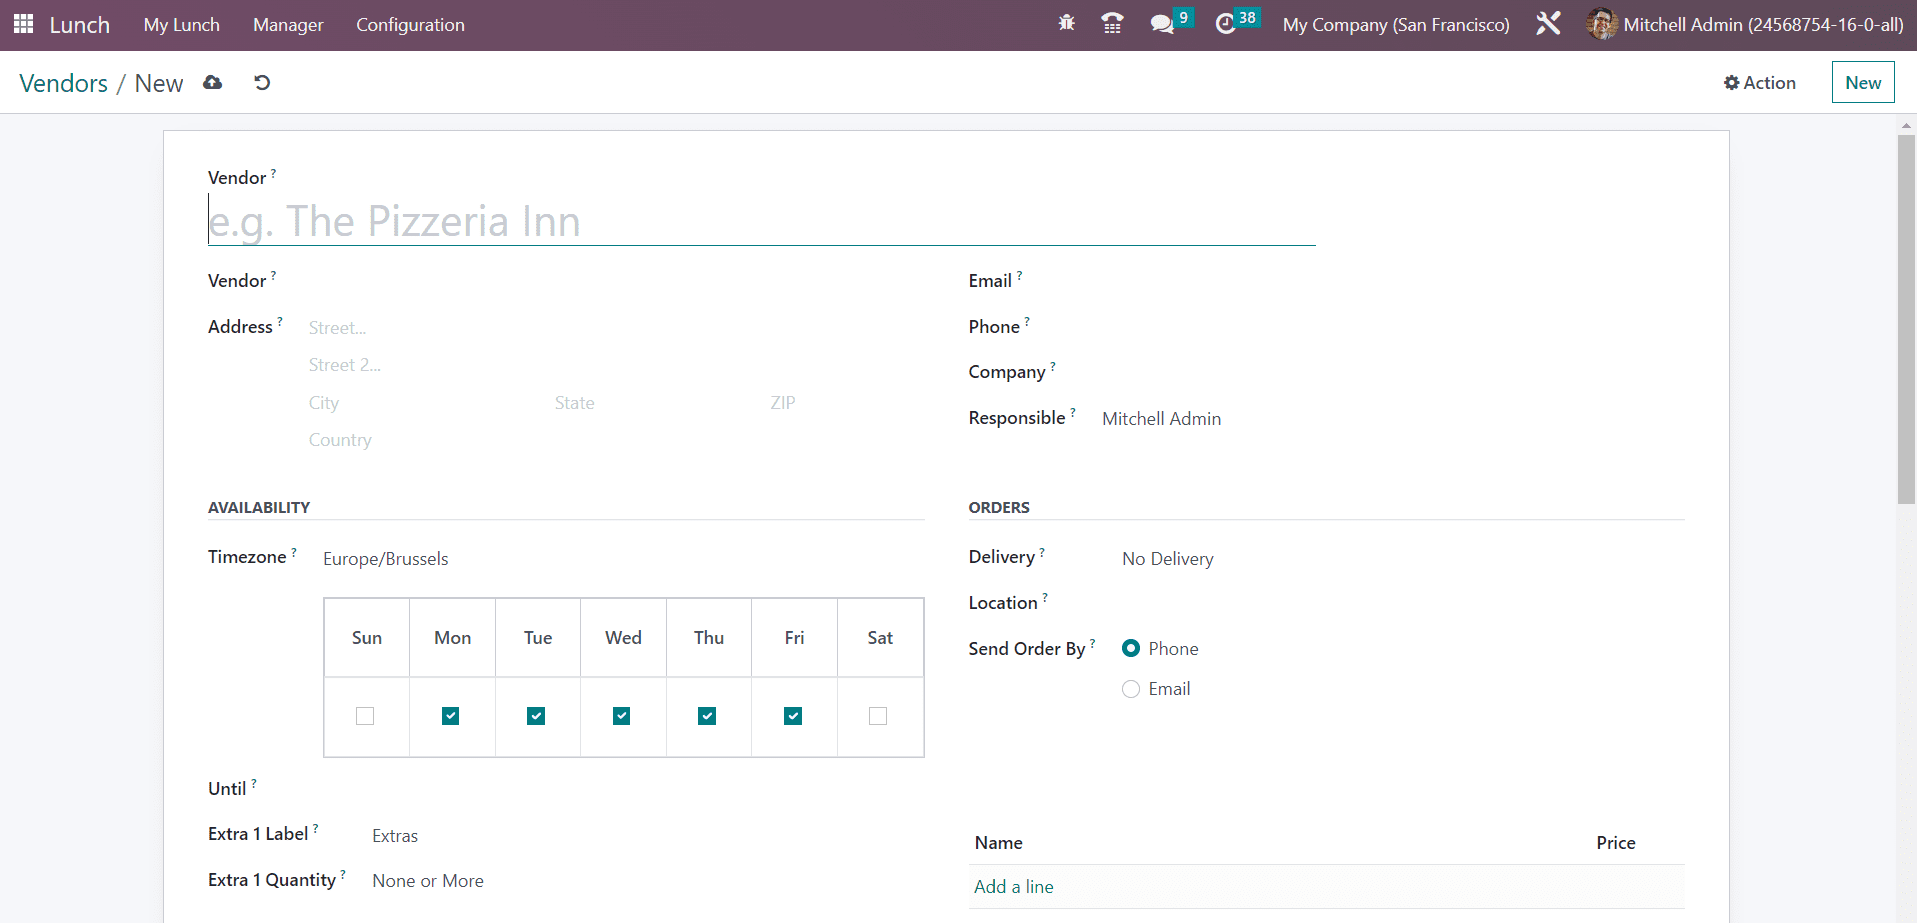
In the given space, you can provide the Vendor, Vendor Address, Email, Phone, Company, and Responsible. Set the Timezone for the vendor in the corresponding field. According to the working schedule of the vendor, you can mark the Availability of their service in a week in the given space. If the vendor provides the Delivery option, you can specify it in the respective field. In the Send Order By field, you can set how the vendor takes orders from the customers. The expiration date of services can be defined in the Until field. If you want to add any extra label to the vendor form, you can use the specific field.
Lunch Location
A company may have multiple branches and working locations. While making orders, it is necessary to mention the lunch location so that the vendor can make deliveries easily.
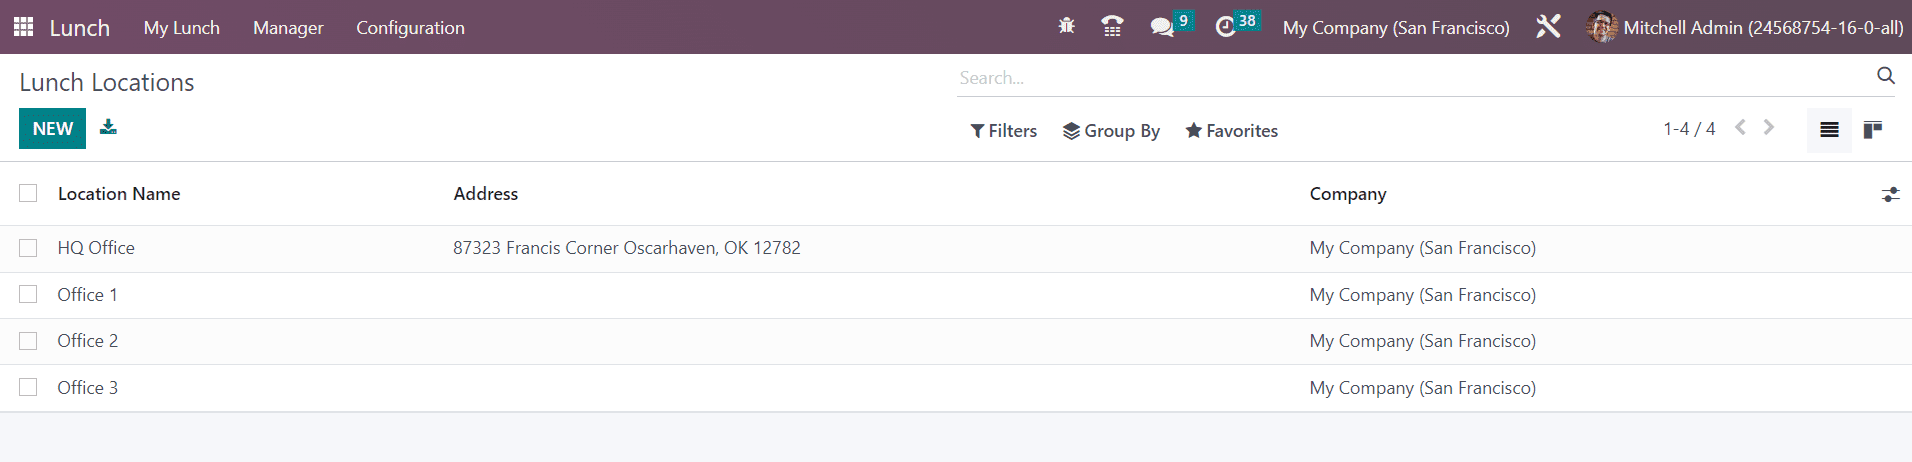
Here, you will get the Lunch Location option under the Configuration menu of the Lunch module. The list will show the Location Name, Address, and Company. You can add the details of the new Lunch Location using the New button.

You will get a new line under the available list of locations. Here, you can add the details of the lunch location in the corresponding spaces. Click the Save button to save the location.
Products
You can configure various food items and products to the Lunch module using the Products option available in the Configuration menu. The platform will show pre-configured products in a list view. You can select suitable categories and vendors form the panel given on the left side of the screen.
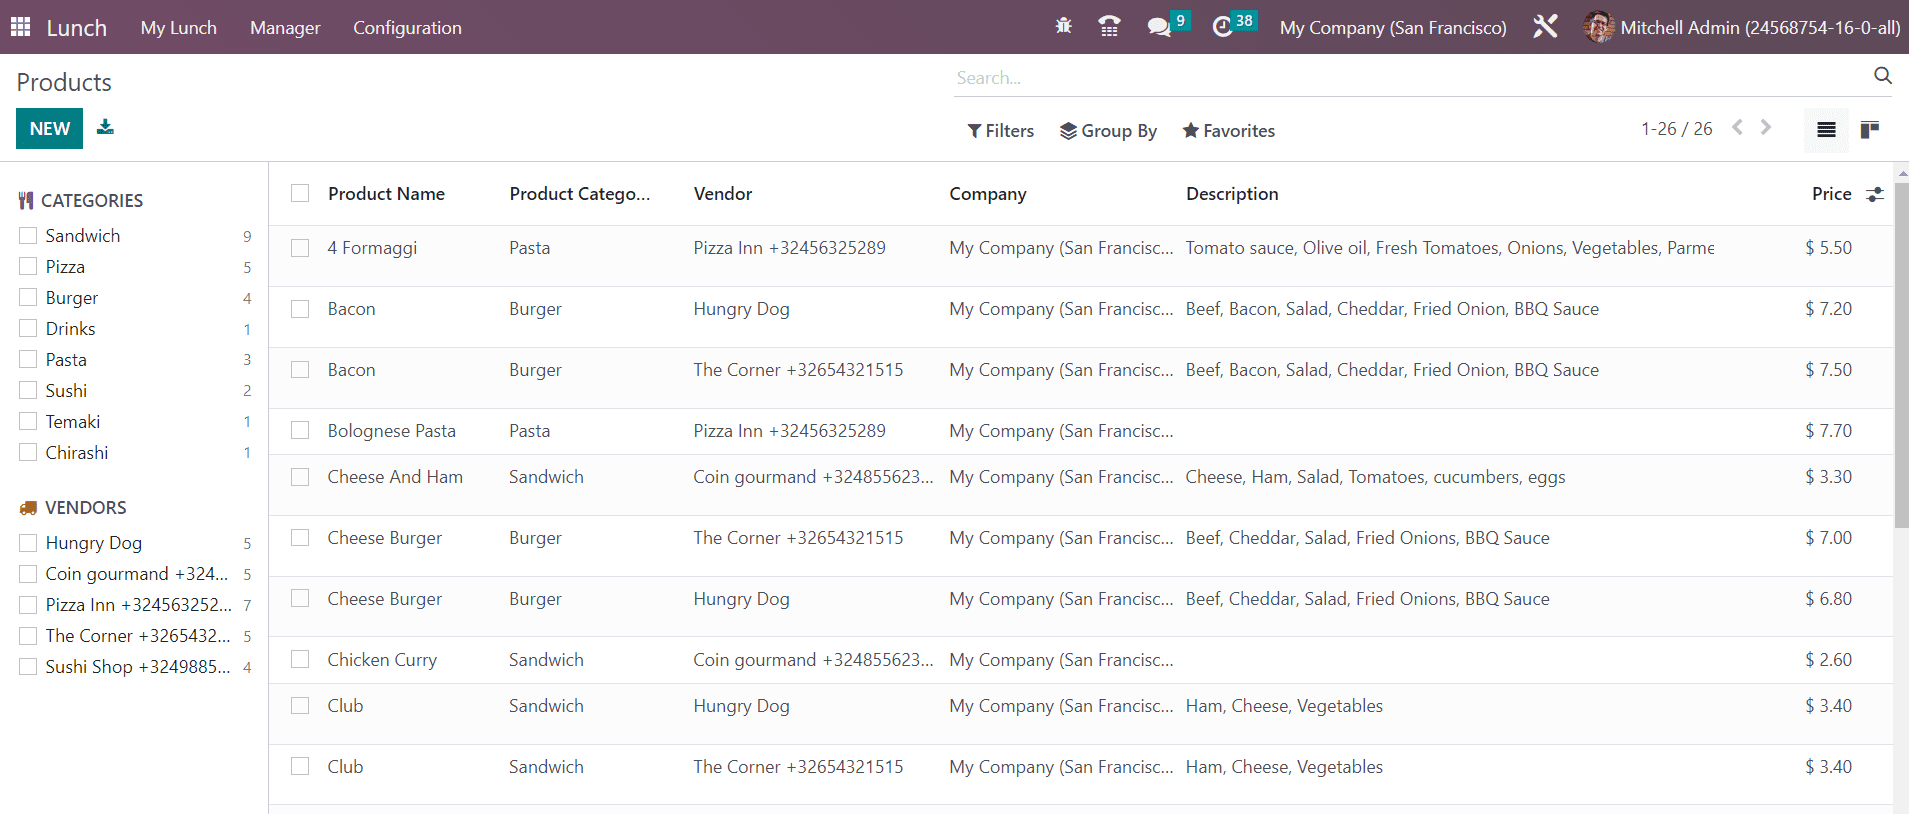
The preview of the list shows the Product Name, Product Categories, Vendor, Company, Description, and Price. Using the New button, you can easily create a new product.
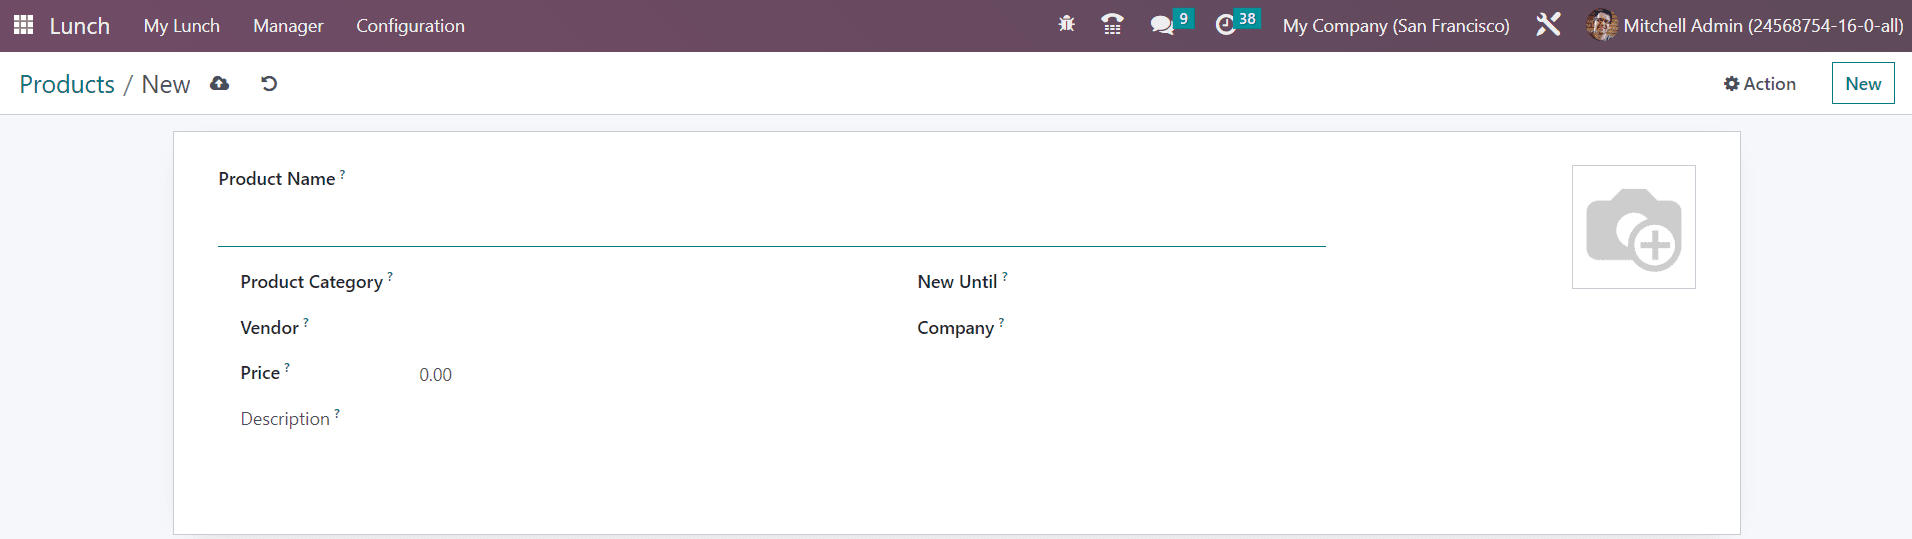
In the specified fields, you can mention the Product Name, Product Category, Vendor, Prices, Description, New Until, and Company. Add an attractive image of the product in the corresponding field.
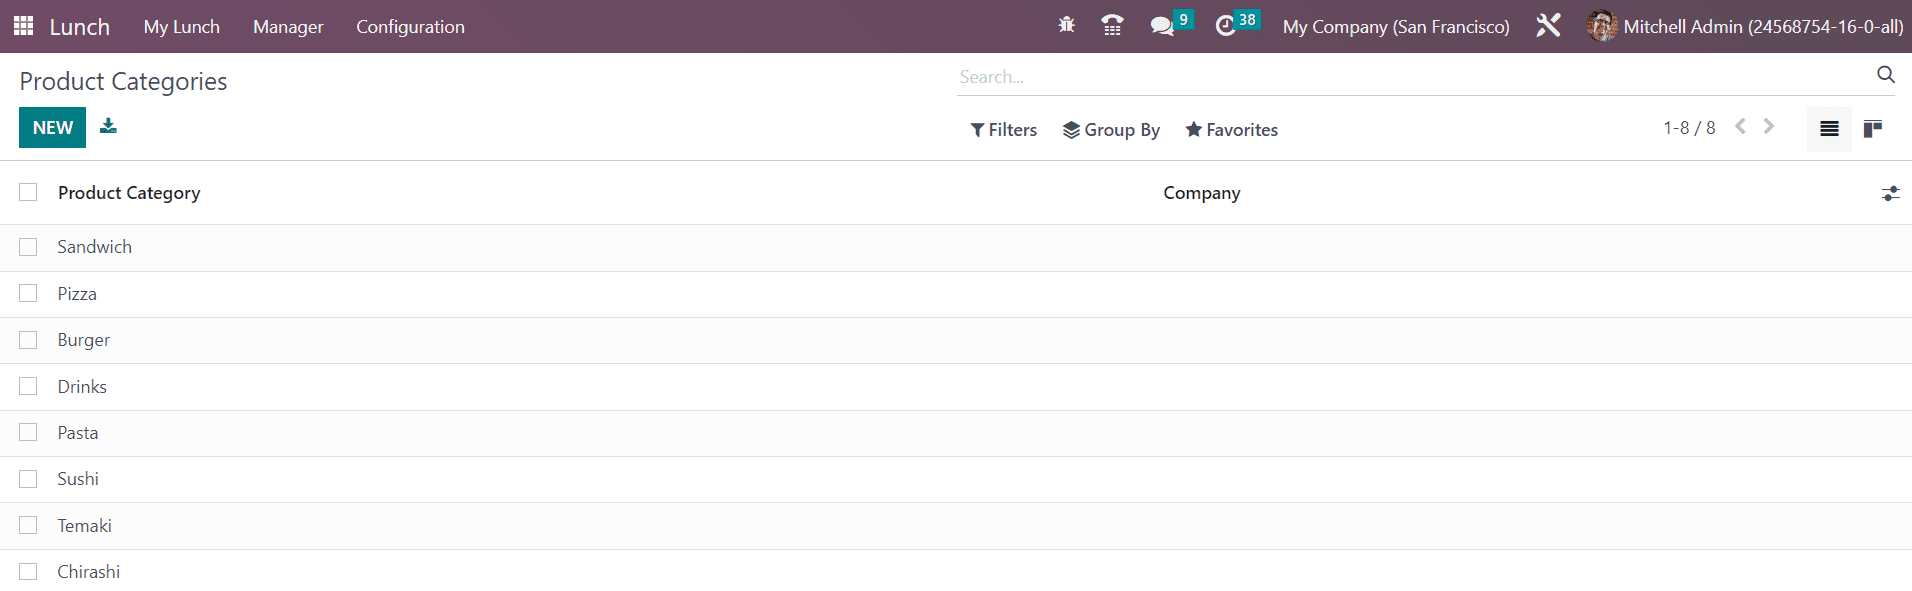
In order to define categories for the product, you can select the Product Categories option from the Configuration menu. The list will show the already created categories in the module.
You can use the New button to add a new category. This will open a new form view as shown in the screenshot below.

You can mention the Product Category and Company in the given fields.
Alerts
If you want to send alert notifications for the users, you can set Alerts using this platform.
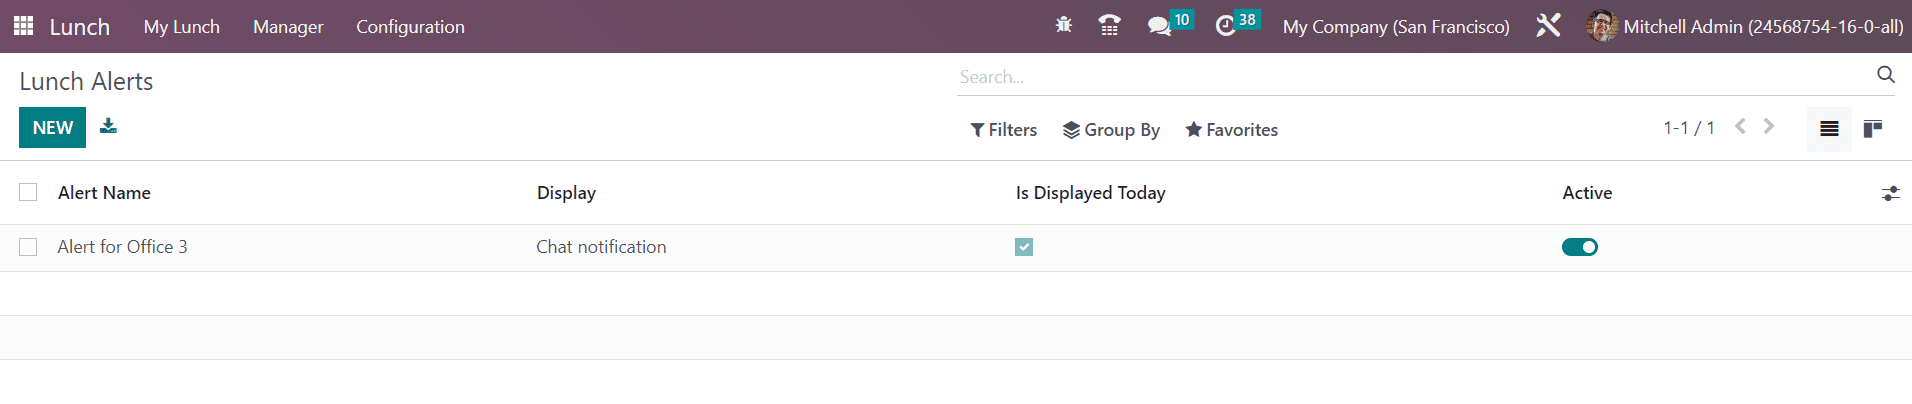
The pre-configured lunch alerts with Alert Name, Display, and Active status can be viewed as shown in the screenshot above. Use the New button to create a new alert.
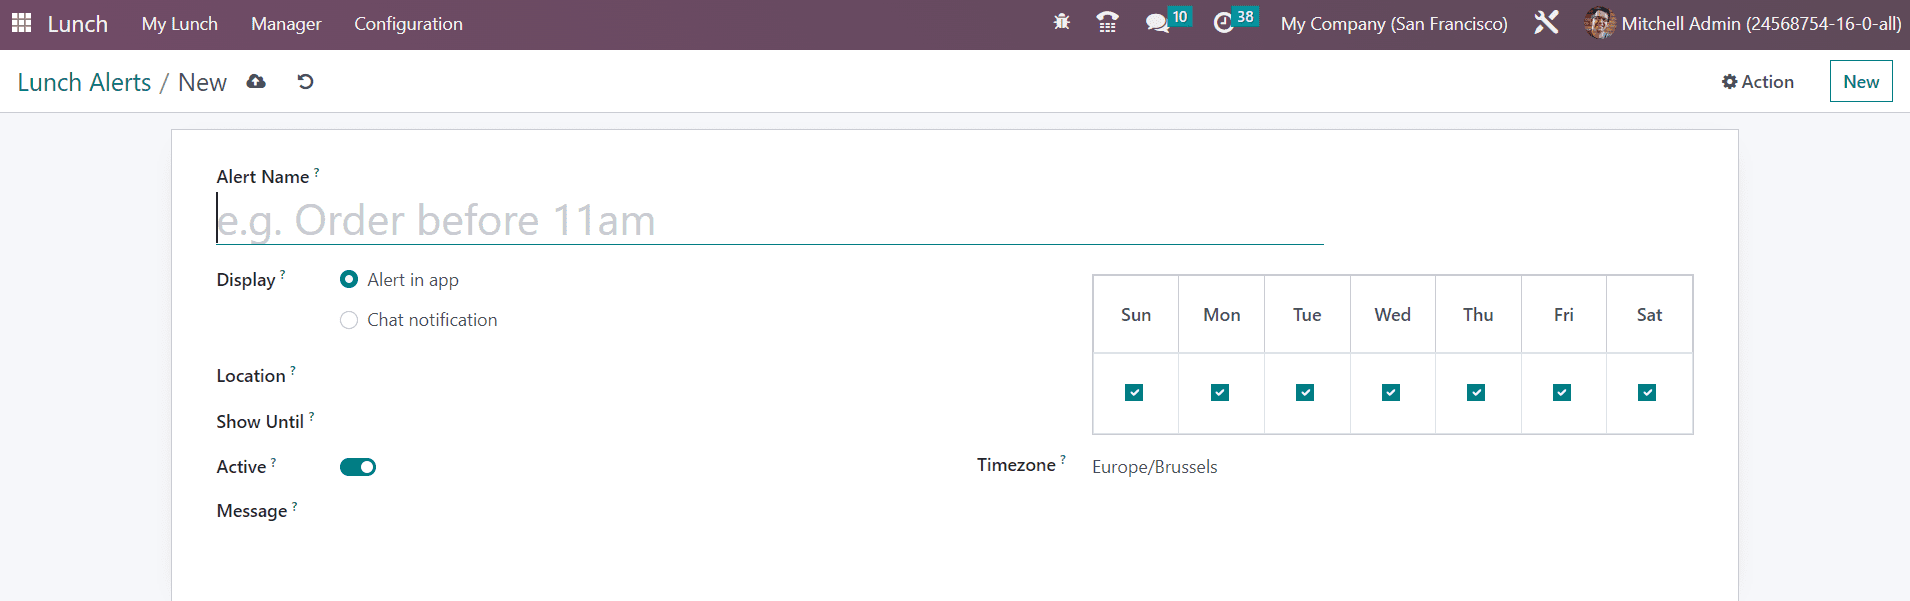
Set the Alert Name in the given space. You can Display alerts in the app as well as chat notification. In the corresponding fields, mention Location, Show Until, and Message. Enabling the Active option will activate the alert. You can set the Timezone and select the days from the given field to generate alerts.
The Odoo Lunch module is beneficial to streamline the food supply management inside a company. This will save lots of productive time and effort for employees and ensure Lunch for employees without any hazards.