Rental
Under the business programs, you should not waste your time on purchasing those products required for the managing and regulating of the functions; instead, for the purpose of medium and small-scale industries, we have got an option to have rentals. You will be very much at risk of providing much of those products for the operations. You can just take them on rental, which will be cheaper in rate. It's getting increased the need for rental products these days. For renting furniture, parts of automobiles, clothes for functions, or for some other grant events, you can completely focus on these kinds of rental techniques. The process for the rental is very much easy to do under the rental module in the Odoo software.
The rental module helps you in all functions required under the rental operations. The options provided under the rental module are rental quotations, regulating rental orders, creating invoices, and payments, and searching for available rental products as well. The page of the rental module will be like this, as shown in the image below.
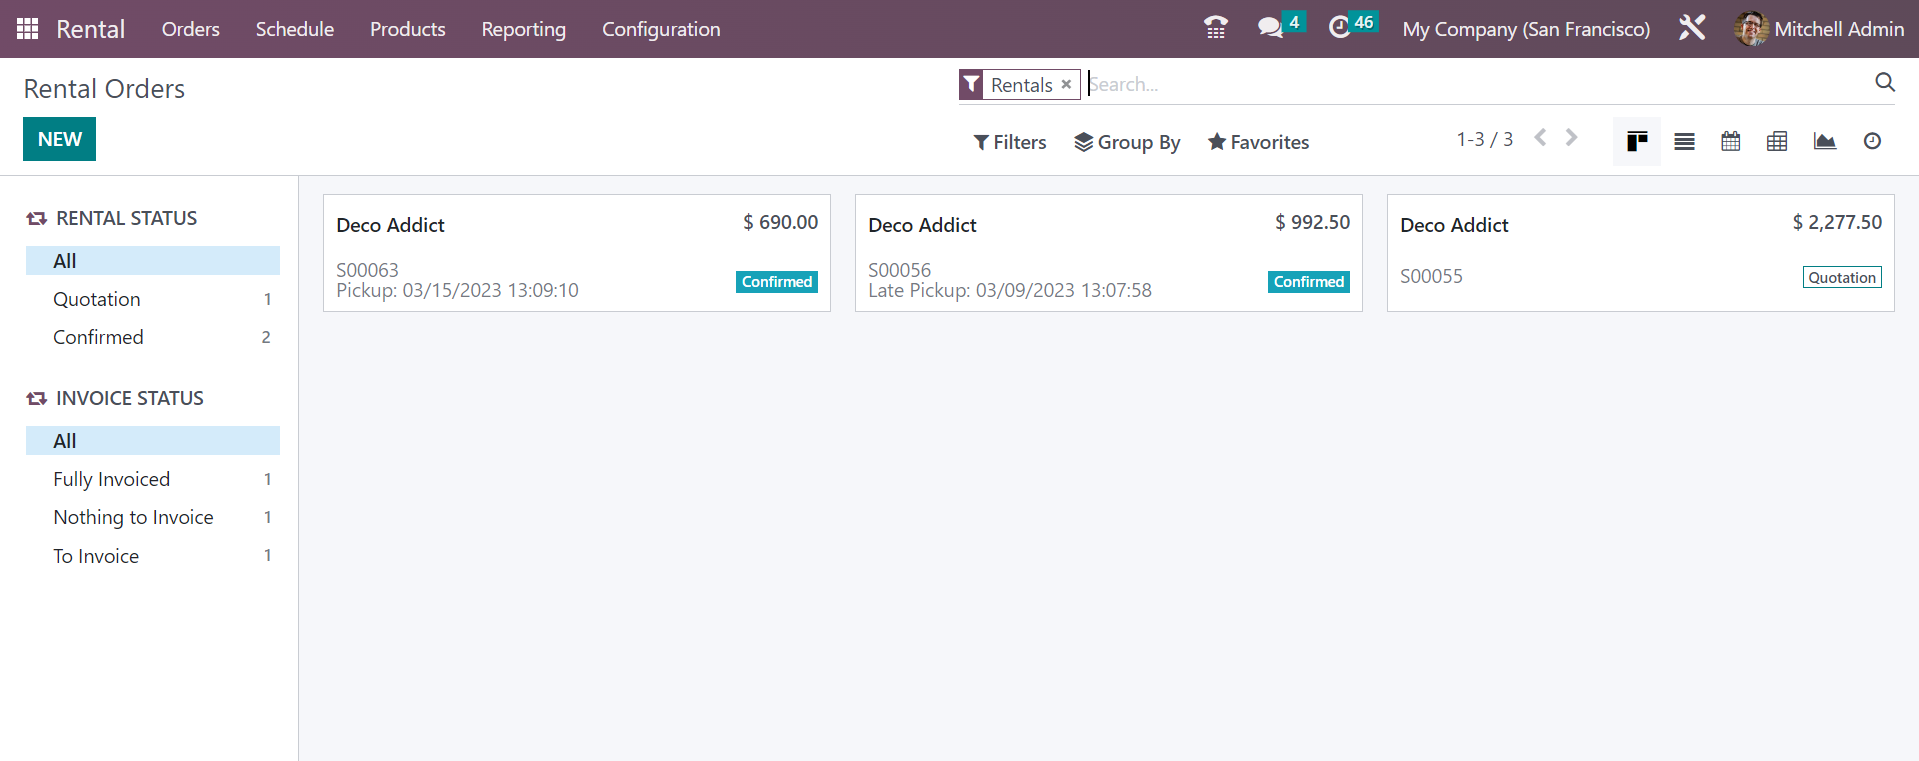
You will get the details regarding the already created rental products and the person responsible for them too. On the left side of the page, the kanban view of the page provides the Rental status and Invoice status. Rental status includes the quotation, confirmed, picked up, and many more.
The page can be seen in Kanban, Lsit, Pivot, Calendar, Activity, and Graphical as well. In order to make a similar kind of rental order, you can just go to the New icon. On selecting the New option for making a new rental, you will be provided with a page, as shown below.
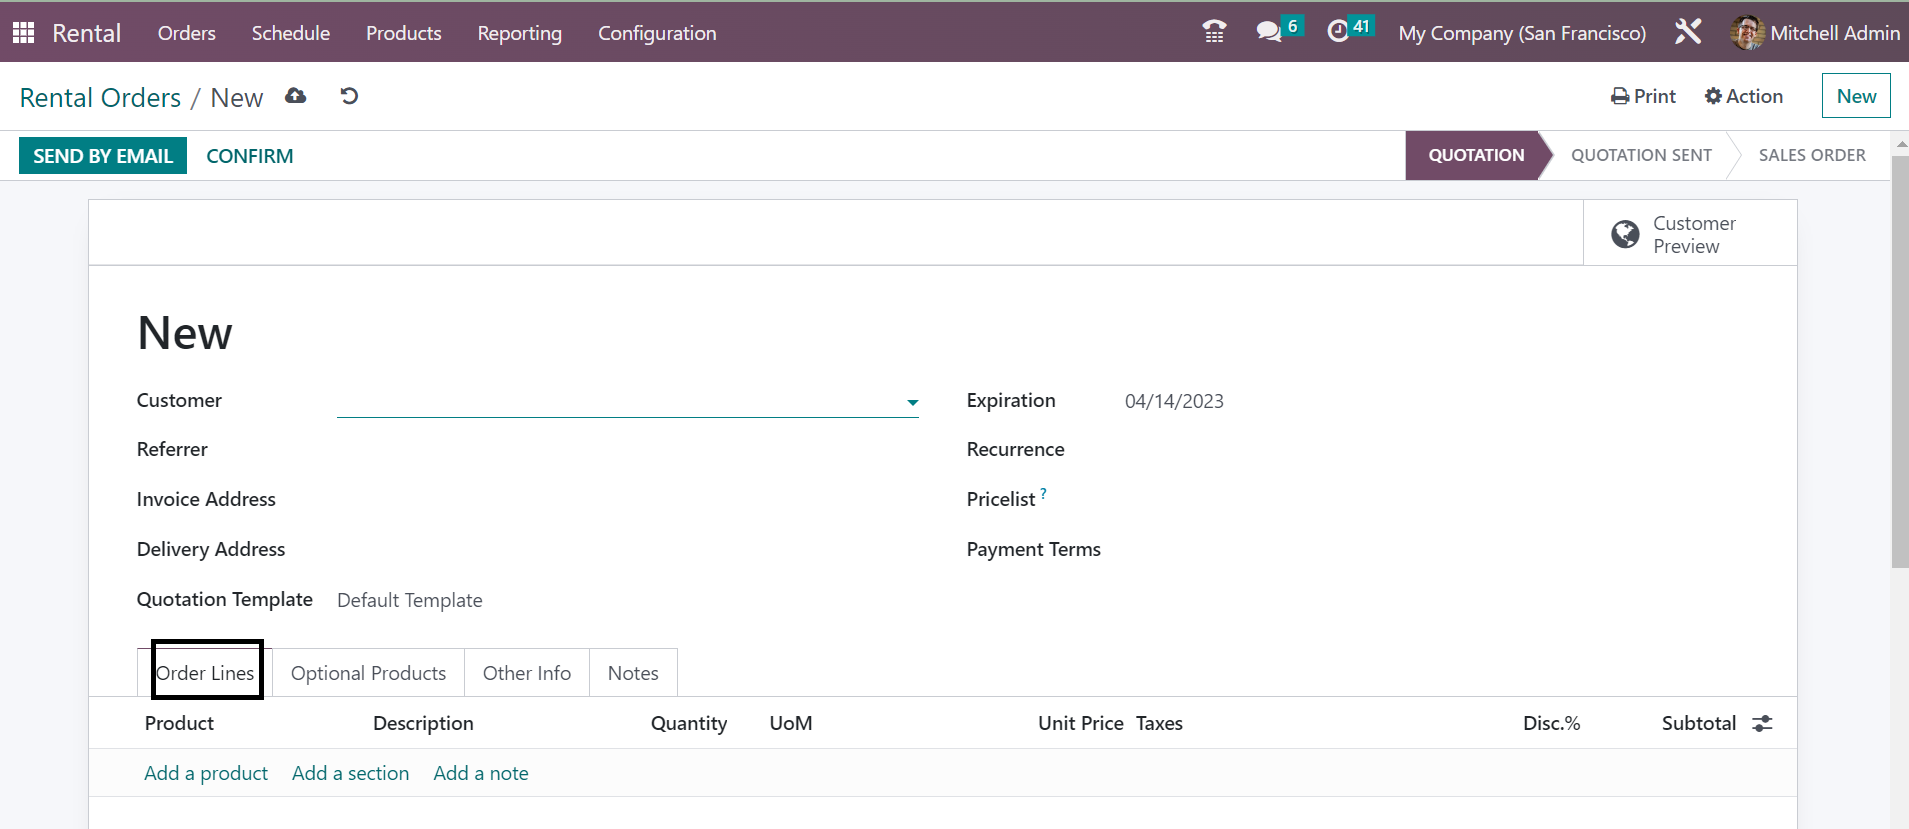
On the creation page, you can see a space to provide the name of the customer, referrer, invoice address, delivery address, expiration date, recurrence, price list, and payment terms, respectively. You have got an option to fill certain tabs, such as Order lines, Optional Products, Other Info, and Notes. Under the Order lines option, you will get a list of products, a description of the product, the quantity of the product, unit price, taxes, discount amount, and the subtotal, respectively. Using the Add a line option, you can just add a new product to the given list. Now, on selecting a particular product from the given list, you will get a new window, as shown below.
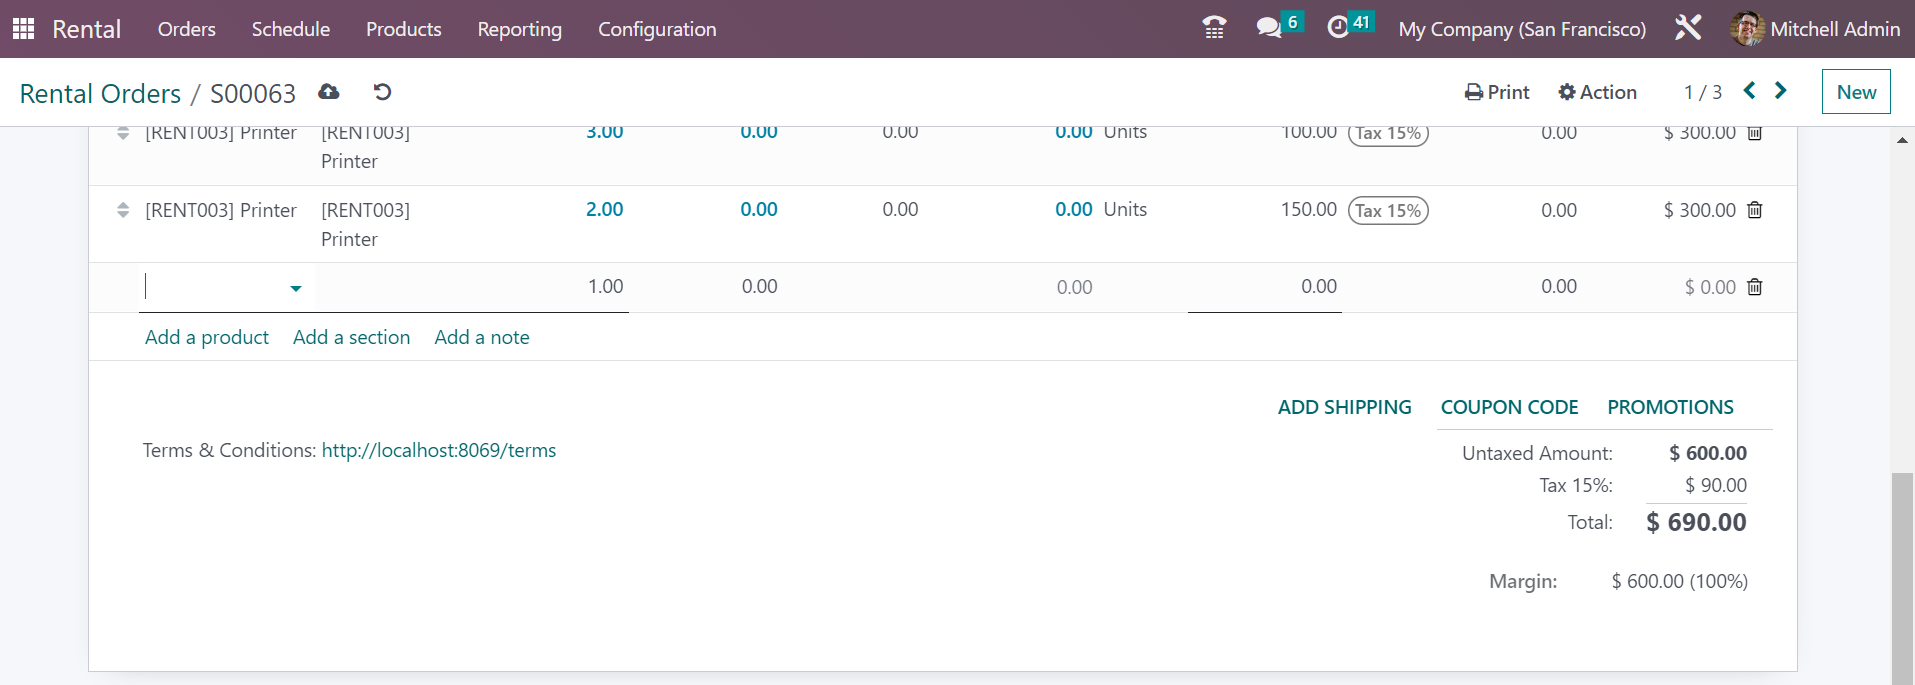
On completing including the new product on the list, you will get all the total prices for the rent. All other steps are the same as that in the sales order.
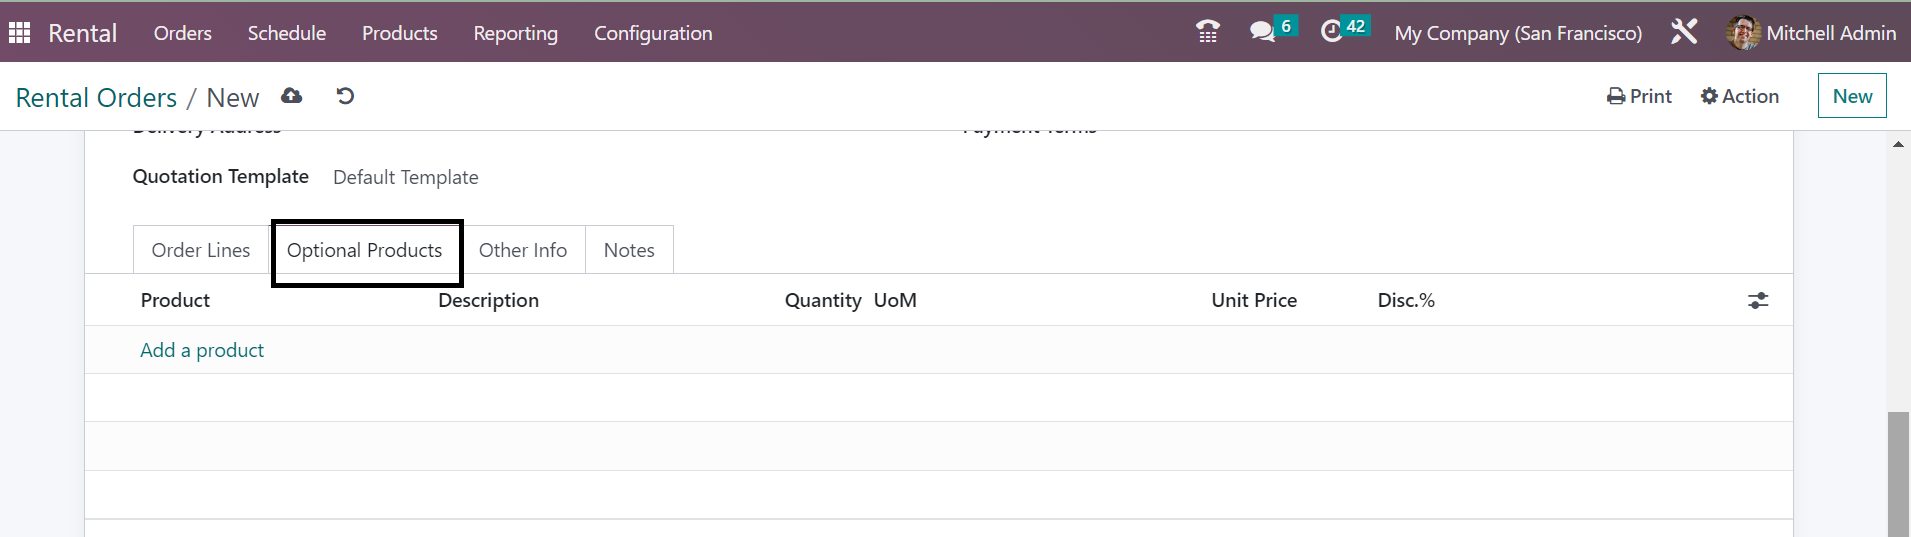
Under the optional products option, you have the options such as product, description, quantity, unit price, discount, and many more. As done earlier, you can add a new one using the Add a line option.
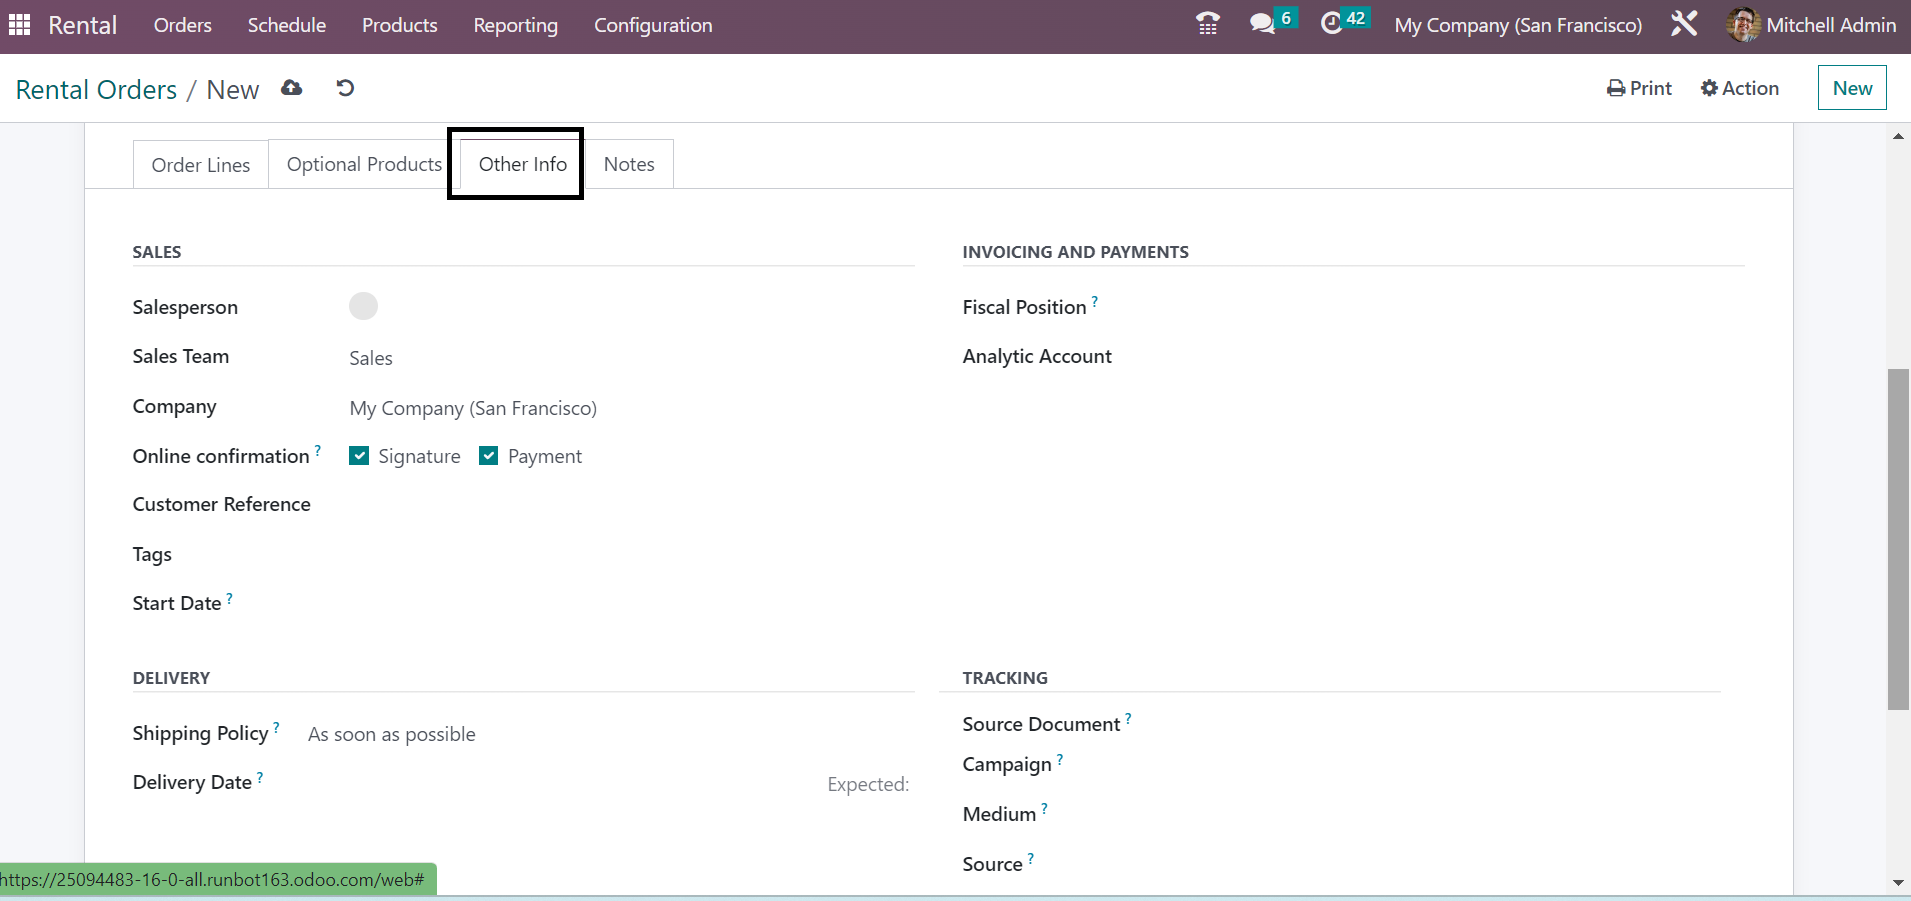
The next tab is Other Info, which has the options such as Sales, Invoicing and Payment, Delivery, and Tracking. Under the sales option, you can mention the salesperson, sales team, name of the company, online confirmations as signature and payment, customer reference, related tags, and the start date, respectively. Under the Invoicing and Payment option, you can provide the fiscal position and analytical account. Now, below the Delivery option, you can provide the shipping policy and delivery date. And finally, you have the Tracking option under which you can mention the source document, campaign, medium, and source, respectively.
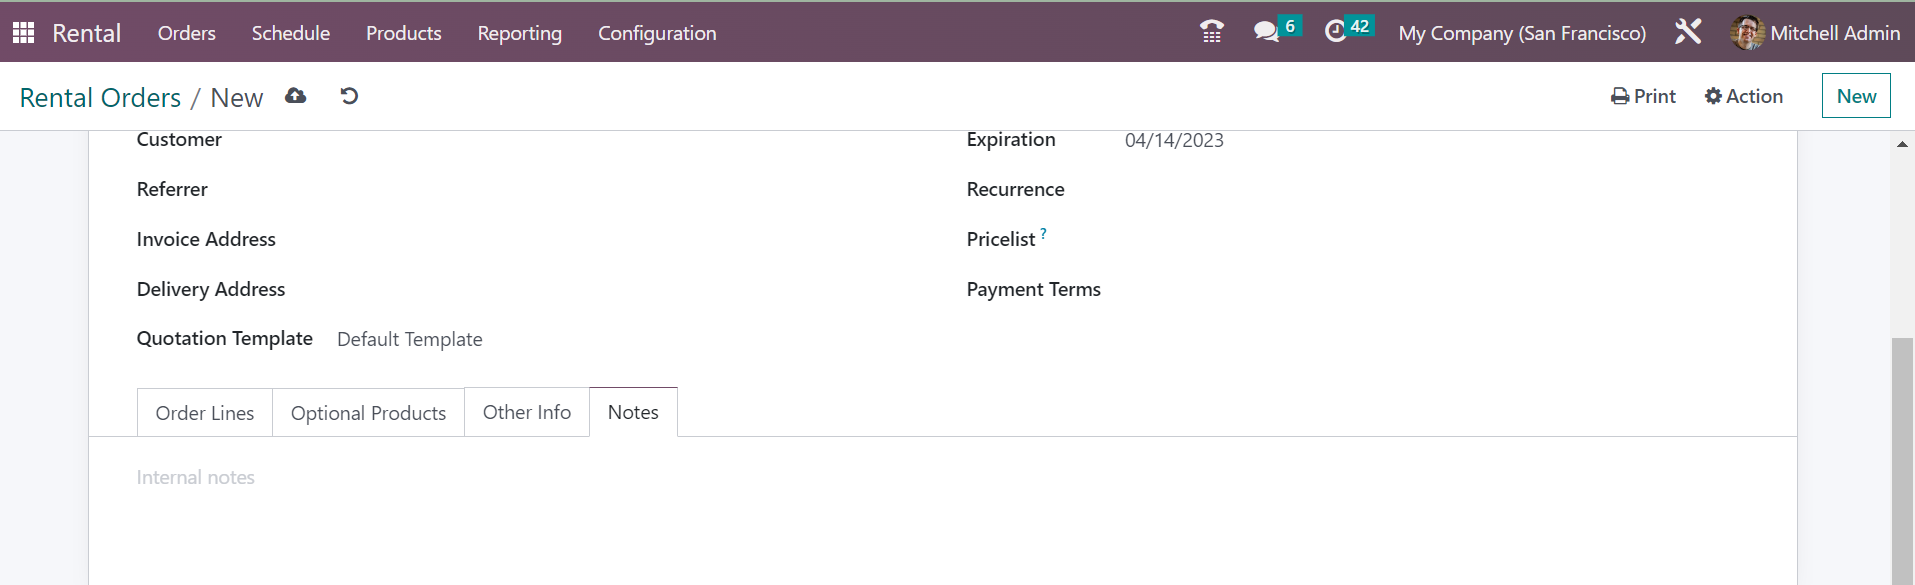
Under the Notes tab, you can add some internal notes regarding the rental product.
On completing all the necessary details, you can go to the save icon. The made quotation order can then be Send By Email, as shown below.
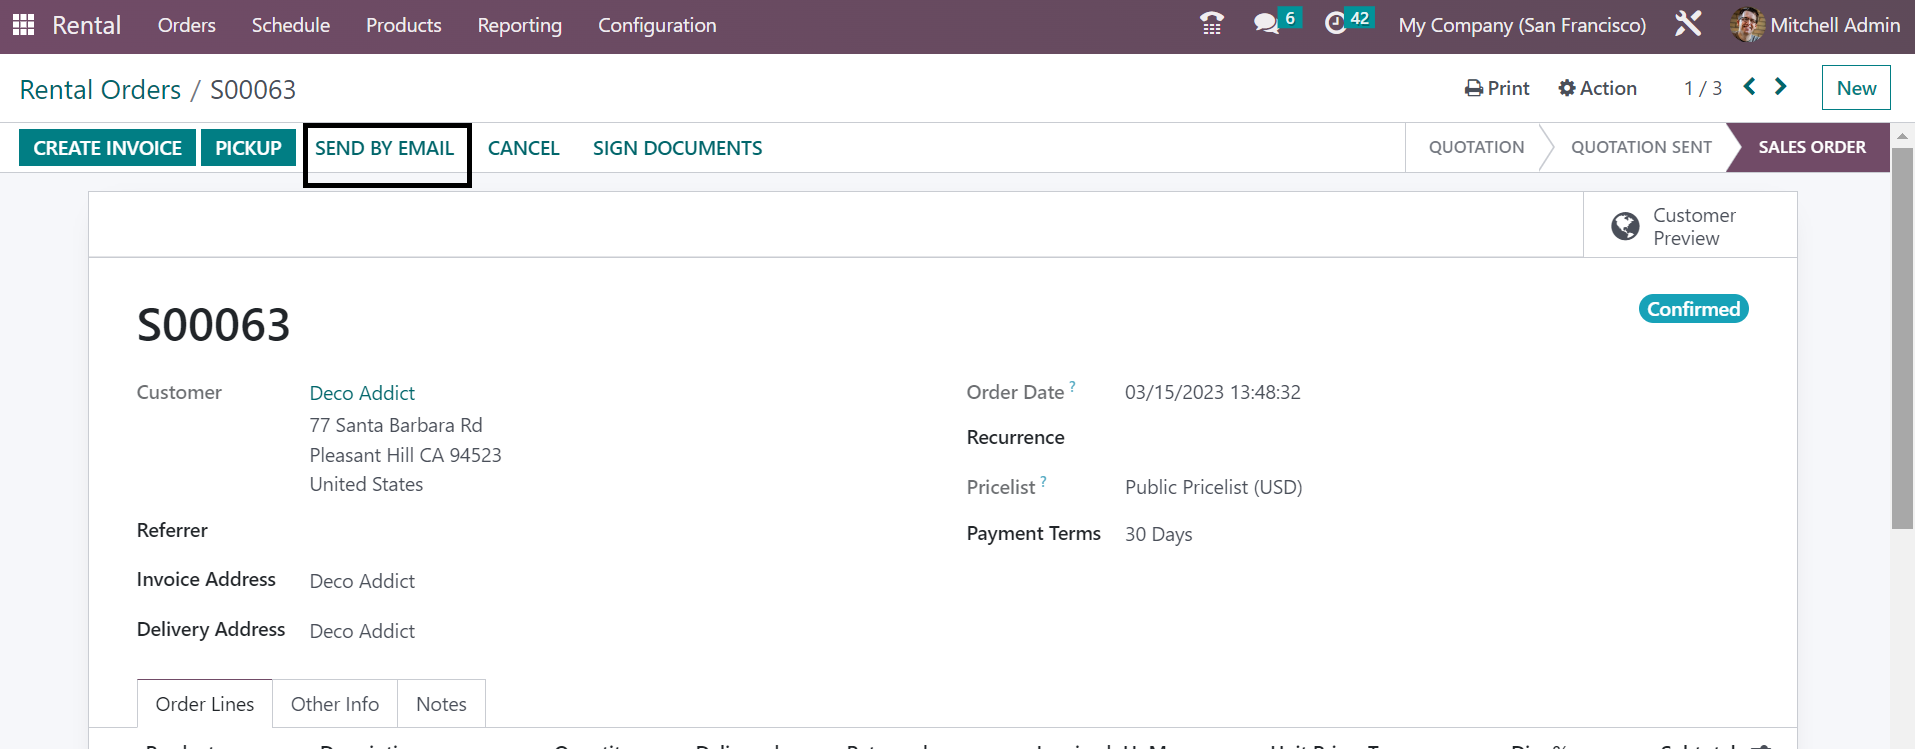
On getting the confirmation from the particular customer, you can easily go to the Confirm option, as shown in the above image. On confirming the rental product, you will be shown the page, as shown in the screenshot below.
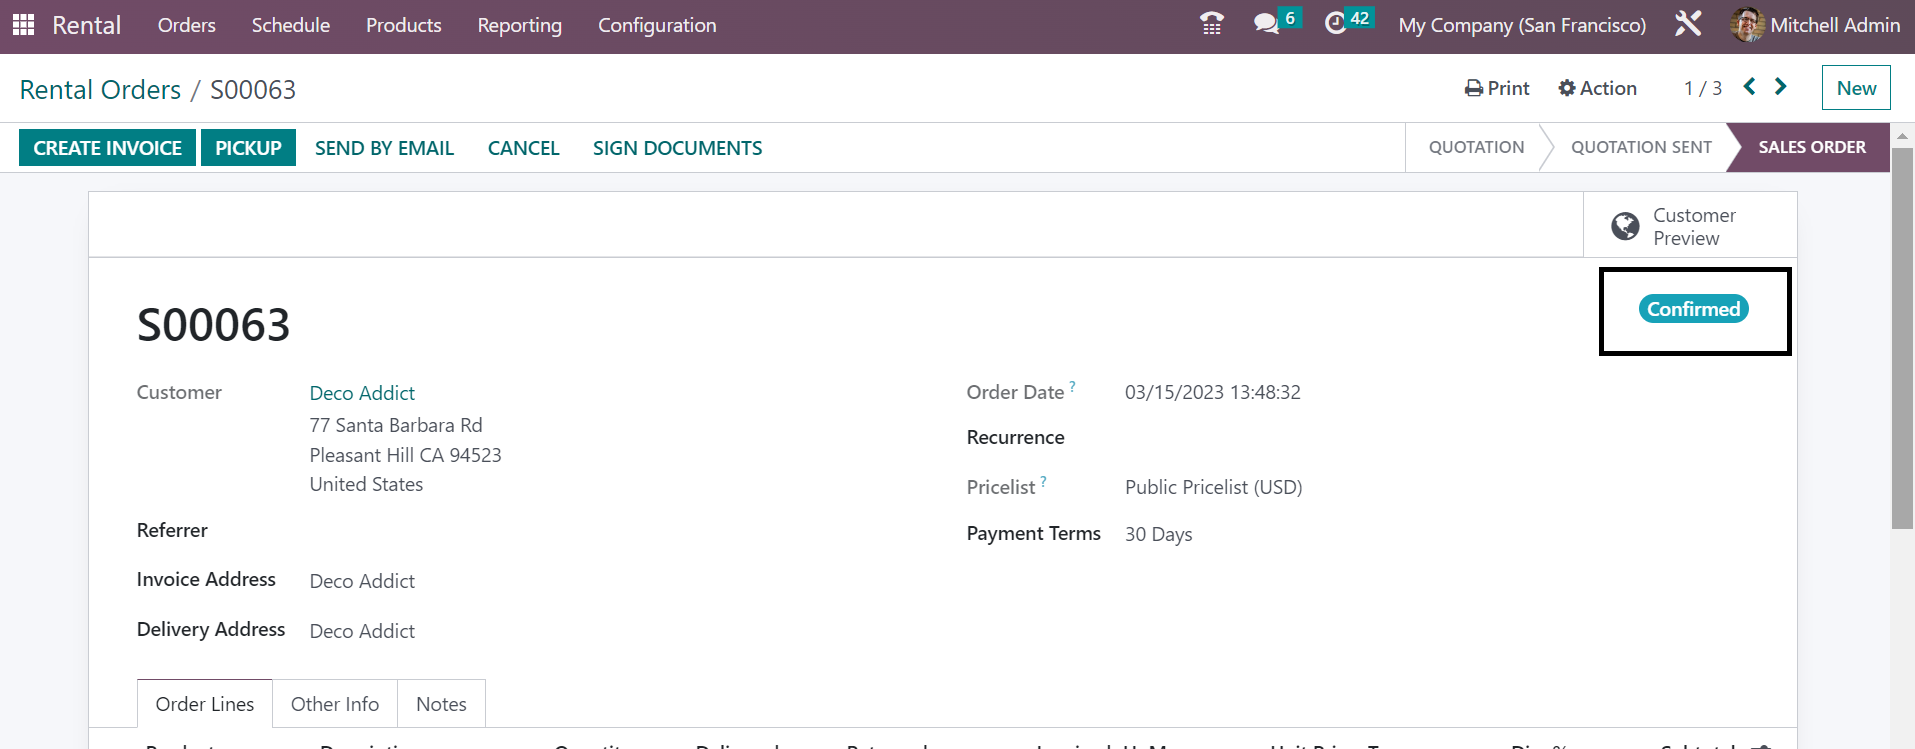
Now, the page shows the status of confirmed on the right side, as marked in the image above. The option of Create Invoice helps the customers to create invoices for the particular product. Then, the payment can be registered using these created invoices very easily. On finishing the payment process, the Pickup option can be activated in order to take this product for delivery. On selecting the option, you will get another window opened, as shown below.
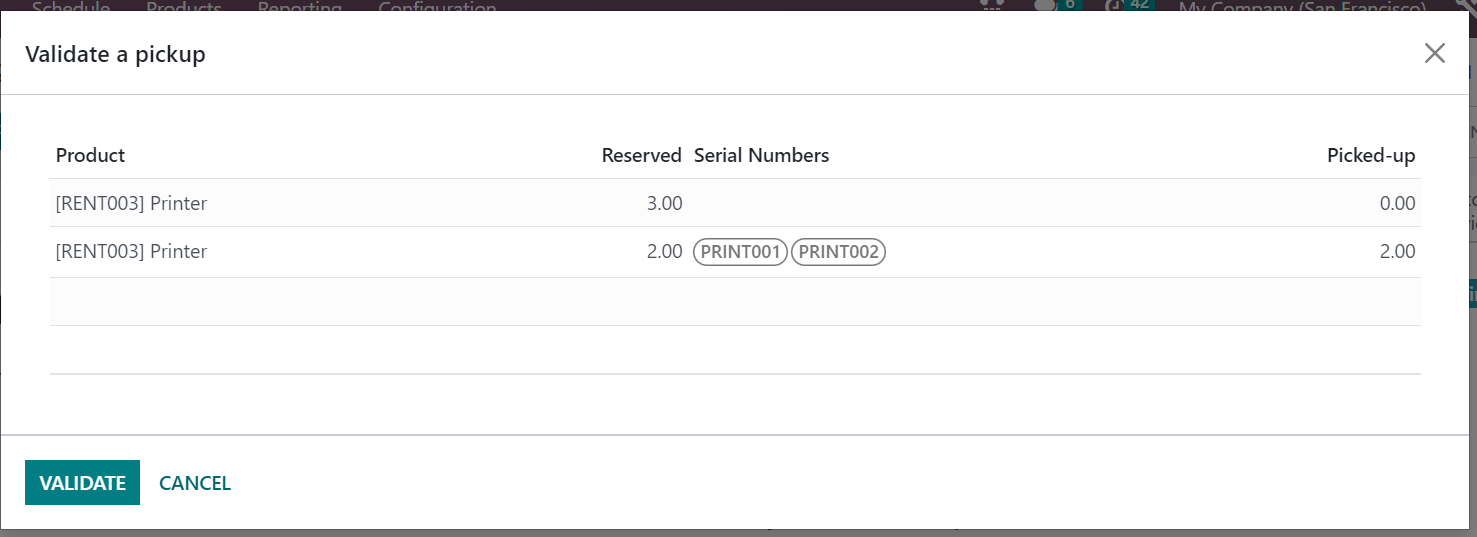
The page is for the confirmation of validating the order. So, go to the Validate option, as seen in the above image. Then, the status will be marked as Picked-up, which suggests that the particular order is delivered to the specific customer. On returning the rental product after completing the time period of rental, the option of Return can be selected. On doing so, the status will be shown as Returned. These are the steps to be kept in mind during the creation and management of rental products under the Rental module.
Now, coming back to the main page of the rental module, you have the orders menu, where you are provided with a ToDo option, shown below.
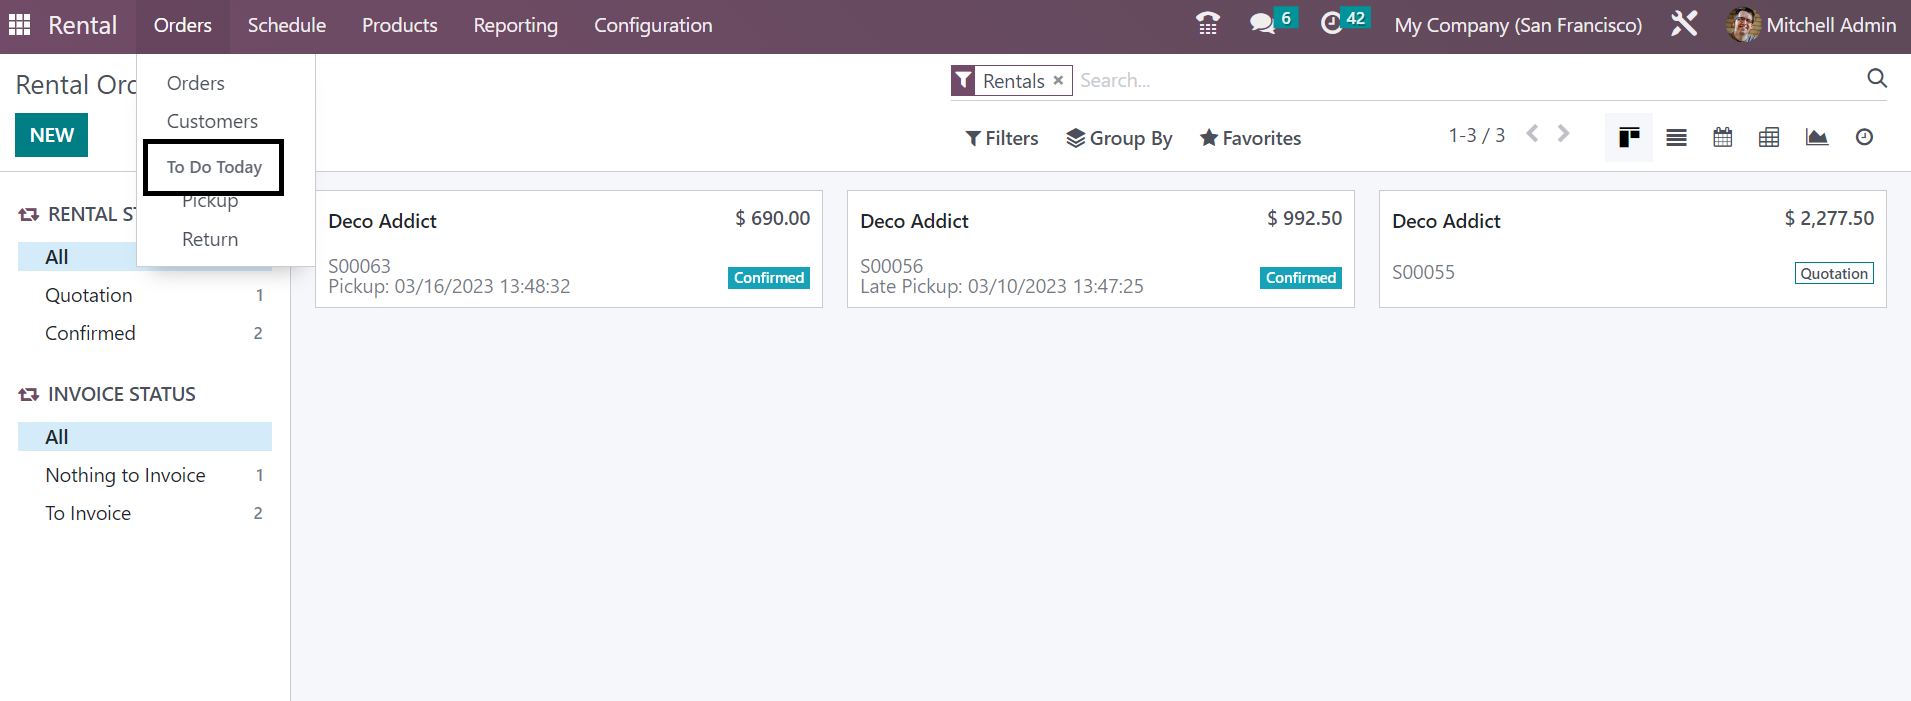
Here, you have the ToDo Today option under the orders menu, which has got two sub- options, such as Return and Pickup. On the pickup page, you will get the details of the product that has to be picked up, and the return option shows the products that are returned after the rental period of the product.
Rental Products
You can easily create new rental products in the rental module. The process of creating a rental product is similar to the configuration of products. On adding a new product, you should remember to mark it as Can be rented under the Configuration window. The menu of the products is available on the main page itself.
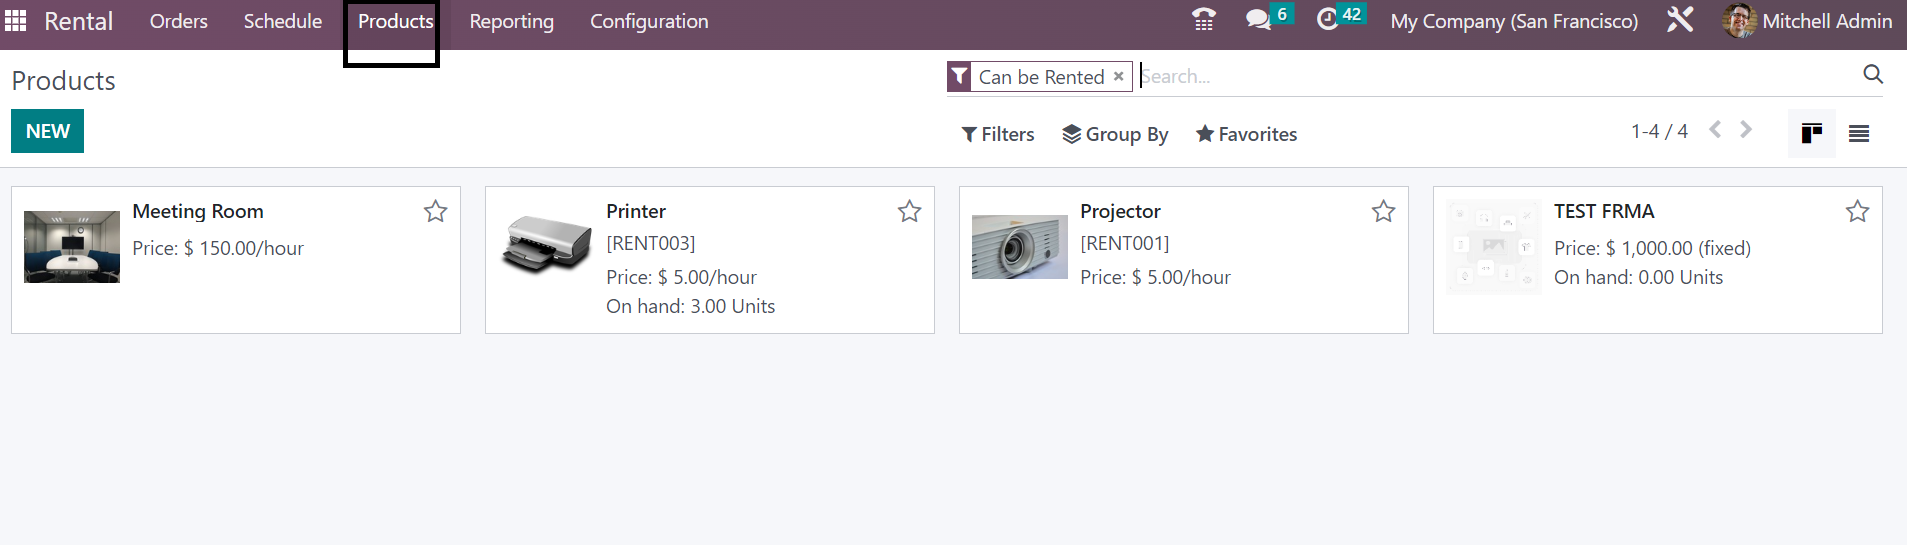
On the page, you can see different kinds of products that are kept for rent. The product includes the name of the product and the cost of the product as well. In order to create a similar kind of product, you can go to the New icon, as seen in the screenshot above.
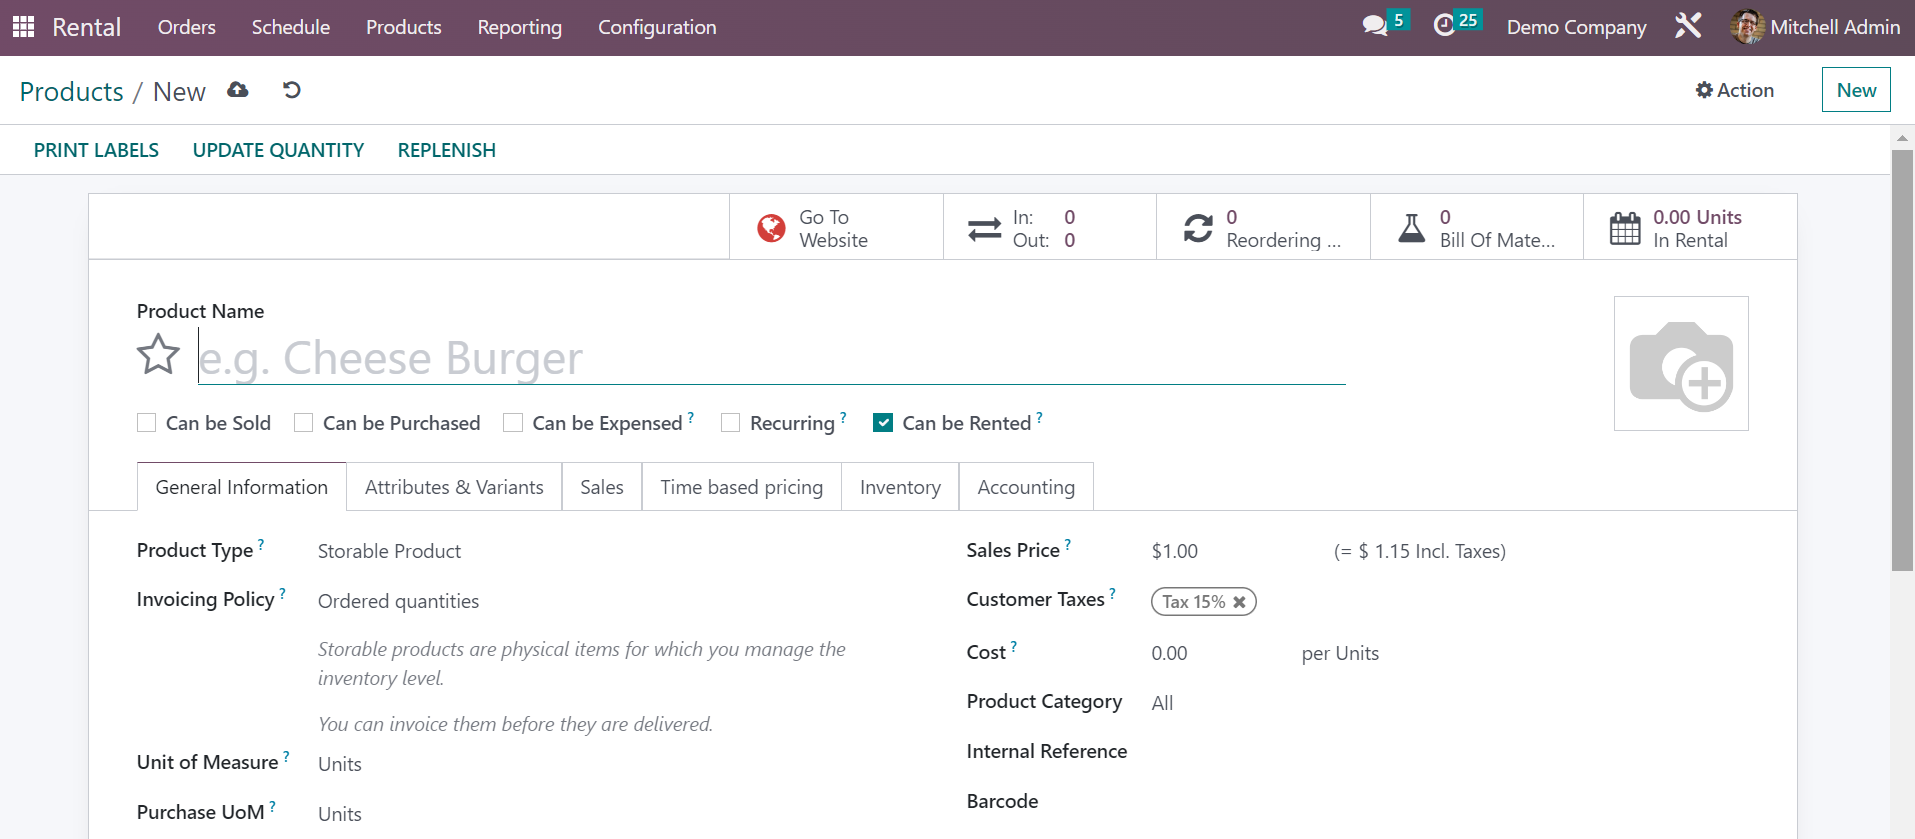
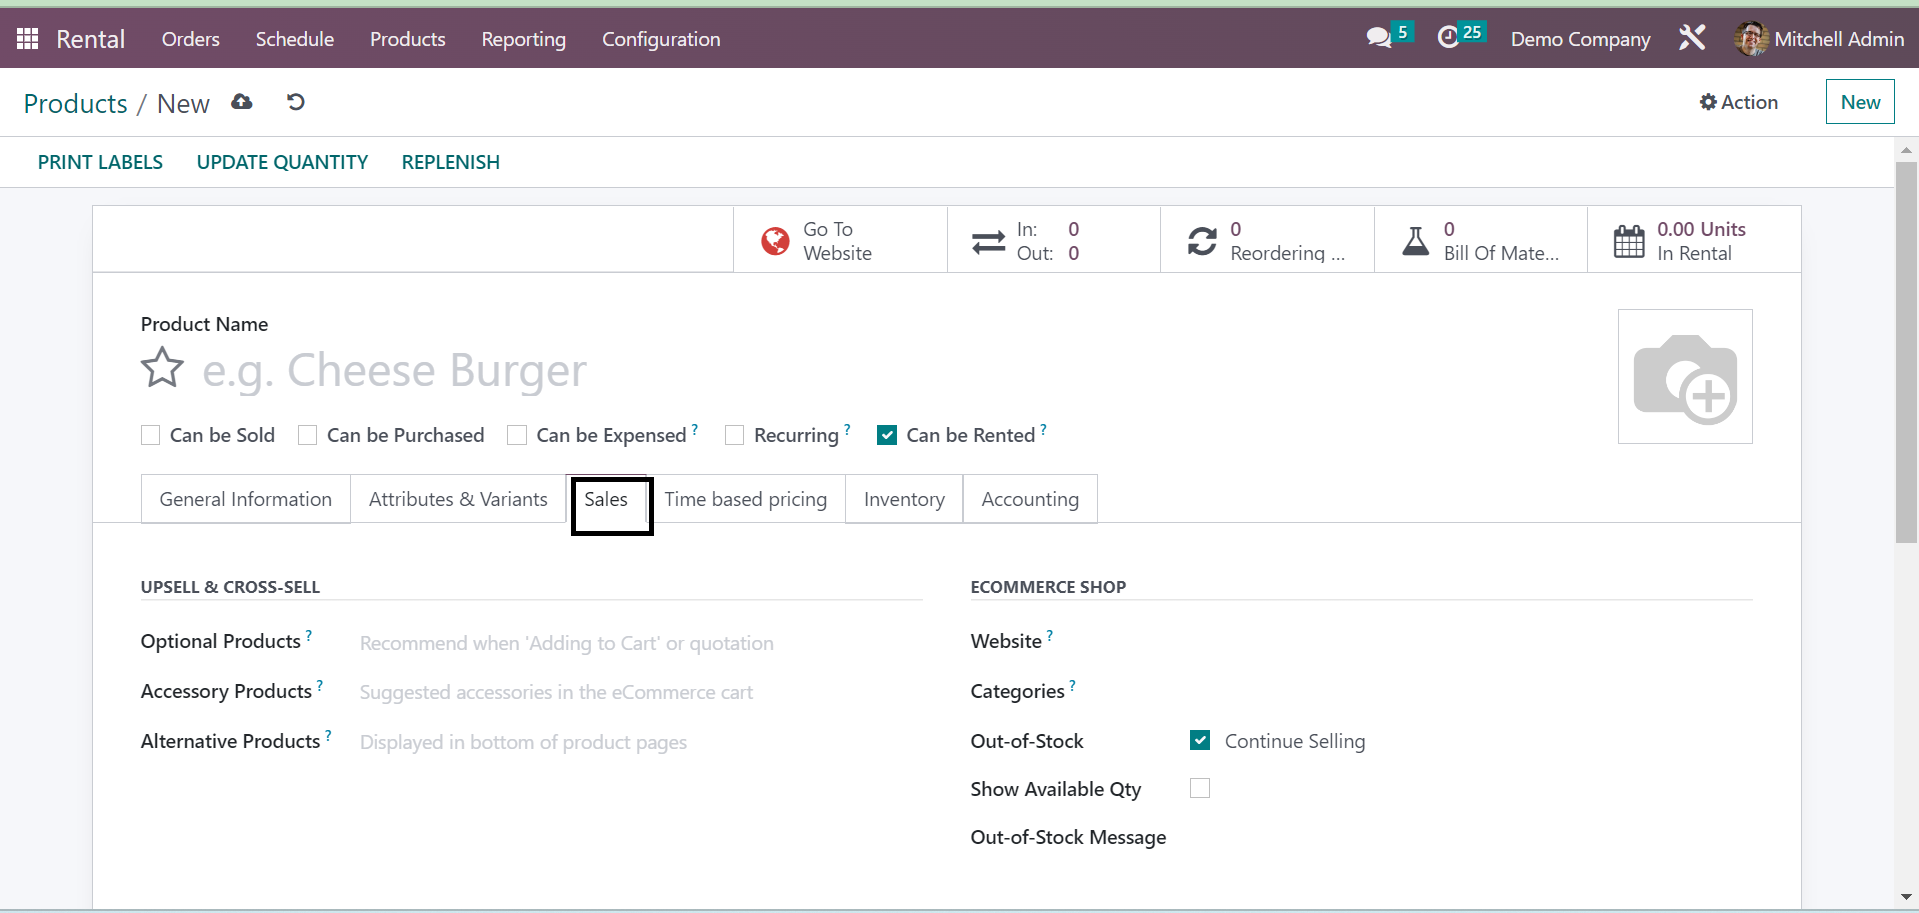
On the creation page, you have many details to upload. You can provide the name of the product and an image of the specific product in the allotted spaces. Now, you can activate the product, as Can be sold, Can be purchased, Can be expensed, Recurring, and Can be rented, respectively. Among this, you have to trigger the option, as Can be rented.
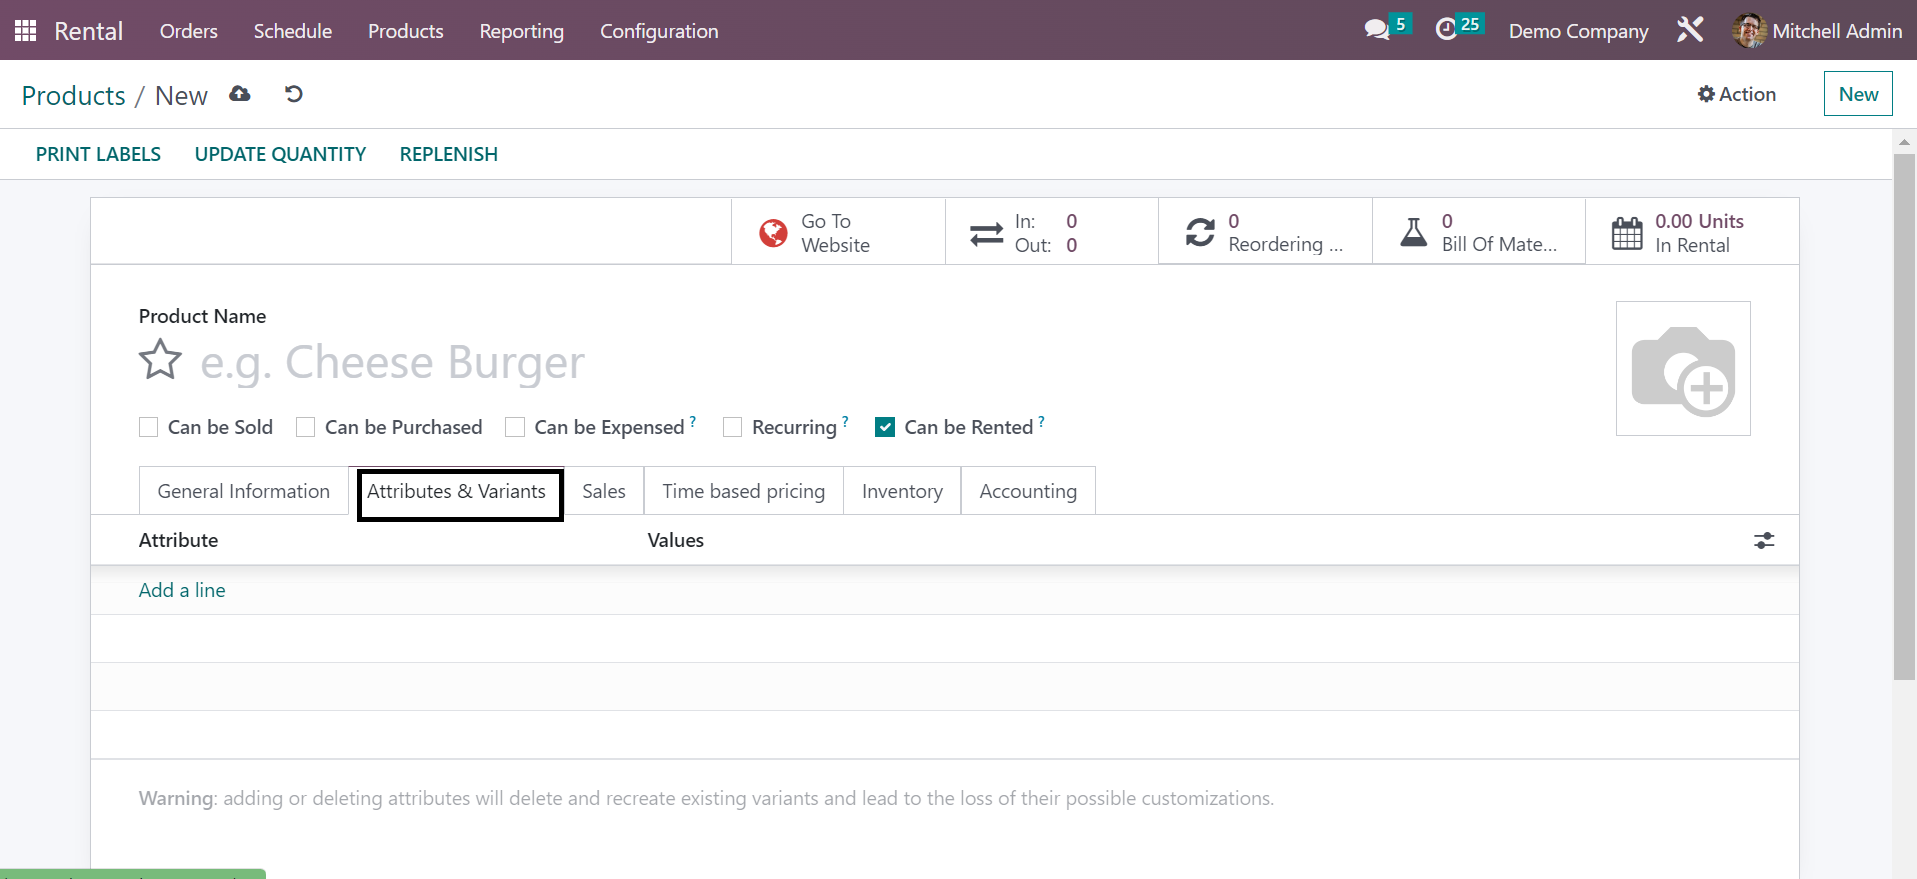
Now, you have many tabs provided where you can mention various details regarding the product. Under the General Information tab, you can give the product type from the drop-down menu. The Invoice policy can be set as ordered quantity or delivered quantity. The Units of measure, Purchase UoM, Sales price, and Customer Taxes can also be provided in the allotted space. The next option is the Taxcloud category, Avatax category, Cost of the product, Product category, Internal reference, Barcode, Tags related to the product, and the name of the company, respectively. Below that, you have Internal notes where you can add a note about the product. The next tab is Attributes and Variants, which gives space for providing the attribute and the corresponding value. Using the Add a Line option, you can easily add the attributes on the Product.
As in the image below, you can see the next tab, time-based pricing, where you can
include a new price using the Add a Price. The price can be added based on the rent period. The calculation of price can be done according to days, weeks, or months. Based on which unit has been selected, we can activate the rental pricing as well. The details include period, pricelist, and price. The next option in the time-based pricing is Reservation, where you can add the extra hours, extra days, and security time as well. The security time helps you to provide the security time in between two rentals. At this security time, the product will be not available and Odoo ERP makes sure that the product is returned or not prior to the next rental. So, security time has become highly relevant.
The next tab is Inventory. Under the inventory tab, you have the operations option
where you can add the routes as buy, drop-ship subcontractor on order, manufacture, resupply subcontractor on order, or drop ship. You can also view the diagram if required.
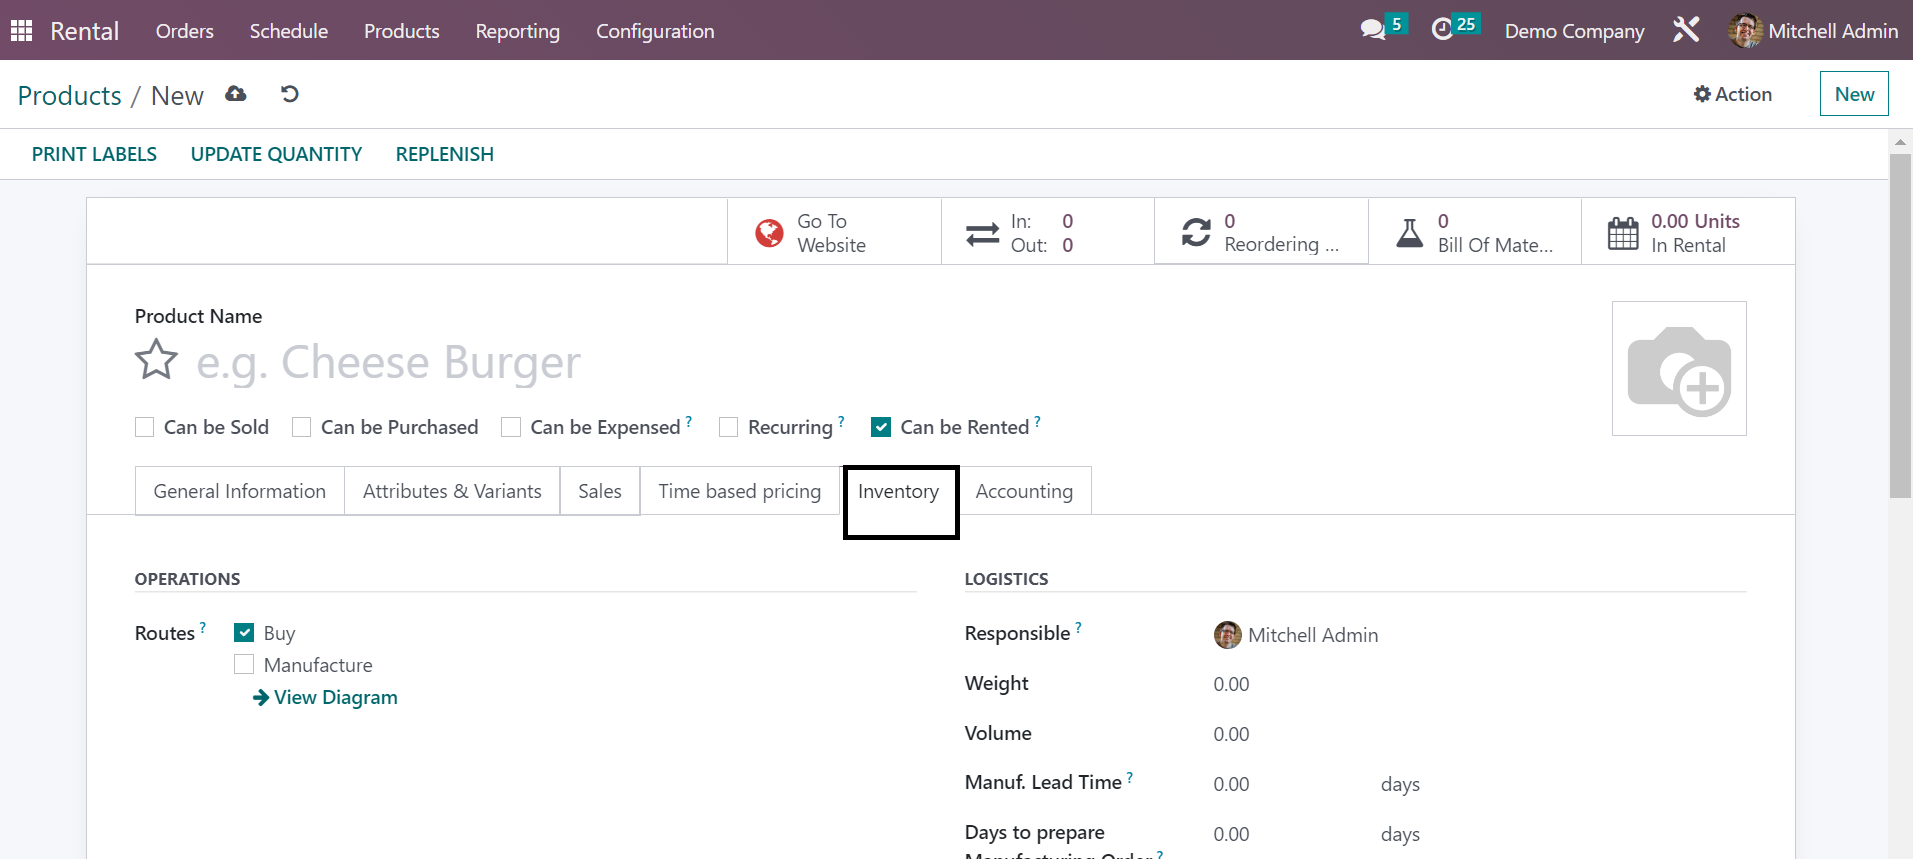
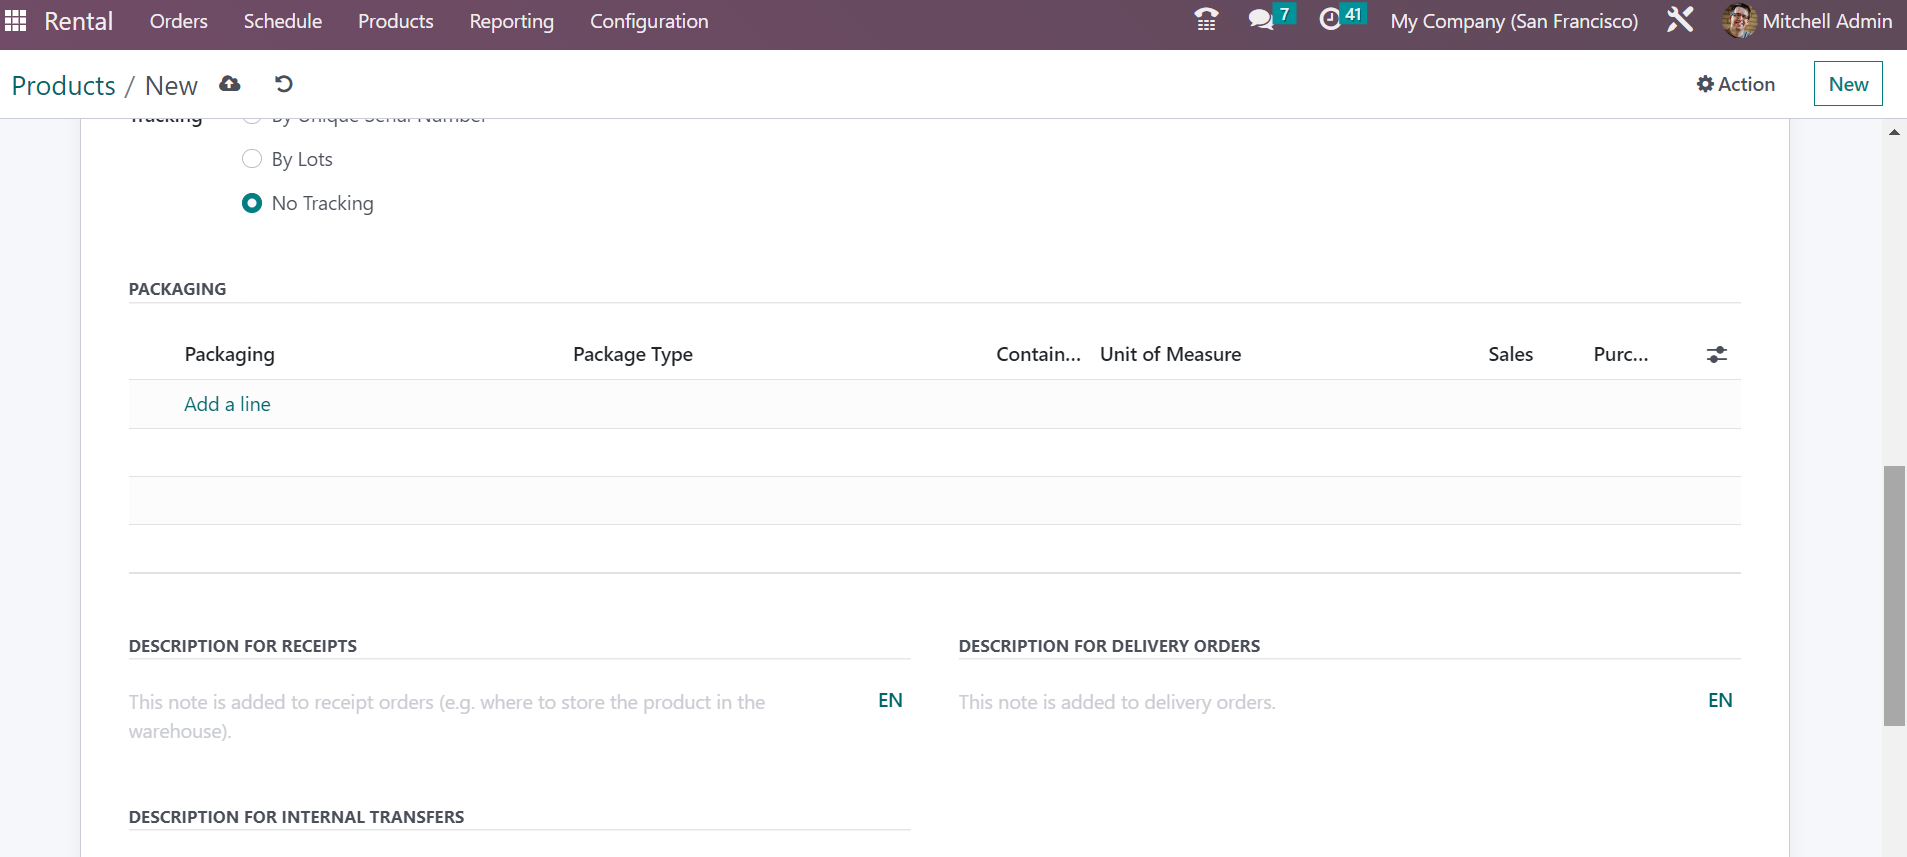
Under the Logistics option, you have to add the responsible user, weight, volume, manufacture lead time, days to prepare manufacturing order, HS code, and Origin of goods, respectively. Under the traceability option, you can mention the tracking by unique serial number, by lots, or by no tracking. Now, under the Packaging option, you can add the details using the Add a Line option, where you have to mention the packaging, package type, contain, units of measure, sales, and purchase. Under the Description for receipts option, you can add the notes for the receipt orders. Below that, you have, description for delivery orders, a short note can also be added. And then under the description for internal transfers, similar kinds of notes can be added very easily.
The next tab is Accounting, as shown in the screenshot below.
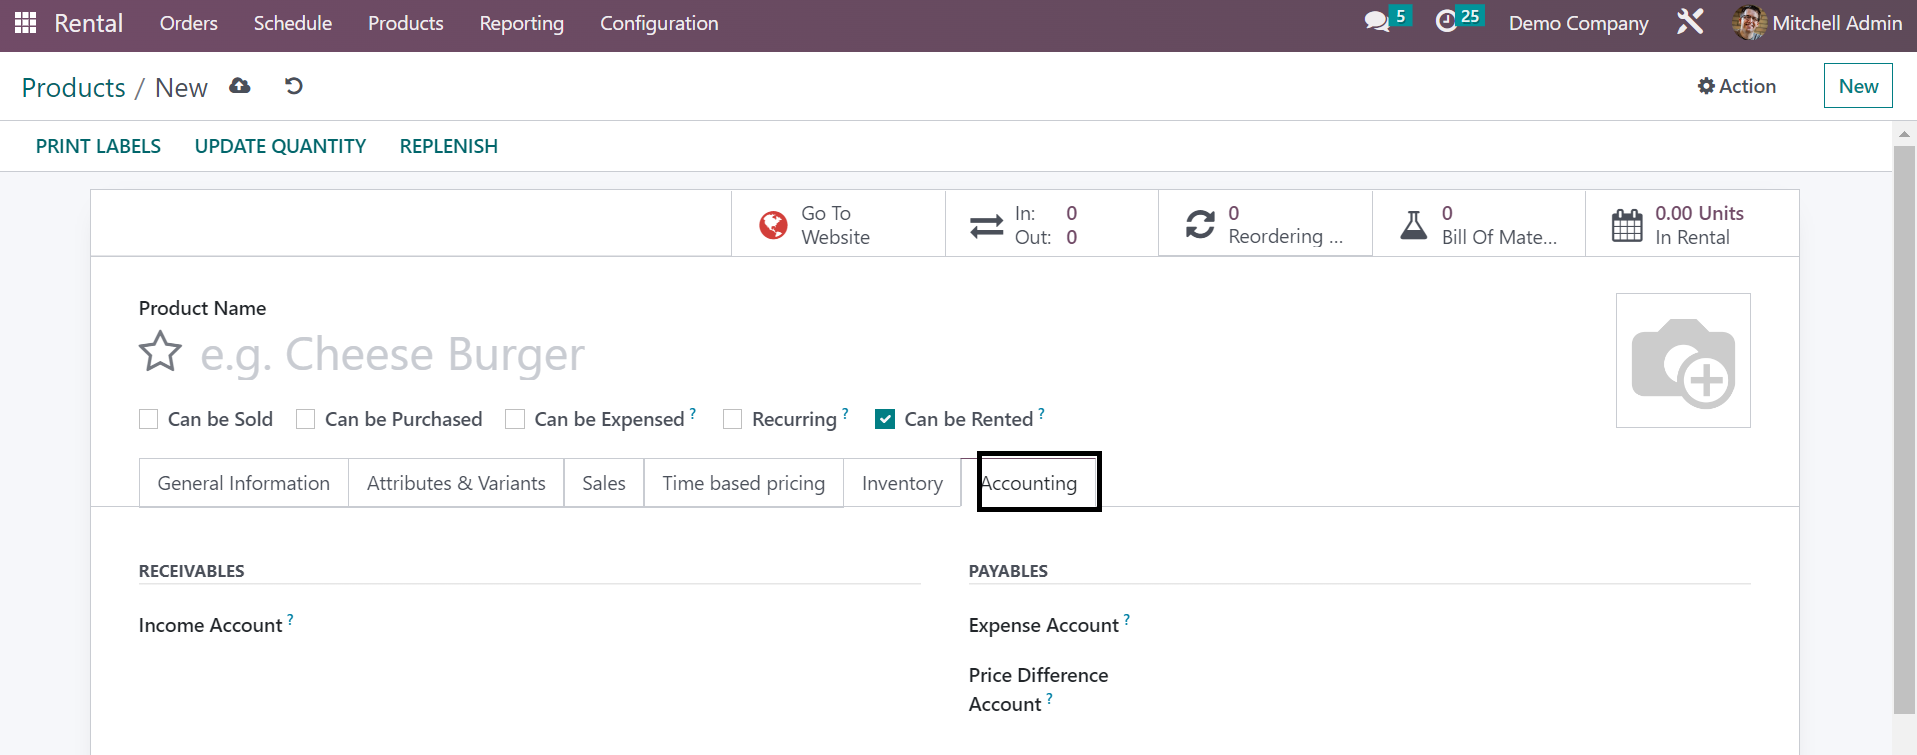
Here, you have to give the income account under the receivable option, expense account and price difference account under the payable option, commodity code, and country of origin under the Intrastat option, and email template under the automatic email at invoice option.
On completing providing all the necessary details or the creation of a rental product, you can have the details. Then, this product gets added to the already created list of rental products.
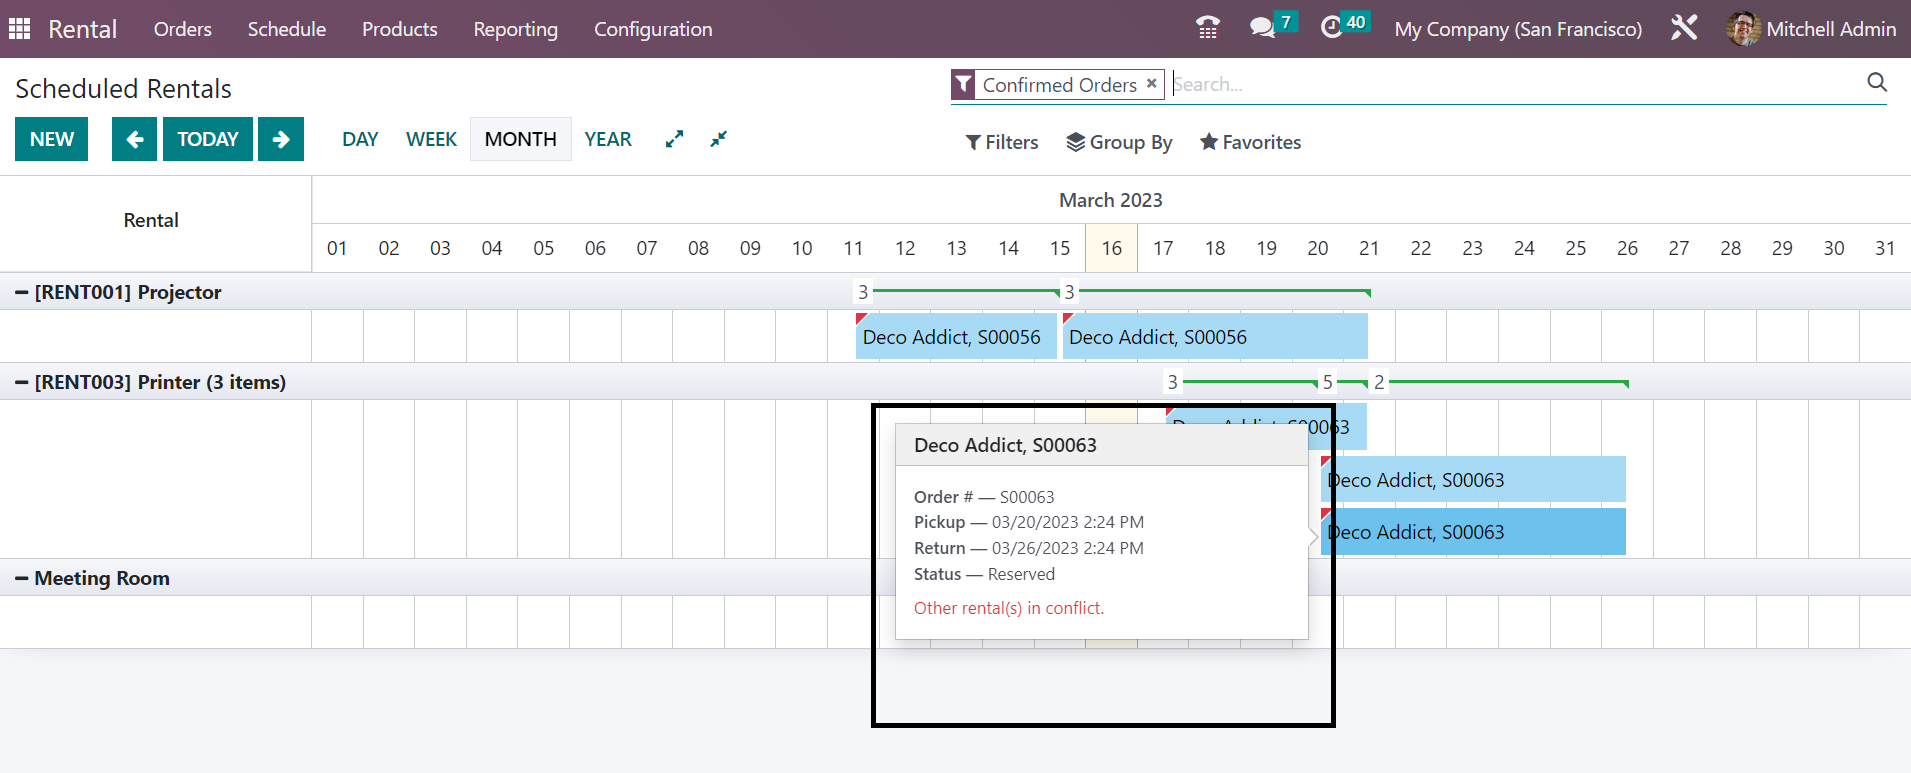
Schedule
All the scheduled orders will be available under the schedule menu of the rental module. The rental related functions and activities can be completely done using this option. All the rental activities created in particular days, weeks, months, or years will be available here.
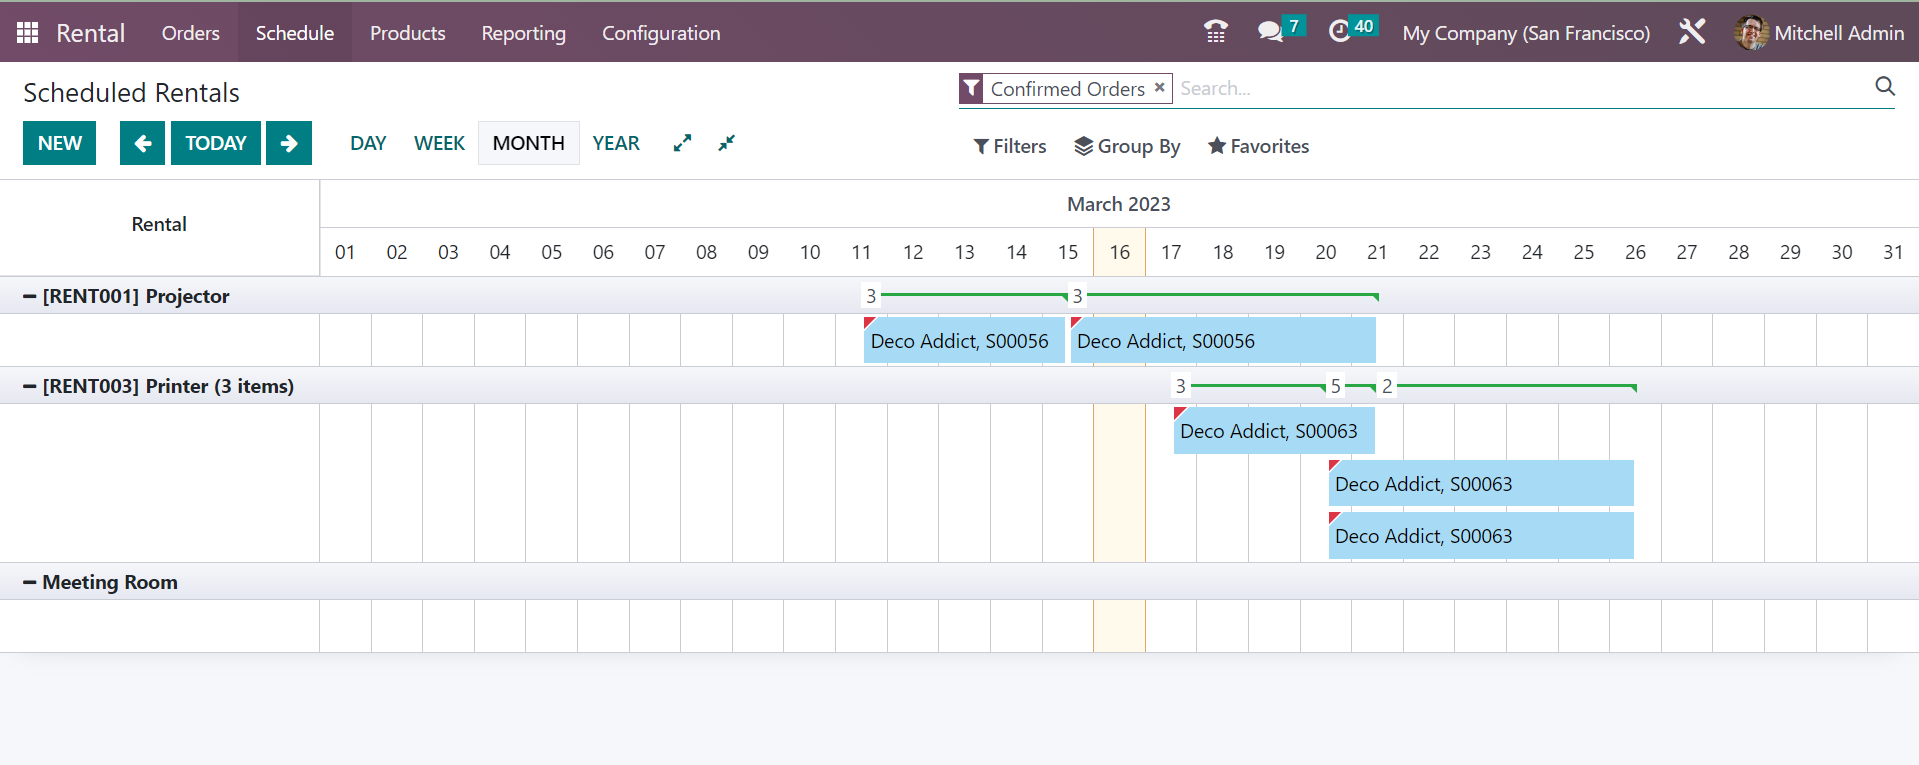
With the help of this page, all the above told daily, weekly, and yearly data can be analyzed very easily. On selecting a particular rental order from the list, the total number of orders, the date and time of the pickup and return, and the current status of the rental order can be viewed without any risk.
Configuration
You have the settings option for the rental module under the configuration menu of the page, as shown below.
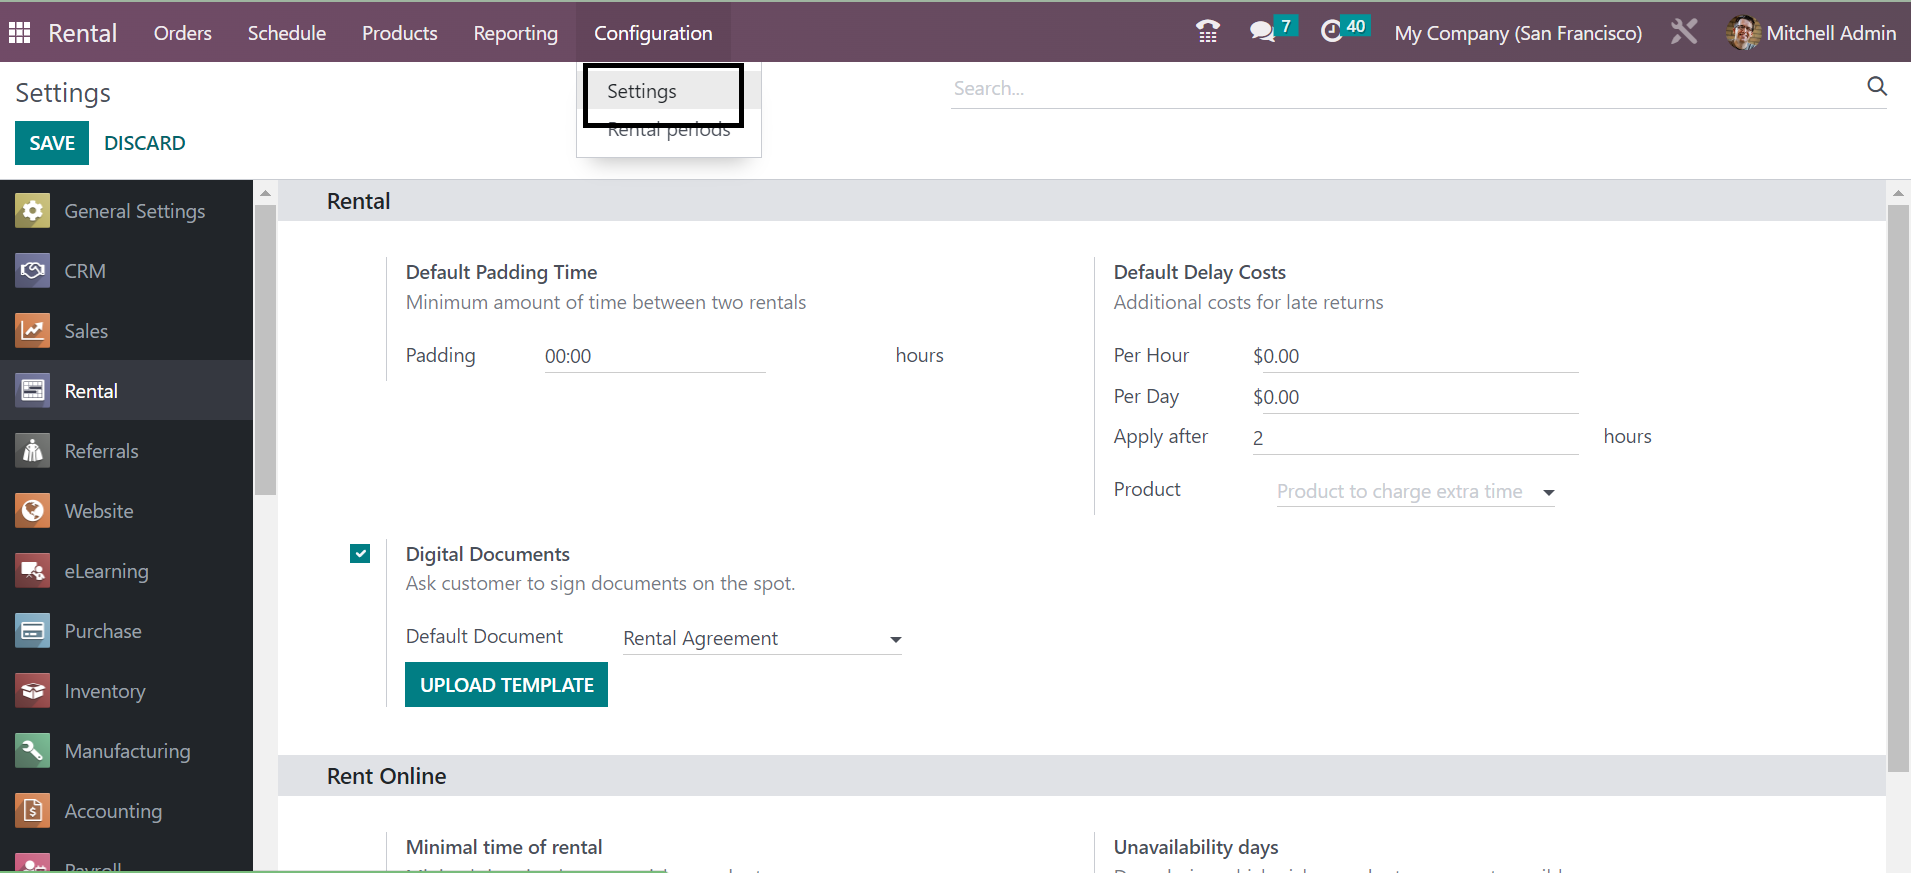
There are rental and rent online options under the settings of the rental module. The rental option in the settings has got default padding time, default delay costs, and digital documents options. The least number in between two rentals can be easily added under the Default padding time. The particular time taken will be considered as the preparation time for the product prior to the next rental.
In the default delay costs option, an extra charge for the late return can be provided. The cost will be applied to the new rental seal. The values can be altered from the product form for the created products. The cost per extra hours and day can also be activated on this option. The least delay time before applying this fine can be provided here. The digital document option is to activate a new default document template for the particular locations. And the upload template can be made used to add a new default document as well. The next tab under the settings option is Rent Online option, as shown in the screenshot below.
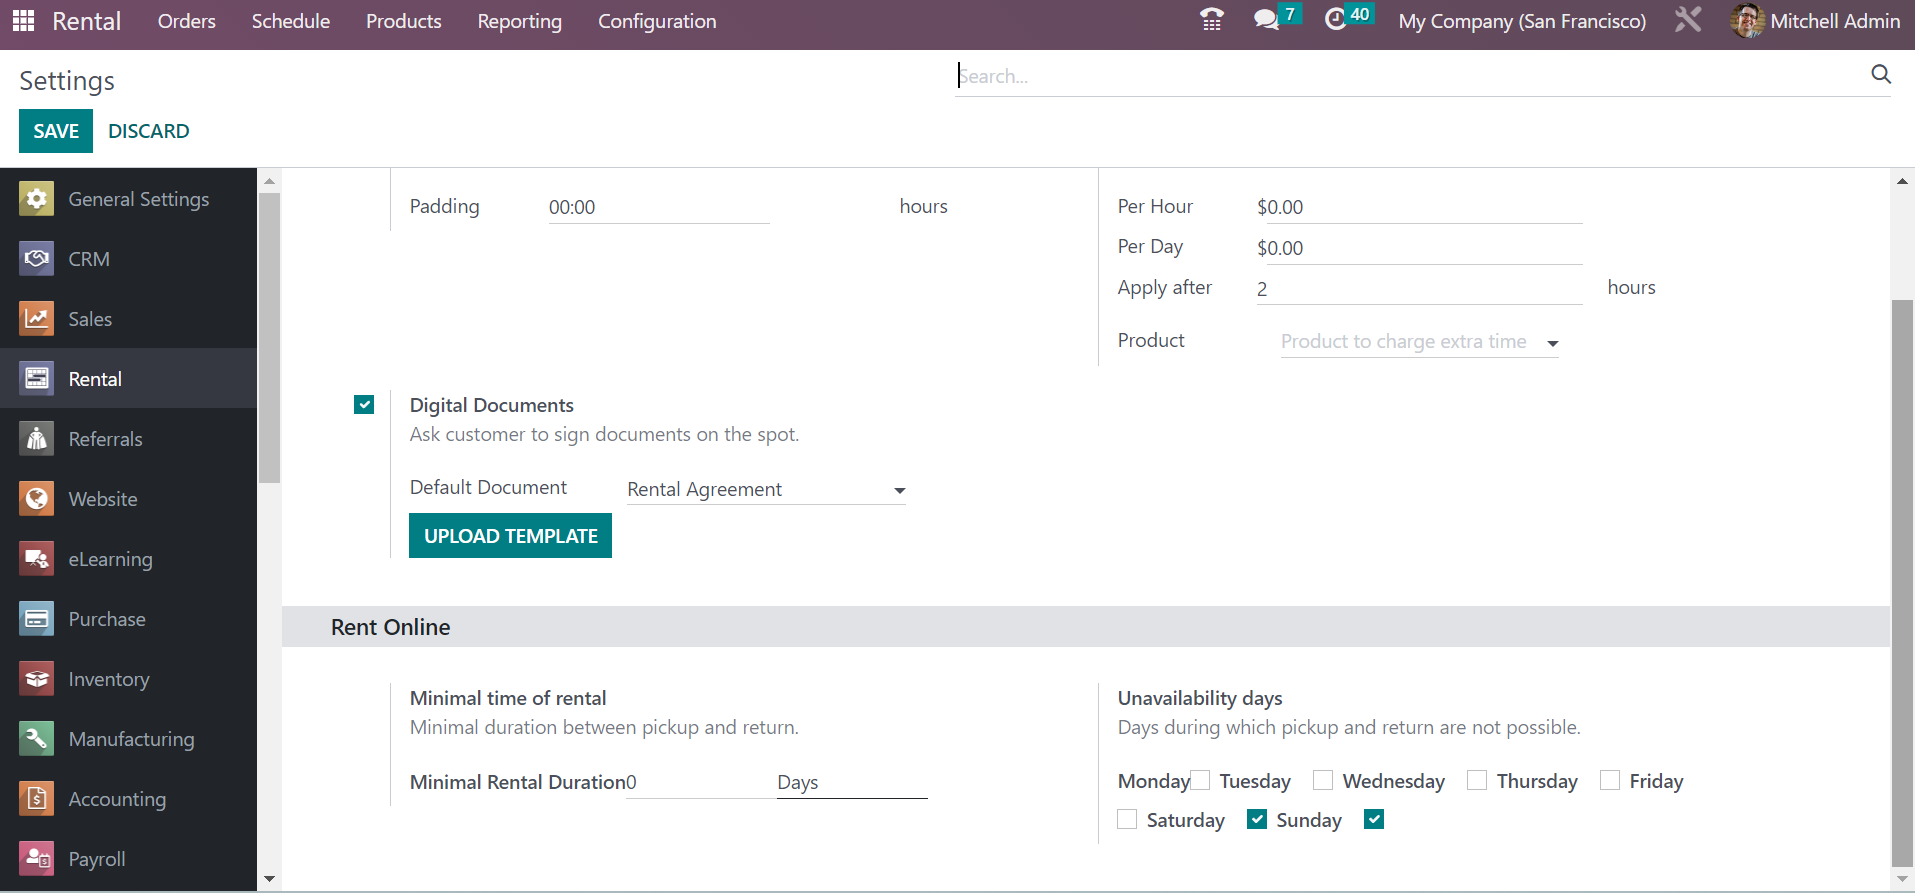
Here, you can pass the minimum time of rental, minimum rental duration, and the days when the pickup and returns are not possible. You are provided with all the days of the week here. The days when rental is not possible is marked here. The Unavailability Days option under the Rent Online option is here to show those days when pickup and return are not possible.
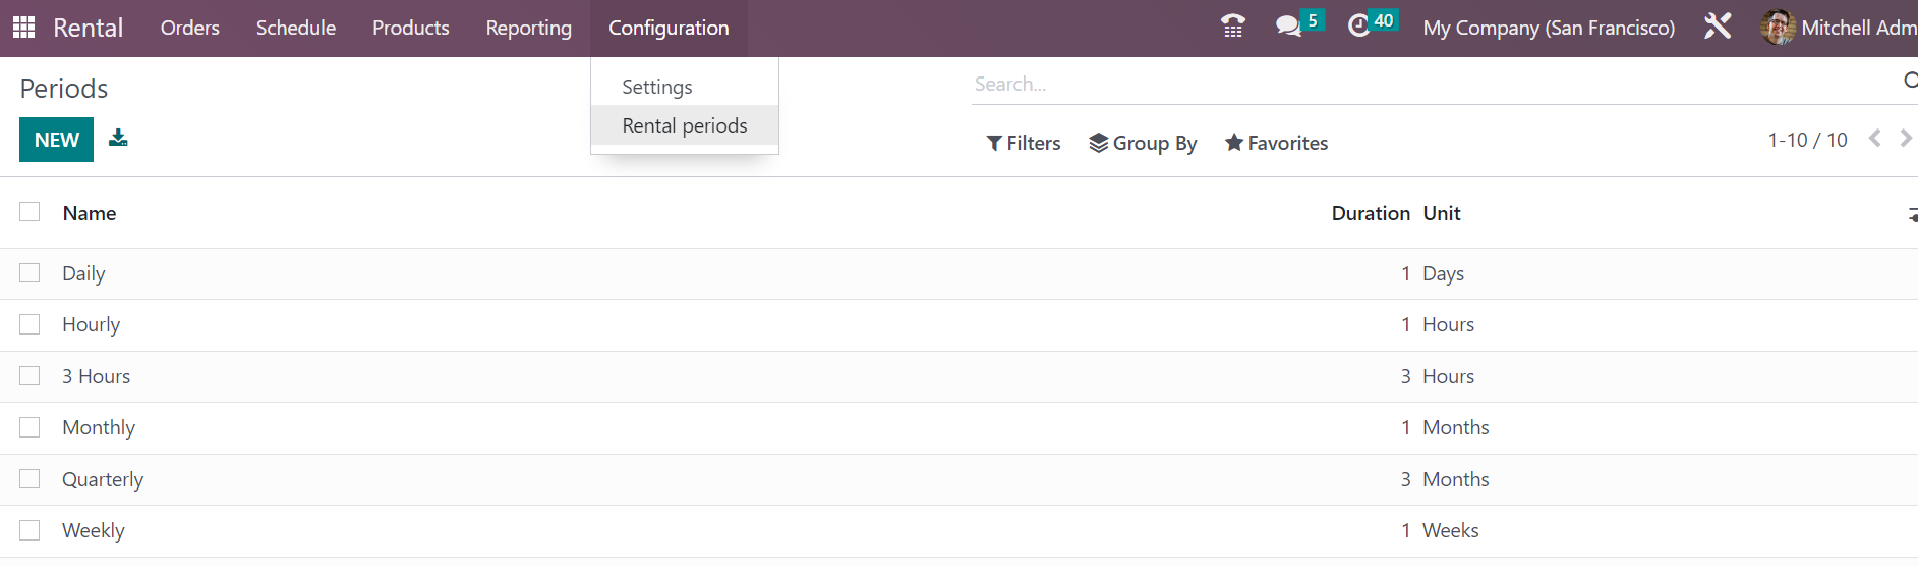
Under the Configuration menu, you will get another option for Rental periods, which provides the details, such as name, duration, and unit respectively. The page will be as shown in the screenshot below. You can easily create a new rental period using the New icon in order to get the newly created one to the existing group by providing the name, duration, and units as well.
Reporting
The complete analysis of the rental product can be done using the Reporting option, which can be seen on the main page of the module. The option of reporting helps you get the reports on the rental orders, which are made on a daily, weekly, monthly, and yearly basis. The page for reporting will be, as shown below.
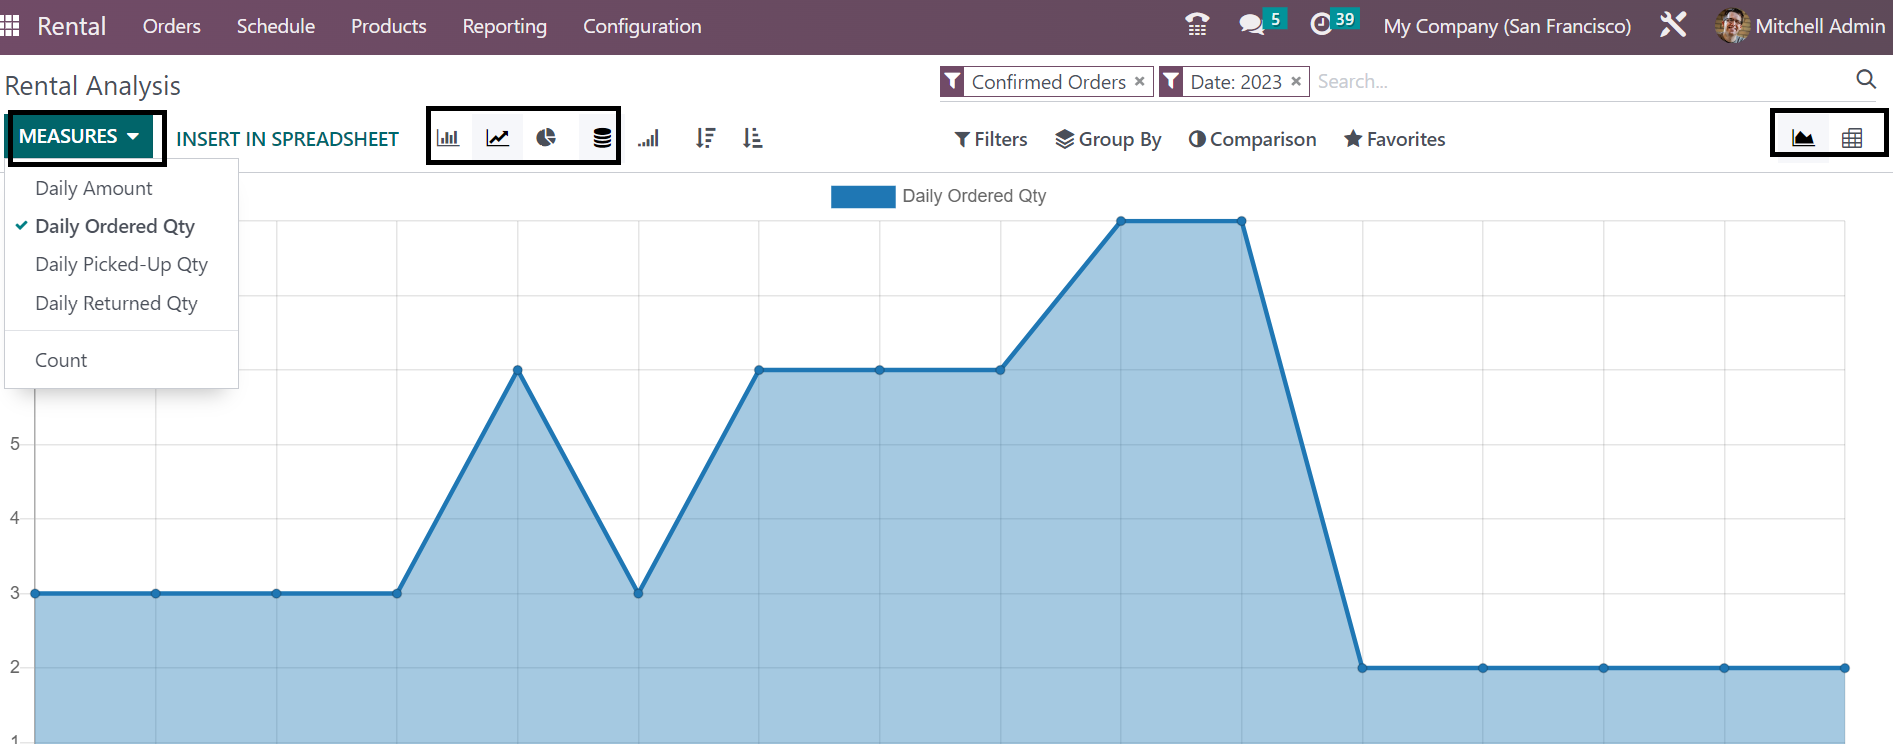
On the page, as you can see the reports on the rental order is shown in the graphical view. Other than the graphical view, you have the Pivot view of the page as well. You can apply some measures, such as daily amount, and daily ordered quantity, daily picked-up quantity, daily returned quantity as well. The graph can be viewed based on the count as well. You can apply certain filters and group by option in order to categorize them according to our needs. You can add them to favorites using the star icon provided on the page. You can even compare the present report with the past one as well.
These are the major features available under the rental module of the Odoo ERP Software. The module really helps the users with regulating the rental orders and quotations using simple steps.