Email Marketing
The Email Marketing Module in the Odoo platform helps you in making successful campaigns efficiently and effectively. The very easily usable module will assist you in regulating the email layouts and other functions in it. You can even select perfect themes for email marketing campaigns accordingly. The process is very easy under the module. The email templates can be selected according to our wishes, and we make our own using the features available. Those emails can be sent to the required persons very easily.
You have the advanced feature of sending those emails to those persons whom you refer. This feature helps to reduce sending of unnecessary emails to others, and thereby, you can make sure of the acceptance, opening, and thereby the rate of clicks as well. You can choose the groups that are targeted and send them to them. The leads, prospects, and extra groups from our contacts can be selected on the basis of country, date, or other different filters.
The module helps you to enhance the campaigns. As the system has accuracy on all the emails that are sent, we can completely rely on it. The module can track and regulate the bounce rate, orders, click rate, leads that are created, and the revenue formed. You can see that the module got integrated with some other modules like CRM, Marketing Automation, Survey, and Events module for the smooth running of the functions. Here, let us look at the various uses and functions played by the options provided under this module.
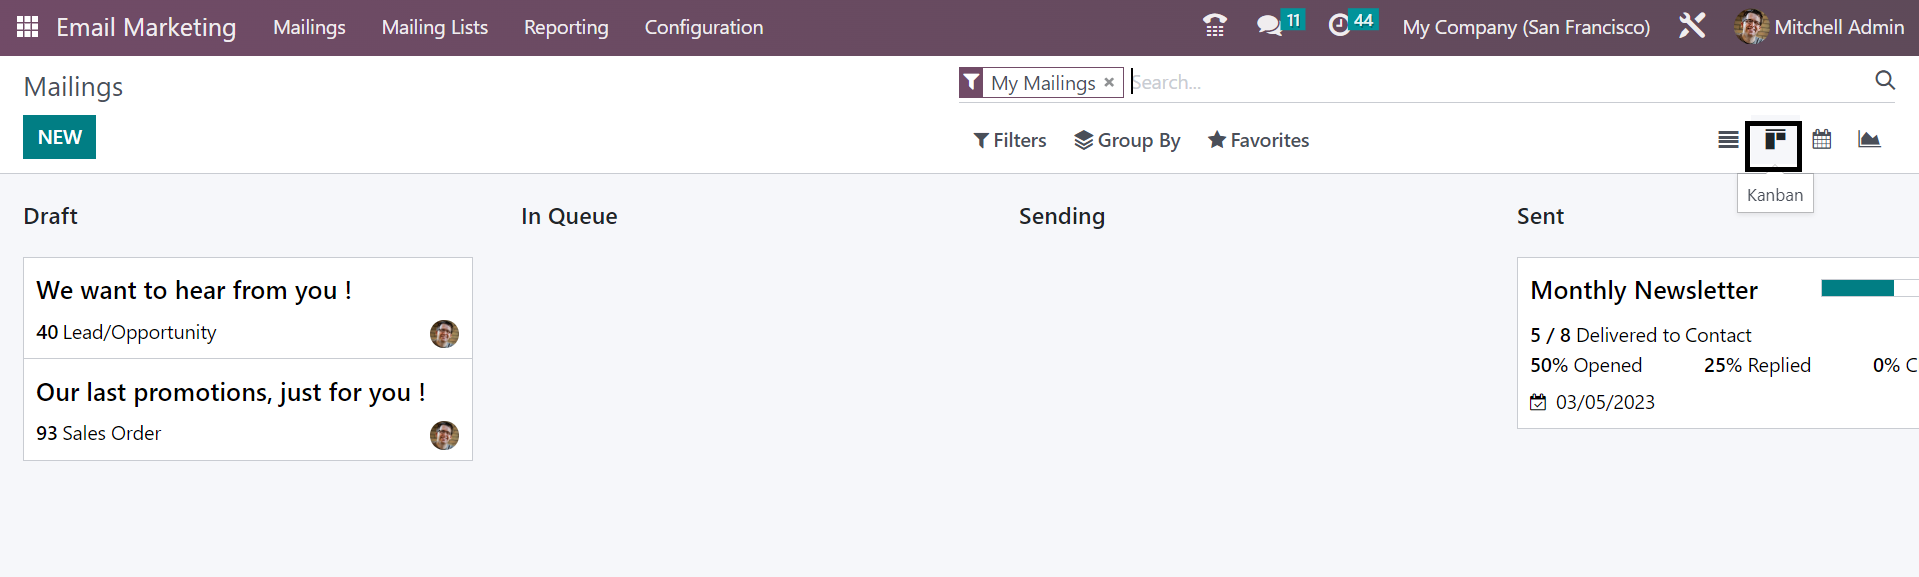
On selecting the module, you will get the main dashboard of the module, as shown below.
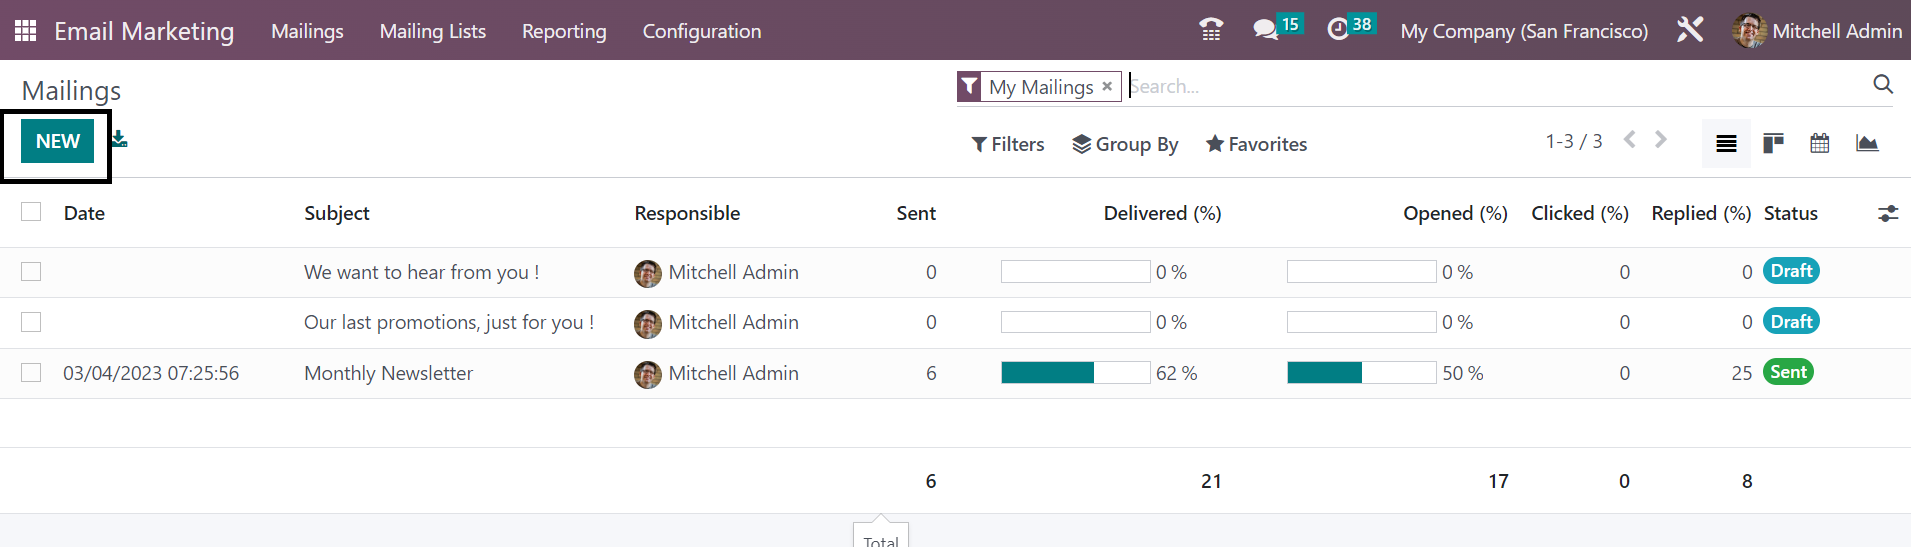
You will get the already created emails with the details, such as date, subject of the mail, responsible user, sent, delivered, opened, clicked, replied, and the status of mail as well. The page can be seen in Kanban, List, Graphical, and Calendar views as well. The options for those views are available on the right side of the page.
You can make use of the Group By and Filters option for sorting according to your needs. On selecting a particular responsible user from the list, you will get the chat box of the person, as shown below.
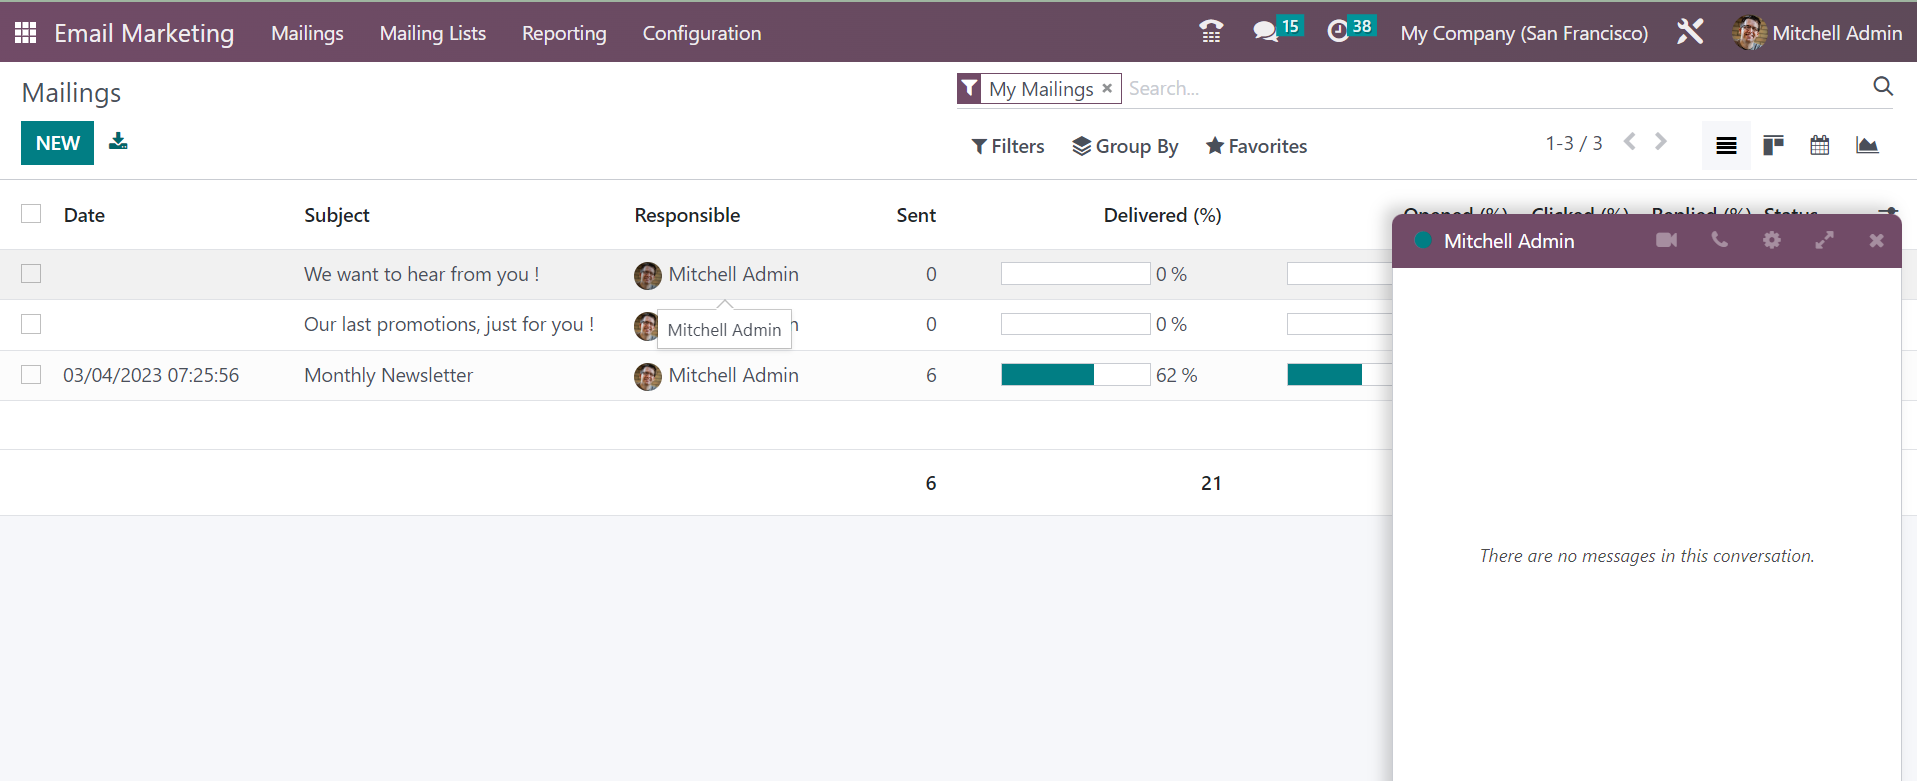
Communication with this responsible user can be done here. All the records of data can be analyzed and studied in detail by selecting the particular one that we want. On screenshot below.
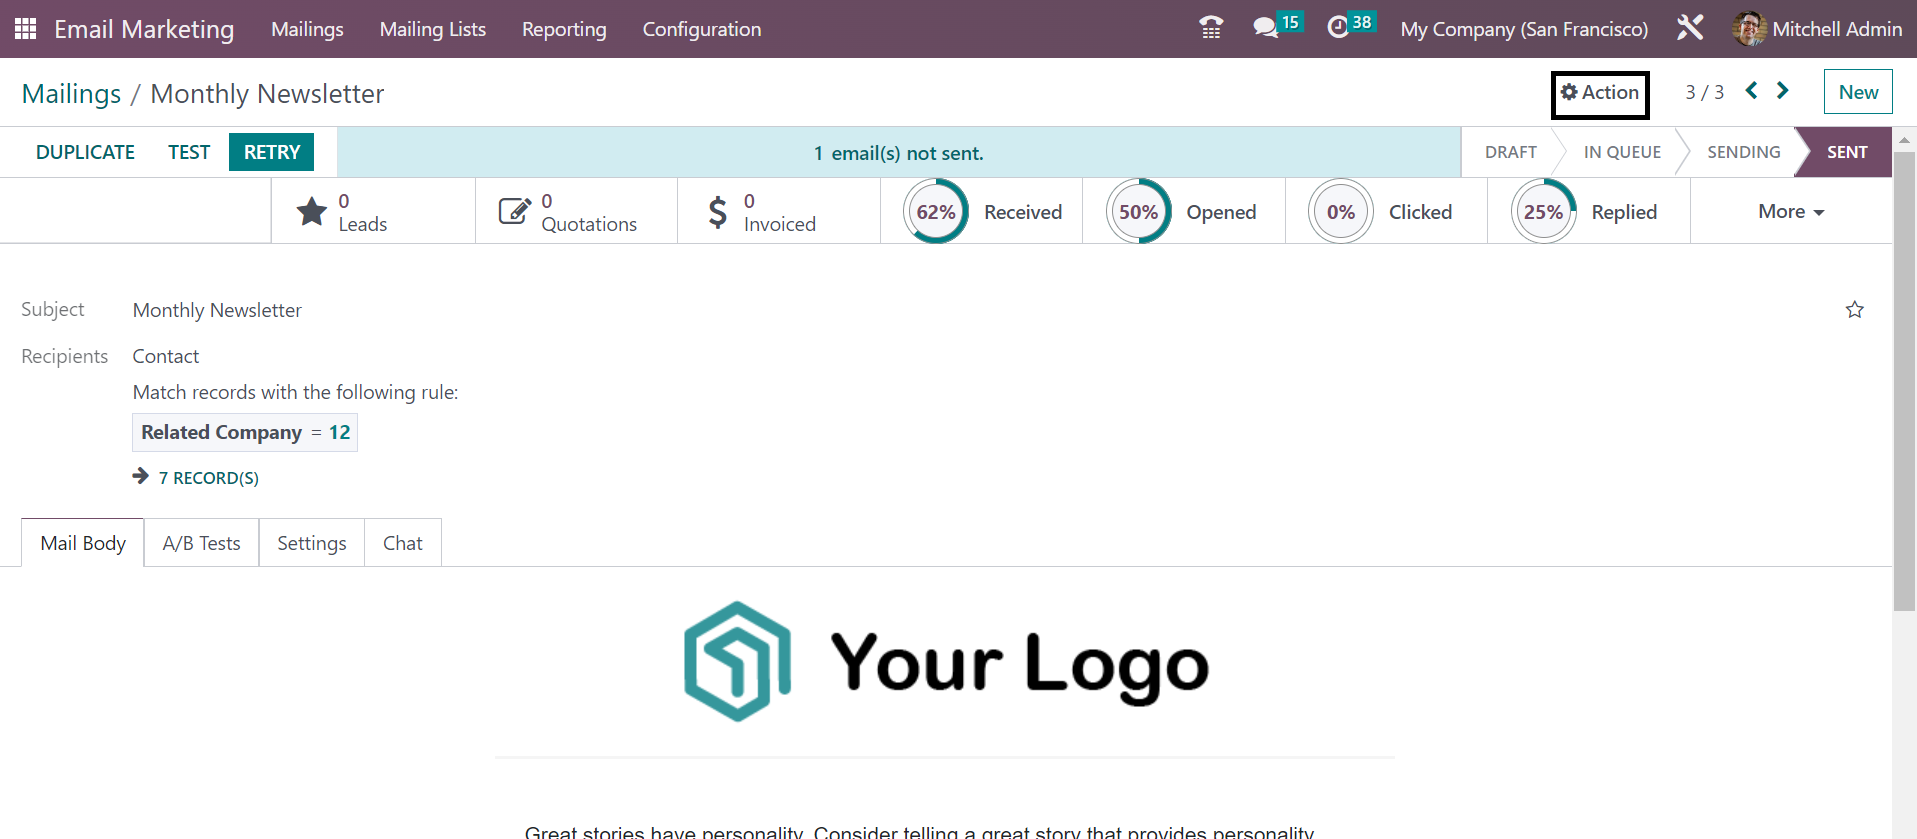
The given image provided above is one of the records on the mailing list. You will get all the information based on the particular mail here very clearly. As marked in the above image, you can make use of the Action icon provided for the purpose of performing extra actions. Under the Archive option, you will get Archive, Duplicate, and Delete options as well, which can be made use of if required.
Now, under the Filters option, you will get some of the filters, such as My Mailings, Send date, A/B test, A/B tests to review, and Archived option, which can be selected accordingly. Moreover, the Group By option includes Status, Send By, Send period, and Add Custom group options. You can also set the particular mail to Favorites, which include Save a current search, Insert view in the article, Insert link in an article, and Add to my dashboard options, respectively.
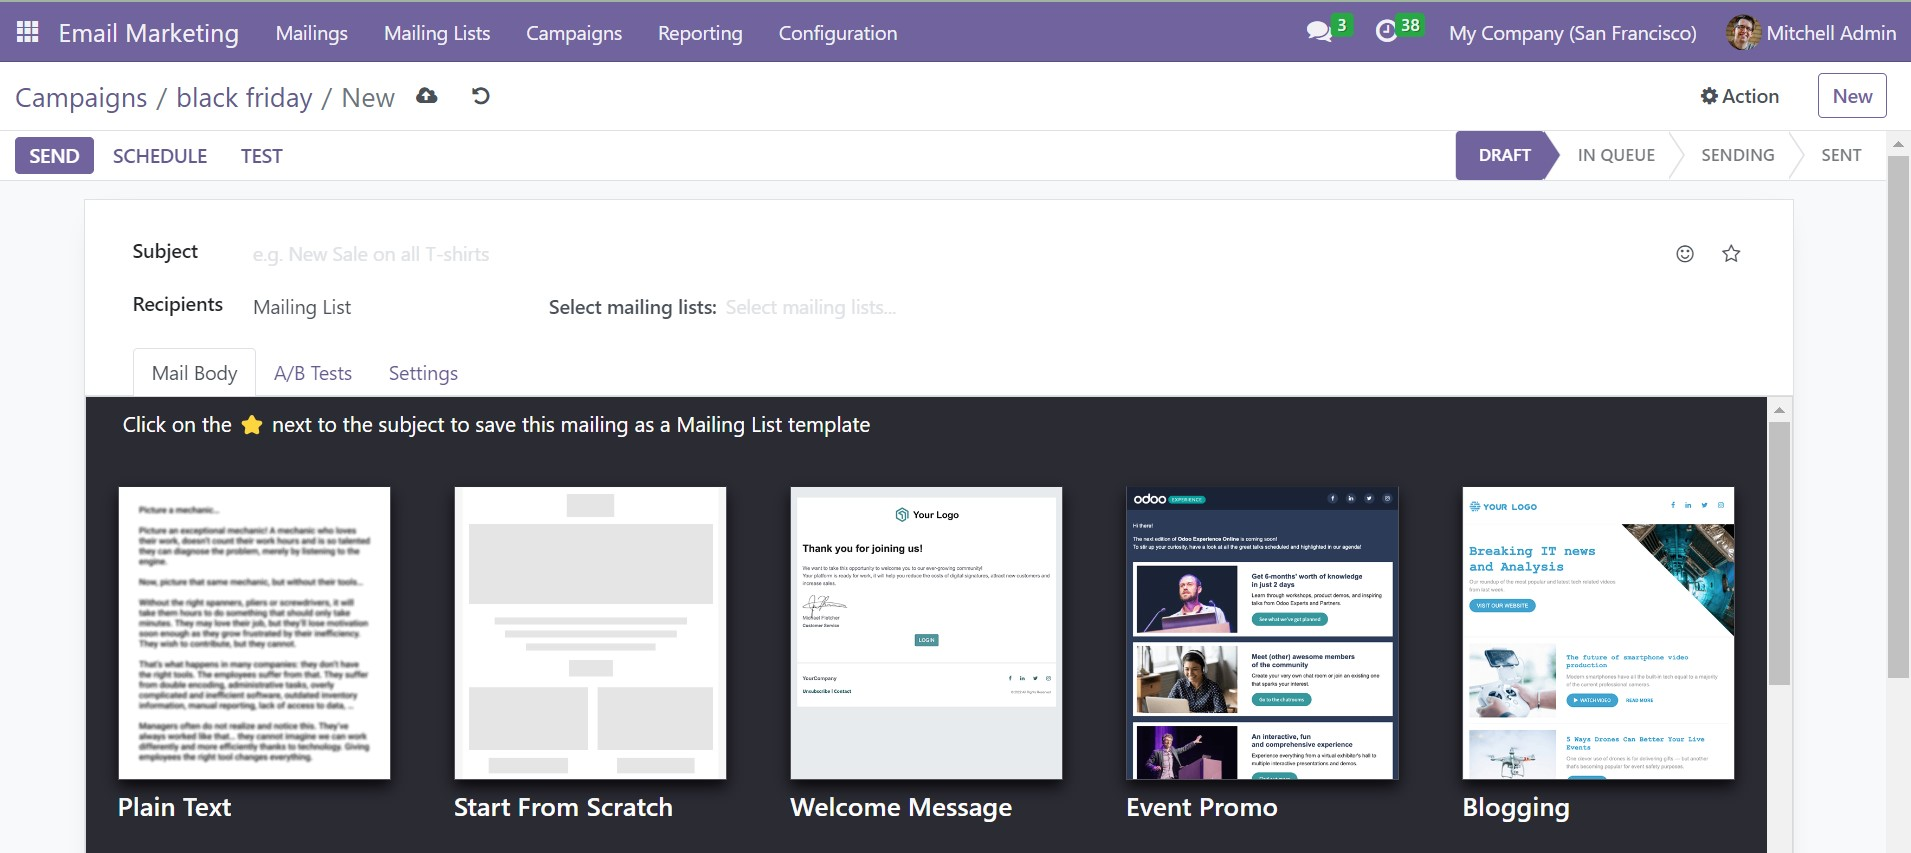
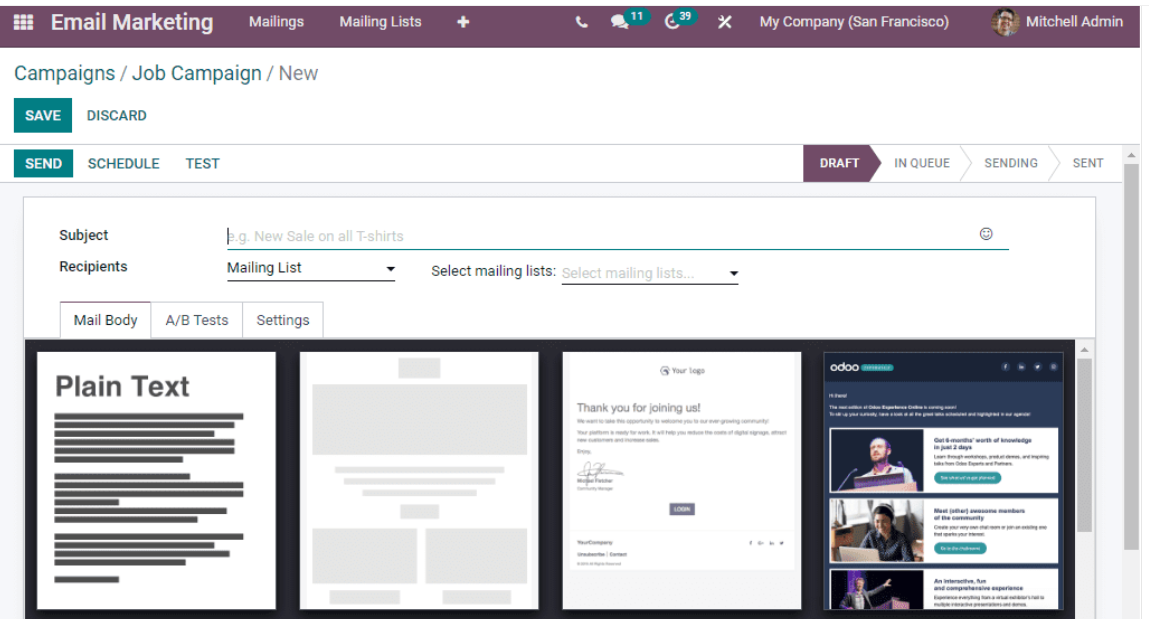
Now, if you want to make a similar kind of mailing, then go to the New option provided on the left side of the window.
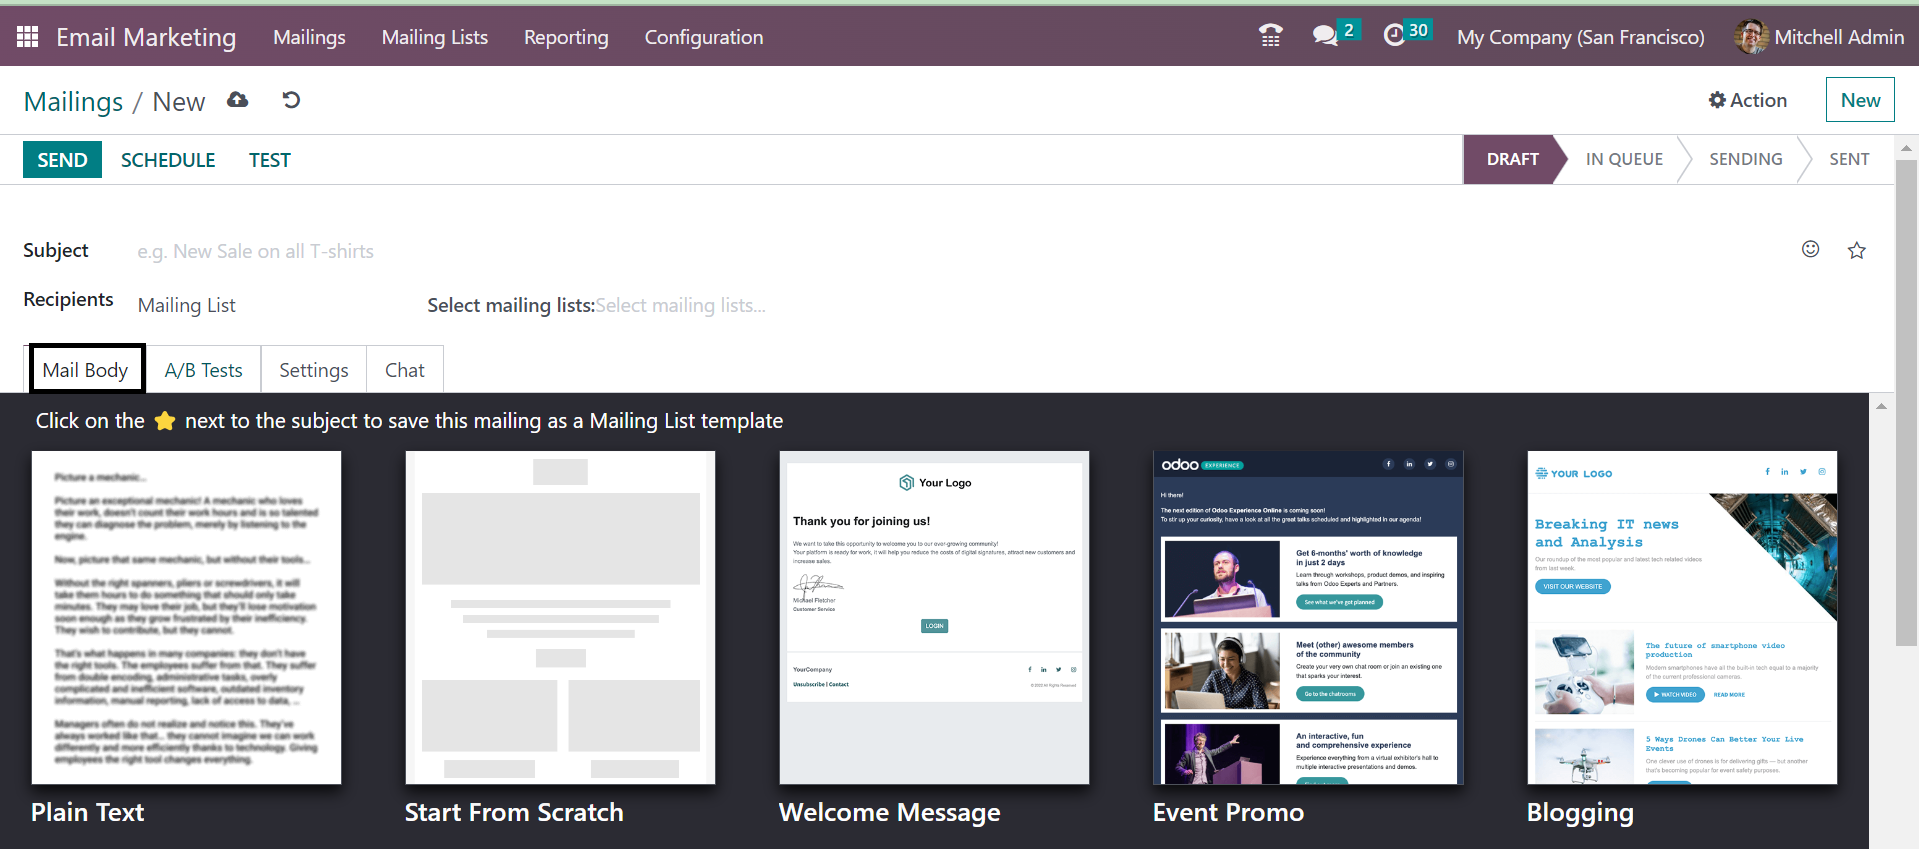
On the creation page, you can see the space for providing the Subject of the mailing. You can also add emojis to the subject if required. Now, below that, you have the Recipients option, which can be selected from the drop-down menu, as per your wish. Now, you can select the mailing list option in the provided space. There are required options under the drop-down menu of the mailing list. You will also get a customizable mailing list from the main menu also.
Under the Mail Body tab, you will get the various mail bodies for the mailing among which, you can go for a particular one. On selecting a particular one from that, you can alter it and customize them as per your need.
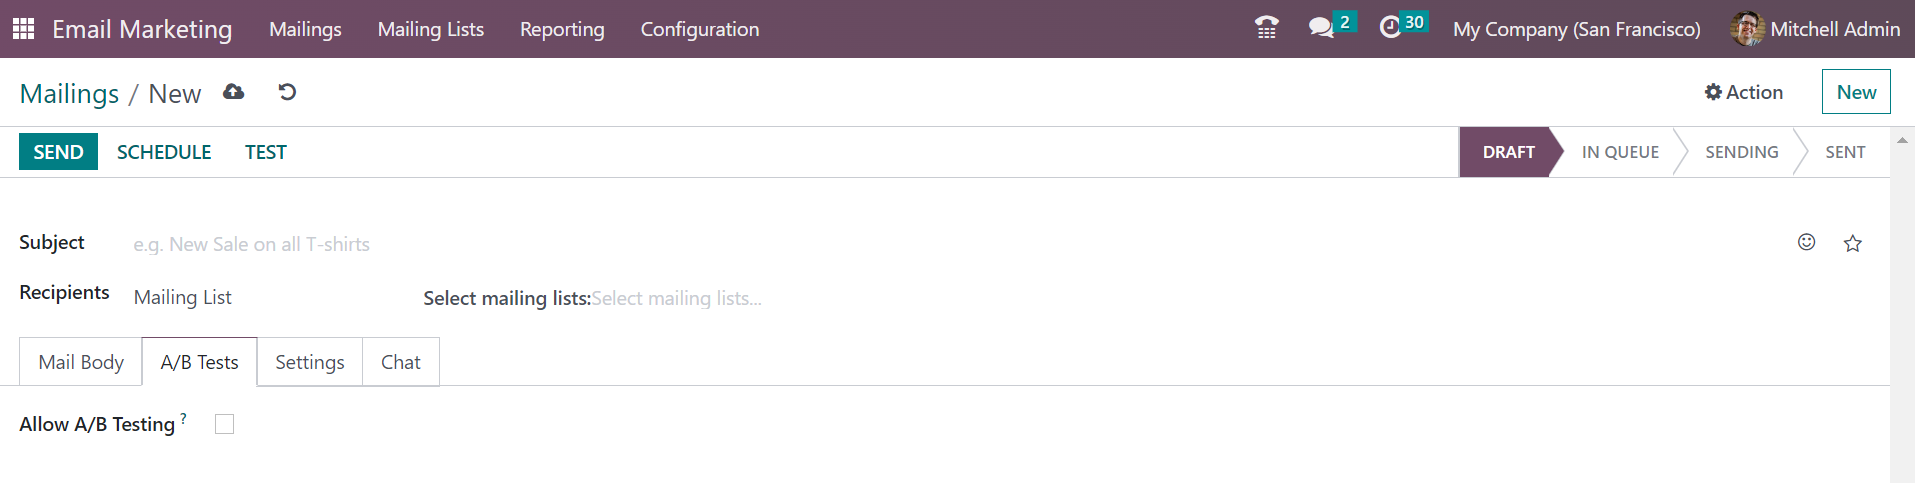
Now, under the A/B Tests, you have the option to activate the A/B test, as seen in the image below. Next to that, the Settings tab helps you to provide some details, as shown in the screenshot below.
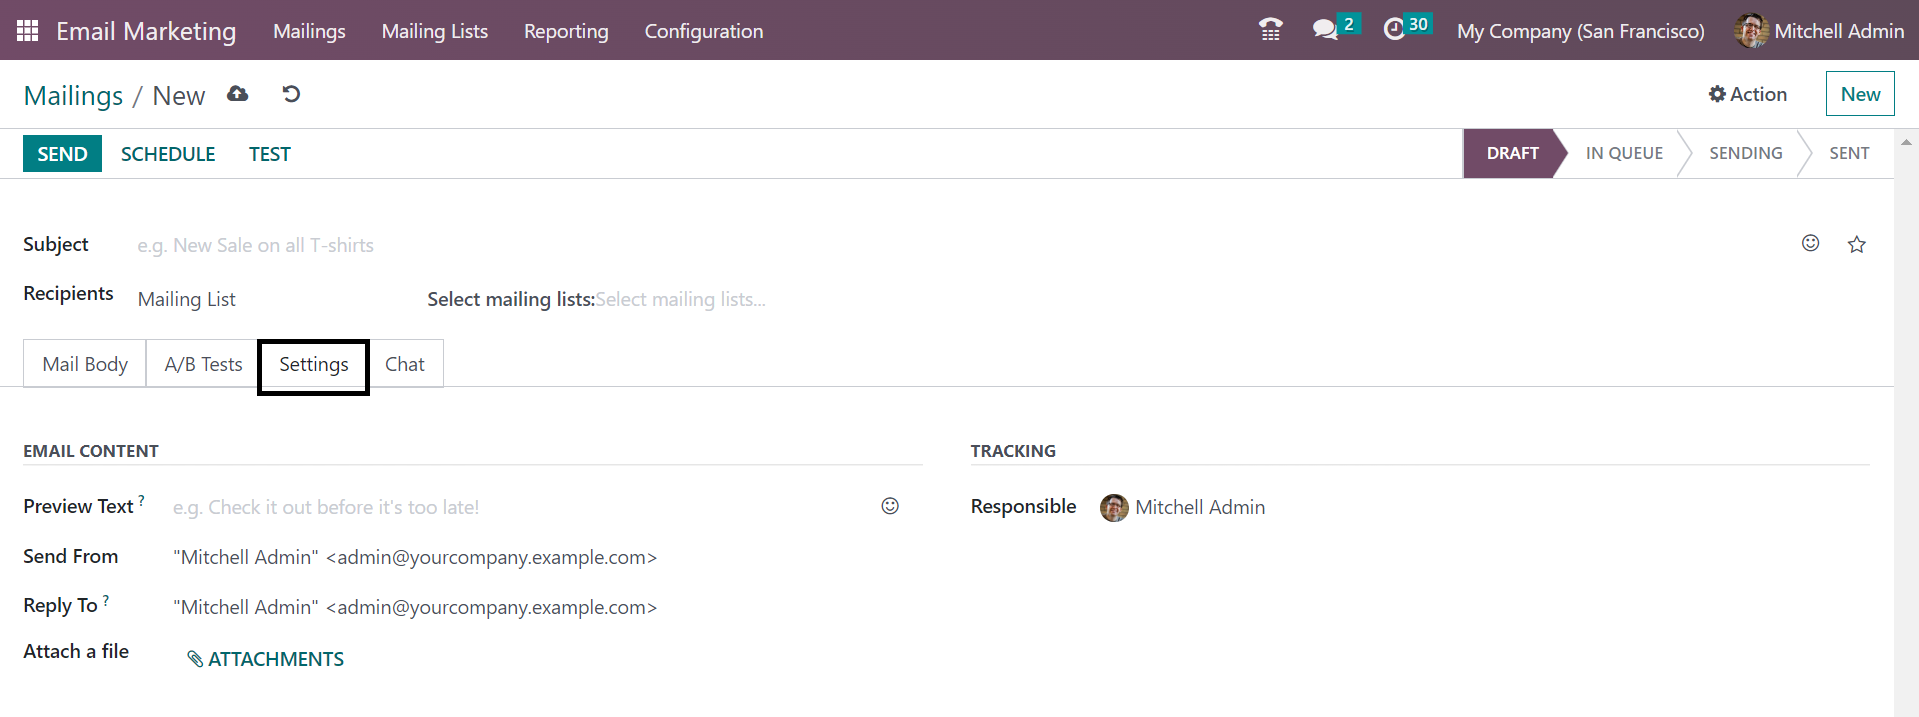
The options include the Preview text option, which encourages people to select the mail. The preview text can be seen near the subject of the mailing. If the first character of the mail content wants to be seen, the field can be kept as empty. And the responsible person will be provided in the space on its own, and it can be changed if required. Below that, you will get the send from and reply to the option, which can be provided accordingly. Under the attach a file option you can attach files in order to support the subject of the mail.
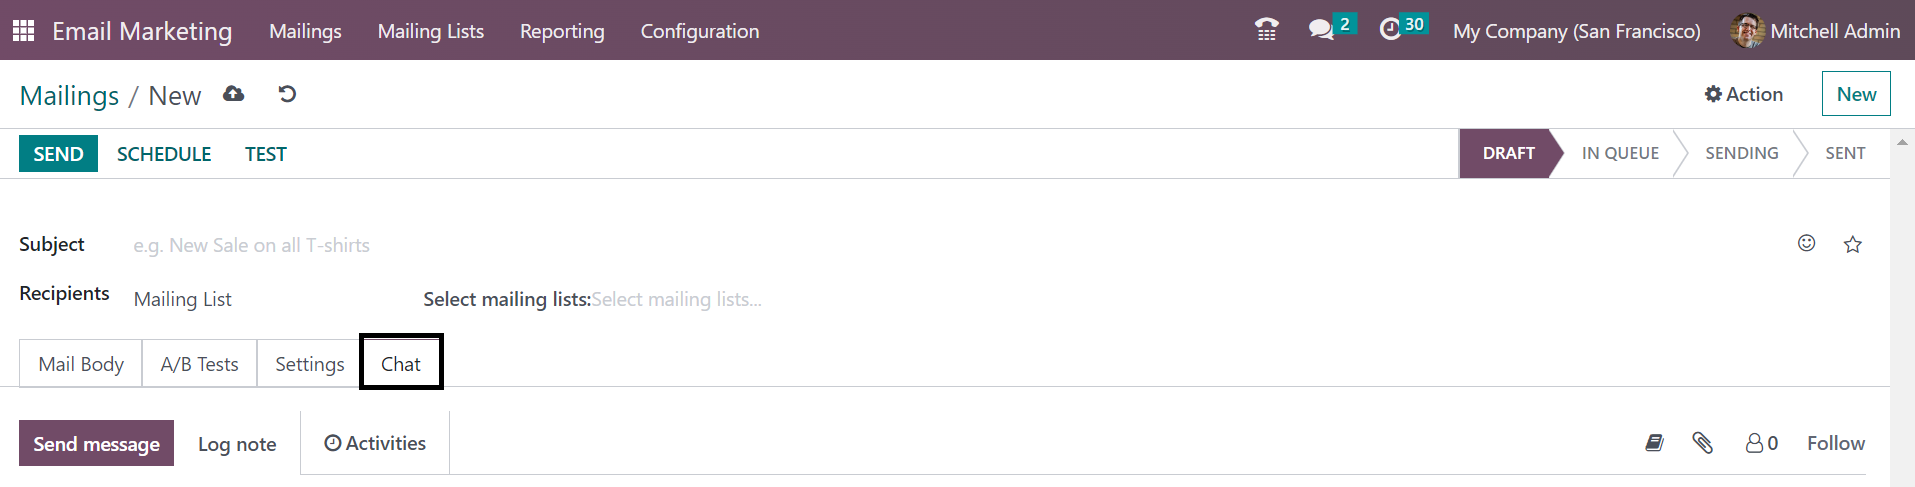
Under the Chats tab, you will get the option to see the send message, Log not, and Schedule activity, respectively, as shown below.
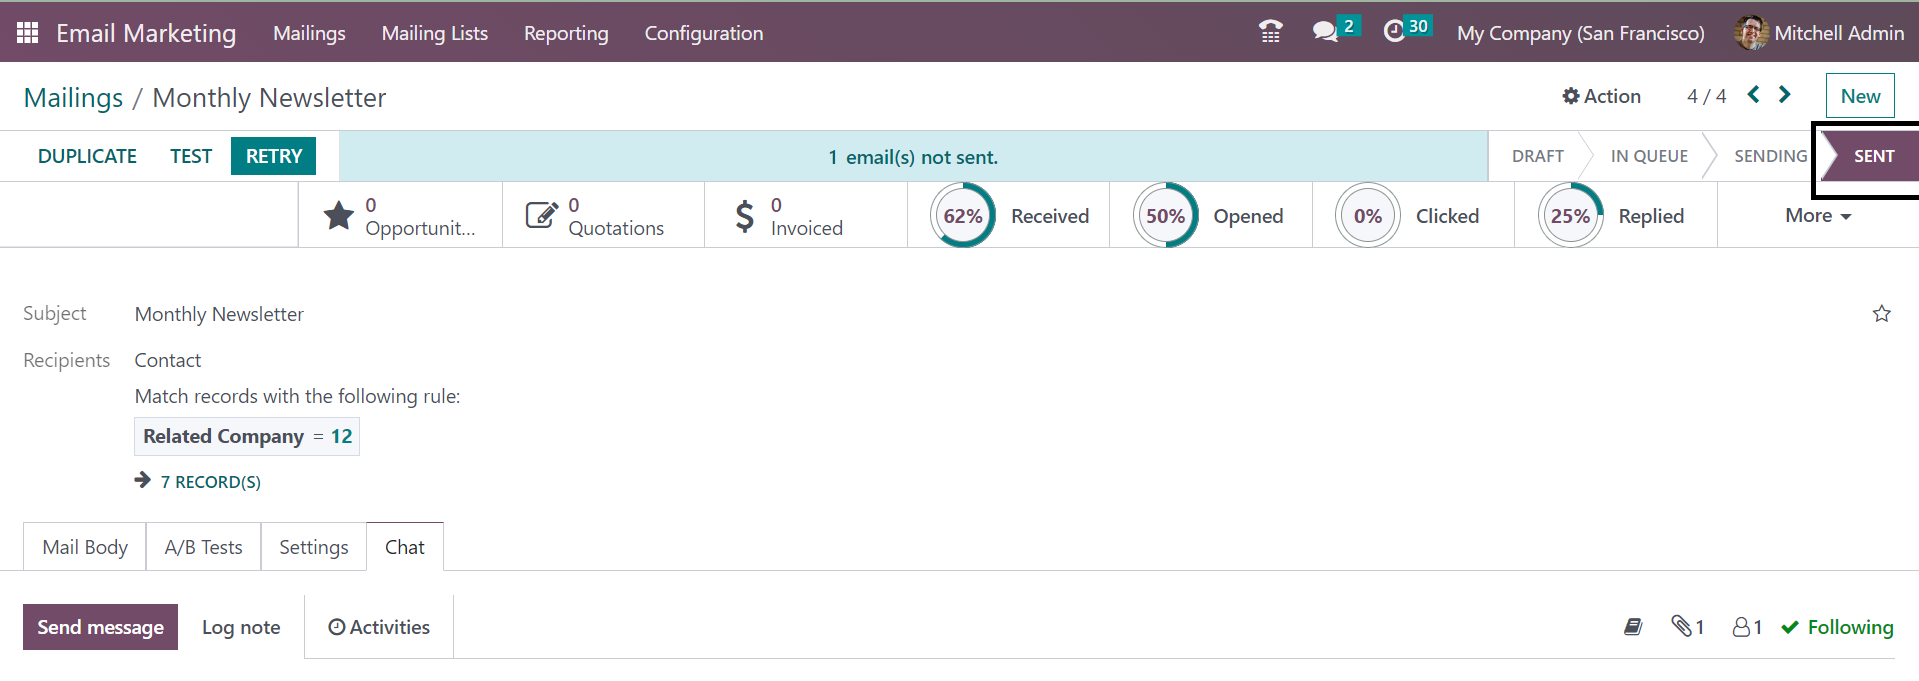
On completing providing all the necessary details for the creation of the mailing, you can go to the Save icon for getting the mailing added to the already created list. In the Save option, you can Send, Schedule, and Test options, as you can see on the page provided above. On selecting the Send option, you will get a page, as shown below.
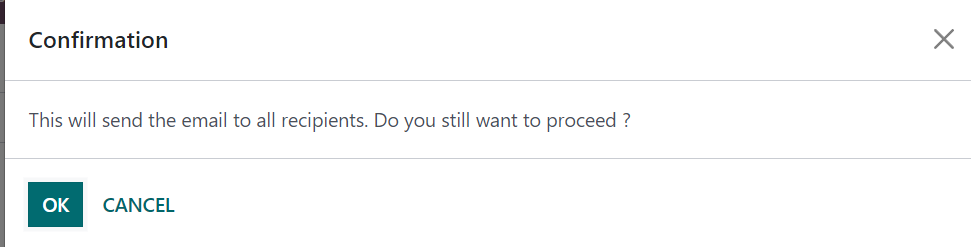
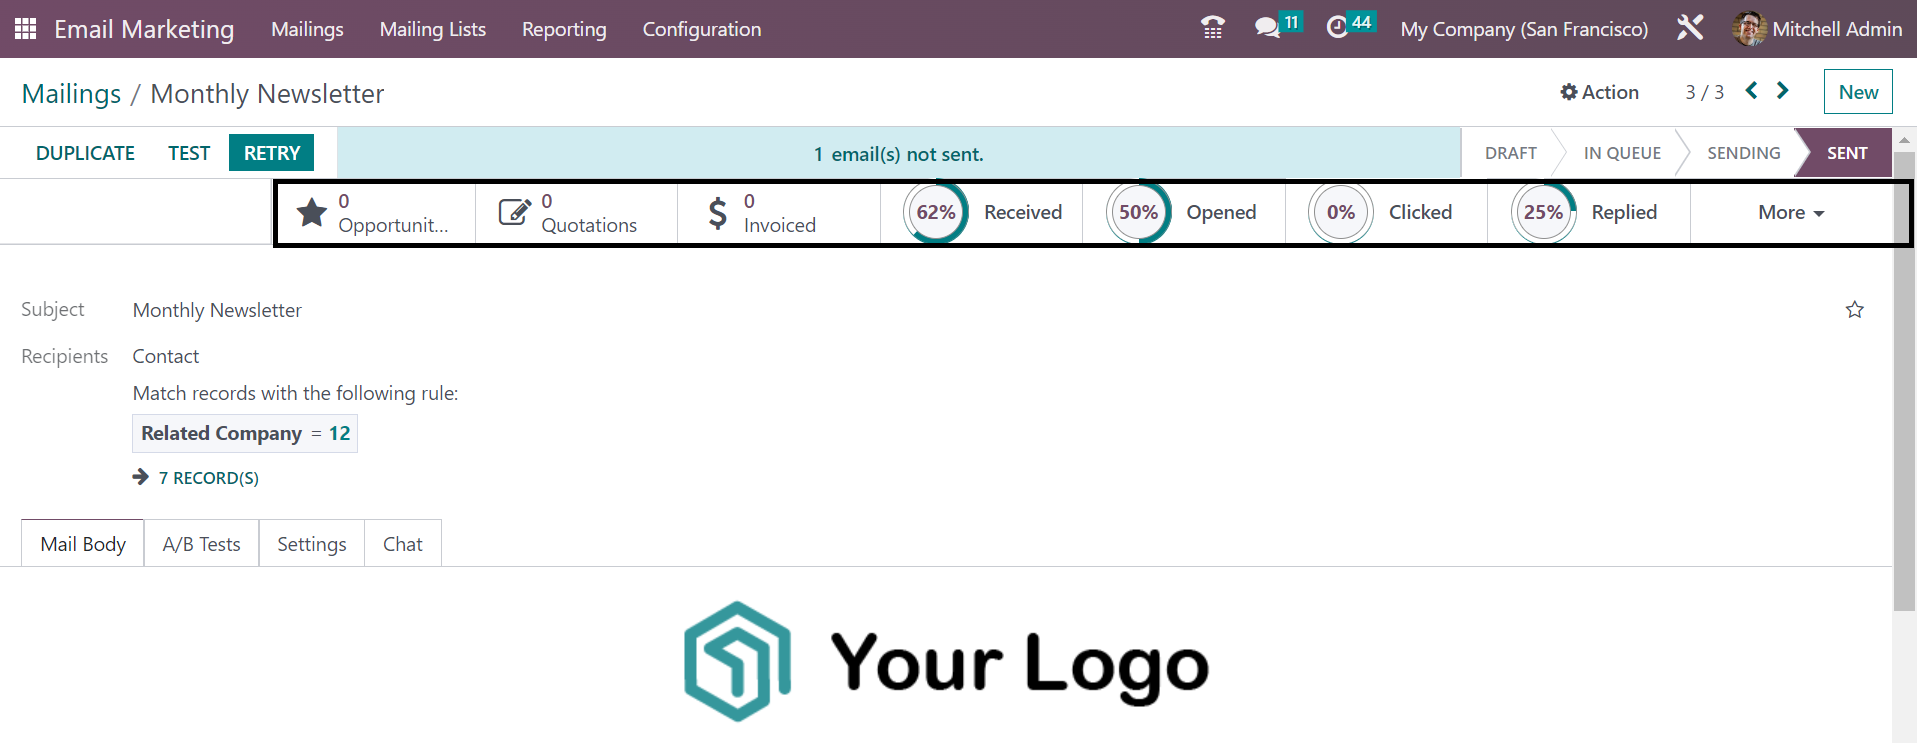
The page will ask for confirmation of mail whether to be sent to all recipients or not. If yes, then proceed with the OK icon. On doing so, the status of the email will be shown as SENT, as shown in the screenshot below.
Now, if you are going with the Schedule option, you will get a page where you can provide the date on which the mail should be sent to the particular recipient.
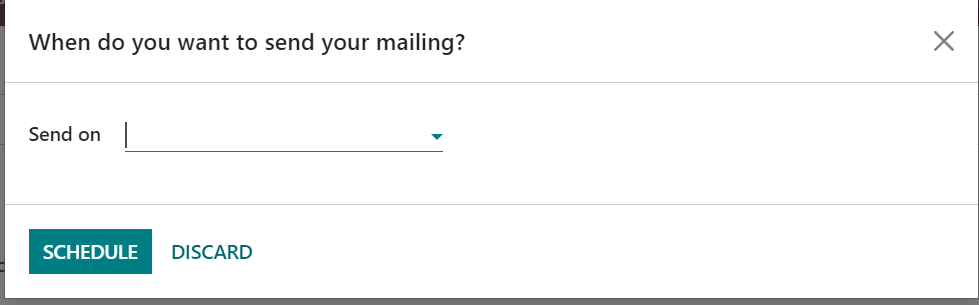
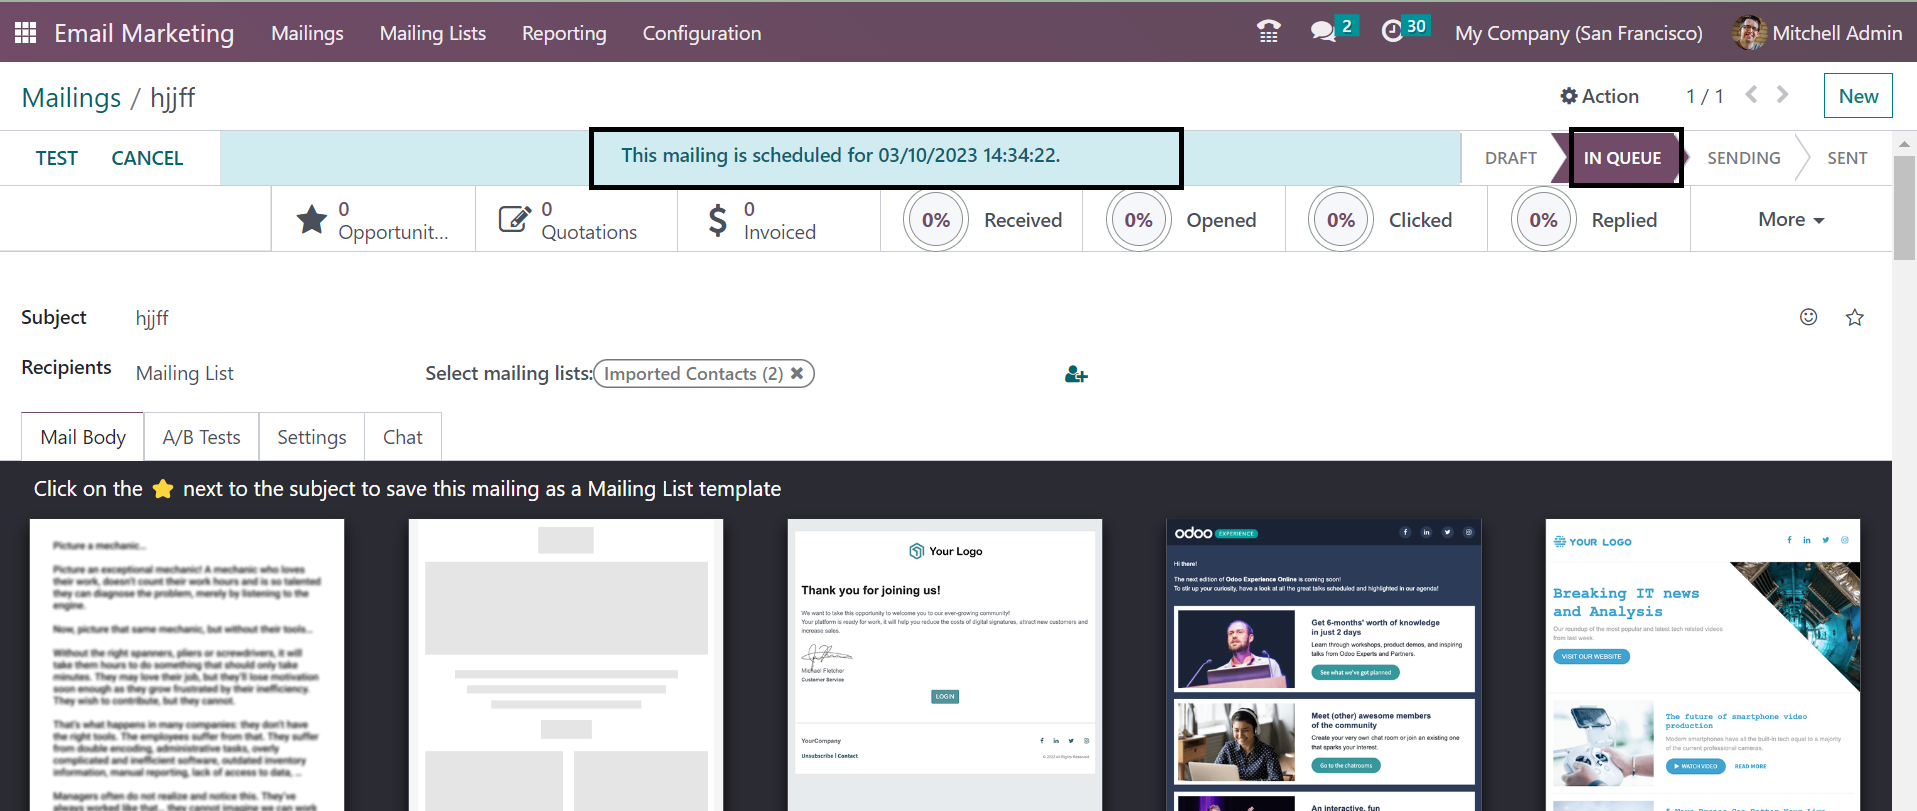
On the Send on option, the date can be provided. Then go to the Schedule option. Now, on the main page, you will get the date that is scheduled, and the status will be set IN QUEUE. And the email will be automatically sent on the scheduled date.
Moreover, the TEST option helps to test the mail to the provided address.

When you are done with all those processes, then you will be provided with some smart buttons, such as Leads, Quotations, Invoiced, Received, Opened, Clicked, Replied, Bounced, Sent, and Ignored, as marked in the below screenshot.
The Lead button helps you by providing the link, which directly leads to the lead page, where you will get all the necessary details regarding the leads made from this mail. Then, Quotations, Invoices, percent of those who received, opened, clicked, replied, bounced, sent, and ignored will be available under these smart buttons. It is on the Kanban view that you will get the view of the status clearly shown, which we had created. It is because the kanban view is made based on those stages. Then the Kanban view is shown in the screenshot below.
Mailing Lists
Under Email Marketing, you will get the option of sending the mail individually or massively. The mass mailing of email helps you to a great extent as it helps you to save most of the time. The mail can be sent to a large group of people within a few procedures. The Mailing List feature helps you in creating email addresses using the feature available under Email Marketing. The mailing list can be made for various purposes, such as events, company promotions, and for advertisements.
The mailing list menu is available in the dashboard. The option gives a new kind of view under the Kanban view. On the page you will get an already-created mailing list on the page, as seen in the image. The page can also be seen in the List view as well. Each of these mailing lists consists of the name of the mailing list, total number of contacts, valid number of recipients, valid number of SMS recipients, and some other details. In order to further details, you can go to a particular one among them.
This is the page that you will get on selecting a particular one. You have an option of showing in preference option to trigger in order to show the mailing on the main list. On selecting the number of contacts provided on each list, you will get the details of the contacts, as shown below.
The page includes details, such as created on date, name of the contact, company name, email of the contact, email blacklisted or not, mobile, phone blacklisted or not, and bounce opt-out or not. Now, back to the mailing list page, you will get the Filters, Group By, and Favorite options in order to sort out and arrange the data accordingly. The List view can be seen by using the list option provided on the right side of the page.
In order to make a similar kind of mailing list, just go to the New icon provided on the left side of the page.
On the creation page, you can provide the name of the mailing list in the allotted space. Shown in the preference option helps you to show the mail in public. You can also see some smart buttons, such as Recipients, Mailings, Bounce, Opt-out, and Blacklist options. These buttons are direct links to the allotted window. To provide all the required details, you can go to the Save icon. The newly formed mailing list will then be seen on the main page.
Mailing List Contacts
Mailing list Contacts will help you to make new contacts for the mailing list. The page of the mailing list contact will be shown, as in the image below.
The list of the mailing list contact includes details, such as created on date, name of the contact, name of the company, email, email blacklisted option to activate, mobile number of the contact, phone blacklisted to activate, and bounce, respectively.
The page has a list of already created mailing list contacts. The Filters and Group By options help you in categorizing those according to our needs. The Filters option includes Bounced, Excluded Blacklisted Emails, Exclude Blacklisted Phone, and Add custom filters options. To make a similar kind of mailing list contact, you can go to the New icon provided on the page.
On the creation page, you will get the details to be provided, such as the name of the contact, tags, email, mobile, title, name of the company, and country. The new mailing list can be included using the Add a Line option. You can trigger the unsubscription date option if required. Finally, go to the Save icon in order to get this newly created contact to get added to the existing list.
Reporting
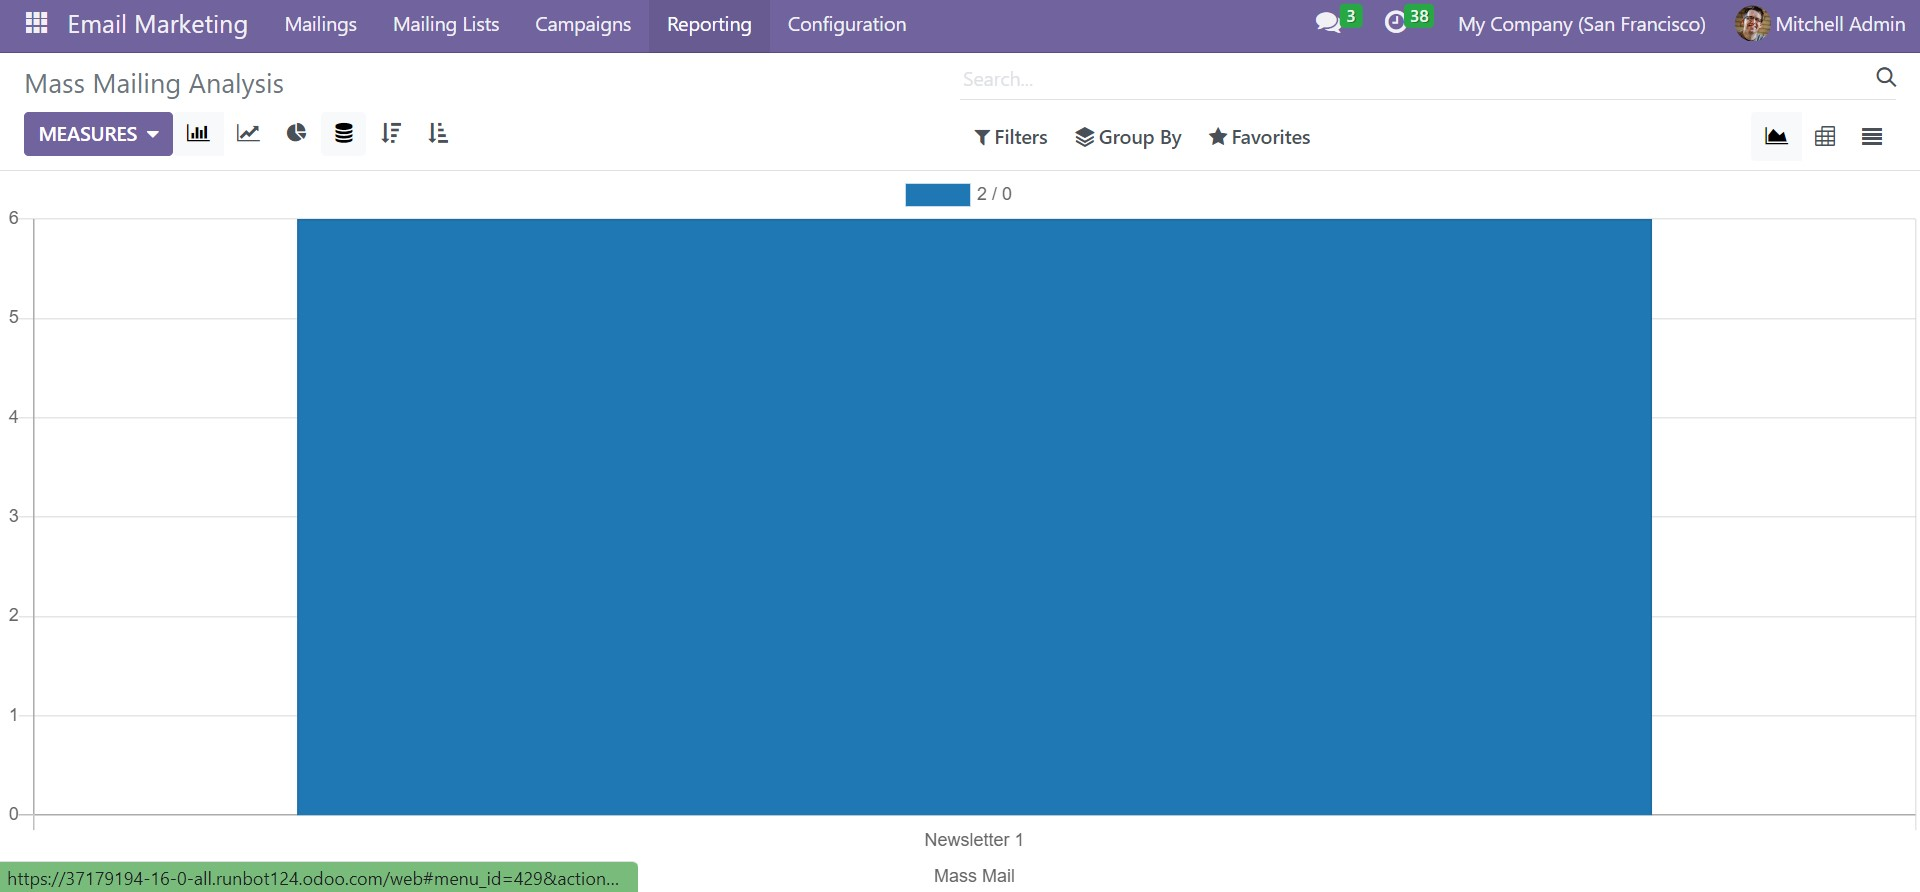
The reporting option under Email Marketing helps you in creating reports on a large group of emails. The mass mailing analysis view will be shown, as in the image below.
This is the image of the mass mailing list in graphical representation. The graphical view can also be seen in Pivot, List, and Bar views. Other than the Graphical view, you can see the page in Kanban, List, and Pivot view as well. You can make use of the different Measures options below, which you will have options, such as bounced, canceled, clicked, delivered, error, opened, replied, scheduled, and sent. The reports can be set in ascending as well as descending order. The Filters and Group By option helps you in grouping the mass mail if required. The Group By option includes Mass Mailing Campaign, State, Sent By, and Scheduled Period. The pivot view of the mass mailing analysis will provide the reports in tabular format, as shown below.
The pivot view of the page includes details, such as Sent, Scheduled, Delivered, Opened, Replied, and Clicked options, which are provided in tabular form. You will also get the list view as well. This reporting feature under the mailing list contact helps you to analyze the mailing list of particular contacts and make corrections if required. The INSERT IN SPREADSHEET option helps you to insert the contact under the spreadsheet. These are the features in the reporting option of Email Marketing.
Of the Odoo Software.
Configuration
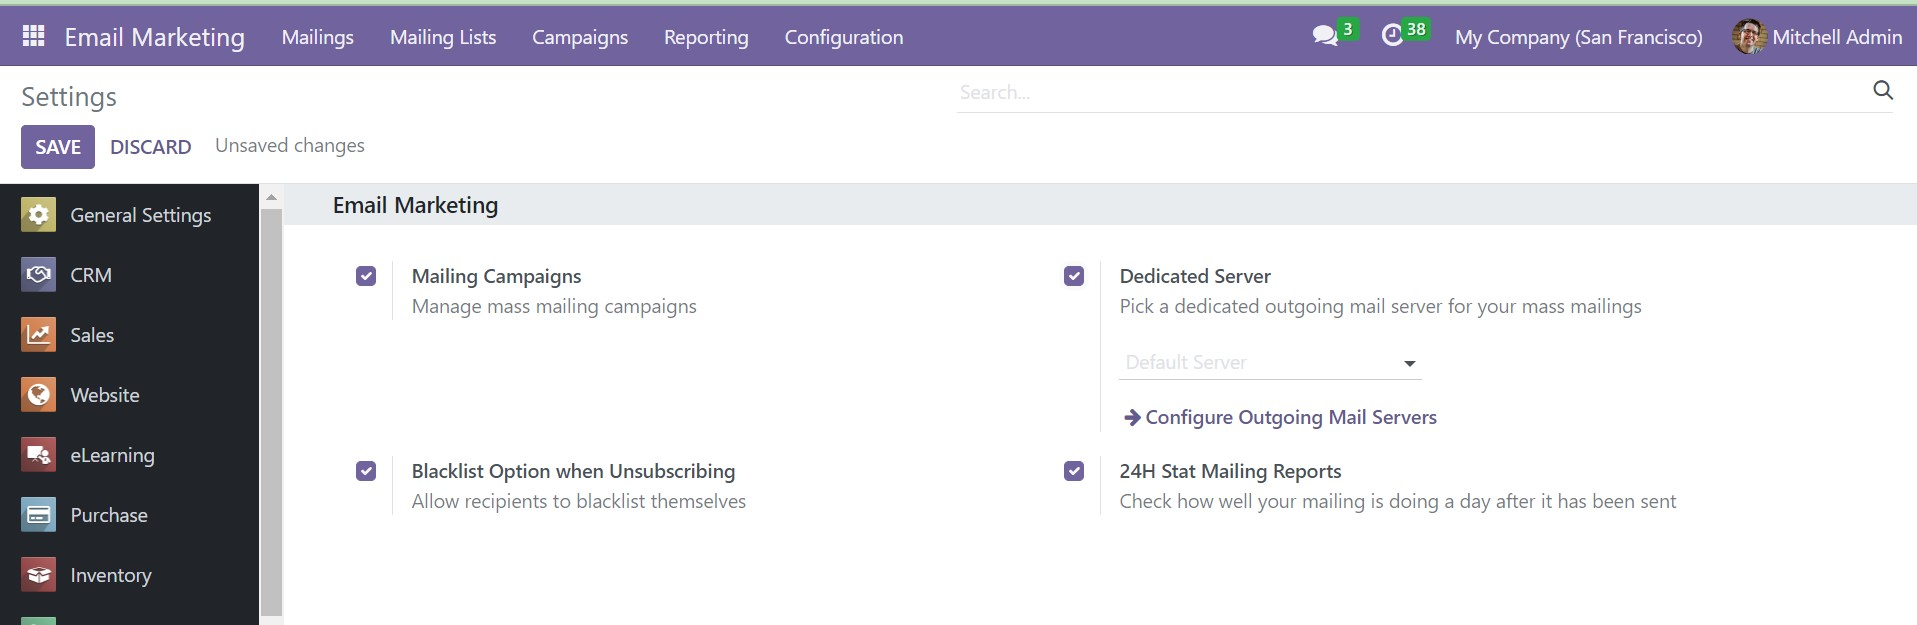
Under the Configuration menu, you will get some options, such as Settings, Link tracker, Blacklisted Email Addresses, and Favorite Filters. Under these options, the Settings option get some features, such as Mailing Campaigns, Blacklist option, dedicated server, and 24 H Stat Mailing Reports options, respectively.
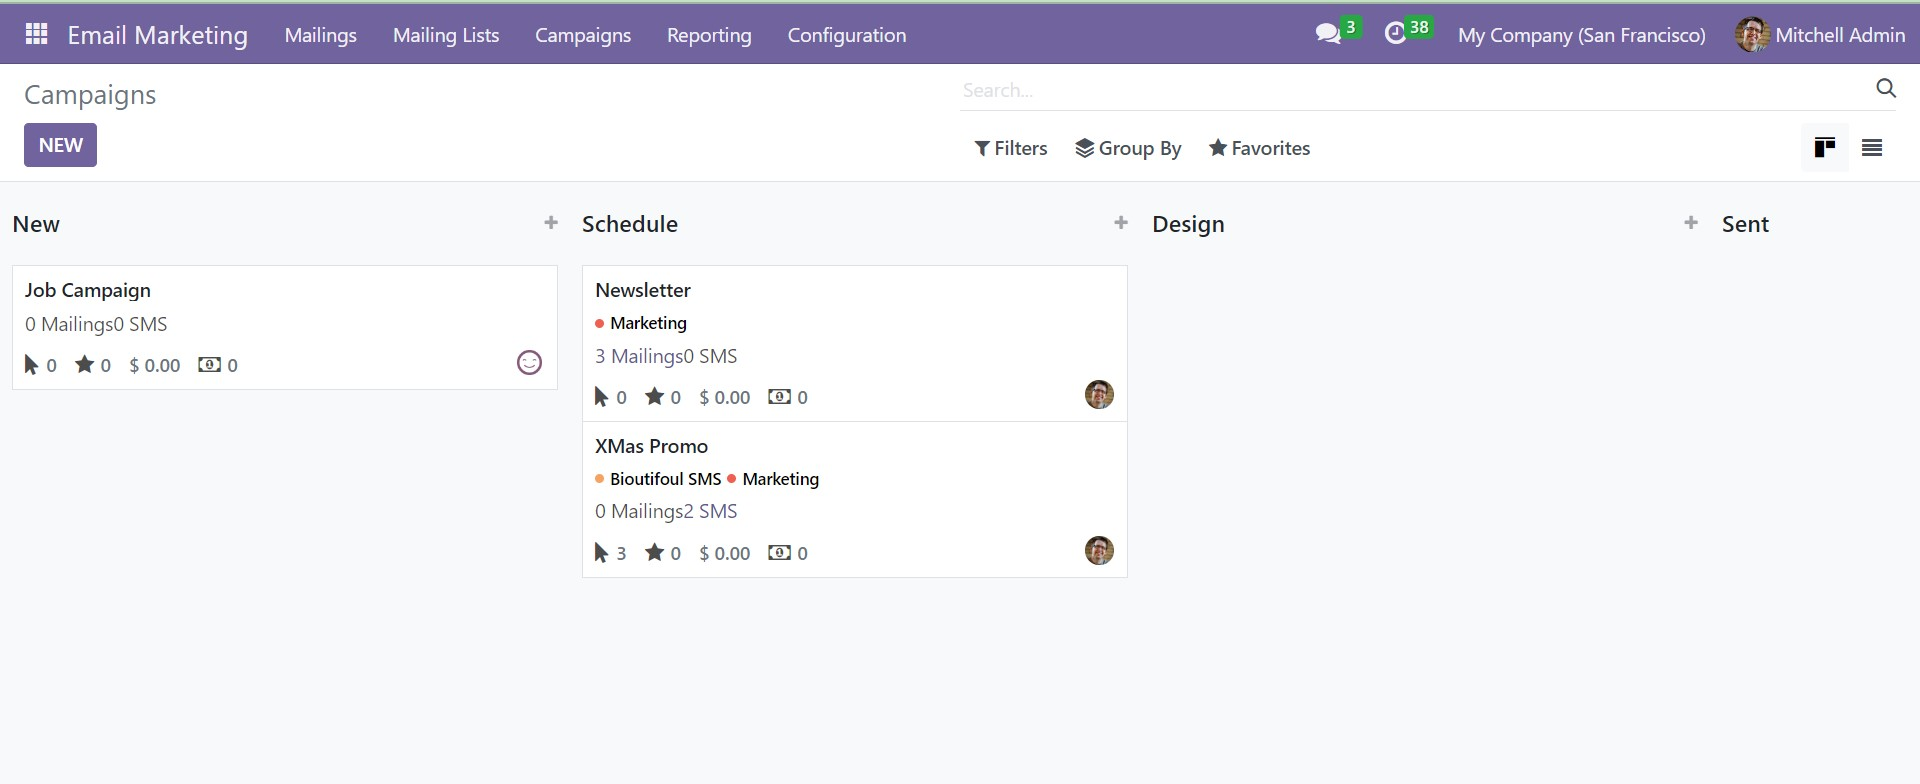
The Mailing Campaign option helps the marketing campaign programs, and thereby it creates a useful mailing campaign tool in the system. In order to begin the system, you have to trigger this option of Mailing Campaign option in the Settings menu. On the Settings menu, you have the space to trigger the option and then go to the Save icon. This option of mailing campaigns will assist you in regulating the campaigns and AB test to the mailings. Using the + icon provided on the main page of the module, you can see the newly triggered option here. The campaign page will be, as shown in the screenshot below.
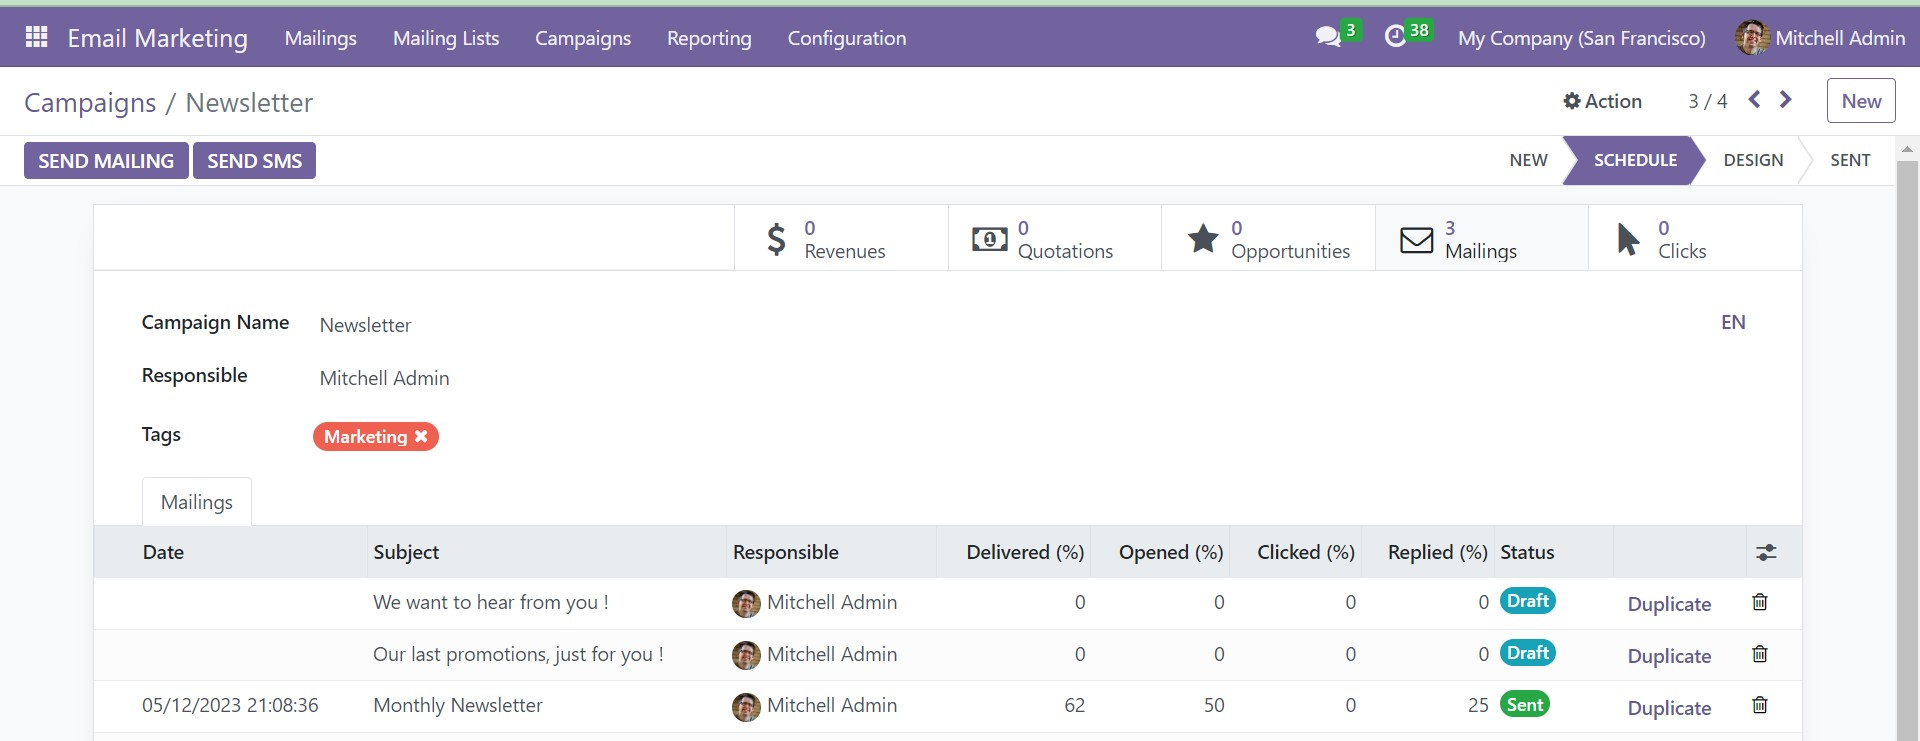
On the Campaign page, you will get the list of already created campaigns. The page can be seen in both Knaban and List view. The Kanban view of the page can be seen in the above image. The page provides the campaigns on the basis of various stages. You can see different stages, such as New, Schedule, Design, and Sent, respectively. You can also make new stages as per our needs. You can see those stages under Kanban view in a card form. On each box, you will get details, such as Posts, Mailings, SMS, Notifications, Clocks, Opportunities, Revenues, and Quotations, respectively. The three dots, which can be seen on the right side of each card, provide the options, such as Edit, Delete, and Coloring, respectively.
In order to know more about each of the Campaigns, you can just click on the required one. The page will be shown below.
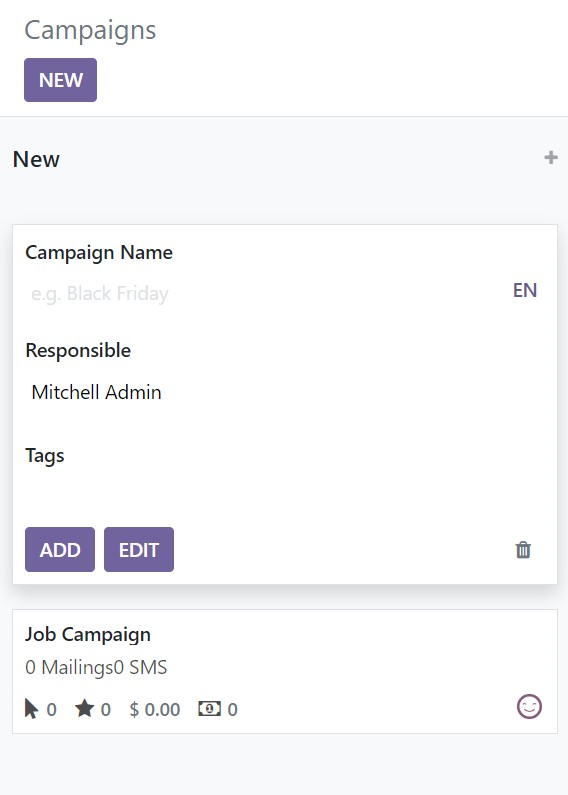
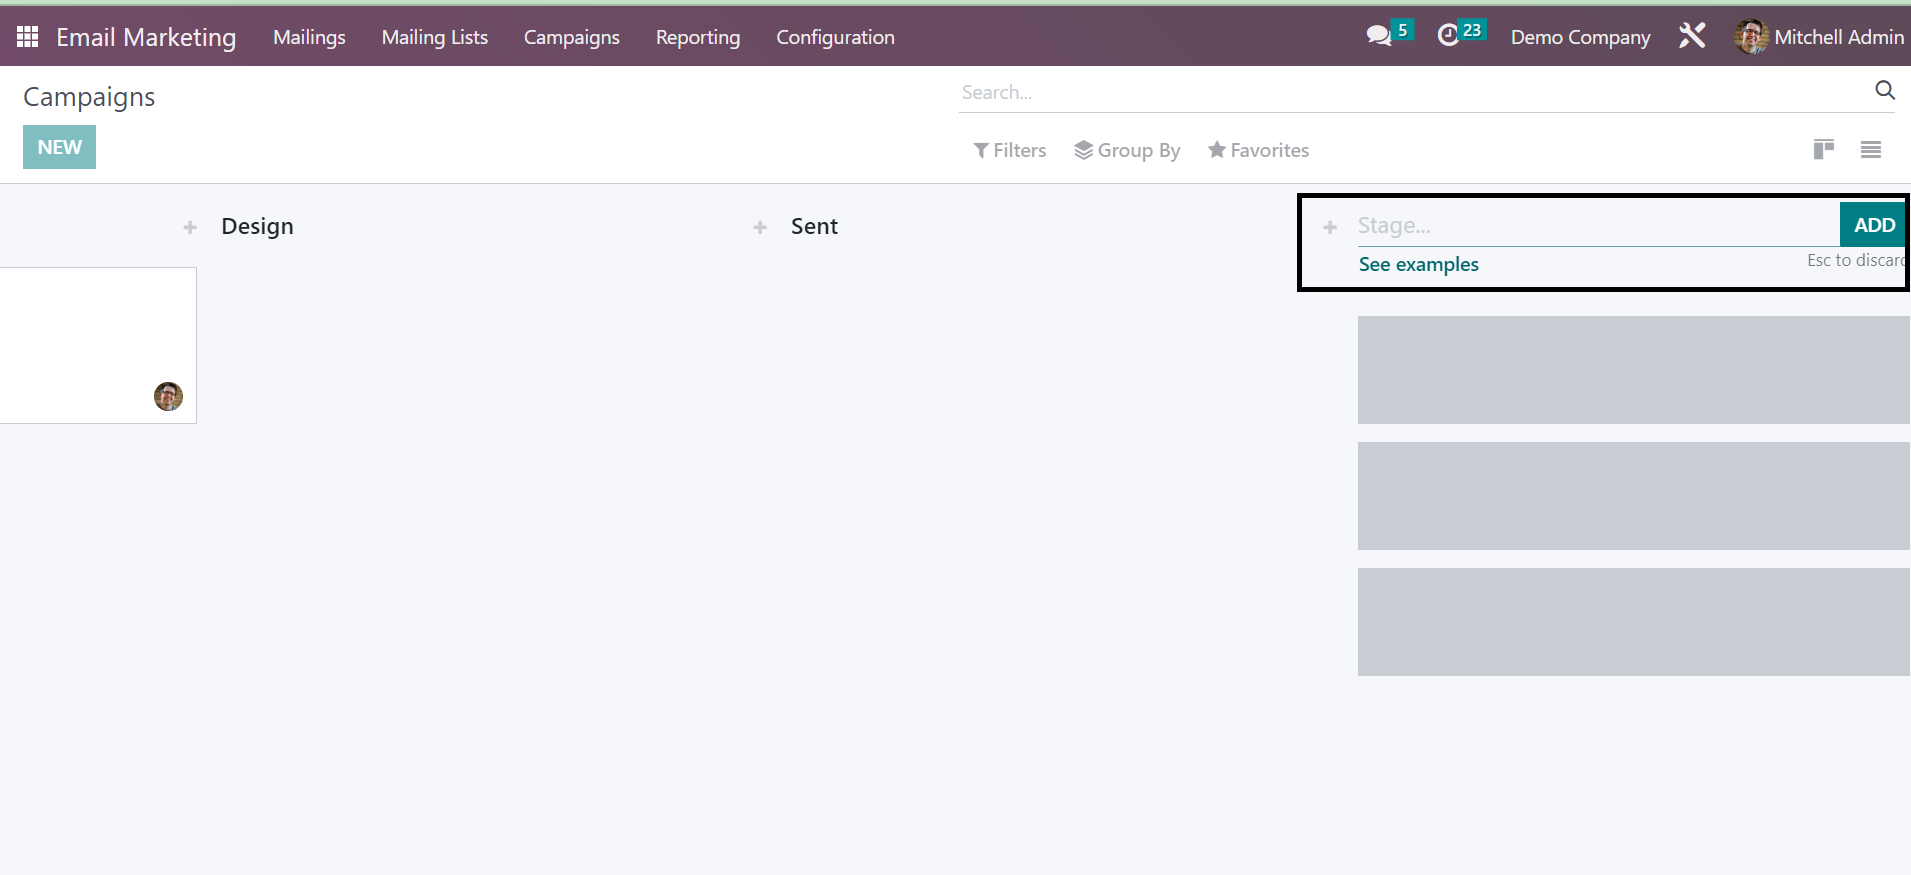
On the Campaign page, you can see a + icon near every stage, which provides the options, such as Settings and Quick Add. The + icon helps you to make new campaigns as well, which can be seen in the screenshot below
Here, you can see the spaces for providing the name of the campaign, the responsible users name, and related tags if required. The Edit option can be used to make further edits on the created stage. On completing providing all the required information, then go to the Add icon. Under the Settings menu, you will get the sub options, such as Fold, EDit state, and Delete options. The fold option among these options helps you to fold the stage that you have to fold.
On selecting the Edit option, you will get another window where you can provide the edits that you want to make.
On selecting the Delete button also, you will be asking for a further confirmation message on a new window, as shown below.
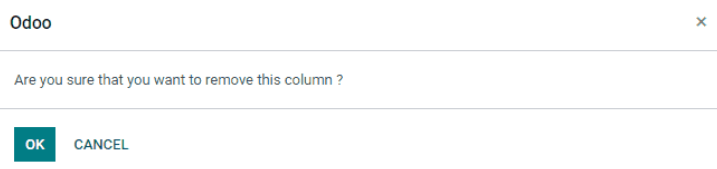
If you are sure about the removal of the column, then you can go with the Ok icon. You will also get an option to add a new stage to the existing list.
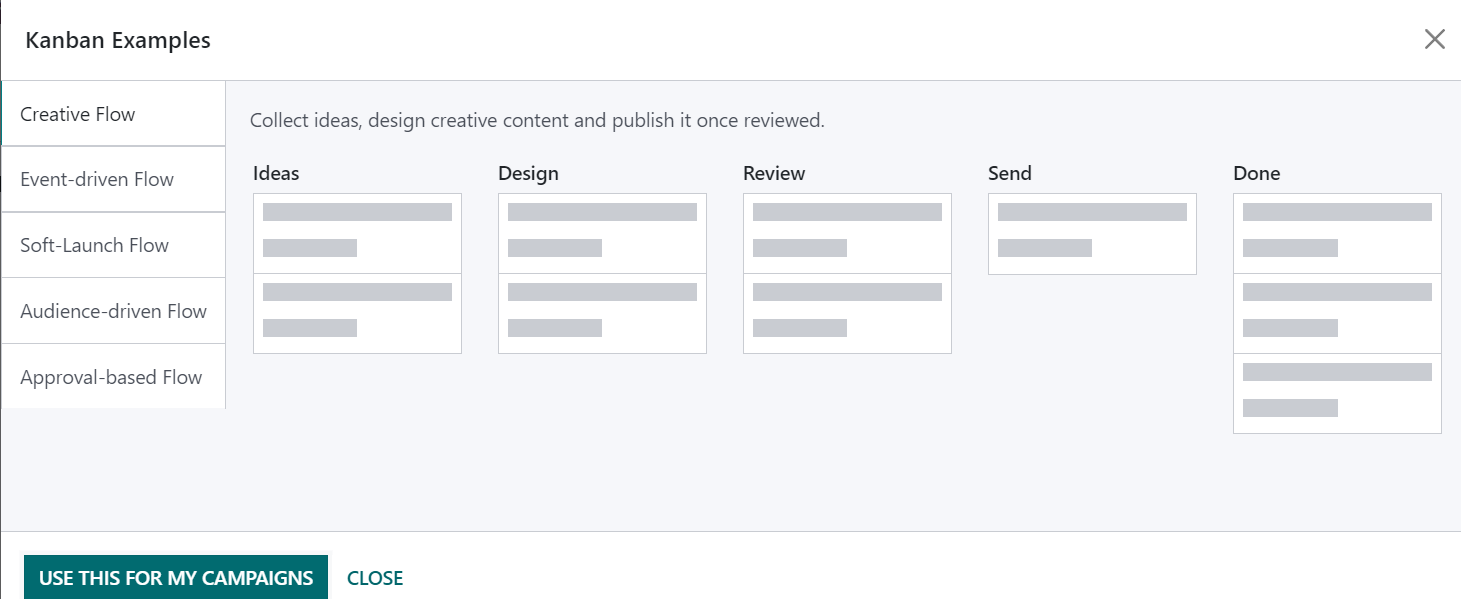
You are also provided with some examples, and those examples can be made use of by selecting the USE THIS FOR MY CAMPAIGNS icon.
You can also go for the list view of the campaign page. On the list view, you will get further details, such as the name of the campaign, responsible user, stage, and related tags. On the page, you will get some filters as well. The Group By option can be used to categorize those campaigns according to our needs. In order to make a similar kind of campaign, you can go to the NEW icon, as shown in the screenshot below.

On selecting the New option, you will get a new page in order to make a new campaign.
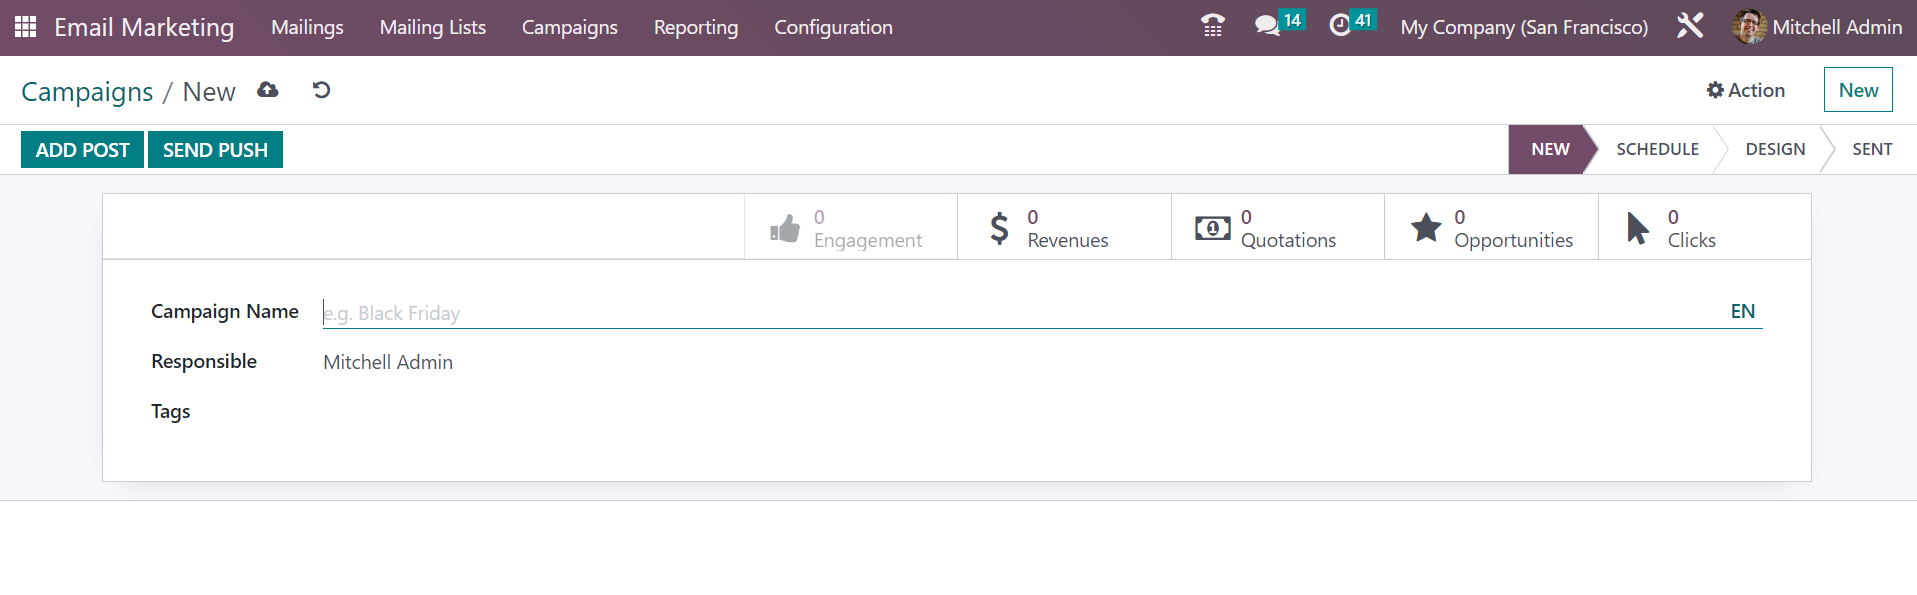
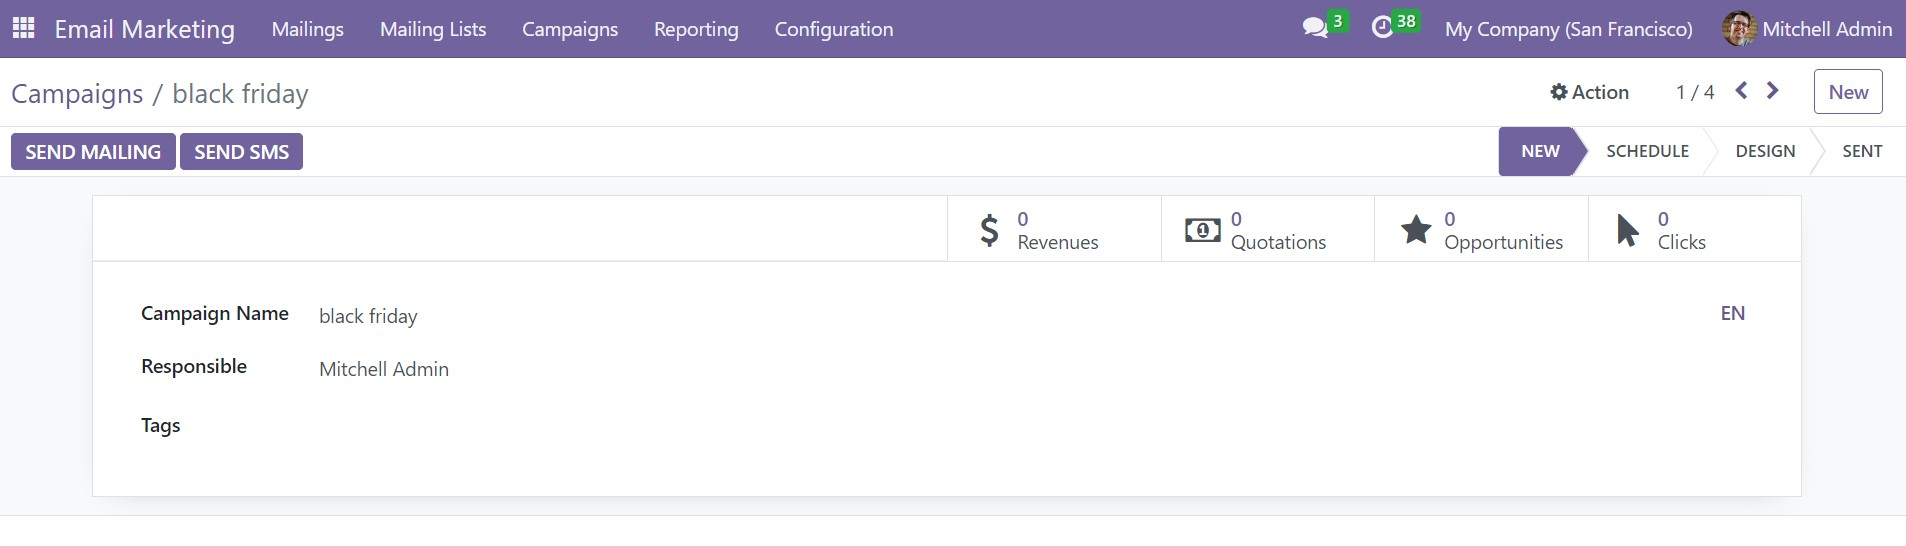
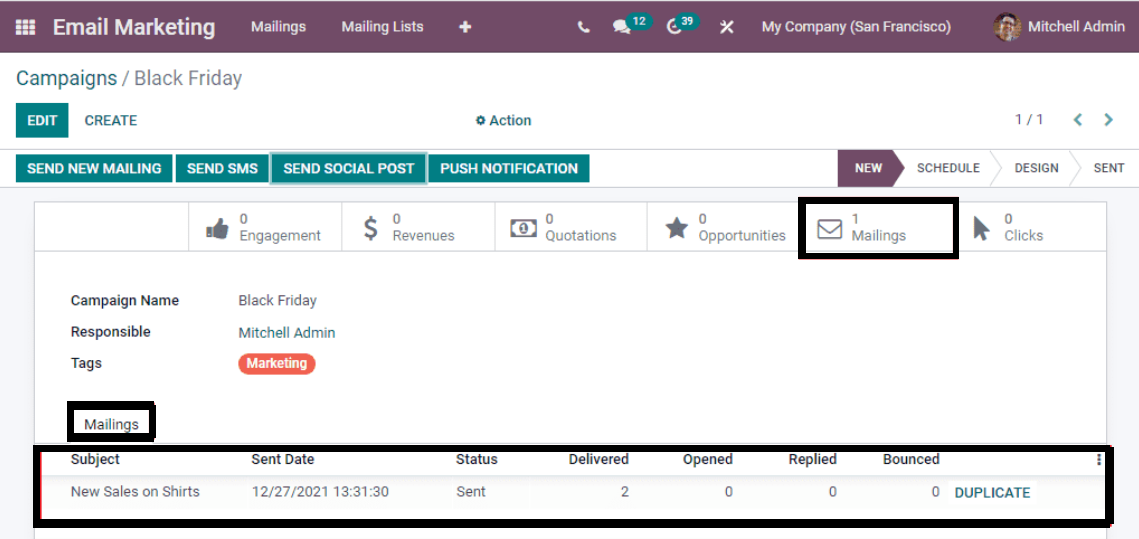
On the creation page, you have to provide the name for the campaign, the responsible user for the campaign, and tags if required. Now, on completing adding the required information, you can go to the Save icon. You will also get options, such as ADD POST and SEND PUSH options as well. On the right side of the page, you will get the status, such as NEW, SCHEDULE, SEND, and DESIGN as well. You can also see some smart buttons, such as Engagement, Revenes, Quotations, Opportunities, and Clicks options. Those buttons are direct links to the allotted operations.
The SEND option helps you to send the email under this campaign.
The Send button helps you in sending mail very easily. Under the Mailing tab, you will get those sent items on the main page of the module.
Here, you have options, such as SEND NEW MAILING, SEND SMS, SEND SOCIAL POST, and PUSH Notification, which can be used accordingly. On selecting the send special post option, you will get another window, as shown in the image below.
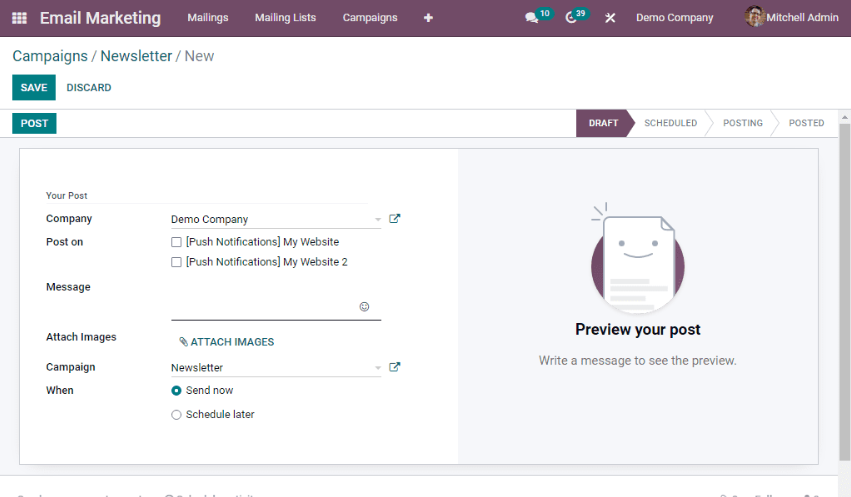
On the post option, you can see the details automatically provided. You can attach images if there is support from social media. The campaign name also gets filled on its own. Finally, go to the POST icon.
Now, on triggering the Marketing Campaign option on the Email Marketing Settings option, you will get options to provide the stages of the campaign and tags of the campaign. The option will be coming on the Configuration menu.
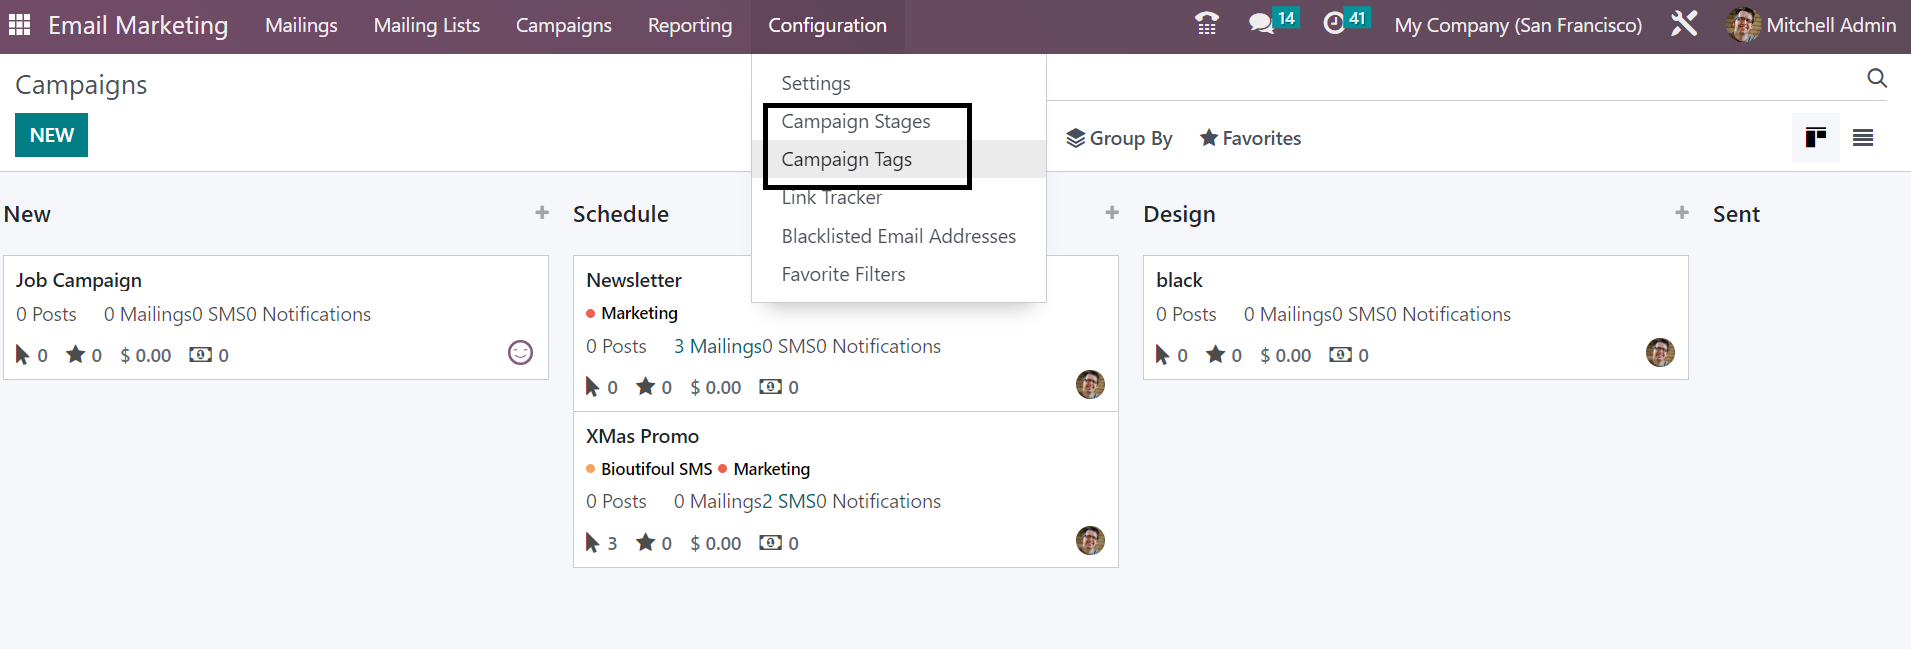
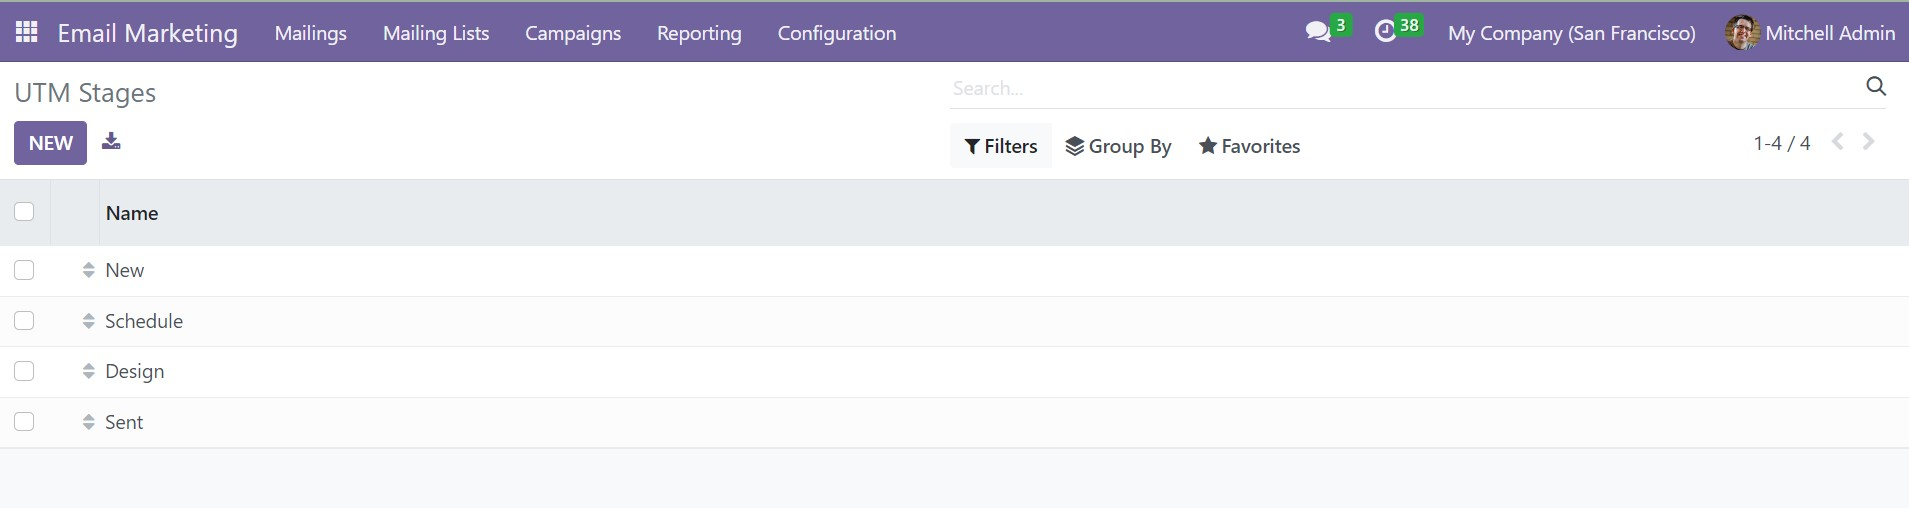
In order to see the UTM stages, you can go to the Campaign Stage option in the configuration menu, as shown in the screenshot above.
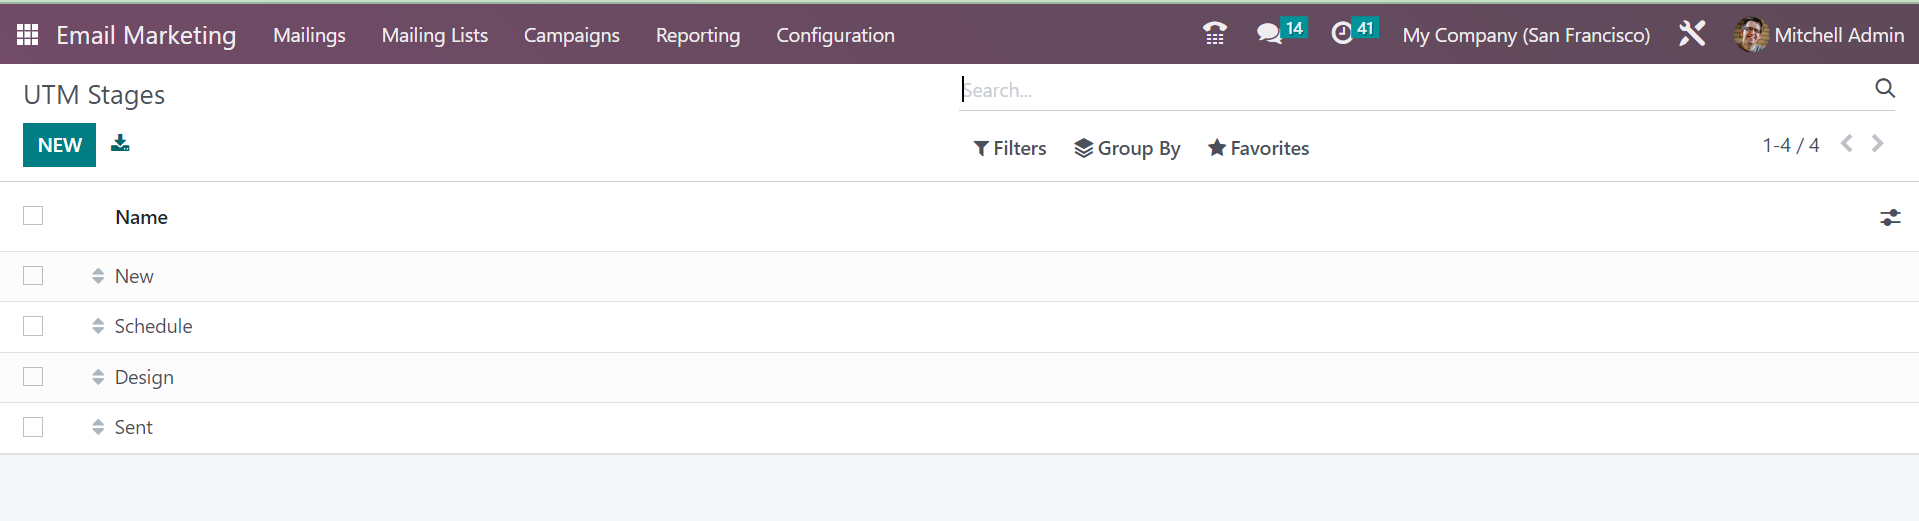
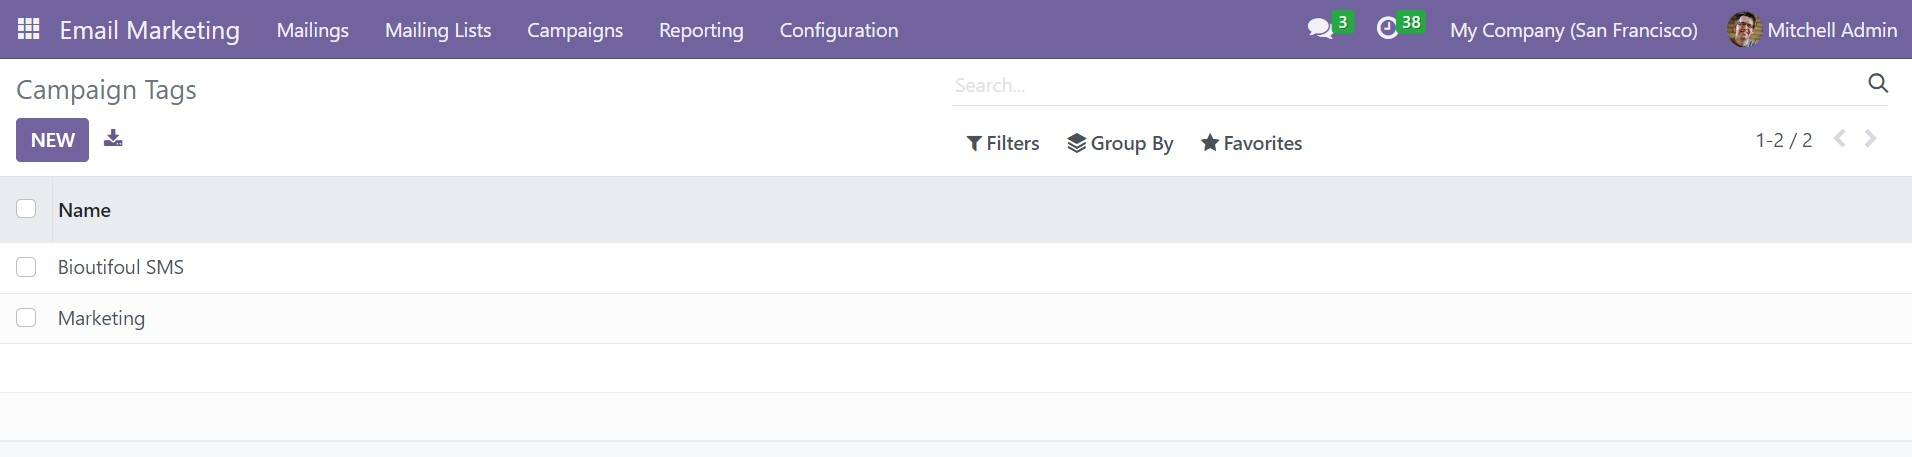
In this window, you will get all the campaign stages that are already configured. In order to make a similar kind of stage, just go to the NEW icon provided on the left side of the window. On selecting the option, you will get a new line, where you can easily add a new stage. Below the Campaign stage option, you will get the option of Camapiagn Tags option, as shown below.
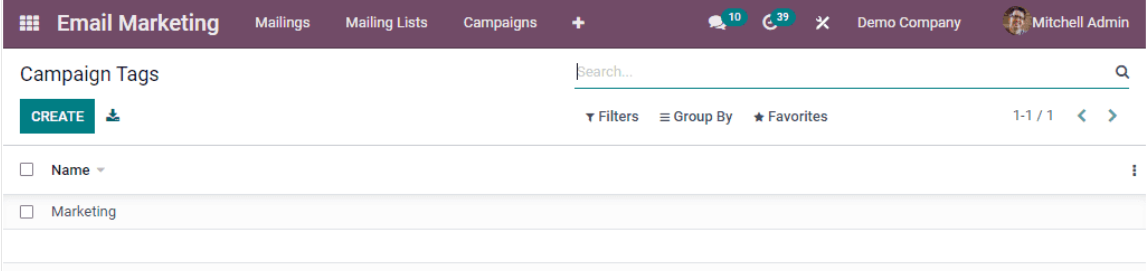
On the page, you will get the already created tags for the campaign. And you can create new tags for the campaign with the help of the CREATE icon. As in the campaign stage, a new line will be displayed where you can easily add a new tag. Finally, go to the Save icon.
Link Tracker
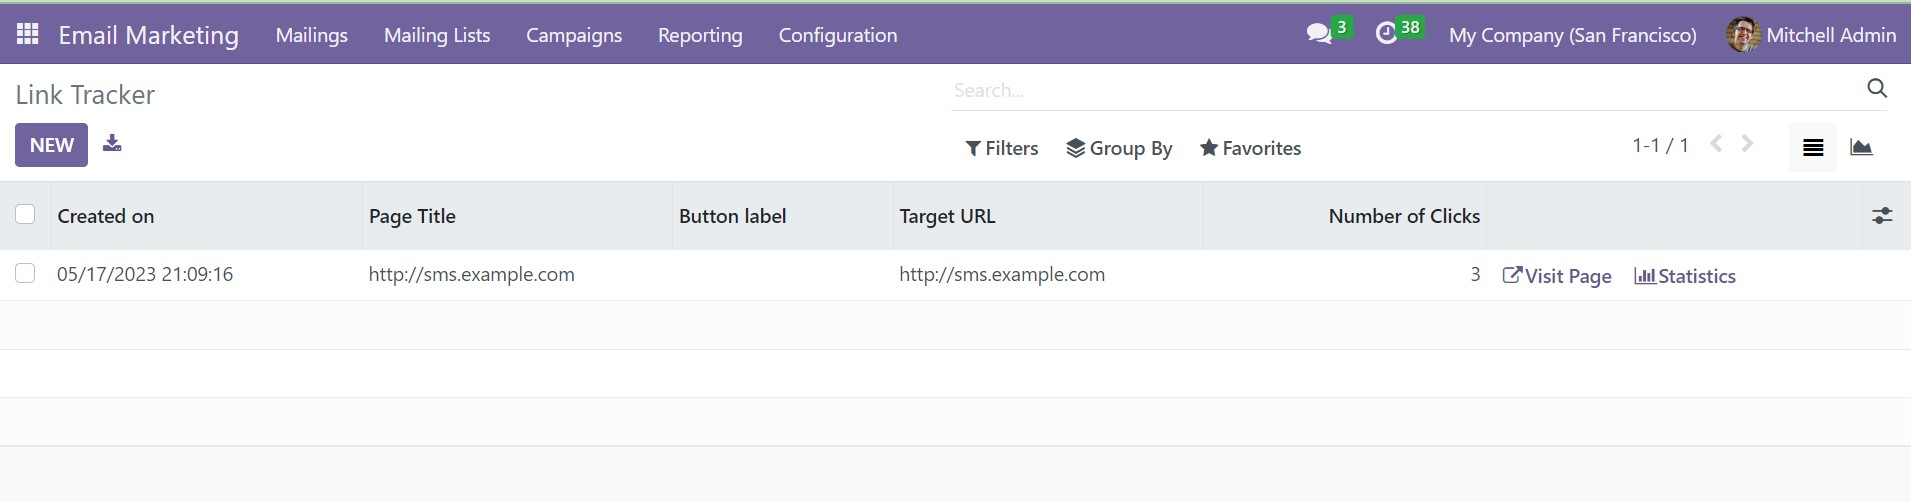
The next option, which is available under the Configuration menu, is Link Tracker. As everyday follow-up and findings are necessary under Email Marketing, there is an option under the Email Marketing module, which is Link Tracker. As we had mentioned earlier, you can find the option under the Configuration menu of the module. The page will be, as shown in the screenshot below.
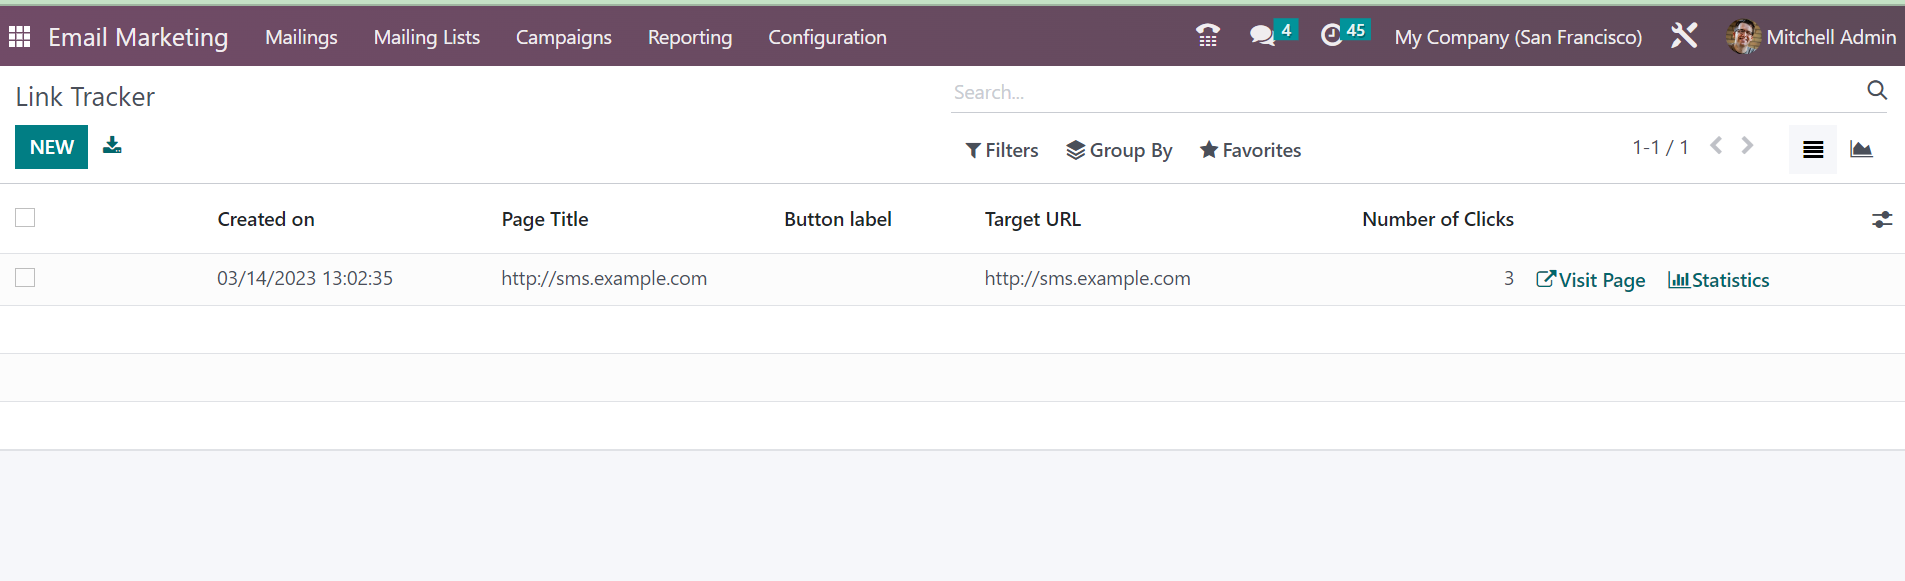
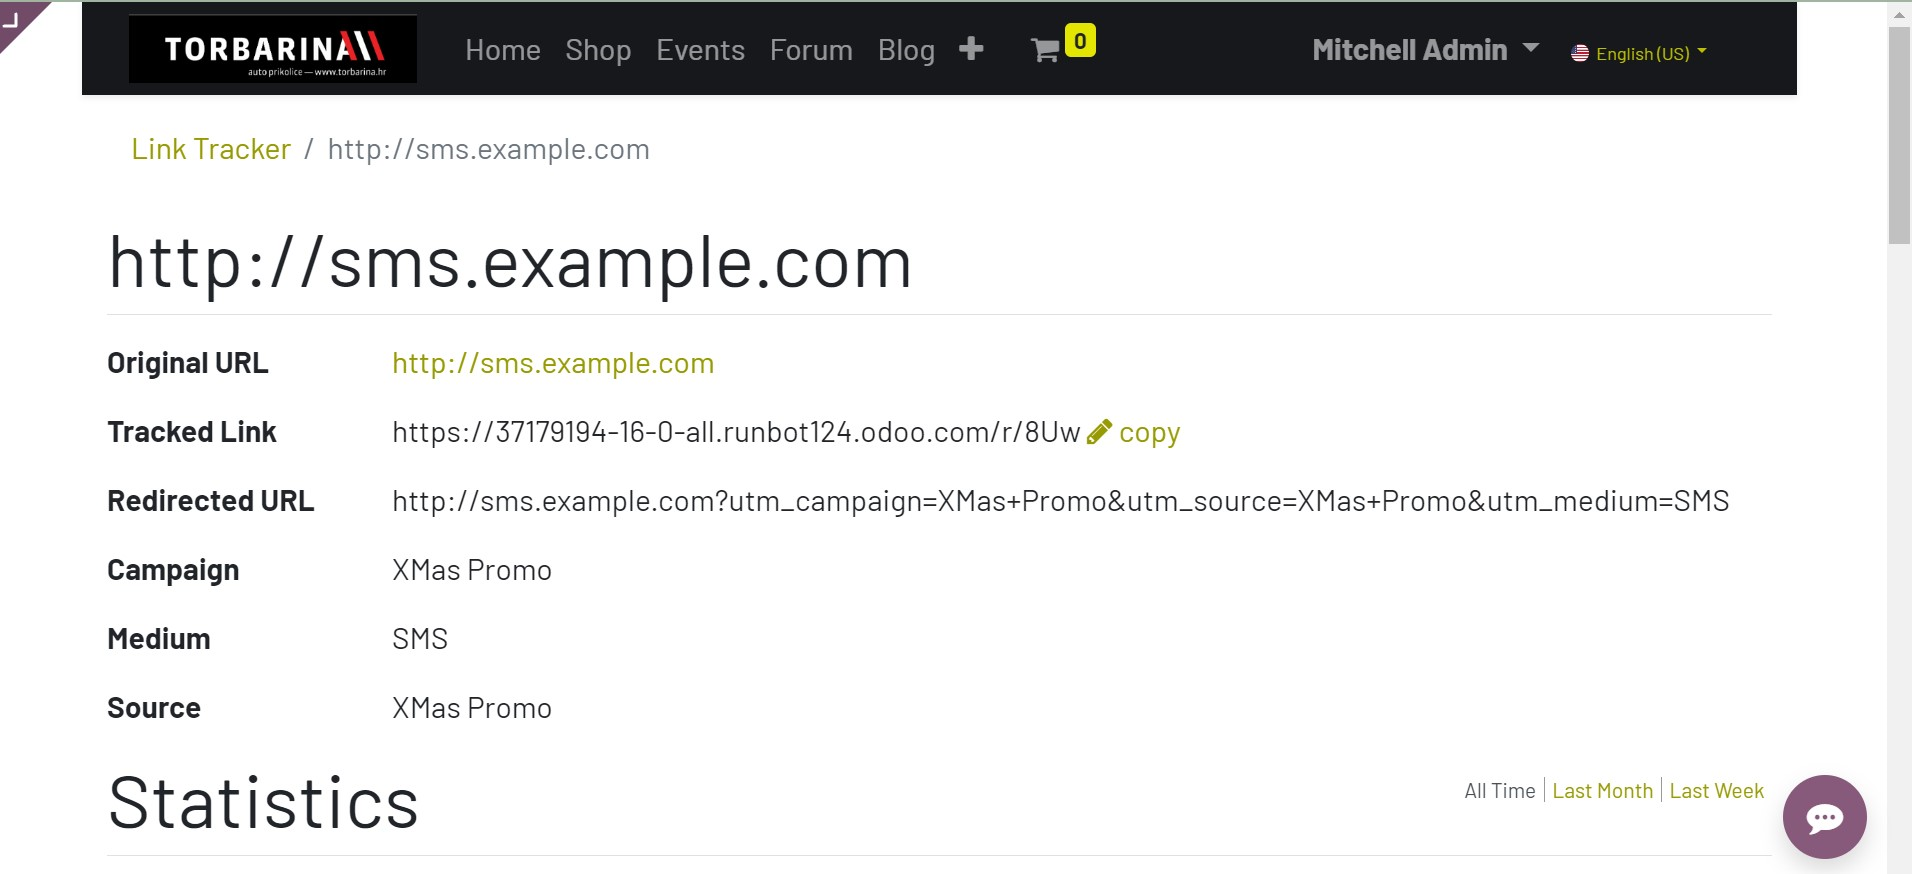
On the page, you will get some already-created link trackers. The page provides some necessary details, such as created date and time, the title of the page, button labels, target URL, and the total number of clicks, respectively. On the website page, you will get the Visit page and statistics, which are considered direct links, as shown in the image below.
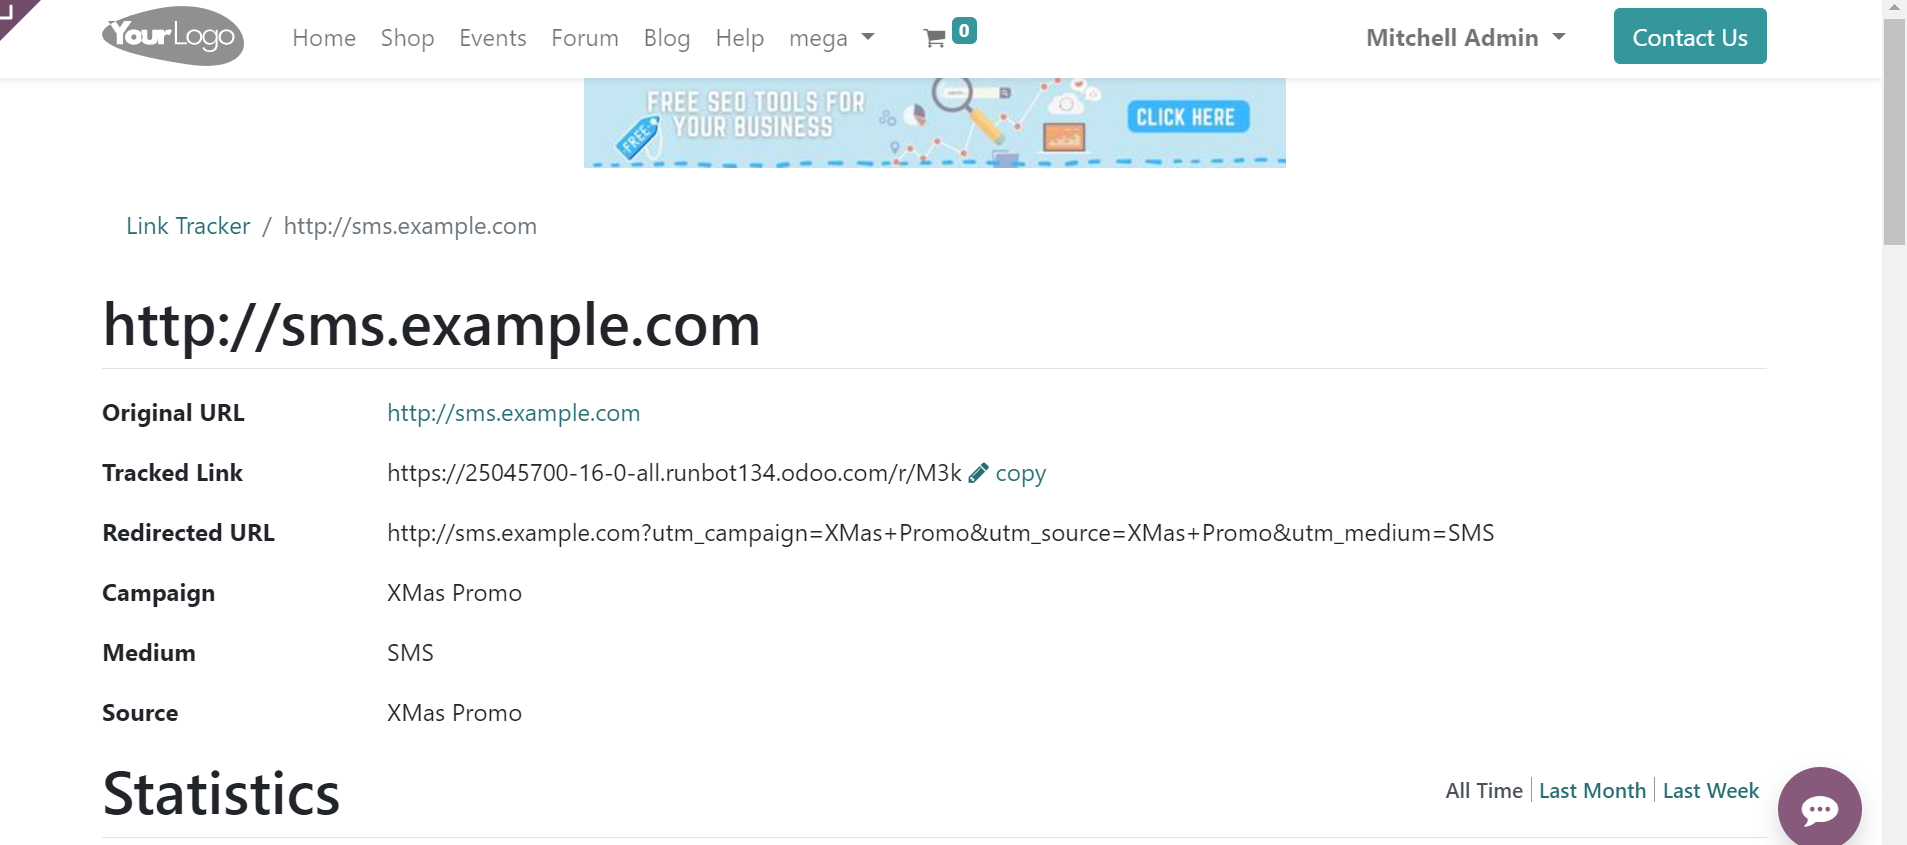
You will get the statistics of the page as well, as marked in the screenshot below.
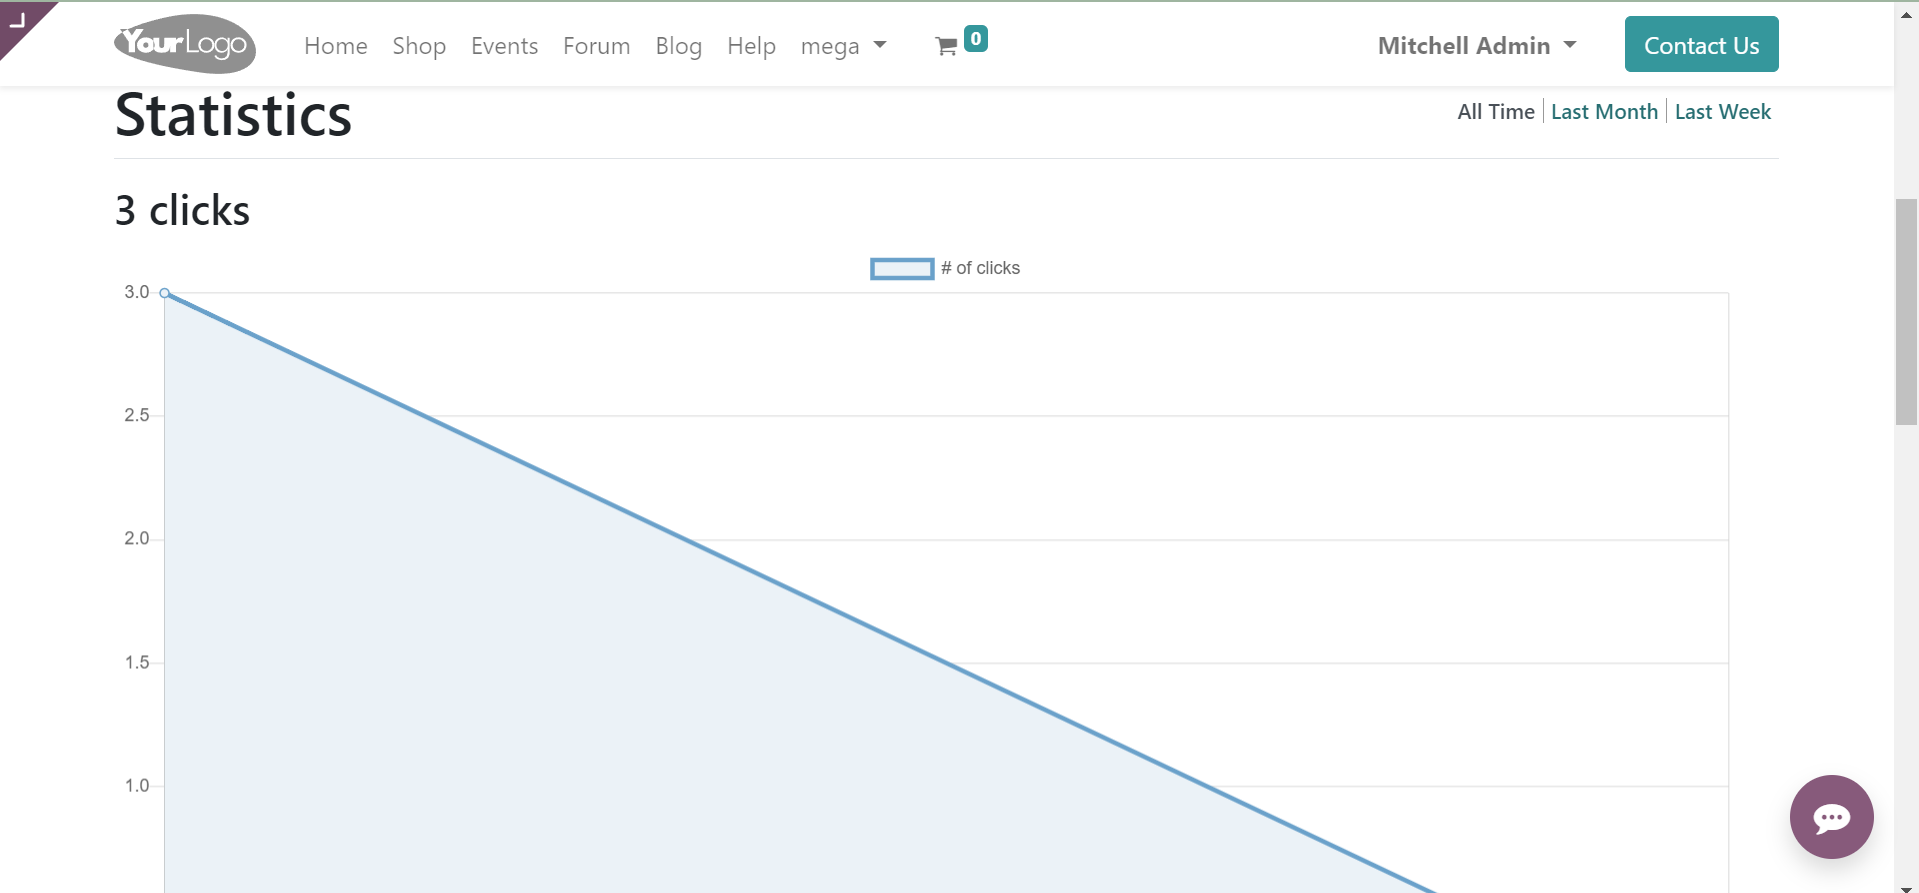
You will also get this graph by selecting the graphical view of the page. The Filters option helps you to make some flyers with the assistance of the Add Custom Filter option, which can be seen under the Filters option. Using the Group By option, you can categorize the data as campaign, Medium, Source, and Mass Mailing accordingly. Using the New icon, you can create a similar kind of link tracker very easily.
Blacklisted Email Addresses
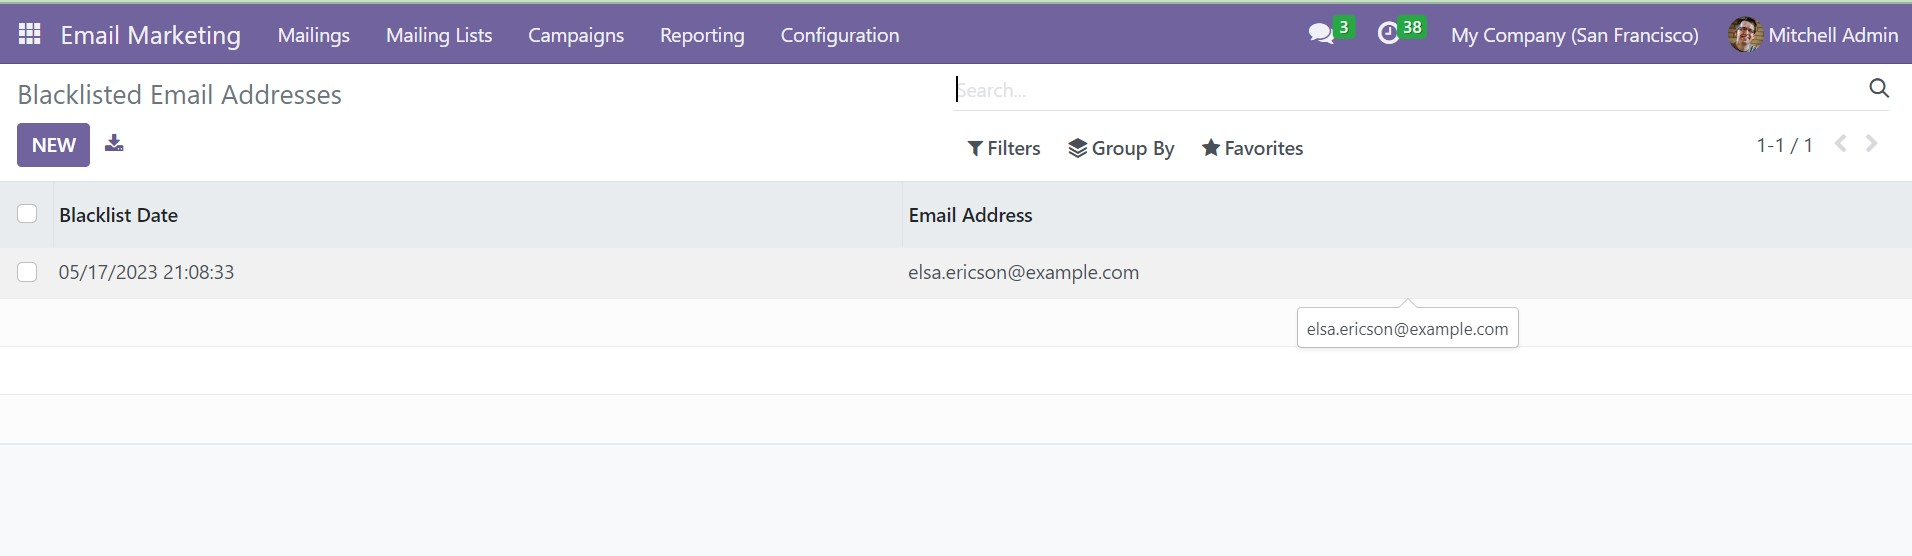
The blacklisted email addresses option under the Configuration menu of the Email Marketing module helps the users on some special occasions. If there are certain conditions where some of the emails are blocked or reported from the mail list, then this special feature of the blacklisted email addresses option in the module helps you. If you include them in the mailing list, then you will not get any mail. The option can be seen under the link tracker option in the configuration menu.

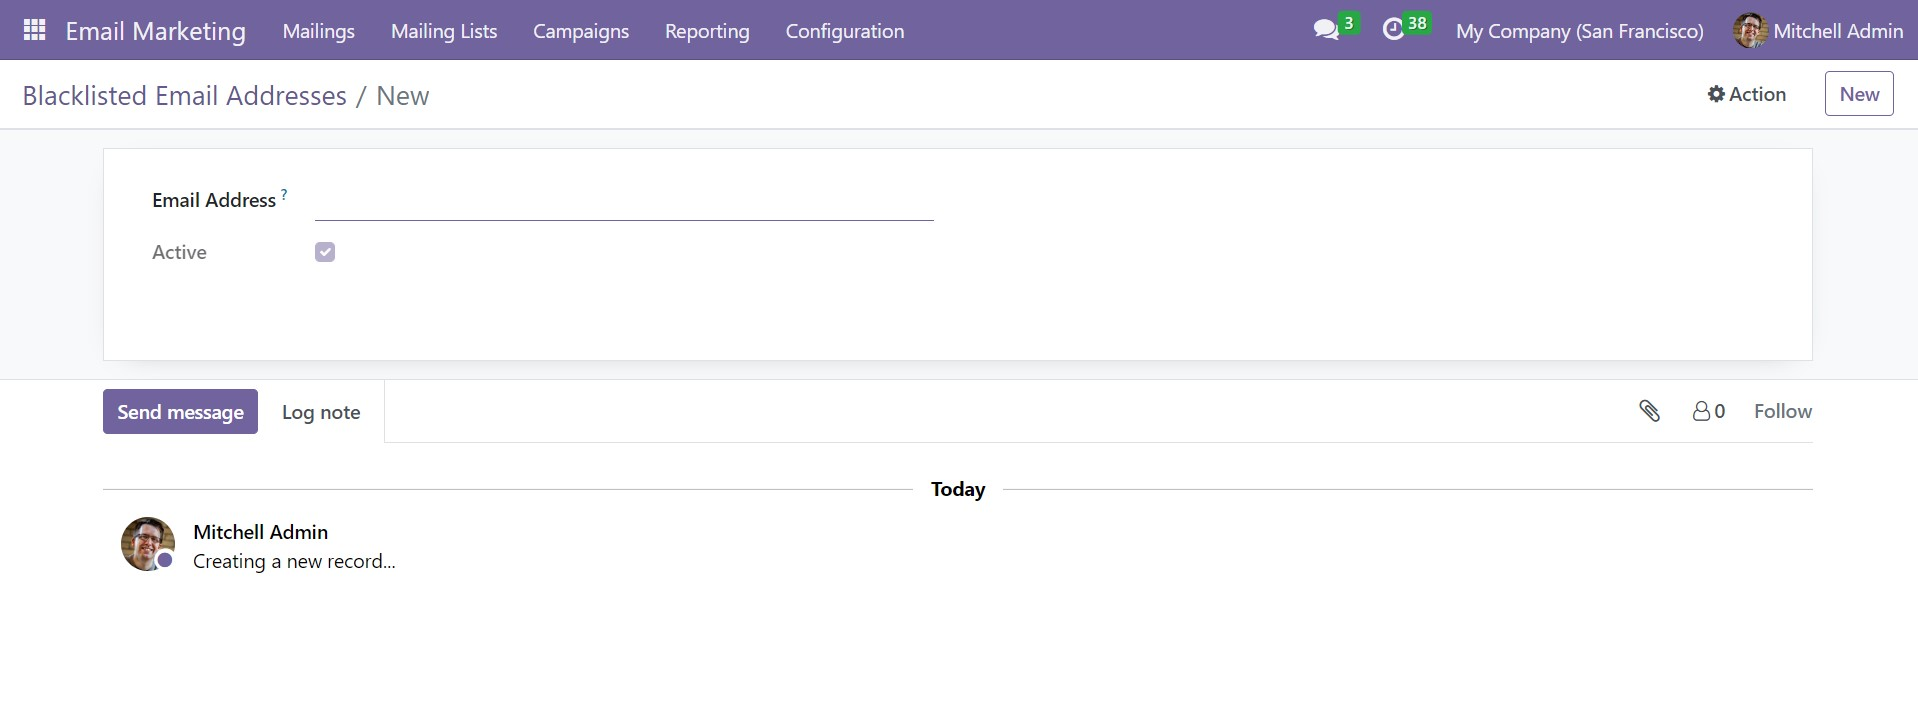
On the page of the blacklisted email address, you can see the already created blacklisted mailings. The page includes the details, such as the blacklisted date and email address as well. In order to include a new mail address to the blacklist, you can simply go to the New icon provided on the page. The option is available on the left side of the page. On selecting the New option, you will get a new page in order to provide some data required to add the email address to the Blacklist. The page has got a space to provide the email address, which has to be blacklisted, and an Active option, which has got automatically activated.
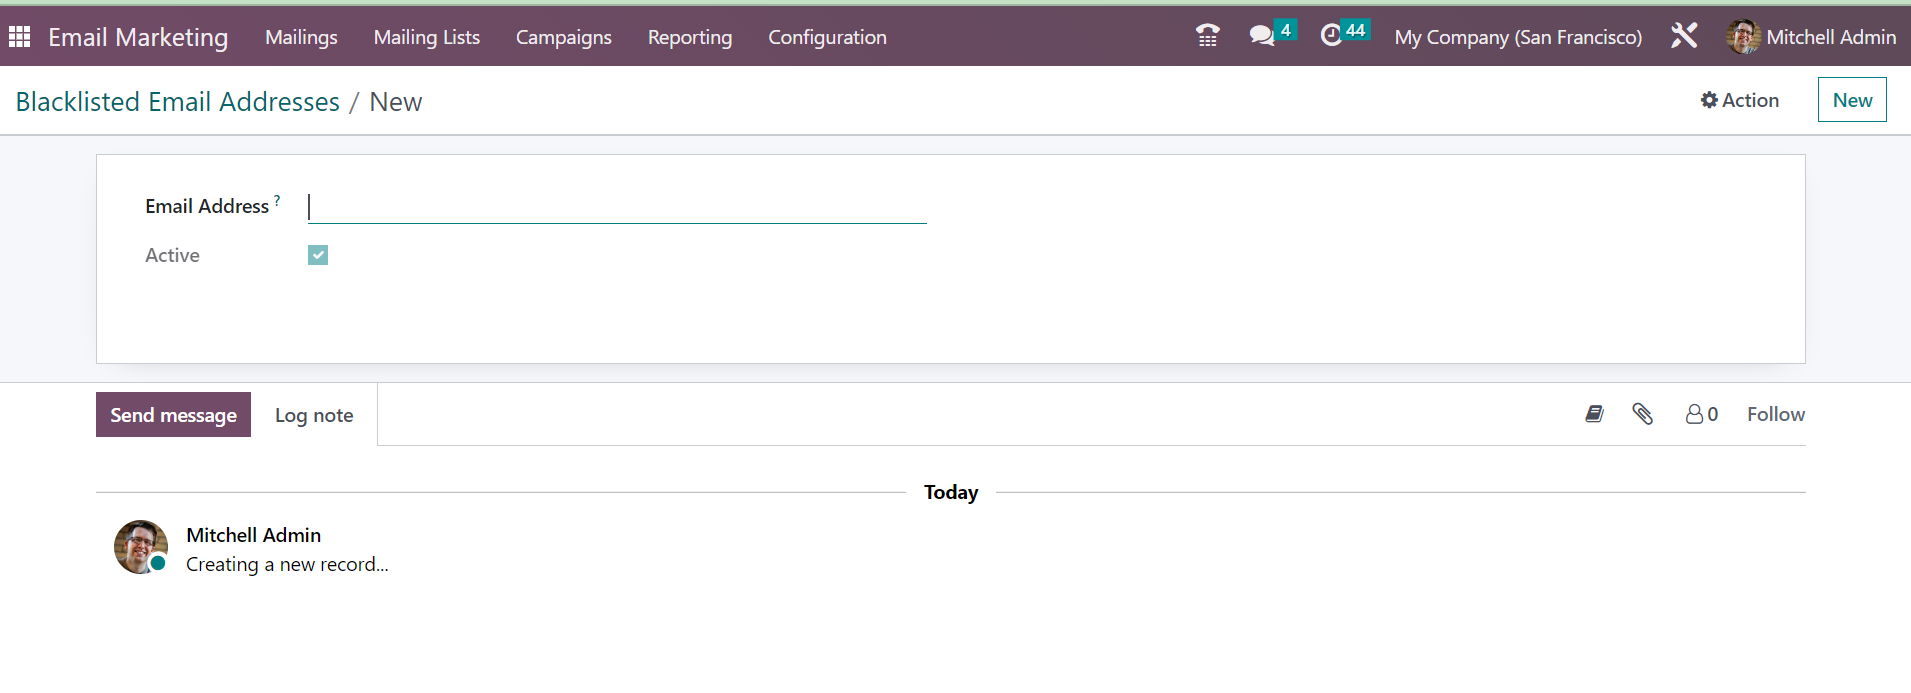
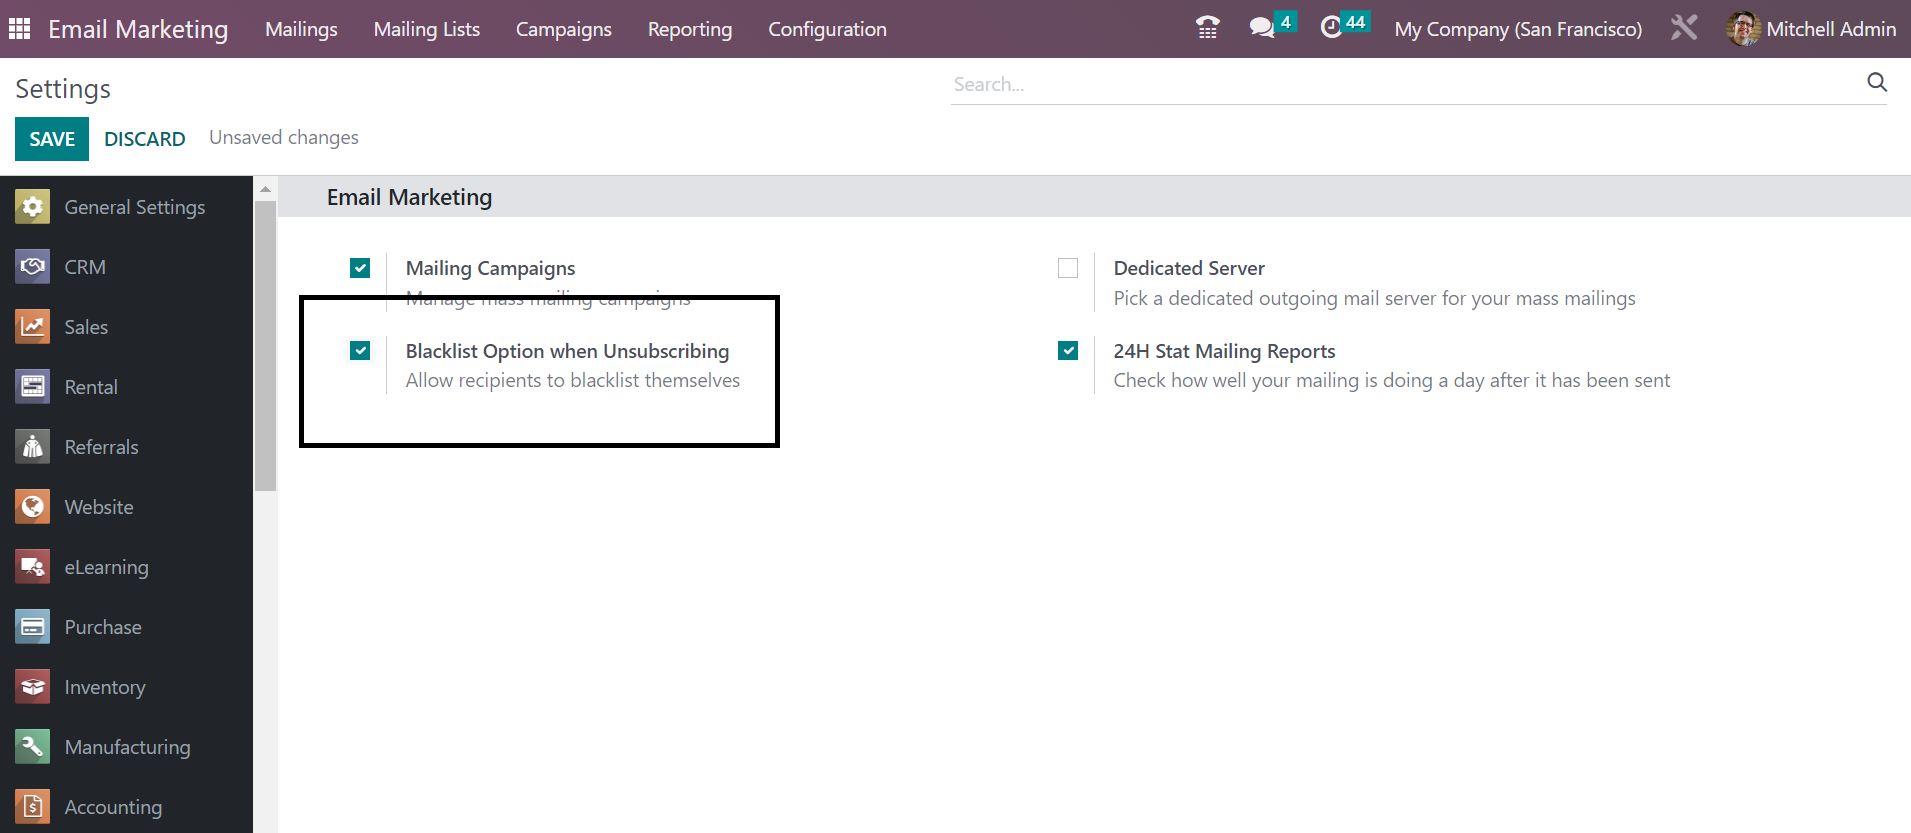
The above image is the window for creating a Blacklisted email address. You are also provided with an option, Blacklisted Option when Unsubscribing in the settings of the Email Marketing module. The option helps the user to regulate his or her state under the blacklist with the help from the unsubscription page as well. So, for the purpose of getting triggered, you have to activate the option from the settings, as shown below.
You can also see another option of Dedicated Server near that blacklisted Email Address option. You have provided a dedicated server for the purpose of mailing under the settings. In order to get this option, firstly, you have to trigger the option of a dedicated server under the settings option. Then, you can go to the configuration of this outgoing dedicated email server. On selecting the option, you will get a new page, as shown below.
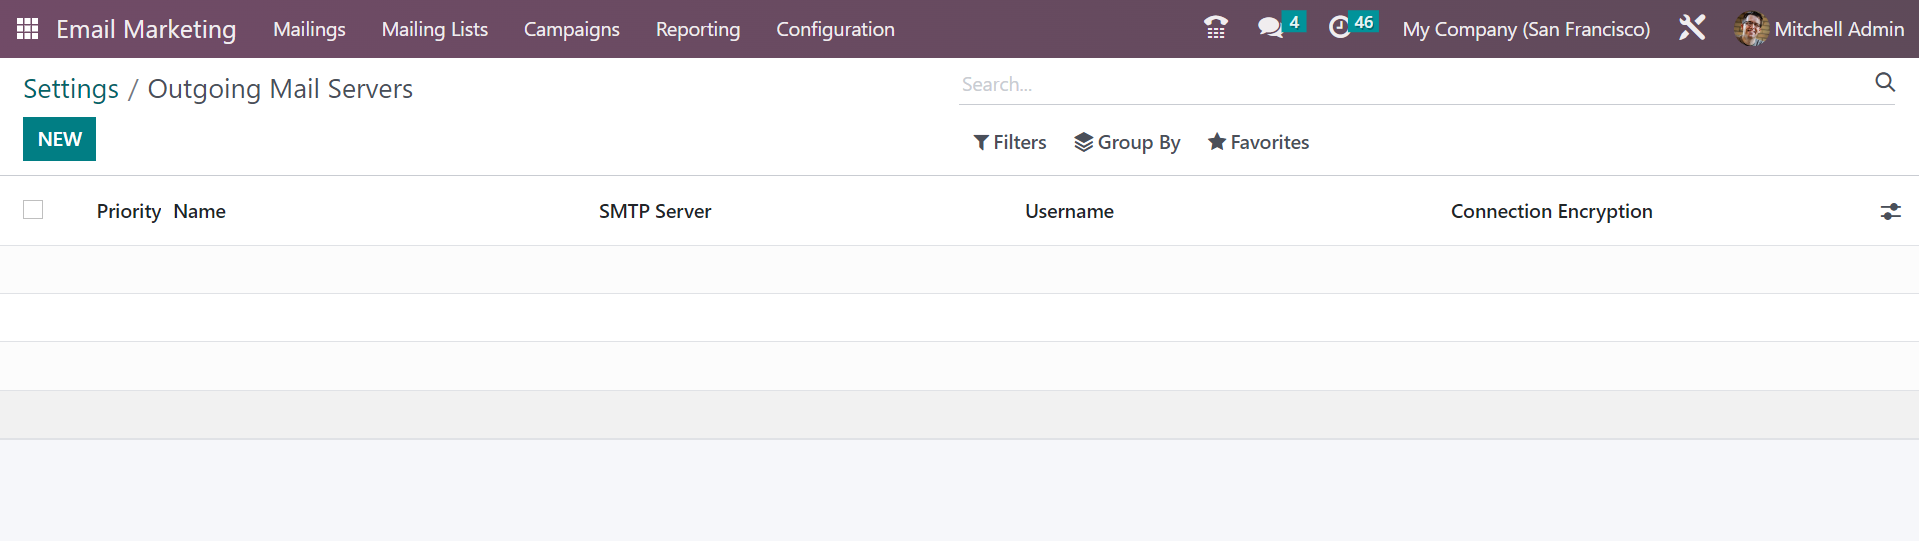
On the page, you have the space to provide the details, such as priority name, SMTP name, username, and connection encryption options, respectively. In order to create a similar kind of dedicated server, you can go to the New icon as well.
You can see a new option of 24H Stat Mailing Reports option in the settings of the module. The option helps you to check how properly your mailing is processed in a day after completing the sending of the mail. In order to get the option, you have to trigger the option from the settings in the Email Marketing module. After making the necessary changes to the settings, you should not forget to click on the Save icon in order to alter the changes.
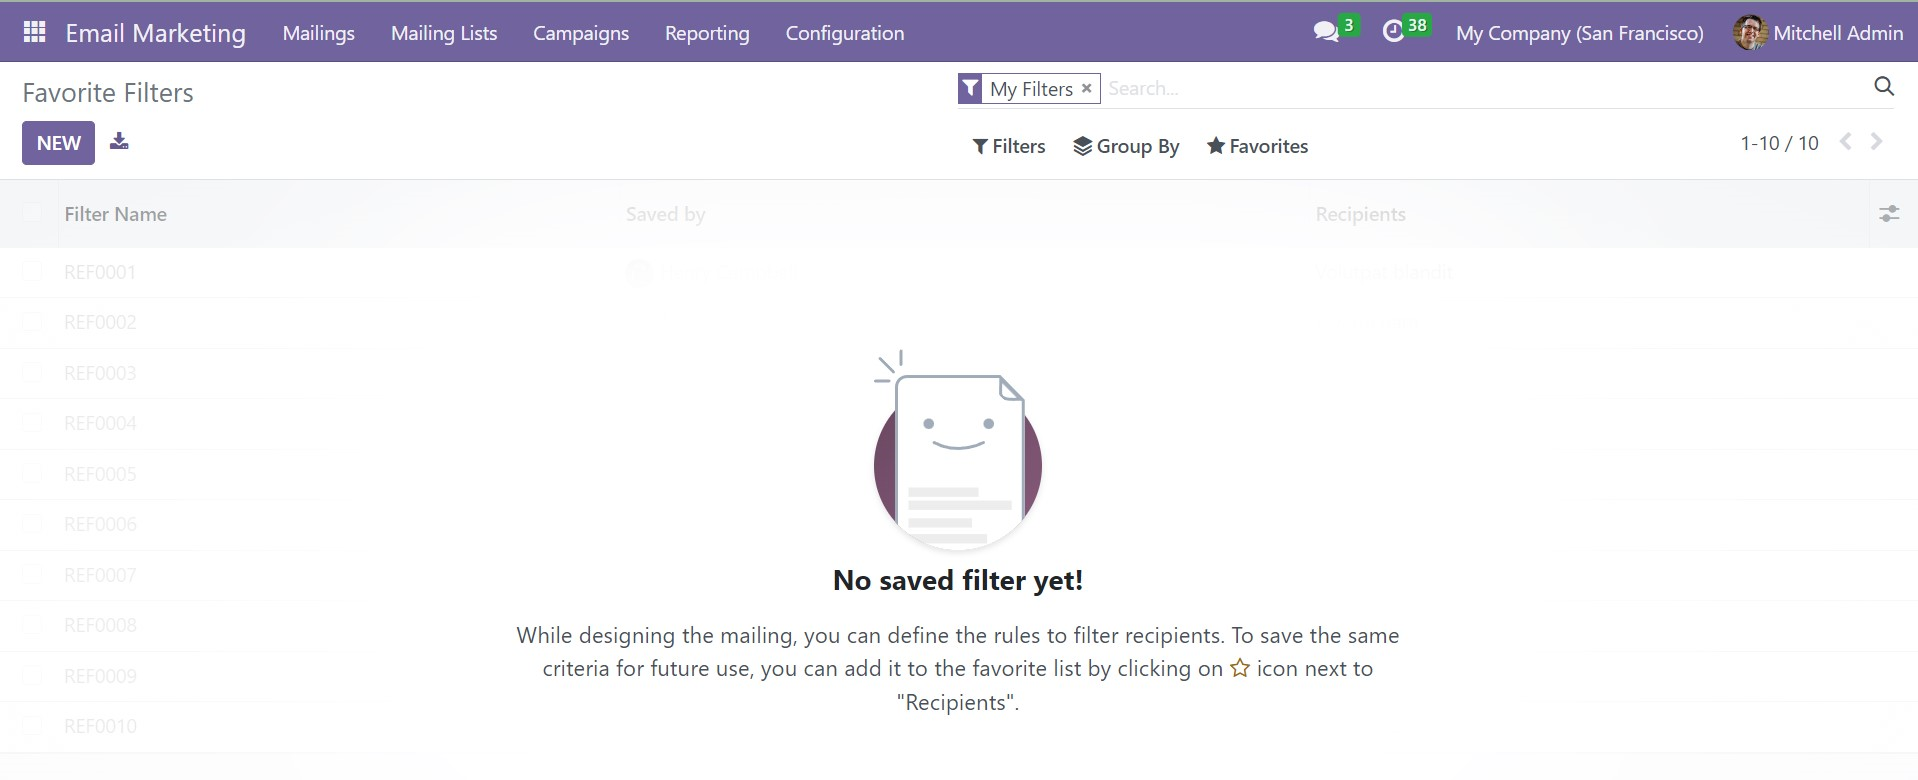
Favorite Filters
Below the blacklisted mail address, you have an option of Favorite Filters under the configuration menu of the Email Marketing module. The page of the feature will be as shown below.

The option of favorite filters helps you in defining the necessary rules in order to filter the recipients in the process of designing the mailing. For saving the basis, you can just add to the favorites by selecting the star icon, which can be seen just nearer to the recipient option. The page includes details, such as filter name, saved by, and recipients, respectively. To create a similar kind of favorite filter, just click on the New icon provided on the left side of the page.
Altogether the option is really a great help for those who are sending the mails and thereby helps for the promotion as well.