Events
The Odoo ERP includes an efficient event management module that allows you to plan and execute the events easily. The Odoo event management platform manages all the activities from the initial stages of your event organization to the ticket sales and promotion programs. By using this platform we can conduct various types of events such as exhibitions, seminars, conferences, shows, sports, and many more.
If you are entering the dashboard, you can view all the events described on the platform along with some keynotes. This window will give you an overview of the scheduled events. The date and time of the events, the name of the events, and the number of expected attendees at the event are just mentioned. The image of the home dashboard is depicted below.
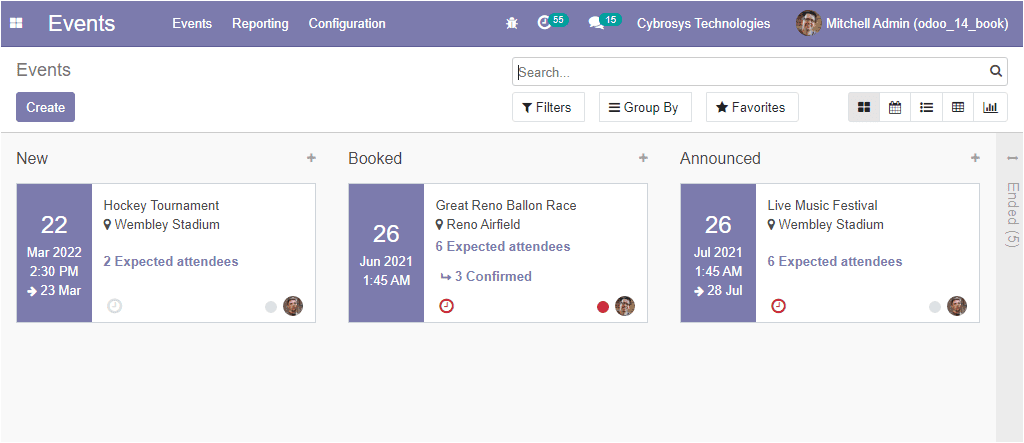
This is the Kanban view of the window. Here in this window, you can also view the various customizable and default functionalities as like any other modules in Odoo. Additionally, you have the provision to view the window in different views such as Kanban, Calendar, List, and Pivot. Now you can create new events by selecting the Create icon available in the top left corner of this window.
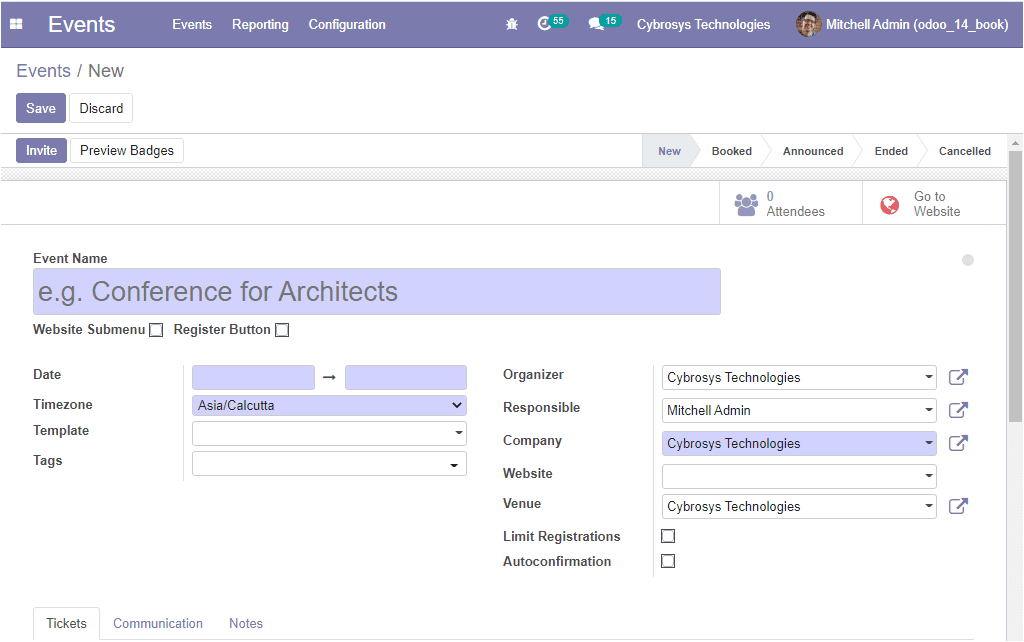
In this Event creation window, you can provide the name for the event along with the Start Date, Timezone, Template, and Tags. Moreover, you can mention the Organizer, allocate Responsible Person and Company. Additionally, you can specify the Website for publishing the event. After that, you can mention the Venue, and the location of the program by selecting the dropdown menu. Then you can mention the maximum attendees by enabling the option Limit Registrations. You can also enable the option Auto Confirmation to automatically confirm registration. Apart from these options, you can enable the options Website Submenu and Register Button available just below the Event Name.
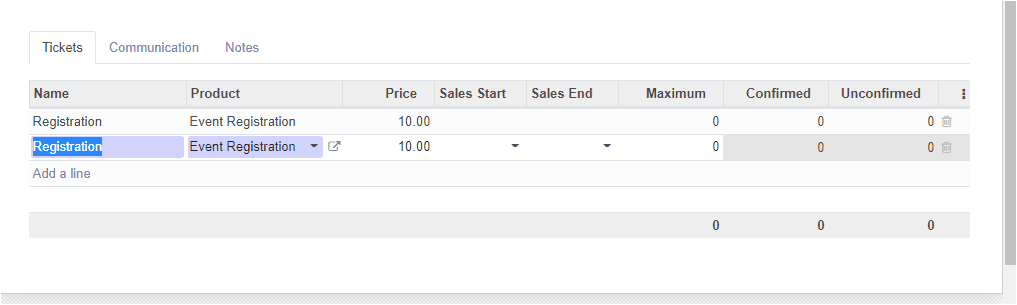
Under the Tickets tab, you can create various types of tickets. This can be done by selecting the Add a line option available. Here you can include the details of Price, Sales start date, Sales end date, define the maximum number of available tickets. You also have the provision to set zero to ignore this rule for sets as unlimited. Moreover, you can mention the reserved seats under the confirmed option and also can mention the unconfirmed seats.
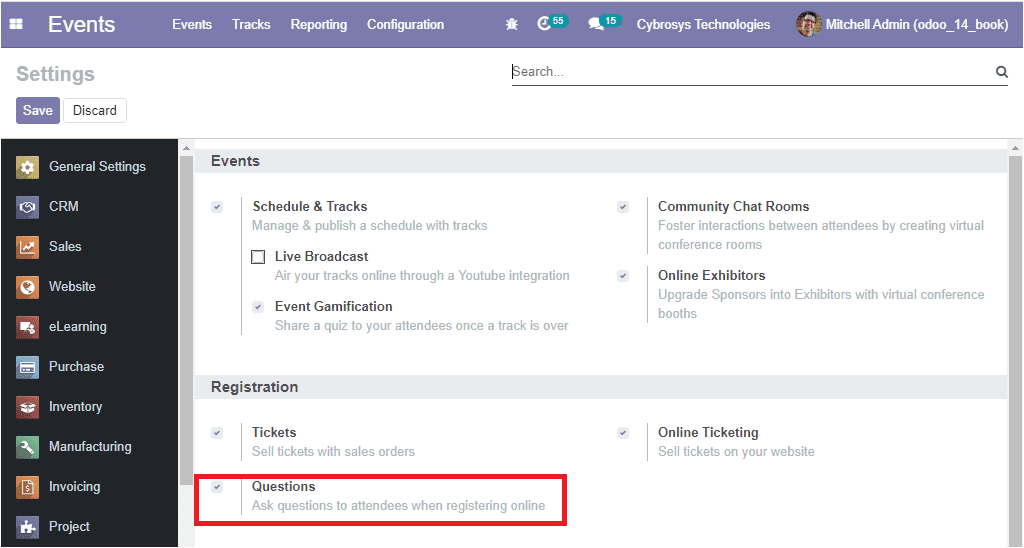
For having the advantages of this option, you should enable the Tickets option from settings.
For that, you can go to Events -> Configuration -> Settings. The image of the settings window is depicted below.
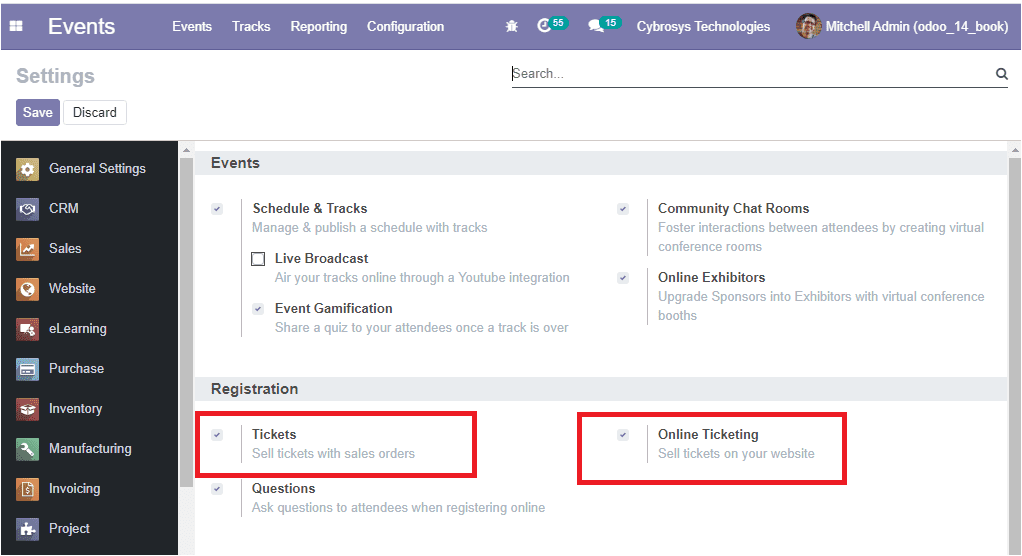
Here you can view the options Tickets and Online Ticketing under the Registration tab. You can check the boxes near the options for enabling these features. Don’t forget to click on the Save button to mark changes.
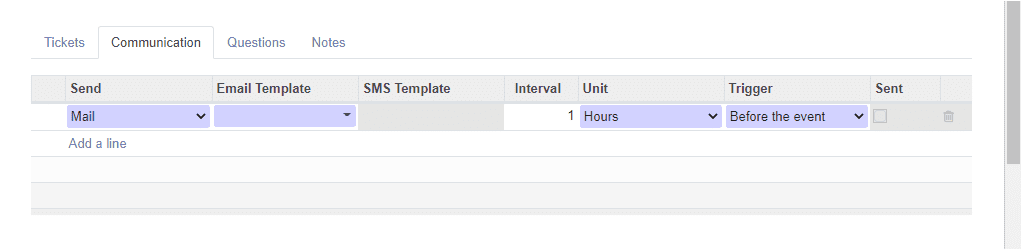
Come back to the Event creation form, let us have a look at the Communication tab, using this tab we can start the communication with the attendees via email or SMS. You can also allocate the Email template, SMS template along with the Interval. Moreover, you can select the units, trigger option for messaging before the events and after the registration process. The image of the Communication tab is depicted below.
In the Event creation form, you can also view a Questions tab. This tab will allow you to Create questions. For getting the benefits of this feature, at first you should enable the option from settings.
By activating this option you can ask questions to the attendees when registering online.
Back to the Questions tab, now here you can create questions by selecting the Add a line option. This action will lead you to a pop-up window where you can create questions. The image of the pop-up window is depicted below.
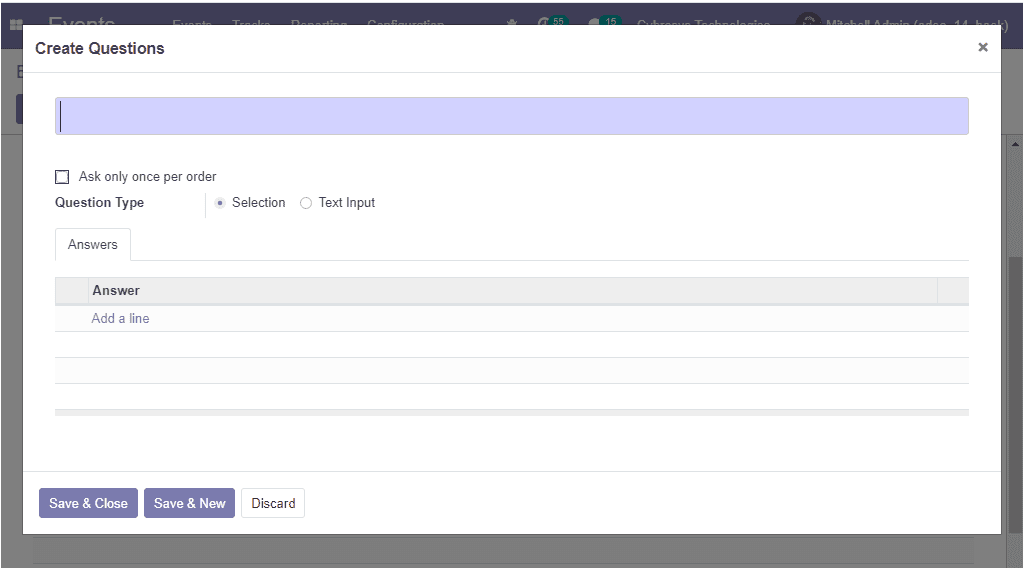
Here in this window, you can specify the question on the allotted space and you can enable the option ‘Ask only once per order. If you enable this option, this question will be asked only once and its value will be propagated to every attendee. If the option is not enabled it will be asked for every attendee of a reservation. Moreover, you can specify the Question Type.
Using this tab, you can provide directions such as plastic bottles are not allowed and if you are planning to provide lunch for the event, you can confirm whether they are vegetarian or not. After providing all the required details you can click on the Save & Close button.
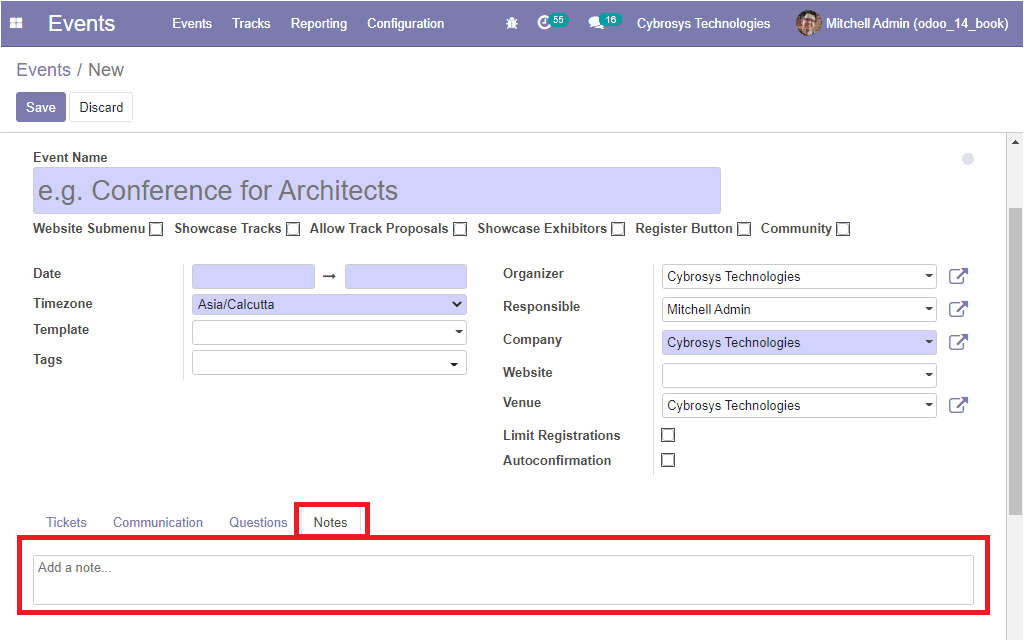
Finally, you can add a note under the Notes tab.
After giving all the details in the Event creation window, you can Save the Event by selecting the Save button available. Then you will be depicted with another window where you can view all your details and you have the provision to edit the details by selecting the Edit button available.
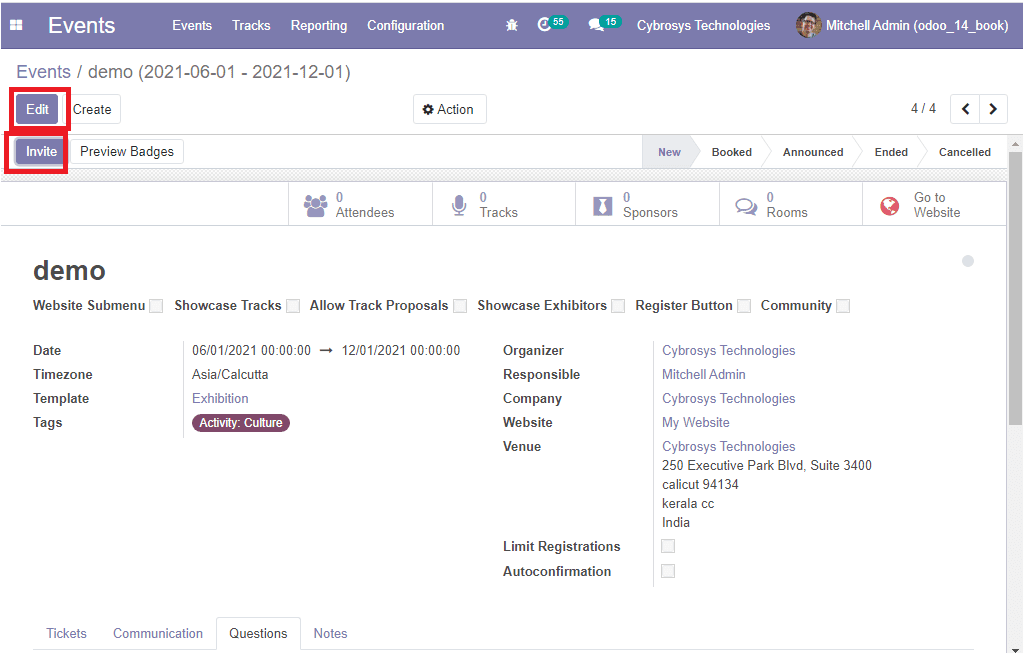
In this window, you can view the Invite button. Upon clicking this button you will be navigated to a new window as shown below.
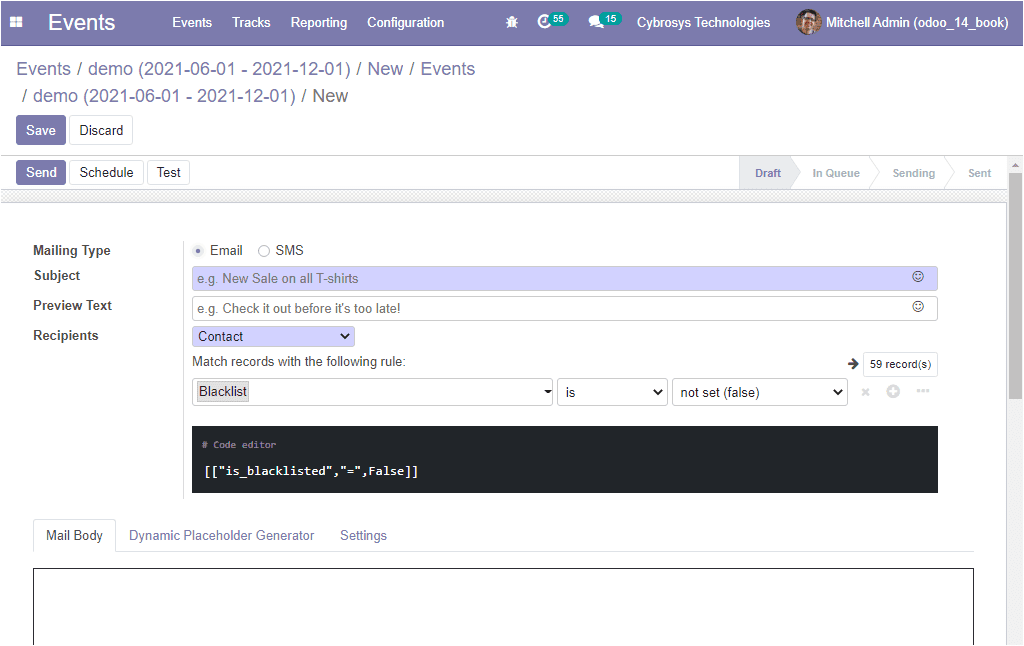
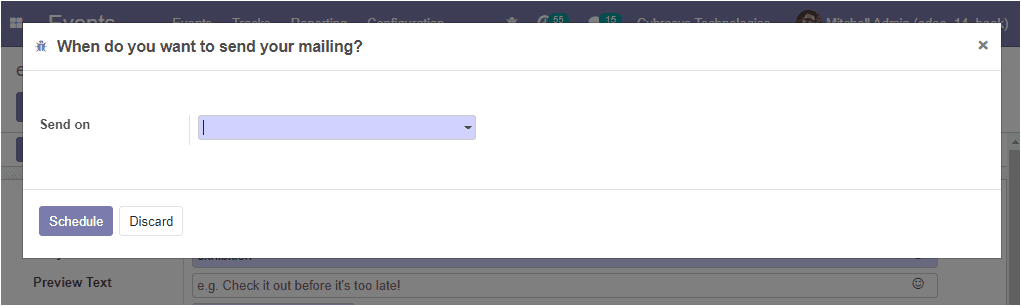
In this window, you can specify the Mailing Type, allocate the Subject along with the Recipients. Moreover, you have the Preview Text option where you can provide attractive preview sentences that encourages recipients to open this email. You can also fill up the options available under the Settings and Dynamic Placeholder Generator tabs. After completing all these steps, you can send it by selecting the Send button or you can schedule the event by selecting the Schedule button available. Upon selecting the schedule button you will be depicted with a pop-up window where you can specify the scheduled date. The image is depicted below.
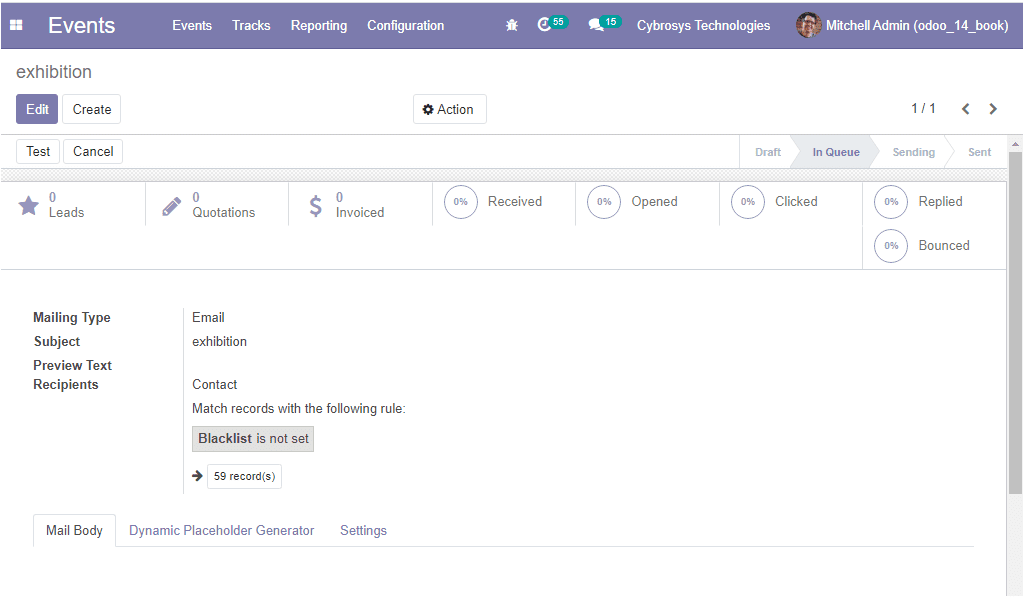
On the other hand, the selection of the Send button will lead you to a new window as depicted below.
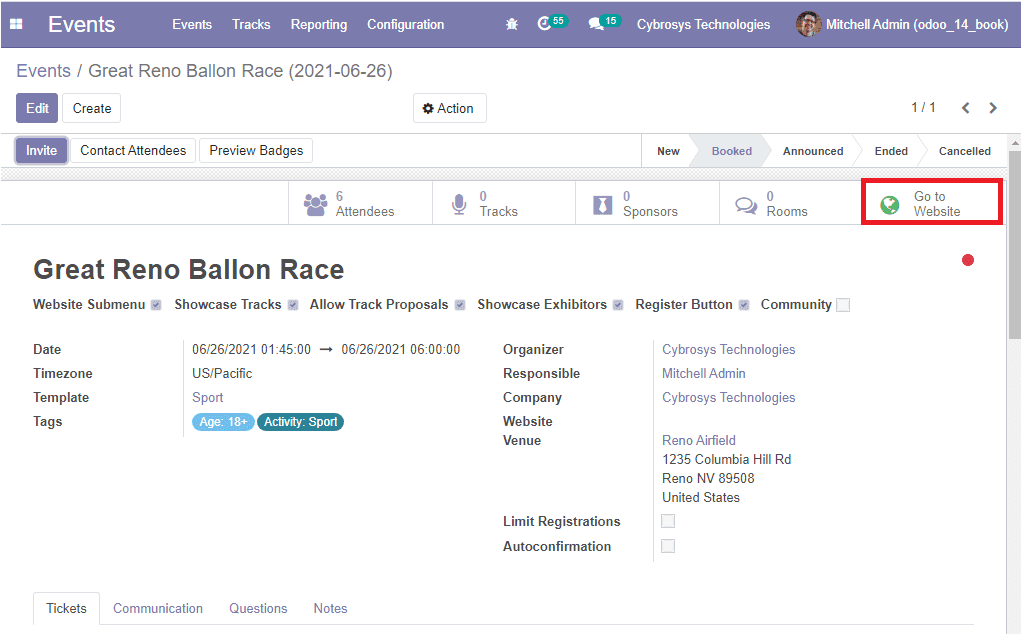
Now let us go to the website by clicking on the Go to Website option available as shown in the below image.
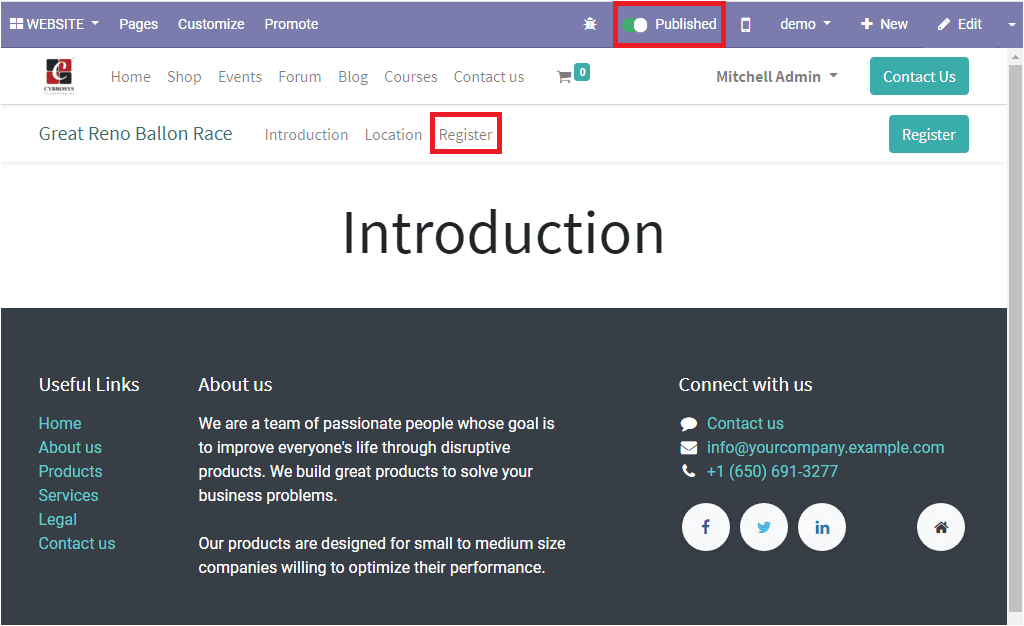
Upon clicking the Go to Website button you will be navigated to the website page where you can turn unpublished to Published as shown below.
Now you can click on the Register button to register the Event.
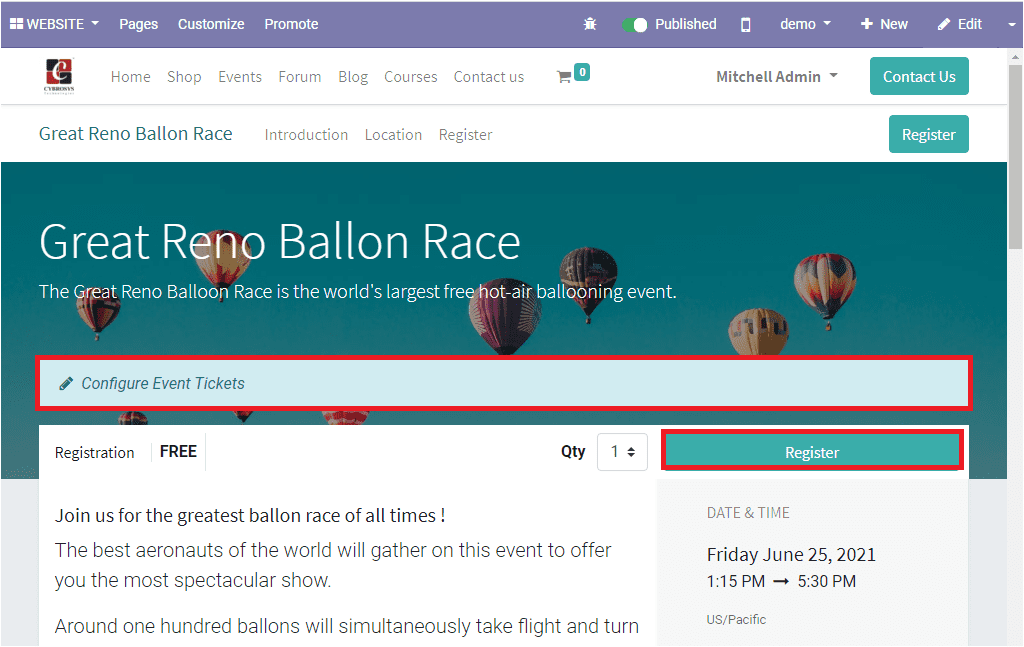
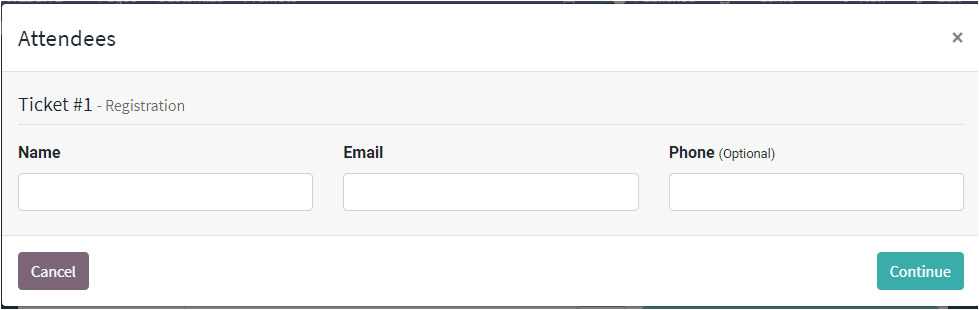
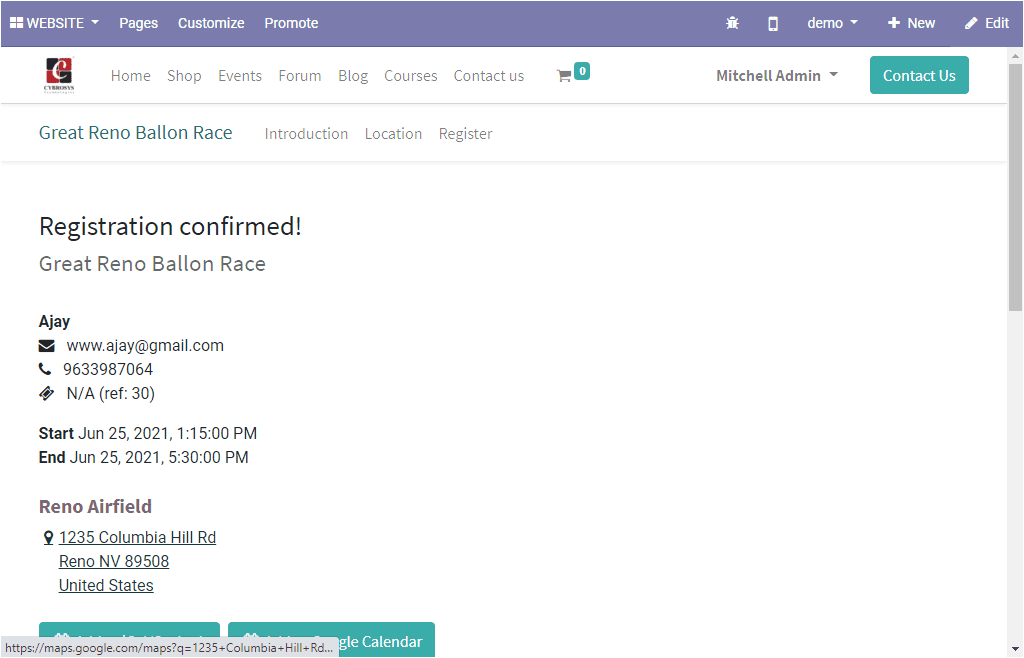
Using this window, you can configure Event Tickets. Here also you have a Register button. By selecting this button you will be depicted with a new pop-up window as depicted below where you can provide the name, email address, and phone number (if required).
After completing all these steps, you can select the Continue button. This action will lead you to the Confirmation page. The image of the Confirmation page is depicted below.
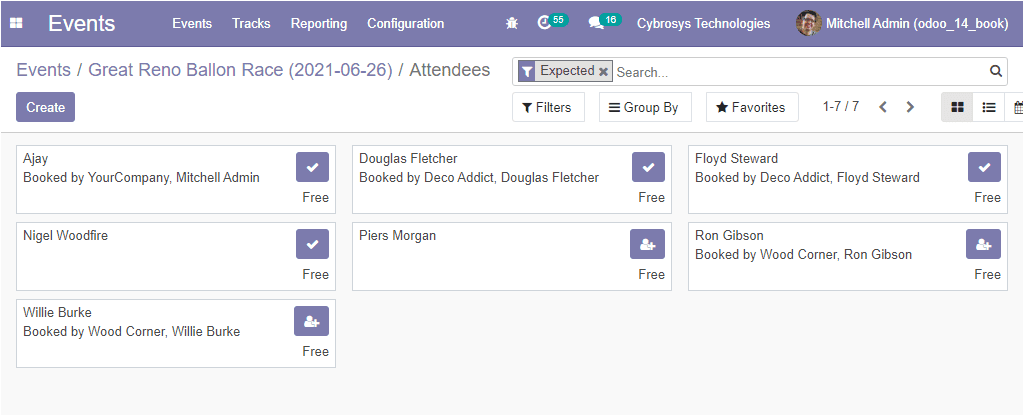
The details of attendees can also be viewed in the Events window. For that, you can click on the Attendees tab as shown below.

On clicking the Attendees tab, you will be directed to the Attendee’s window as depicted below.
So far we were discussing the various operations conducted in the platform and now let us have a look at the reporting section of this module.