Vendor Bill
Odoo will help you to create vendor bills accurately and pay at the right time
effortlessly. You will be able to create and manage vendor bills in the Odoo Invoicing
module and you can send them online without any delay in the payment. In the Odoo
Invoicing module, you can find the Bill option under the Vendor menu.
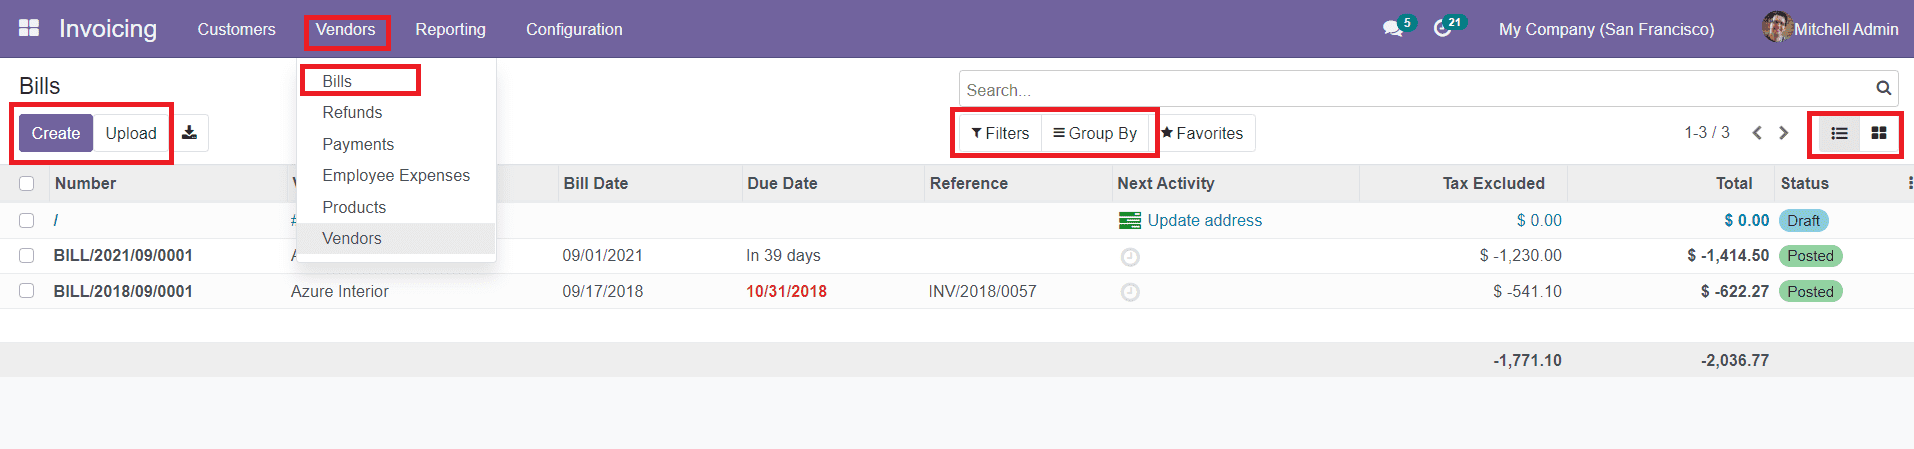
While entering into this platform you will get details about all vendor bills created and
drafted in the Invoicing module. The list will show the Bill Number, Vendor, Bill Date,
Due Date, Reference, Next Activity, Tax Excluded, Total, and Status of the vendor bill.
You can also change the list view into Kanban view at your convenience. The Filters and
Group By options in the window can be used to sort and categorize the data. You will be
able to use default as well as customizable filters and grouping options in this module.
In order to generate a new vendor bill, you need to click on the ‘Create’ option shown in
the image. It is also possible to upload your vendor bills to the system by using the
‘Upload’ button in the same window.
Now, let’s look into how to create new vendor bills in the Odoo Invoicing module. When
you click on the ‘Create’ button, you will be directed to a new vendor bill creation
window as shown below.
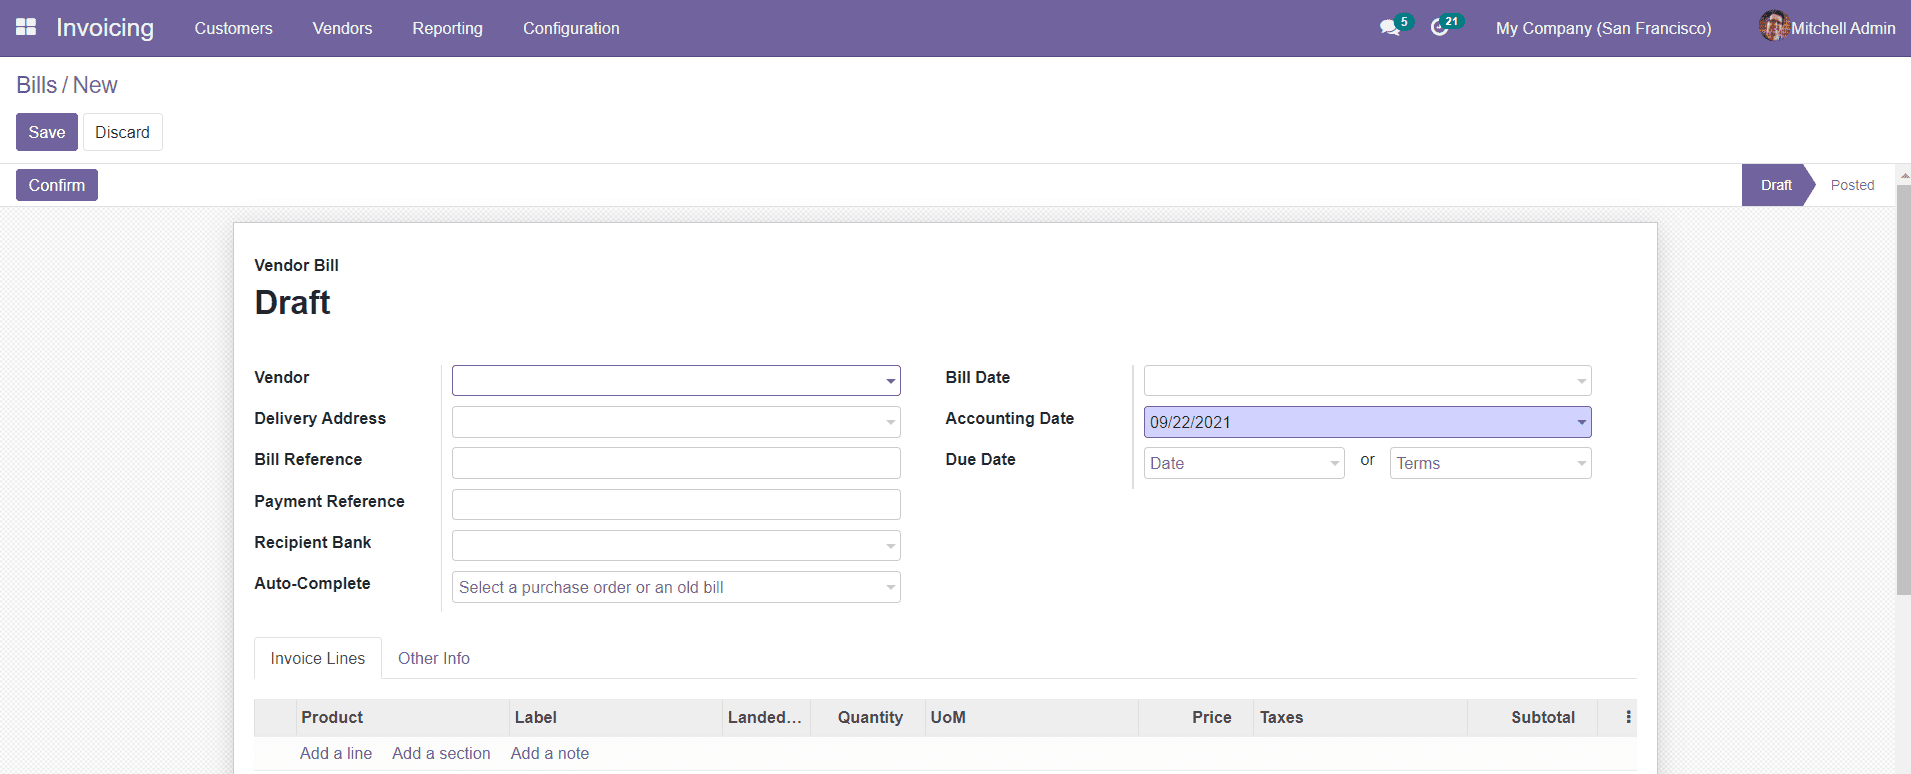
First, you need to select the Vendor from the given list. Similarly, you can add details
about the Delivery Address, Bill Reference, Payment Reference, Recipient Bank, Bill
Date, Accounting Date, and Due Date. The Bill Date can be used to mention the date on
which you want to generate this vendor bill. The Accounting Date is the date on which
the accounting details of this bill have been updated in the report.
In the Auto-Complete field, you can select a purchase order or old bill.
Under the Invoice Line tab, you can add Products to the vendor bill. By clicking on the
Add a Line button, you can select products from the given list.
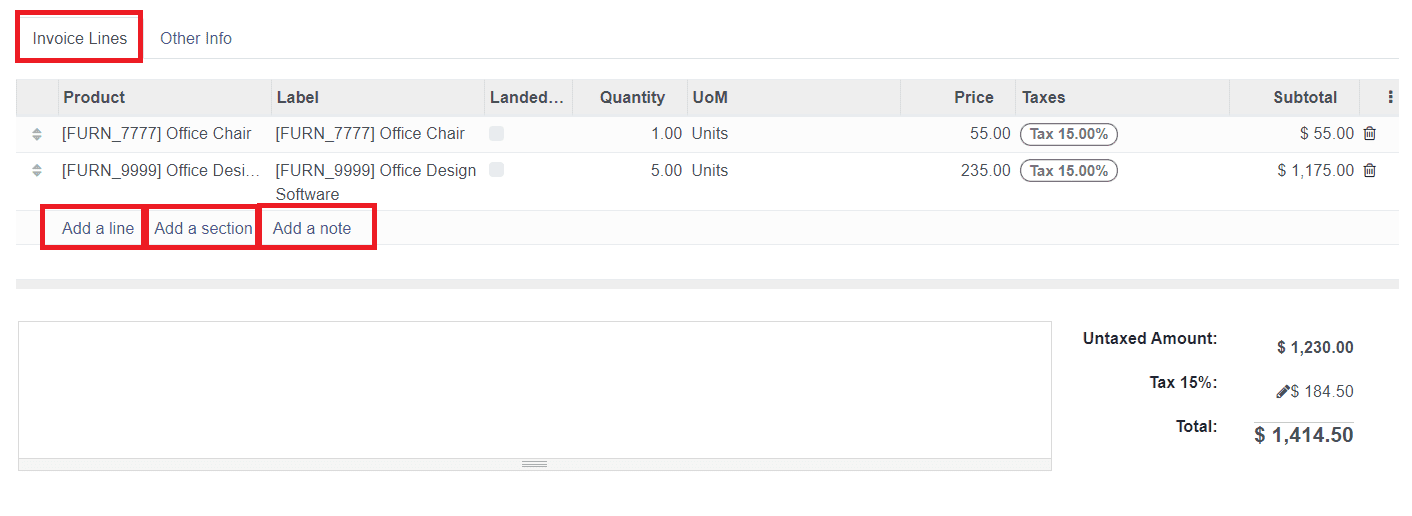
The Label, Landed Costs, UoM, Price, Taxes, and Subtotal fields will be automatically
filled with corresponding data as per the product you have selected. You can specify the
Quantity of the product and you will get the Total amount of the product under the list.
You can add journal items to which the accounting details of this vendor bill will be
added in the Journal Items tab.
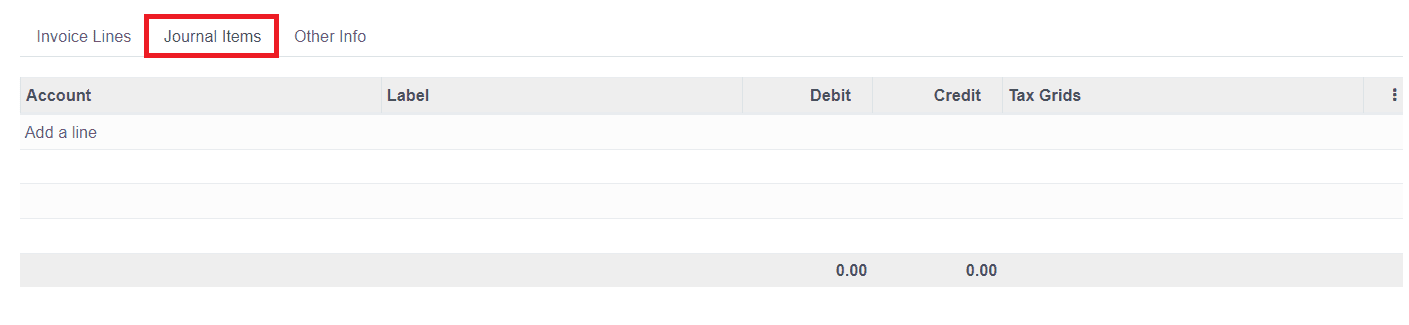
Using the Add a Line option, you can add the Account, Label, Debit, Credit, and Tax Grids
details.
If you want to add sections in the description, you can click on the ‘Add a Section’
option. You can also add notes under the Invoice Lines by using the ‘Add a Note’ option.
The Accounting details regarding the Vendor Bill can be specified under the Other
Information tab as shown in the screenshot below.
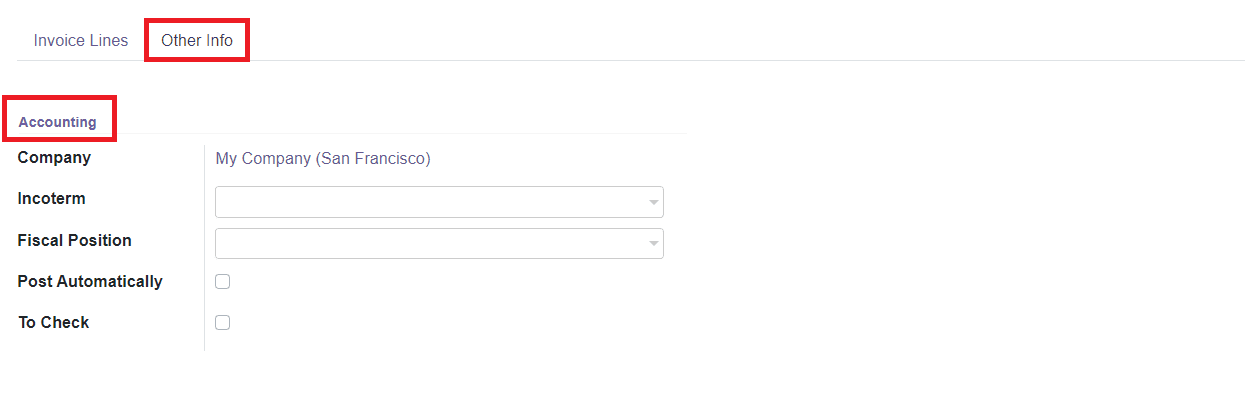
You can easily specify the Company, Incoterm, and Fiscal Position in the Accounting
field. Additionally, you will get an option ‘Post Automatically’ to activate. If you
activate this option, the entry will be automatically posted on the specified date in
the Vendor Bill. If you are not sure about the details entered in the vendor bill at the
time of creation and you want to check the data again, you can activate the ‘To Check’
field.
You can save the data by clicking on the ‘Save’ button after completing all fields and
you will get a draft form of the vendor bill.
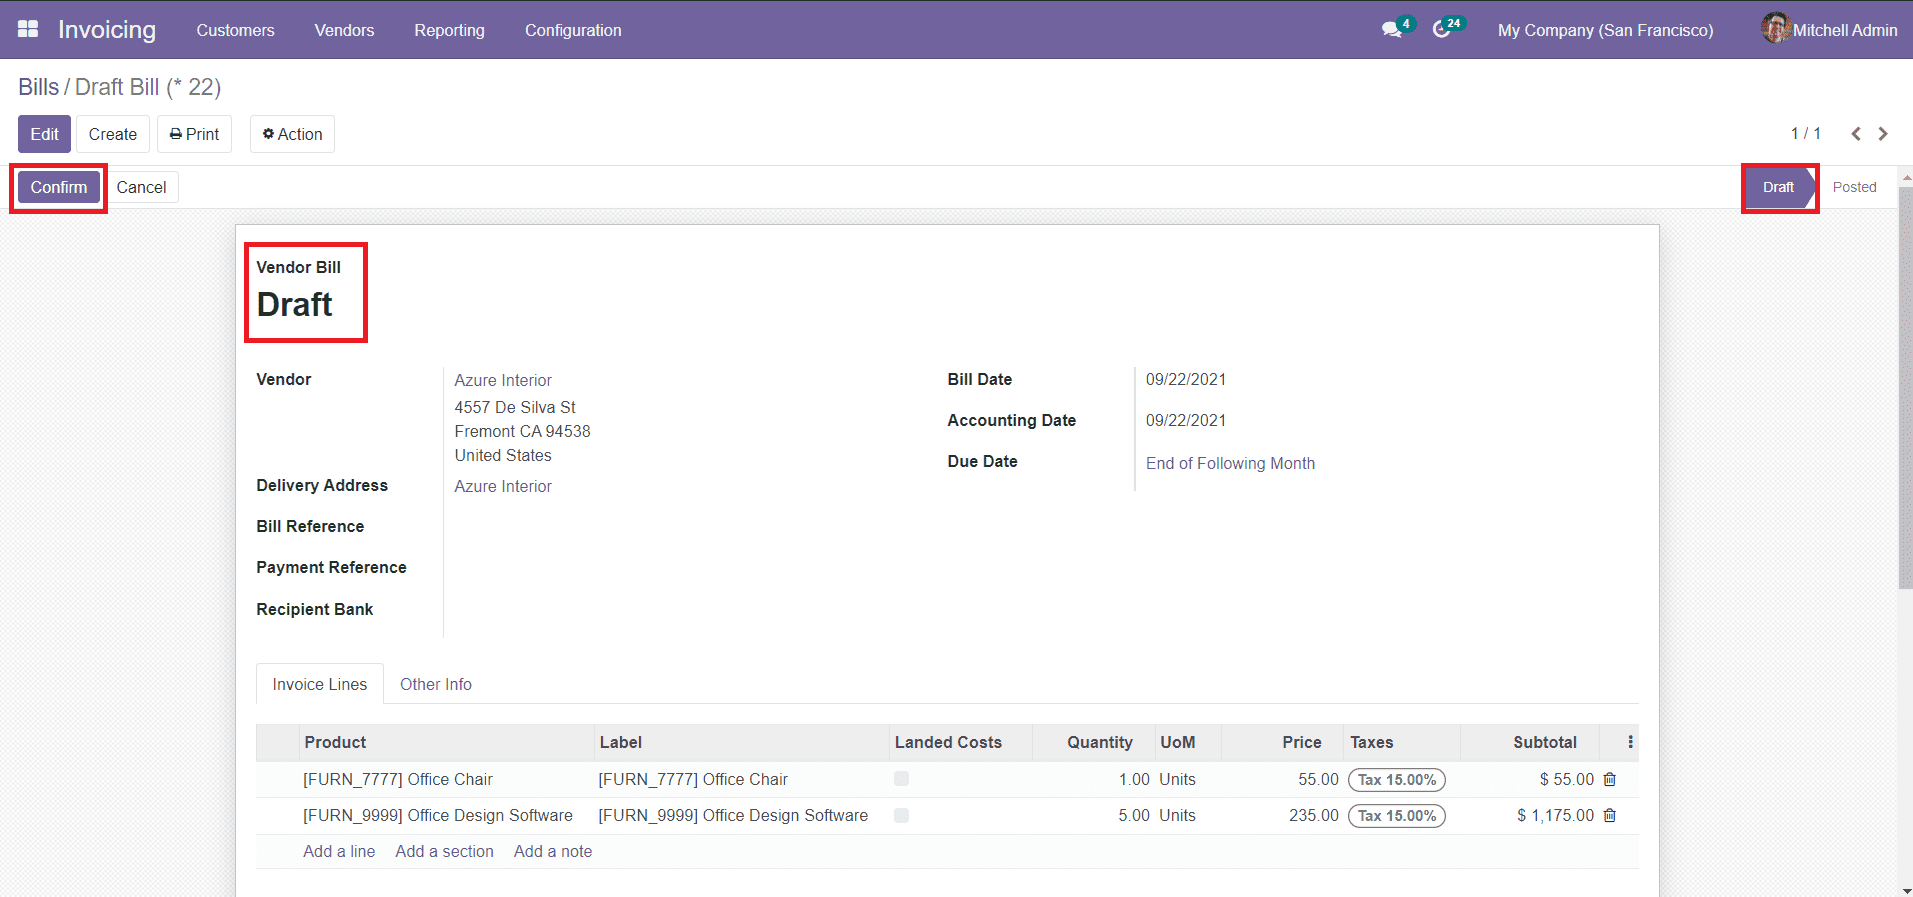
To confirm the newly created Vendor Bill, you can use the ‘Confirm’ button given in the
window.
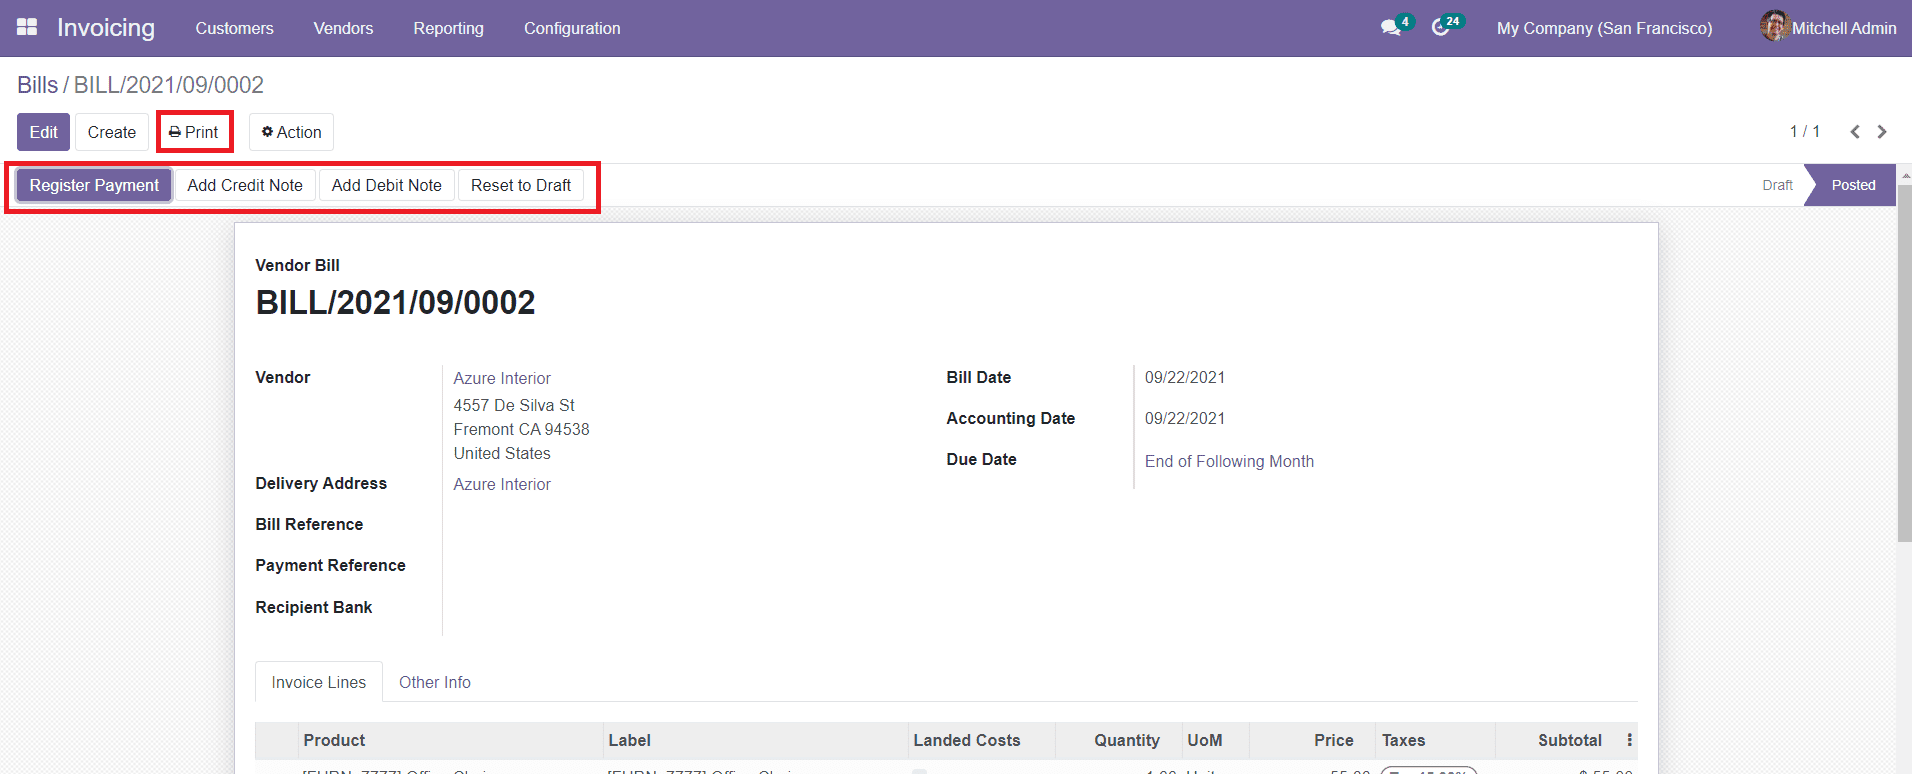
After confirming the vendor bill, you can take further action on the bill. You will be
able to get options to Register Payment, Add Credit Note, Add Debit Note, and Reset to
Draft.
A debit note is issued when there is a return in the purchase and a credit note is issued
when there is a return in sales. When the customer returns the product to the vendor,
the customer will issue a debit note and the vendor will issue a credit note. Here, you
can create a Credit Note in the same method we discussed earlier.
While creating Debit Note from the vendor bill, it will not reverse the current bill as
we did in the earlier Odoo version, instead, Odoo 15 will create a new bill with the
same data. This can be used to bill for the extra quantities received, when the Bill
Control Policy is set on the Ordered Quantity.