Invoicing
Customer Invoice to Payments
Depending upon your business and the application you use, you can follow different approaches to automate the customer invoice creation in Odoo. Normally, draft invoices are made by the framework (data originating from different reports like sales orders or contracts) therefore, the accountants can easily approve or validate the draft invoice and send the solicitations in batch (by customary mail or email).
You can create a customer invoice on this platform directly from the dashboard by clicking on the New Invoice button and you can also create it by taking the route invoicing -> customers -> invoices.
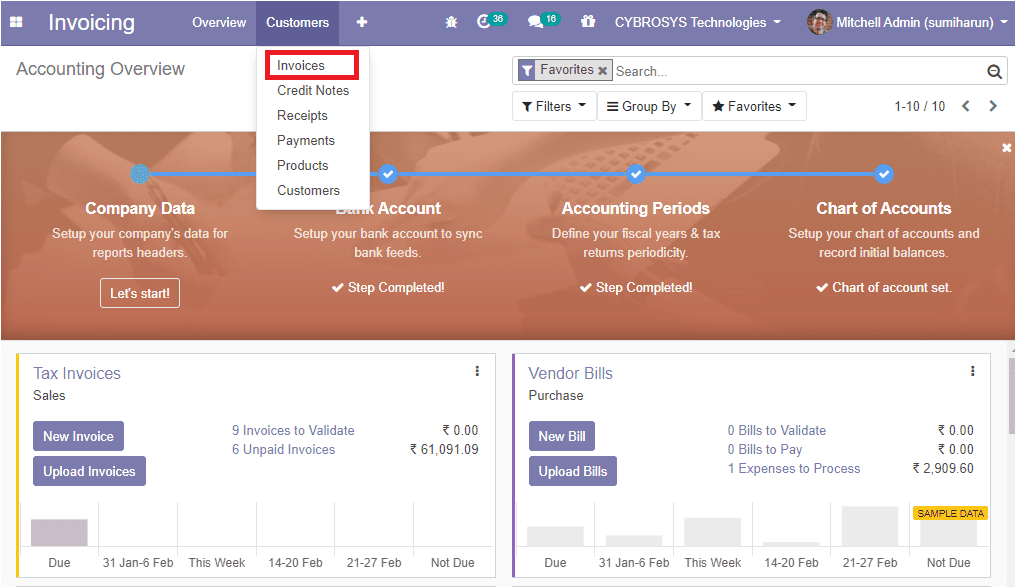
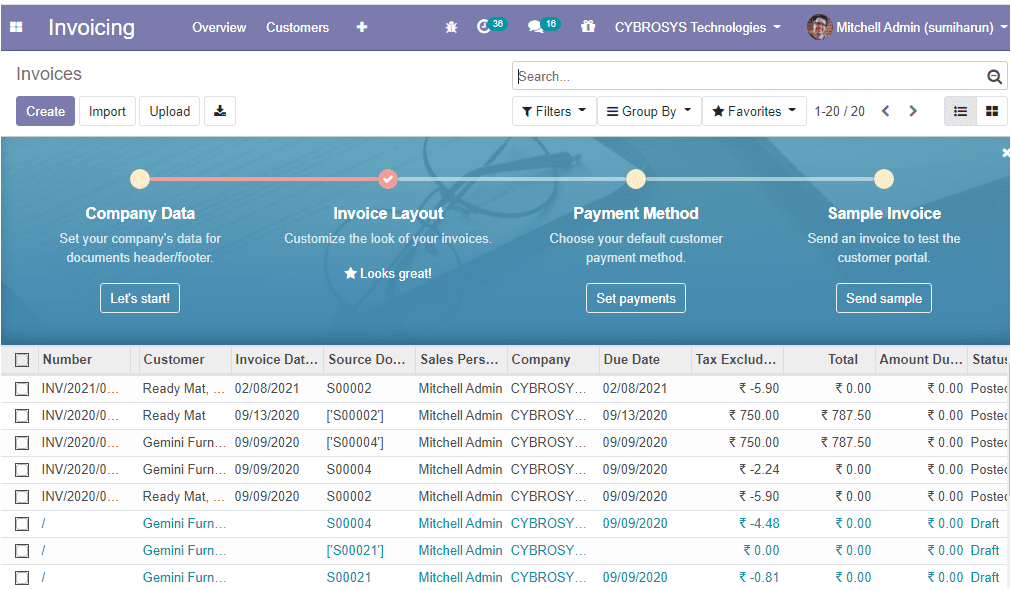
If you are clicking on the invoice button, you will be navigated to a new window where you can see all the invoices described in this platform and you have the provision to create a new one by selecting the create icon. The image of the invoices window is depicted below.
The below image depicts the invoice creation window and in this window, you can allocate the customer, delivery address for the current invoice, registered reseller details, and the reference. You can also allocate the invoice date and the company which is related to this journal. Additionally, you can define the payment terms and currency used for the transaction.
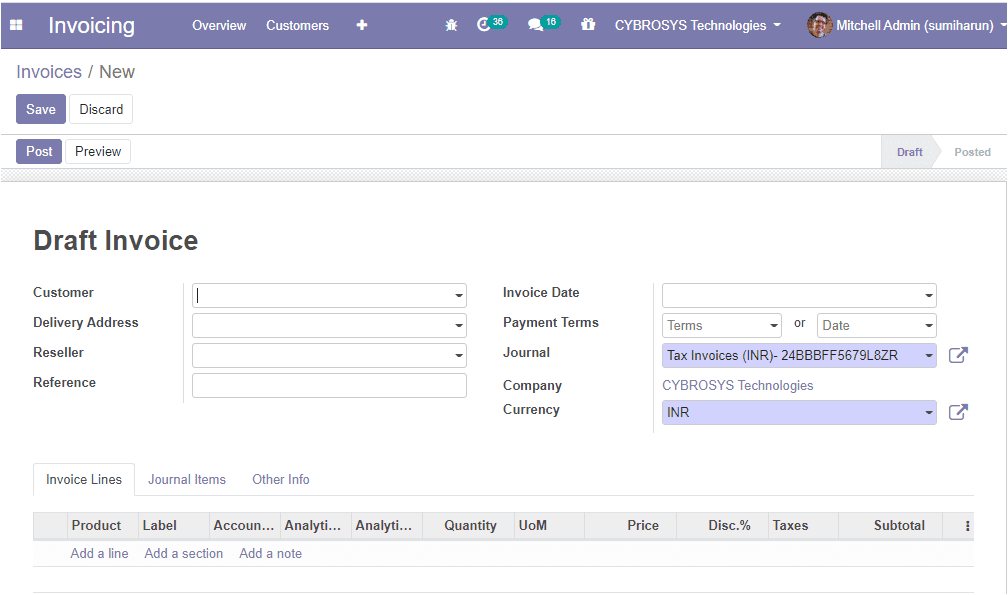
Under the invoice line tab, you can add the products that the customer wishes to buy via selecting the add a line option. You can add a description if any under the label menu. After entering all the details you can register the payment by clicking the register payment button available in the window
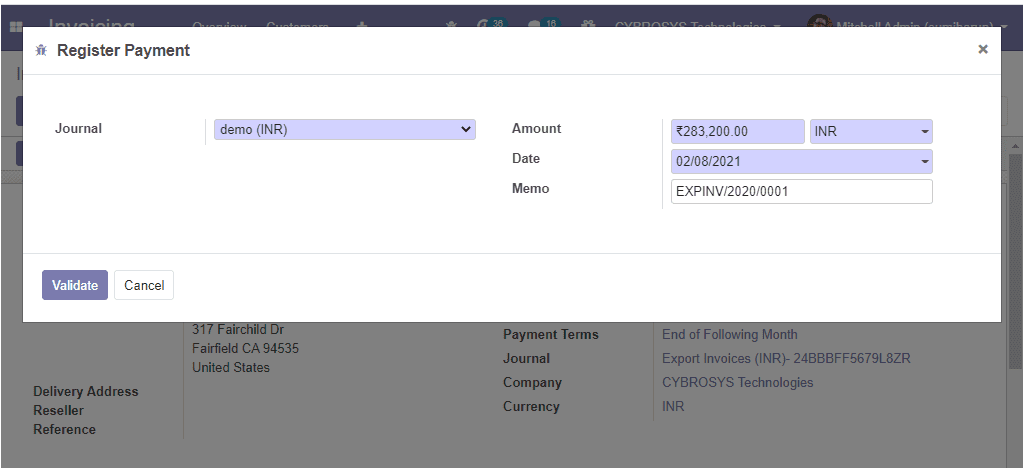
If you click on the register payment button you will be navigated to a register payment window where you can define the journal as bank or cash and can allocate the amount, date, then click on the validate button.
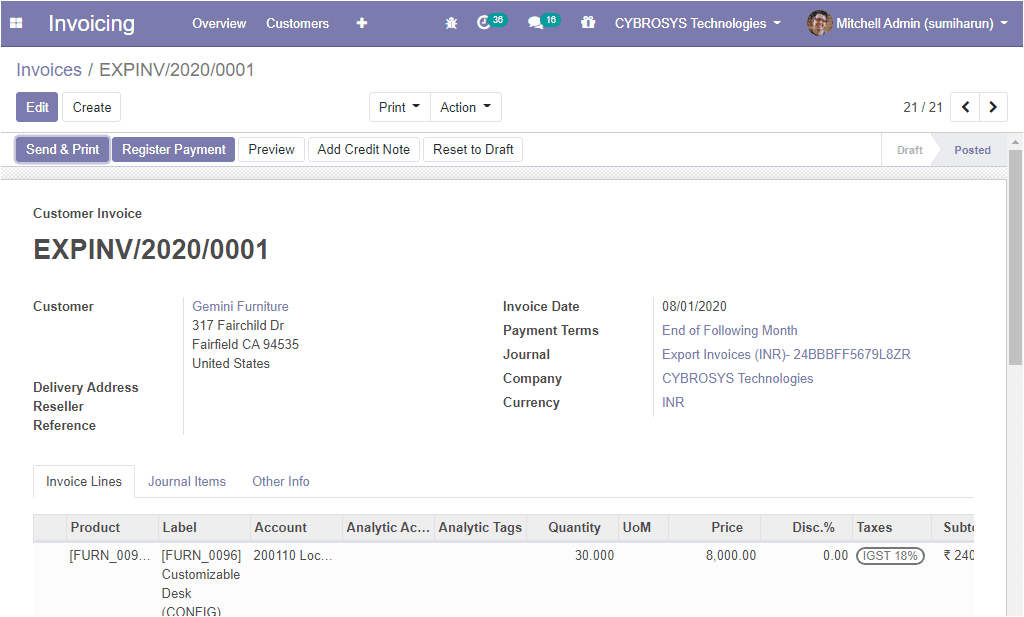
Now you can see that the invoice has been paid for. The image of the window is depicted below.
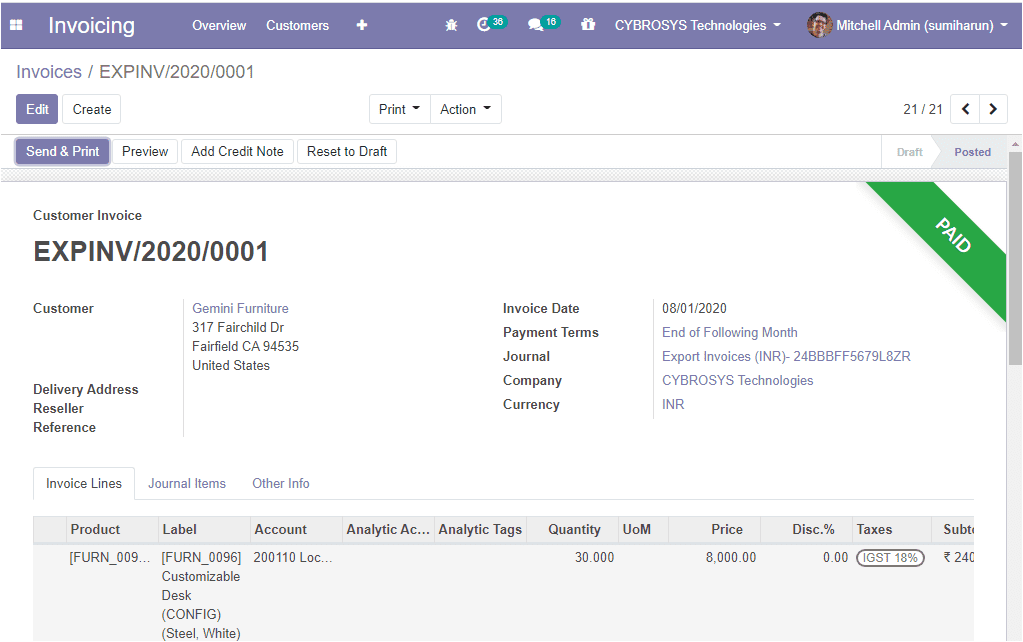
And upon clicking the send & print button available on the top left corner of this window you will be depicted with a new window as shown below.
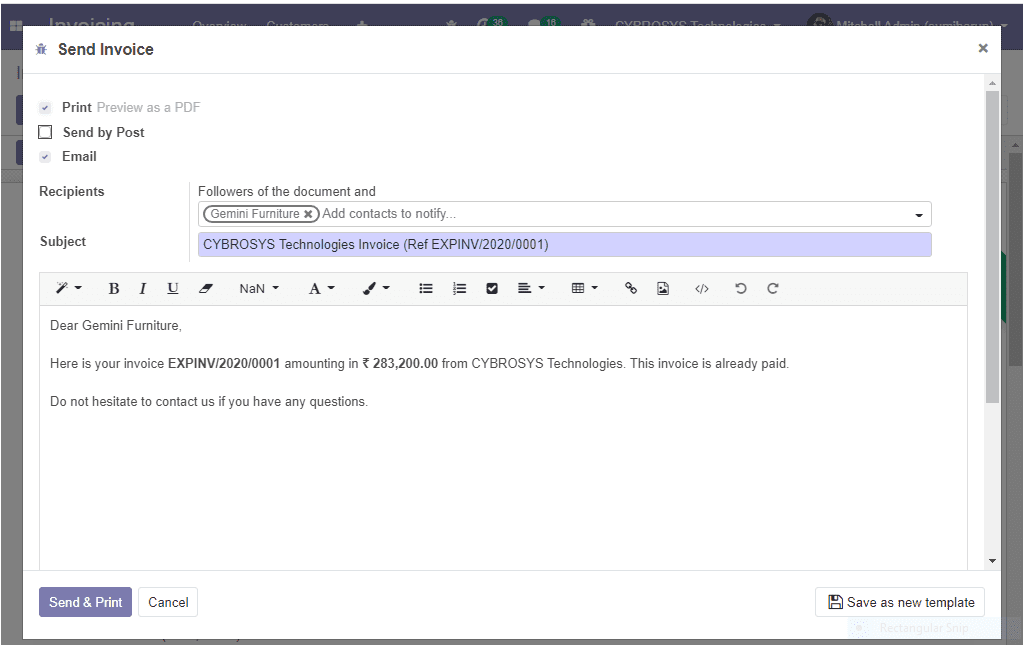
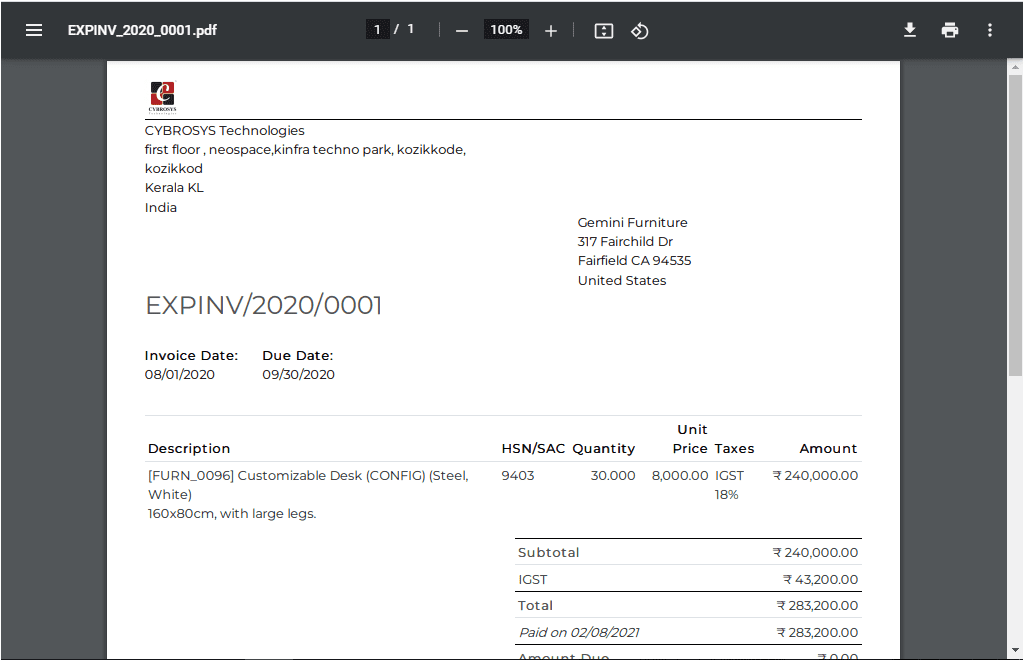
Using this window you can send an invoice by selecting the send & print button. The sample pdf of the invoice is given below.
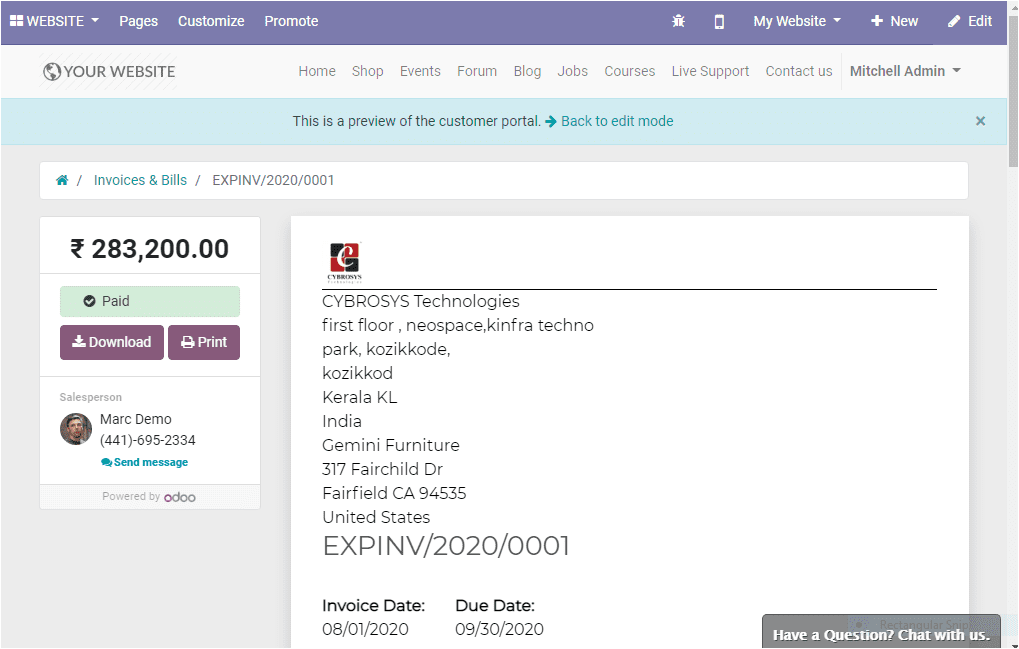
If you are clicking on the preview button available in the invoice window, you can see the website view of the invoice as depicted below.
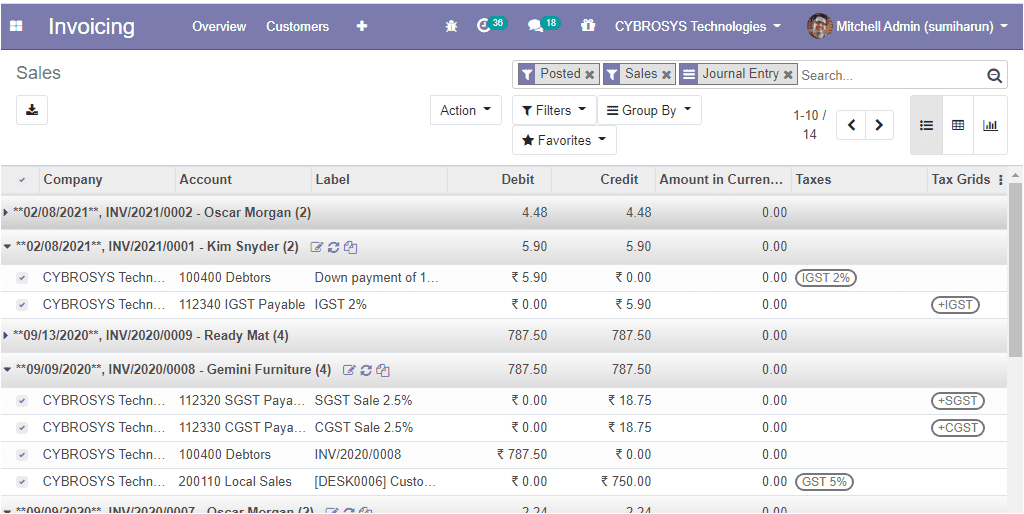
After completing these steps, next what you want to do is to go to invoicing -> journals -> sales.
In the sales window of the invoicing module, you can see the journal entry that was automatically created for the invoice.
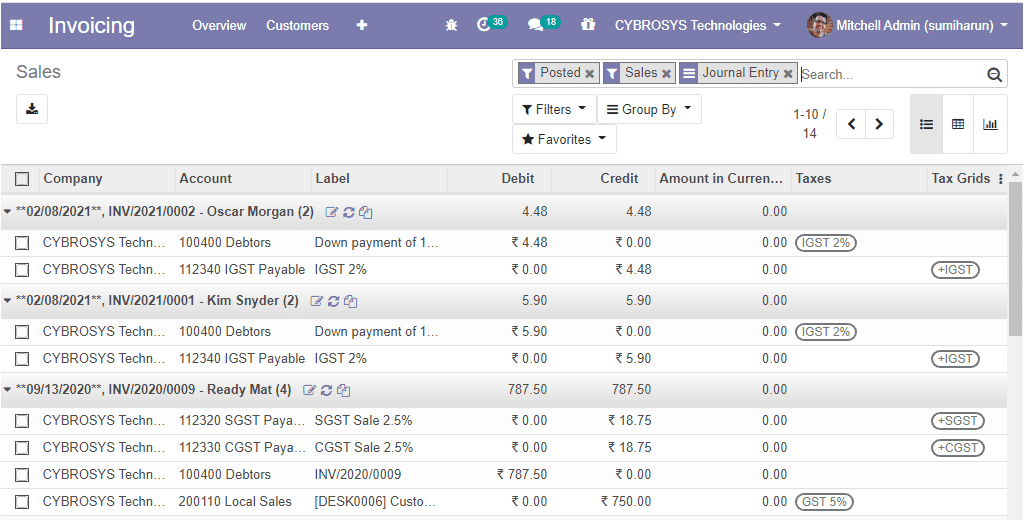
Then you can click on them to get the journal entry with debit and credit balanced.
Now you can go to the payment window to see the payment details. For that, you can go to
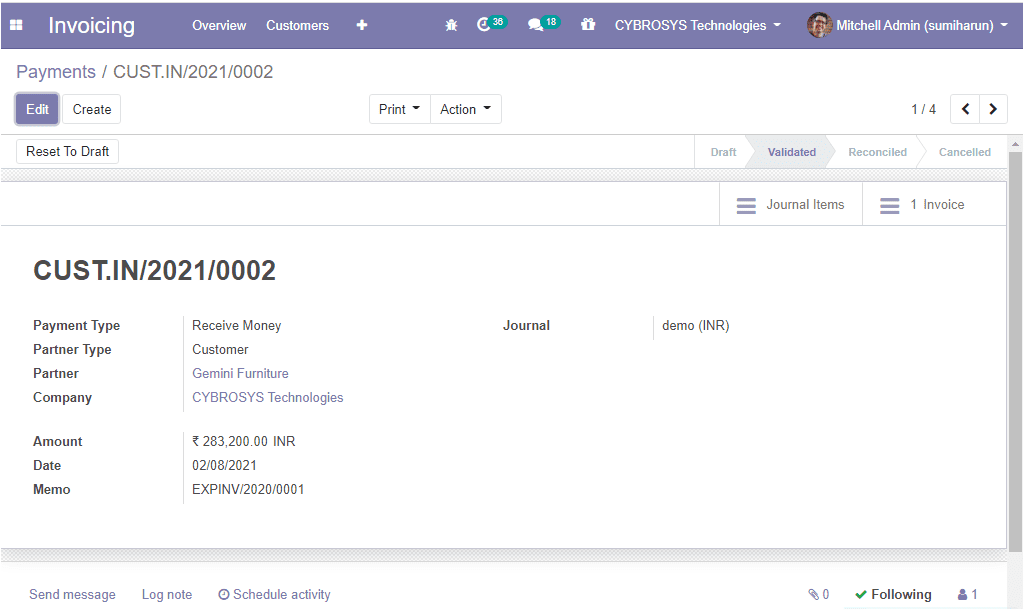
Invoicing -> Customers-> Payments. The image of the window is depicted below.
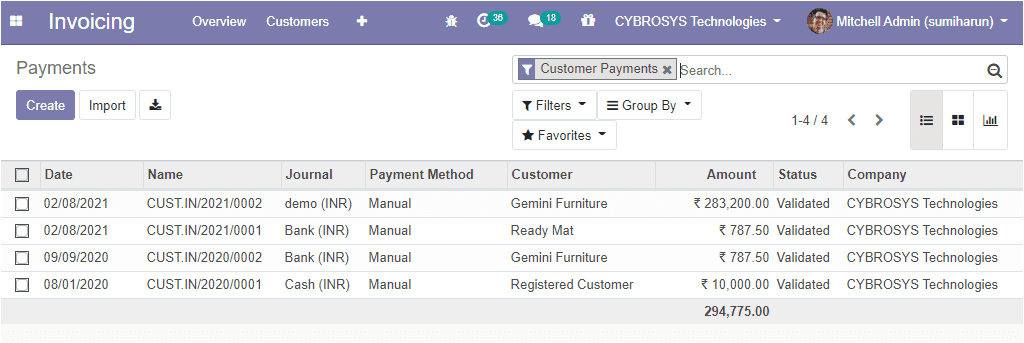
In this payments window, you can see the invoice payment details such as date, invoice name, journal, payment method, customer details, amount, status, and the responsible company.
You can also access the corresponding journal items and the invoices by using this payments window.
As we clear the invoice creation and payment in this platform and now we can move on to the next part of cash rounding’s.