Projects
You can create different projects for each field service. Based on the service you are going to perform, it is possible to create suitable projects in the Field Service module. When you create a new task for field service, you can add that task under a particular project if they belong to the same category. Configuring Projects earlier will benefit you while creating new tasks. You will get an option to select from these preconfigured projects at the time of task creation. The features of the Project menu are the same as those we discussed in the Project module. Here, you can find the Project menu under the Configuration menu.

The list of already created Projects will be displayed on this platform. It shows the Name, Worksheet Template, Company, Start Date, Enda Date, Allocated Hours, Project Manager, and Stage. Use the New button to create a new project.
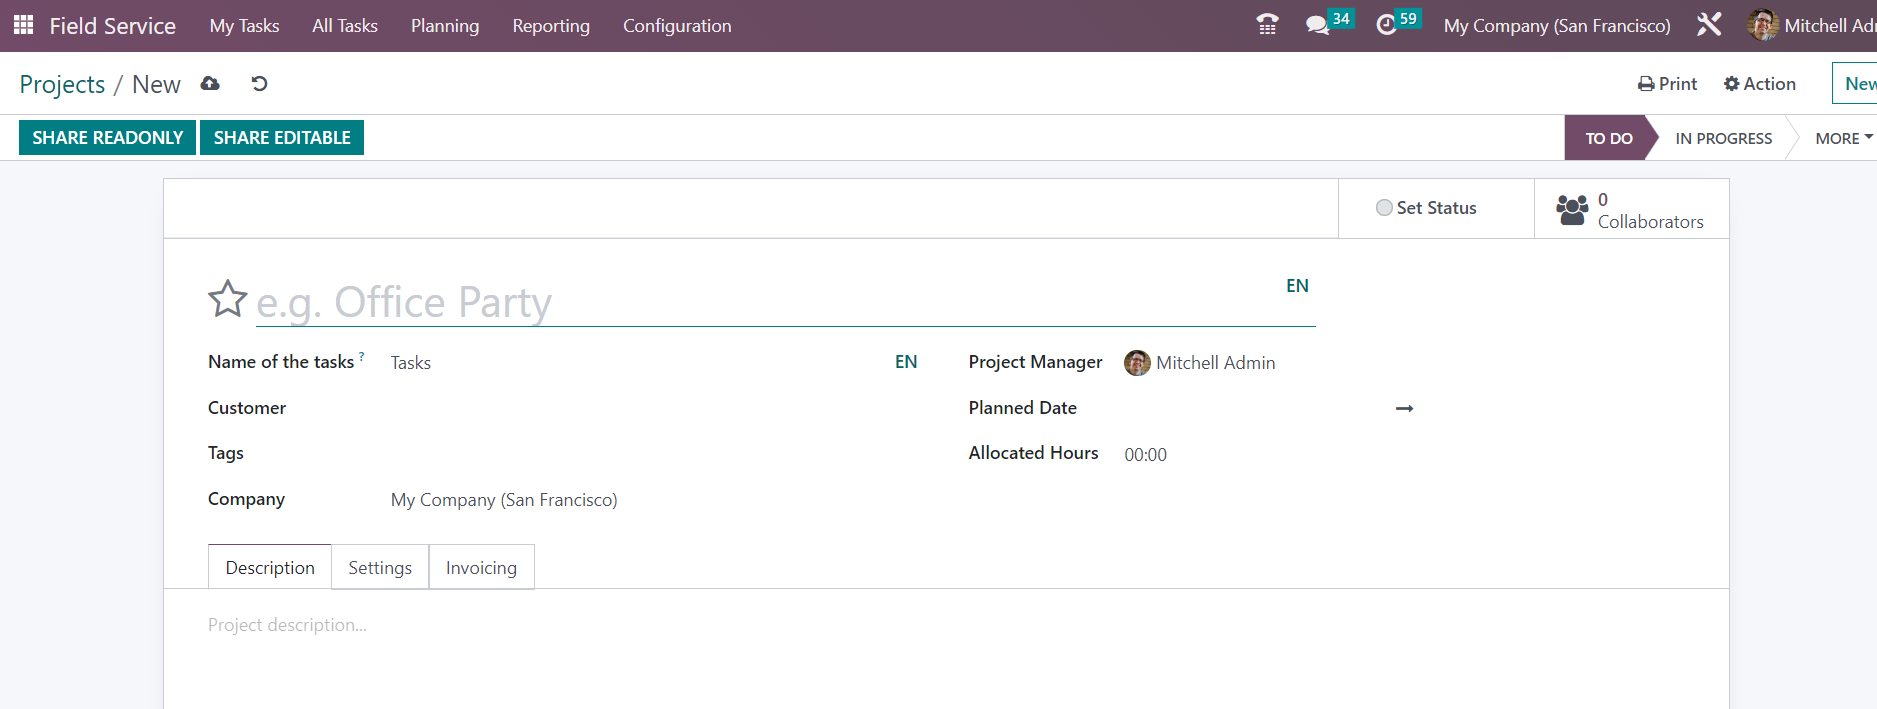
As you can see in the screenshot above, clicking on the New button will open a new form view. The name of the project can be added to the specialized field. You can set a name to refer to the tasks under this project in the Name of the Tasks field. If this project is created for a particular Customer, you can mention that in the respective field. In the corresponding fields, you can add suitable Tags and mention the name of the Company. The name of the Project Manager can be viewed here. If any change in the Project Manager, you can set a new manager from the drop-down menu. The scheduled date of the project can be added in the Planned Date field. The total hours permitted to complete this project can be defined in the Allocated Hours field. Here, you will get the Description tab to detail additional information related to the project.
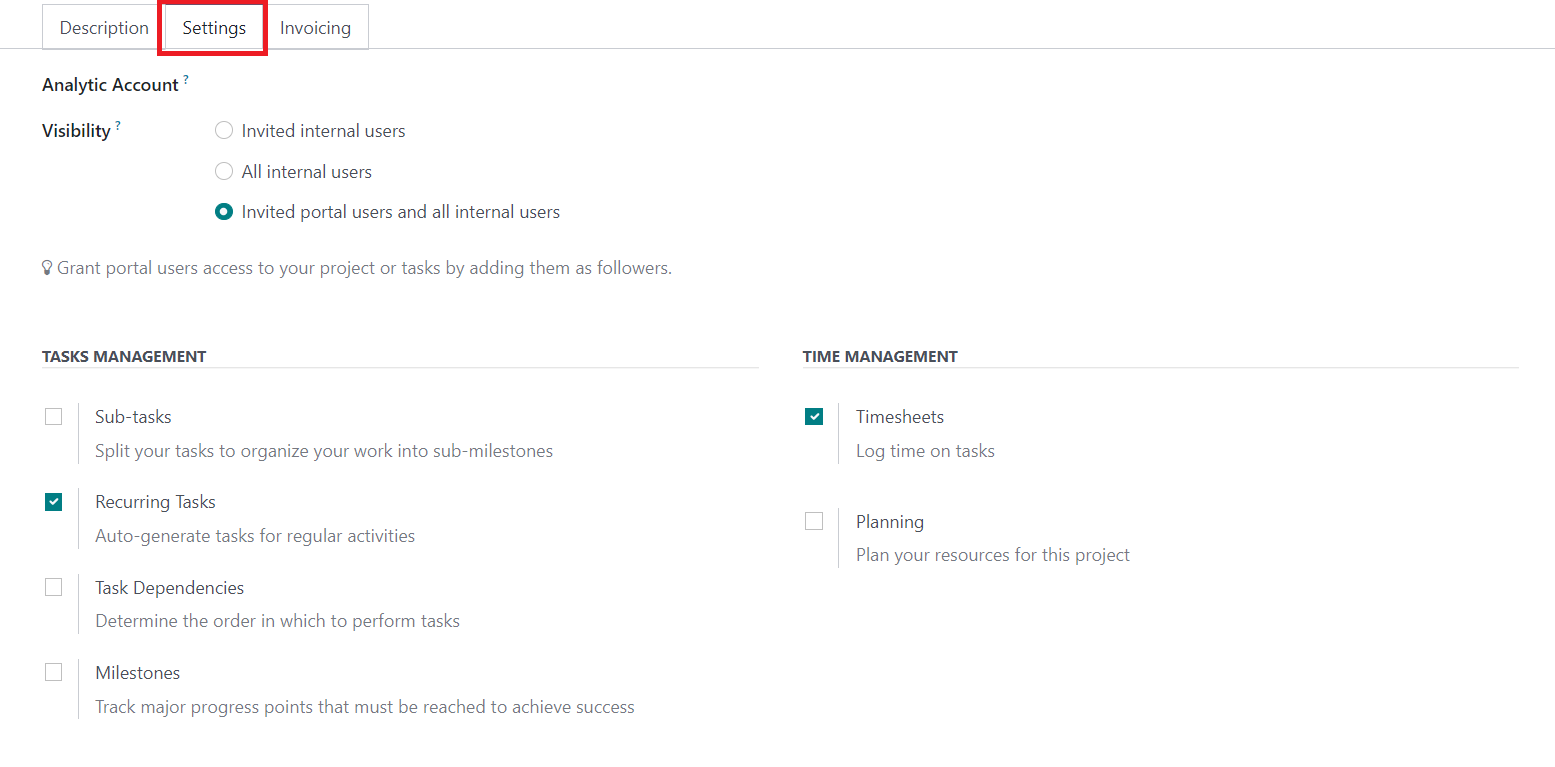
In the Settings tab, you can add an Analytic Account in the given field to link the tasks and timesheets of this project. This will track the costs and revenues of this project. You can set the Visibility of the project as Invited Internal Users, All Internal Users, or Invited Portal Users and all Internal Users in the specified field. This option will decide the access to the project and tasks under this project. In the Task Management session, you can activate the Sub-tasks option to split the tasks into small milestones. In order to allow the automatic scheduling of tasks in regular intervals, you can enable the Recurring Tasks option. Activating the Task Dependencies will help you to define the order to perform each task. The Milestone option can be used to track major progress points that must be completed to achieve success. You can enable the Timesheets option to track the time spent on tasks and record it in a timesheet. Activate the Planning option to plan your resources for this project.
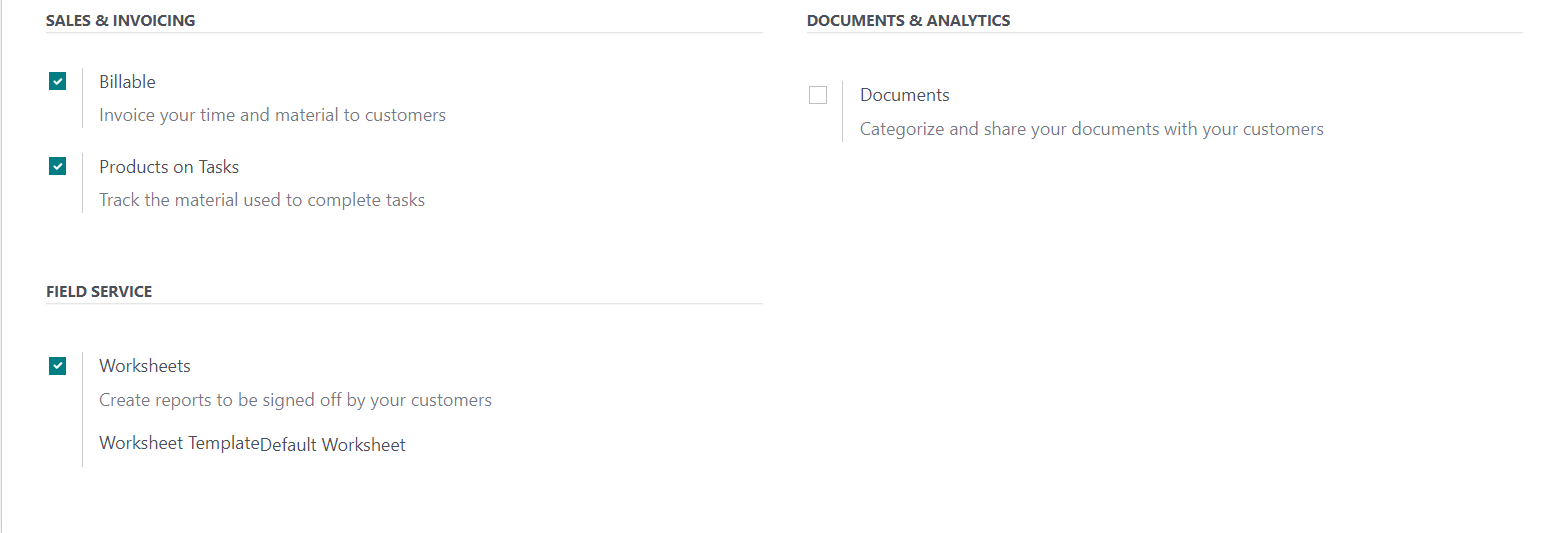
Enabling the Billable option will let you invoice your time and material to the respective customer. It is possible to track the materials used for completing the tasks after activating the Products on Tasks option. You can enable the Documents option to categorize and share your documents with the concerned customer. Under the Field Service session, you can enable the Worksheet option to create worksheet reports of the tasks to be signed off by the respective customer.
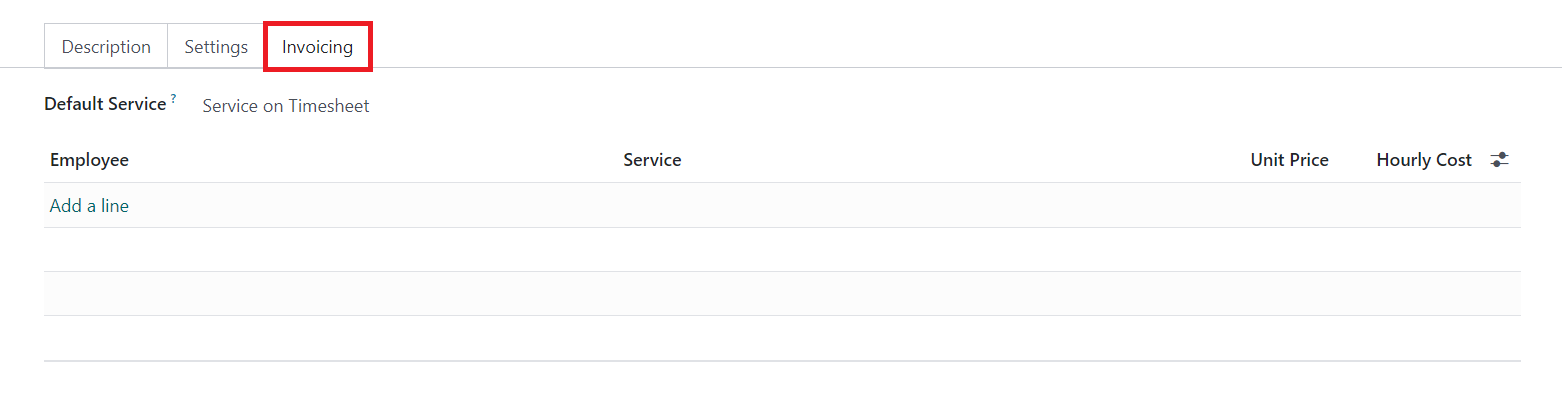
Under the Invoicing tab, you can set Default Service for the invoicing process. This indicates the service that will be by default when invoicing the time spent on a task. It can be modified on each task individually by selecting a specific sales order item. Using the Add a Line button, you can add the Employee, Service, Unit Price, and Hourly Cost.
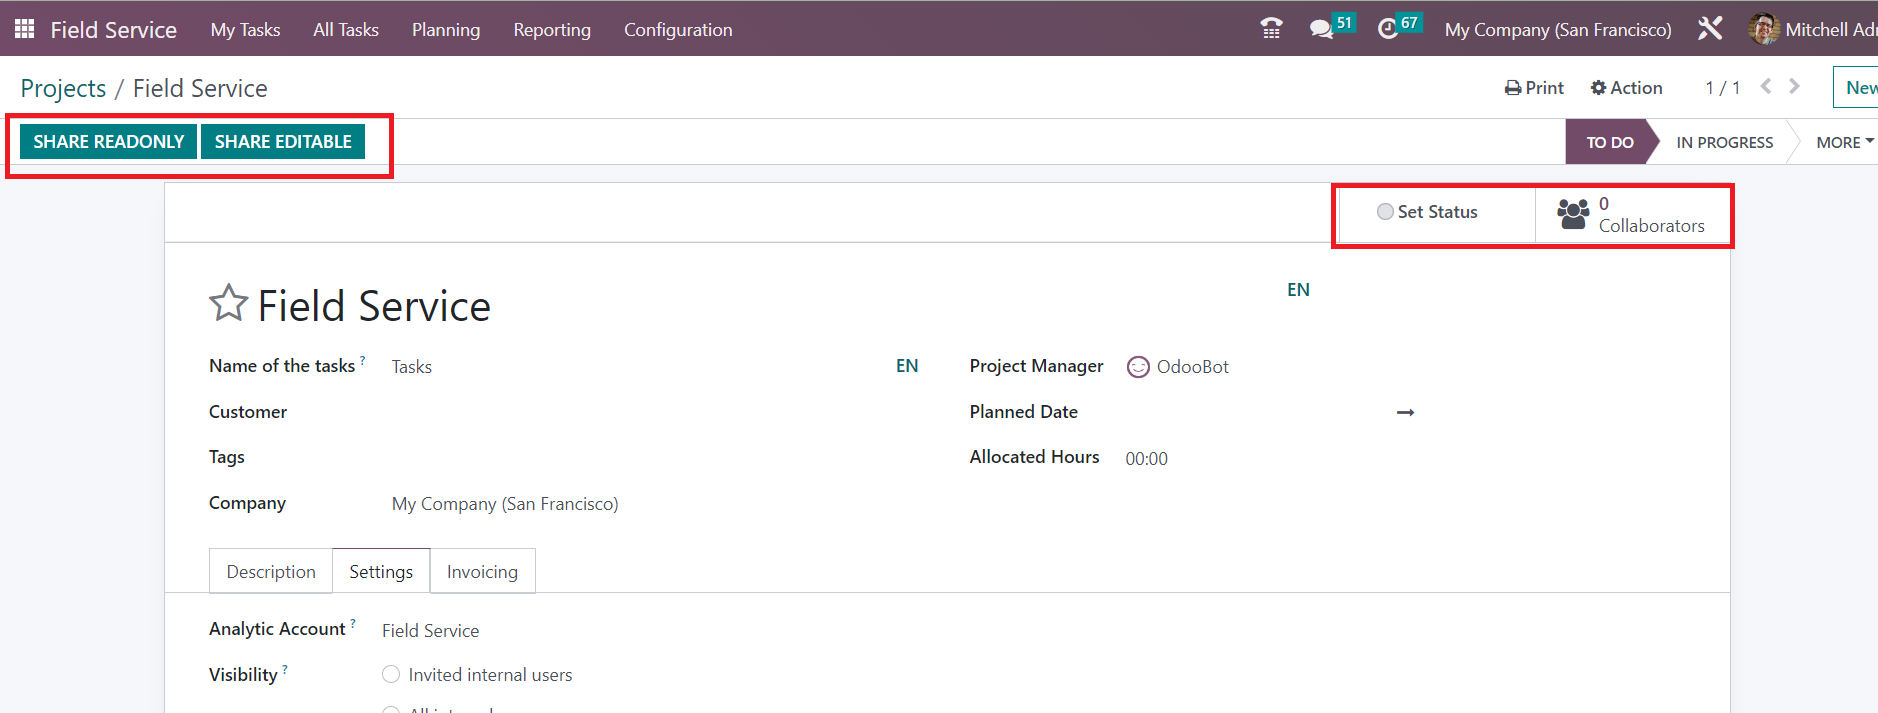
Once you complete the configuration of the project, you can share the read only access to others using the Share Read Only button. The Share Editable button can be used to share the editing access to others. Additionally, you will be able to get the Set Status smart button on this platform which will lead you to a new platform as shown below.
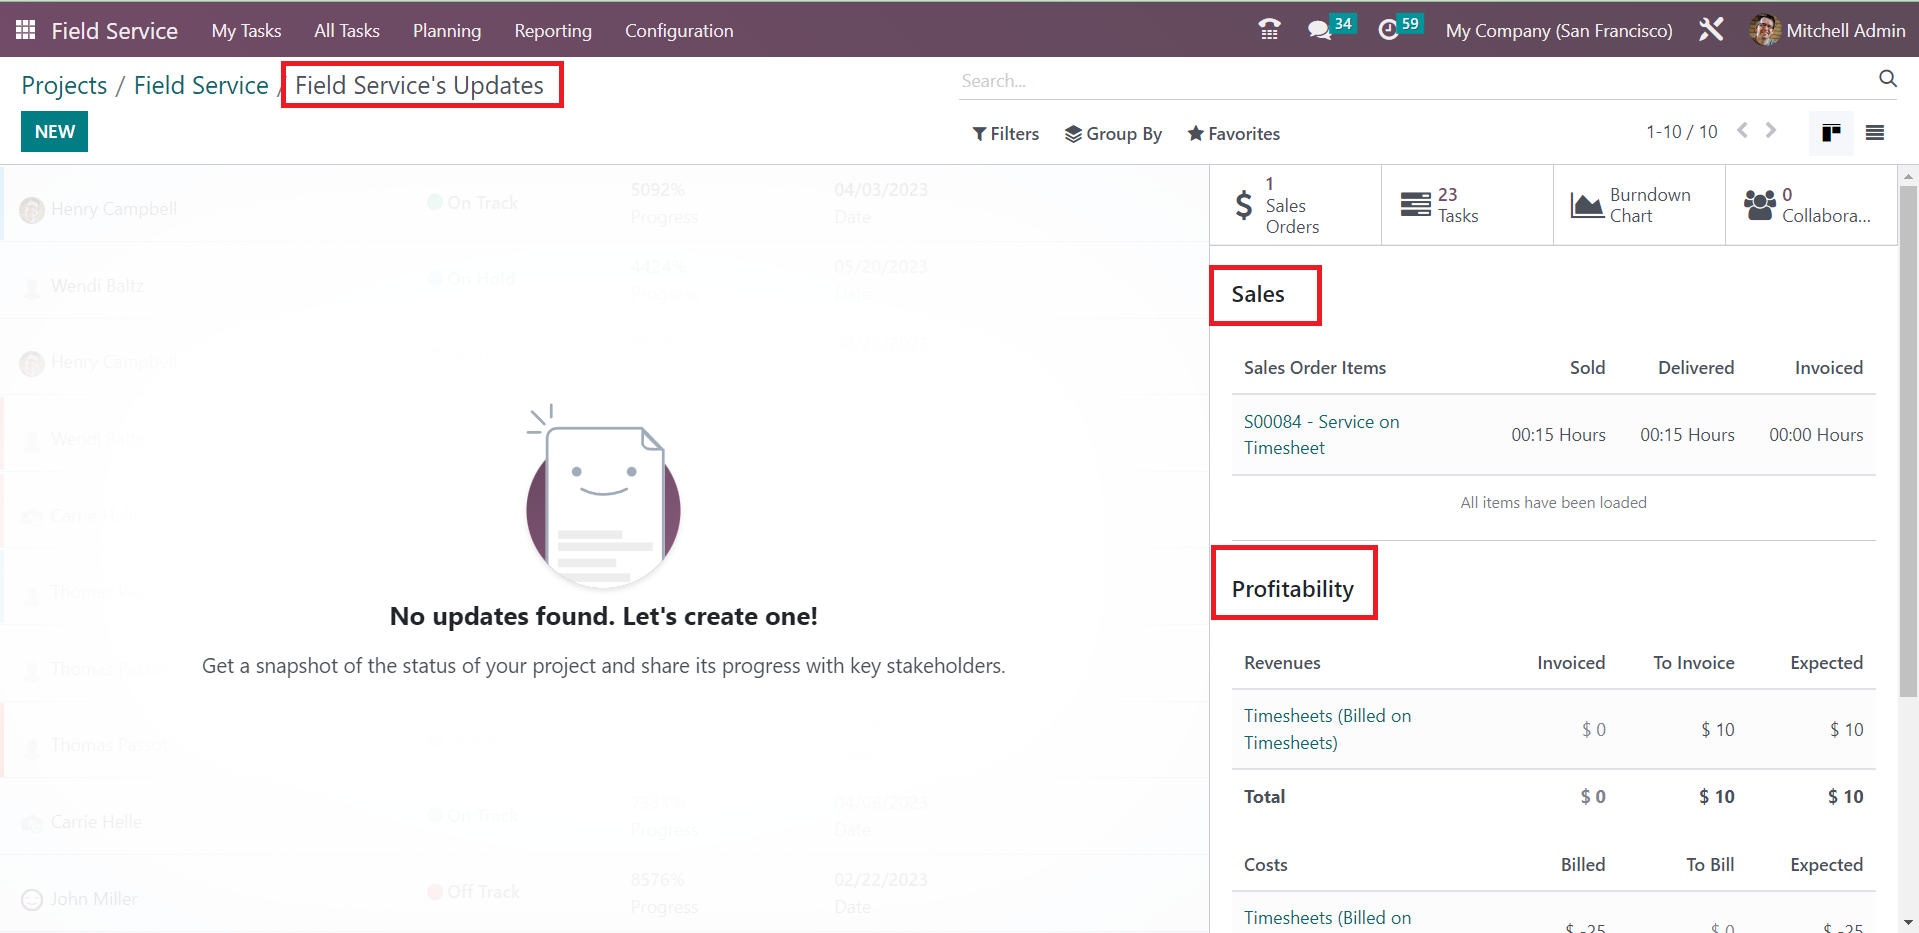
This platform will record the details of the field service’s updates. You can add the status of the project here and share its progress with the stakeholders. On the right side of the screen, you will get the Sales and Profitability details of the project. In order to add the updates to the project, you can use the New button.
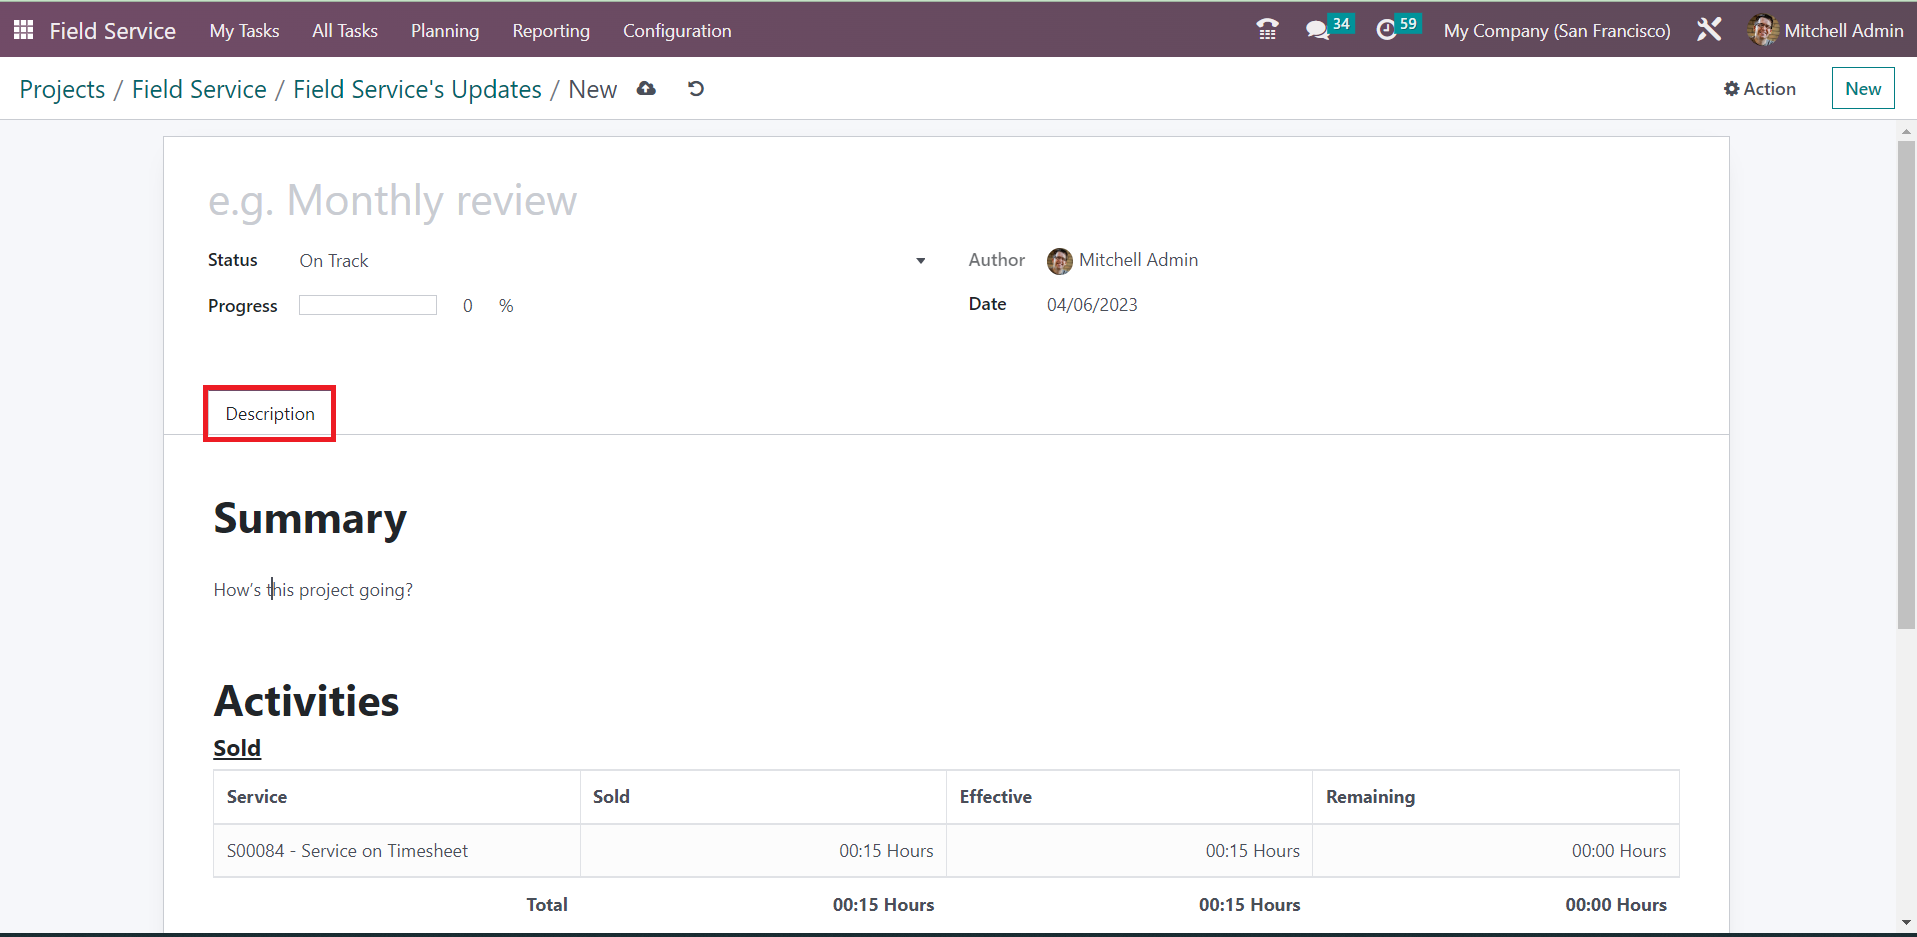
A new window will appear as shown above. Provide a title to the status of the project in the given field. The Status of the project can be selected from the given drop-down menu. In the respective field, you will get the details of the Progress, Author, and Date of the project. You can use the Description tab to add the Summary and Activity details of the project.