Dashboard
The dashboard of the PoS module will give a view of all available point of sale sessions in Odoo. From the dashboard itself, you can easily manage the sessions with the help of the right tools. The screenshot shows the Kanban view of the PoS dashboard. Using the New Session option, you can start a new session for the respective PoS or use the Continue Selling button to proceed with the current session.
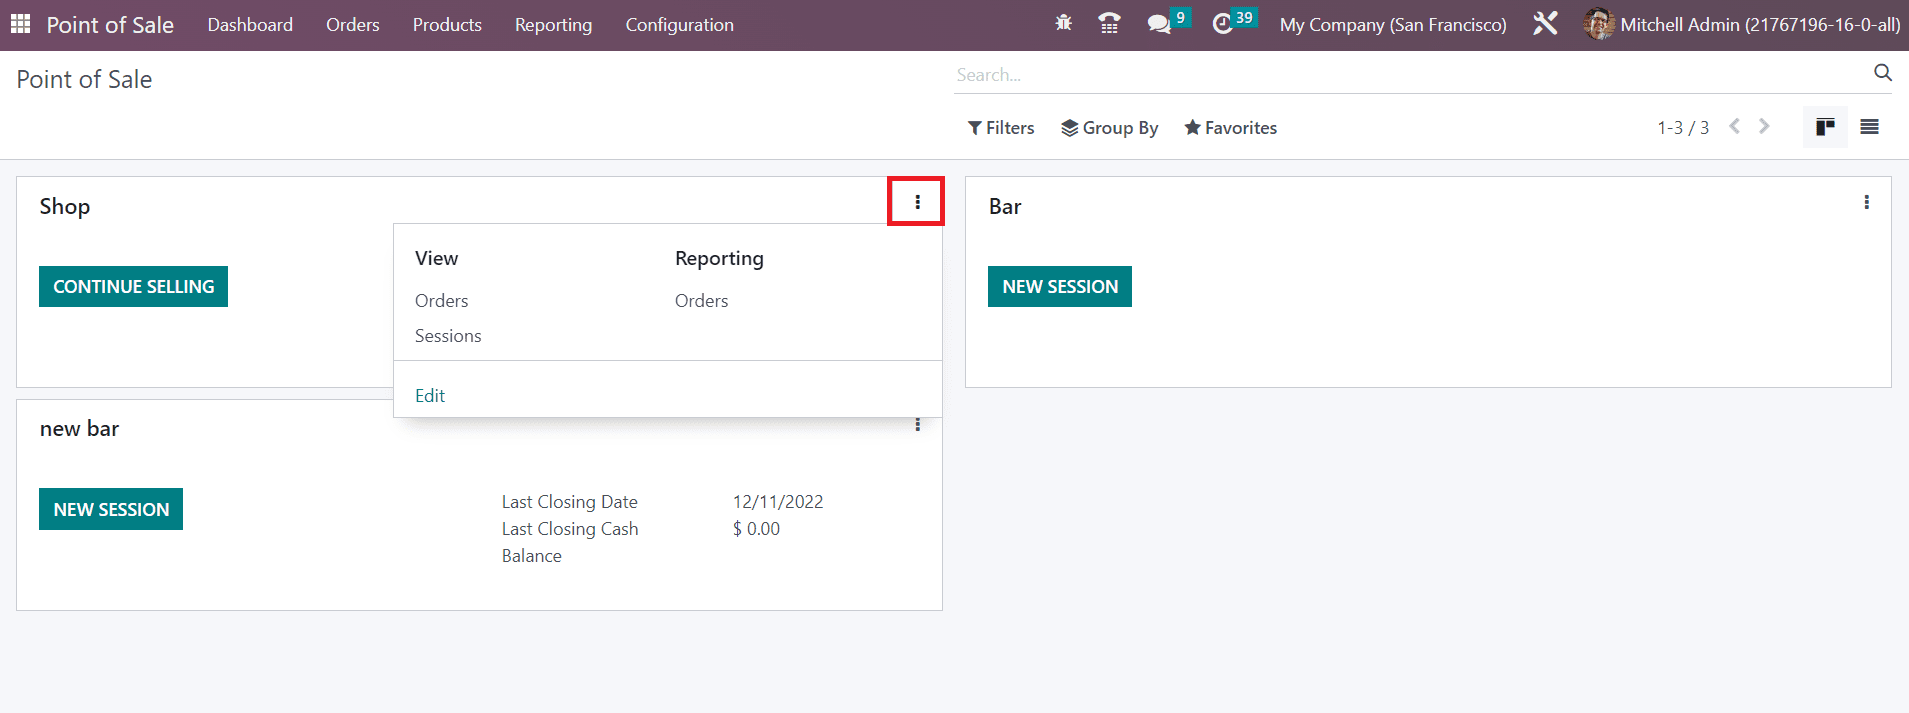
Additional operation tools are available in the menu that appears after clicking the three vertical dots on each session, as highlighted in the image above. Using this menu, you can view the Orders and Sessions of the selected PoS and generate reports on the orders.
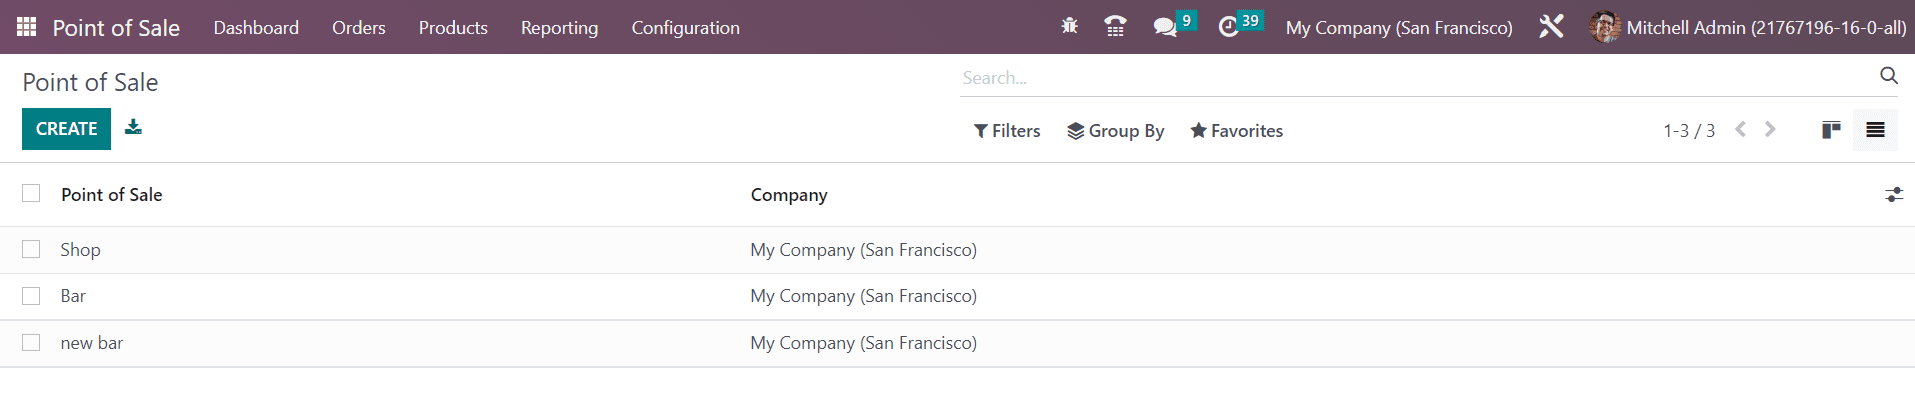
This is the list view of the PoS dashboard. You can click any of the available points of sale to edit the configuration. You can use the Create button to create a new PoS in Odoo.
Odoo will direct you to a new configuration window, as shown below, where you can mention the name of the new Point of Sale in the given space.
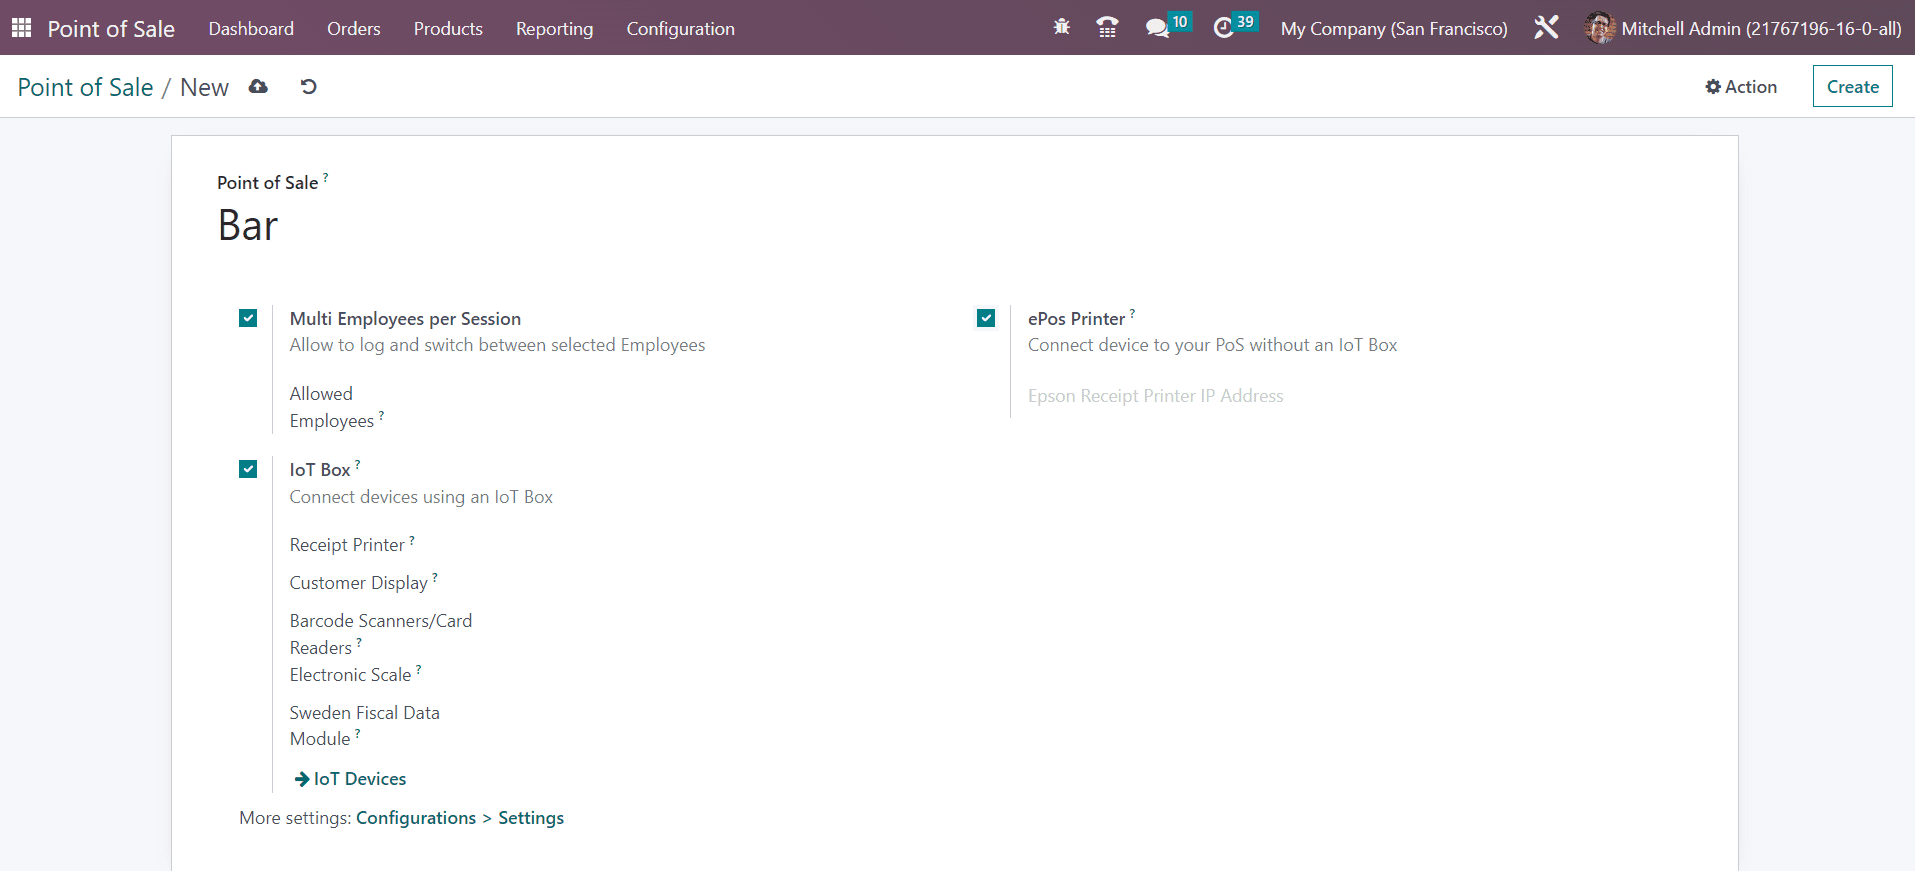
Now, you activate additional features for the new PoS according to your organization’s requirements. If you want to allow multiple employees per session, you can activate the Multi Employees per Session field. This will allow us to log and switch between selected employees in the new PoS. An additional field will appear to mention the names of the allowed employees. These employees can scan their badges or enter their PIN to log into a PoS session.
Activating the IoT Box option will allow you to connect devices using an IoT Box. You can specify the Receipt Printer, Customer Display, Barcode Scanner/Card Readers, Electronic Scale, and Sweden Fiscal Date Module in the respective fields. Using the external link, you can manage the connected IoT Devices. It is possible to connect devices to your PoS without an IoT Box by activating the ePoS Printer field. In the given space, you can mention the IP address of the receipt printer. For more settings, you can click on the Configuration menu and select the Settings option.

You can change the settings of any of the PoS from this window. For this, you can select the required PoS in the Point of Sale field. If you want to create a new shop, use the +New Shop button.
Activate the Is a Bar/Restaurant field, if the new shop falls under any of these categories. In order to improve the navigation for imprecise industrial touchscreens, you can activate the Large Scrollbars option. You can start selling from a default product category by mentioning it in the given field after activating the Start Category option. You can also restrict particular product categories using the Restrict Categories feature.
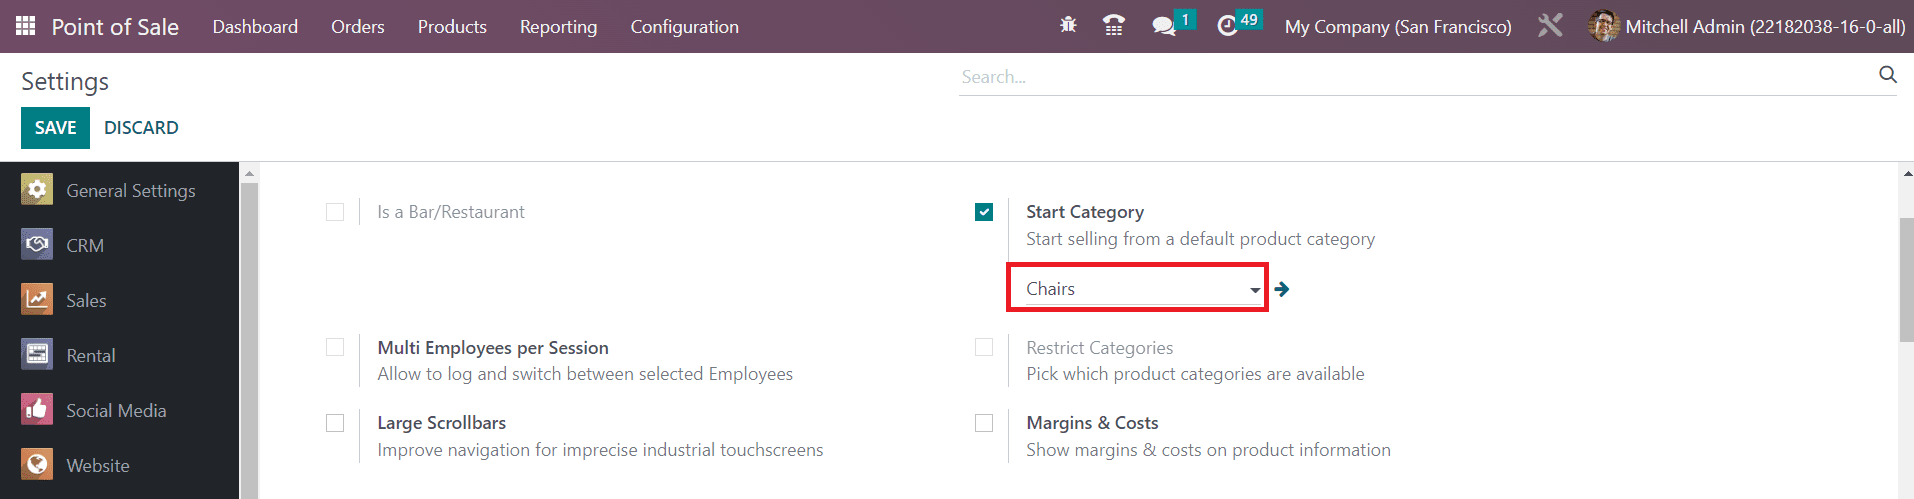
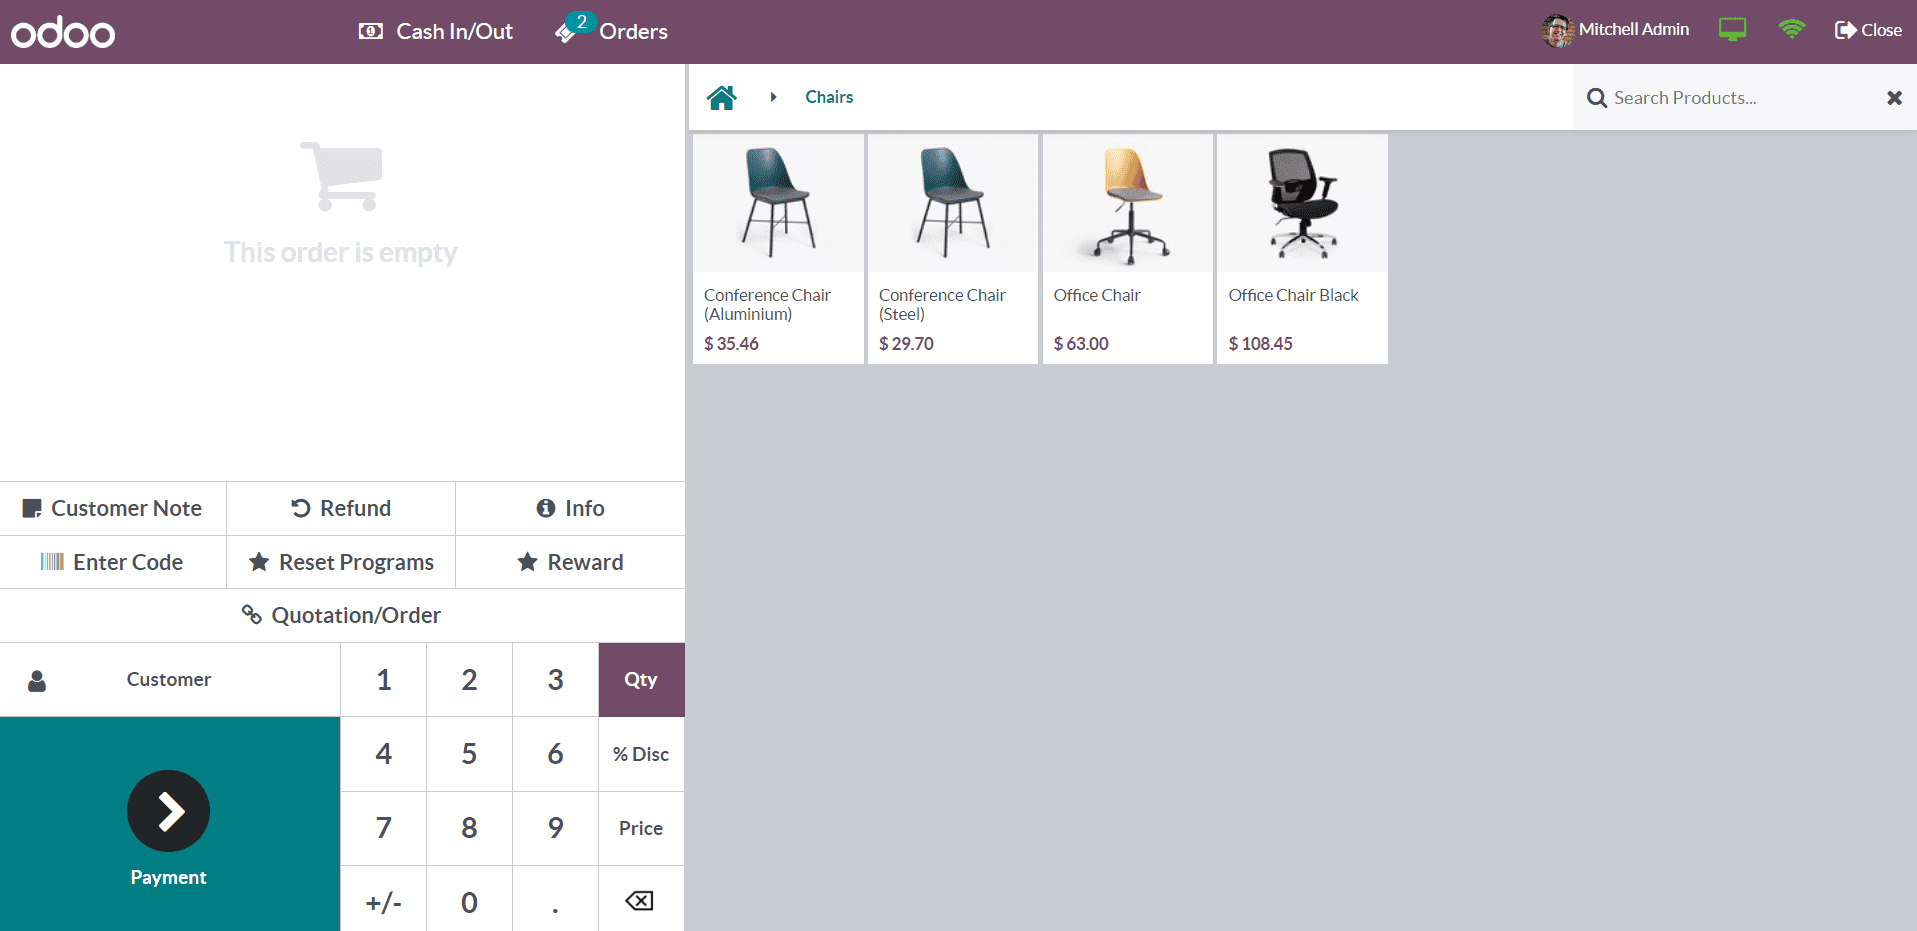
For example, set the product category Chairs as the Start Category. After opening the respective session, the product category Chairs will appear on the point of sale dashboard as default to start the sale as shown below.
Enabling the Margins & Costs feature will show margins & costs on product information in POS.
From the Restaurant & Bar tab, you will be able to get access to design floors and assign orders to tables using the Floors & Tables Map feature. An external link will be available here to manage the Floors of the shop.

If you want to allow printing receipts before payment, activate the Early Receipt Printing option. This option will allow you to print receipts before payment.
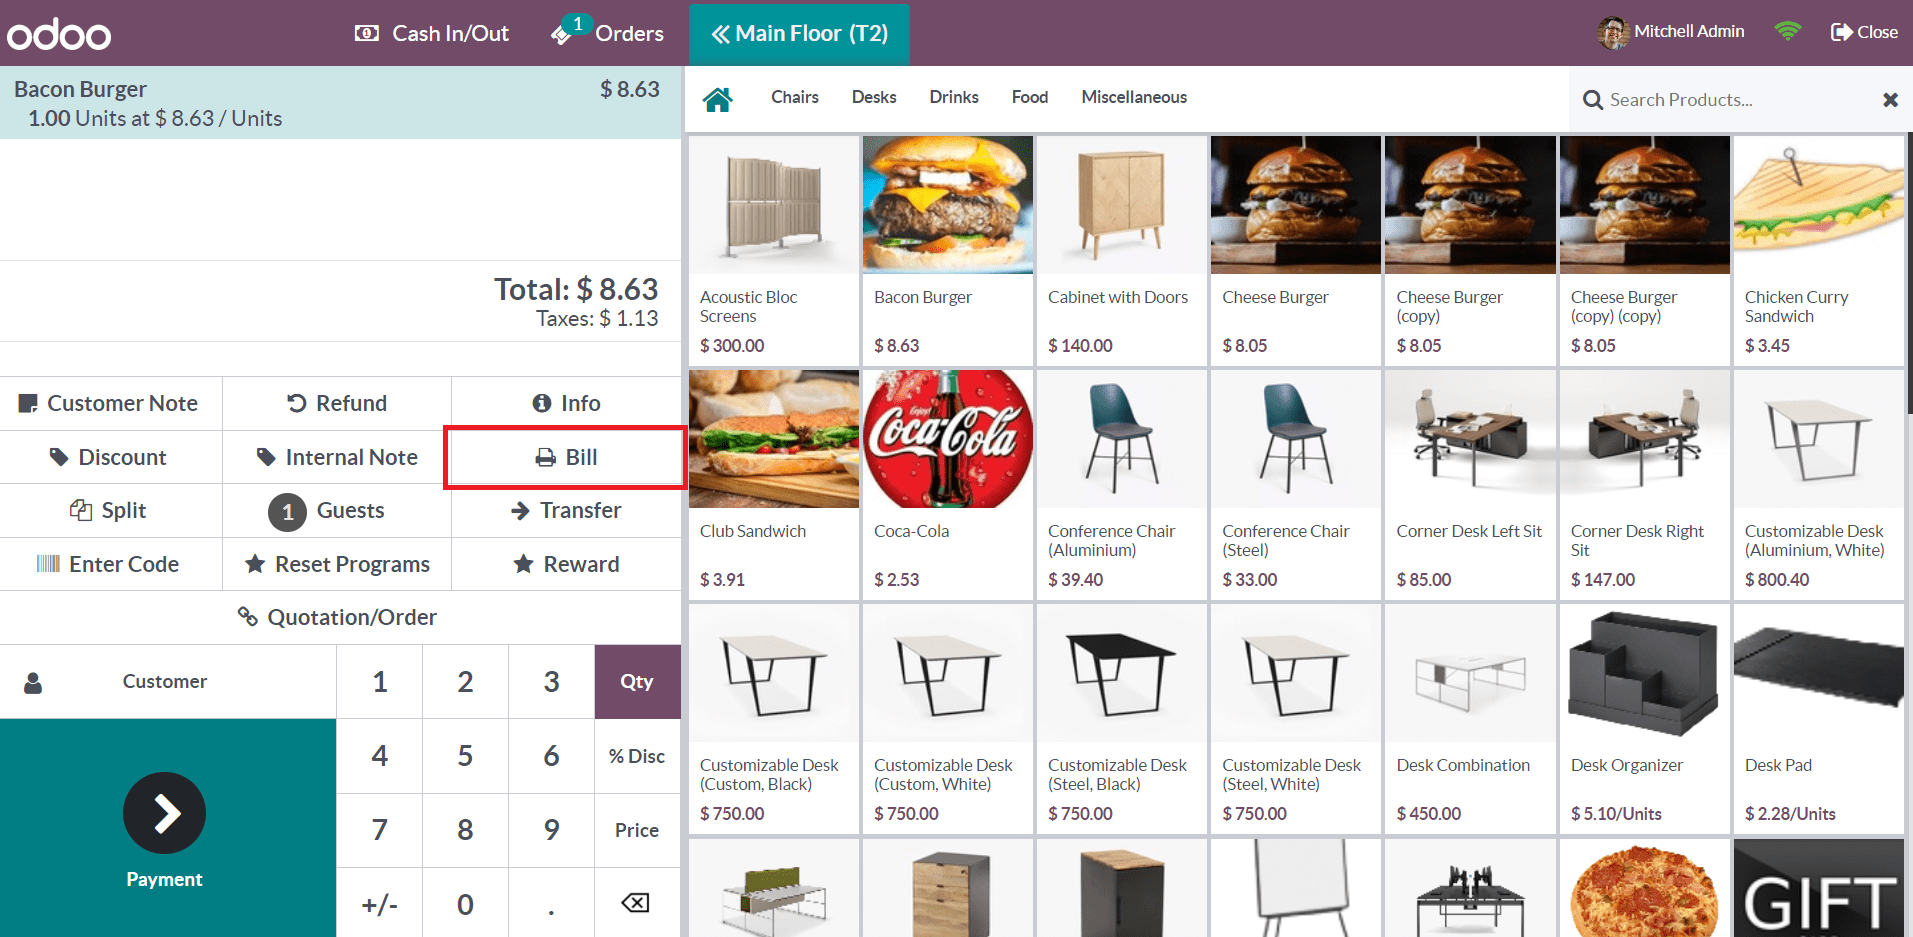
Using the Bill option, you can generate a receipt for the order before payment.
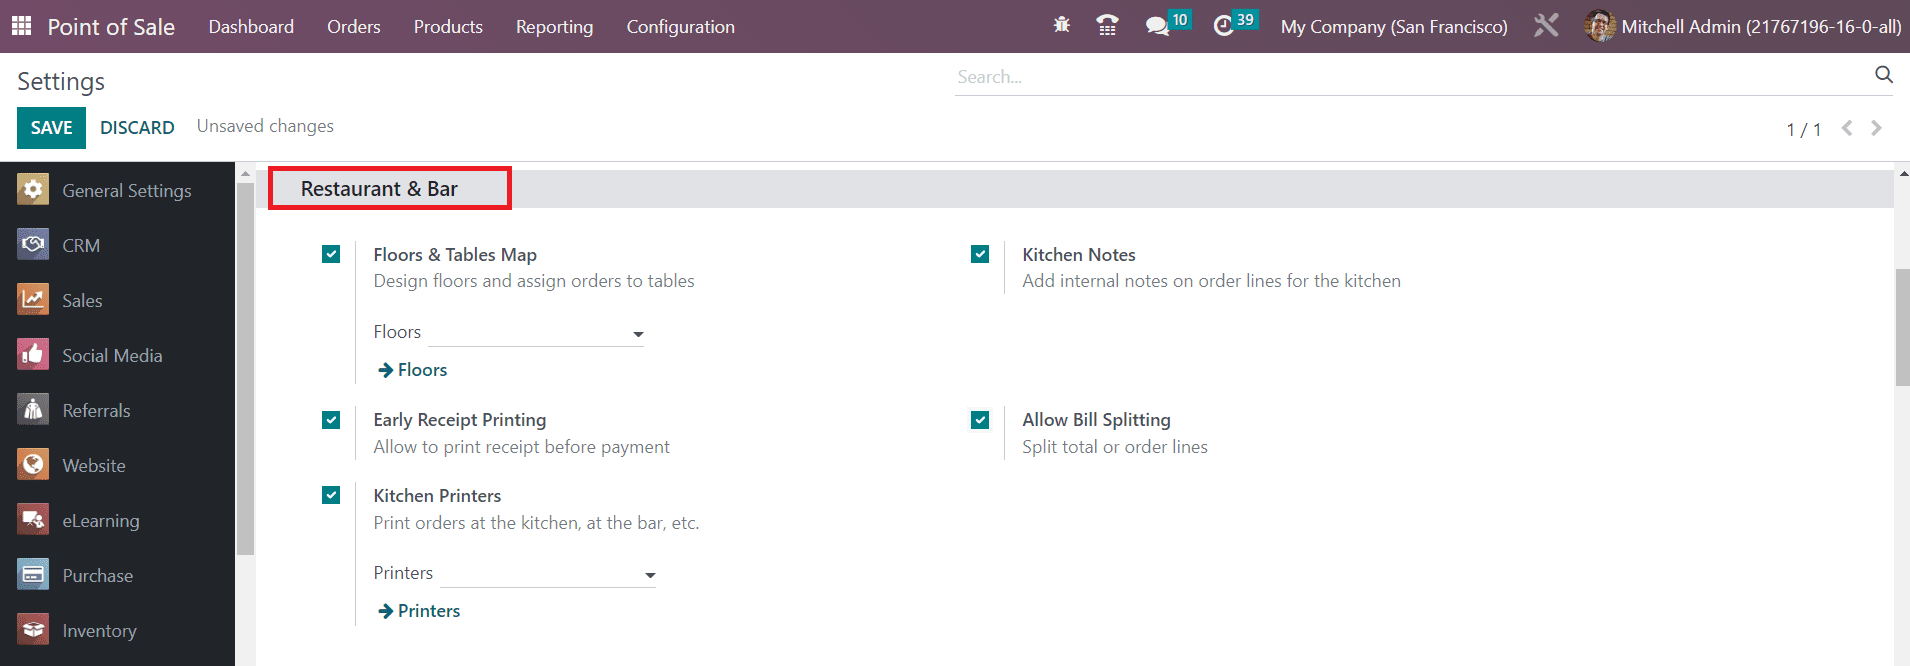
You can print orders at the kitchen, bar, etc, by enabling the Kitchen Printers field. In the Printers field, you can specify the corresponding printer. Activating the Kitchen Notes will allow you to add internal notes on order lines from the kitchen. It is possible to split the total amount or order lines by enabling the Allow Bill Splitting feature.
The Default Sales Tax for the products in the PoS can be defined in the Accounting tab. This sales tax is applied to any new products created in the catalog. In order to manage the available sales taxes, you can use the external link given in this tab.
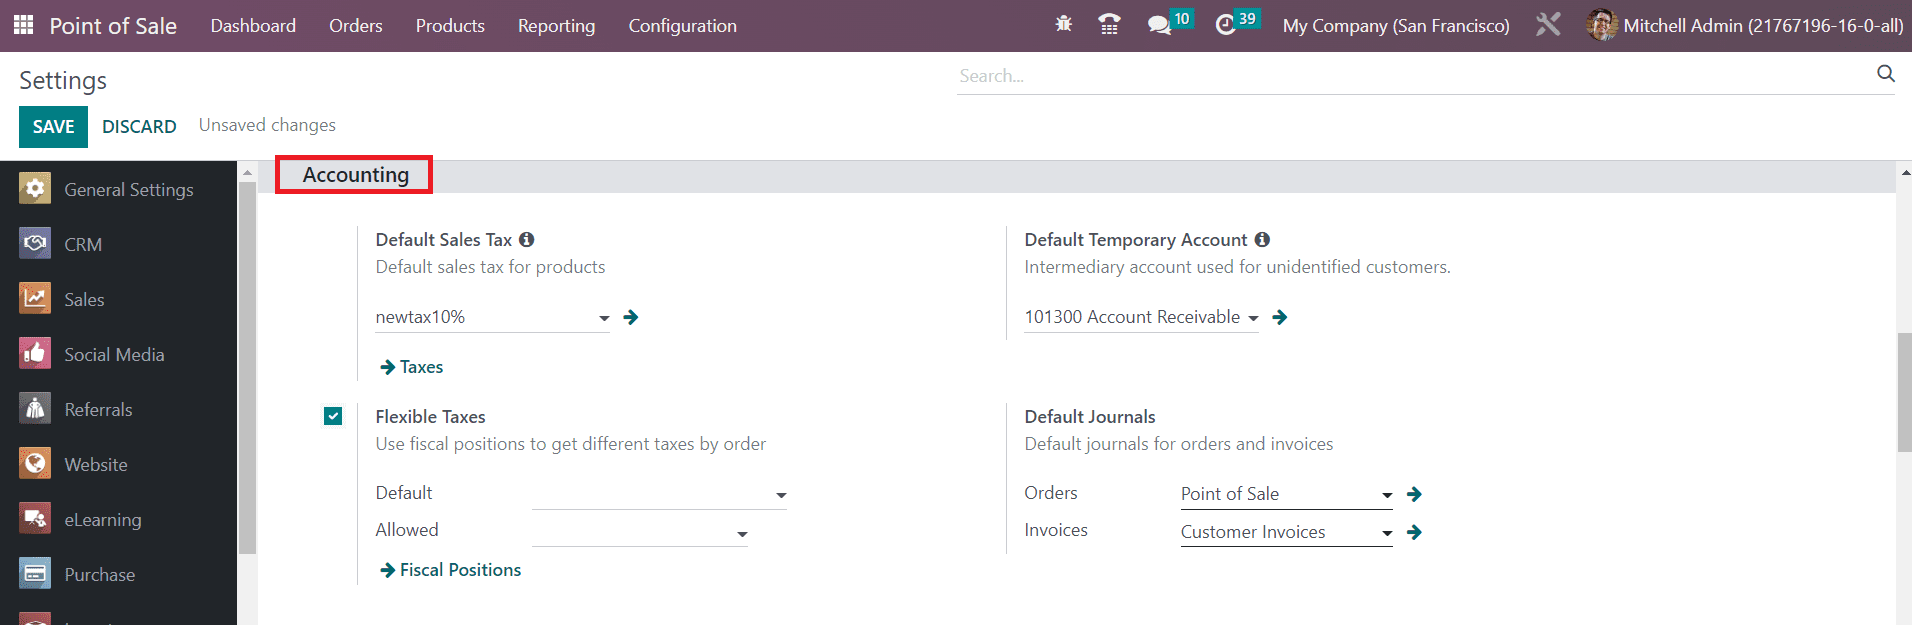
Activating the Flexible Taxes allows you to choose a specific fiscal position at the order depending on the kind of customer. In the Default Temporary Account field, you can specify the intermediary account used for unidentified customers. The default journal used for orders and invoices can be defined in the Default Journals field.
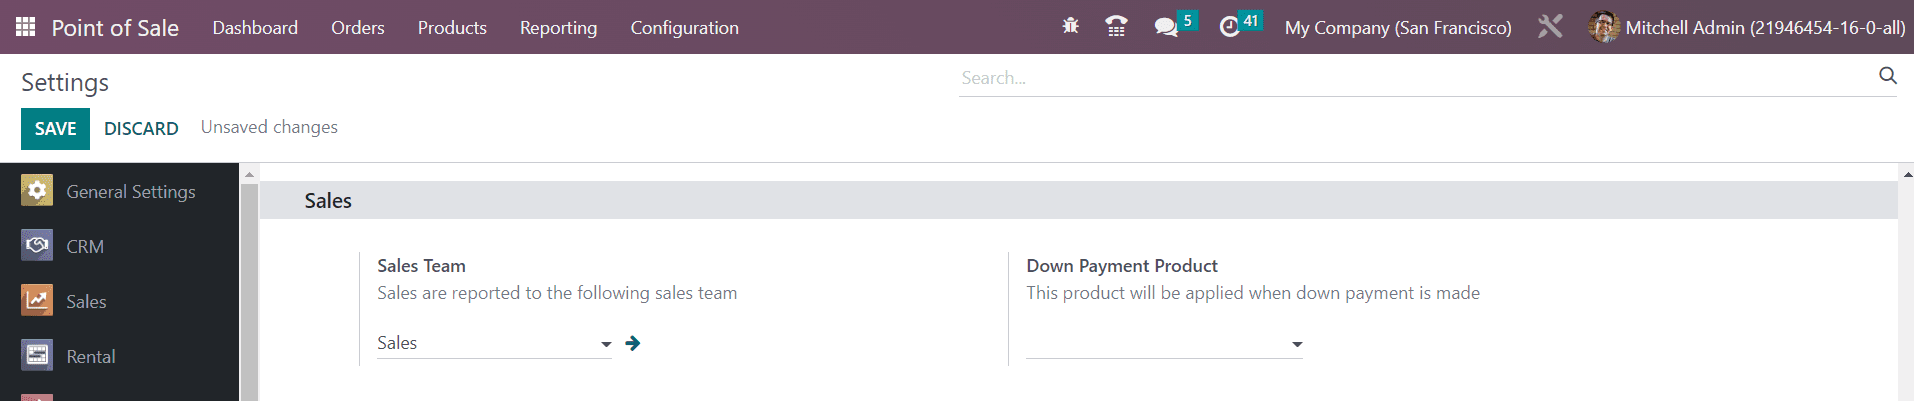
Under the Sales tab, you can assign a sales team for this new PoS and the sales will be reported to the mentioned sales team. In the Down Payment Product field, you can mention a product and this product will be applied when a down payment is made.
By activating the Flexible Pricelists, Odoo allows you to decide the pricelists used for products in this PoS. It can be either based on Multiple prices per product or Advanced price rules. The available and default pricelist can be specified in the given spaces. The Product Prices on the receipts can be set as Tax-Excluded Price or Tax-Included Price.
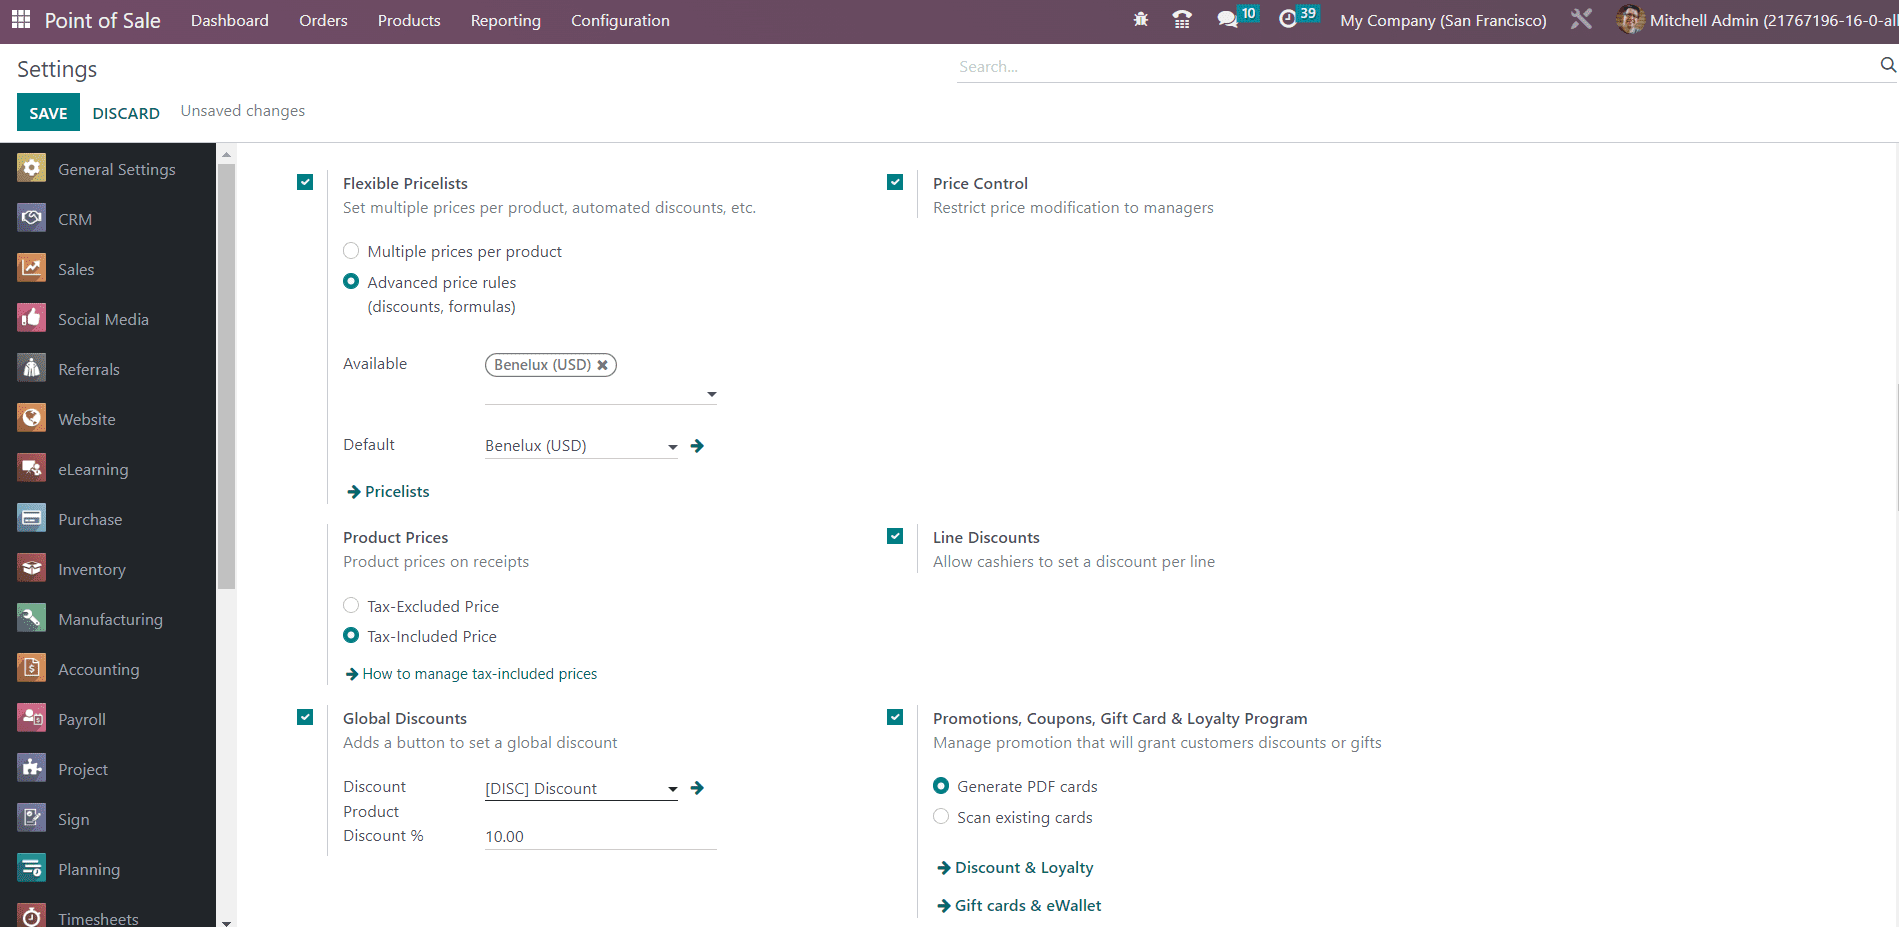
You can add a button to set a global discount on products by activating the Global Discounts feature. You can mention the Discount Product and Discount Percentage in the given fields. You can restrict the price modification to the manager only by activating the Price Control option. By doing so, only users with Manager access rights for the PoS app can modify the product prices on orders. Odoo will allow cashiers to set a discount per line after activating the Line Discount option. You can boost your sales by providing multiple offers to your customers. For this, you can activate the Promotion, Coupons, Gift Cards & Loyalty Program button.
In order to add a custom message to the header and footer of the receipts and bills, activate the Custom Header & Footer feature. You will get additional fields to specify the notes that you want on the header and footer of the receipts and bills.

The Automatic Receipt Printing feature helps you to print receipts automatically once the payment is registered. Activating the Use QR Code on Ticket will print a QR code on the receipt to allow the user to easily request the invoice for an order.
The payment methods available on this PoS can be specified in the Payment Method field. By enabling the Set Maximum Difference field, you can set a maximum difference allowed between the expected and counted money during the closing of the session. The allowed difference can be defined in the Authorized Difference field.
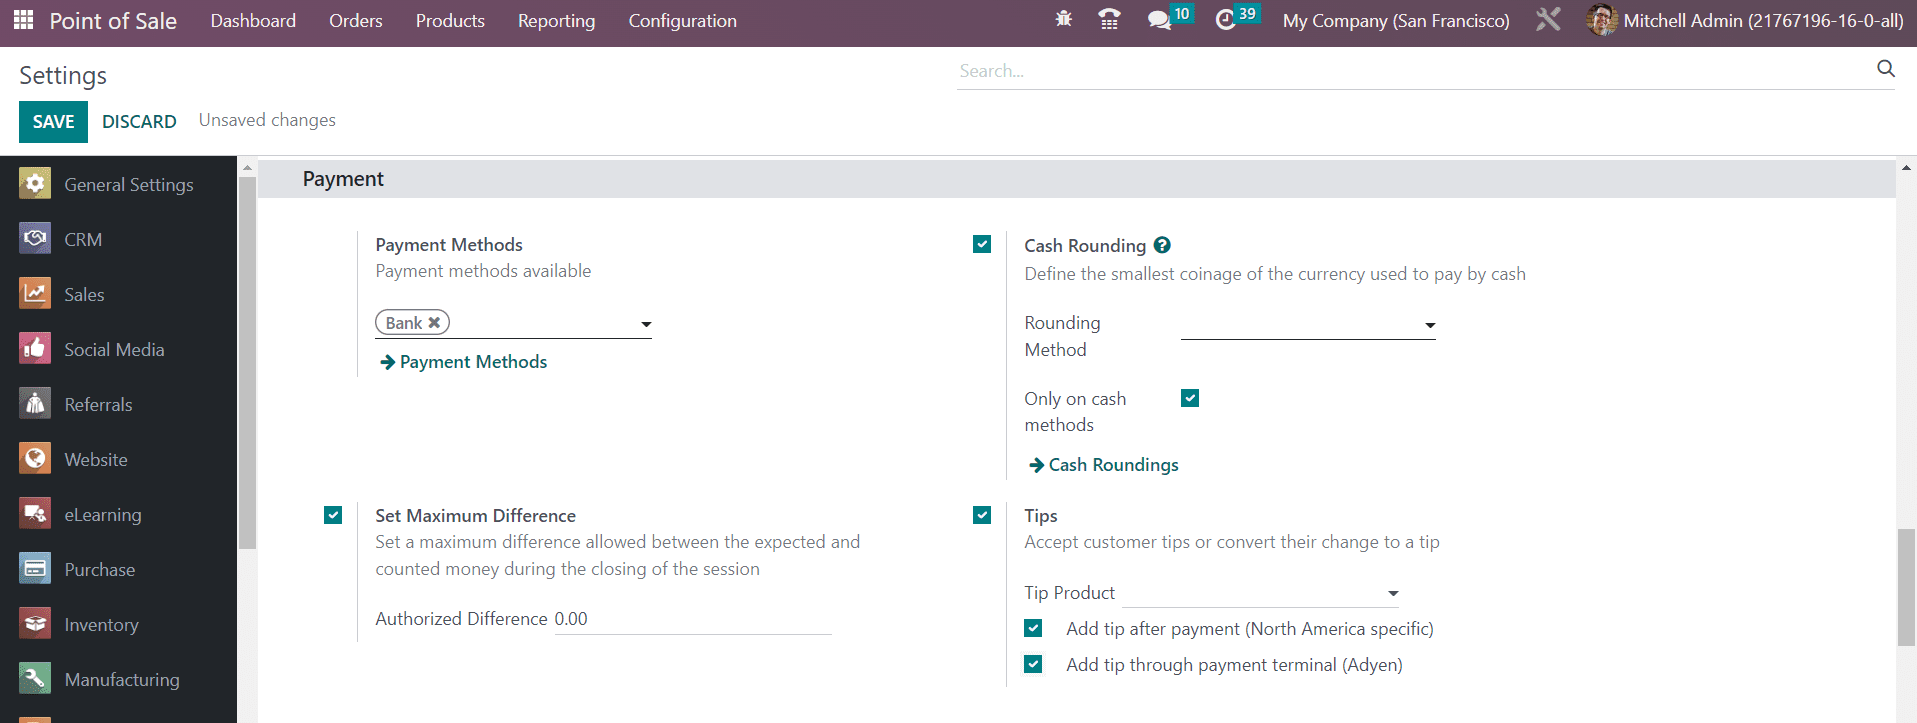
You can define the smallest coinage of the currency used to pay by cash by enabling the Cash Rounding feature. In order to accept customer tips or convert their change to a tip, you can use the Tips option. Specify the Tip Product in the respective field, which is used as a reference on customer receipts.
The payment terminals available in the Odoo Point of Sale module can be observed under the Payment Terminals tab. You can activate suitable payment terminals from here for your new PoS.
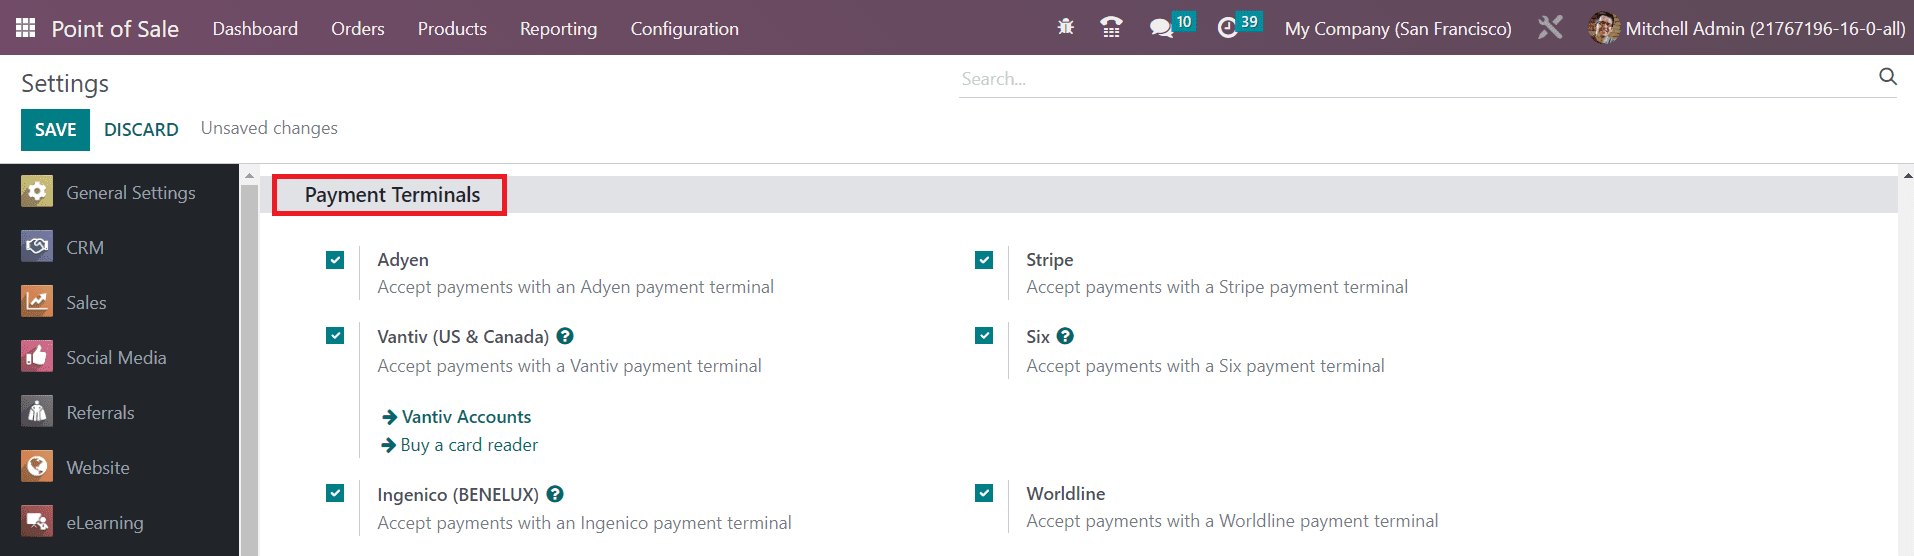
Odoo allows you to accept payment through Adyen, Vantiv (US & Canada), Ingenico (BENELUX), Stripe, Six, and Worldline payment terminals based on the option you activate here.
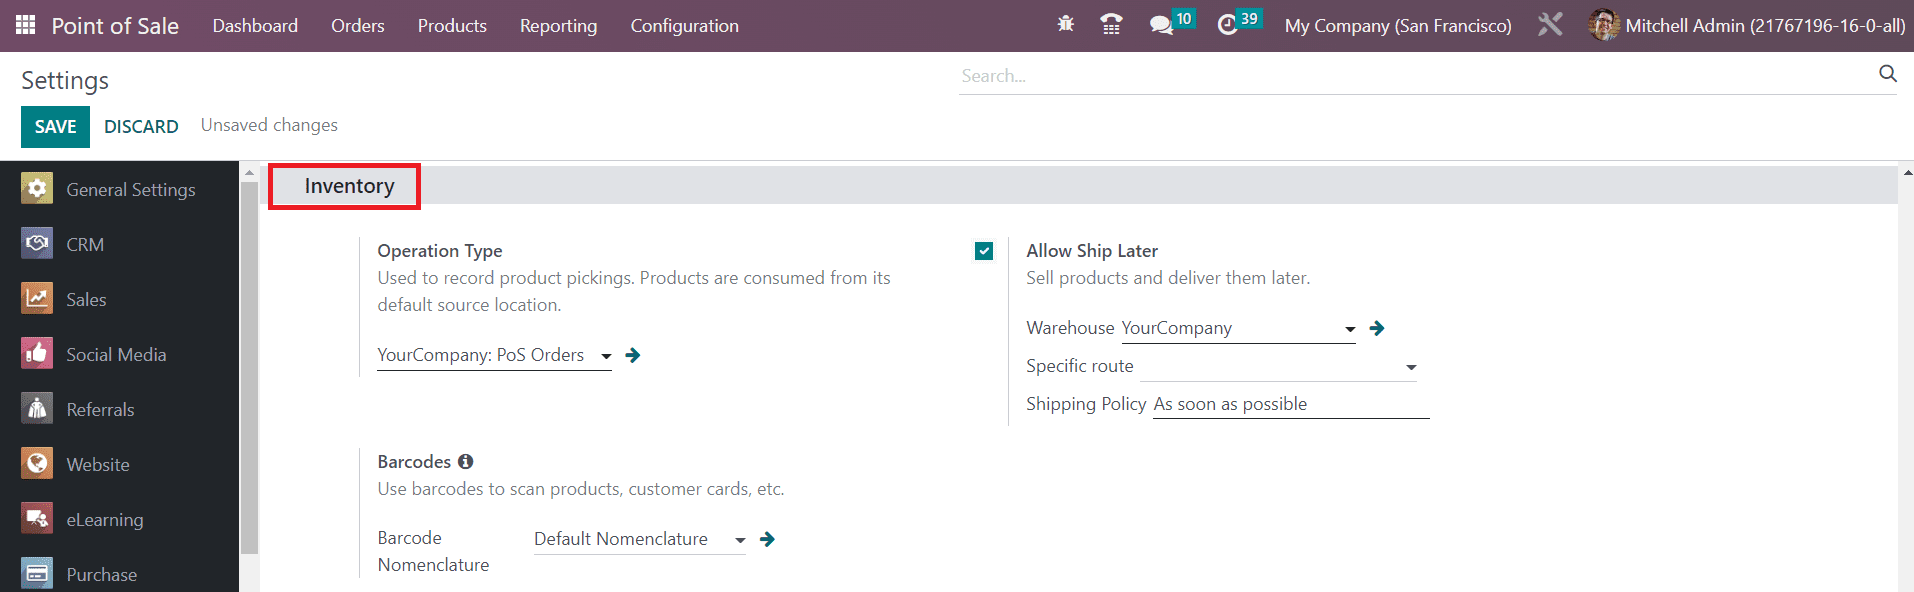
Under the Inventory tab, you can specify the Operation Type used to record the product pickings. You can use barcodes in PoS for scanning products, customer cards, etc, by mentioning the Barcode Nomenclature in the given space.
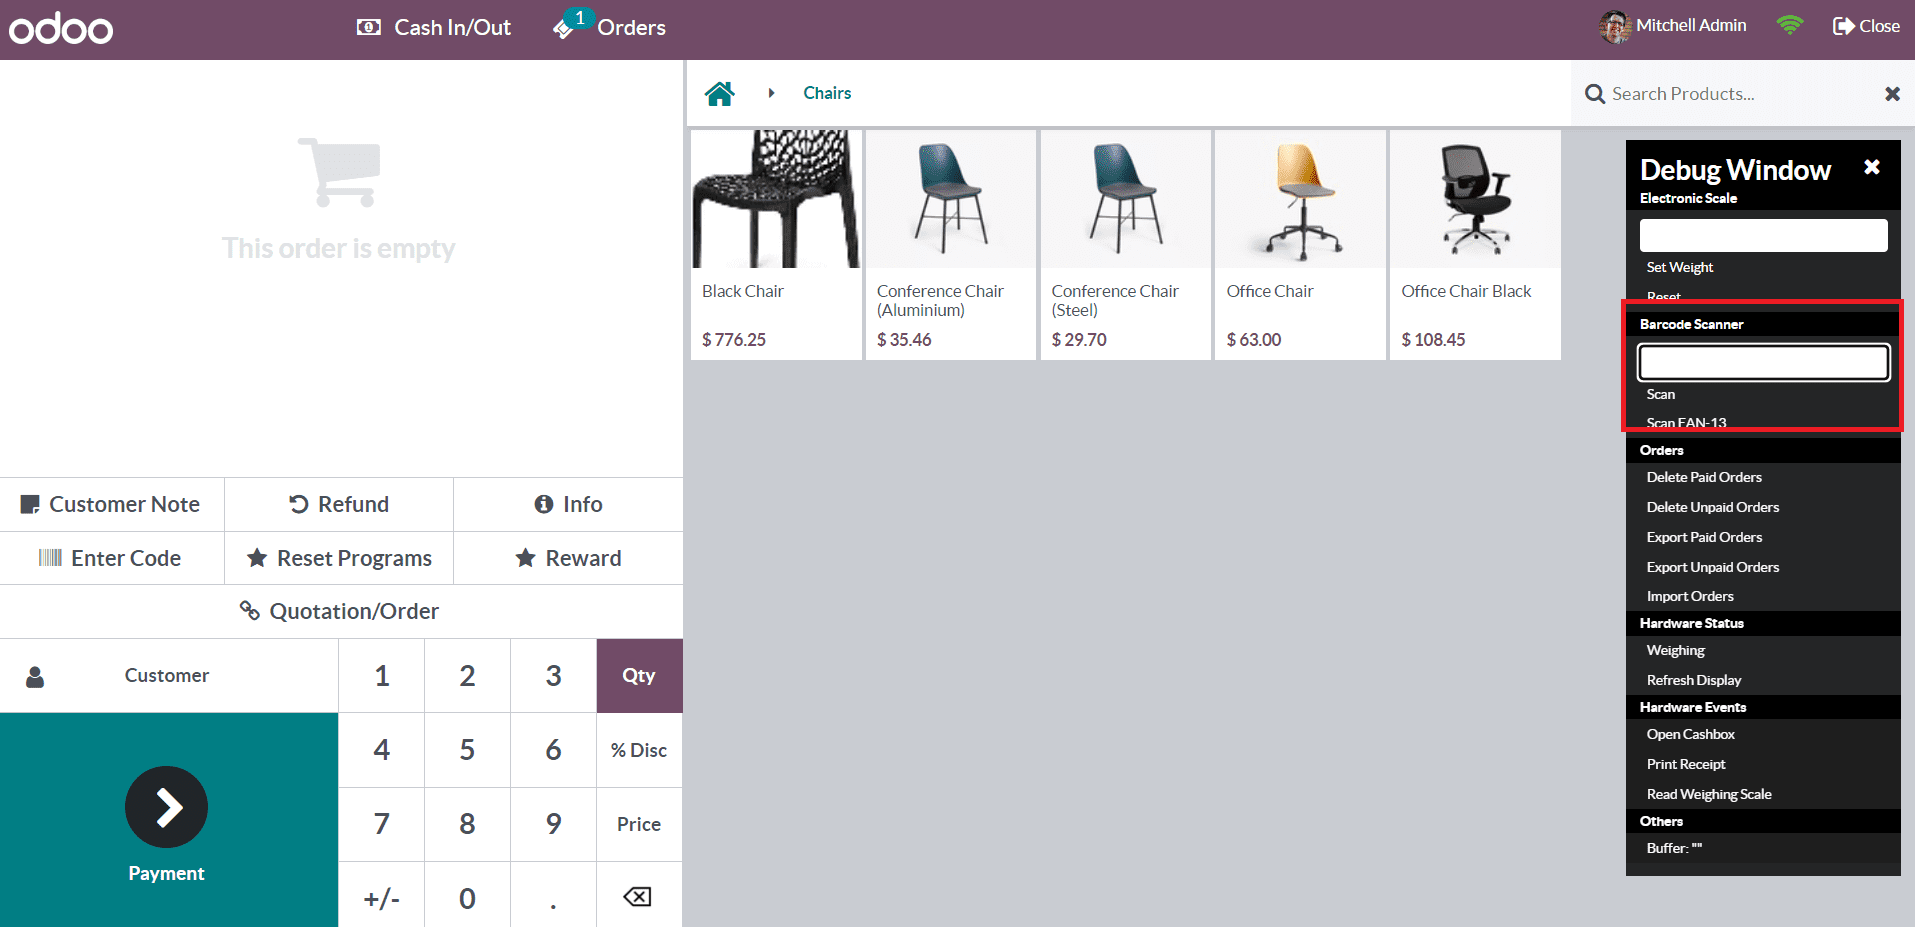
You can make the processes in the PoS faster using the Barcodes. Once you activate the developer mode, you will get a debug window on the PoS interface as shown below. You can use this window to manually enter the barcode of the product.
It is possible to sell products first and deliver them later in your PoS session by activating the Allow Ship Later feature.

By enabling this feature, you are requested to mention the Warehouse, Specific route, and Shipping Policy of such products in the respective fields.
The Technical tab can be used to mention the Inventory Management details of this PoS. Here, you can decide when to update the quantities in the stock. You can set it as At the Session Closing or In Real Time as per your need.
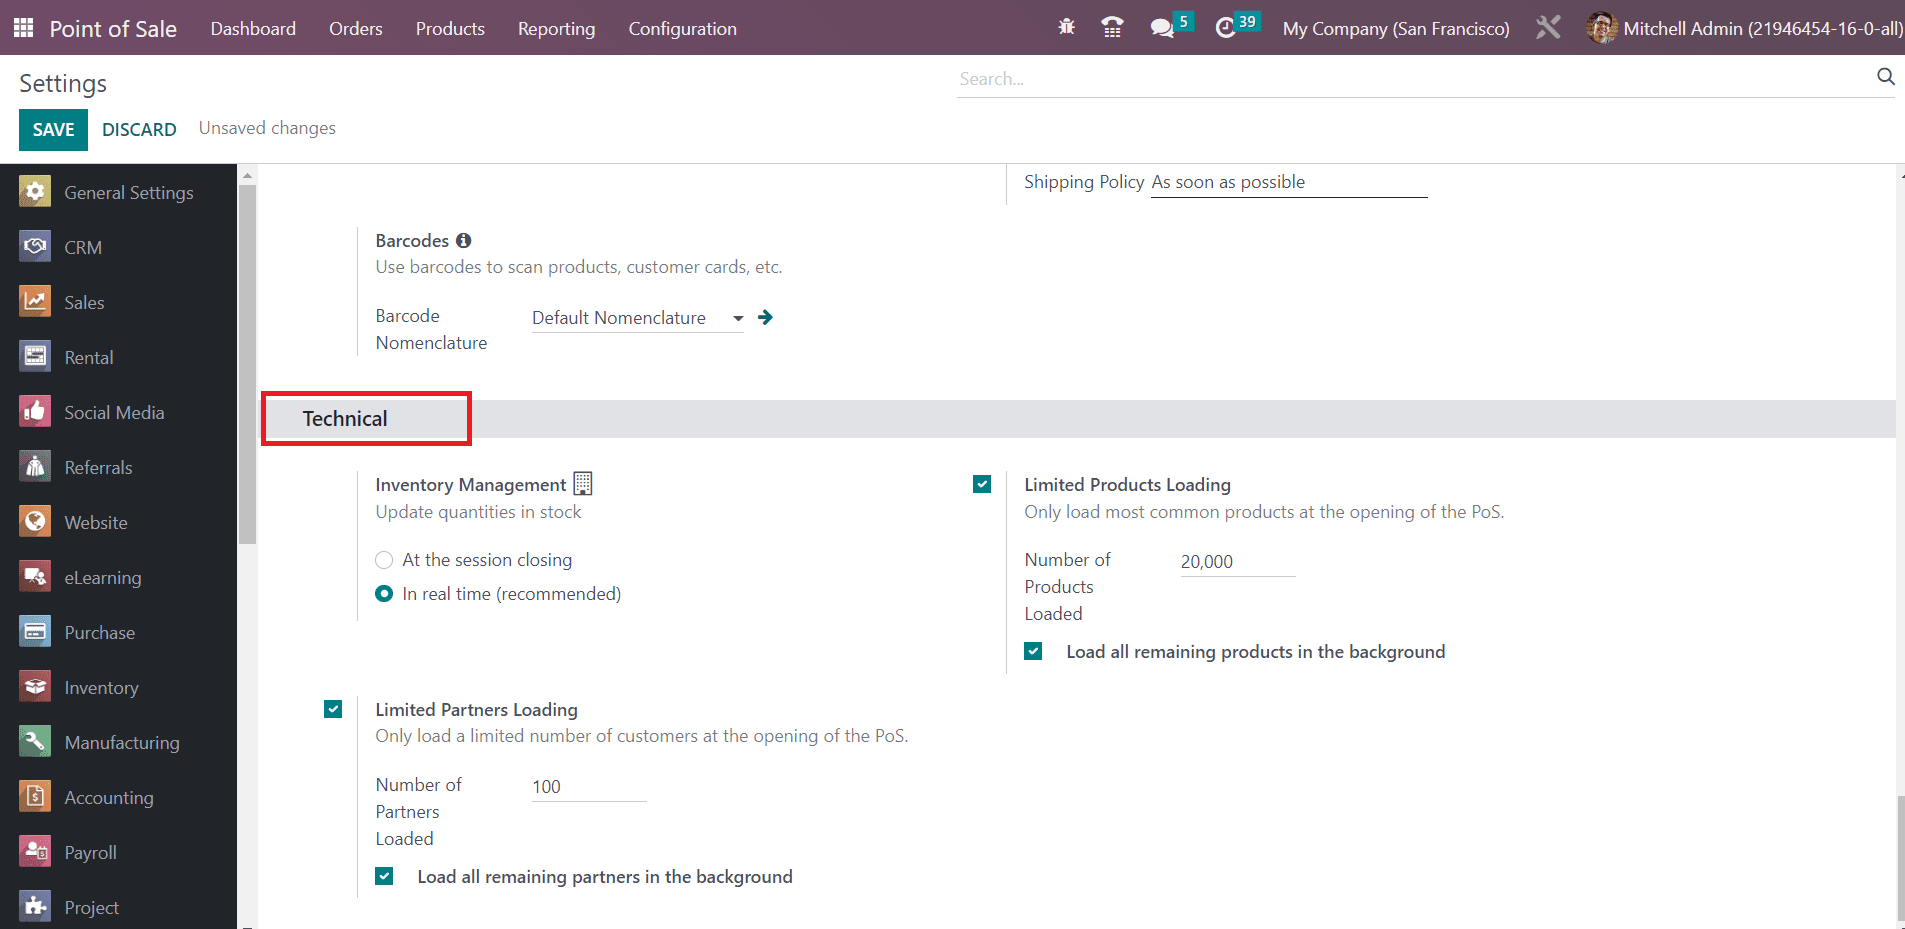
Activating the Limited Partners Loading option will only load a limited number of customers at the opening of the PoS. You will get an additional field to specify the particular number of customers. In order to load all remaining customers in the background, you can enable the corresponding option. Similarly, activating the Limited Products Loading feature will only load a limited number of products at the opening of the PoS. Here, you can set the number of products that you want to load when you open your PoS session. Finally, use the Save button to save all new changes.
When you check the Dashboard of your PoS module, you can see the newly created PoS there as shown in the screenshot below.
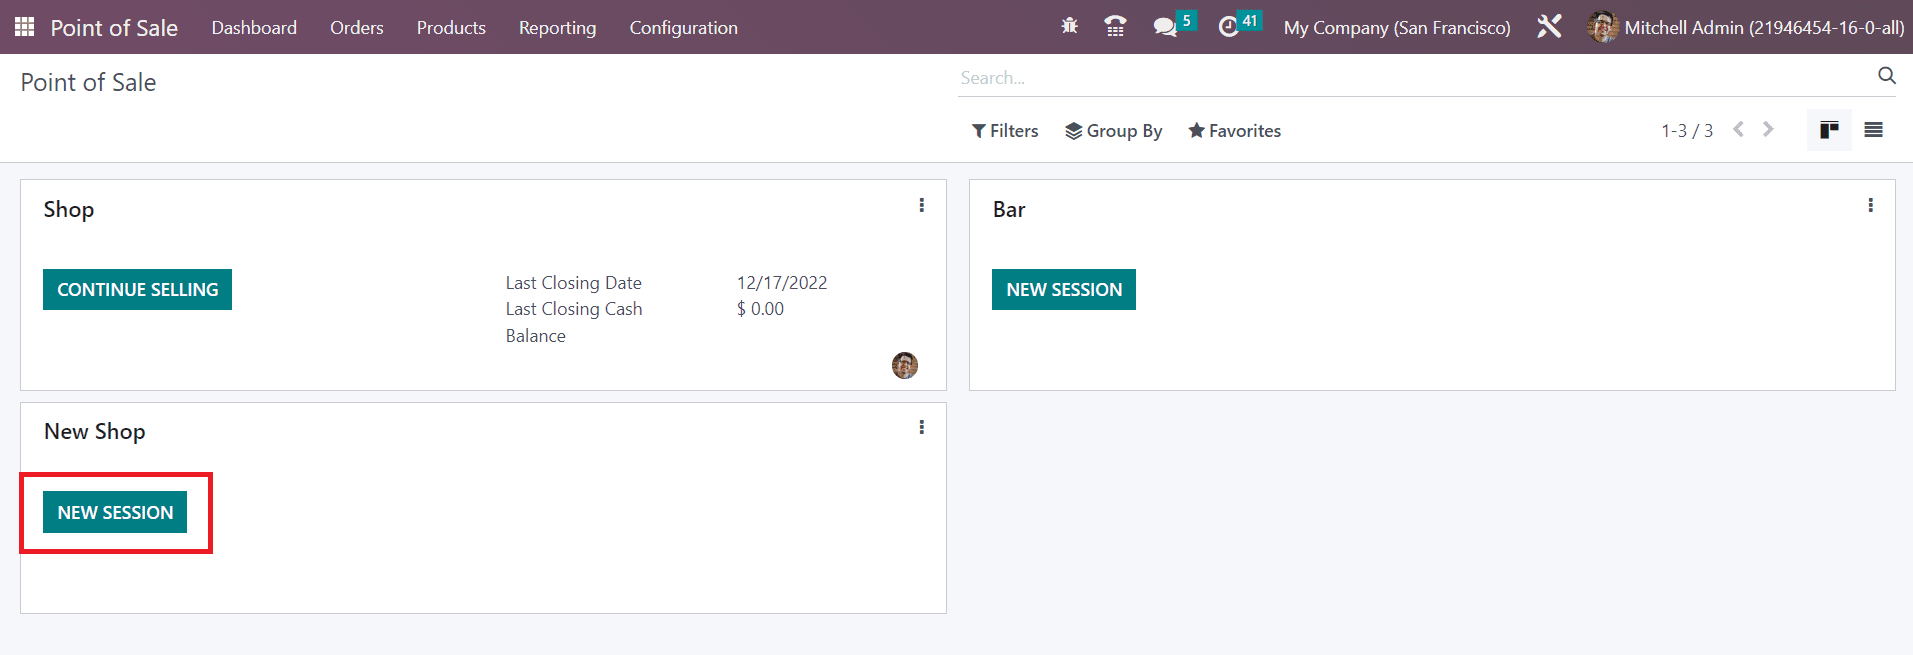
Clicking on the New Session button, you can start a new session for your newly created PoS.