Orders
By starting a new session, you will be able to take orders and record them with the assistance of the Odoo 16. The products, product variants, and product attributes for the PoS can be configured in the Point of Sales module just as we did in the Sales module. We already discussed product configuration in Odoo in detail in the Sales chapter. If you have any doubts related to the configuration of a product in Odoo 16, you can check this chapter. Sales - Odoo 16 Enterprise Book
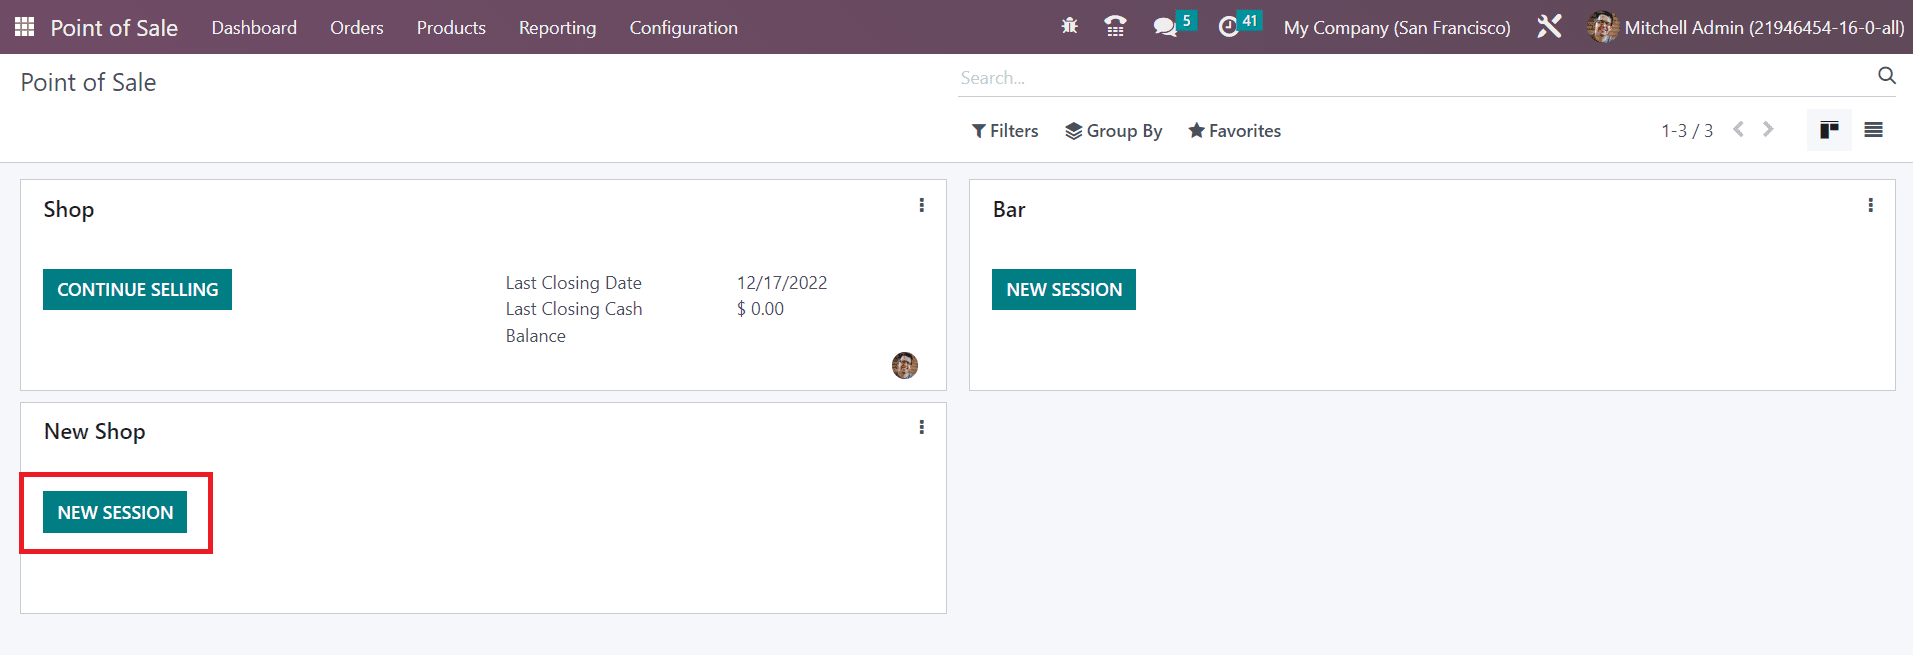
Now, click the New Session button to start taking orders.
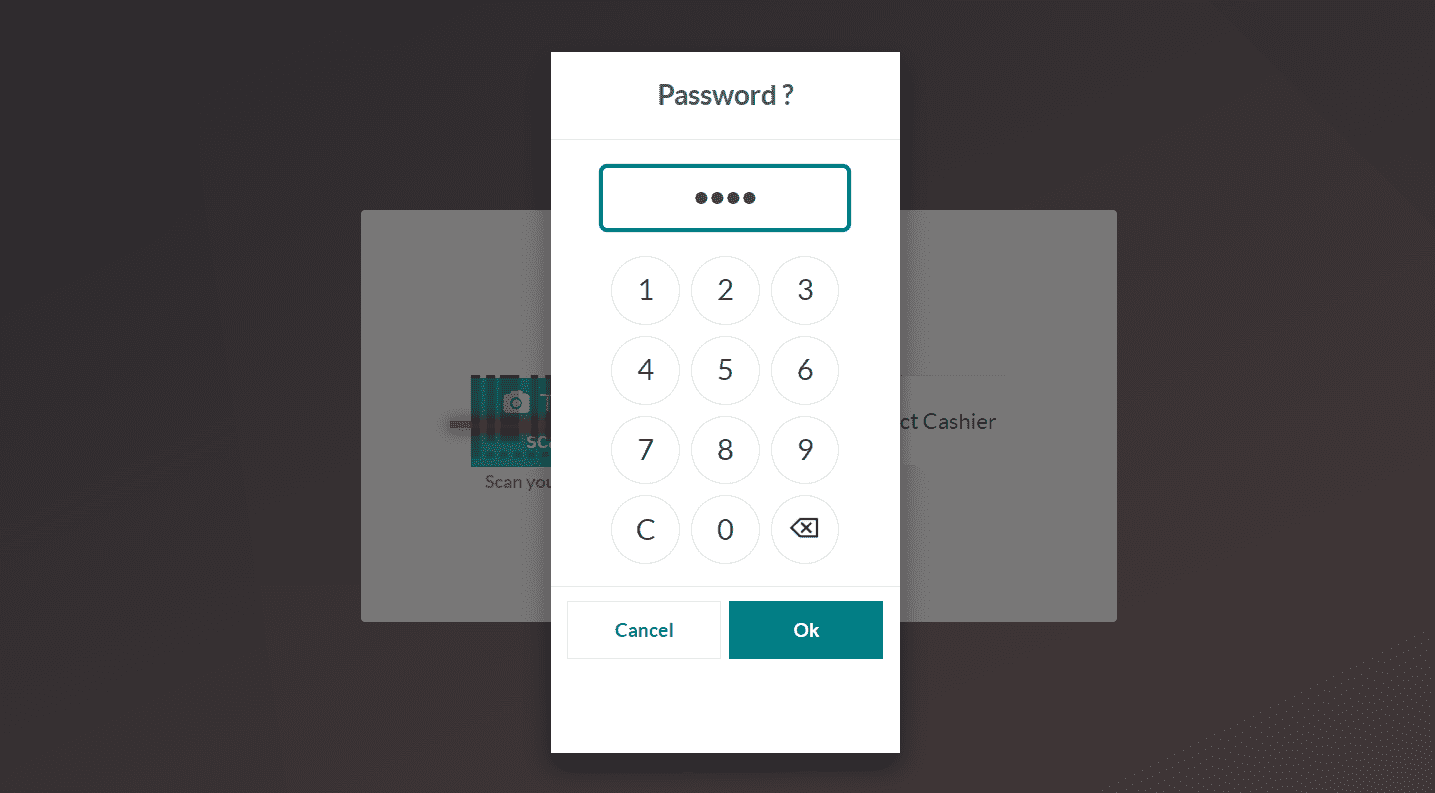
This will lead you to a new window where you will be asked to scan your badges or select a cashier to log in to the new shop.

You can use your employee badge or employee PIN Code to log in to a new session. While creating the record of an employee in the Employees module, the assigned officer or HR will provide a unique pin for each employee which can be used to log in to various platforms like attendance and point of sale. It will be available under the HR Settings tab of the Employee form view as shown below.
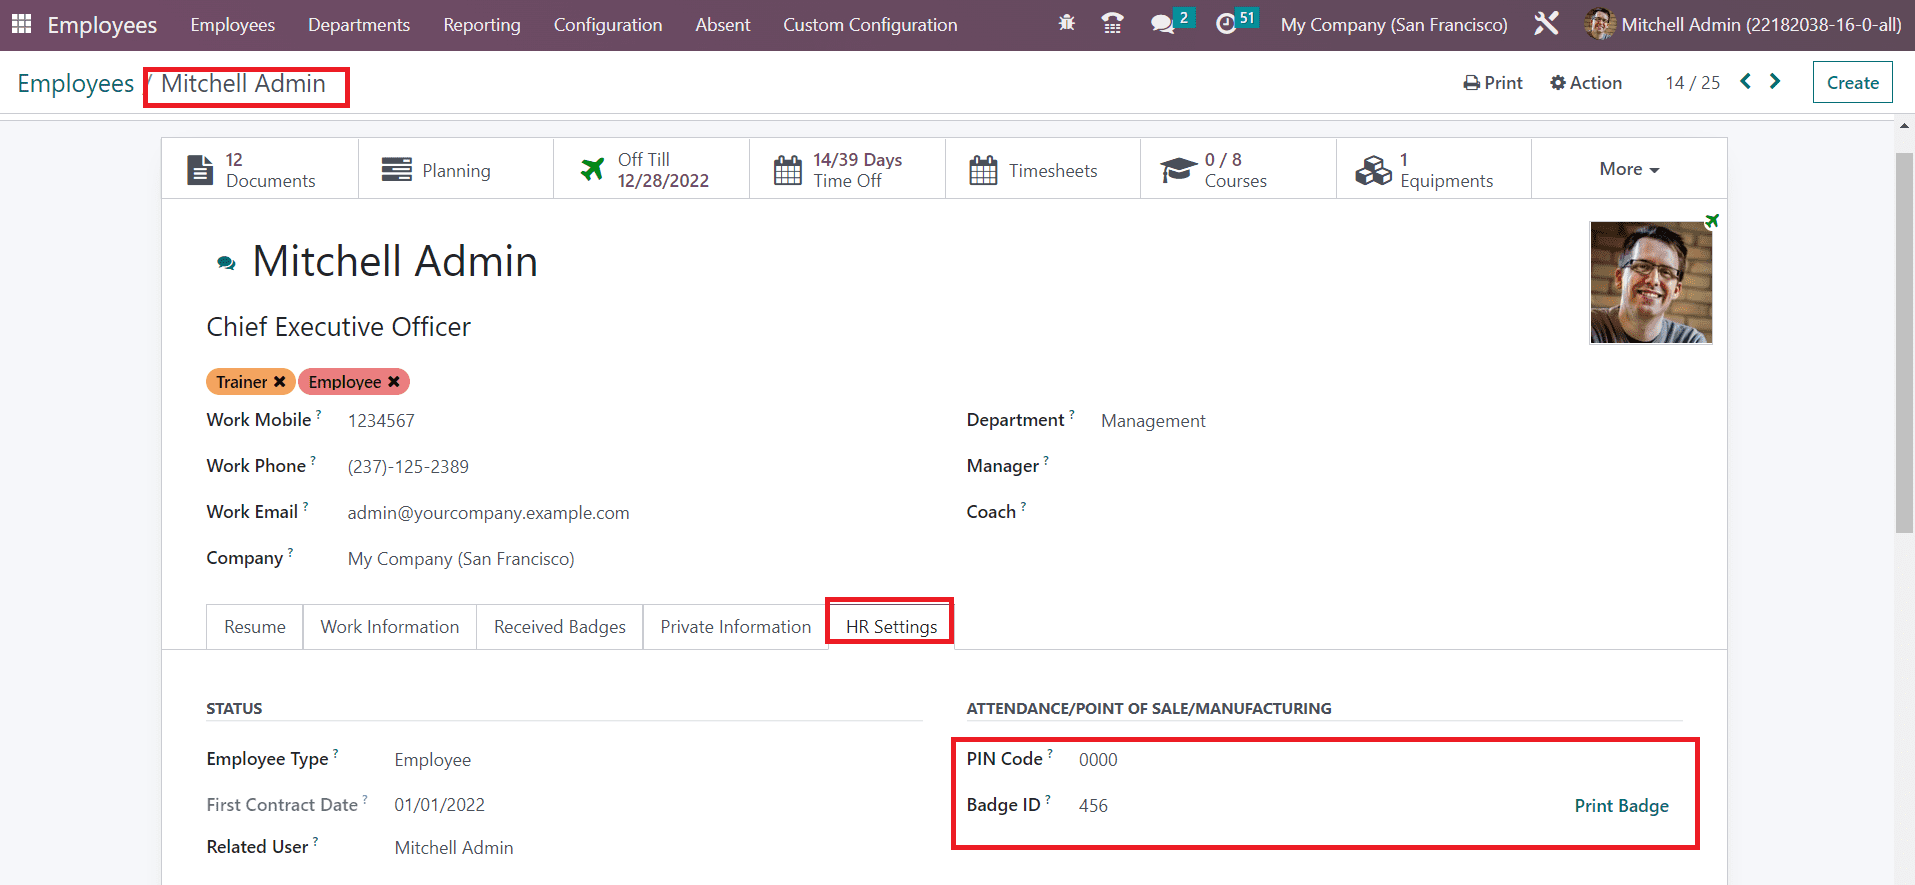
The PIN Code mentioned here can be used to log in to the PoS session or you can click on the Print Badge button to take print of the Badge ID.

The Badge ID can be used in the Scan your Badge field. If you want to log in with the pin, select your name from the Select Cashier field and enter the PIN.
As soon as you enter into the new session, a pop-up will appear to set an opening balance at the PoS cash box.
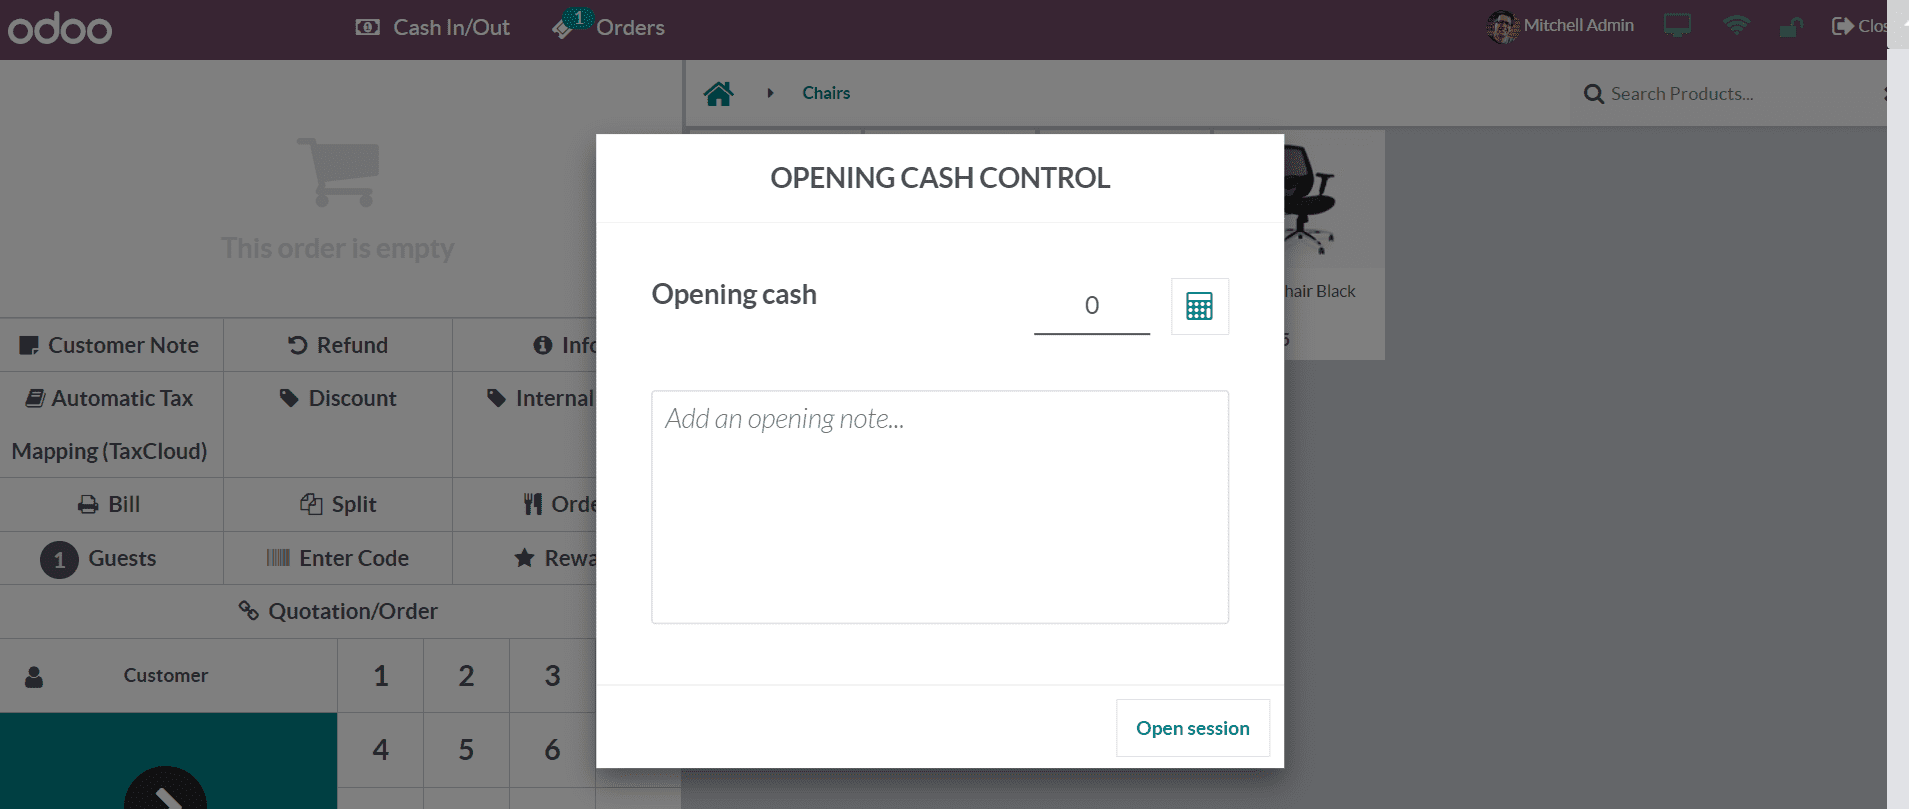
The amount mentioned here will be the opening balance of this session before the sales begin. You can directly mention the Opening Cash or use the small calculator icon. A new window will open when you click this icon.
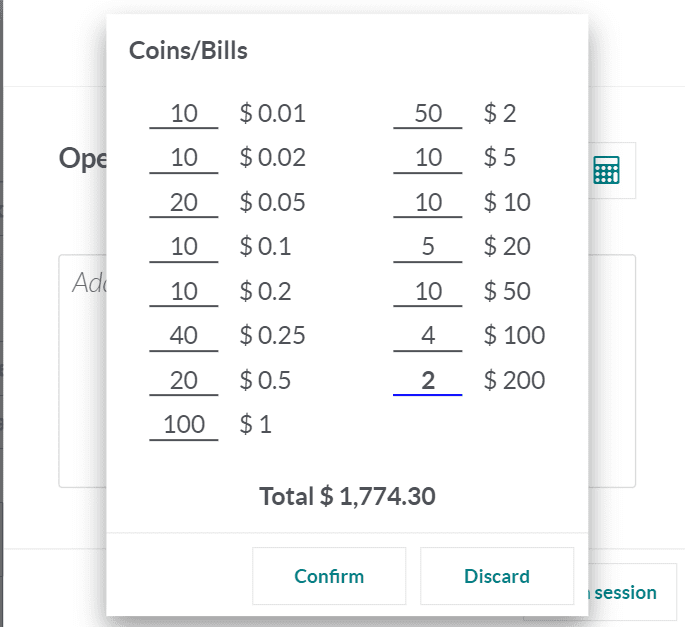
The coins and bill values that have been configured in the backend will appear here. Here, you can select the quantities of each coin and the total value will be displayed in the window. Click the Confirm button, and the Opening Cash will appear in the corresponding field.
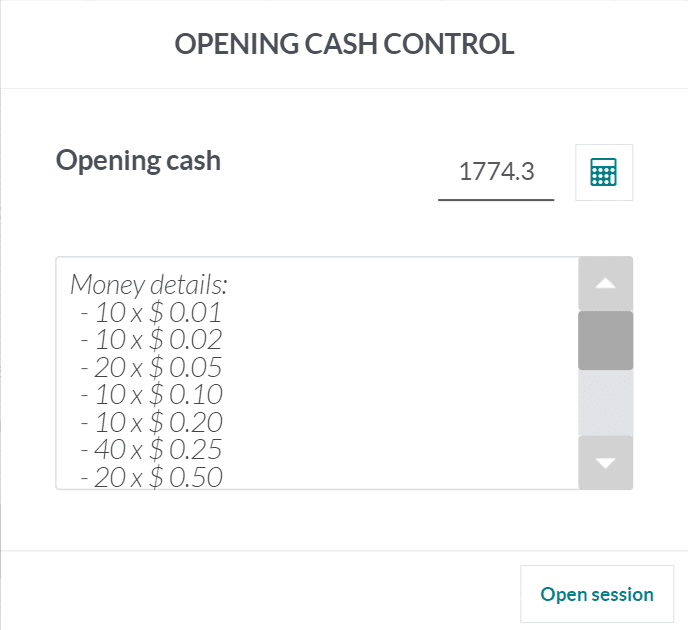
Now, you can click on the Open Session button to start the session with this amount.
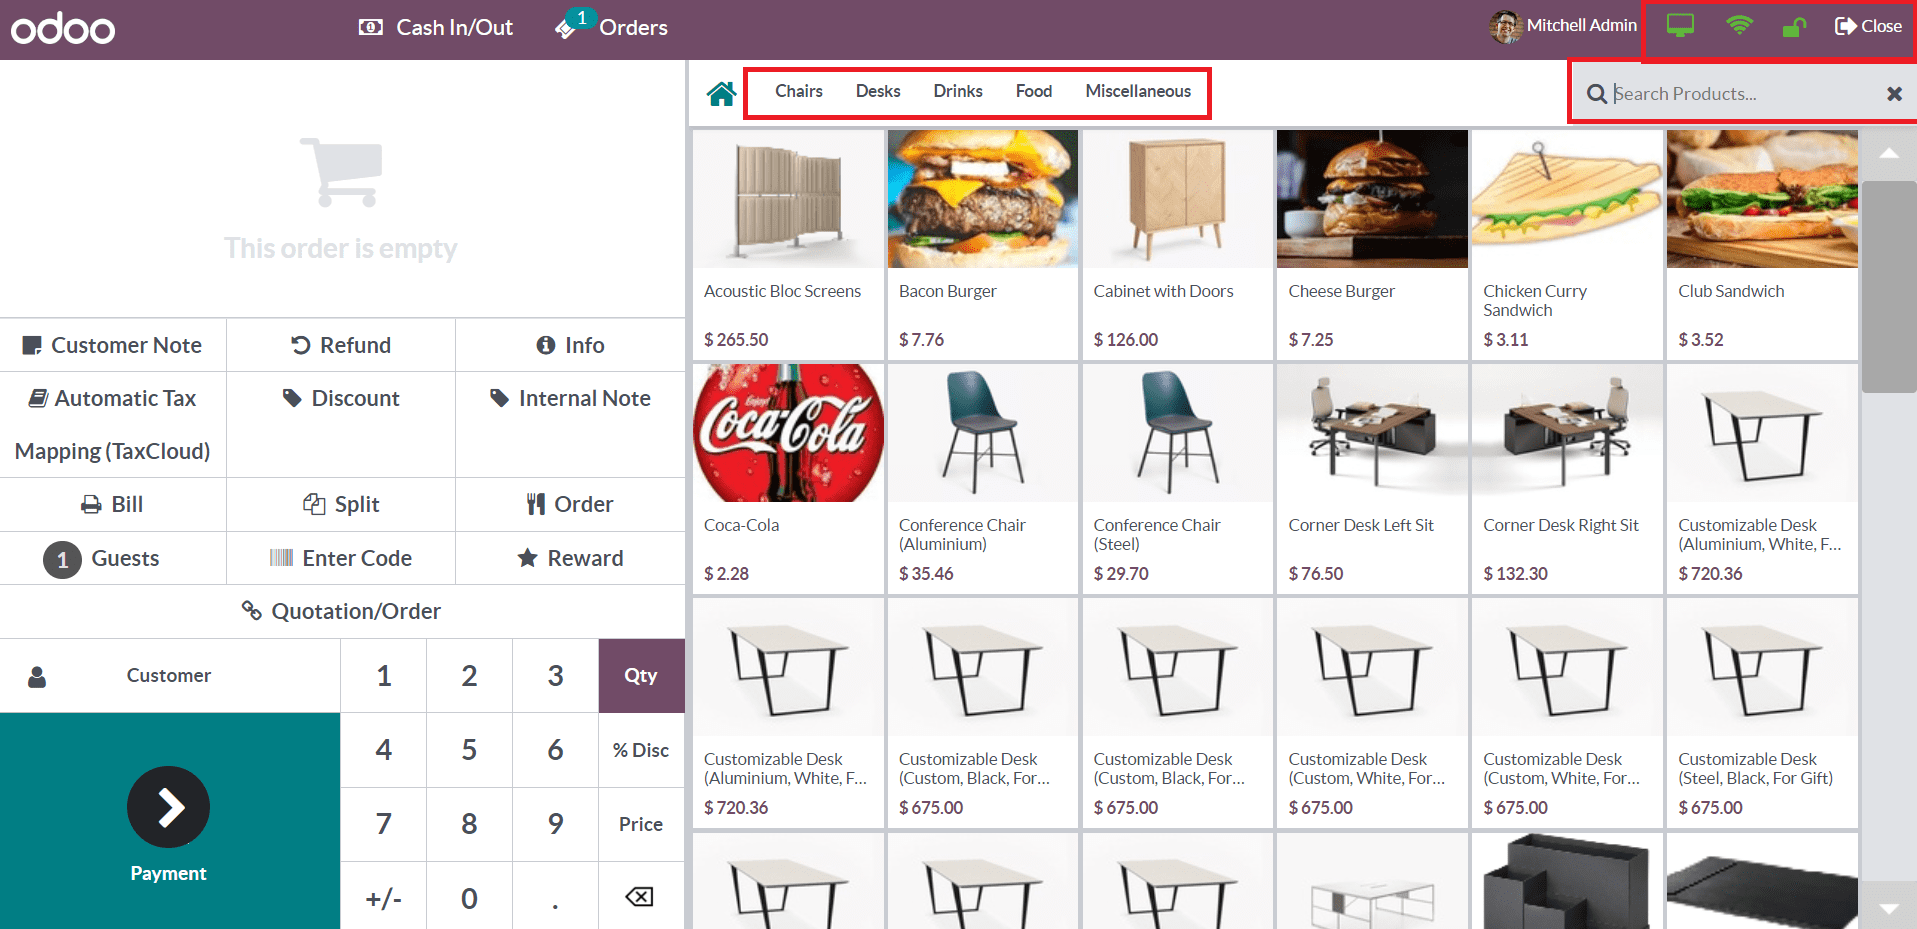
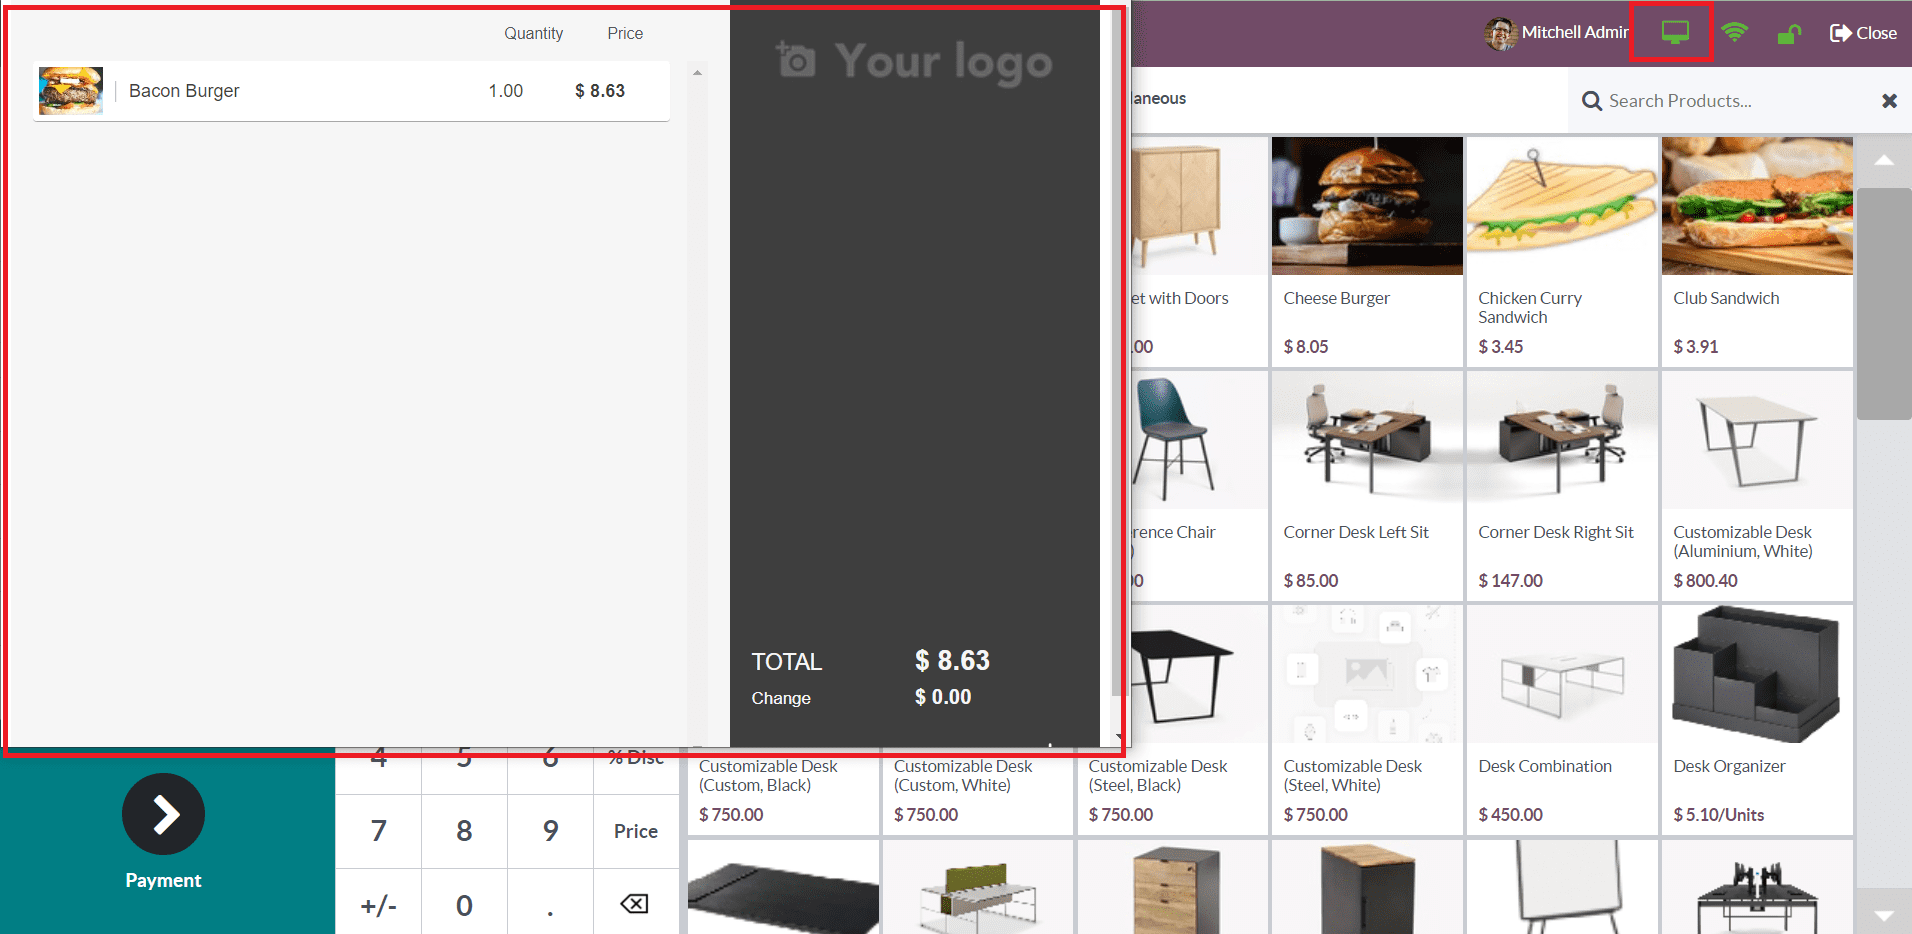
This is the order interface of the PoS session. The PoS categories of the products can be seen on the top of the screen, and you can use them to get the list of products from a particular category. Or else, the search bar will be available for you to search for the required product. On the top right corner of the screen, you will get the connection status of the customer screen and synchronization. The customer display will show check out to customers through a second display.
In order to lock the session, you can use the small lock icon, as highlighted in the image. The Close button will close the session.
You can observe all orders created for this session from the Orders menu. The window will display the Date, Receipt Number, Customer, Cashier, Total, and Status of the orders.
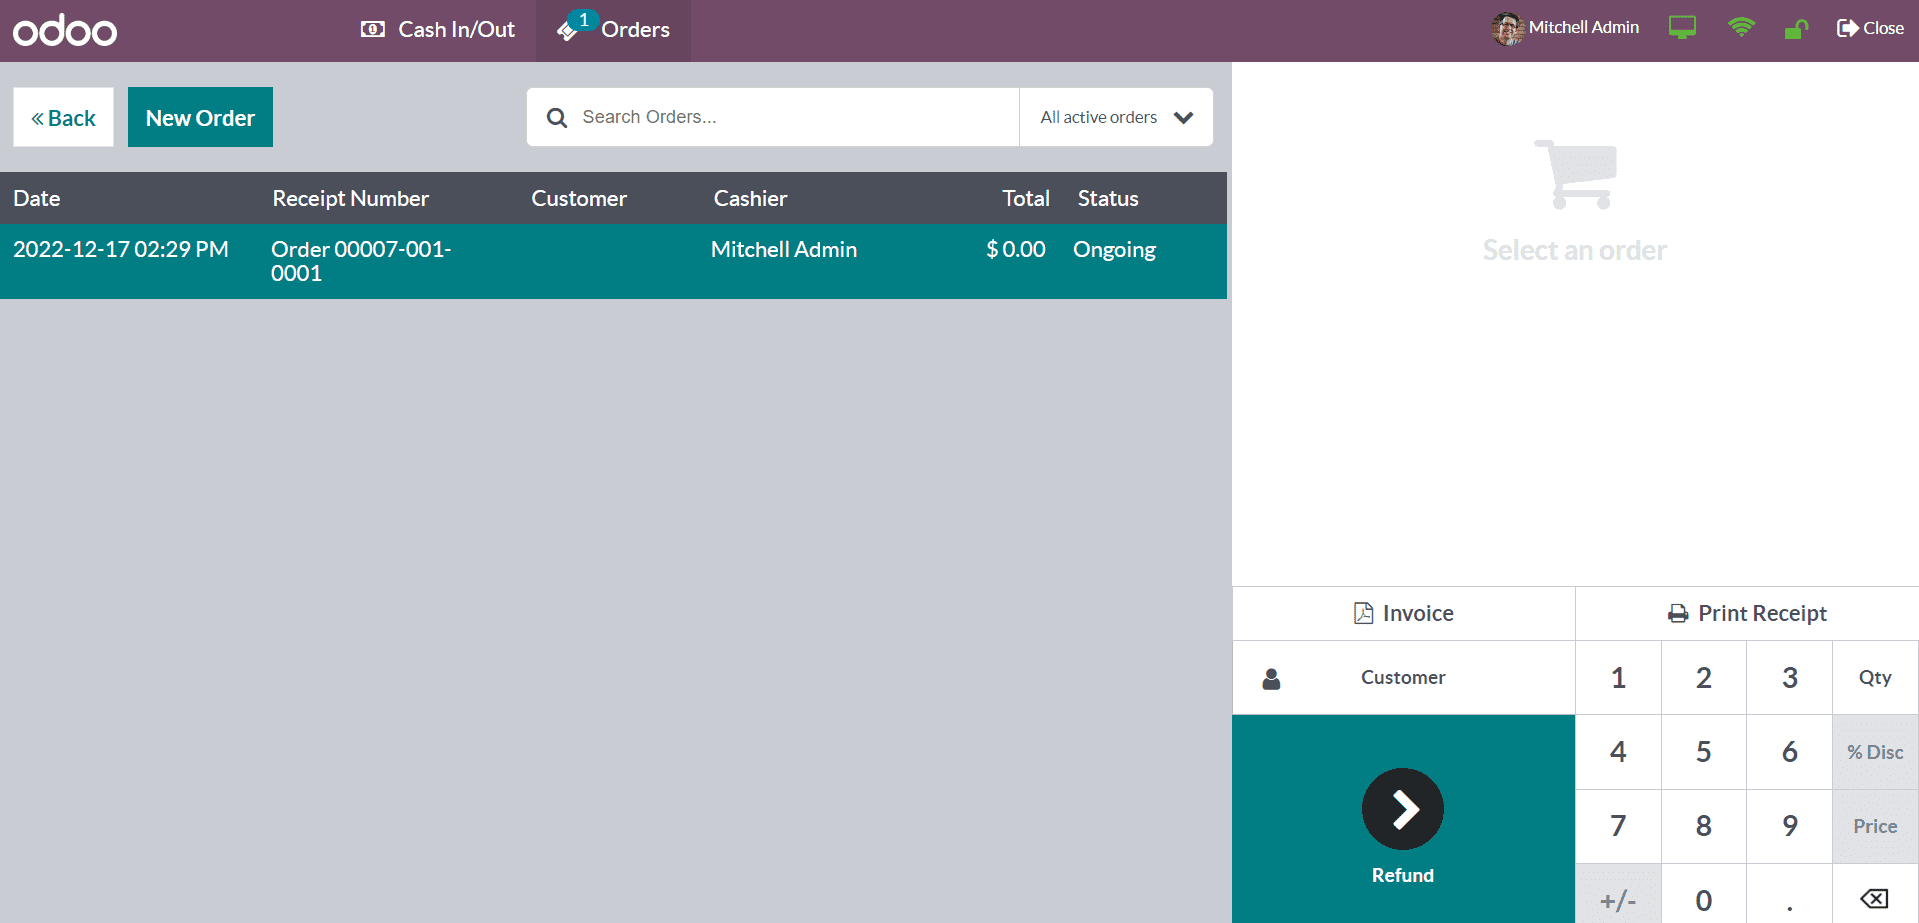
The search bar can be used for searching orders and the filters will help you to filter the orders based on All Active Orders, Ongoing, Paid, Payment, and Receipt. By clicking on the New Order button, you can create a new order from this window itself.
In the main menu bar, you will get a dedicated menu for recording the Cash In and Cash Out details. There may be situations where the employee has no other option but to take money from the counter in emergency situations. Once they return the money to the counter, it is important to record the Cash In and Cash Out details in the accounting to ensure transparency. Let’s detail this through an example. Imagine that an employee took money from the counter for transportation. You can click the Cash In/Out button to record the details.
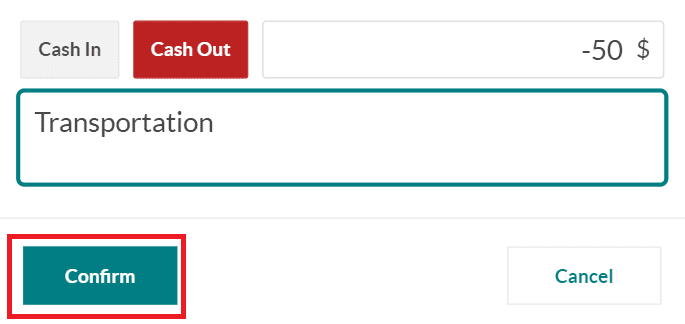
Here, select the Cash Out option and mention the amount taken by the employee. You can specify the reason in the given box and click the Confirm button. Odoo will record the Cash Out details. When the employee returns the money, you can record the amount on your counter by clicking the Cash In button.
Now, let’s check how to make orders in PoS. the list of products will be available on the right side of the screen with their respective name, image, and price. When a customer places an order, you can select the product from the given list and it will be added to the billing session.

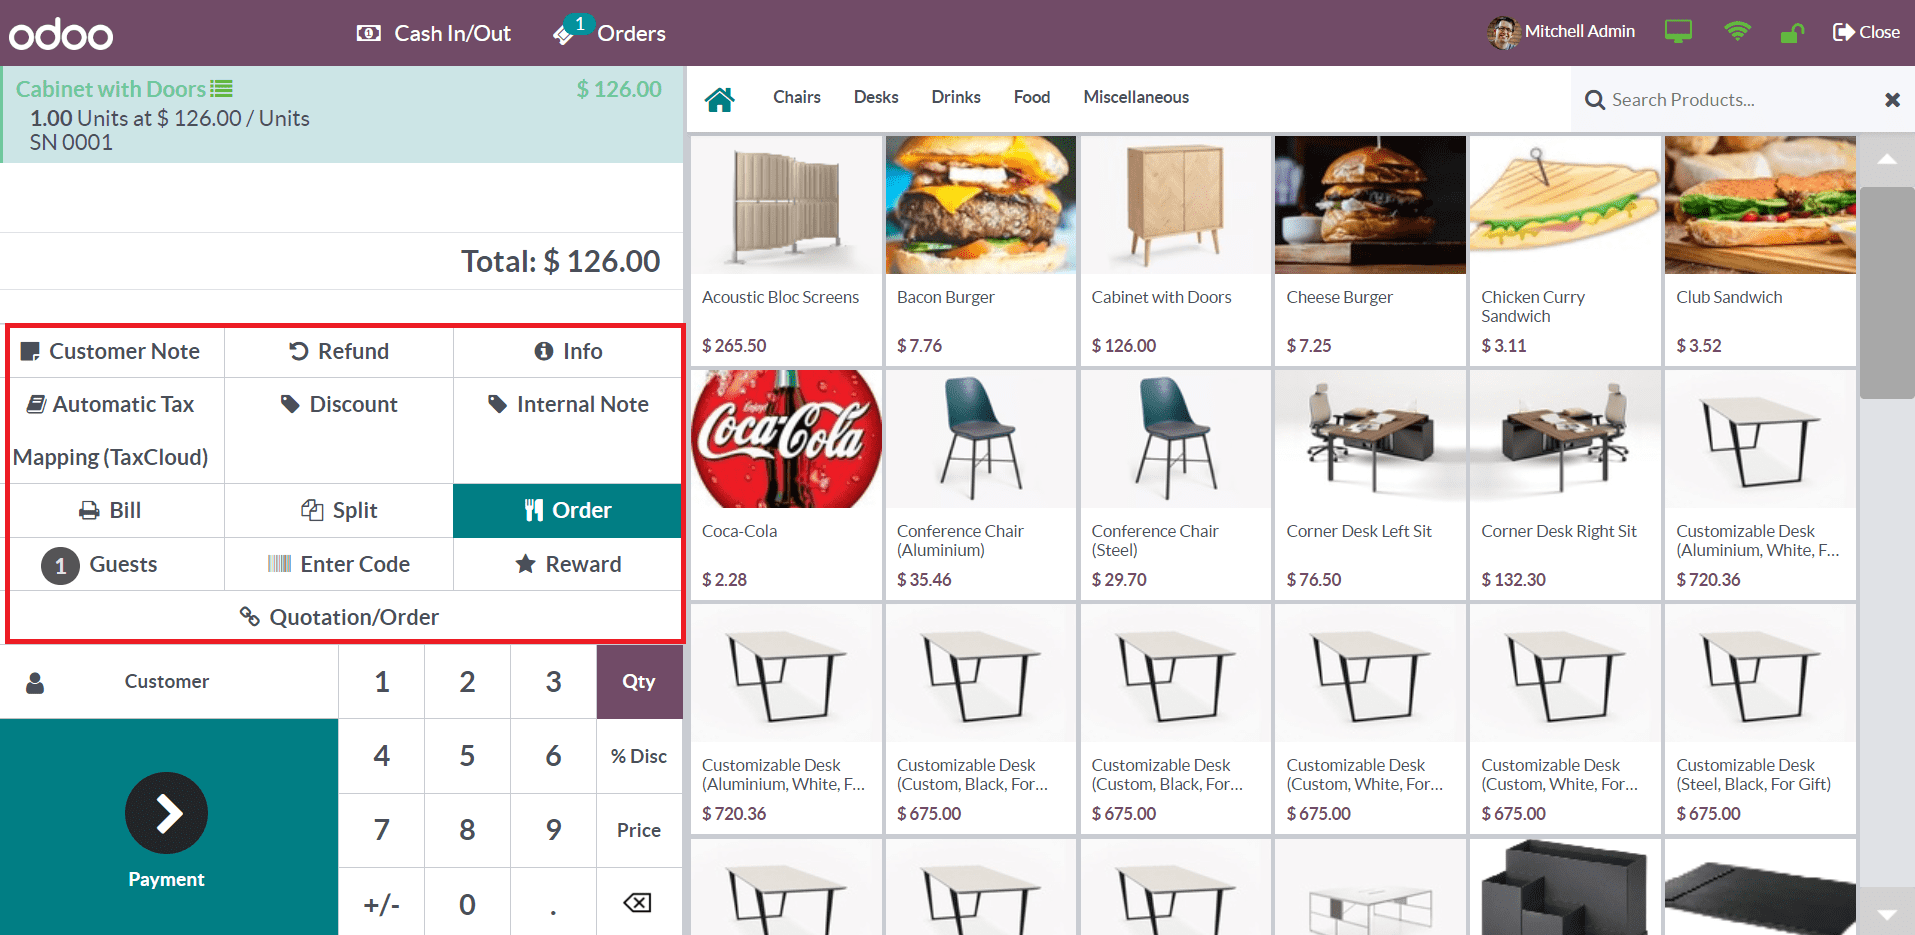
Based on the configuration of this PoS session in the backend, you will get corresponding features in the billing session as shown in the image above. The Customer Note button can be used to add a note in the bill. After making the payment, if the customer wants a refund for specific reasons, you can use the Refund button. The small Info icon will provide additional information related to the ordered product.
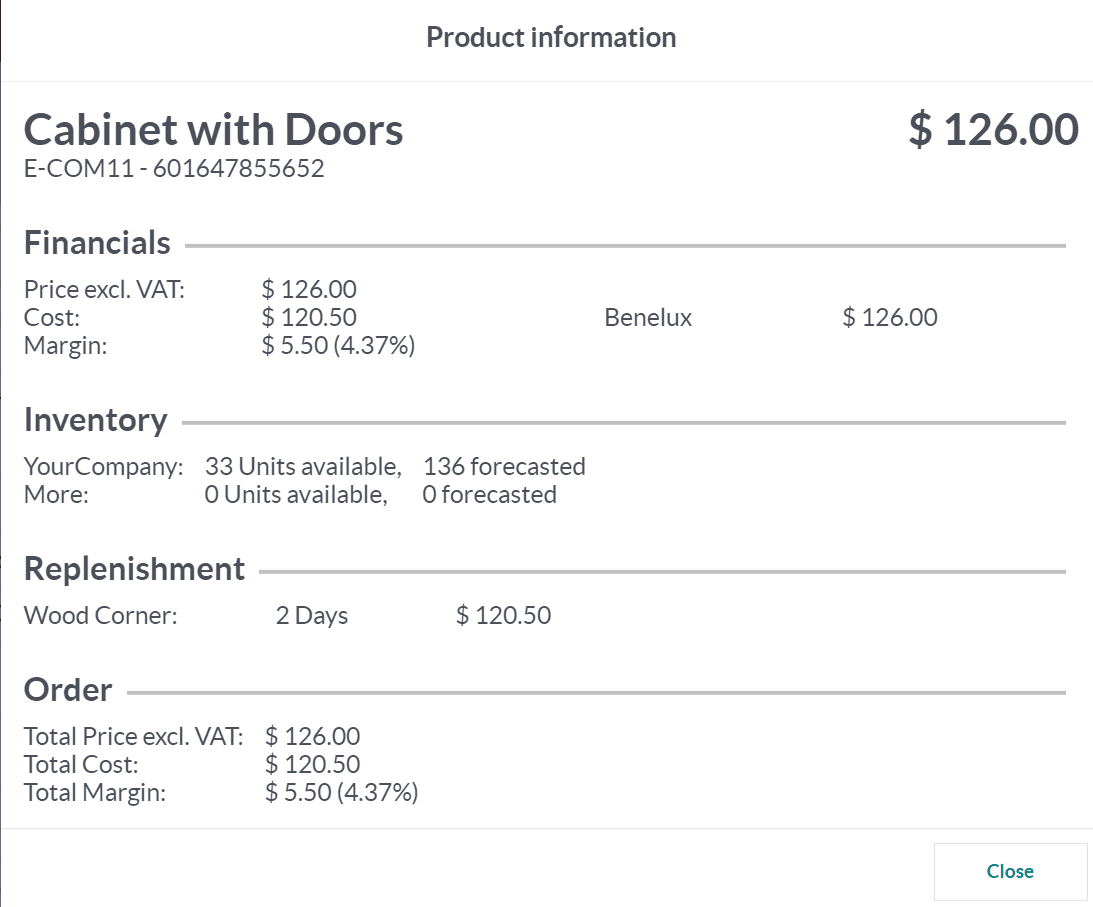
It includes the Financial, Inventory, Replenishment, and Order details as shown in the image above.

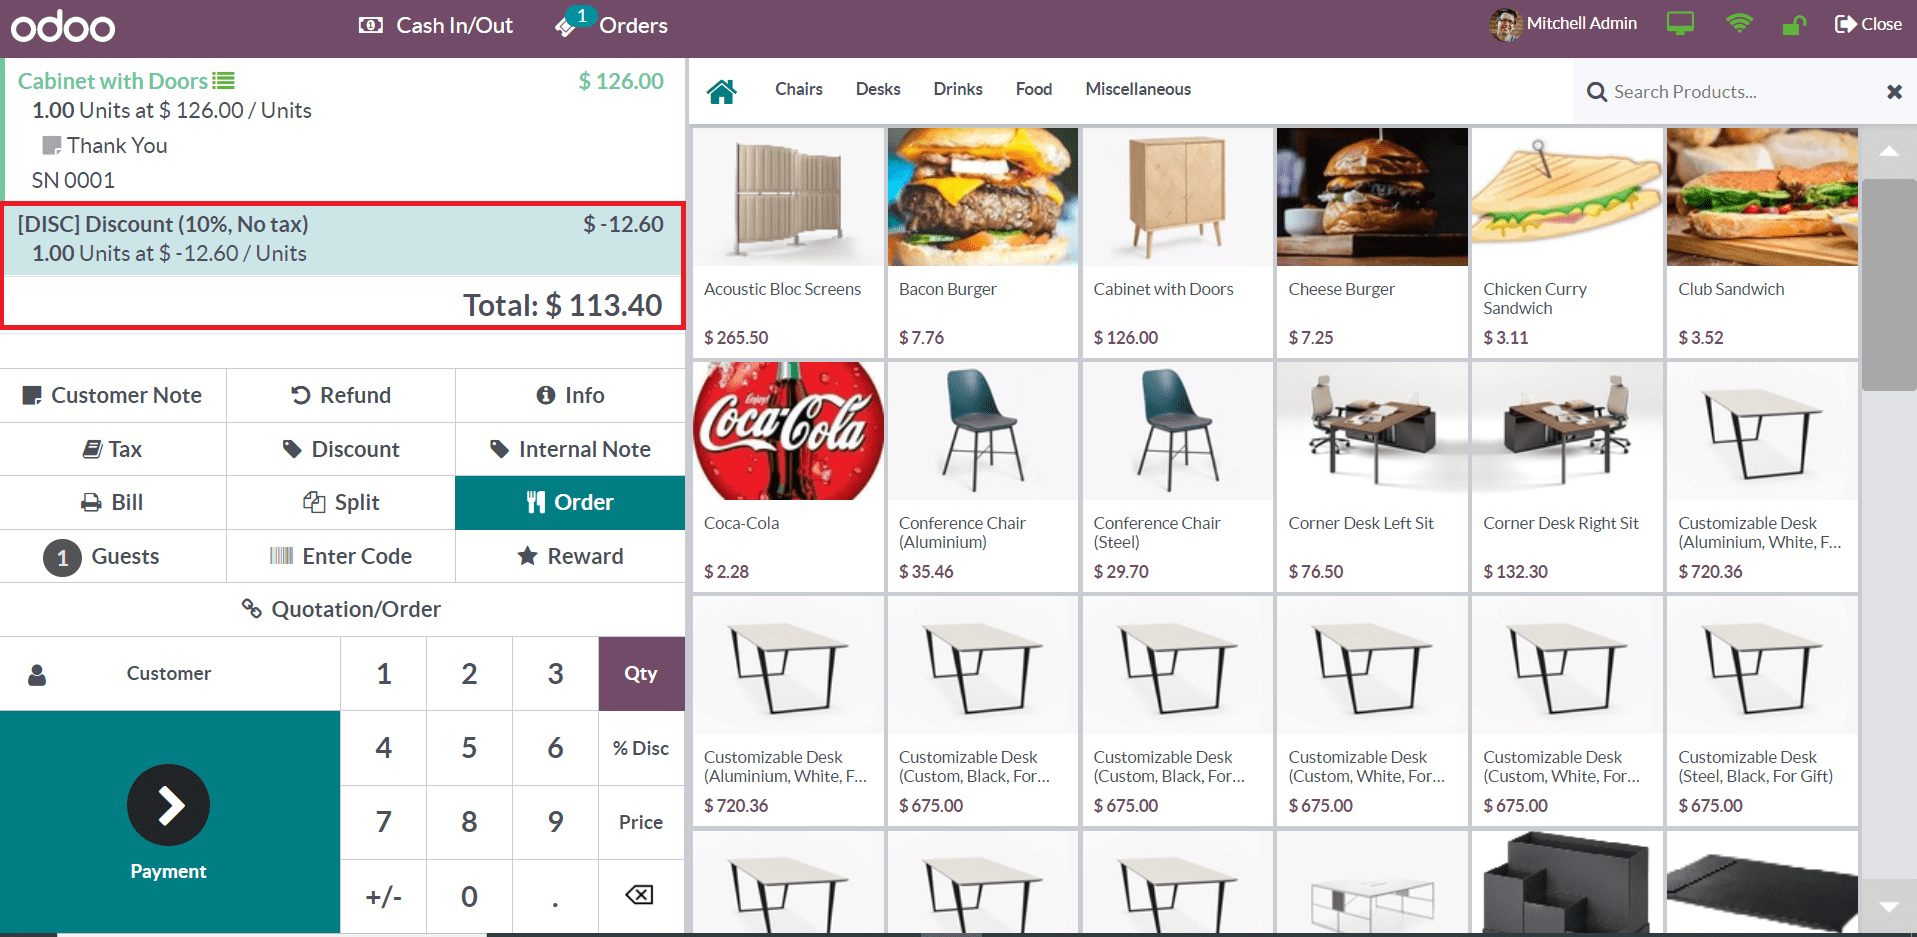
Use the Tax field to set the tax for the order. If any Discount is applicable to this order, you can click on the corresponding button and mention the Discount percentage.
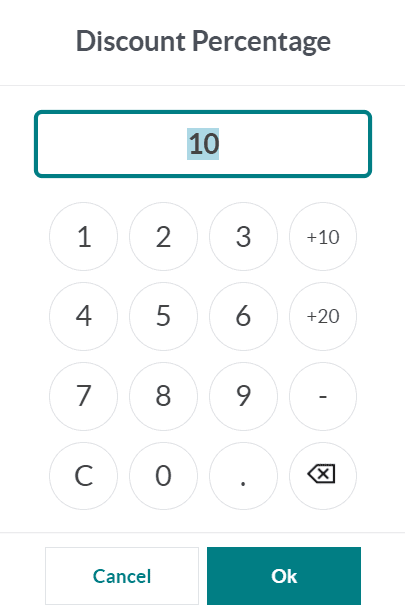
Click the Ok button and the discount amount will be applied to the order.
If you want to add any internal notes to this order, use the Internal Note button. Clicking on the Bill button will help you to take print of the bill.
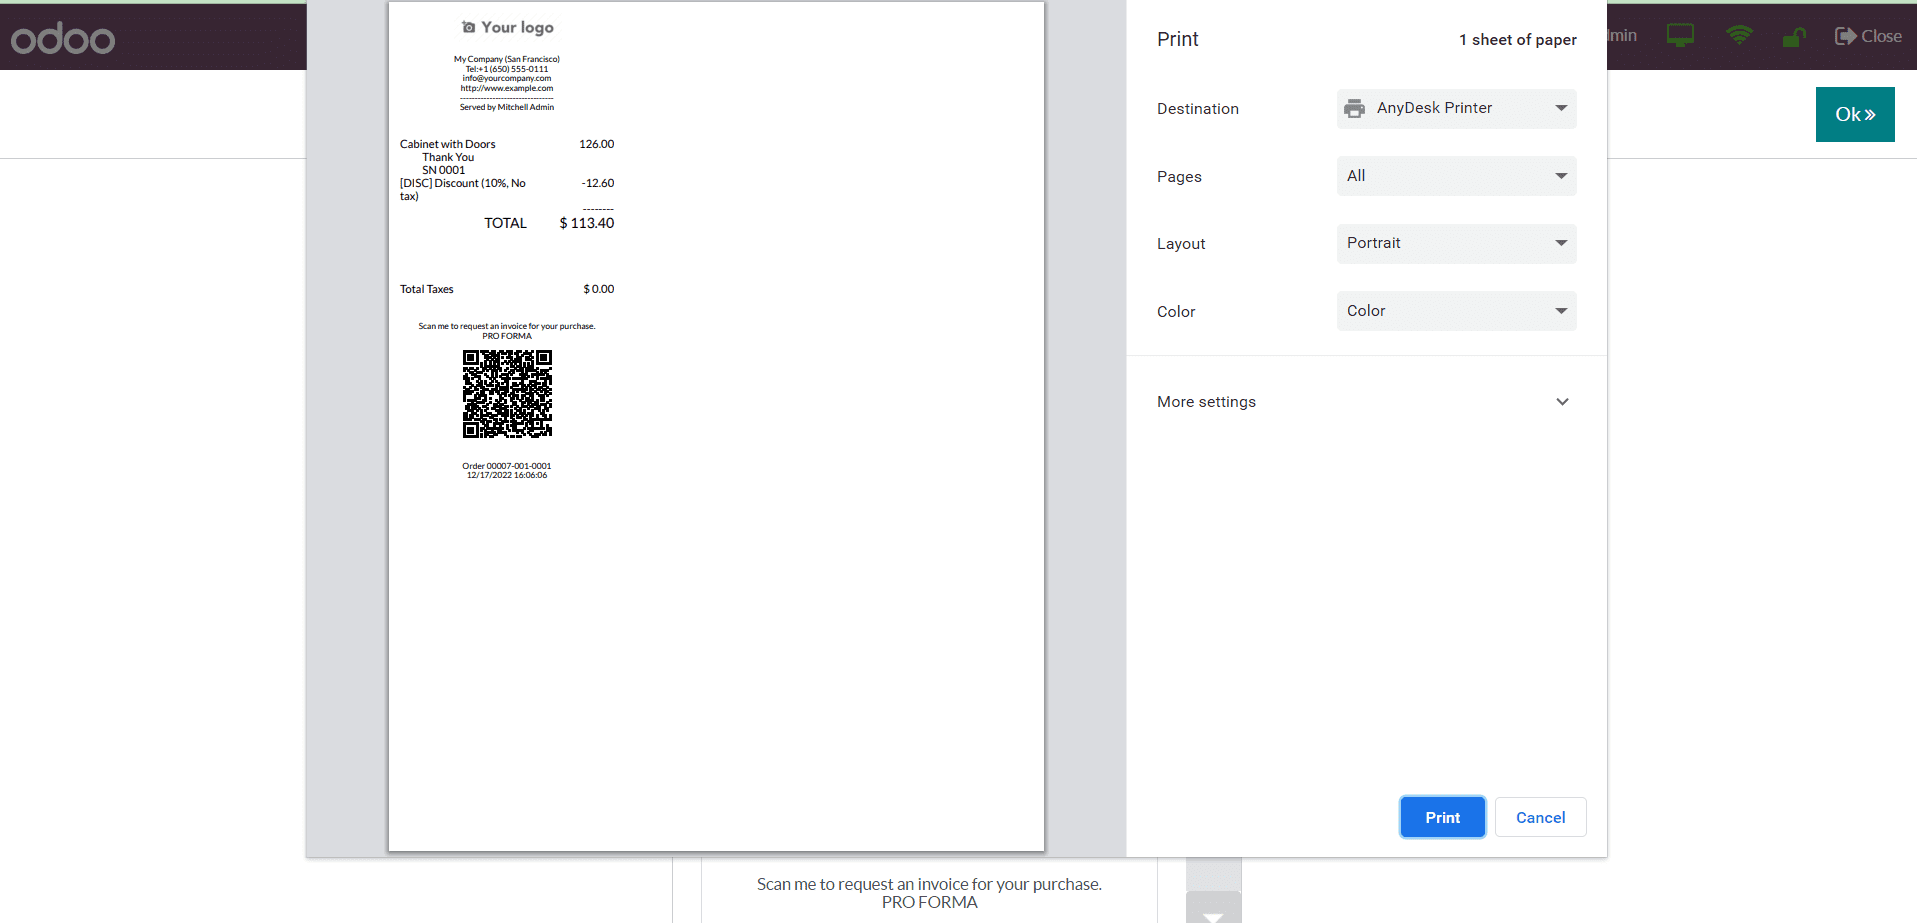
The printing details can be specified in the pop-up and take print out of the bill as per your requirements.
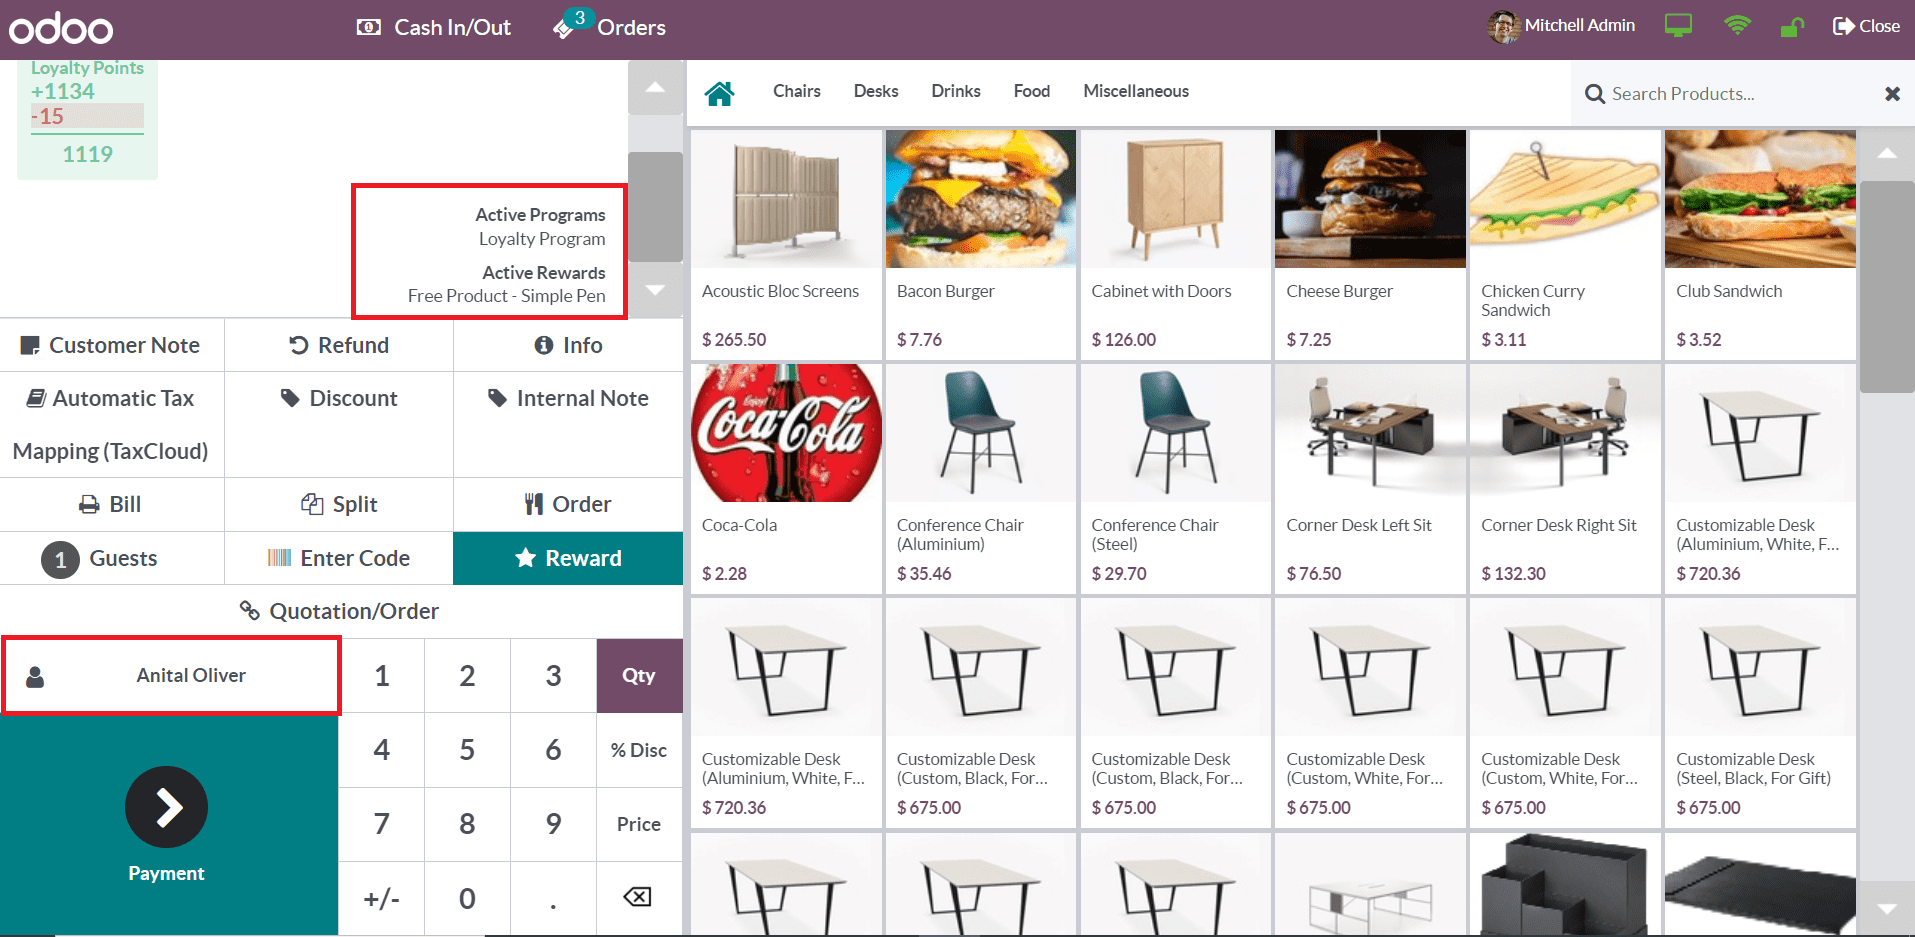
Use the Split button to split the bill. If the order contains more than one product, you can use this button to split the bill and pay for the products separately. The Guests button is usually used for bars and restaurants. Using this button, you can add guests to a specific table. If the customer owns any gift card or discount coupon, you can use the Enter Code button to specify the gift card or discount and the offer will be applied to the order. Similarly, if there is any reward that is claimable for this customer, it will be available in the Reward button. When you click on this button, the reward available for the customer will appear on the screen as shown below.
The Customer field will be available for you to select the customer of this order.

The available list of customers can be seen as shown in the screenshot above. You can select your customer from the given list. If the record of the customer is not available, you can create a new customer using the Create button. The Details button will provide a detailed description of the selected customer.
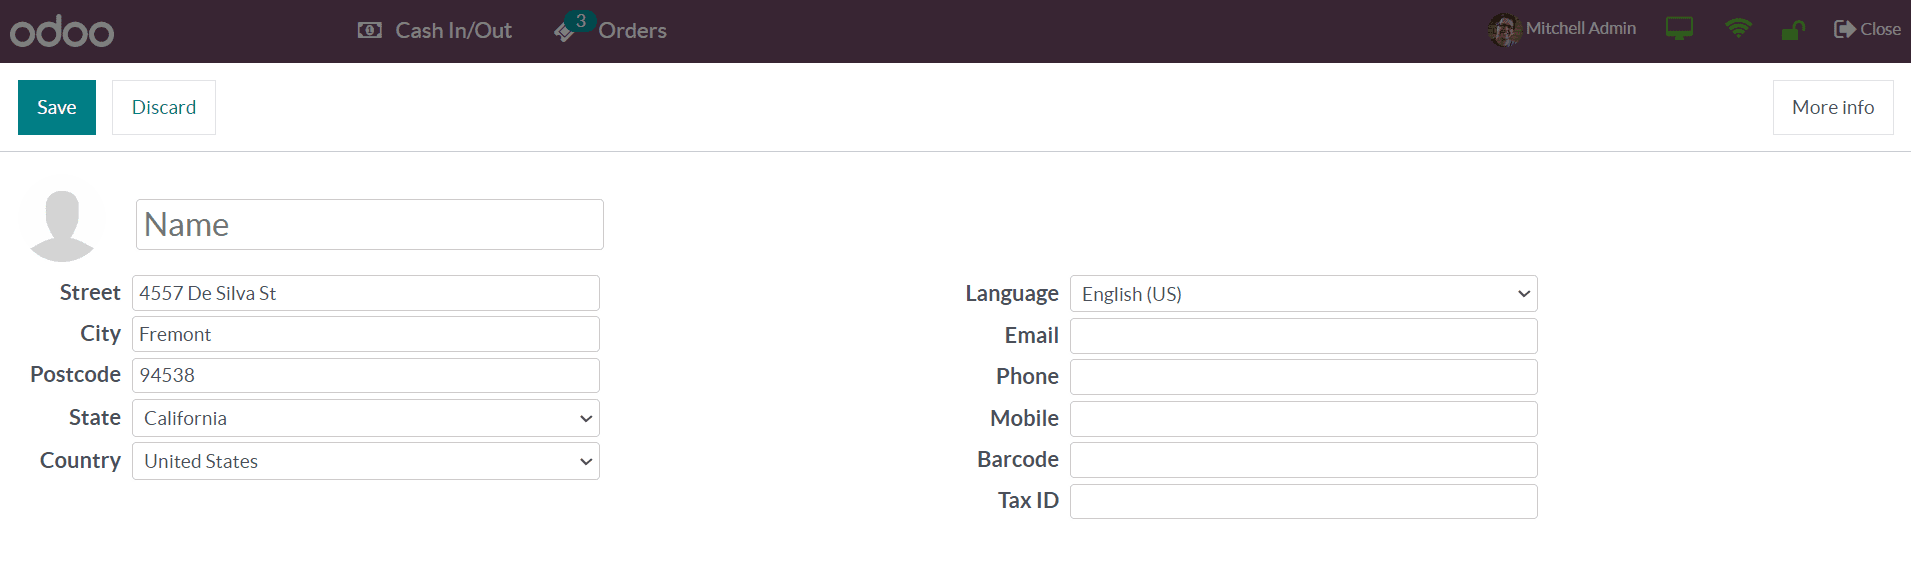
It includes the Name, image, Street, City, Postcode, State, Country, Language, Email, Phone, Mobile, Barcode, and Tax ID of the customer. Use the More Info button to get additional details.
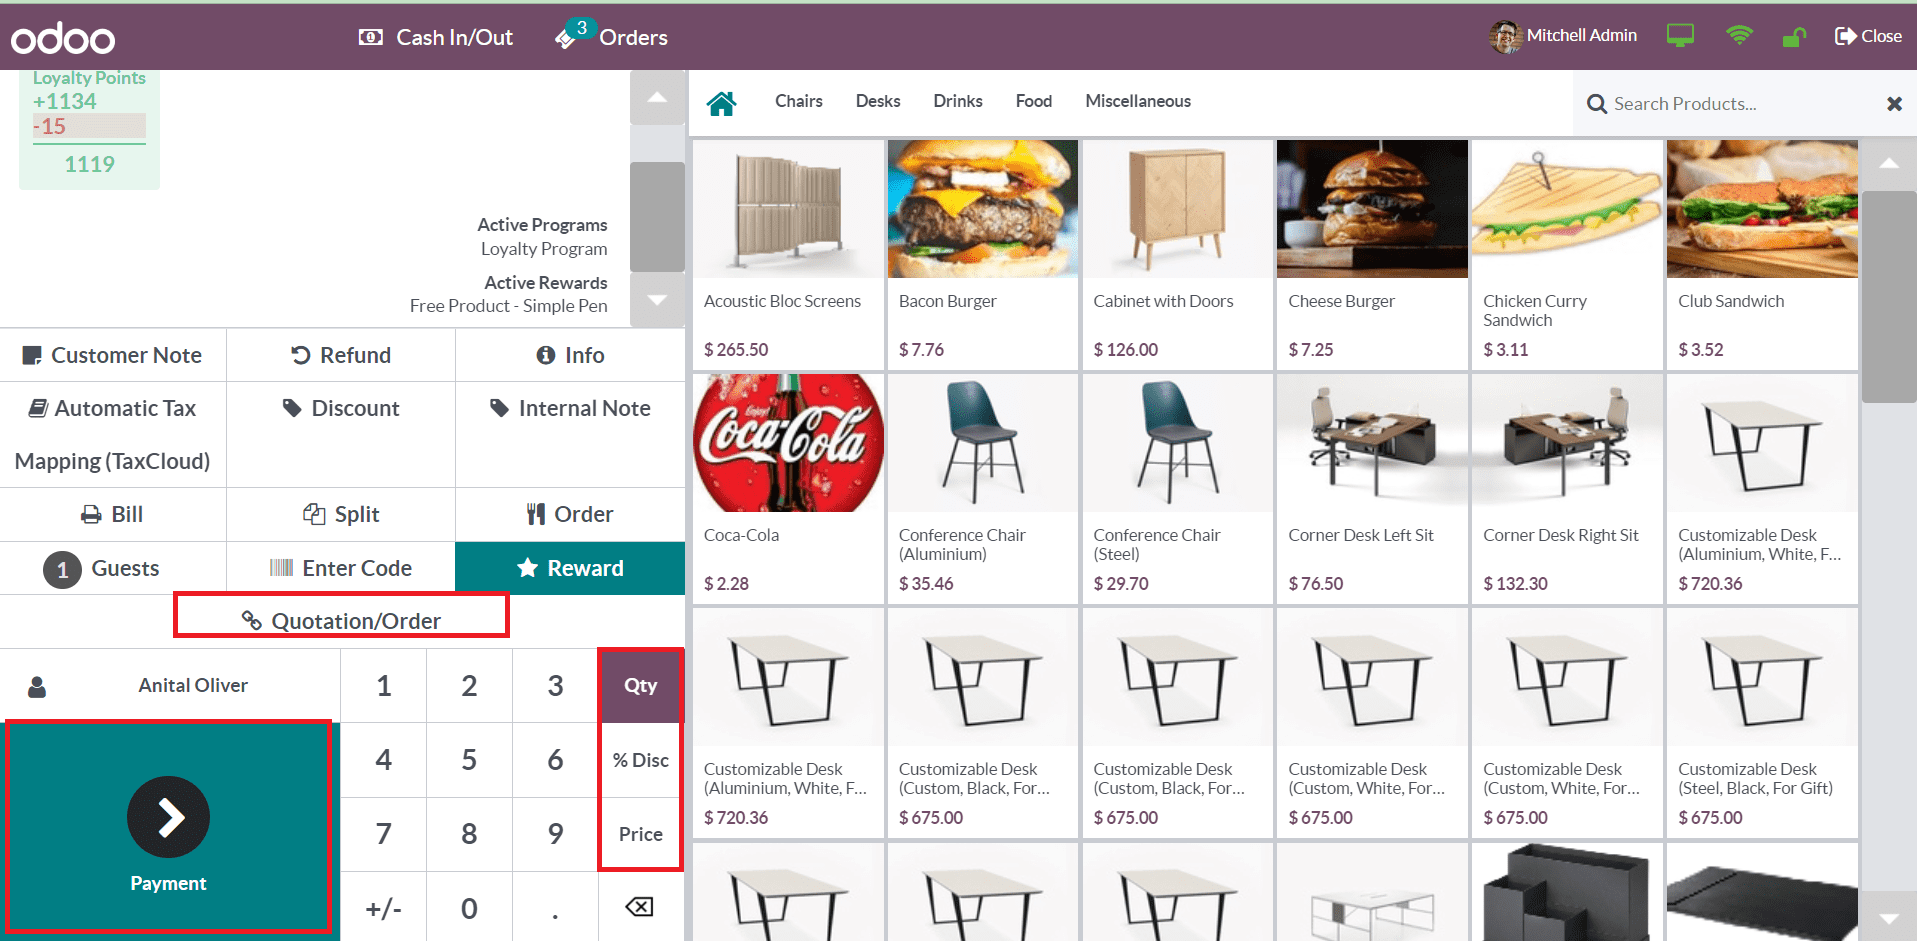
The Quotation or Sales Order related to this order can be observed using the corresponding button. There will be additional buttons available to set the Quantity, %Discount, and Price of the products added to the order. In order to make the payment, click the Payment button. Odoo directs you to the payment window as shown below.
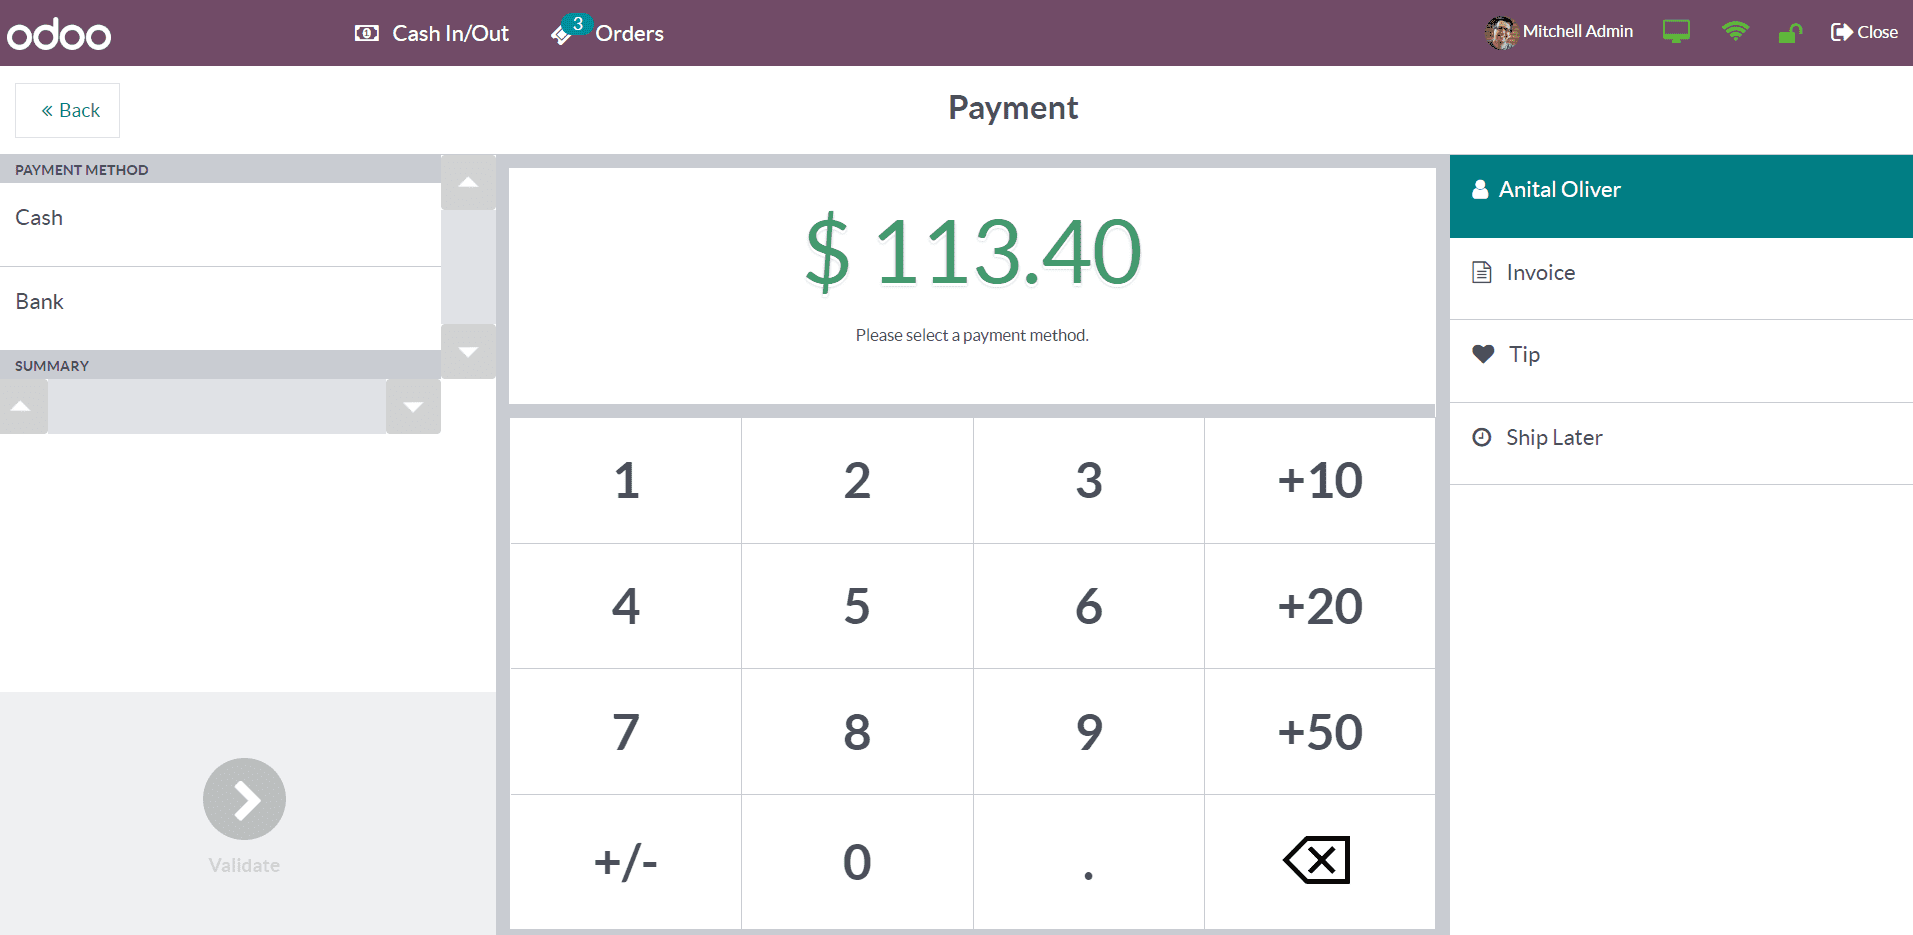
The available Payment Methods for this POS session can be seen on the left side of the screen. Select a suitable payment method according to the request of the customer. After selecting the payment method, the corresponding Summary will be available in the given box. On the right side of the screen, you can observe the Name of the customer. The Invoice button can be used to generate an invoice for this order. If the customer wants to give any tips to the employee, you can record the tip using the Tip button. The Ship Later button can be used if the customer wants to order the product now and ship it later.
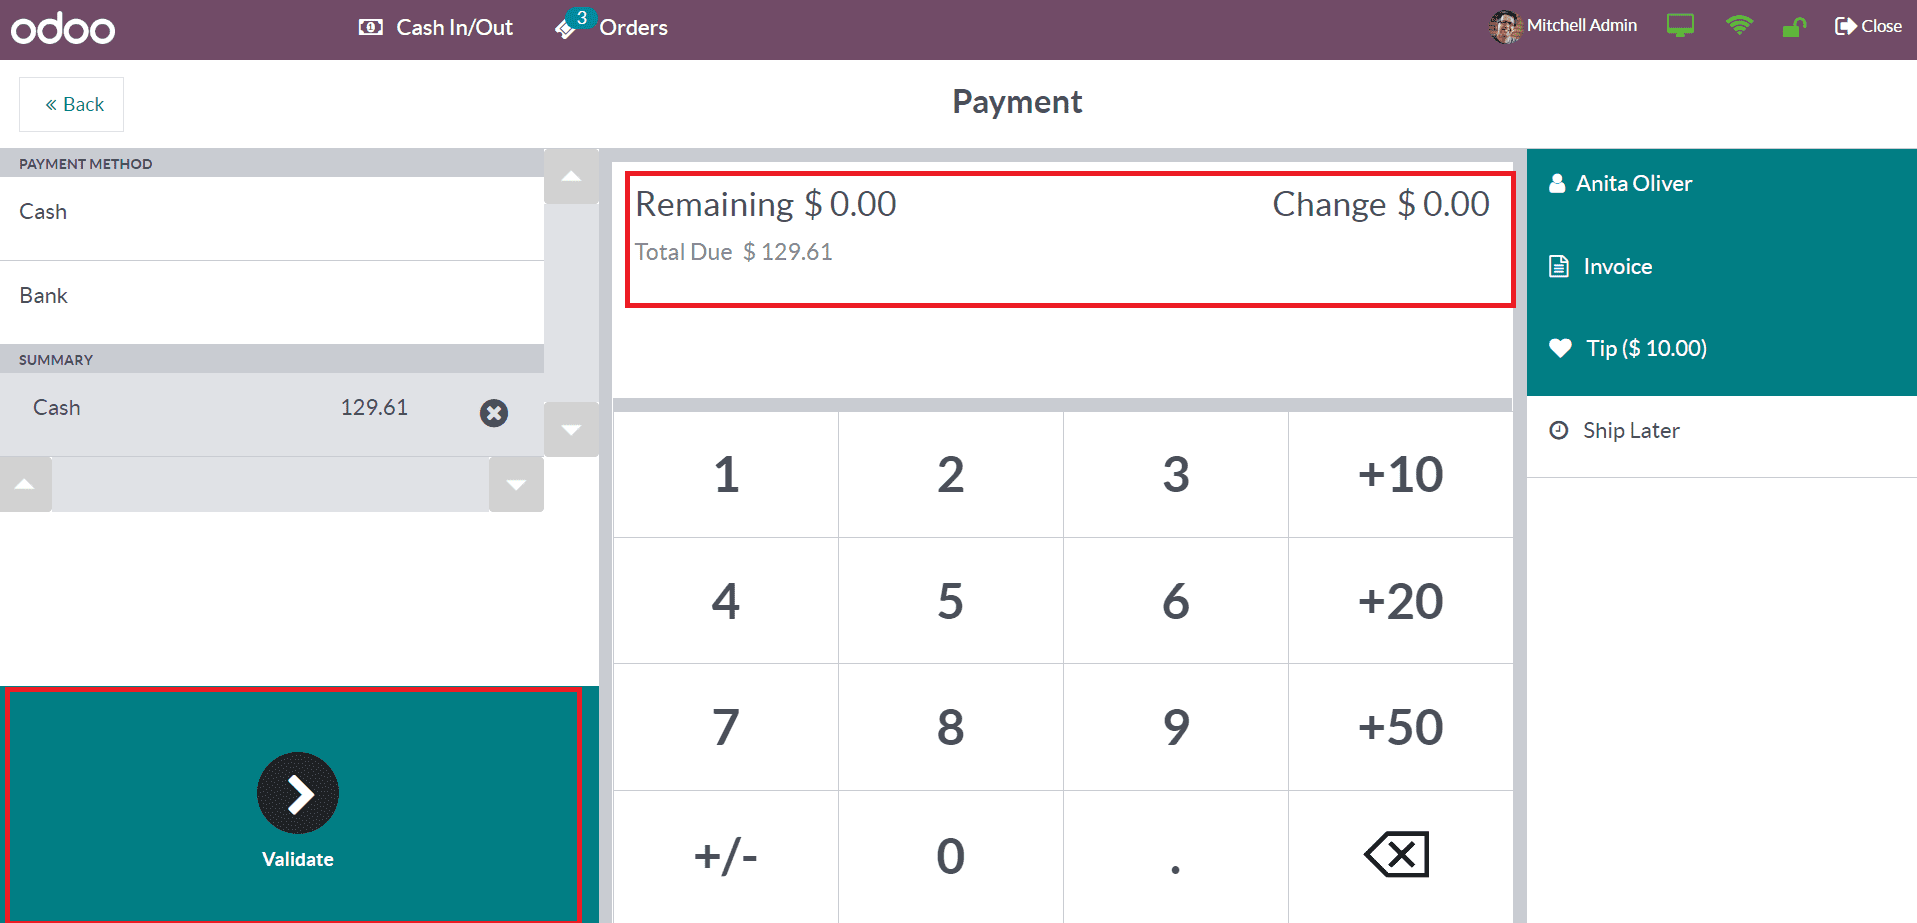
The payment screen will show the Remaining, Change, and Total Due. Using the Validate button, you can confirm the payment and validate it. Once you validate the payment, Odoo will ask you if you would like to receive the receipt and invoice.
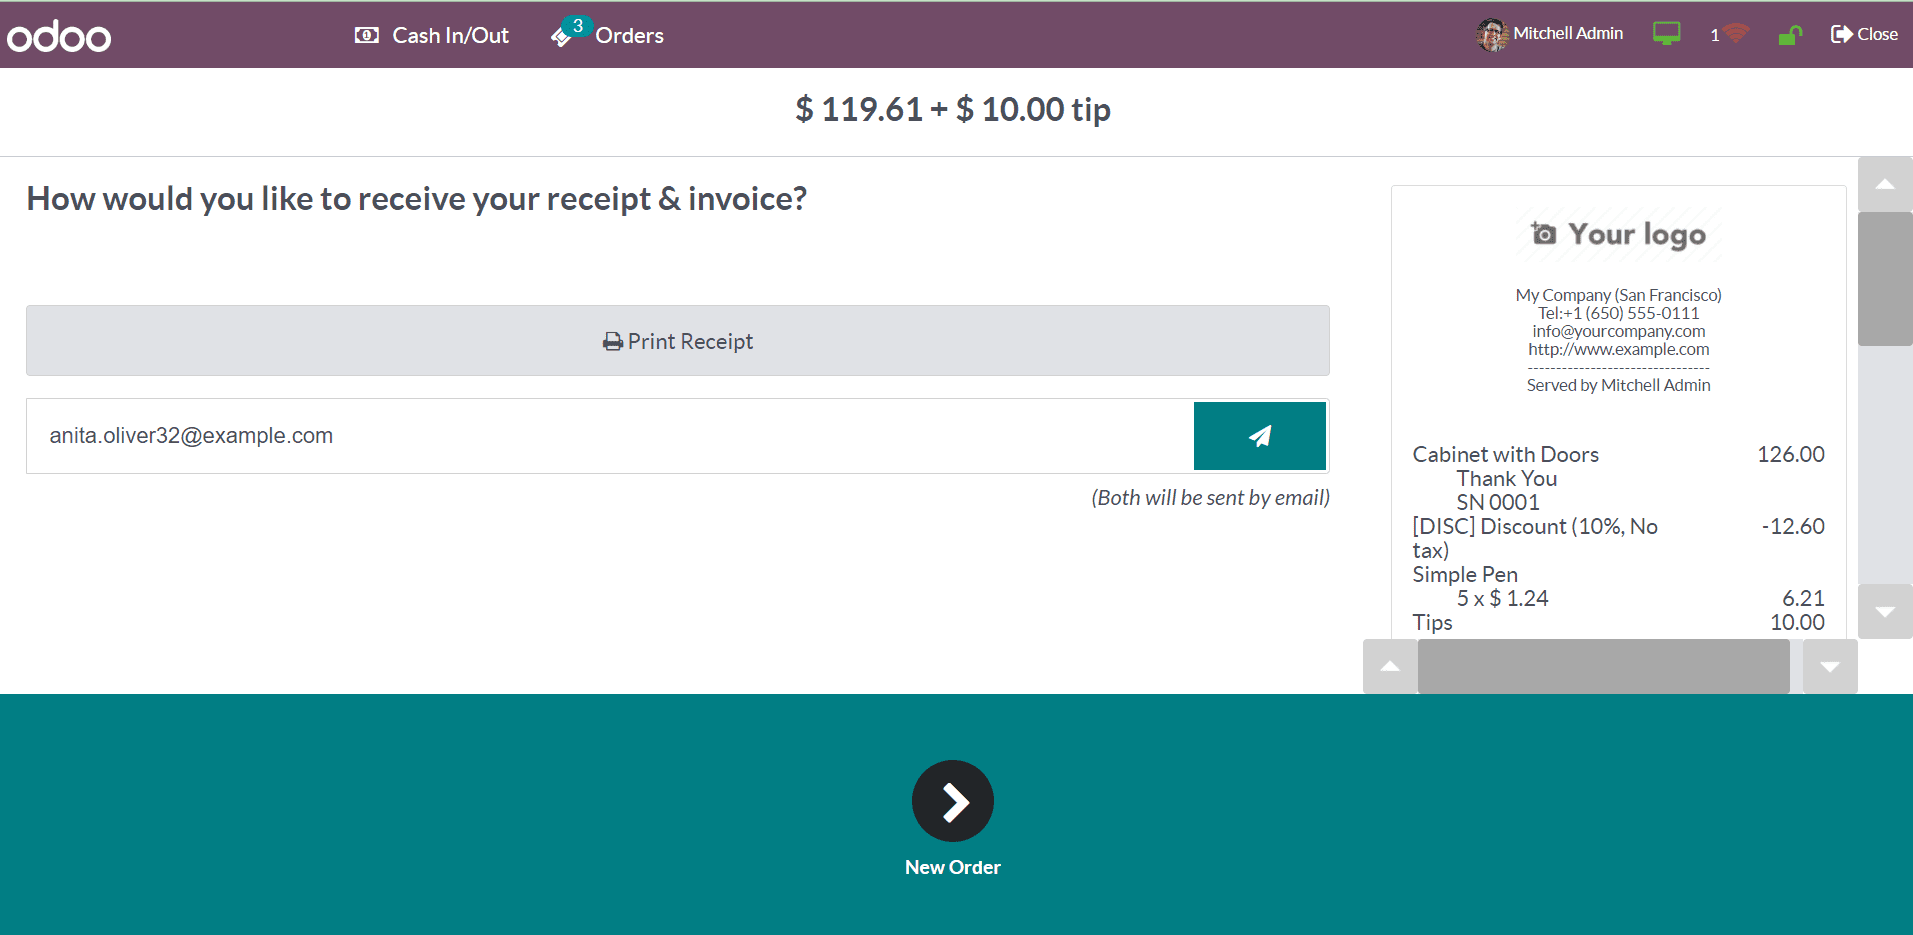
You can take a print of the receipt using the Print Receipt button. Additionally, it is possible to send the receipt and invoice to the customer via Email. After sending the receipt and invoice, the order is completed.
You can use the Close button given on the top right corner of the screen to close the current PoS session. While clicking this button, you will get a pop-up window with the details of the closing session.
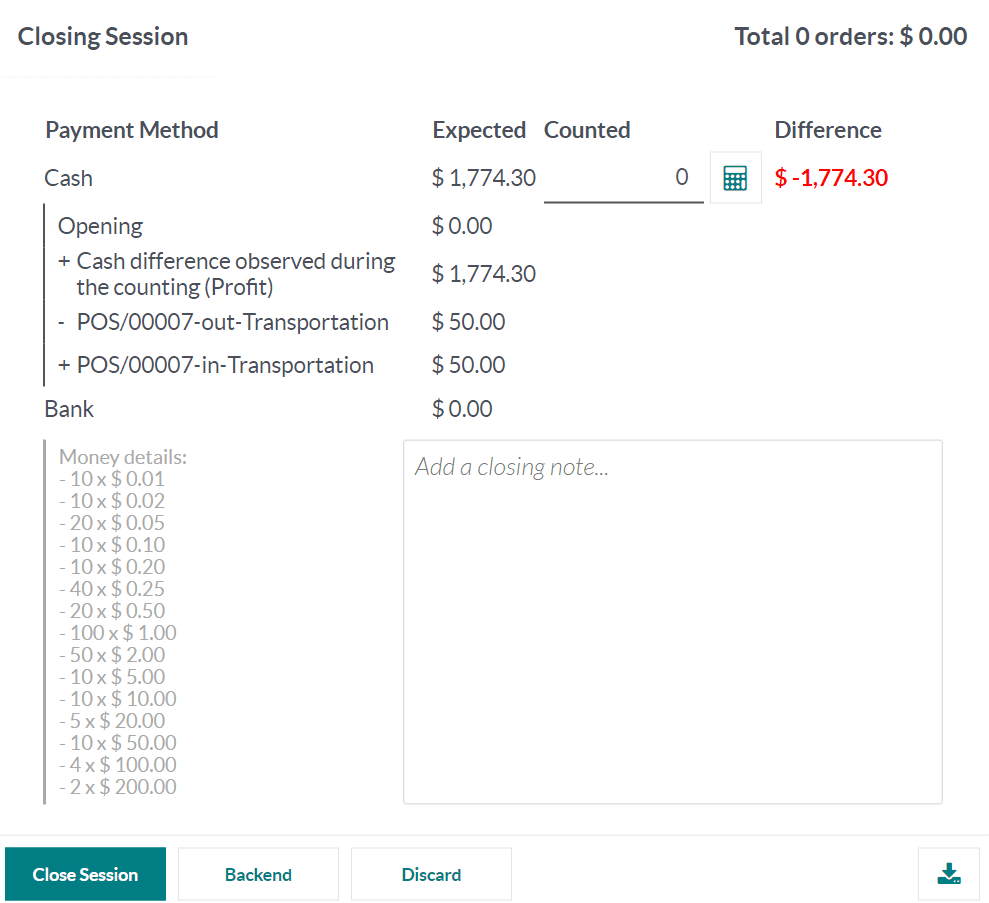
It includes the Payment Methods used for registering payments from customers and the history of the payment details of that particular day. The Expected amount shows the Opening Cash of the session. In the Counted field, you can specify the total amount collected from today’s sale. It is the closing balance of the session. The calculator icon will assist you in calculating the amount using configured coins. The Difference field shows the difference between the opening cash and closing balance of the session. If you want to add a note before closing the session, you can use the Add a Closing Note box. Now, click the Close Session button.
If there is any Difference recorded, Odoo will ask you to accept the payment difference in order to post a profit/loss journal entry in your accounting.
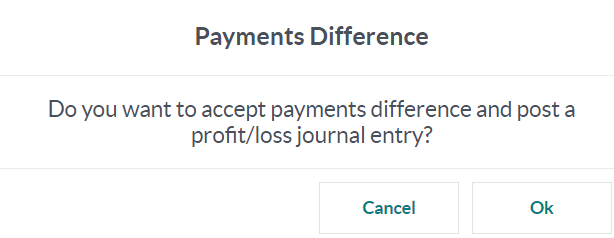
Let’s click the Ok button and see what happens. Now, the session is closed. You can go to the Accounting module and select the Profit and Loss reporting option.

In the Profit and Loss report, the Difference from the session will be considered as Income and recorded in the Cash Difference Gain account. When you check the General Ledger of this account, you can see the entry for the cash difference observed during the counting.
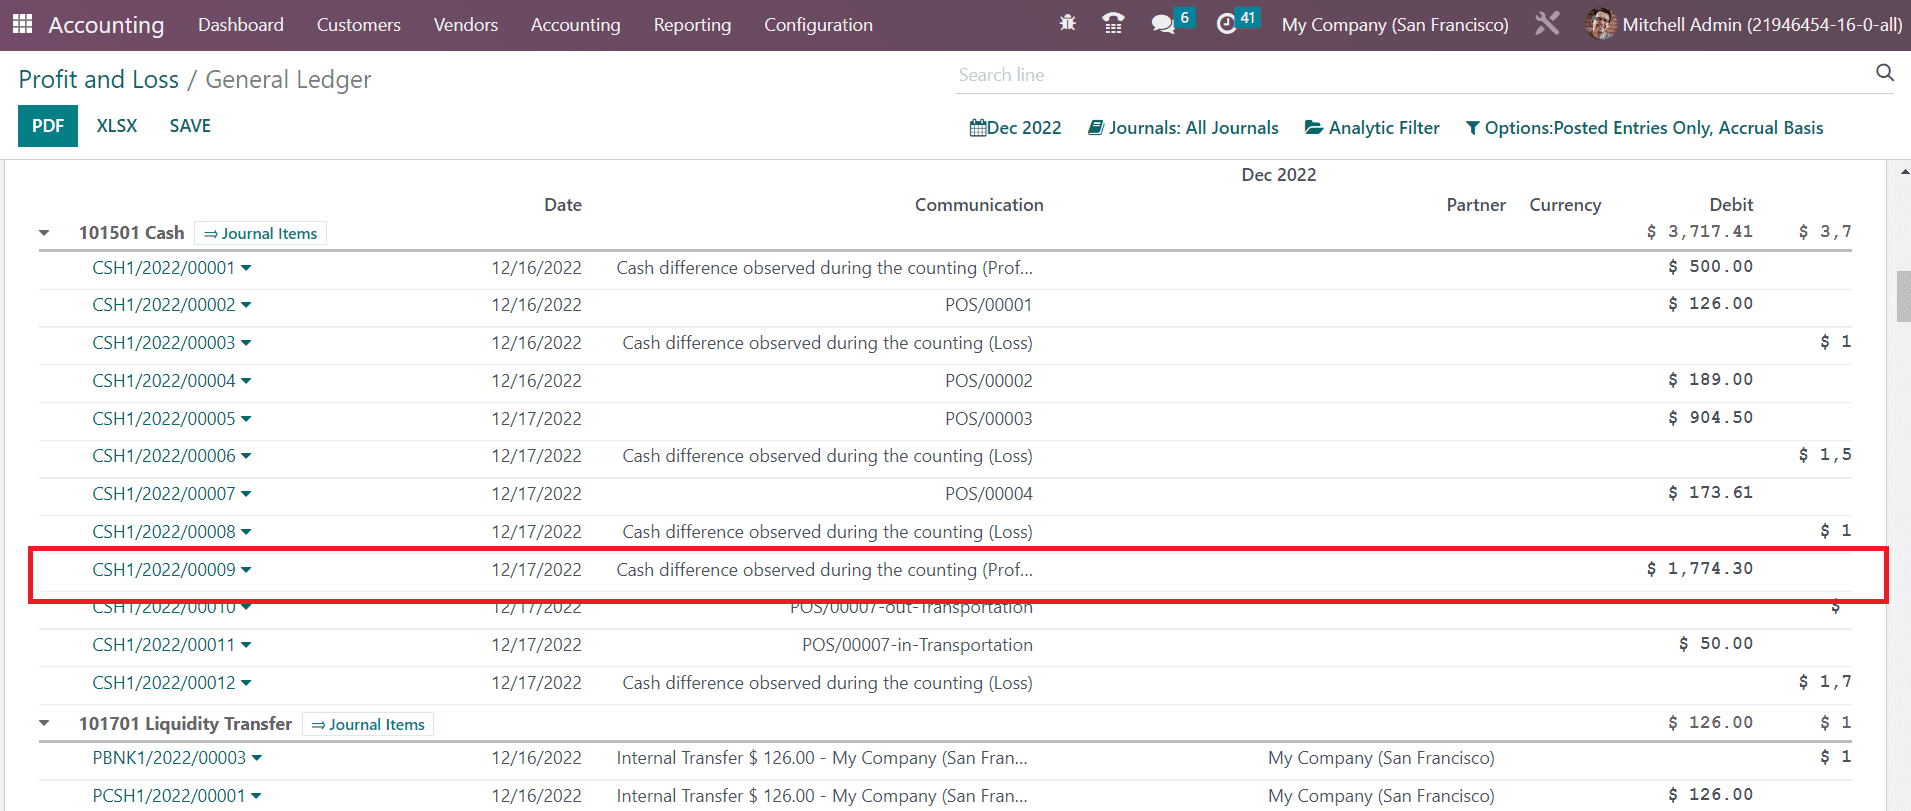
This is how Odoo operates different PoS sessions in Odoo.
In the backend, the record of all orders will be displayed in the Orders menu of the PoS module.
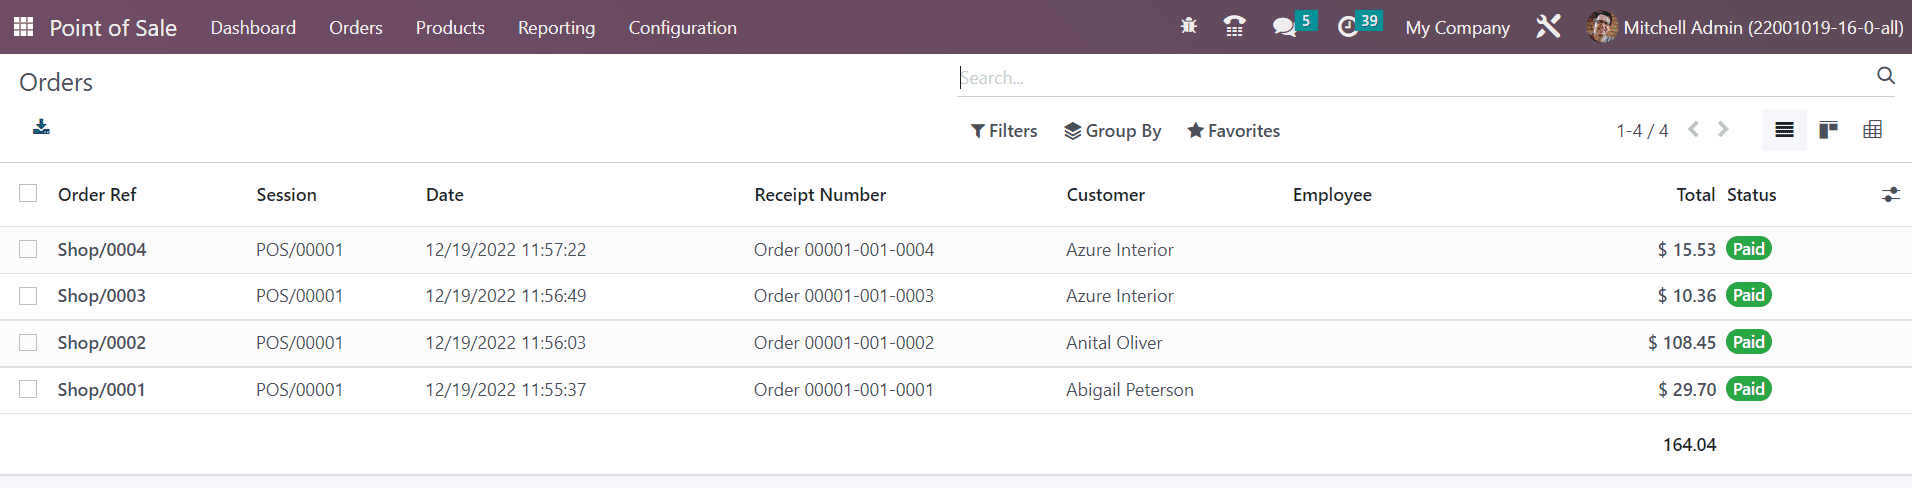
The list view shows the Order Reference, Session, Date, Receipt Number, Customer, Employee, Total, and Payment Status. This window can also be viewed in Kanban and Pivot at your convenience. Based on Session, Cashier, Customer, Status, and Order Date, you can group the Orders. You will get Invoiced, Posted, and Order Date as default Filters in this window. Use the Custom filters and group by options to create new sorting options.
If you want to get the Sessions history, select the Sessions option from the Orders menu. The Session ID, Point of Sale, Opened By, Opening Date, Closing Date, and Status will be shown in this window.
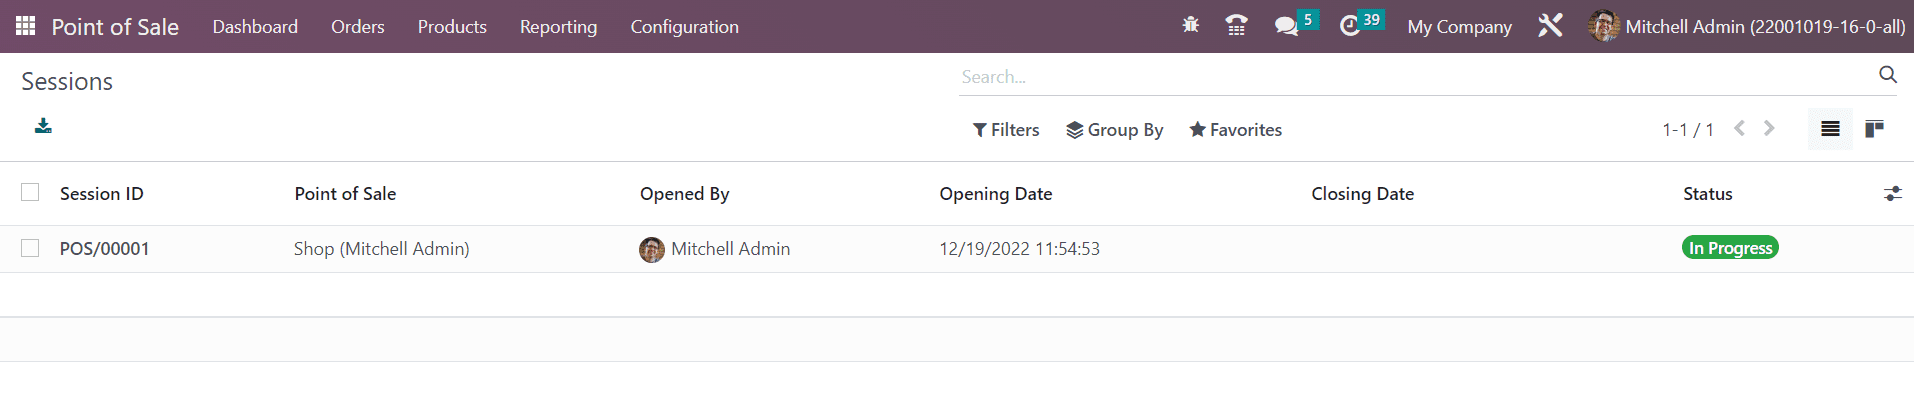
As default filters, you will get My Sessions, In Progress, and Opening Date. The sessions can be grouped by Point of Sale, Opened By, Status, Opening Date, and Closing State. In order to get additional information, you can click on a session and a form view will be displayed as shown below.
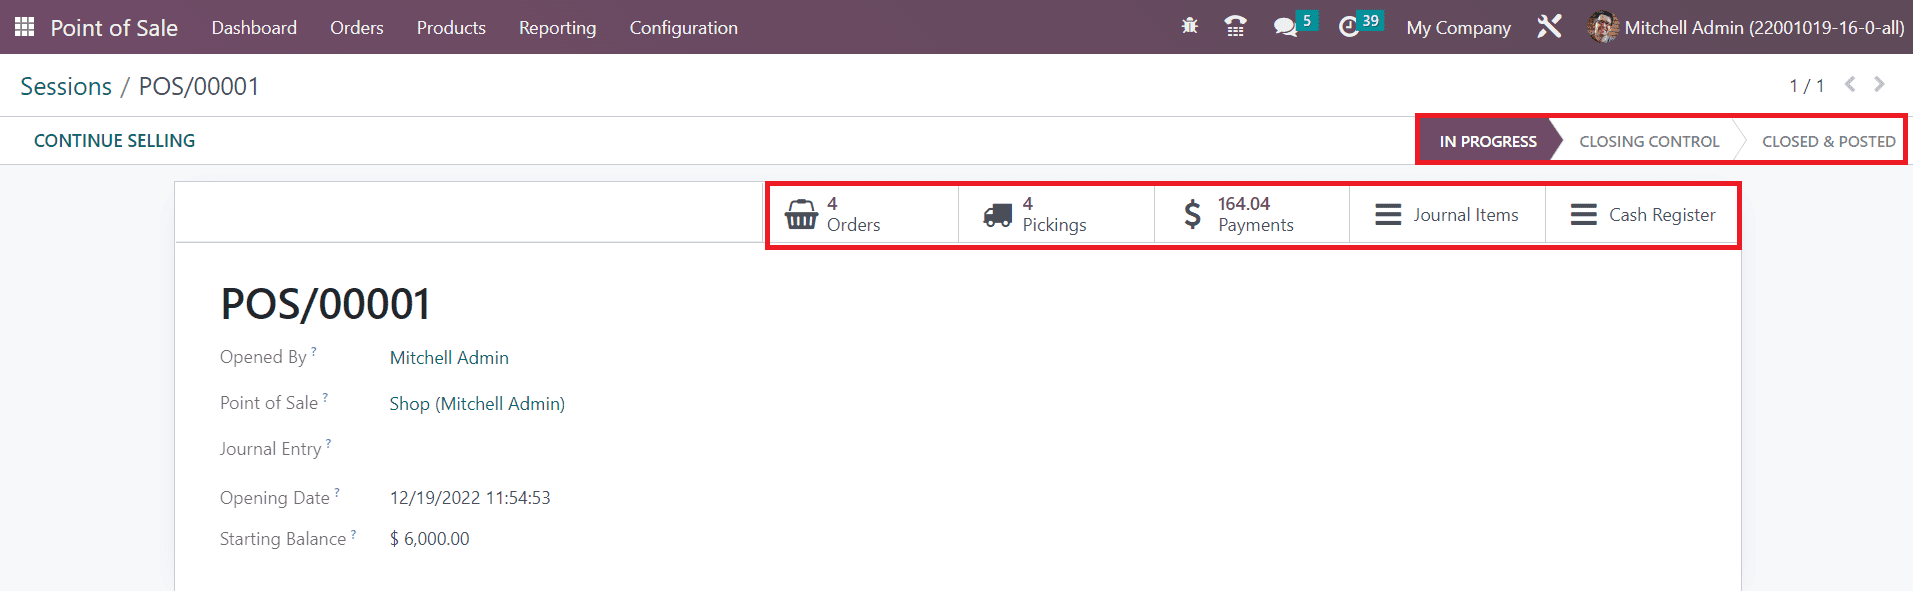
In the smart buttons, you will get details of the total orders, pickings, payments, journal items, and cash register. The status of the session is shown in the top right corner of the window.