Generate an Expense
The Odoo platform allows you to manage Expenses easily. The Expenses window can
be accessed from the My Expenses tab of the platform. For that, you can go to
Expenses -> My Expenses -> All My Expenses.
The image of the All My Expenses window is depicted below.
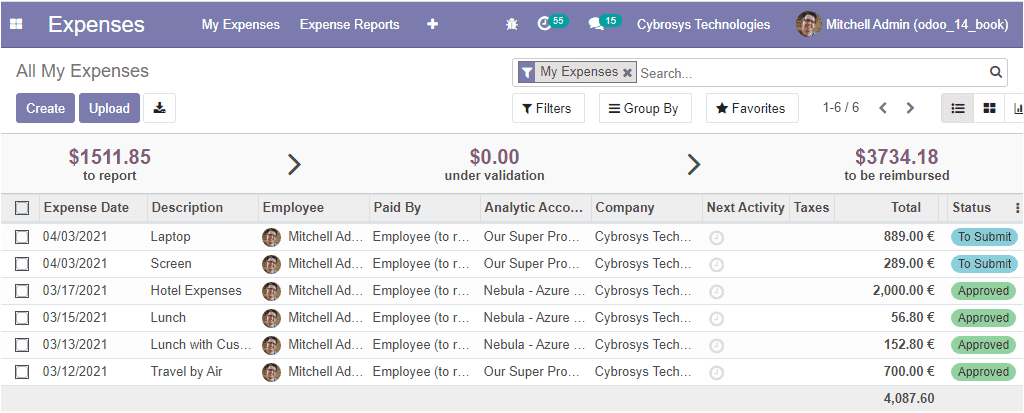
In this window, you can view the Expense created Date along with the Description.
Also, the details of Employee, paid by, Analytic account, Company, Total amount
and the Status. For creating new Expenses, you can select the Create icon available.
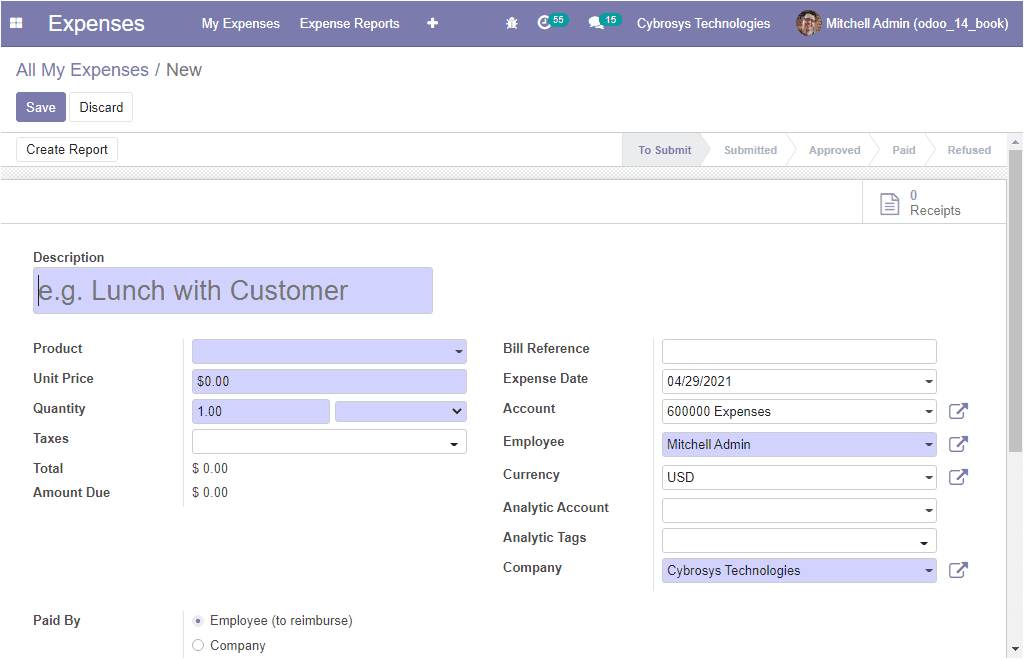
In this creation window, you can provide the Description of the expense, and in
the product field, you can explain the expense type. Then you can define the Unit
price along with the quantity and its unit of measure. After that, you can mention
the Taxes along with the Total amount. Moreover, you have to allocate Bill reference,
Expense date, Account, Employee, Currency, Analytic Account, Analytic Tags, and
the Company.
At last, you can mention whether it is a person or company that made the payment.
After finishing all these steps, you can save the details by selecting the Save
icon available. The image of the window is depicted below.
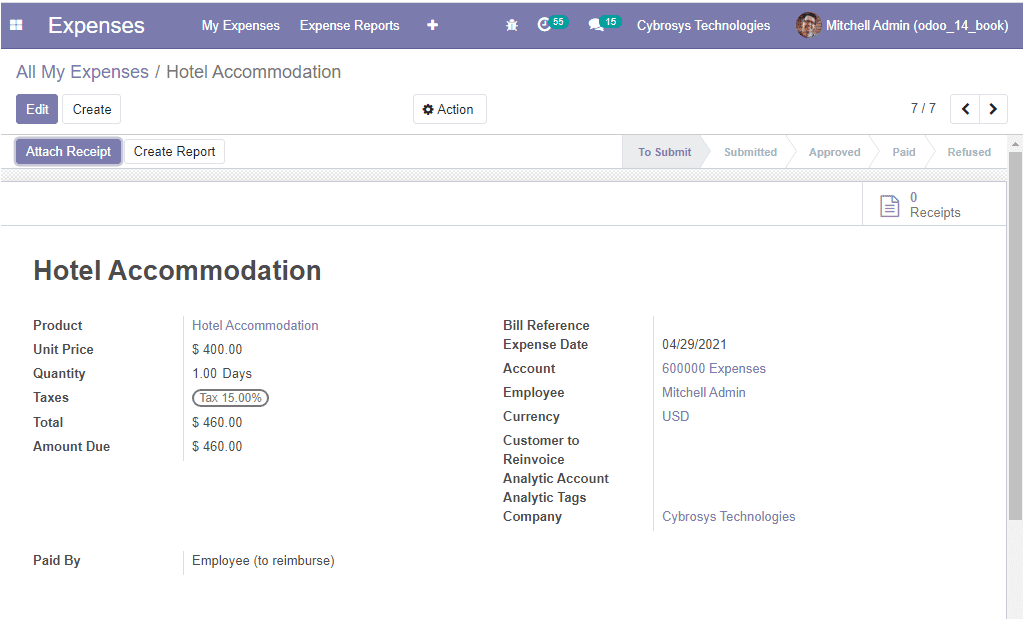
Now the window shows two buttons named Attach Receipt and Create
Report as shown in the below image. Using these buttons you will be
able to attach receipts and also you can create reports by selecting the respective
menu.
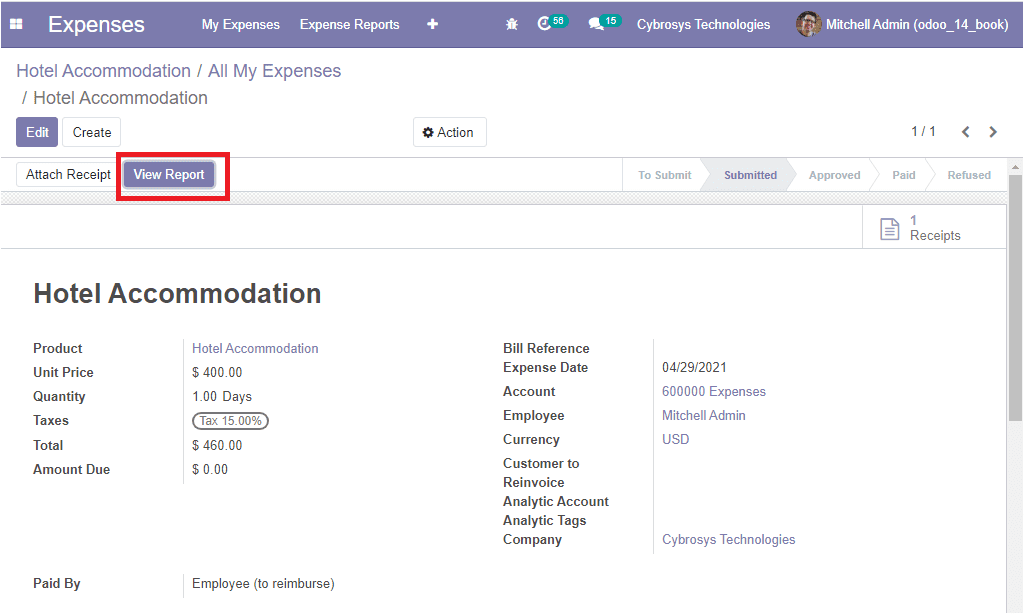
Now the report can be viewed by selecting the View Report option
available in the window as depicted below.
In the View Report window, you can view the Expense details under the Expense tab.
Moreover, the receipt attached can also be viewed here.
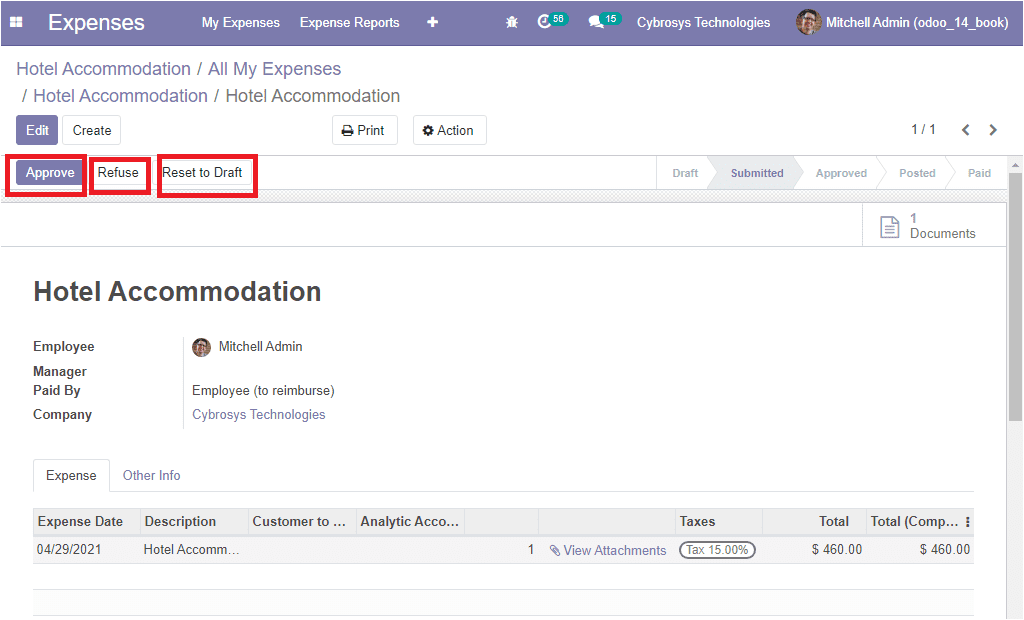
In this window, you can view the Approve, Refuse, and Reset to Draft
button. If you are selecting the Approve button, the status will
change from Submitted to Approved.
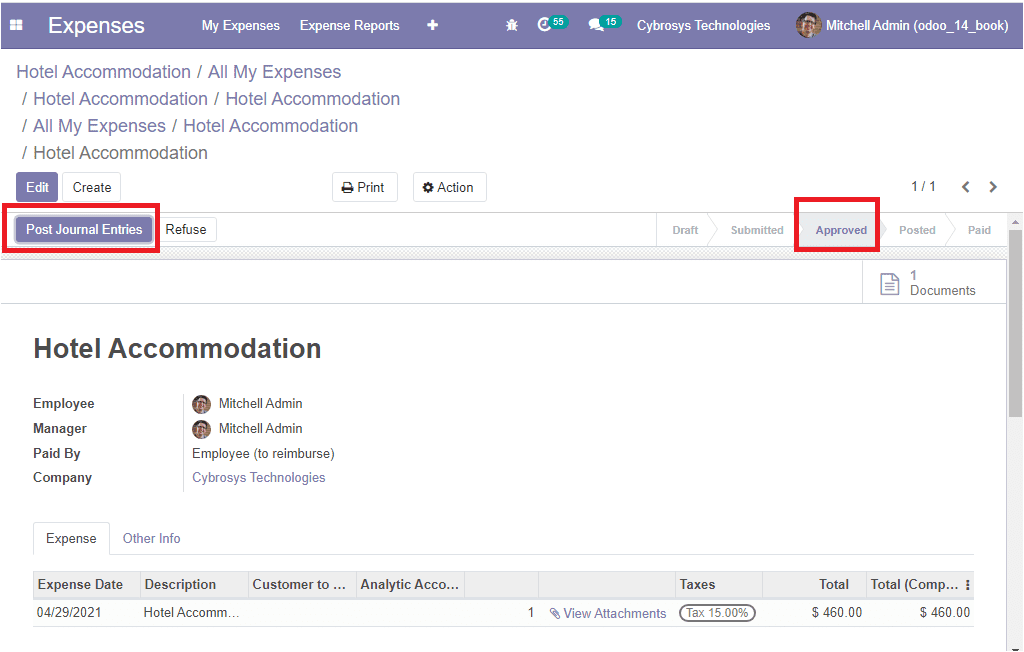
Now it is possible to post journal entries by selecting the Post Journal Entries
button available. This action will make the status Posted. The
image is shown below.
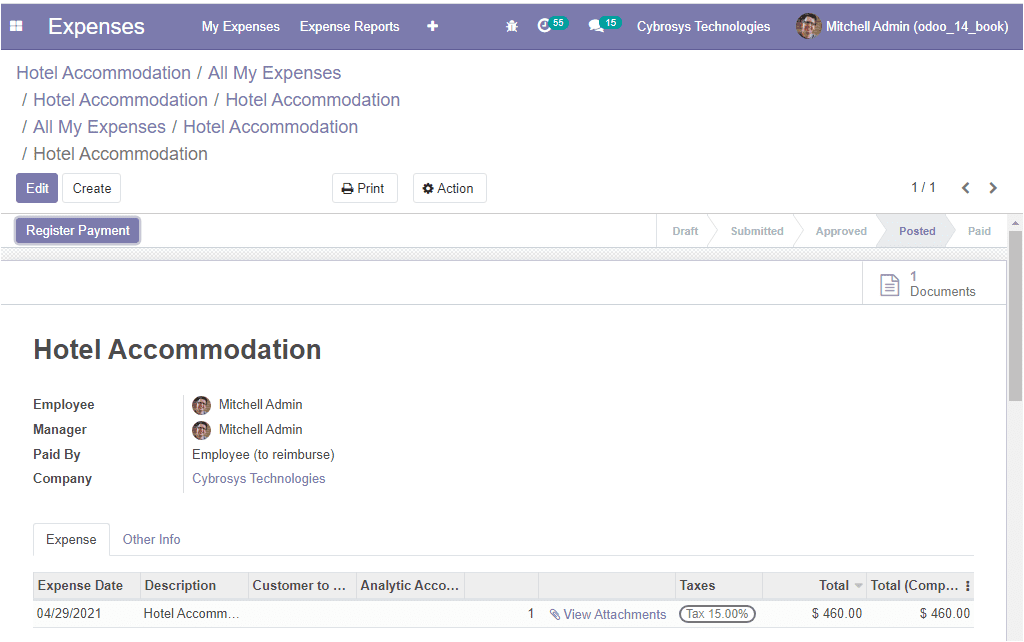
Now you can click on the Register Payment button available. Then
you will be depicted with a new pop-up window as depicted below.
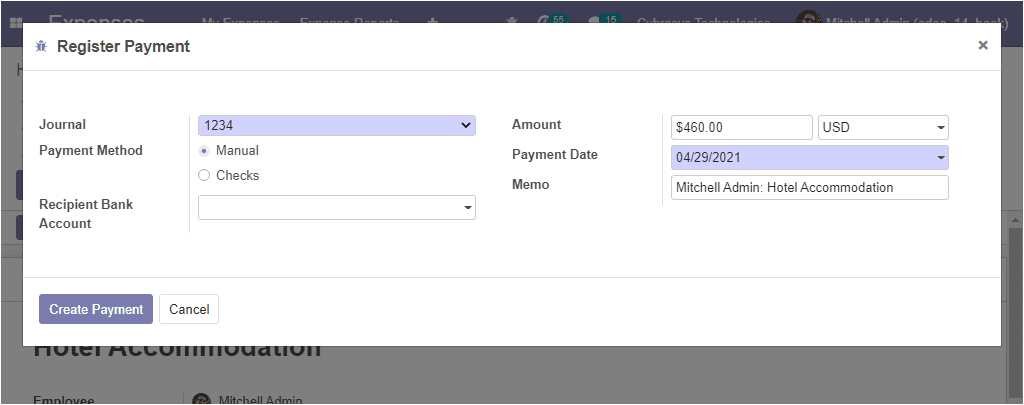
In this popup window, you can provide the name of the Journal, select Payment Method,
and also can specify the Recipient bank account. Moreover, the Amount can be allocated
with the Payment Date and Memo. After providing all the information, you can click
on the Create Payment button.
Now the window will be depicted with a green label indicating PAID. The image of
the window is depicted below.
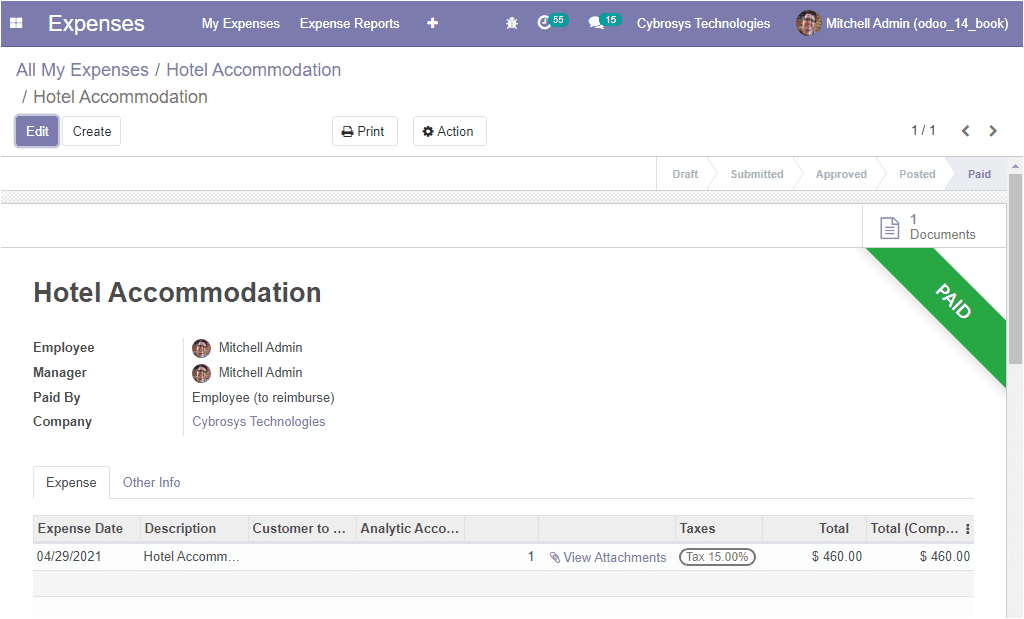
Now the status also changes from Posted to Paid.
So far we were discussing the All My Expenses window and now let us discuss how
to create My Reports on the platform.