Accounting Dashboard
The invoicing module of the community edition allows you to manage all the accounting
features of your company in a well-organized manner. When you enter the Odoo accounting
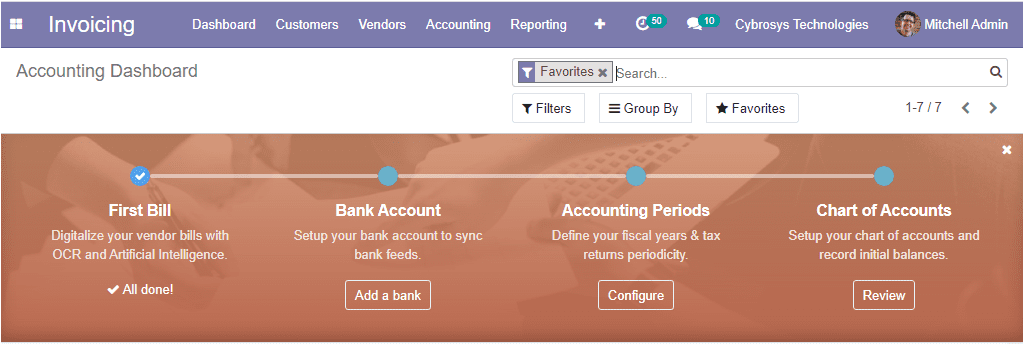
module, you can view an accounting overview window as shown below where you can
view a step-by-step accounting onboarding banner and it is composed of four steps
as Company data, Bank accounts, Accounting periods, Chart of accounts. This onboarding
banner is displayed until you select to close it. The image of the onboarding banner
is depicted below.
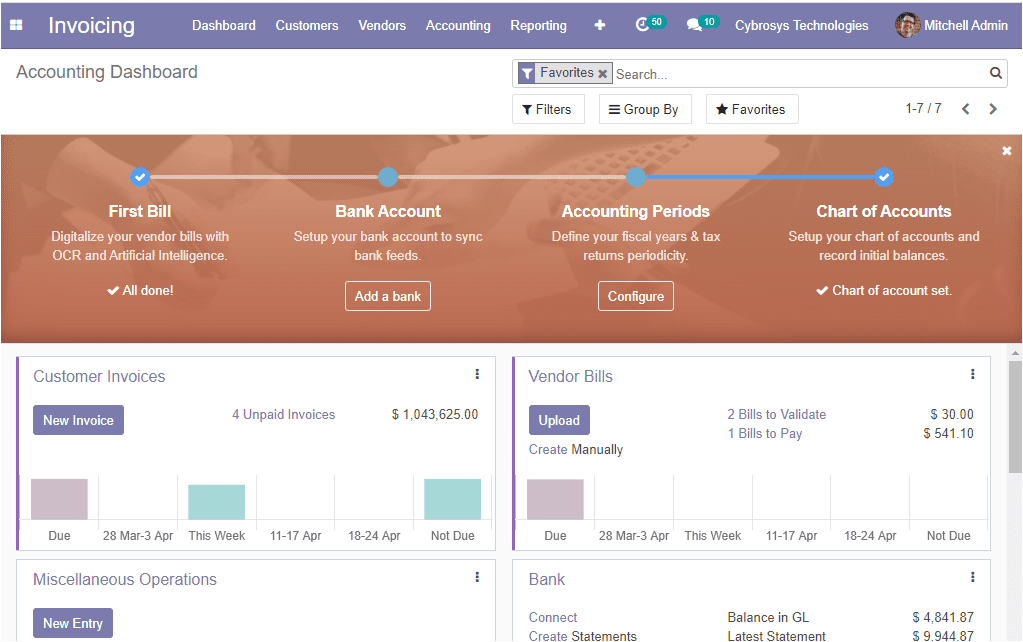
Under the on boarding banner, you can view the advanced options and can conduct
the customer invoices operations, new invoice generation, create and upload vendor
bills, connect with the bank and create statements, and many more from the accounting
dashboard itself. The image of the window is depicted below.
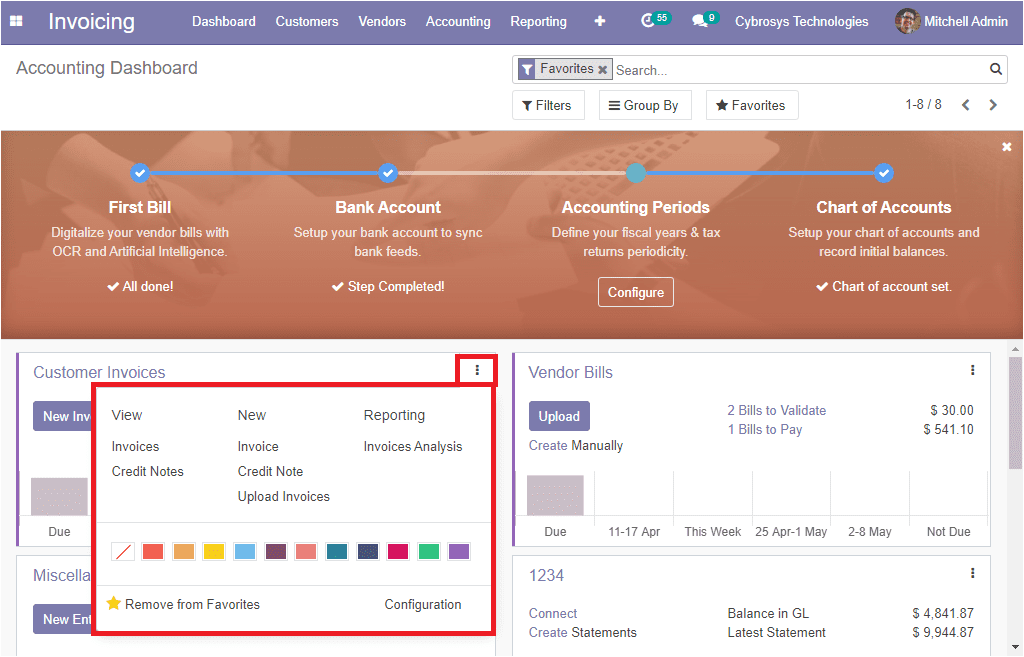
There you can view three dots available at the upper right corner of each tab. By
selecting these dots you can view a new dropdown menu where you have different options
such as View, New, and Reporting. Under the view option of the customer invoices
tab, there are options to access the invoices, credit note windows. You can also
create new invoices and credit notes under the New option available. Likewise, we
can view these options under each operation.
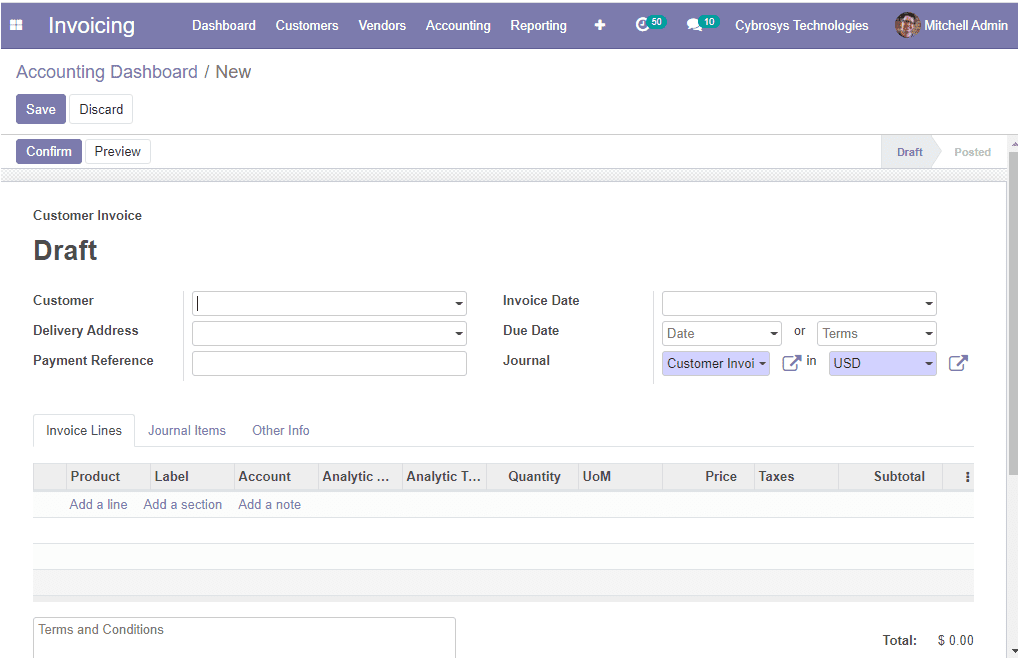
To create new invoices you can select the Create option and you
will be depicted with the new creation window where you can allocate the customer
from the dropdown menu, delivery address for the current invoice, and you can provide
the payment reference to set on journal items. Moreover, you can specify the invoice
date, due date, along with the journal entry. The image of the window is depicted
below.
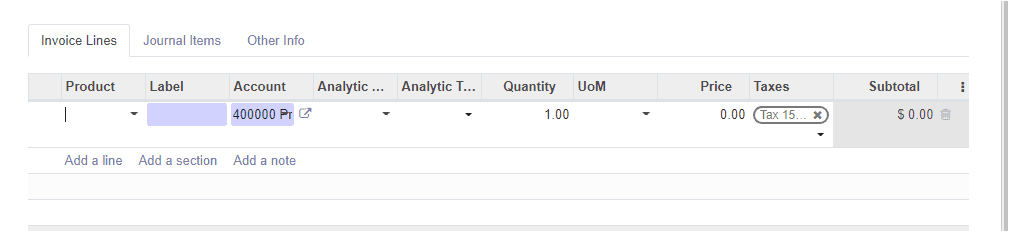
Under the Invoice Lines, you can add products with respect to the sales to the invoice
by clicking on the Add a line option. You can also add a section and a note by selecting
the respective option.
Under the Other info tab, you can specify the invoice details such
as customer reference, salesperson, sales team, recipient bank which is the bank
account number to which the invoice will be paid. If it is a customer invoice or
vendor credit note, a company bank account number is needed. Otherwise, a partner
bank account number is enough. Additionally, you can provide the payment QR- code.
Along with these details, you can also allocate the company, incoterms, fiscal position,
cash rounding method. Moreover, you can enable the option Post automatically to
automatically post at its date. Also, you can enable the TO check option when you
are not sure of all the related information at the time of the creation of the move
and that the move needs to be checked again.
So far we were discussing the accounting dashboard and how to create new invoices
in the Odoo platform. Now let us have a look at the various configurations available
on the platform.