Groups
Groups are the set of users who share some access permissions. Let’s look at how to create security groups.
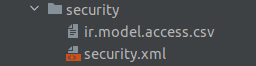
All security-related files are added to the security directory.
Also, this path will be added to the __manifest__.py
'data': [
'security/ir.model.access.csv',
'security/security.xml'
],
First, we can create an XML file for the security group. For that, going to create a record in the ‘res.groups’ model.
<record id="school_management_student" model="res.groups">
        <field name="name">Student</field>
        <field name="category_id" ref="school_management.school_management_accesss"/>
     </record>
Here we mainly mention the name and category_id for the group.
id: id of the record, which will be saved in the res group table and is distinct for each record.
name: the record's name. It is a name that people can read, and the user interface displays it.
category_id: This is the category to which this record belongs.
Therefore, we must construct a category to provide the category's id. For that, we are creating a record in the ‘ir.module.category’ model.
<record model="ir.module.category" id="school_management_accesss">
        <field name="name">School Management</field>
     </record>
For accessing groups from the user interface, enable the debug mode. Go to general settings -> users & companies -> select groups option.
Under this option, we can see all the groups created in the database.
We can also use these groups in the ir.model.access.csv files as per our needs. (please refer to the highlighted part of below code)
id,name,model_id/id,group_id/id,perm_read,perm_write,perm_create,perm_unlink
access_test_model, access_test_model, model_test_model, school_management.school_management_student,1,0,0,0
Hide/View menu based on groups
Let us have a look at how to hide/view menus based on groups.
<header groups="education_organisation.group_education_organisation_user">
        <button groups="education_organisation.group_education_organisation_user" name="get_top_score_students"
            string="Get Top Score Students" class="oe_highlight" type="object"/>
     </header>
Here the groups are defined like ‘module_name.group_id’. Here this header tag is only for the specific user group
‘education_organization.group_education_organisation_user’. In the same way, we can mention the group for the button tag too.
Next, we can consider a menu. By adding groups to the Menu item, we can indicate the group for whom the menu item should be displayed.
<menuitem id="res_config_settings_menu"
    parent="config_menu"
    name="Settings" sequence="10"
    action="dev_book.res_config_settings_menu_action"
groups="education_organisation.group_education_organisation_admin,education_organisation.group_education_organisation_user"/>
Additionally, you can designate multiple user groups. Add each user group category for the groups attribute, separated by commas.