Menu Action
There are two methods In Odoo for navigating to different pages. Both the user interface and the code can be used to generate menus. You add menus and associated actions using XML based upon the code. Therefore, inside the views folder, you should create a new XML file.
Menu:
The menu item tag can be used to create new menus. The attribute name specifies how the menu's name will be displayed. Additionally, you can provide the menu's sequence, which refers to the order in which you want the menu to appear. Only if the menu item or any of its submenus has an action will it appear on the screen.
For example:
<menuitem id="menu_root_hospital" name="Hospital Management"/>
Sub Menu
You can create a submenu for the main menu. For creating a submenu, a parent menu is required.
For example:
<menuitem id="menu_hospital_menu" name="Hospital" action="hospital_action" parent="menu_root_hospital"/>
<menuitem id="menu_patient_menu" name="Patient" action="patient_action"
        parent="menu_hospital_menu"/>
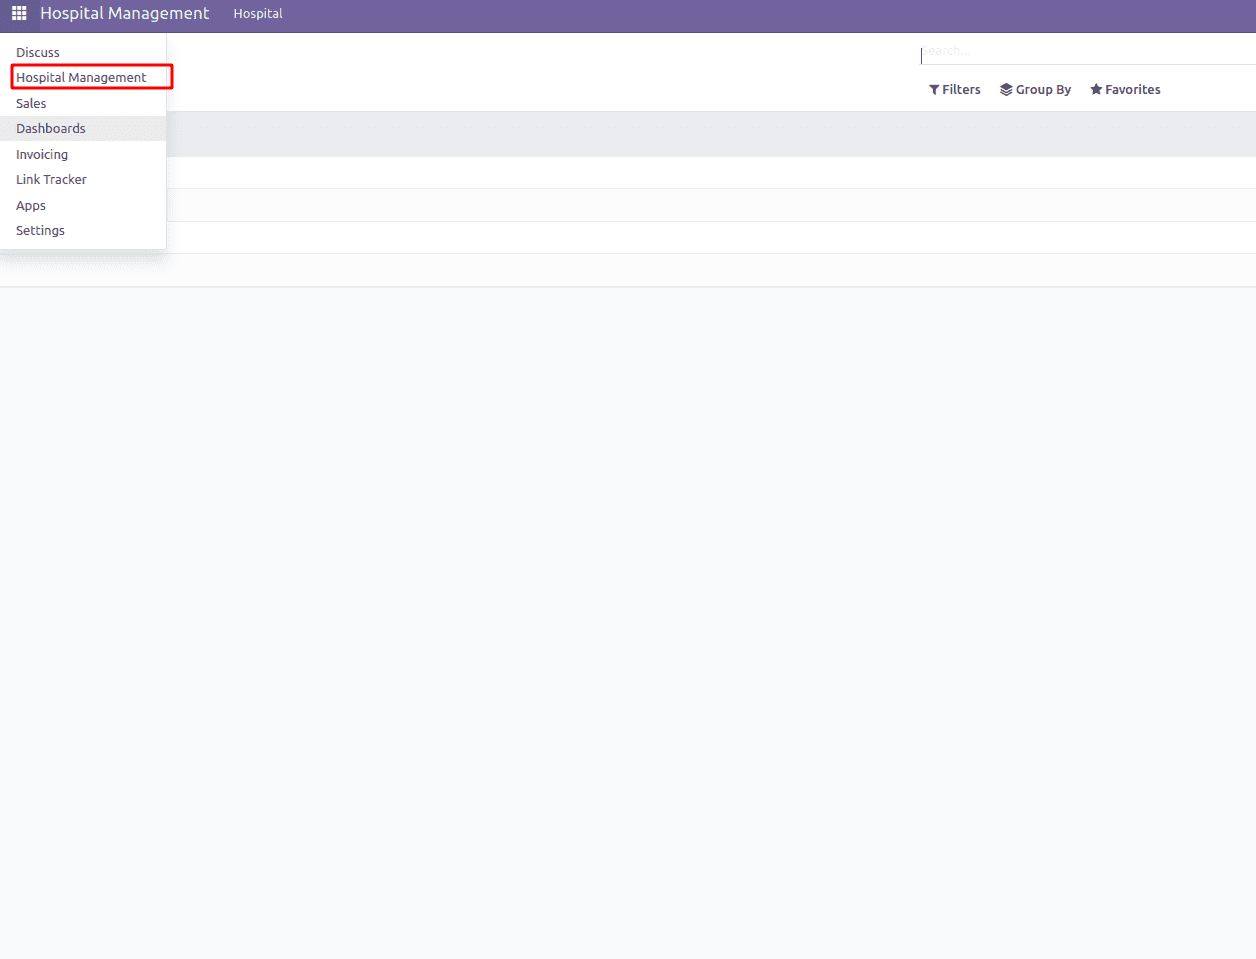
Two submenus are here. The main menu has a hospital submenu.
The Hospital menu includes Hospital Management and Patients.
Patient menus have actions, so when a menu item is clicked, the accompanying action is displayed.
Next is to define the action. The menu or its submenu should have an action for viewing the menu.
For example:
<record id="patient_action" model="ir.actions.act_window">
            <field name="name">Patient</field>
            <field name="res_model">patient.info</field>
            <field name="view_mode">tree,form</field>
            <field name="help" type="html">
            <p class="o_view_nocontent_smiling_face">No patients     found. Let's create one!</p>
          <p>To get things done, use activities and status on    patients.</p>
         </field>
         </record>
From the action:
name: Name of the action
res_model: Name of the action
view_mode: The viewing mode, in this case, list and form and must desire to provide views that correspond to the view modes.
Help: If there is no data, a message inside the help will be displayed.
Menus from The UI:
Using the user interface, it is also able to construct and modify menus and submenus. For that, Go to > Settings > Technical > User Interface > Menu Items.
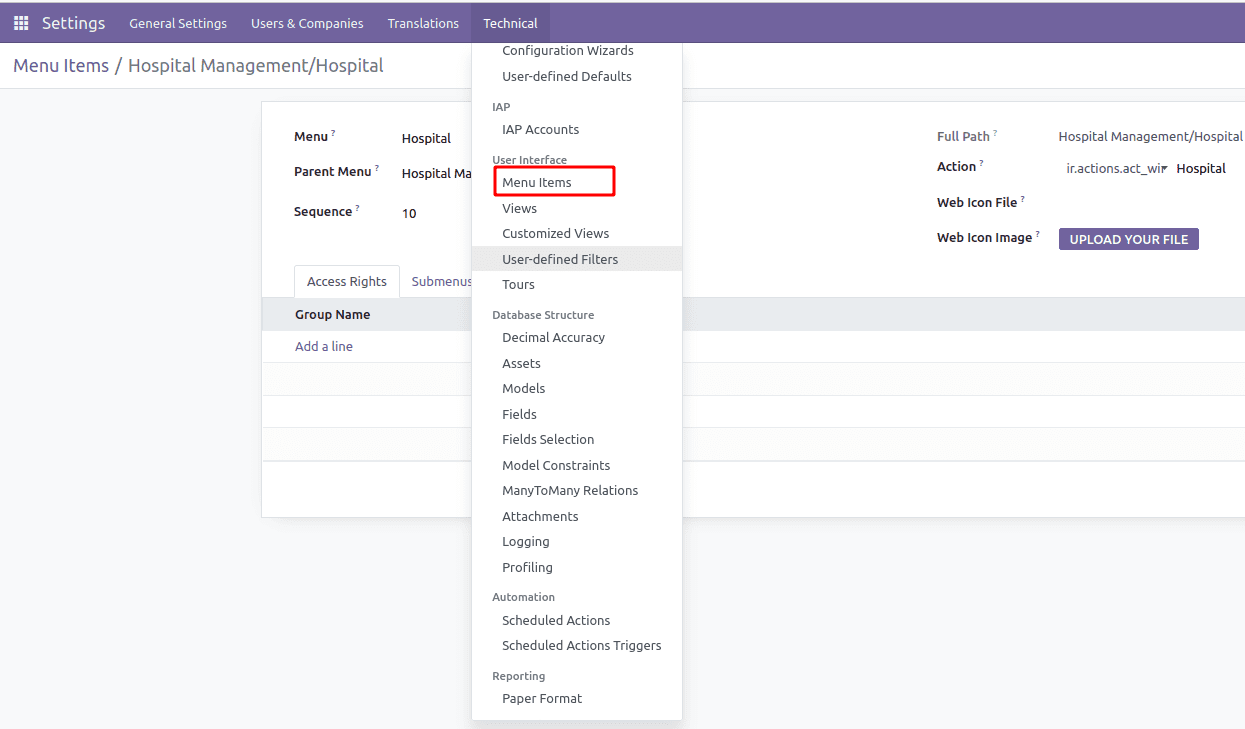
To create a menu from the UI, Go to > Menu Items > Create
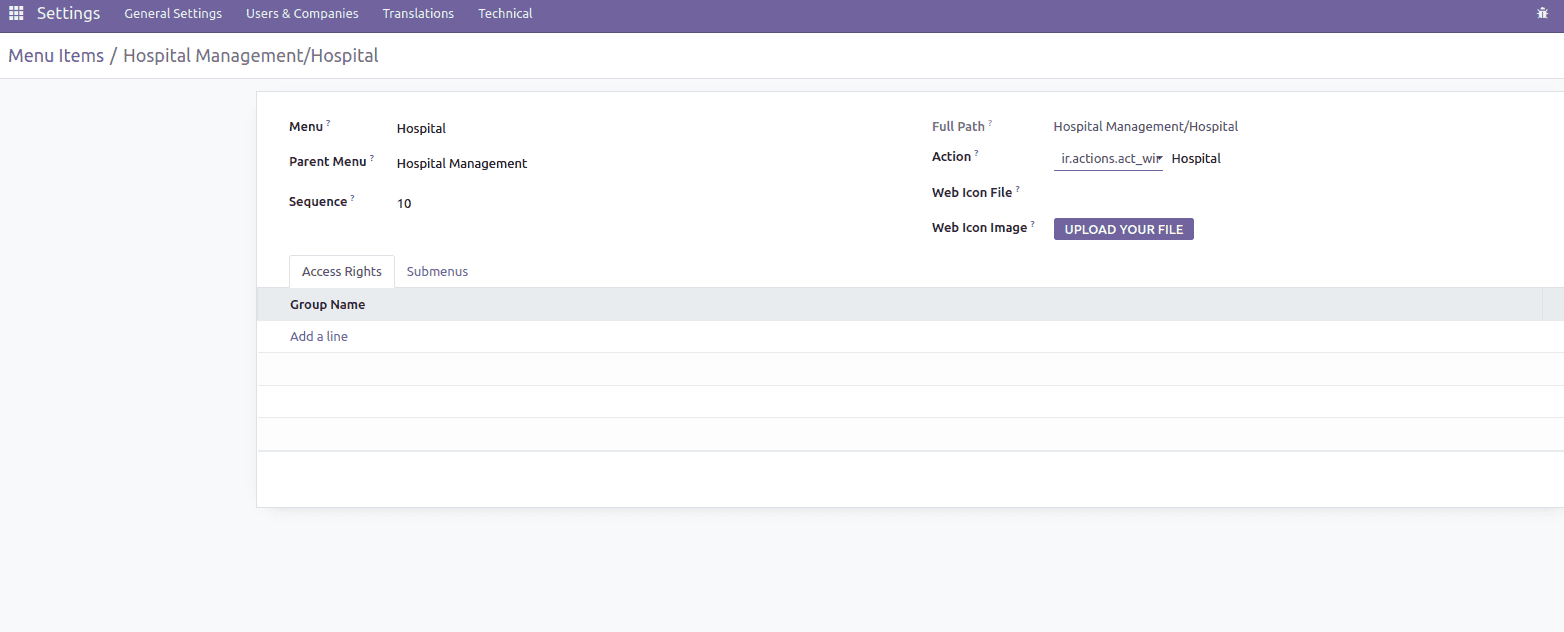
Here to create a menu in the new module hospital_management,
Menu - Name of the menu
Parent Menu - The parent menu
Sequence - Sequence of the menu item.
Action - Specify the action.
Access Rights - Giving access privileges allows you to restrict access to a certain user group
Submenus - You can add a submenu here if you want to expand the menu. When you visit the corresponding module after saving the form, the menus are now visible.
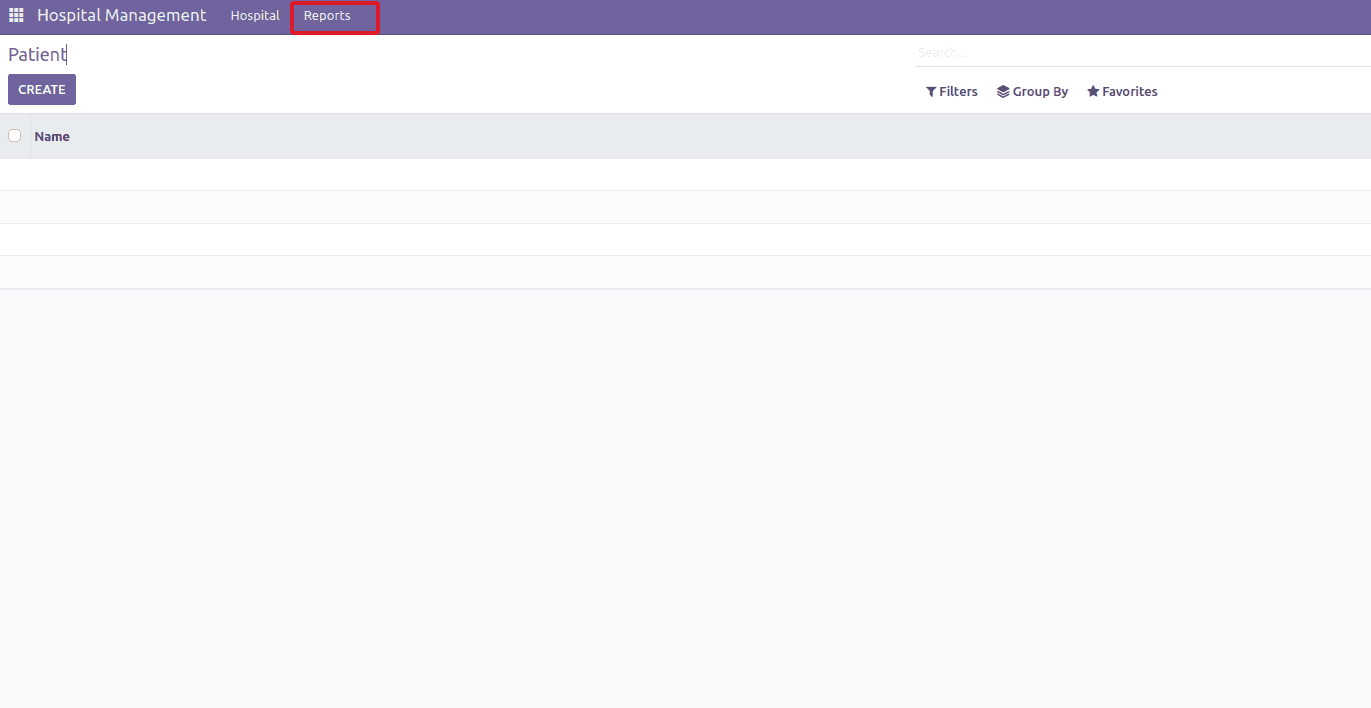
In this menu, Report is a recent addition.
In this manner, the UI can be used to construct new menus and submenus.
Widgets
There are two options for accessing different pages in Odoo. Both the user interface and the code can be used to generate menus. You add menus and associated actions using XML, according to the code. Therefore, inside the views folder, you should first create a new XML file.
widget="many2many_checkboxes"
2. Status bar
Use this widget to display the status. Code is
widget="statusbar"

3. Percentpie
This widget will display the progress chart. The code is

4. Guage
Similar to the percentpie widget, this one also allows you to enter a maximum value in the max field.
For example:
<field name="int_field" widget="gauge" options="{'max_field': 'another_int_field'}"/>
5. Progressbar
By using this widget, you will get the progress. You can use the
widget="progressbar"
6. Many2many Tags
It will display multiple items as tags. Code is
widget="many2many_tags"

7. Handle
By using this widget, you can drag the lineup and down. You can use the code
widget="handle"
8. Many2many Binary
You can attach files by using this widget. Code is
widget="many2many_binary"
9. Selection
It displays a list of items by using the code
widget="selection"
10. Radio
This widget is used to get the radio button effect. Code is
widget="radio"