Tour Test Cases
Testing Python code and JS code separately is very useful, but it doesn't prove that the web client and server work together. To do this, we can write another type of test: tours. Tours are mini-scenarios of interesting business processes. It describes the sequence of steps to follow. The test runner then creates a PhantomJs browser, points it to the correct URL, and simulates clicks and inputs according to the scenario.
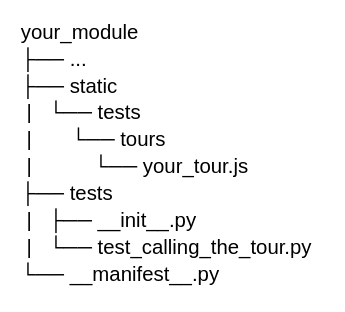
To add a tour test case for a custom module, follow the steps below:
structure:
1. Set up your tour by registering for it.
import { _t } from 'web.core';
import { Markup } from 'web.utils';
import tour from 'web_tour.tour';
tour.register('student_tour', {
	url: "/web",
	test:true,
	},
);
Below are some possible options that you can define for your tour.
- url: Page to start the tour.
- skip_enabled: To add a skip button to the top.
- wait_for: Wait for the deferred object before running the tour.
- test: If set to true, this tour will only be used for testing purposes.
2. Add a required number of steps to the tour.
[tour.stepUtils.showAppsMenuItem(), {
	trigger: '.o_app[data-menu-xmlid="student.menu_research_management_root"]',
	content: Markup(_t('Want to manage your books? It starts here.')),
	position: 'bottom',
   },
   {
	trigger: '.o_list_button_add',
	content: _t('Let\'s create your first book by clicking on create.'),
	position: 'bottom',
	},
	{
   	 trigger: '.o_field_widget[name="name"]',
   	 content: _t('Fill the Book name.'),
   	 // When you run the test (from the developer tools) it will automatically fill in 'War and peace'.
   	 run: function (actions) {
    		 actions.text('War and peace',this.$anchor.find("input"));
   	 },
   	 position: 'right',
   	 },
   ]
Each step of the tour can have several arguments. Possible arguments are:
- trigger: selector/element/jQuery you want to trigger
- extra_trigger: An optional secondary condition for executing the step. It waits like the trigger element, but the action is not executed with additional triggers.
- run: Action to perform on the trigger element.
- edition: If you don't specify an edition, the step is active in both community and enterprise.
- position: Optionally, "Top," "Right," "Bottom," or "Left." Where to place the tooltip relative to the target when running an interactive tour.
- content: Although optional, the interactive tour tooltip content is also logged to the console, which is very useful for tracking and debugging automated tours.
- auto: Whether the tour manager should wait for the user to perform the action if the tour is interactive, defaults to false.
- in_modal: If set, the trigger element will only be searched in top-level modal windows. The default is false.
- timeout: Wait time in milliseconds, 10000 (10 seconds) before the step executes.
3. Add tour.js file in a manifest.
'assets': {
    	'web.assets_backend': [
       	'student/static/src/js/tour.js',
    	],
},
4. To start a tour from a Python test, make your class inherit from HTTPCase and call start_tour.
@tagged('post_install', '-at_install','student')
class TestUi(HttpCase):
	def test_01_student_tour(self):
    	self.start_tour("/web", 'student_tour', login="admin")
5. To run the test case, start the server with the following option;
./odoo-bin -c odoo14.conf -i student - - test - tags=student
6. If our test case ran successfully, the following log will be displayed
...INFO test odoo.addons.student.tests.student_tour.TestBook:
console log: Tour student_tour succeeded