Transfers
Companies with multiple warehouses need to manage the transfer of products from one location to another. In some cases, the companies may have different branches at different locations, which requires a great effort to manage the product transfers successfully. Companies often manage such situations by allocating main warehouses and sub warehouses for product distributions. The Transfers feature in Odoo supports the effortless management of product transfers from one location to another.
Inventory transfers included the movement of products between the warehouses and outside the warehouse. It also includes internal transfers for the movement of products within the warehouses of the company. Odoo ERP system supports the configuration and management of warehouses which we will discuss in the next section. After configuring details of the warehouses and locations of the company, you can use the Transfers option available under the Operations menu to manage the product transfer between the configured warehouses and locations.
As shown in the image below, you will get the details of the Reference, From, To, Contact, Scheduled Date, Source Document, Batch Transfer, Company, and Status details of the preconfigured transfers here.
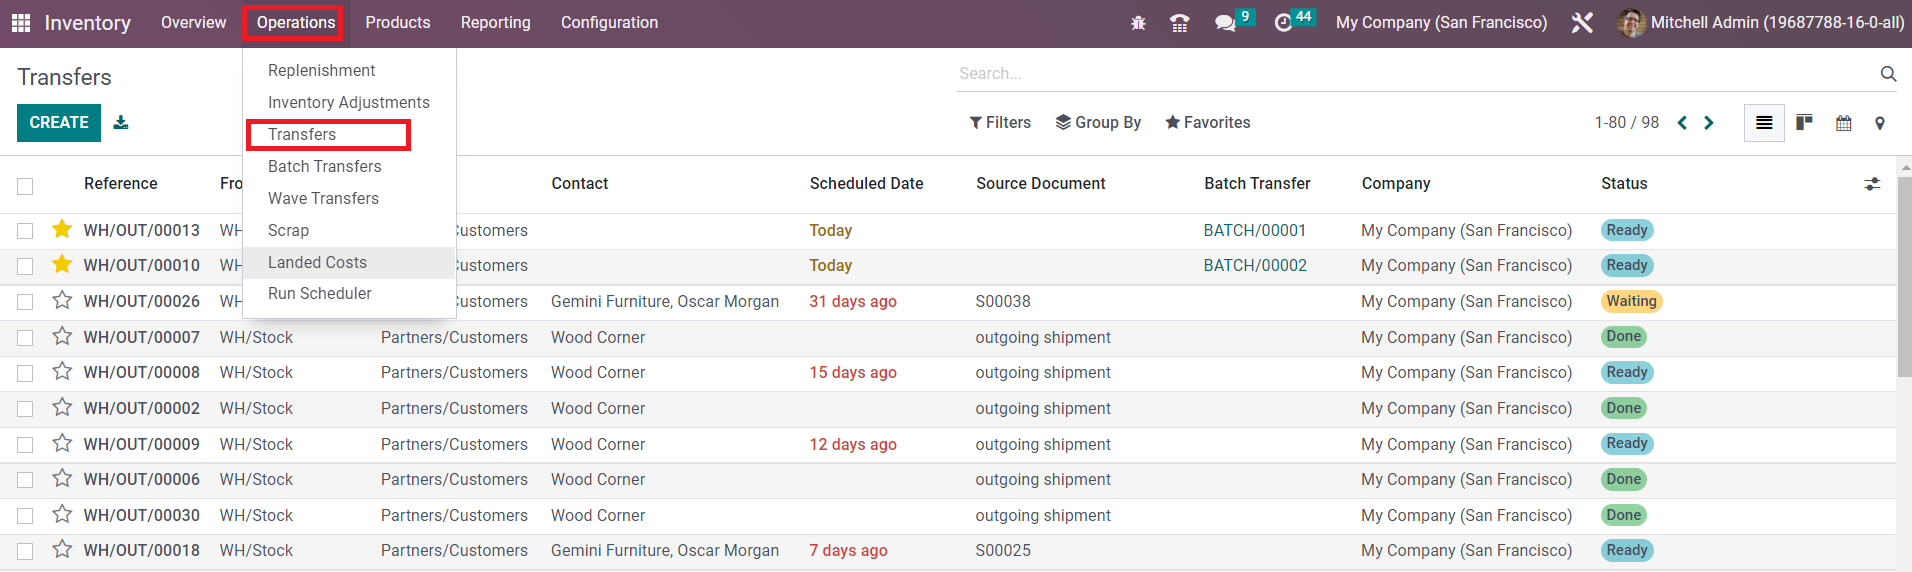
Using the Filters and Group By options, you can effortlessly accomplish the sorting operations. Additionally, you will get Kanban, Calendar, and Location views for this platform. Now, let’s check how Odoo helps you to create a new transfer for the movement of products from one location to another. For this, click on the Create button.
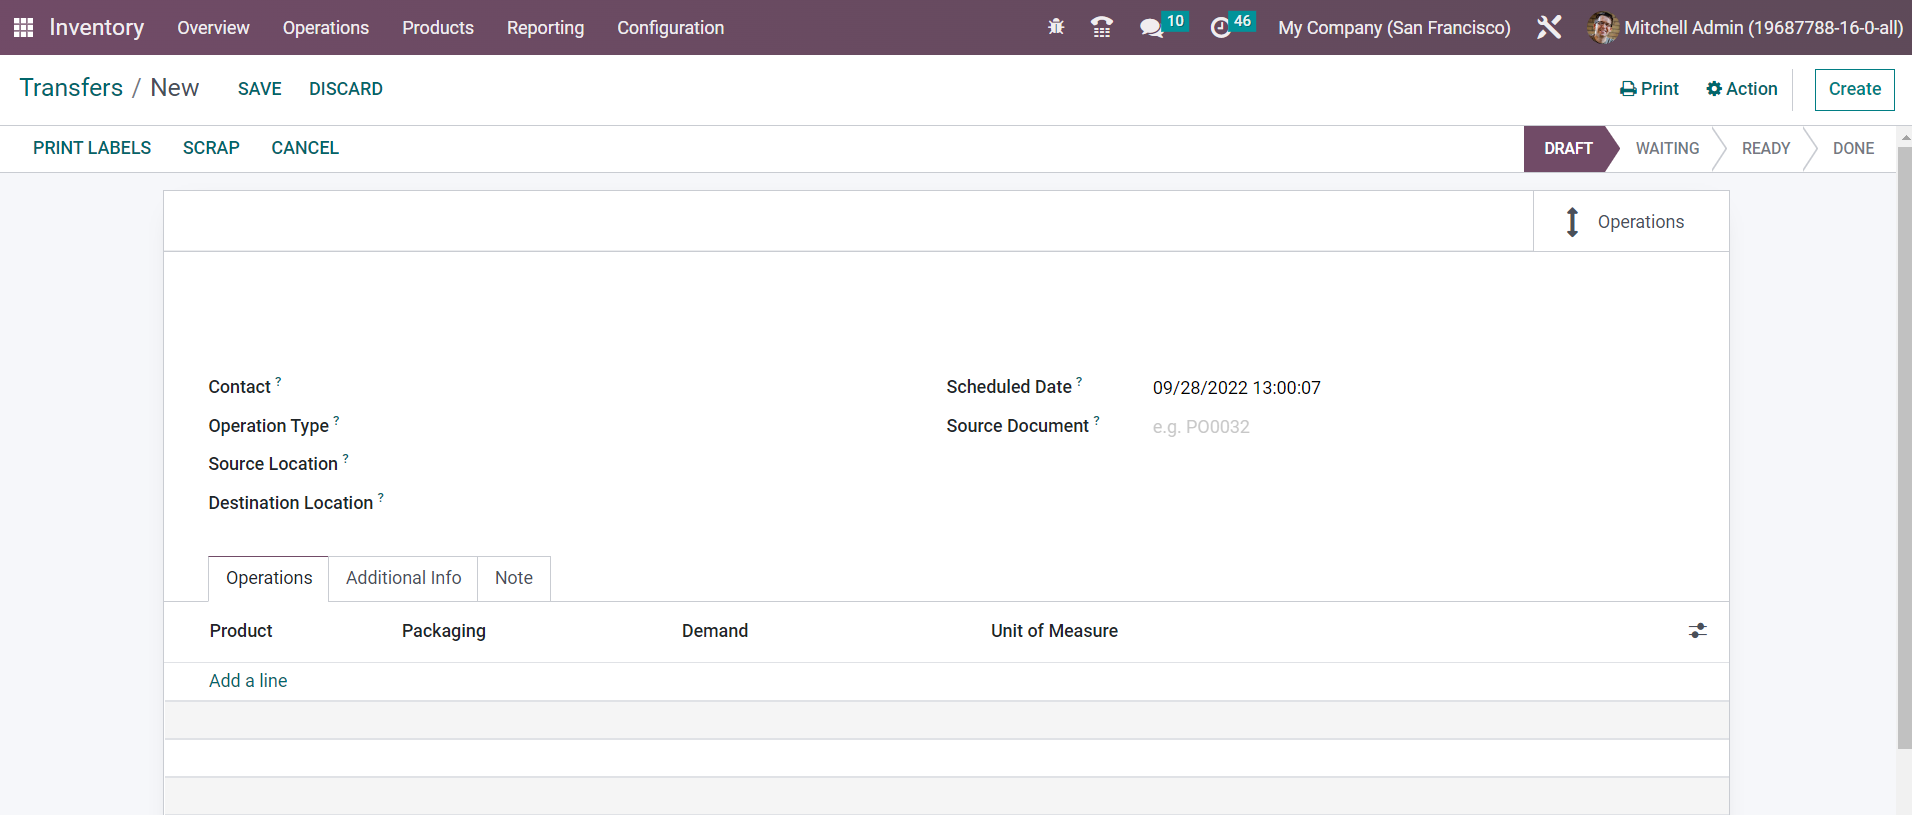
In the new transfer creation window, the partner id can be specified in the Contact field. This platform can be used to manage different types of transfer. Some of them are Receipt, Internal Transfer, Delivery Orders, Returns, Manufacturing, Resupply Subcontractor, POS Orders, and Dropship. You can select the transfer type you want for your product movement in the Operation Type field. Odoo offers a separate platform to define different operations types in the Configuration menu which we will discuss later. After selecting a suitable Operation Type, you can specify the Source Location and Destination Location of the product. The expected date of stock movement can be mentioned in the Scheduled Date field. The reference of the document related to this product transfer can be added in the Source Document field. Under the Operations tab, you can mention the products included in this transfer one by one using the Add a Line button. Along with the name of the Products, you can mention the Packaging, Demand, and UoM of the products. The Demand is considered as the quantity of the product that is planned to be moved.
The Shipping Information can be added under the Additional Info tab.
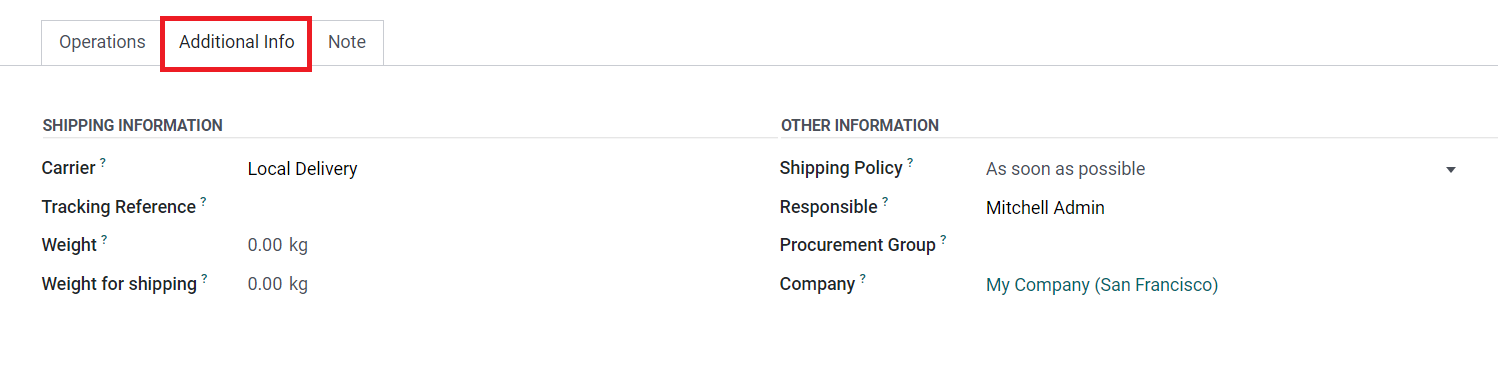
Here, you can add the Carrier information, Tracking Reference, Weight, and Weight for Shipping of the products included in this transfer. In the Other Information section, you can set the Shipping Policy for the transfer. It can be set as ‘As soon as possible’ or ‘When all products are ready’ as per your company policy. Additionally you can assign a Responsible employee who will be responsible for the upcoming operations of this transfer. Finally, specify the Procurement and Company in the corresponding fields. The Note tab can be used to add internal notes related to this transfer. By clicking the Save button, the transfer will be recorded.
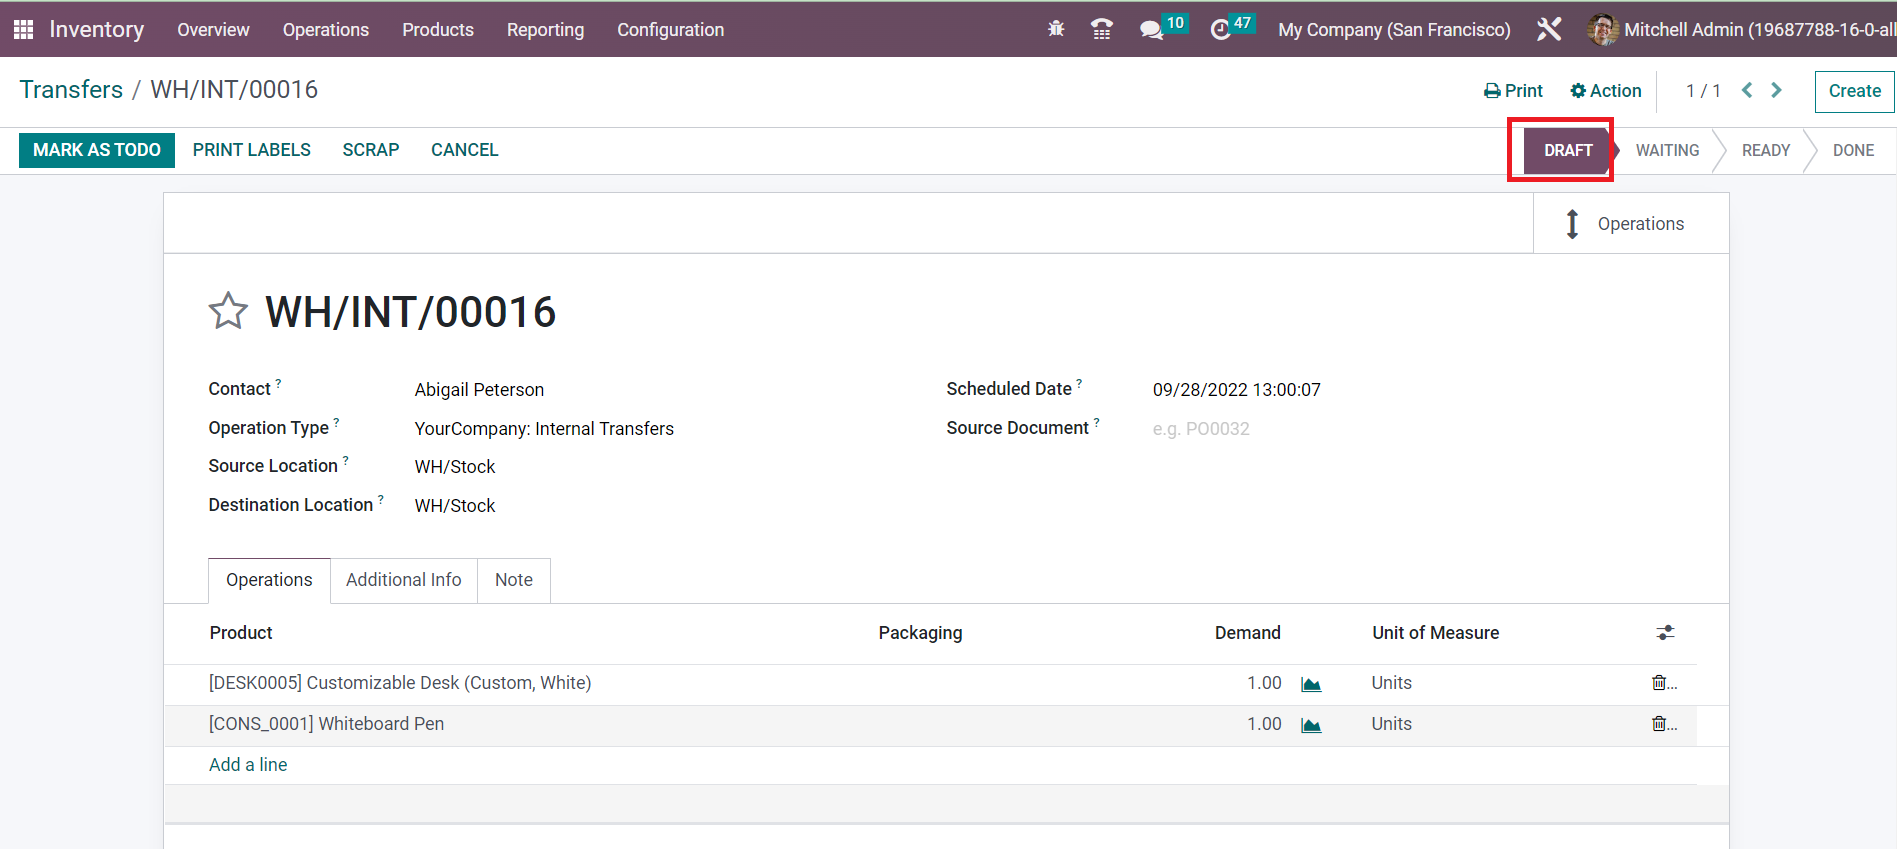
Now, the transfer is in the Draft stage. If the transfer is in the Waiting stage, it indicates that it is waiting for the availability of some products. If the transfer is ready to be processed, it can be observed in the Ready state. You can click the Mark as Do to move the transfer to the Ready stage.
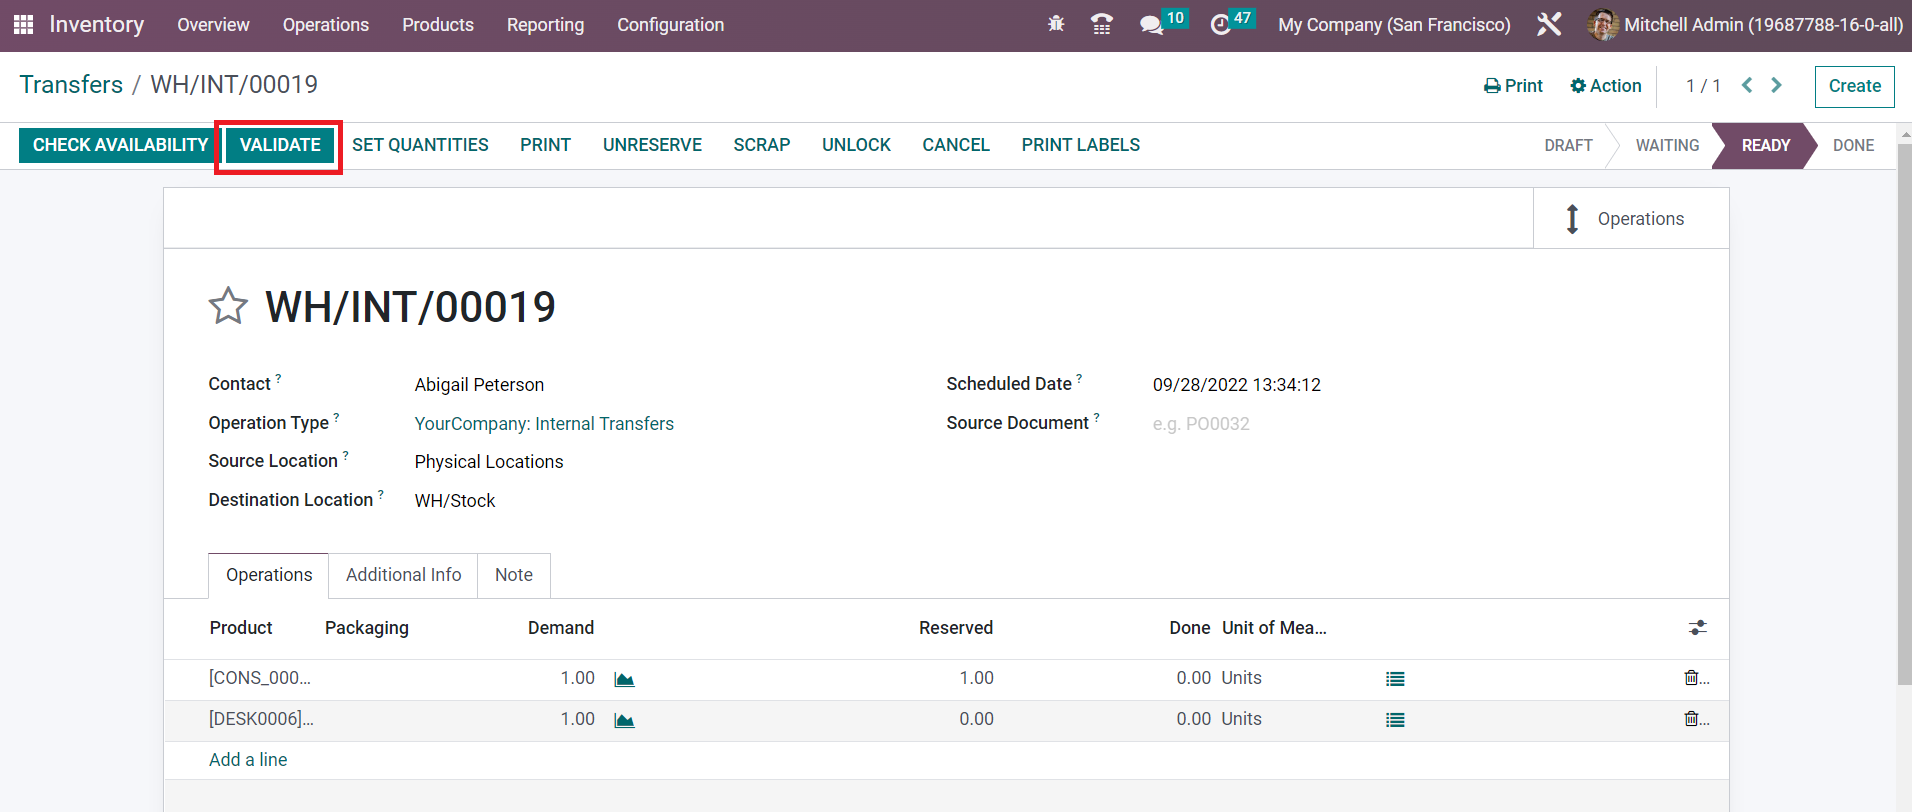
Once you complete the transfer process, you can click the Validate button.
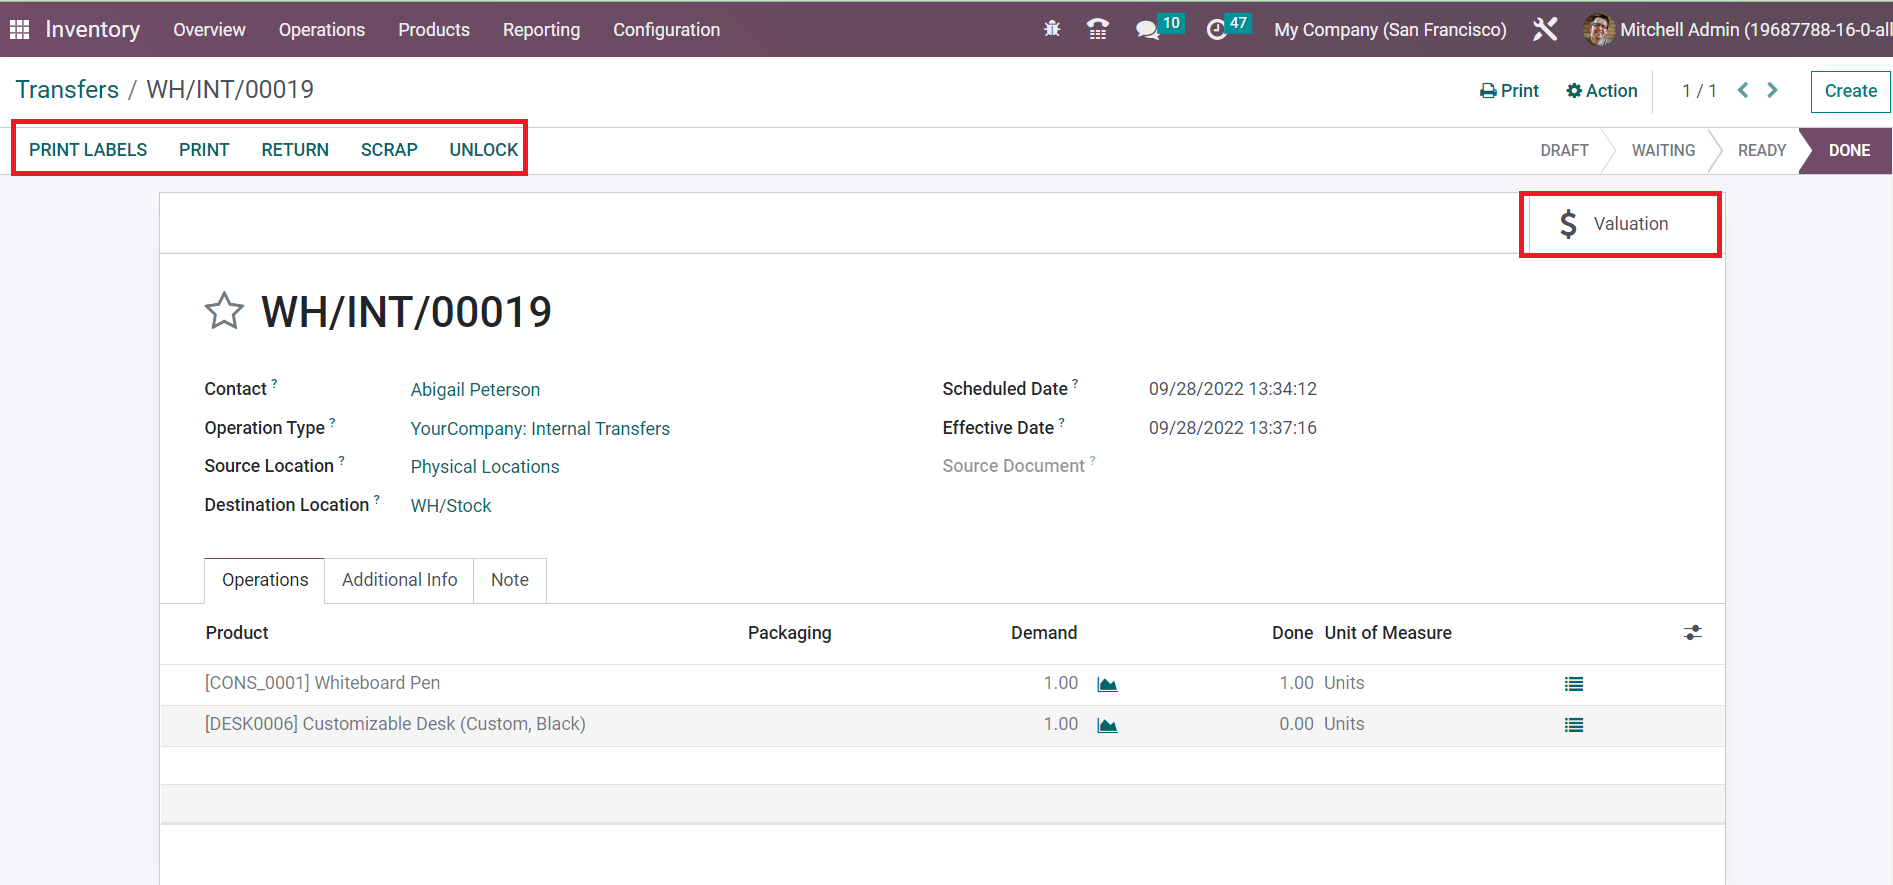
The transfer operation is completed now. You can print labels for the newly transferred products using the Print Label button. The Print button will help you to take prints of the delivery slip of the transfer. The products can be returned to the earlier location with the Return button. If you find any defect in the newly transferred products, you can send them to scrap using the Scrap button. You will get the stock valuation report of this transfer by using the smart button called Valuation given in the window as highlighted in the image above.
Batch Transfer
Odoo enables you to perform multiple transfers together with the assistance of the Batch Transfer feature. This feature can be used to execute group transfers that will be helpful to you to save your time and effort. In batch transfer, all transfers added to the batch are processed together. By using this method, you can minimize the difficulties faced while managing bulk transfers.
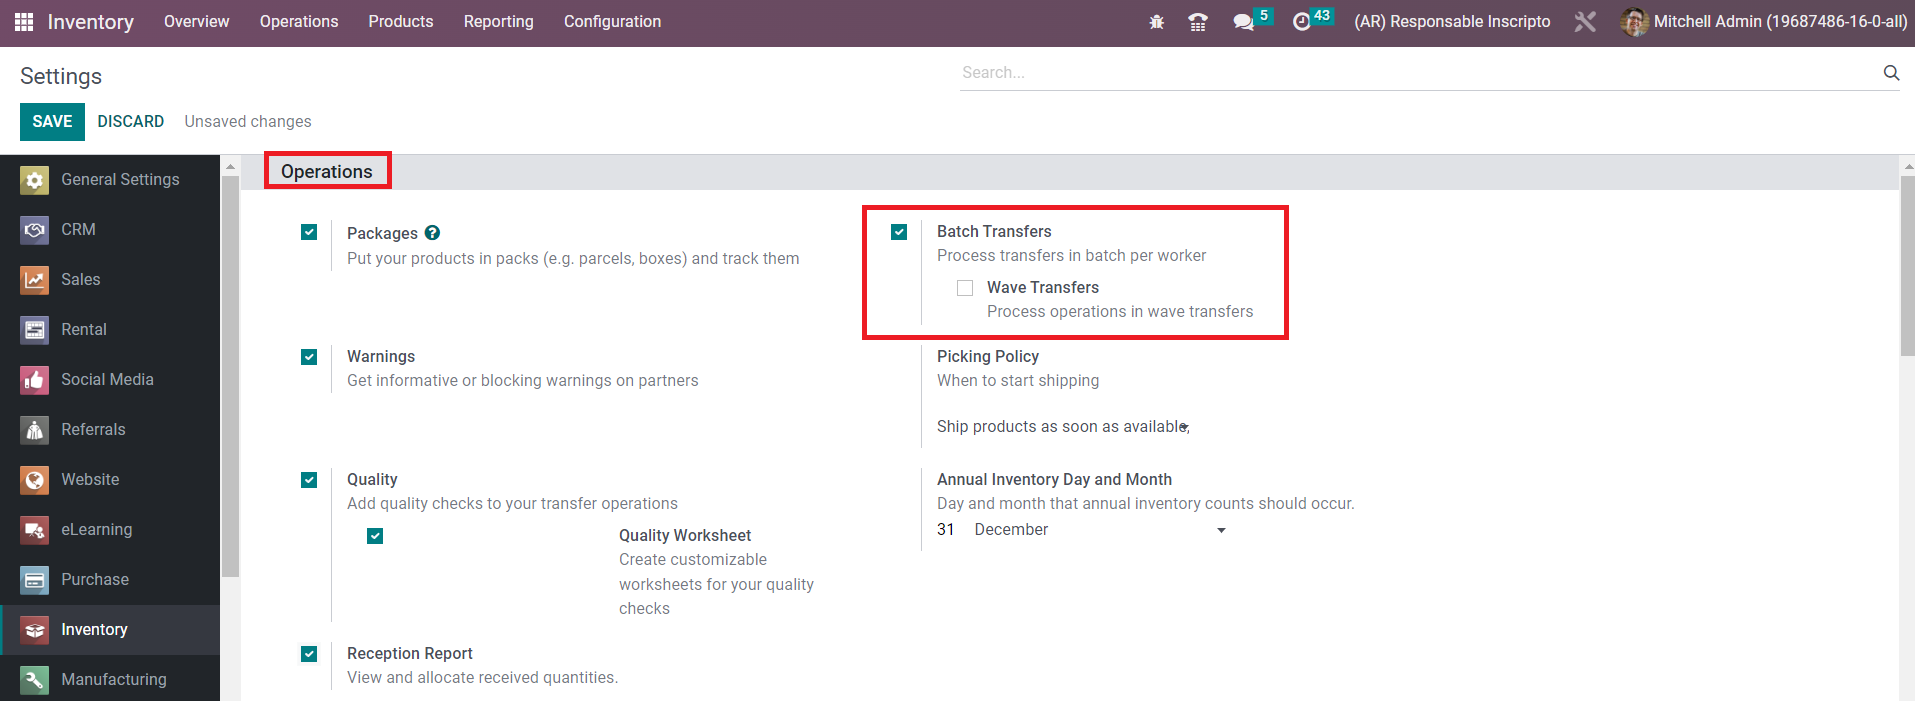
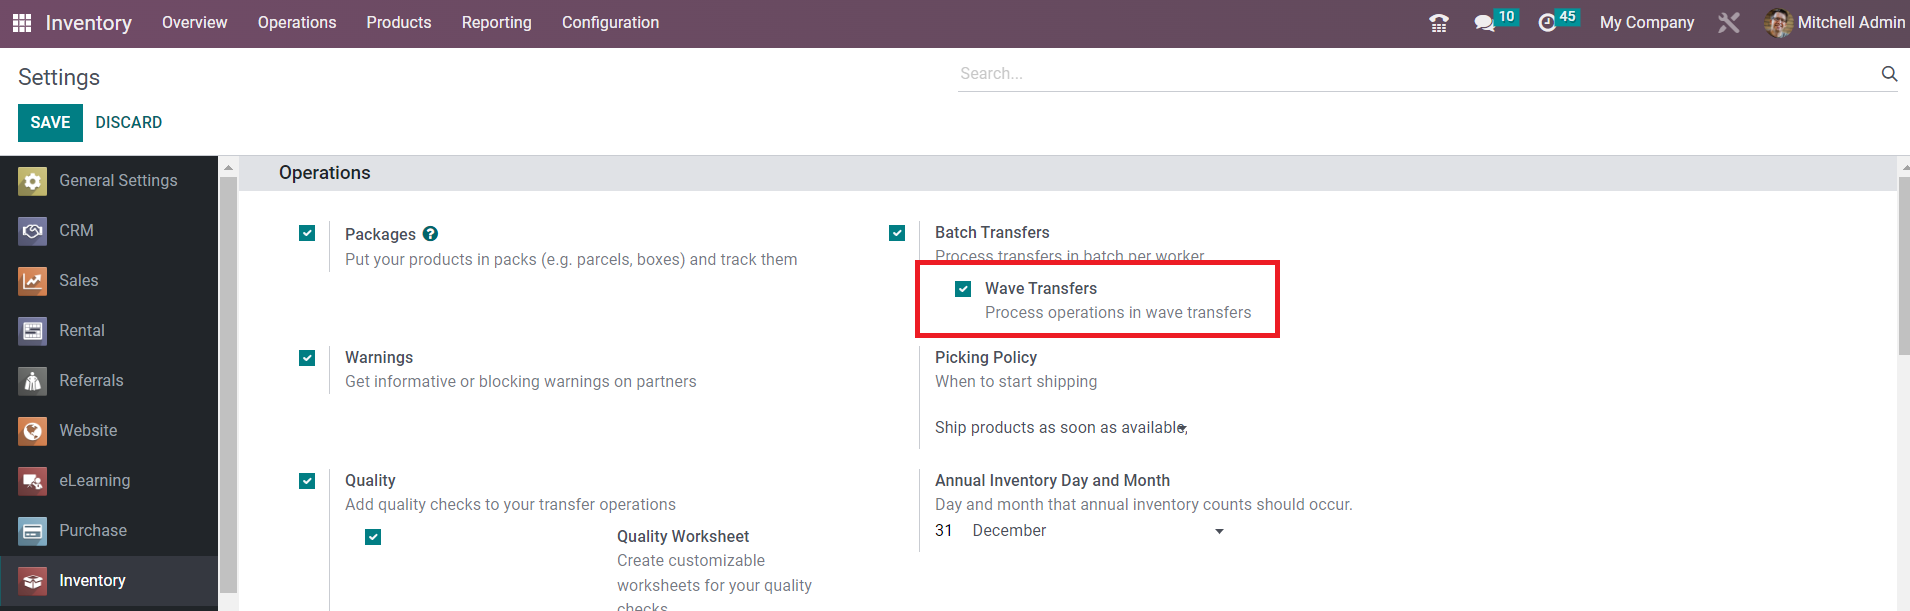
The Batch Transfer feature can be easily activated from the Settings menu of the Inventory module as depicted in the image below.
After selecting the Batch Transfer option click the Save button to save the new changes. Now, you can manage batch transfers from the platform available under the Operations menu as shown below.

The list of already created batches along with the details of the Batch Transfer, Scheduled Date, Responsible, Operation Type, Company, and State can be seen here. You can alter the view of the platform into Kanban also. To create a new batch transfer, you can use the Create button.
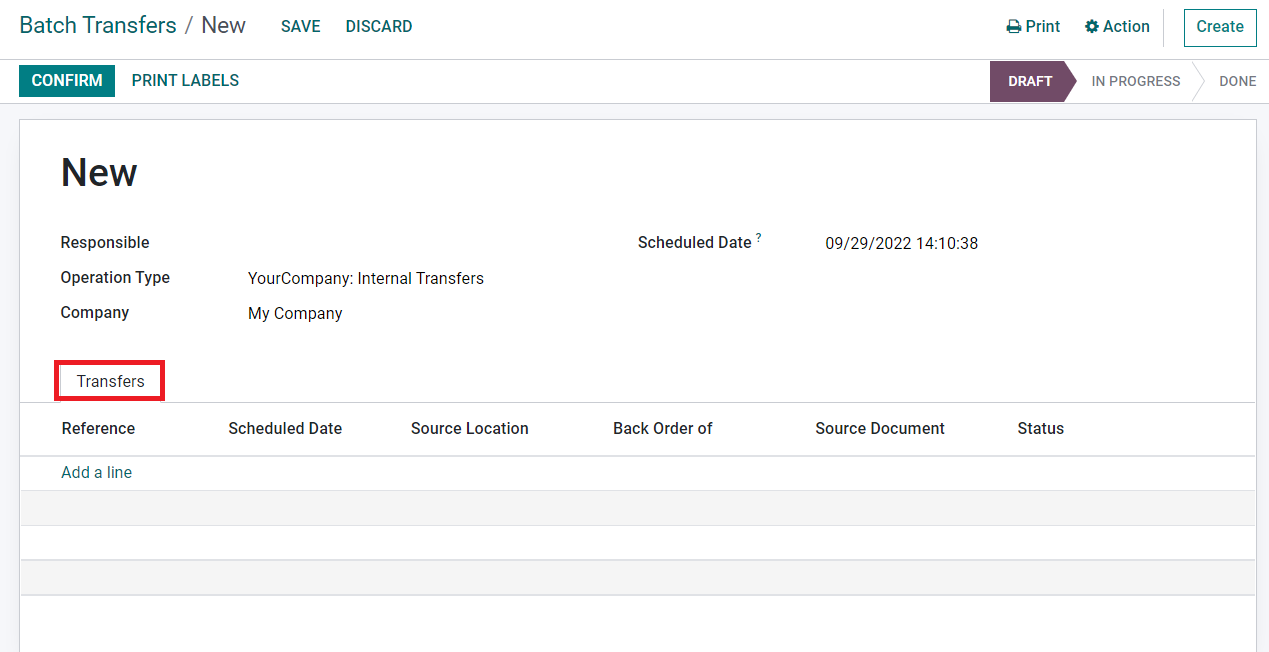
You can assign an employee in the Responsible field who will be incharge of the upcoming activities of this batch transfer. Specify the Operation Type and Company in the given spaces. By mentioning the Operation Type, Odoo lets you add transfers with this operation type to this batch. The expected date for the transfer can be scheduled manually in the Scheduled Date field. If it is not manually set, Odoo will consider the earliest scheduled date of the transfer included in the batch as the scheduled date for this transfer. Now, you can add transfers one by one to this batch using the Add a Line button available in the Transfer tab.
As soon as you click the Add a Line button, a new pop will appear to select the transfers for this batch.

You will get a list of various transfers of the selected operation type in different stages. You can select the transfers from the given list. Make sure to select the transfers from the same stage. In order to add them to the batch, you can use the Select button.
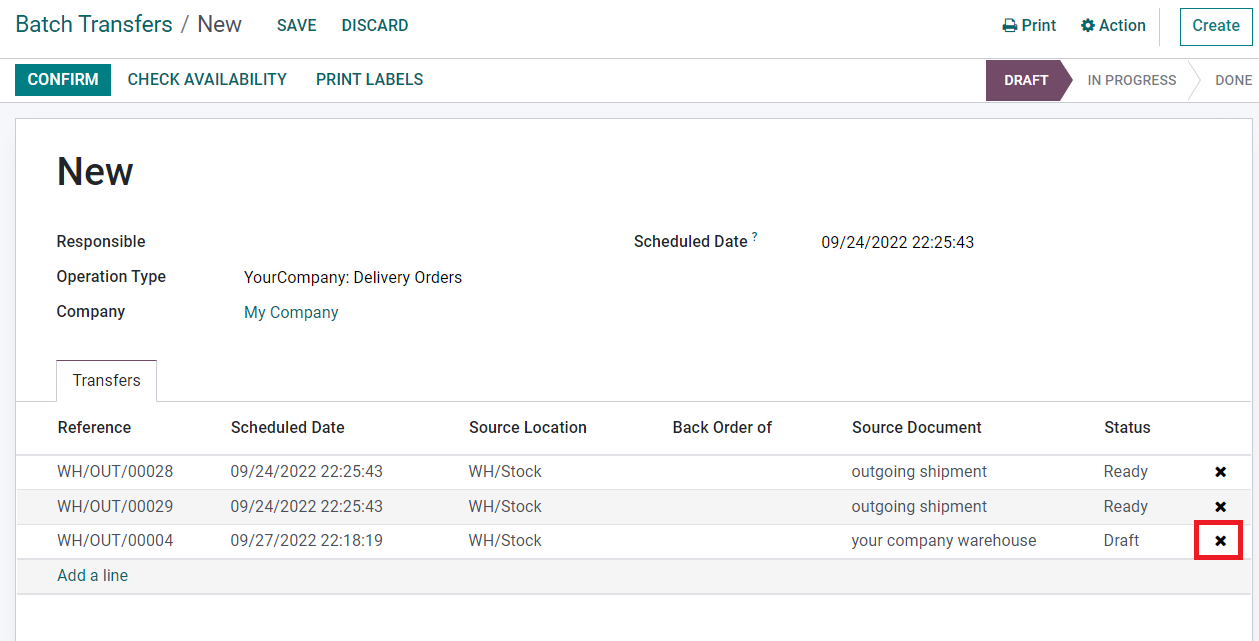
As you can see in the image above, the list of selected transfers will be automatically added to the batch. If you want to remove any of the transfers from the batch, you can use the ❌ icon highlighted in the screenshot above. After checking availability, you can confirm the transfer using the Confirm button.
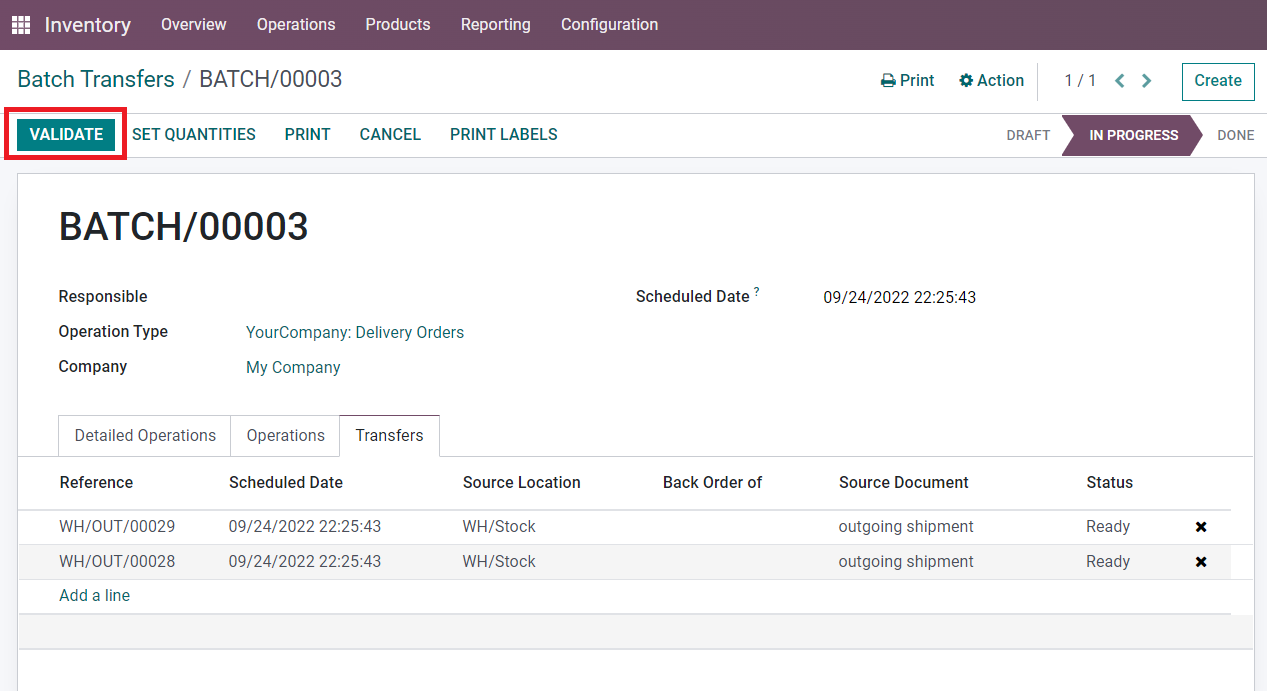
Finally, clicking on the Validate button you can complete the batch transfer operation.You can create new batch transfers from the Transfers menu also. For this, you can go to the Transfers platform available under the Operations menu.
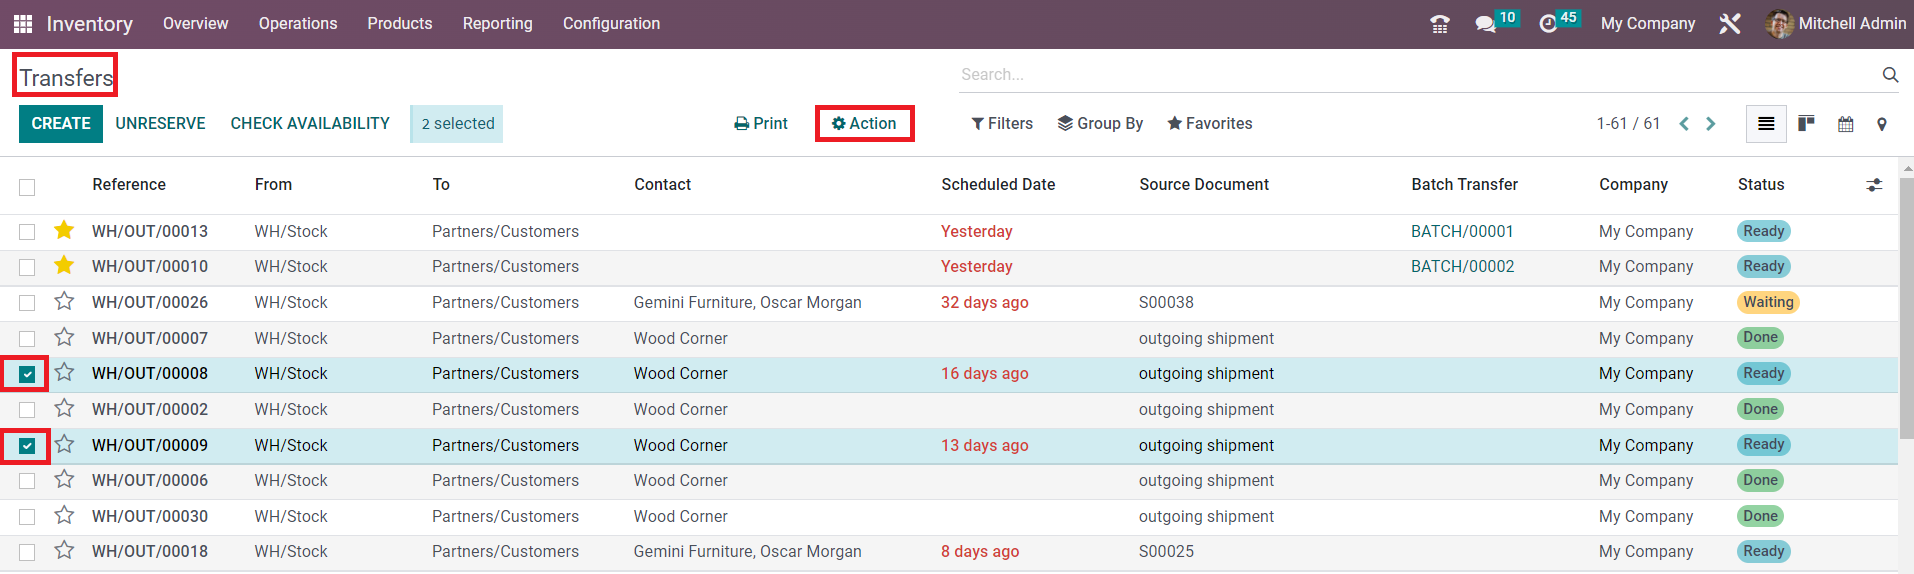
From the available list of transfers, you can select the transfers that you want to add to a batch. Don’t forget that the selected transfers should be in the same status and operation type. After selecting required transfers, you will get an Action button.
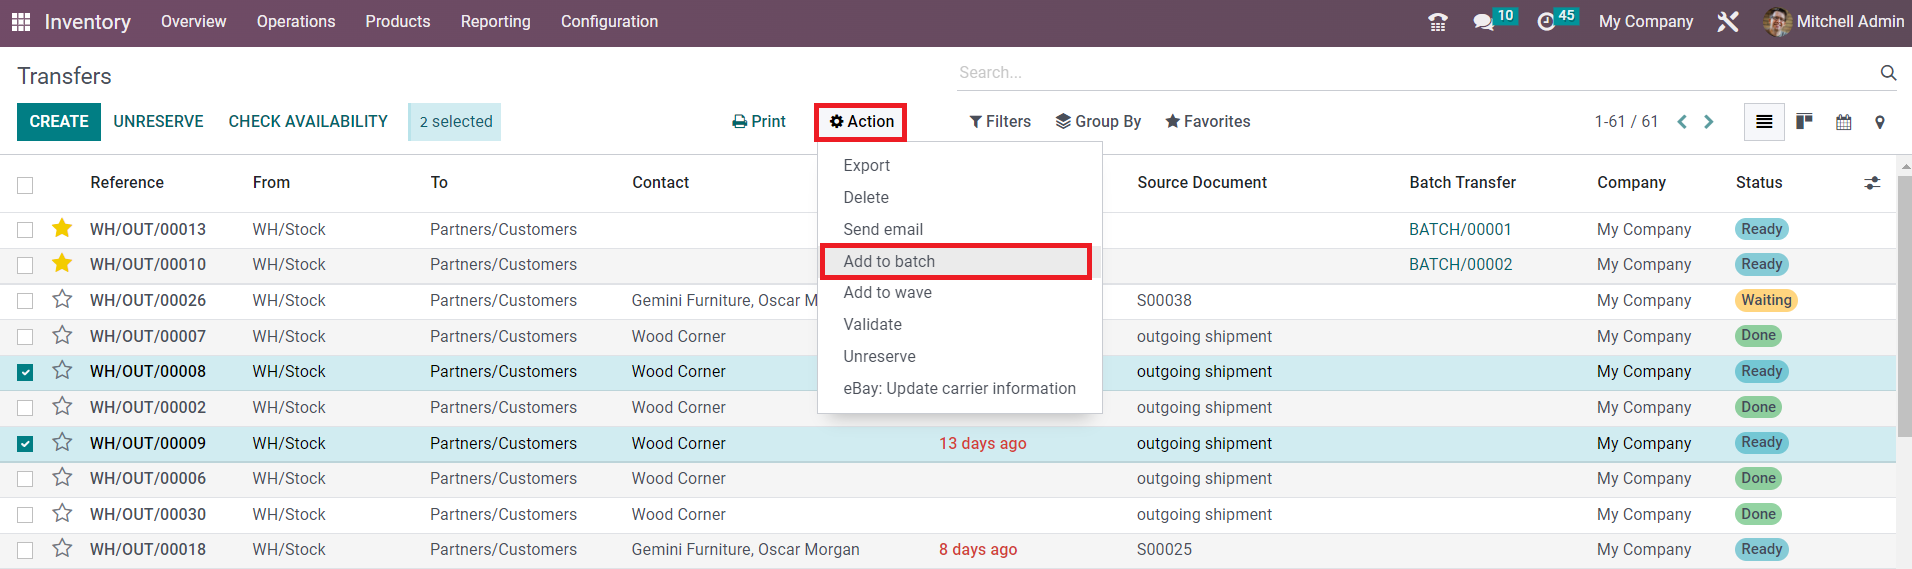
From the Action button, you will get the option to add the selected transfers to a batch. Click on the Add to Batch button. A pop will appear as shown below.
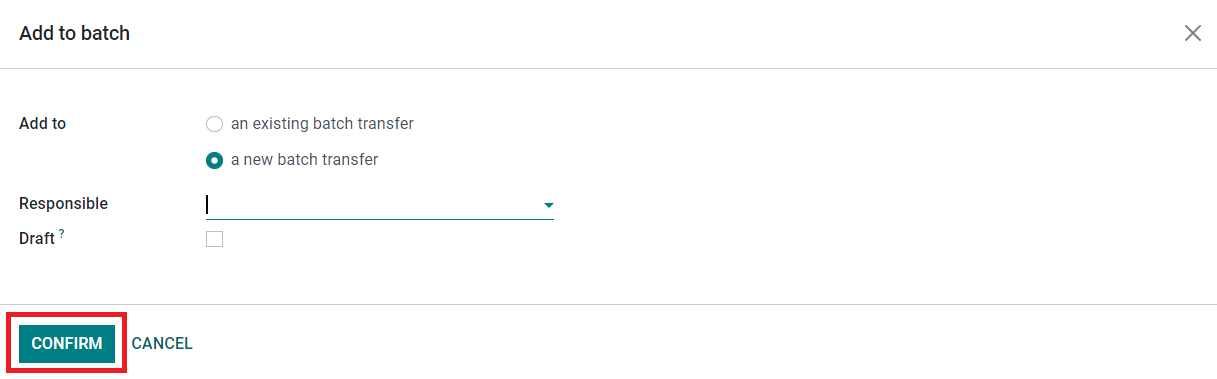
You can add the selected transfers to an existing batch transfer or to a new batch transfer. For new batch transfer, you can mention the Responsible employee in the given field. If you want to create the new batch in draft status, activate the Draft option. Clicking on the Confirm button will create a new batch transfer in the Inventory module. You can observe and manage the new batch transfer from the Batch Transfer platform.
Wave Transfer
The Wave Transfer method is also used for the same purpose of the Batch Transfer option. Using this method, you can move a large number of products from one location to another. But, once you add a transfer into a wave transfer you can not remove it from the wave. The wave transfer method is more advanced than the batch transfer. In order to get this feature in the Odoo Inventory module, make sure to activate it from the Settings menu.
Once the Wave Transfer feature is activated, you can go to the Transfers platform. From the Transfers window, you can select the transfers belonging to the same status and operation type to add them to a wave transfer.
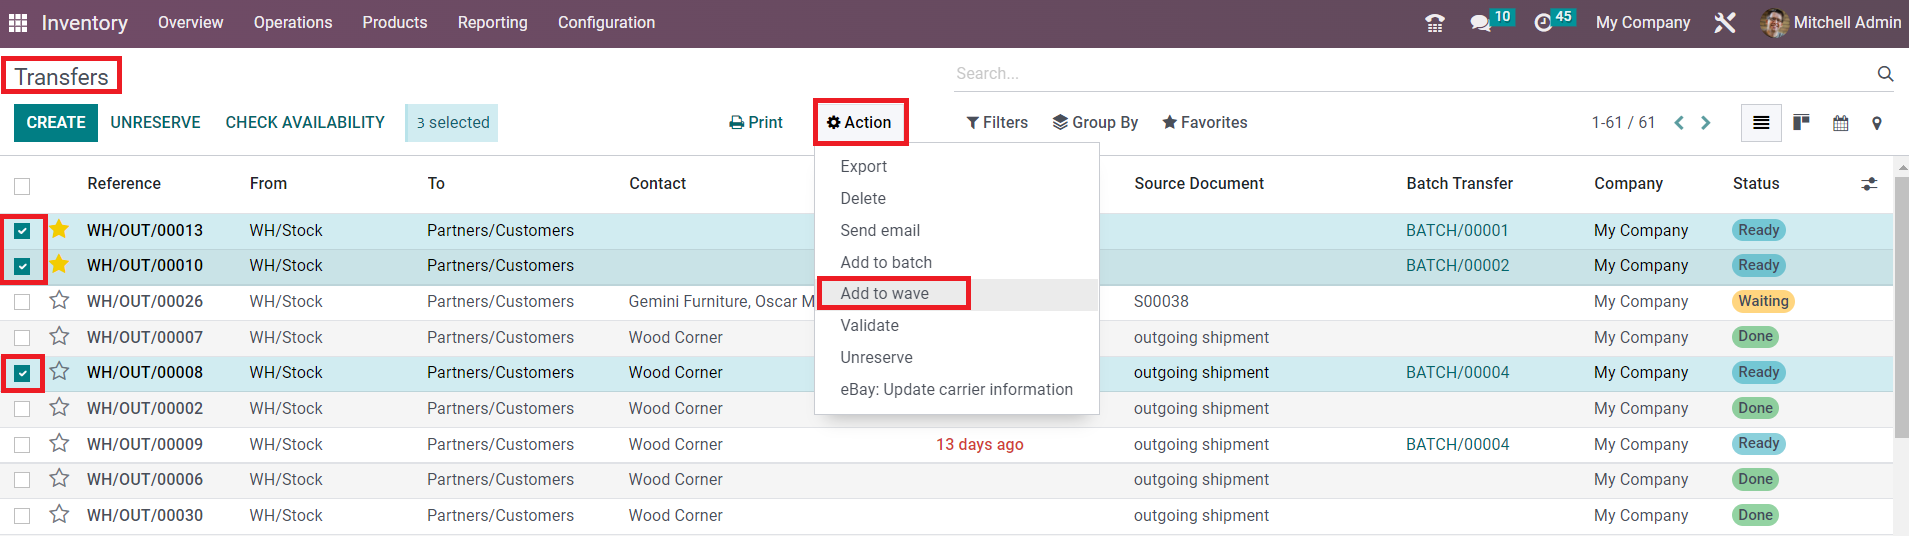
As soon as you select required transfers, you will get the Action button on the screen from where you can select the Add to Wave option. Clicking on this button will give a new pop up on the screen as shown below.
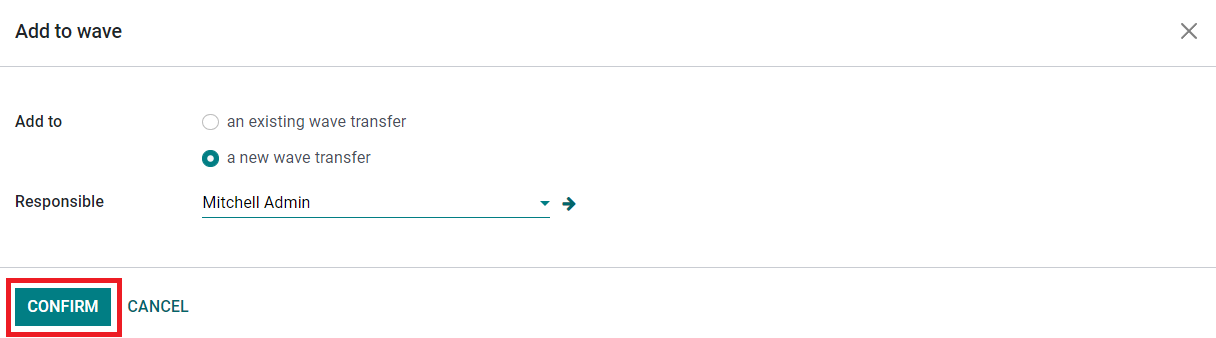
The selected transfers can be added to an existing wave transfer or to a new transfer. For a new wave transfer, you need to mention an officer in the Responsible field. Finally, click the Confirm button. Once you confirm the transfer, all orders from the selected transfers will appear on your screen.
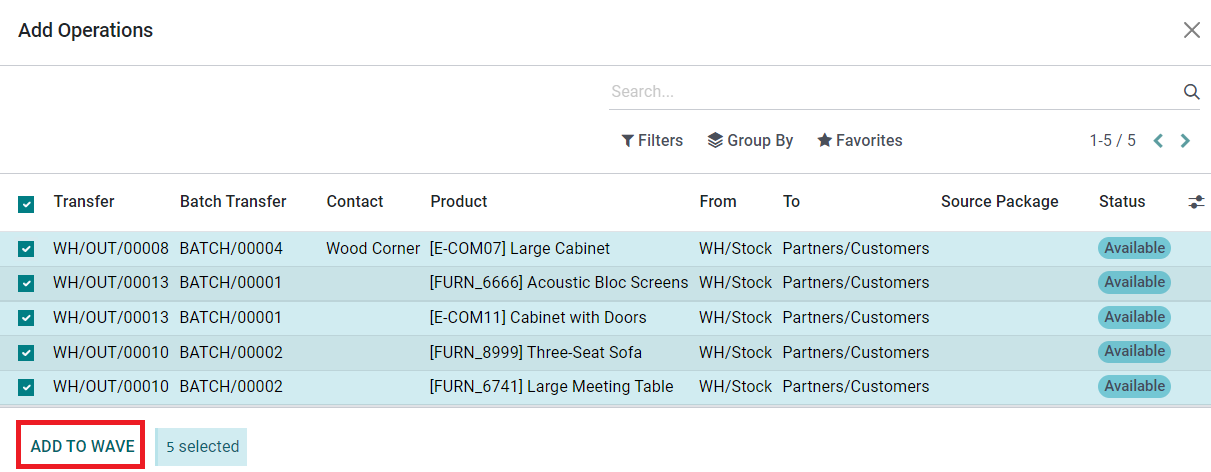
You can select required orders from the list and click the Add to Wave button. The new wave transfer is created now and you can observe the transfer from the Wave Transfer platform available under the Operations menu.

The preview of the list will show the details of the Batch Transfer, Scheduled Date, Responsible, Operation Type, Company, and State. Clicking on the wave transfer will open a new window to validate the transfer.
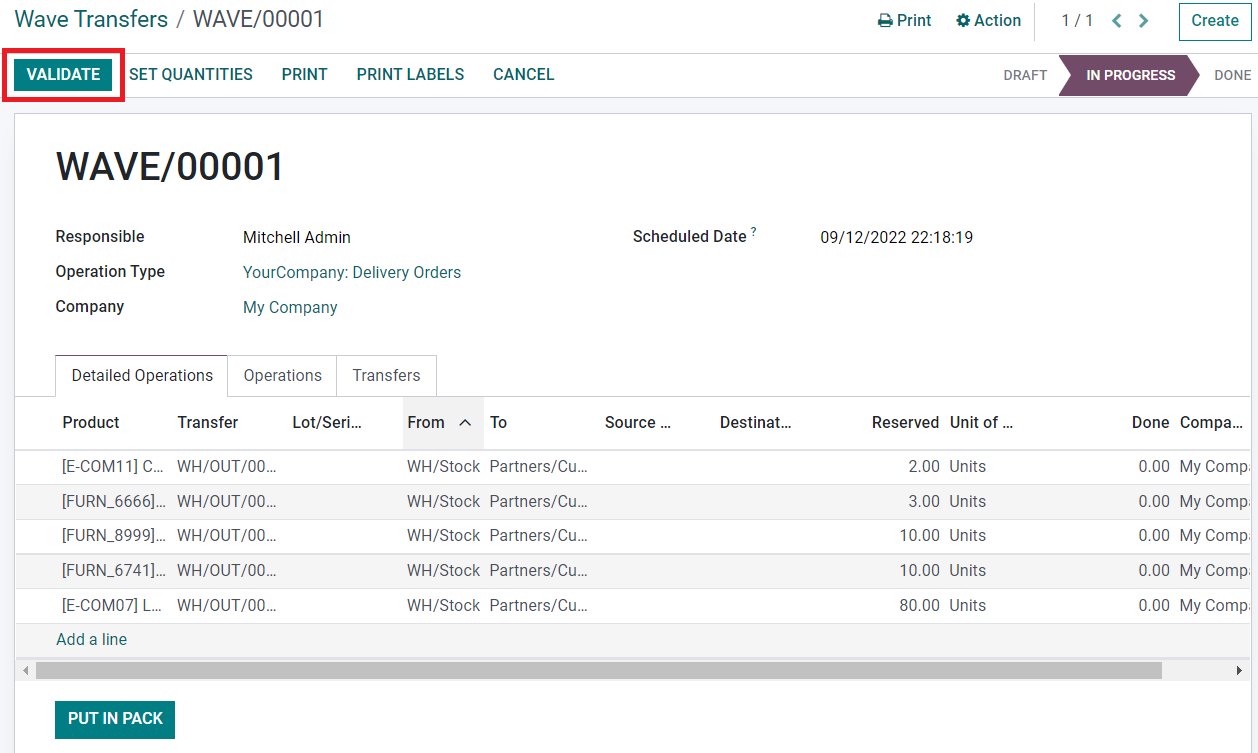
You can click the Validate button to complete the transfer.
As we are clear on the product transfer feature in the Inventory module, now, let’s look at the warehouse management in Odoo.