Let's add buttons to perform some specific actions using the Studio
module. Creating
a new button is quite different from creating other features with
Studio because
it involves some XML coding.
First, you have to enable the debug mode. Either you can enable it
from the general
settings or simply type

In the URL after the web, as shown below:

Now the debug mode is enabled. Now we have to create a server action
to do some
action while we click on the new button
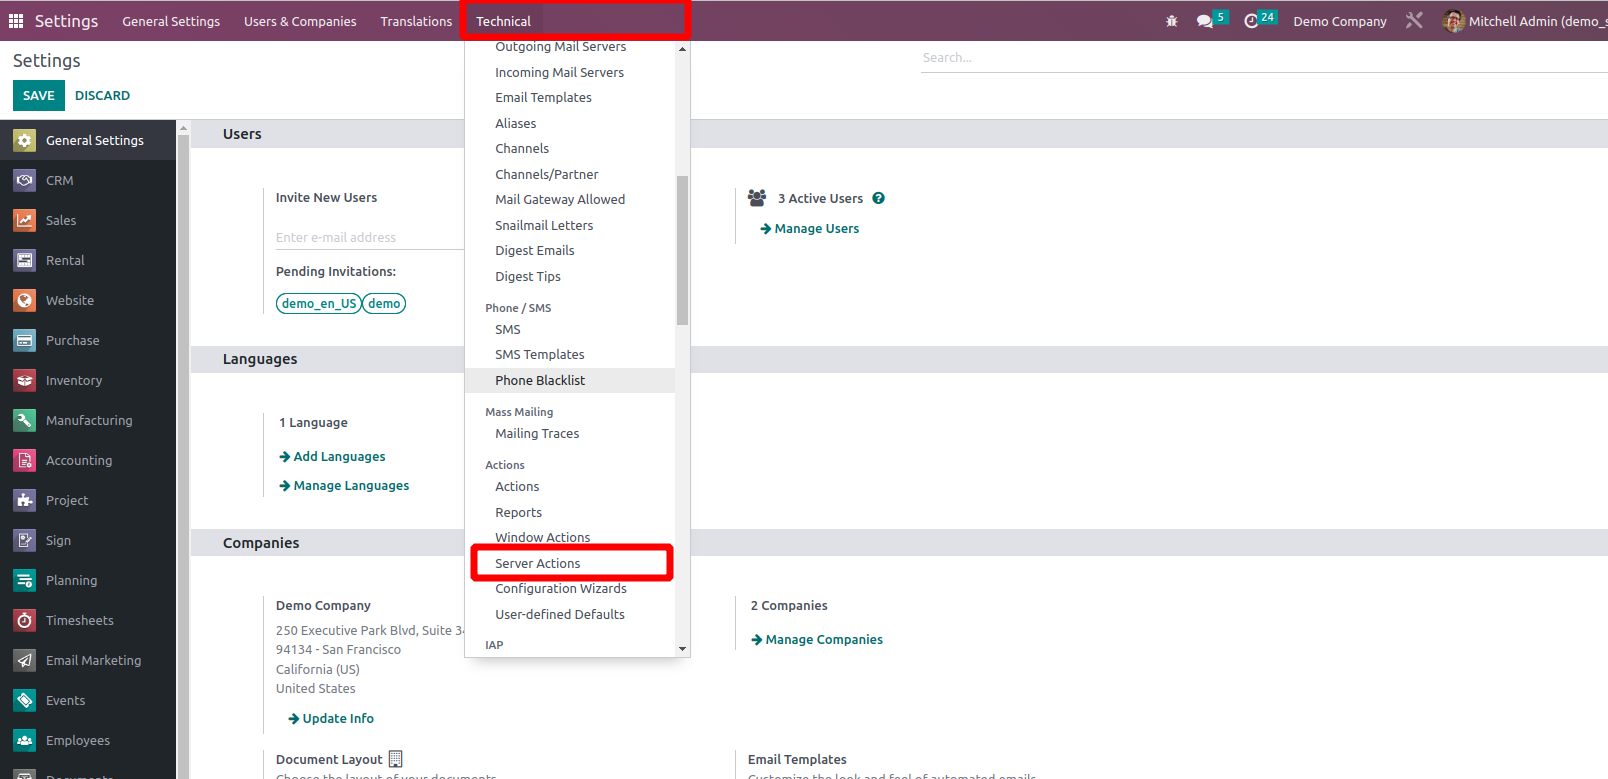
- Go to settings, and click on the Technical menu on top. It can
be seen only with
the developer mode.
- Click on the Server Actions menu from the list of menus that
come up when we click
on Technical.
- Click on the ‘New’ button to create a new Server Action and fill
in the required
fields.
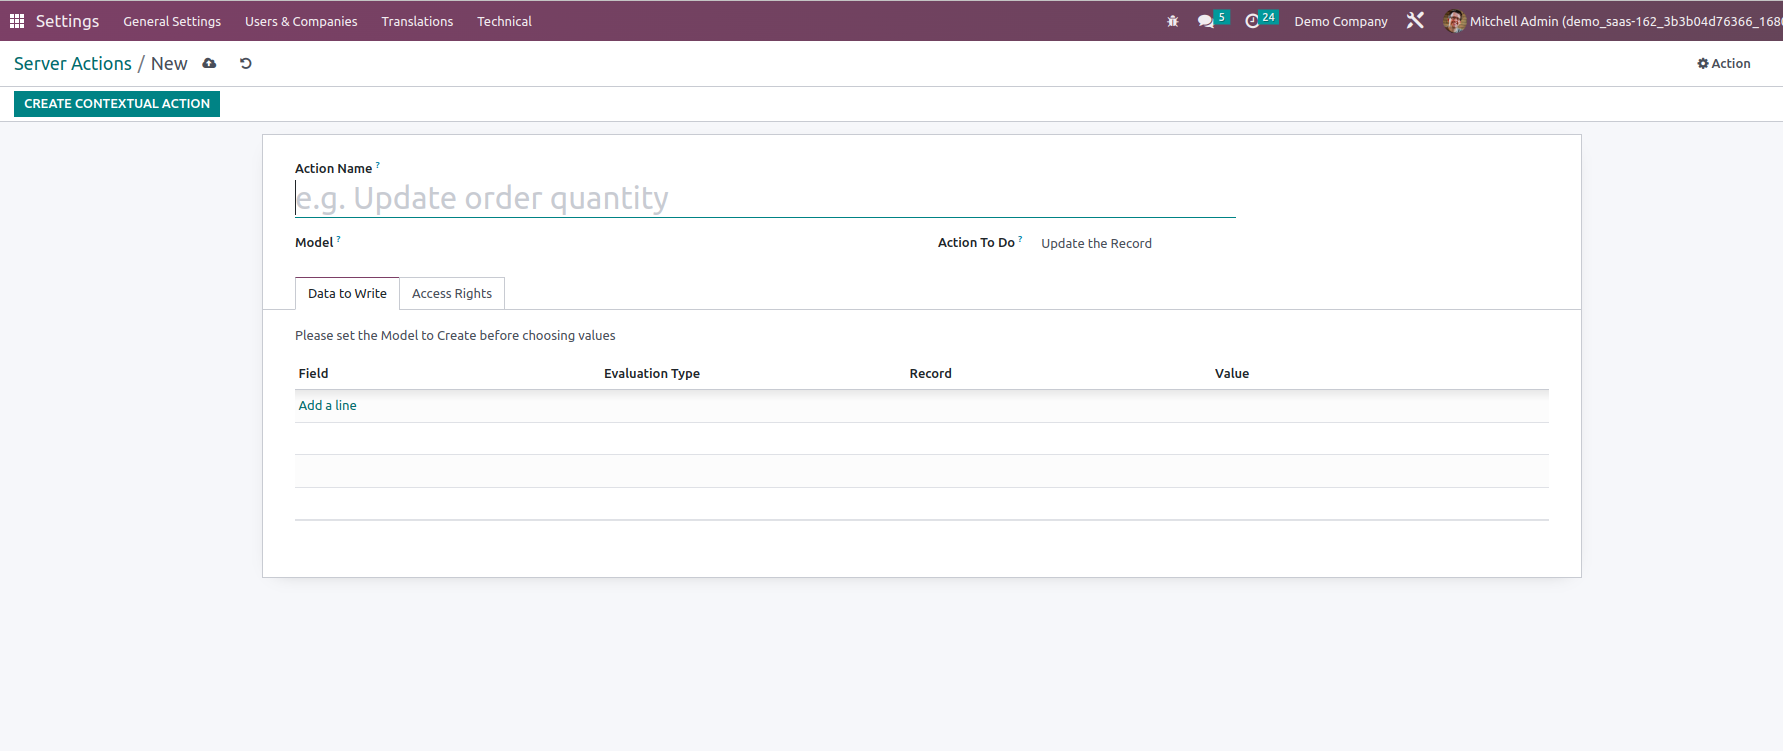
Fields on the form:
- Action Name - You can give a name for your action to identify
the use.
- Model - You can choose a model, which you want to add a button
to
- Action To Do - You can choose an action to do with your new
button from a list of
possible actions.
- Update the Record - If you want to update a record on the
corresponding view, like
set a field’s value, you can select this action. Then you
have to specify the field.
- Create a new Record - If you want to create a new record on
a button click, you
can select this action. Then you have to specify the fields
and corresponding values
to create the record
- Execute Python Code - If you want to perform some
calculations or complex operations
on the button click, you can choose the Execute Python Code
action, and then you
have to write the Python code for that operation.
- Execute several actions - If you want to execute a set of
child actions, you can
choose this action, and then you have to specify the child
server actions.
- Send Email - If you want to send an email on a button click,
you can choose this
action, and then you have to specify the email template.
- Add Followers - If you want to add followers to your
selected record, you can choose
this action, and then you have to add the followers in the
Add Follower field.
- Create Next Activity - If you want to add an activity on the
button click, you can
choose this option, and then you have to configure the
activity.
- Send SMS Text Message - You can send SMS on the button click
by using this option.
Then you have to specify the SMS template.
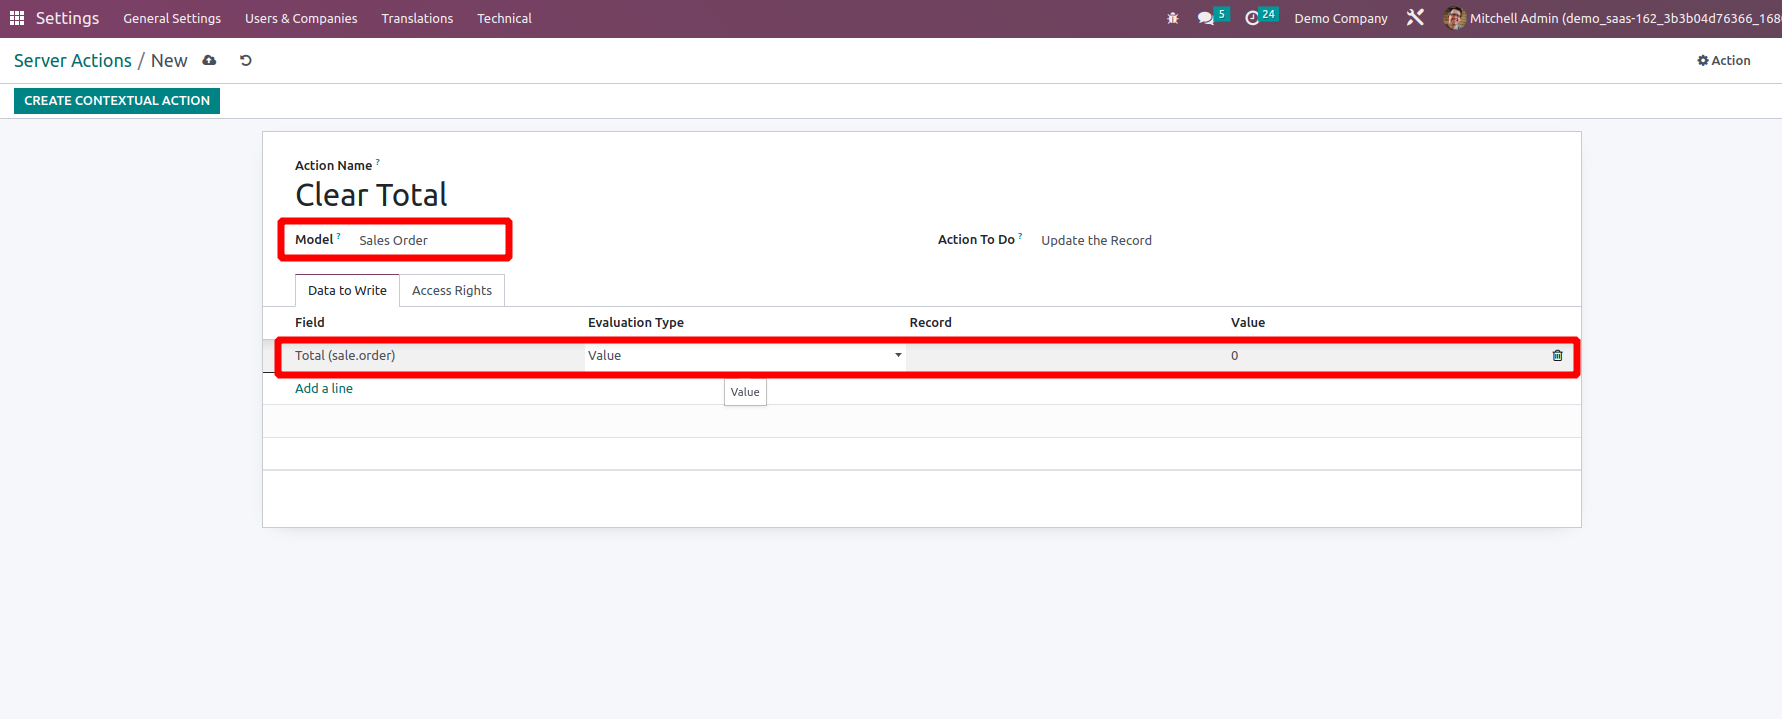
- Fill in all the necessary fields, then save the server action.
- You can see the id of the server action from the URL as shown
below:
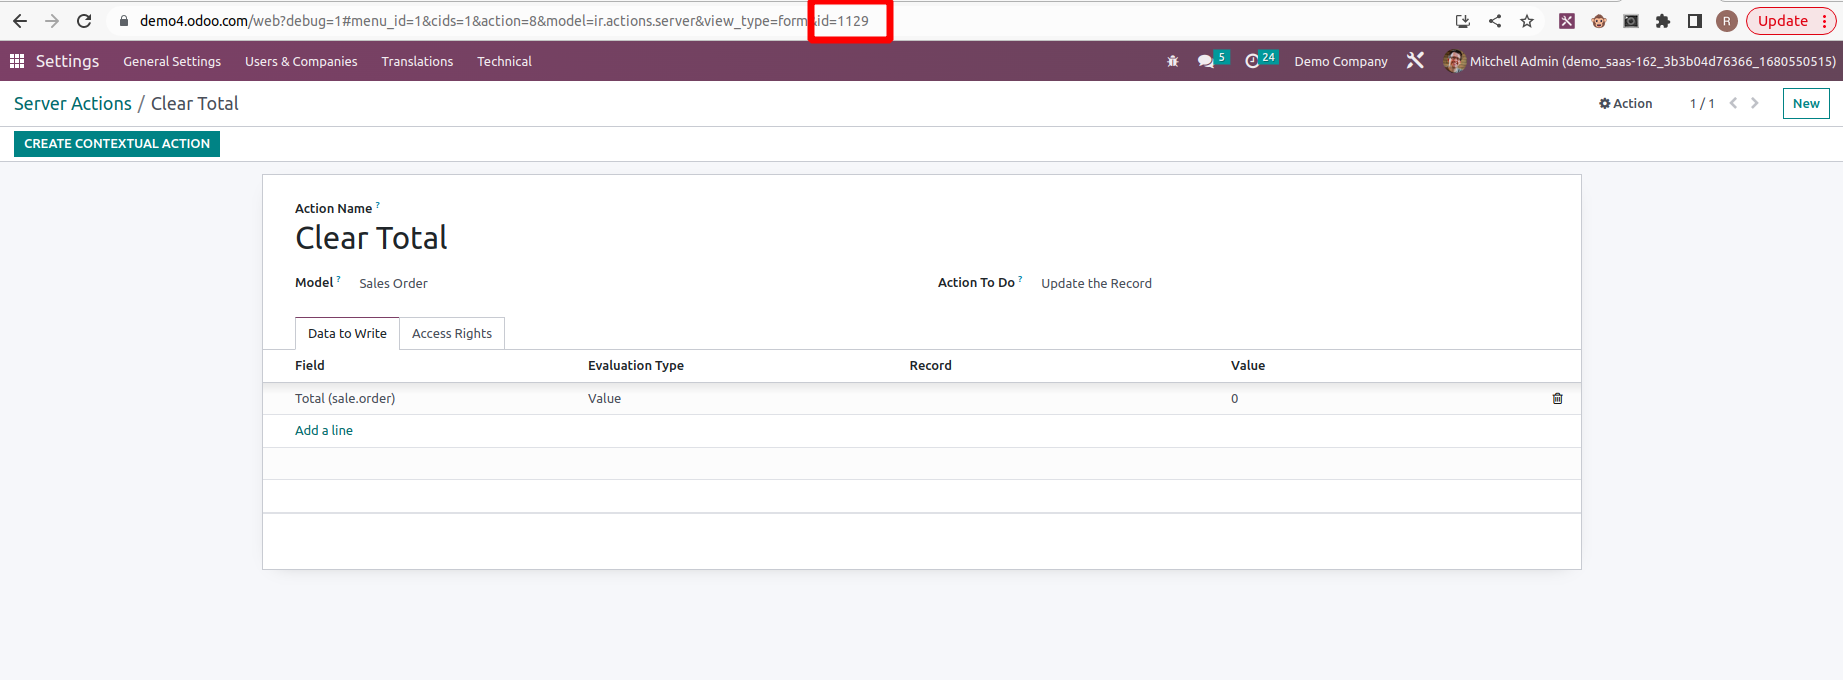
- Copy the id of the server action.
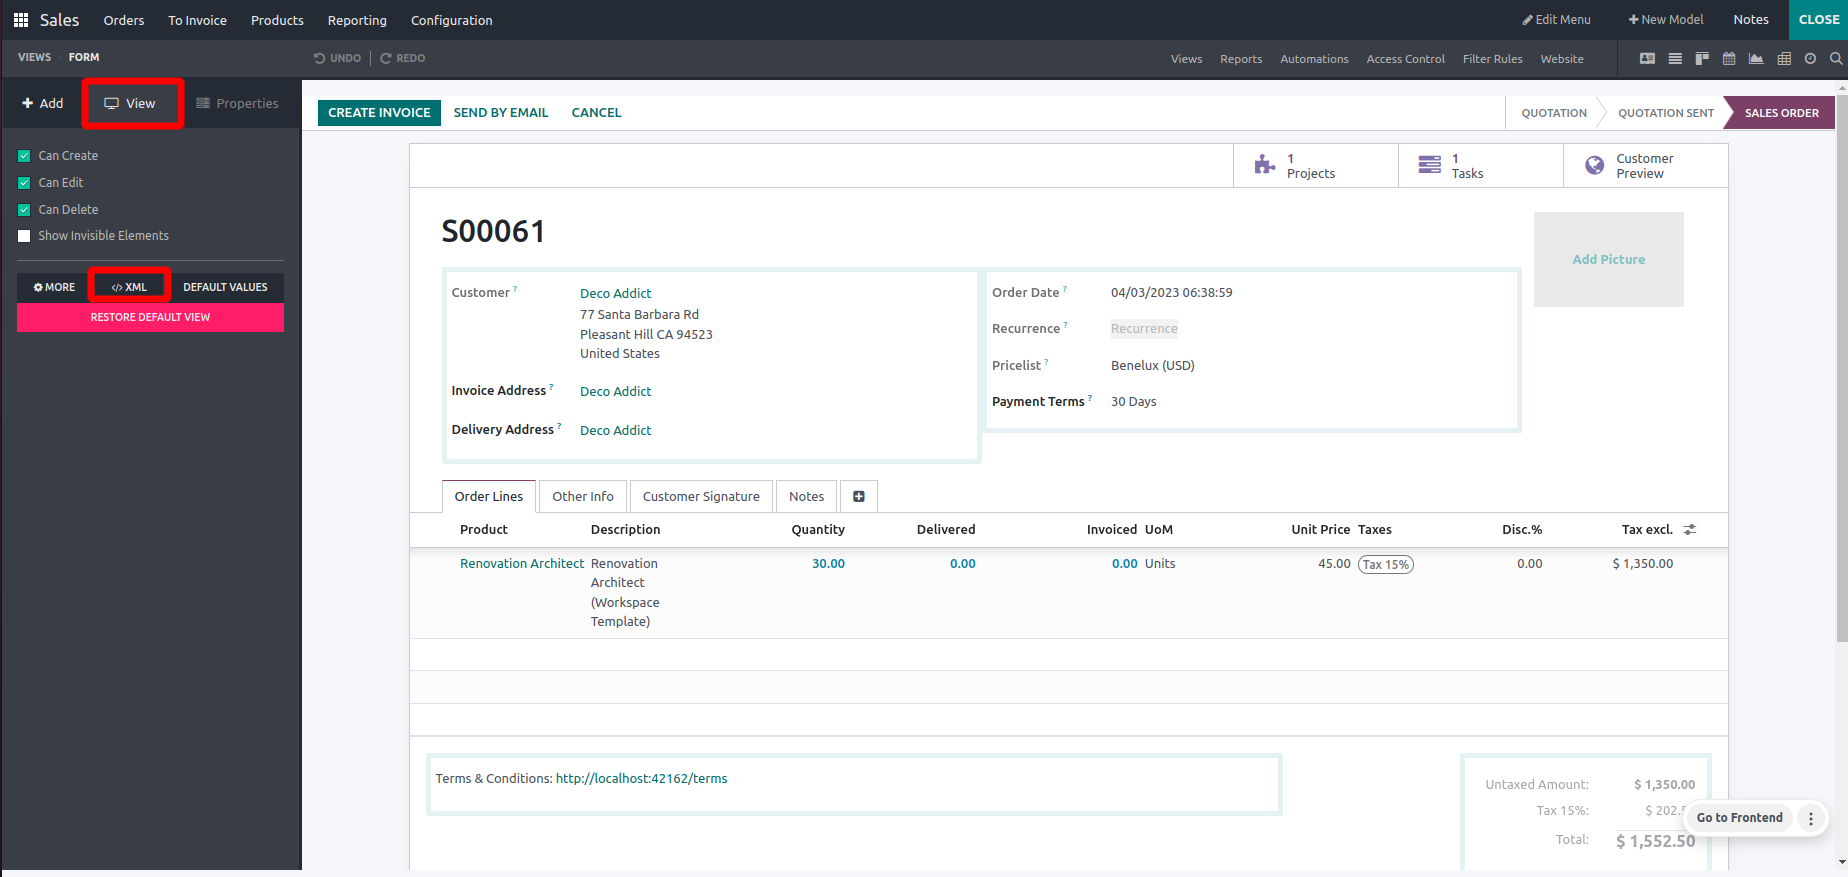
- Then you can open the view, where you want to add your button.
Here I selected the
sale order form view and opened the studio.
- You can click on the View menu on the studio screen and then the
XML tab, as shown
below.
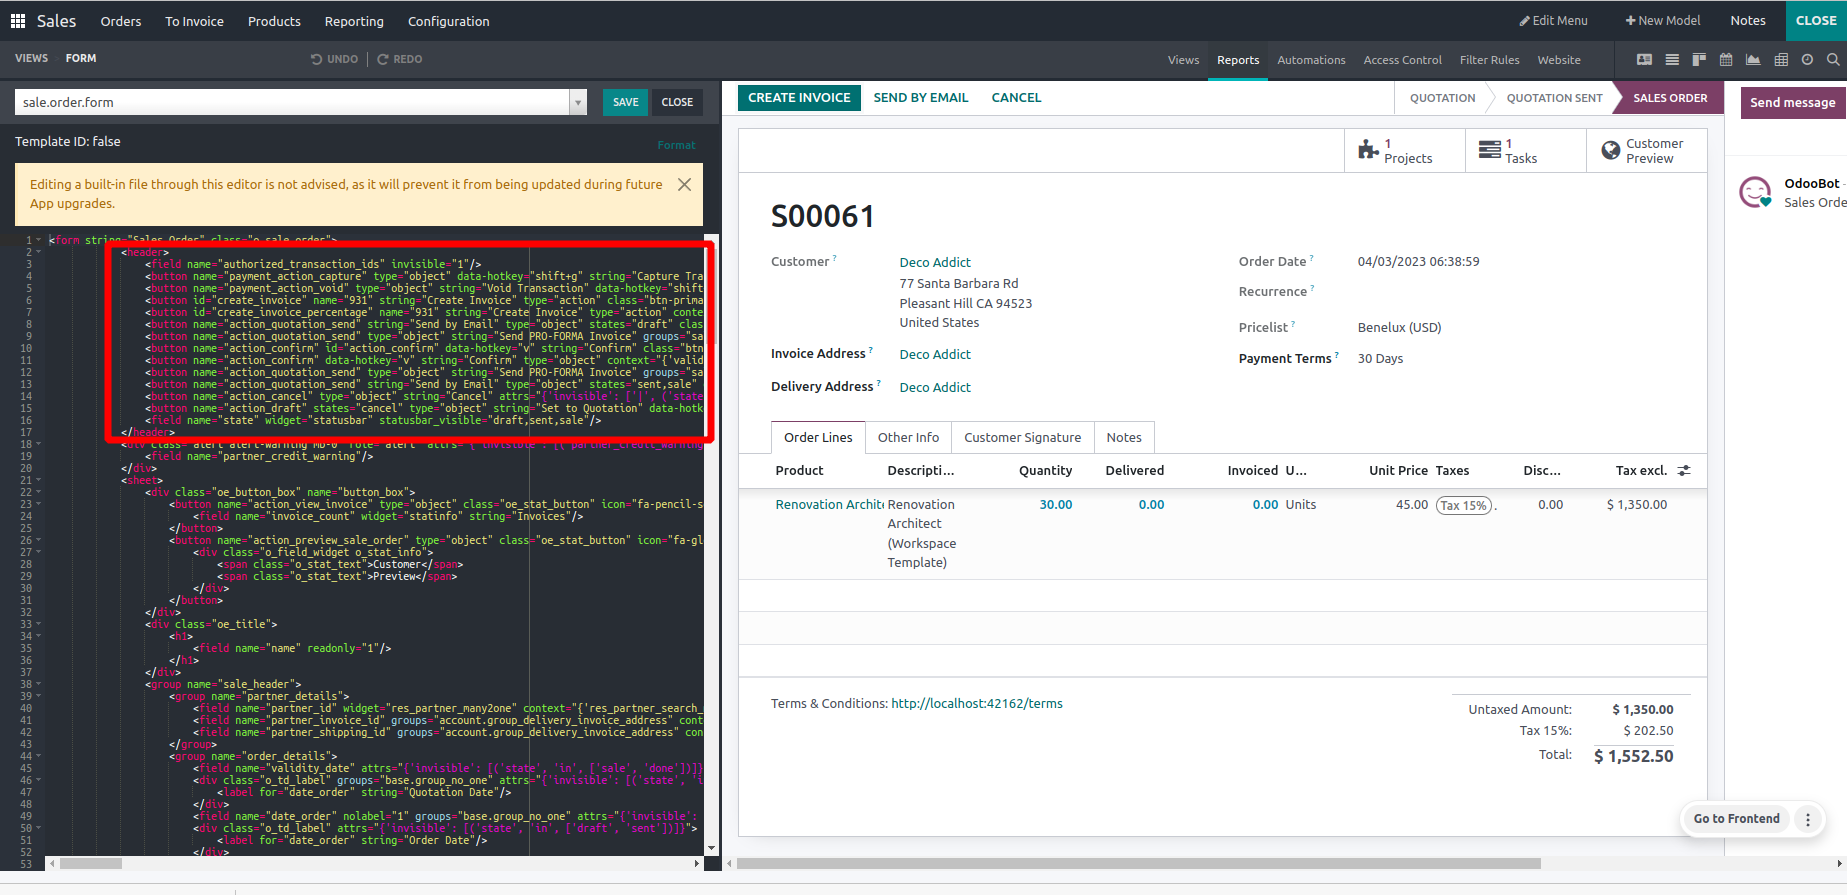
- You can see the XML code for the selected view on the left side.
Inside the header
tag, you can see the code for buttons that are already in that
view.
- You can define the new button inside the header like the one
below and add the id
of the created server action as the name in it.
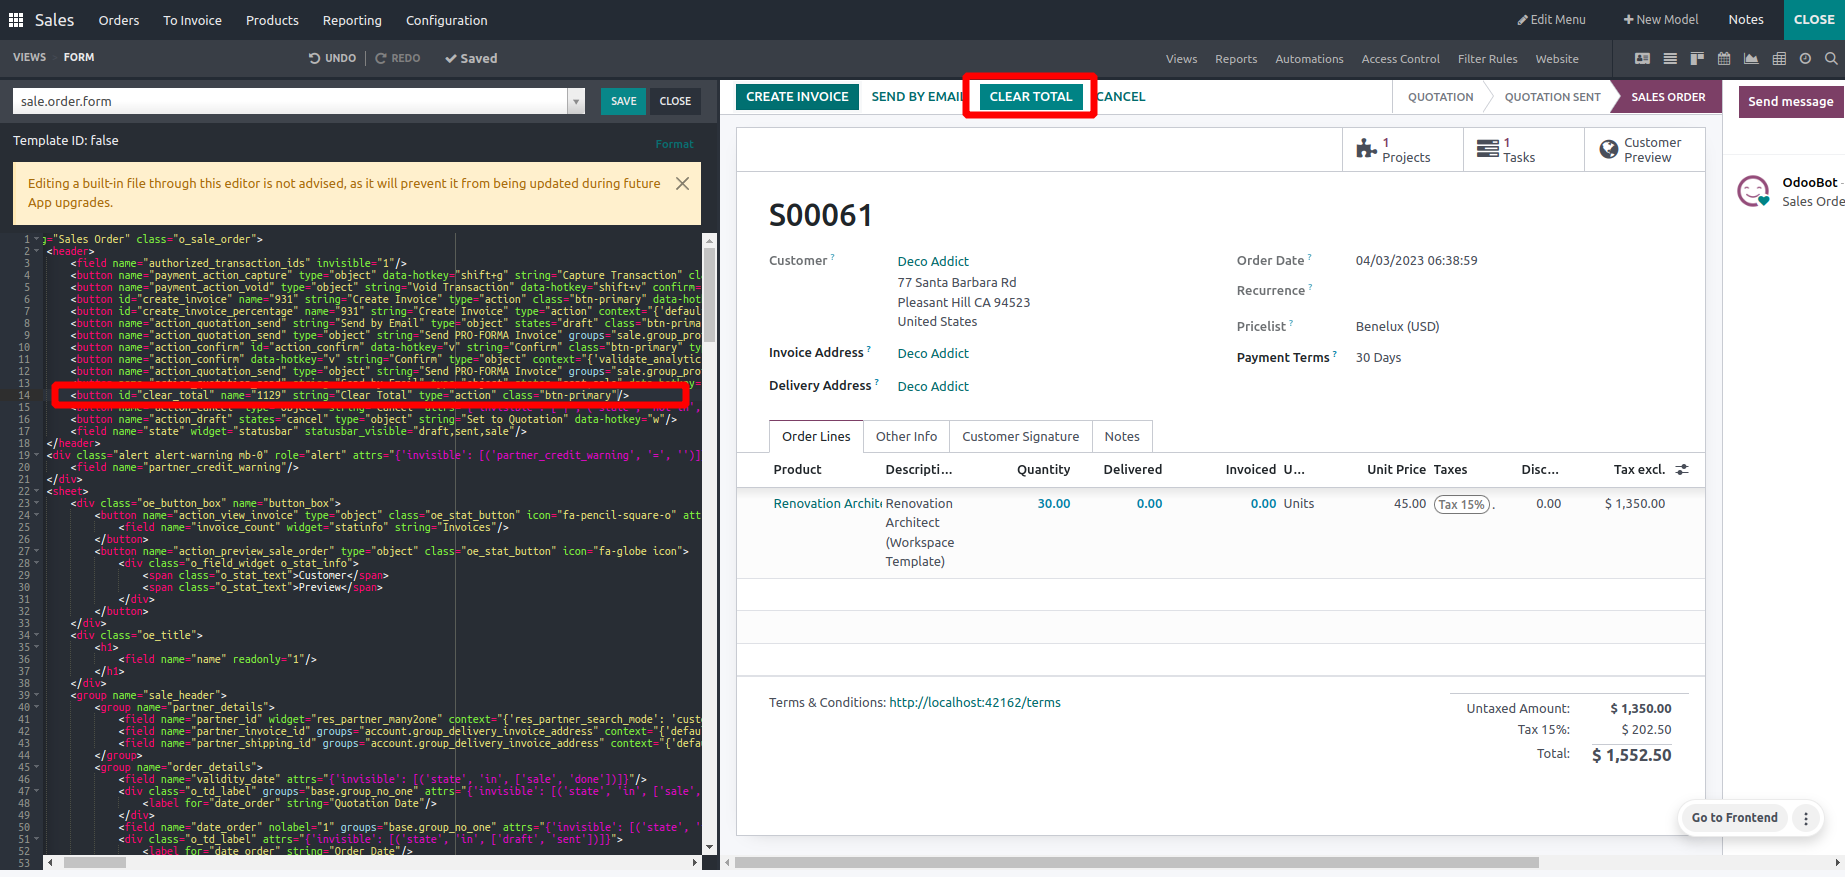
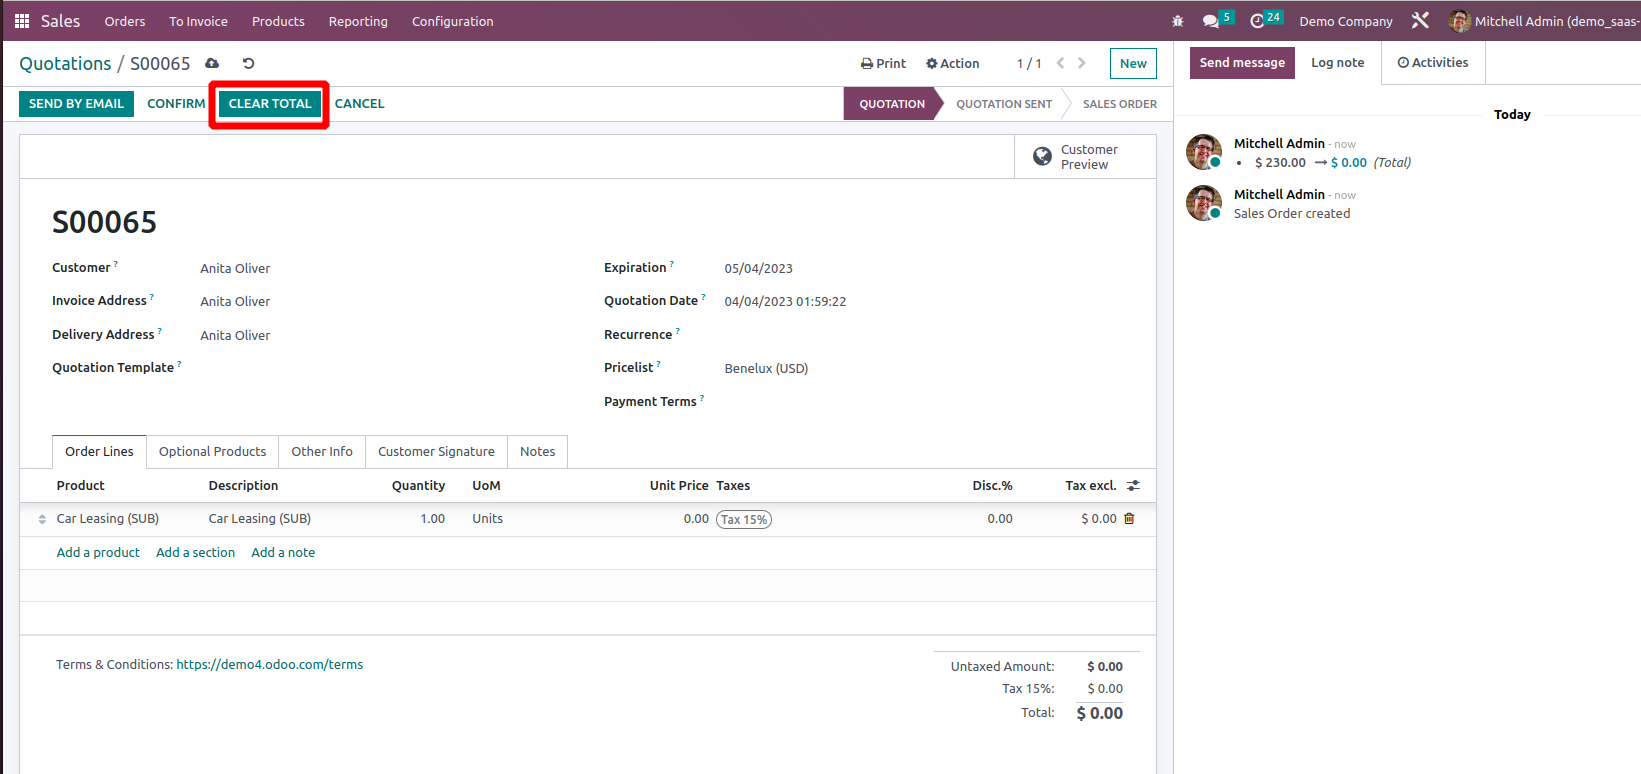
- Then you can see your button on the view, and while clicking it,
the defined server
action will be executed.