Sales
Invoices
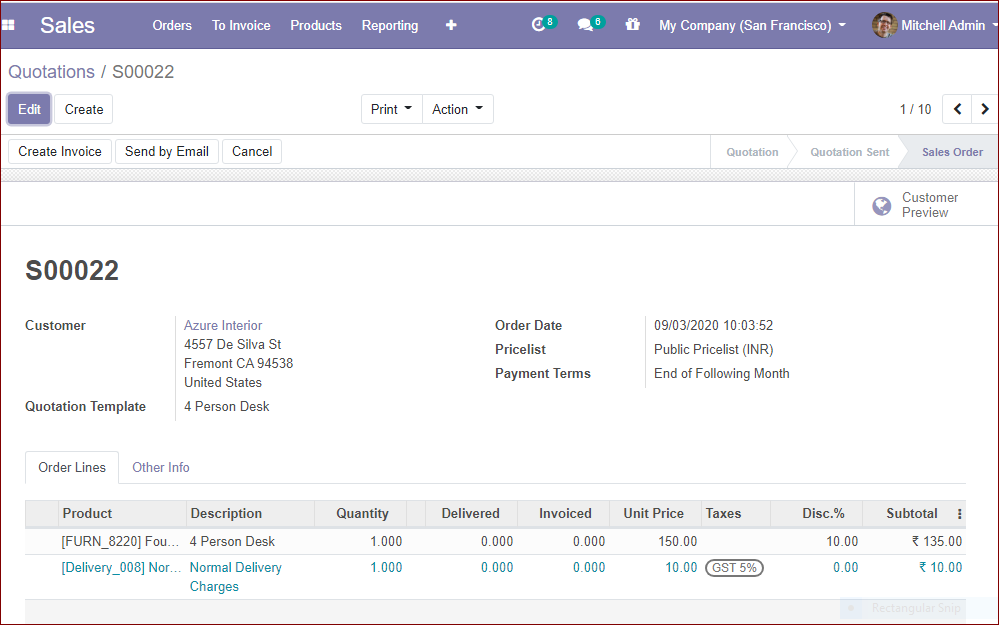
Invoices are the document that sends to a customer to designate the number of products and services that have been offered by a vendor. The vendor can send the invoice to the customer after confirming the sale order. The invoice includes all the information on sale transactions like product details, quantities, prices, payment terms, etc.
When clicking on the Create invoice button, you can visible a new window like below
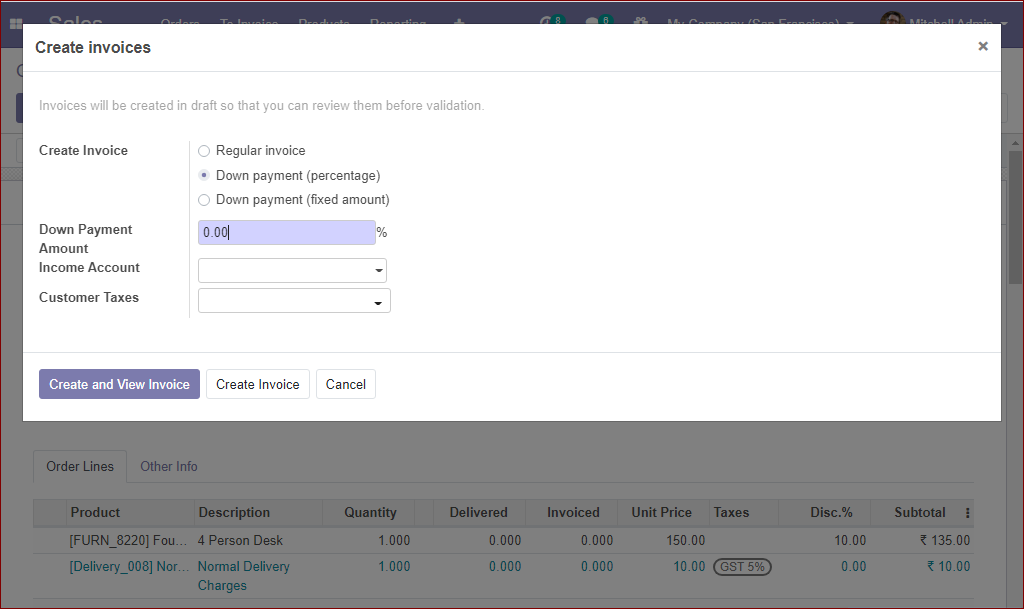
Here in this window, you can see the different options. Odoo provides three options under Create invoice.
- Regular invoice
- Down payment (percentage)
- Down payment (fixed amount)
The down payment is one of the dominant features that allows the buyer to pay a percentage of the amount while ordering with the agreement that the rest amount will pay later.
The next option is the Down payment amount. It is the percentage of the amount to be paid in the initial stage of ordering.
Income account: The income account is the account used for deposits.
Customer Taxes: It is the taxes used for deposits.
After giving the above details, you have the option to click the button Create and View Invoices.
Upon clicking the button, you will be navigated to a new window like below.
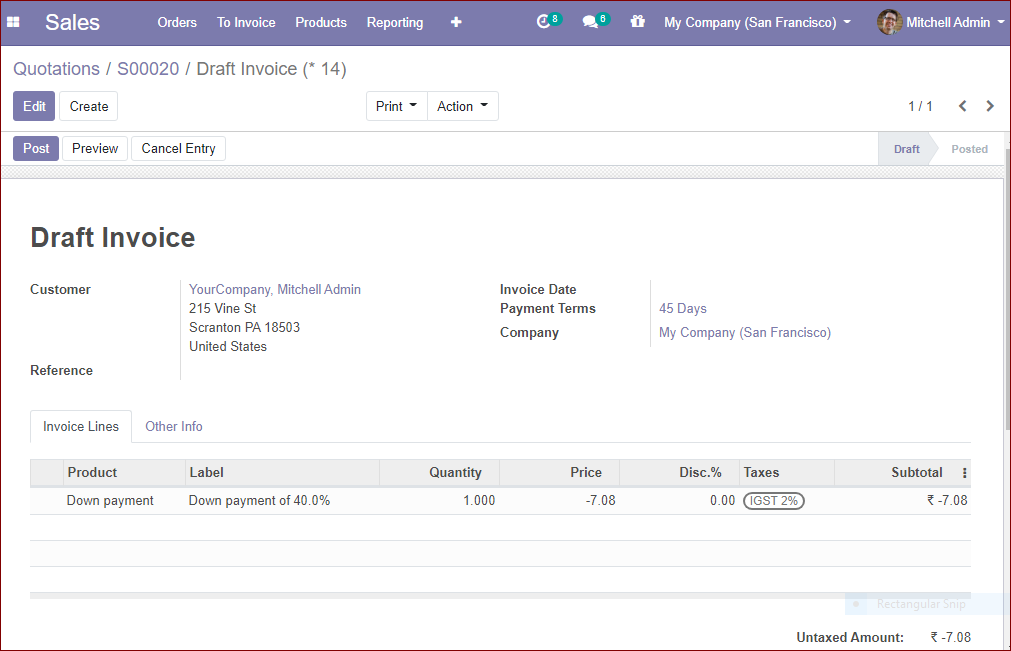
This is a Draft Invoice, so you can make necessary changes in this invoice by clicking the EDIT button.
If you click on the Preview button, you will see the website view of the invoice.
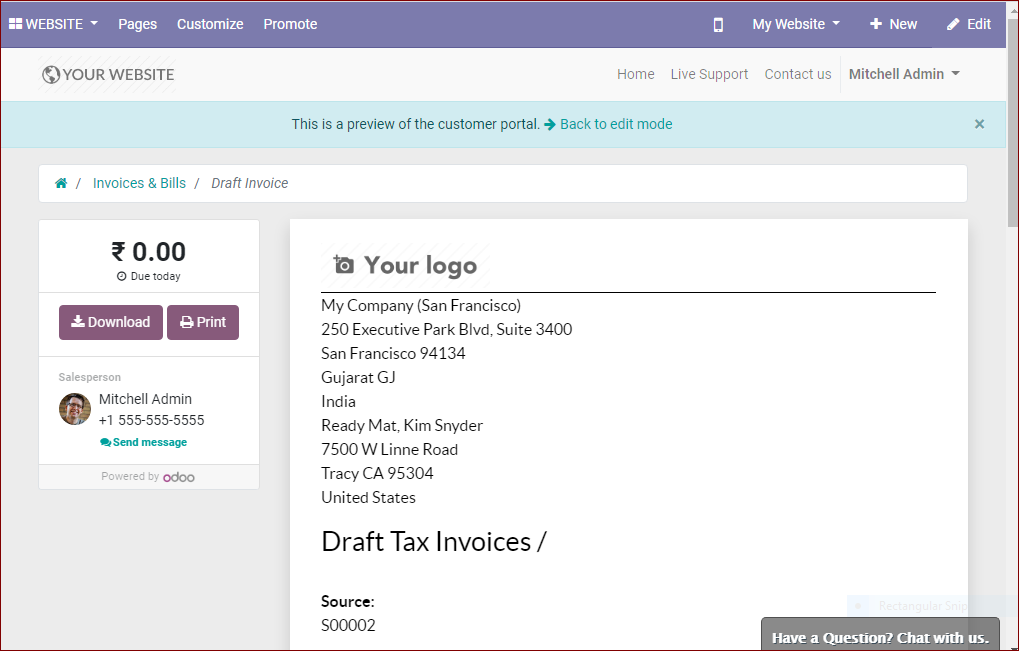
This is the website view of the invoice.
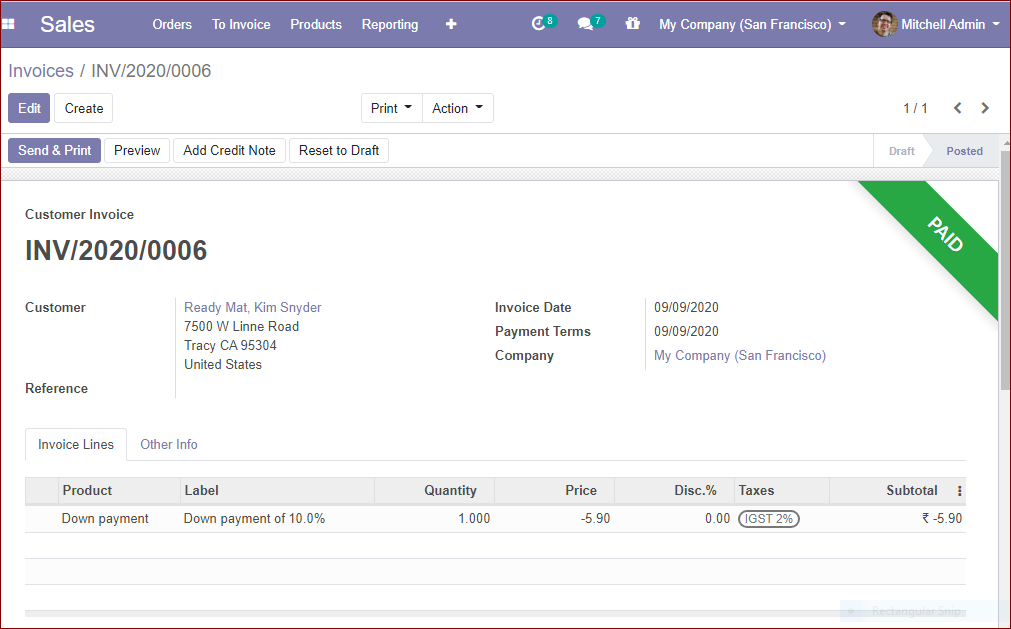
After finishing all the corrections and changes, you can confirm the invoice by clicking the POST button.
When you click on the POST button, you will be navigated to the new page like below.
Now you can click on the Send & Print button available in the left top corner of this page, for receiving the default Email template like below.

This is the default email template.
- Print: This is the option Print, for getting an opportunity to preview as pdf.
- Send by post: This option allows you to send the document by snail mail, a conventional posting delivery service.
- Email
- Recipients
- Subjects
By clicking the Send & print button, you will be navigated to the new window like below.
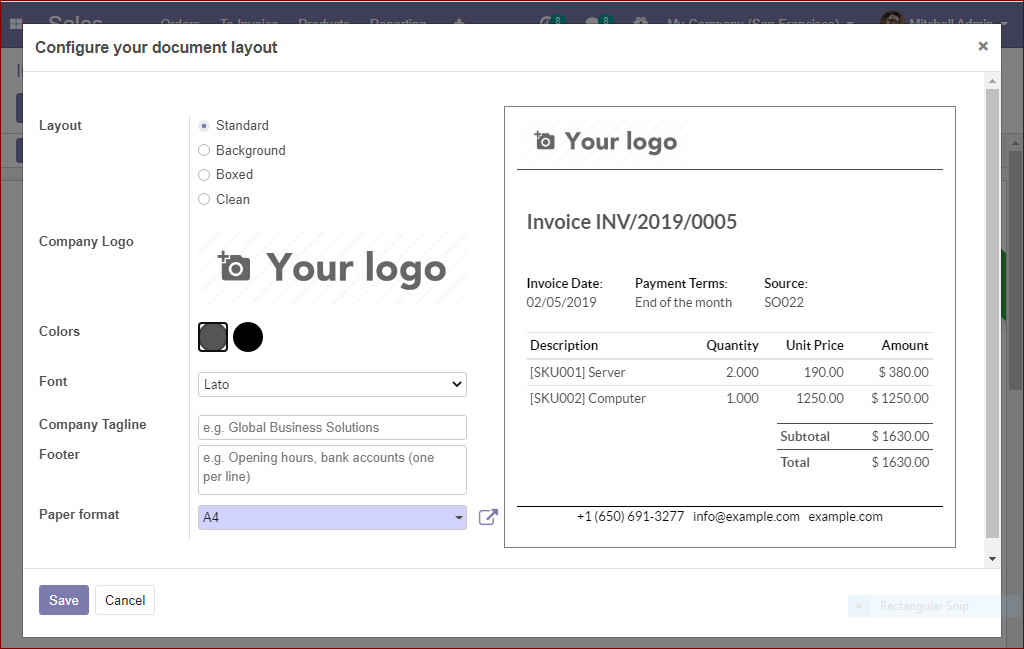
You can configure your document layout here.
One can make the modifications in the document layout by adding a background to the invoice or adding boxes. company logos can be provided or can change the colors and font of the letters. Can also add a company tagline and footer in the invoice. You can select different paper formats.
At last select the save button.
The next step is Registering payment.
When you click on the Registering payment button, you will get a form like below.
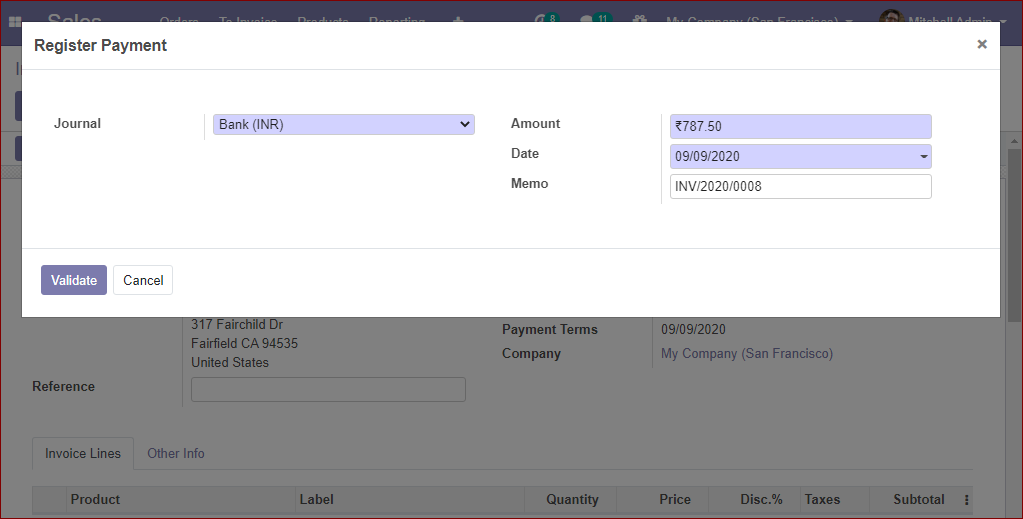
Here you can select the journal. The payable amount, date, memo are there in this window.
After providing the required details, click on the validate button.
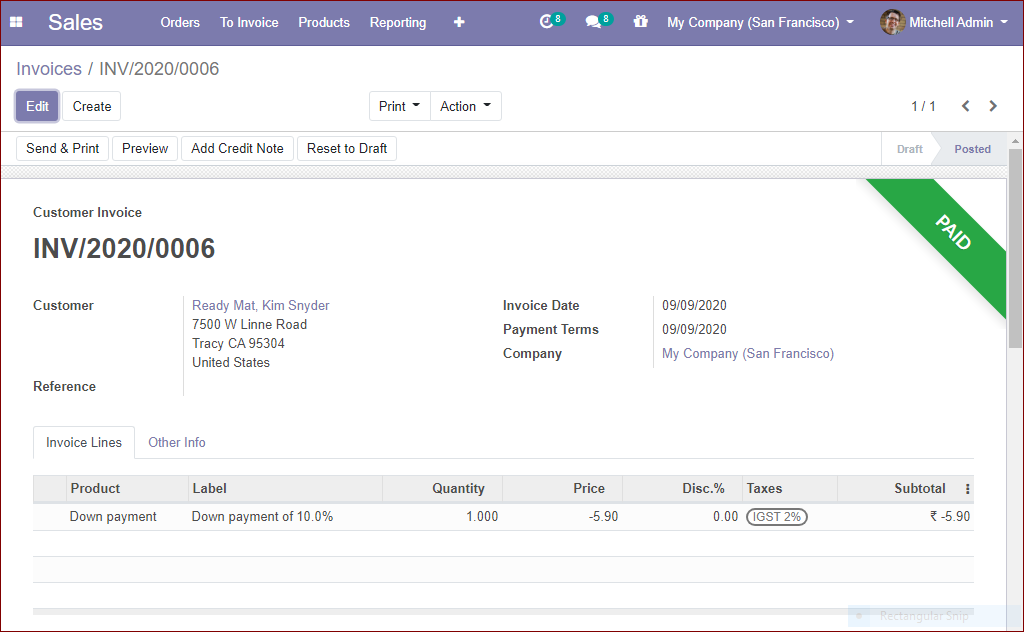
Upon clicking the validate button, you will be navigated to a new window for showing the invoice as PAID.