CRM Leads/Opportunities Pipeline
The window that appears as soon as you enter into the CRM module is considered as the main dashboard of the module. The pipeline operations can be seen as arranged in different stages. Leads/opportunities generated from various platforms in Odoo are organized according to their progression in the sales pipeline. The highly integrated nature of Odoo can be used to mine leads from the company website, email, SMS, live chat, help desk ticket, events, social media accounts, and many more. Leads from all these channels can be effectively managed with the assistance of Odoo CRM. Based on the customer's responses, these leads can be later converted into opportunities and then into sales quotations. The CRM module plays an important role in increasing sales opportunities in a business.
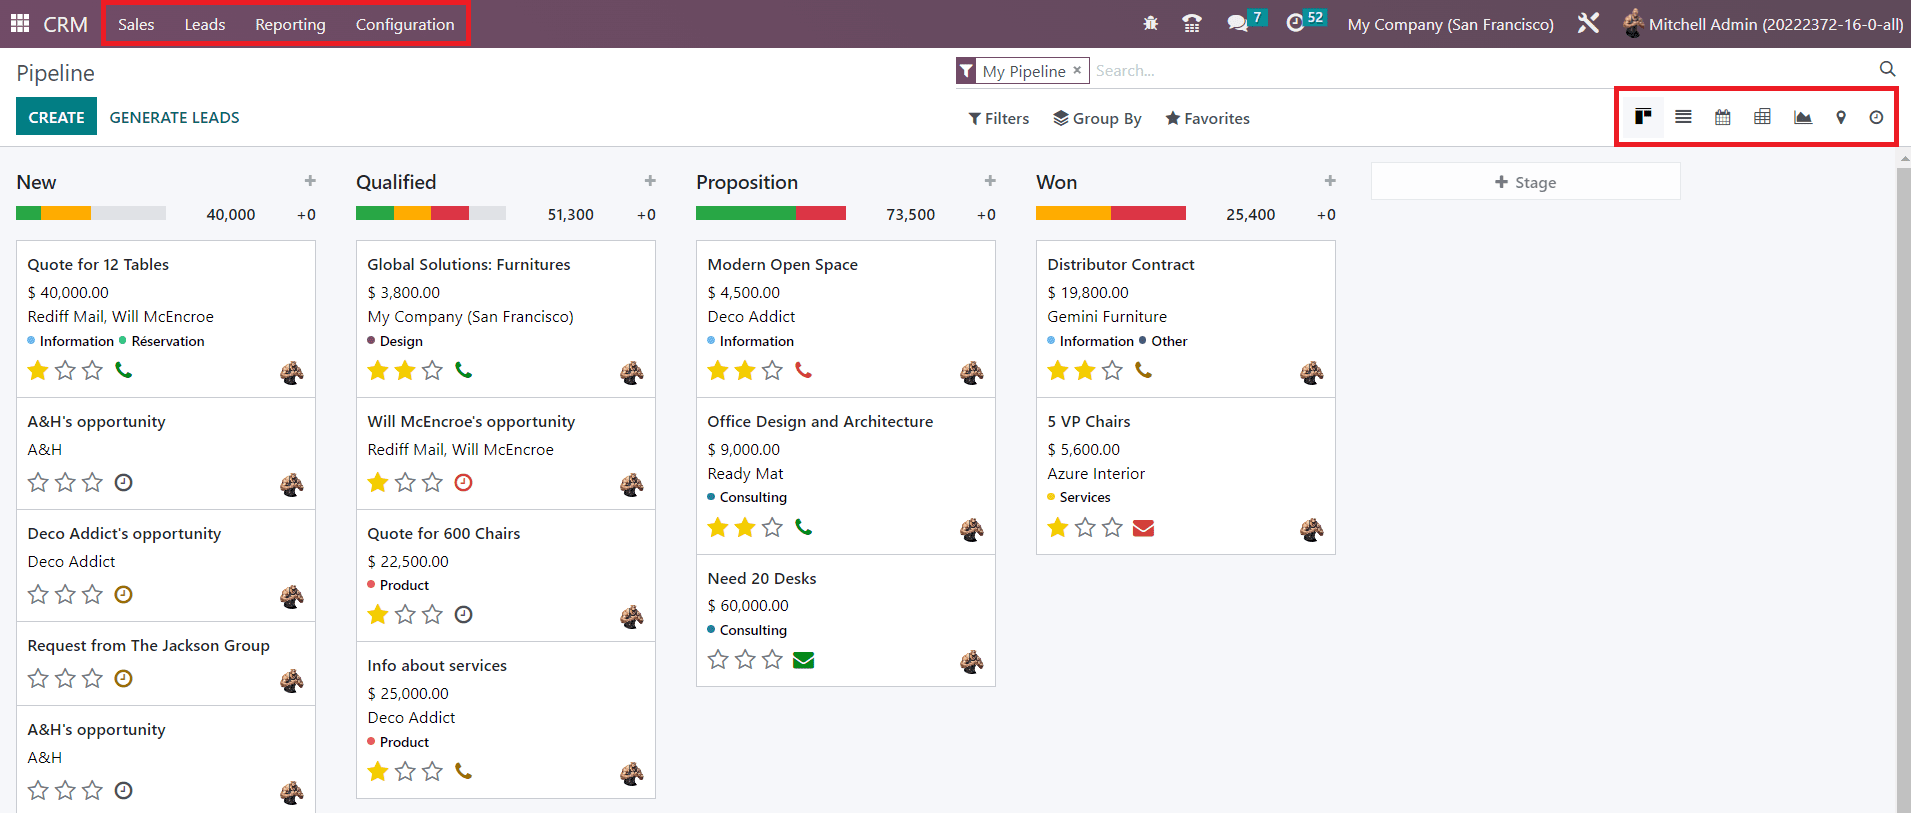
The screenshot above shows the main dashboard of the Odoo 16 CRM module. This platform comes under the My Pipeline option which is available under the Sales menu in the module. As you can see in the screenshot, there are three main menus such as Sales, Reporting, Leads and Configurationavailable in the CRM module. Under each of these menus, you will be able to get several options to perform different tasks related to customer relationship management in Odoo 16. The My Pipeline window will show the records of all leads generated from various channels. Just like in the older versions of Odoo, you can alter the view of the platform into Kanban, List, Calendar, Pivot, Graph, Map, and Activity. As you can see in the image, the icons that represent the Kanban and List views have changed in Odoo 16.
When we take a look at the Kanban view of the CRM pipeline, we can see that all records are being arranged in the window based on their progress in operations. Leads are organized in a way that the user will be able to easily identify the progress of each lead. Assigning different stages for leads in the CRM module is not a difficult task. According to your business requirement, you can customize the stages and arrange leads under suitable stages.
The screenshot shown below includes the stages such as New, Qualified, Proposition, and Won. As the titles of the stages indicate, all new leads will appear under the New stage. Among the new leads, only qualified leads based on certain criteria will be moved to the next stage called Qualified. The successful business leads can be moved to the stage Won after getting confirmation from the corresponding customer.
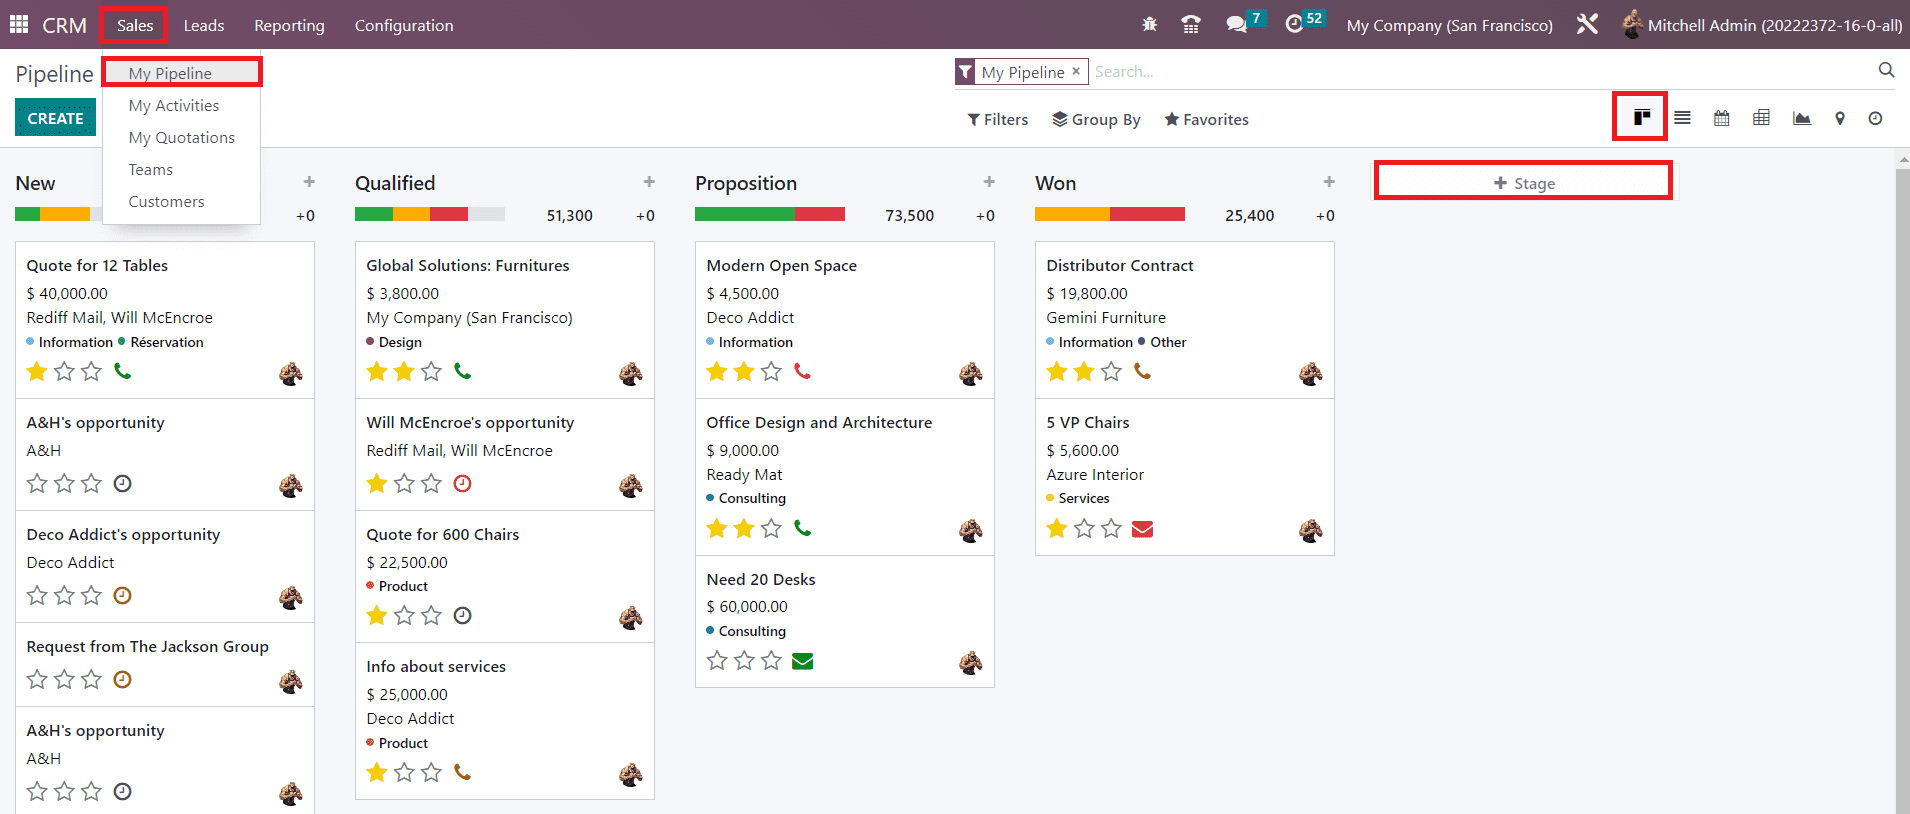
Similarly, you can create required stages for the leads effortlessly by using the +Stage button. When you click on this button, a new field will appear as shown in the image below to mention the title of the new stage.
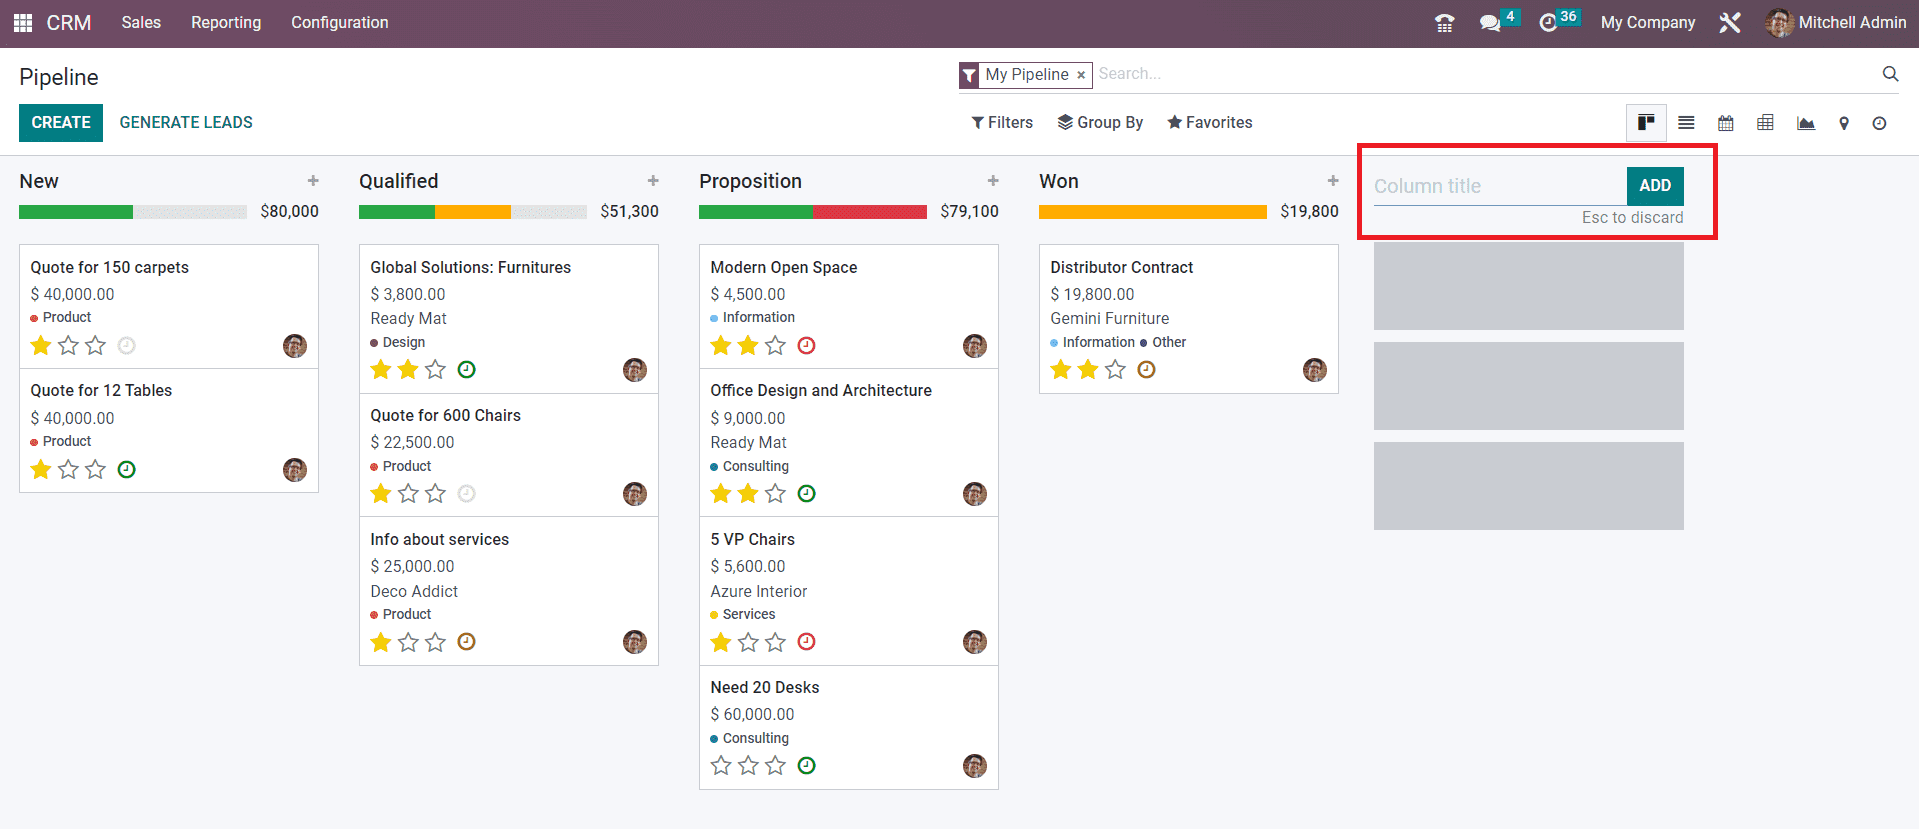
Specify the title in the given space and click the Add button. You can create as many as new stages for leads by following this method. Once you create a new stage, you can change the settings of the respective stage using the gear icon that appears near the title of the stage as shown in the screenshot below.
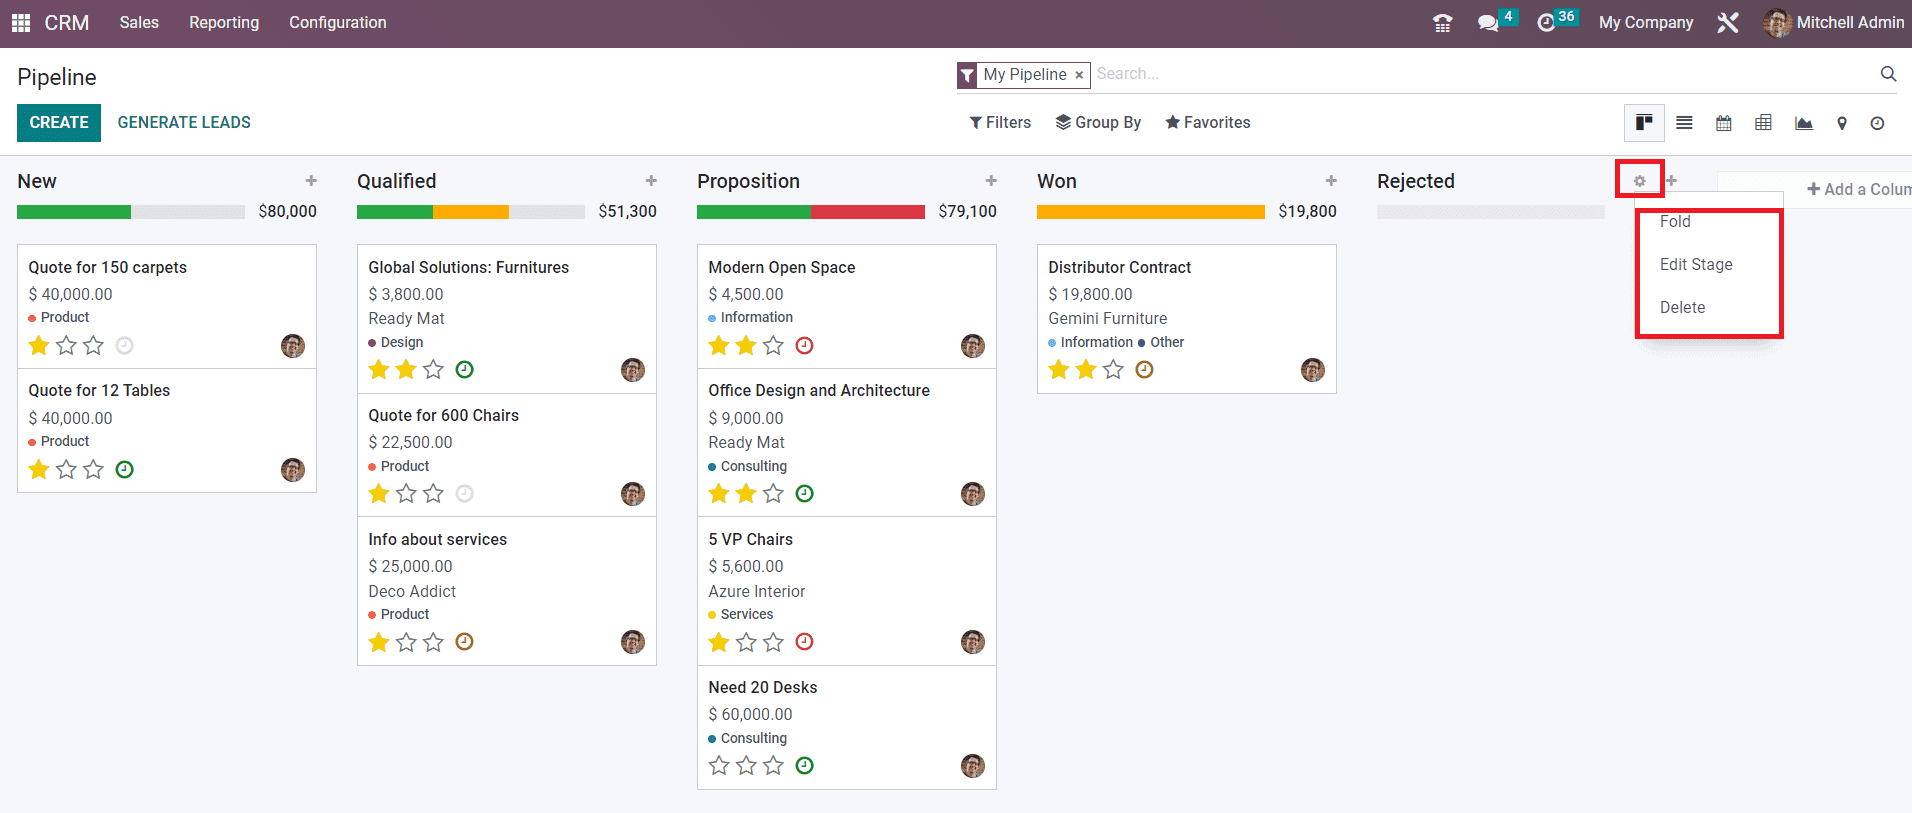
Using this icon, you will be able to Fold, Edit, and Delete the stage according to your requirements. When you click on the Edit button, you will get a pop-up window that can be used to edit the corresponding stage.
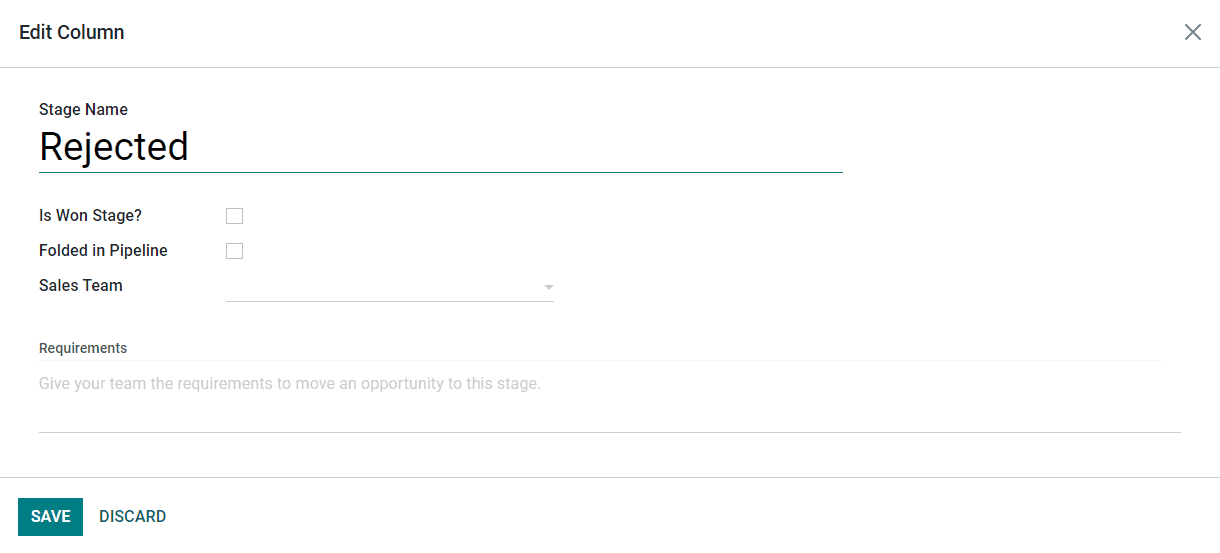
If you want to consider the selected stage as the Won Stage for leads, you can activate the field Is Won Stage?. It is possible to fold the corresponding stage in the kanban view by activating the Folded in Pipeline field. In the Sales Team field, you are allowed to mention a particular sales team who uses this stage. Other sales teams will not be able to see or use this stage than mentioned in the given field. The requirements to move leads to this stage can be specified in the Requirements field so that the team members will get an exact idea regarding the needs of this particular stage. After editing the column, don't forget to click on the Save button to record all new changes.
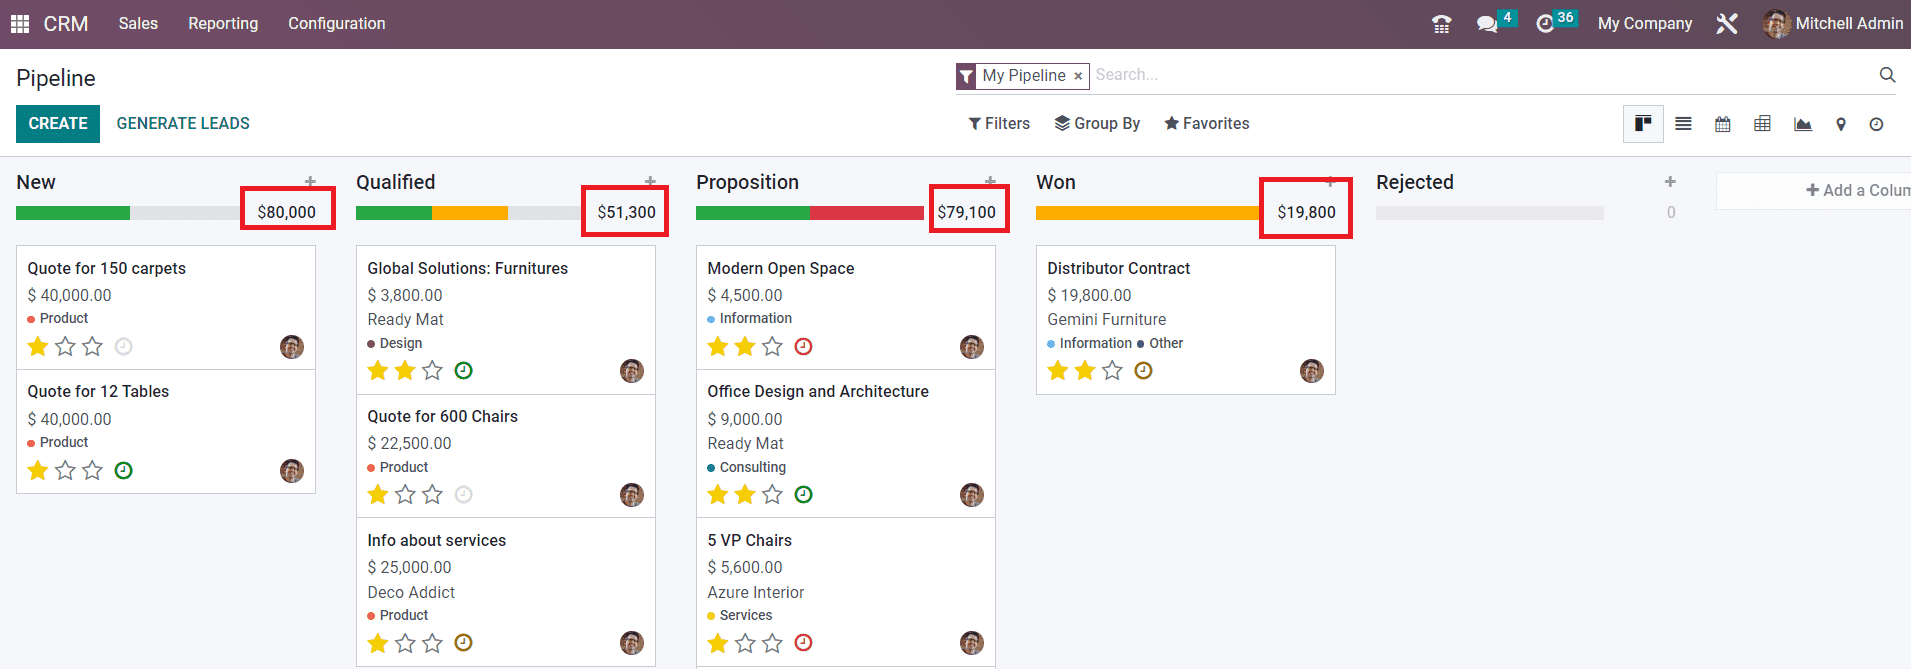
The expected revenue from each stage can be seen in the top right corner of the corresponding columns as highlighted in the image above. You can change stages of leads by using the drag and drop feature. By changing the stage of one lead, the expected revenue will be automatically updated based on the new record.
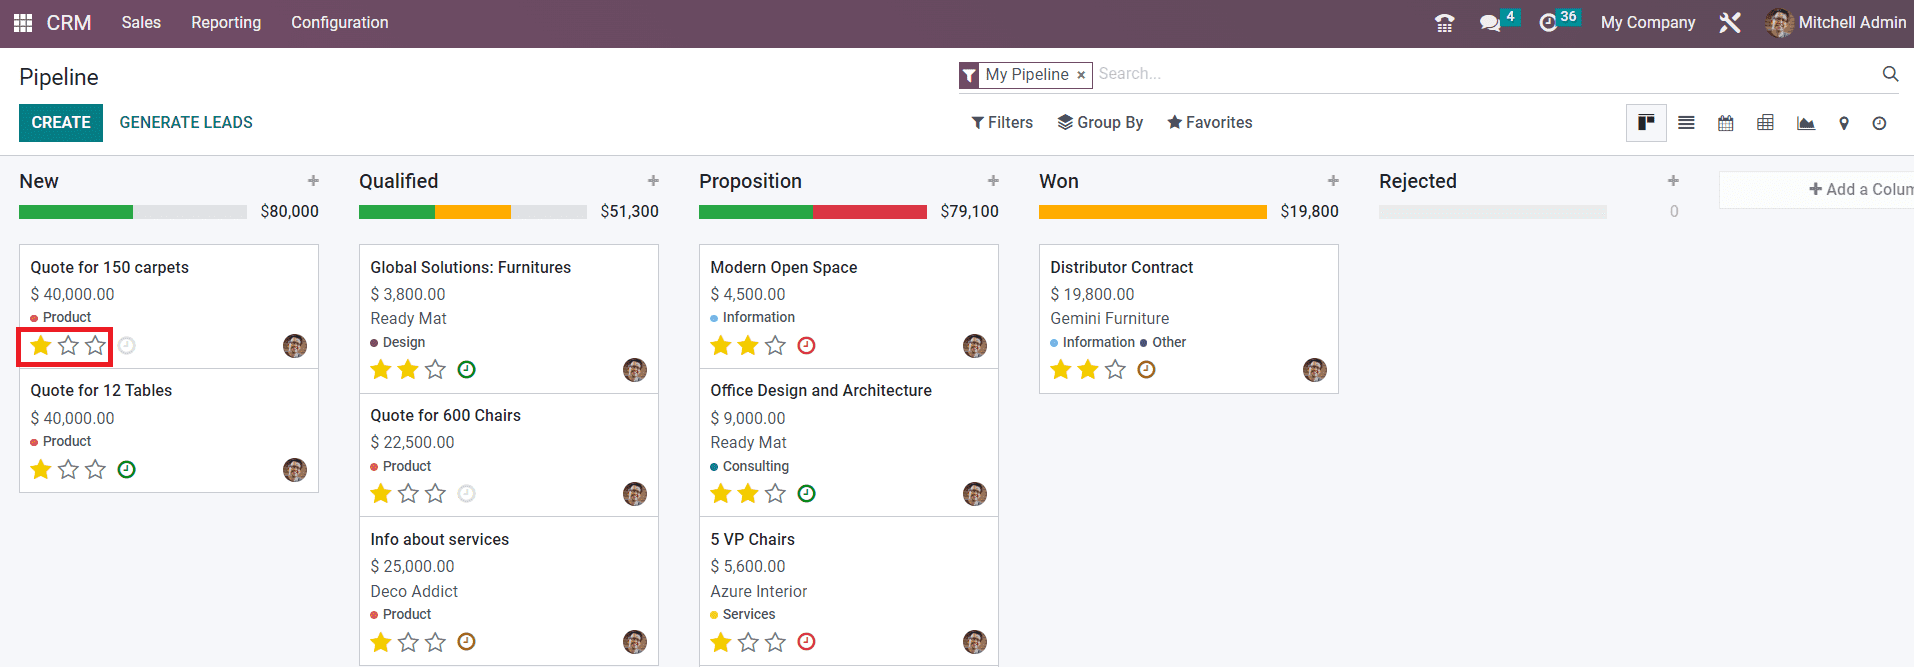
On each lead record, you will be able to find three stars to mark the priority of the lead. Based on the priority of the lead, you can give Medium, High, and Very High stars for leads. This will help to identify high-priority leads.
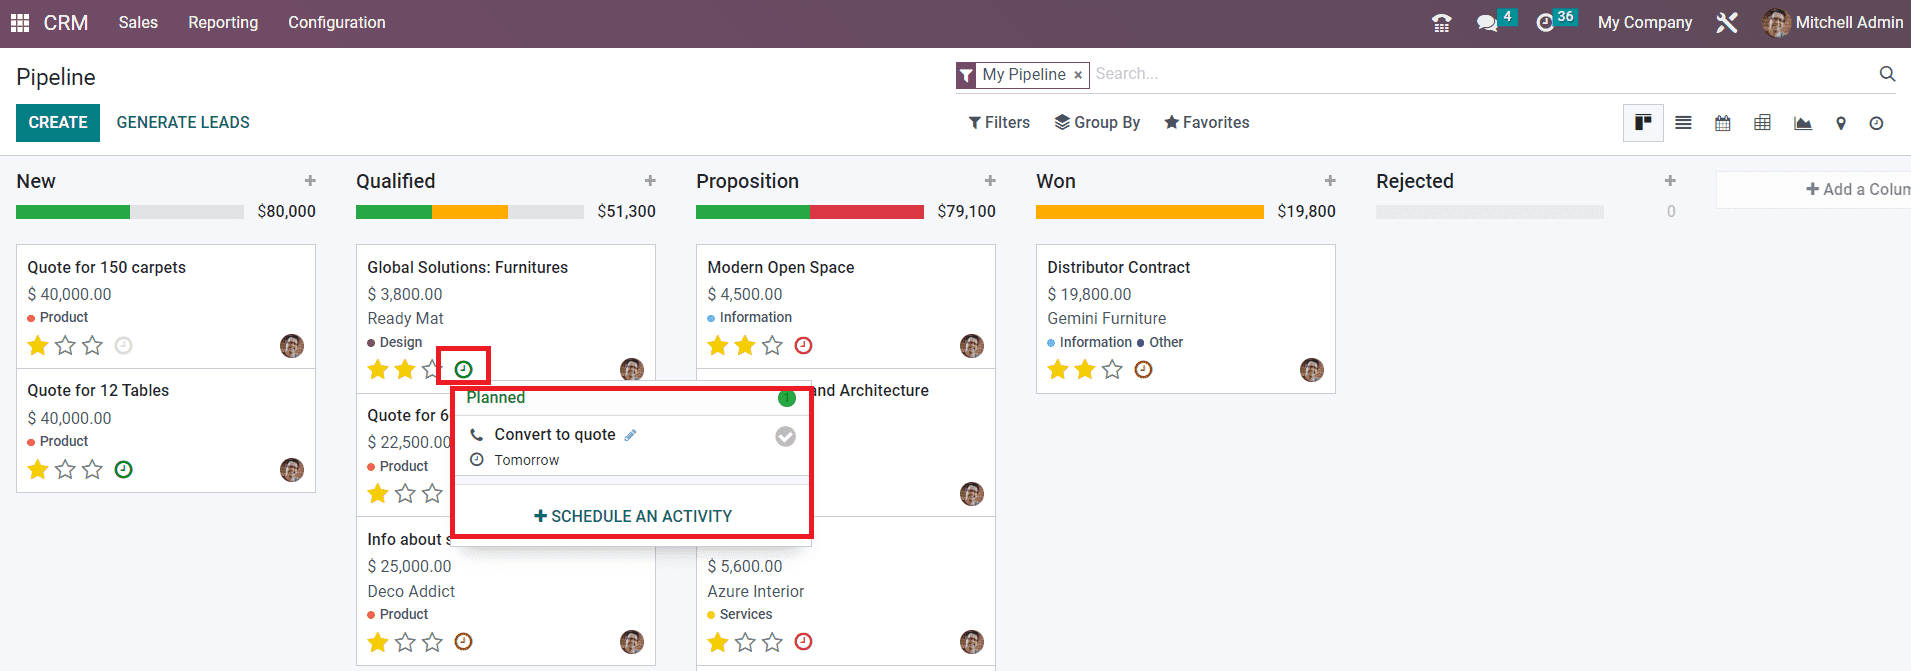
From the main dashboard itself, you can schedule different activities for the leads. As highlighted in the image above, the small clock icon will assist you in scheduling various activities. As soon as you click on this icon, Odoo will show the list of scheduled activities if any activities are scheduled already. Otherwise, you can click on the Schedule An Activity button to plan a new one. Odoo will direct you to a new wizard where you can plan new activities.

Odoo offers you a separate platform to configure different types of activities in the Configuration menu which we will discuss later. Here, in the new activity schedule window, you can select the required activity that you are planning to schedule in the Activity Type field. Along with this, you can specify the Summary of the activity in a few words in the given space. Assign an employee to monitor this activity in the Assigned To field. Last but not least, don't forget to mention the Due Date of the activity. Finally, you can schedule the activity by clicking on the Schedule button. Once you complete the activity, you can use the Mark as Done button. If you have already completed one scheduled activity and want to schedule a new one, you can click on the Done & Schedule Next button. In order to cancel the scheduled activity, use the Discard button. The planned activities can be seen in green color. The red color indicates overdue activities. Activities that are scheduled for today will be shown in brown color.
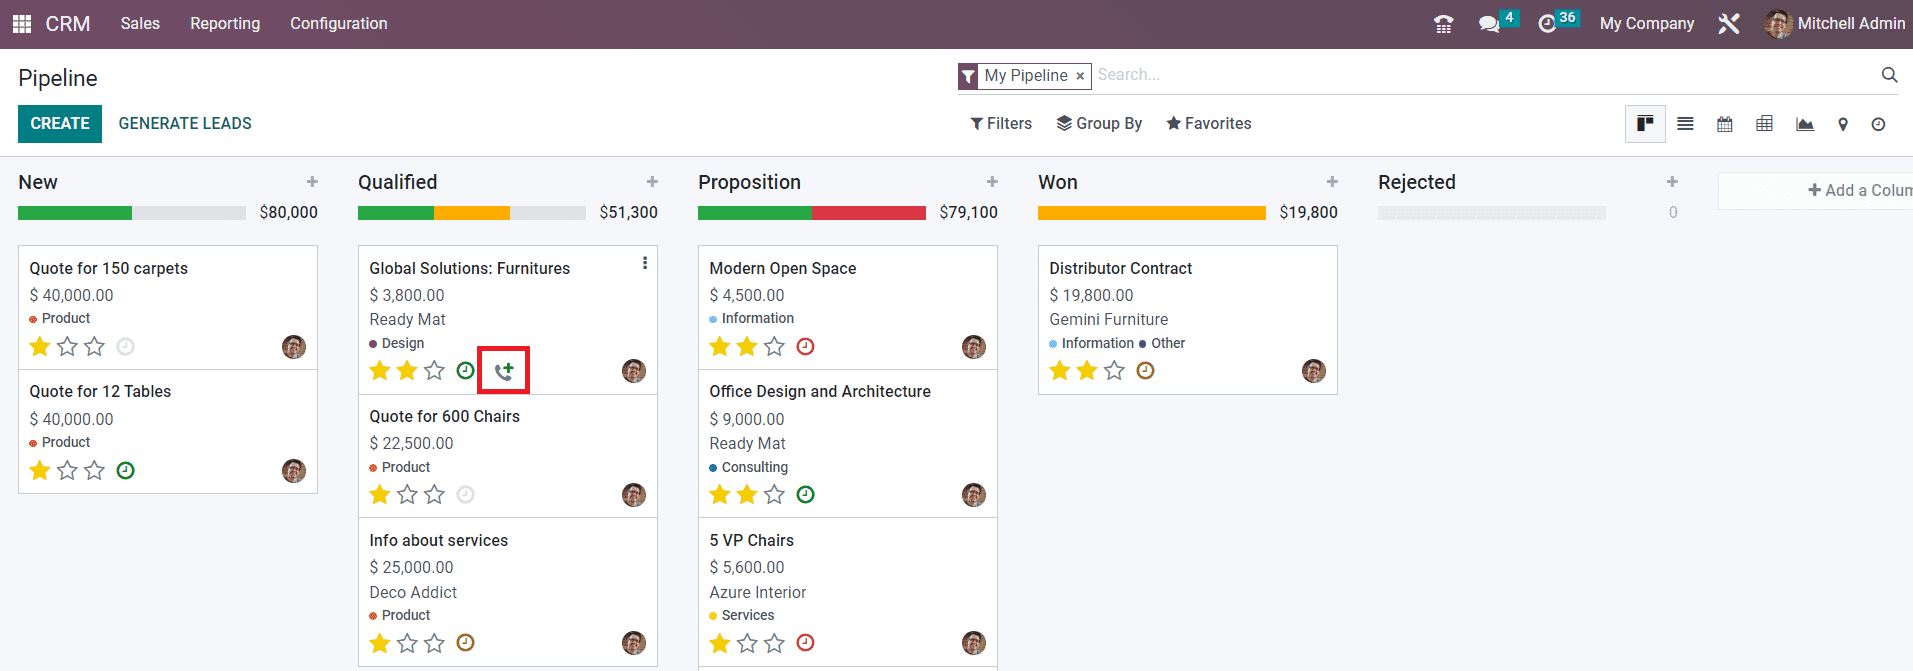
A new feature added in the Odoo 16 CRM module is that now you can add customers to the call queue. This option can be found near the clock icon which is used for scheduling activities. With a single click, you can add leads to the call queue. Clicking again on the icon will remove it from the call queue.
You will get a Quick Add option on each column to quickly add leads under specific stages. This option will be available in the form of a ‘+’ icon near the title of each stage as shown in the image below.
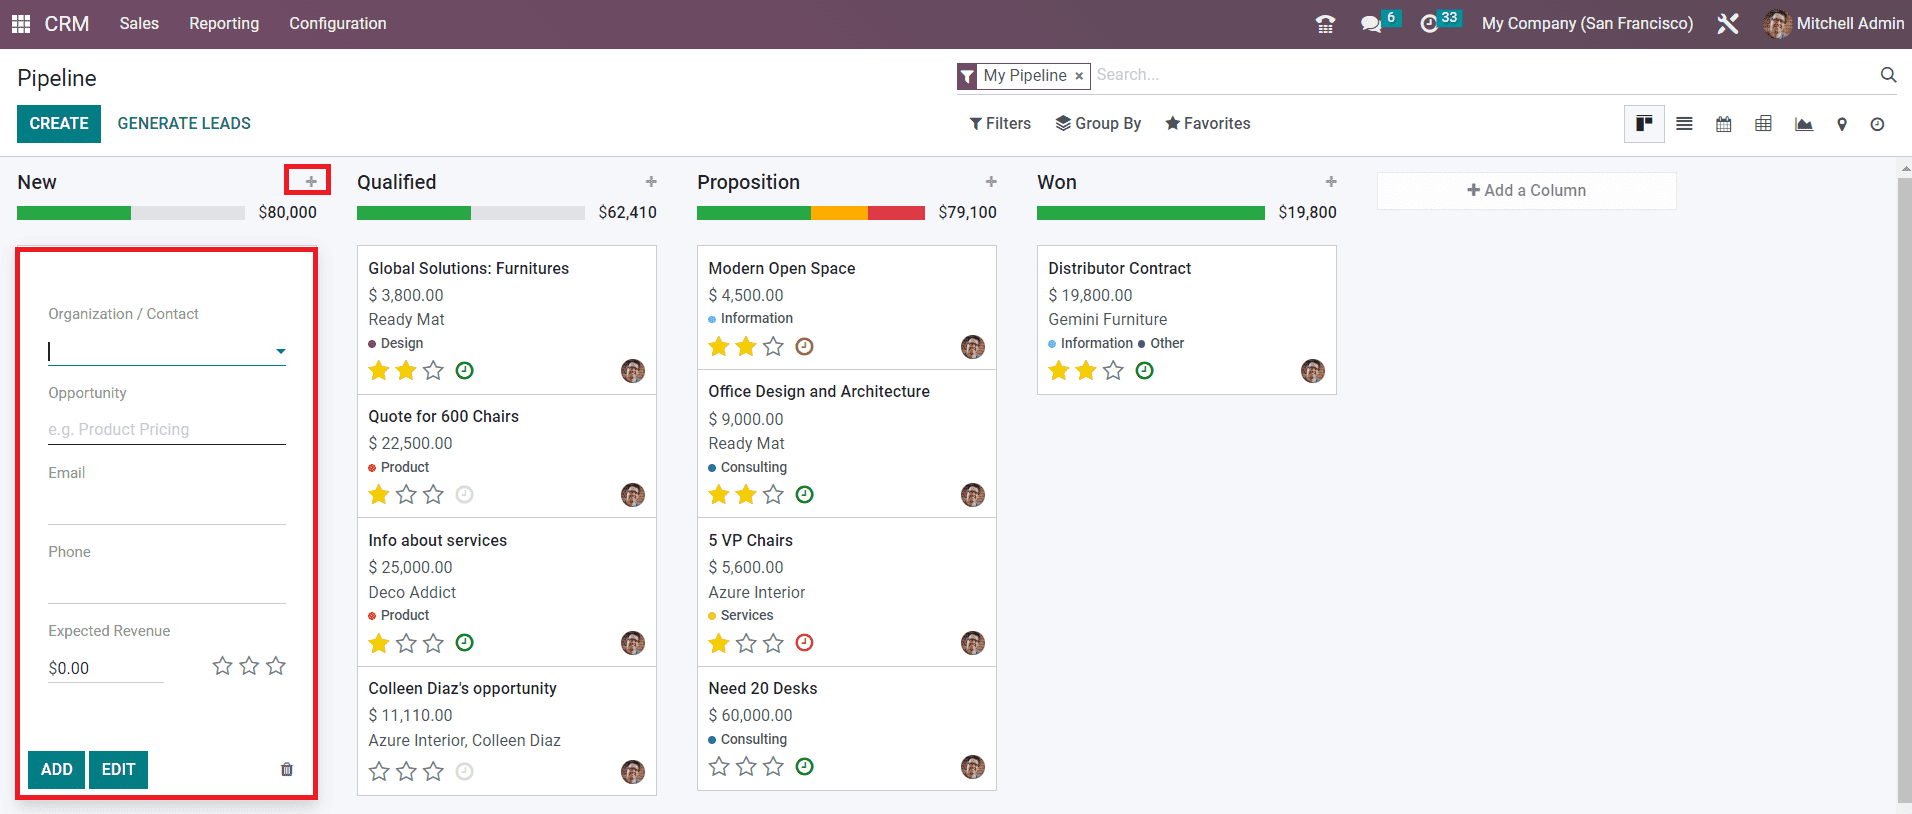
You can quickly add new leads under each stage using this option. Mention the name of the Organization/Contact in the given space. Along with this, you can add the title of the Opportunity, Email, Phone, and Expected Revenue in the respective fields. Clicking on the Add button will add the new lead to the corresponding stage. If you want to make changes to the lead details, you can use the Edit button.
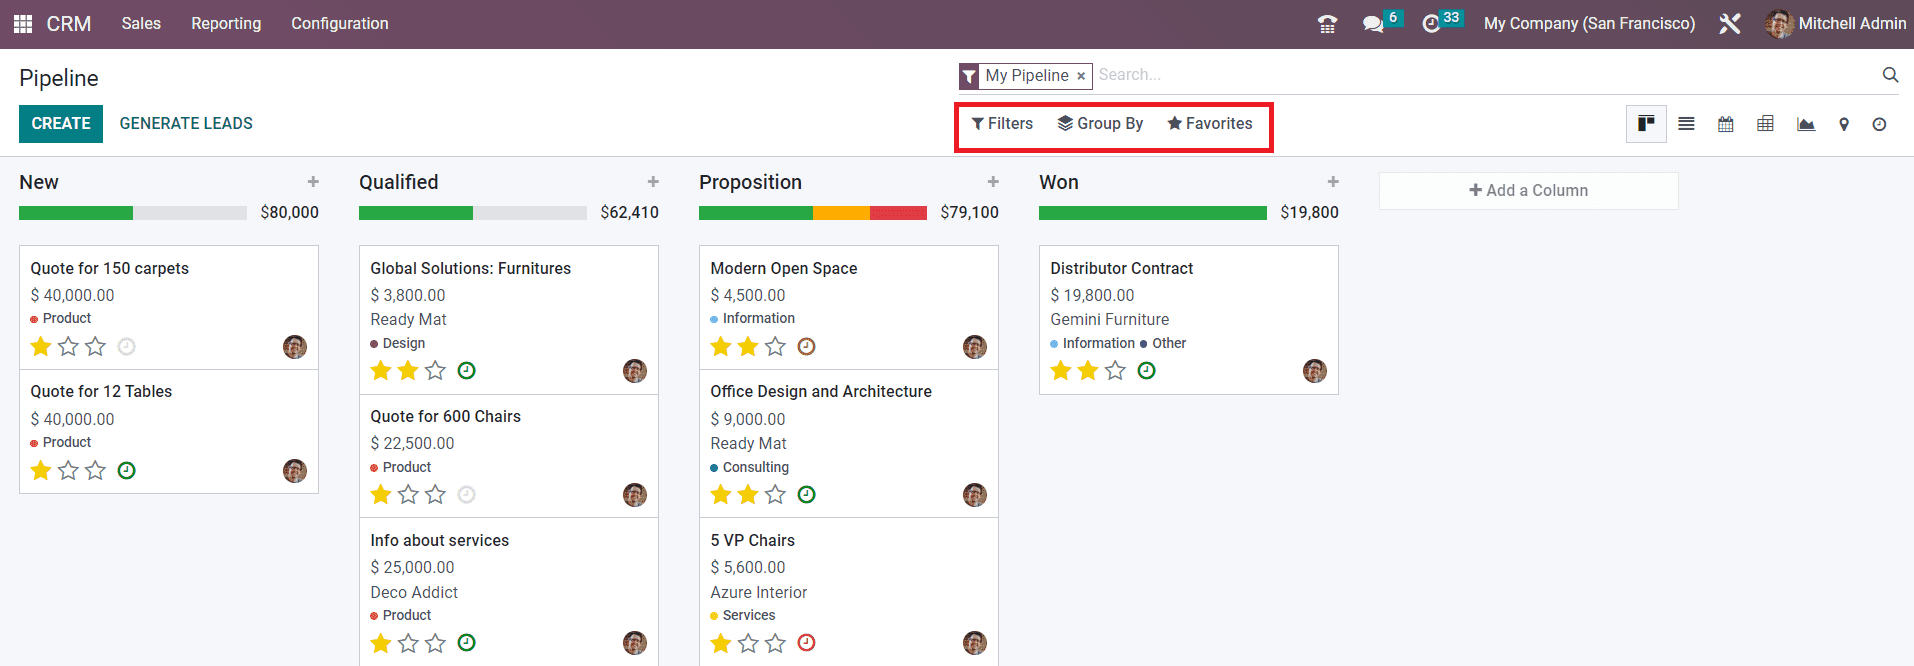
The availability of the advanced sorting options will be helpful for simplifying the searching process in Odoo. The Filters, Group By, and Favorites option in Odoo CRM includes various sorting tools to easily retrieve required data within seconds.
When we take a look at the List view of the CRM pipeline, you will get an advanced preview along with the details of the Opportunity, Contact Name, Email, Phone, Company, Salesperson, Next Activity, My Deadline, Expected Revenue, and Stage.
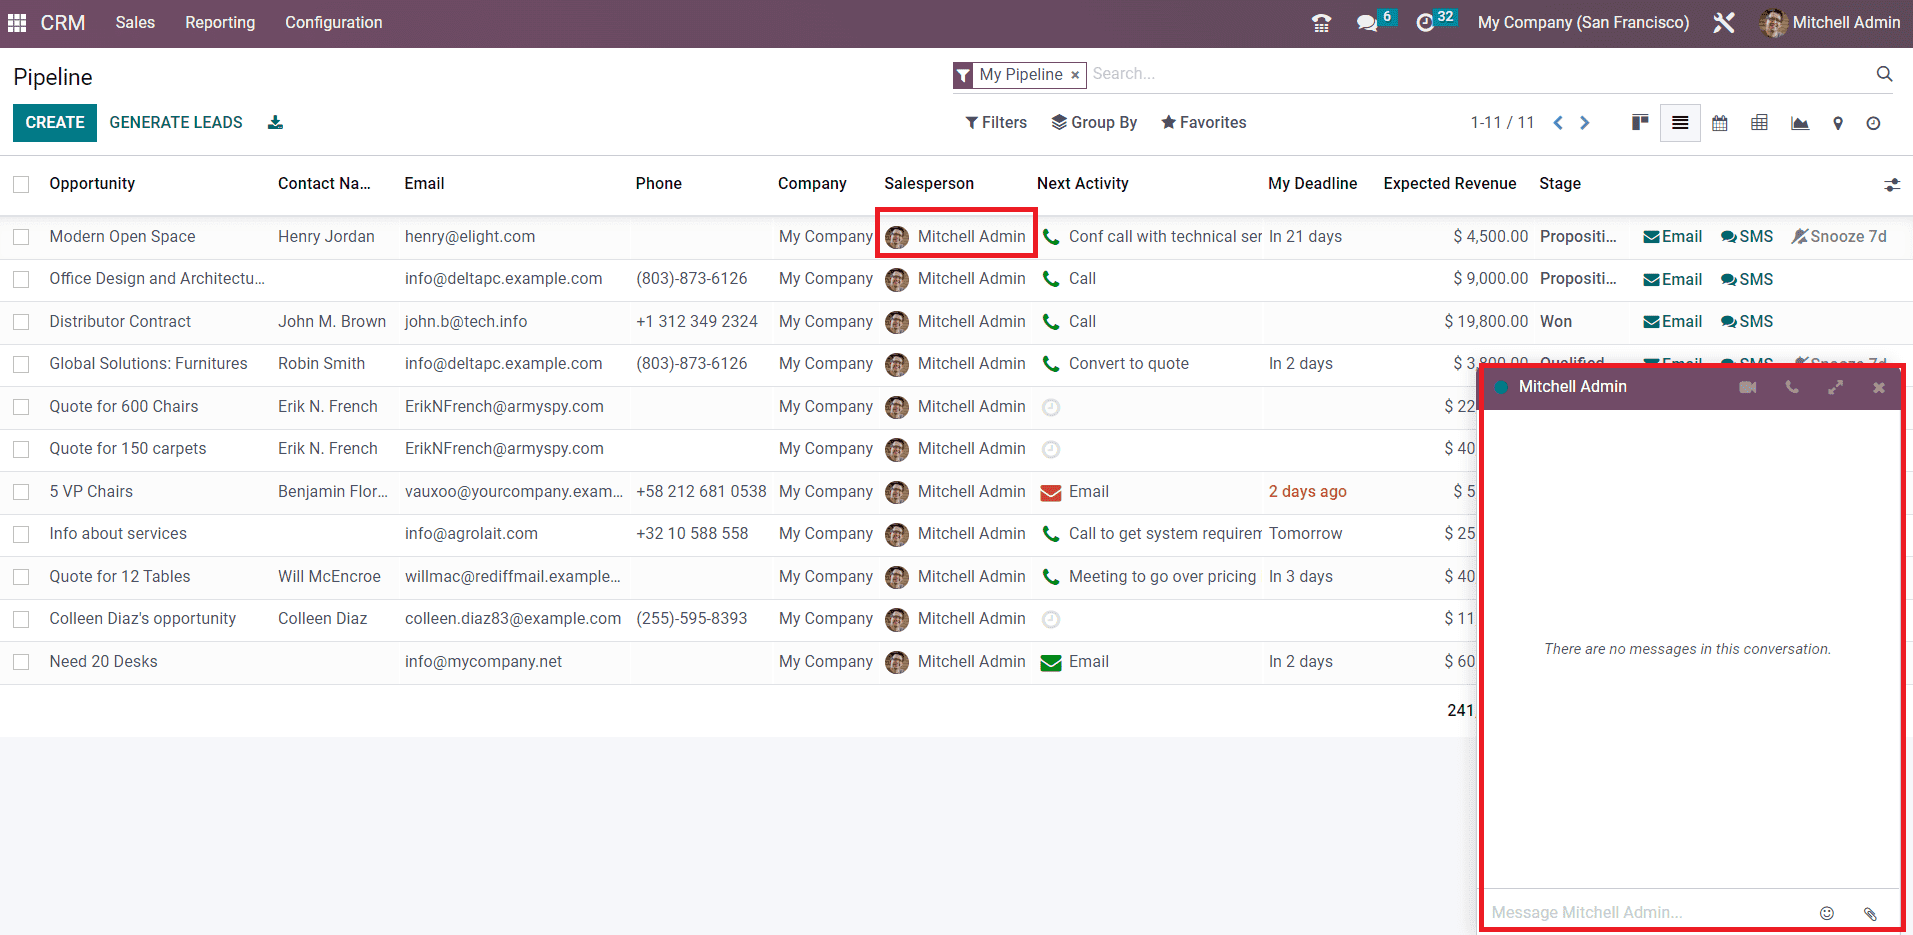
If you want to contact the salesperson, you can click on the name of that person which will directly connect you with the respective salesperson with the help of a message box. Additionally, you will get the Email and SMS options on each lead which will be helpful to connect with the corresponding customer.
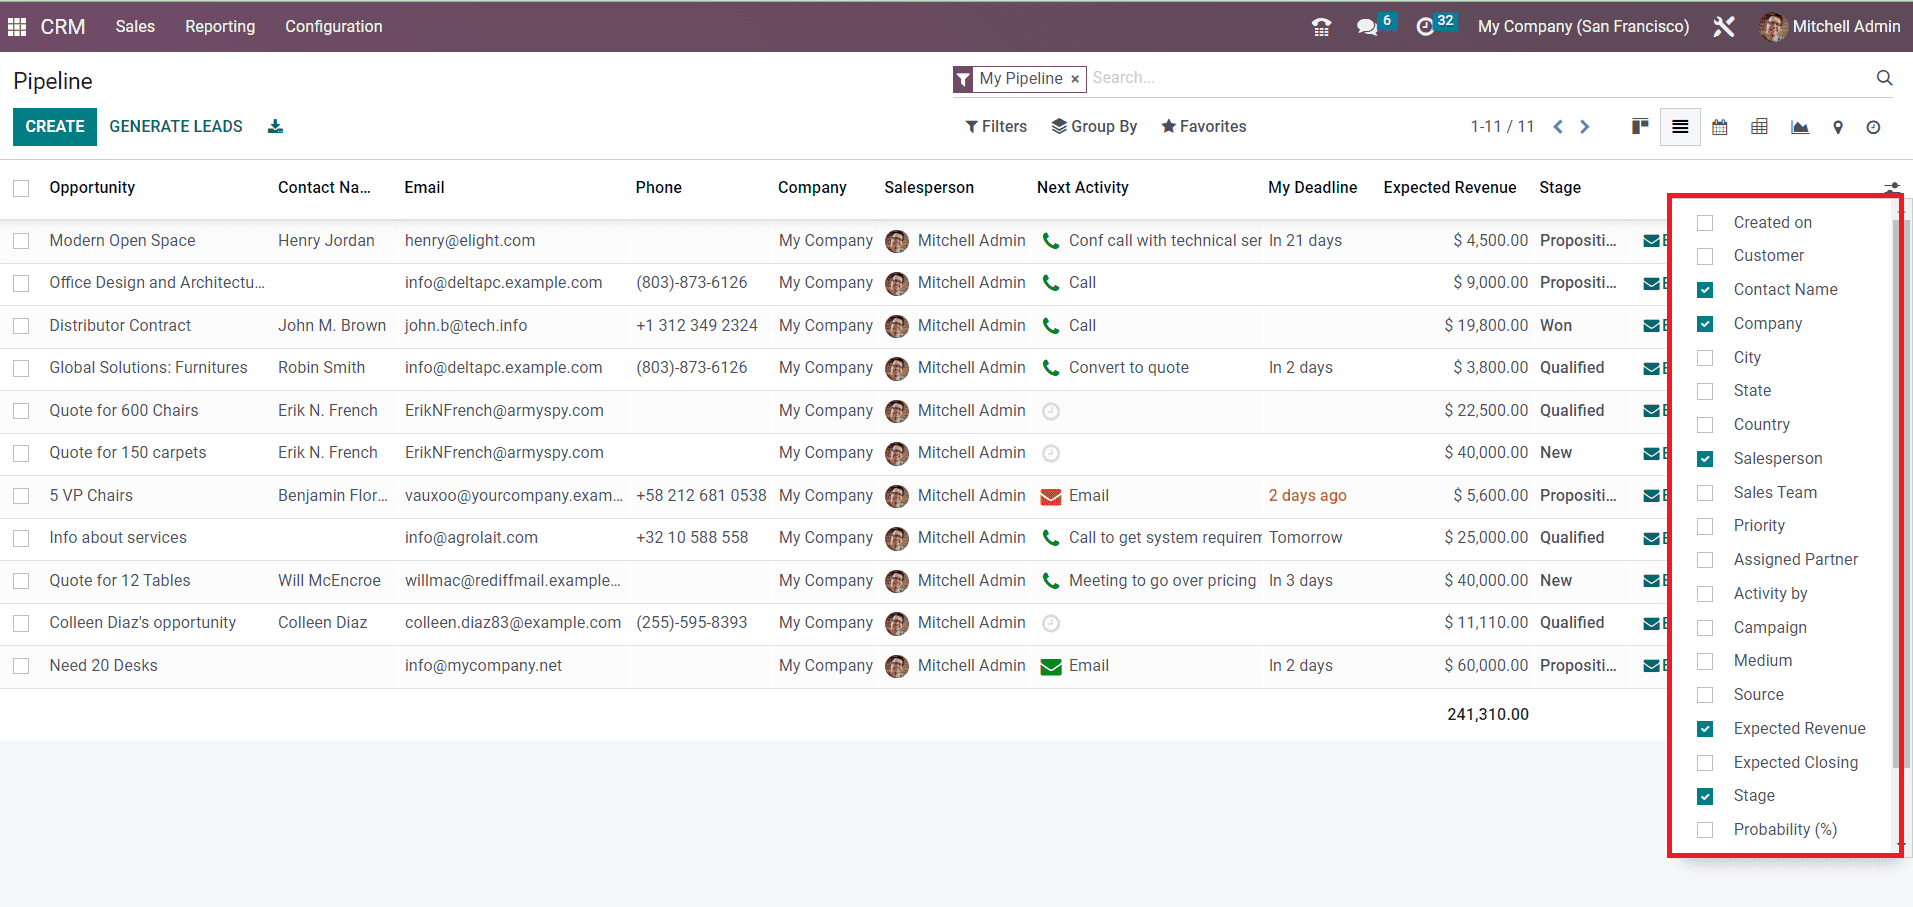
You can enrich the preview of the list by adding more details regarding a lead such as Created On, Customer, City, State, Country, Sales Team, Priority, Assigned Partner, Activity By, Campaign, Medium, Source, Expected Closing, and Probability.
So far we are discussing the My Pipeline window in the CRM module and now, let’s take a look at the My Activities window.
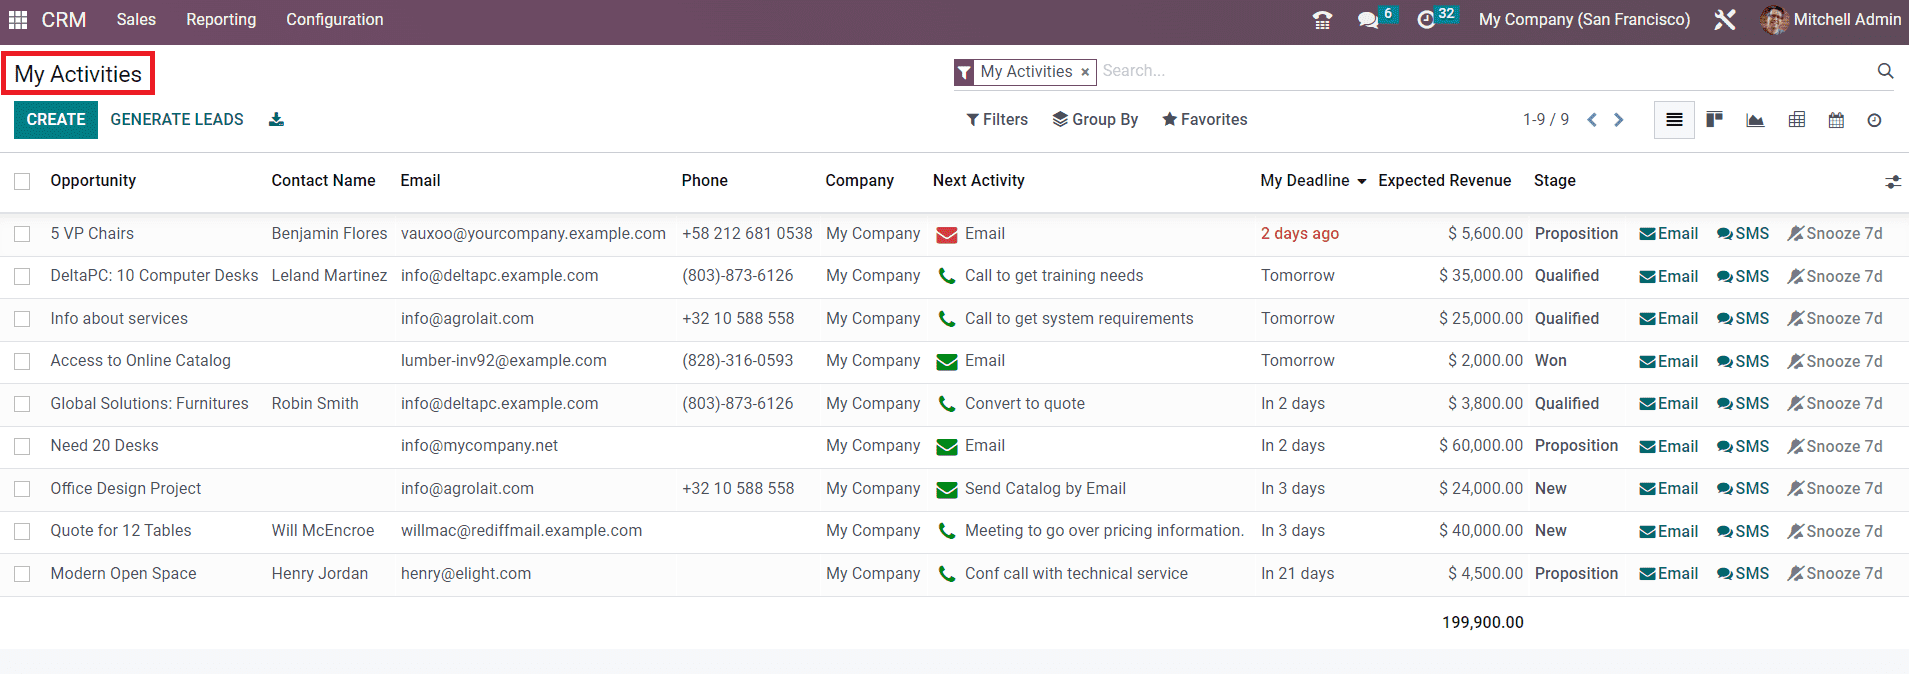
My Activities window is almost similar to that of the My Pipeline window. But, here, you can only find the leads/opportunities that are assigned to you.