Leads
Leads can be considered as the initial step before starting a business with a customer or organization. If a person or an organization is interested in your business, you can convert their interest into your business as a lead which can be later converted into sales opportunities. It is possible to collect leads from various sources with the assistance of the Odoo CRM. Inquiry through phone calls, SMS, Email, Live Chat, Helpdesk Ticket, Events, Contact Forms, and many more can be converted into leads in Odoo. Proper management of leads generated through such platforms should be carried out with utmost care and attention to improve the chances of success. Odoo offers a separate platform for the management of leads in the CRM module.
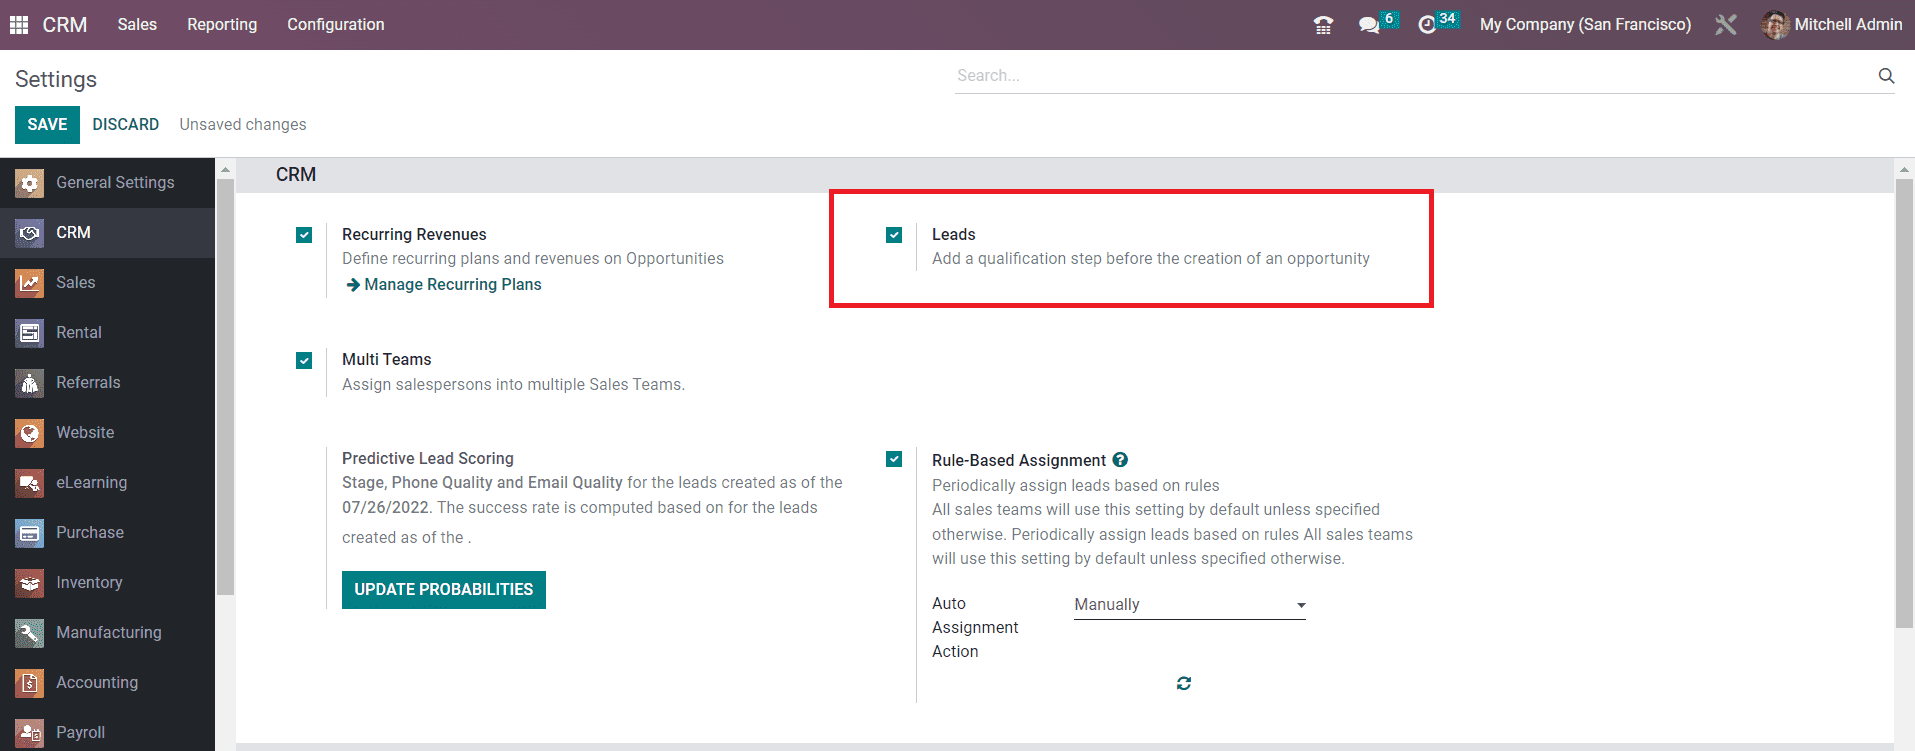
In order to get access to the lead management window, you can go to the Settings menu of the module. As shown in the screenshot below, you can find the Lead option to activate under the CRM tab.
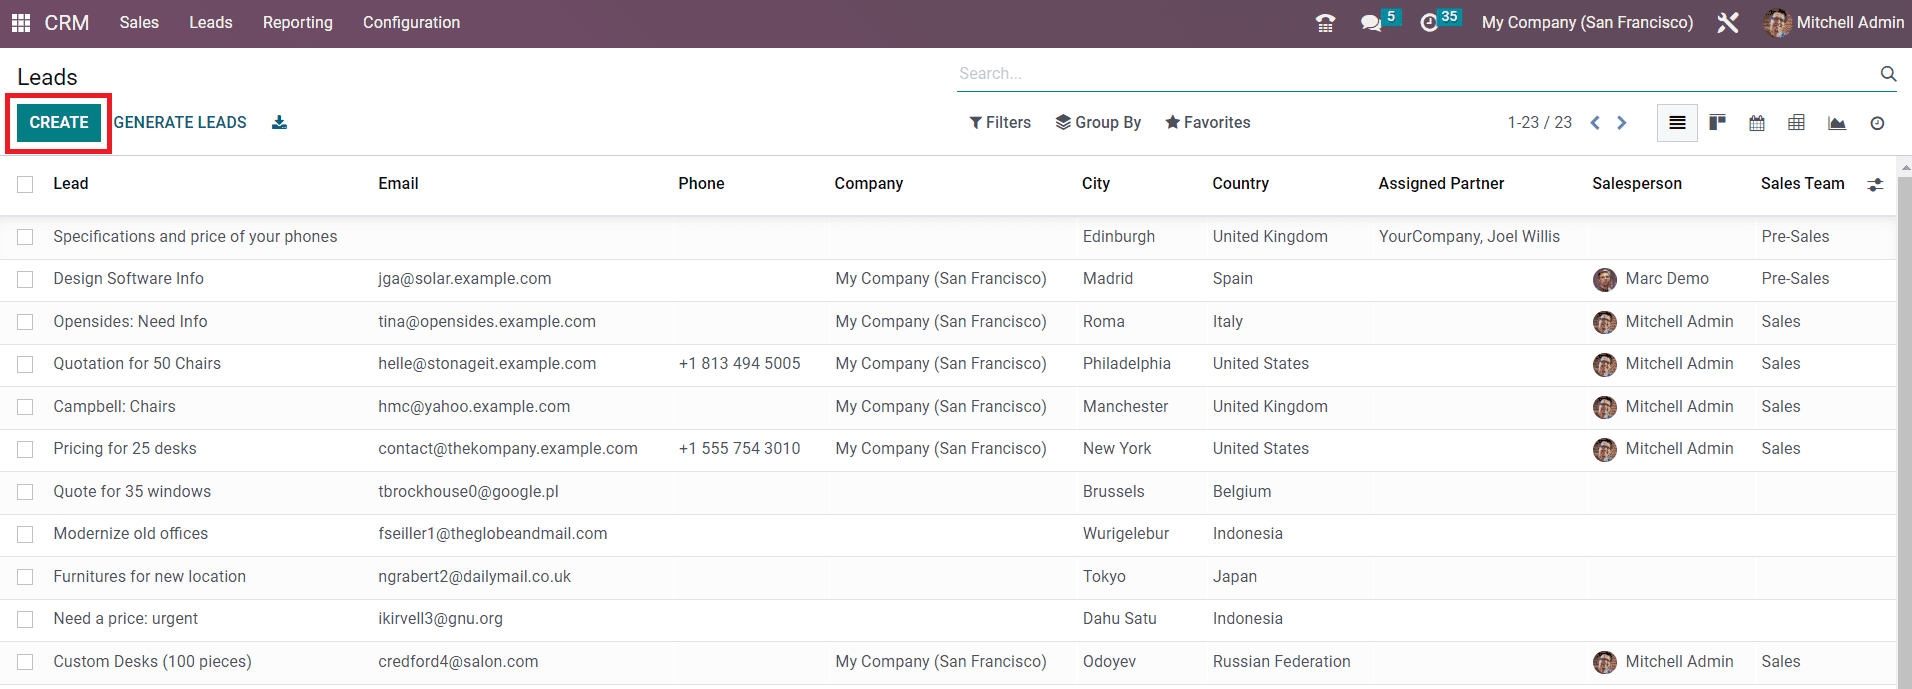
Once you activate this option, you will be able to get a new option in the main menubar called Leads This platform will show the list of all leads generated from various platforms in Odoo. The list includes the details of the Lead, Email, Phone, Company, City, Country, Assigned Partner, Sales Person, and Sales Team. If you want, you can change the view of the platform to Kanban, Calendar, Pivot, Graph, and Activity views based on your requirements..
You can manually create records of new leads using the Create button or automatically generate leads based on specific criteria using the Generate Leads button.
First, let’s take a look at the manual creation of leads in the Odoo 16 CRM module. For this, you have to click on the Create button given in the top left corner of the screen. Once you click on this button, a new window will appear as shown in the screenshot below to mention the details of the lead. First, let’s check the new features available in this window. As you can see, the Create and Action buttons are moved to the right corner of the screen. Additionally, Odoo will automatically save the details added in this window without using the Save button. If you want, you can use the Save Manually icon to save the details. You can also find changes in the Discard button. Odoo 16 has enabled a new icon for Discard Changes. In the latest version of the Odoo, you will not get the Edit button, but you can click on the field where you want to make changes that will allow you to edit the respective field.
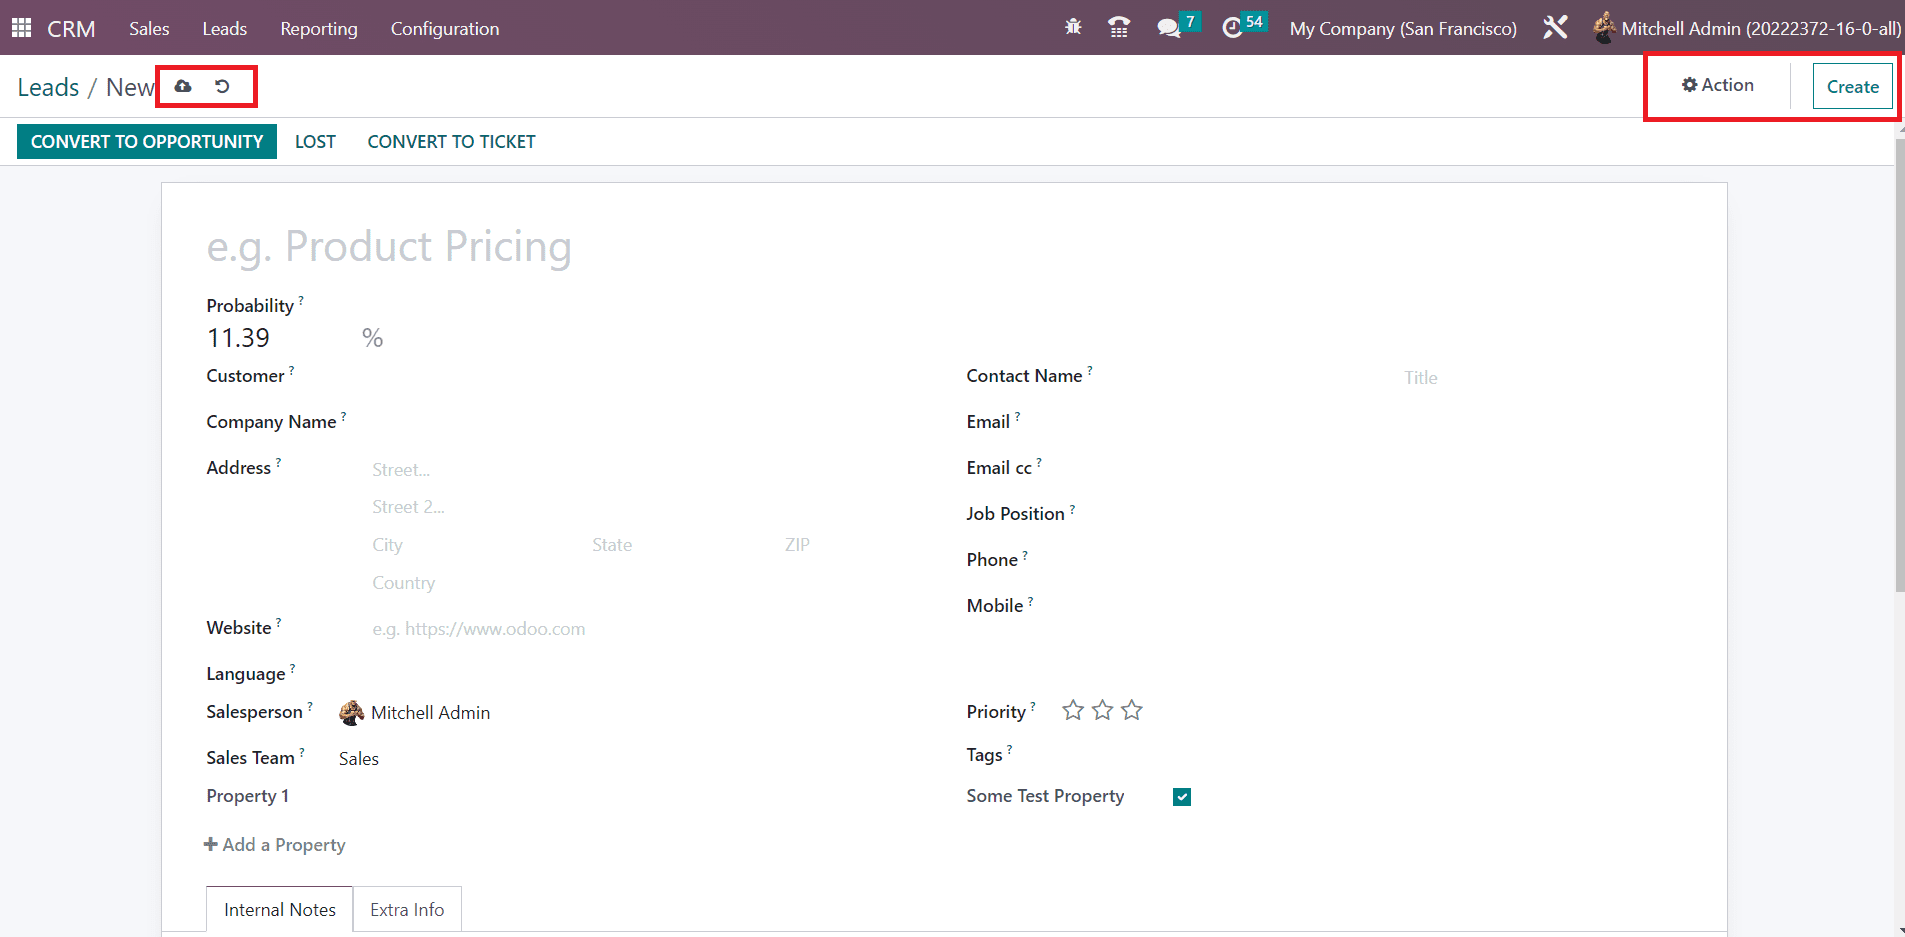
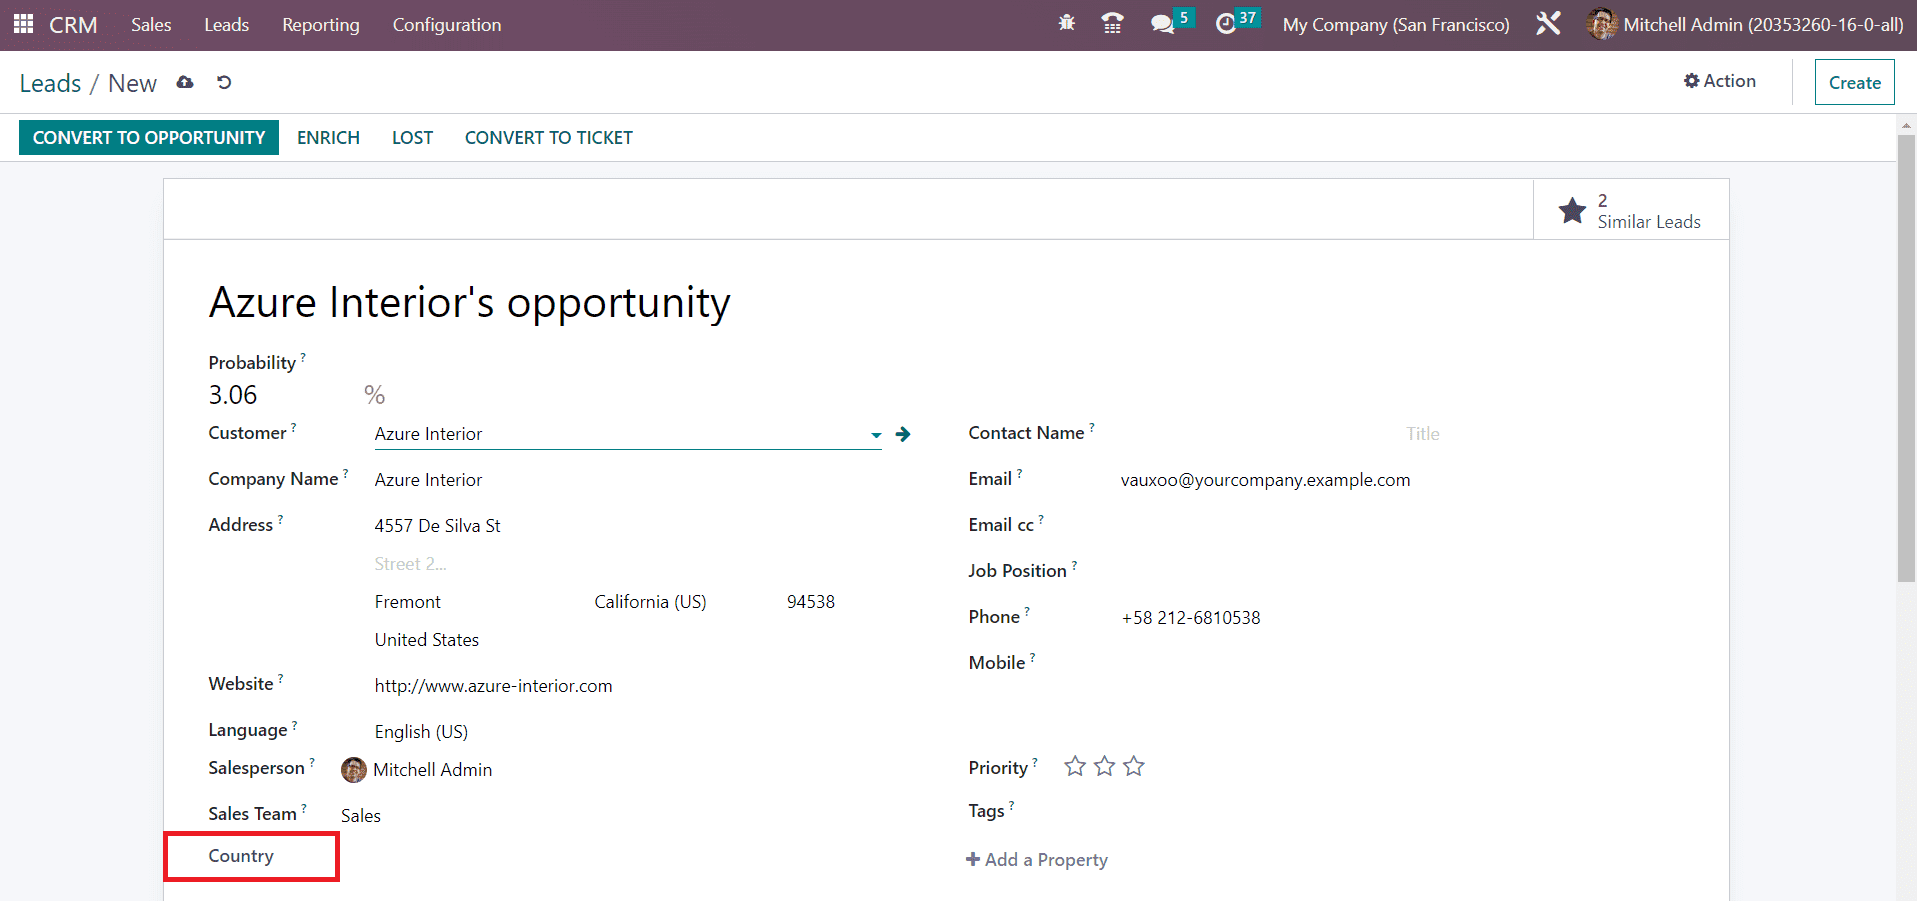
You can specify the title of the lead in the specified area. The name of the future partner company that will be created while converting the lead into an opportunity can be mentioned in the Company Name field. In the Address field, specify the address of the company. The website of the contact can be added in the Website field. Similarly mention the Language, Contact Name, Email, Email cc, Job Position, Phone, and Mobile in the corresponding fields. You can assign an employee and a team for the lead management in the Salesperson and Sales Team fields respectively. Based on the priority of the lead, you can give stars to the lead. Add suitable Tags for the leads in the given field.
The Add a Property field available in this window is a new feature introduced in Odoo 16. With the help of this feature, you can add customized fields to the form view. Clicking on the Add a Property button will give a pop-up window as shown below.
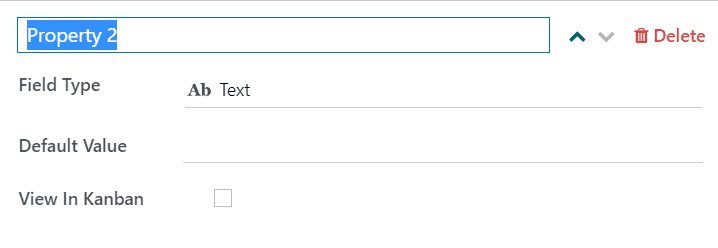
Here, you can mention the name of the new field in the given space. For example, if you want to add the Country field in the form view, you can name the field as Country. You will get a drop-down menu in the Field Type from where you can select the type of the new field.
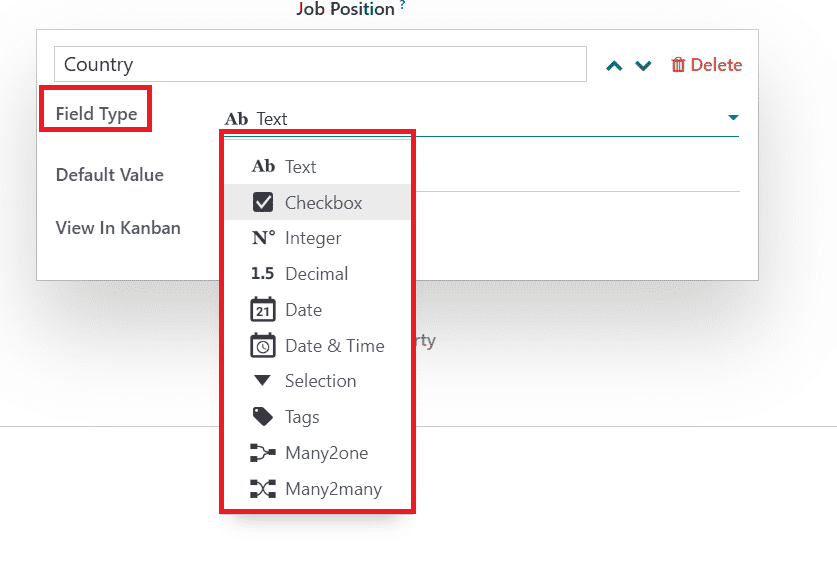
The Field Type can be Text, Checkbox, Integer, Decimal, Date, Date & Time, Selection, Tags, Many2one, or Many2many as per your preference. After defining the Field Type, you can set a Default Value for this new field in the respective field. It is possible to view this field in kanban by activating the View in Kanban field.
Now, you can find that a new field named Country is added to the form view of the lead.
You can add many such fields to the form view using the Add a Property button.
Additional notes regarding the lead can be mentioned in the Internal Notes Notes tab. Under the Extra Info tab, you can add the Marketing and Analysis details. The Bounce field can be used as a counter that will show the number of bounced emails for this contact.
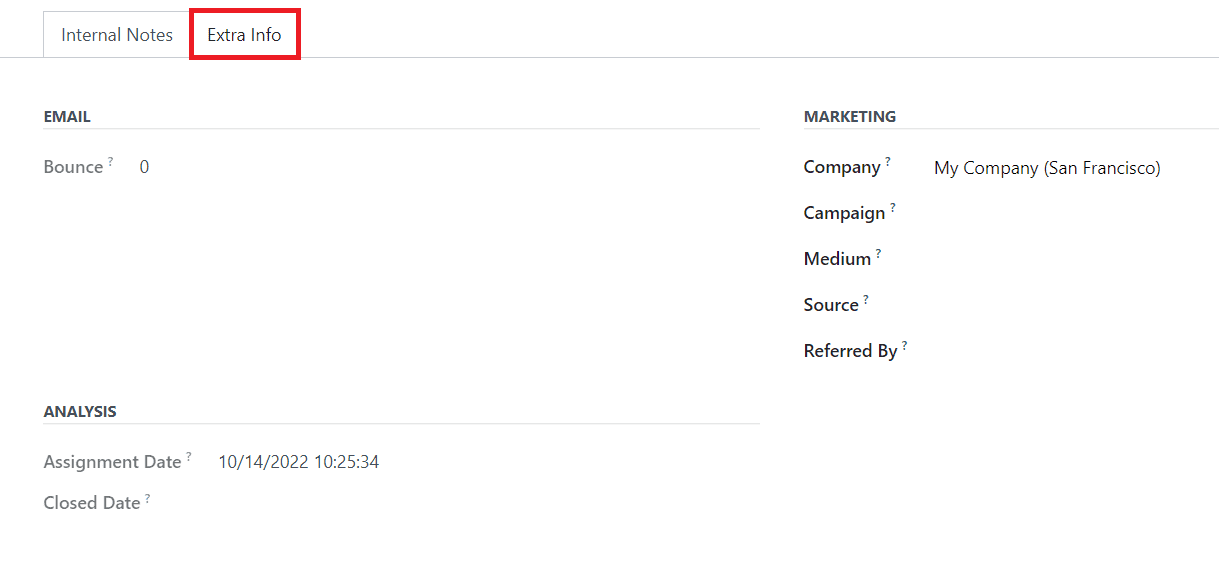
Under the Marketing section, specify the Company, Campaign, Medium, Source, and Referred By. Under the Analysis field, you will get the details of the Assignment Date and Closed Date.

The Geolocation and Assigned Partner details can be specified under the Assigned Partner tab in the new lead creation window.
Generate leads
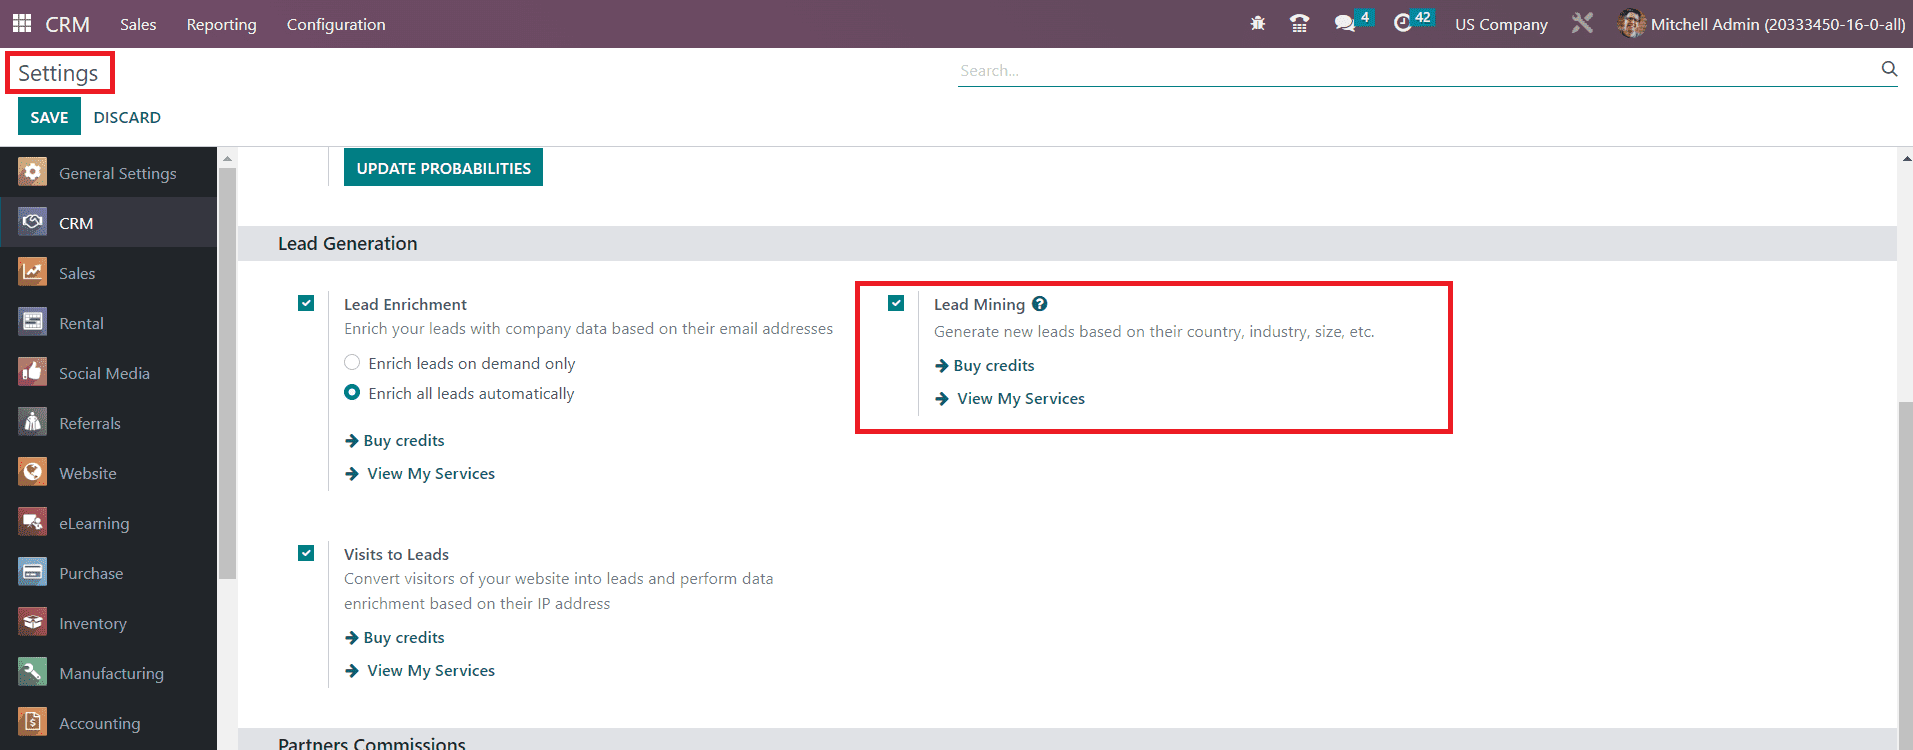
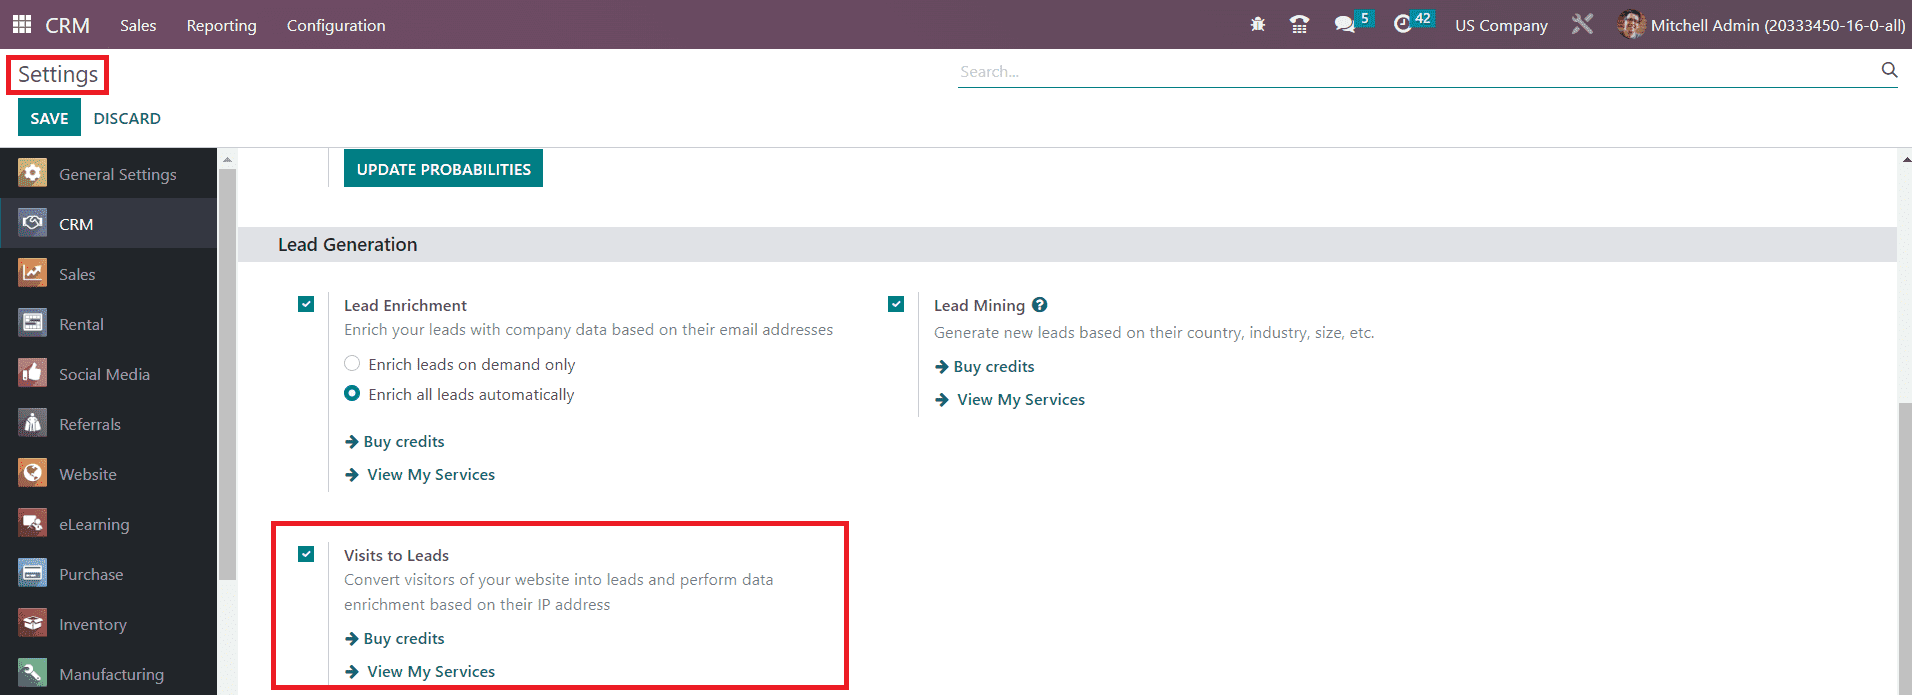
Odoo offers an effortless way to generate leads from the CRM module itself. This feature is exclusively available on the enterprise edition only. In order to get this feature in your CRM module, you can activate the Lead Mining option from the Settings menu of the module. You can find this option under the Lead Generation tab as shown in the image below.
Odoo 16 Enterprise users can use this feature to improve the lead generation process. As you can see in the screenshot given below, the Generate Leads button will assist you in automatically generating leads from the Leads management window.

Now, you can click on the Generate Leads button to set rules for leads. As soon as you click on this button, a pop-up will appear to mention the rules for generating leads. The pop-up window will look like this.
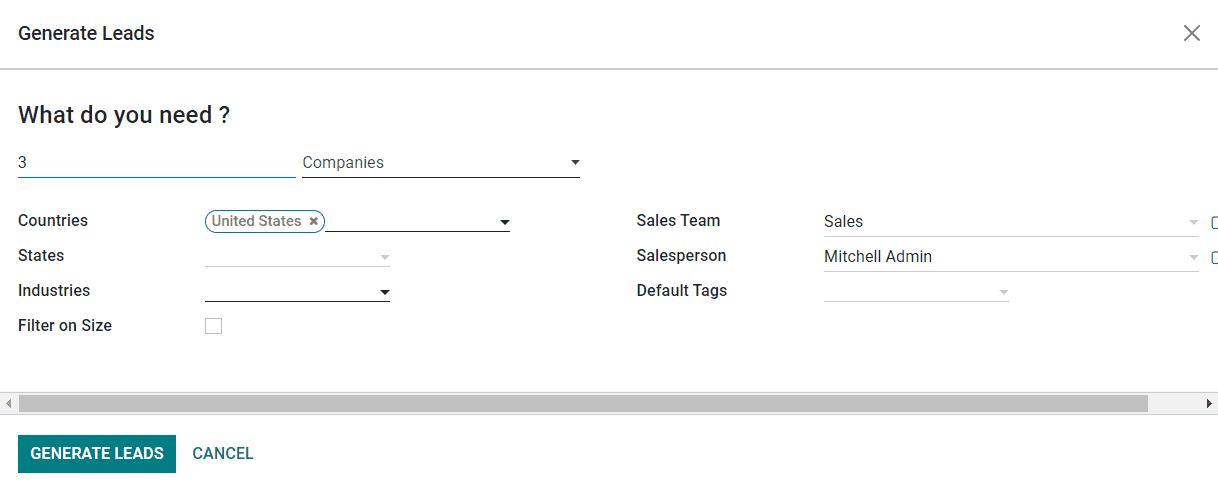
Here, you can mention the number of leads required from a specific target. You can set Companies or Companies and their Contacts as targets. Along with these details, you are allowed to specify the Countries, States, and Industries of the target lead. Activate the Filter on Size field to filter the leads based on their size. You can assign a Sales Team and Salesperson in the corresponding fields in order to manage the leads. Add suitable tags for the leads in the Default Tags field. Once you complete all the fields, you can click on the Generate Leads button which will generate leads based on the already mentioned details. Don't forget that this is a paid service and you need certain credits to generate leads in the CRM module.
In the Odoo 16 CRM module, you will get a separate platform in the Configuration menu for the generation of leads based on certain criteria. In order to get access to this platform, you can go to the Configuration menu of the module where you can find the Lead Mining Requests option under the Lead Generation tab .
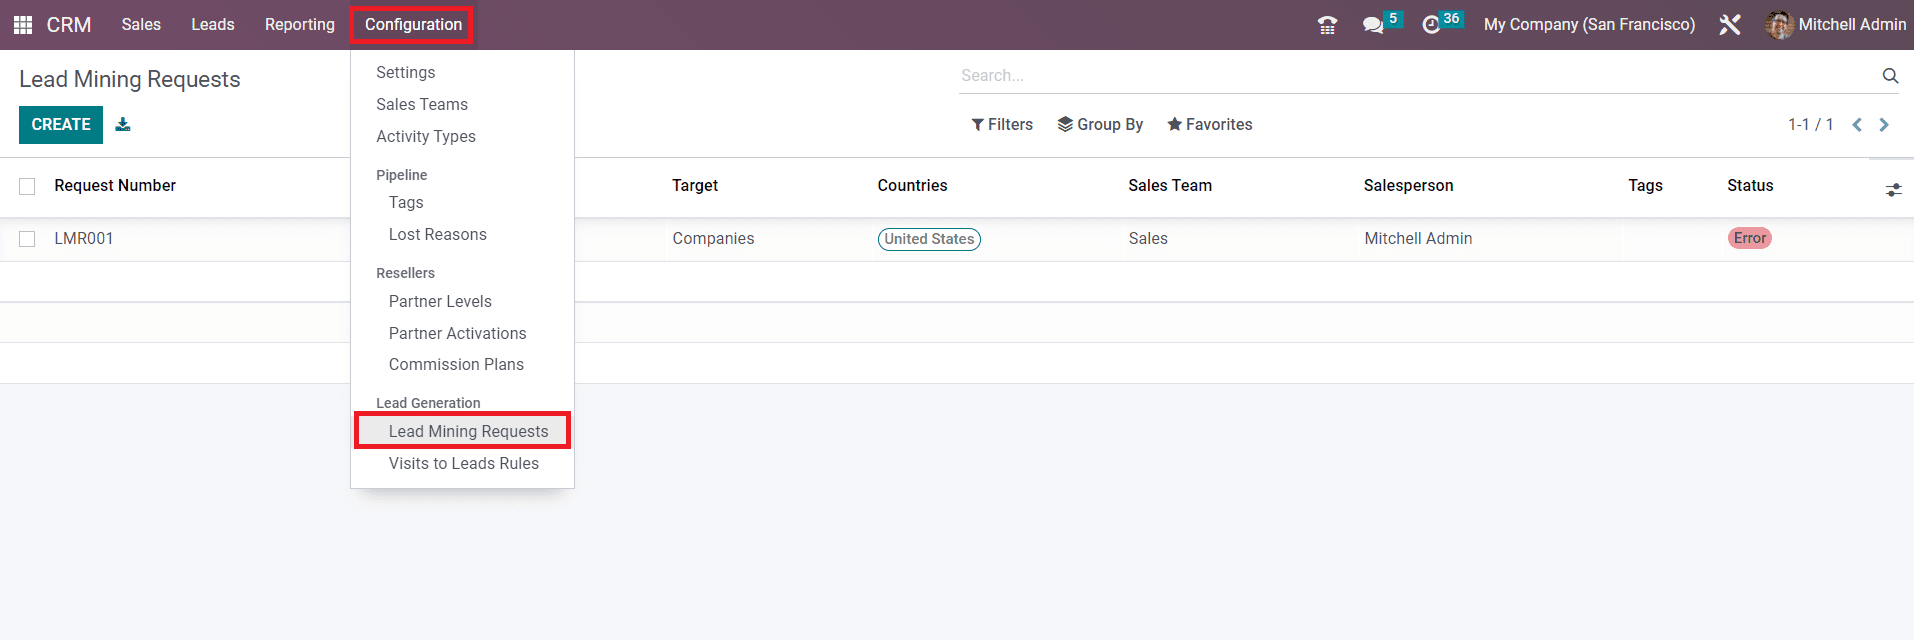
This platform will show all such lead generation requests along with the details of the Request Number, Number of Leads, Target, Countries, Sales Team, Salesperson, Tags, and Status . Using the Create button you can create a new lead mining request just like we did earlier.
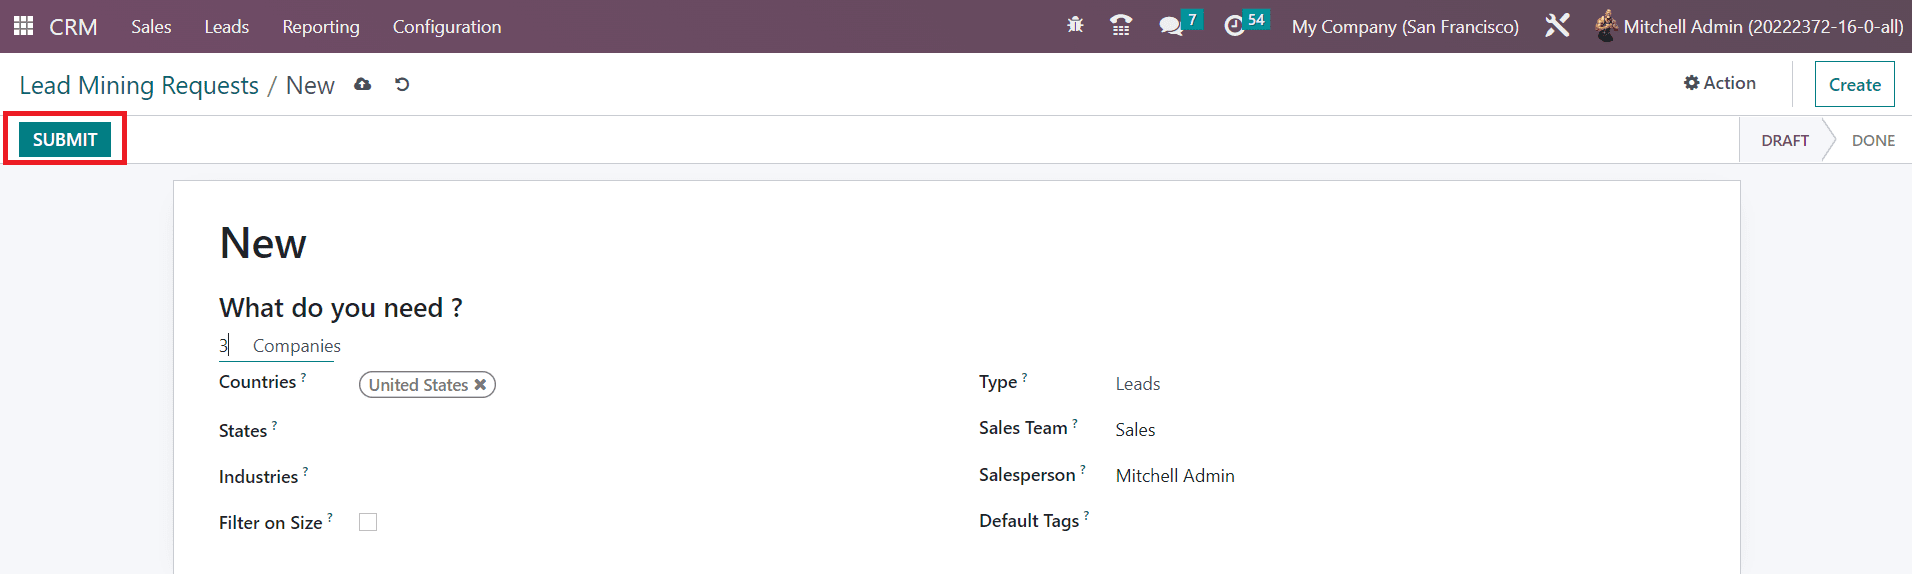
You can create new lead mining requests by mentioning the number of leads required, Countries, States, Industries, Type, Sales Team, Salesperson, and Default Tags in the corresponding fields. Using these lead mining requests, you can effortlessly mine leads as well as opportunities. For this, you can select the corresponding option in the Type field. Odoo will automatically save all these details in your database and you can submit the request with the help of the Submit button.
Now let’s take a look at the other options available in the Odoo CRM module for generating leads.
Visits to Leads Rules
The user can effortlessly convert their website visitors into leads with the assistance of the Odoo CRM module. In the Configuration menu of the module, you will get access to the Visits to Leads Rules platform under the Lead Generation tab which can be used to create rules for the conversion of visitors to new leads. In order to get this feature, you must activate the Visit to Leads option from the Lead Generation tab which is available in the Settings menu. You can perform data enrichment based on the visitor's IP address.
This feature works integrated with the Website module in Odoo. So, before using this feature, make sure to install the Website module into your database. As you can see in the screenshot below, the Visits to Leads Rules platform will show already configured rules with the details of the Rule Name and Type.
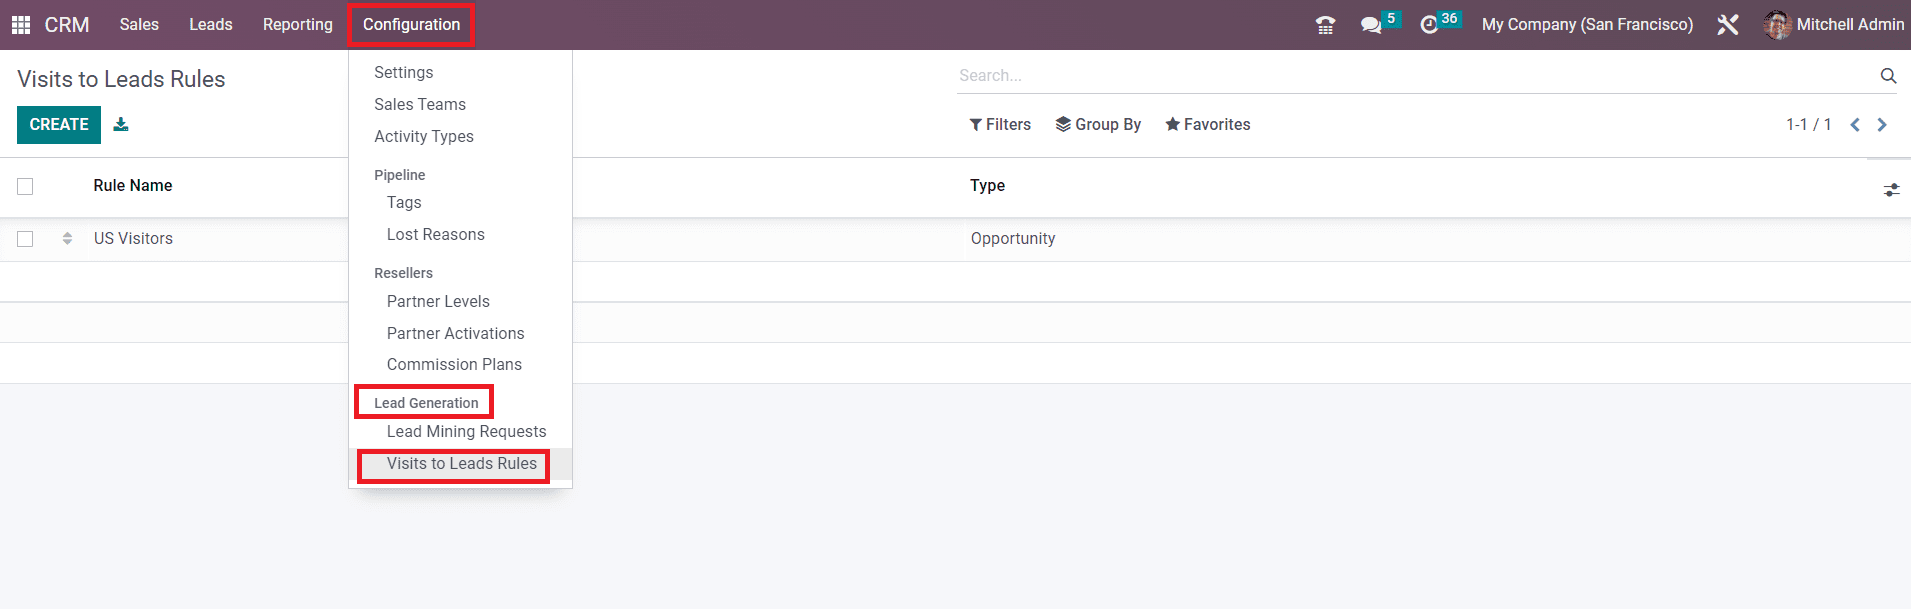
In order to create new rules for the conversion of website visitors into leads, you are allowed to use the Create button. As soon as you click on the Create button, a new window will appear where you can specify the required details to convert visitors to new leads.

First, you can specify a suitable name for the rule in the Rule Name field. Later, select the target of the Data Tracking. It can be either Companies or Companies and their Contacts. Clicking on the Active button will activate the newly created rule. Since we are converting visitors from the website, you need to set certain conditions in the Website Traffic Conditions tab. You can specify particular countries in the Countries field so that the visitors from the specified countries will be converted into leads or opportunities. This will work using GeoIP. Similarly, you can restrict lead generation to specific websites only by mentioning them in the Website field. If you want to track particular web pages, you can mention the URL Expression in the corresponding field. You can leave this field blank if you want to track the entire website. Mention the Sequence which is used to order the rules with the same URL and countries. Rules with a lower sequence number will be considered first.
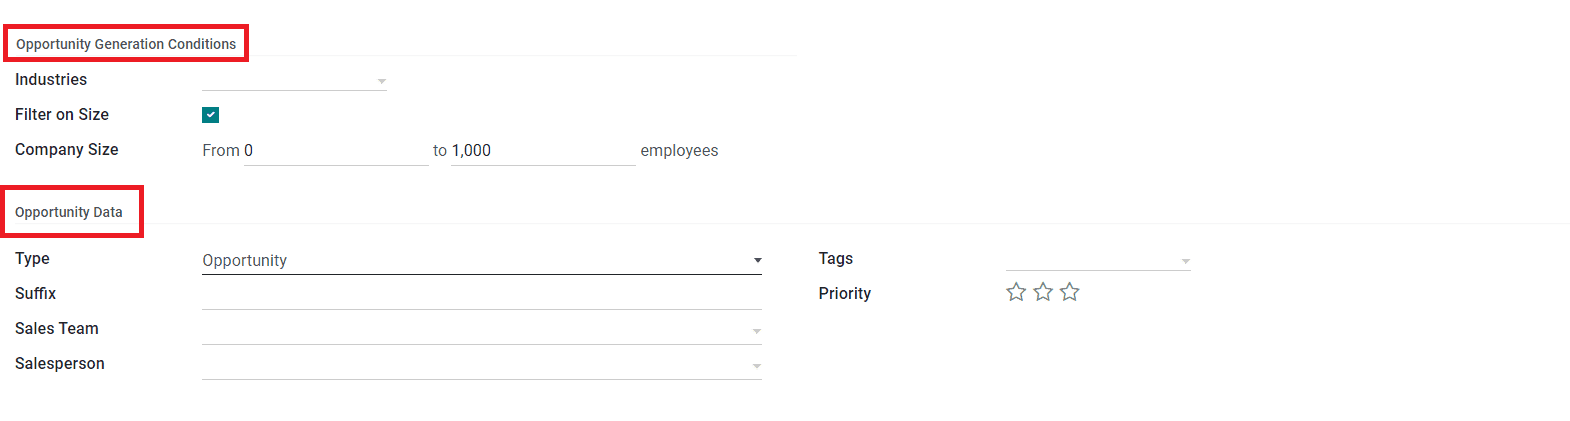
Under the Opportunity Generation Conditions tab, you can set conditions for opportunities. In the Industries field, you can mention the industries from which you want to generate leads. This field can be left blank to always match leads. You can filter companies based on their size by activating the Filter on Size option. By activating this field, you will be able to get an additional field to specify the Company Size. The company size can be defined based on the number of employees working in that particular company.
Now, under the Opportunity Data tab, you can select the Type Type as Lead or Opportunity as per your demand. Mention the Suffix in the given space and this will be appended in the name of generated leads so that you can easily identify leads/opportunities which are generated with this rule. Assign a Sales Team and Salesperson for the management of leads generated using this newly created rule. In the Tags field, you can add suitable tags, and using stars you can highlight the Priority of the lead. Once you complete all the fields required for converting visitors to new leads, you can click on the Save button to save manually. This is how we create new rules for the conversion of website visitors to leads/opportunities with the help of the Odoo CRM module.